C:/VaporTutorial/images - Vapor - UCAR
C:/VaporTutorial/images - Vapor - UCAR
C:/VaporTutorial/images - Vapor - UCAR

You also want an ePaper? Increase the reach of your titles
YUMPU automatically turns print PDFs into web optimized ePapers that Google loves.
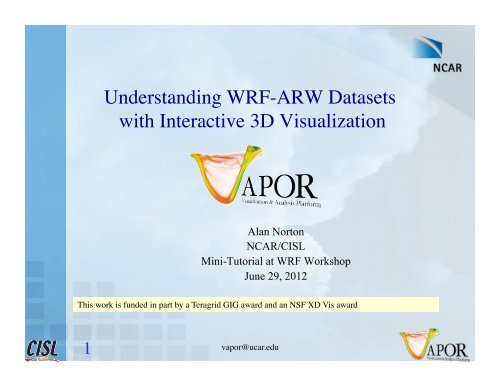
Understanding WRF-ARW Datasets<br />
with Interactive 3D Visualization<br />
Alan Norton<br />
NCAR/CISL<br />
Mini-Tutorial at WRF Workshop<br />
June 29, 2012<br />
This work is funded in part by a Teragrid GIG award and an NSF XD Vis award<br />
1<br />
vapor@ucar.edu
Tutorial Overview<br />
Purpose : Understand how to easily incorporate 2D and 3D<br />
visualization into understanding of WRF-ARW simulation<br />
Utilizing VAPOR (A visualization and analysis package<br />
developed at NCAR):<br />
On completion: You will be able to visualize WRF-ARW<br />
output, calculate and visualize Python-derived variables,<br />
use geo-referenced <strong>images</strong>, volume rendering, isosurfaces,<br />
and streamlines.<br />
You will be able to interactively navigate and animate<br />
through 3D <strong>images</strong> of WRF output, and capture animation<br />
sequences.<br />
2<br />
vapor@ucar.edu
Supporting software and data<br />
• Installed on classroom PC’s:<br />
– VAPOR 2.1.0<br />
– Sample datasets at C:/<strong><strong>Vapor</strong>Tutorial</strong>/vapordata<br />
– Sample <strong>images</strong> at C:/<strong><strong>Vapor</strong>Tutorial</strong>/<strong>images</strong><br />
– Sample Python scripts at C:/<strong><strong>Vapor</strong>Tutorial</strong>/python<br />
– Cygwin at C:\cygwin\ (Windows version of Unix)<br />
• On the web:<br />
<strong>Vapor</strong> website is http://www.vapor.ucar.edu where you can get:<br />
installers, documentation, example data, image gallery<br />
Tutorial data, examples, documentation are at<br />
3<br />
http://vis.ucar.edu/~alan/wrf2012/tutorial/<br />
vapor@ucar.edu
Tutorial Outline<br />
• Set up a visualization session in VAPOR using a<br />
simulation of Typhoon Jangmi (Sept. 2008)<br />
• Apply georeferenced image (Satellite image from Web)<br />
• Volume rendering: Visualize the typhoon progress with<br />
QCLOUD<br />
– Build a Transfer Function (color/opacity map)<br />
• Create and visualize derived variables using Python<br />
• Visualize Isosurfaces of wind speed<br />
• Flow integration (wind visualization)<br />
– Streamlines: observe how the air flows through the typhoon<br />
4<br />
vapor@ucar.edu
Obtaining <strong>images</strong> to use with VAPOR<br />
• Geo-referenced satellite <strong>images</strong> can be retrieved from the<br />
Web, and VAPOR will insert them at the correct world<br />
coordinates.<br />
– VAPOR provides a shell script “getWMSImage.sh” that can be<br />
used to retrieve Web Mapping Service <strong>images</strong> for a specified<br />
longitude/latitude rectangle<br />
• A geo-tiff terrain image for the typhoon data has been<br />
provided in the C:/<strong><strong>Vapor</strong>Tutorial</strong>/<strong>images</strong> directory.<br />
• Several useful <strong>images</strong> are installed with VAPOR,<br />
including a world-wide terrain image, and political<br />
boundaries of the U.S and the world. Apply these by<br />
clicking “Select Installed Image” in the Image panel.<br />
5<br />
vapor@ucar.edu
Optional: getWMSImage.sh exercise<br />
• getWMSImage.sh will create a geo-referenced tiff file for a<br />
specified lon/lat rectangle. Due to NASA server limitations it often<br />
fails for some rectangles.<br />
• Can obtain satellite <strong>images</strong>, political boundaries, rivers, etc.<br />
• Default obtains an image from the NASA “blue marble” earth<br />
• Requires Unix environment (Cygwin on PC will do)<br />
• For Typhoon Jangmi,<br />
min: lon = 100, lat = 7<br />
max: lon = 148, lat = 40<br />
• From a Cygwin (tcsh or bash) shell, issue the command:<br />
getWMSImage.sh –o terrain.tiff 100 7 148 40<br />
6<br />
vapor@ucar.edu
Set-up to visualize a WRF dataset (1)<br />
• Launch ‘vaporgui’ (Desktop Icon: )<br />
• From Data menu: “Import WRF-ARW output files into current session”:<br />
select all (60) C:\<strong><strong>Vapor</strong>Tutorial</strong>\vapordata\wrfout* files to import<br />
7<br />
vapor@ucar.edu
Set-up to visualize a WRF dataset (2)<br />
• From Edit menu, click<br />
“Edit Visualizer<br />
Features” then:<br />
1. Stretch Z by factor of 20,<br />
press to confirm<br />
value<br />
2. Specify time annotation,<br />
“Date/Time stamp”<br />
3. Click “OK”<br />
8<br />
vapor@ucar.edu
Set-up to visualize a WRF dataset (3)<br />
• To include a terrain image: Click on the “Image” tab<br />
1. Click “Select Image File” and choose<br />
“C:\<strong><strong>Vapor</strong>Tutorial</strong>\<strong>images</strong>\jangmi_terrain.tif”<br />
2. Check “Apply image to terrain”<br />
3. Check the “Instance: 1” checkbox at the top of the Image tab to<br />
view the terrain image.<br />
9<br />
vapor@ucar.edu
11<br />
Navigation tools in VAPOR GUI<br />
Session file: slide11.vss<br />
vapor@ucar.edu
Volume Visualization of QCLOUD<br />
1. Using VCR control, type in time step 34, press enter.<br />
2. Click the “wheel” icon ( ) to set navigation mode<br />
3. Select DVR panel (direct volume rendering)<br />
4. Select variable “QCLOUD” (cloud water mixing ratio)<br />
5. Check “Instance:1” to enable volume rendering<br />
12<br />
vapor@ucar.edu<br />
slide12.vss
Volume Visualization: Edit Transfer function (1)<br />
1. Click “Histo” to see histogram<br />
of data values of QCLOUD at<br />
current timestep<br />
2. To make the clouds white, set 4<br />
color control points to white<br />
13<br />
– Either select/edit with right<br />
mouse button, or<br />
– Select point and then choose<br />
white color in color selector.<br />
vapor@ucar.edu<br />
slide13.vss
Volume Visualization: Edit Transfer function (2)<br />
• To edit the transparency:<br />
1. Drag the 2 nd control point down to<br />
make the lower values more<br />
transparent<br />
2. Use slider on the right to control<br />
overall transparency.<br />
3. Click the play button “►” to<br />
animate the clouds associated<br />
with the typhoon.<br />
14<br />
vapor@ucar.edu<br />
slide14.vss
15<br />
Session file: slide15.vss<br />
Visualization of typhoon:<br />
QCLOUD at time step 42<br />
vapor@ucar.edu
Define derived variable<br />
• From VAPOR Edit menu, choose “Edit Python Program defining a new<br />
variable”<br />
• In the Python editor:<br />
1. Check U, V, and W as Input 3D Variables.<br />
2. Add “Wind” as Output 3D Variable.<br />
3. Type in the one-line python script:<br />
Wind = sqrt(U*U+V*V+W*W)<br />
4. Click “Test”; if response is “Successful Test” it’s OK; then click “Apply”<br />
16<br />
vapor@ucar.edu
• In the DVR tab: disable DVR<br />
(un-check Instance: 1)<br />
1. Using VCR control:<br />
– Set current time step to 44<br />
2. Click on Iso tab<br />
17<br />
Isosurfaces of Wind (1)<br />
In the Iso tab:<br />
3. Set variable “Wind”<br />
4. Check “Instance:1” to enable<br />
5. Set histo right bound to 70, then “Fit to<br />
View” and “Histo” to see Wind histogram<br />
6. Set the isovalue near 30 (use slider or type<br />
it in)<br />
vapor@ucar.edu<br />
slide17.vss
Isosurfaces of Wind (2)<br />
To color the isosurface of Wind by QRAIN<br />
(or other variable):<br />
1. Scroll down in the Iso tab to the<br />
transfer function, under Appearance<br />
2. Set the mapped variable to “QRAIN”.<br />
3. Click the button “Load Installed TF”<br />
below the transfer function, and load<br />
“reversedOpaque.vtf”. This makes<br />
low values violet-blue, high values<br />
orange-red.<br />
4. Set the right domain bound of the<br />
transfer function to 0.0005, so that the<br />
large values of QRAIN will show up<br />
as red in the isosurface.<br />
• Animate to see the typhoon vortex<br />
pass over Taiwan<br />
• Enable the DVR to combine clouds,<br />
wind and rain in one visualization.<br />
18<br />
slide18.vss<br />
vapor@ucar.edu
Isosurface of Wind = 30 at time step 45, colored<br />
by QRAIN, with volume render of QCLOUD<br />
19<br />
slide19.vss<br />
vapor@ucar.edu
Capture an animation sequence<br />
Save a sequence of jpeg files of<br />
your visualization:<br />
1. Set the time step to 0<br />
2. From Capture menu, choose “Begin<br />
image capture sequence…”<br />
3. Choose a jpeg file name in a directory<br />
where you can write files.<br />
4. Click the play ( ) button.<br />
5. When animation is done, from the<br />
Capture menu, click “End flow<br />
capture sequence”<br />
• (Use Quicktime Pro, ffmpeg, etc. to<br />
convert to movie file.)<br />
See jangmi.mov in <strong>images</strong> directory<br />
20<br />
vapor@ucar.edu
Use VAPOR/WRF python support<br />
<strong>Vapor</strong> includes several Python routines for various derived variables, such as<br />
radar reflectivity, relative humidity, sea-level pressure, cloud-top<br />
temperature, potential vorticity… (Documented on the VAPOR Website<br />
under “Data analysis with VAPOR”)<br />
• Disable the DVR and the Isosurface<br />
• Write a Python script to create a new variable “dbz” which represents the<br />
simulated radar reflectivity. The python script consists of the two lines:<br />
import vapor_wrf<br />
dbz = vapor_wrf.DBZ(P,PB,QRAIN,0,QSNOW,T,QVAPOR)<br />
• Specify that dbz is an output 3D variable<br />
• Specify that P, PB, QRAIN, QSNOW, T, and QVAPOR are input 3D<br />
variables.<br />
• Visualize the DVR of dbz (click Fit Data and click “fit to view”)<br />
• Compare this with rain, by creating an isosurface of QRAIN=5.e-05<br />
• Animate this over time.<br />
21<br />
vapor@ucar.edu
22<br />
Radar reflectivity with isosurface of QRAIN<br />
as Typhoon Jangmi approaches Taiwan<br />
vapor@ucar.edu
Flow Visualization Overview<br />
• <strong>Vapor</strong> can display streamlines (steady flow, constant time) and<br />
pathlines (unsteady flow, showing particle paths over time)<br />
• Flow can be illustrated in cross-section using the flow image capability<br />
in the Probe tab.<br />
• Streamlines and path lines are established by seed points (starting<br />
points for flow integration)<br />
• Seed points can be:<br />
– Random: Randomly placed within a range of x, y, and z values, or<br />
– Nonrandom: Evenly spaced in x, y, and z dimensions, or<br />
– Seed List: Explicitly placed in the scene<br />
• <strong>Vapor</strong> Rake tool is provided to specify a box for random or evenly<br />
spaced (nonrandom) seeds (looks like: )<br />
• VAPOR Probe tool ( ) can be used to position flow seed points.<br />
23<br />
vapor@ucar.edu
Random streamlines (1)<br />
• Disable isosurface, DVR<br />
1. Click on Flow tab<br />
2. Set time step to 45<br />
3. In flow tab, select U, V, W as<br />
steady field variables.<br />
4. Check “Instance: 1” to enable<br />
steady flow (streamlines). Ignore<br />
the warning message.<br />
5. Click “Show Flow Seeding<br />
Settings”<br />
6. Specify seed count 100 (random)<br />
for steady flow, press to<br />
set the value.<br />
7. Under Appearance settings, adjust<br />
smoothness (~300) and diameter<br />
(~0.3)<br />
vapor@ucar.edu<br />
24
Random streamlines (2), using Rake<br />
1. Select flow rake ( at top left, Mode selector). Note box and handles.<br />
2. Grab the top handle of the rake with the right mouse button, pull it down<br />
about 1/3 of the way down (the flow seeds will be nearer the ground.)<br />
3. Using the right mouse button, shrink the rake to a smaller box enclosing the<br />
eye of the typhoon<br />
4. Color flow lines according to “position on flow” (in Appearance settings)<br />
See how the wind is drawn in at ground level and climbs through the eyewall<br />
25<br />
vapor@ucar.edu<br />
fig12.vss
Use the probe to see a vertical slice of W (1)<br />
Probe is useful to investigate the<br />
wind flow near the eye of the<br />
typhoon, by placing seed<br />
points where the W field is<br />
strongest<br />
• Disable the flow (uncheck<br />
Instance:1 box in Flow tab)<br />
1. Set the time step to 36<br />
2. Select Probe mode( ) in the<br />
Mode selector at the top<br />
3. Enable probe (check Instance:1<br />
box in Probe tab)<br />
4. Set the Probe variable to “W”<br />
26<br />
vapor@ucar.edu
Using the probe to see a vertical slice of W (2)<br />
To view a vertical slice through<br />
the typhoon:<br />
Under “Probe Layout options”:<br />
1. Click 90 degree rotate<br />
2. Select “+X” to get a vertical<br />
slice.<br />
3. Click “Fit to Region” button<br />
In Appearance Parameters at the<br />
bottom of the probe panel:<br />
4. Set the TF domain bounds to -.5<br />
and 0.5<br />
5. Click “Fit to view” and “Histo”<br />
to see the values of W in the<br />
probe<br />
27<br />
vapor@ucar.edu
28<br />
Cross section of typhoon (Probe of W)<br />
Viewed from the south<br />
Session file: slide28.vss<br />
vapor@ucar.edu
Using the probe to specify flow seed points (1)<br />
1. Click on the Flow tab<br />
2. Under Appearance Settings, set<br />
Typical Flow Length = 3<br />
3. On the flow tab, under “flow seeding<br />
settings”, select “List of Seeds” instead<br />
of “Random Rake”.<br />
• Check “Instance:1” to enable the flow.<br />
Ignore the warning messages (there are<br />
no seeds in the list).<br />
29<br />
vapor@ucar.edu
Using the probe to specify flow seed points (2)<br />
1. Click on the probe tab.<br />
2. Scroll down to the probe image settings,<br />
where you see an image of the crosssection<br />
of the data<br />
3. Check “Attach point to flow seed”. You<br />
should see a streamline associated with a<br />
seed point at the cursor position.<br />
4. Click mouse in the image, at positions<br />
with large (purple) W values, and see<br />
the streamlines associated with the eye<br />
wall.<br />
5. Click “Add Point to Flow Seeds” for<br />
streamlines that you want to keep.<br />
With 10-15 flow seeds you can visualize the<br />
wind flow pattern near the eye wall.<br />
30<br />
vapor@ucar.edu
Streamlines placed with the probe<br />
Session file: slide31.vss<br />
31<br />
vapor@ucar.edu
Other useful capabilities of VAPOR<br />
Some features we haven’t shown you<br />
(more info at http://www.vapor.ucar.edu/):<br />
• Convert WRF output to VAPOR data format<br />
– Visualization will be much more interactive, especially on large grids.<br />
• Use NCL with VAPOR: Embed NCL plots in the 3D scene<br />
• Sample Python scripts for deriving variables from WRF output are<br />
available at http://vis.ucar.edu/~alan/wrf2012/tutorial/python<br />
• Other flow visualization capabilities<br />
32<br />
– Particle traces<br />
– Wind barbs<br />
– Image-based flow visualization<br />
vapor@ucar.edu
Where to go from here<br />
To visualize the output of your WRF-ARW simulation:<br />
• Install VAPOR on your computer (or use vapor installed at<br />
NCAR) (Instructions at http://www.vapor.ucar.edu/ )<br />
• For faster visualization, convert your data to VAPOR<br />
using wrfvdfcreate and wrf2vdf<br />
• Various python scripts are available for WRF analysis<br />
• Use NCL to create 2D data plots to put in the scene<br />
• Additional tutorials and user guides are available at<br />
http://www.vapor.ucar.edu/<br />
• E-mail vapor@ucar.edu with questions, suggestions, bugs.<br />
• Let us know if you have additional needs – That’s how we<br />
select and prioritize new features!<br />
33<br />
vapor@ucar.edu
Tutorial supplement:<br />
An analysis of high-res hurricane data<br />
http://vis.ucar.edu/~alan/wrf2012/tutorial/docs/WRF<strong><strong>Vapor</strong>Tutorial</strong>Supplement.ppt<br />
Data provided by:<br />
Yongsheng Chen, MMM/NCAR<br />
34<br />
vapor@ucar.edu
VAPOR Availability<br />
• Version 2.1.0 software is available<br />
• Runs on Linux, Windows, Mac<br />
• System requirements:<br />
– a modern (nVidia or ATI) graphics card (available for about $200)<br />
– ~1GB of memory<br />
• Supported in NCAR visualization/analysis systems<br />
• Software dependencies:<br />
– IDL ® http://www.ittvis.com/ (only if you need IDL)<br />
• Contact: vapor@ucar.edu<br />
• Executables, documentation available (free!) at<br />
http://www.vapor.ucar.edu/<br />
35<br />
vapor@ucar.edu
36<br />
Thanks!<br />
vapor@ucar.edu
• Steering Committee<br />
– Nic Brummell - UCSC<br />
– Yuhong Fan - NCAR, HAO<br />
– Aimé Fournier – NCAR, IMAGe<br />
– Pablo Mininni, NCAR, IMAGe<br />
– Aake Nordlund, University of<br />
Copenhagen<br />
– Helene Politano - Observatoire de la<br />
Cote d'Azur<br />
– Yannick Ponty - Observatoire de la<br />
Cote d'Azur<br />
– Annick Pouquet - NCAR, ESSL<br />
– Mark Rast - CU<br />
– Duane Rosenberg - NCAR, IMAGe<br />
– Matthias Rempel - NCAR, HAO<br />
– Geoff Vasil, CU<br />
– Leigh Orf, U Central Mich.<br />
• Systems Support<br />
– Joey Mendoza, NCAR, CISL<br />
37<br />
Acknowledgements<br />
vapor@ucar.edu<br />
• WRF consultation<br />
– Wei Wang – NCAR, MMM<br />
– Cindy Bruyere –NCAR, MMM<br />
– Yongsheng Chen-NCAR,MMM<br />
– Thara Prabhakaran-U. of Ga.<br />
– Wei Huang – NCAR/CISL<br />
– Minsu Joh - KISTI<br />
• Design and development<br />
– John Clyne – NCAR/CISL<br />
– Alan Norton – NCAR/CISL<br />
– Dan LaGreca – NCAR/CISL<br />
– Pam Gillman – NCAR/CISL<br />
– Kendall Southwick – NCAR/CISL<br />
– Markus Stobbs – NCAR/CISL<br />
– Kenny Gruchalla – NREL<br />
– Victor Snyder – CSM<br />
– Yannick Polius – NCAR/CISL<br />
– Karamjeet Khalsa – NCAR/CISL<br />
• Research Collaborators<br />
– Kwan-Liu Ma, U.C. Davis<br />
– Hiroshi Akiba, U.C. Davis<br />
– Han-Wei Shen, OSU<br />
– Liya Li, OSU