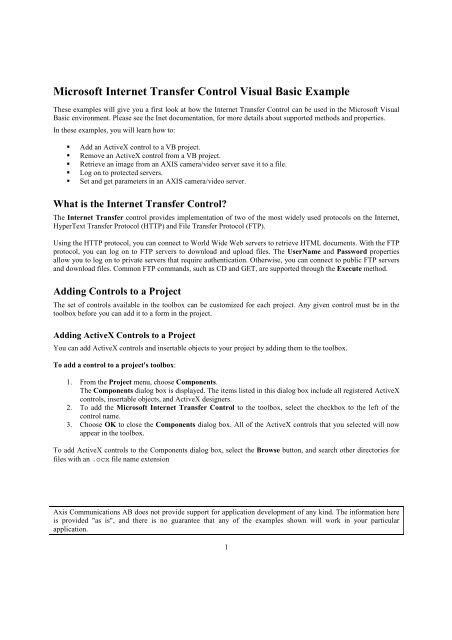
Microsoft Internet Transfer Control Visual Basic Example - Axis ...
Microsoft Internet Transfer Control Visual Basic Example - Axis ...
Microsoft Internet Transfer Control Visual Basic Example - Axis ...

You also want an ePaper? Increase the reach of your titles
YUMPU automatically turns print PDFs into web optimized ePapers that Google loves.
<strong>Microsoft</strong> <strong>Internet</strong> <strong>Transfer</strong> <strong>Control</strong> <strong>Visual</strong> <strong>Basic</strong> <strong>Example</strong><br />
These examples will give you a first look at how the <strong>Internet</strong> <strong>Transfer</strong> <strong>Control</strong> can be used in the <strong>Microsoft</strong> <strong>Visual</strong><br />
<strong>Basic</strong> environment. Please see the Inet documentation, for more details about supported methods and properties.<br />
In these examples, you will learn how to:<br />
�� Add an ActiveX control to a VB project.<br />
�� Remove an ActiveX control from a VB project.<br />
�� Retrieve an image from an AXIS camera/video server save it to a file.<br />
�� Log on to protected servers.<br />
�� Set and get parameters in an AXIS camera/video server.<br />
What is the <strong>Internet</strong> <strong>Transfer</strong> <strong>Control</strong>?<br />
The <strong>Internet</strong> <strong>Transfer</strong> control provides implementation of two of the most widely used protocols on the <strong>Internet</strong>,<br />
HyperText <strong>Transfer</strong> Protocol (HTTP) and File <strong>Transfer</strong> Protocol (FTP).<br />
Using the HTTP protocol, you can connect to World Wide Web servers to retrieve HTML documents. With the FTP<br />
protocol, you can log on to FTP servers to download and upload files. The UserName and Password properties<br />
allow you to log on to private servers that require authentication. Otherwise, you can connect to public FTP servers<br />
and download files. Common FTP commands, such as CD and GET, are supported through the Execute method.<br />
Adding <strong>Control</strong>s to a Project<br />
The set of controls available in the toolbox can be customized for each project. Any given control must be in the<br />
toolbox before you can add it to a form in the project.<br />
Adding ActiveX <strong>Control</strong>s to a Project<br />
You can add ActiveX controls and insertable objects to your project by adding them to the toolbox.<br />
To add a control to a project's toolbox:<br />
1. From the Project menu, choose Components.<br />
The Components dialog box is displayed. The items listed in this dialog box include all registered ActiveX<br />
controls, insertable objects, and ActiveX designers.<br />
2. To add the <strong>Microsoft</strong> <strong>Internet</strong> <strong>Transfer</strong> <strong>Control</strong> to the toolbox, select the checkbox to the left of the<br />
control name.<br />
3. Choose OK to close the Components dialog box. All of the ActiveX controls that you selected will now<br />
appear in the toolbox.<br />
To add ActiveX controls to the Components dialog box, select the Browse button, and search other directories for<br />
files with an .ocx file name extension<br />
<strong>Axis</strong> Communications AB does not provide support for application development of any kind. The information here<br />
is provided "as is", and there is no guarantee that any of the examples shown will work in your particular<br />
application.<br />
1
Removing <strong>Control</strong>s from a Project<br />
To remove a control from a project:<br />
1. From the Project menu, choose Components.<br />
The Components dialog box is displayed.<br />
2. Clear the check box next to each control you want to remove.<br />
The control icons will be removed from the toolbox.<br />
Note: You cannot remove a control from the toolbox if an instance of that control is used on any form in the project.<br />
Using the <strong>Internet</strong> <strong>Transfer</strong> <strong>Control</strong><br />
The <strong>Internet</strong> <strong>Transfer</strong> control implements two widely used <strong>Internet</strong> protocols: the HyperText <strong>Transfer</strong> Protocol<br />
(HTTP) and the File <strong>Transfer</strong> Protocol (FTP). Using the <strong>Internet</strong> <strong>Transfer</strong> control, you can connect to any site that<br />
uses one of these protocols, and retrieve files using either the OpenURL or Execute method.<br />
Possible Uses<br />
�� Add an FTP browser to any application.<br />
�� Create an application that automatically downloads files from a public FTP site.<br />
�� Parse a World Wide Web site for graphics references and download the graphics only.<br />
�� Present a custom display of dynamic data retrieved from a Web page.<br />
•=<br />
<strong>Basic</strong> Operation<br />
The functionality of the <strong>Internet</strong> <strong>Transfer</strong> control depends on the protocol you wish to use. Because the two<br />
supported protocols work differently, the operations you can perform depend on which protocol you are using. For<br />
example, the GetHeader method only works with HTTP (HTML documents).<br />
However, there are a few procedures that are common to both protocols. <strong>Basic</strong>ally, in order to use either protocol,<br />
you must:<br />
1. Set the AccessType property to a valid proxy server<br />
2. Invoke the OpenURL method with a valid URL<br />
3. Invoke the Execute method to retrieve data from the buffer<br />
4. Use the GetChunk method to retrieve data from the buffer<br />
Saving an Image to a File Using the OpenURL Method<br />
If you wish to save the data retrieved through the OpenURL method to a file, use the Open, Put, and Close<br />
statements, as shown in the code below. This example streams a Jpeg image into a Byte array before saving the data<br />
to disk. The following code uses a Command Button control, cmdWriteFile. Set the caption of<br />
cmdWriteFile to WriteFile.<br />
The IP address in the URL should be the correct IP address to an AXIS camera/video server. See the HTTP API for<br />
the AXIS camera/video servers for more information. A trick to figure out the correct Motion JPEG URL for the<br />
specific <strong>Axis</strong> Camera/Video product is to look in the html code of the internal web pages. To verify that you have<br />
the correct URL, use Netscape Navigator and type the complete Motion JPEG URL into the location window. If the<br />
URL is correct you will, for a period of time, see live updated images in your browser.<br />
<strong>Axis</strong> Communications AB does not provide support for application development of any kind. The information here<br />
is provided "as is", and there is no guarantee that any of the examples shown will work in your particular<br />
application.<br />
2
Private Sub cmdWriteFile_Click()<br />
Dim b() As Byte<br />
End Sub<br />
' Set the internet transfer control protocol and URL.<br />
Inet1.Protocol = icHTTP<br />
Inet1.URL = "http://10.13.9.46/axis-cgi/jpg/image.cgi"<br />
' Retrieve the HTML data into a byte array.<br />
b() = Inet1.OpenURL(Inet1.URL, icByteArray)<br />
' Create a local file from the retrieved data.<br />
Open "C:\Image.jpg" For Binary Access Write As #1<br />
Put #1, , b()<br />
Close #1<br />
MsgBox "Done"<br />
Logging on to Protected Servers<br />
Servers come in two flavors: public and private. Public servers are, as suggested by the name, open to anyone.<br />
Private servers on the other hand, won't let you log on unless you are a bona fide user of the server.<br />
If you are logging on to a private server, simply set the UserName and Password properties as shown in the example<br />
below:<br />
Inet1.UserName = "UserName"<br />
Inet1.Password = "Password"<br />
Set and Get Parameters in an AXIS Camera/Video Server<br />
The <strong>Internet</strong> <strong>Transfer</strong> control can be used to set and get parameters in an AXIS camera/video server. See the<br />
HTTP API for the AXIS camera/video servers for more information on how the URLs to set and get parameters<br />
should look like.<br />
The following example uses a TextBox control, Text1, and three Command Button controls,<br />
cmdGetBrightness, cmdSetLowBrightness and cmdSetHighBrightness. Set the captions of the<br />
buttons to Get Brightness, Set Low Brightness and Set High Brightness.<br />
Private Sub cmdGetBrightness_Click()<br />
Text1.Text = Inet1.OpenURL("http://10.13.9.48/axiscgi/admin/getparam.cgi?Image.Brightness")<br />
End Sub<br />
<strong>Axis</strong> Communications AB does not provide support for application development of any kind. The information here<br />
is provided "as is", and there is no guarantee that any of the examples shown will work in your particular<br />
application.<br />
3
Private Sub cmdSetLowBrightness_Click()<br />
Text1.Text = Inet1.OpenURL("http://10.13.9.48/axiscgi/admin/setparam.cgi?Image.Brightness=0")<br />
End Sub<br />
Private Sub cmdSetHighBrightness_Click()<br />
Text1.Text = Inet1.OpenURL("http://10.13.9.48/axiscgi/admin/setparam.cgi?Image.Brightness=15")<br />
End Sub<br />
If you, at the same time as you press the different buttons, look at a browser window showing live images from the<br />
server, you will see the brightness of the image change.<br />
<strong>Axis</strong> Communications AB does not provide support for application development of any kind. The information here<br />
is provided "as is", and there is no guarantee that any of the examples shown will work in your particular<br />
application.<br />
4