AxisCamControl Visual Basic Example - Axis Communications
AxisCamControl Visual Basic Example - Axis Communications
AxisCamControl Visual Basic Example - Axis Communications
You also want an ePaper? Increase the reach of your titles
YUMPU automatically turns print PDFs into web optimized ePapers that Google loves.
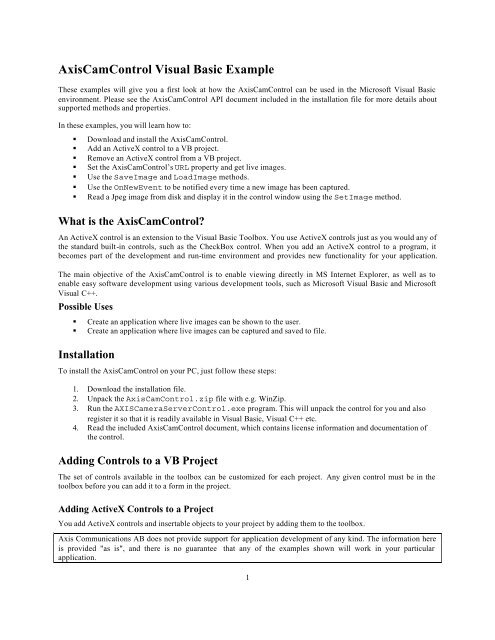
<strong><strong>Axis</strong>CamControl</strong> <strong>Visual</strong> <strong>Basic</strong> <strong>Example</strong><br />
These examples will give you a first look at how the <strong><strong>Axis</strong>CamControl</strong> can be used in the Microsoft <strong>Visual</strong> <strong>Basic</strong><br />
environment. Please see the <strong><strong>Axis</strong>CamControl</strong> API document included in the installation file for more details about<br />
supported methods and properties.<br />
In these examples, you will learn how to:<br />
� Download and install the <strong><strong>Axis</strong>CamControl</strong>.<br />
� Add an ActiveX control to a VB project.<br />
� Remove an ActiveX control from a VB project.<br />
� Set the <strong><strong>Axis</strong>CamControl</strong>’s URL property and get live images.<br />
� Use the SaveImage and LoadImage methods.<br />
� Use the OnNewEvent to be notified every time a new image has been captured.<br />
� Read a Jpeg image from disk and display it in the control window using the SetImage method.<br />
What is the <strong><strong>Axis</strong>CamControl</strong>?<br />
An ActiveX control is an extension to the <strong>Visual</strong> <strong>Basic</strong> Toolbox. You use ActiveX controls just as you would any of<br />
the standard built-in controls, such as the CheckBox control. When you add an ActiveX control to a program, it<br />
becomes part of the development and run-time environment and provides new functionality for your application.<br />
The main objective of the <strong><strong>Axis</strong>CamControl</strong> is to enable viewing directly in MS Internet Explorer, as well as to<br />
enable easy software development using various development tools, such as Microsoft <strong>Visual</strong> <strong>Basic</strong> and Microsoft<br />
<strong>Visual</strong> C++.<br />
Possible Uses<br />
� Create an application where live images can be shown to the user.<br />
� Create an application where live images can be captured and saved to file.<br />
Installation<br />
To install the <strong><strong>Axis</strong>CamControl</strong> on your PC, just follow these steps:<br />
1. Download the installation file.<br />
2. Unpack the <strong><strong>Axis</strong>CamControl</strong>.zip file with e.g. WinZip.<br />
3. Run the AXISCameraServerControl.exe program. This will unpack the control for you and also<br />
register it so that it is readily available in <strong>Visual</strong> <strong>Basic</strong>, <strong>Visual</strong> C++ etc.<br />
4. Read the included <strong><strong>Axis</strong>CamControl</strong> document, which contains license information and documentation of<br />
the control.<br />
Adding Controls to a VB Project<br />
The set of controls available in the toolbox can be customized for each project. Any given control must be in the<br />
toolbox before you can add it to a form in the project.<br />
Adding ActiveX Controls to a Project<br />
You add ActiveX controls and insertable objects to your project by adding them to the toolbox.<br />
<strong>Axis</strong> <strong>Communications</strong> AB does not provide support for application development of any kind. The information here<br />
is provided "as is", and there is no guarantee that any of the examples shown will work in your particular<br />
application.<br />
1
To add a control to a project's toolbox:<br />
1. From the Project menu, choose Components.<br />
The Components dialog box is displayed. The items listed in this dialog box include all registered ActiveX<br />
controls, insertable objects, and ActiveX designers.<br />
2. To add the <strong><strong>Axis</strong>CamControl</strong> to the toolbox, select the checkbox to the left of the control name.<br />
3. Choose OK to close the Components dialog box. All of the ActiveX controls that you selected will now<br />
appear in the toolbox.<br />
To add ActiveX controls to the Components dialog box, choose the Browse button, and search other directories for<br />
files with an .ocx file name extension.<br />
Removing Controls from a Project<br />
To remove a control from a project:<br />
1. From the Project menu, choose Components.<br />
The Components dialog box is displayed.<br />
2. Clear the check box next to each control you want to remove.<br />
The control icons will be removed from the toolbox.<br />
Note: You cannot remove a control from the toolbox if an instance of that control is used on any form in the project.<br />
<strong>Basic</strong> Operation: Set the URL Property to Get Live Images<br />
When using the control, the most basic and important property is the URL property. You start a download from an<br />
AXIS camera/video server simply by assigning a correct URL to this property.<br />
The following code uses two Command Button controls, cmdURL1 and cmdURL2. Set the caption of cmdURL1 to<br />
URL1. The caption of the Command Button control cmdURL2 is set to URL2.<br />
The IP address in the URL should be the correct IP address to an AXIS camera/video server. See the HTTP API for<br />
the AXIS camera/video servers for more information. A trick to figure out the correct Motion JPEG URL for the<br />
specific <strong>Axis</strong> Camera/Video product is to look in the html code of the internal web pages. To verify that you have<br />
the correct URL, use Netscape Navigator and type the complete Motion JPEG URL into the location window. If the<br />
URL is correct you will, for a period of time, see live updated images in your browser.<br />
Private Sub cmdURL1_Click()<br />
' Start the download and show the live images from an<br />
' AXIS camera/video server with the IP address 10.13.10.81.<br />
CamImage1.URL = "http:// 10.13.10.81/axis-cgi/mjpg/video.cgi"<br />
End Sub<br />
Add the code for URL2:<br />
Private Sub cmdURL2_Click()<br />
<strong>Axis</strong> <strong>Communications</strong> AB does not provide support for application development of any kind. The information here<br />
is provided "as is", and there is no guarantee that any of the examples shown will work in your particular<br />
application.<br />
2
' Start the download and show the live images from an<br />
' AXIS camera/video server with the IP address 10.13.10.82.<br />
CamImage1.URL = "http:// 10.13.10.82/axis-cgi/mjpg/video.cgi "<br />
End Sub<br />
Run the application and make sure that you can go from one camera to the other, just by clicking the different<br />
buttons.<br />
Recorder Methods: SaveImage and LoadImage<br />
The <strong><strong>Axis</strong>CamControl</strong> can be used as a simple recorder where images can be captured and saved to file. The saved<br />
images can also be displayed in the control window.<br />
The SaveImage and LoadImage methods each have one argument, a file name, which is an absolute file path,<br />
for example C:/Images/myImage.jpg.<br />
Add two more Command Button controls to the form, cmdSave and cmdLoad. Set the caption of cmdSave to<br />
Save and the caption of the Command Button control cmdLoad to Load.<br />
Private Sub cmdSave_Click()<br />
CamImage1.SaveImage "E:/Images/myImage.jpg”<br />
End Sub<br />
Private Sub cmdLoad_Click()<br />
CamImage1.LoadImage "E:/Images/myImage.jpg”<br />
End Sub<br />
The following code saves an image and displays the saved images.<br />
After the LoadImage method has been called, the control display status is turned off. To view live images again,<br />
the display status must be set to True.<br />
Add a fifth Command Button control, cmdDisplayOn and the code for this:<br />
Private Sub cmdDisplayOn_Click()<br />
CamImage1.Display = True<br />
End Sub<br />
Using Events: OnNewImage<br />
<strong><strong>Axis</strong>CamControl</strong> provides several events that enable your client application to track its state, for example, it sends<br />
out the OnClick event every time there is a mouse click in the control window and the ClickEnabled property<br />
is set to True.<br />
<strong>Axis</strong> <strong>Communications</strong> AB does not provide support for application development of any kind. The information here<br />
is provided "as is", and there is no guarantee that any of the examples shown will work in your particular<br />
application.<br />
3
The OnNewImage event is generated every time a new image has been received from the <strong>Axis</strong> Network Camera or<br />
Video Server. This event can be used in combination with the GetCurrentImage method to e.g. create a simple<br />
application that saves all captured images to disk. In order to do this, add the following code to your project:<br />
Private Sub CamImage1_OnNewImage()<br />
Dim b As Variant<br />
Dim Size As Variant<br />
Dim a() As Byte<br />
Call CamImage1.GetCurrentImage(b, Size)<br />
a() = b<br />
Open "C:/Test.jpg" For Binary Access Write As #1<br />
Put #1, , a()<br />
Close #1<br />
End Sub<br />
Each time an image is captured, the image data will be saved as a Jpeg image, Test.jpg, in the C: directory.<br />
To let the application developer know when something goes wrong with the connection; the<br />
OnConnectionBroken and OnConnectionFailed events are also supported.<br />
Display Images using the SetImage Method<br />
To display an image inside the control window both the LoadImage and the SetImage methods can be used. The<br />
Load Image method opens a Jpeg file from disk and displays it. The SetImage method can be used to display Jpeg<br />
image data. In this example a Jpeg image is read from file and displayed in the control window using the SetImage<br />
method.<br />
Dim MyFile As Long<br />
Dim Buffer As String<br />
Dim aVariant As Variant<br />
Dim nLen As Long<br />
Dim nPos As Long<br />
Dim nGet As Long<br />
Dim I As Long<br />
MyFile = FreeFile<br />
' Open the image file.<br />
Open "C:/Test.jpg" For Binary Access Read As #MyFile<br />
' Define a buffer to receive the image information<br />
nLen = LOF(MyFile)<br />
<strong>Axis</strong> <strong>Communications</strong> AB does not provide support for application development of any kind. The information here<br />
is provided "as is", and there is no guarantee that any of the examples shown will work in your particular<br />
application.<br />
4
' Allocate sufficient buffer to retrieve the image<br />
Buffer = Space(nLen)<br />
' Retrieve the buffer<br />
Get #MyFile, , Buffer<br />
Close #MyFile<br />
' Convert the Buffer to a Byte Array<br />
ReDim aBuffer(0 To nLen - 1) As Byte<br />
For I = 1 To Len(Buffer)<br />
Next<br />
aBuffer(I - 1) = Asc(Mid(Buffer, I, 1))<br />
' Pass the Byte array to a Variant<br />
aVariant = aBuffer<br />
Call CamImage1.SetImage(aVariant, Len(Buffer))<br />
<strong>Axis</strong> <strong>Communications</strong> AB does not provide support for application development of any kind. The information here<br />
is provided "as is", and there is no guarantee that any of the examples shown will work in your particular<br />
application.<br />
5


