NZPhotographer Issue 61, November 2022
As of December 2022, NZPhotographer magazine is only available when you purchase an annual or monthly subscription via the NZP website. Find out more: www.nzphotographer.nz
As of December 2022, NZPhotographer magazine is only available when you purchase an annual or monthly subscription via the NZP website. Find out more: www.nzphotographer.nz

You also want an ePaper? Increase the reach of your titles
YUMPU automatically turns print PDFs into web optimized ePapers that Google loves.
Perspective On Projection Portraits<br />
by Fairlie Atkinson<br />
If you’re a portrait photographer looking to achieve<br />
something with a difference, projection portraits are<br />
not hard to achieve whether you’re working from<br />
home or in your own studio.<br />
The first step is to darken the room. Try and shut out<br />
all external light if you can. We were working in a<br />
classroom at a public high school during school hours,<br />
so this was hard, but we managed to cover all the<br />
windows and doors with black paper and cardboard.<br />
The next thing you need is an untextured wall. This is<br />
relatively easy in a studio, but as seen in September’s<br />
issue, not everyone has a studio, so many people<br />
have become very good at leveraging the spaces<br />
around them. In the case of your home or garage,<br />
find a space with a wall onto which you can project<br />
an image without it becoming distorted.<br />
We were lucky enough to have an overhead school<br />
projector hung from our ceiling in the classroom.<br />
However, you can pick up a relatively cheap portable<br />
projector these days and simply plug it into your<br />
laptop. Saying that, I wouldn’t rush out to buy new<br />
equipment, look at borrowing, hiring or even buying<br />
something small second-hand that can be set up with<br />
minimal preparation in a room in your home first.<br />
Choosing what to project will depend largely on<br />
what your model is wearing. You can project just<br />
about anything onto bare skin, but with clothing, dark<br />
colours work best and provide the best contrast, even<br />
when the projected image is dark. Projecting images<br />
onto white clothing is not very successful unless all the<br />
colours in your image are dark.<br />
We all shot on 55mm lenses on a variety of cameras,<br />
and I would recommend starting with the same if you<br />
are not in a studio or you may not get far enough<br />
back from your subject to be able to create a<br />
statement with your image.<br />
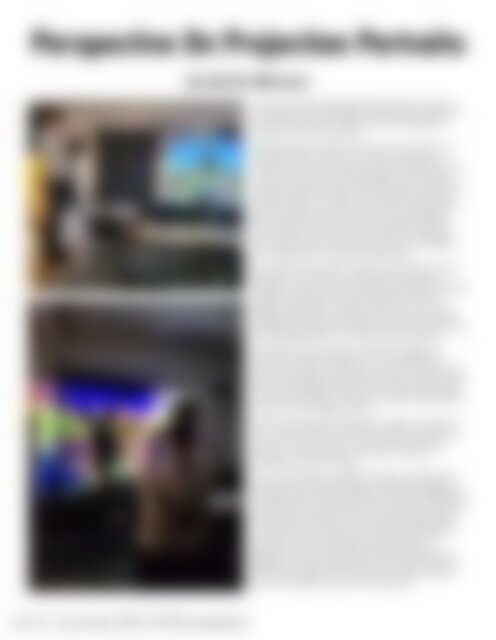
In our first example, students wanted to project their<br />
home town onto their bodies to create an image of<br />
belonging. We projected directly onto the whiteboard<br />
to see whether it would work as a backdrop. While the<br />
whiteboard worked well, the white clothing washed<br />
out the colour of the sea and created a perspective<br />
of negative space where there should have been<br />
water. As you can also see, shooting with the<br />
projection onto the whiteboard (and probably any<br />
reflective surface) means you have to move around<br />
and find an angle where there is no reflective glare<br />
from the projection onto the whiteboard.<br />
60 <strong>November</strong> <strong>2022</strong> <strong>NZPhotographer</strong>