
Create successful ePaper yourself
Turn your PDF publications into a flip-book with our unique Google optimized e-Paper software.
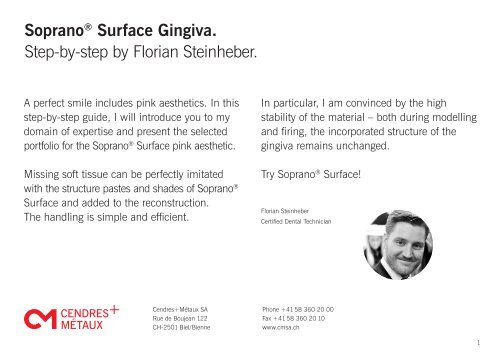
Soprano ® <strong>Surface</strong> <strong>Gingiva</strong>.<br />
<strong>Step</strong>-<strong>by</strong>-<strong>step</strong> <strong>by</strong> <strong>Florian</strong> <strong>Steinheber</strong>.<br />
A perfect smile includes pink aesthetics. In this<br />
<strong>step</strong>-<strong>by</strong>-<strong>step</strong> guide, I will introduce you to my<br />
domain of expertise and present the selected<br />
portfolio for the Soprano ® <strong>Surface</strong> pink aesthetic.<br />
Missing soft tissue can be perfectly imitated<br />
with the structure pastes and shades of Soprano ®<br />
<strong>Surface</strong> and added to the reconstruction.<br />
The handling is simple and efficient.<br />
In particular, I am convinced <strong>by</strong> the high<br />
stability of the material – both during modelling<br />
and firing, the incorporated structure of the<br />
gingiva remains unchanged.<br />
Try Soprano ® <strong>Surface</strong>!<br />
<strong>Florian</strong> <strong>Steinheber</strong><br />
Certified Dental Technician<br />
Cendres+Métaux SA<br />
Rue de Boujean 122<br />
CH-2501 Biel/Bienne<br />
Phone +41 58 360 20 00<br />
Fax +41 58 360 20 10<br />
www.cmsa.ch<br />
1
Soprano ® <strong>Surface</strong> <strong>Gingiva</strong> Kit.<br />
The kit with all structure pastes and stains<br />
for gingival reconstructions.<br />
• 5 gingiva pastes<br />
• 1 clear paste<br />
• 4 non-fluorescent stains<br />
• glaze paste and liquids<br />
Note: This document does not replace the instructions for use. It is an excerpt<br />
and only contains a summary of information for the specialist repeatedly<br />
needed in the work process, such as the specification of firing temperatures.<br />
Therefore, the instructions for use for Soprano ® <strong>Surface</strong> must be read and<br />
understood beforehand. The instructions for use can be downloaded from<br />
www.cmsa.ch/docs or requested from your local representative.<br />
Here's how to use<br />
Soprano ® <strong>Surface</strong>!<br />
Click here for the video<br />
with <strong>Florian</strong> <strong>Steinheber</strong>.<br />
2
First strike.<br />
Please observe the following rules when using Soprano <strong>Surface</strong> ® for the first time.<br />
01<br />
The furnace temperature must be carefully observed, as the<br />
furnace settings may vary. Before firing a piece, I advise you to<br />
make a test. You can use a piece of zircon and apply a stain<br />
such as Stain red and fire it at 770° C. If the surface shines and<br />
shows a deep red, then the furnace is well adjusted. Otherwise, I<br />
recommend continuing to test in 5-degree increments until you<br />
achieve the desired result. Repeat this <strong>step</strong> also with the<br />
Soprano ® <strong>Surface</strong> layering pastes – ideally with Clear paste to<br />
check the transparency.<br />
02<br />
Please make sure that no water is added to either the stains<br />
or the layering materials. Also, please do not clean the<br />
brushes with water, but use the corresponding liquid for this<br />
purpose, as otherwise the ceramics will become opaque, and<br />
the colours will appear rather pasty. In addition, the two<br />
liquids should not be mixed. Glaze Fluid is intended for the<br />
stain and the normal fluid for the ceramic.<br />
03<br />
The stain pastes must not be mixed into the ceramic pastes.<br />
04<br />
When using stains or ceramics pastes, it is important that the<br />
materials are applied in a thin layer, otherwise bubbles may<br />
appear.<br />
05<br />
When working with rotary instruments, it is recommended to use<br />
a fine grit of diamonds or stones. Afterwards, the surface can be<br />
smoothed and polished with silicone polishers.<br />
3
Tools.<br />
Brushes with synthetic hair are much stronger and therefore<br />
ideal for working with Soprano ® <strong>Surface</strong>. Brushes with natural<br />
hair are too soft for the pasty masses and retain too much liquid.<br />
To work in the texture of the gingiva, I use this brush shape. It<br />
is important to pre-dry the ceramic slightly before working in<br />
the gum texture. For this purpose, I open my furnace and lift<br />
the ceramic underneath for about 20-30 seconds. The surface<br />
of the ceramic should become slightly white. Make sure that<br />
the ceramic does not dry out too much. Afterwards, you can<br />
work in a nice texture with the brush and under light pressure.<br />
Afterwards, I recommend smoothing the ceramic again very<br />
gently with a soft brush.<br />
4
<strong>Step</strong> 01 02 03 04 05 06 07 08 09 10 11 12<br />
A2<br />
Stain<br />
orange<br />
Stain<br />
red<br />
Stain redbrown<br />
<strong>Gingiva</strong><br />
dark<br />
<strong>Gingiva</strong><br />
orange<br />
<strong>Gingiva</strong><br />
light<br />
<strong>Gingiva</strong><br />
violet<br />
Glaze<br />
Fluid<br />
Notes<br />
A zirconium framework in A2 with a cutback and Soprano ®<br />
<strong>Surface</strong> thinly layered.<br />
5
<strong>Step</strong> 01 02 03 04 05 06 07 08 09 10 11 12<br />
A2<br />
Stain<br />
orange<br />
Stain<br />
red<br />
Stain redbrown<br />
<strong>Gingiva</strong><br />
dark<br />
<strong>Gingiva</strong><br />
orange<br />
<strong>Gingiva</strong><br />
light<br />
<strong>Gingiva</strong><br />
violet<br />
Glaze<br />
Fluid<br />
Notes<br />
Stain orange is applied around the cervical area and around the<br />
tooth roots.<br />
6
<strong>Step</strong> 01 02 03 04 05 06 07 08 09 10 11 12<br />
A2<br />
Stain<br />
orange<br />
Stain<br />
red<br />
Stain redbrown<br />
<strong>Gingiva</strong><br />
dark<br />
<strong>Gingiva</strong><br />
orange<br />
<strong>Gingiva</strong><br />
light<br />
<strong>Gingiva</strong><br />
violet<br />
Glaze<br />
Fluid<br />
Notes<br />
The remaining part of the gingival area is coloured with Stain<br />
red. The red colour is therefore applied onto the orange colour<br />
like a flame.<br />
7
<strong>Step</strong> 01 02 03 04 05 06 07 08 09 10 11 12<br />
A2<br />
Stain<br />
orange<br />
Stain<br />
red<br />
Stain redbrown<br />
<strong>Gingiva</strong><br />
dark<br />
<strong>Gingiva</strong><br />
orange<br />
<strong>Gingiva</strong><br />
light<br />
<strong>Gingiva</strong><br />
violet<br />
Glaze<br />
Fluid<br />
Notes<br />
To set accents and obtain a slightly darker red, mix a minimal<br />
amount of Stain red-brown with Stain red and place it between<br />
the tooth roots and the transition to the natural gingiva.<br />
According to the instructions for use of the manufacturer<br />
Cendres+Métaux, the stain firing is done at 770° C. I prefer a<br />
somewhat higher firing temperature and fire the stains at 780° C.<br />
8
<strong>Step</strong> 01 02 03 04 05 06 07 08 09 10 11 12<br />
A2<br />
Stain<br />
orange<br />
Stain<br />
red<br />
Stain redbrown<br />
<strong>Gingiva</strong><br />
dark<br />
<strong>Gingiva</strong><br />
orange<br />
<strong>Gingiva</strong><br />
light<br />
<strong>Gingiva</strong><br />
violet<br />
Glaze<br />
Fluid<br />
Notizen<br />
We layer <strong>Gingiva</strong> dark around the cervical area and in the<br />
papillae.<br />
9
<strong>Step</strong> 01 02 03 04 05 06 07 08 09 10 11 12<br />
A2<br />
Stain<br />
orange<br />
Stain<br />
red<br />
Stain redbrown<br />
<strong>Gingiva</strong><br />
dark<br />
<strong>Gingiva</strong><br />
orange<br />
<strong>Gingiva</strong><br />
light<br />
<strong>Gingiva</strong><br />
violet<br />
Glaze<br />
Fluid<br />
Notes<br />
The tooth roots are coated with <strong>Gingiva</strong> orange. Please note<br />
that the two pastes <strong>Gingiva</strong> dark and <strong>Gingiva</strong> orange are<br />
slightly mixed to achieve a natural appearance. Before firing,<br />
the texture and shape are prepared <strong>by</strong> means of a brush.<br />
10
<strong>Step</strong> 01 02 03 04 05 06 07 08 09 10 11 12<br />
A2<br />
Stain<br />
orange<br />
Stain<br />
red<br />
Stain redbrown<br />
<strong>Gingiva</strong><br />
dark<br />
<strong>Gingiva</strong><br />
orange<br />
<strong>Gingiva</strong><br />
light<br />
<strong>Gingiva</strong><br />
violet<br />
Glaze<br />
Fluid<br />
Notes<br />
First firing at 775° C.<br />
11
<strong>Step</strong> 01 02 03 04 05 06 07 08 09 10 11 12<br />
A2<br />
Stain<br />
orange<br />
Stain<br />
red<br />
Stain redbrown<br />
<strong>Gingiva</strong><br />
dark<br />
<strong>Gingiva</strong><br />
orange<br />
<strong>Gingiva</strong><br />
light<br />
<strong>Gingiva</strong><br />
violet<br />
Glaze<br />
Fluid<br />
Notes<br />
<strong>Gingiva</strong> light is used to layer the cervical area and the papillae.<br />
12
<strong>Step</strong> 01 02 03 04 05 06 07 08 09 10 11 12<br />
A2<br />
Stain<br />
orange<br />
Stain<br />
red<br />
Stain redbrown<br />
<strong>Gingiva</strong><br />
dark<br />
<strong>Gingiva</strong><br />
orange<br />
<strong>Gingiva</strong><br />
light<br />
<strong>Gingiva</strong><br />
violet<br />
Glaze<br />
Fluid<br />
Notes<br />
The transition to the natural gingiva is completed with <strong>Gingiva</strong><br />
violet.<br />
13
<strong>Step</strong> 01 02 03 04 05 06 07 08 09 10 11 12<br />
A2<br />
Stain<br />
orange<br />
Stain<br />
red<br />
Stain redbrown<br />
<strong>Gingiva</strong><br />
dark<br />
<strong>Gingiva</strong><br />
orange<br />
<strong>Gingiva</strong><br />
light<br />
<strong>Gingiva</strong><br />
violet<br />
Glaze<br />
Fluid<br />
Notes<br />
The second firing is carried out at 770° C.<br />
14
<strong>Step</strong> 01 02 03 04 05 06 07 08 09 10 11 12<br />
A2<br />
Stain<br />
orange<br />
Stain<br />
red<br />
Stain redbrown<br />
<strong>Gingiva</strong><br />
dark<br />
<strong>Gingiva</strong><br />
orange<br />
<strong>Gingiva</strong><br />
light<br />
<strong>Gingiva</strong><br />
violet<br />
Glaze<br />
Fluid<br />
Notes<br />
Finally, a thin layer of Glaze Fluid is applied and fired at 765° C.<br />
15
<strong>Step</strong> 01 02 03 04 05 06 07 08 09 10 11 12<br />
A2<br />
Stain<br />
orange<br />
Stain<br />
red<br />
Stain redbrown<br />
<strong>Gingiva</strong><br />
dark<br />
<strong>Gingiva</strong><br />
orange<br />
<strong>Gingiva</strong><br />
light<br />
<strong>Gingiva</strong><br />
violet<br />
Glaze<br />
Fluid<br />
I wish you<br />
good success and<br />
plenty of satisfaction<br />
in your work.<br />
The final work is slightly rubbed and then polished up with a<br />
diamond polishing paste and a Robinson brush.<br />
<strong>Florian</strong> <strong>Steinheber</strong><br />
16