Practical Wax Modeling
DESCRIPTION In this book jewelry wax modeling techniques are introduced and explained in detail, illustrated with step-by-step photographs. Some special features of Practical Wax Modeling include: a) Practical applications when using a variety of waxes b) Mitsuro and its uses c) Demonstrations of a variety of textures d) Methodology of finishing castings. Practical Wax Modeling was written as an applied compilation of projects for the authors' introductory book Basic Wax Modeling. TABLE OF CONTENTS Samples of Wax Modeling Techniques 4 Samples of Finished Products 5,6,7 Wax Modeling for Professionals 9 Special Features and Suggestions 10 I. HARD WAX MODELING TECHNIQUES 11 Textured Ring 13 Two Part Ring 21 Ring with a Floating Twist 27 Built-Up Ring 31 Hollow Pendant 35 Brooch Using Hard and Soft Wax 43 Brooch with Realistic Modeling 47 II. SOFT WAX MODELING TECHNIQUES 59 Embossed Figure Brooch 61 Floral Patterned Ring 65 Ring of Wax Wire Construction 69 Pendant Constructed of Wax Wire 73 Making Mitsuro 79 Mitsuro Ring 83 Mitsuro Brooch 89 Mitsuro Pendant 95 Modeling Mitsuro with Other Materials 99 Free Forming 103 III. MODELING TECHNIQUES WITH GEMSTONES 109 Cabochon Mounting for a Pendant in Soft Wax 111 Cabochon Mounting for a Ring in Hard Wax 117 IV. OTHER MODELING TECHNIQUES 125 Sizing 126 Applying Various Textures 128 Reworking a Wax Pattern 130 V. CASTING PROCESSES & RUBBER-MOLD MAKING 135 Casting Processes 136 Rubber-Mold Making 140 VI. PROCESSING & FINISHING AFTER CASTING 143 AFTERWORD 151 APPENDIX 152 Hardcover, 160 pages, 385 detailed black and white photos and illustrations.
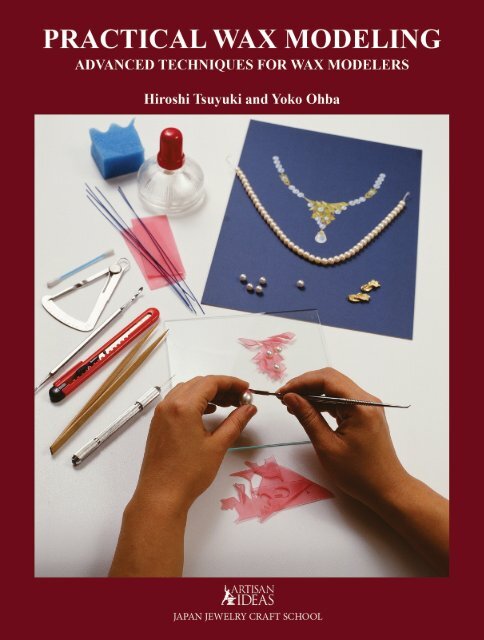
DESCRIPTION
In this book jewelry wax modeling techniques are introduced and explained in detail, illustrated with step-by-step photographs.
Some special features of Practical Wax Modeling include:
a) Practical applications when using a variety of waxes
b) Mitsuro and its uses
c) Demonstrations of a variety of textures
d) Methodology of finishing castings.
Practical Wax Modeling was written as an applied compilation of projects for the authors' introductory book Basic Wax Modeling.
TABLE OF CONTENTS
Samples of Wax Modeling Techniques 4
Samples of Finished Products 5,6,7
Wax Modeling for Professionals 9
Special Features and Suggestions 10
I. HARD WAX MODELING TECHNIQUES 11
Textured Ring 13
Two Part Ring 21
Ring with a Floating Twist 27
Built-Up Ring 31
Hollow Pendant 35
Brooch Using Hard and Soft Wax 43
Brooch with Realistic Modeling 47
II. SOFT WAX MODELING TECHNIQUES 59
Embossed Figure Brooch 61
Floral Patterned Ring 65
Ring of Wax Wire Construction 69
Pendant Constructed of Wax Wire 73
Making Mitsuro 79
Mitsuro Ring 83
Mitsuro Brooch 89
Mitsuro Pendant 95
Modeling Mitsuro with Other Materials 99
Free Forming 103
III. MODELING TECHNIQUES WITH GEMSTONES 109
Cabochon Mounting for a Pendant in Soft Wax 111
Cabochon Mounting for a Ring in Hard Wax 117
IV. OTHER MODELING TECHNIQUES 125
Sizing 126
Applying Various Textures 128
Reworking a Wax Pattern 130
V. CASTING PROCESSES & RUBBER-MOLD MAKING 135
Casting Processes 136
Rubber-Mold Making 140
VI. PROCESSING & FINISHING AFTER CASTING 143
AFTERWORD 151
APPENDIX 152
Hardcover, 160 pages, 385 detailed black and white photos and illustrations.

Create successful ePaper yourself
Turn your PDF publications into a flip-book with our unique Google optimized e-Paper software.
4<br />
Samples of <strong>Wax</strong><br />
<strong>Modeling</strong> Techniques.
Samples of<br />
Finished Products.<br />
5
Ring - Wire Filigree Added<br />
for Volume.<br />
Ring - Wire Added<br />
within the Frame.<br />
Ring in Thick "Melted<br />
Wire" Motif.<br />
Ring - Pearl Wrapped<br />
in Wire.<br />
72
PENDANT CONSTRUCTED OF WAX WIRE<br />
GENERAL DESCRIPTION:<br />
This pendant will be structured in a similar manner to the previous ring. Let us<br />
plan an out-of-the-ordinary presentation by adding texture to wax wires and<br />
adding decorative beads. It is important to advise you to concentrate on the precise<br />
placement of each curved wax wire to maintain good balance. Try to bring out the<br />
three-dimensional effect in the bowing of wax wires and balance as well.<br />
WORK HINTS:<br />
1. Master the method of applying wax wire.<br />
2. Attention to sense of balance and arrangement.<br />
3. Try adding texture and beads effectively to show your own expression.<br />
MATERIALS:<br />
<strong>Wax</strong> wire<br />
Needle<br />
Sponge<br />
Knife<br />
Takebera<br />
73
Make the central stem from a half round<br />
wax wire about 1.2 - 1.5 mm in diameter.<br />
Start with a length about 10 cm; form a<br />
bail (flat side down) on one end using a<br />
dowel.<br />
Warm the wax with your fingers as you<br />
slowly form a loop (curved side up) as<br />
per the drawing. Work carefully; do not<br />
scratch the front side with your finger<br />
nails.<br />
1 2<br />
Cut off the excess wire neatly with a<br />
thin blade knife (recommended: a razor<br />
blade).<br />
3 4<br />
Weld the bail and loop joints securely.<br />
Add wax if necessary.<br />
74
Apply wax wires (0.7 - 0.8 mm) to the<br />
stem. Put the stem on a sponge and melt<br />
the stem with the point of a hot needle,<br />
then insert the smaller wire.<br />
Shape the wire as you warm it with your<br />
fingers. Use the tip of a heated needle to<br />
cut the wire off at the proper length; in<br />
this manner the shape will not be spoiled.<br />
5 6<br />
Install the second piece in the same<br />
manner. At this time, weld the pieces<br />
together. As the wires are thin take ample<br />
care not to over melt (just a touch of the<br />
needle will do).<br />
7 8<br />
Refer to the design; apply each segment<br />
neatly as you proceed. Pay attention to<br />
the balance and avoid any unnatural<br />
bends in the wires.<br />
75
When this layer has been completed,<br />
weld each joint from the reverse side.<br />
Again add extra wax where required.<br />
Moving on, add another layer of wax<br />
wires in the same manner as Step 9. A<br />
nice appearance will be produced by<br />
putting a slight curve in the wire before<br />
you weld it.<br />
9 10<br />
After you have completed the round, yet<br />
another layer of wax wires will be added<br />
at the midpoints of the other layers.<br />
Gradually things will become crowded:<br />
be very careful not to melt the other wires<br />
in the process.<br />
11 12<br />
As you will not be able to use your fingers<br />
to install the wires due to crowding,<br />
shape the wires with a pointed takegushi<br />
or dowel. If the ambient temperature is<br />
cool, breathe on the wires to make them<br />
pliable.<br />
76
Check over the entire assembly and make<br />
certain that each part is nicely welded.<br />
Re-weld joints that appear weak.<br />
Add texture to the wires. To impart a<br />
slight roughened appearance, dot the<br />
wires with the point of a warm needle.<br />
Patiently dot each wire.<br />
13 14<br />
Apply texture to the junction of the wires<br />
as well. Do not over-heat the needle.<br />
15 16<br />
Place beads over the entire assembly<br />
uniformly. Try to keep the beads all the<br />
same size. Pick up a tiny amount of wax<br />
on the tip of the hot needle. The trick is to<br />
place the bead quickly and gently.<br />
77
Pendant with Textured<br />
Wires.<br />
Pendant with Wire, Beads<br />
and Melle.<br />
Pendant with Stone<br />
Encased in Wires.<br />
Pendant with a Realistic<br />
Nest Made with Bits of<br />
Wire.<br />
78
MAKING “MITSURO”, TRADITIONAL WAX FORMULA<br />
GENERAL DESCRIPTION:<br />
Mitsuro has been Japan’s traditional material of use for centuries. It was used in the<br />
lost wax process construction of the Great Buddha during the Nara Era (746 AD).<br />
The technique in the use of mitsuro to create striated texture may be seen in the<br />
design of many products. As mitsuro is not sold in stores, you will have to prepare<br />
the product yourself. Mitsuro is weakened by heat; proportional adjustments will<br />
be necessary to suit the temperature of your work place, the time of year, etc. Work<br />
out a composition suitable for you after you have familiarized yourself with basic<br />
mitsuro production.<br />
WORK HINTS:<br />
1. Master the method of applying wax wire.<br />
2. Attention to sense of balance and arrangement.<br />
3. Try adding texture and beads effectively to show your own expression.<br />
MATERIALS:<br />
Yellow impression wax Pine resin Flat pan<br />
Soft wax<br />
Scale<br />
Stove<br />
Perforated metal pad<br />
Spoon<br />
Bowl<br />
Scissors<br />
Gauze<br />
79
Assemble equal weights of yellow<br />
impression wax and pine resin, add soft<br />
wax to equal 5 - 7% of the total weight of<br />
the resin and yellow impression wax.<br />
Weigh equal amounts of impression wax<br />
and pine resin. In summer use more resin<br />
and less in winter to adjust the hardness.<br />
1 2<br />
Melt the impression wax and resin in a<br />
flat pan. It is imperative that the heat be<br />
kept down; place a perforated metal pad/<br />
grill under the pan.<br />
3 4<br />
Warm the mixture slowly, waiting for it<br />
to melt naturally. If it is over-heated, it<br />
will be ruined. By all means, be patient.<br />
80
As the mixture begins to melt, stir slowly;<br />
used mitsuro may be mixed in at this<br />
time if you have any. Used mitsuro will<br />
contain air; recooking will renew it and<br />
add to the total.<br />
After the impression wax and pine resin<br />
have melted together, stir in the soft wax.<br />
Check the mixture. If the mitsuro sticks to<br />
your fingers, add more soft wax.<br />
5 6<br />
After the mitsuro has been completely<br />
mixed, allow it to “cook” for 30 minutes to<br />
one hour. To test the mitsuro for hardness<br />
and stretchability, pour a spoonful into a<br />
pan containing water.<br />
7 8<br />
The mixture will set in water, test it for<br />
hardness, etc. If it is too hard, add more<br />
impression wax: if it is too soft, add more<br />
pine resin.<br />
81
Ring Fashioned around<br />
a Stone Producing a Solid<br />
Appearence.<br />
Ring with Melle Stone<br />
Accenting the End of<br />
the Mitsuro.<br />
Ring in a Simple Arrangement<br />
with a Single Center Stone.<br />
Ring in a Flat Casual Motif.<br />
88
MITSURO BROOCH<br />
GENERAL DESCRIPTION:<br />
We will make a brooch accenting the lively flow of hikime in the mitsuro. A pleasing<br />
atmosphere is created in the form of an arrangement of twisted slender leaves<br />
brought together with small flowers in the center.<br />
In order to grasp the handling of mitsuro and the natural flow, experiment with<br />
various designs. Try a change in motif, so that you will be able to make small flowers<br />
as well as petals of the same size; small and charming.<br />
WORK HINTS:<br />
1. Work at the method of producing a natural flow of hikime in the mitsuro.<br />
2. Make the four small flowers of the same thickness.<br />
3. Follow the design concept and maintain good balance throughout.<br />
MATERIALS:<br />
Mitsuro<br />
Sheet of glass<br />
Pliers<br />
Needle<br />
Spatula<br />
Talcum powder<br />
Tweezers<br />
89
Produce hikime on a slender piece of<br />
mitsuro, with about 1 mm of uniform<br />
thickness. As both sides of this mitsuro<br />
will be seen, hikime must appear on both<br />
sides as well.<br />
In producing hikime, the knack is to<br />
refrain from undue force; let it form<br />
spontaneously as it is stretched. Here,<br />
you will add twists to the mitsuro. After<br />
the length has been determined, the<br />
ends will be tapered off by controlled<br />
squeezing.<br />
1 2<br />
Next make the shorter piece. The ends of<br />
the slender mitsuro will be prepared as in<br />
Step 2.<br />
3 4<br />
With balance in mind, assemble the<br />
mitsuro pieces. Entwine the ends<br />
“arabesque” style. Make certain that no<br />
sharp ends will appear in the casting.<br />
90
Weld the ends of the mitsuro where they<br />
touch each other with a smidge of mitsuro<br />
applied with a heated needle. Do this<br />
where it can not be seen from the front.<br />
Make the small flowers. First, form small<br />
balls of mitsuro with a heated, small,<br />
rounded-end spatula. Make the balls as<br />
uniform as you can. Line them up on a<br />
glass or metal plate.<br />
5 6<br />
Flatten the balls with a pair of pliers. Dust<br />
talcum powder on the nibs so that the<br />
balls will not stick. Flatten them down to<br />
about 0.8 mm thick. These will made into<br />
petals.<br />
7 8<br />
Hold a petal on the end of the tweezers<br />
and as if to envelope the end of the<br />
tweezers slowly collapse the exposed<br />
mitsuro upwards with your fingers and<br />
pinch the end slightly. Make the heart of<br />
the petal resemble a tear drop.<br />
91
Assemble four petals reverse side up to<br />
form a flower. As it is delicate task use a<br />
pair of tweezers.<br />
Place a heated needle in the center and<br />
weld the petals together. Welding 2<br />
petals at a time will produce good results.<br />
Adding a small bit of wax in the center<br />
will strengthen the bond.<br />
9 10<br />
Turn the flower over and add a bead in<br />
the center of the flower. Do not overheat<br />
the needle; pick up a tiny bit of wax.<br />
Make five flowers of varying sizes.<br />
11 12<br />
With balance in mind lay out the flowers.<br />
Place the flowers so that they touch the<br />
main brooch in more than two places. In<br />
the casting process the molten metal may<br />
not reach the flowers or may break off<br />
later if there is contact in only one spot.<br />
92
When the placements are determined,<br />
each flower will be welded in place. They<br />
will be tacked into place from the front to<br />
be certain of their locations. Do this with<br />
a heated needle and touch lightly with<br />
the point of the needle.<br />
Next, weld the flower from the reverse<br />
side with a small amount of wax. As the<br />
petals are very thin, using waxes with<br />
high melting temperatures for welding<br />
will affect the front side; work at low<br />
temperatures.<br />
13 14<br />
Weld the balance of the flowers using the<br />
same technique. Weld with added wax<br />
from the reverse side so that they will not<br />
move. Placing the assembly on top of a<br />
sponge may be more convenient.<br />
15 16<br />
After the flowers have been completed,<br />
place a bead at the ends of the hikime.<br />
After casting, pin fittings will be soldered;<br />
provide a place for them.<br />
93
Obi Brooch with Effective<br />
Use of Beads.<br />
Pendant Made with Wide<br />
Mitsuro to Create Volume.<br />
Brooch Made with Narrow<br />
Mitsuro and a Carved<br />
Flower in the Center.<br />
Vibrant Mitsuro Brooch.<br />
94
MITSURO PENDANT<br />
GENERAL DESCRIPTION:<br />
Flowers are popular as a design motif. Various expressions of flowers may be created<br />
by the use of sheet wax or mitsuro. Here, small flowers resembling lilies will be made.<br />
Create these flowers, carefully preserving the ambience of the lovely flower petals.<br />
WORK HINTS:<br />
1. Pay attention to the size of the flower petals.<br />
2. Produce a natural unfurled look to the flower.<br />
3. Secure the base of the flower.<br />
MATERIALS:<br />
Mitsuro<br />
Needle<br />
Spatula<br />
95
Pendant Featuring an<br />
Ammonite Fossil.<br />
Pendant with Stone Settings<br />
Added throughout the Design.<br />
Pendant with Mitsuro-Made<br />
Forms in Irregular Setting.<br />
Ring with an Irregular<br />
Shaped Bezel.<br />
116
CABOCHON MOUNTING FOR A RING IN HARD WAX<br />
GENERAL DESCRIPTION:<br />
To make a setting for a precious stone in metal, a hard wax model with a stone<br />
seat will be made for the cabochon. Accurate work will be required. As it becomes<br />
practicable to add texture to a setting, and in the case of a ring, design the shank and<br />
incorporate it into the setting, jewelry fabrication becomes broader in scope. We will<br />
add a veinlike texture to the ring.<br />
WORK HINTS:<br />
1. Make the stone seat slightly larger than the stone.<br />
2. When welding parts together, do not cause any deformation.<br />
3. Join the shank and setting accurately.<br />
MATERIALS:<br />
Slice of wax<br />
Scriber<br />
Jeweler's saw<br />
Needle<br />
Carvers<br />
Off-centered hole wax ring tube<br />
File<br />
Spatula<br />
Abrasive paper<br />
117
Make the bezel. Use a slice of wax the<br />
thickness of the stone, place the stone on<br />
top and scribe its outline on the wax.<br />
Cut a hole to the outline. Drill a small hole<br />
and widen the hole just to the scribed line<br />
with a file, no larger.<br />
1 2<br />
Insert the stone and check for fit. After<br />
casting there will be some shrinkage, so a<br />
slightly loose fit is preferred.<br />
3 4<br />
Allowing about a 2 mm wide band<br />
around the hole, cut out the bezel with<br />
a jeweler’s saw and file to shape. Do not<br />
file too thin.<br />
118
Make the seat. Use a portion of a sheet<br />
of wax about 1.0 - 1.5 mm and trace the<br />
outline of the bezel on it.<br />
Cut the seat to approximate shape with<br />
the jeweler’s saw and finish up with a<br />
file. Remove the material from the center,<br />
leaving enough for the stone seat.<br />
5 6<br />
With a heated spatula weld the parts<br />
together. Run the knife edge on the joint<br />
and melt both pieces at the same time for<br />
a good weld. Afterwards, fill in the joint<br />
with additional wax.<br />
7 8<br />
After the added wax has hardened, file<br />
the outer circumference until the bezel is<br />
1.0 - 1.2 mm thick. Finish the front edge<br />
of the bezel.<br />
119
REWORKING A WAX PATTERN<br />
Add to<br />
a Model<br />
1.<br />
To add a tie to the model shown, cut a strip of sheet wax, bow it<br />
slightly. If there is any carving to be made on the tie use a thick<br />
enough piece to accommodate it.<br />
2.<br />
Cut the piece off from the underside. Weld the tie in place as<br />
you build up the wax. Trim with a knife until it is flat.<br />
130
Remove<br />
Parts and<br />
Add Parts<br />
1.<br />
Use a thin bladed knife to separate the center of the design.<br />
Twist the shank enough to offset the cut ends to slide by each<br />
other a distance of a few millimeters. Weld the contact joint<br />
from the underside.<br />
2.<br />
Put the flower part into the niche formed and weld from the<br />
underside. Add wax and fix the part firmly in place. In this<br />
case, the size will be affected, so check the size.<br />
131
Use Part of<br />
a Model<br />
1.<br />
To use a part of a ring for a pendant, cut out the portion with<br />
the needed thickness. In the event the portion becomes warped<br />
hold it briefly over an alcohol lamp warming it. Bring it back<br />
into shape.<br />
2.<br />
Where you require wax, build it up with a spatula using the<br />
pattern wax. Afterward, trim with a knife.<br />
132
Assemble<br />
Parts of a<br />
Model<br />
1.<br />
Use the top portions of two wax models. Divide each portion<br />
into two parts. Smooth the cuts with a carver. Preserve the<br />
original shape.<br />
2.<br />
Assemble the parts. Tack weld from the front and build up<br />
wax on the underside, securing the pieces. A number of related<br />
pendants or brooches can be made in this manner.<br />
133
CLEANING A CASTING<br />
Cutting the<br />
Sprue<br />
1.<br />
After casting there will be a sprue end remaining on the cast piece.<br />
Generally on rings it will be on the shank and on pendants, the<br />
rear. Cut the sprue end off with a jeweler's saw.<br />
Filing<br />
2.<br />
File the stub down with a coarse file. Finish completely with a<br />
smooth file.<br />
144
Finishing<br />
with<br />
Kisage<br />
3.<br />
After you have finished with a fine cut file, use the kisage in place<br />
of the file and finish up neatly. You must keep the cutting edge of<br />
the kisage mirror sharp at all times. Clean up the inner surface of<br />
the shank with the kisage.<br />
Finishing<br />
with Paper<br />
Abrasives<br />
4.<br />
After the kisage, finish with paper abrasives (1000 grit or finer).<br />
Abrasive paper cemented to a stick is very handy.<br />
145
JAPAN JEWELRY CRAFT SCHOOL