The Art of Focus Stacking - Matrix Software
The Art of Focus Stacking - Matrix Software
The Art of Focus Stacking - Matrix Software

You also want an ePaper? Increase the reach of your titles
YUMPU automatically turns print PDFs into web optimized ePapers that Google loves.
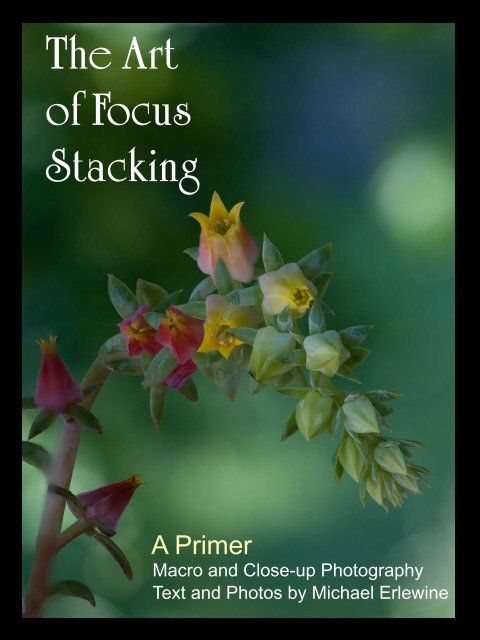
<strong>The</strong> <strong>Art</strong><br />
<strong>of</strong> <strong>Focus</strong><br />
<strong>Stacking</strong><br />
A Primer<br />
Macro and Close-up Photography<br />
Text and Photos by Michael Erlewine<br />
1
Photo: <strong>The</strong> Earthwork Farm in Lake City, Michigan<br />
Heart Center Publications<br />
315 Marion Avenue<br />
Big Rapids, Michigan 49307<br />
Michael@Erlewine.net<br />
First Published 2010 © Michael Erlewine<br />
2010<br />
ISBN 9781450526258<br />
All rights reserved. No part <strong>of</strong> this publication<br />
may be reproduced, stored in a retrieval<br />
system, or transmitted, in any form or by any<br />
means, electronic, mechanical, photocopying,<br />
recording, or otherwise, without the prior<br />
written permission <strong>of</strong> the publisher. This<br />
photo book may be shared provided no fee<br />
is charged.<br />
All photos taken by Michael Erlewine, ©<br />
2007-2011 Michael Erlewine<br />
Cover, format, and graphic design by Michael<br />
Erlewine<br />
Table <strong>of</strong> Contents<br />
1st Edition Introduction Page 3<br />
2nd Edition Notes Page 6<br />
General Introduction Page 8<br />
<strong>Focus</strong> <strong>Stacking</strong> S<strong>of</strong>tware Page 15<br />
Additional Considerations Page 63<br />
Equipment Page 74<br />
Challenges Page 79<br />
<strong>Focus</strong> <strong>Stacking</strong> Processing Page 89<br />
Example Photos Page 95<br />
How I got Into Photography Page 115<br />
Unsolicited Advice Page 115<br />
Key to My Photography Page 120<br />
About the Authore Page 123<br />
2
Introduction<br />
<strong>Focus</strong> <strong>Stacking</strong><br />
Interest in ‘focus stacking’ is increasing rapidly. In this<br />
short article, I would like to suggest some reasons why<br />
this might be. For those <strong>of</strong> you unfamiliar with focus<br />
stacking, let’s make clear what it is.<br />
Just as exposure bracketing and HDR (High Dynamic<br />
Range) techniques, where a number <strong>of</strong> photos are<br />
taken at different exposures and then seamlessly<br />
combined into a final photograph are popular, so focus<br />
stacking takes a series <strong>of</strong> single photos <strong>of</strong> an object<br />
each taken at a slightly different focus points and<br />
combines these photos seamlessly into a final photo<br />
that represents the object with everything in focus,<br />
as if it naturally had greater depth <strong>of</strong> field (DOF). This<br />
requires special s<strong>of</strong>tware to align the series <strong>of</strong> photographs<br />
and merge them into a single resulting image.<br />
<strong>Focus</strong> <strong>Stacking</strong> is essentially ‘focus bracketing’ and<br />
the result is a photo where everything (or more than<br />
you might expect) appears to be in focus as opposed<br />
to the traditional photograph where there is only a<br />
single plane <strong>of</strong> focus and anything not on the plane<br />
is to some degree out <strong>of</strong> focus, however slightly. <strong>The</strong><br />
resulting stacked photo (from combining the images at<br />
different focal distances) can be remarkable, and advances<br />
in focus-stacking s<strong>of</strong>tware like Zerene Stacker,<br />
Helicon <strong>Focus</strong>, Adobe’s Photoshop CS4 are perfecting<br />
this technique.<br />
Two Types <strong>of</strong> <strong>Focus</strong> <strong>Stacking</strong><br />
<strong>The</strong>re are two general types <strong>of</strong> focus stacking being<br />
used today, with perhaps the most common idea <strong>of</strong><br />
this technique including a camera mounted on a focusing<br />
rail (or a lens with bellows attached) and the<br />
photographer taking many dozens (sometimes up to<br />
150-200) photographs, each one just a few millimeters<br />
apart from one another. This first technique is used<br />
mostly for scientific, product photography, and by a<br />
few naturalists who carefully create deep stacks, usually<br />
in a studio, like the one on the left, which is very<br />
lovely.<br />
And while this more elaborate form <strong>of</strong> focus stacking<br />
is wonderful in its own way, it requires more specialized<br />
equipment and does not readily lend itself to<br />
being used outside in the fields and woods or at least<br />
is more difficult to take outside. <strong>The</strong>re are many tutorials<br />
on the web for this type <strong>of</strong> more-technical style <strong>of</strong><br />
focus stacking available, so I refer you to Google to<br />
find those. For myself, I am not much interested in that<br />
method because I don’t want to haul all that equipment<br />
around and prefer being outside to being in a<br />
studio.<br />
It is also possible to stack photos and get excellent<br />
results armed with just a camera and a tripod. This<br />
will be the method presented here. I will present some<br />
guidelines to what I call “Short-<strong>Stacking</strong>,” where instead<br />
<strong>of</strong> 100 layers painstakingly shot to achieve perfect<br />
incremental focus (a science in itself), we shoot<br />
just a few (let’s say from two to a dozen) photos and<br />
combine those to achieve the effect <strong>of</strong> seeming great-<br />
er focus and depth <strong>of</strong> field (DOF). This less technical<br />
approach is (by definition) somewhat more impressionistic<br />
than the first method I described because no<br />
attempt is made to get every possible micro layer-step<br />
photographed. <strong>Focus</strong> stacking requires that nothing<br />
moves. In nature (as we know) this is very difficult due<br />
to wind, changing light, moving creatures, and so on.<br />
With short-stacking we shoot fewer photos, choosing<br />
which layers in the scene we want to capture and<br />
have in focus that represent our impression <strong>of</strong> what is<br />
key or beautiful about the particular shot. To my mind,<br />
although less demanding, there is somewhat more<br />
art in this method, but that is just my opinion. I like it<br />
because I can be out in the wilds <strong>of</strong> nature without<br />
a lot <strong>of</strong> equipment and still produce photos with an<br />
apparent greater focus and depth <strong>of</strong> field, thus: focus<br />
stacking.<br />
<strong>The</strong> Equipment Needed<br />
While theoretically you can stack focus with any digital<br />
camera, in reality the process quickly sorts itself out<br />
in favor <strong>of</strong> better cameras and (for sure) sharp lenses.<br />
After all, the ‘focus’ in focus stacking means trying to<br />
get things sharply in focus and that requires a lens<br />
that is actually sharp and a camera that can process<br />
the light from the lens efficiently. In practice any decent<br />
digital camera with a sharp lens will work, but<br />
like everything else, it is easy to fall into the pattern <strong>of</strong><br />
wanting a better camera and (in particular) better and<br />
sharper lenses. And let’s not forget about tripods.<br />
While some few photographers who focus stack make<br />
a virtue out <strong>of</strong> hand-holding their shots (Look mom,<br />
no tripod!), the rest <strong>of</strong> us will find that we want our<br />
camera and lens mounted on a stable tripod. With all<br />
<strong>of</strong> the other variables in this technique, trying to handhold<br />
the camera is not something I would choose to<br />
do. In this presentation good focus stacking requires<br />
a tripod. After all, we want the scene to hold perfectly<br />
still while we sample shots at different focal distances.<br />
Having the camera also shake and move around<br />
simply because I am holding it does not interest me.<br />
<strong>The</strong>refore I suggest one needs a camera, a good<br />
lens, and both <strong>of</strong> those mounted on a sturdy tripod.<br />
<strong>The</strong> Actual Technique<br />
Given that you have the camera securely mounted on<br />
a tripod, the technique is pretty straight forward. You<br />
aim the camera at a scene you like (whether close-up<br />
as in macro photography or farther away as with landscape)<br />
and proceed to take several carefully-focused<br />
photos at various focal distances. You will need to decide<br />
what part <strong>of</strong> the scene you want to have in focus,<br />
which for a landscape shot may be the whole thing,<br />
but for a close-up shot it could be just a flower. Let’s<br />
use a flower or a leaf as an example.<br />
Starting at the very front-most part <strong>of</strong> the flower, carefully<br />
focus at that front edge and take a shot. Next,<br />
using the focusing ring on your camera, move it just<br />
enough to focus a little deeper into the subject and<br />
take a second shot, and so on, until your final shot is<br />
one <strong>of</strong> the far (rear) edge <strong>of</strong> the subject.<br />
3
Introduction<br />
You now have a series <strong>of</strong> photos each with a different<br />
focus point running from the front to the back <strong>of</strong><br />
the object. In each shot, part <strong>of</strong> the flower is in perfect<br />
focus while the rest <strong>of</strong> the shot (to some degree)<br />
lacks focus. You might have as few photos as two or<br />
as many as you like or feel you need. As mentioned<br />
earlier: if you get into dozens or hundreds <strong>of</strong> shots<br />
you probably need to have special equipment, chiefly<br />
some kind <strong>of</strong> focusing rack to mount your camera<br />
on that allows tiny evenly-spaced incremental movements,<br />
etc. For reasons given above, I am not going<br />
there in this article. Here we will work with just a camera<br />
and tripods.<br />
Once you have taken several layers <strong>of</strong> shots you<br />
are ready to process the layers into a single photograph.<br />
You do this back home on your computer using<br />
special s<strong>of</strong>tware which you will need to have. Some<br />
brands <strong>of</strong> focus-stacking s<strong>of</strong>tware include:<br />
Adobe Photoshop CS4<br />
CombineZM<br />
Helicon <strong>Focus</strong><br />
Zerene Stacker<br />
I have tried all <strong>of</strong> the above s<strong>of</strong>tware and while they<br />
all seem to work, each has its quirks. CombineZM is<br />
free (GPL) so you might want to download a copy, but<br />
it lacks the polish and ease <strong>of</strong> use (IMO) that I look for<br />
in a program. <strong>The</strong> most well-known application that<br />
can process photo stacks is Adobe Photoshop CS4<br />
(and higher), which is easy to use but it is not free and<br />
also runs very slowly when building stacks. <strong>The</strong>re is a<br />
general review <strong>of</strong> focus-stacking s<strong>of</strong>tware later in this<br />
article (including how to stack in Photoshop) but all <strong>of</strong><br />
the above-listed s<strong>of</strong>tware do more or less the same<br />
thing, which is to align your stack <strong>of</strong> photos and merge<br />
them. <strong>The</strong> program I use almost all the time is Zerene<br />
Stacker, but all <strong>of</strong> the above can do the job more or<br />
less well.<br />
S<strong>of</strong>tware to Align and Merge<br />
Using the focus-stacking s<strong>of</strong>tware, each <strong>of</strong> the stack <strong>of</strong><br />
photos that were taken needs to be lined up - aligned.<br />
Every time we turn the focus ring, the whole image<br />
is enlarged (or shrunk) depending on which way we<br />
turn it. While each layer is a photo <strong>of</strong> the same object,<br />
these photos are enough different that they don’t<br />
just automatically line up. <strong>The</strong>y have to be aligned,<br />
one with the other. Once the stack <strong>of</strong> photos are in<br />
the stacking s<strong>of</strong>tware (each one in a different layer),<br />
the program has to do two things and in this order.<br />
First the program will align all <strong>of</strong> the different photos<br />
so they line up with one another internally. This can<br />
take a long while in Photoshop but Helicon <strong>Focus</strong> and<br />
Zerene Stacker are very fast.<br />
Once the layers are aligned then the aligned layers<br />
are blended to merge the separate layers into a single<br />
photo which we then flatten and save to our hard<br />
drive. It is as simple as that although these operations<br />
can take a long time depending on the number<br />
<strong>of</strong> layers and the subject matter. Something with a lot<br />
<strong>of</strong> contrast and detail is easier for the s<strong>of</strong>tware to align<br />
than say a pile <strong>of</strong> sand where there are not many<br />
reference objects. It all depends. Some take seconds<br />
while others can take 30 minutes or more. Photo<br />
stacking, like macro photography itself, is a lesson in<br />
patience, so if you are in a hurry I don’t suggest it. For<br />
me it has been good because I need to learn to have<br />
more patience and this is a fun way to do that.<br />
<strong>The</strong> Result<br />
So there you have the general technique which as<br />
you see is actually pretty simple. <strong>The</strong> tricky part is<br />
learning how to get the results you imagine rather<br />
than the results you actually get. <strong>Focus</strong> stacking is<br />
a natural teacher about expectations and real-world<br />
experience. You don’t always or easily get what you<br />
want, at least I don’t.<br />
However focus stacking can deliver stunning results<br />
when all goes well. I find it worth the effort but don’t<br />
imagine that focus stacking is the only kind <strong>of</strong> photography<br />
I do. <strong>The</strong>re are subjects that lend themselves to<br />
stacking and those that do not. I already knew something<br />
about traditional depth-<strong>of</strong>-field photography and<br />
wanted to add this new technique to my skills. In this<br />
article I will try to illustrate (using photos) some <strong>of</strong> the<br />
ins and outs <strong>of</strong> focus stacking which hopefully can<br />
make your experience <strong>of</strong> this fascinating technique<br />
easier.<br />
Before we get into some <strong>of</strong> the technique <strong>of</strong> focus<br />
stacking, I would like to present a possible reason<br />
why focus stacking is so appealing to the eye. Every<br />
person <strong>of</strong> my age has a natural right to have a theory<br />
or two.<br />
A Possible <strong>The</strong>ory<br />
Human vision can only focus on one area <strong>of</strong> a scene<br />
at a time. No matter how much we take in, no matter<br />
how much is going on around us, our eyes can only<br />
focus at one point at any given time. Everything but<br />
that point <strong>of</strong> focus is, to some degree, out <strong>of</strong> focus.<br />
Just try it now. Look across the room at an object and<br />
note how your peripheral vision on either side <strong>of</strong> the<br />
object is slightly out <strong>of</strong> focus. We are so used to this<br />
phenomenon that we are seldom even aware <strong>of</strong> it.<br />
Although everything around us actually is not in focus<br />
except where we look, this does not affect us because<br />
wherever we look, things are in focus. <strong>The</strong> mind automatically<br />
behaves as if we live in a world where everything<br />
is always in focus, because as we look here<br />
or there things are always in focus, which brings me<br />
to my point:<br />
<strong>The</strong> photos we take, at least at near distances, are<br />
seldom in complete focus. In fact we have no choice<br />
but to focus on one area <strong>of</strong> a scene or another and<br />
all other areas will be at least somewhat out <strong>of</strong> focus.<br />
This is why photographers make such a big deal out<br />
<strong>of</strong> depth <strong>of</strong> field (DOF). In particular macro photographers<br />
struggle to get this beetle or that butterfly (in<br />
its entirety) in focus. We push our f-stops so high that<br />
diffraction <strong>of</strong>ten destroys our resolution before we can<br />
4
Introduction<br />
get everything in focus. Enter focus stacking.<br />
<strong>Focus</strong> <strong>Stacking</strong> creates a photo image where most<br />
everything is in focus, just like our mind assumes the<br />
world out there is, as well – in focus. While with most<br />
photos we are drawn to wherever the photographer<br />
happened to focus, given a stacked photo we are free<br />
to look anywhere we want. <strong>The</strong> photographer no longer<br />
dictates where our eye should go by his personal<br />
point <strong>of</strong> focus and we are at liberty to just kind <strong>of</strong> look<br />
around as we like, like little kids.<br />
This newfound freedom brings a kind <strong>of</strong> spaciousness<br />
to the mind and stacked photos can have an almost<br />
3D quality, when really the only thing new is that the<br />
whole picture (or at least the main subject) is more in<br />
focus than we are used to. Let’s look at examples <strong>of</strong><br />
stack photos and some <strong>of</strong> the things to keep in mind.<br />
5
Introduction to Second Edition<br />
Traditional Depth <strong>of</strong> Field<br />
It would take a whole section to properly explain the<br />
main factors that make up a standard macro photo,<br />
which are Depth <strong>of</strong> Field, Aperture, Distance, and<br />
Focal Length, not to mention their interdependence.<br />
Wikipedia has a fair explanation and some very good<br />
external links that present this. Suffice it to say that<br />
there is no magic bullet or solution to the problem <strong>of</strong><br />
wanting subjects to be in greater overall sharpness,<br />
DOF, or whatever we want to call it. <strong>The</strong>re are only<br />
different approaches, each <strong>of</strong> which gets us part <strong>of</strong> the<br />
way there, and each <strong>of</strong> which has inherent problems.<br />
<strong>The</strong> theory and practice <strong>of</strong> obtaining maximum depth<strong>of</strong>-field<br />
in a photograph is complex and will not be<br />
discussed here. Often what macro and close-up photographers<br />
want is not so much more depth <strong>of</strong> field as<br />
simply more <strong>of</strong> the object they are photographing in<br />
focus. Call it what you want.<br />
Let’s say you have a lovely katydid close-up and the<br />
only thing in focus is its eye. <strong>The</strong> rest <strong>of</strong> the insect is in<br />
varying degrees <strong>of</strong> blur. What we want is more <strong>of</strong> that<br />
katydid in focus. How do we do that? <strong>The</strong>re are several<br />
traditional ways.<br />
One way would be to get in very close with a wide-angle<br />
lens. Wide-angle lenses tend to put more <strong>of</strong> everything<br />
in the frame and in greater focus. <strong>The</strong> problem is<br />
that wide-angle and macro are to some degree opposites<br />
because wide-angles lenses by their very nature<br />
try to step-back and cram more into the frame while<br />
macro lenses are just trying to get in closer. By getting<br />
very close with a wide-angle lens (with a very short<br />
minimum focus distance) you can get some good<br />
effects. When picking a wide-angle lens you want to<br />
ask: “What is the minimum focus distance for that<br />
lens?” If it is less than a foot, the lens may be helpful<br />
in macro and close-up photography.<br />
A second way to get more in focus is to use a telephoto<br />
and get back far enough so that the whole object<br />
you are shooting is in focus at that distance by using<br />
a higher aperture (like f/11) to gain greater depth-<strong>of</strong>field.<br />
Using a 300mm lens at f/11 from several yards<br />
and a camera body with enough megapixels, you can<br />
crop out the small part you want. This can sometimes<br />
do the trick. Again, when picking a telephoto lens for<br />
this kind <strong>of</strong> work you want to find one with a very short<br />
minimum focus distance. When using a long lens you<br />
will have to stop the aperture down to get everything<br />
in focus.<br />
<strong>The</strong> problem with pushing the aperture to higher numbers<br />
like f/16 or f/22 is that at the high end <strong>of</strong> aperture<br />
we run into diffraction, which by definition destroys<br />
sharpness. I won’t lecture about diffraction here, but<br />
do look it up on the Internet. In a word diffraction is<br />
about how rays <strong>of</strong> light bend around an object when<br />
coming through a very narrow aperture and manage<br />
to get in each other’s way. <strong>The</strong> result (for our purposes<br />
here) is that with high apertures sharpness rapidly<br />
degrades and we lose what we tried to gain by going<br />
to higher apertures.<br />
Typically a lens is most sharp around f/4 or f/5.6.<br />
Better lenses can still resolve sharpness (despite the<br />
onset <strong>of</strong> diffraction) at f/8 and even f/11. Beyond that<br />
few lenses hold up. This does not mean that we don’t<br />
use higher apertures, but just that we have to consider<br />
whether sharpness is absolutely important in any<br />
particular shot. With my best lenses I typically push<br />
the aperture to f/8 and f/11 to get greater sharpness<br />
and depth <strong>of</strong> field.<br />
<strong>The</strong> modern digital SLR (DSLR) evolved from the<br />
35mm format film camera and that format essentially<br />
covers a range from 35mm to 65mm, with 50mm<br />
being the center <strong>of</strong> that range. <strong>The</strong> 35mm format<br />
was designed around the fact that the 50mm lens is<br />
considered the “normal” lens because the human eye<br />
sees at a focal length <strong>of</strong> about 50mm. Any lens less<br />
than 35mm is considered wide-angle, and any lens<br />
larger than 65mm is considered a telephoto.<br />
Sharpness<br />
Sharpness is a topic that photographers endlessly<br />
discuss on Internet forums. To understand sharpness<br />
we only need to consider the term “acceptable sharpness,”<br />
as in: what degree <strong>of</strong> sharpness is acceptable<br />
to you. Every analog (non-stacked) photo has one<br />
and only one plane in the photograph where things<br />
are exactly sharp. Every other plane in that photo<br />
(on either side) is gradually relatively less sharp until<br />
it becomes blurred. Even a wide-angle lens, where<br />
most everything may seem to be in focus, there still<br />
is only one plane that actually is in exact focus. All<br />
other parts <strong>of</strong> the photo are relatively blurred. It is a<br />
question <strong>of</strong> what you consider acceptable sharpness,<br />
sharpness good enough for you. Only in non-analog<br />
photos such as focus stacking do we find more than<br />
one plane sharp.<br />
<strong>The</strong> plane <strong>of</strong> focus is always at right angles to the<br />
plane <strong>of</strong> the camera sensor unless we explore view<br />
cameras or tilt/shift lenses for DSLRs that let us twist<br />
and angle that one focal plane this way and that to<br />
achieve very interesting effects.<br />
So we have one plane <strong>of</strong> focus in every photo and<br />
the areas in front <strong>of</strong> and behind that plane that are<br />
also in “acceptable focus” make up our depth-<strong>of</strong>-field,<br />
which may be very shallow or very deep. Obviously<br />
a lens set to infinity shooting a landscape has a very<br />
deep DOF while in general a lens focused close-up<br />
has a more shallow DOF.<br />
And we don’t always want everything in focus. In<br />
fact, aside from “sharpness,” the other term <strong>of</strong>ten<br />
discussed by photographers is “bokeh,” which refers<br />
to the lovely out-<strong>of</strong>-focus areas behind your subject.<br />
Lenses have a good or poor “bokeh” and the relative<br />
bokeh <strong>of</strong> various lenses is fiercely contested. Bokeh<br />
is like the difference between the harsh camera shots<br />
<strong>of</strong> a newscast and the s<strong>of</strong>t feathery feel <strong>of</strong> many<br />
movies, where the subject is in focus against a wash<br />
<strong>of</strong> blurry and lovely pastels. Even when focus stack-<br />
6
Introduction to Second Edition<br />
ing, we learn to drop some <strong>of</strong> the back layers and just<br />
have a nice bokeh.<br />
In taking a photo, we first select a focus point; we<br />
focus. <strong>The</strong>n, and only then, we decide on how much<br />
depth <strong>of</strong> field we need by adjusting the aperture. Of<br />
course, due to various light and other conditions we<br />
don’t always have much choice in the real world. But<br />
theoretically we do.<br />
If we go wide-angle, we have more depth <strong>of</strong> field and if<br />
we go telephoto we have a more narrow depth <strong>of</strong> field.<br />
That is why with wide-angle lenses there is <strong>of</strong>ten little<br />
to no bokeh because everything is too much in focus.<br />
And with telephoto lenses we can have the subject in<br />
exact focus against a nice blurry background – good<br />
bokeh.<br />
When we are close up, we tend to have a very narrow<br />
DOF, while shooting at a distance with a narrow aperture<br />
gives us a wider depth <strong>of</strong> field ; more <strong>of</strong> the subject<br />
is in focus.<br />
And while this topic is too complex to go into here in<br />
detail, there are three factors that help to determine<br />
your depth <strong>of</strong> field: aperture, focal length <strong>of</strong> the lens,<br />
and distance to subject. <strong>The</strong>y can be summed up in<br />
this table.<br />
Narrow DOF Greater DOF<br />
Large Aperture Small Aperture<br />
Telephoto Wide-Angle<br />
Close-up Far Back<br />
As you can see, we can get greater DOF by using a<br />
small aperture, a wide angle lens, and by standing far<br />
back. However these three factors don’t all work together<br />
smoothly for close-up work. If we stand far back<br />
with a wide-angle lens set to a small aperture we get a<br />
great depth <strong>of</strong> field <strong>of</strong> whatever is at infinity but it won’t<br />
help us in macro and close-up photography.<br />
For close-up work we have to mix and match techniques<br />
to get any kind <strong>of</strong> depth <strong>of</strong> field and the history<br />
<strong>of</strong> photography is filled with attempts to push any <strong>of</strong><br />
these approach as far as possible, which brings us to<br />
<strong>Focus</strong> <strong>Stacking</strong>.<br />
<strong>Focus</strong> stacking is a non-analog (digital) approach to<br />
taking photos with increased sharpness and the appearance<br />
<strong>of</strong> greater depth-<strong>of</strong>-field. Actually, focus<br />
stacking is a sampling technique similar in approach<br />
to CDs and DVDS in that an analog (reality) source is<br />
sampled with enough to approximate a desired result.<br />
With CDs the desired result is music, with DVDs it is<br />
movies, and with focus stacking it is a composite photo<br />
with enough samples to give the impression <strong>of</strong> greater<br />
sharpness and depth <strong>of</strong> field.<br />
Beginning<br />
It has been several years now since I intensively began<br />
to work with focus stacking to achieve better all–<br />
around focus and at least the illusion <strong>of</strong> greater depth<br />
<strong>of</strong> field. For myself I have learned a lot about this apparently<br />
simple but demanding technique. <strong>Focus</strong> stacking<br />
originally arose as an in-studio technique where<br />
bellows and incremental focusing rails were used to<br />
take hundreds <strong>of</strong> micro-stop photos that were combined<br />
to create a single ultra-close-up photo <strong>of</strong> something<br />
like the compound eye <strong>of</strong> a bee or dragonfly or<br />
whatever. Since I already spend enough time indoors,<br />
that approach was not all that appealing to me. Also,<br />
a couple <strong>of</strong> dozen images <strong>of</strong> various compound insect<br />
eyes were plenty for me. I got the idea.<br />
I was more interested in how focus stacking might<br />
be applied to outdoor nature photography using a<br />
much smaller series <strong>of</strong> photos and doing away with<br />
the bellows, focusing rails, and what-not. I was not<br />
so interested in ultra-close-ups <strong>of</strong> anything as I was<br />
in getting a little more depth <strong>of</strong> field out <strong>of</strong> whatever I<br />
was photographing, whether it was an insect, a flower,<br />
plant, and so on. I wanted more <strong>of</strong> whatever I was<br />
photographing to be in focus. I like what I call “minilandscapes,”<br />
small worlds where everything is pristine<br />
and… in focus. That was the intention.<br />
I use Nikon systems and back then I happened to<br />
have the Nikon 105mm f/2.8 macro lens and that is<br />
where I began. Any lens can be used to stack photos,<br />
but generally this technique excels at close-up and<br />
macro ranges. You can stack landscape photos (and<br />
to good effect) but <strong>of</strong> course at a distance even the<br />
tiniest <strong>of</strong> change in the focus has a huge effect. In<br />
other words, once you get out toward infinity the number<br />
<strong>of</strong> the stacked photo images that are effective are<br />
few to none. This is generally true <strong>of</strong> many wide-angle<br />
lenses as well.<br />
Wide–angle lenses by their nature have greater depth<br />
<strong>of</strong> field, and turning the focus even a small amount<br />
changes the image greatly. Although I am learning to<br />
stack photos using wide-angle lenses, you really need<br />
a wide-angle lens with a long focus throw to do this<br />
easily or mount the lens on a focus rail and do it that<br />
way. Few wide-angle lenses have a long focus throw.<br />
In general, the focal length range <strong>of</strong> lenses that works<br />
well for focus stacking in my experience are from<br />
60mm to 200mm and then only if these lenses are<br />
dedicated macro lenses. Keep in mind that there are<br />
Nikon 105mm lenses that are not macro lenses and<br />
that do not get close enough to smaller subjects to<br />
make them worthwhile. So do be careful when purchasing<br />
a lens for macro work to make sure it is a true<br />
macro lens and not just a standard lens. Also some<br />
lenses claim to have a macro option, but I suggest<br />
you avoid these as well. If you love macro and closeup<br />
photography, just get a standard macro lens.<br />
Investment<br />
Macro lenses can be had on the cheap, so to speak,<br />
because in macro photography (and absolutely in<br />
focus stacking) only manual focusing is used. Auto<br />
focus is not needed or desired. Because most photographers<br />
today think only in terms <strong>of</strong> auto-focus lenses,<br />
a good Nikon 105mm f/2.8 lens can be found on Ebay<br />
for between $200-$300. Of course you can pay a<br />
lot more, but you can do fine macros with the Nikon<br />
105mm macro lens or the Canon equivalent.<br />
7
Example <strong>of</strong> “Deep Stack” <strong>Focus</strong> <strong>Stacking</strong><br />
A Deep Stack Using a <strong>Focus</strong> Rail by Ed French<br />
This is a 67 image pano where each image had a generous overlap > 50%. <strong>The</strong> center was shot at f/5.6 and focus<br />
stacked from another 55 images. After the center images were taken, the artist switched to f/22 and shot the 66 individual<br />
frame for the rest <strong>of</strong> the pano. See more at: http://www.efrench.members.winisp.net/ Used with permission.<br />
8
Stacked Photo with Good Bokeh (Bow-Kah)<br />
9
Stacked Photo with No Bokeh<br />
10
<strong>Focus</strong> <strong>Stacking</strong>: An Example<br />
Above: Near Shot<br />
<strong>The</strong> Simplest Stack<br />
Here is a stack <strong>of</strong> two photos, a near<br />
shot (above) and a far shot (below).<br />
Stack the two together, blend them,<br />
and we get the finished shot on the<br />
right side <strong>of</strong> the page. Pretty simple:<br />
two quick shots combined to give you<br />
a depth <strong>of</strong> field it would be very difficult<br />
to get otherwise.<br />
<strong>The</strong> result composite photo puts the<br />
railing, the board walk, and even the<br />
background in decent focus. This<br />
lends a sense <strong>of</strong> space and clarity to<br />
the shot.<br />
Note: With a good 60mm lens you<br />
might be able to get this depth <strong>of</strong> field<br />
without stacking.<br />
Below: Far Shot<br />
11
Result: <strong>The</strong> Two Shots Combined in a Single Photo<br />
12
A two-Stack Example<br />
Far Shot Near Shot<br />
Here is a photo <strong>of</strong> a little spring diorama <strong>of</strong> some<br />
Michigan ferns emerging. Notice how the ferns in the<br />
front are in focus on the left but those in the back are<br />
not. In the right photo the ferns in the rear are in focus<br />
but those in front are not. Our eye is drawn to the area<br />
in the photo where everything is in focus. Trying to<br />
get the whole scene into focus through manipulating<br />
the DOF would be difficult if only because the woods<br />
where these ferns grow is quite dark.<br />
Now let’s look at a stacked photograph that is a blending<br />
<strong>of</strong> four different photos, each focused on different<br />
areas <strong>of</strong> the scene. As you can see, at least the main<br />
subject (the various ferns) are in focus. But notice the<br />
ferns midway between the front and back ferns are<br />
somewhat out <strong>of</strong> focus. In stacked focus, unless you<br />
shoot hundreds <strong>of</strong> photos, not everything will be in<br />
focus, but you can choose what is and what is not in<br />
focus. Here the two groups <strong>of</strong> ferns (front and back)<br />
are in focus, which makes for a nice effect.<br />
As you look at this photo, see how appealing it is to<br />
have things in focus and to be able to look around the<br />
scene as opposed to being denied that freedom by<br />
having some areas <strong>of</strong> the photo out <strong>of</strong> focus.<br />
I point this out because I believe that focus stacking<br />
or focus bracketing will (in time) become at least as<br />
important to us as HDR or exposure bracketing have<br />
up to this point.<br />
Camera makers may eventually even include focus<br />
bracketing as a feature where, perhaps, we focus on<br />
the front and back areas <strong>of</strong> any scene or object and<br />
the camera produces a series <strong>of</strong> bracketed photos<br />
with the focus at different layers between the two<br />
points we set. We would tell the camera how many<br />
layers or photos we want. This could be very useful<br />
because one <strong>of</strong> the problems <strong>of</strong> focus stacking is<br />
taking the photos fast enough to capture the images<br />
before changes in lighting, etc. set in. This would be a<br />
poor man’s focus stacking because in reality many <strong>of</strong><br />
the best macro lenses do not aut<strong>of</strong>ocus, and so on.<br />
So far the results I am getting are pleasing to me. <strong>The</strong><br />
example used here gives you some idea <strong>of</strong> what a<br />
stacked photo can look like. In fact, farther on we will<br />
look at a bunch <strong>of</strong> stacked photos so that you can get<br />
an idea <strong>of</strong> what they look like and what subjects lend<br />
themselves to focus stacking.<br />
13
Result: <strong>The</strong> Two Shots Combined in a Single Photo<br />
14
<strong>Focus</strong>-<strong>Stacking</strong> S<strong>of</strong>tware and Pricing<br />
<strong>Focus</strong> <strong>Stacking</strong> S<strong>of</strong>tware<br />
<strong>The</strong>re are a number <strong>of</strong> s<strong>of</strong>tware applications that<br />
do focus stacking and probably more will be coming<br />
along. I don’t have time to learn them all but I would<br />
like to know which ones work the best for my purposes<br />
which are small to mid-sized stacks <strong>of</strong> close-up and<br />
macro subjects. I only need one good s<strong>of</strong>tware application<br />
but to find that I have had to experiment. That<br />
being said, here is a brief summary <strong>of</strong> three <strong>of</strong> the<br />
main contenders, Adobe Photoshop, Zerene Stacker,<br />
and Helicon <strong>Focus</strong>. Perhaps this will save you some<br />
time and expense.<br />
Let me start right <strong>of</strong>f by popping one big bubble: the<br />
idea that you can do quality focus stacking without<br />
any ever retouching. No s<strong>of</strong>tware I have tried will do<br />
that and here is the main reason why. <strong>Focus</strong> stacking<br />
(short <strong>of</strong> an infinite-numbered stack) by definition<br />
leaves out <strong>of</strong> perfect focus whatever areas are between<br />
the focus layers. If you have layers, you have<br />
something between them that is not in perfect focus,<br />
theoretically at least.<br />
If you want a perfectly smooth image, one with nothing<br />
left out, well, that is your standard traditional photo.<br />
However, the traditional photo has a single plane <strong>of</strong> focus.<br />
Even a very wide-angle lens, while having everything<br />
more in focus than longer lenses, still has areas<br />
<strong>of</strong> focus and areas out-<strong>of</strong>-focus. That is the reality.<br />
<strong>Focus</strong> stacking by definition is a form <strong>of</strong> sampling, just<br />
like we sample sound or movie frames. Streaming<br />
them together (digitally) produces the effect <strong>of</strong> seamless<br />
music or motion pictures but in reality they are<br />
still a series <strong>of</strong> samples that only give us the impression<br />
<strong>of</strong> seamlessness. We live in a world <strong>of</strong> sampled<br />
impressions.<br />
<strong>The</strong>refore no focus-stacking s<strong>of</strong>tware will be without<br />
artifacts however small or difficult to detect they might<br />
be. Even if you string 200 layers <strong>of</strong> images together,<br />
there will be minute discrepancies, although we may<br />
not be able to detect them with the unaided eye. Few<br />
<strong>of</strong> us may want to do 200-layer stacks as they generally<br />
require a studio, a focus rail, special lighting, etc.<br />
Many <strong>of</strong> us want to be out in the meadows and woods<br />
and not in the studio.<br />
My point is that to stack focus and expect no flaws is<br />
an oxymoron, conceptually. <strong>The</strong> question is what s<strong>of</strong>tware<br />
gives me what I need with the least amount <strong>of</strong><br />
compromise. With that in mind let’s look at three <strong>of</strong> the<br />
major focus-stacking applications:<br />
Adobe Photoshop CS5 (CS5)<br />
Zerene Stacker 1.2 (ZS)<br />
Helicon <strong>Focus</strong> 5.1 (HF)<br />
Note the acronyms which I will be using in this article.<br />
All three <strong>of</strong> these applications are capable <strong>of</strong> producing<br />
acceptable stacked images that range in quality<br />
from moderate to exceptional. As mentioned, none<br />
<strong>of</strong> this stacking s<strong>of</strong>tware is equivalent to a point-andshoot<br />
camera in that you press a button and can count<br />
on a perfect or even a good stacked photo every<br />
time. In other words, some operator judgment and<br />
experience will be required. How much depends<br />
upon how perfect a stack will satisfy you.<br />
I can testify that any search for perfection will lead<br />
to a greater expenditure <strong>of</strong> time, learning, and experience.<br />
And stacked photos that we find satisfying<br />
today probably will not satisfy us a little farther down<br />
the road. <strong>The</strong>re is both a learning and a perception<br />
curve to focus stacking in my experience.<br />
<strong>The</strong> Time it Takes<br />
Let’s start with time. How long does it take to align<br />
and blend a stack <strong>of</strong> images in these three programs?<br />
Both Zerene Stacker and Helicon <strong>Focus</strong> are<br />
fast, really, really fast compared to Adobe Photoshop<br />
CS4/CS5. If anything, Photoshop CS5 takes longer<br />
than CS4. For example, a stack <strong>of</strong> 8 images took<br />
between 30-40 seconds in both ZS and HF but took<br />
over 28 minutes in CS5. Folks, that is a big difference!<br />
And a stack <strong>of</strong> 36 photos in CS5 sent me to bed and<br />
in the morning it was still chugging away. I finally just<br />
gave up and shut down the program. So if you want<br />
real-time results in this lifetime, Photoshop CS5 is<br />
probably not the program to use.<br />
Processing stacked photos at the end <strong>of</strong> the day is<br />
time consuming and requires a certain amount <strong>of</strong><br />
care and awareness. If you already own Photoshop,<br />
play around with short stacks to see the results, but if<br />
you are serious about focus stacking, you will be old<br />
before your stacks process. At my age I don’t have<br />
that kind <strong>of</strong> time.<br />
Pricing (in U.S. dollars)<br />
Adobe Photoshop CS5 (Mac and PC)<br />
Well, at a cost <strong>of</strong> some $660 Photoshop CS5 once<br />
again brings up the rear. You can photo stack in both<br />
Photoshop CS4 and CS5, but the results in CS4 really<br />
are poor. In CS5 Adobe has finally gotten into the<br />
ballpark with ZS and HF but still is listed third in my<br />
book due to its tendency to warp the image somewhat.<br />
At $660 few <strong>of</strong> us will spring for Photoshop just<br />
to stack focus. Of course, if we already have CS5,<br />
check it out.<br />
As for pricing for Zerene Stacker and Helicon <strong>Focus</strong>,<br />
they are less expensive that Photoshop, but have<br />
caveats <strong>of</strong> their own.<br />
For example, Zerene <strong>Focus</strong> <strong>of</strong>fers the following:<br />
Pr<strong>of</strong>essional Edition $289<br />
Personal Edition $89<br />
Student Edition $39<br />
For Helicon <strong>Focus</strong>, it is a little more complicated:<br />
Helicon <strong>Focus</strong> Lite (1-year license) $30<br />
Helicon <strong>Focus</strong> Lite (Unlimited license) $115<br />
Helicon <strong>Focus</strong> Pro (1-year license) $55<br />
Helicon <strong>Focus</strong> Pro (Unlimited license) $200<br />
Helicon <strong>Focus</strong> Pro X64 (Unlimited license) $250<br />
15
<strong>Focus</strong>-<strong>Stacking</strong> S<strong>of</strong>tware and Pricing<br />
<strong>The</strong> Fine Print: Zerene Stacker (PC only)<br />
With Zerene Stacker (ZS) any version gets you unlimited<br />
use for that version in perpetuity and its upgrades<br />
free. If a new version comes up, ZS says “When version<br />
2.0 becomes available, new licenses will be made<br />
available at attractive upgrade pricing.”<br />
As far as I can tell all versions are identical. <strong>The</strong>re<br />
are no differences between levels. <strong>The</strong>y state that the<br />
pr<strong>of</strong>essional version is for those who use it to make<br />
money, the personal for those who use it for satisfaction,<br />
and the student version is for individuals enrolled<br />
in a degree or certificate program. You can use ZS on<br />
more than one computer as far as I understand.<br />
<strong>The</strong> Fine Print: Helicon <strong>Focus</strong> (PC Only)<br />
With HF, it is more complicated. You can buy in cheaper<br />
than ZS, but the license only lasts a year. I doubt<br />
any <strong>of</strong> us like that idea. So the HF Pro version at $200<br />
gets you into the game and provides the retouching<br />
functions, batch mode, and some other feature which<br />
are not in the “Lite” version. Well, I already stated that<br />
all <strong>of</strong> these stacking s<strong>of</strong>tware require some retouching<br />
from time to time, so (IMO) that option does not work<br />
for me.<br />
So I had to buy the $250 version for the reasons just<br />
given AND because that is the only version that takes<br />
advantage <strong>of</strong> the 64-bit chip on my PC and for those<br />
<strong>of</strong> you with 32-bit PCs, to overcome the 3 GB address<br />
space for Windows 32-bit applications. HF does allow<br />
you to use it on up to four computers as long as you<br />
only use one computer at a time.<br />
<strong>The</strong> S<strong>of</strong>tware Results<br />
This is the section that is most important but also<br />
where it gets more complicated. All three programs<br />
can produce acceptable results, with Photoshop coming<br />
in third every time and Zerene Stacker and Helicon<br />
<strong>Focus</strong> vying for top dog, depending on the attributes<br />
<strong>of</strong> a particular stack.<br />
Adobe Photoshop CS5<br />
I previously said that unlike Photoshop CS4, which<br />
did not produce acceptable results much <strong>of</strong> the time,<br />
that CS5 is very much better. It is better aside from a<br />
tendency to actually warp the entire photo, changing<br />
the shape <strong>of</strong> whatever flower, bug, etc. you are working<br />
with at times. For many wild things, the amount <strong>of</strong><br />
change is not enough to totally reject the photo, but<br />
for product photography the ‘warping’ is definitely not<br />
acceptable. And the cost <strong>of</strong> the s<strong>of</strong>tware is something<br />
to consider, but most <strong>of</strong> all CS5’s inability to process<br />
stacks in a timely manner makes it not usable for<br />
me, at least for stacks <strong>of</strong> any size. <strong>The</strong>refore I cannot<br />
recommend this s<strong>of</strong>tware at this time for focus stacking,<br />
although Adobe has made improvements between<br />
CS4 and CS5.<br />
Helicon <strong>Focus</strong><br />
HF is the fastest <strong>of</strong> the applications I have tested, if<br />
only because it accepts RAW (native) format which<br />
shaves some time <strong>of</strong>f the process and simplifies it a<br />
bit for me. Also, a lot <strong>of</strong> time and consideration has<br />
gone into creating Helicon <strong>Focus</strong> and this s<strong>of</strong>tware is<br />
<strong>of</strong> pr<strong>of</strong>essional quality and feel. It is easy to use.<br />
You can drag and drop your files into HF or just<br />
point to a folder and have them loaded. I have not<br />
found an easy way to select all the files in a folder in<br />
a flash, so if you know how to do that, let me know.<br />
Right now I have to select the first, hold down the<br />
shift key, and select the last, but it should be much<br />
easier to select the whole group.<br />
HF <strong>of</strong>fers two stacking methods, Method-A and Method-B,<br />
but Method-B seems to be the only one I am<br />
using so far that works as I like it, since it produces<br />
the sharpest results. Method-A is said to work with<br />
contrast only, but I have not found it useful yet. And<br />
HF is fast, which is wonderful.<br />
<strong>The</strong> results are very pr<strong>of</strong>essional, but like all focus<br />
stacking s<strong>of</strong>tware <strong>of</strong>ten need touching up. HF does<br />
provide retouching s<strong>of</strong>tware, but only in the more<br />
expensive versions. <strong>The</strong> retouch feature in HF is (for<br />
me) awkward and not nearly as intuitive to use as<br />
Zerene Stacker, so that is a disappointment. It does<br />
work, but I find myself never looking forward to using<br />
it with any joy.<br />
HF focus supports ProPhotoRGB and the color<br />
seems to be good. Helicon <strong>Focus</strong> is a solid program<br />
<strong>of</strong> pr<strong>of</strong>essional quality and I can highly recommend it,<br />
although I find myself preferring Zerene Stacker most<br />
<strong>of</strong> the time, for reasons to be presented now.<br />
Zerene Stacker<br />
Zerene Stacker, like Helicon <strong>Focus</strong>, is fast, easy-touse,<br />
and <strong>of</strong> a pr<strong>of</strong>essional build. And Zerene Stacker<br />
accepts whatever color space you send it (like Pro-<br />
PhotoRGB) and returns the result in the same space.<br />
Like HF, Zerene Stacker <strong>of</strong>fers two stacking methods,<br />
both <strong>of</strong> which I find very useful.<br />
<strong>The</strong> first, PMax, does an incredible job <strong>of</strong> stacking<br />
photos that have fine detail. <strong>The</strong> bristles and hairs on<br />
insects and plants are intelligently handled by PMax,<br />
better than either CS5 or HF. That is the good news.<br />
<strong>The</strong> bad news is that this greater definition comes at<br />
the price <strong>of</strong> some added noise in the photo and some<br />
loss <strong>of</strong> more subtle color.<br />
For many photos, this noise is not significant, but for<br />
some it is. <strong>The</strong> loss <strong>of</strong> subtle color is also not important<br />
unless you are looking at something like the tiniest<br />
color shift, in which case something is lost. I want<br />
to state this but, in practice, I tend to not mind these<br />
problems as they are minimal for most <strong>of</strong> my work.<br />
17
<strong>Focus</strong>-<strong>Stacking</strong> S<strong>of</strong>tware and Pricing<br />
<strong>The</strong>refore I find that I use PMax most <strong>of</strong> the time now<br />
because it gives me the kind <strong>of</strong> stacked look I want,<br />
very much in line with my idea <strong>of</strong> what a stacked photo<br />
should look like. When there is too much noise then I<br />
run the second method, DMap.<br />
DMap does not introduce noise and holds the colors<br />
perfectly. It has the downside <strong>of</strong> (at times) having<br />
more artifacts than does PMax, so photos done in<br />
DMap may require some retouching. As mentioned, I<br />
tend to use PMax unless I am unhappy with the result,<br />
in which case I send it to DMap.<br />
<strong>The</strong> retouching feature in Zerene Stacker is a brilliant<br />
achievement, so easy to use and intuitive that my first<br />
thought was “Why in the world has Adobe not bought<br />
this technology, sent its author Rik Littlefield to the Bahamas<br />
for life, and included it in Photoshop”. With ZS,<br />
you just move through your stack, find the frame with<br />
the part <strong>of</strong> the image as you want it and just paint with<br />
a brush over the original. In a second, it’s perfect.<br />
With Zerene Stacker, you can drag and drop files into<br />
the program and just run the stacker.<br />
Summary<br />
As mentioned I am dumbfounded at the lack <strong>of</strong> attention<br />
Photoshop has given focus stacking in terms <strong>of</strong><br />
speed and results. That being said, both Helicon <strong>Focus</strong><br />
and Zerene <strong>Focus</strong> do an excellent job at stacking<br />
photos. Either one will give you good results.<br />
Personally I tend to use Zerene Stacker for the following<br />
reasons: It is much less expensive for the full version.<br />
It provides two methods that I actually use (with<br />
HF, I use only one) and the PMax method in ZS (although<br />
not perfect) is unique to this kind <strong>of</strong> s<strong>of</strong>tware,<br />
as far as I know. No one else <strong>of</strong>fers it. No one gets<br />
every hair on the insect, sort-<strong>of</strong>-thing.<br />
<strong>The</strong> retouching feature in ZS is worth the price <strong>of</strong><br />
admission by itself. I can fix a finished photo that has<br />
a couple <strong>of</strong> artifacts in seconds and have a perfect image.<br />
And last, the support from ZS has been flawless.<br />
Let me end by reiterating my opening caution that no<br />
focus-stacking s<strong>of</strong>tware is as simple as point-andshoot<br />
or press-a-button. If you are serious about focus<br />
stacking, you will have to do some retouching and<br />
fiddling with stacks. Luckily both Helicon <strong>Focus</strong> and<br />
Zerene Stacker allow you to do this. ZS and HF have<br />
taken some <strong>of</strong> the adventure out <strong>of</strong> focus stacking.<br />
With Abode Photoshop CS4, getting a good stacked<br />
photo was like looking for 4-leaf clovers. ZS and HF<br />
let us get one almost every time.<br />
Six Examples<br />
In the following pages are six comparison images<br />
using Helicon <strong>Focus</strong> (Method B) and Zerene Stacker<br />
(PMax). Hopefully, you can see for yourselves the<br />
good, bad, and ugly in the various photos. For each<br />
photo, the Zerene Stacker is shown first, followed by<br />
the same image in Helicon <strong>Focus</strong>. No retouching was<br />
done, although some minimal exposure adjustments<br />
and some sharpening were added to all.<br />
19
<strong>Focus</strong>-<strong>Stacking</strong> S<strong>of</strong>tware: Zerene Stacker, PMax<br />
Result: Overall Pretty Good<br />
20
<strong>Focus</strong>-<strong>Stacking</strong> S<strong>of</strong>tware: Helicon <strong>Focus</strong>, Method B, Radius 16, Smoothing 1<br />
Result: Details good, but posterization in backgroung<br />
21
<strong>Focus</strong>-<strong>Stacking</strong> S<strong>of</strong>tware: Zerene Stacker, PMax<br />
Result: Looks pretty good.<br />
22
<strong>Focus</strong>-<strong>Stacking</strong> S<strong>of</strong>tware: Helicon <strong>Focus</strong>, Method B, Radius 16, Smoothing 1<br />
Result: Details good, but upper-right is not-so-good<br />
23
<strong>Focus</strong>-<strong>Stacking</strong> S<strong>of</strong>tware: Zerene Stacker, PMax<br />
Result: Looks good<br />
24
<strong>Focus</strong>-<strong>Stacking</strong> S<strong>of</strong>tware: Helicon <strong>Focus</strong>, Method B, Radius 16, Smoothing 1<br />
Result: Looks good<br />
25
<strong>Focus</strong>-<strong>Stacking</strong> S<strong>of</strong>tware: Zerene Stacker, PMax<br />
Result: Looks pretty good<br />
26
<strong>Focus</strong>-<strong>Stacking</strong> S<strong>of</strong>tware: Helicon <strong>Focus</strong>, Method B, Radius 16, Smoothing 1<br />
Result: Details good, but posterization in the upper background<br />
27
<strong>The</strong> Good, the Bad, and the Ugly<br />
<strong>The</strong> following six two-page spreads will really let you<br />
know whether you want to play around with focus<br />
stacking or not. Going in, you should know upfront<br />
what the advantages and disadvantages <strong>of</strong> focus<br />
stacking are.<br />
Any stacked photo, in particular a short stack, is at<br />
best a comprise, an attempt to blend the sharper parts<br />
<strong>of</strong> a series <strong>of</strong> photos into a single photo. As with all<br />
compromises, the complete truth by definition is violated,<br />
hopefully in as few ways as possible, but some<br />
information is lost because we are selecting layers <strong>of</strong><br />
the photo rather than a single shot.<br />
This is why I say that short-stacked photos are the<br />
photographer’s ‘impression’ <strong>of</strong> the subject. <strong>The</strong>y combine<br />
a series <strong>of</strong> desirable photo layer/highlights into a<br />
single photo. As focus stackers, we choose to create<br />
an artfully-flawed photo that gives a more desirable<br />
impression that any single-focus photo. That is the<br />
theory and this is where the art comes in. <strong>The</strong> art <strong>of</strong><br />
focus stacking is to sample focus effectively so that<br />
the finished photo provides more information than any<br />
single-layer photo might.<br />
And by ‘information’, I don’t mean just the pixels in the<br />
photo. A single-shot traditional photo <strong>of</strong>fers that. <strong>Focus</strong><br />
stacking (short-stack) attempts to sample the subject<br />
selectively, bringing different areas <strong>of</strong> the photo into<br />
higher focus, and ignoring the rest.<br />
Beginning focus stackers naturally try to get everything<br />
they can into focus, because it is a relief from<br />
traditional photos that dictate one main focus area. It<br />
is fun to finally see all that focus clarity. But as time<br />
goes by, just pure focus (like with a rack) is not only<br />
very time consuming, but is not always satisfying. In<br />
addition, the existence <strong>of</strong> artifacts at close inspection<br />
can be discouraging. In the end, focus stacking is impressionistic,<br />
a creative effort on our part to present a<br />
subject as we experience it.<br />
In the following pages one stacked photo is compared<br />
at different stacking rates to an un-stacked traditional<br />
photo. For this example I am using a 12-stacked photo<br />
taken in the wild, but with the help <strong>of</strong> a light tent to<br />
make sure that no wind was moving the subject, which<br />
in this case is the Dogtooth Violet (also called “Trout<br />
Lily”), one <strong>of</strong> our most lovely spring flowers. This one<br />
is getting ready to open. <strong>The</strong> forest floors are literally<br />
covered with the mottled leaves <strong>of</strong> this plant in springtime,<br />
and from all those leaves some smaller number<br />
<strong>of</strong> flowers bloom each year.<br />
Twelve stacks is a bunch, enough to embrace quite a<br />
wide range, from the front leaf tips in the close foreground,<br />
the flower itself, to the back leaf leaning the<br />
other way – quite a reach.<br />
At first glance, things are in focus, from the front to the<br />
back. Note the tips <strong>of</strong> the leaves, the top <strong>of</strong> the flower,<br />
the stems, and even some <strong>of</strong> the dry tree leaves making<br />
up the background which I purposely did not drill<br />
down on, preferring some out-<strong>of</strong>-focus areas.<br />
<strong>The</strong> photo looks pretty good. I have not color corrected<br />
it or anything else, other than a little bit <strong>of</strong> sharpening.<br />
I will be showing you three separate photos.<br />
<strong>The</strong> first will be the 12-stack photo, the next will be a<br />
shorter stack <strong>of</strong> four <strong>of</strong> the photos from the 12-stack<br />
shot, selected based on getting as much <strong>of</strong> the photo<br />
in focus as a 4-stack will allow, and the last photo is a<br />
traditional non-stacked photo for comparison.<br />
For each photo, there will be two-2-page spread, with<br />
the entire photo on the right, and close-up photos <strong>of</strong><br />
the flower head and stem on the left side.<br />
<strong>The</strong>re are six two-page spreads to look at, so take<br />
your time and look closely for this is the kind <strong>of</strong> compromise<br />
you will have to get used to if you are interested<br />
in focus stacking using a short stack.<br />
<strong>The</strong> Impression<br />
Looking at the photo on the right, the impression is <strong>of</strong><br />
a woodland flower remarkably in focus, from the tip <strong>of</strong><br />
the front leaves (reaching out toward you), to the tip<br />
<strong>of</strong> the back leaf, leaning quite away from the flower.<br />
And the flower itself is sharp, or so is the impression.<br />
And impression is what short stacking is all about.<br />
Now work through the next twelve pages and photos,<br />
noting that in reality parts <strong>of</strong> the photo suffer blurring<br />
from the focus-stacking process itself. As mentioned,<br />
this is no wind here, at least that I could see. I am<br />
using Adobe Photoshop CS4 to align and blend the<br />
stack, so there may be other s<strong>of</strong>tware that can do a<br />
better job <strong>of</strong> avoiding artifacts. But no s<strong>of</strong>tware can<br />
avoid generating artifacts, unless you want to use<br />
a rack mounted camera and shoot 100+ photos for<br />
each stacked photo. Even then there will be problems.<br />
If your resulting stacked photo has too many artifacts,<br />
try playing with the stack, stacking different combinations,<br />
choosing layers which have the things you<br />
most want in focus. This takes time, so take the time<br />
to explore. You will be surprised at how you can pull<br />
a good stacked photo out <strong>of</strong> what appeared as a<br />
throw-away. And if there are still pesky blurred areas<br />
<strong>of</strong> a photo you really love, take it into Photoshop and<br />
use the Clone Stamp tool to carefully repair the blur.<br />
For those special shots, it is worth the effort.<br />
28
<strong>The</strong> Good, the Bad, and the Ugly<br />
<strong>The</strong> Three People to Impress<br />
<strong>The</strong>y are, <strong>of</strong> course, “Me, Myself, and I,” the ones who<br />
really care about my photos. My wife, kids, and friends<br />
only want to see a very few photographs. After maybe<br />
ten or twelve, they start to look around. And I have<br />
100,000 plus. Other photographers like this, but want<br />
to change that, etc. This leaves just me as the one<br />
who sees it all, takes the photos, stacks them, and<br />
enjoys them. If I am happy with a photo, warts and all,<br />
that is enough.<br />
<strong>The</strong> following six two-page spreads will really let you<br />
know whether you want to play around with focus<br />
stacking or not. Going in, you should know upfront<br />
what the advantages and disadvantages <strong>of</strong> focus<br />
stacking are.<br />
Any stacked photo, in particular a short stack, is at<br />
best a comprise, an attempt to blend the sharper parts<br />
<strong>of</strong> a series <strong>of</strong> photos into a single photo. As with all<br />
compromises, the complete truth by definition is violated,<br />
hopefully in as few ways as possible, but some<br />
information is lost because we are selecting layers <strong>of</strong><br />
the photo rather than a single shot.<br />
This is why I say that short-stacked photos are the<br />
photographer’s ‘impression’ <strong>of</strong> the subject. <strong>The</strong>y combine<br />
a series <strong>of</strong> desirable photo layer/highlights into a<br />
single photo. As focus stackers, we choose to create<br />
an artfully-flawed photo that gives a more desirable<br />
impression that any single-focus photo. That is the<br />
theory and this is where the art comes in. <strong>The</strong> art <strong>of</strong><br />
focus stacking is to sample focus effectively so that<br />
the finished photo provides more information than any<br />
single-layer photo might.<br />
And by ‘information’, I don’t mean just the pixels in the<br />
photo. A single-shot traditional photo <strong>of</strong>fers that. <strong>Focus</strong><br />
stacking (short-stack) attempts to sample the subject<br />
selectively, bringing different areas <strong>of</strong> the photo into<br />
higher focus and ignoring the rest.<br />
Beginning focus stackers naturally try to get everything<br />
they can into focus because it is a relief from<br />
traditional photos that dictate one main focus area. It<br />
is fun to finally see all that focus clarity. But as time<br />
goes by, just pure focus (like with a rack) is not only<br />
very time consuming but is not always satisfying. In<br />
addition, the existence <strong>of</strong> artifacts at close inspection<br />
can be discouraging. In the end, focus stacking is impressionistic,<br />
a creative effort on our part to present a<br />
subject as we experience it.<br />
In the following pages one stacked photo is compared<br />
at different stacking rates to an un-stacked traditional<br />
photo. For this example, I am using a 12-stacked photo<br />
taken in the wild but with the help <strong>of</strong> a light tent to<br />
make sure that no wind was moving the subject, which<br />
in this case is the Dogtooth Violet (also called “Trout<br />
Lily”), one <strong>of</strong> our most lovely spring flowers. This one<br />
is getting ready to open. <strong>The</strong> forest floors are literally<br />
covered with the mottled leaves <strong>of</strong> this plant in springtime,<br />
and from all those leaves some smaller number<br />
<strong>of</strong> flowers bloom each year.<br />
Twelve stacks is a bunch, enough to embrace quite a<br />
wide range, from the front leaf tips in the close foreground,<br />
the flower itself, to the back leaf leaning the<br />
other way – quite a reach.<br />
At first glance, things are in focus, from the front<br />
to the back. Note the tips <strong>of</strong> the leaves, the<br />
top <strong>of</strong> the flower, the stems, and even some <strong>of</strong><br />
the dry tree leaves making up the background<br />
which I purposely did not drill down on, preferring<br />
some out-<strong>of</strong>-focus areas. <strong>The</strong> photo looks<br />
pretty good. I have not color corrected it or anything<br />
else, other than a little bit <strong>of</strong> sharpening.<br />
29
A 12-Stack Photo<br />
At first glance it looks pretty good, but let’s look at the details.<br />
30
A 12-Stack Photo Close-up<br />
12-stack Photo <strong>Art</strong>ifacts<br />
Look carefully along both the right and<br />
left sides <strong>of</strong> the flower stem. See the<br />
fuzzy out-<strong>of</strong>-focus areas. <strong>The</strong>se were<br />
not caused by movement but are artifacts<br />
<strong>of</strong> the artificial aligning and blending<br />
<strong>of</strong> so many stacks.<br />
<strong>Art</strong>ifacts along the stem<br />
31
A 12-Stack Photo Close-up<br />
<strong>Art</strong>ifacts as marked<br />
12-stack Photo <strong>Art</strong>ifacts<br />
Look carefully on both sides where the<br />
flower joins the top <strong>of</strong> the stem. See the<br />
blurry areas on both sides. Also notice<br />
the blurred tip <strong>of</strong> the right end <strong>of</strong> the<br />
flower at the bottom.<br />
32
4-Stack Photo Close-up<br />
<strong>Art</strong>ifacts as marked<br />
4-stack Photo <strong>Art</strong>ifacts<br />
Look carefully along both the right and<br />
left sides <strong>of</strong> the flower stem. See the<br />
fuzzy out-<strong>of</strong>-focus areas, although less<br />
then the 12-stack version. <strong>The</strong>se were<br />
not caused by movement, but are artifacts<br />
<strong>of</strong> the artificial aligning and blending<br />
<strong>of</strong> so many stacks.<br />
33
4-Stack Photo<br />
A photo using only four stacks<br />
34
4-Stack Photo Close-up<br />
<strong>Art</strong>ifacts as marked<br />
4-stack Photo <strong>Art</strong>ifacts<br />
Look carefully on both sides where the<br />
flower joins the top <strong>of</strong> the stem. See the<br />
blurry areas on both sides. Also notice<br />
the blurred tip <strong>of</strong> the right end <strong>of</strong> the<br />
flower at the bottom. About the same as<br />
the 12-stack version.<br />
35
Traditional One-Stack Photo Close-up<br />
Analog Photo<br />
Traditional 1-shot Photo<br />
<strong>The</strong>re are no artifact blurs in this photo,<br />
but the entire stem and leaf behind it is<br />
blurred.<br />
36
Traditional One-Stack Photo<br />
Analog Photo<br />
37
Traditional One-Stack Photo Close-up<br />
Analog Photo<br />
38
Problems with <strong>Focus</strong> <strong>Stacking</strong><br />
Photoshop’s way <strong>of</strong> aligning sometimes<br />
Whatever It Takes<br />
Don’t ask me why Photoshop decided<br />
to bend over backward to align this<br />
stack like this, causing this odd-shaped<br />
pattern to emerge. <strong>The</strong> program has a<br />
mind <strong>of</strong> its own and this kind <strong>of</strong> result is<br />
common using the “Align” command. In<br />
some cases the twisted shape actaully<br />
affects the entire photo, widening or<br />
shortening the image.<br />
However, just crop the finished photo<br />
and it looks pretty nornal. This photo<br />
has not been retouched.<br />
39
Problems with <strong>Focus</strong> <strong>Stacking</strong><br />
Same photo cropped down<br />
40
Problems with <strong>Focus</strong> <strong>Stacking</strong><br />
Photoshop’s way <strong>of</strong> aligning sometimes<br />
Twisted<br />
Here is another example <strong>of</strong> the gyrations<br />
that the Photoshop “Align” process<br />
sometimes goes through to line up all<br />
the layers <strong>of</strong> the stack.<br />
Just crop the finished photo and it looks<br />
pretty nornal. This photo has not been<br />
retouched.<br />
41
Problems with <strong>Focus</strong> <strong>Stacking</strong><br />
Crop it and it looks normal again<br />
42
Problems with <strong>Focus</strong> <strong>Stacking</strong><br />
Photoshops’s crop marks<br />
Normal Align Marks<br />
Notice the marks on all four edges <strong>of</strong><br />
this photo. <strong>The</strong>y look like indentations.<br />
You will find these on almost every<br />
stacked photo from Photoshop and they<br />
are the result <strong>of</strong> the program’s aligning<br />
function as it positions layer over layer<br />
and forces them to line up.<br />
<strong>The</strong>y can take many forms and aside<br />
from the indentation-like marks, you <strong>of</strong>ten<br />
will also have blurred or out-<strong>of</strong>-focus<br />
areas running along the border. Totally<br />
normal. You just have to crop them out.<br />
43
Problems with <strong>Focus</strong> <strong>Stacking</strong><br />
Same photo with the marks cropped out<br />
44
One Stack at Near <strong>Focus</strong><br />
How to get both near and far stacked<br />
<strong>Focus</strong> Limits<br />
I wanted to pick up the branch in the<br />
front, but also the rose hip in the back.<br />
Problem is that in this case there are<br />
several inches or more <strong>of</strong> distance<br />
between the front matter and the back.<br />
<strong>The</strong> resulting composite was just too<br />
much <strong>of</strong> a stretch.<br />
<strong>The</strong> moral <strong>of</strong> the story is: choose your<br />
limits if you expect them to converge.<br />
This photo did not make it.<br />
45
Stacked Photo: <strong>The</strong> Front and Back Limits Were Too Far<br />
“A Stack Too Far”<br />
46
Problems with <strong>Focus</strong> <strong>Stacking</strong><br />
Use a Shorter Stack<br />
Just because you took six photos does<br />
not mean you have to put all six in the<br />
stack. In this case I ran the full stack,<br />
but look at the halos around the upper<br />
leaves. No good. <strong>The</strong>re was obviously<br />
either wind or to much perspective<br />
change in focusing.<br />
By dropping the last few layers I lose focus<br />
in the lower stem but mostly get rid<br />
<strong>of</strong> the halos on the leaves. I can always<br />
say that the lower stem is good bokeh!<br />
Result is on the next page.<br />
Too Many Frames Moved<br />
47
Re-Stacked Photo with Fewer Frames<br />
Less Sometimes is More<br />
Movement Causes <strong>Art</strong>ifacts<br />
<strong>Focus</strong> <strong>Stacking</strong> is primarily for still life<br />
photography where nothing is moving.<br />
Movement causes artifacts in the<br />
finished photo that (usually) cannot be<br />
remedied with the result that the photo<br />
is not considered satisfactory. This is not<br />
to say that focus stacking should not be<br />
used for nature photography with live<br />
subjects but just that you want to catch<br />
your critters at rest, holding a pose long<br />
enough for you to shoot a few frames at<br />
different focus points.<br />
<strong>Focus</strong> stacking with moving subjects<br />
can make for interesting impressionistic<br />
or expressionistic photos but most <strong>of</strong><br />
these would fall into the category <strong>of</strong> artistic<br />
experimentation rather than nature<br />
photography.<br />
48
Single Shot Has Not Enought in <strong>Focus</strong><br />
Bottom <strong>of</strong> stem out-<strong>of</strong>-focus<br />
Small Gains<br />
On this page is a photo with no focus<br />
stacking. Nice, but I want to add just a<br />
little more depth <strong>of</strong> field, so I make a<br />
short stack.<br />
On the next page is the result, with<br />
increased focus up top but still some<br />
nice out-<strong>of</strong>-focus area in the lower stem.<br />
<strong>Focus</strong> stacking need not be at terminator<br />
force but can be use gently for enhancement.<br />
49
Two-Stack Photo Improves<br />
Lower stem more in focus<br />
50
Problems with <strong>Focus</strong> <strong>Stacking</strong><br />
Layer One Layer Two<br />
Intervening Matter<br />
<strong>The</strong>re are two problems here, and only<br />
further cropping will correct them. In the<br />
red boxes is a branch in the foreground,<br />
and this branch moves dramatically between<br />
the two layers, which suggests it<br />
is too far out front <strong>of</strong> the wild leek shoots<br />
that are just coming up.<br />
In the resulting composite, the two<br />
branches don’t align but blur and smear<br />
on the photo. Also note that in the front<br />
lower-left corner is a stick that I failed to<br />
get in focus. Not good.<br />
One solution is to crop out the bad<br />
parts, but some forethought on my part<br />
would have avoided this.<br />
Foreground/Background Matter<br />
Front Matter<br />
I have learned to inspect my shot carefully<br />
before I begin shooting to see if<br />
there is any intervening matter. If there<br />
is something between the camera and<br />
the subject:<br />
(1) Move the camera.<br />
(2) If not destructive, carefully remove<br />
whatever is obstructing the view.<br />
(3) Often I gently bend back branches<br />
(withough breaking them) until they are<br />
just out <strong>of</strong> the shot.<br />
(4) I don’t do invasive removal, like<br />
uprooting plants, bulldozing, or detonations.<br />
51
Prolems with <strong>Focus</strong> <strong>Stacking</strong><br />
Crop It<br />
POSSIBLE CROP<br />
52
Two-Shot Reflection Stack<br />
Photo <strong>of</strong> Stream Bed Photo <strong>of</strong> Stream Surface<br />
Two Layers<br />
Clear water makes a great 2-layer stack.<br />
Simply shoot one layer with the bottom<br />
<strong>of</strong> the stream in focus and another with<br />
whatever is reflected on the top surface,<br />
and combine them.<br />
Here there is a sunlit stream bed with<br />
overhead trees and blue sky reflected<br />
on the surface. <strong>The</strong> combination allows<br />
you to focus on the bottom or the top<br />
reflection, making for a creative and<br />
interesting effect. No need to align this<br />
type <strong>of</strong> shot; just merge.<br />
This is easy and effective<br />
53
Resulting Two-Shot Reflection Stack<br />
Many possible variants <strong>of</strong> this<br />
54
Another Reflection Example<br />
Photo <strong>of</strong> Stream Bed Photo <strong>of</strong> Stream Surface<br />
Merge Two Photos<br />
Here is another example <strong>of</strong> two photos<br />
merged, by with no aligning, since we<br />
want to keep the surface image separate<br />
from the image <strong>of</strong> the bottom <strong>of</strong> the<br />
stream.<br />
Two-shot Stack<br />
55
Resulting Two-Shot Stack<br />
Two-shot Stack<br />
56
Stacked Photo Too Busy<br />
Lots <strong>of</strong> problems here<br />
57
Traditional One-shot Photo<br />
Don’t forget the old analog photo<br />
All-<strong>Focus</strong> Not Always Good<br />
I also find that just because I can bring<br />
the whole frame to focus does not mean<br />
I should or that the resulting photo will<br />
look good. Full-frame focus can be disorienting<br />
such as a case where you are<br />
looking through different layers <strong>of</strong> tree<br />
branches, and lose all sense <strong>of</strong> layers<br />
and distance, which is just what makes<br />
the shot interesting in the first place.<br />
<strong>Focus</strong> stacking can remove the sense <strong>of</strong><br />
distance since the eye is used to having<br />
a focus point and the rest <strong>of</strong> the image<br />
more-or-less out <strong>of</strong> focus. This can<br />
make for an unusual sense <strong>of</strong> space<br />
and spaciousness which can either<br />
enhance a photo or make it seem claustrophobic.<br />
Some scenes are not worth<br />
stacking such as the one show here,<br />
exept perhaps to achieve an unusual<br />
effect. Also, there are tons <strong>of</strong> artifacts in<br />
the photo on the left.<br />
58
Round or Sperical Surfaces Show <strong>Art</strong>ifacts<br />
Need many stacks to capture curves<br />
59
Subjects with Edges Stack Well<br />
Edges are easy to capture as a plane<br />
<strong>The</strong> Dreaded Sphere<br />
If you use rack-mounted focus and take<br />
micro steps with dozens <strong>of</strong> layers the<br />
smoothly rounded objects, like globes,<br />
bubbles, and so on can be resolved.<br />
But if you are taking a handful <strong>of</strong> shots,<br />
using a short stack, then take caution<br />
when you encounter rounded objects.<br />
Here is an example:<br />
Here you have a perfect subject for<br />
focus stacking, a line <strong>of</strong> clearly-defined<br />
levels, each one that you can focus on<br />
as a layer for your stack. <strong>The</strong> result is<br />
very satisfying.<br />
However, on the previous page are<br />
some water droplets on the hood <strong>of</strong> a<br />
car, which hood is not only on an incline,<br />
but itself slightly convex. Notice the<br />
out-<strong>of</strong>-focus areas in the water droplets.<br />
This is because the smooth curvature<br />
<strong>of</strong> the droplets, each different, would<br />
require micro focusing (many, many<br />
layers) to capture all the possibilities in<br />
the curvature. With ours short-stack approach,<br />
sampling areas, by definition we<br />
will miss the in-between areas, with the<br />
resultant OOF blur. Keep this in mind.<br />
60
Roundish Objects with Edges Stack Well<br />
61
Spherical Objects Require a Larger StacK<br />
Round surfaces are hard to catch<br />
Another Example<br />
<strong>The</strong> pine cone on the previoius page<br />
has a round shape, but there is plenty to<br />
focus on and highlight.<br />
However, the Michigan orchid below has<br />
a large round-shaped flower, so this<br />
shot required MORE than average layers<br />
in order not to have blurred spots on<br />
the curvature.<br />
62
Additional Considerations<br />
Playing With Stacks<br />
Back on the computer, after a day’s shoot, you process<br />
a stack in Photoshop and look at the results.<br />
Some stacks work and some have too many artifacts,<br />
motion that you didn’t see at the time, areas that Photoshop<br />
could not distinguish properly, etc.<br />
Some stacks are simply beyond use or repair, but<br />
most are not, so don’t just give up on a stack because<br />
at first glance it has problems. Try to see what is causing<br />
the problem. Here are some things you should<br />
check out before giving up on a stack.<br />
Inherently Flawed<br />
Don’t forget that unless you are on a focus rack and<br />
taking a huge number <strong>of</strong> photos under essentially<br />
laboratory conditions that photostacking, by definition,<br />
is flawed. <strong>Focus</strong>ing using a short-stack means you are<br />
sampling the focus here and there rather than seamlessly<br />
photographing and merging the entire frame. By<br />
design, you are leaving out many areas <strong>of</strong> the photo<br />
which are not treated as a focus point. This is a choice<br />
you make.<br />
An <strong>Art</strong>, Not a Science<br />
<strong>The</strong>re will be areas that are (how ever so slightly) out<br />
<strong>of</strong> focus. <strong>The</strong> art <strong>of</strong> focus stacking is to make these<br />
areas as unobtrusive as possible, selecting what you<br />
feel are the key areas in the photo that tell the story as<br />
you see it, areas that you want to be in sharp focus.<br />
<strong>Focus</strong> stacking, at least in my experience, is more<br />
<strong>of</strong> an art rather than a science. Slavishly using a focus<br />
rack to obtain perfect focus through a stack <strong>of</strong><br />
hundred or so photos simply is not interesting to me,<br />
and way too time consuming. I am happy to look at<br />
the deep stack photos that others make. Most <strong>of</strong> all,<br />
rack-focusing is more suited to the studio and not the<br />
woods and fields. I need to be out there in nature and<br />
without too much gear.<br />
<strong>The</strong> art in focus stacking is learning how to give your<br />
impression <strong>of</strong> a subject in a few carefully-chosen<br />
frames, merging them into a single unified photo that<br />
expresses that impression. That is why focus stacking<br />
is an art and not a science.<br />
<strong>The</strong> Bad Frame<br />
Did you include a frame that does not belong in the<br />
series by mistake? I am surprised at how <strong>of</strong>ten I manage<br />
to do this and, <strong>of</strong> course, a frame from a different<br />
series will seriously screw up a stack and make it appear<br />
unusable.<br />
Too Many Frames<br />
Just because you took ten frames <strong>of</strong> the subject does<br />
not mean you need all ten or that all ten will resolve,<br />
especially when the result shows problems. Try dropping<br />
layers, usually from the back where they matter<br />
least and can serve as bokah (nicely out <strong>of</strong> focus).<br />
Shorten the stack and run it again. Often the result<br />
can be different enough to save the shot.<br />
Minimal Frames<br />
Forget about the whole sequence. Go into the layers<br />
and find just the layers that best put the subject into<br />
focus. Use those, <strong>of</strong>ten just two or three. You end up<br />
with a more normal photograph, but one with the essential<br />
subject remarkably in focus. This is still better<br />
than just the one area in focus <strong>of</strong> a traditional DOF<br />
photo.<br />
Run It Again<br />
Sometimes if I just run the whole stack again i will get<br />
a good result. I have no idea why this is so, but it is<br />
worth a try if you love the subject.<br />
Don’t Forget the Traditional Photo<br />
And as a last result, use a single frame. Forget about<br />
stacking. One virtue <strong>of</strong> taking bracketed focus shots<br />
is that, more <strong>of</strong>ten than not, at least one <strong>of</strong> the frames<br />
will be the shot you would have taken if you only had<br />
one shot – the traditional photo with one point <strong>of</strong> focus.<br />
When all else does not work, usually there may<br />
be a single photo that will do the job.<br />
In summary, it is well worth it to spend some time<br />
tinkering with the stack before you abandon the shot,<br />
especially if it is a photo you really like.<br />
Short Stacks for Macro, Not Micro<br />
How close is too close? That is a question you will<br />
find yourself answering as you get into focus stacking.<br />
Of course, it depends a lot on what lens you are using,<br />
but I have found that trying to focus on too tiny a<br />
part or flower generally shows poor results. Let’s take<br />
some examples.<br />
<strong>The</strong> advantage <strong>of</strong> traditional one-shot photography is<br />
that you don’t have artifacts, but unless you are photographing<br />
a two dimensional subject (like a page from<br />
the newspaper) and even then, unless that newspaper<br />
is flat and exactly parallel to the plane <strong>of</strong> the camera’s<br />
sensor, you automatically have distortion from perspective.<br />
That perspective puts one area <strong>of</strong> the photo<br />
in focus and throws another out <strong>of</strong> focus to some<br />
degree.<br />
Of course the eternal quest for the holy grail <strong>of</strong> depth<strong>of</strong>-field<br />
by photographers meets with disappointment<br />
as diffraction exacts its toll <strong>of</strong> resolution at smaller<br />
apertures, thus the main reason for focus stacking.<br />
Yet focus stacking, as we have pointed out, cannot but<br />
fail to capture every bit <strong>of</strong> the subject, but it can manage<br />
to fail successfully if we are careful, resulting in a<br />
photo that has the appearance <strong>of</strong> real depth <strong>of</strong> field.<br />
63
Additional Considerations<br />
Landscapes<br />
<strong>Focus</strong> stacking is probably more successful in enhancing<br />
focus in non-close-up shots like mid-range<br />
and distant subjects such as landscapes, where<br />
adding even a little more depth <strong>of</strong> field dramatically<br />
enhances the shot. Look at the landscape shots elsewhere<br />
in this book for an example <strong>of</strong> this<br />
Close-up, Macro, and Micro<br />
Where focus stacking breaks down most visibly is in<br />
extreme close-up shots, what we would call micro,<br />
rather than macro shots. When you get this close, you<br />
really do need a focusing rail, studio, lights, and all <strong>of</strong><br />
that. You can get great shots using a rail and microstepping<br />
the focus, but for me this is a whole other<br />
kind <strong>of</strong> photography than that being presented here.<br />
It really is a science and not so much an art, although<br />
art is involved there too.<br />
Not for Micro Work<br />
For example, shooting a very tiny flower: Being so<br />
close to a subject shows not only any weakness in<br />
the lens but also weakness in the technique <strong>of</strong> shortstack<br />
focus photography. By not covering every millimeter<br />
<strong>of</strong> that scene we are opening ourselves up to<br />
tiny movements <strong>of</strong> wind and simply extremes <strong>of</strong> perspective<br />
within the subject matter itself. <strong>The</strong> result is<br />
that artifacts are more visible up close than when we<br />
stand back, just like some <strong>of</strong> the French Impressionist<br />
painters like Monet or Pissarro, which are best viewed<br />
from a few feet back, rather than right up close. <strong>The</strong><br />
artifacts or artifice is absorbed at a distance but obvious<br />
when you get too close. <strong>The</strong> same goes for focus<br />
stacking that is not rail mounted and studio bound.<br />
I find this out by trial and error. Sometimes I can get<br />
away with a lot and at other times, the technique itself<br />
shows its flaws. <strong>The</strong> take away is there are limits to<br />
what short-stack focusing will allow. As you get closer<br />
and closer, going from close-up photography to macro<br />
photography, or even closer to micro photography,<br />
you need more precise control, preferably in exact<br />
micro increments to get results. Impressionist focus<br />
sampling as we are discussing here doesn’t cut it. We<br />
would need to be more exact than that.<br />
As mentioned, the science <strong>of</strong> stepped-rail focusing<br />
does not interest me, so I refer you to Google, where<br />
you can find any number <strong>of</strong> tutorials on rail stacks –<br />
requiring both science and art. Striking photographs,<br />
yes, but sometimes a little too ‘clinical’ for my taste.<br />
Looking Close<br />
If you look very closely at any stacked photo, you can<br />
find its flaws, however minute. This is the nature <strong>of</strong><br />
the beast and just part <strong>of</strong> the deal when you use short<br />
stacks. Most such flaws are usually embraced by the<br />
overall enhanced sharpness <strong>of</strong> the stacked photo and<br />
don’t stand out. Some are glaring and cause the photo<br />
to be rejected. Still others can be fixed in Photoshop<br />
easily, if they are few. If they are legion, there is not<br />
much you can do but enjoy it in the abstract, flaws and<br />
all. <strong>The</strong>n you really are really an impressionist! Frankly<br />
I am continually amazed at how well most stacked<br />
photos work out if you take some care with the original<br />
shots.<br />
64
Traditional Analog Shot (note distance is blurry)<br />
65
Stacked Photo (note more clarity throughout)<br />
66
Entire Stack Processed (note blurry area)<br />
67
Partial Stack (note clarity achieved by fewer photos)<br />
68
Stacked Photo <strong>of</strong> Small Flower (note artifacts)<br />
69
Traditional Analog Shot (note more clarity)<br />
70
Traditional Analog Shot (note distance is blurry)<br />
71
Stacked Photo (much more clarity throughout)<br />
72
Equipment for Macro and Close-up Photography<br />
Macro and Close-up Equipment<br />
This section will be a painful read for many <strong>of</strong> you.<br />
Equipment is expensive, and it seems that all beginners<br />
start out trying to cut corners and end up paying<br />
more for their stuff than pr<strong>of</strong>essionals because they<br />
buy the cheap stuff, are unhappy with it, and end up<br />
getting the good stuff too, thus buying twice. I certainly<br />
did this and regret it to this day.<br />
All the pros advised me to just buy the good stuff right<br />
<strong>of</strong>f, but I did not listen. After all, I knew best, and was<br />
not sure that this more detailed photography stuff was<br />
something I would really get into, so I bought cheap,<br />
and then bought it all again. <strong>The</strong> smart money buys<br />
the good stuff and, if you don’t like photography, you<br />
can actually sell the good brands and get some money<br />
back.<br />
I cringe when I come across some <strong>of</strong> my early tripods<br />
that I bought trying to save a dime and then ultimately<br />
found clumsy, heavy, and ugly. <strong>The</strong>y are worth nothing<br />
and sit unused (and unsalable!), taking up storage<br />
space. <strong>The</strong>refore, I am only going to tell you about the<br />
good stuff and why it is worth the money. You make up<br />
your own mind and follow your own budget. As mentioned,<br />
I didn’t listen, and it cost me plenty, not to mention<br />
the suffering and discouragement <strong>of</strong> using poor<br />
equipment, which is priceless.<br />
Tripods Are Key<br />
<strong>The</strong> long and the short <strong>of</strong> it is that you need a tripod<br />
to do accurate focus stacking. I know there are a few<br />
photographers out there who claim to focus stacks<br />
handheld, but that is why there are few <strong>of</strong> them.<br />
Personally I would not (could not) do focus stacking<br />
without a good tripod. You not only need a tripod, you<br />
need a GOOD tripod. I bought three cheap ones before<br />
I had the common sense to get one good one.<br />
<strong>The</strong> cheap ones are in storage. As mentioned, I can’t<br />
even sell them, so do yourself a favor and get a decent<br />
tripod.<br />
And, if you are a hiker or woods-walker, get a light<br />
tripod, preferable one made with carbon-fiber legs on<br />
it. A good tripod becomes like a third arm to a macro<br />
shooter. I seldom hit the fields without one.<br />
<strong>The</strong>se Photographs<br />
Pictured here is the primary Nikon equipment I use<br />
most <strong>of</strong> the time: Nikon D3s and Nikon D3x bodies,<br />
each shown here with a Voigtlander 125mm f/2.5<br />
APO-Lanthar lens, a Markins Q3 Ball-Head, MC-30<br />
Remote Release, and setting on Gitzo carbon-fiber<br />
tripods GT2531 (3-leg) and FT1228 (4-legs and center<br />
column). <strong>The</strong>se tripods and ball heads are as light as<br />
possible, yet sturdy enough to hold the quite-heavy<br />
nikon cameras and lenses.<br />
73
Equipment for Macro and Close-up Photography<br />
74
Equipment for Macro and Close-up Photography<br />
Ball Head<br />
Another item that you don’t want to cheap-out on is<br />
a good ball head for the tripod on which your camera<br />
sits. I should know; I have a whole shelf <strong>of</strong> lousy ball<br />
heads that I bought trying to avoid buying one good<br />
one. I have ones with a pistol-grip handle, ones with<br />
two handles, etc., a total waste <strong>of</strong> time and money.<br />
Ball heads are expensive and the good ones are<br />
brands like Really Right Stuff (RSS), Kirk, Arca-Swiss,<br />
and Markins.<br />
I use the Markins Q-Ball Q3 (shown on right), which<br />
sells on Ebay for about $260 and I feel that are every<br />
bit as good as the much more expensive kinds.<br />
L-Bracket<br />
I hate to keep laying these essentials on you, because<br />
it can be very discouraging to the pocket-book, but it is<br />
best to know the truth sooner, than later:<br />
You need an L-bracket on your camera!<br />
An L-Bracket mounts on your camera body and allows<br />
you to quickly change from the standard horizontal position<br />
to vertical position. <strong>The</strong> ones shown here are on<br />
the lower-left-hand side (and base) <strong>of</strong> each camera.<br />
For me, the L-bracket is essential because I like to<br />
shoot vertically most <strong>of</strong> the time but have to switch<br />
in a moment to horizontal for a wider shot. I use Kirk<br />
Enterprise L-Bracket and plates. <strong>The</strong>y are excellent.<br />
Quick-release Clamps<br />
It is not enough to have a ball head on your tripod. You<br />
also have to be able to get your camera on and <strong>of</strong>f<br />
the tripod. You can screw it on and <strong>of</strong>f but that takes<br />
a lot <strong>of</strong> time and sooner or later you are gonna’ mess<br />
up the threads in the base <strong>of</strong> your camera and have<br />
a real problem on your hands. You need to be able to<br />
get that camera on and <strong>of</strong>f the tripod in seconds, not<br />
minutes <strong>of</strong> fumbling with thumb screws.<br />
My quick-release <strong>of</strong> choice is the Swiss-Arca style,<br />
as used by Kirk Enterprises, Really-Right Stuff, and<br />
<strong>of</strong> course Swiss-Arca-style plates. You need one.<br />
<strong>The</strong> quick release shown here are built into the Markins<br />
ball head and receive the L-brackets, which are<br />
thumb-tightened on.<br />
Remote Shutter Release<br />
Another (for me) essential accessory is the remote<br />
shutter release, which attaches to the camera and<br />
allows me to release the camera without having to<br />
touch the camera’s shutter-release button and potentially<br />
cause vibrations. Remote shutter release cords<br />
for Nikon are available on Ebay for very little and are<br />
more than a little helpful. <strong>The</strong>y can be seen here dangling<br />
from the right side <strong>of</strong> the cameras. Some <strong>of</strong> the<br />
newere camera bodies linke the Nikon D7000 have<br />
infrared remotes, so there are not cords involved.<br />
Camera Bodies<br />
<strong>The</strong>re actually are many cameras that will do a good<br />
job. Ultimately, after you find you like photography, you<br />
want a DSLR (Digital Single Lens Reflex) camera, with<br />
a 100% viewfinder (shows the whole image, not just<br />
most <strong>of</strong> it) with a large LCD preview window and preferably<br />
with mirror lockup (will explain in a moment).<br />
Another feature I could NOT do without is the ability to<br />
see a histogram <strong>of</strong> the RGB levels on the LCD at the<br />
rear <strong>of</strong> the camera body. Let me go over all <strong>of</strong> this in<br />
more detail.<br />
For myself, I love Nikon cameras, but Canon, Panasonic,<br />
Sony, and others also make fine DSLRs. It is<br />
just that Nikon cameras are better looking and, well,<br />
just better. Suit yourself.<br />
Viewfinders<br />
DSLR cameras <strong>of</strong>fer viewfinders that are larger and<br />
smaller, meaning that some cameras show most (but<br />
not all <strong>of</strong> the frame), while better ones do show all <strong>of</strong><br />
it. If you can, get a camera that will show ALL <strong>of</strong> the<br />
frame, a viewfinder that also is as clear and bright as<br />
possible. I would not consider trying to do focus stacking<br />
using a camera with only an LCD preview window,<br />
as in: a camera without a real viewfinder. You will be<br />
doing all <strong>of</strong> your work looking through the viewfinder,<br />
so get a camera with a large clear viewfinder. That is<br />
my point.<br />
75
Equipment for Macro and Close-up Photography<br />
Depth <strong>of</strong> Field Preview<br />
How wide open or not your lens diaphragm is determines<br />
your depth <strong>of</strong> field. If the lens is wide open<br />
(smallest aperture number, like F/2.8), you have the<br />
most light-gathering ability for that particular lens, but<br />
your Depth-<strong>of</strong>-Field (DOF) will be razor thin. In other<br />
words, aside from the one plane that is in focus, everything<br />
else is out-<strong>of</strong>-focus. When your lens is closed<br />
down to the smallest apertures (highest aperture number,<br />
like f/22), you have the least light coming into the<br />
lens, but the greatest DOF.<br />
When you look through the viewfinder <strong>of</strong> your camera<br />
for a preview <strong>of</strong> a shot, the lens is always forced wide<br />
open, so you get a very bright image, which is needed<br />
to focus properly. However, when you actually take the<br />
photo, your lens will be automatically stopped down to<br />
the actual aperture you set and the photo taken. That<br />
actual aperture may be so small (and dark) to your<br />
eye that you could not see well to focus, which is why<br />
the viewfinder always shows the lens wide open.<br />
However, especially in focus stacking, you can need<br />
to know how much DOF field you already have. If you<br />
already have enough DOF, perhaps you don’t need to<br />
focus stack for this photo. Some <strong>of</strong> the better cameras<br />
have a Depth-<strong>of</strong>-Field (DOF) Preview button which<br />
can be a great help, especially in close-up and macro<br />
photography where you want to know how much <strong>of</strong><br />
that bug or flower actually is already in focus.<br />
When you look through the viewfinder <strong>of</strong> the camera<br />
and focus on your subject, you can see where your focus<br />
is, <strong>of</strong> course, but not how much more (the DOF) <strong>of</strong><br />
the object is also on focus. Pressing the DOF Preview<br />
button on a camera stops the lens down to whatever<br />
aperture you have set and allows you to see (although<br />
<strong>of</strong>ten in dim light) exactly how much <strong>of</strong> the total object<br />
is in focus – your depth <strong>of</strong> field. So while not a showstopper,<br />
a DOF Preview button is VERY helpful to the<br />
close-up photographer.<br />
Mirror-Lock-Up<br />
Cameras with a mirror-lock up are to be preferred<br />
because it allows you to lock the mirror up before the<br />
shot. Otherwise the slap <strong>of</strong> the mirror can cause vibrations<br />
that resonate through the camera body and blur<br />
the image you are trying to take.<br />
Ready to Rock<br />
Given all the above equipment, you have what you<br />
need to hit the trails and stack photos. You might also<br />
want to decide how much ‘stuff’ you want to carry with<br />
you through the woods and over hill and dale. Things<br />
get really heavy fast after a mile or so. And I am talking<br />
about what you want to carry ASIDE from your<br />
camera, ball head, lens, and tripod, which you will<br />
probably want to have with you at all times.<br />
76
Equipment for Macro and Close-up Photography<br />
Common Macro Lenses<br />
In the above photo are ten lenses commonly used for<br />
macro and close-up work. Most, but not all, are Nikon<br />
lenses. <strong>The</strong> one marked “J” consists <strong>of</strong> two lenses<br />
stacked together to make higher magnification, as listed<br />
below. For my work, the most-used lens is (I), the<br />
Voigtlander 125mm f/2.5 APO-Lanthar, a marvel <strong>of</strong> a<br />
lens. <strong>The</strong> other incredible lens (IMO) is (C), the 60mm<br />
f/4 APO lens from Coastal Optics. Any <strong>of</strong> the lenses<br />
listed above would be good for macro and close-up<br />
photography.<br />
A. Micro-Nikkor 105mm F/2.8 VR Lens<br />
B. Kiron (Lester A. Dine) 100mm f/2.8 Macro<br />
C. Coastal Optics 60mm f/4.0 APO<br />
D. Micro-NikKor 55mm P Auto f/3.5<br />
E. Micro-Nikkor 60mm f/2.8 D Lens<br />
F. Micro-Nikkor 85mm f/2.8 PC Tilt/Shift Lens<br />
G. Micro-Nikkor 70mm-180mm AF f/.5-5.6 D<br />
H. Micro-Nikkor 200m AF F/4 ED-IF Macro<br />
I. Micro Voigtlander 125 F/2.5 Macro APO-Lanthar<br />
J-1. Micro-Nikkor 105mm P F/4 Macro Lens<br />
J-2 Micro-Nikkor 105mm P F/4 Macro Bellows Lens<br />
Most close-up and macro photographers use lenses in the short<br />
telephoto range, from 60mm to 200mm.<br />
<strong>The</strong> Lens Is the Thing<br />
Lenses are the heart <strong>of</strong> photography, IMO, and certainly<br />
a good sharp lens is required for decent focus<br />
stacking. And lenses can be expensive, to say the<br />
least. Fortunately for macro and close-up photography,<br />
where we must focus manually anyway, we can<br />
use older lenses which are readily available at reasonable<br />
prices.<br />
<strong>The</strong> kind <strong>of</strong> lens you need depends on the kind <strong>of</strong> photographing<br />
you intend to do. And while focus stacking<br />
can be used for landscape and intermediate distance<br />
photography, much <strong>of</strong> it tends to be done in close-up<br />
and macro photography.<br />
Speaking very generally, most macro and close-up<br />
work is done with short telephoto lenses, rather than<br />
wide angle lenses. Traditionally, the 50mm lens has<br />
been set as the standard and any lenses smaller than<br />
that (24mm, 35mm, etc.) are considered wide angle<br />
lenses, while any lenses longer (105mm, 200mm) are<br />
considered telephoto lenses.<br />
You can do focus stacking with almost any kind <strong>of</strong><br />
lens (including wide angle lenses) with the exception<br />
perhaps <strong>of</strong> fisheye lenses. And we should differentiate<br />
between standard lenses and macro lenses. A macro<br />
lens allows you to focus down to very short distances<br />
from your subject, providing you greater magnification<br />
and thus huge images <strong>of</strong> tiny critters like ants, as well<br />
as flowers, leaves, etc. Standard lenses don’t usually<br />
have a focus distance close enough to do macro photography,<br />
so take note.<br />
77
Equipment for Macro and Close-up Photography<br />
<strong>The</strong> Quest for Depth <strong>of</strong> Field<br />
As long as there have been cameras and lenses, photographers<br />
have struggled to achieve greater depth <strong>of</strong><br />
field (DOF). When a lens is wide open the DOF is very<br />
shallow, which means that, at best, you can expect to<br />
have sharp focus only in one plane <strong>of</strong> the photo. <strong>The</strong><br />
rest <strong>of</strong> the frame will be more or less out <strong>of</strong> focus.<br />
As we close down the lens (smaller openings), we<br />
achieve greater and greater DOF until a point is<br />
reached where the effects <strong>of</strong> diffraction set in and<br />
begin to destroy the overall sharpness <strong>of</strong> the photo.<br />
So photographers are caught between the devil and<br />
the deep blue sea, trapped by almost no DOF at wide<br />
apertures or loss <strong>of</strong> sharpness when stopped down<br />
too far. That has been the traditional problem.<br />
We all seem to like to see photos that embrace greater<br />
DOF and with the advent <strong>of</strong> focus stacking this is<br />
becoming increasingly possible. <strong>Focus</strong> stacking has<br />
been going on for a long time, but limited to those<br />
photographers with enough technical expertise in Photoshop<br />
(or other s<strong>of</strong>tware) to painstaking stack layers<br />
<strong>of</strong> photos and then gradually erase part <strong>of</strong> different<br />
layers to reveal those areas <strong>of</strong> greatest sharpness.<br />
Each photo becomes a real labor <strong>of</strong> love and is very<br />
time intensive.<br />
Now that Photoshop CS4 (and other s<strong>of</strong>tware) can do<br />
this more automatically, focus stacking is increasing<br />
coming into its own. Today (using Photoshop as an<br />
example), all that is necessary is to place the stack<br />
<strong>of</strong> photos (at different focus points) as individual layers<br />
and apply two commands to that stack, Align and<br />
Blend.<br />
<strong>The</strong> “Align” command automatically works through the<br />
layers and aligns the subject in each layer so they line<br />
up. Once that is done, the “Blend” command blends<br />
the aligned layers into a single photo, automatically<br />
doing what previous photographers laboriously did<br />
by hand. <strong>The</strong> resulting image is a stacked photo,<br />
where the stack <strong>of</strong> individual photos has been aligned,<br />
blended, and reduced to a single photo that appears<br />
to have a greater depth <strong>of</strong> field or overall sharpness, if<br />
all has been done correctly.<br />
Users <strong>of</strong> Adobe Lightroom 2.0 (and higher) can select<br />
a series <strong>of</strong> photos in Lightroom and send them to<br />
Photoshop where they can be aligned, blended, and<br />
automatically saved back into Lightroom, including<br />
any adjustments made to the photos in Lightroom.<br />
What this means is that focus stacking is now available<br />
to a much wider group <strong>of</strong> users than in the past.<br />
Just as HDR-stitched photos have become very popular<br />
and have their own special “look,” we can expect<br />
to see focus stacking following on the same path to<br />
more common usage. <strong>Focus</strong> stacking also has a certain<br />
look that differentiates it from standard photos.<br />
Perhaps camera makers like Nikon may include focus<br />
stacking (focus bracketing) in future camera bodies<br />
just like they did with aperture bracketing, which<br />
is now available. <strong>The</strong> user would focus at the front<br />
and the rear <strong>of</strong> a subject, indicate how many photos<br />
should be stacked, and the camera would do the rest.<br />
Of course, this sounds like a job that would require<br />
a tripod. For shots <strong>of</strong> live subjects, in-camera focus<br />
stacking would further open up this technique, since<br />
the stacked series would happen at maximum speed.<br />
Later in this text, we will walk through how to use<br />
Adobe Photoshop to stack photos.<br />
Diffraction<br />
When you camera lens is wide open like F/2.8, there<br />
is plenty <strong>of</strong> room for light to enter and the parallel<br />
rays <strong>of</strong> light more or less stay parallel, with minimal<br />
divergence. However when you narrow the lens to a<br />
tiny opening, like f/22, not only does less light come<br />
through, but after passing through a small aperture,<br />
parallel light rays begin to diverge, spread out, and<br />
interfere with one another.<br />
At small apertures the light waves get out <strong>of</strong> phase<br />
with one another, pile up in some areas, and cancel<br />
each other out in other areas. <strong>The</strong> net result is that<br />
they create a pattern <strong>of</strong> bands called the “diffraction<br />
pattern,” and this pattern impacts the photo image we<br />
are trying to create, causing it to deteriorate.<br />
<strong>The</strong> long and the short <strong>of</strong> it is that no matter how<br />
fine a lens you have or how many megapixels your<br />
camera sensor has, diffraction imposes an absolute<br />
resolution limit for photo detail that cannot be gone<br />
beyond. Diffraction automatically smoothes or blurs<br />
detail that we have resolved with the higher f/stop <strong>of</strong><br />
the lens.<br />
Web Sites for Lenses<br />
<strong>The</strong> best web sites to learn the qualities <strong>of</strong> lenses (in<br />
my opinion) are:<br />
Bjørn Rørslett (http://www.naturfotograf.com)<br />
Thom Hogan (http://www.bythom.com)<br />
78
Challenges in <strong>Focus</strong> <strong>Stacking</strong><br />
Challenges in <strong>Focus</strong> <strong>Stacking</strong><br />
<strong>Focus</strong> stacking has a number <strong>of</strong> distinct challenges,<br />
things to keep in mind when you are learning to use<br />
this technique, so let’s go over some <strong>of</strong> them.<br />
Near <strong>Focus</strong><br />
A continual problem I have is not having the nearest<br />
objects in focus. It is an easy mistake to make.<br />
Of course, if there is a single object I don’t miss that.<br />
But let’s say I am photographing a bunch <strong>of</strong> moss or<br />
foliage. Many times after the shoot when I am back<br />
on the computer I find that I did not get the very most<br />
front matter. It could just be the tip <strong>of</strong> the top <strong>of</strong> a few<br />
blades <strong>of</strong> grass but it more-or-less ruins the shot. So<br />
it pays to back <strong>of</strong>f until the entire field is out <strong>of</strong> focus,<br />
and then start in until the first something appears and<br />
shoot that. Some focus stackers make a rule <strong>of</strong> starting<br />
with an out-<strong>of</strong>-focus shot.<br />
With rear focus, it usually does not matter. We can just<br />
call a missed layer in the rear… bokeh.<br />
A <strong>Focus</strong> Too Far<br />
Often we try to get too much <strong>of</strong> the entire frame in focus<br />
and it can be just too far <strong>of</strong> a reach. I have learned<br />
to let the rear part <strong>of</strong> the frame remain somewhat out<br />
<strong>of</strong> focus so that it either is or resembles bokah. This<br />
brings out the subject in the foreground that is in focus<br />
all the better, which amounts to traditional photography<br />
with just a wee bit more in focus.<br />
You will get a feel for how much you can strong-arm<br />
the entire frame into focus. I find it is better to pick my<br />
battles carefully.<br />
“All-<strong>Focus</strong>” Not Always Good<br />
I also find that just because I can bring the whole<br />
frame to focus does not mean I should or that the<br />
resulting photo will look good. Full-frame focus can<br />
be disorienting, such as a case where you are looking<br />
through different layers <strong>of</strong> tree branches and lose all<br />
sense <strong>of</strong> layers and distance which is just what makes<br />
the shot interesting in the first place.<br />
<strong>Focus</strong> stacking can remove the sense <strong>of</strong> distance,<br />
since the eye is used to having a focus point and the<br />
rest <strong>of</strong> the image more-or-less out <strong>of</strong> focus. This can<br />
make for an unusual sense <strong>of</strong> space and spaciousness<br />
which can either enhance a photo or make it<br />
seem claustrophobic. Some scenes are not worth<br />
stacking.<br />
Movement<br />
<strong>Focus</strong> <strong>Stacking</strong> is primarily for still life photography,<br />
where nothing is moving. Movement causes artifacts<br />
in the finished photo that (usually) cannot be remedied,<br />
with the result that the photo is not considered<br />
satisfactory. This is not say that focus stacking should<br />
not be used for nature photography with live subjects,<br />
but just that you want to catch your critters at rest,<br />
holding a pose long enough for you to shoot a few<br />
frames at different focus points.<br />
<strong>Focus</strong> stacking with moving subjects can make for interesting<br />
impressionistic or expressionistic photos, but<br />
most <strong>of</strong> these would fall into the category <strong>of</strong> artistic<br />
experimentation rather than nature photography.<br />
What’s Missing?<br />
Usually you won’t know until you are home on the<br />
computer processing the shots, but here is the rule<br />
<strong>of</strong> thumb: unless you are shooting 30-40 shots on a<br />
focusing rack setup or shooting traditional (one plane<br />
<strong>of</strong> focus), something will be left out, somewhere. <strong>The</strong><br />
skill comes in choosing what you want in focus and<br />
what if left out will never be missed.<br />
Just about every stacked photo I have made has<br />
weak or missing spots, if not outright blatant artifacts.<br />
I generally ignore those who insist every speck has<br />
to be in focus or you are a lousy photographer. That’s<br />
asking too much and is by definition impossible without<br />
shooting hundreds <strong>of</strong> photos. Every other possibility<br />
has one kind <strong>of</strong> flaw or another. With focus stacking,<br />
you just have to pick your battles.<br />
And as I like to say, focus stacking (at least the kind I<br />
do) is at heart impressionistic, meaning that I as the<br />
photographer choose what to have in focus and what<br />
to ignore. <strong>The</strong> result (like all photographs) is my impression<br />
<strong>of</strong> the subject, the sense <strong>of</strong> it as I see it. Like<br />
HDR and other newer techniques, focus stacking is<br />
just another way to present an impression <strong>of</strong> what you<br />
see, in this case by playing with focus. Further on I<br />
will illustrate these various problems.<br />
Camera Modes<br />
Most cameras nowadays <strong>of</strong>fer you the option <strong>of</strong> several<br />
shooting modes, typically:<br />
Program Mode<br />
<strong>The</strong> camera does everything for you and decides<br />
what is your best shot.<br />
Shutter Priority Mode<br />
You set the shutter to what you need, and the camera<br />
does the rest. For example, in sports events, you<br />
need a high (fast) shutter speed to capture the action,<br />
while in still life photography, you can use a much<br />
lower shutter speed.<br />
Aperture Priority Mode<br />
Here you set the aperture yourself to gather more or<br />
less light, and let the camera do the rest.<br />
Manual Mode<br />
In this mode, the photographer sets everything, the<br />
shutter speed, the aperture, and the focus. THIS is<br />
the mode I generally use and recommend, although<br />
you can use any <strong>of</strong> the above with the exception <strong>of</strong><br />
auto-focus. Setting aperture, shutter speed, and ISO<br />
limits becomes natural very quickly.<br />
79
Challenges in <strong>Focus</strong> <strong>Stacking</strong><br />
Histograms<br />
I have been photographing since around 1954 when<br />
my father loaned me his Kodak Retina 2A camera for<br />
a summer trip. Of course I was shooting film and dad<br />
paid for that and the developing. But the expense <strong>of</strong><br />
film and the fact that you had to wait days to find out if<br />
your photo even came out were great inhibitors to my<br />
photography experimentation. Back then I used a light<br />
meter to determine how to set my exposure but even<br />
that device (or my ineptitude) did not guarantee me a<br />
decent photo.<br />
In general I wouldn’t spend the money for film/ developing<br />
and I hated the guesswork involved in having<br />
no immediate visible feedback from each shot I took.<br />
With the advent <strong>of</strong> digital cameras all that changed.<br />
Now I can afford to shoot as much as I like and the<br />
LCD preview screen gives me instant feedback as to<br />
whether I am in or out <strong>of</strong> focus, whether I have too<br />
much or too little light, and so on. <strong>The</strong>re is one feature<br />
in these new cameras that is VERY important to have,<br />
and that is visible histograms that evaluate exposure.<br />
<strong>The</strong> RGB histograms amount to a 21st century light<br />
meter, one built into the camera itself.<br />
Using RGB histograms allows us to tell at a glance<br />
whether the photo we just shot is exposed properly<br />
for our purposes or whether it is too dark or too light.<br />
Histograms make it clear whether we have a lot <strong>of</strong><br />
clipping going on, which means we have lost photo<br />
information that can’t be retrieved later in Photoshop.<br />
This is something we really need to know, because<br />
if I spend an hour shooting an important subject only<br />
to find out later that all images were severely overexposed,<br />
it is a heartbreaker if I can’t repeat the shoot<br />
due to circumstances, etc.<br />
This is not the place to explain how best to use histograms.<br />
<strong>The</strong>re are dozens <strong>of</strong> good tutorials on using<br />
histograms on the web. Just note: when shopping for<br />
a camera, get one that does show you an RGB histogram.<br />
Since I don’t use automatic focus, shutter, or<br />
aperture, I would be lost without histograms.<br />
<strong>Focus</strong><br />
In <strong>Focus</strong> <strong>Stacking</strong>, auto-focusing is not used since<br />
auto focusing lets the camera decide on one and only<br />
one focus point, and that is that. In focus stacking we<br />
need many points <strong>of</strong> focus, and want to set each one<br />
ourselves, since the camera does not have an eye for<br />
beauty… yet. So you will be using manual focus for<br />
close-up and focus stacking.<br />
Camera Bodies<br />
<strong>The</strong> two leading makers <strong>of</strong> fine camera bodies are<br />
Canon and Nikon. Both companies make good cameras.<br />
I happen to like the Nikon workmanship and right<br />
now they are the best low-light cameras on the market,<br />
meaning they can work at relatively high ISO levels,<br />
i.e. work in low light with less graininess. Nikon also<br />
has (even according to Canon users) the best aut<strong>of</strong>ocus<br />
system and best flash system available. It is too<br />
bad that there is not a universal lens mount for DSLRs<br />
because once you start buying lenses for one brand,<br />
Nikon or Canon, it is very difficult to switch camera<br />
bodies since they are not interchangeable.<br />
Normal Lenses<br />
On 35mm format cameras (like many DSLRs) the<br />
50mm lens is “normal” and anything longer (60mm,<br />
90mm, 200mm, 500mm) is considered a telephoto lens<br />
and anything shorter (35mm, 24mm, 14mm) is considered<br />
as wide angle. Almost every photographer has a<br />
50mm lens and preferably a fast one… f/2.8 or better.<br />
Most photographers’ kits also have at least one wideangle<br />
lens and one telephoto lens. I mentioned earlier<br />
that the most popular macro lenses typically range<br />
from 60mm to 200mm, with 105mm being traditionally<br />
a popular length for macro photography. My favorite<br />
macro lens is 125mm.<br />
Camera Body Features<br />
Close-up and macro photography require a stable support<br />
such as a tripod and with focus stacking it is pretty<br />
much mandatory. An added feature that you might want<br />
to look for when buying a camera body is the ability<br />
lock the mirror up before a shot. With DSLR bodies<br />
typically, in order to see through the viewfinder to focus<br />
one has to have a mirror so that you can see out <strong>of</strong> the<br />
front <strong>of</strong> the lens. Yet when a picture is taken that mirror<br />
has to first be raised up out <strong>of</strong> the way, the photo taken,<br />
and the mirror lowered for the next shot. When the<br />
mirror is raised it slams into the top <strong>of</strong> the camera body<br />
and causes vibration which very <strong>of</strong>ten affects the photo<br />
being taken. <strong>The</strong> shock <strong>of</strong> the mirror bring raised reverberates<br />
through the camera while the shot is taken and<br />
causes the photo to be very slightly out <strong>of</strong> focus.<br />
This is especially important in close-up and macro<br />
photography, in particular when focus stacking. Higherend<br />
cameras have a setting that allows you to raise the<br />
mirror when you take a photo, wait for a second while<br />
the mirror is raised and the vibration vanishes, and<br />
then press the release button a second time to take the<br />
actual photo. This <strong>of</strong> course only works for still life or<br />
shots where action is not what you are after. This is a<br />
very important feature to have, if you can.<br />
80
Challenges in <strong>Focus</strong> <strong>Stacking</strong><br />
Wind and <strong>Focus</strong> <strong>Stacking</strong><br />
I live in Michigan which is for the most part just flat,<br />
since the glaciers moved across it like a snow plow<br />
(way back then) and scraped it flat. With nothing to<br />
stop it, like mountains and valleys, we have wind and<br />
more <strong>of</strong>ten than not.<br />
Wind is a problem for any macro photographer, but a<br />
much greater problem if you are trying to stack photos,<br />
since even a tiny movement results in halos and other<br />
artifacts. <strong>The</strong> proverbial advice for shooting in wind is<br />
either don’t shoot at all or be patient and wait for a lull.<br />
This is good advice except where you need to shoot<br />
five or ten photos each at a different focal point. What<br />
happens is that you get two or three shots <strong>of</strong>f and the<br />
wind moves the subject (or parts <strong>of</strong> the subject) a tiny<br />
bit. You don’t even see it because you have your eye<br />
to the viewfinder, your hand focusing, and your mind<br />
busy coordinating it all.<br />
It actually is worse than this. <strong>The</strong> wind doesn’t usually<br />
just move one blade <strong>of</strong> grass or whatever. It moves all<br />
kinds <strong>of</strong> things ever so slightly, <strong>of</strong>ten too subtle for you<br />
to even catch, but not too subtle for your lens to catch.<br />
<strong>The</strong> result is that all kinds <strong>of</strong> stuff moves around.<br />
Where you figure this out is back home on the computer<br />
while processing the stacks. Photo after photo<br />
has some movement flaw or all kinds <strong>of</strong> little windgenerated<br />
artifacts. Some can be fixed in Photoshop,<br />
but a lot are not worth fixing unless you like being a<br />
photo-touchup artist for hours at a time.<br />
To make things worse, if you are shooting seasonal<br />
flowers the season does not wait for the wind to die<br />
down. Many flowers are in and gone in a few days.<br />
We can schedule time for shooting, but we can’t control<br />
the wind which sometimes is strong enough to<br />
keep all <strong>of</strong> the plants dancing for days at a time. What<br />
to do?<br />
One thing we can do (although not focus stacking) is<br />
just use a higher shutter speed (one that stops motion)<br />
and just shoot traditional one-shot photos with<br />
as much depth <strong>of</strong> field as we can push the aperture.<br />
<strong>The</strong>re is always that. Or, if you are shooting something<br />
like an entire flower that moves slowly in the wind and<br />
can push the shutter speed up so that the whole flower<br />
is caught, SOME stacks will work because Photoshop<br />
will align the whole flower, shot by shot. Although<br />
this approach sometimes works, it seldom works well<br />
and is hardly worth the effort.<br />
Another thing I have tried is to make little stakes and<br />
string little panels <strong>of</strong> cloth on them in an attempt to<br />
stop the wind from coming in. I even bought some<br />
small collapsible car antennae so the whole thing<br />
could be portable but the wind came in from above or<br />
from anywhere that was not covered and did it’s thing,<br />
so this was not a satisfying solution. For really good<br />
stacked photos <strong>of</strong> very small flowers wind is pretty<br />
much a deal breaker.<br />
<strong>The</strong>re is an inexpensive way out <strong>of</strong> this, although it is<br />
a real PITA to haul around and that is: a Light Tent.<br />
Light Tents are expandable cubes <strong>of</strong> translucent material<br />
that are used for product photography.<br />
<strong>The</strong>y diffuse light over whatever is inside the cube<br />
AND they stop wind. <strong>The</strong>se light tents are all over<br />
Ebay, and you can get a 24” or 30” Light Tent for<br />
around $30. You will have to cut the bottom <strong>of</strong> one <strong>of</strong><br />
the flat sides out <strong>of</strong> the tent for it to be used outdoors,<br />
and resign to dedicate the tent for field work since it is<br />
going to get dinged and smudge no matter how careful<br />
you are.<br />
Simply place the tent over the area on the ground<br />
where the flowers are and start shooting. <strong>The</strong> tents<br />
even come with a Velcro cover for the front (with a slit<br />
for the camera lens) if the wind is trying to get in the<br />
front direction, so you have five sides that are closed<br />
and one side (the bottom) that is open. <strong>The</strong>se light<br />
tents work great for ground work provided you resign<br />
yourself to carting them around in the woods, in addition<br />
to your tripod, camera, lenses, and what-not. But<br />
this is a real solution worth trying if you really want<br />
those good stacked photos.<br />
I even had my daughter sew a skirt on the bottom <strong>of</strong><br />
the light tent so that I could feather it out to further<br />
stop wind from coming in from the bottom.<br />
PHOTO<br />
On the next page is an inexpensive Light Tent that I<br />
have cut the bottom (cut on one <strong>of</strong> the flat sides) out<br />
<strong>of</strong>. I then place the light tent over the subject, as you<br />
can see. Here the subject is the Mullein plant. In this<br />
photo I have partially bent the detachable (velcro)<br />
front panel back, so that you can see into the tent. I<br />
usually just poke the camera lens through the slit in<br />
the front or pull back the velcro from the top and shoot<br />
downward from there. This is my smaller tent. I also<br />
have a 48” tent that kids could play in. I use it to place<br />
over whole sections <strong>of</strong> plants, like in a field so that I<br />
can stop the wind and concentrate on the flowers or<br />
the insects on the flowers, etc. This approach is a little<br />
extreme and cumbersome but it does work well.<br />
Here you see a Nikon D3s on a Gitzo GT2531 tripod,<br />
with a Markins Q3 ballhead, and a Nikon MC-30<br />
remote shutter release. <strong>The</strong>se and the following shots<br />
are kind <strong>of</strong> sloppy, because I was fighting rain that<br />
was only minutes away.<br />
81
Challenges in <strong>Focus</strong> <strong>Stacking</strong><br />
Light Tent setup<br />
82
Challenges in <strong>Focus</strong> <strong>Stacking</strong><br />
Light Tent closer-up<br />
83
Challenges in <strong>Focus</strong> <strong>Stacking</strong><br />
Light Tent when the wind is really bad<br />
84
Challenges in <strong>Focus</strong> <strong>Stacking</strong><br />
Light Tents in the Field<br />
Light Tents fold up flat or can be twisted into a small<br />
round package but as you get to the larger sizes it<br />
becomes more difficult to twist them into their smallest<br />
form. Lets face it, light tents are a hassle to drag<br />
around, but if you live in an area where wind is the default<br />
and not the exception, like Michigan, your choice<br />
is either waiting a long time for the chance to make a<br />
stacked photo or using a light tent. And I mean a long<br />
time.<br />
As mentioned earlier, taking a traditional one-shot<br />
photo is not too much <strong>of</strong> a problem in wind. Just push<br />
up the shutter speed or the aperture, or both. Forget<br />
about getting a stacked photo that day. However, if<br />
you stack photos then wind will seldom let you get<br />
more than a couple <strong>of</strong> shots <strong>of</strong>f before it starts to move<br />
things around within the frame.<br />
Even with a light tent, you have wind. It creeps in<br />
through the bottom <strong>of</strong> the tent, although using a couple<br />
<strong>of</strong> rocks or large sticks to weigh down the sides<br />
can lessen it a bit. Still, if the wind is up and the flower<br />
(or whatever) is delicate and on an attenuated stem,<br />
you are going to find movement and still be waiting for<br />
the wind to die down, although light tents greatly can<br />
speed up an outing, allowing you to get many more<br />
photos on a windy day.<br />
I have 24” and 48” light cubes and usually always<br />
have the smaller one in my car. Using light tents can<br />
mean that I range in a smaller radius from my car than<br />
I otherwise might, but the results are more than worth<br />
it. With care and setup (weighting the sides if the wind<br />
is up), I can shoot fairly large stacks most <strong>of</strong> the time.<br />
Of course, to avoid getting the white sides <strong>of</strong> the tent<br />
in the photo you will have to shoot at some angle,<br />
either from the slit in the front <strong>of</strong> the tent or by pulling<br />
back the Velcro strips along the top <strong>of</strong> the front. If you<br />
can blur the white tent as background, it works well<br />
for some subjects. Larger light tents give you more<br />
freedom in this regard, but are even more awkward to<br />
move around.<br />
I find that using light tents is well worth the extra effort<br />
and hassle involved. And the larger (48”) tent can be<br />
used in a field <strong>of</strong> flowers or plants, placed over an entire<br />
section, allowing you not only to work with plants,<br />
but to remove the wind factor on the top <strong>of</strong> plants (like<br />
Queen Anne’s Lace) and concentrate on the many<br />
interesting insects that are wandering around on the<br />
flower heads. Moving insects AND moving flowers due<br />
to wind usually manage to make any stacked photo<br />
almost impossible, but remove the wind and the insects<br />
may pause long enough to get some depth from<br />
stacking a few shots.<br />
Light Diffusers<br />
Diffusers and reflectors are readily available on<br />
Ebay, B&H, Adorama, and other providers <strong>of</strong> photography<br />
accessories and there are many tutorials on<br />
the Internet as to how to use them. <strong>The</strong>re are gold,<br />
silver, and white reflectors, and usually one type <strong>of</strong><br />
opaque diffuser.<br />
My problem is with the diffusers currently on the<br />
market. While they may be useful in full sun, I find<br />
that for any more delicate sun-shade condition,<br />
they block too much light. For example, in a woods<br />
situation, where some streaming sunlight is coming<br />
through the forest canopy (that is too harsh and<br />
needs to be toned down) the standard diffuser more<br />
or less creates more shade rather than diffuses the<br />
light. Here is a solution:<br />
I bought one <strong>of</strong> the regular diffusers. I use the 22”<br />
round diffuser because I can collapse it and (with<br />
effort) jam it into my coat pocket, which pocket acts<br />
like a carrying case.<br />
I then went to WalMart and picked out a somewhatsheer<br />
fabric that lets a lot more <strong>of</strong> light through than<br />
the original panel. Silk screen material also is perfect.<br />
I stretched this new fabric over the open diffuser<br />
and (temporarily) clamped it in place and then had<br />
my daughter (I can’t sew) sew around the rim, fixing<br />
the new fabric. <strong>The</strong>n, with the new fabric firmly<br />
sewed on, I carefully cut out the original translucent<br />
panel. <strong>The</strong> result is a diffusing panel that is actually<br />
helpful in many situations.<br />
It folds up and fits in my coat pocket or the little<br />
round bag it came in. I also stuff it in a holster-type<br />
camera bag which holds it without any additional<br />
sleeve and pop it out whenever I need it. It screens<br />
and s<strong>of</strong>tens the light so I don’t have glaring patches<br />
<strong>of</strong> sun that blow out the highlights. I prop it up somehow,<br />
by any means I can - sticks, holding it, hanging<br />
it from its one loop from my tripod, etc. This diffuser<br />
acts as a filter to bring down the light to a manageable<br />
level.<br />
85
Modified Light Diffuser<br />
86
Processing <strong>Focus</strong> Stacks<br />
Lightroom and Photoshop<br />
I don’t want to get too technical here, but it might be<br />
useful for you to get a visual idea <strong>of</strong> how your stack <strong>of</strong><br />
photos is processed, so here is a quick run through.<br />
I use adobe Lightroom 2.6 to not only catalog all my<br />
photos but also to develop and touch up photos. It really<br />
is a great program, a comfort to use. But to stack<br />
photos I use Adobe Photoshop CS4. Luckily Adobe<br />
has seen to it that these two programs work seamlessly<br />
together so that I can send two or more photos<br />
from Lightroom to Photoshop and back with no trouble.<br />
I will show you how I do it, but you, <strong>of</strong> course, will<br />
come up with your own favorite methods.<br />
After I input my photos to the Lightroom catalog I go<br />
through them to find the stacks and mark them, so<br />
that I don’t mistake a stacked series <strong>of</strong> photos from<br />
just a standard shot or two. So I go through my new<br />
photos and mark the beginning <strong>of</strong> each stack with a<br />
green border which tells me this is a stack that runs<br />
from the green photo until the next different shot. Here<br />
is a screen shot from lightroom on the next page.<br />
As you can see, near the upper left-hand corner, I<br />
have marked a photo with a green border as the first<br />
in a series <strong>of</strong> four photos. In this case the photo is <strong>of</strong><br />
a dying tree trunk that has been drilled out by one <strong>of</strong><br />
Michigan’s Pileated Woodpecker, a bird with a body<br />
about a foot and a half long!<br />
You can see the stack <strong>of</strong> photos both in the main grid<br />
view and in the loupe view running along the bottom <strong>of</strong><br />
the screen as well. <strong>The</strong>re are some other stacks following<br />
this one that are visible.<br />
Lightroom and Photoshop are the trademarks <strong>of</strong><br />
Abobe S<strong>of</strong>tware, Inc.<br />
Archiving Photos<br />
I take lots <strong>of</strong> photos and their individual size keeps<br />
getting larger, what with sensors with more megapixels,<br />
like the Nikon D3x, etc. What to do with them?<br />
How do I protect them from… whatever?<br />
It is good to have as many copies <strong>of</strong> your photos as<br />
you can manage, and stored in different places at<br />
that. I have my computer set up so that when I copy<br />
a new set <strong>of</strong> photos from a flashcard they are written<br />
simultaneously to two separate hard drives. This is<br />
accomplished through RAID formatting which always<br />
keeps two copies <strong>of</strong> all files, separately. <strong>The</strong>refore, if<br />
one disk goes down, the other (hopefully) is intact. In<br />
addition, I also copy all the files to a third disk for even<br />
more protection.<br />
I use Adobe Lightroom to keep track <strong>of</strong> my photos,<br />
as well as to do most developing tasks, like light-balance,<br />
tone, sharpening, and so on. I store each day’s<br />
photo shoot in a separate folder by date, in the format<br />
“YYYY-MM-DD” so that they can appear sequentially<br />
and be sorted by date.<br />
Lightroom has strong keyword capability and attributes<br />
you can tag a photo with, such as “Keep,” “Reject,”<br />
plus five colors and five star ratings. As for keywords,<br />
you can enter almost anything and find it later. I use<br />
the color, five-star rating, keep & reject attributes all<br />
the time, but tend to fall behind on writing out all the<br />
keywords. I do tag my “Keepers” in red, so a search<br />
for all red-bordered photos let’s me find the most important<br />
ones quickly.<br />
I like to browse through my entire collection from time<br />
to time, just because I <strong>of</strong>ten find photos I have overlooked<br />
for one reason or another that now I have a<br />
use for or can touch up to make them useful.<br />
PC or Mac Computer<br />
I have both a Mac and PC and work with images on<br />
both machines, although I do more video work on my<br />
MacPro and still-photo work on the windows-7 PC.<br />
Both computers can handle 64-bit applications. As for<br />
monitors, I have used two monitors for years and find<br />
the extra room indispensible. Lately, I have switched<br />
to a single 30” monitor.<br />
87
Processing <strong>Focus</strong> Stacks<br />
88
Processing <strong>Focus</strong> Stacks<br />
Lightroom, Step 2<br />
I have selected these four photos to be stacked. Next,<br />
I select the PHOTO tab at the top <strong>of</strong> the screen, scroll<br />
down to the EDIT IN option, and within that option I<br />
select the “Open as Layers in Photoshop” option. This<br />
will automatically send all four photos to Photoshop<br />
where they will appear as consecutive layers, ready<br />
to be processed as a focus stack. Instructions continued<br />
on next two-page spread.<br />
Note: Color Space<br />
Color Space (in a camera or in s<strong>of</strong>tware) sets the<br />
practical limits on how much color can be handled.<br />
<strong>The</strong>re are three main types <strong>of</strong> color space commonly<br />
encountered in cameras and their s<strong>of</strong>tware, sRGB,<br />
AdobeRGB, and ProPhotoRGB. <strong>The</strong> AdobeRGB color<br />
space is wider than the sRGB color space, and the<br />
ProPhotoRGB color space is much wider than the<br />
AdobeRGB color space.<br />
Which color space to use depends on a number <strong>of</strong><br />
considerations including how are you going to use<br />
your finished photos? Most DSLR Cameras <strong>of</strong>fer you<br />
the choice <strong>of</strong> two color spaces, sRGB (web output)<br />
and AdobeRGB (printed color). AdobeRGB has a<br />
broader range <strong>of</strong> color coverage than sRGB, so many<br />
folks use that. However, please note:<br />
If you are going to shoot JPEG in the camera then you<br />
want to set your color space to sRGB. <strong>The</strong> same goes<br />
if you are shooting JPEG and outputting to the web<br />
or a computer; use sRGB. Otherwise, you will have to<br />
convert to sRGB later in the process.<br />
HOWEVER, if you shoot camera-RAW images, you<br />
don’t have to worry or choose a color space ahead <strong>of</strong><br />
time or be concerned what your camera color space is<br />
set to BECAUSE raw images are independent <strong>of</strong> color<br />
space and their color space is automatically assigned<br />
by whichever raw converter (s<strong>of</strong>tware) you use, that<br />
is: whatever color space you set your raw-image converter<br />
to. Repeat: raw images are color-space independent.<br />
As mentioned above, if you are shooting raw then it<br />
does not matter how you set your color space in the<br />
camera BECAUSE your s<strong>of</strong>tware/converter can be<br />
set to whatever color space you want. Right now, the<br />
broadest color space is ProPhotoRGB. Adobe Lightroom<br />
defaults to the ProPhotoRBG color space and<br />
Adobe Photoshop can be set to ProPhotoRGB.<br />
I use ProPhoto RGB and convert to whatever other<br />
color space (sRGB, etc.) when I output images from<br />
the above programs. I set both Adobe Lightroom and<br />
Adobe Photoshop to ProPhotoRGB.<br />
<strong>The</strong> ProPhotoRGB color space is said to resolve 90%<br />
<strong>of</strong> all possible surface colors in the CIE Lab color<br />
space and 100% <strong>of</strong> likely real-world surface colors,<br />
which is saying a lot. <strong>The</strong>refore a combination <strong>of</strong> the<br />
RAW format from the camera and ProPhotoRGB color<br />
space in your s<strong>of</strong>ware is the best available at the moment<br />
and a good argument for not using JPEG compression.<br />
Note: JPEG or Raw Format<br />
Most sophisticated DSLRs <strong>of</strong>fer two output formats,<br />
Raw (native) or .JPG compressed, although almost all<br />
pr<strong>of</strong>essionals that I am familiar with shoot their important<br />
photos using the Raw format. <strong>The</strong> reason for Raw<br />
is that by using the raw format there is much greater<br />
flexibility to adjust your light balance and other important<br />
factors later (like years!) back in the studio, while<br />
with a compressed bit-map format like .JPG, you lose<br />
most <strong>of</strong> that flexibility and may live to regret it. With<br />
.JPG, light-balance factors are fixed forever in that<br />
format, and can only be tweaked a little, so you better<br />
be a skilled photographer and get the shot right in the<br />
first place.<br />
I shoot in raw (native) format at the highest bit rate,<br />
which is 14-bit Raw in the Nikon cameras that I use.<br />
Yes, it uses more space, slows down the computer,<br />
etc., but you get a better photo as a result AND can<br />
dicker with the photo years from now, when some new<br />
development will allow us to pull more from the raw<br />
format than we can now. All the bits and bytes that the<br />
camera saw are there.<br />
If you are a macro or close-up photographer, I would<br />
very sincerely suggest you shoot RAW, because if<br />
you get any good at it, years from now you may really<br />
regret using the .JPG format which loses some <strong>of</strong> your<br />
precious data.<br />
89
Processing <strong>Focus</strong> Stacks<br />
90
Processing <strong>Focus</strong> Stacks<br />
Photoshop Launches Automatically<br />
Photoshop will automatically open and the four photos I selected appear, one above the other, as layers. I then select<br />
all four, and from the EDIT menu, I select “AUTO-ALIGN Layers, which brings up the<br />
Auto-Align Layers dialog box, as you can see on the left.<br />
91
Processing <strong>Focus</strong> Stacks<br />
Auto-Align Dialog Box<br />
Once the dialog box is up, you want to check the AUTO radio button and the GEOMETRIC DISTORTION check box,<br />
as shown here, and hit OK. <strong>The</strong> program will then proceed to align the images in all the layers with one another. Depending<br />
on various considerations, this can take less then a minute to thirty minutes or more. In fact, the program will<br />
even say “Not Responding,” but have patience, wait, and it will return.<br />
92
Processing <strong>Focus</strong> Stacks<br />
Auto-Blend Dialog Box<br />
When the images have been aligned, you will be see that the image may be shaped differently than before. Next, go<br />
back to the EDIT tab at the top <strong>of</strong> the screen and this time select the AUTO-BLEND LAYERS option and make sure<br />
you have checked the STACK LAYERS option and the SEAMELESS TONES AND COLORS option. Press OK. <strong>The</strong><br />
program will now blend all the stacks into a single image. This takes less time than alignment.<br />
93
Processing <strong>Focus</strong> Stacks<br />
Save <strong>The</strong> Stacked Photo<br />
When the layers have been blended and the stacked image is displayed, you want to FLATTEN THE IMAGE, by<br />
chosing that option in the pull-down menuu in the upper-right-hand corner <strong>of</strong> the layers palette.<br />
<strong>The</strong>n, from the FILE menu at the top <strong>of</strong> the page, select SAVE and the finished stacked photo will be automaticall<br />
saved as a .TIFF image on your hard drive and that image will be added to your Lightroom collection. I tag all stacked<br />
photos in red.<br />
94
Examples <strong>of</strong> <strong>Focus</strong> <strong>Stacking</strong><br />
95
Examples <strong>of</strong> <strong>Focus</strong> <strong>Stacking</strong><br />
96
Examples <strong>of</strong> <strong>Focus</strong> <strong>Stacking</strong><br />
97
Examples <strong>of</strong> <strong>Focus</strong> <strong>Stacking</strong><br />
98
Examples <strong>of</strong> <strong>Focus</strong> <strong>Stacking</strong><br />
99
Examples <strong>of</strong> <strong>Focus</strong> <strong>Stacking</strong><br />
100
Examples <strong>of</strong> <strong>Focus</strong> <strong>Stacking</strong><br />
101
Examples <strong>of</strong> <strong>Focus</strong> <strong>Stacking</strong><br />
102
Examples <strong>of</strong> <strong>Focus</strong> <strong>Stacking</strong><br />
103
Examples <strong>of</strong> <strong>Focus</strong> <strong>Stacking</strong><br />
104
Examples <strong>of</strong> <strong>Focus</strong> <strong>Stacking</strong><br />
105
Examples <strong>of</strong> <strong>Focus</strong> <strong>Stacking</strong><br />
106
Examples <strong>of</strong> <strong>Focus</strong> <strong>Stacking</strong><br />
107
Examples <strong>of</strong> <strong>Focus</strong> <strong>Stacking</strong><br />
108
Examples <strong>of</strong> <strong>Focus</strong> <strong>Stacking</strong><br />
109
Examples <strong>of</strong> <strong>Focus</strong> <strong>Stacking</strong><br />
110
Examples <strong>of</strong> <strong>Focus</strong> <strong>Stacking</strong><br />
111
Examples <strong>of</strong> <strong>Focus</strong> <strong>Stacking</strong><br />
112
Examples <strong>of</strong> <strong>Focus</strong> <strong>Stacking</strong><br />
113
Examples <strong>of</strong> <strong>Focus</strong> <strong>Stacking</strong><br />
114
How I Got Into Nature Photography<br />
BY Michael Erlewine<br />
What motivates me in nature photography is probably a little<br />
unusual and I will sketch it out so that you know where I<br />
am coming from. I was a naturalist from the time I was sixyears<br />
old until I discovered how beautiful women are at the<br />
age <strong>of</strong> say sixteen. So I kind <strong>of</strong> segued out <strong>of</strong> nature study<br />
when I was around seventeen. We can perhaps all agree<br />
that nature is serene and beautiful but I am not as sure that<br />
all <strong>of</strong> us are aware that nature is also fierce, a very harsh<br />
mistress.<br />
I find it hard to look nature in the eye. And I usually blink<br />
first, because she never blinks. <strong>The</strong>re is some tough<br />
love there. And while I loved nature, as I grew older, I<br />
also gradually shied away from looking directly at the<br />
harder parts. I find the same problem with Billie Holliday<br />
recordings, my favorite woman singer. Even though I love<br />
her singing, I am not always willing to put myself through the<br />
emotions she brings out in her voice. I can’t go there without<br />
paying the price <strong>of</strong> my full attention and all that entails.<br />
It is the same thing with nature. Nature is so absolutely<br />
direct and not all <strong>of</strong> her story is happy. <strong>The</strong>re is an<br />
enormous amount <strong>of</strong> suffering to be witnessed in nature,<br />
creatures living in fear their entire lives <strong>of</strong> being eaten and<br />
at the same time struggling to find something to eat, and so<br />
on. Nature tells a touching story and I did not always want<br />
to be touched. I was not willing at times to go there and over<br />
the years I kind <strong>of</strong> opted out <strong>of</strong> that kind <strong>of</strong> directness. I was<br />
out <strong>of</strong> shape in that department and like exercise I found it<br />
hard to get back into the rhythm <strong>of</strong> it.<br />
<strong>The</strong>n some years ago I had a very tough personal time,<br />
one that kind <strong>of</strong> popped me out <strong>of</strong> whatever groove or<br />
bubble I was in and I found myself kind <strong>of</strong> waking up in the<br />
middle <strong>of</strong> this personal crisis. Some part <strong>of</strong> me was back<br />
from wherever it had gone to years before. At that time I<br />
was somewhat inconsolable and soon wandered outside <strong>of</strong><br />
whatever box I normally was happy in.<br />
One <strong>of</strong> the places I went was out into nature once again.<br />
Whatever pain I didn’t want to face in nature all those years<br />
was nothing compared to how I was feeling at that time<br />
and before I knew it I was out in the fields and meadows<br />
watching the sun come up every morning. Unless it rained<br />
or something, I believe I saw the sun come up every<br />
morning from late May until it was too cold to go out that<br />
early, sometime in October. And here is what is interesting.<br />
When I went back out into nature, this time I took a camera.<br />
I just happened to. I had been photographing since the late<br />
1950s, but not as intensely as I was about to. Perhaps the<br />
camera was my excuse to get out there, a better reason<br />
than the truth which was that I was desperate at some level.<br />
And I took pictures. Looking at nature real close up was a<br />
good antidote for what I was suffering from. Perhaps it was<br />
the pristine mini worlds that I could see into through a macro<br />
lens, worlds untouched by all in the world that had recently<br />
touched me so painfully.<br />
Anyway the fact <strong>of</strong> the matter is that here I was out in<br />
nature with my eye glued to a lens peering at her truths and<br />
lessons after many years <strong>of</strong> not being able to really look.<br />
Somehow my mind was calmed by what I was seeing and<br />
before long I found myself searching for and learning to use<br />
better and better macro lenses. Yes, it was therapy.<br />
<strong>The</strong> story is actually a bit more complex than I have<br />
described it here and I wrote it all out in two free<br />
e-books for those inquiring minds who really want to<br />
know more. <strong>The</strong> books are “<strong>The</strong> Lama <strong>of</strong> Appearances:<br />
Learning Dharma through Nature” and “Experiences with<br />
Mahamudra: <strong>The</strong> Dharma <strong>of</strong> Meditation.” <strong>The</strong>y can be<br />
found at MacroStop.com. I don’t need to go into those<br />
details now.<br />
I retell this story here to explain to readers why the<br />
resulting nature photographs from my photography were<br />
never the reason I did photography. Some photographers<br />
find this hard to understand, so I present it here.<br />
It was not the resulting photos (stacked or unstacked)<br />
that interested me, but rather the process, the mental<br />
therapy I got out <strong>of</strong> being out there in the meadows and<br />
peering through my lenses at whatever was there. It<br />
was not what I was seeing through the lenses that was<br />
important, but rather the act <strong>of</strong> “seeing” itself. It was all<br />
about the “seeing.” It was about getting my mind right<br />
and about ever-so-carefully setting up and taking these<br />
close-up photographs, holding ever so still for ever so long<br />
until the wind died down or the critter stopped moving,<br />
and then taking one, two, or ten photos without anything<br />
moving whatsoever. This elaborate and slow process did<br />
something to my mind, something clarifying and bright.<br />
So over quite some period <strong>of</strong> time I healed myself not<br />
with pills and potions but with the ritual <strong>of</strong> taking precise<br />
photographs and the mental clarity that came out <strong>of</strong> that<br />
process. It was the “process” not the product that was<br />
important and it has remained so to this day. For the<br />
longest time I hardly (sometimes never) looked at the<br />
resulting photos or, if so, just long enough to get some<br />
bearings on how I might perfect the process. Again, it was<br />
the process and the “seeing” that was satisfying.<br />
Over the years the resulting photos also happened to<br />
get better but it is only recently that I have even begun or<br />
bothered finishing these photos so that I might show them<br />
to others. After all, there are probably more than 125,000<br />
<strong>of</strong> them at this point.<br />
I did become a better photographer through the process<br />
and the patience required in macro photography but<br />
most <strong>of</strong> all I became a much clearer person in the mind.<br />
And all <strong>of</strong> this time I was more and more aware <strong>of</strong> what<br />
nature is all about. And as the Buddhists say, the laws <strong>of</strong><br />
nature accurately reflect the dharma, the path to clarity<br />
and awareness set out by the Buddha. So, I was learning<br />
dharma during all this time as well. This is a synopsis <strong>of</strong><br />
my story and what macro photography for me is all about.<br />
Unsolicited Advice<br />
What follows are comments, notes, suggestions,<br />
warnings, etc. related to photography, macro and closeup<br />
photography, and focus stacking. <strong>The</strong>y are roughly<br />
organized and are intended to give you some information<br />
on commonly asked questions and areas where that I feel<br />
should be pointed out. Equipment<br />
Good Lenses – When I was just starting out and did not<br />
want to spend any money on a hobby that I might not<br />
stick with I was ingenious at rationalizing why I should buy<br />
cheap lenses. All I did was waste money because I ended<br />
up getting the expensive lenses anyway. <strong>The</strong> lens is “the<br />
thing” my friends, so get a good one. Good lenses are<br />
worth their weight in money.<br />
115
Tripod – You need one for focus stacking and a good one<br />
at that. I have a whole bunch <strong>of</strong> lousy, cheap tripods I can’t<br />
even sell that I bought trying to avoid buying one good<br />
tripod. A light and strong carbon-fiber tripod is a treasure.<br />
I use Gitzo carbon-fiber tripods, three-section (not four),<br />
and the model I use is the GT2531 and it weighs 3 lbs. and<br />
costs around $500. Wirth every penny.<br />
Ball Heads – Between your tripod and your camera you<br />
need some kind <strong>of</strong> connecting head. A good ball head with<br />
Arca-style quick-release clamp is superior to anything else<br />
I have tried. Markins make an inexpensive and good one<br />
(Q3) for about $260 on Ebay. <strong>The</strong> BH-40 by Really Right<br />
Stuff is a more expensive ball head.<br />
Quick Release – When you buy a ball head, make sure to<br />
get one that has a built-in quick release clamp compatible<br />
with the dovetail style plates (Arca). This is important<br />
because you need to be able to attach or detach the<br />
camera in a second. Otherwise you will be thumb-screwing<br />
the camera to the head and sooner than later the threads<br />
will get ruined on the camera and you will be in for a big<br />
expense. Also: I would avoid the Bogen/Manfrotto type<br />
quick release system.<br />
L-Bracket -- A quick-release L-Bracket for the camera<br />
body for macro shooting is essential. Otherwise you are<br />
stuck with just one view. I shoot most <strong>of</strong> my photos with<br />
the camera rotated so that the long side <strong>of</strong> the photo is the<br />
vertical but I need the ability to change to the horizontal<br />
view at a moment’s notice. I use Kirk Enterprises for all my<br />
plates.<br />
My Standard Kit – I travel light. Aside from my camera and<br />
tripod, I usually take only one extra lens in a very small case<br />
hung over my shoulder, if that. Mostly I only take the lens on<br />
the camera. I might stuff a collapsible diffuser in my pocket.<br />
That’s it.<br />
Outside<br />
Direct Sun - Direct sun is very difficult to photograph in.<br />
Once the sun is up high in the sky, head for the shade or get<br />
out the diffusers because your photos will just not work out.<br />
Some part <strong>of</strong> your subject will catch or reflect the light and<br />
blow out that area leaving you with a photo that is both too<br />
dark and too light – one or the other. <strong>The</strong> hot spots will be<br />
hard to manage.<br />
High-Haze Sky – Slightly overcast (hazy) skies are<br />
probably the best for photographing you can get. Grab your<br />
camera and head outside. With no direct sun, the whole sky<br />
is your diffuser. You can’t beat it because there are no hot<br />
spots. I am not talking here about really cloudy days, but<br />
just bright hazy skies.<br />
Sun and Shade -- Shadows mottled with sun rays make<br />
for difficult photography, like a forest canopy with rays <strong>of</strong><br />
sunlight. It can be very attractive, but those rays <strong>of</strong> sun blow<br />
out easily and conflict with all that shade. Better to have a<br />
fine diffuser at these times to filter the sun a bit and bring it<br />
down to being less stark.<br />
Flash – I tried it (and a lot) and didn’t like what it did to<br />
the photos and the subjects. I know it is the way to go for<br />
certain kinds <strong>of</strong> definition, but I don’t need it at the expense<br />
<strong>of</strong> the alien-flash look. If you must use flash, use a tiny<br />
flash like the Nikon SB-400 and on top <strong>of</strong> that use a snapon<br />
diffuser and even then rotate the flash upward and not<br />
straight at the subject. This can work. Natural light is better<br />
than any flash device. So I avoid flash if at all possible and<br />
if not possible, I s<strong>of</strong>ten it by using a diffuser.<br />
When You Buy a Camera Be Sure it Has:<br />
Histograms – Since most macro work requires manual<br />
focusing and many <strong>of</strong> the really good lenses don’t synch<br />
with your in-camera light metering, it is essential to<br />
purchase a camera with a built-in histogram. I consider<br />
this essential. Read more about histograms here:<br />
http://www.bythom.com/histogram.htm<br />
Mirror Lock-Up – I have detailed this elsewhere, but I<br />
would not buy a camera without the ability to lock-up the<br />
mirror and thus remove the excess vibrations when the<br />
mirror snaps up out <strong>of</strong> the way <strong>of</strong> the lens viewfinder. It<br />
means I have to click the shutter, the mirror goes up, wait<br />
for the vibrations to die out, and click it again, but it makes<br />
a real difference. <strong>Stacking</strong> focus means: everything has to<br />
be motionless.<br />
Remote Release Trigger – Absolutely essential. You can’t<br />
touch the release button on the camera without affecting<br />
the shot, however slightly. Make sure your camera can<br />
take a remote release, either tethered (cord) or untethered<br />
(infrared). Don’t leave home without it.<br />
Depth-<strong>of</strong>-Field Preview – Not available on all cameras,<br />
but I would not buy one without it. Otherwise you have no<br />
idea <strong>of</strong> how much depth <strong>of</strong> field you have. <strong>The</strong> best Nikon<br />
and Canon cameras have this.<br />
Lens <strong>Focus</strong> Throw - A lens with a focus throw greater<br />
than 360-degrees is preferred. With focus stacking you<br />
want to take many photos incrementally. If the focus<br />
throw (turn <strong>of</strong> the focus ring) is too short, it is difficult to<br />
micro-inch forward. My favorite lens has a 720-degree<br />
focus throw (two turns <strong>of</strong> the focus ring) and that is a real<br />
pleasure to use. For action-sports it would be a liability –<br />
take too long. For macro it is perfection.<br />
APO Lenses - APO (apochromatic) lens are rare and<br />
expensive, but they provide better color by not having<br />
chromatic aberration and other anomalies. <strong>The</strong> best APO<br />
lenses I know for macro use are the Voigtlander 125mm<br />
f/2.5 APO-Lanthar macro, the Leica 100mm f/2.8 Elmarit-R<br />
APO macro, and the Coastal Optics 60 mm f/4 APO macro<br />
lens. All <strong>of</strong> these are very expensive but very nice<br />
Accessories<br />
UV Filters – I use clear or UV filters to protect my lenses<br />
although I know they must degrade the quality <strong>of</strong> the<br />
lenses, however minutely.<br />
Lens Hoods – Most lenses come with a hood and you<br />
need them to keep extraneous light out, so by all means<br />
use them and if you have a lens without one, track the<br />
appropriate lens hood down and buy it. <strong>The</strong>y are there for<br />
a purpose.<br />
Extra Batteries – I am a little obsessive about having<br />
extra batteries for my camera or whatever. I try to carry<br />
an extra one in the car but seldom on my person when I<br />
photograph. I seldom shoot more than several hundred<br />
photos at one shooting so the new Lithium batteries are<br />
enough for one outing.<br />
Close-up Adaptors – <strong>The</strong>se are little lenses that screw<br />
on the front <strong>of</strong> macro lenses to give them even more<br />
close-up magnification. I have them but don’t use them.<br />
116
<strong>The</strong>y may give you added magnification but for the most<br />
part they mess with your good glass. If you do get them get<br />
only diopters which have two elements (not one). <strong>The</strong>re are<br />
scads <strong>of</strong> inexpensive one-element diopters on the market<br />
and they are not worth anything. <strong>The</strong> make your good<br />
lenses look crappy. I have all the good diopters and never<br />
use them. Almost never. Occasionally I fool myself into<br />
experimenting just to remind myself why I don’t use them.<br />
Polarizing Filter – Useful for darkening skies, reflections<br />
on water or leaves, etc. I have them but seldom if ever use<br />
them because I am doing close-up and macro, so not sky,<br />
shiny tree leaves, open water, etc.<br />
Graduated Filter – I use the graduated filter in Adobe<br />
Lightroom for this instead <strong>of</strong> a filter you screw into the front<br />
<strong>of</strong> your lens. For my purposes that is good enough.<br />
Memory Cards – I like to have lots <strong>of</strong> these and big ones.<br />
I mostly use Lexar and SanDisk, although I have some<br />
Delkin (because they were inexpensive). All work well. My<br />
little Nikon D7000 has two 64GB SD cards in it at all times.<br />
That’s a lot <strong>of</strong> photos.<br />
Extension Tubes – I have scads <strong>of</strong> them but seldom use<br />
them. <strong>The</strong>y are used to give you greater magnification for<br />
a given lens but they always suck light out <strong>of</strong> your shot<br />
anytime you use them and I seldom feel it is worth it. In<br />
other words, if you have a f/2.8 lens and add an extension<br />
tube between the lens and the camera body, you will<br />
get greater magnification but lose one or more f-stops.<br />
Suddenly you have an f/2.8 lens that now is a f/3.5 lens or<br />
whatever f-stop. I seldom use them and am not happy with<br />
the results when I do.<br />
Teleconverters – You can get a teleconverter lens that<br />
is placed between your lens and the camera body that<br />
will give you 1x or even 2x magnification. If you put a<br />
2x teleconverter on a 200mm lens, you instantly have a<br />
400mm lens. However, you lose light, meaning suddenly<br />
your widest aperture for that lens jumps from f/2.8 to f/3.5<br />
or higher. I have these, but every time I use them I swear I<br />
will never use them again. It is very, very difficult to improve<br />
on a lens just as it is, which is why the lens was made just<br />
that way in the first place – optimum. Put anything on the<br />
front or back <strong>of</strong> it and you are (IMO) just taking a good or<br />
great lens and turning it into an average (or worse) a poor<br />
lens. I seldom ever, ever use one and don’t suggest them.<br />
Of course, they are not for macro work but for distance<br />
photography. If I was shooting birds I would probably have<br />
to use them.<br />
Neutral Density Filters – <strong>The</strong>se are used for a variety <strong>of</strong><br />
reason like adding blur or being able to use a wider aperture<br />
and still lesson diffraction. I don’t use them and/or know<br />
much about them.<br />
Gray Card – Can be useful for setting white balance on<br />
site but I seldom bring one along. Instead I do this in Adobe<br />
Lightroom. However, for very exact color work in the studio<br />
a Gretag Macbeth ColorChecker Passport system is what I<br />
use. In the field I seldom bring one along. I sometimes do.<br />
<strong>Focus</strong>ing Rail – Many macro photographers prefer to stack<br />
photos working with a focusing rail rather than turn the focus<br />
ring on the lens. Either way can produce good stacked<br />
photos. Using a focusing rail you mount your camera on<br />
the rail, the rail on your tripod, and by turning little geared<br />
wheels incrementally move your camera closer or farther<br />
from your subject, taking photos as you move along.<br />
Bellows – Lenses can be mounted on a bellows which<br />
in turn is mounted on a focusing rail for very close macro<br />
work, usually in the studio. Special bellow lenses are <strong>of</strong>ten<br />
(and usually) used. <strong>The</strong>y are similar to the old lenses used<br />
in enlargers back in the days <strong>of</strong> film. I am not going into<br />
this here, but some <strong>of</strong> you may want to learn about them.<br />
Bellows are used mostly for ultra-close macro work. I<br />
seldom use them.<br />
Diffusers - A simple light diffuser can be very useful.<br />
Most on the market are too opaque for my taste, so I buy<br />
a cheap one, tear out the center, and sew in something<br />
that lets more light through. I go to walmart and pick some<br />
gauzy white fabric. All I want to do is cut back the strong<br />
sunlight a bit not block all <strong>of</strong> it.<br />
Reflectors - In addition to diffusers, there are reflectors<br />
that reflect light onto your subject. Diffusers allow light<br />
to pass through them and you hold them in between the<br />
subject and the light source. Reflectors are held <strong>of</strong>f at<br />
some angle to reflect light on the subject. I have tons <strong>of</strong><br />
them but I mostly use them for video studio work. <strong>The</strong>y<br />
can be helpful outdoors in taking macro shots where you<br />
are in the shade and trying to get more light on whatever<br />
you are photographing.<br />
Other Stuff<br />
<strong>Stacking</strong> Live Critters - Live critters do sometimes<br />
hold still long enough for stacking. Spiders, bees in the<br />
early morning, you would be surprised. Ants? Not likely.<br />
Butterflies yes and definitely dragonflies. Try for it. You will<br />
be surprised what even a two-shot stack will produce in<br />
terms <strong>of</strong> greater focus depth.<br />
Dust Bunnies – Particles <strong>of</strong> dust, sticky pollen, and<br />
whatnot somewhere worm their way inside your camera<br />
and cling to your sensor. <strong>The</strong> results are little persistent<br />
spots on each and every photo you take. This is<br />
particularly bad when focus stacking because as you focus<br />
closer in that little dust-bunny spot becomes a long line<br />
on the finished stack photo or a bunch <strong>of</strong> lines which can<br />
be hard to remove. You must keep your sensor clean for<br />
focus stacking.<br />
Sensor Cleaning – This is the ugliest part <strong>of</strong> digital<br />
camera work but you have to do it. <strong>The</strong>re are different<br />
levels <strong>of</strong> cleaning the sensor. On my Nikon cameras I<br />
have to lock the mirror up, take <strong>of</strong>f the lens, and look<br />
inside. Behind where the mirror was (before it was locked<br />
up) is the sensor actually covered by a Lithium Niobate<br />
filter which is pretty tough and does not scratch easily. Still<br />
doing anything with the sensor requires care and can be<br />
nerve wracking.<br />
For beginners (and occasionally for any <strong>of</strong> us) cleaning<br />
the sensor is not only difficult but <strong>of</strong>ten fraught with worry<br />
about damaging the camera’s sensor. It is no fun at all.<br />
<strong>The</strong> single most-important tool for cleaning the sensor<br />
is some way to know if you have it clean. <strong>The</strong> traditional<br />
way is to go outside, point the camera/lens at the sky<br />
and take a photo. <strong>The</strong>n get the photo <strong>of</strong>f the card, put it<br />
in Photoshop (or somewhere), expand the photo, and<br />
minutely inspect it for dust, what are called “dust bunnies.”<br />
This is a horrible method and can take a very long time,<br />
going outside and in, etc. It is easy to spend an hour doing<br />
this if you fail to remove the dust you can’t see in any way<br />
except as describe above.<br />
<strong>The</strong> best money I EVER SPENT was to buy a BriteVue<br />
117
Quasar Sensor Loupe which costs a whopping $88. You can<br />
get them from VisibleDust. This is a 7x round magnifier that<br />
fits over your open lens hole (when the lens is <strong>of</strong>f) and is lit<br />
by six bright LED lights. By looking through it you can easily<br />
see every speck <strong>of</strong> dust on the sensor. No more taking<br />
photos endlessly. If you value peace <strong>of</strong> mind and don’t<br />
want to be ritually humiliated by the previously-mentioned<br />
process, just buy one. I know it is expensive, but you won’t<br />
regret it. That said, here in general is what has to be done<br />
to clean a sensor. Please refer to your camera manual for<br />
exact details.<br />
<strong>The</strong> first step is to place the LED sensor loupe on the<br />
camera and look inside. What is there? Is it a piece <strong>of</strong> hair,<br />
tiny dust bunnies, or a gooey piece <strong>of</strong> pollen? With the LED<br />
loupe you can see it all.<br />
<strong>The</strong> next step is to take a special hand blower and blow<br />
air on the sensor to remove any dust particles that can be<br />
removed. Be sure to hold the camera with the lens-hole<br />
pointing to the ground so the dust stirred up by the blower<br />
will float down and out <strong>of</strong> the camera. <strong>The</strong>n look again at the<br />
sensor.<br />
After blowing a few times, if there is still something<br />
there then try a special sensor brush (I use the one by<br />
VisibleDust, called the <strong>Art</strong>ic Butterfly). <strong>The</strong>se batteryoperated<br />
brushes whirl around and become charged so they<br />
pick up dust. Very carefully brush the sensor WITHOUT<br />
going beyond the sensor and touching the sides, which can<br />
have grease. If you pick up the grease and wipe it on the<br />
sensor you are in for real problems. Using the loupe, see if<br />
this did the trick.<br />
And the last and most scary resort is to use a special fluid<br />
and a special swab to actually clean the sensor manually.<br />
Again, I use swabs and fluid by Visible Dust made for my<br />
Nikon cameras. This may have to be done repeatedly and it<br />
is very tricky. Too little fluid and you don’t get it all, too much<br />
and it leaves a residue. No fun at all folks.<br />
If all <strong>of</strong> the above do not work, you will have to send the<br />
camera to the manufacturer. <strong>The</strong> above is a very general<br />
description <strong>of</strong> the process and is not definitive. You must<br />
refer to your camera manual for precise instructions. I<br />
cannot be responsible for errors you might make in attempts<br />
to clean your sensor. Use the procedures listed above<br />
at your own risk. Before doing anything please read this<br />
excellent article on sensor cleaning by expert photographer<br />
Thom Hogan:<br />
http://www.bythom.com/cleaning.htm<br />
Shower Cap – Buy one <strong>of</strong> those inexpensive plastic shower<br />
caps with an elastic band in them for rain protection for<br />
your camera. <strong>The</strong>y take up almost no space and are totally<br />
useful if your camera and lenses get caught in a rainstorm.<br />
Just put them over the camera and lens while you get wet.<br />
You do not want to get your camera and lenses soaked.<br />
Period.<br />
Camera Vests – I have them but don’t use them. If I<br />
need that many pockets I am taking too much stuff with<br />
me. Walking around with a zillion pockets full <strong>of</strong> stuff is<br />
something I have done plenty <strong>of</strong> in third-world countries<br />
where if you don’t carry everything, it gets stolen. Pocketloaded<br />
vests are no fun and I really like to travel ultra-light.<br />
Photo S<strong>of</strong>tware - We could write a book about photography<br />
s<strong>of</strong>tware and many people have. All I am going to do here is<br />
briefly tell you what I use. <strong>The</strong>re are many simple programs<br />
for processing digital photos and Adobe Elements is<br />
one that will do quite a lot and is inexpensive. However,<br />
most photographers use Adobe Photoshop and/or Adobe<br />
Lightroom.<br />
I use Adobe Lightroom 3.0 and it is far easier to use than<br />
Photoshop plus it also allows me to catalog and keep track<br />
<strong>of</strong> all my photos. Compared to Lightroom Photoshop is<br />
a lot more expensive and difficult to learn, so I suggest<br />
you get Lightroom. However, and I am sure Adobe<br />
planned it this way, there are some tasks that you can’t<br />
do in Lightroom and for which you need Photoshop or at<br />
least Adobe Elements. If you are on a budget, just get<br />
Lightroom and Elements. That will do you. And: you will<br />
love Adobe Lightroom. It is intuitive and adjusting photos<br />
in various ways is easy.<br />
<strong>Focus</strong>ing Rails - I do use focus rails in the studio but<br />
seldom outside because they are just one more thing to<br />
drag along and the focus ring works well enough for me. If<br />
you do buy a rail, get a good one. Read about them. Most<br />
<strong>of</strong> them IMO suck. Nov<strong>of</strong>lex <strong>Focus</strong>ing Rail Mini is a good<br />
one and Minolta (if you can find an old one) made a solid<br />
and really well-made rail.<br />
Tripod Cleaning – I have several tripods but I primarily<br />
use one for dry work and one for wet work (ponds,<br />
swamps, etc.). <strong>The</strong> wet tripod has to be taken apart and<br />
carefully cleaned and dried every so <strong>of</strong>ten, and at the end<br />
<strong>of</strong> the season.<br />
Manual Photography – I don’t do close-up or macro on<br />
any other setting other than “Manual.” It takes only a short<br />
time to adjust to doing everything manually and after that<br />
adjustment I would never go back. I use “Program Mode”<br />
for parties and anywhere I need quick, auto-focus results.<br />
Otherwise, I use only manual. I set my own aperture<br />
and shutter speed and get better results, the results I<br />
want. Turn the dial to manual and leave it there. Manual<br />
Mode requires setting aperture and shutter speed (and<br />
ISO), taking a photo, looking at the histogram, and either<br />
keeping that photo or deleting it, adjusting the settings<br />
further, and taking another photo. This is the way to go.<br />
ISO – ISO dictates how your camera behaves in low light<br />
– how grainy things look. I keep my ISO as low as possible<br />
even though I have cameras that can handle very-low light<br />
levels like the Nikon D3s. If possible I have my ISO setting<br />
at 100 or 200 ISO. This means I have to sometimes use<br />
long shutter speeds but if I am doing still life, so who<br />
cares. If I am shooting moving critters, I adjust the ISO<br />
upward as needed.<br />
Be Ready To:<br />
Get Wet - Be ready to get wet and not worry about it.<br />
Especially if you are out in the dew and fields early in the<br />
morning, you are going to get really wet or you are not<br />
doing your job. Sometimes I wear hip boots in the field to<br />
stay dry. Most macro work requires being on your knees or<br />
lower, so just accept it. I routinely get soaked out there in<br />
the dew.<br />
Get Dirty - Be ready to get dirty. It is nearly impossible to<br />
assume all the positions a macro photographer has to take<br />
on and not get anything on you. You are going to get dirty.<br />
So what? My family is used to seeing me walking around<br />
with dirt residue on my knees from kneeling here and<br />
there.<br />
Get Exercise – Macro photography is some <strong>of</strong> the best<br />
118
exercise possible because you are kneeling down, getting<br />
up, kneeling down, dozens or hundreds <strong>of</strong> times and it is<br />
all great exercise for your midsection especially. Best way<br />
to lose weight I know and still have fun. As I come across<br />
great subjects I am willing to get down again and again and<br />
hardly notice it, something an exercise program could not<br />
get you to do.<br />
Get Cold - Be ready to get cold. Even summer mornings<br />
can be cold. Spring and fall mornings in the field can be<br />
very chilly. If the sun is out I start out cold and gradually<br />
warm up. <strong>The</strong> warmth <strong>of</strong> the rising sun is most welcome.<br />
Things to Wear<br />
Waterpro<strong>of</strong> Boots - I need them and the Canadians make<br />
the best kind. Up in Canada they are serious about zipper<br />
ankle boots and they make them warm and waterpro<strong>of</strong>.<br />
Hip Boots – I use hip boots for streams, ponds, and<br />
swamps and also sometimes for wet grass in the early<br />
morning meadows. I can kneel in them and still not get wet.<br />
<strong>The</strong>y are kind <strong>of</strong> cumbersome but sometimes it is just too<br />
cold to get soaked.<br />
Running Shoes – In warm weather I use a pair <strong>of</strong> the<br />
lightest and most-breathable running shoes I can find and<br />
sometimes just let them get soaked. <strong>The</strong>y dry quickly.<br />
Pants – I find the ExOfficio superlight pants can get soaking<br />
wet and be almost dry twenty minutes later. I get wet a lot in<br />
the summer.<br />
Clothes - Wear old comfortable clothes, just slightly less<br />
than what you need because you warm up. Include a floppy<br />
hat to protect the ears if in full sun. And footwear to season,<br />
but light, and waterpro<strong>of</strong>. I usually wear a light synthetic<br />
down vest that I can take <strong>of</strong>f if necessary.<br />
Hats – In winter I use the old wool Navy Watch hats so that<br />
I can get my eye to the viewfinder. In summer I either use a<br />
baseball cap which I wear backward when photographing or<br />
a big (ventilated) loose floppy hat that protects my ears from<br />
too much sun.<br />
Mosquito Netting - As the season grows longer and I still<br />
want to get into the deeper danker woods, I carry mosquito<br />
netting that goes under my hat and covers my face and<br />
neck. Any sports store has them for almost nothing.<br />
Travel Light - Pack the car with stuff, but outside the<br />
car, travel very light: a camera, ball head, tripod, lens<br />
and maybe one extra lens and on too-bright days a small<br />
collapsible diffuser. That’s it. I don’t carry food, water, etc.<br />
Sometimes a cell phone if I am going to some strange<br />
place. I seldom get more than half a mile from the car. I<br />
have my water in the car.<br />
119
In a Few Words.... the Key.<br />
My Key to Taking Good Photos<br />
<strong>The</strong> poet Gerard Manley Hopkins came up with a concept<br />
that struck me as true. He even made up his own<br />
word to describe it, “inscape.” Inscape was to Hopkins<br />
an insight or path into the eternal or beautiful, literally<br />
the way or sign <strong>of</strong> the beautiful in the world around us.<br />
Let me explain.<br />
I look forward to my trips out into the fields and woods.<br />
<strong>The</strong>y <strong>of</strong>fer me a chance to get my head together, to<br />
relax from the day-to-day grind <strong>of</strong> running a business,<br />
and generally to relax a bit. This is not to say that just<br />
going outside and walking in nature means that I am<br />
instantly relaxed. That usually takes time.<br />
It is the same with taking photos. In the first ten minutes<br />
<strong>of</strong> a photo shoot I <strong>of</strong>ten don’t see all that much to<br />
photograph. This too takes time, time for me to slow<br />
down, open up, and ‘see’, and let the natural beauty<br />
all around me in. It could be that I am still filled with<br />
all the workaday-world thoughts, the things I have to<br />
do, problems, and what-have-you. It takes time for my<br />
mind to relax and let go <strong>of</strong> its constant chatter. This<br />
day-to-day endless worry and thinking affects my photography.<br />
And here is where the word ‘inscape’ comes<br />
in.<br />
As I get out there and wander through the fields or<br />
wherever, I gradually start to slow down and begin to<br />
see things that are beautiful, scenes that I might actually<br />
want to photograph. Slowly my view <strong>of</strong> the natural<br />
world around me starts to open up again, and I begin<br />
to experience things differently. I begin to ‘see’. It<br />
takes time and usually does not happen all at once.<br />
This little pattern <strong>of</strong> leaves over here or the way the<br />
light comes through the forest canopy grabs me just a<br />
little bit and the chatter <strong>of</strong> my mind pauses and begins<br />
to slow down. As I walk along, some little thing<br />
or scene appears beautiful to me; I am touched by it,<br />
however lightly at first. I gradually get distracted from<br />
my daily distractions and begin to center.<br />
<strong>The</strong>se little moments are ‘inscapes’, ways out <strong>of</strong> my<br />
mundane world and into the beauty <strong>of</strong> nature or, more<br />
accurately, back into the state <strong>of</strong> my own mind or being.<br />
As I take my time, I am able to see the beauty in<br />
things once again, and what I am seeing suddenly<br />
seems worth photographing. Like most <strong>of</strong> us, I photograph<br />
what catches my interest, what I find beautiful<br />
or worthy in the world around me.<br />
<strong>The</strong>se inscapes are signals that catch my attention,<br />
and they flag me down on my busy way forward to<br />
nowhere-in-particular. <strong>The</strong>se moments and signs<br />
are how I stop going nowhere and manage to almost<br />
miraculously arrive somewhere once again, perhaps<br />
only at my own peace <strong>of</strong> mind. This is one <strong>of</strong> the functions<br />
<strong>of</strong> the beautiful, to catch us in the turmoil <strong>of</strong> life,<br />
flag us down, and induce us to pull over and take a<br />
moment <strong>of</strong> rest - some time out. <strong>The</strong>se moments <strong>of</strong><br />
inscape are different on different days and different<br />
for different people. <strong>The</strong>y represent the clues or signs<br />
that catch our attention and show us the way into the<br />
beauty <strong>of</strong> the natural world, actually the beauty <strong>of</strong><br />
our own mind. Another way <strong>of</strong> saying this might be:<br />
what is beauty actually? What happens when we see<br />
something beautiful?<br />
Beauty is not simply somewhere out there in nature<br />
waiting to be found, but always here within us, locked<br />
within us, we who are seeing this nature. Only we can<br />
see the beautiful. Beauty breaks down the rush <strong>of</strong> the<br />
everyday world and opens our heart a wee bit, making<br />
us vulnerable once again, more open to experience<br />
and input.<br />
Through the natural beauty outside we go inside and<br />
experience the inner beauty <strong>of</strong> things, which is none<br />
other than our own inner beauty. That is what beauty<br />
is for, to be touched on, seen, so that we find once<br />
again the beauty within our own hearts that we may<br />
have lost through the distractions <strong>of</strong> our daily life. We<br />
forgot. We look outside in nature to see in here, to see<br />
into our own heart once again.<br />
We can be sensitive to beauty in our photography. I<br />
would hate to tell you how many photographs I have<br />
<strong>of</strong> this or that butterfly or critter that are perfectly good<br />
photographs, but are empty <strong>of</strong> magic or meaning.<br />
<strong>The</strong>y are well lit, well composed, and have everything<br />
that makes a good photograph except that ‘magic’<br />
that keys or excites me. Instead, they are ‘pictures’ <strong>of</strong><br />
a butterfly, but they have not captured any essence<br />
<strong>of</strong> anything. <strong>The</strong>y might as well be in a field guide –<br />
snapshots in time with no meaning.<br />
<strong>The</strong> reason for this (so I tell myself) is because they<br />
just happened to be there, photographic opportunities.<br />
I saw them and I took a photograph, but at the time<br />
they did not instill or strike any particular beauty in me.<br />
This, to me, is “gotcha” photography, taking a photo<br />
because I can, not because I saw beauty in it or was<br />
moved to do so. <strong>The</strong>re was no inscape moment, no<br />
moment <strong>of</strong> vision – snapshots only.<br />
I find that it really worth paying attention to what<br />
strikes me as beautiful or meaningful and photograph<br />
that, rather than just photographing the Grand Canyon<br />
because it is there or I am there. A lasting photograph,<br />
in my opinion, requires more <strong>of</strong> me than that, by definition.<br />
It has to mean something to me and for that<br />
to happen I need to actually be moved or inspired.<br />
Photographs that have special meaning for me usually<br />
have some form <strong>of</strong> inscape into a special moment that<br />
inspires me to capture the scene in a photo.<br />
We can wander for miles looking for something to<br />
photograph, chasing down this or that butterfly or animal…<br />
searching. Or, we can slow down and let nature<br />
herself show us the signs, the inscapes through which<br />
120
In a Few Words.... the Key.<br />
we can relax and begin to ‘see’ photographically once<br />
again. We can listen to our own intuition. This process<br />
<strong>of</strong> inscape, <strong>of</strong> insight into the sublime in nature (the<br />
sublime within us) I find to be the key to good photographs<br />
and to creating photographs that are real<br />
keepers, at least in my mind. If we don’t touch our<br />
own inner self in our work, we touch no one at all, but<br />
when we are touched by a moment, I find that others<br />
also feel this. Touch one, touch all.<br />
Michael Erlewine<br />
Michael@Erlewine.net<br />
121
About the Author<br />
Michael Erlewine<br />
Archivist <strong>of</strong> Popular Culture Michael Erlewine<br />
is a well-known entrepreneur, the founder<br />
and creator <strong>of</strong> many large web sites including<br />
the All-Music Guide (allmusic.com), All-Movie<br />
Guide (allmovie. com), All-Game Guide (allgame.com),<br />
<strong>Matrix</strong> S<strong>of</strong>tware (AstrologyS<strong>of</strong>tware.com),<br />
AstrologyLand.com, MacroStop,<br />
ACTastrology.com, StarTypes.com, Classic-<br />
Posters.com, MichaelErlewine.com, and others.<br />
Erlewine was very active in the folk scene in<br />
the late 1950s and 1960s, especially in the<br />
Ann Arbor area, which included traveling with<br />
Bob Dylan (hitchhiking) in 1961. Later, as leader<br />
<strong>of</strong> the influential Prime Movers Blues Band<br />
(Iggy Pop was the drummer), Erlewine played<br />
a wide variety <strong>of</strong> venues, including the Fillmore<br />
Auditorium in San Francisco (during the “Summer<br />
<strong>of</strong> Love” in 1967) where his band opened<br />
for “Cream” during their first U.S. tour.<br />
Erlewine was instrumental in the landmark<br />
Ann Arbor Blues Festivals <strong>of</strong> 1969 and 1970<br />
as well as the Ann Arbor Blues & Jazz Festivals<br />
in 1972 and 1973, where he did audio<br />
and video interviews <strong>of</strong> almost all performers.<br />
This led to his becoming interested in archiving<br />
popular culture and founding the All-Music<br />
Guide (AMG), which today is the largest must<br />
review site on the planet. He did the same for<br />
film, video games, and rock and roll posters.<br />
Next to Micros<strong>of</strong>t, <strong>Matrix</strong> Astrological S<strong>of</strong>tware<br />
(founded by Erlewine) is the oldest s<strong>of</strong>tware<br />
company on the Internet.<br />
Erlewine still owns and runs the company today,<br />
which is located in Big Rapids, Michigan.<br />
Erlewine is also very active in Tibetan Buddhism<br />
and Macro Photography.<br />
Photo Equipment In my work, I generally use<br />
the Nikon D3x, D3s, and D7000 cameras, with<br />
the Voigtlander 125mm 2.5 APO-Lanthar, the<br />
Coastal Optics 60mm f/4 APO lenses, and a<br />
Gitzo T2531 carbon-fiber tripod, with a Markins<br />
Q2 ball head. As for camera settings, I tend to<br />
shoot around f/11 at whatever shutter speed<br />
will bring down the ISO to 200 or so. -- Michael<br />
Erlewine<br />
Questions and comments can be addressed<br />
to Michael@Erlewine.net and there are other<br />
free books and PDF downloads at: http://www.<br />
MacroStop.com.<br />
You are free to distribute this to anyone who<br />
might enjoy it. No fee may be charged.<br />
Other books by Michael Erlewine here:<br />
http://astrologys<strong>of</strong>tware.com/books/index.<br />
asp?orig=<br />
122