- Page 1:
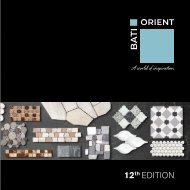
ANNIVERSARY EDITION 11 th EDITION
- Page 4 and 5:
Our planet has so much to offer 2
- Page 6 and 7:
NEW LOGO Bati Orient USA is introdu
- Page 8 and 9:
6
- Page 10 and 11:
Index Ref. Page Treatment Size Weig
- Page 12 and 13:
Ref. Page Treatment Size Weight per
- Page 14 and 15:
Ref. Page Treatment Size Weight per
- Page 16 and 17:
Ref. Page Treatment Size Weight per
- Page 18 and 19:
Warning The products pictured in th
- Page 20 and 21:
PEBBLES OPUS MOSAIC ROUND MOSAIC MO
- Page 22 and 23:
20
- Page 24 and 25:
atiorientus ebbles 22
- Page 26 and 27:
Sliced Matte 11.8"x11.8"x3/8" - 30x
- Page 28 and 29:
Sliced Matte White 12"x12" 30x30 cm
- Page 30 and 31:
Sliced Matte 12"x12"x3/8" - 30x30x0
- Page 32 and 33:
Sliced XL 12"x12"x3/8" - 30x30x0.9
- Page 34 and 35:
32 The Bali Series
- Page 36 and 37:
Sliced Polished Beige 12"x12" 30x30
- Page 38 and 39:
Sliced Polished 11.8"x11.8"x5/16" -
- Page 40 and 41:
38
- Page 42 and 43:
Rectified Matte Normal Pebble Secti
- Page 44 and 45:
Rectified Matte Black 12"x12" 30x30
- Page 46 and 47:
44 GABE01R page 42
- Page 48 and 49:
Polished Brown 12"x12" 30x30 cm 4.8
- Page 50 and 51:
Pebble for wall 6"x12" - 15x30 cm 1
- Page 52 and 53:
50
- Page 54 and 55:
Reconstituted Decorated 12"x12"x3/8
- Page 56 and 57:
Reconstituted Round 12"x12"x3/8" -
- Page 58 and 59:
Reconstituted XL Sliced 12"x12"x5/1
- Page 60 and 61:
58
- Page 62 and 63:
60 batiorientus pus Mosaic
- Page 64 and 65:
Matte 12.6"x12.6"5/16" - 32x32x0.8
- Page 66 and 67:
Matte White/Beige Brick 11.8"x11.8"
- Page 68 and 69:
Matte 11.8"x11.8"x3/8" - 30x30x0.9
- Page 70 and 71:
68 The Ancient Series
- Page 72 and 73:
Cubic 11.8"x11.8"x5/16" - 30x30x0.8
- Page 74 and 75:
Cubic 11.8"x11.8"x3/8" - 30x30x0.9
- Page 76 and 77:
74 The Ancient Series
- Page 78 and 79:
76
- Page 80 and 81:
78 batiorientus ound Mosaic
- Page 82 and 83:
Marble Stone 11.8"x11.8"x5/16" - 30
- Page 84 and 85:
Marble Stone 11.8"x11.8"x5/16" - 30
- Page 86 and 87:
Reconstituted 12"x12"x3/8" - 30x30x
- Page 88 and 89:
86 The Exotic Series
- Page 90 and 91:
Metal 11.8"x13.7"x5/16" - 30x34.8x0
- Page 92 and 93:
90
- Page 94 and 95:
92
- Page 96 and 97:
Mix Glass 11.5"x12"x5/16" - 29.5x30
- Page 98 and 99:
Mix 11.9"x11.9"x3/8" - 30.3x30.3x0.
- Page 100 and 101:
98
- Page 102 and 103:
atiorientus osaic 100
- Page 104 and 105:
Ceramic 12"x12"x1/4" - 30.5x30.5x0.
- Page 106 and 107:
Porcelain 11.8"x11.8"x3/8" - 30x30x
- Page 108 and 109:
Porcelain Ceramic 11.8"x11.8"x3/8"
- Page 110 and 111:
Porcelain Ceramic 11.8"x11.8"x3/8"
- Page 112 and 113:
atiorientus osaic 110
- Page 114 and 115:
112 The World Series
- Page 116 and 117:
Porcelain Ceramic 11.2"x11.2"x1/4"
- Page 118 and 119:
Porcelain Ceramic 11.2"x11.2"x1/4"
- Page 120 and 121:
Porcelain Ceramic 11.2"x11.2"x1/4"
- Page 122 and 123:
Porcelain Ceramic 11.2"x11.2"x1/4"
- Page 124 and 125:
122
- Page 126 and 127:
Porcelain Ceramic 11.3"x11.6"x1/4"
- Page 128 and 129:
Porcelain Ceramic 11.2"x11.6"x1/4"
- Page 130 and 131:
Porcelain Ceramic 11.7"x13.2"x3/8"
- Page 132 and 133:
Porcelain Ceramic 11.8"x11.8"x3/8"
- Page 134 and 135:
atiorientus osaic 132
- Page 136 and 137:
134 The Native Series
- Page 138 and 139:
Ceramic 11.8"x11.8"x1/4" - 30x30x0.
- Page 140 and 141:
Ceramic 11.8"x11.8"x1/4" - 30x30x0.
- Page 142 and 143:
Ceramic 11.8"x11.8"x1/4" - 30x30x0.
- Page 144 and 145:
atiorientus osaic 142
- Page 146 and 147:
Ceramic 11.8"x11.8"x1/4" - 30x30x0.
- Page 148 and 149:
Ceramic 11.8"x11.4"x1/4" - 30x29x0.
- Page 150 and 151:
Ceramic 11.8"x11.4"x1/4" - 30x29x0.
- Page 152 and 153:
atiorientus osaic 150
- Page 154 and 155:
Ceramic 11.8"x11.8"x3/8" - 30x30x0.
- Page 156 and 157:
Ceramic 11.8"x11.8"x1/4" - 30x30x0.
- Page 158 and 159:
Ceramic 12"x12"x1/4" - 30.5x30.5x0.
- Page 160 and 161:
Ceramic 12"x12"x1/4" - 30.5x30.5x0.
- Page 162 and 163:
Porcelain 11.9"x11.8"x3/8" - 30.3x3
- Page 164 and 165:
Porcelain 11.9"x11.8"x3/8" - 30.3x3
- Page 166 and 167:
164 The Wood Series
- Page 168 and 169:
Porcelain 11.8"x12.2"x1/4" - 30x31x
- Page 170 and 171:
Porcelain 11.8"x12.2"x1/4" - 30x31x
- Page 172 and 173:
Ceramic 11.6"x11.6"x5/16" - 29.5x29
- Page 174 and 175:
Ceramic Patchwork Square Black & Wh
- Page 176 and 177:
Reconstituted 12.2"x11.8"x3/8" - 31
- Page 178 and 179:
atiorientus osaic 176
- Page 180 and 181:
Terrazzo Marble Mix 11.8"x12"x3/8"
- Page 182 and 183:
Terrazzo Marble Mix 13"x13.8"x3/8"
- Page 184 and 185:
Mix 11.8"x11.8"x5/16" - 30x30x0.8 c
- Page 186 and 187:
Mix Mother of Pearl 11.7"x11.7"x5/1
- Page 188 and 189:
Mix Baguette Glass Metal Mix Beige
- Page 190 and 191:
Mix 12"x12"x3/8" (5/8"x5/8") - 30x3
- Page 192 and 193:
190
- Page 194 and 195:
Mix 12"x12"x3/8" (7/8"x7/8") - 30x3
- Page 196 and 197:
194
- Page 198 and 199:
Mix 12"x12"x5/16" (7/8"x7/8") - 30x
- Page 200 and 201:
Mix 12"x12"x3/8" (3/4"x13/4") - 30.
- Page 202 and 203:
200
- Page 204 and 205:
Mix 11.8"x11.8"x5/16" - 30x30x0.8 c
- Page 206 and 207:
Mix 11.6"x11.6"x3/8" - 29.5x29.5x0.
- Page 208 and 209:
206
- Page 210 and 211:
Mix Stone Grey Black Aluminum Mix 1
- Page 212 and 213:
210
- Page 214 and 215:
Mix 12"x12"x3/8" (7/8" x2") - 30x30
- Page 216 and 217:
214
- Page 218 and 219:
Marble 11.4"x11.3"x5/16" - 28.9x28.
- Page 220 and 221:
Marble 11.7"x11.1"x5/16" - 29.6x28.
- Page 222 and 223:
Marble 12"x12"x5/16" - 30.5x30.5x0.
- Page 224 and 225:
Marble 12"x12"x5/16" - 30.5x30.5x0.
- Page 226 and 227:
Marble 12"x12"x5/16" - 30.5x30.5x0.
- Page 228 and 229:
Marble 12"x12"x5/16" - 30.5x30.5x0.
- Page 230 and 231:
Marble 11.8"x12"x5/16"- 30x30.5x0.8
- Page 232 and 233:
Marble 11.8"x11.8"x5/16" - 30x30x0.
- Page 234 and 235:
Marble 12"x12"x3/8" (2"x2") - 0x30x
- Page 236 and 237:
atiorientus osaic 234
- Page 238 and 239:
Metal 11.4"x12.2"x5/16" - 29x31x0.8
- Page 240 and 241:
Metal 11.4"x12.2"x5/16" - 29x31x0.8
- Page 242 and 243:
Metal 11.8x"11.8"x5/16" - 30x30x0.8
- Page 244 and 245:
Metal 11.5"x11.5"x5/16" - 29.2x29.2
- Page 246 and 247:
Metal 11.1"x11.6"x5/16" - 28.2x29.5
- Page 248 and 249:
Metal 11.8"x12"x5/16" - 30x30.6x0.8
- Page 250 and 251:
Metal 11.8"x11.8"x1/8" - 30x30x0.4
- Page 252 and 253:
Metal 11.9"x11.9"x1/8" - 30.5x30.5x
- Page 254 and 255:
Metal 12"x12"x3/8" (5/8"x5/8") - 30
- Page 256 and 257:
Stone 11.7"x11.7"x5/16" (2"x4") 29.
- Page 258 and 259:
Stone 4 3/4"x12"x3/8" - 12x30x0.9 c
- Page 260 and 261:
Stone 12"x12"x3/8" (2"x2") - 30x30x
- Page 262 and 263:
atiorientus osaic 260
- Page 264 and 265:
Glass 11.4"x11.4"x3/16" - 29x29x0.5
- Page 266 and 267:
Glass 11.4"x11.4"x3/16" - 29x29x0.5
- Page 268 and 269:
Glass 11.4"x11.4"x3/16" - 29x29x0.5
- Page 270 and 271:
Glass 11.8"11.8"x5/16" - 30x30x0.8
- Page 272 and 273:
Glass 11.9"x10.8"x3/8" - 30.2x27.5x
- Page 274 and 275: atiorientus osaic 272
- Page 276 and 277: Glass 11.8"x11.8"x3/16" - 30x30x0.5
- Page 278 and 279: Glass 11.8"x11.8"x3/16" - 30x30x0.5
- Page 280 and 281: Glass 11.8"x11.8"x3/16" - 30x30x0.5
- Page 282 and 283: Glass 11.8"x11.8"x5/16" - 30x30x0.8
- Page 284 and 285: Glass 11.8"x11.8"x5/16" - 30x30x0.8
- Page 286 and 287: Glass 11.8"x11.8"x5/16" - 30x30x0.8
- Page 288 and 289: Glass 18"x11.8"x5/16" - 29.8x29.8x0
- Page 290 and 291: Glass 11.8"x11.8"x5/16" (2"x2") - 3
- Page 292 and 293: Glass 12"x12"x5/16" (1/2"x1/2") 30x
- Page 294 and 295: Glass 11.8"x11.8"x3/8" - 30x30x0.9
- Page 296 and 297: 294
- Page 298 and 299: Glass 11.8"x12.6"x5/16" - 30x32x0.8
- Page 300 and 301: Recycled Glass 10.3"x11.7"x8/32" -
- Page 302 and 303: Recycled Glass 10.4"x11.8"x1/4" - 2
- Page 304 and 305: Wood 13"x14.4"x3/8" - 32x36x1 cm 10
- Page 306 and 307: 304
- Page 308 and 309: atiorientus loor 306
- Page 310 and 311: Floor 11.4"x17.7"x3/8" - 28x48x1 cm
- Page 312 and 313: Floor 11.4"x17.7"x3/8" - 28x48x1 cm
- Page 314 and 315: Wall Cladding 4"x14"x3/8" - 10x35x1
- Page 316 and 317: Wall Cladding White Mix Marble Inte
- Page 318 and 319: 316
- Page 320 and 321: 318 The Cement Series
- Page 322 and 323: HISTORY The production process of t
- Page 326 and 327: 324
- Page 328 and 329: 326
- Page 330 and 331: Square 8”x8”x 5/8” 20x20x1.6
- Page 332 and 333: 330
- Page 334 and 335: Square 8”x8”x 5/8” 20x20x1.6
- Page 336 and 337: Square 8”x8”x 5/8” 20x20x1.6
- Page 338 and 339: Square 8”x8”x 5/8” 20x20x1.6
- Page 340 and 341: 338
- Page 342 and 343: Square 8”x8”x 5/8” 20x20x1.6
- Page 344 and 345: Square 8”x8”x 5/8” 20x20x1.6
- Page 346 and 347: Square 8”x8”x 5/8” 20x20x1.6
- Page 348 and 349: 346
- Page 350 and 351: 348
- Page 352 and 353: Square 8”x8”x 5/8” 20x20x1.6
- Page 354 and 355: 352
- Page 356 and 357: Square 8”x8”x 5/8” 20x20x1.6
- Page 358 and 359: 356
- Page 360 and 361: Hexagon 8”x9”x 5/8” 20x23x1.6
- Page 362 and 363: 360
- Page 364 and 365: 362
- Page 366 and 367: Trim 4”x8”x 5/8” 10x20x1.6 cm
- Page 368 and 369: 366
- Page 370 and 371: Square 8”x8”x 5/8” G 20x20x1.
- Page 372 and 373: Square 8”x8”x 5/8” G Trim 20x
- Page 374 and 375:
Installation tips & treatment metho
- Page 376 and 377:
374
- Page 378 and 379:
376
- Page 380 and 381:
378 The Lava Series
- Page 382 and 383:
Glazed Lava Our washbasins in glaze
- Page 384 and 385:
Glazed Lava 1 pcs Ø 4"x20" - Ø 40
- Page 386 and 387:
Glazed Lava 1 pcs Ø 5"x20" - Ø 40
- Page 388 and 389:
Glazed Lava 386
- Page 390 and 391:
Rock Washbasin 1 pcs Ø 6"x24" - Ø
- Page 392 and 393:
Petrified Wood Washbasin 1 pcs Ø 2
- Page 394 and 395:
Marble Bowl Striped 1 pcs Ø 16 3/8
- Page 396 and 397:
Trapezoidal Striped Pedestal White
- Page 398 and 399:
Bowl Shaped Hammered Pedestal 1 pcs
- Page 400 and 401:
398
- Page 402 and 403:
Treatment reatment 400 Our natural
- Page 404 and 405:
Treatment reatment 402 B Polished P
- Page 406 and 407:
Treatment reatment 404 D Ceramic Po
- Page 408 and 409:
Treatment reatment 406 F Travertine
- Page 410 and 411:
eatment 408 Here’s an idea to tak
- Page 412 and 413:
Installation Tips reatment 410 •A
- Page 414:
Notes We strongly advise a “DO NO


![BATI ORIENT USA - CAT 11 EDITION (High quality) [430MB]](https://img.yumpu.com/67956066/324/500x640/bati-orient-usa-cat-11-edition-high-quality-430mb.jpg)


![BATI ORIENT USA - CAT 11 EDITION (High quality) [430MB]](https://img.yumpu.com/67970173/1/190x190/bati-orient-usa-cat-11-edition-high-quality-430mb.jpg?quality=85)


