ONE+ Series User Manual

Create successful ePaper yourself
Turn your PDF publications into a flip-book with our unique Google optimized e-Paper software.
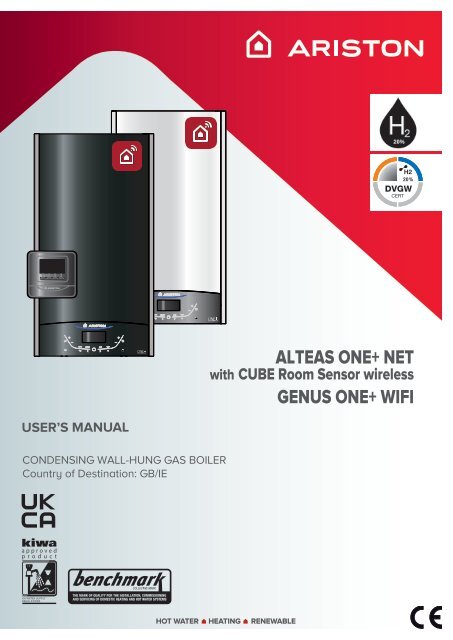
ALTEAS <strong>ONE+</strong> NET<br />
with CUBE Room Sensor wireless<br />
GENUS <strong>ONE+</strong> WIFI<br />
USER’S MANUAL<br />
CONDENSING WALL-HUNG GAS BOILER<br />
Country of Destination: GB/IE<br />
HOT WATER HEATING RENEWABLE
USER’S MANUAL<br />
Dear Customer,<br />
Thank you for choosing an ARISTON boiler.<br />
We warranty that your boiler is a reliable and technically<br />
sound product.<br />
This manual provides detailed instructions and<br />
recommendations for proper installation, use and<br />
maintenance.<br />
Remember to keep this manual in a safe place for future<br />
reference.<br />
WARRANTY<br />
This appliance is in warranty from the date of installation.<br />
Proof of installation or purchase and annual servicing must<br />
be provided upon request. The installation must have been<br />
carried out by a Gas Safe Registered engineer.<br />
Ariston is obliged under this warranty to repair or replace a<br />
faulty appliance under our terms and conditions.<br />
Any repair or replacement will be at Ariston’s discretion.<br />
This warranty will only apply where the fault arises from<br />
defects in the appliance, caused either by material or<br />
workmanship of the manufacturer.<br />
This warranty does not cover malfunction or damage<br />
arising from incorrect installation, commissioning or<br />
maintenance procedures as advised in the Installation and<br />
Servicing manual, inefficient flue system, poor or incorrect<br />
electricity and wiring, incorrect gas supply or pressure,<br />
tampering by inexperienced persons and any other cause<br />
not directly related to manufacture.<br />
Ariston Thermo Uk Ltd cannot accept responsibility for any<br />
cost arising from repair or maintenance carried out by any<br />
third party.<br />
This warranty does not affect your statutory rights.<br />
The appliance must be registered with Ariston within 30<br />
days from date of installation.<br />
The boiler must be serviced annually either by a local Gas<br />
Safe Registered engineer or managed by Ariston directly<br />
which can be arranged by calling 0333 240 8777.<br />
If the boiler is not serviced directly through Ariston then<br />
proof service must be sent in to Ariston UK (address on<br />
back cover of manual).”<br />
Ariston NET* app.<br />
ARISTON<br />
NET<br />
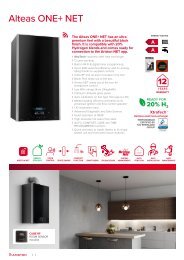
The ALTEAS <strong>ONE+</strong>NET<br />
/ GENUS <strong>ONE+</strong> WIFI<br />
offers you a new<br />
experience in using your<br />
heating and hot water<br />
installation with the<br />
With Ariston NET you can turn on, turn off and control the<br />
temperature of your heating and domestic hot water from<br />
your smartphone or PC, wherever you are.<br />
You will also be able to regularly check your energy<br />
consumption and receive valuable advice on how to<br />
optimise your gas consumption at home to save money<br />
and reduce your carbon emissions.<br />
Your comfort will always be guaranteed with Ariston NET;<br />
the APP will notify you in real time of any faults, allowing<br />
you to react quickly.<br />
By subscribing to the Ariston Net PRO service, your<br />
remote assistance centre will be able to constantly<br />
monitor your product, intervene promptly where<br />
necessary and in some cases, thanks to artificial<br />
intelligence, even prevent malfunctions.<br />
For more information, visit the Ariston NET website www.<br />
ariston.com/it/ariston-net.<br />
* The installation must have been carried out by a Gas<br />
Safe Registered engineer.<br />
For more information call us on 0333 240 8777.<br />
Registration is online at www.ariston.com/uk.<br />
The Benchmark commissioning checklist,<br />
which can be found at the back of<br />
the Installation instructions, must be<br />
completed in full by the installer.<br />
If you smell gas or are worried about gas<br />
safety, you can call the<br />
National Gas Emergency Service free on<br />
0800 111 999<br />
at any time, day or night.<br />
/ 2
USER’S MANUAL<br />
SAFETY REGULATIONS<br />
Key to symbols:<br />
Failure to comply with this warning could<br />
expose the user to the risk of serious or<br />
fatal personal injury<br />
Failure to comply with this warning risks<br />
damage to property, plants or animals<br />
Do not perform operations which involve opening<br />
the appliance.<br />
Electrocution from live components.<br />
Personal injury caused by burns due to<br />
overheated components, or wounds caused<br />
by sharp edges or protrusions.<br />
Do not perform operations which involve removing<br />
the appliance from its installation space .<br />
Electrocution from live components.<br />
Flooding caused by water leaking from<br />
disconnected piping.<br />
Explosions, fires or intoxication caused by gas<br />
leaking from disconnected piping.<br />
Do not damage the power supply cable.<br />
Electrocution from live uninsulated wires.<br />
Do not leave anything on top of the appliance.<br />
Personal injury caused by an object falling off<br />
the appliance as a result of vibrations.<br />
Damage to the appliance or items underneath<br />
it caused by the object falling off as a result of<br />
vibrations.<br />
Do not climb onto the appliance.<br />
Personal injury caused by the appliance falling.<br />
Damage to the appliance or any objects<br />
underneath it caused by the appliance falling<br />
away from its installation space.<br />
Do not climb onto chairs, stools, ladders or<br />
unstable supports to clean the appliance.<br />
Personal injury caused by falling from a height<br />
or cuts (stepladders shutting accidentally).<br />
Do not attempt to clean the appliance without first<br />
switching it off and turning the external switch to<br />
the OFF position.<br />
Electrocution from live components.<br />
Do not use insecticides, solvents or aggressive<br />
detergents to clean the appliance.<br />
Damage to plastic and painted parts.<br />
Do not use the appliance for any use other than<br />
normal domestic use.<br />
Damage to the appliance caused by operation<br />
overload.<br />
Damage caused to objects treated<br />
inappropriately.<br />
Do not allow children or inexperienced individuals<br />
to operate the appliance.<br />
Damage to the appliance caused by improper<br />
use.<br />
If you believe there is a smell of burning or<br />
smoke coming from the appliance, turn off the<br />
appliance immediately, open all windows and call<br />
the gas emergency service provider.<br />
Personal injury caused by burns, smoke<br />
inhalation, intoxication.<br />
If there is a strong smell of gas, turn off the building<br />
main gas valve, open all windows and call for<br />
assistance from the gas emergency service<br />
provider..<br />
Explosions, fires or intoxication.<br />
This appliance can be used by children aged<br />
from 8 years and above and person with<br />
reduced physical, sensory or mental capabilities<br />
or lack of experience and knowledge if they<br />
have been given supervision or instruction<br />
concerning use of the appliance in a safe way<br />
and understand the hazards involved. Children<br />
shall not play with the appliance. Cleaning<br />
and user maintenance shall not be made by<br />
children without supervision.<br />
/ 3
USER’S MANUAL<br />
The installation and first ignition of the<br />
boiler must be performed by qualified Gas<br />
Safe Registered engineer in compliance with<br />
Gas Safety (instillation & use) regulations<br />
and all other national regulations regarding<br />
installation, and in conformity with any<br />
requirements established by local authorities<br />
and public health organisations.<br />
After the boiler has been installed, the installer<br />
must ensure that the end user receives the<br />
declaration of conformity and the operating<br />
manual, and should provide all necessary<br />
information as to how the boiler and the safety<br />
devices should be handled.<br />
This appliance is designed to produce hot water for domestic<br />
use (combi version).<br />
It should be connected to a heating system and a domestic<br />
hot water system, both of which must be compatible with its<br />
performance and power levels.<br />
The use of the appliance for purposes other than those<br />
specified is strictly forbidden. The manufacturer cannot be held<br />
responsible for any damage caused by improper, incorrect and<br />
unreasonable use of the appliance or by the failure to comply<br />
with the instructions given in this manual.<br />
Installation, maintenance and all other interventions must be<br />
carried out in full conformity with the governing legal regulations<br />
and the instructions provided by the manufacturer. Incorrect<br />
installation can harm persons, animals and possessions; the<br />
manufacturing company shall not be held responsible for any<br />
damage caused as a result.<br />
In the event of any maintenance or other structural work in the<br />
immediate vicinity of the flue gas exhaust devices and their<br />
accessories (chimney), switch the appliance off. When the work<br />
has been completed, ask a suitably qualified and competent<br />
engineer to check the conformity of the flue gas exhaust devices<br />
and their accessories (chimney) with the gas regulations.<br />
When the work has been completed, ask a qualified technician<br />
to check the efficiency of the ducting and the devices.<br />
If the boiler should be out of use for a prolonged period, it is<br />
recommended that the electrical power supply be disconnected<br />
and that the external gas cock be closed. If low temperatures are<br />
expected, the boiler and system pipe work should be drained in<br />
order to prevent frost damage.<br />
Ensure the boiler is switched off before cleaning any exterior<br />
parts of the appliance.<br />
Do not allow children or inexperienced persons to use the<br />
appliance without supervision.<br />
Ariston is a licensed member of the<br />
Benchmark Scheme which aims to<br />
improve the standards of installation<br />
and commissioning of domestic heating<br />
and hot water systems in the UK and to<br />
encourage regular servicing to optimise<br />
safety, efficiency and performance.<br />
Benchmark is managed and promoted<br />
by the Heating and Hotwater Industry<br />
Council.<br />
For more information visit<br />
www.benchmark.org.uk.<br />
The Benchmark commissioning checklist, which<br />
can be found at the back of the installation<br />
instructions, must be completed in full by the<br />
installer and be left with the boiler or be made<br />
available upon request by any attending Ariston<br />
representative.<br />
UKCA labelling<br />
The UKCA mark guarantee that the appliance conform to the<br />
following UK regulations:<br />
- Gas Appliances Regulation (Regulation (EU) 2016/426<br />
as brought into GB law and amended) and the Gas Appliances<br />
(Enforcement) and Miscellaneous Amendment Regulations<br />
2018 (S.I. 2018 No. 389, as amended)<br />
- The Ecodesign for Energy-Related Products and Energy<br />
Information (Amendment) (EU Exit) Regulations 2019 (S.I. 2019<br />
No. 539, as amended)<br />
- BED (Boiler Efficiency Directive) - only art.7 ( 2), art.8 and<br />
annex Ill, IV, V<br />
- Electrical Equipment (Safety) Regulations 2016 (S.I. 2016 No<br />
1101, as amended)<br />
- Electromagnetic Compatibility Regulations 2016<br />
- Radio Equipment Regulations 2017 (S.I. 2017 No. 1206, as<br />
amended)<br />
(S.I. 2016 No. 1091, as amended)<br />
- The Restriction of the Use of Certain Hazardous Substances<br />
in Electrical and Electronic Equipment Regulations 2012 (S.I.<br />
2012 No. 3031, as amended).<br />
CE labelling<br />
The CE mark guarantees that the appliance conforms to the<br />
following directives:<br />
- 2016/426/EU relating to gas appliances<br />
- 2014/30/EU relating to electromagnetic compatibility<br />
- 92/42/CEE relating to energy efficiency<br />
- 2014/35/EU relating to electrical safety<br />
- 2009/125/CE Energy related Products<br />
- 813/2013 Commission regulation (EU)<br />
- 2014/53/EU RED (Radio Equipment Directive)<br />
/ 4
USER’S MANUAL<br />
CONTROL PANNEL<br />
26/10/21 16:18<br />
10°<br />
20,5° 3 00 02 04 06 08 10 12 14 16 18 20 22 24<br />
40° 1,5 bar 70°<br />
COMFORT<br />
AUTO<br />
Central Heating<br />
1 2 3 4<br />
5<br />
6<br />
7<br />
8 9 10 11<br />
a<br />
b<br />
b<br />
c<br />
Legend:<br />
1. Display<br />
2. WIFI button (enable / disable / configure)<br />
3. Domestic Hot Water adjustment button +/-<br />
4. MODE button (Operation mode selection summer/winter)<br />
5. COMFORT button<br />
6. ON/OFF button<br />
7. Auto button (To activate Thermoregulation)<br />
8. RESET button<br />
9. Heating temperature adjustument button +/-<br />
10. Keylock<br />
11. Led Blue - Flame presence<br />
Programming key<br />
a. Esc button (Back)<br />
b. Programming keys<br />
c. Ok button programming key<br />
/ 5
USER’S MANUAL<br />
DISPLAY<br />
26/10/21 16:19<br />
10°<br />
20,5° 3 00 02 04 06 08 10 12 14 16 18 20 22 24<br />
42° 1,5 bar 70°<br />
COMFORT<br />
AUTO<br />
C Heating active<br />
Date and time 26/10/21 16:19<br />
Keylock active<br />
D.H.W. set temperature and indication of 42°<br />
the set temperature level<br />
C.H. set temperature and indication of the<br />
set temperature level<br />
Checking operation of the appliance<br />
Check the water pressure on the pressure gauge and make sure<br />
that the figure is between 0.6 and1.5 bar when the system is cold.<br />
If the pressure is just under the minimum value the display will<br />
request a filling procedure - see note below.<br />
FILLING PROCEDURE<br />
RE-ESTABLISH THE CORRECT PRESSURE USING<br />
THE FILLING LOOP (POSITIONED UNDERNEATH THE<br />
BOILER) AND PRESS THE MODE BUTTON FOR 5<br />
SECONDS. THE DISPLAY SHOWS “Air Purge Active“.<br />
WHEN THE PRESSURE GAUGE INDICATES A PRESSURE<br />
OF 1 BAR, CLOSE THE FILLING VALVE AND PRESS THE<br />
MODE BUTTON. THE DISPLAY RETURNS TO NORMAL<br />
VIEW.<br />
Re-establish the correct pressure by filling loop.<br />
If the pressure drops very frequently, there may be a water leak<br />
at some point in the system. If this is the case a plumber should<br />
be contacted.<br />
Warning scheduled maintenance<br />
Heating operation set<br />
Heating operation active<br />
D.H.W. operation set<br />
1<br />
2<br />
D.H.W. operation active<br />
Flame detected with indication of power<br />
used<br />
Digital pressure gauge (bar)<br />
Scrolling text displaying operation as<br />
information<br />
Error wsignals<br />
The display show the code and<br />
description<br />
AUTO function activated<br />
Hot Water Comfort activated<br />
CH Schedule programming<br />
(set display: boiler base - see user’s menù)<br />
Central heating<br />
ALERT<br />
AUTO<br />
COMFORT<br />
Note.<br />
Connections viewed from<br />
behind boiler.<br />
Note: Connections viewed from behind boiler<br />
1. To repressurise the system ensure flexible hose 3 is connected<br />
2. Slowly open taps 1 & 2 (see diagrams above)<br />
3. Water will be heard entering the system<br />
4. When the pressure gauge reads between 1.0 Bar and 1.5 bar<br />
close taps 1 & 2.<br />
5. When the filling operation is complete remove the filling hose<br />
and store safely<br />
3<br />
CH Schedule programming<br />
(set display: boiler complete - see user’s menù)<br />
Internal temperature displayed for<br />
set zone. (with bus device connected<br />
- optional)<br />
External temperature displayed<br />
ECO mode<br />
WIFI active<br />
WIFI connected to the local network,<br />
but without access to the server<br />
WIFI not configured<br />
Solar temperature probe connected -<br />
option<br />
/ 6
USER’S MANUAL<br />
Ignition procedure<br />
Press the ON/OFF button on the control panel to switch on the boiler.<br />
The display shows the initialisation procedure - indicated by the bar.<br />
Wi-Fi bo<br />
Initializing.......<br />
Once the procedure is completed, the display will visualise the<br />
temperatures set for the central heating and domestic hot water circuits<br />
(display configuration: boiler base).<br />
It’s also required to set the date, time and language - see the note<br />
below.<br />
00/00/00 00:00<br />
42° 1,5 bar 70°<br />
Operating mode selection<br />
Use the MODE button 4 to select the desired operating mode.<br />
Operating mode<br />
Winter<br />
heating + hot water production for<br />
domestic use with set temperature<br />
Summer<br />
only hot water production for<br />
domestic use with set temperature<br />
Display<br />
26/10/21<br />
16:19<br />
42° 1,5 bar 70°<br />
42°<br />
Press OK to enter Menu<br />
26/10/21<br />
16:19<br />
Press OK to enter Menu<br />
26/10/21<br />
16:19<br />
The ignition of the burner will be signalled by the blue LED 11.<br />
1,5 bar<br />
1,5 bar<br />
70°<br />
Press OK to enter Menu<br />
Adjusting the heating<br />
The temperature that may be obtained which varies from 40°C to 82°C.<br />
The value set previously will flash on the display.<br />
WARNING: adjusting the heating temperature has the potential to<br />
damage your heating system and/or adversely effect performance. It is<br />
recommended before doing so consult a suitably competent engineer.<br />
Press OK to enter Menu<br />
Operating ATTENTION mode - Initial selection start-up<br />
The first time the display requires a few basic<br />
settings.<br />
First, select the language. Press the programming key b<br />
to select the language, then press the OK button to<br />
confirm.<br />
Move on to setting the date and time. Press the<br />
programming key b to make a selection, press the OK<br />
button to confirm your selection. Press the programming<br />
key b to set the value.<br />
Press the OK button to confirm. Save the settings by<br />
pressing OK.<br />
Press the OK button to access the <strong>User</strong>’s Menu.<br />
Press the programming key b to scroll through the menu<br />
list and select a parameter, then press OK to confirm.<br />
CAUTION!!<br />
Some parameters are protected with an access code<br />
(safety code) which protects the boiler settings from<br />
unauthorised use.<br />
26/10/21 16:20<br />
40° 1,5 bar 70°<br />
C Heating active<br />
Domestic hot water temperature adjustement<br />
It is possible to set the temperature of the domestic hot water by<br />
pressing the buttons 3 a temperature may be obtained which varies<br />
from 36°C to 60°C. The value set previously will flash on the display.<br />
26/10/21 16:21<br />
42° 1,5 bar 70°<br />
DHW active<br />
/ 7
USER’S MANUAL<br />
Switching off the heating<br />
To switch off the heating, press the MODE button 4; the heating<br />
operation symbol will disappear from the display.<br />
The boiler remains active only for the production of domestic hot<br />
water, indicating the set temperature.<br />
20/11/15 09:57<br />
42° 1,5 bar<br />
Press Ok to enter Menu<br />
COMFORT function<br />
The boiler allows the ‘comfort’ level for the output of domestic hot<br />
water to be increased through the “COMFORT” function. This function<br />
keeps the secondary exchanger warm during the periods in which the<br />
boiler is inactive, thereby bringing the initial thermal<br />
condition of the water drawn to a higher temperature.<br />
This function may be enabled by pressing the COMFORT button 5.<br />
Press to select:<br />
- Comfort function disabled<br />
- Comfort function set to: Time based<br />
The Boiler will be ignited to quickly provide Hot Water for 30 minutes<br />
after the last tapping<br />
- Comfort function set to: Always active<br />
The Boiler will be ignited to quickly provide Hot Water all day long<br />
When the function is enabled the text COMFORT appears on the<br />
display.<br />
Switching off the boiler<br />
To switch off the boiler press the ON/OFF button<br />
switch off.<br />
The Anti-frost Function is allready active.<br />
, the display will<br />
26/10/15 10:15<br />
40° 1,5 bar 70°<br />
COMFORT<br />
26/10/15 12:46<br />
OFF<br />
ATTENTION!!<br />
Switch off the boiler completely by switching the external electrical<br />
switch to the OFF position.<br />
Control panel - Keylock<br />
It’s possible to lock the control panel of the boiler by pressing<br />
the button 10. The display shows the symbol .<br />
To unlock the control panel, press again the button 10. The<br />
symbol disappears from the display.<br />
20/11/15 10:22<br />
0°<br />
40° 70°<br />
AUTO<br />
Central Heating<br />
/ 8
USER’S MANUAL<br />
Auto button - Temperature adjustment activation<br />
The AUTO function enables boiler operation to be adapted to<br />
environmental conditions and to the type of system it is installed on.<br />
Comfortable temperature is reached inside the room in the quickest<br />
way possible, without wasting money, energy or efficiency, while<br />
substantially reducing the amount of wear experienced by the<br />
components.<br />
Your installer will advise you on the devices connectable to the boiler<br />
and will program it according to the system.<br />
In normal boilers the water temperature inside the heating elements is<br />
usually set to a high value (70-80°C), thereby ensuring effective heating<br />
during the few really cold winter days. It then becomes excessive on<br />
less cold days (of which there are many) more typical of the autumn<br />
and winter seasons. This leads to excessive room heating after the<br />
thermostat has been switched off, resulting in energy waste and<br />
uncomfortable conditions inside the room.<br />
The AUTO function “takes control” of the boiler and selects the best<br />
operating regime based on environmental conditions, external devices<br />
connected to the boiler and the performance required. It constantly<br />
decides at which power level to operate based on the environmental<br />
conditions and the room temperature required.<br />
This function may be enabled by pressing the AUTO button 7.<br />
When the function is enabled the text AUTO appears on the display.<br />
26/10/21 16:23<br />
0°<br />
40° 1,5 bar 70°<br />
AUTO<br />
C Heating active<br />
/ 9
ALERT<br />
USER’S MANUAL<br />
Appliance shut-off conditions<br />
The boiler is protected from malfunctions by means of internal checks<br />
performed by the electronic P.C.B., which stops the boiler from operating<br />
if necessary. In the event of the boiler being shut off in this manner, a<br />
code appears on the control panel display which refers to the type of<br />
shut-off and the reason behind it.<br />
Two types of shut-off may occur:<br />
Safety shut-off<br />
This type of error is “volatile”, which means that the boiler starts up<br />
again automatically as soon as the problem which caused the shut-off<br />
is removed.<br />
The display shows the code and the error description.<br />
“Fault 110 - Send Probe Damaged”<br />
Operation shutdown<br />
This type of error is “non-volatile”, which means that it is not removed<br />
automatically.<br />
The display shows the code and the error description.<br />
To restore normal operation press the RESET button on the control<br />
panel.<br />
The dispay shows “Reset in progress” and then “Fault solved”.<br />
If the problem manifests itself again after several attempts to reset the<br />
appliance, contact a qualified and comment engineer.<br />
ALERT<br />
Fault 501<br />
No flame detected<br />
Fault 501<br />
Fault 110<br />
Press the Reset button<br />
No flame detected<br />
Press the Reset button<br />
ALERT<br />
Send Probe Damaged<br />
Reset in progress<br />
When the cause of the shut-off is resolved, the boiler will start up again<br />
and continues to operate normally.<br />
If the boiler still indicates a safety shut-off, switch it off and contact a<br />
qualified on competent engineer.<br />
Safety shut-off due to insufficient water pressure<br />
In the event of insufficient water pressure in the heating circuit, the<br />
boiler signals a safety shutdown.<br />
The display shows “Fault 108 - Filling Needed”.<br />
The system may be restarted, re-balancing the water pressure, by<br />
using the filling procedure - see note 1.<br />
Fault 108<br />
Fault solved<br />
Important<br />
If this shutdown occurs frequently, contact an authorised qualified and<br />
competent engineer, such as a Ariston Service partner for assistance.<br />
For safety reasons, the boiler will permit a maximum of 5 resets in 15<br />
minutes (5 presses of the RESET button); at the 6th attempt within this<br />
15-minute period the boiler will shut down and may only be operated<br />
again after the electricity supply has been disconnected.<br />
ALERT<br />
Filling Needed<br />
If the re-balancing request is performed on a frequent basis, switch<br />
the boiler off, bring the external electric switch to the OFF position,<br />
shut off the gas valve and contact a qualified technician to check for<br />
any leaks of water.<br />
NOTE 1 - FILLING PROCEDURE<br />
RE-ESTABLISH THE CORRECT PRESSURE USING<br />
THE FILLING LOOP (POSITIONED UNDERNEATH<br />
THE BOILER) AND PRESS THE MODE BUTTON<br />
FOR 5 SECONDS. THE DISPLAY SHOWS “AIR PURGE<br />
ACTIVE“.<br />
WHEN THE PRESSURE GAUGE INDICATES A PRESSURE<br />
OF 1 BAR, CLOSE THE FILLING VALVE AND PRESS THE<br />
MODE BUTTON.<br />
THE DISPLAY RETURNS TO NORMAL VIEW.<br />
/ 10
USER’S MANUAL<br />
Operation shutdown error table<br />
Display<br />
Description<br />
1 01 Overheating<br />
5 01 No flame detection<br />
1 03<br />
1 04<br />
1 05 Flow Check Failed<br />
1 06<br />
1 07<br />
1 08 Filling Needed<br />
3 05 PCB Fault<br />
3 06 PCB Fault<br />
3 07 PCB Fault<br />
Anti-frost function<br />
The anti-frost function acts on the central heating flow temperature probe<br />
only when the electrical supply is turned on.<br />
If the primary circuit temperature falls below 8°C the pump will run for<br />
2 minutes.<br />
After the two minutes of circulation (fixed) the boiler will check the following:<br />
a) if the central heating flow temperature is > 8°C, the pump stops;<br />
b) if the central heating flow temperature is between 4 and 8°C, the<br />
pump will run for another two minutes;<br />
c) if the central heating flow temperature is < 4°C, the burner will fire<br />
(heating position) at minimum power until the temperature reaches<br />
33°C, the burner will go out and the pump will continue to run for<br />
two minutes.<br />
If the flow temperature remains between 4-8°C the pump will continue<br />
to run for two minutes for a maximum of 10 times unless a temperature<br />
above 8°C is detected in the central heating flow, after this the the<br />
burner will fire. If lockout is caused by overheat the burner is kept OFF.<br />
The anti-frost function activates only when (with the boiler operating<br />
correctly):<br />
- the system pressure is correct;<br />
- the boiler is electrically powered;<br />
- there is a supply of gas.<br />
/ 11
USER’S MANUAL<br />
USER’S MENU<br />
Press the OK button to access to the <strong>User</strong>’s Menu.<br />
Press the OK button to access the menu and the sub-menu.<br />
Press the programming key to navigate into the menu and the submenu.<br />
Press the programming key to change the setting of the<br />
parameters.<br />
Press the OK button to save the new settings.<br />
Press the ESC button to exit until the normal display screen is<br />
restored.<br />
The various parameters can be accessed and modified using the Ok<br />
button and the programming key (see fig. below).<br />
CH Settings<br />
CH Settings<br />
DHW Settings<br />
Connectivity Settings<br />
Screen Settings<br />
DHW Settings<br />
Connectivity Settings<br />
Screen Settings<br />
a b b c<br />
/ 12
USER’S MANUAL<br />
USER’S MENU STRUCTURE<br />
CH Settings<br />
CH Setpoint Temperature<br />
T set Z1<br />
T set Z2<br />
T set Z3<br />
Time program<br />
Free Time Programming<br />
Wizard time programming<br />
Preset programs<br />
Time program/manual mode<br />
Holiday function<br />
➢ The system will remain in antifreeze mode until<br />
midnight of the date set.<br />
AUTO function<br />
➢ Set of the best operation mode according to the<br />
type of installation.<br />
DHW Settings<br />
DHW comfort Setpoint Temperature<br />
➢ Set the domestic hot water temperature<br />
Time program (NOT ACTIVE)<br />
Comfort function<br />
➢ Disabled ➢ Funzione Comfort disattivata<br />
➢ Time Based ➢ Comfort function set to: Time<br />
Based. The Boiler will be ignited to quickly provide<br />
Hot Water for 30 minutes after the last tapping.<br />
➢ Always Active ➢ Comfort function set to:<br />
Always Active. The Boiler will be ignited to quickly<br />
provide Hot Water all day long.<br />
Connectivity Settings - see page 18<br />
ON/OFF Wi-Fi Network<br />
Network configuration<br />
Serial Number<br />
Reset to factory settings<br />
Signal Level<br />
Internet Time<br />
➢ Factory setting: ON (Date and Time disabled)<br />
Internet weather<br />
Screen Settings<br />
Language<br />
➢ Selected language: English<br />
Time & Date<br />
➢ Selected language: English<br />
ATTENTION!<br />
TO SET TIME & DATE IT’S NECESSARY TO DISABLE<br />
THE INTERNET TIME.<br />
ACCESS TO THE CONNECTIVITY SETTINGS AND<br />
SET THE INTERNET TIME TO OFF.<br />
Zone to be set by display<br />
➢ Select heating zone - from1 to 3<br />
Home screen<br />
➢ Boiler base<br />
➢ Boiler complete<br />
Automatic keylock<br />
➢ The keylock will be activated together with the<br />
display stand-by<br />
Stand-by timing<br />
➢ Select the timing to pass at stand-by after the last<br />
use( from 1 to 10 minutes or 2 hours)<br />
Brightness in standby<br />
➢ Select Contrast level of screen<br />
Press the Programming Keys b<br />
- +<br />
to select:<br />
Home screen timing<br />
➢ Select waiting time before you see the home screen<br />
(from 1 to 15 minutes)<br />
Sound feedback volume<br />
➢ Select the level of sound feedback when you press<br />
the display buttons (from 1 to 10)<br />
Time Program mode<br />
➢ Extended Time Program (Factory setting)<br />
➢ Time program<br />
IN THE EVENT OF CHANGE OF TIME PROGRAM MODE,<br />
THE DISPALY IS RESET.<br />
/ 13
USER’S MANUAL<br />
DISPLAY SETTINGS<br />
The main screen of the display can be customised. The main<br />
screen can be used to check the time, date, boiler operating<br />
mode, temperature settings or temperatures detected by the<br />
accessories, schedule programming.<br />
Press OK to access the display settings.<br />
Press the programming key and select:<br />
- Screen settings<br />
CH Settings<br />
DHW Settings<br />
Connectivity Settings<br />
Screen Settings<br />
Press the OK button.<br />
The “Screen settings” menu can be used<br />
to select the following parameters:<br />
- Language<br />
Press the OK button.<br />
Press the programming key and select the desired<br />
language.<br />
Press OK to confi rm the choice, and press the back button ,<br />
to return to the previous screen.<br />
Press the programming key and select:<br />
- Date and time:<br />
- Press the OK button.<br />
- Press the programming key and select the date,<br />
- Press the OK button.<br />
- Press the programming key to select the exact day.<br />
- Press the OK button to confirm and move on to the month<br />
followed by the year, pressing the OK button to confirm<br />
after each step.<br />
- Press the programming key to select the time,<br />
- Press the OK button.<br />
- Press the programming key to select the exact hour<br />
- Press the OK button to confirm and move on to the minute<br />
value.<br />
- Press the OK button to confirm<br />
- Press the programming key to select summer time,<br />
- Press the OK button<br />
Date<br />
Time<br />
Legal hour<br />
Setting the date and time<br />
26 / 10 / 2021<br />
Save<br />
Tuesday<br />
11 : 14<br />
Auto<br />
Press OK to confi rm the choice, and press the ESC button ,<br />
to return to the previous screen.<br />
ATTENTION!<br />
TIME AND DATE ARE RETRIEVED AUTOMATICALLY<br />
FROM INTERNET IN CASE THE PRODUCT IS<br />
CONNECTED. IF NOT, OR TO SET IT MANUALLY, IT<br />
IS NECESSARY TO ACCESS “CONNECTIVITY SETTINGS”<br />
AND SET THE INTERNET TIME FUNCTION TO OFF.<br />
Press the programming key to select:<br />
- Zone to be set by display<br />
to set the heating zone to show on the display<br />
Press the programming key to select:<br />
1 Set zone<br />
2 Set zone<br />
3 Set zone<br />
Press the OK button to confirm your selection.<br />
Press the ESC button to return to the previous screen.<br />
Press the programming key to select:<br />
- Home screen<br />
when selecting the start screen settings, you can choose<br />
which information to display.<br />
Press the programming key to select:<br />
Boiler base<br />
Boiler complete<br />
Press the OK button to confirm your selection.<br />
Press the ESC button to return to the previous screen.<br />
Boiler base<br />
Boiler complete<br />
COMFORT<br />
26/10/21 12:30<br />
60° 1,5 bar 82°<br />
C. Heating Active<br />
26/10/21 12:30<br />
AUTO<br />
Press the programming key to select:<br />
- Automatic keylock<br />
Press the programming key to enable (ON) or disable<br />
(OFF) the keylock with the dispaly stand<br />
Press the OK button to confirm.<br />
Press the ESC button to return to the previous screen.<br />
Press the programming key to select:<br />
- Standby timing<br />
Press the programming key to select the timing to pass<br />
at stand-by after the last use (from 1 to 10 minutes or 24<br />
hours)<br />
Press the OK button to confirm.<br />
Press the ESC button to return to the previous screen.<br />
Press the programming key to select:<br />
- Brightness in standby<br />
Press the programming key to adjust the brightness of<br />
the display during standby periods.<br />
Press the OK button to confirm.<br />
Press the ESC button to return to the previous screen.<br />
10°<br />
10°<br />
20,5° 3 00 02 04 06 08 10 12 14 16 18 20 22 24<br />
60° 1,5 bar 82°<br />
COMFORT<br />
AUTO<br />
C. Heating Active<br />
/ 14
USER’S MANUAL<br />
Press the programming key to select:<br />
- Home screen timing<br />
Press the programming key to set waiting time before<br />
the display come back to the home screen (from 1 to 15<br />
minutes)<br />
Press the OK button to confi rm.<br />
Press the programming key to select:<br />
- Sound feedback volume<br />
Press the programming key to select the levelof sound<br />
feedback when you press the display button (from 1 to 10).<br />
Press the OK button to confirm.<br />
Press the back button to return to the previous screen.<br />
Press the programming key b to select:<br />
➢ Time program service type<br />
Press the programming key b to select the type of time<br />
programming.<br />
Press the OK button to confirm.<br />
Press the back button to return to the previous screen.<br />
HEATING HOT WATER SETTING<br />
Access to the USER’S MENU<br />
Press the programming key to select:<br />
- Central Heating settings<br />
Press the OK button.<br />
CH Settings<br />
DHW Settings<br />
Connectivity Settings<br />
Screen Settings<br />
Selecting Heating settings<br />
To set the flow temperature, press the programming key<br />
and select:<br />
- Central heating Setpoint Temperature<br />
Press the OK button.<br />
The display screen shows:<br />
- Zone 1 set T<br />
- Zone 2 set T - active with Sensys connected<br />
- Zone 3 set T - active with Sensys connected<br />
Press the programming key to select:<br />
- Zone 1 set T<br />
Press the OK button.<br />
Press the programming key to set the flow temperature for<br />
the selected zone.<br />
Press the OK button to confirm.<br />
Repeat the above procedure to set the fl ow temperature for<br />
the other zones, if applicable.<br />
Press the ESC button .<br />
T set Z1<br />
Set the flow temperature of zone 1<br />
75°C<br />
Press OK to confirm<br />
Change heating hot<br />
water temperature<br />
NOTE<br />
If there is only one heating zone, the setting of<br />
the flow temperature is done by the keys 9 - see p. 7<br />
/ 15
USER’S MANUAL<br />
HEATING SCHEDULE PROGRAMMING<br />
THE TIME PROGRAMMING IS SET FROM THE FACTORY TO<br />
THE EXTENDED “MULTILEVEL” TIME PROGRAMMING.<br />
However, it is possible to select between:<br />
➢ Extended Time Program “Multilevel setpoint”: in daily<br />
multi-level time scheduling, available only on specially<br />
configured products, it is possible to define up to 12 daily<br />
slots, each of which can be associated with a specific setpoint<br />
temperature<br />
➢Time Program “Two levels setpoint”:the daily 2-level time<br />
scheduling allows for dividing the schedule into a maximum<br />
of 4 comfort slots and 4 reduced-temperature slots<br />
within the 24 hours of each day. It is possible to define a<br />
temperature set-point for the comfort slot and one for the<br />
reduced-temperature slot.<br />
Press OK to set heating schedule programming.<br />
Press the programming key to select:<br />
- Central Heating settings<br />
Press the OK button.<br />
The display screen shows:<br />
- Set heating temperature<br />
- Time program<br />
- Holiday function<br />
- Termoregulation<br />
Press the programming key to select:<br />
- Time program<br />
Press the OK button.<br />
The display screen shows:<br />
- Free Time programming<br />
- Wizard time programming<br />
- Preset programs<br />
- Time program/manual mode<br />
Press the programming key to select:<br />
- FREE TIME PROGRAMMING<br />
Press the OK button.<br />
The display screen shows:<br />
- All zones<br />
- Zone 1<br />
- Zone 2<br />
- Zone 3<br />
Press the programming key to select the zone in which<br />
you wish to apply schedule programming:<br />
Press the OK button.<br />
Press the programming key<br />
to select Save.<br />
Press the OK button and the programming key b set the<br />
start of the heating period corresponding to the flashing value.<br />
Press the OK button to confirm.<br />
Press the OK button and the programming key b to set<br />
the temperature of the period. If you want to add new time<br />
periods, press the programming key b and select Add<br />
period, press the OK button.<br />
Repeat the above procedure to set the start and end times for<br />
each period added.<br />
Once programming is complete, press the programming key b<br />
and select Save.<br />
Comfort days time programming<br />
Start<br />
00:00 Temp 15:00<br />
Start<br />
Start<br />
07:00 Temp<br />
09:00 Temp<br />
20:00<br />
15:00<br />
Start 17:00 Temp 20:00<br />
Add period<br />
Save<br />
00 02 04 06 08 10 12 14 16 18 20 22 24<br />
Setting comfort<br />
periods<br />
heating schedule<br />
programming<br />
Press the OK button to confirm.<br />
Press the programming key to select:<br />
- Days remaining<br />
if there are any days which have not yet been programmed,<br />
then repeat the steps described above.<br />
Press the programming key to select:<br />
- Modify<br />
to change any previously programmed periods<br />
Press the programming key to select:<br />
- Exit<br />
to exit schedule programming.<br />
Press the OK button to confirm.<br />
The display reverts to showing the previous screen.<br />
Press the ESC button to return to the main screen.<br />
Press the programming key to select:<br />
- Set time program<br />
Press the OK button.<br />
Press the programming key to select the day or days of the<br />
week you wish to program.<br />
Every time a day is selected, press the OK button to confirm.<br />
The days selected for programming appear on the display in a<br />
box.<br />
Select days with the same time program<br />
00<br />
02 04 06 08 10 12 14 16 18 20 22 24<br />
Su Mo Tu We Th Fr Sa Save<br />
Selecting days<br />
heating schedule<br />
programming<br />
/ 16
USER’S MANUAL<br />
GUIDED PROGRAMMING<br />
To facilitate schedule programming procedures,<br />
configuration can be carried out via:<br />
- Wizard time programming<br />
- Pre-set programs<br />
Press the programming key to select:<br />
- WIZARD TIME PROGRAMMING<br />
Press the OK button.<br />
Press the programming key to select the zone in which you<br />
wish to apply schedule programming.<br />
Press the OK button.<br />
Press the programming key to select:<br />
- Set time program<br />
Press the OK button.<br />
Now follow the step-by-step instructions which appear<br />
on the display from time to time.<br />
- PRESET PROGRAMS<br />
Press the OK button.<br />
Press the programming key to select the zone in which you<br />
wish to apply schedule programming.<br />
Press the OK button<br />
Press the programming key to select:<br />
- Set programming<br />
Press the OK button.<br />
Press the programming key to select among the<br />
following:<br />
- Family program<br />
- No lunch program<br />
- Midday program<br />
- Always Active<br />
Press the OK button to confirm.<br />
Press the programming key to scroll through the days<br />
and the heating program start and end time.<br />
Press the programming key to select save, then press<br />
the OK button.<br />
Press the ESC button to return to the previous screen.<br />
Family program<br />
No lunch program<br />
Midday program<br />
Always active<br />
Selecting<br />
half-day program<br />
- TIME PROGRAM/MANUAL MODE<br />
(this mode can be used to select either programmed or manual<br />
zone heating management)<br />
Press the OK button.<br />
Press the programming key to select the zone to which<br />
you wish to apply the setting.<br />
All zones<br />
Zone 1<br />
Zone 2<br />
Zone 3<br />
Selecting<br />
operating mode for<br />
zone 2<br />
Select scheduled or manual programming.<br />
Press the OK button.<br />
Press the ESC button to return to the previous screen.<br />
Time Programn<br />
Mode Setting<br />
MANUAL HEATING MODE<br />
<strong>Manual</strong> mode disables heating schedule programming.<br />
<strong>Manual</strong> operation allows the heating to be kept on constantly.<br />
To select manual boiler operation, press the OK button to access<br />
the Menu.<br />
Press the programming key to select:<br />
- Time Program<br />
Press the OK button.<br />
Press the programming key<br />
<strong>Manual</strong><br />
to select:<br />
Selecting<br />
mode<br />
manual<br />
- <strong>Manual</strong><br />
Press the programming key to select <strong>Manual</strong> mode and<br />
press the OK button.<br />
Press the OK button again to save these settings. The display<br />
reverts to showing the previous screen.<br />
Press the back button until the main screen reappears.<br />
/ 17
USER’S MANUAL<br />
DOMESTIC HOT WATER SETTINGS<br />
To access the domestic hot water settings, press the OK button.<br />
Press the programming key to select:<br />
- DHW settings<br />
CH Settings<br />
DHW Settings<br />
Connectivity Settings<br />
Screen Settings<br />
Press the OK button.<br />
The display screen shows:<br />
- DHW comfort Setpoint Temp<br />
- Time program - NOT ACTIVE<br />
- Comfort function<br />
Selecting hot<br />
water settings<br />
Press the programming key to select:<br />
- DHW comfort Setpoint Temp<br />
Press the OK button twice.<br />
Press the programming key to select the desired<br />
domestic hot water temperature.<br />
Press the OK button to confirm.<br />
Press the ESC button to return to the previous screen.<br />
COMFORT FUNCTION<br />
The comfort function can be used to reduce the wait time when<br />
a request for domestic hot water is made.<br />
Press the programming key to select:<br />
- Comfort<br />
Press the OK button.<br />
Press the programming key to select:<br />
- Disabled<br />
- Timed (can be used to keep the secondary exchanger hot<br />
during periods of boiler inactivity this increasing wellbeing -<br />
30 minutes)<br />
- Always enabled<br />
Disabled<br />
Time Based<br />
Always Active<br />
Selecting timed<br />
Comfort mode<br />
SPECIAL FUNCTIONS<br />
To set special function programming, press the OK button.<br />
Press the programming key to select:<br />
- CH Setting<br />
Press the OK button.<br />
Press the programming key to select:<br />
- Holiday function<br />
- Thermoregulation<br />
Press the OK button to confirm your selection.<br />
- HOLIDAY FUNCTION<br />
The holiday function disables heating during the holiday period.<br />
Press the OK button<br />
Press the programming key to select:<br />
- ON (activates the function)<br />
- OFF (deactivates the function)<br />
Press the OK button..<br />
If you select ON,, press the programming key to set the<br />
date on which you are due to return home.<br />
This will allow the system interface to resume operation - in the<br />
mode set previously - on the set date.<br />
Press the OK button to save the settings; the display reverts to<br />
showing the previous screen.<br />
The “ ” icon appears on the active sources screen when the<br />
holiday function is enabled.<br />
- THERMOREGULATION (AUTO FUNCTION)<br />
The AUTO function automatically sets the boiler operating<br />
regime in accordance with the installation type and the<br />
environmental conditions.<br />
The temperature adjustment of a building consists of<br />
maintaining the indoor temperature at a constant level while<br />
the temperature outside changes.<br />
Press the OK button.<br />
Press the programming key to select:<br />
- ON (activates the function)<br />
- OFF (deactivates the function)<br />
Press the OK button to save the settings; the display reverts to<br />
showing the previous screen.<br />
If the heating hot water temperature does not match the<br />
desired value, it can be increased or decreased using the set<br />
heating temperature parameter.<br />
The correction bar appears on the display.<br />
The “AUTO ” icon appears on the display.<br />
Press the ESC button to return to the main screen.<br />
01/12/21 11:40<br />
02°<br />
40° 1,5 bar 70°<br />
AUTO<br />
C. Heating active<br />
AUTO Function<br />
active<br />
/ 18
USER’S MANUAL<br />
WIFI CONFIGURATION - CONNECTIVITY SETTING<br />
At the end of the commissioning operations, the request to<br />
activate the ARISTON NET service appears on the display.<br />
Press the OK button to continue the procedure,<br />
follow the on-screen instructions.<br />
When NO is pressed, the display asks if the<br />
configuration message should be repeated.<br />
Select OK or NO.<br />
Network configuration can be accessed from<br />
the <strong>User</strong> Menu.<br />
Connectivity settings<br />
The product can be managed<br />
and controlled via App<br />
NO<br />
OK<br />
Discover Ariston Net<br />
services!<br />
To activate the Remote<br />
Control of the boiler<br />
refer to the ARISTON<br />
NET quick start guide in<br />
the box.<br />
Access to the USER’S MENU<br />
Press the programming key<br />
- Connectivity Settings<br />
to select:<br />
CH Settings<br />
DHW Settings<br />
Connectivity Settings<br />
Screen Settings<br />
Press the OK button.<br />
Налаштування зв’язку<br />
Перш ніж продовжити, перевірте, чи<br />
доступна послуга встановлення<br />
зв’язку у вашій країні<br />
OK<br />
Press the OK button. The dispaly shows the Connettivity Settings menu<br />
Connectivity Settings<br />
ON/OFF Wi-Fi Network<br />
Note:<br />
The “Network<br />
configuration” submenu<br />
is displayed only the WI-FI<br />
network is set to ON.<br />
Network configuration<br />
Note: The procedure will<br />
delete the Wi-Fi password<br />
if already connected.<br />
The procedure must be<br />
repeted to connect the<br />
boiler to internet<br />
OK<br />
OK<br />
Activation/Deactivation<br />
Wi-Fi Network of the<br />
system.<br />
Press the programming<br />
key to select:<br />
The procedure permits<br />
to create Wifi Access<br />
Point to connect<br />
the system with the<br />
Internet network.<br />
OK<br />
OK<br />
OK<br />
ON = Turns on the Wi-Fi functionality. To proceed with the<br />
configuration move then to “Network configuration”<br />
OFF = “Wifi Network has been disabled”<br />
Log in to the App to start network<br />
configuration<br />
Serial Number OK The connectivity serial number is displayed here:<br />
XXXXXXXXX<br />
Re-configuration OK Would you like to proceed and recover the data back to<br />
factory settings?<br />
OK<br />
OK<br />
Connection to the local<br />
network accomplished.<br />
Configuration failed,<br />
please repeat the<br />
procedure.<br />
The display returns to the<br />
previous screen<br />
The display returns to the<br />
previous screen<br />
Press the programming key to select OFF or ON and press OK.<br />
WI-FI Signal Level OK Signal Level<br />
XX%<br />
Internet Time OK This functionality will update the time through the internet.<br />
Be sure to register the product in the right location!<br />
Press the programming key<br />
0 OFF - 1 ON<br />
to select OFF or ON and press OK.<br />
Internet weather OK With internet weather your boiler will know the external<br />
temperature directly from internet and show the current<br />
forecasts in the app. Be sure to register the product in the<br />
right location!<br />
0 OFF - 1 ON<br />
OK<br />
OK<br />
OK<br />
The display returns to the<br />
previous screen<br />
The display returns to the<br />
previous screen<br />
The display returns to the<br />
previous screen<br />
Press the programming key<br />
to select OFF or ON and press OK.<br />
/ 19
USER’S MANUAL<br />
Disposal and recycling boiler.<br />
Our products are designed and manufactured for most of the<br />
components of recyclable materials.<br />
The boiler and its accessories have to be adequately disposed<br />
and the various materials differentiated, where possible.<br />
The packaging used for the transport of the boiler must be<br />
disposal by the installer / dealer.<br />
ATTENTION!!<br />
Recycling and disposal of the boiler and the accessories must<br />
be made as required by regulations.<br />
Change of gas type<br />
Our boilers are designed to function either with Natural Gas<br />
(Methane, G20) or LPG (Propane, G31).<br />
If you need to change from one gas to another then you should<br />
speak to a Gas Safe Registered engineer or please call Ariston<br />
on 0333 240 8777.<br />
Maintenance<br />
Schedule an annual service for the boiler with a Gas Safe<br />
Registered engineer.<br />
Correct maintenance always results in savings in the cost of<br />
running the system.<br />
Failure to arrange an annual service for the appliance will<br />
invalidate the warranty of the appliance.<br />
This product conforms<br />
to Directive WEEE 2012/19/EU.<br />
The symbol of the crossed waste paper basket on the<br />
appliance indicates that at the end of its working life the<br />
product should be disposed of separately from normal<br />
domestic household rubbish, it must be disposed of at a<br />
waste disposal centre with dedicated facilities for electric<br />
and electronic appliances or returned to the retailer when<br />
a new replacement product is purchased.<br />
The user is responsible for the disposal of the product at<br />
the end of its life at an appropriate waste disposal centre.<br />
The waste disposal centre (which using special treatment<br />
and recycling processes effectively dismantles and<br />
disposes of the appliance) helps to protect the environment<br />
by recycling the material from which the product is made.<br />
For further information about waste disposal systems visit<br />
your local waste disposal centre or the retailer from which<br />
the product was purchased.<br />
/ 20
Warranty<br />
Terms & Conditions<br />
WHAT ARISTON REQUIRES<br />
· The boiler must be registered with Ariston within 30 days from date of installation. Registration is on line<br />
at www.ariston.co.uk<br />
· The boiler must be installed in accordance with the manufacturers instructions<br />
· The boiler must be installed by a Gas Safe Registered engineer.<br />
· The installer must arrange for a Building Regulations Compliance Certificate to be issued to the boiler<br />
owner.<br />
· The Building Regulations Compliance Certificate is to be made available upon request by any attending<br />
Ariston service representative.<br />
· The Benchmark commissioning checklist, which can be found at the back of the Installation instructions,<br />
must be completed in full by the installer.<br />
· The completed Benchmark checklist must be left with the boiler or be made available upon request by<br />
any attending Ariston representative.<br />
· The boiler must be serviced by the 12 month anniversary of the installation. This must be carried out by a<br />
Gas Safe Registered engineer.<br />
· Proof of annual service must be made available upon request by any attending Ariston representative.<br />
· The boiler must be installed on a clean system and corrosion inhibitors added. Fitting a magnetic filter is<br />
suggested.<br />
All of the above are standard procedures which a competent installer will be aware of.<br />
Failure to comply with any of the above will result in any warranty being withdrawn.<br />
CONDITIONS OF THE WARRANTY<br />
• Ariston must be contacted immediately following any malfunction. Access must be granted for an Ariston<br />
approved engineer to inspect the appliance and it’s installation. We are unable to cover any costs under<br />
warranty where Ariston have not been contacted and allowed access to inspect the appliance and<br />
installation. Removal or repair of the appliance by any other party than Ariston without prior inspection or<br />
authorisation will void this warranty.<br />
• The warranty is only applicable to appliances installed in the United Kingdom.<br />
• The following is not covered under the warranty:<br />
- Any external boiler controls (other than those supplied by Ariston), pipework and radiators<br />
- Loss or damage caused by using the boiler in a non-domestic or commercial environment.<br />
- Loss or damage caused by accident, theft, attempted theft, malicious damage or damage caused by<br />
fire or explosion.<br />
- Damage caused by any disaster affecting the equipment including neglect without limitation.<br />
- Clearing airlocks and partially or fully blocked pipes or work caused by equipment, which has not<br />
installed correctly.<br />
- Dirty systems/dirt particles degradation of the boiler from other parts of the system.<br />
- Claims arising from any problem with the supply of electricity, gas or water.<br />
- Consequential loss or damage arising directly or indirectly caused by the boiler not working. Cosmetic<br />
damage.<br />
- Costs arising from difficulties in getting to the boiler. This includes: pipe work under floor boards or pipe<br />
work contained in the fabric of the building. Ariston requires the warranty holder to carry out whatever<br />
works are necessary to enable Ariston staff or nominated representatives to gain access the boiler<br />
prior to arrival.<br />
- Any water pressure adjustments on sealed systems, Claims arising from scale damage.<br />
- Any modification, alteration to the boiler carried out without permission or authority from Ariston.
Manufactured by<br />
Ariston S.p.A.<br />
Viale Aristide Merloni 45<br />
60044 Fabriano (AN)<br />
ITALY<br />
ariston.com<br />
Imported by<br />
Ariston UK Ltd<br />
3 Juniper West<br />
Basildon<br />
SS15 6SJ<br />
UK<br />
ariston.com/uk<br />
ariston.com<br />
420011270800 - Rev.01 - 0723