solar restore bst manual.indd - Accessory Power
solar restore bst manual.indd - Accessory Power
solar restore bst manual.indd - Accessory Power

You also want an ePaper? Increase the reach of your titles
YUMPU automatically turns print PDFs into web optimized ePapers that Google loves.
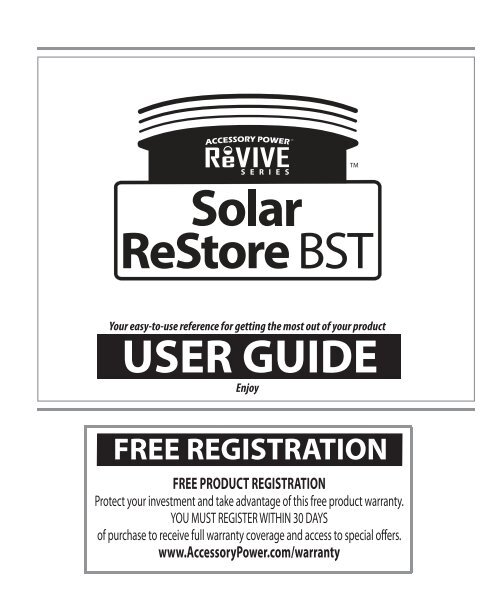
Your easy-to-use reference for getting the most out of your product<br />
USER GUIDE<br />
Enjoy<br />
FREE REGISTRATION
Thank you for purchasing the<br />
ReVIVE Series Solar ReStore BST<br />
Battery Pack<br />
This easy-to-use, multi functional charger lets you take charging on-the-go!<br />
It’s equipped with a universal USB charging port and a powerful internal<br />
backup battery that stores power for when you are away from outlets.<br />
Charge it up by the power of the Sun, AC or USB. It’s also designed with<br />
a convenient, fl exible LED fl ashlight! Don’t get stuck with a dead battery.<br />
Breathe some battery life into your mobile devices with the Solar ReStore BST!<br />
What’s in the box?<br />
a - Solar ReStore battery pack<br />
b - MicroUSB charging cable<br />
c - MiniUSB charging cable<br />
d - USB-AC adapter<br />
e - Window suction mounts<br />
f - BST <strong>solar</strong> panel<br />
f<br />
d<br />
a<br />
c<br />
e<br />
b
Product Diagram<br />
1 - Solar panel<br />
2 - OUT port<br />
3 - Control switch<br />
4 - Status LED<br />
5 - Flexible LED light<br />
6<br />
back<br />
1<br />
3<br />
8<br />
4<br />
6 - Capacity indicator<br />
7 - IN port<br />
8 - CHECK button<br />
9 - BST <strong>solar</strong> panel cable<br />
7<br />
2<br />
9<br />
5
Operating Instructions:<br />
Charging the Solar ReStore BST Battery Pack<br />
Solar Charging<br />
Solar charging can be done by following the steps below:<br />
1 - Move the (3) Control switch to the OFF position.<br />
2 - Connect the (f) BST <strong>solar</strong> panel to the (7) IN port using the (9) BST <strong>solar</strong> panel cable.<br />
3 - Place the Solar ReStore BST in direct sunlight for 8 hours to fully charge the<br />
1500mAh internal battery. You will notice that the (4) Status LED glows red to<br />
indicate charging.<br />
PLEASE NOTE: If you are not using the (f) BST <strong>solar</strong> panel, 8 hours of sunlight wil<br />
give approximately a 50% charge to the internal battery.<br />
4 - The battery status can be checked by pressing the (8) CHECK button located below<br />
the (6) Capacity indicator. The (6) Capacity indicator display will light up with<br />
blue LEDs to indicate the level of charge.<br />
AC Charging<br />
The Solar ReStore BST battery pack can be charged by any standard AC wall outlet<br />
using the included (d) USB-AC adapter and (b) MicroUSB charging cable.<br />
1 - Move the (3) Control switch to the OFF position.<br />
2 - Connect the small end of the (b) MicroUSB charging cable to the (7) IN port on<br />
the side of the Solar ReStore BST. Connect the other end of the (b) MicroUSB<br />
charging cable into the (d) USB-AC adapter.<br />
3 - Plug the (d) USB-AC adapter into any standard AC wall outlet to begin charging.<br />
The (4) Status LED will glow red to indicate charging. The 1500mAh internal<br />
backup battery will take about 3 hours to fully charge.<br />
4 - The battery status can be checked by pressing the (8) CHECK button located<br />
below the (6) Capacity indicator. The (6) Capacity indicator display will light up<br />
with blue LEDs to indicate the level of charge.
Operating Instructions continued:<br />
USB Charging<br />
The Solar ReStore BST battery pack can be charged by USB port using the<br />
(b) MicroUSB charging cable.<br />
1 - Move the (3) Control switch to the OFF position.<br />
2 - Connect the small end of the (b) MicroUSB charging cable to the (7) IN port on<br />
the side of the Solar ReStore BST. Connect the other end of the (b) MicroUSB<br />
charging cable into a USB port to begin charging.<br />
3 - The (4) Status LED will glow red to indicate charging. The 1500mAh internal<br />
backup battery will take about 5 hours to fully charge.<br />
4 - The battery status can be checked by pressing the (8) CHECK button located<br />
below the (6) Capacity indicator. The (6) Capacity indicator display will light up<br />
with blue LEDs to indicate the level of charge.<br />
Charging Your Mobile Device<br />
The Solar ReStore BST is designed with a 1500mAh internal backup battery.<br />
Many mobile devices can charge with the included (c) MiniUSB and (b) MicroUSB<br />
charging cables.<br />
1 - Choose the charging cable which is appropriate for you, and connect the small<br />
end into your mobile device. Next, connect the other end of the charging<br />
cable into the (2) OUT port on the Solar ReStore BST.<br />
2 - Slide the (3) Control switch to the ON position to begin charging your device.<br />
You will see the (4) Status LED glow blue to indicate power fl ow to your device.<br />
3 - The (2) OUT port allows you to charge mobile devices such as iPod®, iPhone®,<br />
Zune®, Samsung® phones and other devices which require special proprietary<br />
OEM cables. Simply connect your OEM USB cable to your device and the Solar<br />
ReStore BST as described in the steps above.
Operating Instructions continued:<br />
Flexible LED light<br />
The Solar ReStore BST is equipped with a (5) Flexible LED light. It provides<br />
20 hours of continuous light on a single charge. It can be used as a reading light<br />
or emergency backup light for camping and more.<br />
1 - Slide the (3) Control switch to the LED position to turn on the light.<br />
2 - Adjust the (5) Flexible LED light positioning to fi t your needs.<br />
3 - Slide the (3) Control switch to the OFF position when you are fi nished so that<br />
you do not drain the Solar ReStore BST battery power.
Troubleshooting<br />
When I connect my device to the Solar ReStore BST, it does not begin<br />
charging:<br />
- Make sure that you have charged the Solar ReStore BST internal backup<br />
battery by either <strong>solar</strong>, USB, or AC charging. Press the (8) CHECK button on the<br />
(6) Capacity indicator to check how much battery power is left.<br />
- Check to see that the (3) Control switch is in the ON position and that the<br />
(4) Status LED is glowing blue.<br />
- Please ensure that both ends of the USB cable you are using are securely and<br />
fully connected.<br />
The Solar ReStore is not charging my device by <strong>solar</strong> power:<br />
- The Solar ReStore BST is not designed as an ACTIVE <strong>solar</strong> charger. You must<br />
fi rst place the Solar ReStore BST in direct sunlight for 2-8 hours, and please be<br />
sure that the (3) Control switch is in the OFF position. After it has charged in direct<br />
sunlight, you should then move the (3) Control switch to the ON position and<br />
connect your device to the Solar Restore BST for a battery boost.<br />
PLEASE NOTE: 8 hours of direct sunlight is required to charge the<br />
Solar ReStore BST to 100% while utilizing the (f) BST <strong>solar</strong> panel. Without the<br />
(f) BST <strong>solar</strong> panel, charging will take twice as long.<br />
- Please make sure that the (5) Flexible LED light is not on.<br />
- Please make sure the (3) Control Switch is in the OFF position while <strong>solar</strong> charging.
Cautions<br />
- Keep in a safe place free from dust, liquid and extreme temperatures<br />
- Only use this device with the recommended power sources<br />
- Keep out of reach of small children<br />
- When not in use, please disconnect from power sources
Product Specifi cations<br />
Input by AC outlet: 120 – 240v<br />
Input by USB Port: DC5V±5%<br />
USB Output with backup battery: DC5V±5%, 600mA<br />
Battery: 1500mAh Lithium rechargeable<br />
AC and USB Recharging time: 3-5 hours<br />
Solar charging: 8 hours in direct sunlight for a 100% charge; 240mA <strong>solar</strong><br />
charging current when both <strong>solar</strong> panels are used<br />
LED Flashlight time: ~ 20 hours on a full charge<br />
Battery pack dimensions: 4.7”(L) x 2.6”(W) x 0.5”(H) (11.9(L) x 6.6(W) x 1.3(H) cm)<br />
Detachable Solar Panel dimensions: 4.0”(L) x 2.9”(W) x .25”(H) (10.2(L) x 7.4(W) x .06(H) cm)<br />
Weight: 6.4 ounces
®<br />
©2012 ACCESSORY POWER<br />
ALL TRADEMARKS AND BRAND NAMES ARE THE PROPERTY OF THEIR OWNERS.<br />
iPhone, iPod classic, iPod nano and iPod touch are trademarks of Apple Inc., registered in the U.S. and<br />
other countries. “Made for iPod” and “Made for iPhone” mean that an electronic accessory has been<br />
designed to connect specifi cally to iPod or iPhone respectively, and has been certifi ed by the developer<br />
to meet Apple performance standards. Apple is not responsible for the operation of this device or its<br />
compliance with safety and regulatory standards. please note that use of this accessory with iPod or<br />
iPhone may aff ect wireless performance.