Sara Plus - Disability Hoist Hire
Sara Plus - Disability Hoist Hire
Sara Plus - Disability Hoist Hire

Create successful ePaper yourself
Turn your PDF publications into a flip-book with our unique Google optimized e-Paper software.
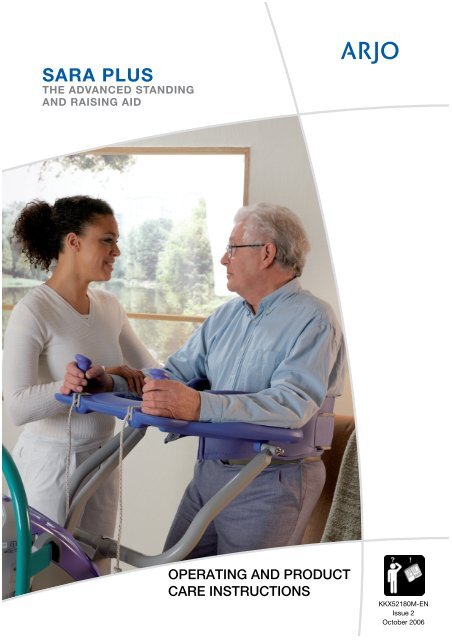
SARA PLUS<br />
THE ADVANCED STANDING<br />
AND RAISING AID<br />
OPERATING AND PRODUCT<br />
CARE INSTRUCTIONS<br />
KKX52180M-EN<br />
Issue 2<br />
October 2006
© ARJO<br />
ARJO products are patented or patent pending.<br />
Patent information is available by contacting ARJO.<br />
The policy of Arjo is one of continuous<br />
development and we therefore reserve the right to<br />
make technical alterations without notice. The<br />
content of this publication may not be copied either<br />
whole or in part without the consent of ARJO.<br />
This product has been manufactured for ARJO by :<br />
Medibo Medical Products N.V.<br />
Heikant 5<br />
B-3930 Hamont-Achel<br />
Belgium<br />
‘<strong>Sara</strong> <strong>Plus</strong>’ and ‘ARJO’ are registered trademarks<br />
of GETINGE AB.<br />
The SARA PLUS is produced in Belgium by<br />
MEDIBO MEDICAL PRODUCTS for GETINGE<br />
AB and sold under the ARJO brand.<br />
2
Contents<br />
SECTION<br />
Page<br />
No.<br />
Foreword..................................................... 4<br />
Safety Instructions ..................................... 5<br />
Intended Use............................................. 5<br />
Product description/function .................... 6-10<br />
Parts referred to in this manual................. 6<br />
Control Handset........................................ 7<br />
Dual Control panel ................................... 7<br />
Emergency stop button (red) .................... 7<br />
Reset button (green) ................................. 8<br />
Automatic cutout ...................................... 8<br />
Automatic stop function ........................... 8<br />
System failure lower override .................. 8<br />
Battery discharge indicator....................... 8<br />
Hour meter................................................ 8<br />
Chassis castor Brakes ............................... 8<br />
Straight line steering function (option)..... 8<br />
Arc-Rest.................................................... 9<br />
Foot support.............................................. 9<br />
Proactive pad ............................................ 9<br />
Lower leg straps ....................................... 9<br />
Adjustable width chassis legs................... 10<br />
Commode Seat (accessory) ...................... 10<br />
Using your <strong>Sara</strong> <strong>Plus</strong>..................................<br />
Using your <strong>Sara</strong> <strong>Plus</strong> for toileting and<br />
11-23<br />
transport.................................................... 11<br />
Standing sling ........................................... 12<br />
Transfer and walking sling ....................... 14<br />
Using the sling for transfer ................... 14<br />
Using the sling for walking practice ..... 17<br />
Scale (if fitted).......................................... 20-23<br />
Lifter Battery charging ............................. 24-25<br />
Warnings for charging .............................. 24<br />
General safety Practices for Batteries ...... 24<br />
Care of your <strong>Sara</strong> <strong>Plus</strong>............................... 26-28<br />
General lifter care..................................... 26<br />
Environmental advice............................... 27<br />
Periodic Testing........................................<br />
Cleaning and disinfecting the toilet<br />
27<br />
commode chair and frame (if fitted)......... 27<br />
Servicing advice ....................................... 28<br />
Labels .......................................................... 29<br />
Technical Specification .............................. 30-31<br />
Lifter Dimensions..................................... 31<br />
3
Foreword<br />
Thank you for purchasing ARJO equipment<br />
Your <strong>Sara</strong> <strong>Plus</strong> is part of a series of quality products<br />
designed especially for hospitals, nursing homes<br />
and other health care uses.<br />
We are dedicated to serving your needs and<br />
providing the best products available along with<br />
training that will bring your staff maximum benefit<br />
from every ARJO product.<br />
Please contact us if you have any questions about<br />
the operation or maintenance of your ARJO<br />
equipment.<br />
The touch panel label on the dual control panel<br />
displays several instruction symbols. The letter (i)<br />
shown on the open book icon indicates<br />
‘information’, and is an instruction to always read<br />
the operating instructions before use. (See fig 1).<br />
The expected operational life of your ARJO lifter is<br />
10 (ten) years from the date of manufacture,<br />
providing the following conditions are adhered to:-<br />
Conditions<br />
• The unit is cared for and serviced in accordance<br />
with recommended, published “Operating and<br />
Product Care Instructions” and the “Preventive<br />
Maintenance Schedule”.<br />
• The unit is maintained to the minimum<br />
requirements as published in the “Preventive<br />
Maintenance Schedule”.<br />
• The servicing and product care, in accordance<br />
with ARJO requirements, must begin on first<br />
use of the unit by the customer.<br />
• The equipment is used for its intended purpose<br />
only and is operated within the published<br />
limitations.<br />
• Only ARJO designated spare parts should be<br />
used.<br />
Consumables<br />
The expected operational life for fabric slings and<br />
fabric stretchers is approximately 2 years from date<br />
of purchase. This life expectancy only applies if the<br />
slings and stretchers have been cleaned, maintained<br />
and inspected in accordance with the “ARJO Sling<br />
Information” documents, the “Operating and<br />
Product Care Instructions” and the “Preventive<br />
Maintenance Schedule”.<br />
The expected life for other consumable products,<br />
such as batteries, fuses, lamps, gel cushions, filters,<br />
4<br />
seal kits, seat inserts, mattresses, safety belts,<br />
padded covers, straps and cords is dependent upon<br />
the care and usage of the equipment concerned.<br />
Consumables must be maintained in accordance<br />
with published “Operating and Product Care<br />
Instructions” and the “Preventive Maintenance<br />
Schedule”.<br />
All references to the patient in these instructions<br />
refer to the person being lifted, and reference to the<br />
attendant refer to the person who operates the lifter.<br />
References to left and right of the lifter in these<br />
instructions are as viewed from the rear of the <strong>Sara</strong><br />
<strong>Plus</strong>, i.e. viewed from the dual control panel (see<br />
Fig. 1)<br />
Lifting operations in these instructions are described<br />
as if lifting a patient from a chair, the same<br />
operations can be performed effectively when<br />
lifting a patient from a wheelchair or sitting position<br />
on a bed, although a second attendant should<br />
support the patient if the patient lacks sitting<br />
balance.<br />
All operations in these instructions are described as<br />
if the attendant were using the control handset. Each<br />
operation described can be controlled using the<br />
control handset and/or the dual switch panel,<br />
situated at the rear of the mast.<br />
The <strong>Sara</strong> <strong>Plus</strong> is manufactured to a very high<br />
standard, and primarily designed to assist patients<br />
when standing and toileting, for use as a short<br />
distance patient transfer aid, and for standing and<br />
walking practice.<br />
When used as a standing aid the <strong>Sara</strong> <strong>Plus</strong> is<br />
extremely useful for quick easy transfers from one<br />
sitting position to another, and to elevate a patient<br />
for toileting, repositioning, changing of<br />
incontinence pads or wound dressings, standing<br />
practice etc. it is not intended for long periods of<br />
suspension or transportation.<br />
Some information contained in these instructions<br />
may become outdated, due to improvements made<br />
to this product in the future. If you have any<br />
questions regarding these instructions or your lifter,<br />
please contact ARJO or their approved distributor.
Safety Instructions<br />
Symbols used adjacent to the text in these<br />
instructions:-<br />
Warning: Means:- failure to understand<br />
and obey this warning may result in<br />
injury to you or to others.<br />
Caution: Means:- failure to follow<br />
these instructions may cause damage to<br />
all or parts of the system or equipment.<br />
• Note: Means:- this is important<br />
information for the correct use of this<br />
system or equipment.<br />
This product has been designed and manufactured<br />
to provide you with trouble free use, however, this<br />
product does contain components that with regular<br />
use are subject to wear.<br />
Warning: SOME OF THESE PARTS<br />
ARE SAFETY CRITICAL TO THE<br />
OPERATION OF THE LIFTER AND<br />
WILL NEED EXAMINING AND<br />
SERVICING ON A REGULAR BASIS<br />
AND MUST BE REPLACED WHEN<br />
NECESSARY. See also “Care of your<br />
<strong>Sara</strong> <strong>Plus</strong>” section.<br />
Warning: IMPORTANT: When using<br />
the transfer and walking sling for the<br />
transfer operation the maximum lifting<br />
capacity is 140Kg (308lbs). When using<br />
the same sling for walking practice the<br />
maximum lifting capacity is 190Kg<br />
(420lbs).<br />
Do not exceed these weight limits.<br />
Warning: It is advisable to familiarise<br />
yourself and understand the operation of<br />
the various controls and features of the<br />
<strong>Sara</strong> <strong>Plus</strong> as described in “Product<br />
Description/Function” section in this<br />
manual and ensure that any action or<br />
check specified is carried out before<br />
commencing to lift a patient.<br />
5<br />
INTENDED USE<br />
<strong>Sara</strong> <strong>Plus</strong> is a standing and raising aid for short<br />
transfers e.g. raising from bed and transfer to<br />
wheelchair, or from wheelchair to toilet. <strong>Sara</strong> <strong>Plus</strong> is<br />
also suitable for walking training when the<br />
footboard and kneepad are removed.<br />
<strong>Sara</strong> <strong>Plus</strong> is intended to be used in hospitals, nursing<br />
homes or other health care facilities for the different<br />
categories of residents/patients<br />
Category C, where the resident/patient<br />
"Sits in a wheelchair<br />
"Is able to partially bear weight on at least one leg<br />
"Has some trunk stability<br />
"Is dependent on the caregiver in most situations<br />
"Need mobility-maintaining standing exercises<br />
Or,Category D, where the resident/patient<br />
"Sits in a wheelchair<br />
"Is dependent on the caregiver in most situations<br />
"SARA <strong>Plus</strong> is the only standing and raising aid<br />
where a resident/patient such as Category D, can<br />
safely be raisied and transferred. The unique support<br />
of the EPS (Extra Postural Support) /BOS sling<br />
makes it feasible.<br />
<strong>Sara</strong> <strong>Plus</strong> shall always be handled by a trained<br />
caregiver and in accordance with the instructions<br />
outlined in these Operating and Product Care<br />
Instructions.<br />
<strong>Sara</strong> <strong>Plus</strong> is intended to be used with specifically<br />
designed ARJO slings<br />
Lifting operations in these instructions are described<br />
as if lifting a patient from a chair, the same<br />
operations can be performed effectively when<br />
lifting a patient from a sitting position on a bed,<br />
although a second attendant should support the<br />
patient if the patient lacks sitting balance.<br />
Caution: Although manufactured to a<br />
high standard the <strong>Sara</strong> <strong>Plus</strong> and<br />
accessories should not be left for extended<br />
periods in humid or wet areas.<br />
Do not under any circumstances spray the<br />
<strong>Sara</strong> <strong>Plus</strong> or accessories (excluding<br />
slings) with water e.g. under the shower.
Product Description/Function<br />
Parts referred to in this manual<br />
8<br />
10<br />
11<br />
9<br />
7<br />
6<br />
1. Manoeuvring handle<br />
2. Battery pack<br />
3. Braked castors (rear)<br />
4. Chassis legs<br />
5. Front castors (unbraked)<br />
6. Foot support (removeable)<br />
7. Commode pan (optional)<br />
8. Commode seat and frame (optional)<br />
9. Proactive Pad (Adjustable)<br />
10. Sling attachment cords<br />
11. Arc-Rest (Supportive arm rests with<br />
handgrips)<br />
12. Detail view of cord locking cleats<br />
13. dual control panel<br />
14. Control handset<br />
15. System failure lower override knob<br />
12<br />
5<br />
22<br />
4<br />
3<br />
6<br />
2<br />
1<br />
23<br />
20<br />
19<br />
18<br />
24<br />
17<br />
Fig. 1<br />
16. Label - System failure lower override<br />
identification<br />
17. Handset cable connection<br />
18. Battery discharge indicator<br />
19. Reset button (green)<br />
20. Emergency stop button (red)<br />
21. Label - Read operating instructions before use<br />
22. Label - Sling size guide<br />
23. Hour meter<br />
24. Scale display panel (if fitted)<br />
21<br />
13<br />
16<br />
14<br />
15<br />
P1331a/2, P1431a, P1224, P1381c
Product Description/Function<br />
Unpack the battery pack supplied, and fully charge<br />
it as described in “Battery Charging section”.<br />
When the battery pack is charged, disconnect the<br />
mains power, then remove the pack from the charger<br />
and insert it fully into the <strong>Sara</strong> <strong>Plus</strong> battery position,<br />
located at the left hand side of the lifter. Locate the<br />
recess in the bottom of the battery with the<br />
protrusion at the bottom of the battery position then<br />
pivot the battery into position until the retaining<br />
catch operates. Electrical connection is made<br />
automatically.<br />
Ensure that the green reset button situated on the<br />
back of the lifter cover is pressed in. (see inset to<br />
Fig. 1).<br />
Check that the system failure lower override knob is<br />
turned fully clockwise and finger tight, (see Fig. 1).<br />
Ensure that both sling types are available for the<br />
types of lift likely to be encountered when using the<br />
ARJO <strong>Sara</strong> <strong>Plus</strong>.<br />
Two types of sling can be used with the <strong>Sara</strong> <strong>Plus</strong>.<br />
Standing Sling – a single loop, used for supporting<br />
patients at the toilet, and to aid in the standing<br />
process. The sling has a ‘fleece’ cover for added<br />
comfort, which can be easily removed for cleaning.<br />
Transfer and Walking Sling – A loop sling with<br />
back, buttock and leg support, used for easy and<br />
comfortable transporting of patients over short<br />
distances without the need for the detachable seat<br />
frame. By using different attachment straps the<br />
same sling can be used for supporting patients<br />
during the training procedure of standing, stepping<br />
and walking under the supervision of trained<br />
nursing staff. The sling has variable adjustment.<br />
Note: The slings have colour coded connection<br />
loops for size identification, as follows:-<br />
Red - Small (S)<br />
Yellow - Medium (M)<br />
Green - Large (L)<br />
Blue - Extra Large (XL)<br />
A circular label is fitted to the central lifting tube for<br />
quick colour to size reference. (see fig 1)<br />
7<br />
Controls and Features<br />
Control handset:- Is a semi-remote control unit<br />
attached to the lifter by an extending cable. The<br />
handset controls lift and lower and chassis leg<br />
opening/closing. Direction arrows adjacent to the<br />
buttons indicate each function. (See Fig. 2). If<br />
pressure is released from any button during use,<br />
powered movement will stop immediately.<br />
‘Raise’ button<br />
‘Chassis legs<br />
open’ button<br />
‘Lower’ button<br />
‘Chassis legs<br />
close’ button<br />
P1396a<br />
Fig. 2<br />
Dual control panel:- offers the same controls as<br />
the handset and is conveniently positioned on the<br />
top of the main body of the lifter (See Fig. 3).<br />
P1431b<br />
Fig. 3<br />
Emergency stop button (red):- (see fig 1) If, in an<br />
emergency, you have to immediately stop any<br />
powered movement, (other than by releasing<br />
pressure on the button either on the handset or dual<br />
control panel), press the “emergency stop button<br />
situated on the back of the cover below the dual<br />
control panel. (See Fig. 1).This function can also be<br />
utilised to ensure that no powered operation is<br />
accidentally used when either transporting the lifter,<br />
or leaving the lifter in store or unattended.
Product Description/Function<br />
Once the emergency stop button has been operated,<br />
the green reset button will have to be re-engaged by<br />
pressing it in, before any powered movement can be<br />
utilised.<br />
Reset button (green):- (see Fig. 1) Adjacent to the<br />
emergency stop button. It is used to reset the ‘power<br />
on’ condition, once the emergency stop button has<br />
been operated, also used to reset if the automatic<br />
overload fuse has operated (indicated by the reset<br />
button projecting outwards slightly). If the fuse has<br />
operated and once reset, operates again, withdraw<br />
the lifter from use and contact ARJO Service<br />
department or their appointed distributor.<br />
Automatic cut out:- (not an operator control but a<br />
function built into the lifter electronics):-<br />
If the lifter is inadvertently overloaded (trying to lift<br />
a patient heavier than permitted), an automatic ‘cut<br />
out’ operates to prevent the lifter raising a load in<br />
excess of one and a half times the maximum rated<br />
load; this will stop the lift motion automatically.<br />
If this occurs, when pressure is released from the lift<br />
button on the handset or dual control the electronics<br />
will reset and enable the patient to be lowered only,<br />
by pressing either lower button. Remove the patient<br />
from the lifter.<br />
Automatic stop function:- Great care should be<br />
taken not to lower the patient support arms onto the<br />
patient or any other obstruction but if this should<br />
happen inadvertently the motor will continue to run<br />
but downward movement will be held by the<br />
obstruction. If this occurs release pressure from the<br />
‘lower’ button immediately, operate the ‘raise’<br />
button until clear, then remove the obstruction.<br />
System failure lower override:- This can be used<br />
in the event of main control failure. In the unlikely<br />
event that the control handset or dual control panel<br />
fails to operate the lifter, with a patient still<br />
supported by the sling, provision for lowering has<br />
been made, using the “lower override knob”,<br />
situated on the right hand side of the main cover (see<br />
Fig. 4). A label situated above the switch is for quick<br />
and easy recognition (see Fig. 1) To operate the<br />
lower override, turn the knob anti clockwise half a<br />
turn, to cease lowering turn the knob clockwise until<br />
finger tight only (do not over tighten), only use this<br />
knob in the event of normal control failure do not<br />
use it for normal function lowering.<br />
Warning: Before operating the lower<br />
override to lower a patient, always ensure<br />
that a chair or suitable support is<br />
underneath ready to accept the patient.<br />
8<br />
P1332c<br />
Fig. 4<br />
The lower override will operate whether the<br />
emergency stop button has been operated or not.<br />
The “automatic stop function” of the jib will still<br />
operate when using the lower override knob.<br />
When using the <strong>Sara</strong> <strong>Plus</strong> normally, always ensure<br />
the system failure lower override knob is always<br />
turned fully clockwise and finger tight.<br />
Battery Discharge Indicator:- is a small LED<br />
display which shows the charge condition of the<br />
lifter battery. (See Fig. 1 and also ‘Battery Charging<br />
Section’ for complete description).<br />
Hour Meter:- Is a small LCD display (See Fig. 1)<br />
which shows the total duration of powered<br />
operation (in hours). This is primarily intended as an<br />
aid to service engineers and to help the attendant<br />
calculate servicing intervals.<br />
Chassis castor Brakes:- The chassis rear castors<br />
have brakes which can be foot operated if required,<br />
(see Fig. 5) for example, when leaving the patient<br />
unattended, or to keep the <strong>Sara</strong> <strong>Plus</strong> in position.<br />
Straight line steering function :- When using the<br />
<strong>Sara</strong> <strong>Plus</strong> for walking practice it may be considered<br />
useful to fix one of the castors to steer in a straight<br />
line. This has the effect of allowing the <strong>Sara</strong> <strong>Plus</strong>,<br />
without assistance to follow the intended straight<br />
line walked by the patient. The function is activated<br />
by flipping over the steering guide on the rear castor<br />
to hold it in position (see Fig. 5).<br />
Straight line<br />
steering guide<br />
P1332e, f<br />
Fig. 5
Product Description/Function<br />
Arc-Rest (with handgrips):- Integral Part of the<br />
Lifting mechanism of the lifter, the intuitive and<br />
supportive armrests allow patient participation and<br />
comfort during the lifting procedure. (See Fig. 1)<br />
Foot Support:- For positioning the patient’s feet<br />
when lifting and transporting, it can be removed if<br />
using the <strong>Sara</strong> <strong>Plus</strong> to lift a patient to their feet prior<br />
to them using a walking aid eg. “Zimmer” etc. To<br />
remove the foot support, raise the Proactive knee<br />
support to its highest position, (note: where<br />
installed, unclip one side of the “Velcro” tie strap<br />
from around the foot support cover and slide the<br />
cover up the knee support column). Position<br />
yourself between the chassis legs and grip both sides<br />
of the foot support, lift up the front half of the foot<br />
support until it just comes into contact with the foot<br />
support bracket (see fig. 6), whilst it is in this<br />
position pivot the rear of the foot support upwards<br />
until the foot support is horizontal. Pull the foot<br />
support towards yourself until it is clear of the<br />
support bracket. Store carefully for future use.<br />
Slide the foot support cover back down into position<br />
and secure using the “Velcro” strap. Re-adjust the<br />
Proactive kneepad to the position required.<br />
Re-fitting the foot support is acheived by reversing<br />
the above procedure. Note: Ensure the two hooks on<br />
the foot support locate over the top two locating<br />
buttons.<br />
P1450<br />
Fig. 6<br />
Proactive Pad:- This is a reactive lower leg<br />
support Fig. 1 and 7), which enables the patient to be<br />
lifted comfortably and effortlessly. It can be<br />
adjusted vertically for differing lower leg lengths<br />
and is sprung to stay in contact, when the patient’s<br />
9<br />
legs move radially during the lifting procedure. To<br />
adjust, hold the Proactive Pad with one hand (see<br />
Fig. 7) and slacken the clamping screw knob with<br />
the other hand. When the correct height has been<br />
established re-tighten the knob.<br />
Proactive Pad clamping<br />
screw knob<br />
Proactive Pad <br />
P1334c/2<br />
Fig. 7<br />
It can be removed from its mount quickly, for<br />
walking practice, simply by lifting upwards, after<br />
the foot support has been removed.<br />
Lower leg Straps:- An optional accessory used for<br />
ensuring the lower parts of the patient’s legs stay in<br />
close proximity to the Proactive Pad for correct<br />
lifting procedure.<br />
The Strap ensures the lower parts of the patient’s<br />
legs stay in close proximity to the Proactive Pad for<br />
correct lifting procedure. The strap is held in<br />
position in relationship to the Proactive Pad by<br />
passing through the guides on the back of the<br />
Proactive Pad then around the patients lower calves<br />
to be finally overlapped and pressed together to join<br />
the “velcro” fastening. (See Fig. 8). Ensure the strap<br />
is firm but comfortable for the patient<br />
.<br />
P1333a/2<br />
Fig. 8
Product Description/Function<br />
Adjustable width chassis legs:- By operating the<br />
appropriate button on either the control handset or<br />
dual control panel on the lifter the chassis legs can<br />
be opened to any variable width (See Fig. 9). When<br />
pressure is released from the button, movement will<br />
stop and the chassis legs will remain securely in<br />
position.<br />
• Note: Transportation should be<br />
done with the chassis legs closed, it will<br />
be easier through doorways etc.<br />
P1332d<br />
Fig. 9<br />
Warning: At all times the patient and/or<br />
operator should not allow their feet or any<br />
other part of their body to be placed in the<br />
area between the foot support and chassis<br />
legs when the chassis legs are closing.<br />
Commode Seat (Accessory)<br />
For toileting patients at the chair or bedside or for<br />
patients who cannot be transported with the transfer<br />
sling, the use of the commode seat and frame is the<br />
recommended method of transporting patients over<br />
longer distances. The commode frame is inserted<br />
into the holes in the chassis legs (see Fig. 10), once<br />
the patient has been lifted to a standing or near<br />
standing position in the manner previously<br />
described.<br />
P1335d/2<br />
Fig. 10<br />
10<br />
Removal of any clothing can be attended to, and the<br />
patient is then lowered down onto the commode<br />
seat. It is recommended that the patient is kept<br />
supported by the sling.<br />
The retractable commode pan, accessible from the<br />
rear of the seat, (see Fig. 11), may be utilised, or<br />
removed to enable the patient to be positioned over<br />
a toilet. Apply chassis brakes if leaving the patient<br />
unattended.<br />
P1335e<br />
Fig. 11
Using your <strong>Sara</strong> <strong>Plus</strong><br />
Using the <strong>Sara</strong> <strong>Plus</strong> for Toiletting<br />
and Transporting<br />
Before approaching the Patient the attendant should<br />
always tell the patient what they are going to do, and<br />
have the correct size and type of sling ready. (See<br />
description of sling types in the “Introduction”<br />
section.)<br />
Although the sling can be fitted to the patient with<br />
the <strong>Sara</strong> <strong>Plus</strong> in close proximity it may be<br />
considered easier to fit the sling to the patient with<br />
the <strong>Sara</strong> <strong>Plus</strong> away.<br />
Once the sling has been fitted (see following<br />
sections) the <strong>Sara</strong> <strong>Plus</strong> may be brought to the patient<br />
as follows:-<br />
Adjust the height of the Patient Support arms to be<br />
raised or lowered sufficiently to avoid approaching<br />
the patient at eye level, making allowances for the<br />
patients arms and any obstructions, e.g. chair arms<br />
etc.<br />
Approach the patient from the front with the lifter,<br />
stop before the foot support and Proactive Pad are<br />
in contact with the patient. (See Fig. 12)<br />
P1334a/2<br />
Fig. 12<br />
• Note: If required, the chassis legs<br />
may be opened to go around the chair, by<br />
operating the appropriate button on the<br />
control handset or dual control on the<br />
lifter.<br />
• Note: Note: If If the handset handset button or dual<br />
control control button is released during any<br />
function, powered motion will will stop<br />
immediately.<br />
When the patient is ready, give assistance or allow<br />
the patient to place his/her feet on the foot support,<br />
pushing the <strong>Sara</strong> <strong>Plus</strong> towards the patient a little to<br />
achieve this easily. (See Fig. 13).<br />
11<br />
P1334b/2<br />
Fig. 13<br />
Adjust the Proactive Pad height (if necessary) –<br />
an approximate guide is to align the top of the<br />
Proactive Pad just below the patient’s patella.<br />
(See Fig. 14).<br />
P1334g/2<br />
Fig. 14<br />
Carefully push the lifter in closer to make full lower<br />
leg contact with the Proactive Pad (see Fig. 15),<br />
then apply the chassis brakes.<br />
P1331e/2<br />
Fig. 15<br />
For the use of each individual type of sling see<br />
following sections: -
Using your <strong>Sara</strong> <strong>Plus</strong><br />
Standing Sling<br />
Warning: Assessment will have to be<br />
made whether the patient requires the<br />
lower leg straps, apply if necessary.<br />
Allow the patient to hold the handgrips, with their<br />
arms resting on the Arc-Rest. This will not apply if<br />
fitting the sling around the patient before the <strong>Sara</strong><br />
<strong>Plus</strong> is brought into close proximity.<br />
Encourage the patient to lean slightly forwards to<br />
enable the sling to be placed around the lower back<br />
of the patient (see Fig. 16). Position the sling around<br />
the patient’s back so that the bottom of the sling lies<br />
horizontally approximately two inches above the<br />
patient’s waistline, with the patient’s arms outside<br />
the sling. Ensure the support strap is separated,<br />
brought loosely around the body, and is not twisted<br />
or trapped behind the patient’s back.<br />
P1333b<br />
Fig. 16<br />
Fasten the support strap securely by overlapping<br />
and pressing the “Velcro” together. The strap should<br />
be tight, but comfortable for the patient. (See Fig.<br />
17).<br />
• Note: As stated previously, the<br />
standing sling may be applied before the<br />
<strong>Sara</strong> <strong>Plus</strong> is brought into position as<br />
shown in figure 13.<br />
Warning: The support strap must<br />
always be applied when using any of the<br />
slings.<br />
12<br />
• Note: The support strap will assist<br />
in supporting the patient in the sling<br />
during the lifting procedure. The strap<br />
also retains the sling in the correct<br />
position around the patient.<br />
P1333c<br />
Fig. 17<br />
If the <strong>Sara</strong> <strong>Plus</strong> is not already in close proximity to<br />
the patient bring it to the patient as described<br />
previously.<br />
Take each adjustment cord in turn and attach to the<br />
sling. (See Fig. 18).<br />
Fitting the Loop Lock cord attachment system<br />
Cone<br />
‘Cup’ section<br />
P1333d, e, f<br />
Fig. 18
Using your <strong>Sara</strong> <strong>Plus</strong><br />
Warning: Ensure the cone is pulled<br />
tightly into the cup section. (See Fig. 18).<br />
When both cords are attached correctly make<br />
adjustments on both cords equally so that any slack<br />
is taken up in each cord and the back section of the<br />
sling supports the patient comfortably and securely,<br />
lock the adjustment cords down into the cord<br />
retaining cleats. (See Fig. 19).<br />
Warning: Ensure the cord end knobs are<br />
away from the proactive pad when the<br />
patients legs are near or in contact with the<br />
pad.<br />
Detail view showing cords & cleats<br />
P1331b/2, P1381b<br />
Fig. 19<br />
• Note: The patient should be<br />
supported by the sling, but not pulled<br />
forward too much. (See Fig. 20)<br />
P1334e/2<br />
Fig. 20<br />
13<br />
If possible, the patient should then hold on to the<br />
Patient Support arms with one or both hands.<br />
The patient is then ready to be lifted.<br />
• Note: If the handset button or dual<br />
control button is released during lifting<br />
or lowering powered motion will stop<br />
immediately.<br />
If the patient is able to offer some assistance when<br />
standing this may be beneficial to patient<br />
confidence and muscular exercise. Encourage the<br />
patient to assist all he/she can to raise from the chair<br />
and/or steady themselves.<br />
Operate the lift button on the handset or dual control<br />
panel to raise the patient to a suitable and<br />
comfortable height for the particular function, e.g.<br />
transportation, toileting with commode, etc. (See<br />
Fig. 21)<br />
P1334f/2<br />
Fig. 21<br />
IMPORTANT: Always check that the sling<br />
adjustment cords are fully in position and locked<br />
before and during the commencement of the lifting<br />
cycle, and in tension as the patient’s weight is<br />
gradually taken up.<br />
• Note: If the patient can stand<br />
sufficiently well and lock his/her knees in<br />
the normal way when fully raised, their<br />
knees will come away from the Proactive<br />
Pad and he/she will be able to lean<br />
back into the sling.<br />
Patients who can only hold on with one hand, (those<br />
who have suffered a “stroke”, for example) may still<br />
be lifted by using the <strong>Sara</strong> <strong>Plus</strong>. The patient may<br />
just rest the unusable arm on the Arc-Rest or hold it<br />
across their chest, and rest their elbow on the end of<br />
the Arc-Rest, while their useable hand holds the<br />
handgrip in the normal way.
Using your <strong>Sara</strong> <strong>Plus</strong><br />
Warning: Only use this or other<br />
methods after a satisfactory professional<br />
assessment has been carried out on the<br />
individual patient.<br />
If required insert the detachable seat frame into the<br />
receptor holes in the chassis legs, then lower the<br />
patient to a comfortable seating position for<br />
commode toiletting or longer distance<br />
transportation. (See Fig. 22).<br />
PP1331e/2<br />
Fig. 22<br />
• Note: The chassis legs will have to<br />
be adjusted to the closed position to fit<br />
the seat frame.<br />
Release the brakes, and transfer the patient to new<br />
position, i.e., toilet, wheelchair, chair, bed, etc.<br />
• Note: Transportation should be<br />
done with the chassis legs closed, it will<br />
be easier through doorways etc.<br />
While the patient is raised, make any necessary<br />
adjustments to clothing, incontinence pads etc.,<br />
before lowering again. Lower the patient carefully<br />
using the control handset or dual control panel.<br />
Warning: Apply the chassis brakes if<br />
leaving the patient at the toilet, or if<br />
leaving the patient unattended.<br />
When the patient is seated in the new position, and<br />
you wish to remove the sling.<br />
Pull each cord up from the locking cleats and<br />
slacken the cords sufficiently to release the Loop<br />
Lock fitting, then remove the cords from the<br />
sling.<br />
14<br />
Pull apart the “Velcro” fastening to remove the<br />
support strap.<br />
Warning: Do not attempt to release the<br />
support strap while the patient is<br />
supported by the sling.<br />
Remove the sling from the patient.<br />
Remove the lower leg straps if they have been<br />
applied.<br />
Warning: If the patient lacks sitting<br />
balance and has been returned to sit on the<br />
side of the bed a second attendant may be<br />
needed to support the patient while the<br />
sling is being removed.<br />
Transfer and Walking Sling<br />
Using the sling for transfer (140Kg - 308 lbs<br />
maximum patient weight):- The attendant should<br />
always tell the patient what they are going to do, and<br />
have the correct size and type of sling ready. (See<br />
description of sling types in the “Introduction”<br />
section.)<br />
Encourage the patient to lean slightly forwards to<br />
enable the selected sling to be placed around the<br />
lower back of the patient (see Fig. 23). Position the<br />
sling around the patient’s back so that the bottom<br />
edge of the sling is level with the base of the spine.<br />
Ensure the patient’s arms are outside the sling and<br />
that the support strap is separated.<br />
Take each leg section of the sling in turn and slide<br />
under each leg, (see Fig. 24).<br />
Bring the support strap around the body and fasten<br />
securely by overlapping and pressing the “Velcro”<br />
together.<br />
P1337a<br />
Fig. 23<br />
Take each leg section of the sling in turn and slide<br />
under each leg, (see Fig. 25).
Using your <strong>Sara</strong> <strong>Plus</strong><br />
Fig. 24<br />
• Note: The support strap will assist<br />
in supporting the patient in the sling<br />
during the lifting procedure.<br />
The strap should be tight but comfortable for the<br />
patient. (See Fig. 26).<br />
P1337b<br />
P1337d<br />
Fig. 25<br />
15<br />
P1334a/2<br />
Fig. 26<br />
• Note: If required, the chassis legs<br />
may be opened to go around the chair, by<br />
operating the appropriate button on the<br />
control handset or dual control on the<br />
lifter.<br />
• Note: If the handset button or dual<br />
control button is released during any<br />
function, powered motion will stop<br />
immediately.<br />
Give assistance or allow the patient to place his/her<br />
feet on the foot support, pushing the <strong>Sara</strong> <strong>Plus</strong><br />
towards the patient a little to achieve this easily.<br />
(See Fig. 27).<br />
P334b/2<br />
Fig. 27<br />
Adjust the Proactive Pad height (if necessary) - to<br />
align the top of the Proactive Pad just above the<br />
patients patella, or adjust the pad to its highest<br />
position. (see Fig. 28).
Using your <strong>Sara</strong> <strong>Plus</strong><br />
Identify the attachment loop on each side of the<br />
sling and attach the right hand adjustment cord to<br />
the left loop, repeat for the other side (see Fig. 29).<br />
See also Fig. 18 for attachment of the cords.<br />
P1337c<br />
Fig. 29<br />
When both cords are attached correctly make<br />
adjustments on both cords equally so that any slack<br />
in the cord is taken up.<br />
Warning: Lock the adjustment cords<br />
down into the cord retaining cleats (see<br />
also Fig. 30).<br />
Warning: Ensure the cord end knobs are<br />
away from the proactive pad when the<br />
patients legs are near or in contact with the<br />
pad.<br />
P1334d/2<br />
Fig. 28<br />
16<br />
Detail view showing cords & cleats<br />
P1338a, P1381b<br />
Fig. 30<br />
Identify the support strap on each side of the sling<br />
(fitted with a plastic attachment clip), and adjust<br />
both straps to their maximum length. Attach each<br />
clip to the lug situated on the outer sides of the Arc-<br />
Rest (see Fig. 31).<br />
P1338b<br />
Fig. 31<br />
Warning: Ensure each clip is attached<br />
correctly and secure onto the lug.<br />
Allow the patient to hold the hand grips with their<br />
arms resting on the Arc-Rest.<br />
Operate the lift button on the handset or dual control<br />
panel, continue to raise until each support strap is in<br />
tension and the patient’s back just comes away from<br />
the chair, then stop the lift. Then adjust both cords<br />
equally to take up any slack, lock both cords into the<br />
locking cleats. (See Fig. 32).<br />
Continue raising until the patient is just clear of the<br />
seat.
Using your <strong>Sara</strong> <strong>Plus</strong><br />
If any discomfort is experienced by the patient<br />
return to the sitting position and re-adjust.<br />
Warning: Important: Always check<br />
that the sling adjustment cords and<br />
support strap attachment clips are fully in<br />
position and locked before and during the<br />
commencement of the lifting cycle, and in<br />
tension as the patients weight is gradually<br />
taken up.<br />
Be careful not to raise the patient too high as this<br />
will negate the comfort of the transfer sling.<br />
Release the chassis brakes and close the chassis<br />
legs, then transport the patient to desired<br />
position.(See Fig. 33).<br />
P1338d<br />
Fig. 33<br />
Transportation should be done with the chassis legs<br />
closed, it will be easier through doorways etc.<br />
Warning: Apply the chassis brakes if<br />
leaving the patient unattended.<br />
Do not attempt to release the straps or<br />
cords while the patient is supported by the<br />
sling.<br />
P1338c<br />
Fig. 32<br />
17<br />
Using the sling for walking practice - (190Kg -<br />
420 lbs maximum patient weight):-<br />
Remove the foot support from the lifter and store<br />
carefully for future use (see “Product Description/<br />
Function” section in this manual).<br />
As with all types of lift, before approaching the<br />
patient the attendant should always tell the patient<br />
what they are going to do, and have the correct size<br />
and type of sling ready.<br />
Encourage the patient to lean slightly forwards to<br />
enable the selected sling to be placed around the<br />
lower back of the patient (see Fig. 23). Position the<br />
sling around the patient’s back so that the bottom<br />
edge of the sling is level with the base of the spine.<br />
Ensure the patient’s arms are outside the sling and<br />
that the support strap is separated. Bring the support<br />
strap around the body and fasten securely by<br />
overlapping and pressing the “Velcro” together. The<br />
strap should be tight but comfortable for the patient.<br />
• Note: The support strap will assist<br />
in supporting the patient in the sling<br />
during the lifting procedure.<br />
Take each leg section of the sling in turn and slide<br />
under each leg (See Fig. 25).<br />
Pull up each leg section strap and connect to each<br />
corresponding body strap, by connecting both<br />
halves of the buckles securely (see Fig. 34).<br />
P1339d<br />
Fig. 34<br />
Adjust the straps to be supportive but not restrictive<br />
for the patient. (See Fig. 35).<br />
• Note: The leg section strap<br />
connection can be performed after the<br />
patient has been lifted if preferred.
Using your <strong>Sara</strong> <strong>Plus</strong><br />
Adjust the height of the Arc-Rest to be as low as<br />
possible, making allowances for obstructions, e.g.<br />
Chair arms etc.<br />
Approach the patient from the front with the lifter;<br />
stop before the Proactive Pad is in contact with the<br />
patient. (See Fig. 36).<br />
P1331d/2<br />
Fig. 36<br />
• Note: If required, the chassis legs<br />
may be opened to go around the chair, by<br />
operating the appropriate button on the<br />
control handset or dual control on the<br />
lifter.<br />
• Note: If the handset button or dual<br />
control button is released during any<br />
function, powered motion will stop<br />
immediately.<br />
Adjust the Proactive Pad height (if necessary) - an<br />
approximate guide is to align the top of the<br />
Proactive Pad just below the patient’s patella. (See<br />
Fig. 28).<br />
Carefully push the lifter in closer to make full lower<br />
leg contact with the Proactive Pad, then apply the<br />
chassis brakes.<br />
P1339e<br />
Fig. 35<br />
18<br />
Identify the cord attachment loop on each side of the<br />
sling body and attach the cords (Loop Lock method<br />
as previously shown in Fig. 18). When both cords<br />
are attached correctly adjust both cords equally so<br />
that the slack is taken up, but does not pull the<br />
patient forward.<br />
Warning: Lock the adjustment cords<br />
down into the cord retaining cleats. (See<br />
Fig. 37).<br />
Detail view showing cords & cleats<br />
P1339a, P1381b<br />
Fig. 37<br />
Allow the patient to hold the handgrips with their<br />
arms resting on the Arc-Rest.<br />
Slacken the adjustment on each body support strap<br />
(if required), enough to be able to connect the<br />
attachment clips to the lugs on the outer sides of the<br />
Arc-Rest (See Fig. 38).<br />
Detail view of<br />
strap attachment<br />
P1339c, P1381a<br />
Fig. 38
Using your <strong>Sara</strong> <strong>Plus</strong><br />
When the patient is ready, operate the lift button on<br />
the handset or dual control to raise the patient, at the<br />
same time encourage him/her to actively stand (See<br />
Fig. 39).<br />
P1339b<br />
Fig. 39<br />
Continue to raise the Arc-Rest until the patient is in<br />
a comfortably supported standing position (see<br />
Fig. 40).<br />
Fig. 40<br />
If walking practice is to be carried out ensure the<br />
patient is correctly and comfortably supported,<br />
adjust the body support straps equally to take up any<br />
slack and be supportive but not too tight and make<br />
adjustment to the Arc-Rest as necessary.<br />
When the patient is standing confidently release the<br />
brakes and pull the lifter slightly away from the<br />
patient until the Proactive Pad is clear of the patients<br />
legs (see Fig. 41).<br />
Re-apply the chassis brakes then carefully remove<br />
the Proactive Pad complete with attachment bracket<br />
by lifting upwards and store carefully for future use.<br />
(See Fig. 42).<br />
P1339f<br />
19<br />
P1340a<br />
Fig. 41<br />
P1340b<br />
Fig. 42<br />
• Note: The chassis legs may be<br />
opened or left open to give better<br />
clearance for the patient.<br />
• Note: The ‘straight line’ steering<br />
lock (if fitted) can be applied over the<br />
rear castor as an additional aid if<br />
required.<br />
With the Pro-Active pad removed and the brakes<br />
released, the patient will be able to walk at their own<br />
pace, while being supported by the <strong>Sara</strong> <strong>Plus</strong>. (See<br />
Fig. 43).
Using your <strong>Sara</strong> <strong>Plus</strong><br />
Once walking practice has been completed, apply<br />
the chassis brakes and replace the Pro-Active pad,<br />
return the patient to a chair and when fully<br />
supported, remove the sling by reversing the fitting<br />
procedure.<br />
ARJO Scale (if fitted)<br />
Fig. 43<br />
• Note: To have better flexion for the<br />
leg it may be necessary to slacken the leg<br />
straps slightly, this will allow better leg<br />
movement.<br />
Warning: Do not separate the two<br />
halves of the buckles or release the<br />
adjustment cords at any stage other than<br />
when the patient is seated and fully<br />
supported.<br />
Ensure there are no obstructions in the path<br />
before the patient is encouraged to walk.<br />
If your <strong>Sara</strong> <strong>Plus</strong> has been supplied with the integral<br />
Scale unit (see Fig. 44), it is possible to weigh a<br />
patient during the lifting procedure.<br />
The scale has been designed to weigh hospital or<br />
care facility patients under the supervision of<br />
trained nursing staff. All other uses must be<br />
avoided.<br />
P1340c<br />
20<br />
Reset Button (lbs to kg)<br />
Print out button<br />
(if facility is fitted)<br />
Scale Labels<br />
Scale operating<br />
button<br />
Visual display<br />
mP1431c<br />
Fig. 44<br />
On the labels relating to the Scale you will find the<br />
following information:-<br />
Rating and Battery Size Label<br />
(attached to the plate behind the lifter battery)<br />
Weight range 1 = 2kg - 120kg (4lbs - 264.6lbs)<br />
d = e 100g (0.2lbs)<br />
Weight range 2 = 4kg - 190kg (10lbs - 419lbs)<br />
d = e 200g (0.5lbs)<br />
d = Actual Scale Division<br />
Serial number label<br />
(attached to the plate behind the lifter battery)
Using your <strong>Sara</strong> <strong>Plus</strong><br />
Menu function<br />
Mode display<br />
Battery symbol<br />
Scale Display<br />
The scale has an LCD which displays various<br />
numbers and symbols which are explained below<br />
(see Fig. 45).<br />
Display symbols /functions<br />
Menu Functions<br />
Shows “Operation” function.<br />
Other functions are only available when calibrating.<br />
Mode Display<br />
B/G – Gross Weight<br />
NET – Net Weight<br />
Battery Symbol<br />
Lock symbol<br />
‘O’ symbol<br />
If on – battery power is low.<br />
(Approximately 1 hour of operation left).<br />
All digits flashing – batteries are exhausted.<br />
Lock symbol<br />
Input password. (Only available for special and<br />
configuration functions. Contact ARJO Service<br />
Department if a password is required).<br />
‘0’ symbol<br />
Displayed when the Scale is in zero range, 25g<br />
(0.05lbs).<br />
Dual<br />
range scale<br />
21<br />
Dual range symbol<br />
Minimum symbol<br />
Upper indicator<br />
Trend indicator<br />
Unit of<br />
measurement<br />
(kg or lb)<br />
Maximum symbol<br />
L = Low: 2kg-120kg (4lbs-264.4lbs)<br />
H = High: 4kg-190kg (10lbs-418lbs)<br />
The symbol is displayed for weights over 120kg<br />
(264.6lbs).<br />
Min symbol<br />
Displayed when the load is below 2kg (4lbs).<br />
Max symbol<br />
Fig. 45<br />
Displayed when the load is above 191.8kg<br />
(422.5lbs). If the Scale is overloaded, remove the<br />
load immediately. Do no move the Scale/lifter until<br />
the symbol is switched off.<br />
Trend indicator<br />
Visual weighing range indicator. Blocks are<br />
displayed which increase from left to right as<br />
loading increases.<br />
Unit of measurement<br />
The unit of measurement, in either ‘kg’ or ‘lbs’ will<br />
be preset before delivery. If, for any reason you need<br />
to change from ‘kg’ to ‘lbs’, press the operating<br />
button for a minimum of 10 seconds.<br />
Upper indicator<br />
Shows weight in kilograms or pounds.<br />
(-) shows, when weight is negative. (See section<br />
“Weighing with the Patient already suspended in the<br />
sling.”).<br />
P1122a
Using your <strong>Sara</strong> <strong>Plus</strong><br />
To return to the ‘kg’ setting use a ball point pen or<br />
similar to press the reset button (small dot recess).<br />
Situated on the scale display panel (see Fig. 46).<br />
Only weigh a patient when they are completely<br />
suspended with feet on the foot support. Do not<br />
attempt to weigh when the patient is sitting either in<br />
a chair or on the commode seat (if fitted).<br />
There are two methods to weigh the patient:-<br />
Method “A” Weighing before the<br />
patient is suspended in the sling.<br />
Press the scale operating button (see Fig. 46).<br />
• Note: With agitated patients the<br />
attendant should wait until the patient is<br />
calm before attempting to weigh.<br />
A display test is performed, all segments of the<br />
display are shown for approximately one second.<br />
The display will show ‘WAIT’ and after some<br />
seconds will display the mode that the scale is in.<br />
Hang the sling to be used over the Patient Support<br />
arms and press the operating button again.<br />
The scale will display “NET 0.0” (see Fig. 46).<br />
Reset Button (lbs to kg)<br />
Print out button<br />
(if facility is fitted)<br />
Scale operating<br />
button<br />
Visual display<br />
P1431c<br />
Fig. 46<br />
This procedure is to “Zero Out” (Tare) the Scale, to<br />
take account of the weight of accessories, e.g. sling<br />
etc.<br />
Remove the sling and position it around the patient,<br />
as in normal lifting procedure.<br />
Lift the patient until clear of any obstructions, e.g.<br />
chair, bed, commode seat (if fitted) etc.<br />
Ensure the patient’s feet are securely on the foot<br />
support.<br />
22<br />
Do not press the button again – the number<br />
displayed will be the weight of the patient.<br />
IMPORTANT: Do not touch or lean on the patient<br />
or lifter during the weighing operation.<br />
• Note: The scale, once switched on<br />
will operate for 6 minutes. After this time,<br />
the scale will automatically switch off.<br />
Should this happen, press the button<br />
again.<br />
Caution: Do not overload the scale. If<br />
the scale unit displays “MAX”, remove<br />
the patient immediately.<br />
Method “B” Weighing with the<br />
patient already suspended in the<br />
sling.<br />
Ensure the patient is suspended free and clear of any<br />
obstructions, e.g. chair, bed, commode seat (if<br />
fitted) etc.<br />
Press the scale operating button (see Fig. 46).<br />
• Note: With agitated patients the<br />
attendant should wait until the patient is<br />
calm before attempting to weigh.<br />
A display test will be performed, all display<br />
segments are shown for approximately one second.<br />
The display will show ‘WAIT’ and after some<br />
seconds will display the mode that the scale is in.<br />
Ignore the weight displayed, and press the operating<br />
button again.<br />
The scale will display “NET 0.0” (see Fig. 46)<br />
Lower the patient to a suitable position and remove<br />
the sling, then leave the patient sitting comfortably<br />
and move the lifter away from the patient.<br />
Hang the sling over the Patient Support arms.<br />
The weight is displayed, and although having a<br />
minus (-) sign in front of it, is the weight of the<br />
patient.<br />
Remove the sling.<br />
IMPORTANT: Do not touch or lean on the patient<br />
or lifter during weighing.
Using your <strong>Sara</strong> <strong>Plus</strong><br />
• Note: The scale, once switched on<br />
will operate for 6 minutes. After this time,<br />
the scale will automatically switch off.<br />
Should this happen, press the button<br />
again.<br />
With the scale apart from cleaning, no other special<br />
maintenance should be required.<br />
Calibration<br />
Caution: Do not overload the scale. If<br />
the scale unit displays “MAX”, remove<br />
the patient immediately.<br />
• Note: It is permissible to “Zero<br />
Out” (Tare) during operation.<br />
ARJO recommend that your scale is checked every<br />
12 months for accuracy and the calibration adjusted<br />
if necessary. This must be carried out by an ARJO<br />
service engineer. For more information contact your<br />
local Arjo distributor.<br />
23
Battery Charging<br />
Warning: The charging of the battery<br />
must only be performed away from the<br />
patient environment.<br />
The charger is for indoor use only.<br />
Only use the charger unit in a dry<br />
environment, do not use it in the bathroom.<br />
Do not expose the charger unit or battery<br />
pack to rain or spray and do not immerse in<br />
water.<br />
Do not expose the charger unit to dust.<br />
To avoid overheating, the charger must not<br />
be covered whilst in use.<br />
No smoking or naked flames in battery<br />
vicinity.<br />
The battery charger is for use only with<br />
ARJO supplied batteries that are to be used<br />
with the <strong>Sara</strong> <strong>Plus</strong>.<br />
The battery charger is for use with sealed<br />
lead acid batteries only.<br />
Under no circumstances should the<br />
charger be used to attempt to recharge nonrechargeable<br />
batteries.<br />
Do not attempt to open or tamper with the<br />
charger unit in any way, for any repair the<br />
charger must be sent to the manufacturer.<br />
The mains electricity socket must be easily<br />
accessible. Should a faulty condition occur<br />
switch off and remove the connection plug<br />
from the socket.<br />
Only use ARJO components that have<br />
been specifically designed for the purpose<br />
when charging batteries<br />
Only use the ARJO battery that is supplied<br />
to be used with the <strong>Sara</strong> <strong>Plus</strong>.<br />
Only use the ARJO charger unit supplied<br />
with the <strong>Sara</strong> <strong>Plus</strong>.<br />
Do NOT charge batteries in a sealed<br />
container.<br />
Do NOT place batteries near, or dispose<br />
of, in a fire.<br />
Do NOT short circuit a battery.<br />
Do NOT store batteries at temperatures in<br />
excess of 60°C (140°F).<br />
24<br />
Warning: Do NOT crush, puncture,<br />
open, dismantle or otherwise<br />
mechanically interfere with batteries.<br />
Should the battery casing become cracked,<br />
and electrolyte come into contact with skin<br />
or clothing, wash immediately with water.<br />
Should the battery casing become cracked,<br />
and electrolyte come into contact with skin<br />
or clothing, wash immediately with water.<br />
If the electrolyte contacts the eyes, wash<br />
immediately with copious amounts of<br />
water, and seek medical attention.<br />
When disposing of batteries, contact the<br />
appropriate local authority for advice.<br />
The abbreviation “Pb” shown adjacent to<br />
the recycling and trash bin symbols on the<br />
battery back label is the element symbol<br />
for lead, and indicates that the battery<br />
contains lead and therefore should not be<br />
disposed of in the normal manner but must<br />
be recycled.<br />
• Note: Ensure the battery is removed<br />
from the lifter if it is anticipated it will not<br />
be used for a prolonged period of time.<br />
For more details of caring for your lifter battery<br />
refer to ARJO ‘Battery Care’ literature, Part No.<br />
KDX01660.GB.<br />
The <strong>Sara</strong> <strong>Plus</strong> incorporates a battery discharge<br />
indicator, situated on the right hand side of the cover<br />
(see Fig. 1). The display shows ten levels of battery<br />
state ranging from fully charged on the right to very<br />
low on the left (green, through yellow to red).<br />
• Note: The battery discharge<br />
indicator has an energy saving function<br />
which automatically switches off the<br />
display if a function button has not been<br />
operated for at least 30 seconds. The<br />
moment a button is pressed to operate<br />
any function the display will re-start.<br />
It is recommended that the battery is removed from<br />
the lifter and recharged when the display reaches the<br />
yellow range, but lifting is possible until the display<br />
shows the red flashing light, at this point, the battery<br />
must be recharged as soon as possible.<br />
Recharging the battery pack before it reaches a low<br />
state of battery charge or certainly totally discharged<br />
will prolong its life.
Battery Charging<br />
Your lifter is fitted with an audible warning device<br />
this will sound when the battery discharge indicator<br />
reaches the red light range.<br />
To ensure the <strong>Sara</strong> <strong>Plus</strong> is always ready for use, it is<br />
recommended that a freshly charged battery pack is<br />
always available. This is achieved by having<br />
additional battery packs available and keeping one<br />
on charge while the other is in use.<br />
It may be considered good protocol to have a freshly<br />
charged battery ready for the start of every work<br />
shift.<br />
• Note: Whichever level the indicator<br />
has reached, once a fully charged battery<br />
is re-inserted into the lifter, the display<br />
will return to the green fully charged<br />
position, but if a partially charged<br />
battery is re-inserted, the level at which<br />
the indicator had reached will remain,<br />
even though the recently inserted battery<br />
may be in a better state of charge than<br />
indicated. To achieve a true indication of<br />
battery state a fully charged battery must<br />
be inserted into the lifter to reset the<br />
indicator.<br />
Place the battery pack on charge as follows:<br />
Caution: Ensure the mains power to<br />
the charger unit is switched off before<br />
connecting the battery.<br />
• Note: The cable that connects the<br />
main electricity supply to the charger is<br />
supplied as a detachable item. If using<br />
the battery charger for the first time or if<br />
the cable has been unplugged from the<br />
charger, connect the cable fully into the<br />
charger before connecting to the mains<br />
electrical socket.<br />
Warning: Always ensure the cable<br />
connection plugs that fit into the charger<br />
and into the battery are fully inserted<br />
before switching on mains electricity.<br />
When the LEDs on the battery discharge indicator<br />
display amber, complete your lift cycle then take the<br />
lifter to a convenient situation and remove the<br />
battery pack by holding the grip position of the<br />
battery and pressing the release catch situated<br />
above, pivot the battery away and lift clear. Take the<br />
battery to the battery charger unit and ensure the<br />
battery is positioned securely then insert the battery<br />
connector from the charger into the corresponding<br />
25<br />
connector in the back of the battery, switch on mains<br />
power. An orange light will be displayed on the<br />
charger unit when the battery is totally discharged.<br />
This will change to a yellow light as the battery<br />
approaches full charge capacity, finally changing to<br />
a green light when the battery is fully charged.<br />
A discharged battery should be left approximately 8<br />
hours to totally recharge (See also ARJO Battery<br />
Care document).<br />
Warning: Hold the pack firmly to<br />
ensure it does not drop and become<br />
damaged, or cause personal injury.<br />
• Note: The battery pack may be left<br />
connected to the charger unit when it is<br />
fully charged without being damaged by<br />
overcharging, this will also ensure the<br />
battery is kept fully charged.<br />
Caution: Always disconnect the mains<br />
supply before disconnecting the battery<br />
from the charger unit.<br />
When the battery pack is fully charged, disconnect<br />
the mains power, remove the battery pack from the<br />
charger, and insert it back into the <strong>Sara</strong> <strong>Plus</strong> battery<br />
position.<br />
Ensure the green reset button (situated on the rear of<br />
the mast) is pressed in (see Fig. 1).<br />
The <strong>Sara</strong> <strong>Plus</strong> is now ready for use.
Care of your <strong>Sara</strong> <strong>Plus</strong><br />
General Lifter Care<br />
How often the following actions are taken depends<br />
on how often the equipment is used.<br />
Unless otherwise stated, it is a good idea to begin<br />
once a week and then rely on experience to decide<br />
how often it is necessary in the future.<br />
Warning: The slings should be checked,<br />
and if necessary washed according to<br />
instructions on the sling, also refer to sling<br />
instruction sheet MAX.01520.INT.<br />
The Polyester fleece sling cover may be removed<br />
from the sling cushion assembly for laundering. To<br />
remove the cover, undo the tie cords at each end of<br />
the sling, open up the ‘Velcro’ seam and remove.<br />
Secure the tie cords with a knot before laundering.<br />
Warning: With regard to laundering,<br />
slings should not be classified as linen,<br />
but as an accessory to a patient transfer<br />
lifter and therefore classified as a medical<br />
device. Slings should be cleaned and<br />
disinfected only in strict accordance with<br />
the manufacturers instructions.<br />
ARJO strongly recommends that the<br />
support strap is removed from the sling<br />
prior to washing, this is to prevent ‘velcro’<br />
hook damage to the fabric of the sling. The<br />
support strap should be washed separately<br />
with the ‘velcro’ patches in the ‘closed’<br />
position i.e.: fold the strap, over on itself<br />
and press ‘velcro’ mating halves together.<br />
Always ensure the support strap is<br />
reconnected to the sling before use.<br />
Mechanical pressure should be avoided<br />
during the washing and drying procedure<br />
e.g. rolling or pressing, as these can<br />
damage parts vital to the safe and<br />
comfortable operation of the sling.<br />
It is recommended that ARJO Patient<br />
lifters, equipment, accessories and slings<br />
are regularly cleaned. If the slings, lifters<br />
and equipment needs cleaning, or are<br />
suspected of being contaminated, follow<br />
the cleaning and/or disinfection<br />
procedures recommended below, before<br />
re-using the equipment. This is especially<br />
important when using the same equipment<br />
for another patient, to minimise the risk of<br />
cross infection.<br />
26<br />
For cleaning your lifter, equipment and accessories<br />
wipe down with a damp cloth using warm water to<br />
which a disinfectant/cleaner has been added e.g.<br />
“ARJO CLEAN” - disinfectant/cleaner or<br />
equivalent.<br />
• Note: ARJO CLEAN” - disinfectant<br />
cleaner is available from ARJO. or their<br />
approved distributors.<br />
Caution: Do not over wet areas of the<br />
product which could cause problems with<br />
electrical<br />
corrosion.<br />
components or internal<br />
If a hot air dryer is used to dry the lifter, the<br />
temperature<br />
(176°F).<br />
must not exceed 80°C<br />
Do not use petroleum based solvents or<br />
similar, since this may damage plastic<br />
parts.<br />
Warning: For disinfection of<br />
contaminated lifters, equipment and<br />
accessories, use the preferred method of<br />
wiping the product completely with “hard<br />
surface disinfectant wipes” that are<br />
supplied impregnated with a 70% v/v<br />
solution of Isopropyl Alcohol.<br />
• Note: A rubbing action will be<br />
necessary when using the wipes to<br />
promote effective disinfection of the<br />
surfaces.<br />
Warning: IMPORTANT: Cleaning<br />
and disinfection products must be used in<br />
accordance with the manufacturers<br />
instructions and suitable eye, hand and<br />
clothing protection must be worn at all<br />
times when handling disinfectants.<br />
• Note: 70% v/v Isopropyl Alcohol<br />
wipes have been proved to be effective<br />
against MRSA and several other microorganisms<br />
under light soiling conditions.<br />
Ensure that the battery pack is always in a good state<br />
of charge.<br />
Check that the lifter can be propelled in a normal<br />
manner, making sure that the castors are quite free<br />
in their movement, as clogging by hair and fluff can<br />
occur, also check that the tread of the castor is not<br />
damaged.
Care of your <strong>Sara</strong> <strong>Plus</strong><br />
Warning: Ensure that the castors are<br />
firmly secured to the chassis.<br />
Carefully inspect all parts, in particular<br />
where there is personal contact with the<br />
patient’s body, ensure that no cracks or<br />
sharp edges have developed which could<br />
injure the patient’s skin or become<br />
unhygienic.<br />
It is essential that the sling attachment<br />
cords, the slings, their straps and<br />
attachment clips are carefully inspected<br />
before each and every use. If the slings,<br />
cords or straps are frayed, or the clips<br />
damaged, the sling or attachment cord<br />
should be withdrawn from use<br />
immediately and replaced.<br />
Check that all external fittings are secure<br />
and that all screws and nuts are tight.<br />
Ensure that all instruction labels are firmly<br />
attached and in good readable condition.<br />
Environmental Advice<br />
When disposing of any items associated with the<br />
lifter, contact the appropriate local authority for<br />
advice.<br />
Periodic Testing<br />
For normal operation - raise and lower the Patient<br />
Support arms using the control handset and dual<br />
control panel, this is to test for full and efficient<br />
movement.<br />
Automatic Stop Function:- With the Patient<br />
Support arms raised well above its lowest position,<br />
using the control handset lower it, and at the same<br />
time with your other hand hold the Patient Support<br />
arms up briefly. The motor will continue to run<br />
while the Patient Support arms weight is held, this is<br />
quite normal, release the button, then lower the<br />
Patient Support arms carefully. Repeat this check<br />
using the dual control lower button on the lifter. This<br />
check is for the correct function of the automatic<br />
stop.<br />
Emergency Stop:- Test the emergency stop facility<br />
by operating the control handset to lift or lower the<br />
patient support arms, and whilst operating, press in<br />
the emergency stop button. (See Fig. 1). Powered<br />
movement should stop immediately.<br />
Reset to normal function by pressing the green reset<br />
button. (See Fig. 1). Repeat for chassis legs<br />
opening / closing function, and reset the button.<br />
27<br />
Adjustable Width Chassis Function:- Open and<br />
close the chassis legs using the control handset to<br />
check for full and efficient movement.<br />
General Lifter Condition:- A general visual<br />
inspection of all external parts should be carried out,<br />
and all functions should be tested for correct<br />
operation, to ensure that no adverse damage has<br />
occurred during use.<br />
Warning: If in any doubt about the<br />
correct functioning of the <strong>Sara</strong> <strong>Plus</strong>,<br />
withdraw it from use and contact ARJO<br />
Service Department.<br />
Cleaning and Disinfecting the Toilet<br />
Commode Chair and Frame<br />
(if fitted)<br />
For exterior areas of the seat and frame the “hard<br />
surface disinfectant wipes” mentioned above will be<br />
very effective, but for internal and crevice areas of<br />
the equipment ARJO recommend that the seat and<br />
frame is cleaned in accordance with your normal<br />
cleaning and disinfecting protocol.<br />
Dis-assembly of the Commode Seat<br />
Remove the plastic commode seat from the seat<br />
frame by pulling the rear edge up sharply to<br />
disengage the locating lugs (see Fig. 47). Slide the<br />
seat forwards a short distance until clear of the<br />
frame tubes and lift away.<br />
P1248c<br />
Fig. 47<br />
To refit the commode seat, locate the seat holes over<br />
the seat frame tubes, and align the location lugs over<br />
the rear cross bar of the seat frame as shown in<br />
Fig. 48. Apply sharp downward blows onto the rear<br />
of the seat, (as shown in Fig. 49), in two places<br />
directly above the location lugs, until the seat<br />
‘snaps’ back into place.
Care of your <strong>Sara</strong> <strong>Plus</strong><br />
Servicing Advice<br />
Fig. 48<br />
Warning: Always ensure the seat is<br />
secure before allowing a patient to use it.<br />
Warning: Arjo recommend that the<br />
<strong>Sara</strong> <strong>Plus</strong> is maintained at regular<br />
intervals, see Arjo <strong>Sara</strong> <strong>Plus</strong> Preventative<br />
maintenance schedule literature Part No.<br />
PMS001.<br />
With regular use the following items are<br />
subject to wear:- Slings, batteries, sling<br />
cords, straps, castors. These items must be<br />
regularly checked as described previously,<br />
and replaced as necessary.<br />
P1248a<br />
P1248b<br />
Fig. 49<br />
28<br />
Warning: UK LIFTERS ONLY:<br />
Important legislation came into force on<br />
5th December 1998, which has an impact<br />
on the schedule of service for your patient<br />
lifter(s), variable height baths and other<br />
raising and lowering equipment. The<br />
Lifting Operations and Lifting Equipment<br />
Regulations (LOLER) 1998 and The<br />
Provision and Use of Work Equipment<br />
Regulations (PUWER 98) must be<br />
satisfied by the duty holder. A scheme of<br />
six monthly thorough examinations has<br />
been devised to comply with the law and<br />
details can be obtained from ARJO<br />
Service UK<br />
Parts lists and circuit diagrams are available from<br />
ARJO or their approved distributors on request.<br />
Warning: Spare parts, if required are<br />
available from ARJO or their approved<br />
distributors.<br />
Special tools are required for certain component<br />
replacement.<br />
Warning: The simplest; safest and most<br />
effective way to maintain your product in<br />
good working order, is to have it<br />
methodically and professionally serviced<br />
by an ARJO approved engineer using<br />
ARJO approved spare parts.<br />
For information on service and<br />
maintenance contracts, please contact your<br />
local ARJO distributor.
Labels<br />
9<br />
8<br />
7,8<br />
10<br />
7, 8<br />
1. Label - Battery discharge indicator and hour<br />
meter<br />
2. Label - ARJO logo<br />
3. Label - Emergency stop button identification<br />
4. Label - Reset button identification<br />
5. Label - Address and SWL 190kg (420 lbs)<br />
6. Label - “<strong>Sara</strong> <strong>Plus</strong>”<br />
29<br />
1<br />
Fig. 50<br />
7. Label - Safe working load 190kg (420 lbs)<br />
8. Label - CE mark<br />
9. Label - System failure lower override<br />
identification<br />
10. Label - Sling size guide<br />
11. Label - Electrical information<br />
12. Label - UL / CSA approval (US/Canada only)<br />
6<br />
5<br />
4<br />
3<br />
2<br />
P1331<br />
<strong>Sara</strong> <strong>Plus</strong><br />
12<br />
11
Technical Specification<br />
kg lbs<br />
Maximum weight limit to be lifted or carried (when using ‘standing sling’) . . . . . . . . . . . . 190 (420)<br />
Maximum weight limit to be lifted or carried (when using ‘transfer and<br />
walking sling’ for walking practice only) . . . . . . . . . . . . . . . . . . . . . . . . . . . . . . . . . . . . . . . 190 (420)<br />
Maximum weight limit to be lifted or carried (when using the ‘transfer and<br />
walking sling’ for transfer operation only) . . . . . . . . . . . . . . . . . . . . . . . . . . . . . . . . . . . . . . 140 (308)<br />
Maximum weight limit to be carried (when using ‘toilet commode seat and frame’). . . . . . 190 (420)<br />
Component Weights<br />
30<br />
kg lbs<br />
<strong>Sara</strong> <strong>Plus</strong> - non scale version (complete - less battery) . . . . . . . 75.0 (165.3)<br />
<strong>Sara</strong> <strong>Plus</strong> - scale version (complete - less battery). . . . . . . . . . . 85.6 (188.7)<br />
Battery pack . . . . . . . . . . . . . . . . . . . . . . . . . . . . . . . . . . . . . . . . . 4.9 (10.8)<br />
Commode seat and frame (option). . . . . . . . . . . . . . . . . . . . . . . . . .4 (8.8)<br />
Commode pan and holder (option). . . . . . . . . . . . . . . . . . . . . . . . 1.2 (2.6)<br />
Foot support . . . . . . . . . . . . . . . . . . . . . . . . . . . . . . . . . . . . . . . . . 4.5 (10)<br />
Electrical<br />
Battery type and part number . . . . . . . . . . . . . . . . . . . . . . . . . . . (Rechargable - lead acid) KPA0100<br />
Battery capacity . . . . . . . . . . . . . . . . . . . . . . . . . . . . . . . . . . . . . . 5Ah<br />
Battery charger part number . . . . . . . . . . . . . . . . . . . . . . . . . . . . KPA0101**<br />
. . . . . . . . . . . . . . . . . . . . . . . . . . . . . . . . . . . . . . . . . . . . . . . . . . . (Note:** indicates relevant country code)<br />
Protection class lifter . . . . . . . . . . . . . . . . . . . . . . . . . . . . . . . . . . IPX 4<br />
Protection class handcontrol. . . . . . . . . . . . . . . . . . . . . . . . . . . . . IPX 67<br />
Lifter nominal voltage . . . . . . . . . . . . . . . . . . . . . . . . . . . . . . . . . 24V DC<br />
Medical Equipment:- type B protection against electrical shock in accordance with IEC 601-1)<br />
Arjo patient handling products meet the requirements of Electromagnetic Compatibility (EMC) as stated in<br />
clause 12.5 of the Medical Devices Directive 93/42/EEC<br />
Although compliant with EMC requirements there is a remote chance that close proximity usage may<br />
affect over-sensitive electrical equipment<br />
Duty cycle Max volts Max amps<br />
Mast Lift Actuator (sealed electro-hydraulic unit). . . . . . . . . . . . 15% (9 min/hr) 24 20<br />
‘V’ Chassis Actuator (electro-mechanical unit). . . . . . . . . . . . . . 10% (6 min/hr) 24 4<br />
Maximum sound power level<br />
In accordance with ISO 3746. . . . . . . . . . . . . . . . . . . . . . . . . . . . 74dB (dB re 1pW ± 3dB)<br />
Scale<br />
Power supply . . . . . . . . . . . . . . . . . . . . . . . . . . . . . . . . . . . . . . . . Main lifter battery<br />
Protection class. . . . . . . . . . . . . . . . . . . . . . . . . . . . . . . . . . . . . . . IP 53<br />
Accuracy (standard scale) 2-50kg (4-110lbs) . . . . . . . . . . . . . . . ±.5kg (1.1lbs)<br />
Accuracy (standard scale)50-120kg (110-265lbs) . . . . . . . . . . . . ±.5kg (1.1lbs)<br />
Accuracy (standard scale)120-190kg (265-420lbs) . . . . . . . . . . . ±.5kg (1.1lbs)<br />
Environment<br />
Air humidity . . . . . . . . . . . . . . . . . . . . . . . . . . . . . . . . . . . . . . . . 80% @ 20ºC (68ºF)<br />
Usage temperature range (ambient) . . . . . . . . . . . . . . . . . . . . . . +5ºC (41ºF) to +35ºC (95ºF)<br />
Optimum usage temperature (ambient) . . . . . . . . . . . . . . . . . . . . +20ºC (68ºF) to +25ºC (77ºF)<br />
Storage and transportation temperature (ambient) . . . . . . . . . . . -10ºC (14ºF) to +45ºC (113ºF)
Technical Specification<br />
Lifter Dimensions<br />
Dimensions in millimetres (equivalent in inches)<br />
31
AUSTRALIA<br />
ARJO Hospital Equipment Pty. Ltd.<br />
205 Queensport Road, Murarrie,<br />
Brisbane QLD 4172, Australia<br />
PO Box 675, Bulimba<br />
Brisbane QLD, 4171, Australia<br />
Tel. (61) 7 3395 6311<br />
Fax. (61) 7 3395 6712<br />
Email: info@arjoaustralia.com.au<br />
SVERIGE<br />
ARJO SCANDINAVIA AB<br />
Box 61, 241 21 Eslov, Sweden<br />
Tel. +46 413-645 00<br />
Fax. +46 413-645 83<br />
E-post: kundservice@arjo.se<br />
DANMARK<br />
ARJO SCANDINAVIA<br />
Postboks 51, 4632 Bjæverskov<br />
Tel. 45 93 27 37<br />
Fax. 45 93 27 39<br />
E-post: kundservice@arjo.se<br />
NORGE<br />
ARJO SCANDINAVIA<br />
Enebakkveien 117 d, 0680 Oslo<br />
Tel. 98 28 11 70<br />
Fax. 23 05 11 99<br />
E-post: kundservice@arjo.se<br />
BELGIQUE / BELGIË<br />
ARJO N.V. Hospital Equipment S.A.<br />
Ternesselei 243<br />
2160 WOMMELGEM<br />
Tel. 03/353 91 00<br />
Fax. 03/353 91 01<br />
Email: info@arjo.be<br />
CANADA<br />
ARJO Canada Inc.<br />
1575 South Gateway Road<br />
Unit C, Mississauga, ONTARIO<br />
L4W 5J1<br />
Tel. 1 800 665 4831<br />
Fax.1 800 309 1116<br />
CESKÁ REPUBLIKA<br />
ARJO Hospital Equipment s.r.o.<br />
Strmá 35<br />
CZ-616 00 BRNO<br />
Tel. 549 254 252<br />
Fax. 541 213 550<br />
DEUTSCHLAND<br />
ARJO GmbH<br />
Christof-Ruthof-Weg 6<br />
55252 Mainz-Kastel, Germany<br />
Tel. +49 (0)61 34-186 211<br />
Fax. +49 (0)61 34-186 209<br />
Email: info@arjo.de<br />
ESPAÑA<br />
ARJO SPAIN, S.A.<br />
C/ San Rafael, nº 6<br />
28108 ALCOBENDAS (MADRID)<br />
SPAIN<br />
Tel. +34 902 300 126<br />
Fax. +34 902 300 191<br />
Email: arjospain@arjospain.es<br />
FRANCE<br />
ARJO Equipements Hospitaliers<br />
S.A.<br />
45, Avenue de l'europe<br />
Eurocit BP133<br />
F–59436 RONCQ CEDEX<br />
FRANCE<br />
Tel. 03 20 28 13 13<br />
Fax. 03 20 28 13 14<br />
Email: info@arjo.fr<br />
GREAT BRITAIN<br />
ARJO MED AB Ltd.<br />
St. Catherine Street<br />
Gloucester, GL1 2SL<br />
ENGLAND U.K.<br />
Tel. (08702) 430430<br />
Fax. (01452) 428344<br />
IRELAND<br />
ARJO Ireland Ltd, EA House,<br />
Damastown Industrial Estate,<br />
Mulhuddart, Dublin 15, Eire<br />
Tel. 00 35 31 8098960<br />
Fax. 00 35 31 8098971<br />
HONG KONG<br />
ARJO Far East Ltd.<br />
1001-1003 APEC Plaza,<br />
49 Hoi Yuen Road, Kwun Tong,<br />
Kowloon, HONG KONG<br />
Tel. 852 2908 9553<br />
Fax. 852 2508 1416<br />
ITALIA<br />
ARJO Italia SPA<br />
Via Tor Vergata,<br />
432 - 00133 ROMA<br />
Tel. 06 87426211<br />
Fax. 06 87426222<br />
Email: promo@arjo.it<br />
NEDERLAND<br />
ARJO NEDERLAND B.V.<br />
De Blomboogerd 8,<br />
4003 BX TIEL,<br />
Postbus 6116,<br />
4000 HC TIEL<br />
Tel. +31 (0)344 64 08 00<br />
Fax. +31 (0)344 64 08 85<br />
Email: info@arjo.nl<br />
ÖSTERREICH<br />
ARJO GmbH, Föhrenweg 5,<br />
A-6065 THAUR, Austria<br />
Tel. +43 (0)5223 493350<br />
Fax. +43 (0)5223 493350 75<br />
Email: office@arjo.at<br />
POLAND<br />
Getinge POLAND Sp. z o.o.<br />
02-387 Warszawa<br />
ul. Lirowa 27<br />
Poland<br />
Tel. +48 22 882-06-26..28<br />
Fax +48 22 882-24-52<br />
Email: wysokinski@getinge.pl<br />
SCHWEIZ / SVIZZERA<br />
ARJO INTERNATIONAL AG<br />
Florenzstr. 1d, Postfach,<br />
CH-4023 BASEL, Switzerland<br />
Tel. +41 (0)61 337 9797.<br />
Fax. +41 (0)61 331 4780<br />
Email: arjo.international@arjo.com<br />
SCHWEIZ<br />
ARJO-SIC AG<br />
Florenzstr. 1d, Postfach<br />
4023 BASEL<br />
Tel. +41 (0)61 337 97 77<br />
Fax. +41 (0)61 311 97 42<br />
Email: arjo.sic@arjo.ch<br />
USA<br />
ARJO, Inc.<br />
50 North Gary Avenue<br />
Roselle, IL 60172<br />
Tel. 1-800-323-1245<br />
Fax. 1-888-594-ARJO(2756)<br />
www.arjo.com<br />
www.arjo.com<br />
www.Arjo.com<br />
GETINGE GROUP is a leading global provider of<br />
If your country is not listed<br />
If your country is not listed here, please contact equipment your and systems that contribute to quality en-<br />
here, please contact your local<br />
local If your distributor, country is not listed or ARJO here, please International, contact your local distributor, Florenzstrasse hancement or ARJO and cost efficiency within healthcare and<br />
International distributor, AB, Box 61, or S-241 ARJO 21 ESLÖV, Interna- SWEDEN.<br />
Tel +46 413 64500. Fax + 46 413 555586. life sciences, equipment, FM 21964 FM services, 21964 and technologies<br />
tional AB, Box 61, S-241 21<br />
ISO 9001 • ISO 13485<br />
© ARJO Med. AB<br />
are supplied under ISO 9001 the ARJO brands • GLOUCESTER • IS013485 ARJO • U.K. for resident hy-<br />
ESLÖV, SWEDEN.<br />
giene, resident handling and wound care, GETINGE<br />
for infection control and prevention within healthcare<br />
and life science and MAQUET for surgical workplaces,<br />
cardiopulmonary and critical care.<br />
Printed in Great in Great Britain. Britain.