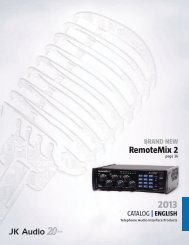

You also want an ePaper? Increase the reach of your titles
YUMPU automatically turns print PDFs into web optimized ePapers that Google loves.
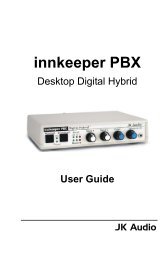
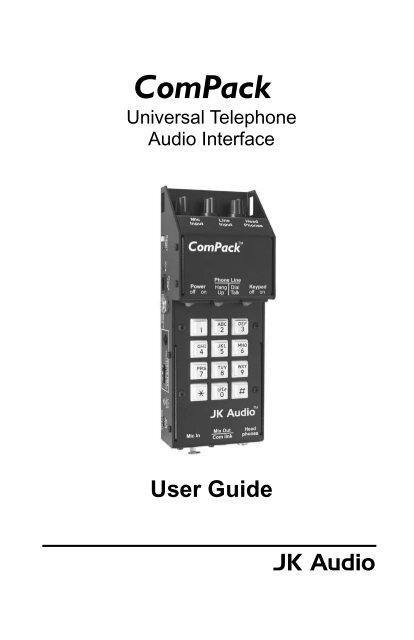
<strong>ComPack</strong><br />
Universal Telephone<br />
<strong>Audio</strong> Interface<br />
<strong>User</strong> <strong>Guide</strong><br />
<strong>JK</strong> <strong>Audio</strong>
Introduction<br />
<strong>ComPack</strong> is a universal telephone audio interface that connects<br />
to cell phones, PBX phone systems and standard analog<br />
phone lines. Perfect for remote broadcasts, IFB feeds, or<br />
interviews over any telephone connection.<br />
Simply plug your audio equipment into <strong>ComPack</strong> and connect<br />
to a phone line. Then put on your headphones, plug in a<br />
microphone and you are ready to broadcast the game or talk<br />
up a taped interview. The balanced XLR line output jack provides<br />
a high quality connection to mixers and professional<br />
tape gear.<br />
<strong>ComPack</strong> also functions as a simple telecom interface for<br />
your beltpack intercom system. This no-frills feature allows<br />
you to connect the 3 pin XLR to your beltpack intercom group<br />
to provide a full duplex, always-on connection to any telephone<br />
network.<br />
2
<strong>ComPack</strong> General Operation<br />
1. Connect your microphone (and/or line input) and headphones<br />
to the input and output jacks on <strong>ComPack</strong>.<br />
2. (a) Connect the jack marked "Phone Line" to any<br />
standard analog telephone line, or<br />
(b) Connect the “Wireless Phone Headset Jack” to the<br />
2.5 mm headset jack on your cellular telephone using<br />
the supplied cable, or<br />
(c) Disconnect the handset on an existing telephone and<br />
plug the coily cord from the phone into the “Universal<br />
PBX Handset Interface” jack on <strong>ComPack</strong>.<br />
3. Turn on the power switch, flip the phone line switch to<br />
dial/talk*, flip the keypad switch to on*, and dial your call.<br />
*When using the wireless phone or PBX handset interface,<br />
the phone line switch should be left in the Hang Up position<br />
and the Keypad switch should be in the off position. All Dialing<br />
and answering of calls in these modes must be done from<br />
the telephone itself.<br />
2. (a) Standard<br />
analog phone<br />
line<br />
OR OR<br />
2. (b) Cell Phone connection<br />
using wireless<br />
phone cable provided<br />
3<br />
2. (c) Handset jack on<br />
PBX telephone. Set A-B-C<br />
switch for best audio.
Features<br />
1. Female XLR Input<br />
Level Control<br />
Clip LED<br />
10. Power<br />
Switch<br />
9. Phone Line Switch<br />
On Hook / Off Hook<br />
8. Keypad<br />
On / Off Switch<br />
7. DTMF Keypad<br />
4<br />
2. 3.5 mm Line<br />
Input Level Control<br />
3. Headphone<br />
Level Control<br />
4. Battery<br />
Door<br />
5. 9VDC<br />
Power Jack<br />
6. Phone Mix<br />
Output /<br />
Intercom Link<br />
1. Female XLR Input Level Control<br />
The Mic Input volume control adjusts the level of audio from<br />
the female XLR input. Adjusting this control determines the<br />
level of audio you send down the phone line from this input.*<br />
There is an LED that will indicate when your audio is clipping<br />
so you can decrease your input volume to avoid distortion.<br />
2. 3.5 mm line input level control<br />
The Line Input volume control adjusts the level of audio from<br />
the 3.5 mm input. Adjustment of this control determines the<br />
level of audio you send down the phone line from this input.*<br />
*The FCC requires that a limiter be present in any device that connects<br />
to a phone line. The peak limiter within the <strong>ComPack</strong> will<br />
help to control the audio level sent down the phone line so it does<br />
not exceed the maximum audio level specified by the FCC.
Features<br />
3. Headphone Level Control<br />
The headphone volume control adjusts the level of audio sent<br />
out the 1/4” headphone jack. Adjusting this control will determine<br />
the level of audio you hear in your headphones.<br />
4. Battery Door<br />
The easy change battery door can be opened by inserting a<br />
small object into the slot, such as a coin or fingernail, and lifting<br />
up and out. The battery should be removed if <strong>ComPack</strong> is not<br />
going to be used for extended periods of time.<br />
5. 9 VDC Power Jack<br />
<strong>ComPack</strong> is powered by either one 9 V battery or the included<br />
AC adapter. The provided AC to DC adapter is a high quality,<br />
regulated power supply. When the power supply is connected<br />
to <strong>ComPack</strong>, battery power is bypassed. This AC adapter is for<br />
powering the unit only, it does NOT charge the battery. Make<br />
sure to use only the supplied AC adapter with <strong>ComPack</strong>. Using<br />
any other adapter can cause poor audio quality and/or damage<br />
the unit. If you need a replacement AC adapter, contact any <strong>JK</strong><br />
<strong>Audio</strong> dealer and ask for a 9 V power supply (Part # PS008).<br />
6. Phone Mix Output / Intercom Link<br />
This recessed switch sets how the male XLR jack will be used.<br />
With the switch to the left (toward the XLR jacks) the XLR jack<br />
will contain a mix of the telephone caller and the microphone or<br />
line input from the female XLR jack. With the switch to the right<br />
(toward the level control knobs) the male XLR will provide bidirectional<br />
audio for use with your intercom beltpack system.<br />
7. DTMF Keypad<br />
The telephone keypad is equipped for tone dialing only. You<br />
may use the keypad at any time during a call but keep in mind<br />
that transmit audio is muted during a keypress. This keypad<br />
should only be used to dial calls when the unit is connected<br />
directly to an analog telephone line.<br />
8. Keypad On / Off Switch<br />
This switch disables the DTMF keypad to prevent tones from<br />
being blasted down the phone line during a broadcast. You<br />
should leave this switch in the off position when using the wireless<br />
phone or PBX handset interface.<br />
5
Features<br />
9. Phone Line Switch<br />
This switch acts as the switch-hook for the telephone line. The<br />
Hang Up position is the normal on-hook position when you are<br />
not using the line or you are waiting for a call. When you want<br />
to place a call, or when a call comes in, switch to the Dial/Talk<br />
position. When using the Handset or Wireless Interface, the<br />
switch should remain in the Hang Up position at all times.<br />
10. Power Switch<br />
The power switch should be left in the “Off” position any time<br />
the unit is not being used or battery drain will occur. The unit<br />
will retain a phone line connection if the power switch is<br />
turned off during a call.<br />
11. Battery Test Button / LED<br />
To test the battery, press the Battery Test button on the side<br />
of the unit. If the LED lights, the battery is still good. The unit<br />
may still function if the LED does not light, but there may be<br />
significant audio distortion and a loss of level as the battery<br />
continues to discharge. Under normal use you should get at<br />
least 20 hours of continuous use from one fresh 9 volt alkaline<br />
battery.<br />
12. Wireless / Cellular Telephones<br />
<strong>ComPack</strong> comes equipped with a built in cellular telephone<br />
interface. This 1/4” wireless interface jack accepts a special<br />
1/4” to 2.5 mm cable provided with the unit. This interface will<br />
work with any wireless phone that can accept a standard 3conductor<br />
headset and earpiece.<br />
Some wireless telephones have the standard 2.5 mm jack<br />
while others have proprietary jacks. Adapters to convert the<br />
proprietary jack to the standard 2.5 mm jack are available for<br />
most wireless telephones through local electronic stores, their<br />
respective telephone dealers or many internet stores.<br />
When using the wireless interface, it is important to keep your<br />
wireless telephone 12”-24” away from the <strong>ComPack</strong> and any<br />
microphone or headphone cables. This will help prevent unwanted<br />
RF noise from entering the unit.<br />
6
Features<br />
11. Battery Test<br />
Button / LED<br />
21. Visual Ring<br />
Indicator<br />
20. Phone<br />
Line Jack<br />
12. Wireless Phone<br />
Interface Jack<br />
19. Handset<br />
Interface Jack<br />
18. Handset Type<br />
Selector Switch<br />
7<br />
13. 3.5 mm<br />
Line Input<br />
14. Male XLR -<br />
Output / Com Link<br />
15. Headphone<br />
Jack<br />
16. Female XLR<br />
Input<br />
17. Mic/Line Selector<br />
for XLR Input<br />
The wireless interface on the <strong>ComPack</strong> works very well with<br />
most cellular telephones. However, some wireless telephones<br />
generate excessive RF noise which can be can be heard as a<br />
“chattering” or “motor boat” sound. The noise from these particular<br />
telephones will be unacceptable for most broadcast applications.<br />
13. 3.5 mm Line Input<br />
The 3.5 mm input is a mono, line level input. This input can be<br />
used at the same time as the XLR input.<br />
14. Male XLR Mix Output / Com Link<br />
The Male XLR output can be used in two ways: as a balanced,<br />
fixed level mixed mono output or as a bi-directional<br />
telecom link for your beltpack intercom system.<br />
15. 1/4” Headphone Jack<br />
The headphone output is a 1/4” 3-conductor jack. Both the tip<br />
and ring of this jack contain the same audio signal. Either<br />
mono or stereo headphones may be used.
Features<br />
16. Female XLR Input<br />
The female XLR input can be used for either the connection of<br />
a dynamic microphone or a line level audio signal such as from<br />
an audio mixer. This input can be used at the same time as the<br />
3.5 mm line input.<br />
17. Mic / Line Selector Switch<br />
The Mic / Line Selector Switch determines whether the female<br />
XLR is to be used as a mic level or line level input.<br />
18. Handset Type Selector Switch<br />
Select the handset microphone type of the telephone that Com-<br />
Pack is connected to when using the PBX handset interface.<br />
Trial and error works faster than a chart of handset types, but<br />
the following may help:<br />
Switch Position Handset Microphone Type<br />
A Electret<br />
B Dynamic<br />
C Carbon<br />
19. Handset Interface<br />
If you do not have access to an analog phone line or if the<br />
phone system is a digital or analog PBX, ISDN, or key system,<br />
you can use the built-in handset interface. Simply disconnect<br />
the handset from the coily cord and plug the cord into the Universal<br />
PBX Handset Interface jack. Dialing must be done with<br />
the existing telephone. Make sure to leave the telephone handset<br />
off hook or your call will be disconnected. Do not connect a<br />
handset to the <strong>ComPack</strong>; you must talk through your mic.<br />
20. Phone Line Jack<br />
Use this jack to connect to standard analog telephone lines or<br />
a fax / modem adapter for analog cell phones. A 60” RJ-11 cable<br />
is provided with the unit. This jack should not be connected<br />
directly to digital PBX or ISDN phone systems.<br />
21. Visual Ring Indicator<br />
The Ring LED will flash when there is an incoming call from the<br />
phone line. This feature is disabled when <strong>ComPack</strong> is being<br />
used with the handset interface or the wireless phone interface.<br />
8
<strong>ComPack</strong> Telecom / Intercom Link<br />
<strong>ComPack</strong> also functions as a simple “no-frills” telecom link for your<br />
beltpack intercom system. <strong>ComPack</strong> will provide bi-directional audio<br />
on pin 3 of the male XLR jack to any industry standard intercom<br />
beltpack system. <strong>ComPack</strong> does not provide power over this XLR<br />
jack nor does it require power from the loop. <strong>ComPack</strong> will not recognize<br />
a “call” signal generated by your intercom system and it will<br />
not provide one.<br />
1. Slide the Male XLR selector switch to the Com Link position.<br />
This recessed switch is located near the power jack. Accessing<br />
the switch can be done using a small blade screwdriver, or other<br />
such object, inserted into the opening. The left position (towards<br />
the XLR jacks) designates Line Output. The right position<br />
(towards the volume controls) designates Com Link. The factory<br />
default position of this switch is Line Output.<br />
2. Connect your beltpack intercom XLR cable to the <strong>ComPack</strong><br />
Com Link Male XLR jack. The XLR jack is wired as:<br />
Pin 1 = Ground<br />
Pin 2 = Com in<br />
Pin 3 = Com out<br />
3. Your intercom headset should remain plugged in to your beltpack<br />
system, not directly into <strong>ComPack</strong>.<br />
9
FAQs<br />
? How do I select which telephone interface to use (analog<br />
phone line, PBX, or wireless)?<br />
! Actually, all three connections are live all the time. Technically,<br />
you could connect to all three at once, but since there is no way<br />
to equalize levels, this "conference call" might not be the best<br />
quality connection.<br />
? Will <strong>ComPack</strong> work with my model ______ cell phone?<br />
! As long as your wireless phone has a 3-conductor, 2.5 mm earpiece<br />
jack and accepts a generic 3rd party earpiece or headset,<br />
you should be OK.<br />
? Can I talk on my cell phone while I record the call?<br />
! No, most phones detect the presence of anything plugged into<br />
the headset jack and immediately disable the phone’s microphone<br />
and speaker.<br />
? What if my cell phone does not have a 2.5 mm headset jack?<br />
! Some phone manufacturers and many third parties sell adapters<br />
to allow connection of a standard 3-conductor 2.5 mm plug. You<br />
can often find these adapters where you purchased your phone,<br />
in electronics stores or on the internet.<br />
? Can I send and receive audio at the same time?<br />
! Yes, but whatever audio you send into the <strong>ComPack</strong> will come<br />
back mixed with the caller audio.<br />
? Will <strong>ComPack</strong> provide phantom power for my mic?<br />
! No, our devices will not provide phantom power. If you are connecting<br />
your microphone directly to a <strong>ComPack</strong>, you should use<br />
a dynamic mic.<br />
? The output from my Mic is very low but it was fine last week.<br />
! Check the position of the Mic/Line switch near the Mic jack. This<br />
input can be switched to accept a line level signal from a mixer<br />
or other equipment.<br />
10
FAQs<br />
? How can I record my conversation?<br />
! The balanced male XLR, in "Line Out" mode provides a nice mix<br />
of both sides of the conversation.<br />
? What is the Com Link used for?<br />
! Simply slide the Male XLR function switch to Com Link and you<br />
can connect the <strong>ComPack</strong> Male XLR to your single channel beltpack<br />
intercom system.<br />
? Can I connect <strong>ComPack</strong> to a powered beltpack line?<br />
! Yes, the <strong>ComPack</strong> has a DC blocking cap so it will not be damaged<br />
if connected to a powered line, although DC power is not<br />
necessary for operation.<br />
? I've lost the power supply for my <strong>ComPack</strong>. I have another<br />
power supply that fits from a different product. Can I use<br />
this instead?<br />
! NO! Never use a power supply other than the one that was supplied<br />
by your manufacturer. Power supplies are available in either<br />
AC or DC output with many combinations of voltage and<br />
current. DC supplies carry either positive or negative center pin<br />
output and may or may not be regulated. If you connect a negative<br />
center pin power supply to a positive center pin jack, it's just<br />
like hooking up the battery cables to your car backwards. Obviously<br />
you would not want to do this to your expensive audio<br />
equipment. Regulation is the tolerance to the specified voltage<br />
of your DC power supply. All of our power supplies have low<br />
noise 5% tolerance. So our 9V DC power supplies will always<br />
output 9 volts +/- 5%, whether you are using no power at all or<br />
applying a full load. Most consumer power supplies are not<br />
regulated. A non-regulated 9V, 800mA power supply could actually<br />
output 16V until an 800 mA load is applied. This could damage<br />
your equipment and create a great deal of noise. Also, because<br />
there is no standard for the size of your power jack, a<br />
16VAC and a 1.5VDC power supply could both have the same<br />
2.1mm jack.<br />
11
Specifications<br />
Inputs:<br />
Female XLR 1000 ohms, mic/line switch -35 dB pad<br />
3.5 mm Line level, 20k ohms, 250 mV,<br />
(-10 dBm) RMS<br />
Outputs:<br />
Male XLR Phone mix mode - balanced 600 ohms,<br />
15 mV, (-25 dBm) RMS<br />
intercom mode - bi-directional unbalanced<br />
1/4” jack 8 ohms, 500 mW<br />
Power: One 9 volt battery or AC power supply<br />
(included)<br />
Size: 8” x 3” x 2.2” (20.3 x 7.6 x 5.6 cm)<br />
Weight: 1.5 lbs.<br />
Shoulder strap, wireless interface cable and one 9 volt battery<br />
included.<br />
12
Block Diagram<br />
DTMF<br />
Keypad<br />
Clip<br />
LED<br />
mic/line<br />
switch<br />
Ring LED<br />
Hybrid<br />
Transformer<br />
XLR<br />
Input<br />
RJ-11<br />
Phone Line<br />
Jack<br />
FCC<br />
signal<br />
limiter<br />
3.5mm<br />
Line<br />
Input<br />
RJ-22<br />
Handset<br />
Jack<br />
PBX<br />
Handset Type Switch<br />
1/4" TRS<br />
Cellular<br />
Interface<br />
Headset<br />
Emulator<br />
Circuit<br />
Switch Selects<br />
XLR Function<br />
<strong>JK</strong> <strong>Audio</strong>, Inc.<br />
<strong>ComPack</strong><br />
Block Diagram<br />
1/10/02 - WR<br />
13<br />
Line<br />
Output<br />
Isolation<br />
Transformer<br />
Intercom<br />
LInk<br />
Hybrid<br />
Transformer<br />
1/4"<br />
Headphone<br />
Jack
FCC Registration<br />
Your new <strong>JK</strong> <strong>Audio</strong> product has been registered with the Federal<br />
Communications Commission (FCC). This product complies with<br />
the standards in Part 68 of the FCC rules.<br />
1. Connection and use with the nationwide telephone<br />
network<br />
The FCC requires that you connect this telephone equipment<br />
to the national telephone network through a USOC RJ-11C<br />
modular telephone jack.<br />
This equipment may not be used with Party Line Service or<br />
Coin Telephone Lines.<br />
This equipment is hearing aid compatible.<br />
2. Information for the telephone company<br />
Upon request from your local telephone company, you are<br />
required to provide the following information:<br />
a) The "line" to which you will connect the telephone<br />
equipment (that is, your telephone number), and<br />
b) The telephone equipment's FCC registration number.<br />
This can be found on the bottom of your t e l ephone<br />
equipment, and,<br />
c) The ringer equivalence number (REN) for this<br />
equipment. The REN is used to determine the quantity of<br />
devices which will be connected to the telephone line.<br />
Excessive RENs on the telephone line may result in the<br />
devices not ringing in response to an incoming call. In most,<br />
but not all areas, the sum of the RENs should not exceed 5.0.<br />
To be certain of the number of devices that may beconnected<br />
to the line, as determined by the total RENs, contact the local<br />
telephone company.<br />
3. Repair Instructions<br />
If it is determined that your telephone equipment is<br />
malfunctioning, the FCC requires that it not be used and that it<br />
14
FCC Registration (continued)<br />
be unplugged from the modular outlet until the problem has<br />
been corrected. Repairs to this telephone equipment can only<br />
be made by the manufacturer or its authorized agents or by<br />
others who may be authorized by the FCC. For repair<br />
procedures, follow the instructions outlined under the warranty<br />
section of the manual.<br />
4. Rights of the telephone company<br />
If telephone equipment is causing harm to the network, the<br />
telephone company may temporarily discontinue your<br />
telephone service. If possible, they'll notify you before they<br />
interrupt service. If advanced notice isn't practical, you'll be<br />
notified as soon as possible. You'll be given the opportunity to<br />
correct the problem, and you'll be informed of your right to file<br />
a complaint with the FCC.<br />
Your telephone company may make changes in its facilities,<br />
equipment, operations or procedures that could affect the<br />
proper functioning of your <strong>JK</strong> <strong>Audio</strong> product. If such changes<br />
are planned, you'll be notified by your telephone company.<br />
FCC Part 15 Compliance<br />
This equipment has been tested and found to comply with the<br />
limits for a Class A digital device, pursuant to Part 15 of the FCC<br />
Rules. These limits are designed to provide reasonable protection<br />
against harmful interference when the equipment is operated in a<br />
commercial environment. This equipment generates, uses, and<br />
can radiate radio frequency energy and, if not installed and used in<br />
accordance with the instruction manual, may cause harmful<br />
interference to radio communications. Operation of this equipment<br />
in a residential area is likely to cause harmful interference in which<br />
case the user will be required to correct the interference at his own<br />
expense.<br />
Changes or modifications not expressly approved by <strong>JK</strong> <strong>Audio</strong> can<br />
void the user's authority to operate the equipment.<br />
15
Warranty<br />
<strong>ComPack</strong> is covered by a 2 year warranty to be free from<br />
defective workmanship and materials. In the event that the<br />
<strong>ComPack</strong> needs repair, you must call us to get an<br />
authorization, and then carefully pack and ship it to us. You<br />
will pay for shipping to us and we will pay for the return back to<br />
you, UPS ground. No free repairs will be made if the defect<br />
was caused by misuse, weather conditions, or other cause,<br />
except for defective workmanship or materials.<br />
THERE ARE NO EXPRESSED OR IMPLIED WARRANTIES<br />
WHICH EXTEND BEYOND THE WARRANTY HERE MADE.<br />
03/07<br />
<strong>JK</strong> <strong>Audio</strong>, Inc. 1311 E 6th Street, Sandwich, IL 60548 USA<br />
Voice: (815) 786-2929 Toll Free: 800-<strong>JK</strong>-<strong>Audio</strong> Fax: 815-786-8502<br />
Info@jkaudio.com www.jkaudio.com<br />
Copyright © 2007 <strong>JK</strong> <strong>Audio</strong>, Inc. All Rights Reserved.