How to Burn an ISO Image File onto a CD ... - Cambridge Audio
How to Burn an ISO Image File onto a CD ... - Cambridge Audio
How to Burn an ISO Image File onto a CD ... - Cambridge Audio
Create successful ePaper yourself
Turn your PDF publications into a flip-book with our unique Google optimized e-Paper software.
14. Take the <strong>CD</strong> out, let it cool down if it is hot, shut the <strong>CD</strong> tray <strong>an</strong>d press the<br />
“Exit” but<strong>to</strong>n in Nero.<br />
Nero 7 for PC’s<br />
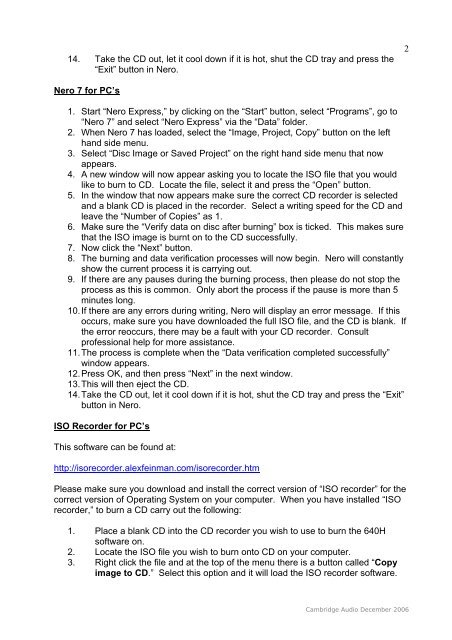
1. Start “Nero Express,” by clicking on the “Start” but<strong>to</strong>n, select “Programs”, go <strong>to</strong><br />
“Nero 7” <strong>an</strong>d select “Nero Express” via the “Data” folder.<br />
2. When Nero 7 has loaded, select the “<strong>Image</strong>, Project, Copy” but<strong>to</strong>n on the left<br />
h<strong>an</strong>d side menu.<br />
3. Select “Disc <strong>Image</strong> or Saved Project” on the right h<strong>an</strong>d side menu that now<br />
appears.<br />
4. A new window will now appear asking you <strong>to</strong> locate the <strong>ISO</strong> file that you would<br />
like <strong>to</strong> burn <strong>to</strong> <strong>CD</strong>. Locate the file, select it <strong>an</strong>d press the “Open” but<strong>to</strong>n.<br />
5. In the window that now appears make sure the correct <strong>CD</strong> recorder is selected<br />
<strong>an</strong>d a bl<strong>an</strong>k <strong>CD</strong> is placed in the recorder. Select a writing speed for the <strong>CD</strong> <strong>an</strong>d<br />
leave the “Number of Copies” as 1.<br />
6. Make sure the “Verify data on disc after burning” box is ticked. This makes sure<br />
that the <strong>ISO</strong> image is burnt on <strong>to</strong> the <strong>CD</strong> successfully.<br />
7. Now click the “Next” but<strong>to</strong>n.<br />
8. The burning <strong>an</strong>d data verification processes will now begin. Nero will const<strong>an</strong>tly<br />
show the current process it is carrying out.<br />
9. If there are <strong>an</strong>y pauses during the burning process, then please do not s<strong>to</strong>p the<br />
process as this is common. Only abort the process if the pause is more th<strong>an</strong> 5<br />
minutes long.<br />
10. If there are <strong>an</strong>y errors during writing, Nero will display <strong>an</strong> error message. If this<br />
occurs, make sure you have downloaded the full <strong>ISO</strong> file, <strong>an</strong>d the <strong>CD</strong> is bl<strong>an</strong>k. If<br />
the error reoccurs, there may be a fault with your <strong>CD</strong> recorder. Consult<br />
professional help for more assist<strong>an</strong>ce.<br />
11. The process is complete when the “Data verification completed successfully”<br />
window appears.<br />
12. Press OK, <strong>an</strong>d then press “Next” in the next window.<br />
13. This will then eject the <strong>CD</strong>.<br />
14. Take the <strong>CD</strong> out, let it cool down if it is hot, shut the <strong>CD</strong> tray <strong>an</strong>d press the “Exit”<br />
but<strong>to</strong>n in Nero.<br />
<strong>ISO</strong> Recorder for PC’s<br />
This software c<strong>an</strong> be found at:<br />
http://isorecorder.alexfeinm<strong>an</strong>.com/isorecorder.htm<br />
Please make sure you download <strong>an</strong>d install the correct version of “<strong>ISO</strong> recorder” for the<br />
correct version of Operating System on your computer. When you have installed “<strong>ISO</strong><br />
recorder,” <strong>to</strong> burn a <strong>CD</strong> carry out the following:<br />
1. Place a bl<strong>an</strong>k <strong>CD</strong> in<strong>to</strong> the <strong>CD</strong> recorder you wish <strong>to</strong> use <strong>to</strong> burn the 640H<br />
software on.<br />
2. Locate the <strong>ISO</strong> file you wish <strong>to</strong> burn on<strong>to</strong> <strong>CD</strong> on your computer.<br />
3. Right click the file <strong>an</strong>d at the <strong>to</strong>p of the menu there is a but<strong>to</strong>n called “Copy<br />
image <strong>to</strong> <strong>CD</strong>.” Select this option <strong>an</strong>d it will load the <strong>ISO</strong> recorder software.<br />
<strong>Cambridge</strong> <strong>Audio</strong> December 2006<br />
2


