

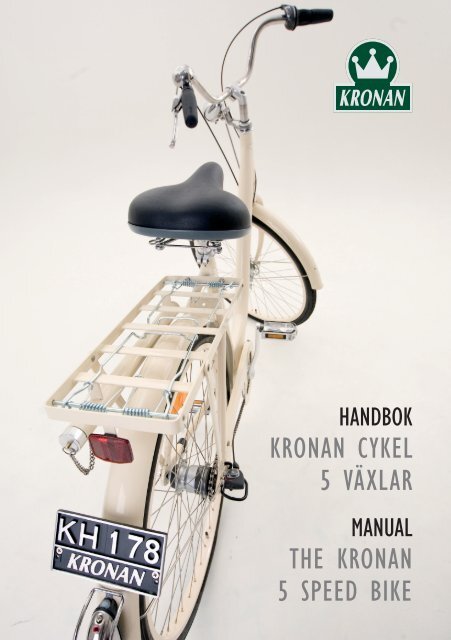
KRONAN CYKEL 5 VÄXLAR THE KRONAN 5 SPEED BIKE
KRONAN CYKEL 5 VÄXLAR THE KRONAN 5 SPEED BIKE
KRONAN CYKEL 5 VÄXLAR THE KRONAN 5 SPEED BIKE

You also want an ePaper? Increase the reach of your titles
YUMPU automatically turns print PDFs into web optimized ePapers that Google loves.
1<br />
HANDBOK<br />
<strong>KRONAN</strong> <strong>CYKEL</strong><br />
5 VÄXLAR<br />
MANUAL<br />
<strong>THE</strong> <strong>KRONAN</strong><br />
5 <strong>SPEED</strong> <strong>BIKE</strong>
INNEHåLLSföRTECKNINg/TABLE Of CONTENTS<br />
HANDBOK föR <strong>KRONAN</strong> <strong>CYKEL</strong> SIDA<br />
MONTERINg 3<br />
VÄXELJUSTERINg 7<br />
SKöTSELRåD 8<br />
SPECIfIKATION 8<br />
VANLIgA fRågOR 9<br />
KONTAKTA <strong>KRONAN</strong> 9<br />
REKLAMATION 10<br />
gARANTIVILLKOR 10<br />
DINA <strong>CYKEL</strong>UPPgIfTER 20<br />
MANUAL fOR <strong>THE</strong> <strong>KRONAN</strong> <strong>BIKE</strong> PAgE<br />
ASSEMBLY 12<br />
ADJUSTINg <strong>THE</strong> gEARS 16<br />
MAINTENANCE 17<br />
SPECIfICATION 17<br />
fAQs 18<br />
CONTACT <strong>KRONAN</strong> 18<br />
COMPLAINTS 19<br />
gUARANTEE TERMS 19<br />
YOUR <strong>BIKE</strong> DATA 20<br />
2
gRATTIS TILL DIN NYA <strong>KRONAN</strong><strong>CYKEL</strong>!<br />
INgET TRAMS<br />
Hos oss är en cykel en cykel och inget annat. Form och funktion härstammar från den<br />
gamla militärcykeln som togs fram för över fyrtio år sedan. Man sökte en enkel, robust och<br />
prisvärd cykel som skulle hålla många långa mil. Samma filosofi gäller även för Kronans nya<br />
5-växlade cykel som har samma klassiska design som föregångaren men vi har förfinat den<br />
och tillverkat den i lätt aluminium och lagt till modern teknik.<br />
Vi är övertygande om att du kommer att ha stor glädje av din nya Kronan cykel under många<br />
år framöver. Följ noga våra monterings- och skötselanvisningar nedan.<br />
MONTERINg<br />
Monteringen tar cirka 15 minuter. De verktyg som medföljer är fastnyckel, två insexnycklar<br />
5 mm och 6 mm, samt en skruvmejsel.<br />
bild 1<br />
bild 2<br />
STÄNKSKÄRM<br />
Längst upp i framgaffelkronan sitter en skruv, ta bort<br />
den. (bild 1:1) Sätt stänkskärmen mellan armarna på<br />
framgaffelbena. Skruva tillbaka skruven och dra åt den<br />
med skruvmejseln som medföljer. Fäst skärmstagen<br />
på var sida på framgaffeln med mutter och bricka,<br />
som redan finns där. (bild 1:2)<br />
fRAMHJUL<br />
Ta först bort bricka och mutter på var sida. Därefter<br />
fäst hjulet mellan framgaffelbena på framgaffeln, (bild<br />
2:1) var noga med att bromsarmen fäster på insidan<br />
av framgaffeln på samma sida där frambromsen sitter.<br />
(bild 2:1) Det är mycket noga att hjulen kommer i linje<br />
med varandra när de monteras. Om hjulen ej är i linje<br />
kommer cykeln dra åt olika håll. Fäst en bricka och<br />
en mutter på utsidan av var sida på framgaffeln på<br />
respektive sida av hjulet med den fasta skiftnyckel 15<br />
mm, och dra åt muttrarna. Dra först lite på var sida och<br />
justera så att hjulet är centrerat. Sedan dra åt muttrarna<br />
en sista gång ordentligt. (bild 2:2)<br />
3
ild 3<br />
bild 4<br />
bild 5<br />
bild 6:1<br />
bild 6:2<br />
STYRE<br />
Sätt styrstammen med styret i ramen. (bild 3:1)<br />
Var noga med att styret är rakt. Dra sedan åt med<br />
insexnyckel nr 6 mm. Styret ställer du in på två sätt.<br />
Höjden justeras med hjälp av skruven på den övre<br />
delen av styrstammen (bild 3:2), vinkeln på styret<br />
justeras med hjälp av skruven undertill. (bild 3:3)<br />
Det är möjligt att du först behöver lossa båda dessa<br />
innan du justerar styret, använd den medföljande<br />
insexnyckeln. Observera att det är endast med<br />
insexnyckeln som du justerar styret, den andra<br />
stora muttern vid styrlagret används inte för detta<br />
ändamål. Viktigt är att du inte sätter styret högre än<br />
markeringen på styrstammen eftersom det då finns<br />
risk att styret lossnar.<br />
INSTALLERA BROMSVAJER<br />
Innan du installerar kabeln, lätta justeringsskruven<br />
halvvägs. Var noga med att springan är rak mellan<br />
justeringsskruven och handtaget. (bild 4:1)<br />
Bromsa med handtaget, så du ser infästningen. Mata<br />
in kabeln igenom springan. Fäst innervajerns ände<br />
i vajerhaken (bild 4:2). Reglera justerings-skruven<br />
genom att dra åt den, sedan anpassa den hur hårt den<br />
ska sitta åt. Är det korrekt ska det inte vara någon<br />
glipa alls.<br />
Medan du skjuter undan skänkeln, fäst innervajerns<br />
bultenhet i guidehållet (bild 5:1). Dra åt ordentligt.<br />
Sätt ytterhöljets hållare i spåret på bromsarmen,<br />
sedan justera med vajerns justeringsbult. (bild 5:2)<br />
PEDALER<br />
Montera tramporna på följande sätt. Höger trampa,<br />
märkt R (bild 6:1), gängas på medsols på höger sida i<br />
cykelns färdriktning. Vänster trampa, märkt L gängas<br />
på motsols på vänster sida i cykelns färdriktning<br />
(bild 6:2). Det ska gå lätt att skruva på tramporna,<br />
försök ej att med kraft tvinga på trampan. Efter det<br />
att tramporna är helt igängade ska de dras åt med<br />
skiftnyckel alternativt fast nyckel storlek 15.<br />
4
ild 7<br />
bild 8<br />
bild 9<br />
SADEL<br />
Justera höjden och se till även här att markeringen<br />
för maximal höjd inte överskrids. Dra åt med<br />
insexnyckel 5mm. När du sitter på sadeln och cyklar<br />
ska du ha utsträckt ben när pedalen är i botten.<br />
LåS<br />
I det fall du har beställt ett lås tillsammans med din<br />
cykel så ska även det monteras på cykeln. Låset är<br />
ett godkänt blocklås med två nycklar som medföljer.<br />
Ett nyckelnummer finns inristat på båda nycklarna.<br />
Har du förlorat dina nycklar kan du beställa nya på<br />
www.axa-basta.nl<br />
1. Till låset medföljer 2 skruvar, 2 muttrar samt 2 brickor<br />
(bild 8). Dessutom medföljer en större svart bricka för<br />
montage på andra cyklar än Kronancyklar. Denna behövs<br />
alltså inte om du har en Kronancykel.<br />
2. De båda skruvarna ska passera genom fästet på cykeln<br />
och låsa fast i detta med hjälp av det fyrkantspår som<br />
huvudet på skruvarna har. Trä på brickorna och sedan<br />
muttrarna på låssidan och skruva på muttrarna (bild 8).<br />
Eftersom muttrarna har en låsningsfunktion kommer det att<br />
gå lite tungt att dra åt dem, men det är helt normalt. Dra<br />
de båda muttrarna så att låset sitter ordentligt. För låsets<br />
funktion, se illustrationerna på låsförpackningens baksida.<br />
fRAMPAKETSHåLLARE<br />
Frampakethållaren är byggd för att klara 15 kg.<br />
Skjutsa aldrig någon på frampakethållaren!<br />
Här medföljer (bild 9) 2 fästen, 4 skruvar, samt ett<br />
fäste för montering av framlykta på gaffeln (bild<br />
12) Beroende på vilket sätt du avser att använda<br />
pakethållaren på finns det två olika monteringssätt av<br />
framlyktan. I det fall du avser att använda den för att<br />
transportera större paket är det lämpligt att montera<br />
framlyktan på vänstra gaffelbenet eftersom den då<br />
inte hindrar större paket. I annat fall låter kan du låta<br />
framlyktan sitta kvar på ordinarie plats.<br />
Montera fästet enligt bildanvisning med insexnyckeln<br />
som medföljer.<br />
5
MONTERINg AV <strong>CYKEL</strong>KORg<br />
Börja med att montera framlyktan. Se ”Montering<br />
av framlyktan på gaffelbenet”, se sida 7.<br />
Med cykelkorgen medföljer 1 stag (bild 10:2),<br />
4 skruvar, 4 brickor, 4 muttrar. Fäste som ska<br />
monteras på lykthållaren (bild 11:3). Fäste som<br />
monteras under korgen med mutter och stag. (bild<br />
10:2)<br />
Ta bort reflexen från stänkskärmen med skruvmejseln.<br />
Skruva tillbaka de två skruvarna i hålen på<br />
stänkskärmen, så rost ej uppkommer. Sätt den på<br />
framsidan av korgen. (bild 10:1)<br />
Sedan börjar du med att montera staget på korgen<br />
(bild 10:2).<br />
Var noga med att ha bågen på staget på samma sida<br />
du monterar framlyktan (bild 9) Ska monteras med<br />
två muttrar från ovansidan (bild 10:2) under korgen.<br />
Monteras med fäste, två brickor och två muttrar.<br />
Nu sitter korgen ihop med staget. Montera korgen,<br />
genom att fästa korgen med lykthållaren (bild<br />
11:3).<br />
Sista momentet är först lossa bricka och mutter<br />
på varje sida av hjulet. Därefter trä på staget på<br />
respektive sida av navet och dra åt bricka och<br />
mutter (bild 10:4).<br />
6<br />
bild 10<br />
bild 11
ild 12<br />
MONTERINg UTAN ATT ÄNDRA fRAMLYKTANS PLACERINg<br />
1. Koppla ur elkabeln från dynamon och haka loss spiralen så att den hänger löst.<br />
2. Placera fäste 1 och pakethållaren (bild 9:1) och trä på brickorna. Skruva på<br />
muttrarna endast så pass att de har fått fäste.<br />
3. Gör likadant med det mindre fästet (bild 9:2).<br />
4. Dra åt samtliga skruvar lite i taget så att pakethållaren hamnar rätt. När<br />
pakethållaren sitter på plats (det undre fästet vilar mot det nedre ramröret) drag då<br />
åt skruvarna hårt.<br />
5. Spiralen för du sedan mellan frampakethållarens stöd såsom bilden visar och ner<br />
mot dynamon. Haka spiralen på plats och koppla tillbaka elkabeln.<br />
A<br />
A -Taggbricka<br />
B - Jordskruv<br />
VÄXELJUSTERINg<br />
B<br />
MONTERINg AV fRAMLYKTAN På<br />
gAffELBENET<br />
1. Haka av lyktan från fästet på cykeln och montera<br />
av fästet under lyktan. Använd sedan dessa skruvar,<br />
muttrar och brickor och fäst lyktan på hållaren<br />
(bild 9). Det är viktigt att den lilla taggbrickan (A)<br />
hamnar mellan framlyktan och lykthållaren för att<br />
skapa bästa kontakt. Lykthållaren fästs sedan på det<br />
vänstra gaffelbenet som illustrationen visar. Fäst den i<br />
höjd med dynamon på motsatta sida för att få bästa<br />
läge.<br />
2. Stålspiralen läggs över skärmen och hakas i på<br />
vardera sida.<br />
3. Skruva till sist åt jordskruven (B).<br />
I det fall du inte får i alla växlar behöver växeln justeras. Detta gör du med några enkla<br />
handgrepp. Om du inte får i 1:ans växel behöver vajern spännas, gör då så här: Vid baknavet<br />
kommer en kedja ut som går över i en räfflad mässingspinne, den ska skjutas in i det grå<br />
höljet försiktigt cirka ett par millimeter. Prova sedan växeln, om du fortfarande inte får i 1:an<br />
så upprepa förfarandet till dess att det fungerar. Om du inte får i 5:ans växel ska du göra på<br />
motsatt sätt. Dra ur den räfflade mässingspinnen ur det grå höljet, vilket du gör du genom att<br />
hålla ner spärren på höljet samtidigt som du försiktigt för ut mässingspinnen. Prova, justera<br />
mer ifall det behövs.<br />
7
SKöTSELRåD<br />
Vi är övertygade att du kommer att ha glädje av din Kronancykel under många år framöver.<br />
Även om det är en robust cykel mår den givetvis extra bra om du sköter om den med jämna<br />
mellanrum.<br />
DRA åT SKRUV & MUTTER<br />
Kontrollera att samtliga bultar är åtdragna.<br />
När du har använt din cykel en tid kan det<br />
vara bra att efterspänna skruvar och muttrar.<br />
SMöRJ KEDJAN<br />
Smörj kedjan ofta med kedjeolja, använd<br />
inte fett varken på kedja eller kugghjul.<br />
Efterspänn kedjan vid behov.<br />
TVÄTTA <strong>CYKEL</strong>N!<br />
Skölj eller tvätta cykeln regelbundet.<br />
Speciellt viktigt är detta vintertid eftersom<br />
SPECIfIKATION<br />
8<br />
vägsalt påskyndar korrosion. Dessutom<br />
ser det trevligt ut. Ramen är klarlackerad<br />
vilket ger en mycket tålig yta mot rost och<br />
andra angrepp. För att helt undvika rost<br />
och missfärgningar rekommenderar vi<br />
att du behandlar olackerade delar med ett<br />
rostskyddande medel.<br />
KOLLA LUfTTRYCKET<br />
Se till att däcken har ett bra ringtryck, cirka<br />
35 P.S.I. Annars kan cykeln uppfattas som<br />
trög.<br />
Däck och slang Dam 28X1 5/8 (ETRTO 47-622)<br />
Lufttryck 35 PSI<br />
Ramhöjd 56 cm<br />
Kedjehjul fram Dam 42 tänder i aluminium<br />
Nav fram med handbroms SACHS,VT 3000<br />
Nav bak fem växlar SRAM SACHS Spectro<br />
Pedaler Axeltjocklek: 9/16 tum<br />
Framlykta 6 volt, 3 watt<br />
Baklykta Diod med sensor, 2 st AAA-batterier<br />
Sadelstope Diameter 30,2 mm, längd 349 mm<br />
Styrstam Diamter 25,4 mm, längd 210 mm<br />
Eker Transporteker 2,3 mm<br />
Frampakethållare Maxlast 15 kg<br />
Pakethållare Maxlast 20 kg.<br />
Pump 440 mm<br />
Vikt 18,14 kg
VANLIgA fRågOR<br />
Var hittar jag ramnumret?<br />
Det är inristat i ramen under vevlagret och är samma nummer som registreringsskylten.<br />
Har Kronan mitt ramnummer registrerat ifall cykeln blir stulen?<br />
Inte per automatik, fyll därför i dessa uppgifter när du mottar din cykel och spara det<br />
tillsammans med kvitto på cykeln som gäller som garanti.<br />
Mitt baklyse fungerar inte, vad kan vara fel?<br />
Kontrollera att du har aktiverat baklyset. Det gör du genom att trycka en gång på den vita<br />
knappen på baklyktan. I sista hand kontrollera att batterierna är bra. Batterierstorlek är AAA.<br />
Varför får jag inte i alla växlar?<br />
Troligtvis behöver växeln justeras, det är ett enkelt handgrepp som behövs. Se under<br />
”Växeljustering” i denna handbok.<br />
Varför går cykeln tungt?<br />
Kronancyklarna är utrustade med rejäla ballongdäck och om det inte är tillräckligt med luft i<br />
dessa så går cykeln trögt. Se till att pumpa upp ordentligt så kommer din cykel att rulla lätt!<br />
Rekommenderat ringtryck är cirka 35 PSI.<br />
Framlyktan fungerar inte efter det att jag har monterat den på gaffeln.<br />
Kontrollera att jordskruven (se bild 12:B) är ordentligt åtskruvad.<br />
KONTAKTA <strong>KRONAN</strong><br />
<strong>KRONAN</strong> TRADEMARK AB<br />
Tel. +46 8 694 72 82<br />
Fax. +46 8 694 72 84<br />
E-mail. info@kronan.com<br />
WWW.<strong>KRONAN</strong>.COM<br />
9
REKLAMATION<br />
Om du får problem vill vi kunna hjälpa dig så fort som möjligt. Därför måste du alltid anmäla<br />
din reklamation till distrubitören i det land du har köpt cykeln. Kontaktuppgifter finner du<br />
direkt på www.kronan.com. Distrubitören skickar dig en reklamationsblankett. Du skickar<br />
tillbaka reklamationen med kvitto och bild på reklamationen.<br />
RESERVDELAR<br />
Kan du beställa direkt på www.kronan.com, eller hos din distributör i ditt land.<br />
gARANTIVILLKOR<br />
Kronan Trademark AB garanterar att denna produkt är fri från fel i material, utformning och funktion<br />
vid inköpstillfället och under den därpå följande perioden av ett (1) år. Om det under garantitiden, vid<br />
normal användning och efter montering och skötsel enligt bifogad anvisning, uppstår fel med produkten<br />
beroende på brister i material, utformning eller funktion reparerar vi eller byter vi produkten i enlighet<br />
med de villkor som är specificerade i denna handbok.<br />
Garantin gäller endast mot uppvisande av det inköpsbevis som Kronan har utfärdat till köparen.<br />
Kronan förbehåller sig rätten att vägra utföra garantiservice om detta inköpsbevis saknas.<br />
Garantin gäller inte för någonting annat än fel i material, utformning och funktion.<br />
Garantin täcker inte:<br />
• periodiska kontroller, underhåll, reparationer och utbyte av delar beroende på normalt slitage.<br />
• skador som uppstår på produkten genom felaktig användning eller hantering, inklusive utan att<br />
begränsa sig därtill, annan användning av produkten än sådan den är avsedd för, eller underlåtelse<br />
att underhålla cykeln enligt instruktionerna i denna handbok.<br />
Denna garanti påverkar inte konsumentens rättigheter enligt gällande tillämplig lagstiftning. Om<br />
det inte finns någon tillämplig lagstiftning är köparens rättigheter begränsade till vad som nämns i<br />
garantivillkoren. Kronan är ej ansvarig för skador som följer av brott mot uttalad eller underförstådd<br />
garanti för denna produkt.<br />
10
MANUAL<br />
<strong>THE</strong> <strong>KRONAN</strong> 5 <strong>SPEED</strong> <strong>BIKE</strong><br />
11
CONgRATULATIONS ON YOUR NEW <strong>KRONAN</strong> <strong>BIKE</strong>!<br />
NO fRILLS<br />
As we see it, a bike is a bike and nothing else. The form and function of our bikes stem from<br />
the old military models that were designed more than 40 years ago. At that time, requirements<br />
were for a simple, robust bike that offered good value for money and could withstand hundreds<br />
of miles of use. The same concept still applies for Kronan’s new 5 speed bike, which has the<br />
same classic design as the former Kronan Classic. But, we have improved details and produce<br />
it in aluminium together with modern technique.<br />
We are sure that you will get a lot of enjoyment out of your new Kronan bike for years and<br />
years. Carefully follow the assembly and maintenance instructions below.<br />
ASSEMBLY<br />
It will take you about 15 minutes to assemble the bike. Enclosed tools - a wrench, two Allen<br />
keys, 5 mm and 6 mm, and a screwdriver.<br />
figure 1<br />
figure 2<br />
MUDgUARD<br />
On the front fork is a screw, adjust the screw. (figure<br />
1:1) Place the mudguard in the right position between<br />
the legs of the front fork. Attach the screw with the<br />
screwdriver. Attach the mudguard stay on each side<br />
on the front fork with a nut and a washer.(figure 1:2)<br />
fRONT WHEEL<br />
Adjust the washer and nut on each side. Attach the<br />
front wheel between the legs of the front fork (figure<br />
2:1), make sure the arm of the front hub is attached<br />
on the inside of the leg on the front fork. (figure 2:1)<br />
It is important that the wheels are in a straight line<br />
with each other. Otherwise you will have a feeling<br />
the bike is pulling in the wrong direction.<br />
Attach a washer and nut outside the front fork on each<br />
side, (figure 2:2) a little bit on one side and then the<br />
other side. Check one last time that the front wheel is<br />
in harmony with the rear wheel and then you attach<br />
the nut one last time.<br />
12
figure figure 3 3<br />
figure 4<br />
figure 4<br />
figure 5<br />
figure 6:2<br />
figure 6:1<br />
HANDLEBARS<br />
Insert the handle stem into the frame. (figure 3:1)<br />
Make sure that the handlebars are straight. You need<br />
to adjust the handlebars in two directions. The height<br />
is adjusted by using the screw on top of the handlebar<br />
stem, the angle of the handlebar is adjusted by using<br />
the screw under the handlebar. (figure 3:3) You may<br />
need to loosen both screws before adjusting the<br />
handlebars. Note that it is only the handlebars that<br />
are adjusted by using the Allen key, the other larger<br />
nut on the headset is not used while adjusting. It is<br />
important that you don’t raise the handlebars higher<br />
than the mark on the handlebar stem. This might lead<br />
to the handlebars coming out of the frame.<br />
INSTALL <strong>THE</strong> BRAKE LEVEL<br />
Before you install the cable, loosen the adjusting<br />
screw half way. Be sure the slit is straight between<br />
the adjusting screw and the handlebars. (figure 4:1)<br />
Squeeze the break handle, so you can see the<br />
attachment. Insert the cable through the gap. Insert<br />
the end of the brake wire into the hook. First tighten<br />
the adjustment screw, (figure 4:2) then loosen the<br />
screw until the brake handle is in the position you<br />
want. When done correctly, there should be no gap.<br />
While pushing down the leg, insert the end of the<br />
brake wire into the guide hole. (figure 5:1) Be sure<br />
tighten securely. Place envelope holder in the arm<br />
of the front brake, then adjust with the brake wire’s<br />
adjustable bolt. (figure 5:2)<br />
PEDALS<br />
Fit the pedals as follows: screw the right-hand pedal<br />
(marked “R” - figure 6:1) clockwise onto the crank<br />
on the right-hand side of the bike (as seen facing<br />
forwards). Screw the left-hand pedal (marked “L”)<br />
counter-clockwise onto the crank on the left-hand<br />
side of the cycle (as seen facing forwards - figure<br />
6:2). The pedals should screw in easily. Never try<br />
to force the pedal into the thread. Once you have<br />
screwed the pedals all the way in, tighten them with<br />
an adjustable wrench or a 15 mm spanner.<br />
13
figure 7<br />
figure 8<br />
figure 9<br />
SEAT<br />
Adjust the height of the seat but make sure not<br />
to exceed the maximum height mark. Loosen the<br />
binder bolt on the frame. When you sit in the seat<br />
and bike, your leg should be almost fully extended<br />
when the pedal is at its lowest position.<br />
LOCK<br />
If you have ordered a lock together with your<br />
bike, you need to fit this, too. The lock is an<br />
approved block-lock supplied with two keys.<br />
A key number has been etched on both keys.<br />
You can order new ones at www.axa-basta.nl<br />
1. The lock is supplied with 2 bolts, 2 nuts and 2 washers<br />
(Figure 8). It also comes with a larger, black spacer for fitting<br />
to cycles other than Kronan models. You do not need to use<br />
this black spacer if you have a Kronan bike.<br />
2. Pass both the bolts through the fitting on the bike and<br />
seat them firmly in the square holes that match the bolt<br />
heads. Slide the lock and the washers onto the bolts from<br />
the lock side and then screw on and tighten the nuts (figure<br />
8). As the nuts feature a locking function, they may be a<br />
little difficult to tighten, but this is completely normal. Adjust<br />
the nuts to make sure that the lock is seated correctly. For<br />
information about how to work the lock, see the illustrations<br />
on the back of the lock packaging.<br />
fRONT CARRIER<br />
The front carrier is designed to bear up to 15<br />
kg. Never use the rack to give anyone a ride!<br />
The following items are supplied with the front carrier.<br />
(figure 9 ) 2 brackets, 4 bolts and a fitting for attaching<br />
the front light on the fork (figure 12) Depending on<br />
which way you intend to use the front carrier, there are<br />
two different ways to fit the front light. If you intend to<br />
use the rack to carry large packages, it is best to fit the<br />
front light to the left front fork leg as this will keep it out<br />
of the way of tall packages. Otherwise, you can simply<br />
fit the the front light in its standard position.<br />
Mounting the attachment according to figure 9 with<br />
the Allen key supplied.<br />
14
fITTINg <strong>THE</strong> HANDLEBAR BASKET<br />
Start by fitting the front light. See ”Fitting the front<br />
light to the front fork”, page 16.<br />
With the Handelbar Basket you will find, 1 stay<br />
(figure 10:2) 4 bolts, 4 washers, 4 nuts. Attachment<br />
that is fastened to the front light. (figure 11:3)<br />
Remove the reflector from the fender with a<br />
screwdriver and place it on the front of the basket<br />
(figure 10:1).<br />
Start by fastening the basket to the stay. (figure<br />
10:2)<br />
Be sure that the curve in the stay is on the side where<br />
the front light (figure 9) is mounted with 2 nuts from<br />
the top (figure 10:2) under the basket. Mount with<br />
the mounting plate, 2 washers and 2 nuts.<br />
Now the basket is fastened to the stay. Fasten the<br />
basket to the mounting plate of the light. (figure<br />
11:3)<br />
Finally, unscrew the nuts and remove the washers<br />
from each side of the front tire. Insert the ends of<br />
the stay into each side of the hub, insert the washers<br />
and tighten the nuts. (figure 10:4)<br />
15<br />
figure 10<br />
figure 11
fITTINg WITHOUT CHANgINg <strong>THE</strong> POSITION Of <strong>THE</strong> fRONT LIgHT<br />
1. Disconnect the power cable from the dynamo and unhitch the loop so that it hangs<br />
free.<br />
2. Position fitting 1 and the front carrier (figure 9:1) and thread on the washers.<br />
Thread the nuts onto the ends of the fittings but do not tighten yet.<br />
3. Repeat the procedure for the smaller fitting (figure 9:2).<br />
4. Tighten all the nuts slightly to bring the front carrier into position. When the front<br />
carrier is in position (i.e. when the lower fitting is resting snugly against the lower<br />
frame tube), tighten the nuts.<br />
5. Lead the loop of wire through the front carrier supports (as shown in the illustration)<br />
and run it down to the dynamo. Hitch the loop in position and re-connect the power<br />
cable.<br />
figure 12<br />
A<br />
A -Toothed washer<br />
B - Earthing screw<br />
ADJUSTINg <strong>THE</strong> gEARS<br />
B<br />
fITTINg <strong>THE</strong> fRONT LIgHT TO <strong>THE</strong><br />
fRONT fORK<br />
1. Disconnect the light from its fitting on the bike<br />
and remove the bracket under the light. Then use<br />
these bolts, nuts and washers to attach the light to<br />
its holder (figure 12). It is important to position the<br />
small toothed washer (A) between the front light and<br />
the light bracket, as this ensures the best contact. Then<br />
affix the light bracket to the left front fork as shown<br />
in the illustration. For the best position, attach it at the<br />
same height as the dynamo on the opposite side.<br />
2. Lead the steel loop over the front mudguard and<br />
hitch it into each side.<br />
3. Finally, screw in the earthing screw (B).<br />
If you find that any of the gears is not working, you will need to adjust the gears. This is quite<br />
simple to do. If you cannot get into first gear, the cable needs tightening. Do the following: at<br />
the rear hub, you will see that a chain comes out and runs into a grooved brass peg. You need<br />
to push this peg carefully a few millimetres into the grey cover. Then try the gears again. If<br />
you still cannot get into first, repeat the process until you can. If you cannot get into fifth gear,<br />
do the reverse: pull the grooved brass peg gently a few millimetres out of the grey cover. To<br />
do this, hold down the catch on the cover while simultaenously and carefully withdrawing the<br />
brass peg. Try the gears again and re-adjust if necessary.<br />
16
MAINTENANCE<br />
We are sure that you will get a lot of enjoyment out or your new Kronan bike for years<br />
and years. However, even though it is a robust bike, it will work and last even better if you<br />
perform a little maintenance on it at regular intervals.<br />
CHECK <strong>THE</strong> NUTS AND BOLTS<br />
Check that all the nuts and bolts are seated<br />
firmly. When you have ridden your bike for a<br />
while, it is a good idea to post-tighten all the<br />
nuts and bolts.<br />
LUBRICATE <strong>THE</strong> CHAIN<br />
Lubricate the chain with chain lubricant.<br />
Never use grease on either the chain or the<br />
chainwheel. Tighten the chain as required.<br />
WASH YOUR <strong>BIKE</strong>!<br />
Rinse or wash your bike regularly.<br />
This is especially important in winter, when<br />
SPECIfICATION<br />
17<br />
salt from the roads can stimulate corrosion.<br />
Anyway, a clean bike looks good. The frame<br />
has been treated with clear varnish, which<br />
ensures a very durable surface that can resist<br />
rust and other attacks. In order to prevent rust<br />
and discoloration completely, we recommend<br />
that you treat all unvarnished parts with a<br />
rust-prevention agent.<br />
CHECK <strong>THE</strong> TYRE PRESSURE<br />
Make sure that there is plenty of pressure in<br />
the tyres, i.e. approx. 35 P.S.I. Otherwise,<br />
your bike might feel “sluggish”.<br />
Tyres and tubes Women 28X1 5/8 (ETRTO 47-622)<br />
Tyre pressure 35 PSI<br />
Frame height 56 cm<br />
Chainwheel, front Women: 42 teeth aluminium<br />
Hub, front, with hand-brake SACHS,VT 3000<br />
Hub, rear, three gears SRAM SACHS Spectro<br />
Pedals Axle thickness: 9/16 inch<br />
Front light 6 volt, 3 watt<br />
Rear light Diode with sensor, 2 AAA batteries<br />
Seat post Diameter 30,3 mm, length 349 mm<br />
Handlebar Diameter 22.2 mm, length 250 mm<br />
Spokes Transport spokes 2,3 mm<br />
Front carrier Max. load 15 kg<br />
Rear carrier Max. load 20 kg<br />
Pump 440 mm<br />
Weight 18,14 kg
fAQs<br />
Where do I find the frame number?<br />
This is stamped into the frame under the bottom bracket and is the same as the number on the<br />
registration tag.<br />
Has Kronan registered my frame number in case my bike is stolen?<br />
Not automatically. It is therefore a good idea to write down the relevant details when you<br />
receive your bike and keep them together with your receipt, which also serves as your<br />
guarantee.<br />
My rear light is not working. What can the problem be?<br />
Make sure that the rear light is switched on. To do this, press the white button on the rear<br />
light once. Finally, check that the batteries are live. The battery size is AAA.<br />
Why can’t I get into all the gears?<br />
The gears probably need adjusting. This is simple to do. See the section of this manual entitled<br />
“Adjusting the gears”.<br />
Why does my bike feel heavy to handle?<br />
Kronan bikes are fitted with genuine balloon tyres, and if there is insufficient pressure in them,<br />
your bike will feel heavy to handle. Pump your tyres up to the correct pressure and your bike<br />
will become much more responsive! The recommended tyre pressure is 35 PSI.<br />
My front light does not work after I have fitted it to the front fork.<br />
Check that the earthing screw (See Figure 12:B) is screwed in tightly.<br />
CONTACT <strong>KRONAN</strong><br />
<strong>KRONAN</strong> TRADEMARK AB<br />
Tel. +46 8 694 72 82<br />
Fax. +46 8 694 72 84<br />
E-mail. info@kronan.com<br />
WWW.<strong>KRONAN</strong>.COM<br />
18
COMPLAINTS<br />
If you have any problems, we will do our very best to help you as quickly as possible. Therefore,<br />
please submit any complaints directly to Kronan, or to your distributor in your country. The<br />
distributor will supply you with a complaints form. If you submit a complaint, please attach<br />
your receipt or any other valid proof of purchase.<br />
SPARE PARTS<br />
You can order spare parts directly on www.kronan.com (Swedish market), or from your<br />
distributor in your country.<br />
gUARANTEE TERMS<br />
Kronan Trademark AB guarantees that this product is free from material faults, design errors and<br />
functional faults at the time of purchase and for a subsequent period of one (1) year. If, during the<br />
guarantee period - and following correct assembly, normal use and maintenance in accordance with<br />
the instructions supplied - faults should appear in the material, design or function, we will repair or<br />
replace the product in accordance with the terms laid down in this manual. The guarantee shall only<br />
apply on presentation of the purchase certificate issued by Kronan to the purchaser. Kronan reserves<br />
the right to decline to perform service under guarantee in the absence of said purchase certificate.<br />
The guarantee applies exclusively to faults in material, design and function.<br />
The guarantee does not cover:<br />
• periodic checks, maintenance, repairs and replacement of parts on account of normal wear and<br />
tear.<br />
• damage caused to the product through incorrect use or handling, including but not limited to, use<br />
of the product for any purpose other than that for which it was intended, or failure to maintain<br />
the cycle in accordance with the instructions in this manual.<br />
This guarantee does not affect the consumer’s rights pursuant to applicable legislation. In the absence<br />
of any applicable legislation, the purchaser’s rights are limited to those mentioned in the guarantee<br />
terms. Kronan accepts no liability for damage resulting from breach of pronounced or implicit<br />
guarantee provisions for this product.<br />
19
DINA <strong>CYKEL</strong>UPPgIfTER/YOUR <strong>BIKE</strong> DATA<br />
Om du nedan fyller i uppgifter och sparar denna lapp så blir det<br />
lättare att spåra cykeln om den skulle bli stulen. I många fall kräver<br />
försäkringsbolagen att du har denna information. Ramnumret är<br />
detsamma som sitter på registreringsskylten, men det finns också<br />
instansat i ramen under vevpartiet. Ibland kan det vara lite suddigt<br />
p g a att färgen är lite tjock.<br />
If you fill in the relevant details below and keep this form, it will be easier<br />
to trace your bike in the event that it is stolen. In many cases, your insurance<br />
company will require you to produce this information. The frame number<br />
is the same as the number on the registration tag, and it is also stamped<br />
under the bottom bracket. Sometimes, it may be a little unclear if the paint<br />
is too thick.<br />
_____________________________________________<br />
Registreringsnummer / registration number<br />
_____________________________________________<br />
Nyckelnummer (om du köpt lås) / Key number (if you bought a lock)<br />
_____________________________________________<br />
Inköpsdatum (datum du mottog cykeln) / Purchase date (the date on which you received the bike)<br />
WWW.<strong>KRONAN</strong>.COM<br />
20
