ALLGAS 2000 - Rothenberger South Africa
ALLGAS 2000 - Rothenberger South Africa
ALLGAS 2000 - Rothenberger South Africa
You also want an ePaper? Increase the reach of your titles
YUMPU automatically turns print PDFs into web optimized ePapers that Google loves.
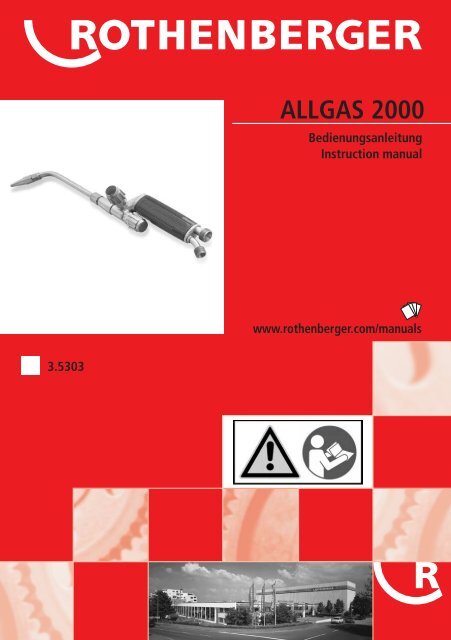
3.5303<br />
<strong>ALLGAS</strong> <strong>2000</strong><br />
Bedienungsanleitung<br />
Instruction manual<br />
www.rothenberger.com/manuals
A OVERVIEW<br />
B CONNECTING<br />
9<br />
B<br />
11 5<br />
28<br />
1<br />
19<br />
18<br />
16<br />
F<br />
17<br />
15<br />
13<br />
7<br />
3<br />
5<br />
26<br />
C<br />
2<br />
E<br />
D<br />
13<br />
6<br />
A<br />
12<br />
14<br />
10<br />
27<br />
14<br />
8<br />
4<br />
25<br />
6
DEUTSCH Seite 2<br />
Bedienungsanleitung bitte lesen und aufbewahren! Nicht wegwerfen!<br />
Bei Schäden durch Bedienungsfehler erlischt die Garantie! Technische Änderungen vorbehalten!<br />
ENGLISH page 4<br />
Please read and retain these directions for use. Do not throw them away! The warranty does not cover<br />
damage caused by incorrect use of the equipment! Subject to technical modifications!<br />
1
2<br />
Technische Daten<br />
Schweißeinsatz<br />
Nr.<br />
Sauerstoff Acetylen Sauerstoff Propan<br />
Bereich<br />
mm bar bar bar bar<br />
1 0,2 - 1<br />
2 1- 2<br />
3 2 - 3<br />
4 3 - 5<br />
5 4 - 5<br />
Übersicht Abb. A<br />
0,8<br />
-<br />
1,2<br />
0,1<br />
-<br />
0,3<br />
0,8<br />
-<br />
1,2<br />
A Handgriff D Sauerstoff-Nadelventil<br />
B Schweißdüse E Einstellventil für Brenngas<br />
0,3<br />
-<br />
0,5<br />
C Schweißdüsen-Halter / Schlüssel F Mischrohr<br />
Bedienung<br />
Anschließen des Brenners:<br />
Schließen Sie den Brenner mit einem nach EN 559 zugelassenen Schlauch an den Druckregler an oder an<br />
einen zentralen Gasanschluss. Sichern Sie den Anschluss mit Schlauchklemmen. Wenn Sie eine undichte<br />
Stelle vermuten, überprüfen Sie dies mit Seifenlauge.<br />
Anzünden und Regeln des Brenners: (Verwenden Sie die Ventile des Brenners)<br />
Hinweis: Der Brenner arbeitet nach dem Düsennadelprinzip. Die folgende Methode für das<br />
Anzünden des Brenners sollte deshalb übernommen werden.<br />
Um die Betriebssicherheit zu gewährleisten, sollten passende Flammenrückschlagsicherungen<br />
eingebaut werden.<br />
Schweißen, Hartlöten, Anwärmen, etc.:<br />
1. Setzen Sie einen geeigneten Schweißaufsatz auf den Handgriff des Brenners. Überprüfen Sie, ob der<br />
Konus am Ende des Aufsatzes intakt ist.<br />
2. Schließen Sie beide Ventile (D und E) am Handgriff.<br />
3. Wenn der Regler mit einem Nadelventil ausgestattet ist, sollte dieses geöffnet werden. Stellen Sie den<br />
empfohlenen Arbeitsdruck am Druckregler ein. Das gleiche gilt auch für den Anschlusspunkt, wenn<br />
eine zentrale Gasversorgung benutzt wird.<br />
4. Öffnen Sie das Sauerstoff-Nadelventil (D) am Handgriff und lassen Sie das Gas die Schläuche für kurze<br />
Zeit reinigen. Lange Schläuche und kleine Schweißdüsen benötigen eine längere Reinigungszeit.<br />
Behalten Sie einen geringen Gasfluss bei.<br />
5. Öffnen Sie das Brenngasventil (E) am Handgriff des Brenners und lassen Sie das Gas für kurze Zeit<br />
strömen. Reinigen Sie die Schläuche wie oben beschrieben.<br />
6. Zünden Sie den Brenner an.<br />
7. Regulieren Sie die Größe und Art der Flamme mit den Ventilen (D und E) am Handgriff. Der Brenner ist<br />
jetzt betriebsbereit.<br />
Löschen der Flamme: Schweißen, Hartlöten, Anwärmen, etc.<br />
Schließen Sie zuerst das Brenngasventil (E) am Handgriff und dann das Sauerstoffventil (D).<br />
DEUTSCH
Wartung<br />
Halten Sie den Brenner sauber. Fetten Sie keine Teile ein. Öl oder Fett können in Verbindung mit<br />
Sauerstoff explosiv sein.<br />
Falls erforderlich, reinigen Sie die Bohrungen des Anwärm- und Schweißzubehörs mit der mitgelieferten<br />
Reinigungsnadel. Drücken Sie diese vorsichtig in die Bohrungen hinein und ziehen Sie die Nadel heraus,<br />
ohne sie zu verdrehen.<br />
Wenn das Anschlussende des Anwärm- und Schweißzubehörs beschädigt ist, kann dieses repariert werden,<br />
indem man das Anschlussende auf eine glatte Oberfläche legt und es mit einem feinen Schmirgelpapier<br />
poliert.<br />
Sie erhalten Hilfe von einem Service-Mitarbeiter, wenn Reparaturen notwendig sind.<br />
Anschlüsse (Abb. B)<br />
1 Flaschenventil für Brenngas 13 Brenngasschlauch<br />
2 Flaschenventil für Sauerstoff 14 Sauerstoffschlauch<br />
3 Flaschendruckminderer für Brenngas 15 Griffstück<br />
4 Flaschendruckminderer für Sauerstoff 16 Einstellventil für Brenngas<br />
5 Stellschraube für Brenngas 17 Einstellventil für Sauerstoff<br />
6 Stellschraube für Sauerstoff 18 Anschlussmutter<br />
7 Ausgangsventil für Brenngas 19 Schweiß-, Löt- oder Anwärmsatz<br />
8 Ausgangsventil für Sauerstoff 25 Flammenrückschlagsicherung für<br />
Sauerstoff<br />
9 Entnahmeventil für Brenngas 26 Flammenrückschlagsicherung für<br />
Brenngas<br />
10 Entnahmeventil für Sauerstoff 27 Entnahmestellenrückschlagsicherung für<br />
Sauerstoff<br />
11 Entnahmestellendruckminderer für<br />
28 Entnahmestellenrückschlagsicherung für<br />
Brenngas<br />
Brenngas<br />
12 Entnahmestellendruckminderer für<br />
Sauerstoff<br />
Zubehör<br />
Geeignetes Zubehör und ein Bestellformular finden Sie ab Seite 6.<br />
Entsorgung<br />
Teile des Gerätes sind Wertstoffe und können der Wiederverwertung zugeführt werden. Hierfür stehen<br />
zugelassene und zertifizierte Verwerterbetriebe zur Verfügung. Zur umweltverträglichen Entsorgung der<br />
nicht verwertbaren Teile (z.B. Elektronikschrott) befragen Sie bitte Ihre zuständige Abfallbehörde.<br />
DEUTSCH<br />
3
4<br />
Technical data<br />
No<br />
.<br />
Range<br />
mm<br />
1 0,2 - 1<br />
2 1- 2<br />
3 2 - 3<br />
4 3 - 5<br />
5 4 - 5<br />
Overview Fig. A<br />
Welding insert<br />
Oxygen Acetylen<br />
e<br />
Oxygen Propane<br />
bar bar bar bar<br />
0,8<br />
-<br />
1,2<br />
0,1<br />
-<br />
0,3<br />
0,8<br />
-<br />
1,2<br />
A Handle D Needle valve for oxygen<br />
B Welding tip E Valve for fuel gas<br />
0,3<br />
-<br />
0,5<br />
C Nozzle holder F Mixing tube<br />
Operating<br />
Connecting the torch:<br />
Connect the torch to the cylinder regulators or with a central gas supply to the supply points with the<br />
approved hose according to EN 559. Secure the connection with hose clamps. If leakage is suspected, check<br />
using soapy water.<br />
Lighting and regulating the torches: (using the valves on the torch)<br />
Note: The torch works on the needle injector principle and the following method of<br />
lighting it should therefore be adopted.<br />
In order to assure safety, appropriate flashback arrestors should be installed.<br />
Welding, brazing, heating, etc.:<br />
1. Put an appropriate welding or heating attachment into the handle of the torch. Check that the cone at<br />
the end of the attachment is intact.<br />
2. Close both valves (D and E) on the handle.<br />
3. If the regulator is fitted with a needle valve, this should be opened. Set the recommended working<br />
pressure by using the regulator's pressure adjusting screw. The same applies to supply points if a gas<br />
pipeline is used.<br />
4. Open the oxygen needle valve (D) on the handle and allow the gas to purge the hoses for a short time.<br />
Long hoses and small welding nozzles require a longer purge time. Maintain a small gas flow.<br />
5. Open the torch fuel gas valve (E) on the handle and allow the gas to flow for a short time. Purge as<br />
above.<br />
6. Light the torch.<br />
7. Regulate the size and type of flame with the valves (D and E) on the handle. The torch is now ready for<br />
use.<br />
Extinguishing the flame: Welding, brazing, heating, etc.<br />
First close the fuel gas valve (E) on the handle and then the oxygen valve (D).<br />
Maintenance<br />
ENGLISH
Keep the torch clean. Do not grease any parts. Oil or grease can be explosive when in contact<br />
with oxygen.<br />
If necessary clean the holes of the welding or heating attachments with the cleaning needles supplied. Push<br />
these carefully in and out without twisting. Spiral drills steel wires, etc.<br />
If the outlet end of the welding or heating attachment is damaged, it may be repaired by polishing<br />
perpendicularly with a fine emery cloth laid on a flat surface.<br />
Obtain help from a sevice engineer if repairs are necessary.<br />
Connecting (Fig. B)<br />
1 Cylinder valve for fuel gas 13 Fuel gas hose<br />
2 Cylinder valve for oxygen 14 Oxygen hose<br />
3 Cylinder pressure regulator for fuel gas 15 Torch handle<br />
4 Cylinder pressure regulator for oxygen 16 Adjustment valve for fuel gas<br />
5 Pressure adjusting valve fuel gas 17 Adjustment needle valve for oxygen<br />
6 Pressure adjusting valve for oxygen 18 Connection nut<br />
7 Shut-off valve for fuel gas 19 Welding, heating or brazing attachment<br />
8 Shut-off valve for oxygen 25 Regulator mounted flashback arrestor for<br />
a single cylinder for oxygen<br />
9 Tapping point valve for fuel gas 26 Regulator mounted flashback arrestor for<br />
a single cylinder for fuel gas<br />
10 Tapping point valve for oxygen 27 Tapping point flashback arrestor for<br />
oxygen<br />
11 Tapping point pressure regulatorf or fuel 28 Tapping point flashback arrestor for fuel<br />
gas<br />
gas<br />
12 Tapping point pressure regulator for<br />
oxygen<br />
Accessories<br />
The relevant accessories and an order form can be found from page 6 onwards.<br />
Disposal<br />
Components of the unit are recyclable material and should be put to recycling. For this purpose registered<br />
and certified recycling companies are available. For an environmentalfriendly disposal of the non-recyclable<br />
parts (e.g. electronic waste) please contact your local waste disposal authority.<br />
ENGLISH<br />
5
6<br />
OPTIONAL<br />
3.5304 3.5305 Ø 0,2 mm 3.5313 Gr.1<br />
3.5306 Ø 1-2 mm 3.5314 Gr.2<br />
3.5307 Ø 2-3 mm<br />
3.5308 Ø 3-4 mm<br />
3.5309 Ø 4-5,0 mm<br />
3.5315<br />
3.5311<br />
3.2073 SW 14 x 19 3.5312<br />
3.2079<br />
3.5319<br />
3.5221 2,5 m<br />
3.2077
Zubehör und Ersatzteile / Accessories and spare parts<br />
Bestellen Sie Ihre Zubehör- und Ersatzteile bei Ihrem Fachhändler<br />
Order your accessories and spare parts from your specialist retailer<br />
oder bei unserer Hotline Service After Sales<br />
or from our Service After Sales hotline<br />
Tel. : +49 6195 / 99 52-14<br />
Fax : +49 6195 / 99 52-15<br />
Kunde / Anschrift<br />
Customer / address<br />
Kunden Nr. /<br />
customer no.<br />
Bestell Nr. /<br />
Order no.<br />
Ansprechpartner<br />
Contact person<br />
Tel.:<br />
Ihre Bestellung<br />
Your order<br />
Artikel Nr. /<br />
Article no.<br />
Menge /<br />
Quantity<br />
OPTIONAL<br />
Bezeichnung /<br />
Description<br />
Stempel / Stamp<br />
Preis /<br />
Price<br />
Datum / Date Unterschrift / Signature<br />
7
8<br />
Notes
Notes<br />
9
Germany<br />
Headquarters<br />
Australia<br />
Austria<br />
Belgium<br />
Brazil<br />
Bulgaria<br />
China<br />
Czech<br />
Republic<br />
Denmark<br />
France<br />
Greece<br />
Hungary<br />
India<br />
Ireland<br />
ROTHENBERGER Worldwide<br />
ROTHENBERGER AG<br />
Industriestraße 7 • D-65779 Kelkheim/Germany<br />
Tel.+49(0)6195/800-1•Fax+49(0)6195/74422<br />
verkauf@rothenberger.com • www.rothenberger.com<br />
ROTHENBERGER Produktion GmbH<br />
Lilienthalstraße 71 - 87 • D-37235 Hessisch-Lichtenau<br />
Tel.+49(0)5602/9394-0• Fax+49(0)5602/939436<br />
ROTHENBERGER Werkzeuge GmbH<br />
Industriestraße 7 • D-65779 Kelkheim/Germany<br />
Tel.+49(0)6195/800-1•Fax+49(0)6195/74422<br />
verkauf@rothenberger.com<br />
ROTHENBERGER Australia Pty. Ltd.<br />
Unit 12 • 5 Hudson Avenue • Castle Hill • N.S.W. 2154<br />
Tel.+612/98997577•Fax+612/98997677<br />
rothenberger@rothenberger.com.au<br />
www.rothenberger.com.au<br />
ROTHENBERGER Werkzeuge- und Maschinen<br />
Handelsgesellschaft m.b.H.<br />
Gewerbeparkstraße 9 • A-5081 Anif near Salzburg<br />
Tel.+43(0)6246/72091-45•Fax+43(0)6246/72091-15<br />
service@rothenberger.at • www.rothenberger.at<br />
ROTHENBERGER Benelux bvba<br />
Antwerpsesteenweg 59 • B-2630 Aartselaar<br />
Tel.+32(0)3/8772277•Fax+32(0)3/8770394<br />
info@rothenberger.be<br />
ROTHENBERGER do Brasil Ltda.<br />
Rua marinho de Carvalho, No. 72 - Vila Marina<br />
09921-005 Diadema - Sao Paulo - Brazil<br />
Tel.+5511/404447-48•Fax+5511/404450-51<br />
vendas@rothenberger.com.br • www.rothenberger.com.br<br />
ROTHENBERGER Bulgaria GmbH<br />
Boul. Sitniakovo 79 • BG-1111 Sofia<br />
Tel.+359/29461459•Fax+359/29461205<br />
info@rothenberger.bg • www.rothenberger.bg<br />
SHANGHAI ROTHENBERGER I/E CO., LTD<br />
No. 199 Jiugan Road, Sijing Town,<br />
Songjiang District, Shanghai, (201601) China<br />
Tel.+8621/57617688•+8621/57617959<br />
Fax +8621/57626062•office@rothenberger.cn<br />
ROTHENBERGER CZ, náøadí a stroje, spol. s.r.o.<br />
Vinohradská 100 (1710) • CZ-130 00 Praha 3<br />
Tel.+4202/71730183•Fax+4202/67310187<br />
info@rothenberger.cz • www.rothenberger.cz<br />
ROTHENBERGER Scandinavia A/S<br />
Fåborgvej 8 • DK-9220 Aalborg Øst<br />
Tel.+4598/157566•Fax+4598/156823<br />
roscan@rothenberger.dk<br />
ROTHENBERGER France S.A.<br />
24, rue des Drapiers, BP 45033 • F-57071 Metz Cedex 3<br />
Tel.+333/87749292•Fax+333/87749403<br />
info-fr@rothenberger.com<br />
ROTHENBERGER Hellas S.A.<br />
249 Syngrou Avenue • GR-171 22 Nea Smyrni, Athens<br />
Tel.+30210/9407302•Fax+30210/9407322<br />
ro-he@otenet.gr<br />
ROTHENBERGER Hungary Kft.<br />
Gubacsi út 26 • H-1097 Budapest<br />
Tel.+361/347-5040•Fax+361/347-5059<br />
mail@rothenberger.hu<br />
ROTHENBERGER India Private Limited<br />
B-1/D-5,Ground Floor<br />
Mohan Cooperative Industrial Estate,<br />
Mathura Road, New Delhi 110044<br />
Tel.+9111/51699040,51699050•Fax+9111/51699030<br />
contactus@rothenbergerindia.com<br />
ROTHENBERGER Ireland Ltd.<br />
Bay N. 119, Shannon Industrial Estate<br />
IRL-Shannon, Co. Clare<br />
Tel.+35361/472188•Fax+35361/472436<br />
rothenb@iol.ie<br />
Italy<br />
Japan<br />
Mexico<br />
Netherlands<br />
Poland<br />
Portugal<br />
Singapore<br />
<strong>South</strong> <strong>Africa</strong><br />
Spain<br />
Switzerland<br />
Turkey<br />
ROTHENBERGER Italiana s.r.l.<br />
Via Reiss Romoli 17/19 • I-20019 Settimo Milanese<br />
Tel.+3902/3350601•Fax+3902/33500151<br />
rothenberger@rothenberger.it • www.rothenberger.it<br />
<strong>Rothenberger</strong> S.A. Sucursal México<br />
Bosques de Duraznos No. 69-1006<br />
Col. Bosques de las Lomas • México D.F. 11700<br />
Tel.+5255/5596-8498<br />
Fax+5255/2634-2555<br />
ROTHENBERGER Nederland bv<br />
Postbus 45 • NL-5120 AA Rijen<br />
Tel.+31(0)161/293579•Fax+31(0)161/293908<br />
info@rothenberger.nl • www.rothenberger.nl<br />
ROTHENBERGER Polska Sp.z.o.o.<br />
ul. Cyklamenów 1 • PL-04-798 Warszawa<br />
Tel.+4822/6127701•Fax+4822/6127295<br />
biuro@rothenberger.pl • www.rothenberger.pl<br />
SUPER-EGO TOOLS FERRAMENTAS, S.A.<br />
Apartado 62 - 2894-909 Alcochete - PORTUGAL<br />
Tel.+351/919306400•Fax+351/212340394<br />
sul.pt@rothenberger.es<br />
ROTHENBERGER TOOLS (FE) PTE LTD<br />
147 Thyrwhitt Road<br />
Singapore 207561<br />
Tel. + 65 / 6296 - 2031 • Fax + 65 / 6296 - 4031<br />
rfareast@singnet.com.sg • www.rothenberger.com.sg<br />
ROTHENBERGER-TOOLS SA (PTY) Ltd.<br />
P.O. Box 4360 • Edenvale 1610<br />
165 Vanderbijl Street, Meadowdale Germiston<br />
Gauteng (Johannesburg), <strong>South</strong> <strong>Africa</strong><br />
Tel.+2711/3729633•Fax+2711/3729632<br />
info@rothenberger-tools.co.za<br />
ROTHENBERGER S.A.<br />
Ctra. Durango-Elorrio, Km 2•E-48220 Abadiano (Vizcaya)<br />
(P.O. Box) 117 • E-48200 Durango (Vizcaya)<br />
Tel.+3494/6210100•Fax+3494/6210131<br />
export@rothenberger.es • www.rothenberger.es<br />
ROTHENBERGER Schweiz AG<br />
Herostr. 9•CH-8048 Zürich<br />
Tel. + 41 (0) 44 / 435 30 30 • Fax + 41 (0) 44 / 401 06 08<br />
info@rothenberger-werkzeuge.ch<br />
ROTHENBERGER Tes. Alet ve Mak. San. Tic. Ltd. Sti.<br />
Poyraz Sok. No.: 20/3 - Detay Is Merkezi<br />
TR-34722 Kadiköy-Istanbul<br />
Tel. + 90 / 216 449 24 85 pbx • Fax + 90 / 216 449 24 87<br />
rothenberger@rothenberger.com.tr<br />
ROTHENBERGER UK Limited<br />
2, Kingsthorne Park, Henson Way,<br />
Kettering • GB-Northants NN16 8PX<br />
Tel.+441536/310300•Fax+441536/310600<br />
info@rothenberger.co.uk<br />
ROTHENBERGER USA LLC<br />
4455 Boeing Drive, USA-Rockford, IL 61109<br />
Tel.+1/8153977070•Fax+1/8153978289<br />
www.rothenberger-usa.com<br />
ROTHENBERGER USA Inc.<br />
Western Regional Office • USA-955 Monterey Pass Road<br />
Monterey Park, CA 91754<br />
Tel.+1323/2681381•Fax+1323/260497<br />
ROTHENBERGER Agency<br />
OLMAX<br />
2-y Verkhny Mikhailovsky pr-d, 9 build.2<br />
115419 Moscow<br />
Tel. + 7 / 09 57 92 59 44 Fax + 7 / 09 57 92 59 46<br />
olmax@olmax.ru • www.olmax.ru<br />
Service Hotline +49 (0) 61 95-99 52-12<br />
www.rothenberger.com<br />
UK<br />
USA<br />
Russia<br />
ROTHENBERGER Japan CO. Ltd.<br />
Shin Yokohama Dani Center • Bldg. 10F<br />
3-19-5 Shin Yokohama, Kohoku-Ku<br />
222-0033 Yokohama Japan<br />
Tel. +8145/4710961 • Fax +8145/4729845<br />
9.0253/05.06/F&E


