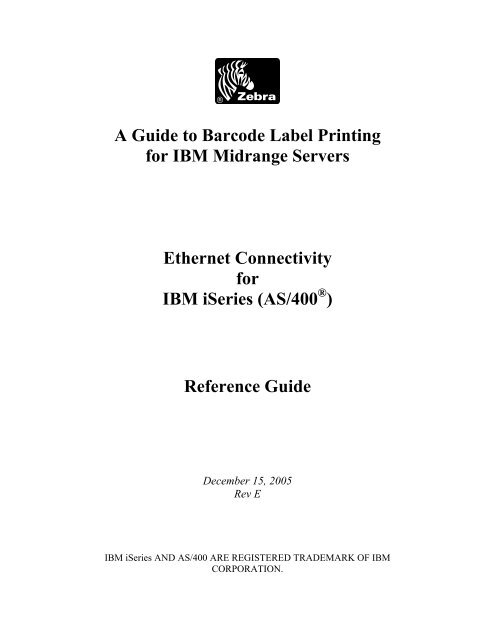
A Guide to Barcode Label Printing for IBM Midrange Servers ... - Zebra
A Guide to Barcode Label Printing for IBM Midrange Servers ... - Zebra
A Guide to Barcode Label Printing for IBM Midrange Servers ... - Zebra

Create successful ePaper yourself
Turn your PDF publications into a flip-book with our unique Google optimized e-Paper software.
A <strong>Guide</strong> <strong>to</strong> <strong>Barcode</strong> <strong>Label</strong> <strong>Printing</strong><br />
<strong>for</strong> <strong>IBM</strong> <strong>Midrange</strong> <strong>Servers</strong><br />
Ethernet Connectivity<br />
<strong>for</strong><br />
<strong>IBM</strong> iSeries (AS/400 ® )<br />
Reference <strong>Guide</strong><br />
December 15, 2005<br />
Rev E<br />
<strong>IBM</strong> iSeries AND AS/400 ARE REGISTERED TRADEMARK OF <strong>IBM</strong><br />
CORPORATION.
<strong>Barcode</strong> <strong>Printing</strong> & Ethernet Connectivity <strong>for</strong> <strong>IBM</strong> <strong>Midrange</strong> <strong>Servers</strong><br />
Contents<br />
Contents ............................................................................................................................... i<br />
Introduction <strong>to</strong> <strong>IBM</strong> iSeries Ethernet Configuration .......................................................... 1<br />
ZPL, EPL or CPCL - Remote Output Queue or Device? ............................................... 1<br />
ZPL - <strong>Zebra</strong> Programming Language......................................................................... 1<br />
EPL - Eltron Programming Language ........................................................................ 1<br />
CPCL - Comtec Programming Command Language ................................................. 1<br />
Remote Output Queue................................................................................................. 1<br />
Device <strong>Printing</strong> - Printer Job Language (PJL) Device................................................ 2<br />
Device <strong>Printing</strong> - SNMP Device – Recommended method........................................ 2<br />
Intelligent Printer Data Stream (IPDS)....................................................................... 3<br />
Intelligent Graphics <strong>Printing</strong> (IGP)............................................................................. 3<br />
Print <strong>to</strong> File or Middleware............................................................................................. 4<br />
Print <strong>to</strong> File ................................................................................................................. 4<br />
Native <strong>IBM</strong> iSeries Middleware ................................................................................. 4<br />
Windows Middleware................................................................................................. 4<br />
<strong>IBM</strong> iSeries Printer Set-up.................................................................................................. 5<br />
Introduction <strong>to</strong> ZPL Programming Language <strong>for</strong> <strong>IBM</strong> iSeries....................................... 5<br />
Fonts and the <strong>IBM</strong> iSeries........................................................................................... 5<br />
Graphics and the <strong>IBM</strong> iSeries..................................................................................... 6<br />
EBCIDIC verus ASCII ............................................................................................... 6<br />
Sample ZPL String...................................................................................................... 6<br />
Front Panel Settings ........................................................................................................ 7<br />
Commercial @ ............................................................................................................ 7<br />
TCP/IP Address (Ethernet only) ..................................................................................... 8<br />
IP Resolution (DHCP/Dynamic)................................................................................. 8<br />
IP Resolution (Permanent).......................................................................................... 9<br />
Introduction <strong>to</strong> CPCL Programming Language <strong>for</strong> <strong>IBM</strong> iSeries.................................. 10<br />
Designing A <strong>Label</strong> With <strong>Zebra</strong>Designer Pro.................................................................... 11<br />
Linked Fields ................................................................................................................ 11<br />
Identical Copies ........................................................................................................ 11<br />
Copy Quantity – Not Identical.................................................................................. 12<br />
Au<strong>to</strong>matic incrementing by printer – Serial Numbers.............................................. 12<br />
Variable Graphics dialogue box................................................................................ 12<br />
Uploading a ZPL Test File <strong>to</strong> the <strong>IBM</strong> iSeries ................................................................. 13<br />
Test File ........................................................................................................................ 13<br />
Change the ^ <strong>to</strong> @......................................................................................................... 13<br />
Transferring the file ...................................................................................................... 14<br />
Looking at the “new” <strong>IBM</strong> iSeries file ......................................................................... 14<br />
The PJL ZBI driver <strong>for</strong> ZPL printers ............................................................................ 18<br />
Loading the PJL ZBI Program.................................................................................. 20<br />
SNMP (<strong>IBM</strong>SNMPDRV) / PJL Device Driver (Ethernet)............................................... 21<br />
CRTDEVPRT ............................................................................................................... 21<br />
All product and brand names are trademarks of their respective companies. Page i
<strong>Barcode</strong> <strong>Printing</strong> & Ethernet Connectivity <strong>for</strong> <strong>IBM</strong> <strong>Midrange</strong> <strong>Servers</strong><br />
Vary on the printer........................................................................................................ 27<br />
Start the printer writer................................................................................................... 29<br />
Test print using CPYF .................................................................................................. 30<br />
Changing Printer settings.............................................................................................. 35<br />
Remote Out Queue............................................................................................................ 40<br />
CRTOUTQ.................................................................................................................... 40<br />
OVRPRTF..................................................................................................................... 44<br />
Test print <strong>to</strong> the OUTQ using CPYF ............................................................................ 46<br />
Changing the OUTQ Printer Settings ............................................................................... 50<br />
End Writer (ENDWTR)................................................................................................ 50<br />
Change Output Queue (CHGOUTQ)............................................................................ 51<br />
Working with Writers ....................................................................................................... 53<br />
Tracing Print Jobs ............................................................................................................. 54<br />
Creating the Report....................................................................................................... 54<br />
<strong>Printing</strong> a file................................................................................................................. 58<br />
S<strong>to</strong>pping a trace............................................................................................................. 61<br />
Create a physical file <strong>for</strong> the trace ................................................................................ 65<br />
Convert the trace file <strong>to</strong> a physical file ......................................................................... 66<br />
Display the trace on the <strong>IBM</strong> iSeries ............................................................................ 68<br />
Copy the report from the <strong>IBM</strong> iSeries <strong>to</strong> the PC .......................................................... 70<br />
Sample trace report ........................................................................................................... 70<br />
Twinax / Coax................................................................................................................... 72<br />
Twinax .......................................................................................................................... 72<br />
Coax .............................................................................................................................. 72<br />
All product and brand names are trademarks of their respective companies. Page ii
<strong>Barcode</strong> <strong>Printing</strong> & Ethernet Connectivity <strong>for</strong> <strong>IBM</strong> <strong>Midrange</strong> <strong>Servers</strong><br />
Introduction <strong>to</strong> <strong>IBM</strong> iSeries Ethernet Configuration<br />
ZPL, EPL or CPCL - Remote Output Queue or Device?<br />
The first thing that needs <strong>to</strong> be determined is what <strong>Zebra</strong> Page Description Language<br />
your printer supports, i.e., ZPL, EPL or CPCL. You also choose your preferred method<br />
of setting up the print queue on the <strong>IBM</strong> iSeries, i.e., Remote Output Queue, PJL Device,<br />
SNMP Device or IPDS. The in<strong>for</strong>mation below will help you with this decision:<br />
ZPL - <strong>Zebra</strong> Programming Language<br />
This is <strong>Zebra</strong>’s original page description language previously found on High end and<br />
midrange Industrial printers but now migrating <strong>to</strong> desk<strong>to</strong>p and portable. ZPL printers can<br />
be driven via Remote Output Queue, PJL Device(via ZBI), SNMP and IPDS.<br />
EPL - Eltron Programming Language<br />
This language is mainly found on small plastic desk<strong>to</strong>p printers. EPL was introduced in<strong>to</strong><br />
the <strong>Zebra</strong> family as part of the Eltron Merger. EPL printers do not support ZBI or PJL<br />
and there<strong>for</strong>e can’t be used as an <strong>IBM</strong> iSeries PJL device. EPL Printers must be setup as<br />
a Remote Output Queue (CRTOUTQ) or alternatively as an SNMP Device<br />
(CRTDEVPRT). The later (SNMP) requires the use of a third party Print Server. <strong>IBM</strong><br />
<strong>IBM</strong> iSeries SNMP connectivity is currently not supported via <strong>Zebra</strong>Nett PrintServer II.<br />
CPCL - Comtec Programming Command Language<br />
This language is mainly found on small plastic portable printers. CPCL was introduced<br />
in<strong>to</strong> the <strong>Zebra</strong> family as part of the Comtec Acquisition. CPCL printers do not support<br />
PJL, SNMP or ZBI and there<strong>for</strong>e can’t be used as <strong>IBM</strong> iSeries devices (CRTDEVPRT).<br />
This also applies <strong>to</strong> mobile printers that are CPCL printers running the ZBI emulation.<br />
CPCL Printers must be setup as a Remote Output Queue (CRTOUTQ). This<br />
procedure is also described later in this documentation, refer <strong>to</strong> the Table of Contents.<br />
<strong>Label</strong> Vista should be used <strong>to</strong> generate CPCL commands <strong>for</strong> uploading in<strong>to</strong> the <strong>IBM</strong><br />
iSeries or downloading in<strong>to</strong> the printer. <strong>Zebra</strong>Desinger Pro may be used when the CPCL<br />
printer has ZPL firmware loaded (emulation). CPCL printers also require the preloading<br />
of a configuration file (Config.sys), this is required <strong>to</strong> eliminate unnecessary <strong>for</strong>mfeeds.<br />
You should also ensure that you have the latest firmware.<br />
Remote Output Queue<br />
This is, by far, the simplest and quickest method of connecting any Ethernet printer <strong>to</strong> the<br />
<strong>IBM</strong> iSeries, however this does not support “Printer Error Reporting” and “Page Range<br />
<strong>Printing</strong>”.<br />
All product and brand names are trademarks of their respective companies. Page 1
<strong>Barcode</strong> <strong>Printing</strong> & Ethernet Connectivity <strong>for</strong> <strong>IBM</strong> <strong>Midrange</strong> <strong>Servers</strong><br />
Device <strong>Printing</strong> - Printer Job Language (PJL) Device<br />
The <strong>Zebra</strong>Nett PrintServer II does not support PJL but we have created a ZBI program<br />
that recognises PJL commands and responds <strong>to</strong> the <strong>IBM</strong> iSeries accordingly. This<br />
requires the <strong>Zebra</strong>Nett PrinterServer II, the loading of a ZBI program and also that your<br />
firmware has ZBI version 1.2 or greater. We advise that you use a <strong>Zebra</strong>Net 10/100 with<br />
the iSeries SNMP device type (<strong>IBM</strong>SNMPDRV) rather than PJL where possible.<br />
Device <strong>Printing</strong> - SNMP Device – Recommended method<br />
This is <strong>IBM</strong>’s current preferred method of Ethernet printer connectivity. The advantages,<br />
over Remote Output queue, are “Printer Error Reporting” and “Page Range <strong>Printing</strong>”.<br />
The <strong>Zebra</strong>Net 10/100 (internal and external) support <strong>IBM</strong>’s SNMP printing. You may be<br />
required <strong>to</strong> upgrade the firmware of the print server.<br />
Note: The <strong>Zebra</strong>Nett PrintServer II does not support <strong>IBM</strong> SNMP.<br />
A third party print server is also available from a <strong>Zebra</strong> partner. This “SNMPDRV print<br />
server” plugs in<strong>to</strong> the parallel port of any ZPL or EPL printer. Contact<br />
www.cus<strong>to</strong>mbusinesslink.com (US)<br />
http://www.nlynx.co.uk/products/printing/printing_snmpdrv.htm (EMEA) <strong>for</strong> more<br />
in<strong>for</strong>mation.<br />
All product and brand names are trademarks of their respective companies. Page 2
<strong>Barcode</strong> <strong>Printing</strong> & Ethernet Connectivity <strong>for</strong> <strong>IBM</strong> <strong>Midrange</strong> <strong>Servers</strong><br />
Intelligent Printer Data Stream (IPDS)<br />
This allows <strong>for</strong> full label development using Intelligent Printer Data Stream (IPDS).<br />
IPDS is only supported via a third party print server called the “E-Box Ethernet Print<br />
Server <strong>for</strong> <strong>Zebra</strong> printers”. Contact http://www.csp-gmbh.de/ <strong>for</strong> more in<strong>for</strong>mation.<br />
Intelligent Graphics <strong>Printing</strong> (IGP)<br />
IGP emulation can be supported <strong>for</strong> replacing legacy line matrix printers from Prin<strong>to</strong>nix.<br />
IGP emulation is only supported via a third party print server called the “G-Box Ethernet<br />
Print Server <strong>for</strong> <strong>Zebra</strong> printers”. Contact http://www.csp-gmbh.de/ <strong>for</strong> more in<strong>for</strong>mation.<br />
Summary of Connectivity Options<br />
Remote PJL Device SNMP IGP IPDS<br />
Queue<br />
Device<br />
ZPL Yes Yes via ZBI Yes**<br />
(<strong>Zebra</strong>Net 10/100)<br />
Yes<br />
(3rd party product)<br />
203 dpi Only<br />
(3 rd party product)<br />
EPL Yes** No Yes<br />
(3rd party product)<br />
No 203 dpi Only<br />
(3 rd party product)<br />
CPCL/ZPL<br />
Emulation<br />
Yes** No No No No<br />
** <strong>Zebra</strong>’s recommended method of connectivity.<br />
All product and brand names are trademarks of their respective companies. Page 3
<strong>Barcode</strong> <strong>Printing</strong> & Ethernet Connectivity <strong>for</strong> <strong>IBM</strong> <strong>Midrange</strong> <strong>Servers</strong><br />
Introduction <strong>to</strong> <strong>Label</strong> Design Software <strong>for</strong> <strong>IBM</strong> iSeries<br />
Print <strong>to</strong> File or Middleware<br />
You may wish <strong>to</strong> use label design software <strong>to</strong> generate printer commands (EPL, ZPL or<br />
CPCL) and then upload these <strong>to</strong> the <strong>IBM</strong> iSeries <strong>for</strong> embedding in<strong>to</strong> your RPG II<br />
application. Alternatively you may wish <strong>to</strong> drive the printers via iSeries or Windows<br />
based Middleware. The in<strong>for</strong>mation below will help you with this decision:<br />
Print <strong>to</strong> File<br />
Any label design package can be used <strong>to</strong> generate the printers command language. <strong>Zebra</strong><br />
recommend the following:<br />
<strong>Zebra</strong>Designer Pro ZPL, EPL and CPCL<br />
<strong>Label</strong> Vista CPCL<br />
The above <strong>Label</strong> Design Applications (LDA), and many more, can generate printer<br />
commands in a file that can be uploaded <strong>to</strong> the iSeries.<br />
Native <strong>IBM</strong> iSeries Middleware<br />
The following applications support <strong>Zebra</strong> printers and also run natively on the <strong>IBM</strong><br />
iSeries. These applications allow you <strong>to</strong> drive your printer without having <strong>to</strong> embed<br />
printer commands within your own iSeries application. They, in some cases, allow you <strong>to</strong><br />
drive the printers even without having <strong>to</strong> modify your existing application.<br />
<strong>Barcode</strong>400 www.tlash<strong>for</strong>d.com<br />
MarkMagic www.cybra.com<br />
InterForm/400 www.inter<strong>for</strong>m.dk<br />
www.intermate.com<br />
www.spacetec.co.uk<br />
Windows Middleware<br />
It is also possible <strong>to</strong> print <strong>to</strong> <strong>Zebra</strong> printers, from the <strong>IBM</strong> iSeries, via NT servers running<br />
Windows print queues managed by <strong>Label</strong> Design Applications such as:<br />
CodeSoft http://www.teklynx.com<br />
Bar-Tender http://www.seagullscientific.com<br />
NiceLAbel http://www.europlus.si<br />
Loftware http://www.loftware.com<br />
All product and brand names are trademarks of their respective companies. Page 4
<strong>Barcode</strong> <strong>Printing</strong> & Ethernet Connectivity <strong>for</strong> <strong>IBM</strong> <strong>Midrange</strong> <strong>Servers</strong><br />
<strong>IBM</strong> iSeries Printer Set-up<br />
Introduction <strong>to</strong> ZPL Programming Language <strong>for</strong> <strong>IBM</strong> iSeries<br />
Fonts and the <strong>IBM</strong> iSeries<br />
Western Europe and the Americas TTF<br />
CG Triumvirate Bold Condensed and Swiss 721 are the default fonts supplied with all<br />
ZPL <strong>Zebra</strong> printers. CG Triumvirate bold condensed supports <strong>IBM</strong> codepage 850 and<br />
this contains all of the characters needed <strong>for</strong> the Americas and Western Europe (similar <strong>to</strong><br />
Latin 1).<br />
EMEA TTF<br />
Swiss 721 is a Unicode font that supports 936 characters. This font is preloaded in all<br />
<strong>Zebra</strong> European supplied ZPL printers, excluding desk<strong>to</strong>p, and is also available <strong>for</strong> free<br />
download from:<br />
http://www.zebra.com/id/zebra/na/en/index/drivers_downloads/utilities/fonts/swiss_721_font.html<br />
This font is listed as “<strong>Zebra</strong> Swiss Unicode” in <strong>Zebra</strong>Designer Pro. You should design<br />
with this font if you need any Central/Easter European, Hebrew, Cyrillic or Arabic<br />
Languages. This also supports all of the Western European characters.<br />
Asia Pacific (APAC) TTFs<br />
Various optional APAC fonts are available <strong>for</strong> s<strong>to</strong>rage in flash memory or PC Card.<br />
Andale offers all of the languages in a single “wordtype” font or you can choose from<br />
individual smaller single language fonts. <strong>Zebra</strong>Designer Pro supports these fonts after<br />
enabling them via File|Printer Settings|Printer Memmory|Memory Card<br />
Note: <strong>Zebra</strong> strongly recommends that you use a printer resident font when printing from<br />
the <strong>IBM</strong> iSeries. TrueType Fonts will be rendered as graphics and there<strong>for</strong>e slow down<br />
printing. This TrueType graphic option is only relevant <strong>for</strong> fixed text!<br />
Unicode on the iSeries<br />
<strong>IBM</strong> offer an online course on how <strong>to</strong> use Unicode with you <strong>IBM</strong> iSeries. In<strong>for</strong>mation is<br />
available from the following link:<br />
http://www-03.ibm.com/servers/enable/site/education/abstracts/8fce_abs.html<br />
The following jump contains everything you need <strong>to</strong> know how <strong>to</strong> support Unicode<br />
within your iSeries:<br />
http://www-03.ibm.com/servers/eserver/iseries/software/globalization/unicodeinfo.html<br />
All product and brand names are trademarks of their respective companies. Page 5
<strong>Barcode</strong> <strong>Printing</strong> & Ethernet Connectivity <strong>for</strong> <strong>IBM</strong> <strong>Midrange</strong> <strong>Servers</strong><br />
Graphics and the <strong>IBM</strong> iSeries<br />
We recommend that you try and install graphics in the Flash memory of the printer where<br />
possible. IT is possible that the <strong>IBM</strong> iSeries may insert print control characters, such as<br />
<strong>for</strong>mfeed and linefeed, within the graphics ZPL Datastream. This could generate corrupt<br />
graphics or even s<strong>to</strong>p the printer from printing. This is more likely <strong>to</strong> happen with larger<br />
graphics!<br />
EBCIDIC verus ASCII<br />
Within the ZPL programming language special characters are used <strong>to</strong> denote a Control<br />
Instruction, a Format Instruction and a Delimiter.<br />
A Control Prefix is usually a tilde (~) character and is used it identify a Control<br />
instruction. These cause the printer <strong>to</strong> take some specific action immediately, such as<br />
clearing the memory or feeding a blank label.<br />
A Format Prefix is usually a caret (^) character and is used <strong>to</strong> identify a Format<br />
instruction. These instructions are the “blueprint” of a label and define label length, field<br />
origin, type of field, field data, and other in<strong>for</strong>mation.<br />
A Delimiter is usually a comma (,) character and is used <strong>to</strong> separate the different<br />
parameters <strong>for</strong> each <strong>for</strong>mat instruction.<br />
These characters are the default values used but, because of system conflicts, can be<br />
changed <strong>to</strong> any other value. This can be accomplished by means of a ZPL string or<br />
through the printer’s front panel features (depending on the printer type)<br />
When you upload (FTP) ZPL, created by a <strong>Label</strong> Design Application (LDA) on a<br />
PC, All command prefix characters (^) will be converted <strong>to</strong> (¬). To avoid this<br />
problem, YOU MUST CHANGE THE COMMAND PREFIX TO AN<br />
ALTERNATIVE VALUE. You may only continue <strong>to</strong> use (^) when you are entering<br />
this directly via an <strong>IBM</strong> iSeries Edi<strong>to</strong>r.<br />
Sample ZPL String<br />
A sample ZPL string, <strong>to</strong> change ALL the characters, would be<br />
^XA^CC##CT%#CD+#XZ<br />
In this the Control Prefix is now %, the Format Prefix is now # and the Delimiter is now<br />
+.<br />
This simple ZPL string can be written using any text edi<strong>to</strong>r and simply “copied” <strong>to</strong> the<br />
printer<br />
All product and brand names are trademarks of their respective companies. Page 6
<strong>Barcode</strong> <strong>Printing</strong> & Ethernet Connectivity <strong>for</strong> <strong>IBM</strong> <strong>Midrange</strong> <strong>Servers</strong><br />
Front Panel Settings<br />
The same can be accomplished, if the printer has an LCD front panel, by<br />
� Pressing the SETUP/EXIT key<br />
� Then keep pressing the NEXT key until the display shows CONTROL PREFIX<br />
� Then press either the + or – keys<br />
� Here you will be prompted <strong>for</strong> the printer password<br />
♦ The default password is 1234<br />
� This can be entered by, again, using the + or – keys<br />
♦ The + increments the current value<br />
♦ The – moves the prompt 1 position <strong>to</strong> the right<br />
� Once the correct password has been entered press NEXT/SAVE<br />
� You will now be able <strong>to</strong> change the Control Prefix <strong>to</strong> whatever value you wish<br />
♦ This value can be changed by, once again, using the + or – keys<br />
� The keys per<strong>for</strong>m the same actions as above<br />
� Once the desired value has been set you can move on <strong>to</strong> change the Format<br />
Prefix by pressing the NEXT/SAVE key<br />
� The above steps can then be repeated <strong>to</strong> set a new value here and <strong>for</strong> the<br />
Delimiter Character<br />
To exit this menu<br />
� Press SETUP/EXIT<br />
� Then NEXT/SAVE<br />
Commercial @<br />
YOU WILL NEED TO OPEN THE ZPL FILE, CREATED BY ZEBRA<br />
DESIGNER PRO, WITH NOTEPAD AND DO A SEARCH AND REPLACE ON<br />
ALL “^” AND REPLACE WITH “@” BEFORE YOU DO YOUR FTP (UPLOAD)<br />
TO THE iSERIES.<br />
This can be set via a ZPL string (^XA^CC@@XZ) or by entering the value 40h as the<br />
Format Prefix (Please follow the above steps <strong>to</strong> do this).<br />
All product and brand names are trademarks of their respective companies. Page 7
<strong>Barcode</strong> <strong>Printing</strong> & Ethernet Connectivity <strong>for</strong> <strong>IBM</strong> <strong>Midrange</strong> <strong>Servers</strong><br />
TCP/IP Address (Ethernet only)<br />
After setting the Format Prefix the next step is <strong>to</strong> either set or note the printers TCP/IP<br />
Address (This in<strong>for</strong>mation will be needed when setting up the printer on the <strong>IBM</strong><br />
iSeries).<br />
All the data associated with these settings can be seen on a printer configuration label.<br />
This can be printed by<br />
� Pressing the SETUP/EXIT key<br />
� Repeatedly pressing the NEXT/SAVE key until LIST SETUP is shown in the LCD<br />
� Then press the key underneath the word PRINT<br />
� A full Printer Configuration label will now be printed<br />
To exit this menu<br />
� Press SETUP/EXIT<br />
� Then NEXT/SAVE<br />
The in<strong>for</strong>mation that is of interest is in the lower<br />
portion of the configuration label.<br />
IP RESOLUTION<br />
IP PROTOCOL<br />
IP ADDRESS<br />
SUBNET MASK<br />
DEFAULT GATEWAY<br />
On the right is a sample Configuration label and in this<br />
the useful in<strong>for</strong>mation is shown as<br />
PERMANENT IP RESOLUTION<br />
ALL IP PROTOCOL<br />
010.006.002.240 IP ADDRESS<br />
255.255.255.000 SUBNET MASK<br />
000.000.000.000 GATEWAY<br />
How the device is configured may depend, <strong>to</strong> an extent,<br />
on your network pro<strong>to</strong>cols.<br />
IP Resolution (DHCP/Dynamic)<br />
All necessary IP data (listed above) is sent by the host<br />
system, there is nothing <strong>to</strong> be configured.<br />
All product and brand names are trademarks of their respective companies. Page 8
<strong>Barcode</strong> <strong>Printing</strong> & Ethernet Connectivity <strong>for</strong> <strong>IBM</strong> <strong>Midrange</strong> <strong>Servers</strong><br />
IP Resolution (Permanent)<br />
Here all the IP data needs <strong>to</strong> be manually configured and, in most cases, will have already<br />
been defined by your IT department (it will just need entering in<strong>to</strong> the printer). Access <strong>to</strong><br />
the relevant printer menu section is gained in similar steps <strong>to</strong> those previously used.<br />
� Enter the menu mode<br />
� Press SETUP/EXIT<br />
� Scroll through the various options until IP RESOLUTION is displayed<br />
� Press NEXT/SAVE <strong>to</strong> move through menu options<br />
� Once at IP RESOLUTION press either the + or – keys<br />
� Either one will prompt you <strong>for</strong> the password and defaults <strong>to</strong> 1234<br />
� The password is entered by using a combination of the + or – keys<br />
♦ The + increments the value under the pointer<br />
♦ The – moves the prompt 1 position right<br />
� Press NEXT/SAVE<br />
� You are now back at the IP RESOLUTION screen<br />
� You will now be able <strong>to</strong> select between DYNAMIC or PERMANENT<br />
♦ The selection can be made by pressing either key under the ← (left) or → (right)<br />
arrow<br />
� You will want <strong>to</strong> select DYNAMIC<br />
� Press NEXT/SAVE<br />
♦ This will move you <strong>to</strong> the next option in that particular menu branch<br />
� You now have the choice of IP PROTOCOL<br />
� The choices are<br />
♦ ALL<br />
♦ GLEANING ONLY<br />
♦ RARP<br />
♦ BOOTP<br />
♦ DHCP<br />
♦ DHCP AND BOOTP<br />
� Once your choice has been made press NEXT/SAVE<br />
� You can now enter the IP ADDRESS<br />
� The address is entered by using the + or – keys as be<strong>for</strong>e<br />
♦ The + increments the value under the pointer<br />
♦ The – moves the prompt 1 position right<br />
� Enter the IP ADDRESS given <strong>to</strong> you by your IT department<br />
� Press NEXT/SAVE<br />
� You can now enter the SUBNET MASK<br />
� Again use the + or – keys <strong>to</strong> enter the relevant address<br />
� Press NEXT/SAVE<br />
� You can now enter the DEFAULT GATEWAY<br />
� Again use the + or – keys <strong>to</strong> enter the relevant address<br />
� Press NEXT/SAVE<br />
� Press NEXT/SAVE<br />
� Back <strong>to</strong> the main menu options<br />
� Press SETUP/EXIT<br />
� Press NEXT/SAVE<br />
This will permanently save your settings<br />
All product and brand names are trademarks of their respective companies. Page 9
<strong>Barcode</strong> <strong>Printing</strong> & Ethernet Connectivity <strong>for</strong> <strong>IBM</strong> <strong>Midrange</strong> <strong>Servers</strong><br />
Introduction <strong>to</strong> CPCL Programming Language <strong>for</strong> <strong>IBM</strong> iSeries<br />
<strong>Zebra</strong> Mobile printers native page description language is Comtec Page Command<br />
Language (CPCL). These printers also support ZPL and EPL emulation, however this<br />
requires the loading of a special firmware application. If you wish <strong>to</strong> use the<br />
<strong>Zebra</strong>DesignerPro label design <strong>to</strong>ol then we strongly recommend that you use a ZPL<br />
verus EPL printer. For example, use a TLP2844-Z instead of a TLP2844. In the case of<br />
mobile CPCL printer we recommend that you load the ZPL emulation firmware.<br />
CPCL (mobile) based printers require that a configuration file (Config.sys) be<br />
preloaded inside the printer. This must done <strong>for</strong> both CPCL and ZPL emulation based<br />
printers. The file eliminates unnecessary <strong>for</strong>m feeds and also removes ASCII <strong>to</strong><br />
EBCIDIC character mapping issues. For printers with ZPL emulation, this configuration<br />
also changes the command prefix from “^” <strong>to</strong> “@”.<br />
The file below must be created by Notepad and sent from <strong>Label</strong> Vista, as it requires a<br />
check digit <strong>to</strong> be downloaded. <strong>Label</strong> Vista au<strong>to</strong>matically adds this.<br />
! UTILITIES<br />
SETLP 0 0 0<br />
SETLF 0 0<br />
SET ""=""<br />
SET "@"="^"<br />
SET "|"="!"<br />
PRINT<br />
All product and brand names are trademarks of their respective companies. Page 10
<strong>Barcode</strong> <strong>Printing</strong> & Ethernet Connectivity <strong>for</strong> <strong>IBM</strong> <strong>Midrange</strong> <strong>Servers</strong><br />
Designing A <strong>Label</strong> With <strong>Zebra</strong>Designer Pro<br />
This documentation contains in<strong>for</strong>mation that is<br />
specific <strong>to</strong> <strong>Zebra</strong>Designer tm<br />
Pro. Please ignore<br />
all references <strong>to</strong> variable data “data types” in the<br />
<strong>Zebra</strong>Designer tm<br />
Pro help system. Features like<br />
“Database” and “Counter” variable data are not<br />
relevant as all we are doing is generating a ZPL<br />
file and then the <strong>IBM</strong> iSeries® is doing the<br />
printing, not <strong>Zebra</strong>Designer tm<br />
Pro. Refer <strong>to</strong> the<br />
help system <strong>for</strong> in<strong>for</strong>mation on general label<br />
design and refer <strong>to</strong> this document <strong>for</strong> variable data setup and <strong>IBM</strong> iSeries® specific<br />
considerations.<br />
Linked Fields<br />
This example demonstrates how <strong>to</strong> link both<br />
the model number and serial number in<strong>to</strong> a<br />
single barcode. This is done by making the<br />
fixed text the names of the variables. This<br />
will cause the barcode <strong>to</strong> preview very long<br />
but it will print correctly after the search and<br />
replace is done at print time.<br />
Variable Fields should be designed as “fixed<br />
text” with the field data being the field name.<br />
In this case the <strong>IBM</strong> iSeries® will replace<br />
both $MODEL_NO$ and $SERIAL_NO$<br />
with the correct data at print time. This is a<br />
little like “mail merge”.<br />
Identical Copies<br />
You will need <strong>to</strong> use Notepad <strong>to</strong> edit the third parameter on the line that contains<br />
“^PQ1,0,1,Y^XZ”. You could change this <strong>to</strong> “^PQ1,0,5,Y^XZ” <strong>for</strong> 5 identical copies or<br />
you could change it <strong>to</strong> “^PQ1,0,$ICOPIES$,Y^XZ” <strong>for</strong> a variable number of identical<br />
copes. The iSeries will need <strong>to</strong> replace “$ICOPIES” with the relevant variable value.<br />
All product and brand names are trademarks of their respective companies. Page 11
<strong>Barcode</strong> <strong>Printing</strong> & Ethernet Connectivity <strong>for</strong> <strong>IBM</strong> <strong>Midrange</strong> <strong>Servers</strong><br />
Copy Quantity – Not Identical<br />
You will need <strong>to</strong> use Notepad <strong>to</strong> edit the first parameter on the line that contains<br />
“^PQ1,0,1,Y^XZ”. You could change this <strong>to</strong> “^PQ100,0,1,Y^XZ” <strong>for</strong> 100 copes or you<br />
could change it <strong>to</strong> “^PQ$COPIES$,0,1,Y^XZ” <strong>for</strong> a variable number of identical copies.<br />
The iSeries will need <strong>to</strong> replace “$COPIES” with the relevant variable value. This allows<br />
<strong>for</strong> the printer <strong>to</strong> make copies and increment serial numbers etc.<br />
Au<strong>to</strong>matic incrementing by printer – Serial Numbers<br />
You would need <strong>to</strong> design these types of fields just as you do with any other variable, via<br />
fixed text. You then would have <strong>to</strong> edit the ZPL in Notepad and change the ^FD <strong>to</strong> a<br />
^SN. You will also have <strong>to</strong> supply some basic parameter. This would only cause fields <strong>to</strong><br />
increment when using the ^PQ “copies” parameter. Refer <strong>to</strong> the ZPL manual <strong>for</strong> more<br />
in<strong>for</strong>mation.<br />
Variable Graphics dialogue box<br />
Variable graphics are not supported with <strong>Zebra</strong>Deisnger Pro. You would have <strong>to</strong> edit the<br />
ZPL manually via Notepad and s<strong>to</strong>re the graphics in the printers flash memory. Refer <strong>to</strong><br />
the ZPL manual <strong>for</strong> more in<strong>for</strong>mation.<br />
We STRONGLY recommend that you do not send graphics from the <strong>IBM</strong> iSeries®<br />
as it is possible the print writer may include linfeed and <strong>for</strong>mfeeds in the <strong>Zebra</strong><br />
graphics data creating corrupt graphics.<br />
Print <strong>to</strong> file<br />
Now that you have designed your label, you must create the ZPL file that you will upload<br />
<strong>to</strong> the iSeries. Select File|Print and then ensure that the “Print <strong>to</strong> File” checkbox is<br />
“checked” and then press the “Print” but<strong>to</strong>n. You will then need <strong>to</strong> supply the filename<br />
and path <strong>for</strong> the ZPL file.<br />
All product and brand names are trademarks of their respective companies. Page 12
<strong>Barcode</strong> <strong>Printing</strong> & Ethernet Connectivity <strong>for</strong> <strong>IBM</strong> <strong>Midrange</strong> <strong>Servers</strong><br />
Uploading a ZPL Test File <strong>to</strong> the <strong>IBM</strong> iSeries<br />
Be<strong>for</strong>e we look at creating any sort of device we will need <strong>to</strong> upload a test file, so that the<br />
status and printing can be checked. If you have <strong>Zebra</strong>Desinger Pro then that can be used<br />
<strong>to</strong> generate a test ZPL file such as the following:<br />
Test File<br />
Below is the file we will use:<br />
^XA~TA0~JSO^LT0^MMT^MNW^MTT^PON^PMN^LH0,0^JMA^PR8,8^MD10^JUS^LRN^CI0^XZ<br />
^XA^LL0406<br />
^PW609<br />
^FO,56^FS<br />
^FT117,89^A0N,45,45<br />
^FH\^FD<strong>Zebra</strong>Designer^FS<br />
^FO,31^FS<br />
^FT89,161^A0N,25,26<br />
^FH\^FDEasy <strong>to</strong> use labeling software.^FS<br />
^FO16,180^GB496,0,5^FS<br />
^FO52,37^GB450,66,4^FS<br />
^BY4,3,40^FT69,319^BCN,,Y,N<br />
^FD>:$BARCODEDATA$^FS<br />
^FO,28^FS<br />
^FT28,255^A0N,23,24<br />
^FH\^FDSale date:^FS<br />
^FO,28^FS<br />
^FT28,220^A0N,23,24<br />
^FH\^FDVersion:^FS<br />
^FO,28^FS<br />
^FT131,220^A0N,23,24<br />
^FH\^FD$VERSION$^FS<br />
^FO,28^FS<br />
^FT131,255^A0N,23,24<br />
^FH\^FD$SALESDATE$^FS<br />
^PQ1,0,1,Y^XZ<br />
Change the ^ <strong>to</strong> @<br />
We will use Notepad <strong>to</strong> do a search and replace on the ^ (carrat) character. We now end<br />
up with the following file:<br />
@XA~TA0~JSO@LT0@MMT@MNW@MTT@PON@PMN@LH0,0@JMA@PR8,8@MD10@JU<br />
S@LRN@CI0@XZ<br />
@XA@LL0406<br />
@PW609<br />
@FO,56@FS<br />
@FT117,89@A0N,45,45<br />
@FH\@FD<strong>Zebra</strong>Designer@FS<br />
@FO,31@FS<br />
All product and brand names are trademarks of their respective companies. Page 13
<strong>Barcode</strong> <strong>Printing</strong> & Ethernet Connectivity <strong>for</strong> <strong>IBM</strong> <strong>Midrange</strong> <strong>Servers</strong><br />
@FT89,161@A0N,25,26<br />
@FH\@FDEasy <strong>to</strong> use labeling software.@FS<br />
@FO16,180@GB496,0,5@FS<br />
@FO52,37@GB450,66,4@FS<br />
@BY4,3,40@FT69,319@BCN,,Y,N<br />
@FD>:$BARCODEDATA$@FS<br />
@FO,28@FS<br />
@FT28,255@A0N,23,24<br />
@FH\@FDSale date:@FS<br />
@FO,28@FS<br />
@FT28,220@A0N,23,24<br />
@FH\@FDVersion:@FS<br />
@FO,28@FS<br />
@FT131,220@A0N,23,24<br />
Transferring the file<br />
The easiest method of getting this file in<strong>to</strong> the <strong>IBM</strong> iSeries is <strong>to</strong> use FTP, just follow<br />
these simple steps.<br />
1. Create the above file as C:\AS_TEST.TXT. Using a DOS box change <strong>to</strong> the<br />
direc<strong>to</strong>ry containing this file (CD C:\)<br />
2. Type FTP xxx.xxx.xxx.xxx<br />
a. xxx.xxx.xxx.xxx represent the IP address of the <strong>IBM</strong> iSeries<br />
3. You will need <strong>to</strong> log on <strong>to</strong> the system<br />
a. User name and password required<br />
4. Type CD QGPL<br />
a. This will change the destination folder, on the <strong>IBM</strong> iSeries, <strong>to</strong> QGPL<br />
5. Type PUT AS_TEST.TXT TEST1<br />
a. This will copy the file, AS_TEST.TXT, <strong>to</strong> the QGPL folder and rename it<br />
TEST1<br />
6. Type QUIT, <strong>to</strong> end the FTP utility<br />
Note: When you upload (FTP) ZPL, created by a <strong>Label</strong> Design Application (LDA) on<br />
a PC, All command prefix characters (^) will be converted <strong>to</strong> (¬). To avoid this<br />
problem, YOU MUST CHANGE THE COMMAND PREFIX TO AN<br />
ALTERNATIVE VALUE SUCH AS “@”. You may only continue <strong>to</strong> use (^) when<br />
you are entering this directly via an <strong>IBM</strong> iSeries Edi<strong>to</strong>r.<br />
Looking at the “new” <strong>IBM</strong> iSeries file<br />
Once the file has been uploaded it is wise <strong>to</strong> check that the operation was completely<br />
successful. This can be done by typing WRKF, in the <strong>IBM</strong> iSeries Main Menu.<br />
All product and brand names are trademarks of their respective companies. Page 14
<strong>Barcode</strong> <strong>Printing</strong> & Ethernet Connectivity <strong>for</strong> <strong>IBM</strong> <strong>Midrange</strong> <strong>Servers</strong><br />
At the next screen, type TEST1 as the file name and QGPL as the library name, then<br />
press ENTER.<br />
The next screen will show if a file with the same name (TEST1) exists, but is it the right<br />
file?<br />
All product and brand names are trademarks of their respective companies. Page 15
<strong>Barcode</strong> <strong>Printing</strong> & Ethernet Connectivity <strong>for</strong> <strong>IBM</strong> <strong>Midrange</strong> <strong>Servers</strong><br />
TAB <strong>to</strong> the start of the line containing TEST1 and enter 5, press ENTER.<br />
Now just press ENTER<br />
All product and brand names are trademarks of their respective companies. Page 16
<strong>Barcode</strong> <strong>Printing</strong> & Ethernet Connectivity <strong>for</strong> <strong>IBM</strong> <strong>Midrange</strong> <strong>Servers</strong><br />
The file listing shown on the <strong>IBM</strong> iSeries screen should match that of the file<br />
AS_TEST.TXT.<br />
To exit from this screen press, either, F3 or F12 twice. This will return you <strong>to</strong> the <strong>IBM</strong><br />
iSeries Main Menu.<br />
All product and brand names are trademarks of their respective companies. Page 17
<strong>Barcode</strong> <strong>Printing</strong> & Ethernet Connectivity <strong>for</strong> <strong>IBM</strong> <strong>Midrange</strong> <strong>Servers</strong><br />
The PJL ZBI driver <strong>for</strong> ZPL printers<br />
If you wish <strong>to</strong> set-up your ZPL printer, with a <strong>Zebra</strong>Nett PrintServer II, as a Device<br />
Driver then you MUST use the PJL method. This requires that you have the PJL ZBI<br />
program loaded/running inside the printer.<br />
ZEBRA STRONLY RECCOMENDS THAT YOU DO NOT USE THE PJL<br />
DRIVER AND CONSIDER SWITCHING TO THE 10/100 ZEBRANETT PRINT<br />
SERVER. BOTH ZEBRA AND <strong>IBM</strong> RECOMMEND THE “<strong>IBM</strong>SNMPDRV” FOR<br />
ASCII PRINTERS..<br />
All the ZPL “speaking” printers have the “optional” intelligence of the <strong>Zebra</strong> BASIC<br />
Interpreter (ZBI). ZBI allows cus<strong>to</strong>m BASIC style programs <strong>to</strong> be written and s<strong>to</strong>red in<br />
the printer, <strong>to</strong> be run whenever required. The program can also be au<strong>to</strong>matically loaded<br />
whenever the printer is switched on and, so, ready <strong>for</strong> immediate use.<br />
Since neither the Printers nor the <strong>Zebra</strong>Nett PrintServer II understand the PJL command<br />
language, ZBI is ideally suited <strong>to</strong> act as an intermediary, taking the PJL command and<br />
converting it in<strong>to</strong> something the printer understands. It can also be used <strong>to</strong> return suitably<br />
encoded responses <strong>to</strong> the <strong>IBM</strong> iSeries system. The ZBI program is listed below:<br />
@XA<br />
@DFE:AUTOEXEC.ZPL@FS<br />
@PRE@FS<br />
@JIE:AS400.BAS,N,N@FS<br />
@XZ<br />
~JI<br />
1 REM AS400 PJL Program Rev 2.0<br />
10 FOR I = 1 TO 9<br />
20 CLOSE # ( I )<br />
30 NEXT I<br />
40 LET A = SERVERCLOSE ( 99 )<br />
50 OPEN # 1 : NAME "ZPL"<br />
51 print #1: "@xa@fo50,50@a0n20,20@fdZBI VERSION 2.0 IS RUNNING@FS@XZ"<br />
60 LET ISERVER = SERVERSOCKET ( "TCP" )<br />
70 LET TCPORT = ACCEPT ( ISERVER )<br />
80 ON ERROR GOTO 620<br />
90 DECLARE STRING DUMP$ ( 3 )<br />
100 LET DUMP$ ( 1 ) = CHR$ ( 27 )<br />
110 LET DUMP$ ( 2 ) = CHR$ ( 2 )<br />
120 LET DUMP$ ( 3 ) = CHR$ ( 3 )<br />
130 LET START$ = SEARCHTO$ ( TCPORT , DUMP$ , 1 )<br />
140 ON ERROR GOTO 620<br />
150 IF START$ = CHR$ ( 2 ) OR START$ = CHR$ ( 3 ) THEN<br />
160 GOTO 130<br />
170 END IF<br />
180 DECLARE STRING DUMP2$ ( 4 )<br />
200 LET DUMP2$ ( 1 ) = CHR$ ( 37 )<br />
All product and brand names are trademarks of their respective companies. Page 18
<strong>Barcode</strong> <strong>Printing</strong> & Ethernet Connectivity <strong>for</strong> <strong>IBM</strong> <strong>Midrange</strong> <strong>Servers</strong><br />
210 LET DUMP2$ ( 2 ) = CHR$ ( 2 )<br />
220 LET DUMP2$ ( 3 ) = CHR$ ( 3 )<br />
225 LET DUMP2$ ( 4 ) = "XZ"<br />
230 LET START$ = SEARCHTO$ ( TCPORT , DUMP2$ , 1 )<br />
240 ON ERROR GOTO 620<br />
245 IF START$ = "XZ" THEN<br />
246 PRINT #1 : "@XZ"<br />
247 GOSUB 7000<br />
248 END IF<br />
250 IF START$ = CHR$ ( 2 ) OR START$ = CHR$ ( 3 ) THEN<br />
260 GOTO 230<br />
270 END IF<br />
280 IF START$ = DUMP2$ ( 1 ) THEN<br />
290 DECLARE STRING SEARCH$ ( 4 )<br />
300 LET SEARCH$ ( 1 ) = "@PJL INFO STATUS"<br />
310 LET SEARCH$ ( 2 ) = "@PJL ECHO"<br />
320 LET SEARCH$ ( 3 ) = CHR$ ( 2 )<br />
340 LET SEARCH$ ( 4 ) = CHR$ ( 3 )<br />
350 LET FIND$ = SEARCHTO$ ( TCPORT , SEARCH$ , 1 )<br />
360 ON ERROR GOTO 620<br />
370 IF FIND$ = CHR$ ( 2 ) OR FIND$ = CHR$ ( 3 ) THEN<br />
380 GOTO 350<br />
390 END IF<br />
400 IF FIND$ = "@PJL INFO STATUS" THEN<br />
405 GOSUB 6000<br />
470 END IF<br />
480 IF FIND$ = "@PJL ECHO" THEN<br />
490 LET RETURN$ = EXTRACT$ ( TCPORT , "" , "" )<br />
500 LET RESPONSE$ = FIND$ & RETURN$ & CHR$ ( 13 ) & CHR$ ( 10 ) & CHR$ ( 12 )<br />
510 PRINT # TCPORT : RESPONSE$<br />
520 END IF<br />
530 LET EOF$ = SEARCHTO$ ( TCPORT , CHR$ ( 27 ) )<br />
540 ON ERROR GOTO 620<br />
550 LET EOF$ = SEARCHTO$ ( TCPORT , CHR$ ( 37 ) )<br />
560 ON ERROR GOTO 620<br />
570 GOTO 90<br />
580 ELSE<br />
590 SLEEP 1<br />
600 GOTO 90<br />
610 END IF<br />
620 SLEEP 1<br />
630 IF TCPORT < 3 THEN<br />
640 FOR I = 1 TO 9<br />
650 CLOSE # ( I )<br />
660 NEXT I<br />
670 open#1: name "ZPL"<br />
680 end if<br />
690 GOTO 70<br />
1 REM PRINTER STATUS<br />
6000 LET STAT$ = ""<br />
6005 PRINT #1: "~HS"<br />
6010 INPUT #1 : STAT$<br />
6019 IF STAT$(6:7) = ",0" THEN ! PRINTER READY<br />
All product and brand names are trademarks of their respective companies. Page 19
<strong>Barcode</strong> <strong>Printing</strong> & Ethernet Connectivity <strong>for</strong> <strong>IBM</strong> <strong>Midrange</strong> <strong>Servers</strong><br />
6021 Print #TCPort: "@PJL INFO STATUS"<br />
6022 Print #TCPort: "CODE=10001"<br />
6023 Print #TCPort: "DISPLAY=" & CHR$(34) & "PRINTER READY" & CHR$(34)<br />
6024 Print #TCPort: "ONLINE=TRUE"<br />
6025 PRINT # TCPORT : CHR$ ( 12 ) ;<br />
6130 ELSE ! PRINTER NOT READY<br />
6145 Print #TCPort: "@PJL USTATUS DEVICE"<br />
6147 Print #TCPort: "CODE=40038"<br />
6155 Print #TCPort: "DISPLAY=" & CHR$(34) & "PRINTER ERROR" & CHR$(34)<br />
6160 Print #TCPort: "ONLINE=FALSE"<br />
6165 PRINT # TCPORT : CHR$ ( 12 ) ;<br />
6190 ENDIF<br />
6195 INPUT #1 : STAT$<br />
6196 INPUT #1 : STAT$<br />
6200 RETURN<br />
7000 LET STAT$ = ""<br />
7010 PRINT #1: "~HS"<br />
7020 INPUT #1 :STAT$<br />
7030 IF STAT$(6:7) = ",1" THEN ! PRINTER ERROR<br />
7040 Print #TCPort: "@PJL USTATUS DEVICE"<br />
7050 Print #TCPort: "CODE=40038"<br />
7060 Print #TCPort: "DISPLAY=" & CHR$(34) & "PRINTER PAUSED" & CHR$(34)<br />
7070 Print #TCPort: "ONLINE=FALSE"<br />
7080 PRINT # TCPORT : CHR$ ( 12 ) ;<br />
7090 ENDIF<br />
7100 INPUT #1 : STAT$<br />
7110 INPUT #1 : STAT$<br />
7200 RETURN<br />
STORE "E:AS400.BAS"<br />
ZPL<br />
The above ZBI program requires that you have the correct firmware loaded. This<br />
must support ZBI v1.2 or greater.<br />
Loading the PJL ZBI Program<br />
To load the ZBI program in<strong>to</strong> the printer simply copy the file <strong>to</strong> the printer.<br />
From a DOS box use the COPY command.<br />
COPY “AS400 ZBI.TXT” LPT1:, if the printer is connected <strong>to</strong> your local PC via a<br />
standard parallel cable.<br />
If the printer is networked, and in another location, use FTP. In the same way that it was<br />
used <strong>to</strong> upload the test file.<br />
All product and brand names are trademarks of their respective companies. Page 20
<strong>Barcode</strong> <strong>Printing</strong> & Ethernet Connectivity <strong>for</strong> <strong>IBM</strong> <strong>Midrange</strong> <strong>Servers</strong><br />
SNMP (<strong>IBM</strong>SNMPDRV) / PJL Device Driver (Ethernet)<br />
If you wish <strong>to</strong> set-up your ZPL printer as a Device Driver then you MUST use the SNMP<br />
or PJL method.<br />
We STRONGLY recommend that you use the SNMP method. The SNMP method<br />
requires that you use a <strong>Zebra</strong>Net 10/100 Print Server with the latest firmware loaded that<br />
supports AS/400 SNMP (RFC1514). Contact <strong>Zebra</strong> Technical Support <strong>for</strong> this firmware.<br />
PJL supports requires that you have the PJL ZBI program loaded/running inside the<br />
printer. You must also have the correct version of printer firmware that supports ZBI v1.2<br />
or greater. Please refer <strong>to</strong> “The PJL ZBI Device Driver <strong>for</strong> further in<strong>for</strong>mation”.<br />
The steps we will look at here are<br />
1. CRTDEVPRT<br />
2. Vary on the printer<br />
3. Start the printer writer<br />
4. Test print using CPYSPLF<br />
Be<strong>for</strong>e any of these steps can be carried out you will need <strong>to</strong> know<br />
A. What name you are going <strong>to</strong> use <strong>to</strong> refer <strong>to</strong> the device<br />
B. What it’s designated IP address is<br />
Once you have this in<strong>for</strong>mation you can start <strong>to</strong> create the device<br />
CRTDEVPRT<br />
� Log on<strong>to</strong> your <strong>IBM</strong> iSeries system<br />
� At the prompt type CRTDEVPRT, and press ENTER<br />
All product and brand names are trademarks of their respective companies. Page 21
<strong>Barcode</strong> <strong>Printing</strong> & Ethernet Connectivity <strong>for</strong> <strong>IBM</strong> <strong>Midrange</strong> <strong>Servers</strong><br />
� Type in the name that will be used <strong>to</strong> identify the printer, here we will use ZBRAHW<br />
� Press TAB, <strong>to</strong> move <strong>to</strong> the next line, and type *LAN (Device class)<br />
� Press TAB and type 3812 (Device type)<br />
� Press TAB and type 1 (Device model)<br />
� Now press ENTER<br />
� Now TAB <strong>to</strong> the LAN attachment line and type *IP, then press ENTER<br />
� Remember <strong>to</strong> clear the remaining text from the line be<strong>for</strong>e pressing ENTER<br />
� Type 9100 (Port number)<br />
� TAB <strong>to</strong> Font: Identifier and type 11<br />
� TAB <strong>to</strong> Form feed and type *AUTOCUT<br />
All product and brand names are trademarks of their respective companies. Page 22
<strong>Barcode</strong> <strong>Printing</strong> & Ethernet Connectivity <strong>for</strong> <strong>IBM</strong> <strong>Midrange</strong> <strong>Servers</strong><br />
� Press ENTER<br />
� At the Printer error message type *INFO<br />
� Now press PAGE DOWN, <strong>to</strong> move the rest of the screen<br />
� TAB <strong>to</strong> Activation timer and type 2550<br />
� TAB <strong>to</strong> next line and type 30 (Inactivity timer)<br />
� Then press ENTER<br />
� For Manufacturer type and model type *WSCSTCONT132<br />
All product and brand names are trademarks of their respective companies. Page 23
<strong>Barcode</strong> <strong>Printing</strong> & Ethernet Connectivity <strong>for</strong> <strong>IBM</strong> <strong>Midrange</strong> <strong>Servers</strong><br />
� TAB <strong>to</strong> next line and type *CONT80 (Paper source 1)<br />
� TAB <strong>to</strong> next line and type *NONE (Paper source 2)<br />
� TAB <strong>to</strong> next line and type *NONE (Envelope source)<br />
� The remaining lines can stay unchanged<br />
� Press PAGE DOWN, <strong>for</strong> the next screen<br />
� Type in the IP address of the printer<br />
� This was one of the things you needed <strong>to</strong> know be<strong>for</strong>e starting this sequence of<br />
events<br />
� TAB <strong>to</strong> System driver program and type *<strong>IBM</strong>SNMPDRV or *<strong>IBM</strong>PJLDRV<br />
All product and brand names are trademarks of their respective companies. Page 24
<strong>Barcode</strong> <strong>Printing</strong> & Ethernet Connectivity <strong>for</strong> <strong>IBM</strong> <strong>Midrange</strong> <strong>Servers</strong><br />
� If you TAB <strong>to</strong> the next line, page Down on some version of the OS, you can enter an<br />
identifying description <strong>for</strong> the printer<br />
� In this case 170XiIII Plus was entered as the printer description<br />
� Press F10 <strong>for</strong> Additional parameters<br />
� Press PAGE DOWN <strong>to</strong> get <strong>to</strong> the last screen (bot<strong>to</strong>m)<br />
� The “Workstation cus<strong>to</strong>mising object” is set as QWPDEFAULT and the library is<br />
set as QSYS<br />
� At any of the lines, that display a number of different choices, press F4 <strong>to</strong> see a<br />
list of available options<br />
� Then press ENTER<br />
All product and brand names are trademarks of their respective companies. Page 25
<strong>Barcode</strong> <strong>Printing</strong> & Ethernet Connectivity <strong>for</strong> <strong>IBM</strong> <strong>Midrange</strong> <strong>Servers</strong><br />
� The process should now be completed and the <strong>IBM</strong> iSeries screen should show<br />
the following<br />
� The important part is the line at the bot<strong>to</strong>m<br />
� Description <strong>for</strong> device ZBRAHW created<br />
All product and brand names are trademarks of their respective companies. Page 26
<strong>Barcode</strong> <strong>Printing</strong> & Ethernet Connectivity <strong>for</strong> <strong>IBM</strong> <strong>Midrange</strong> <strong>Servers</strong><br />
Vary on the printer<br />
The nest step, in the sequence, is <strong>to</strong> “Vary on” the printer.<br />
� At the prompt type WRKDEVD<br />
� Use the PAGE DOWN but<strong>to</strong>n <strong>to</strong> move <strong>to</strong> the section that contains the name of the<br />
Device we created earlier (ZBRAHW)<br />
� TAB <strong>to</strong> the Device and type 8<br />
� 8=Work with status<br />
� And press ENTER<br />
All product and brand names are trademarks of their respective companies. Page 27
<strong>Barcode</strong> <strong>Printing</strong> & Ethernet Connectivity <strong>for</strong> <strong>IBM</strong> <strong>Midrange</strong> <strong>Servers</strong><br />
� You can now see the current status of the device; in this case it is VARIED OFF.<br />
� To change the status, use the relevant Numeric key.<br />
� Here we want <strong>to</strong> VARY ON the device so enter 1, under OPT, and press<br />
ENTER.<br />
� To exit this screen press F12 twice, you will now be back at the <strong>IBM</strong> iSeries Main<br />
Menu.<br />
All product and brand names are trademarks of their respective companies. Page 28
<strong>Barcode</strong> <strong>Printing</strong> & Ethernet Connectivity <strong>for</strong> <strong>IBM</strong> <strong>Midrange</strong> <strong>Servers</strong><br />
Start the printer writer<br />
� Type WRKWTR and press ENTER.<br />
� Use either the TAB key or PAGE DOWN <strong>to</strong> move <strong>to</strong> the line containing the device<br />
we want <strong>to</strong> work with and type 1<br />
� Press ENTER and the screen should change <strong>to</strong> show the device as started (STR).<br />
� Press, either, F3 or F12 <strong>to</strong> return <strong>to</strong> the <strong>IBM</strong> iSeries Main Menu.<br />
All product and brand names are trademarks of their respective companies. Page 29
<strong>Barcode</strong> <strong>Printing</strong> & Ethernet Connectivity <strong>for</strong> <strong>IBM</strong> <strong>Midrange</strong> <strong>Servers</strong><br />
Test print using CPYF<br />
Now that we have uploaded a test file, created the device and started the writer the final<br />
step is <strong>to</strong> check that everything is working<br />
� Type CPYF and press ENTER<br />
� Enter TEST1 as From file<br />
� QGPL as Library<br />
� QPCSMPRT as To file<br />
� Press ENTER<br />
All product and brand names are trademarks of their respective companies. Page 30
<strong>Barcode</strong> <strong>Printing</strong> & Ethernet Connectivity <strong>for</strong> <strong>IBM</strong> <strong>Midrange</strong> <strong>Servers</strong><br />
� You should then be returned <strong>to</strong> the <strong>IBM</strong> iSeries Main Menu, with the following<br />
message displayed<br />
� “Printer device PRT01 not found. Output queue changed <strong>to</strong> QPRINT in library…”<br />
We now need <strong>to</strong> work with the spool file<br />
� Type WRKSPLF and press Enter<br />
All product and brand names are trademarks of their respective companies. Page 31
<strong>Barcode</strong> <strong>Printing</strong> & Ethernet Connectivity <strong>for</strong> <strong>IBM</strong> <strong>Midrange</strong> <strong>Servers</strong><br />
� In the above example you can see the spool file waiting <strong>to</strong> be assigned <strong>to</strong> a printer<br />
� If the screen is similar <strong>to</strong> that above then we are working at the Basic level<br />
� It is easier <strong>to</strong> work with the spool file at the Intermediate level<br />
� To switch <strong>to</strong> the Intermediate level press, and hold, the Shift key then press F9<br />
� You will then see a screen like the one below<br />
� Select 2 –Intermediate<br />
� The screen will then change <strong>to</strong> one like that below<br />
All product and brand names are trademarks of their respective companies. Page 32
<strong>Barcode</strong> <strong>Printing</strong> & Ethernet Connectivity <strong>for</strong> <strong>IBM</strong> <strong>Midrange</strong> <strong>Servers</strong><br />
The 1 spool file is still waiting <strong>to</strong> be assigned<br />
� TAB <strong>to</strong> the line containing the printer output and enter 10<br />
� Press ENTER<br />
� Either type in the name of the device <strong>to</strong> use, or press F4 <strong>to</strong> see a list of available<br />
devices.<br />
� Press ENTER<br />
All product and brand names are trademarks of their respective companies. Page 33
<strong>Barcode</strong> <strong>Printing</strong> & Ethernet Connectivity <strong>for</strong> <strong>IBM</strong> <strong>Midrange</strong> <strong>Servers</strong><br />
� The label will au<strong>to</strong>matically be printed<br />
Note: All “main” commands have been entered from the <strong>IBM</strong> iSeries Main Menu; this<br />
does not have <strong>to</strong> be the case. The command can be entered, and or concatenated, from<br />
the main prompt.<br />
i.e. CPYF FROMFILE(QGPL/TEST1) TOFILE(QPCSMPRT)<br />
If you have any problems printing or recovering from errors then you should “Hold” and<br />
then “Release” the print job. Also ensure the PJL ZBI program is running.<br />
Now that we have successfully tested our device we will look at changing the printer<br />
settings<br />
All product and brand names are trademarks of their respective companies. Page 34
<strong>Barcode</strong> <strong>Printing</strong> & Ethernet Connectivity <strong>for</strong> <strong>IBM</strong> <strong>Midrange</strong> <strong>Servers</strong><br />
Changing Printer settings<br />
To change the printer/device settings the printer must first be s<strong>to</strong>pped, <strong>to</strong> do this<br />
� At the prompt type WRKWTR and press ENTER<br />
� PAGE DOWN or TAB <strong>to</strong> the required device<br />
� Enter 4 (End) and press ENTER<br />
All product and brand names are trademarks of their respective companies. Page 35
<strong>Barcode</strong> <strong>Printing</strong> & Ethernet Connectivity <strong>for</strong> <strong>IBM</strong> <strong>Midrange</strong> <strong>Servers</strong><br />
� Press ENTER <strong>to</strong> confirm this action<br />
Now that the device has been s<strong>to</strong>pped you can<br />
� Press F12 and return <strong>to</strong> the main menu.<br />
All product and brand names are trademarks of their respective companies. Page 36
<strong>Barcode</strong> <strong>Printing</strong> & Ethernet Connectivity <strong>for</strong> <strong>IBM</strong> <strong>Midrange</strong> <strong>Servers</strong><br />
� Type WRKDEVD and press ENTER<br />
� TAB or PAGE DOWN <strong>to</strong> the device you wish <strong>to</strong> change<br />
� Type 2 and press ENTER<br />
All product and brand names are trademarks of their respective companies. Page 37
<strong>Barcode</strong> <strong>Printing</strong> & Ethernet Connectivity <strong>for</strong> <strong>IBM</strong> <strong>Midrange</strong> <strong>Servers</strong><br />
� You can now make the desired changes <strong>to</strong> the device<br />
� RAW Port number<br />
� Printer type<br />
� IP address, etc.<br />
� Here the IP address has been changed<br />
� After making the changes, and pressing ENTER, you will see the following screen<br />
All product and brand names are trademarks of their respective companies. Page 38
<strong>Barcode</strong> <strong>Printing</strong> & Ethernet Connectivity <strong>for</strong> <strong>IBM</strong> <strong>Midrange</strong> <strong>Servers</strong><br />
� Press F3 or F12 <strong>to</strong> return <strong>to</strong> the main menu<br />
All product and brand names are trademarks of their respective companies. Page 39
<strong>Barcode</strong> <strong>Printing</strong> & Ethernet Connectivity <strong>for</strong> <strong>IBM</strong> <strong>Midrange</strong> <strong>Servers</strong><br />
Remote Out Queue<br />
EPL and CPCL printers do no support PJL, SNMP or ZBI and there<strong>for</strong>e can’t be used as<br />
<strong>IBM</strong> iSeries devices (CRTDEVPRT). This also applies <strong>to</strong> mobile printers that are CPCL<br />
printers running the ZBI emulation. This is the only means of driving EPL, CPCL and<br />
ZPL emulation printers connected via Ethernet.<br />
Note: CPCL printers also require the preloading of a configuration file (Config.sys), this<br />
is required <strong>to</strong> eliminate unnecessary <strong>for</strong>mfeeds. This was described earlier in this<br />
document.<br />
This is, by far, the simplest and quickest method of connecting any Ethernet printer <strong>to</strong> the<br />
<strong>IBM</strong> iSeries including ZPL printers, however this does not support “Printer Error<br />
Reporting” and “Page Range <strong>Printing</strong>”.<br />
The steps we will look at here are<br />
1. CRTOUTQ (Here we are looking at a true ZPL printer)<br />
2. Test print using CPYF<br />
3. Changing Printer Settings<br />
CRTOUTQ<br />
� Type CRTOUTQ and press ENTER<br />
� Press F9, this will show all the different parameters <strong>for</strong> this particular activity<br />
� Press F11, this will show the command line parameter name<br />
All product and brand names are trademarks of their respective companies. Page 40
<strong>Barcode</strong> <strong>Printing</strong> & Ethernet Connectivity <strong>for</strong> <strong>IBM</strong> <strong>Midrange</strong> <strong>Servers</strong><br />
� Enter the name <strong>for</strong> your Output queue<br />
� Here it is ZB_OUT<br />
� Set the Library <strong>to</strong> QGPL<br />
� Change Remote System <strong>to</strong> *INTNETADR<br />
� Change Remote Printer Queue <strong>to</strong> portLF1 (Please note the case)<br />
� Press Page Down<br />
All product and brand names are trademarks of their respective companies. Page 41
<strong>Barcode</strong> <strong>Printing</strong> & Ethernet Connectivity <strong>for</strong> <strong>IBM</strong> <strong>Midrange</strong> <strong>Servers</strong><br />
� Set Writers <strong>to</strong> au<strong>to</strong>start <strong>to</strong> 1<br />
� Change the Queue <strong>for</strong> writer messages / Library <strong>to</strong> QSYSOPR<br />
� Change Connection type <strong>to</strong> *IP<br />
� Set Destination type <strong>to</strong> *OTHER<br />
� Change the “Manufacturer type and model” <strong>to</strong> *WSCSTCONT132<br />
� The “Workstation cus<strong>to</strong>mising object” is set as QWPDEFAULT<br />
� And the library is set as QSYS<br />
� Set the Internet address <strong>to</strong> that of the printer being used<br />
� Set Print separa<strong>to</strong>r page <strong>to</strong> *NO<br />
� Press Page Down<br />
� TAB <strong>to</strong>, and change the Text ‘description’ <strong>to</strong> something meaningful<br />
� Press ENTER<br />
All product and brand names are trademarks of their respective companies. Page 42
<strong>Barcode</strong> <strong>Printing</strong> & Ethernet Connectivity <strong>for</strong> <strong>IBM</strong> <strong>Midrange</strong> <strong>Servers</strong><br />
� If the operation was successful then a message similar <strong>to</strong> that above will be shown<br />
� Object ZB_OUT type *OUTQ created in library QGPL.<br />
All product and brand names are trademarks of their respective companies. Page 43
<strong>Barcode</strong> <strong>Printing</strong> & Ethernet Connectivity <strong>for</strong> <strong>IBM</strong> <strong>Midrange</strong> <strong>Servers</strong><br />
OVRPRTF<br />
This command allows you <strong>to</strong> allocate a print queue (outq or device type) <strong>to</strong> the current<br />
session. This also helps remove some <strong>for</strong>mfeed characters from the datastream. If you do<br />
not set this command up then you will have <strong>to</strong> manually allocate print jobs <strong>to</strong> print<br />
queues and you may also get extra blank labels printing out on CPCL based printers.<br />
Ensure that your writer is started by using the STRRMTWTR (Start Remote Writer). If<br />
you have any problems then do the following:<br />
ENDWTR WTR(*ALL) OPTION(*IMMED)<br />
STRRMTWTR<br />
OVRPRTF (See setting below)<br />
At the command line type OVRPRTF<br />
� Set the “File being overridden” <strong>to</strong> *PRTF<br />
� Page down <strong>to</strong> the next screen<br />
All product and brand names are trademarks of their respective companies. Page 44
<strong>Barcode</strong> <strong>Printing</strong> & Ethernet Connectivity <strong>for</strong> <strong>IBM</strong> <strong>Midrange</strong> <strong>Servers</strong><br />
� Set the “Form feed” <strong>to</strong> *CONT<br />
� Page down, about, 5 more screens<br />
� Set the “Output queue” <strong>to</strong> the name of the OUTQ you want <strong>to</strong> use<br />
� Set the “Library” <strong>to</strong> that the OUTQ was created in<br />
� Then press ENTER<br />
Now whenever CPYF FROMFILE(QGPL/TEST1) TOFILE(QPCSMPRT) is entered<br />
the job will au<strong>to</strong>matically go <strong>to</strong> the OUTQ, and print without a blank label following the<br />
printed labels<br />
All product and brand names are trademarks of their respective companies. Page 45
<strong>Barcode</strong> <strong>Printing</strong> & Ethernet Connectivity <strong>for</strong> <strong>IBM</strong> <strong>Midrange</strong> <strong>Servers</strong><br />
Test print <strong>to</strong> the OUTQ using CPYF<br />
The OUTQ can be tested in a similar way <strong>to</strong> testing the Device, by copying a file <strong>to</strong> the<br />
spool file. You can follow the menu options by typing CPYF or use a command line<br />
similar <strong>to</strong> that below.<br />
CPYF FROMFILE(QGPL/TEST1) TOFILE(QPCSMPRT)<br />
We then need <strong>to</strong> work with the newly created spool file and allocate it <strong>to</strong> the OUTQ<br />
� Just type WRKSPLF and press ENTER<br />
All product and brand names are trademarks of their respective companies. Page 46
<strong>Barcode</strong> <strong>Printing</strong> & Ethernet Connectivity <strong>for</strong> <strong>IBM</strong> <strong>Midrange</strong> <strong>Servers</strong><br />
� In the above example you can see the spool file waiting <strong>to</strong> be assigned <strong>to</strong> a printer<br />
� If the screen is similar <strong>to</strong> that above then we are working at the Basic level<br />
� It is easier <strong>to</strong> work with the spool file at the Intermediate level<br />
� To switch <strong>to</strong> the Intermediate level press, and hold, the Shift key then press F9<br />
� You will then see a screen like the one below<br />
� Select 2 –Intermediate<br />
� The screen will then change <strong>to</strong> one like that below<br />
� The 1 spool file is still waiting <strong>to</strong> be assigned<br />
All product and brand names are trademarks of their respective companies. Page 47
<strong>Barcode</strong> <strong>Printing</strong> & Ethernet Connectivity <strong>for</strong> <strong>IBM</strong> <strong>Midrange</strong> <strong>Servers</strong><br />
� Enter the number 2 against each of the files you want <strong>to</strong> print<br />
� If there are more files that are <strong>to</strong> be assigned <strong>to</strong> the same OUTQ, then enter 2<br />
against each of them<br />
� If the cursor does not jump <strong>to</strong> the command line then TAB there and type<br />
OUTQ(ZB_OUT)<br />
� Replacing ZB_OUT with the name you gave your OUTQ<br />
� Then press ENTER<br />
� The status of the spooled job will change <strong>to</strong> *CHG<br />
� If, after a while, you press F5 the screen will show as below<br />
All product and brand names are trademarks of their respective companies. Page 48
<strong>Barcode</strong> <strong>Printing</strong> & Ethernet Connectivity <strong>for</strong> <strong>IBM</strong> <strong>Midrange</strong> <strong>Servers</strong><br />
� Indicating that the job has been passed <strong>to</strong> the printer<br />
If you have any problems the eplease nsure that your writer is started by using the<br />
STRRMTWTR (Start Remote Writer). We advise you issue the following commands in<br />
the order below:<br />
ENDWTR WTR(*ALL) OPTION(*IMMED)<br />
STRRMTWTR<br />
OVRPRTF (See setting below)<br />
This will s<strong>to</strong>p the writer, start it and then you must allocate the printer <strong>to</strong> a queue <strong>for</strong><br />
au<strong>to</strong>matic printing.<br />
All product and brand names are trademarks of their respective companies. Page 49
<strong>Barcode</strong> <strong>Printing</strong> & Ethernet Connectivity <strong>for</strong> <strong>IBM</strong> <strong>Midrange</strong> <strong>Servers</strong><br />
Changing the OUTQ Printer Settings<br />
Should it become necessary <strong>to</strong> make changes <strong>to</strong> the way the Remote Output Queue has<br />
been configured the following steps should be taken.<br />
End Writer (ENDWTR)<br />
� The first step is <strong>to</strong> end the writer, <strong>to</strong> do this<br />
� Type ENDWTR WTR(outq_name)<br />
� outq_name being the name of the remote out queue <strong>to</strong> end<br />
� Then press ENTER<br />
� After about 15 seconds the queue will end<br />
� If it does not end then, at the command line, type<br />
� ENDWTR *ALL *IMMED<br />
� This will end ALL the writers immediately<br />
All product and brand names are trademarks of their respective companies. Page 50
<strong>Barcode</strong> <strong>Printing</strong> & Ethernet Connectivity <strong>for</strong> <strong>IBM</strong> <strong>Midrange</strong> <strong>Servers</strong><br />
Change Output Queue (CHGOUTQ)<br />
� The next step is <strong>to</strong> “open” the queue <strong>for</strong> editing, <strong>to</strong> do this<br />
� Type CHGOUTQ at the <strong>IBM</strong> iSeries Main menu<br />
� Press ENTER<br />
� Type the name of the Remote Output Queue you wish <strong>to</strong> change<br />
� In this case the name of the queue we just tested (ZB_OUT)<br />
� And enter the name of it’s Library (QGPL <strong>for</strong> our writer)<br />
� Press ENTER<br />
All product and brand names are trademarks of their respective companies. Page 51
<strong>Barcode</strong> <strong>Printing</strong> & Ethernet Connectivity <strong>for</strong> <strong>IBM</strong> <strong>Midrange</strong> <strong>Servers</strong><br />
� Press F9 and then F11<br />
� This will show all the various parameters and their syntax name<br />
� You will then see the opening “page” of the queue configuration<br />
� To see subsequent “pages” press Page Down<br />
� Once all the changes have been made simply press ENTER <strong>to</strong> save them<br />
� If the Writers <strong>to</strong> au<strong>to</strong>start is greater than 0 then the queue will au<strong>to</strong>matically start<br />
� If it doesn’t, or the Writers <strong>to</strong> au<strong>to</strong>start is 0 then type STRRMTWTR outq_name<br />
All product and brand names are trademarks of their respective companies. Page 52
<strong>Barcode</strong> <strong>Printing</strong> & Ethernet Connectivity <strong>for</strong> <strong>IBM</strong> <strong>Midrange</strong> <strong>Servers</strong><br />
Working with Writers<br />
To see a list of all working writers, at the command line type WRKWTR *ALL<br />
� Here you can see that there are 2 writers (OUTQ) running<br />
� From here you can do things like;<br />
� End a writer<br />
� Change settings<br />
� Hold a writer<br />
All product and brand names are trademarks of their respective companies. Page 53
<strong>Barcode</strong> <strong>Printing</strong> & Ethernet Connectivity <strong>for</strong> <strong>IBM</strong> <strong>Midrange</strong> <strong>Servers</strong><br />
Tracing Print Jobs<br />
This facility allows you <strong>to</strong> log the communication between the <strong>IBM</strong> iSeries and the<br />
printer. This allows you <strong>to</strong> see exactly what is being sent <strong>to</strong> the printer and also what the<br />
printer is sending <strong>to</strong> the <strong>IBM</strong> iSeries.<br />
In this section we will look at how <strong>to</strong><br />
1. Create a report that traces a print job<br />
2. How <strong>to</strong> view that report<br />
3. How <strong>to</strong> copy that report <strong>to</strong> a PC<br />
Creating the Report<br />
� The first step is <strong>to</strong> start the trace, this can be done by typing STRSST<br />
All product and brand names are trademarks of their respective companies. Page 54
<strong>Barcode</strong> <strong>Printing</strong> & Ethernet Connectivity <strong>for</strong> <strong>IBM</strong> <strong>Midrange</strong> <strong>Servers</strong><br />
� Then select option 1 (Start a Service <strong>to</strong>ol)<br />
� Then select item 3 (Work with communication trace)<br />
All product and brand names are trademarks of their respective companies. Page 55
<strong>Barcode</strong> <strong>Printing</strong> & Ethernet Connectivity <strong>for</strong> <strong>IBM</strong> <strong>Midrange</strong> <strong>Servers</strong><br />
� If no trace is running then, <strong>to</strong> create a new trace, press F6 (Start trace)<br />
� Enter the details as listed below;<br />
� Configuration object ETHLINE<br />
� Type 1<br />
� Trace description can be whatever you like<br />
� Buffer size 4<br />
� S<strong>to</strong>p on buffer full N<br />
� Data direction 3<br />
� Beginning bytes *CALC<br />
� Ending bytes *CALC<br />
All product and brand names are trademarks of their respective companies. Page 56
� Now press ENTER<br />
<strong>Barcode</strong> <strong>Printing</strong> & Ethernet Connectivity <strong>for</strong> <strong>IBM</strong> <strong>Midrange</strong> <strong>Servers</strong><br />
� Select 1 (All data (no filtering))<br />
� You will then see a screen that indicates the status of the trace, in this case ACTIVE<br />
� Press F3 twice and then ENTER<br />
All product and brand names are trademarks of their respective companies. Page 57
<strong>Printing</strong> a file<br />
<strong>Barcode</strong> <strong>Printing</strong> & Ethernet Connectivity <strong>for</strong> <strong>IBM</strong> <strong>Midrange</strong> <strong>Servers</strong><br />
� Type CPYF FROMFILE(QGPL/RBP_1) TOFILE(QPCSMPRT)<br />
� Replace RBP_1 with the name of the file <strong>to</strong> copy.<br />
� Now type WRKSPLF<br />
� And press ENTER<br />
All product and brand names are trademarks of their respective companies. Page 58
<strong>Barcode</strong> <strong>Printing</strong> & Ethernet Connectivity <strong>for</strong> <strong>IBM</strong> <strong>Midrange</strong> <strong>Servers</strong><br />
� Here, there is 1 file awaiting printing<br />
� Be<strong>for</strong>e we assign the file <strong>to</strong> a particular printer we will need <strong>to</strong> note some details<br />
� Job<br />
� User<br />
� Number<br />
� This in<strong>for</strong>mation can be found by selecting Intermediate mode and View 3<br />
� To enter Intermediate mode press and hold Shift, then press F9<br />
� Select 2 – Intermediate<br />
� To change <strong>to</strong> View 3 press F10<br />
All product and brand names are trademarks of their respective companies. Page 59
<strong>Barcode</strong> <strong>Printing</strong> & Ethernet Connectivity <strong>for</strong> <strong>IBM</strong> <strong>Midrange</strong> <strong>Servers</strong><br />
� You can now see the in<strong>for</strong>mation you will need <strong>to</strong> record<br />
� Job QPADEV0009<br />
� User KENMOIR<br />
� Number 006372<br />
� The actual values will be different <strong>for</strong> you<br />
� The next step is <strong>to</strong> assign the file <strong>to</strong> a printer<br />
� Here we are using the OUTQ<br />
� After a while the file will be printed and the queue will be empty<br />
All product and brand names are trademarks of their respective companies. Page 60
<strong>Barcode</strong> <strong>Printing</strong> & Ethernet Connectivity <strong>for</strong> <strong>IBM</strong> <strong>Midrange</strong> <strong>Servers</strong><br />
S<strong>to</strong>pping a trace<br />
After the report has finished printing, or at any time you wish <strong>to</strong> end the trace, type<br />
STRSST in the command line<br />
� Select option 1 (Start a service <strong>to</strong>ol)<br />
� Then select item 3 (Work with a communications trace)<br />
All product and brand names are trademarks of their respective companies. Page 61
<strong>Barcode</strong> <strong>Printing</strong> & Ethernet Connectivity <strong>for</strong> <strong>IBM</strong> <strong>Midrange</strong> <strong>Servers</strong><br />
� Select option 2 (S<strong>to</strong>p trace)<br />
� Then select option 6 (Format and print trace)<br />
All product and brand names are trademarks of their respective companies. Page 62
<strong>Barcode</strong> <strong>Printing</strong> & Ethernet Connectivity <strong>for</strong> <strong>IBM</strong> <strong>Midrange</strong> <strong>Servers</strong><br />
� Enter the data as shown below<br />
� Controller *ALL<br />
� Data representation 1<br />
� Format RR, RNR commands N<br />
� Format Broadcast data Y<br />
� Format UI data only N<br />
� Format SNA data only N<br />
� Format TCP/IP data only Y<br />
� Format IPX data only N<br />
� Select Ethernet data 3<br />
� Now press ENTER<br />
All product and brand names are trademarks of their respective companies. Page 63
<strong>Barcode</strong> <strong>Printing</strong> & Ethernet Connectivity <strong>for</strong> <strong>IBM</strong> <strong>Midrange</strong> <strong>Servers</strong><br />
� Enter the IP address of both your <strong>IBM</strong> iSeries and the printer being used <strong>for</strong> the trace<br />
� Press ENTER, the trace will now be created<br />
� Here we can see that the trace has been completed because of the message<br />
� Format of trace data complete<br />
All product and brand names are trademarks of their respective companies. Page 64
<strong>Barcode</strong> <strong>Printing</strong> & Ethernet Connectivity <strong>for</strong> <strong>IBM</strong> <strong>Midrange</strong> <strong>Servers</strong><br />
Create a physical file <strong>for</strong> the trace<br />
Now that the trace has been created we need <strong>to</strong> create an empty physical file <strong>to</strong> copy it <strong>to</strong>.<br />
� At the command line type CRTPF<br />
� Press ENTER<br />
� Enter the data as shown below, only those lines that need <strong>to</strong> be changed are shown.<br />
� File RBP_TRACE (this is name you wish <strong>to</strong> give the file)<br />
� Library QGPL<br />
� Record length 132<br />
All product and brand names are trademarks of their respective companies. Page 65
<strong>Barcode</strong> <strong>Printing</strong> & Ethernet Connectivity <strong>for</strong> <strong>IBM</strong> <strong>Midrange</strong> <strong>Servers</strong><br />
� Text ‘description’ Anything you like, <strong>to</strong> help describe the file<br />
� Press ENTER<br />
� After which you should see the following message<br />
File RBP_TRACE created in library QGPL<br />
All the above data could be entered directly in<strong>to</strong> the command line<br />
CRTPF FILE(QGPL/RBP_TRACE) RCDLEN(132)<br />
Convert the trace file <strong>to</strong> a physical file<br />
We now need <strong>to</strong> convert the trace file <strong>to</strong> this physical file.<br />
All product and brand names are trademarks of their respective companies. Page 66
<strong>Barcode</strong> <strong>Printing</strong> & Ethernet Connectivity <strong>for</strong> <strong>IBM</strong> <strong>Midrange</strong> <strong>Servers</strong><br />
� At the command line type CPYSPLF and press ENTER<br />
� Set the Spooled file <strong>to</strong> QPCSMPRT<br />
� Set the database file <strong>to</strong> the name of the file you have created (TRACEREPRT)<br />
� Set library <strong>to</strong> QGPL<br />
� Then set Job name, User and number <strong>to</strong> the values you previously recorded<br />
� Finally, pres ENTER<br />
� You should then see a message similar <strong>to</strong> this<br />
� 473 records copied <strong>to</strong> file TRACEREPRT in QGPL<br />
All product and brand names are trademarks of their respective companies. Page 67
<strong>Barcode</strong> <strong>Printing</strong> & Ethernet Connectivity <strong>for</strong> <strong>IBM</strong> <strong>Midrange</strong> <strong>Servers</strong><br />
Display the trace on the <strong>IBM</strong> iSeries<br />
To actually view the contents of the trace report<br />
� Type WRKMBRPDM<br />
� Press F4 (Do NOT press ENTER)<br />
� Enter the details as shown<br />
� File The name of the physical file you copied the trace <strong>to</strong><br />
� Library QGPL<br />
� Press ENTER<br />
All product and brand names are trademarks of their respective companies. Page 68
<strong>Barcode</strong> <strong>Printing</strong> & Ethernet Connectivity <strong>for</strong> <strong>IBM</strong> <strong>Midrange</strong> <strong>Servers</strong><br />
� Once the physical file has been located select 5 as the option (Display)<br />
� Press ENTER<br />
� You can now browse the trace report<br />
� Press page down <strong>to</strong> view more of the file<br />
� Press F3 <strong>to</strong> exit from the report<br />
All product and brand names are trademarks of their respective companies. Page 69
<strong>Barcode</strong> <strong>Printing</strong> & Ethernet Connectivity <strong>for</strong> <strong>IBM</strong> <strong>Midrange</strong> <strong>Servers</strong><br />
Copy the report from the <strong>IBM</strong> iSeries <strong>to</strong> the PC<br />
To copy the physical file, containing the trace report <strong>to</strong> your PC follow these simple steps<br />
� Type FTP xxx.xxx.xxx.xxx<br />
� xxx.xxx.xxx.xxx represents the IP address of the <strong>IBM</strong> iSeries<br />
� You will need <strong>to</strong> log on <strong>to</strong> the system<br />
� User name and password required<br />
� Type CD QGPL<br />
� This will change the source folder, on the <strong>IBM</strong> iSeries, <strong>to</strong> QGPL<br />
� Type GET TRACEREPRT RBP_REP1.TXT<br />
� This will copy the file, TRACEREPRT, from the QGPL folder and rename it<br />
RBP_REP1.TXT<br />
� Type QUIT, <strong>to</strong> end the FTP utility<br />
Sample trace report<br />
COMMUNICATIONS TRACE Title: SAMPLE REPORT 07/14/03 05:09:41 Page: 1<br />
Trace Description . . . . . : SAMPLE REPORT<br />
Configuration object . . . . : ETHLINE<br />
Type . . . . . . . . . . . . : 1 1=Line, 2=Network Interface<br />
3=Network server<br />
Object pro<strong>to</strong>col . . . . . . : ETHERNET<br />
Start date/Time . . . . . . : 07/14/03 05:00:21.852<br />
End date/Time . . . . . . . : 07/14/03 05:09:14.589<br />
Bytes collected . . . . . . : 210202<br />
Buffer size . . . . . . . . : 4 1=128K, 2=256K, 3=2M, 4=4M<br />
5=6M, 6=8M, 7=16M, 8=32M<br />
9=64M<br />
Data direction . . . . . . . : 3 1=Sent, 2=Received, 3=Both<br />
S<strong>to</strong>p on buffer full . . . . : N Y=Yes, N=No<br />
Number of bytes <strong>to</strong> trace<br />
Beginning bytes . . . . . : *CALC Value, *CALC<br />
Ending bytes . . . . . . : *CALC Value, *CALC<br />
Controller name . . . . . . : *ALL *ALL, name<br />
Data representation . . . . : 1 1=ASCII, 2=EBCDIC, 3=*CALC<br />
Format SNA data only . . . . : N Y=Yes, N=No<br />
All product and brand names are trademarks of their respective companies. Page 70
<strong>Barcode</strong> <strong>Printing</strong> & Ethernet Connectivity <strong>for</strong> <strong>IBM</strong> <strong>Midrange</strong> <strong>Servers</strong><br />
Format RR, RNR commands . . : N Y=Yes, N=No<br />
Format TCP/IP data only . . : Y Y=Yes, N=No<br />
IP address . . . . . . . . : 10.3.4.212 *ALL, address<br />
IP address . . . . . . . . : 10.6.2.241 *ALL, address<br />
Format UI data only . . . . : N Y=Yes, N=No<br />
Format IPX data only . . : N Y=Yes, N=No<br />
Select Ethernet data . . . . : 3 1=802.3, 2=ETHV2, 3=Both<br />
Format Broadcast data . . . : Y Y=Yes, N=No<br />
COMMUNICATIONS TRACE Title: SAMPLE REPORT 07/14/03 05:09:41 Page: 2<br />
Record Number . . . . Number of record in trace buffer (decimal)<br />
S/R . . . . . . . . . S=Sent R=Received M=Modem Change<br />
Data Length . . . . . Amount of data in record (decimal)<br />
Record Status . . . . Status of record<br />
Record Timer . . . . Time stamp. Based on communications hardware, the time<br />
stamp will be either:<br />
In the sample report we created it produced a <strong>to</strong>tal of 11 pages, above is only a small<br />
extract from the report.<br />
All product and brand names are trademarks of their respective companies. Page 71
Twinax / Coax<br />
<strong>Barcode</strong> <strong>Printing</strong> & Ethernet Connectivity <strong>for</strong> <strong>IBM</strong> <strong>Midrange</strong> <strong>Servers</strong><br />
Twinax<br />
The <strong>Zebra</strong> Twinax Interface permits the <strong>Zebra</strong> R-140, 105SL, XiII/XiIII Series printers<br />
and the PAX Print Engines <strong>to</strong> communicate with an <strong>IBM</strong> System, 34/36/38, <strong>IBM</strong> iSeries,<br />
or associated controller.<br />
It can be configured on the <strong>IBM</strong> Host as either an <strong>IBM</strong> 5256, 5224, 5225, or 4214<br />
printers.<br />
Twinax Cable- is a high frequency connecting cable in which two insulated wires run<br />
through the middle of the cable. Surrounding the insulated wires is a second wire made of<br />
solid or mesh metal.<br />
It is called "twinax" because it includes two physical channels that carry the signal<br />
surrounded (after a layer of insulation) by another concentric physical channel, both<br />
running along the same axis. The outer channel serves as a ground.<br />
Twinax is designed <strong>to</strong> operate with <strong>IBM</strong> System 34/36/38, AS400 or associated remote<br />
controller<br />
Coax<br />
The <strong>Zebra</strong> Coax Interface permits the <strong>Zebra</strong> R-140, 105SL, XiII/XiIII Series printers and<br />
the PAX Print Engines <strong>to</strong> communicate with an <strong>IBM</strong> 3270 Mainframe, or associated<br />
controller.<br />
It provides <strong>IBM</strong> 3287, Model 2, printer compatibility including LU1 (SCS) and LU3<br />
(3270 data stream) modes<br />
Coaxial Cable is a high frequency connecting cable in which an insulated wire runs<br />
through the middle of the cable. Surrounding the insulated wire is a second wire made of<br />
solid or mesh metal.<br />
It is called "coaxial" because it includes one physical channel that carries the signal<br />
surrounded (after a layer of insulation) by another concentric physical channel, both<br />
running along the same axis. The outer channel serves as a ground. Many of these cables<br />
or pairs of coaxial tubes can be placed in a single outer sheathing and, with repeaters, can<br />
carry in<strong>for</strong>mation <strong>for</strong> a great distance.<br />
Coaxial cables are required <strong>for</strong> high-bandwidth broadband systems and <strong>for</strong> fast baseband<br />
systems, such as Ethernet.<br />
All product and brand names are trademarks of their respective companies. Page 72