
You also want an ePaper? Increase the reach of your titles
YUMPU automatically turns print PDFs into web optimized ePapers that Google loves.
Written in Plain English.<br />
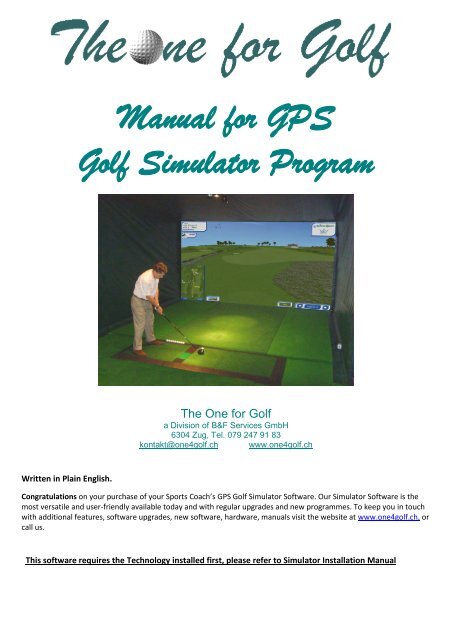
<strong>Manual</strong> <strong>for</strong> <strong>GPS</strong><br />
<strong>Golf</strong> <strong>Simulator</strong> <strong>Program</strong><br />
The One <strong>for</strong> <strong>Golf</strong><br />
a Division of B&F Services GmbH<br />
6304 Zug, Tel. 079 247 91 83<br />
kontakt@one4golf.ch www.one4golf.ch<br />
Congratulations on your purchase of your Sports Coach’s <strong>GPS</strong> <strong>Golf</strong> <strong>Simulator</strong> Software. Our <strong>Simulator</strong> Software is the<br />
most versatile and user-friendly available today and with regular upgrades and new programmes. To keep you in touch<br />
with additional features, software upgrades, new software, hardware, manuals visit the website at www.one4golf.ch, or<br />
call us.<br />
This software requires the Technology installed first, please refer to <strong>Simulator</strong> Installation <strong>Manual</strong>
Table of Contents<br />
1. Recommended Computer Specification 2<br />
2. Installing Sports Coach <strong>GPS</strong> <strong>Golf</strong> <strong>Simulator</strong> Software 2<br />
3. Fitting Security Device 2<br />
4. Entering Sports Coach <strong>GPS</strong> <strong>Golf</strong> <strong>Simulator</strong> Software 2<br />
5. Using Sports Coach <strong>GPS</strong> <strong>Golf</strong> <strong>Simulator</strong> 2<br />
6. Fast Loaders 19<br />
7. Resolution Selection 20<br />
8. Uploading Latest Versions 20<br />
9. Keyboard Languages 20<br />
10. Microsoft Vista Settings 20<br />
11. <strong>Simulator</strong> Per<strong>for</strong>mance 20<br />
12. Warranty 20<br />
1. Minimum Computer Specification <strong>for</strong> <strong>Simulator</strong> Mat Technology<br />
Intel Pentium 3 GHz Dual Core Processor, 3 Gig Ram, DVD Rom Drive, 200 Gb Hard Drive,<br />
SXGA Display 1280 x 1024, 32 Bit Colour, Reasonable Audio Card, 9800 GTX NVIDIA 512 Mb Graphics Card,<br />
4 USB Ports, Serial Port Card, Parallel Port and Windows Vista 32 Bit Business Edition.<br />
Minimum Computer Specification <strong>for</strong> 3D High Speed Camera System<br />
Intel Core 2 Quad 2.33 Ghz 1333 Mhz FSB, 4Mb Cache, 4 Gb DDR2 Ram, 1TB Hard Drive, DVD Player, Graphics Card<br />
NVDIA XT250 512 Mb DDR3 or NVDIA 9800 GTX 512 Mb Graphics Card, Intel G43, or P43 or later Chipset, 2 USB2<br />
PCI Cards, 2 on board USB2 Enhanced Intel Host Controllers and Windows Vista 32 Bit Business Edition.<br />
Make sure that the PC supplied has the very latest motherboard drivers installed. Generally the Motherboard Driver<br />
CD are out of date, so it is very important to go online and download the very latest drivers, otherwise the simulator<br />
may not work correctly.<br />
2. Installing Sports Coach <strong>GPS</strong> <strong>Golf</strong> <strong>Simulator</strong> <strong>Program</strong><br />
Place the CD marked <strong>GPS</strong> <strong>Golf</strong> <strong>Simulator</strong> <strong>Program</strong> into the DVD Rom Drive. The CD will automatically boot up<br />
double click on the <strong>GPS</strong> icon and the program will then install, follow the screen commands, and then Reboot.<br />
3. Fitting Security Device<br />
The program needs to locate the security device, <strong>for</strong> the program to function. It is used to check the <strong>GPS</strong> <strong>Simulator</strong><br />
<strong>Program</strong> is licensed. Without the security device being attached to a USB port, the programme will not function.<br />
4. Entering Sports Coach <strong>GPS</strong> <strong>Golf</strong> <strong>Simulator</strong> <strong>Program</strong>me<br />
You can now start playing rounds of golf. First double click the <strong>Simulator</strong> Icon on the desktop and the programme<br />
will boot up. In the programme you will see the Sports Coach <strong>GPS</strong> <strong>Golf</strong> <strong>Simulator</strong> program.<br />
5. Using the Sports Coach <strong>GPS</strong> <strong>Golf</strong> <strong>Simulator</strong><br />
The Start Screen will show the following choices.<br />
The ONE <strong>for</strong> <strong>Golf</strong> <strong>GPS</strong> User <strong>Manual</strong> 08-10 2
There are 11 Choices to Play, Resume, Longest Drive, Nearest to Pin, Putting Contest, Virtual Range, Virtual Chip,<br />
Virtual Putt, <strong>Golf</strong> Analysis, Course Library and Exit.<br />
If you choose Play you will go to the Play Screen. Resume you get a choice of saved games, longest drive, nearest<br />
the pin and putting contest are competition screens, virtual range, virtual chip and virtual putt are practise screens,<br />
golf analysis is another program, course library shows current and future courses and exit, shuts the program down.<br />
The Play Screen allows golfers to start a game quick and easily.<br />
Course click on the scroll bar and highlight the course you wish to play.<br />
Competition click on the scroll bar and highlight the competition you wish to play.<br />
Holes click on either all, front 9 or back 9. Alternatively click clear and select individual golf holes, to be played.<br />
Players click on click to add and this sends you to the players screen, where you can choose or add a new player.<br />
Cloud Cover click on clear, thin or thick, depending upon what cloud cover you require.<br />
Weather click on fine, gusty or rain, depending upon what weather conditions you require.<br />
Defaults click if you require changing the defaults that have been selected<br />
Play click to simply start the game - Exit click if you wish to return to the Start Screen.<br />
The ONE <strong>for</strong> <strong>Golf</strong> <strong>GPS</strong> User <strong>Manual</strong> 08-10 3
Clicking on ‘Click to Add’ will add the currently highlighted player to the new game. A second screen will open listing<br />
all the players selected to play. The above example shows one player has been selected.<br />
New players can also be created here. Click on Create new player to add a new player to the players list.<br />
Players can also be edited – Choose to tee from the competition position, or slightly further <strong>for</strong>ward at the Mens<br />
tee, or <strong>for</strong>ward to tee from the front. Select 14 suited clubs <strong>for</strong> the game and enter the player handicap. Set players<br />
to left or right handed. Make adjustments to clubbing – this ranges from +3 to -3 and by making a selection. Clubs<br />
offered will be either longer or shorter depending on this setting.<br />
The ONE <strong>for</strong> <strong>Golf</strong> <strong>GPS</strong> User <strong>Manual</strong> 08-10 4
The Defaults Screen allows the <strong>Golf</strong> Centre or <strong>Golf</strong>ers to change the game defaults.<br />
Green Speed controls the speed of the green, click on one of the options; Slow, Normal or Quick.<br />
Green Hardness controls the hardness of the green, click on one of the options;<br />
Time Limit controls the time a game can last <strong>for</strong> after the time has expired, the game will stop and the golfer’s will<br />
be asked if they wish to save the game, <strong>for</strong> a later time. Click on the up and down arrows to alter the minutes<br />
shown.<br />
Mulligan controls the amount of mulligans available except off the tee. Click on options none, 4, 6, 10 & Unlimited.<br />
Auto Continue controls the time the post shot screen stays on <strong>for</strong> after a shot is hit, click on one of the options;<br />
Off, 3 Seconds, 5 Seconds, 7 Seconds and 10 Seconds.<br />
Flyby determines the type of flyby normal or broadcast, which is similar to flybys used in the broadcast industry.<br />
Auto Putt allows you to putt <strong>for</strong> real or allow the computer to automatically putt out. Click On or Off.<br />
Contour View allows you to see the contours close to the ball. Click on the options Off or Near Green or On.<br />
Units of Measurement allow you to decide what type is displayed. Click on Imperial or Metric or Metric/Imperial.<br />
Rough Reduction controls the reduction distances, if using a Multi Surface unit, Rough Reduction should be Off.<br />
Putting Alignment allows you to decide whether there is a putting arrow on screen and whether the screen is<br />
redrawn to allow <strong>for</strong> the burrow. Click on the options Rotate Align, Hole Arrow, Rotate or Hole.<br />
Sounds allow you to decide whether sounds are selected. Click on the options; Off or On.<br />
Gimmie allows you to select the distance that putts are given, 2’, 4’, 6’ and 8’.<br />
Cancel resets the defaults back to the original settings.<br />
More Defaults sends you to additional defaults that can be altered, as listed below.<br />
Ok saves your selections and sends you back to the Play Screen.<br />
More Defaults Screen offers some additional defaults, plus future defaults as they are required.<br />
Ball Trail offers the ability to see a trail of the ball’s flight. Click on the options; Off or On.<br />
Shot Camera allows you to either fly with the ball, fixed or tilted static view. Click on options; Ball, Fixed or Tilt.<br />
Ball Camera allows the view to be from behind the ball or from the tee, most have the option off.<br />
Auto Scorecard allows you to see the scorecard at the end of the hole. Click on options; Off, 3, 5, 7, or 10 seconds.<br />
The ONE <strong>for</strong> <strong>Golf</strong> <strong>GPS</strong> User <strong>Manual</strong> 08-10 5
Perspective allows you to view the screen from the normal or wide angle. Click on options; Normal or Wide.<br />
Flight Model allows you to hit shots in an easier or more difficult mode. Click on options Normal or Professional.<br />
Distance Calibration allows you to alter the distance of the overall shots. Click on arrows to Increase or Decrease.<br />
Putting Distance allows you to specify the exact distance from the screen, to the ball the putting perspective distance.<br />
Graphics Quality allows you to choose normal or high, if you have a very powerful 2009 specification computer.<br />
Language allows you to choose what language you wish to use. Click on the options English, French, German, Italian,<br />
Spanish, Portuguese, Polish, Finish, Czech, Swedish, Norwegian, Turkish, Russian, Romanian, Danish, Dutch,<br />
Chinese, Arabic, Korean and Japanese. We will be creating other languages in due course.<br />
Measurement Setup allows you to select to calibrate the simulator hardware being used and selected club display.<br />
Change Contest Logo allows you to locate and alter the image that appears in the contest lead board.<br />
Course Signage allows you to locate and alter the image that appears on the tee box and green signage, in the game.<br />
Cancel resets the defaults back to the original settings.<br />
Measurement Setup sends you to the specific hardware measurement system settings.<br />
More Defaults sends you back to the original default screen.<br />
Ok saves your selections and sends you back to the Play Screen.<br />
Measurement Setup Screen offers you the ability to setup the high speed cameras, simulator mat and putting<br />
options.<br />
Selected Club Display allows the suggested club to appear or not during the game of golf, On or Off.<br />
Side Camera Distance allows you to enter the distance from the camera to the centre of the hitting area.<br />
Top Camera Distance allows you to enter the distance from the camera to the floor of the hitting area.<br />
Measurement System allows you to chose the mat, cameras or mat + camera, select the technology being used.<br />
Putting Location allows you to choose when using the cameras, the putting location. Normal is the centre circle in<br />
top camera calibration, whilst the Hitting Area is used with auto tee up systems.<br />
Camera Frequency allows to select the power frequency, it is important to select the correct frequency when using<br />
the camera system. 50 Hz <strong>for</strong> Europe and Most Countries and 60 Hz <strong>for</strong> North America.<br />
Camera Detection shown in Red shows each individual camera being detected, Side Camera Detected, Top Camera<br />
Detected and Both Cameras Detected. Updated immediately you plug cameras in or out, ideal <strong>for</strong> testing purposes.<br />
Camera Host Controllers shown in Red shows whether the cameras are on the required separate controller<br />
channels. It is important that both cameras are on separate channels, <strong>for</strong> the cameras to work. If not OK simple plug<br />
one of the camera leads into different usb ports, such as the front of the pc, until both controllers are OK.<br />
Cancel resets the defaults back to the original settings. Ok saves your selections and sends you back to the Play<br />
Screen.<br />
The ONE <strong>for</strong> <strong>Golf</strong> <strong>GPS</strong> User <strong>Manual</strong> 08-10 6
This option allows a number of simulators to be connected on a network. If a game is commenced on one simulator<br />
and saved at any time, the game can be resumed on any other simulator on the network. To use this option, you<br />
must have a router in place. To set up a simulator network, select a computer that will act as your server. On the<br />
chosen PC, access the router manufacturer’s settings and configure the chosen PC with a static IP address. This<br />
computer will now act as the simulator server. Refer to your router manufacturer’s manual <strong>for</strong> more in<strong>for</strong>mation.<br />
Once your router is configured, open the golf simulator program on the same computer and enter the Network<br />
Options screen. The program will detect your local IP address. This will be shown against the status ‘idle’ as the<br />
simulator has not yet made a connection. This is now the server IP address. Note it down. Click on Server and then<br />
click on OK to activate the chosen computer as the server. You will be asked to exit the program and restart it at this<br />
point so that the server connection can be established and other simulator clients can be added.<br />
Check the server connection by returning to the Network Options screen on the server computer. The status will<br />
now be shown as ‘listening’. This shows that the server is connected to the router and is waiting <strong>for</strong> signals from<br />
other simulators. On each simulator that you wish to join to the network, enter the Network Options. You will see<br />
the local IP address <strong>for</strong> the client at the top of the screen. You now need to connect to the server. Click on ‘change<br />
ip’<br />
Enter the static ip address of the server computer and click OK. You will then return to the Network Options screen.<br />
At this point, the client ip address is shown at the top of the screen and the acting server address is shown below.<br />
To check the client and server are communicating, click on test. A message will be returned stating ‘successfully<br />
connected to remote server’ If an error is returned, check the server ip address is correct, that the server computer<br />
is on and running the simulator program and that the router can be connected to.<br />
The ONE <strong>for</strong> <strong>Golf</strong> <strong>GPS</strong> User <strong>Manual</strong> 08-10 7
Set up each client the same way to join all simulators the same network. You can now set up players on any of the<br />
simulators and play. At any point during a game, you can quit and save the game and return to it later. The saved<br />
game can be resumed on any simulator.<br />
If you have configured a number of simulators, you can choose to play a live tournament. Create the tournament by<br />
accessing the network settings on the server computer, click on ‘set up network game’ and configure the game<br />
settings – choosing the type of competition, course, holes and conditions.<br />
Once the game is set, you will be warned that current scorecard data will be lost. Click OK to accept then click OK<br />
until the defaults screen is exited. Enter players as you would a normal game and click on ‘join live network game’ to<br />
start play. Any other simulators connected to the network can join the selected game at any time by adding players<br />
and clicking on ‘join network game’.<br />
The ONE <strong>for</strong> <strong>Golf</strong> <strong>GPS</strong> User <strong>Manual</strong> 08-10 8
By Clicking on this button you get the all the camera setup images and the log files saved. Which are then<br />
automatically saved as a zipped file on the desktop. This can be then copied to a PC with internet access, so the file<br />
can be sent to the vendor, <strong>for</strong> diagnostic purposes. So the <strong>Simulator</strong> is working at optimal potential.<br />
All <strong>Golf</strong> Courses are available in Alphabetical Order, with the course been altered highlighted.<br />
Rectangle Sign click on and select the image required on the rectangle green signage.<br />
Triangle Sign click on and select the image required on the triangle tee box signage.<br />
Signs allows you to be able to turn the signs, on or off. Click to select On or Off.<br />
Exit click if and when you wish to go back to the more defaults screen.<br />
At the Play Screen simply click Play to begin the game.<br />
It is possible to change the Gamma which brightens or darkens the screen.<br />
By Pressing [darkening the screen occurs and] lightening the screen occurs.<br />
The ONE <strong>for</strong> <strong>Golf</strong> <strong>GPS</strong> User <strong>Manual</strong> 08-10 9
At the Game Screen there is a great deal of in<strong>for</strong>mation and 8 interactive buttons.<br />
Shot In<strong>for</strong>mation is in the top left of the screen, the following<br />
in<strong>for</strong>mation appears; player name, hole number, par <strong>for</strong> the hole,<br />
shot being played, yardage to hole and course name.<br />
Club Suggested Icon is clicked on to expand to the entire range of<br />
clubs available. Simply click on a different club to change the club<br />
that you wish to use.<br />
Mini Map displays the top view layout of the hole.<br />
The yellow line shows the suggested direction and distance<br />
of the next shot towards the centre of the fairway. Whilst<br />
the white line, shows the expected direction and distance<br />
of the following shot towards the green. It is possible to<br />
click on the screen to get the relevant distances, so helping<br />
you to decide on club selection. By clicking Set you can<br />
then change the shot view, to match your selection,<br />
clicking Reset, put the shot view, back to the original view.<br />
The Wind Speed is shown on the middle left of the screen<br />
and the animated arrows to the right, shown the current<br />
wind direction.<br />
Elevation Indicator appears beneath the mini map, the<br />
elevation indicator shows the height difference between the<br />
ball and the flag. Current Location, shows you the current<br />
surface the ball is laying on, so that you know, what surface<br />
to play from and club to take.<br />
The ONE <strong>for</strong> <strong>Golf</strong> <strong>GPS</strong> User <strong>Manual</strong> 08-10 10
Time Limit if selected is displayed in the bottom right of the<br />
screen and shows the minutes of the game left. When only 5<br />
minutes remain the minutes change to red in colour.<br />
Redraw Arrows when clicked you click either the left or right arrow, the<br />
screen redraws the view immediately.<br />
Options when clicked bring up the various options as listed below.<br />
Show Flag brings the flag <strong>for</strong>ward from the hole to the current position.<br />
Helicopter shows a helicopter fly by of the current hole.<br />
Scorecard brings up the scorecard <strong>for</strong> the golf course,<br />
showing the yardages <strong>for</strong> each of the three golf tees. As<br />
well as the pars and the strokes <strong>for</strong> all 18 holes, as well. All<br />
players’ scores are also shown.<br />
The ONE <strong>for</strong> <strong>Golf</strong> <strong>GPS</strong> User <strong>Manual</strong> 08-10 11
Statistics brings up the stats <strong>for</strong> each of the players, giving<br />
a complete breakdown of their per<strong>for</strong>mance during the<br />
round. It automatically appears after the Scorecard at the<br />
end of the round. The stats can be viewed at any time by<br />
going to the scorecard and clicking the stats button.<br />
Rehit allows the golfer to rehit the shot, if they have rehits selected.<br />
Practice creates a driving range of the current position.<br />
Next Player skips the current player allowing another player to play.<br />
Hole Out allows the player to complete the hole with penalty.<br />
Next Hole allows all players to go to the next hole with penalty.<br />
Post Shot allows the player to bring back the post shot info and replays.<br />
Grid allows you to turn the Grid On or Off.<br />
The ONE <strong>for</strong> <strong>Golf</strong> <strong>GPS</strong> User <strong>Manual</strong> 08-10 12
Appears after each shot is hit, showing all the in<strong>for</strong>mation relating to the last shot, the time is stays on <strong>for</strong> depends<br />
upon the setting in defaults <strong>for</strong> the auto continue timer.<br />
Swing data that is displayed; club head speed, tempo, swing path and club face.<br />
Shot data that is displayed; ball speed, total distance, carry and roll of the ball.<br />
Lie a visual and naming of the landing area itself. To Cup the distance left after the shot to the hole.<br />
Elevation the difference in elevation of the ball and to the hole.<br />
Rehit Button if you would like to rehit the shot, if rehit is available.<br />
Auto Continue a timer of the seconds left be<strong>for</strong>e the screen closes.<br />
Next Players showing the name of the each player in turn, the distance of the next shot and the suggested club.<br />
Club and Ball Animation showing the golfer how they per<strong>for</strong>med at impact.<br />
As well as the choice of 3 types of Replays, Forward, Reverse and Destination, as listed below.<br />
Forward Replay Reverse Replay Destination Replay<br />
Resume Game allows golfers to restart a previous game. The games are listed in date and player order; the data saved is<br />
the course being played, the date, the time, players playing and the competition mode being played, games can be<br />
deleted.<br />
The ONE <strong>for</strong> <strong>Golf</strong> <strong>GPS</strong> User <strong>Manual</strong> 08-10 13
Longest Drive enables longest competitions to be easily setup and contested. The Par 4’s and 5’s <strong>for</strong> each course are<br />
shown, so it is easy to decide, which course you which to use <strong>for</strong> the competition. The Tee distances are shown, <strong>for</strong> each<br />
and every hole, so hole selected. The Cloud Cover, Weather Conditions and the defaults can also be chosen.<br />
During the contest any golfer hitting over 220 yards on the fairway and an automatic reverse replay occurs. After every<br />
shot the leader board appears which shows the leading players in order of length of drive. Showing players name,<br />
distance and allowing you to enter their telephone number. Entering the next player is added during the golfers 3<br />
attempts.<br />
Nearest to Pin enables closest to pin competitions to be easily setup and contested. The Par 3’s <strong>for</strong> each course are<br />
shown, so it is easy to decide, which course you which to use <strong>for</strong> the competition. The Tee distances are shown, <strong>for</strong> each<br />
and every hole, so hole selected. The Cloud Cover, Weather Conditions and the defaults can also be chosen.<br />
During the contest any golfer hitting the green and an automatic reverse replay occurs. After every shot the leader<br />
board appears which shows the leading players in order of nearest to the pin. Showing players name, distance and<br />
allowing you to enter their telephone number. Entering the next player is added during the golfers 3 attempts.<br />
The ONE <strong>for</strong> <strong>Golf</strong> <strong>GPS</strong> User <strong>Manual</strong> 08-10 14
Putting Contest enables putting competitions to be easily setup and contested. All greens on all available courses are<br />
shown, <strong>for</strong> the competition. The Cloud Cover, Weather Conditions and the defaults can also be chosen.<br />
By clicking on the Mini Map you can decide the starting position, which will affect the background layout as well. When<br />
the position is chosen, click set to begin the contest. The distance from the cup is shown, <strong>for</strong> each and every putt.<br />
During the contest any putt going in the hole, gets an automatic reverse replay. After every shot the leader board<br />
appears which shows the leading players in order of nearest to the cup. Showing players name, distance and allowing<br />
you to enter the telephone number. Entering the next player is added during the 3 attempts.<br />
Virtual Range enables practice to be easily setup and contested. So you can practise all types of<br />
drives, long iron and mid iron shots, on 4 famous golf holes. The Cloud Cover, Weather Conditions<br />
and the defaults can also be chosen.If you click options and the wind icon, you can practise shots, in<br />
any wind speed and wind direction.<br />
By clicking on the results button, you access the Fitting program.<br />
Commencing Club Fitting<br />
<strong>GPS</strong> Club Fitting works alongside the Virtual Range program. Using<br />
the 3D High Speed Camera Technology it ensures an incredibly<br />
accurate Ball Flight Model <strong>for</strong> analyzing shot per<strong>for</strong>mance, enabling<br />
the correct club to be located <strong>for</strong> every golfer. To begin a fitting,<br />
click on results from within Virtual Range. In the first screen, enter<br />
personal data such as name, email, and phone number into the first<br />
screen. A maximum of 5 colour coded demo clubs can then be<br />
selected <strong>for</strong> shot comparison to identify the right choice of club.<br />
When each club is selected, the manufacturer’s club head will<br />
appear on the screen. Descriptions of each demo club being tested<br />
are shown including make, model, shaft, club type and loft.<br />
The ONE <strong>for</strong> <strong>Golf</strong> <strong>GPS</strong> User <strong>Manual</strong> 08-10 15
Virtual Range Fitting<br />
Hit shots with each of the 5 chosen Demo models. Each time the<br />
ball is tracked through air and the correct ball flight is displayed<br />
showing the natural shape of the golfer’s shots. By using a more<br />
suitable club, the golfer will automatically see the improvement<br />
either in direction or distance. The table on the left records the<br />
average data <strong>for</strong> each model, whilst the last shots side angle<br />
trajectory and the overhead ball trail.<br />
Model Per<strong>for</strong>mance<br />
By clicking on results, shot per<strong>for</strong>mance data will appear <strong>for</strong> all 5<br />
demo clubs tested. Each club is colour coded. Deleting bad shots<br />
will give a true reflection of each model’s average per<strong>for</strong>mance.<br />
Per<strong>for</strong>mance data shows distance, carry, ball speed, club speed,<br />
swing path, face angle, vertical launch angle, horizontal launch<br />
angle, back spin and the amount of shots played.<br />
Virtual Range Analysis<br />
By returning to the Virtual Range screen, club average data can be<br />
processed graphically <strong>for</strong> each club. The average per<strong>for</strong>mance <strong>for</strong><br />
all 5 models combined with the side angle trajectory and<br />
overhead ball trails color coded. A player can zoon into the Mini<br />
Map which reveals the actual Shot Disbursement <strong>for</strong> every shot,<br />
again colour coded This Enables the <strong>Golf</strong>er to easily understand<br />
exactly which model best suits their golf swing.<br />
Club Comparison<br />
By returning to results, Club Comparison can now be selected<br />
showing the actual average per<strong>for</strong>mance data <strong>for</strong> all 5 Demo<br />
Models tested, enabling the golfer to be completely satisfied that<br />
the correct club has been chosen. The Club Advisor can now print<br />
the results <strong>for</strong> the customer and more importantly, discuss the<br />
purchase of the new equipment based on facts.<br />
The ONE <strong>for</strong> <strong>Golf</strong> <strong>GPS</strong> User <strong>Manual</strong> 08-10 16
Virtual Chip enables practice to be easily setup and contested. So you can practise all types of mid iron shorts and short<br />
iron shots, on 4 famous golf holes. The Cloud Cover, Weather Conditions and the defaults can also be chosen.<br />
Virtual Putt enables practice to be easily setup and contested. So you can practise all types of putts over a 3 Dimensional<br />
green, on 4 famous golf holes. The Cloud Cover, Weather Conditions and the defaults can also be chosen.<br />
<strong>Golf</strong> Analysis is a separate program, which allows a complete analysis of the golf swing, club fitting and teaching, as well<br />
as practise on images of your won golf course.<br />
The ONE <strong>for</strong> <strong>Golf</strong> <strong>GPS</strong> User <strong>Manual</strong> 08-10 17
Course Library gives a detailed description of courses available and future courses, so that it is known which courses can<br />
be currently purchased and ordered in the future.<br />
Adding Courses allows you to locate the details so that you can order new courses, <strong>for</strong> your security dongle.<br />
F2 allows you to go to the course renaming screen, if you wish to alter the name, logo or loading screen.<br />
Adding Courses allows you to fill in all your contact details and the courses that you wish to order.<br />
Current Dongle details are shown so either print screen or printing this page will give updating in<strong>for</strong>mation needed.<br />
Print or Email to the details supplied. An invoice will be sent in return and once payment is received, a new dongle code<br />
will be supplied. It needs to be entered in the box update dongle. Then you will be able to play the Premium Course(s).<br />
The ONE <strong>for</strong> <strong>Golf</strong> <strong>GPS</strong> User <strong>Manual</strong> 08-10 18
Renaming allows you to change the name of any course, logo, and loading screen.<br />
Change Course Name allows you to click on a course and a user keyboard allows you to alter.<br />
Change Course Logo allows you to click on a selection of logos, so the logo can be altered.<br />
Change Loading Screen allows you to change the loading screen to include advertising if needed.<br />
Exit will send you back to the Course Library screen.<br />
Change Course Logo allows you to change the logo, to one that you have previously created in a TGA file <strong>for</strong>mat.<br />
Change Loading Screen allows you to change the Loading Screen, to one that you have created in a JPG file <strong>for</strong>mat.<br />
Which can be easily edited using any artwork program, such as paint shop, to import logos or advertising visuals.<br />
6. Fast Loaders<br />
The ONE <strong>for</strong> <strong>Golf</strong> <strong>GPS</strong> User <strong>Manual</strong> 08-10 19
On desktop, click Start, click <strong>Program</strong>s, click <strong>GPS</strong> <strong>Golf</strong> <strong>Simulator</strong>, click Create Fast Loaders, this creates every golf<br />
hole, on every golf course. It takes several hours to run, but speeds up the loading of each golf hole considerably,<br />
instead of a 7 of 7 loading process, you have a 2 of 2 loading process. Every time you install an updated courses<br />
package, it is best to run fast loaders looking at the date modified and select the latest updated courses, to create.<br />
Another Option if you have multiple simulators, is to run Fast Loaders on one computer and then copy the holes<br />
created folder, on to the computers. It will require a Portable Hard Drive with 12 GB of Free Space, right click Start,<br />
click Explore, then Copy the updated Folder C:/<strong>Program</strong> Files/<strong>GPS</strong><strong>Golf</strong>Sim/Courses/CZ, then copy that Folder in<br />
the same place on the other computers.<br />
7. Resolution Selection<br />
On desktop, click Start, click <strong>Program</strong>s, click <strong>GPS</strong> <strong>Golf</strong> <strong>Simulator</strong>, click Resolutions, you can change the resolution<br />
from the default 1024 x 768 XGA resolution. To another resolution that matches your graphics card and display<br />
settings. The program has all the most common settings, to match all future projectors as they become af<strong>for</strong>dable.<br />
8. Keyboard Languages<br />
If the language you have selected appears to be corrupt, it is likely the Keyboard Language has not been selected.<br />
Click Start, Click Control Panel, Click Regional & Language Options, Select Languages Tab, Tick the Two Boxes.<br />
Click Apply, then Insert your Windows Operating Cd, follow instructions and then Restart the Computer.<br />
9. Microsoft Windows Vista<br />
If Vista has been installed on your computer you will have to make a change to the Vista settings in order <strong>for</strong> the<br />
<strong>GPS</strong> to work to its full potential here are the steps to be carried out.<br />
Step 1. Left Click the Start Menu<br />
Step 2. Open Control Panel<br />
Step 3 Left Click User Accounts<br />
Step 4. There will be a section called (Turn User Account Control (UAC) on or off.)<br />
Step 5 Select this and a new menu will appear<br />
Step 6 Uncheck the Ticked box (Use User Account Control (UAC) to help protect your computer and click ok.<br />
10. <strong>Simulator</strong> Per<strong>for</strong>mance<br />
During the <strong>Simulator</strong> Game you can press Ctrl D, to see the actual Frame Rate, if it drops below 15 frames per<br />
second. It is worth considering upgrading the computer, to the latest recommended specification.<br />
11. Warranty<br />
The Software is covered by a 12 month back to base warranty, against faulty workmanship. Any transportation<br />
charges are the sole responsibility of the customer. If any other <strong>for</strong>m of damage occurs like, water damage,<br />
transportation damage, wear and tear etc. It is not the responsibility of Sports Coach Systems Limited, to cover any<br />
eventuality, so we ask that you take out an Insurance Policy to cover any eventuality. Sports Coach Systems<br />
reserves the right to change specifications without notice or obligation. All names and trademarks are the property<br />
of there respective owners. When doing Chip Shots you must use a flat edged club and not a curved wedge or sand<br />
wedge, otherwise you will get some incorrect shots.<br />
The ONE <strong>for</strong> <strong>Golf</strong> <strong>GPS</strong> User <strong>Manual</strong> 08-10 20