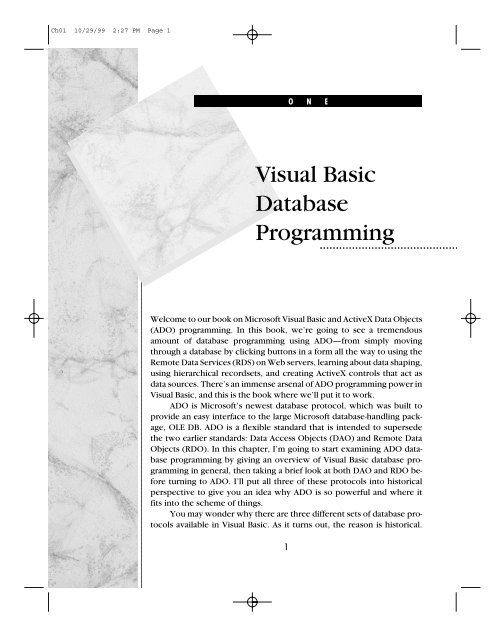
Visual Basic Database Programming
Visual Basic Database Programming
Visual Basic Database Programming

Create successful ePaper yourself
Turn your PDF publications into a flip-book with our unique Google optimized e-Paper software.
Ch01 10/29/99 2:27 PM Page 1<br />
O N E<br />
<strong>Visual</strong> <strong>Basic</strong><br />
<strong>Database</strong><br />
<strong>Programming</strong><br />
Welcome to our book on Microsoft <strong>Visual</strong> <strong>Basic</strong> and ActiveX Data Objects<br />
(ADO) programming. In this book, we’re going to see a tremendous<br />
amount of database programming using ADO—from simply moving<br />
through a database by clicking buttons in a form all the way to using the<br />
Remote Data Services (RDS) on Web servers, learning about data shaping,<br />
using hierarchical recordsets, and creating ActiveX controls that act as<br />
data sources. There’s an immense arsenal of ADO programming power in<br />
<strong>Visual</strong> <strong>Basic</strong>, and this is the book where we’ll put it to work.<br />
ADO is Microsoft’s newest database protocol, which was built to<br />
provide an easy interface to the large Microsoft database-handling package,<br />
OLE DB. ADO is a flexible standard that is intended to supersede<br />
the two earlier standards: Data Access Objects (DAO) and Remote Data<br />
Objects (RDO). In this chapter, I’m going to start examining ADO database<br />
programming by giving an overview of <strong>Visual</strong> <strong>Basic</strong> database programming<br />
in general, then taking a brief look at both DAO and RDO before<br />
turning to ADO. I’ll put all three of these protocols into historical<br />
perspective to give you an idea why ADO is so powerful and where it<br />
fits into the scheme of things.<br />
You may wonder why there are three different sets of database protocols<br />
available in <strong>Visual</strong> <strong>Basic</strong>. As it turns out, the reason is historical.<br />
1
Ch01 10/29/99 2:27 PM Page 2<br />
2 Chapter one • <strong>Visual</strong> <strong>Basic</strong> <strong>Database</strong> <strong>Programming</strong><br />
What Are <strong>Database</strong>s?<br />
At first, <strong>Visual</strong> <strong>Basic</strong> only supported DAO, which connected to the Microsoft Jet<br />
database engine (the database engine in Microsoft Access). Then, recognizing<br />
that there are other database types available, Microsoft created the Open <strong>Database</strong><br />
Connectivity (ODBC) standard, and supported ODBC with RDO in <strong>Visual</strong><br />
<strong>Basic</strong>. Finally, Microsoft saw that the Web and other forms of data—from email<br />
to Web content—were available too, and created ADO, which is a flexible standard<br />
that allows connections on the same computer, over networks, and the<br />
Web—and is intended to supersede ODBC.<br />
In this chapter, we’ll take a look at what databases are all about, and<br />
how to create and edit them in simple ways. I’ll take a look at DAO, RDO,<br />
and ADO programming in <strong>Visual</strong> <strong>Basic</strong> in overview to create the foundation<br />
we’ll use in the rest of the book, and specifically to get an idea of what ADO<br />
programming is all about, including an overview of the ADO object model,<br />
which is what we’ll be exploring throughout most of the book. I’ll end the<br />
chapter with an overview of another important aspect of database programming<br />
in <strong>Visual</strong> <strong>Basic</strong>—Structured Query Language (SQL). SQL is integral to a<br />
lot of database programming, and some knowledge of it is essential to database<br />
programming beyond the most basic.<br />
So the question now is—just what are databases?<br />
Like many other programming concepts, databases have become more complex<br />
over the years, but the fundamental concept is still a simple one—<br />
databases organize data for access and manipulation under programmatic or<br />
application control.<br />
The most popular database construct is the table, and that provides our<br />
conceptual starting point. To see how a database table works, say, for example,<br />
that you are in charge of teaching a class and are supposed to store a<br />
grade for each student. You might make up a table much like this one to<br />
record the grade for each student:<br />
Column/ Column/<br />
Field 1 Field 2<br />
Name Grade<br />
---------------<br />
| Ann | C |
Ch01 10/29/99 2:27 PM Page 3<br />
|-------|-------| .<br />
| Ed | A | .<br />
|-------|-------| .<br />
| Frank | A |<br />
|-------|-------|<br />
| Ted | A |<br />
|-------|-------|<br />
| Mabel | B |<br />
|-------|-------|<br />
| Ralph | B |<br />
|-------|-------|<br />
| Tom | B |<br />
---------------<br />
What Are <strong>Database</strong>s? 3<br />
In fact, you’ve already created a database—or more specifically, a database<br />
table. The transition from a table on paper to one in a computer is natural:<br />
With a computer, you can sort, index, update, and organize large tables<br />
of data in an easy way (and without a great waste of paper). You can even<br />
connect tables together, creating relational databases.<br />
Each individual data entry in a table, such as a student’s name, goes<br />
into a field in the table. A collection of fields together, such as the Name and<br />
Grade fields in our table, make up a record.<br />
Each record gets its own row in a table, and each column in a row represents<br />
a different field. A collection of records—that is, rows of records<br />
where each column is a field—becomes a table.<br />
What, then, is a database? In its most conventional form, a database is<br />
just a collection of one or more tables. In fact, you can go further than that in<br />
<strong>Visual</strong> <strong>Basic</strong>—you can have collections of databases. You can also have indexes<br />
in tables, and those are pointers to specific fields, either in the current<br />
database or another one. There are other ways of setting up databases as<br />
well—for example, you can use data cubes with some database protocols,<br />
and other database constructs are available too, as we’ll see in this book.<br />
Even so, the table is the crucial concept to get down first, because even<br />
though ADO is intended to let you handle the data kept in data stores in<br />
many different formats—from email to Web content, from standard databases<br />
to spreadsheets—it all comes down to working with data with techniques<br />
adapted from handling tables.
Ch01 10/29/99 2:27 PM Page 4<br />
4 Chapter one • <strong>Visual</strong> <strong>Basic</strong> <strong>Database</strong> <strong>Programming</strong><br />
Flat and Relational <strong>Database</strong>s<br />
So far, we’ve defined a certain type of database: a flat, or flat-file database.<br />
There is a second type of database as well: a relational database. Relational<br />
databases are called relational because they are set up to relate the data in<br />
multiple tables together. To make a table relational, you choose certain fields<br />
to be primary and foreign keys.<br />
The primary key in a table is usually the most important one—the one<br />
you might use to sort, for instance. The foreign key usually represents the primary<br />
key in another table, giving you access to that table in an organized<br />
way. For example, I might add a field for student IDs to the student grade<br />
table. That same field, the student ID, may be the primary key in the school<br />
registrar’s database table, which lists all students. In this table, then, the student<br />
ID field is a foreign key, allowing us to specify individual records in the<br />
registrar’s table. In a flat-file system, a file corresponds to a table and it has<br />
records and fields, whereas in a relational system, a database is made up of<br />
many tables, which each have columns and rows.<br />
We’ll elaborate on this simple concept of how databases work throughout<br />
the book, but we already have a good idea of what’s going on. We’ve<br />
seen how a basic database of tables works, and how each table—made up of<br />
records and fields—works. Next, I’ll take a look at the question of database<br />
access, which is all about client/server architecture.<br />
Multi-Tiered <strong>Database</strong> Architecture<br />
Your database and the software you use to work with it can all be on the<br />
same machine, and very commonly are. Today, however, multi-tiered database<br />
installations are becoming increasingly common, breaking things up into<br />
client/server relationships.<br />
Multi-tiered installations are broken into modular layers. Probably the<br />
most common multi-tiered application today is the two-tier, server-side database.<br />
There, the data is stored in a server and the user interface is present in<br />
client applications that accept input and commands from the user. In this<br />
way, the client application can request data from the server, modify that data,<br />
and send it back.<br />
The actual work of handling and manipulating the data in a two-tier<br />
model is done on the server, which is usually a more powerful machine than<br />
the client machines. The results are that network traffic is minimized, the data<br />
the server works on is internal to the server for very fast access, and when<br />
you want to update the data or the way that data is handled, you only need<br />
to replace the server-side component of the whole application.<br />
The two-tier model has been expanded now to become a three-tier<br />
model in many environments. The third tier is often called the business logic,<br />
or business services layer, and it is placed between the client and server. This
Ch01 10/29/99 2:27 PM Page 5<br />
Multi-Tiered <strong>Database</strong> Architecture 5<br />
layer exists to check the data sent on to the actual server, making sure that<br />
the data is in the proper format, that it maintains data integrity, and that it adheres<br />
to requirements called business rules.<br />
An example of a business rule might be to check to make sure that the<br />
number of items on an order form is one or greater, or to make sure that<br />
items marked for shipment are actually in stock. We’ll see how to implement<br />
business rules in this book.<br />
Here, then, is the usual division of services in a three-tiered architecture:<br />
■ Client user services—Provide the user interface, preliminary processing.<br />
■ Business services—Implement business rules for checking data.<br />
■ Data services—Handle the data crunching.<br />
Originally, the middle layer was usually implemented with a transaction<br />
processing monitor, much like the Microsoft Transaction Server. However,<br />
the middle tier today can also be a message server, which is much like an<br />
asynchronous, distributed version of a transaction server, or even made up of<br />
fully distributed components. Such distributed components can be based, for<br />
example, on the Microsoft COM or DCOM model, and together, those components<br />
form an application.<br />
The third tier is often implemented on a third machine, but that need<br />
not be the case because client machines are becoming more and more powerful.<br />
In fact, putting the third tier on a client machine can speed up processing<br />
considerably, which means you can get a lot done in this layer. As a result,<br />
client applications often do little more than present the data to the user,<br />
allowing the user to edit and modify that data, but doing little real processing;<br />
such client applications are called thin clients.<br />
What type of database architecture you should choose depends, of<br />
course, on your needs and resources. For example, if you’ve got a lot of users<br />
that will be interacting with your data stores, the idea of using thin clients—<br />
where you don’t have to support many powerful computers and software installations—becomes<br />
very attractive.<br />
There’s one more concept to mention before digging into database programming:<br />
Universal Data Access. Universal Data Access (UDA) is the name<br />
for Microsoft’s overall data access strategy, and it’s a term you might come<br />
across when working with database programming. UDA is made up of the<br />
union of these technologies:<br />
■ ADO—ActiveX Data Objects, an interface for OLE DB.<br />
■ ODBC—Open <strong>Database</strong> Connectivity, used for SQL relational databases.<br />
■ OLE DB—The OLE database protocol, the specification for objectoriented<br />
database access and the basis for ADO.<br />
■ RDS—Remote Data Services.
Ch01 10/29/99 2:27 PM Page 6<br />
6 Chapter one • <strong>Visual</strong> <strong>Basic</strong> <strong>Database</strong> <strong>Programming</strong><br />
Now it’s time to start translating these concepts into practice by writing<br />
some working code, and to do that, I’ll take a look at the three ways of handling<br />
databases in <strong>Visual</strong> <strong>Basic</strong> now: DAO, RDO, and ADO.<br />
Using <strong>Database</strong>s in <strong>Visual</strong> <strong>Basic</strong><br />
How do you use a database file in a <strong>Visual</strong> <strong>Basic</strong> program? You use a database<br />
protocol: DAO, RDO, or ADO. Using one of these protocols makes the<br />
data in a database available to you in code. That is to say, DAO, RDO, and<br />
ADO are the available database interfaces you can use in <strong>Visual</strong> <strong>Basic</strong>.<br />
From a programming point of view, there are two ways to work with all<br />
these protocols in <strong>Visual</strong> <strong>Basic</strong>: with the <strong>Visual</strong> <strong>Basic</strong> controls that specifically<br />
support these protocols, or with a library of programming objects that lets<br />
you handle these protocols in code (ADO also lets you use Data Environments,<br />
as we’ll see throughout this book).<br />
Using Data Controls<br />
The <strong>Visual</strong> <strong>Basic</strong> control set includes three data controls: the DAO data control<br />
(which supports DAO), the RDO remote data control (which supports<br />
ODBC), and the ADO data control (which supports ADO). You use these<br />
controls to connect to and move through databases, but they don’t actually<br />
display data—you bind them to other <strong>Visual</strong> <strong>Basic</strong> controls, called databound<br />
controls, and those bound controls handle the data display.<br />
Using data controls and data-bound controls is the easiest way to work<br />
with data in databases in <strong>Visual</strong> <strong>Basic</strong>, because the programming is mostly<br />
handled for you. The process goes like this: You simply add the data control<br />
you want to a <strong>Visual</strong> <strong>Basic</strong> form, then connect that data control to a database.<br />
The data control acts as a data source for the rest of the project, and you can<br />
bind controls to the data control. To bind a control to a data source, you use<br />
the control’s properties like DataSource to specify the data control, and<br />
then use properties like DataField and BoundColumn to specify what field<br />
to display in the bound control.<br />
The data control itself presents a set of buttons with arrows to let the user<br />
move through a database, record by record, and the record pointed to at any<br />
time by a data control is that control’s current record. The data in the field or<br />
fields of the current record is automatically displayed in controls bound to the<br />
data control, and if the user changes that data, the new data is automatically<br />
written to the database when the user moves on to another record.<br />
Here are the <strong>Visual</strong> <strong>Basic</strong> controls that can function as bound controls:<br />
■ Picture boxes.<br />
■ Labels.<br />
■ Text boxes.
Ch01 10/29/99 2:27 PM Page 7<br />
■ Check boxes.<br />
■ Image controls.<br />
■ OLE controls.<br />
■ List boxes.<br />
■ Masked edit controls.<br />
■ Rich text boxes.<br />
■ Combo boxes.<br />
In addition, there are the following special controls that are designed to<br />
be used as bound controls:<br />
■ DBList.<br />
■ DBCombo.<br />
■ FlexGrid.<br />
■ MSHFlexGrid.<br />
Finally, there are a number of bound controls that are specially built to<br />
be used with the ADO data control only. These controls are:<br />
■ DataList.<br />
■ DataCombo.<br />
■ DataGrid.<br />
We’ll take a good look at working with data-bound controls in Chapter 4.<br />
Besides using data controls, there’s another connection technique designed<br />
specifically for ADO: Data Environments. A Data Environment can act<br />
as a data source for data-bound controls just as a data control can. Data Environments<br />
are the successors to the UserConnection objects one used to use<br />
to form connections with ODBC sources; UserConnections are mostly considered<br />
obsolete today, and now you use Data Environments to provide an<br />
ADO-based connection to your data at both design-time and run-time (not<br />
just at run-time, as with data controls and code). We’ll see a great deal about<br />
using Data Environments in this book.<br />
Note that while using data controls and data-bound controls provides a<br />
simple way to work with a database, it’s also simplistic, because you typically<br />
let <strong>Visual</strong> <strong>Basic</strong> handle all the programming details—which means the most<br />
the user can do is view individual records and edit a field or two (although<br />
you can gain access to the data in the database directly as stored in a data<br />
control, as we’ll see in Chapter 3). For real database programming, you usually<br />
use the database object libraries.<br />
Using <strong>Database</strong> Object Libraries<br />
Using <strong>Database</strong>s in <strong>Visual</strong> <strong>Basic</strong> 7<br />
Data controls—the DAO, RDO, and ADO controls—are useful when you<br />
want a quick solution to move through the records in a database, but as data-
Ch01 10/29/99 2:27 PM Page 8<br />
8 Chapter one • <strong>Visual</strong> <strong>Basic</strong> <strong>Database</strong> <strong>Programming</strong><br />
DAO<br />
base programming became more serious, programmers turned more and<br />
more to working with databases in code, using the database object libraries.<br />
There’s an object library for the DAO, RDO, and ADO protocols; in fact, there<br />
are two for the ADO protocol.<br />
You can work with the three database object sets directly in code, without<br />
controls like the DAO data control or ADO data control. To do that, you<br />
add a reference to a database protocol library, such as the Microsoft ActiveX<br />
Data Objects Library in <strong>Visual</strong> <strong>Basic</strong>, using the Project menu’s References<br />
option. When you’ve referenced a database object library in your code, you<br />
can connect to a database using that object library’s methods.<br />
When you connect to a database using the DAO, RDO, or ADO object<br />
libraries, you typically create a Recordset object (called a Resultset object<br />
in RDO) based on the connection protocol you used. A recordset holds<br />
the records that match the criteria you’ve set. A recordset can hold an entire<br />
table of data from a database, a subset of data from a table, or data from a<br />
number of tables. You can then use the methods of a recordset to move<br />
through records and manipulate them. We’ll see a great deal about creating<br />
recordsets in this book.<br />
Besides using the built-in methods of DAO, RDO, or ADO objects to<br />
manipulate and edit records, you can also execute Structured Query Language<br />
(SQL) commands directly on the records in a recordset. We’ll see how<br />
that works in this book too.<br />
Those are the two techniques for handling database protocols in <strong>Visual</strong><br />
<strong>Basic</strong>: using data controls and data-bound controls, and using database object<br />
libraries in code. I’ll start the overview of available database protocols now,<br />
beginning with the venerable workhorse of database programming in <strong>Visual</strong><br />
<strong>Basic</strong>—DAO.<br />
In the days when <strong>Visual</strong> <strong>Basic</strong> first started handling databases, it used the Microsoft<br />
Jet database engine, which is what Microsoft Access is built on. Using<br />
the Jet engine represented quite an advance for <strong>Visual</strong> <strong>Basic</strong> because it let<br />
you work with all kinds of data formats in the fields of a database: text, numbers,<br />
integers, longs, singles, doubles, dates, binary values, OLE objects, currency<br />
values, Boolean values, and even memo objects (up to 1.2GB of text).<br />
The Jet engine also supported SQL, in which database programmers found<br />
another significant advance. <strong>Database</strong> programming in <strong>Visual</strong> <strong>Basic</strong> took off<br />
when DAO appeared.<br />
To support the Jet database engine, Microsoft added the DAO data control<br />
to <strong>Visual</strong> <strong>Basic</strong>, and you can use that control to open Jet database files<br />
(which have the extension .mdb).
Ch01 10/29/99 2:27 PM Page 9<br />
To support the connection to Jet, Microsoft added the following set of<br />
data access objects to <strong>Visual</strong> <strong>Basic</strong>. You can work with these objects in code<br />
when you’ve added a reference to the DAO object library in your project.<br />
■ DBEngine—The Jet database engine.<br />
■ Workspace—An area that can hold one or more databases.<br />
■ <strong>Database</strong>—A collection of tables.<br />
■ TableDef—The definition of a table.<br />
■ QueryDef—The definition of a query.<br />
■ RecordSet—The set of records that make up the result of a query.<br />
■ Field—A column in a table.<br />
■ Index—An ordered list of records.<br />
■ Relation—Stored information about the specific relationship between<br />
tables.<br />
You can also use the DAO data control, also called just the data control,<br />
to connect to databases without using any of the above objects in code.<br />
The DAO Data Control<br />
DAO 9<br />
With the DAO data control, you can move around in a database from record<br />
to record. This control lets you bind and display data in bound controls, and<br />
displays a set of arrow buttons the user can manipulate to move through the<br />
database.<br />
You can see a data control operating with bound controls in Figure 1.1,<br />
where I’ve opened the students table discussed earlier with a data control.<br />
You can see the Name and Grade fields for the first record in that figure.<br />
FIGURE 1.1 A<br />
DAO data control at<br />
work.
Ch01 10/29/99 2:27 PM Page 10<br />
10 Chapter one • <strong>Visual</strong> <strong>Basic</strong> <strong>Database</strong> <strong>Programming</strong><br />
RDO<br />
The attraction of using the DAO data control is that you can perform<br />
many data access operations without writing code. Data-bound controls automatically<br />
display data from one or more fields for the current record, and the<br />
data control performs all operations on the current record.<br />
If the DAO data control is made to move to a different record, all bound<br />
controls automatically pass any changes to the data control to be saved in the<br />
database. The DAO data control moves to the requested record and passes<br />
back data from the current record to the bound controls, and the bound controls<br />
display that data.<br />
<strong>Visual</strong> <strong>Basic</strong> uses a control’s properties as you’ve set them to open a selected<br />
database, create a DAO <strong>Database</strong> object, and create a Recordset<br />
object. The data control’s <strong>Database</strong> and Recordset properties refer to<br />
<strong>Database</strong> and Recordset objects, and you can manipulate the data using<br />
those properties. If you have an SQL statement to execute, you place that<br />
statement in the data control’s RecordSource property, and the result appears<br />
in the RecordSet property.<br />
You use Remote Data Objects (RDO) to connect to databases using the Open<br />
<strong>Database</strong> Connectivity (ODBC) specification, which Microsoft anticipates will<br />
be superseded by ADO. Originally, Microsoft introduced this specification to<br />
allow developers to work with databases besides those based on the Jet engine,<br />
such as Oracle databases.<br />
Setting up a connection to an ODBC source can be a little involved.<br />
You set up ODBC connections to databases using the ODBC Data Sources<br />
item in the Windows Control Panel, and when you do, those connections<br />
are registered and available to all applications by name.<br />
Say that you put the students table in a Microsoft Access database file<br />
named db.mdb. How would you set that database up as an ODBC data<br />
source? To set up a data source, you open the ODBC Data Sources item,<br />
opening the ODBC Data Source Administrator dialog, click the System<br />
DSN tab (DSN stands for Data Source Name), and click the Add button to<br />
open the Create New Data Source dialog.<br />
You can see the ODBC drivers installed on your system in this dialog. Select<br />
the one you want to use (the Microsoft Access driver) and click Finish<br />
to install the db.mdb file. Doing so opens the ODBC Microsoft Access<br />
dialog, and you use the Select button to select the database file, db.mdb, and<br />
give a name to that new data source, such as db, making db the name this data<br />
source may be accessed with from your <strong>Visual</strong> <strong>Basic</strong> programs. Then you click<br />
the OK button in the ODBC Microsoft Access dialog.<br />
This creates a new ODBC connection for your file, and that connection<br />
appears in the ODBC Data Source Administrator. Click the OK button to<br />
close the ODBC Data Source Administrator. Now you’ve added a new
Ch01 10/29/99 2:27 PM Page 11<br />
ODBC source, db, to your computer’s Data Environment. You can use that<br />
data source in your programs, such as to set an RDO control’s DataSource-<br />
Name property to that data source, which makes the data in the data source<br />
available to controls bound to the RDO control.<br />
You can also create direct connections to ODBC data sources with the objects<br />
in the RDO library. The remote data objects are (mostly) designed in parallel<br />
with data access objects; for example, the database engine is rdoEngine<br />
instead of DBEngine, Recordsets are rdoResultsets, Workspaces are<br />
rdoEnvironments, Field objects are rdoColumn objects, and so on. And although<br />
the names have changed, the command set is very similar to DAO.<br />
The RDO Data Control<br />
RDO 11<br />
Much like the DAO data control, the RDO control gives you access to a database<br />
and displays data in bound controls. Unlike the DAO data control, however,<br />
you use the remote data control to access ODBC data sources through<br />
ODBC connections, which at this time includes databases built with nearly all<br />
the popular database programs.<br />
You can see the RDO control at work in Figure 1.2, where I’ve connected<br />
that control to the db ODBC data source that holds the students<br />
table. As with the DAO data control, you can use the arrow buttons in the<br />
RDO control to move to other records, and all the controls bound to the RDO<br />
control will be updated automatically.<br />
After creating DAO and RDO, Microsoft saw that data access needs<br />
were still multiplying, so they finally created ADO.<br />
FIGURE 1.2 An<br />
RDO data control at<br />
work.
Ch01 10/29/99 2:27 PM Page 12<br />
12 Chapter one • <strong>Visual</strong> <strong>Basic</strong> <strong>Database</strong> <strong>Programming</strong><br />
ADO<br />
Both DAO and RDO are limited in many respects. DAO uses only the Jet engine,<br />
and while RDO supports many databases, it restricts you to certain formats<br />
and connection methods, and because it supports so many formats, you<br />
get a sort of least-common-denominator performance, which has left room<br />
for improvement.<br />
Microsoft’s most recent data access implementation is based on ActiveX<br />
Data Objects (ADO), which are based on OLE DB, the successor to ODBC.<br />
ADO lets you access data in a database server through any OLE DB provider.<br />
ADO is designed to provide you with a consistent interface for working with<br />
a variety of data sources, from text files to ODBC relational databases, from<br />
email to groups of databases.<br />
ADO is based on OLE DB; in fact, ADO is only an application-level interface<br />
that exposes the objects of OLE DB. Microsoft introduced OLE DB,<br />
ADO, and the advanced data connector in 1996. The advanced data connector<br />
has since been replaced with Remote Data Services (RDS). RDS, along<br />
with the remote provider for ADO (which some people call ADO/R), give<br />
you the ability to work with remote data in distributed environments. Together<br />
with ODBC, these elements make up the core of the Microsoft Data<br />
Access Components (MDAC) package. MDAC is now in version 2, as of July<br />
1998. The components in this package are OLE DB 2, ADO 2, a new RDS,<br />
and ODBC 3.5.<br />
OLE DB itself is the foundation of ADO and, in turn, it is based on the<br />
COM specification. OLE DB supports a standard set of data access methods<br />
for data sources, and each such data source is called an OLE DB provider.<br />
ADO enables you to write an application to access and manipulate data in a<br />
database server through such OLE DB providers, and for every supported<br />
data storage platform, there is an OLE provider type.<br />
As of this writing, here are the available OLE providers in <strong>Visual</strong> <strong>Basic</strong>:<br />
■ Microsoft Jet 3.51 OLE DB Provider.<br />
■ Microsoft Jet 4.0 OLE DB Provider.<br />
■ Microsoft OLE DB Provider for DTS Packages.<br />
■ Microsoft OLE DB Provider for Microsoft Active Directory Services.<br />
■ Microsoft OLE DB Provider for ODBC Drivers.<br />
■ Microsoft OLE DB Provider for OLAP Services.<br />
■ Microsoft OLE DB Provider for Oracle.<br />
■ Microsoft OLE DB Provider for SQL Server.<br />
■ Microsoft OLE DB Simple Provider.<br />
■ MS Remote.<br />
■ MSDataShape.
Ch01 10/29/99 2:27 PM Page 13<br />
■ MSPersist.<br />
■ SQL Server DTS Flat File OLE DB Provider.<br />
ADO 13<br />
As we’ll see, these are the software packages that you use to connect to<br />
specific data providers using ADO. For example, to connect to a Microsoft<br />
Access database, which is based on the Microsoft Jet engine, you would use a<br />
Jet OLE DB provider.<br />
ADO’s main benefits are ease of use, high speed, low memory overhead,<br />
and a relatively small amount of disk usage. ADO supports a great<br />
many features for building client/server and Web-based applications.<br />
ADO also features the Remote Data Services (RDS), by which you can<br />
move data from a remote server to a client application or Web page, manipulate<br />
the data on a client, and return updates to the server in a single round<br />
trip. We’ll see all that in this book. For example, you may want to access data<br />
sources through non-standard data sources such as the Microsoft Internet Information<br />
Server (IIS) in a three-tier system. RDS defines a programming<br />
model to enable access to data through intermediaries such as IIS. Using RDS,<br />
you can also cache data on the client or middle tier of a three-tier application.<br />
Previously released as Microsoft Remote Data Services 1.5, RDS has been<br />
combined with the ADO programming model to simplify client-side data remoting.<br />
ADO is actually a library of objects that you use to connect to databases.<br />
It doesn’t support all the methods that DAO does now, but it will in<br />
the future. In ODBC, you used to connect to databases directly using SQL<br />
strings; now the interface has been made more modular in ADO, which is<br />
based on objects, not on passing SQL strings directly using procedures. <strong>Programming</strong><br />
with objects is intended to make it easier to break your application<br />
up across tiers.<br />
Here are the objects in the ADO library:<br />
■ Connection—Access from your application to a data source is through<br />
a connection, the environment necessary for exchanging data. The<br />
Connection object is used to specify a particular data provider and<br />
any parameters.<br />
■ Command—A command issued across an established connection manipulates<br />
the data source in some way. The Command object lets ADO<br />
make it easy to issue commands.<br />
■ Parameter—Commands can require parameters, which can be set before<br />
you issue a command. For example, if you require a debit from a<br />
charge account, you would specify the amount of money to be debited<br />
as a parameter in a Parameter object.<br />
■ Recordset—If your command is a query that returns data as rows of<br />
information in a table, then those rows are placed in local storage in a<br />
Recordset object.
Ch01 10/29/99 2:27 PM Page 14<br />
14 Chapter one • <strong>Visual</strong> <strong>Basic</strong> <strong>Database</strong> <strong>Programming</strong><br />
■ Field—A row of a recordset consists of one or more fields, which are<br />
stored in Field objects.<br />
■ Error—Errors can occur when your program is not able to establish a<br />
connection, execute a command, or perform an operation. ADO supports<br />
an Error object to hold the resulting error.<br />
■ Collection—ADO provides collections, objects that contain other objects<br />
of a particular type. ADO provides four types of collections: the<br />
Connection object has the Errors collection; the Command object has<br />
the Parameters collection; the Recordset object has the Fields collection;<br />
and the Connection, Command, Recordset, and Field objects<br />
all have a Properties collection, which contains all the Property<br />
objects that apply to them.<br />
■ Events—ADO uses the concept of events, just like other interface objects<br />
in <strong>Visual</strong> <strong>Basic</strong>. You use event-handling procedures with events.<br />
There are two types of events: ConnectionEvents (issued when transactions<br />
occur, when commands are executed, and when connections<br />
start or end) and RecordsetEvents (events used to report the<br />
progress of data changes).<br />
Here’s a quick overview showing how to use the ADO objects:<br />
■ You make a connection to a data source using the Connection object.<br />
■ If you want to use SQL with the data source, you can create an object to<br />
represent an SQL command using the Command object.<br />
■ If you’re creating an SQL command, you can specify columns, tables,<br />
and values in the command as variable parameters with the Parameter<br />
object.<br />
■ You execute the command using the Command, Connection, or<br />
Recordset objects.<br />
■ If the command returns rows of data, you store them in a cache using<br />
the Recordset object.<br />
■ You can create a view of the cache so you can sort, filter, and navigate<br />
the data using the Recordset object.<br />
■ You can also edit the data by adding, deleting, or changing rows and<br />
columns with the Recordset object.<br />
■ When you’re done making changes, you update the data source with<br />
changes from the cache using the Recordset object.<br />
■ You end the connection, using the Connection object.<br />
Much of this book will be an exploration of the ADO object library, so<br />
it’s a good idea to get an overview of the objects in the library here. I’ll start<br />
with the Connection object.
Ch01 10/29/99 2:27 PM Page 15<br />
Connection Objects<br />
ADO 15<br />
A Connection object represents a unique session with a data source. In the<br />
case of a client/server database system, it may be equivalent to an actual network<br />
connection to the server. Access from your application to the data<br />
source is through this connection, which provides the environment necessary<br />
for exchanging data. The Connection object is used to specify a particular<br />
data provider and any parameters.<br />
You specify a connection string to connect to a data source, and that<br />
string specifies not only the database to use, but also the OLE DB provider,<br />
passwords, if any, and other options, such as what security protocol you<br />
want to use with the SQL Server. You can use the Connection object’s Open<br />
method to open a connection.<br />
When you’re connected, you can execute SQL queries on the data<br />
source with the Connection object’s Execute method, which can return a<br />
recordset. Or you can use a Recordset object’s Open method, passing it a<br />
Connection object, to open a database.<br />
You can also manage database transactions using the Connection object.<br />
Using transactions, you can group what may be many different individual<br />
actions into one coherent whole, so if one action fails, they all do. In this<br />
way, you don’t end up with only partial updates to your database if there’s a<br />
problem during update operations.<br />
The Connection object supports methods to work with transactions<br />
like BeginTrans (begin a transaction), CommitTrans (update a database),<br />
and RollbackTrans (restore the state before the transaction began). Once<br />
you call the BeginTrans method, the provider will not commit changes to<br />
the database until you call CommitTrans or RollbackTrans and end the<br />
transaction. We’ll use these methods in Chapter 5.<br />
Note that not all data providers support transactions. You can check if your provider does by seeing if the providerdefined<br />
property Transaction DDL appears in the Connection object’s Properties collection. The<br />
Microsoft Transaction Server (MTS) is a middle-tier application that lets you support transactions, and we’ll see more of<br />
it later.<br />
Since the Connection object manages your connection with the database,<br />
it includes a ConnectionString property, which holds the connection<br />
string, and a CommandTimeout property, which sets the timeout length<br />
for commands. A command is typically an SQL query that returns a recordset<br />
or performs some other action, such as deleting a record. That’s one way of<br />
sending instructions to the Connection object—using Command objects.<br />
Command Objects<br />
Command objects represent instructions issued across a connection to manipulate<br />
a data source, typically through SQL.
Ch01 10/29/99 2:27 PM Page 16<br />
16 Chapter one • <strong>Visual</strong> <strong>Basic</strong> <strong>Database</strong> <strong>Programming</strong><br />
Note that some OLE DB providers do not support Command objects, so you’ll have to use the Connection<br />
Open or Execute methods with them.<br />
You use a Command object to query a database and return records in a<br />
Recordset object, or to manipulate the structure of a database. Here’s how<br />
you use Command objects, step by step:<br />
1. Connect the Command object to an active connection by setting the<br />
Command object’s ActiveConnection property.<br />
2. Store the actual text of the command (for example, an SQL statement)<br />
in the CommandText property.<br />
3. Configure parameterized queries or stored procedure arguments with<br />
Parameter objects and the Parameters collection.<br />
4. If you wish, specify the type of command with the CommandType property<br />
before execution to optimize performance.<br />
5. Execute a command and return a Recordset object—if appropriate—<br />
with the Command object’s Execute method.<br />
Commands are important objects in ADO. They can manipulate records<br />
by deleting or updating them, they can return recordsets, and you can use<br />
them to define multiple commands for each connection.<br />
There are three important Connection methods that you should know<br />
about when dealing with commands: Execute, which executes a command;<br />
WillExecute, which is called just before a command executes and gives you<br />
an opportunity to modify command parameters; and ExecuteComplete,<br />
which is called just after a command has finished executing.<br />
WillExecute causes a WillExecute event, which may occur because of<br />
calls to the Connection.Execute, Command.Execute, or Recordset.Open<br />
methods. ExecuteComplete causes an ExecuteComplete event, which may<br />
occur because of calls to the Connection.Execute, Command.Execute,<br />
Recordset.Open, or Recordset.NextRecordset methods.<br />
The parameters you might use in a Command object are stored in its Parameters<br />
collection, and each item in that collection is a Parameter object.<br />
For example, to shift money between accounts, you could specify the amount<br />
as a parameter in a Parameter object.<br />
Parameter Objects<br />
Parameter objects hold all that you need to specify a command parameter.<br />
Here’s how you use Parameter objects:<br />
1. Use the Command object’s CreateParameter method to create a Parameter<br />
object with the appropriate property settings.
Ch01 10/29/99 2:27 PM Page 17<br />
2. Set the name of a parameter with the Name property.<br />
3. Set the value of a parameter with the Value property.<br />
4. Set parameter characteristics with attributes and the Direction, Precision,<br />
NumericScale, Size, and Type properties.<br />
5. Pass long binary or character data (more than 255 bytes) to the parameter<br />
with the AppendChunk method.<br />
6. Use the Command object’s Append method to the Parameter object to<br />
add to the Command object’s Parameters collection.<br />
After you’ve created a parameter and given it a name and a value, you<br />
can refer to it by name in an SQL string, where it replaces a ? character with<br />
the value of the parameter. For example, if you created a parameter object<br />
called Name, you could use it in SQL like this:<br />
cmd.CommandText = "SELECT * from students WHERE<br />
Name = ?"<br />
We’ll see more about this in detail when we work with parameterized<br />
ADO commands later. When you execute a command, with or without parameters,<br />
you may generate a recordset, depending on the command you’ve<br />
executed (some commands, such as the SQL Delete command, don’t create<br />
new recordsets). That recordset is held in an ADO Recordset object.<br />
Recordset Objects<br />
Recordsets are what you use to manipulate data from a data provider. When<br />
you use ADO, you manipulate data almost entirely using Recordset objects.<br />
All Recordset objects are constructed using records (that is, rows) and fields<br />
(that is, columns). We’ll see more about Recordset objects throughout the<br />
book, of course, but I’ll cover them here in overview.<br />
Recordset objects include methods like MoveFirst, MoveNext, and<br />
so on that let you navigate through a recordset.<br />
When you open a recordset, you use the recordset’s Open method.<br />
Here’s how you use the Open method to create a recordset:<br />
recordset.Open Source, ActiveConnection, _<br />
CursorType, LockType, Options<br />
ADO 17<br />
The first argument is a valid Command object variable name, SQL statement,<br />
table name, stored procedure call, or the file name of a recordset. The<br />
ActiveConnection argument is the connection you want to create the<br />
recordset from.
Ch01 10/29/99 2:27 PM Page 18<br />
18 Chapter one • <strong>Visual</strong> <strong>Basic</strong> <strong>Database</strong> <strong>Programming</strong><br />
You can also specify the type of cursor you want in the CursorType<br />
argument. So what is a cursor? A cursor manages a recordset in ADO, and<br />
specifies how you can move through the recordset. Say, for example, that<br />
you have a database with 40,000 records and you execute a command on<br />
that database that retrieves 4 records—records 1,233, 21,607, 37,999, and<br />
39,003. The cursor in your program is responsible for making those records<br />
appear as records 1, 2, 3, and 4 to your code as the user scrolls through<br />
them. In this way, an ADO cursor mimics a cursor you’d use on the screen to<br />
scroll through lines of text.<br />
There are four different cursor types defined in ADO, and it’s important<br />
to know the differences between them; here are the four possible options<br />
you can pass to a recordset’s Open method:<br />
■ adOpenDynamic—Dynamic cursor. This cursor type lets you view additions,<br />
changes, and deletions by other users, and allows all types of<br />
movement through the recordset.<br />
■ adOpenKeyset—Keyset cursor. This cursor behaves like a dynamic cursor,<br />
except that it prevents you from seeing records that other users<br />
add, and prevents access to records that other users delete. Data<br />
changes by other users will still be visible.<br />
■ adOpenStatic—Static cursor. This cursor provides a static copy of a<br />
set of records for you to use to find data or generate reports. Note that<br />
additions, changes, and deletions by other users will not be visible.<br />
■ adOpenForwardOnly—Forward-only cursor. This cursor behaves the<br />
same as a dynamic cursor, except that it allows you to only scroll forward<br />
through records. This can improve performance when you only<br />
need to make a single pass through the data in a recordset.<br />
You can set the CursorType property before opening a Recordset<br />
object to choose the cursor type, or you can pass a CursorType argument<br />
with the Open method. If you don’t specify a cursor type, ADO opens a forward-only<br />
cursor by default. We’ll see more about cursors when we work<br />
with Recordset objects in Chapter 8.<br />
Although not supported in the Open method, you can use the Recordset object’s CursorLocation property<br />
to indicate if you want the cursor to be on the client or the server (not all servers will support cursors).<br />
When you open a Recordset object, you can specify the lock type<br />
using the LockType argument. This argument specifies how you lock records<br />
that are being updated. To update a record, you edit the data in a record’s<br />
fields (by changing a Field object’s Value property, or by editing the data<br />
in a bound control), which puts the recordset in Edit mode (as indicated in
Ch01 10/29/99 2:27 PM Page 19<br />
the EditMode property, which is set to adEditInProgress), then call the<br />
Update method. Various types of locking can occur when you edit or update<br />
records. Here are the possibilities; note in particular the difference between<br />
optimistic and pessimistic locking:<br />
■ adLockReadOnly—(default) read-only. You cannot alter the data.<br />
ADO 19<br />
■ adLockPessimistic—Pessimistic locking, record by record. The data provider<br />
does what is necessary to ensure successful editing of the records,<br />
usually by locking records at the data source immediately when you start<br />
editing the data in the recordset’s fields.<br />
■ adLockOptimistic—Optimistic locking, record by record. The provider<br />
uses optimistic locking, locking records only when you call the<br />
Update method.<br />
■ adLockBatchOptimistic—Optimistic batch updates; required for batch<br />
update mode as opposed to immediate update mode.<br />
With some providers (such as the Microsoft ODBC Provider for OLE DB and the Microsoft SQL Server), you can create<br />
Recordset objects without a previously defined Connection object by passing a connection string to the<br />
Open method. Behind the scenes, ADO still creates a Connection object, but it doesn’t give that object an object<br />
variable in your code.<br />
When you open a recordset, the current record is positioned to the first<br />
record (if any) and the BOF (Beginning of File) and EOF (End of File) properties<br />
are set to False. If there are no records, the BOF and EOF property settings<br />
are True.<br />
You can use the Recordset object’s MoveFirst, MoveLast,<br />
MoveNext, and MovePrevious methods, as well as the Move method, and<br />
the AbsolutePosition, AbsolutePage, and Filter properties to reposition<br />
the current record, assuming the provider supports these methods and<br />
properties. As you might expect, forward-only Recordset objects support<br />
only the MoveNext method.<br />
When you use the Move methods to traverse each record, you can use<br />
the BOF and EOF properties to see if you’ve moved beyond the beginning or<br />
end of the recordset.<br />
It’s also useful to know that Recordset objects can support two types<br />
of updating: immediate and batched. In immediate updating, all changes to<br />
data are written immediately to the data source when you call the Update<br />
method.<br />
If a data provider supports batch updating, you can have the data<br />
provider cache changes to more than one record and then send them in a<br />
single call to the database with the UpdateBatch method. Batch operations<br />
apply to changes made with the AddNew, Update, and Delete methods.<br />
After you call the UpdateBatch method, you can use the Status property<br />
to check for any problems.
Ch01 10/29/99 2:27 PM Page 20<br />
20 Chapter one • <strong>Visual</strong> <strong>Basic</strong> <strong>Database</strong> <strong>Programming</strong><br />
ADO Recordset objects are so important that Microsoft has a whole library<br />
just for them. There are two main ADO libraries: ADOR and ADODB.<br />
The ADOR library is installed with Microsoft Internet Explorer and supports<br />
only Recordset objects and static cursors. The ADODB library is the full<br />
ADO library, including ADO Recordset objects, and it’s the one we’ll use<br />
except when working with the Microsoft Internet Explorer.<br />
That’s it for the Recordset object. How do you address the fields in an<br />
ADO recordset? With Field objects from the recordset’s Fields collection.<br />
Field Objects<br />
A Field object represents a field in a database; that is, a column of data. You<br />
use the Value property of Field objects to set or return data for the current<br />
record. The Value property is the default property of Field objects, so you<br />
can refer to the data in a field called Name in any of these ways:<br />
■ adoRecordset.Fields(1).Value<br />
■ adoRecordset("Name")<br />
■ adoRecordset.Fields(1)<br />
■ adoRecordset.Fields("Name")<br />
■ adoRecordset!Name<br />
Besides the Value property, Field objects also have properties like<br />
Name, Type, Size, and Precision. You can use their AppendChunk<br />
method to add longer data items to a field.<br />
Error Objects<br />
Errors can happen when your application can’t establish a connection or execute<br />
a command. ADO supports the Error object to hold the resulting error.<br />
The Connection object contains an Errors collection, which contains<br />
Error objects. The Error object contains details about data access errors<br />
pertaining to a single operation involving the provider.<br />
Each Error object holds a provider error, not an ADO error. You handle ADO errors with the On Error GoTo<br />
statement, and they are stored in the Err object.<br />
Property Objects<br />
A Property object represents a characteristic of an ADO object defined by the<br />
provider. ADO objects have two types of properties: built-in and dynamic.<br />
Built-in properties are those properties implemented in ADO and immediately<br />
available to any new object using the Object.Property syntax. They
Ch01 10/29/99 2:27 PM Page 21<br />
do not appear as Property objects in an object’s Properties collection, so<br />
although you can change their values, you cannot modify their characteristics.<br />
Dynamic properties are defined by the data provider and appear in the<br />
ADO Properties collection. For example, such a property may specify if a<br />
Recordset object supports transactions. These properties will appear as<br />
Property objects in that Recordset object’s Properties collection. Dynamic<br />
properties can be referred to only with the Properties collection, like<br />
this: adoObject.Properties(0) or adoObject.Properties("Name").<br />
That completes our discussion of ADO. As with the other data connection<br />
protocols, ADO also has a data source control: the ADO data control.<br />
The ADO Data Control<br />
The ADO Data Control 21<br />
You can see an ADO data control at work in Figure 1.3. The ADO data control<br />
is similar to the DAO data control and the remote data control, except<br />
that it uses the ADO connection protocol. At design-time, you create a connection<br />
by setting the ConnectionString property to a valid connection<br />
string, then you set the RecordSource property to a statement appropriate<br />
to the database provider.<br />
You can also set the ConnectionString property to the name of a file<br />
that defines a connection. You then connect the ADO data control to a databound<br />
control, such as a data grid, data combo, or data list, by setting its<br />
DataSource property to the ADO data control. At run-time, you can set the<br />
Provider, ConnectionString, and RecordSource properties to change<br />
the database.<br />
The ADO data control is an important one in <strong>Visual</strong> <strong>Basic</strong> ADO programming,<br />
and it’s worth getting a closer look at it here. We’ll see more<br />
FIGURE 1.3 FAn<br />
ADO data control at<br />
work.
Ch01 10/29/99 2:27 PM Page 22<br />
22 Chapter one • <strong>Visual</strong> <strong>Basic</strong> <strong>Database</strong> <strong>Programming</strong><br />
FIGURE 1.4<br />
about the ADO data control in Chapter 3, but it’s a good idea to start with<br />
some actual ADO programming to make it easier to put the material we’ll<br />
cover between now and then into perspective.<br />
Getting Started with the ADO Data Control<br />
Probably the easiest way to connect an application to a data source using the<br />
ADO protocol is with the ADO data control. Because it’s an easy process, I’ll<br />
go through an example here, connecting an ADO data control to the<br />
Nwind.mdb database that comes with <strong>Visual</strong> <strong>Basic</strong>, getting us into ADO programming<br />
immediately (the Nwind database holds customer and sales<br />
records for a fictitious company named Northwind).<br />
Start <strong>Visual</strong> <strong>Basic</strong> now and create a new standard EXE project by clicking<br />
the New tab in the dialog box that appears when <strong>Visual</strong> <strong>Basic</strong> opens, selecting<br />
the Standard EXE icon, and clicking the Open button. The new standard<br />
EXE project appears in <strong>Visual</strong> <strong>Basic</strong> as in Figure 1.4, where I’ve opened<br />
the code window by clicking the View Code button in the Project Explorer<br />
(the button at the top left in the Project Explorer). I’ve also labeled the parts<br />
of the <strong>Visual</strong> <strong>Basic</strong> Integrated Development Environment (IDE) in that figure<br />
because I’ll be referring to those parts of the IDE throughout the book.<br />
Select the new <strong>Visual</strong> <strong>Basic</strong> form, Form1, in the <strong>Visual</strong> <strong>Basic</strong> IDE now<br />
(this form is automatically selected when you create a new standard EXE<br />
FA new standard EXE project in <strong>Visual</strong> <strong>Basic</strong>.
Ch01 10/29/99 2:27 PM Page 23<br />
FIGURE 1.5<br />
The ADO Data Control 23<br />
project). In this example, I’ll add a label, an ADO data control, and a bound<br />
control to this form. Using the ADO data control, the user will then be able to<br />
move through the Nwind database, seeing data displayed in the text box.<br />
The label in this program will just display the caption ADO Data Control<br />
Example, so find the label tool in the toolbox, double-click it to add a<br />
new label to Form1, and use the mouse to position the new label as shown<br />
in Figure 1.5.<br />
Add the appropriate caption to the label, ADO Data Control Example,<br />
using the label’s Caption property in the Properties window. In addition,<br />
center the text by setting the label’s Alignment property to Center<br />
using the drop-down list box for that property in the Properties window.<br />
Finally, set the font size to 24 points by clicking the Font data item in the<br />
Properties window, clicking the ellipsis (…) button that appears, selecting<br />
24 in the Size list of the Font dialog box, and clicking OK to close the Font<br />
dialog. The result appears in Figure 1.6.<br />
The next step is to add an ADO data control, and I’ll take a look at that<br />
now.<br />
Adding a label to a form in <strong>Visual</strong> <strong>Basic</strong>.
Ch01 10/29/99 2:27 PM Page 24<br />
24 Chapter one • <strong>Visual</strong> <strong>Basic</strong> <strong>Database</strong> <strong>Programming</strong><br />
FIGURE 1.6<br />
A label with the caption ADO Data Control Example.<br />
Adding an ADO Data Control to a Form<br />
Here’s how you add an ADO data control to a form in <strong>Visual</strong> <strong>Basic</strong>:<br />
1. Select the Components item in the Project menu.<br />
2. Click the Controls tab in the Components dialog.<br />
3. Select the Microsoft ADO Data Control entry in the Controls list<br />
box.<br />
4. Click OK to close the Components dialog box.<br />
5. Add an ADO data control to your form.<br />
6. Connect the ADO data control’s Connection object to a data source<br />
with the ConnectionString property, separating items in that string<br />
with semicolons.<br />
The Components dialog appears in Figure 1.7, and you can see the Microsoft<br />
ADO Data Control entry selected in that figure. Select that entry<br />
now and click OK to add the ADO data control to the <strong>Visual</strong> <strong>Basic</strong> toolbox;<br />
the new ADO data control tool appears in the toolbox in Figure 1.8.
Ch01 10/29/99 2:27 PM Page 25<br />
FIGURE 1.7<br />
The <strong>Visual</strong> <strong>Basic</strong> Components dialog box.<br />
Double-click the ADO data control tool now to add a new ADO data<br />
control, Adodc1, to Form1. Position the control with the mouse and use the<br />
sizing handles to size the control as shown in Figure 1.8.<br />
Now that we’ve created this new control, the next step is to connect it<br />
to the Nwind.mdb database. In this case, that means creating a connection<br />
string for the control.<br />
Creating a Connection String<br />
The ADO Data Control 25<br />
Creating a connection string is the standard first step in connecting an ADO data<br />
control to a database. You place the connection string in the ADO ConnectionString<br />
property. The ADO control supports four arguments for the ConnectionString<br />
property, as well as other arguments you pass directly to the<br />
data provider. Here are the arguments for the ConnectionString property:<br />
■ Provider—Name of a data provider to use for the connection.<br />
■ File Name—Name of a provider-specific file containing preset connection<br />
information.
Ch01 10/29/99 2:27 PM Page 26<br />
26 Chapter one • <strong>Visual</strong> <strong>Basic</strong> <strong>Database</strong> <strong>Programming</strong><br />
FIGURE 1.8<br />
Adding a new ADO data control to a form.<br />
■ Remote Provider—Name of a provider to use when opening a clientside<br />
connection. (This applies to the RDS only.)<br />
■ Remote Server—Pathname of the server to use when opening a clientside<br />
connection. (This applies to the RDS only.)<br />
In fact, you’ll frequently have to add server-specific information, such as<br />
commands and so forth, directly to the server in the connection string. So<br />
where does that leave us now that we want to connect to the Nwind.mdb<br />
file? How do you create a connection string?<br />
Fortunately, <strong>Visual</strong> <strong>Basic</strong> automates the process for every type of OLE<br />
DB data provider for which there are drivers. To see how this works, just<br />
click the ellipsis button in the ConnectionString property’s entry in the <strong>Visual</strong><br />
<strong>Basic</strong> Properties window to open the ADO control’s Property<br />
Pages, as shown in Figure 1.9.<br />
As you can see in that figure, you can specify a connection using a data<br />
link file (data link files have the extension .udl), an ODBC DSN, or a connection<br />
string. To automate the building of a connection string, click the<br />
Build button after making sure the Use Connection String option button<br />
is selected.
Ch01 10/29/99 2:27 PM Page 27<br />
FIGURE 1.9<br />
The ADO control’s Property Pages.<br />
The ADO Data Control 27<br />
Clicking the Build button opens the Data Link Properties dialog<br />
you see in Figure 1.10, and we’ll see more about this dialog throughout the<br />
book. This dialog lets you select an OLE provider to use to access your data<br />
through ADO. In this case, I’ll select a Jet OLE provider, the Microsoft Jet<br />
4.0 OLE DB Provider.<br />
Now click the Next button to move to the Connection page, as you<br />
see in Figure 1.11. In this page, you give the name of the database you want<br />
to connect to. In this case, click the ellipsis button next to the text box labeled<br />
Select or enter a database name, browse to the Nwind.mdb<br />
database, select it, and click the Open button. If applicable for a database,<br />
you can also specify the user name and password you want to use with the<br />
database at this point.<br />
To test the connection, click the Test Connection button; you will<br />
get a message box saying Test connection succeeded or an error box<br />
indicating what the problem was (usually the database file was not where <strong>Visual</strong><br />
<strong>Basic</strong> expected it to be).<br />
After testing the connection, click OK to dismiss the Data Link Properties<br />
dialog. The new connection string appears in the ADO control’s<br />
Property Pages, as you see in Figure 1.12.<br />
Here’s the new connection string for the Nwind.mdb database:
Ch01 10/29/99 2:27 PM Page 28<br />
28 Chapter one • <strong>Visual</strong> <strong>Basic</strong> <strong>Database</strong> <strong>Programming</strong><br />
FIGURE 1.10<br />
The Data Link Properties dialog, Provider page.<br />
Provider=Microsoft.Jet.OLEDB.4.0;Persist Security<br />
Info=False;Data Source=C:\ADO\Nwind.mdb<br />
Here’s how the connection string might have looked if I used another<br />
OLE DB provider—the Microsoft SQL Server:<br />
Provider=SQLOLEDB.1;Persist Security Info=False;User<br />
ID=sa;Initial Catalog=Northwind<br />
At this point, we’ve selected a database to connect to and created a<br />
connection string, but we haven’t specified what data we want to use in the<br />
database.
Ch01 10/29/99 2:27 PM Page 29<br />
FIGURE 1.11<br />
Getting Records from a <strong>Database</strong><br />
The ADO Data Control 29<br />
The Data Link Properties dialog, Connection page.<br />
After indicating what database to connect to, you must still set the ADO control’s<br />
RecordSource property to indicate where you want to get the actual<br />
records from in the database.<br />
In this case, I’ll enter the Customers table in the ADO control’s<br />
RecordSource property. To do that, click the ellipsis button in the Record-<br />
Source property’s entry in the Properties window, opening the Property<br />
Pages dialog to the RecordSource property, as shown in Figure 1.13.<br />
Here, you select the CommandType property from the drop-down list.<br />
This property holds the command we’ll execute on the data source to create<br />
the records the ADO data control will work with. The possibilities are ad-<br />
CmdUnknown, adCmdText (lets you specify an SQL statement), adCmdTable
Ch01 10/29/99 2:27 PM Page 30<br />
30 Chapter one • <strong>Visual</strong> <strong>Basic</strong> <strong>Database</strong> <strong>Programming</strong><br />
FIGURE 1.12<br />
FIGURE 1.13<br />
A new connection string in the Property Pages.<br />
The Property Pages, RecordSource tab.
Ch01 10/29/99 2:27 PM Page 31<br />
FIGURE 1.14<br />
The ADO Data Control 31<br />
(lets you specify a table), and adCmdStoredProc (lets you specify a stored<br />
procedure), as you see in Figure 1.13. These possibilities indicate the ways of<br />
getting records from the Microsoft Jet 4.0 OLE DB provider.<br />
In this case, I’ll select adCmdTable to make this a table-type command,<br />
which will fetch an entire table from Nwind.mdb. The next step is to specify<br />
what table to fetch; in this case, I’ll use the Customers table in the Nwind<br />
database. That table appears in Figure 1.14 in the <strong>Visual</strong> Data Manager, one<br />
of the <strong>Visual</strong> <strong>Basic</strong> database tools we’ll take a look at in Chapter 2.<br />
To load the Customers table into the ADO data control, you can use<br />
the Table or Stored Procedure Name drop-down list in the Property<br />
Pages, as shown in Figure 1.15. <strong>Visual</strong> <strong>Basic</strong> helps out here by examining<br />
the database immediately and filling that drop-down list with the available tables,<br />
as shown in Figure 1.15. Select the Customers table from the dropdown<br />
list now.<br />
The Customers table in the Nwind database.
Ch01 10/29/99 2:27 PM Page 32<br />
32 Chapter one • <strong>Visual</strong> <strong>Basic</strong> <strong>Database</strong> <strong>Programming</strong><br />
FIGURE 1.15<br />
The Property Pages, RecordSource tab.<br />
Finally, click OK to close the Property Pages dialog; doing so sets the<br />
RecordSource property of the ADO data control, adodc1, to Customers.<br />
And that’s it—now the ADO data control is connected to a table in a database;<br />
we’ve specified an OLE DB provider type to use, the command to execute<br />
on the database to fetch a specific table of data, and the table we want.<br />
Note that we’ll see a lot more about the ADO data control in Chapter 3, but<br />
what we’ve done so far already provides a useful overview.<br />
Now that the ADO control is connected to a database, it’s time to connect<br />
other controls to the ADO control itself and to see the data in the Customers<br />
table.<br />
Binding Controls to the ADO Data Control<br />
Note that a control like a text box can only display a single string of text,<br />
which means that you can use it only to display a single field of data from the<br />
current record in the ADO data control. In this case, I’ll bind a text box to the<br />
ContactName field of the Customers table in the ADO control’s Recordset<br />
object (you can see the ContactName field’s column of data in the Customers<br />
table in Figure 1.14). You bind controls like text boxes by setting<br />
their DataSource and DataField properties. The DataSource property<br />
will hold the name of the ADO data control in the form, adodc1, and the
Ch01 10/29/99 2:27 PM Page 33<br />
FIGURE 1.16<br />
The ADO Data Control 33<br />
DataField property will hold the name of the field in the records supplied<br />
by the ADO data control that I want to display in the text box.<br />
To add a text box to Form1, double-click the text box tool in the toolbox<br />
and position the new text box as shown in Figure 1.16. The new text<br />
box is named Text1.<br />
Clear the text box by erasing the text in its Text property in the Properties<br />
window. Now I’ll bind the text box to the ADO data control. To do that,<br />
I’ll start by setting its DataSource property to the ADO control, Adodc1.<br />
<strong>Visual</strong> <strong>Basic</strong> helps here again; just click the drop-down list box in the<br />
text box’s DataSource entry in the Property Pages and you’ll see a list of<br />
the possible data sources, as shown in Figure 1.17; in this case, there’s only<br />
one possibility—the ADO data control I’ve added to the form, adodc1. Select<br />
adodc1 in the text box’s DataSource property now.<br />
The final step is to set Text1’s DataField property to the Contact-<br />
Name field in the Customers database. <strong>Visual</strong> <strong>Basic</strong> helps here once again by<br />
checking the database to see what fields are available in the table we’re<br />
going to use and displaying those fields in the drop-down list box that ap-<br />
Adding a text box to a form.
Ch01 10/29/99 2:27 PM Page 34<br />
34 Chapter one • <strong>Visual</strong> <strong>Basic</strong> <strong>Database</strong> <strong>Programming</strong><br />
FIGURE 1.17<br />
Setting a text box’s DataSource property.<br />
pears when you click the DataField property’s entry in the Properties<br />
window, as shown in Figure 1.18.<br />
That’s all it takes. Now run the application by selecting the Start item<br />
in the <strong>Visual</strong> <strong>Basic</strong> Run menu. The program runs, as you see in Figure 1.19—<br />
and as you can see in that figure, the first ContactName entry in the Nwind<br />
Customers table appears in the text box. The ADO data control at the bottom<br />
of the form displays buttons that you can use to navigate through the<br />
records in the Customers table; in order, from left to right, the buttons move<br />
to the first record in the table, the previous record, the next record, and the<br />
last record.<br />
Congratulations—you’ve just completed your first ADO program! As you<br />
can see, it’s not too difficult to get a working program going using ADO.<br />
So far, we’ve gotten an overview of the ADO object model and completed<br />
a working ADO program. I’ll continue the ADO overview now by taking<br />
a look at what’s new in recent versions of ADO.
Ch01 10/29/99 2:27 PM Page 35<br />
FIGURE 1.18<br />
Setting a text box’s DataField property.<br />
FIGURE 1.19 Using<br />
an ADO data control.<br />
The ADO Data Control 35
Ch01 10/29/99 2:27 PM Page 36<br />
36 Chapter one • <strong>Visual</strong> <strong>Basic</strong> <strong>Database</strong> <strong>Programming</strong><br />
What’s New in Recent Versions of ADO?<br />
As of this writing, the current versions of ADO you can use in <strong>Visual</strong> <strong>Basic</strong><br />
are ADO 2.0 and 2.1. I’ll take a look here at what’s new in these two versions.<br />
Much of this material is advanced and won’t have much meaning unless<br />
you’re already familiar with ADO programming, but you can refer back<br />
to this information later when we’ve covered the topics mentioned here.<br />
New in ADO 2.0<br />
Here’s some of what’s new in ADO version 2.0:<br />
■ There’s a new shorthand method to create a recordset by appending<br />
new Field objects to the Fields collection of a recordset. After creating<br />
the recordset, you can open it and insert data from any source. You<br />
can also manufacture the data under programmatic control. The new<br />
Recordset object can use all the data methods available to any recordset.<br />
You can use the recordset to supply information to a visual control,<br />
or even to update an actual data source.<br />
■ Now, with recordset persistence, you can save recordset data in a file.<br />
After saving the data, you can use the data in the file, called persisted<br />
data, to create a Recordset object. As you might expect with ADO, the<br />
persisted file may exist on a local drive, network server, or as a URL on<br />
a Web site.<br />
■ The MSPersist provider is new and supports storing a Recordset<br />
object in a file with the Save method. The persisted file can be restored<br />
with the Recordset object’s Open or the Connection object’s Execute<br />
methods. To store the Recordset object, it’s converted into a string in<br />
the file. Right now, the only supported format is the Microsoft Advanced<br />
Data TableGram (ADTG) format. The MSPersist provider also adds a<br />
property—PersistFormat—to the Recordset object’s Properties<br />
collection, so you can determine or set the string format used.<br />
■ The new GetString method formats a Recordset object so that the<br />
columns and rows are delimited with characters you choose.<br />
■ The new Sort property determines the order in which rows of a<br />
recordset are presented.<br />
■ The new Filter property determines which rows are accessible when<br />
moving among rows.<br />
■ The Find method locates a value within an indexed column of a<br />
recordset.<br />
■ You can now create an internal index for a Field object by setting its<br />
dynamic Optimize property (this dynamic property is added to the<br />
Field object’s Properties collection when you set the CursorLoca-
Ch01 10/29/99 2:27 PM Page 37<br />
tion property to adUseClient). Note, however, that this index is internal<br />
to ADO—you can’t gain access to it in your code.<br />
We’ll cover these concepts in more detail later.<br />
New in ADO 2.1<br />
Here’s some of what’s new in ADO 2.1:<br />
What’s New in Recent Versions of ADO? 37<br />
■ The new Seek method and Index property let you locate rows in a<br />
recordset quickly.<br />
■ ADO now supports row updates and synchronization.<br />
■ You can have custom control of row updates and synchronization for<br />
Recordset objects created by an SQL JOIN operation. In fact, seven<br />
new dynamic properties control the behavior of the five existing methods.<br />
■ Recordsets can now be saved in Extensible Markup Language (XML)<br />
format.<br />
■ The Microsoft Data Shaping Service for OLE DB, which supports data<br />
shaping, can now reshape previously shaped recordsets. (To support<br />
this new feature, Recordset objects now have a Name property that is<br />
available for the duration of the connection.)<br />
■ You can perform aggregate calculations on a column at any level of a<br />
shaped recordset, not just the immediate child of the parent. (This feature<br />
uses fully qualified chapter names to form a path to the desired<br />
level and column.)<br />
■ Parameterized COMPUTE commands can now have an arbitrary number<br />
of intermediate COMPUTE clauses between the PARAMETER clause and<br />
parameter argument.<br />
■ The Microsoft OLE DB Remoting Provider service provider became a<br />
standard service provider in ADO 2.1. This service was given new dynamic<br />
properties for better performance and compatibility with ADO<br />
2.0 in ADO 2.1.<br />
■ The new Microsoft Cursor Service for the OLE DB service component<br />
augments the cursor support in other data providers.<br />
Again, much of this information probably makes little sense now, but<br />
we’ll cover it in more detail later.<br />
That finishes our overview of ADO in this chapter—but there’s still<br />
more to consider. This chapter is on <strong>Visual</strong> <strong>Basic</strong> database programming, and<br />
<strong>Visual</strong> <strong>Basic</strong> version 6 adds a specific capability that all database programmers<br />
should be aware of—data validation. I’ll take a look at that now.
Ch01 10/29/99 2:27 PM Page 38<br />
38 Chapter one • <strong>Visual</strong> <strong>Basic</strong> <strong>Database</strong> <strong>Programming</strong><br />
Writing Bulletproof <strong>Database</strong> Programs<br />
by Validating User Data<br />
One of the most important aspects of database programming is validating<br />
user input. Your application is responsible for ensuring that the data a user<br />
enters is in an appropriate form for your program to use and store, and<br />
checking that data is especially important when you’re using databases.<br />
In real-world database programming, this is one of the most important<br />
parts of programming; when you release a database application to users, it<br />
has to be bulletproof. In fact, it’s not unusual to spend more time developing<br />
a program’s user interface than writing the actual core code that works with a<br />
database. It’s crucial that your program doesn’t break if someone enters text<br />
when they should have entered a number or makes some other kind of mistake,<br />
such as asking your program to sort an empty table.<br />
Ideally, every possible misuse of your program should be considered,<br />
planned for, handled, and tested. (After a few too many calls from mystified<br />
users, this is one of the things you learn quickly in a commercial database<br />
programming environment.)<br />
It’s hard to emphasize this part of database programming enough,<br />
which is why I’m covering it at the very beginning of this book in this chapter<br />
on general <strong>Visual</strong> <strong>Basic</strong> database programming. The feel of a program is<br />
of paramount importance to users, and if your program feels fragile to<br />
them—crashing frequently or getting stuck—they’ll stop using it.<br />
<strong>Visual</strong> <strong>Basic</strong> 6 includes a great deal of support that lets you check, that<br />
is, validate, data entered by users before you pass it on to the database part<br />
of your code. This support is an invaluable part of <strong>Visual</strong> <strong>Basic</strong> database programming,<br />
and I’ll take a look at it here. Much of this support is designed to<br />
let you check the data the user entered when the user moves the focus to another<br />
control. The focus, more properly called the input focus, is a Windows<br />
concept. When you give a control the focus, usually by clicking it, that control<br />
will be able to read keystrokes. Only one control can have the focus at<br />
any one time (i.e., there’s only one keyboard to enter data from).<br />
Here are some of the properties, events, and methods that you can use<br />
in the data validation process in <strong>Visual</strong> <strong>Basic</strong>—new in <strong>Visual</strong> <strong>Basic</strong> 6 are the<br />
important CausesValidation property and Validate event:<br />
■ Enabled property—Enables or disables controls.<br />
■ Locked property—Denies user access to the data in a control if True.<br />
■ MaxLength property—Sets the maximum length of the text in text box<br />
controls.<br />
■ DataFormat property—Specifies the data format in bound controls.<br />
■ CausesValidation property—If True, means this control causes a<br />
Validate event.
Ch01 10/29/99 2:27 PM Page 39<br />
Writing Bulletproof <strong>Database</strong> Programs by Validating User Data 39<br />
■ Validate event—Occurs if the user tries to move the focus away from the<br />
control and the CausesValidation property of the target control is True.<br />
■ Change event—Occurs if the user changes the data in a control.<br />
■ KeyPress event—Occurs when the user presses a key that generates<br />
an ANSI code.<br />
■ LostFocus event—Occurs when a control loses the focus.<br />
■ ValidateControls method—A form method that lets you fire the<br />
Validate event for the last-used control on a form, when the user is<br />
about to leave the form.<br />
Which control event you want to use for data validation depends on<br />
how you want to validate that data. Four events that you can use are the<br />
Change, KeyPress, LostFocus, and Validate events:<br />
■ Change event—You can use this event to validate data if you want to<br />
catch errors as the user enters data character by character.<br />
■ KeyPress event—You can use this event if you want to catch errors as<br />
the user presses keys that generate ANSI codes.<br />
■ LostFocus event—You can use this event to validate data when the<br />
user moves the focus away from the control, although the Validate<br />
event is now a better event to use; in other words, when the user is<br />
done entering data.<br />
■ Validate event—You can use this event to validate data when the<br />
user moves the focus away from the control; in other words, when the<br />
user is done entering data.<br />
I’ll take a look at a data validation example now using the new<br />
CausesValidation property and Validate event.<br />
Data Validation Using the CausesValidation<br />
Property and Validate Event<br />
In this data validation example, I’ll use two text boxes, Text1 and Text2, written<br />
so the user must enter numeric data in each. If the user places non-numeric<br />
data in a text box and then moves away from that text box (as by clicking another<br />
control), the program will display a message box asking the user to enter<br />
numeric data in the text box and return the focus to that text box.<br />
To start this example, I will create a new standard EXE project and add<br />
two text boxes—which <strong>Visual</strong> <strong>Basic</strong> names Text1 and Text2—to the default<br />
form, Form1, as shown in Figure 1.20. I will also clear the text in those text<br />
boxes, as also shown in Figure 1.20.<br />
When the user enters data into one of these text boxes and moves to<br />
another control whose CausesValidation property is set to True, the Validate<br />
event of the text box is fired. You can place code in the Validate<br />
event handler to check the new data in the text box and display a message
Ch01 10/29/99 2:27 PM Page 40<br />
40 Chapter one • <strong>Visual</strong> <strong>Basic</strong> <strong>Database</strong> <strong>Programming</strong><br />
FIGURE 1.20<br />
Adding two text boxes to a form.<br />
box if needed. By default, the CausesValidation property of controls like<br />
text boxes is True, so I don’t need to set that property.<br />
To add code to the Validate event of each text box, you use the <strong>Visual</strong><br />
<strong>Basic</strong> code window, which you can open by clicking the View Code<br />
window in the Project Explorer, or by double-clicking a form or control.<br />
In the code window, select the first text box, Text1, in the upper left<br />
drop-down list box and select the text box’s Validate event in the upper<br />
right drop-down list box, as shown in Figure 1.21.<br />
Selecting the Validate event in the drop-down list box adds this code<br />
to the code window:<br />
Private Sub Text1_Validate(Cancel As Boolean)<br />
End Sub<br />
This is the Sub procedure that will be called when Text1’s Validate<br />
event fires. In this event handler, you can check the data in the text box. If<br />
you set the Cancel parameter to True, <strong>Visual</strong> <strong>Basic</strong> prevents the user from<br />
moving away from the text box by returning the focus to the text box.
Ch01 10/29/99 2:27 PM Page 41<br />
FIGURE 1.21<br />
Writing Bulletproof <strong>Database</strong> Programs by Validating User Data 41<br />
Selecting the Validate event.<br />
In this case, I’ll just make sure that the user entered numeric data into<br />
the text box by using the <strong>Visual</strong> <strong>Basic</strong> IsNumeric function. Here’s the code<br />
to add to the Validate event handlers for Text1—note that if the data in<br />
the current text box is not in numeric form when the user tries to move the<br />
focus to a new control whose CausesValidation property is True, the<br />
code sets the Cancel parameter to True, preventing the user from moving<br />
the focus away from the text box, and displays a message:<br />
Private Sub Text1_Validate(Cancel As Boolean)<br />
If Not IsNumeric(Text1.Text) Then<br />
Cancel = True<br />
MsgBox "Please enter a number in Text1"<br />
End If<br />
End Sub<br />
Next, add a Validate event handler for the other text box, Text2:
Ch01 10/29/99 2:27 PM Page 42<br />
42 Chapter one • <strong>Visual</strong> <strong>Basic</strong> <strong>Database</strong> <strong>Programming</strong><br />
Private Sub Text2_Validate(Cancel As Boolean)<br />
End Sub<br />
As before, add this code—customized for Text2—to check the value<br />
the user entered to make sure it’s numeric:<br />
Private Sub Text2_Validate(Cancel As Boolean)<br />
If Not IsNumeric(Text2.Text) Then<br />
Cancel = True<br />
MsgBox "Please enter a number in Text2"<br />
End If<br />
End Sub<br />
That’s it—the result appears in Figure 1.22. When the user enters data<br />
that does not represent a number in a text box and then tries to move the<br />
focus, the application displays the error message you see in that figure and<br />
returns the focus to the text box.<br />
As you can see, the new CausesValidation property and Validate<br />
event are useful for checking user data—an essential step in database programs<br />
that you release generally.<br />
FIGURE 1.22<br />
Validating user data.
Ch01 10/29/99 2:27 PM Page 43<br />
Writing Bulletproof <strong>Database</strong> Programs by Validating User Data 43<br />
Besides the CausesValidation property and Validate event, you<br />
can watch what the user is typing keystroke by keystroke if you want to,<br />
using the Change or KeyPress events. For example, this code checks the<br />
data the user enters into Text1 as they’re entering it:<br />
Private Sub Text1_Change()<br />
If Not IsNumeric(Text1.Text) Then<br />
MsgBox "Please enter only numbers in Text1"<br />
End If<br />
End Sub<br />
Disabling and Hiding Controls<br />
Another technique good user interfaces use is disabling a control when that<br />
control doesn’t apply—such as disabling text boxes labeled First Name and<br />
Last Name when the user is entering data about inventory products, not<br />
people. When a control is disabled, it’s grayed out and won’t accept the<br />
focus, so the user can’t enter data in it. Disabling controls means that the user<br />
won’t enter data in them inadvertently. In <strong>Visual</strong> <strong>Basic</strong>, you can disable controls,<br />
even menu items, by setting their Enabled property to False.<br />
On the other hand, if you disable too many controls, your program will<br />
seem impenetrable to the user. It’s better to make controls invisible than to<br />
present too many disabled controls at any one time. You can make controls<br />
invisible by setting their Visible property to False.<br />
Form-Level Data Validation<br />
Usually you perform data validation at the control level, but you can also validate<br />
data at the form level. To do that, you use the KeyPreview property<br />
and the following key events: KeyDown, KeyPress, and KeyUp, which fire<br />
when the user types data.<br />
By default, forms do not fire key events. However, you can change that<br />
by setting their KeyPreview property to True. When you do, you can use<br />
the KeyDown, KeyPress, and KeyUp events to preview keystrokes before<br />
they are sent to controls, which lets your code check that data.<br />
The KeyDown event occurs when the user presses a key:<br />
Private Sub Form_KeyDown(KeyCode As Integer, Shift As<br />
Integer)<br />
MsgBox "You pressed a key."<br />
End Sub<br />
The KeyUp event occurs when the user releases a key:
Ch01 10/29/99 2:27 PM Page 44<br />
44 Chapter one • <strong>Visual</strong> <strong>Basic</strong> <strong>Database</strong> <strong>Programming</strong><br />
Private Sub Form_KeyUp(KeyCode As Integer, Shift As<br />
Integer)<br />
MsgBox "You released a key."<br />
End Sub<br />
ters:<br />
Both the KeyDown and KeyUp event handlers get the same two parame-<br />
■ keycode—A key code as defined by <strong>Visual</strong> <strong>Basic</strong>, such as vbKeyF1<br />
(the F1 key) or vbKeyHome (the HOME key).<br />
■ shift—An integer that corresponds to the state of the SHIFT, CTRL,<br />
and ALT keys at the time of the event. The shift argument is a bit field<br />
with the least-significant bits corresponding to the SHIFT key (bit 0),<br />
the CTRL key (bit 1), and the ALT key (bit 2). These bits correspond to<br />
the values 1, 2, and 4, respectively.<br />
If you want to determine what key was pressed in these two events,<br />
you must decipher the key code and then determine if the SHIFT or another<br />
key was pressed. On the other hand, the KeyPress event handler is passed<br />
the actual value of the struck key, KeyAscii, and you can convert that value<br />
into a character by passing it to the <strong>Visual</strong> <strong>Basic</strong> Chr function:<br />
Private Sub Form_KeyPress(KeyAscii As Integer)<br />
MsgBox "You pressed:" & Chr(KeyAscii)<br />
End Sub<br />
The KeyPress event does not happen when the user presses a key that<br />
does not have an ANSI equivalent, such as arrow keys or function keys.<br />
Using key previewing, you can check the value of keys the user types<br />
before they are sent to the control they were targeted to, and this provides a<br />
powerful way of validating data. For example, if you don’t want the user to<br />
be able to type the character “a” in the controls in a form, you can set the<br />
KeyAscii argument to 0 in the form-level KeyPress:<br />
Private Sub Form_KeyPress(KeyAscii As Integer)<br />
If Chr(KeyAscii) = "a" Then<br />
KeyAscii = 0<br />
End If<br />
End Sub<br />
As you can see, <strong>Visual</strong> <strong>Basic</strong> provides a lot of help when it comes to<br />
data validation, and I strongly recommend that you incorporate data valida-
Ch01 10/29/99 2:27 PM Page 45<br />
Some <strong>Basic</strong> SQL<br />
Some <strong>Basic</strong> SQL 45<br />
tion into your database programs—doing so almost always saves you a lot of<br />
grief in real-world applications.<br />
There’s one more useful topic to complete our database programming<br />
overview in this chapter—SQL programming. SQL is the lingua franca of<br />
database programming, and it’s hard to get by without at least a little SQL in<br />
<strong>Visual</strong> <strong>Basic</strong> database programming. You don’t have to be an SQL expert, but<br />
a little can go a long way, so I’ll present an overview of SQL here at the beginning<br />
of the book—we’ll be using it to some extent throughout the book<br />
and won’t want to stop to learn it when there are more pressing topics to be<br />
covered.<br />
Note that you will not need a profound knowledge of SQL to work with ADO in this book.<br />
To get an overview of basic SQL at work, I’ll use the Customers table in the<br />
Nwind.mdb database that comes with <strong>Visual</strong> <strong>Basic</strong> and create SQL queries<br />
that work with that table. You can see this table displayed in Figure 1.14.<br />
Here, I’ll just work through some basic SQL to get us started. The foundation<br />
of SQL is the SELECT statement, and I’ll start with that.<br />
The SELECT Statement<br />
You use the SELECT statement to retrieve fields from a table; here’s an example<br />
in which I’m retrieving all the records in the Customers table using the<br />
wildcard character, *:<br />
SELECT * FROM Customers<br />
This returns a recordset that holds all the records in the Customers<br />
table. This is a basic SQL statement that we’ll see frequently in this book.<br />
Selecting Specific Fields<br />
You can also select specific fields from a table like this instance, in which I’m selecting<br />
the CustomerID, Address, and City fields from the Customers table:<br />
SELECT CustomerID, Address, City FROM Customers<br />
The result of this query appears in Figure 1.23 in the <strong>Visual</strong> Data Manager.
Ch01 10/29/99 2:27 PM Page 46<br />
46 Chapter one • <strong>Visual</strong> <strong>Basic</strong> <strong>Database</strong> <strong>Programming</strong><br />
FIGURE 1.23<br />
Selecting specific fields from a database.<br />
The WHERE Clause<br />
Using the WHERE clause, you can set up selection criteria that must be met by<br />
the records in the recordset generated by the query. For example, to select all<br />
the records in the Customers table where the City field equals Berlin,<br />
you can execute this statement:<br />
SELECT * FROM Customers WHERE City = "Berlin"<br />
You don’t have to use an equals sign here; you can also test fields using<br />
these operators:<br />
■ < (less than).<br />
■ (greater than).<br />
■ >= (greater than or equal to).<br />
■ BETWEEN.
Ch01 10/29/99 2:27 PM Page 47<br />
■ LIKE.<br />
■ IN.<br />
The logical comparisons like < and > are familiar, but what about BE-<br />
TWEEN, LIKE, and IN? I’ll take a look at them next.<br />
The BETWEEN Clause<br />
You use the BETWEEN clause to specify a range for acceptable values. For example,<br />
here’s how to select all the records from the Customers table where<br />
the CustomerID record starts with A (the CustomerID field is alphabetic,<br />
not numeric, in this table):<br />
SELECT * FROM Customers WHERE CustomerID BETWEEN<br />
"A*" And "B*"<br />
Note the use of wildcard characters: "A*" and "B*". Using these parameters<br />
indicates that you want all the CustomerID values that start with A.<br />
The results appear in the <strong>Visual</strong> Data Manager in Figure 1.24.<br />
The LIKE Clause<br />
The LIKE clause is specially designed to let you use partial string matching,<br />
which you can specify with wildcards like this, where I select all the records<br />
from the Customers table where the City matches the wildcard string "Be*":<br />
SELECT * FROM Customers WHERE City LIKE "Be*"<br />
This yields a recordset with records whose City fields match names<br />
like Berlin and Belgrade.<br />
The IN Clause<br />
You can use the IN clause to specify a set of values that fields can match. For<br />
example, here’s how I retrieve records that have values in the City field that<br />
match "Berlin" or "London":<br />
SELECT * FROM Customers WHERE City IN ("Berlin",<br />
"London")<br />
Some <strong>Basic</strong> SQL 47<br />
Logical Operations<br />
You can also use logical operations on the clauses in your SQL statements.<br />
Here’s an example in which I’m specifying two criteria: The City field must<br />
hold either "Berlin" or "London", and there must be some value in the<br />
Fax field (note that you use the Null keyword to test if there’s anything in a<br />
field):
Ch01 10/29/99 2:27 PM Page 48<br />
48 Chapter one • <strong>Visual</strong> <strong>Basic</strong> <strong>Database</strong> <strong>Programming</strong><br />
FIGURE 1.24<br />
Selecting a range of data from a database.<br />
SELECT * FROM Customers WHERE City NOT IN ("Berlin",<br />
"London") AND Fax IS NOT NULL<br />
You can use these logical operators to connect clauses: AND, OR, and<br />
NOT. Using AND means that both clauses must be True, using OR means either<br />
one can be True, and using NOT flips the value of a clause from True to False<br />
or False to True. The results of this query appear in Figure 1.25 in the <strong>Visual</strong><br />
Data Manager.<br />
The DISTINCT Clause<br />
Sometimes, a database may hold duplicate values in the fields of the records<br />
of a table; for example, several customers come from the same city, so they’d<br />
all have the same value in the City field. You might want to take a look at
Ch01 10/29/99 2:27 PM Page 49<br />
FIGURE 1.25<br />
Using logical operations to get data from a database.<br />
all the cities represented, without duplicates, and you can use the DISTINCT<br />
clause for that, like this:<br />
SELECT DISTINCT City FROM Customers<br />
The Order BY Clause<br />
As you might expect, you can also order the records in a recordset produced<br />
by an SQL statement. Here’s an example in which I order the records in the<br />
Customers table by CustomerID:<br />
SELECT * FROM Customers Order BY CustomerID<br />
Some <strong>Basic</strong> SQL 49<br />
You can also sort in descending order with the Desc keyword:
Ch01 10/29/99 2:27 PM Page 50<br />
50 Chapter one • <strong>Visual</strong> <strong>Basic</strong> <strong>Database</strong> <strong>Programming</strong><br />
SELECT * FROM Customers Order BY CustomerID Desc<br />
The AS Clause<br />
Note that names of the fields returned in a recordset retain the original names<br />
they had in the table. You might want to change those names; for example,<br />
labeling a field "Name" might be more descriptive to the user than "Usr-<br />
ObjectDescriptor". You can alias a field’s name with the AS clause like<br />
this, where I’m changing ContactName to just Name for the purposes of the<br />
returned recordset:<br />
SELECT ContactName AS Name FROM Customers<br />
Now in the recordset, the ContactName field will be called Name.<br />
COUNT, SUM, MIN, MAX, and AVG<br />
SQL comes with built-in functions like COUNT, SUM, MIN, MAX, and AVG that let<br />
you work with the records in a recordset. Here are what those functions do:<br />
■ COUNT—Returns a count of records.<br />
■ SUM—Adds values over records.<br />
■ MIN—Finds the minimum value.<br />
■ MAX—Finds the maximum value.<br />
■ AVG—Finds the average value.<br />
Here are some examples in which I put those functions to work:<br />
SELECT COUNT(EmployeeID) AS NumberEmployees,<br />
AVG(BirthDate) AS AverageBirthDate, SUM(BirthDate)<br />
AS TotalYears, MIN(BirthDate) AS MinBirthDate,<br />
MAX(BirthDate) AS MaxBirthDate FROM Employees<br />
The GROUP BY Clause<br />
You can group the way records are returned with the GROUP BY clause like<br />
this, where I’m grouping records by city:<br />
SELECT City, Count (City) AS NumberCities FROM<br />
Customers GROUP BY City<br />
The HAVING Clause<br />
You can use the SQL HAVING clause with GROUP BY; this clause is like the<br />
WHERE clause, but is used only with GROUP BY. This clause lets you specify
Ch01 10/29/99 2:27 PM Page 51<br />
additional criteria that records must meet, like this, where I’m specifying only<br />
records with cities that begin with "B":<br />
SELECT City, Count (City) AS NumberCities FROM<br />
Customers GROUP BY City HAVING City LIKE "B*"<br />
The DELETE Statement<br />
Not all SQL statements are designed to return recordsets. For example, you<br />
can use the DELETE statement to delete records like this, where I’m removing<br />
all records from the Customers table that have City values that are not<br />
"Berlin" or "London":<br />
DELETE * FROM Customers WHERE City NOT IN ("Berlin",<br />
"London")<br />
The UPDATE Statement<br />
You use the UPDATE statement to update a database when you want to make<br />
changes. For example, here’s how to change the value of the City in all<br />
records where it’s currently "London" to "Berlin":<br />
UPDATE Customers SET City = "Berlin" WHERE City =<br />
"London"<br />
Joining Tables<br />
Relational databases are powerful databases that connect tables with specific<br />
keys and, using relational concepts, you can perform many SQL operations.<br />
For example, say you wanted to create a new recordset with customer contact<br />
names from the Customers table and the IDs of the items they’ve ordered<br />
from the Orders table. The key that relates these two tables is CustomerID,<br />
so you can set up the SQL query like this, making sure that the<br />
CustomerID field matches in each record you’re joining:<br />
SELECT Customers.ContactName, Orders.OrderID FROM<br />
Customers, Orders WHERE Customers.CustomerID =<br />
Orders.CustomerID<br />
Some <strong>Basic</strong> SQL 51<br />
The results appear in the <strong>Visual</strong> Data Manager in Figure 1.26.<br />
You can also do inner joins, where records must be in both tables, or<br />
outer joins, where records can be in either table and, of course, a lot more<br />
with SQL.<br />
You can see how useful the <strong>Visual</strong> <strong>Basic</strong> <strong>Visual</strong> Data Manager is when<br />
you want to take a look at a database. In fact, <strong>Visual</strong> <strong>Basic</strong> includes a flood of
Ch01 10/29/99 2:27 PM Page 52<br />
52 Chapter one • <strong>Visual</strong> <strong>Basic</strong> <strong>Database</strong> <strong>Programming</strong><br />
FIGURE 1.26<br />
Joining tables using SQL.<br />
database tools, and we’ll be using those tools throughout this book. There are<br />
so many database tools that it can be a significant problem trying to understand<br />
what each one does—the <strong>Visual</strong> <strong>Basic</strong> database tools include the <strong>Visual</strong><br />
Data Manager, the Data Form Wizard, the Data Object Wizard, the Data Project<br />
Wizard, the Data Report Designer, Data Environments, Data Views, <strong>Database</strong><br />
Designers, Query Designers, and a great many others.<br />
Some <strong>Visual</strong> <strong>Basic</strong> programmers may feel inundated by the vast tool set,<br />
especially when each tool can be very complex. However, knowing what<br />
these tools do is essential for database programming in <strong>Visual</strong> <strong>Basic</strong>, so we’ll<br />
take a look at these tools and how to use them in the next chapter. And, after<br />
we’re comfortable handling databases in <strong>Visual</strong> <strong>Basic</strong>, we’ll start using the<br />
ADO data control in-depth in Chapter 3.