
Create successful ePaper yourself
Turn your PDF publications into a flip-book with our unique Google optimized e-Paper software.
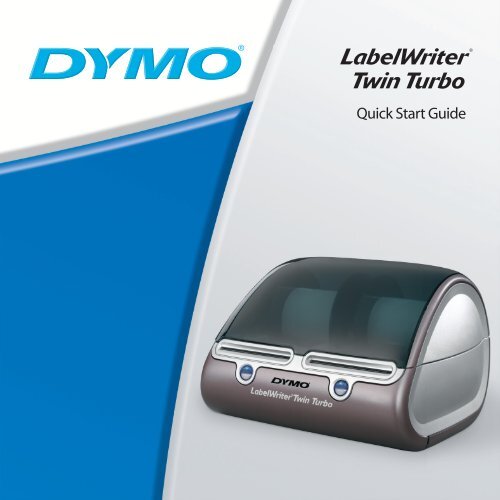
<strong>Quick</strong> <strong>Start</strong> <strong>Guide</strong>
© 2007 Sanford, L.P. All rights reserved.<br />
DYMO and LabelWriter are registered trademarks of Sanford, L.P. All other trademarks are the<br />
property of their respective holders.
English<br />
<strong>Quick</strong> <strong>Start</strong> <strong>Guide</strong><br />
Follow these steps to install the LabelWriter printer and print your first label.<br />
1. Unpacking your LabelWriter Printer<br />
NOTE Do not plug the printer into your computer until asked to do so during the<br />
software installation.<br />
1 Unpack your printer and save the packing materials.<br />
2 Make sure you have all the items shown in Figure 1. (Labels included in the<br />
package may vary.)<br />
CD-ROM<br />
USB cable<br />
Roll of<br />
address labels<br />
LabelWriter printer<br />
Roll of<br />
DYMO Stamps labels<br />
Figure 1<br />
Tested to comply<br />
with FCC standards<br />
Europe P/N: 924883<br />
INPUT:100-240V-50/60Hz Max0.64A<br />
OUTPUT:24V --- 0-1.0A<br />
UL<br />
C UL<br />
Switching Adapter<br />
FOR HOME OR<br />
OFFICE USE<br />
LISTED<br />
15WM<br />
I.T.E. POWER SUPPLY<br />
Model No.:TESA2-2401000<br />
U.S. P/N: 90819<br />
N10926<br />
E198850<br />
SHOCK HAZARD<br />
RISK OF ELECTRIC SHOCK<br />
DRY LOCATION USE ONLY .<br />
NON-SERVICEABLE ARTS P INSIDE.<br />
FOR USE WITH ITE ONLY .<br />
END AST FOR KONT ORSMASKINER.<br />
MADE IN CHINA<br />
CAUTION<br />
LabelWriter<br />
<strong>Quick</strong> <strong>Start</strong><br />
<strong>Quick</strong> <strong>Start</strong> <strong>Guide</strong><br />
Power adapter<br />
Power cable
Become familiar with the printer’s major components. See Figure 2.<br />
LabelWriter Printer Features<br />
Your LabelWriter printer is a direct thermal printer and does not use ink or toner.<br />
Instead, the printer uses heat from a thermal print head to print on specially<br />
treated labels. Labels are the only supplies you will ever need to buy.<br />
The form-feed button on the front of the printer advances a single label. The label<br />
eject button is used to remove labels from the printer when changing rolls.<br />
The LED status light visually shows the current state of the printer:<br />
• Solid blue - power is on and the printer is ready.<br />
• Flashing blue - labels are not loaded properly or label spool is empty.<br />
2<br />
USB<br />
connector<br />
Cable<br />
channels<br />
DC power<br />
connector<br />
Label feed path<br />
and tear bar<br />
Form-feed<br />
button and LED<br />
Figure 2<br />
Platen<br />
release<br />
Top<br />
cover<br />
Label roll<br />
Label<br />
spool<br />
Label eject<br />
button
2. Installing the Software<br />
NOTE Do not connect the printer to your computer until instructed to do so during<br />
the software installation.<br />
To install the software on a Windows system<br />
1 Insert the LabelWriter CD into your CD-ROM drive. After a few seconds, the<br />
installation screen appears.<br />
If the installation screen does not appear:<br />
a. Click <strong>Start</strong>, then Run on the Windows taskbar. The Run dialog box<br />
appears.<br />
b. Enter D:\install.exe (where D is the letter assigned to the CD-ROM drive)<br />
and click OK.<br />
2 Click Install and follow the instructions in the installer.<br />
To install the software on a Mac OS system<br />
1 Insert the DYMO LabelWriter CD into the CD-ROM drive.<br />
After a few seconds, the DYMO Label Software Installer<br />
DYMO Label<br />
icon appears. See Figure 3.<br />
Figure 3<br />
2 Double-click the Installer icon and follow the instructions.<br />
If you do not see your printer in the printer list when the installation is<br />
complete, refer to the ReadMe file for instructions on how to add the printer.<br />
3
3. Connecting your LabelWriter Printer<br />
NOTE Do not connect the printer to your computer<br />
until instructed to do so during the software<br />
installation.<br />
To connect the cables<br />
1 Plug the power cord into the power adapter.<br />
See Figure 4.<br />
2 Plug the power adapter into the power connector<br />
on the bottom of the printer. See Figure 5.<br />
3 Plug the other end of the power cord into a<br />
power outlet.<br />
4 Plug the USB cable into the USB port on the<br />
bottom of the printer. See Figure 5.<br />
5 Insert the power and USB cables through the<br />
cable channels and set the printer down.<br />
NOTE DO NOT CONNECT the other end of the USB cable to<br />
your computer until asked to do so during the software<br />
installation.<br />
4<br />
6 When prompted by the software installer, plug the USB<br />
cable into a USB port.<br />
Tested to comply<br />
with FCC standards<br />
Europe P/N: 924883<br />
INPUT:100-240V-50/60Hz Max0.64A<br />
OUTPUT:24V --- 0-1.0A<br />
C<br />
FOR HOME OR<br />
OFFICE USE<br />
Model No.:TESA2-2401000<br />
U.S. P/N: 90819<br />
Switching Adapter<br />
Power Cord<br />
Figure 4<br />
USB Power<br />
Cable<br />
channels<br />
UL<br />
N10926<br />
LISTED<br />
15WM<br />
I.T.E. POWER SUPPLY<br />
SHOCK HAZARD<br />
RISK OF ELECTRIC SHOCK<br />
UL<br />
E198850<br />
Power Adapter<br />
DRY LOCATION USE ONLY.<br />
NON-SERVICEABLE PARTS INSIDE.<br />
FOR USE WITH ITE ONLY.<br />
MADE END AST IN CHINA FOR KONTORSMASKINER.<br />
CAUTION<br />
Figure 5<br />
Figure 6
4. Loading Labels<br />
The LabelWriter Twin Turbo printer holds two label rolls, so you can print two<br />
types of labels without having to change the label roll. For example, load address<br />
labels on the left side and postage labels on the right side.<br />
To load a label roll<br />
Spool<br />
1 Press the form-feed button to eject the labels that<br />
protected the printer during shipment.<br />
spindle<br />
2 Open the top cover and remove any packing<br />
material inside the label compartment.<br />
3 Remove the label spool from inside the cover.<br />
Figure 7<br />
4 Hold the spool spindle in your left hand and place the<br />
label roll on the spindle so that the labels feed from<br />
underneath and the left edge of the label roll is flush<br />
against the side of the spool. See Figure 8.<br />
5 Place the spool guide onto the right side of the spool<br />
and press the guide tightly against the side of the<br />
Figure 8<br />
label roll, leaving no gap between the roll and the spool. See Figure 8.<br />
NOTE The label roll must fit snugly against both sides of the label<br />
spool, with no gaps, to avoid drifting as the labels feed through the<br />
printer. See Figure 8.<br />
6 Insert the label spool into the slot in the printer cover with the<br />
labels extending from underneath the roll. See Figure 9.<br />
Spool<br />
guide<br />
Figure 9<br />
5
7 Align the left edge of the label with the left edge of<br />
the label feed slot and insert the label into the slot.<br />
See Figure 10.<br />
The printer feeds the labels, stopping at the beginning<br />
of the first label. If the printer does not feed the labels,<br />
make sure the first label is fully inserted and then<br />
Figure 10<br />
press the form-feed button.<br />
8 Repeat Steps 3 through 7 to load a second roll of labels (for example,<br />
postage labels).<br />
9 Close the top cover.<br />
You are now ready to print address or postage labels on demand.<br />
5. Printing your First Address Label<br />
To print your first address label<br />
1 <strong>Start</strong> DYMO Label Software by doing one of the following:<br />
• For Windows, click <strong>Start</strong>, then Programs>DYMO Label>DYMO Label.<br />
• For Macintosh, double-click in the DYMO Label folder.<br />
The first time you open the application, you are asked to register the<br />
software. Registering the software ensures that you will be informed of any<br />
software updates. You are also asked to enter your default return address.<br />
6<br />
2 At the main window, click once on the address label and type an address.<br />
3 Choose a font setting that you like from the Formatting toolbar.
4 Choose Left Roll or Right Roll from the Label Roll drop-down list to select<br />
the side of the printer where the address labels are loaded. See Figure 11.<br />
5 Click to print the label.<br />
Figure 11 highlights some of the features available in DYMO Label Software.<br />
Insert text, addresses,<br />
pictures, rectangles,<br />
lines, barcodes, dates,<br />
or counters.<br />
If you also have a tape<br />
printer, two buttons<br />
allow you to easily<br />
switch between the<br />
Label and Tape Editors.<br />
Store your favorite<br />
addresses in the<br />
Address Book;<br />
automatically insert<br />
them on your label.<br />
Insert text you’ve<br />
copied to the<br />
Clipboard.<br />
Figure 11<br />
Verify and correct<br />
addresses as you add them<br />
to the Address Book.<br />
Select the label<br />
roll for your label<br />
For complete details on using the software, refer to the DYMO Label Software User<br />
<strong>Guide</strong>, located on the DYMO Label Software CD-ROM, and the online Help.<br />
7
Printing Postage with<br />
DYMO Stamps <br />
Now you can print postage right from your desktop using your LabelWriter Twin<br />
Turbo label printer. All you need is DYMO Stamps software, your LabelWriter<br />
printer, DYMO Stamps labels, and an Internet connection .<br />
To install DYMO Stamps and print postage<br />
1 Sign up for your USPS account with Endicia. Go to:<br />
www.endicia.com/dymostamps<br />
2 At the end of the sign up process, download and install the DYMO Stamps<br />
software.<br />
DYMO Stamps software is available for both Windows and Mac OS X.<br />
NOTE You must have DYMO Label Software and your LabelWriter printer<br />
installed before installing the DYMO Stamps software.<br />
The first time you start the DYMO<br />
Stamps software, you are prompted<br />
to enter the postage account<br />
number assigned and the pass<br />
phrase you created during the signup<br />
process.<br />
3 Enter your account number and<br />
pass phrase, and then click OK.<br />
8
4 Select Buy Postage from the<br />
Account menu and purchase<br />
postage for your account.<br />
5 Select LabelWriter Twin Turbo<br />
from the Printer drop-down list<br />
under Printer Selection.<br />
6 Assuming you loaded the<br />
DYMO Stamps labels in the<br />
right side of the printer, select<br />
Right Roll as the Label Roll<br />
and click OK.<br />
7 Click Test Print to print a<br />
voided postage label.<br />
You are now ready to start printing actual postage whenever you need it. Refer to<br />
the DYMO Stamps online Help for more information about using the software.<br />
You can add postage, buy DYMO Stamps postage labels, and order supplies<br />
directly from within the DYMO Stamps software.<br />
9
Ordering Labels<br />
Labels for your LabelWriter printer are available in a wide variety of sizes and<br />
styles. You can purchase labels from your local computer and office supply retailer<br />
or directly from DYMO. Visit www.dymo.com or call 1.800.426.7827.<br />
DYMO Stamps labels are regulated by the United States Postal Service, and must<br />
be purchased through the link in DYMO Stamps software or through your Endicia<br />
postage account.<br />
Troubleshooting or Customer Service<br />
Visit www.dymo.com or call 203.588.2500 between 9 a.m. and 8 p.m. Eastern time.<br />
www.sanford.com<br />
Produced by:<br />
DYMO<br />
Stamford CT 06902<br />
800-426-7827: www.dymo.com<br />
A Newell Rubbermaid Company<br />
1739698 Rev. 05/07