Instruction Manual - COBY Electronics
Instruction Manual - COBY Electronics
Instruction Manual - COBY Electronics

Create successful ePaper yourself
Turn your PDF publications into a flip-book with our unique Google optimized e-Paper software.
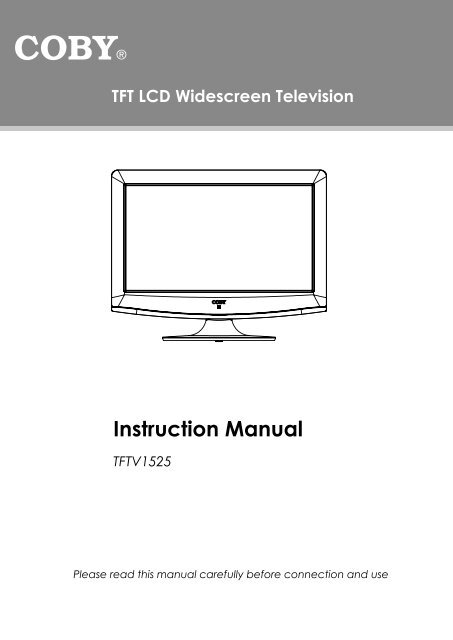
TFT LCD Widescreen Television<br />
<strong>Instruction</strong> <strong>Manual</strong><br />
TFTV1525<br />
Please read this manual carefully before connection and use
Precautions<br />
WARNING:<br />
TO REDUCE THE RISK OF FIRE OR ELECTRIC SHOCK, DO NOT EXPOSE THIS<br />
APPLIANCE TO RAIN OR MOISTURE.<br />
The lightning flash with arrowhead symbol, within an equilateral triangle, is intended to alert<br />
the user to the presence of uninsulated “dangerous voltage” within the product’s enclosure<br />
that may be of sufficient magnitude to constitute a risk of electric to persons.<br />
The exclamation point within an equilateral triangle is intended to alert the user to the<br />
presence of important operating and maintenance (servicing) instructions in the literature<br />
accompanying the appliance.<br />
For Customer Use:<br />
Enter below the serial number that is located on the<br />
rear of the unit. Retain this information for future reference.<br />
Model No. TF-TV 1525<br />
Serial No.<br />
Caution:<br />
These servicing instructions are for use by qualified service personnel only. To reduce the risk of electric<br />
shock, do not perform any servicing other than that contained in the operating instructions unless you are<br />
qualified to do so. Refer to manual for servicing instructions.<br />
Power Supply:<br />
Connect one end of the supplied power cord to the power jack on the unit rear panel and the other end<br />
to the AC100-240V wall outlet. If the unit will not be used for a long time, disconnect the plug from the outlet.<br />
Power Management:<br />
• Before plugging the power cord into the AC outlet, make sure that all the connections have been properly<br />
made.<br />
• If the unit will not be used for a long period of time, disconnect the power and remove the batteries<br />
from the remote.
FCC Statement:<br />
This device complies with Part 15 of the FCC Rules. Operation is subject to the following two conditions:<br />
• This device may not cause harmful interference, and<br />
•<br />
This device must accept any interference received, including interference that may cause undesired<br />
operation.<br />
Note:<br />
This equipment has been tested and found to comply with the limits for Class B digital devices, pursuant<br />
to Part 15 of the FCC rules. These limits are designed to provide reasonable protection against harmful<br />
interference in a residential installation. This equipment generates, uses and can radiate radio frequency<br />
energy and, if not installed and used in accordance with the instructions, may cause harmful interference<br />
to radio communications. However, there is no guarantee that interference will not occur in a particular<br />
installation. If this equipment does cause harmful interference to radio or television reception, which can be<br />
determined by turning the equipment off and on, the user is encouraged to try to correct the interference by<br />
one or more of the following measures:<br />
•<br />
•<br />
•<br />
•<br />
Reorient or relocate the receiving antenna.<br />
Precautions<br />
Increase the separation between the equipment and receiver.<br />
Connect the equipment into an outlet on a circuit different from that to which the receiver is connected.<br />
Consult the dealer or an experienced radio/TV technician for help<br />
Use of shielded cable is required to comply with Class B limits in Subpart B of Part 15 of the FCC rules. Do<br />
not make any changes or modifications to the equipment unless otherwise specified in the manual. If such<br />
changes or modifications should be made, you could be required to stop operation of the equipment.<br />
LCD Information<br />
The LCD panel used in this television contains millions of thin film transistors that have been manufactured<br />
using a high-technology process to deliver a crisp, clear, and detailed picture. Occasionally, a few of these<br />
transistors may become stuck or non-active; please note that this does not affect the performance of the<br />
television.<br />
Copyright Protection<br />
Unauthorized copying, broadcasting, public performance, and lending of disks are prohibited. This product<br />
incorporates copyright protection technology that is protected by method claims of certain U.S. patents and<br />
other intellectual property rights owned by Macrovision Corporation and other rights owners. Use of this<br />
copyright protection technology must be authorized by Macrovision Corporation, and is intended for home<br />
and other limited viewing uses only unless otherwise authorized by Macrovision Corporation. Reverse<br />
engineering or disassembly is prohibited.
Important Safety <strong>Instruction</strong>s<br />
1. Read <strong>Instruction</strong>s: All the safety and operating instructions should be read before the product is operated.<br />
2. Retain <strong>Instruction</strong>s: The safety and operating instructions should be retained for future reference.<br />
3. Heed Warnings: All warnings on the product and in the operating instructions should be adhered to.<br />
4. Follow <strong>Instruction</strong>s: All operating and usage instructions should be followed.<br />
5. Cleaning: Unplug this product from the wall outlet before cleaning. Do not use liquid cleaners or aerosol<br />
cleaners. Use a damp cloth for cleaning.<br />
6. Attachments: Use only attachments recommended by the manufacturer. Use of other attachments may<br />
be hazardous.<br />
7. Water and Moisture: Do not use this product near water (e.g., near a bath tub, washbowl, kitchen sink,<br />
laundry tub, in wet basements, or near a swimming pool and the like).<br />
8. Accessories: Do not place this product on an unstable cart, stand, tripod, bracket, or table. Use only<br />
with carts, stands, tripods, brackets, or tables recommended by the manufacturer<br />
or sold with the product. Any mounting of the product should follow the<br />
manufacturer’s instructions and should use a mounting accessory<br />
recommended by the manufacturer.<br />
9. A product and cart combination should be moved with care. Quick stops,<br />
excessive force, and uneven surfaces may cause the product and cart<br />
combination to overturn.<br />
11. Ventilation: Slots and openings in the cabinet are provided for ventilation<br />
to ensure reliable operation of the product and to protect it from<br />
overheating. These openings should never be blocked by placing the<br />
product on a bed, sofa, rug, or other similar surface. This product should<br />
not be placed in a built-in installation such as a bookcase or rack unless proper<br />
ventilation is provided or the manufacturer instructions have been adhered to.<br />
11. Power Sources: This product should be operated only from the type of power source indicated on the<br />
rating label. If you are not sure of the type of power supply to your home, consult your product dealer or<br />
local power company. For products intended to operate from battery power or other sources, refer to the<br />
operating instructions.<br />
12. Grounding or Polarization: This product may be equipped with a polarized alternating-current line plug<br />
that has one blade wider than the other. This plug will only fit into the power outlet in one direction. This<br />
is a safety feature. If you are unable to insert the plug fully into the outlet, try reversing the direction of the<br />
plug. If the plug should still fail to fit, contact an electrician to replace the obsolete outlet. Do not defeat<br />
the safety purpose of the polarized plug.<br />
13. Power-Cord Protection: Power supply cords should be routed so that they are not likely to be walked<br />
on or pinched by items placed upon or against them, paying particular attention to cords at plugs,<br />
convenience receptacles, and at the point which they exit from the product.<br />
14. Protective Attachment Plug: The product may be equipped with an attachment plug with overload<br />
protection. This is a safety feature. See the operating instructions for replacement or directions to<br />
reset the protective device. If replacement of the plug is required, be sure the service technician has<br />
used a replacement plug that has the same overload protection as the original plug as specified by the<br />
manufacturer.<br />
15. Lightning: For added protection for this product, unplug it from the wall outlet and disconnect the antenna<br />
or cable system during a lightning storm or when it is left unattended and unused for long periods of time.<br />
This will prevent damage to the product due to lightning or power-line surges.<br />
16. Power Lines: An outside antenna system should not be located in the vicinity of overhead power lines or<br />
other electric light or power circuits, or where it can fall into such power lines or circuits. When installing<br />
an outside antenna system, extreme care should be taken to keep from touching such power lines or<br />
circuits, as contact with them might be fatal.<br />
17. Overloading: Do not overload wall outlets, extension cords, or integral convenience receptacles as this<br />
can result in a risk of fire or electric shock.<br />
18. Object and Liquid Entry: Never push objects of any kind into this product through openings as they may<br />
touch dangerous voltage points or shout-out parts that could result in a fire or electric shock. Never spill<br />
liquid of any kind on the product.<br />
19. Servicing: Do not attempt to service this product yourself as opening or removing covers may expose<br />
you to dangerous voltage or other hazards. Refer all servicing to qualified service personnel.
Important Safety <strong>Instruction</strong>s<br />
21. Damage Requiring Service: Unplug this product from the wall outlet and refer servicing to qualified<br />
service personnel under the following conditions: a) when the power-supply or plug is damaged; b) if<br />
liquid has been spilled or if objects have fallen into the product; c) if the product has been exposed to<br />
rain or water; d) if the product does not operate normally by following the operating instructions. Adjust<br />
only those controls that are covered by the operating instructions as improper adjustment of other<br />
controls may result in damage and will often require extensive work by a qualified technician to restore<br />
the product to its normal operation; e) if the product has been dropped or damaged in any way; f) when<br />
the product exhibits a distinct change in performance—this indicates a need for service.<br />
21. Replacement Parts: When replacement parts are required, be sure that your service technician has used<br />
replacement parts specified by the manufacturer or have the same characteristics as the original part.<br />
Unauthorized substitutions may result in fire, electric shock, or other hazards.<br />
22. Safety Check: Upon completion of any service or repairs to this product, ask the service technician to<br />
perform safety checks to ensure that the product is in proper operating condition.<br />
23. Wall or Ceiling Mounting: The product should be mounted to a wall or ceiling only as recommended by<br />
the manufacturer.<br />
24. Heat: The product should be situated away from heat sources such as radiators, heat registers, stoves,<br />
or other products (including amplifiers) that produce heat.<br />
25. Outdoor Antenna Grounding: If an outside antenna is connected to the product, be sure the antenna<br />
system is grounded so as to provide some protection against voltage surges and built-up static charges.<br />
Article 810 of the National Electrical Code, ANS/NFPA 70 provides information with regard to proper<br />
grounding of the mast and supporting structure, grounding of the lead-in wire to an antenna-discharge<br />
unit, size of grounding conductors, location of antenna-discharge unit, connection to grounding<br />
electrodes, and requirements for the grounding electrode (see figure).
Table Of Contents<br />
Precautions<br />
Important Safety <strong>Instruction</strong>s<br />
Table of Contents<br />
Main Feature-----------------------------------------------------------------------------------------------------------------------------1<br />
Package Contents-----------------------------------------------------------------------------------------------------------------2<br />
Unit View---------------------------------------------------------------------------------------------------------------------3<br />
Remote Control ------------------------------------------------------------------------------------------------------------------4<br />
Cable Connections----------------------------------------------------------------------------------------------------------------6<br />
TV Function----------------------------------------------------------------------------------------------------------------8<br />
AV Function-----------------------------------------------------------------------------------------------------------------------------12<br />
PC Function----------------------------------------------------------------------------------------------------------------------------13<br />
Troubleshooting -----------------------------------------------------------------------------------------------------------------------14<br />
Specifications ----------------------------------------------------------------------------------------------------------------------15
This product incorporates the LCD display and the TV receiver in one system.<br />
Multiple Mode<br />
TV<br />
AV<br />
S-VIDEO<br />
COMPONENT<br />
HDMI<br />
VGA<br />
High Quality Property<br />
High Resolution<br />
Adopt an MPEG2 decoding format to achieve horizontal resolution more than 500 lines.<br />
Superior sound<br />
Built-in Dolby Digital decoder to output high quality sound effects.<br />
Screen<br />
Support the picture size of a normal screen (4:3) and a wide screen (16:9)<br />
LCD (Liquid Crystal Display)<br />
Main Features<br />
Designed with color TFT liquid crystal display clearly shows the data.<br />
NOTE: It is normal for a TFT screen to experience some light or dark spots appearing on the LCD screen.<br />
1
Please make sure the following items are included with your LCD TV/monitor. If any item is missing, contact<br />
your dealer.<br />
a.<br />
a, Main Unit<br />
b, Power Cord & RCA Cable<br />
c, Remote Control Unit<br />
Package Contents<br />
b. c.<br />
2<br />
FAV+<br />
FAV-<br />
023
1 2 3<br />
Screw x 2<br />
1. TFT SCREEN<br />
2. POWER INDICATOR<br />
3. REMOTE SENSOR<br />
4. VOLUME-/+<br />
75mm<br />
< ><br />
5. CH-/+<br />
6. MENU<br />
7. MODE<br />
8. POWER<br />
< ><br />
75mm<br />
Unit View<br />
Unit Stand<br />
Wall Mounting - Attach the TV case to the wall<br />
• Release screws and take apart the unit case and the unit stand.<br />
• Use the VESA standard mountings to fix the unit on the wall. Take care when mounting, it may cause<br />
damage or serious injury should it fall from its mountings. See the Specification page for VESA<br />
informaiton.<br />
3<br />
><br />
4<br />
5<br />
6<br />
7<br />
8<br />
9. ANTENNA JACK<br />
10. COAXIAL<br />
11. HDMI<br />
12. HEADPHONE<br />
OUTPUT<br />
9<br />
10<br />
11<br />
16<br />
12<br />
13<br />
14<br />
15<br />
13. VIDEO/S-VIDEO INPUT<br />
14. COMPONENT INPUT<br />
15. VGA INPUT<br />
16. POWER JACK
Remote Control Drawing<br />
Remote Control<br />
1. POWER button<br />
Press to turn the power on/off.<br />
2. Numeric Keypad<br />
Press to input data.<br />
3. S.Mode<br />
Press to select the audio mode.<br />
4. VOLUME +/- button<br />
Press to adjust the sound level.<br />
5. MENU button<br />
Press to show the system menu.<br />
6. Sleep button<br />
Press to access the sleep timer.<br />
7. FAV + button<br />
Press to skip the favorite channels forward.<br />
8. FAV button<br />
Press to display the favorite channel list.<br />
9. FAV - button<br />
Press to skip the favorite channels backward.<br />
10. EPG button<br />
Access the Electronic Program Guide.<br />
11. SCALE button<br />
Adjust the display effect.<br />
12. STILL button<br />
Press to freeze the picture.<br />
13. MODE button<br />
Press to select the working mode.<br />
14. RETURN button<br />
Press to return to the previously viewed channel.<br />
15. P.Mode<br />
Select the picture mode.<br />
16. CHANNEL+/-button<br />
Press to skip channels.<br />
17. Direction &OK<br />
While working with the system menu, press the direction buttons to<br />
move the cursor and press OK to confirm settings.<br />
18. EXIT button<br />
Press to exit the system menu.<br />
19. MTS button<br />
Set the ATV audio mode or the DTV audio language.<br />
20. CH-LIST<br />
Press to display the channel list.<br />
21. V-CHIP<br />
Access the LOCK menu.<br />
22. CAPTION<br />
Select the closed caption mode. (CC Off, CC On, CC On Mute)<br />
23. MUTE button<br />
Press to muffle/release sound.<br />
24. INFO<br />
Press to show the current working information.<br />
4<br />
1<br />
2<br />
3<br />
4<br />
5<br />
6<br />
7<br />
8<br />
9<br />
11<br />
11<br />
12<br />
FAV+<br />
FAV-<br />
023<br />
13<br />
14<br />
15<br />
16<br />
17<br />
18<br />
19<br />
21<br />
21<br />
22<br />
23<br />
24
Remote Control<br />
Remote Control<br />
Preparation<br />
• Remove the battery compartment cover located on the rear of the remote control. Insert 2 x “AAA”<br />
batteries, making sure to match their polarities (+/-) to the markings on the inside of the compartment.<br />
Replace the cover.<br />
•<br />
•<br />
Batteries in the remote will last for approximately 6 months under the normal use. Replace the batteries if<br />
the remote control does not work. Do not mix old with new batteries, or different types of batteries.<br />
Remove the batteries from the remote if it will not be used for a long period of time.<br />
Warnings:<br />
The battery used in this device may present a fire or chemical burn if mistreated. Do not recharge,<br />
disassemble, incinerate, or heat the battery (~212ºF).<br />
Keep batteries away from children.<br />
Using the Remote Control<br />
To use the remote, point it at the remote sensor of the player. Operate the remote within 20 feet of the sensor<br />
and at an angle of ±30 degrees.<br />
The operating distance may vary depending on the brightness around.<br />
Notes:<br />
1. Do not point bright lights directly at the remote control sensor.<br />
2. Do not place objects between the remote control unit and the remote control sensor.<br />
3. Do not use this remote control unit while simultaneously operating the remote control unit of any other<br />
equipment.<br />
5
Figure. Cable connections<br />
Antenna/Power Connection<br />
1. Connect TV RF sources to the antenna port. TV RF signals include: receiving antenna/CATV net. You<br />
can use 75 Ohm coaxial cable to connect outdoor antenna.<br />
2. Insert one end of the supplied power cord to the player’s power jack and the other end to the 110-240V<br />
AC wall outlet.<br />
VGA Input - PC Connection<br />
The VGA port of the TV is capable of accepting high-definition signals from computers with a VGA output<br />
jack. When used as a computer moniter, connect the VGA jack and the PC Audio In jack with a 15-Pin D-Sub<br />
cable and a 3.5mm stereo audio cable.<br />
Coaxial Output - Digital Audio Output Connector<br />
When MPEG audio or Dolby Digital audio is played, Dolby Digital bitstream or MPEG audio bitstream is<br />
sent to the player’s digital audio output connector. When the player is connected to a Dolby or MPEG audio<br />
decorder via this output socket, you can enjoy theater-quality audio in your home. An optical audio cable is<br />
required when a Dolby Digital decoder or MPEG audio decoder is used.<br />
Phone Connection<br />
Be sure that your unit is set at a low volume level before connecting the earphone. Increase the volume<br />
gradually for your comfortable listening.<br />
CAUTION:<br />
Hearing experts advise against the constant use of personal stereos played at high volume. Constant high<br />
volume use can lead to hearing loss. If you experience ringing in the ears or hearing loss, discontinue use<br />
and seek medical advise.<br />
HDMI Input - AV Signal Input<br />
HDMI (High Definition Multimedia Interface) is a new type of connection that transmits digital audio and video<br />
signals simultaneously over a single cable. A HDMI cable is required for the HDMI connection.<br />
These HDMI input connectors are capable of receiving video at resolutions up to 1080p (1080-progressive).<br />
Set the unit into the relative input mode to enable the<br />
signal pass.<br />
Wall Outlet<br />
Cable Connections<br />
><br />
External AV Source<br />
6<br />
Amplifier equipped with a Dolby<br />
Pro Logic Surround
Component Input (Y Cb/Pb Cr/Pr)<br />
The component port is capable of accepting high-definition signals from standard video sources. (e.g., cable/<br />
satellite boxes, DVD players, VCRs, etc.)<br />
1.<br />
2.<br />
Connect the Y/Pb/Pr port by the component<br />
cable to input the video signal.<br />
Connect “R” "L" port by the supplied AV cable<br />
to input the audio signal. The red/white plug of<br />
the AV cable is for the audio conneciton and the<br />
yellow plug for the video connection.<br />
S-Video Input<br />
The S-Video port is capable of accepting signals from standard video sources. (e.g., cable/satellite boxes,<br />
DVD players, VCRs, etc.)<br />
1.<br />
2.<br />
Connect the S-Video port by the<br />
S-Video cable to input the video<br />
signal.<br />
Connect the AUDIO-L/R port by<br />
the supplied AV cable to input<br />
the audio signal.<br />
RCA Input<br />
The CVBS port is capable of accepting signals from standard video sources(e.g., cable/satellite boxes, DVD<br />
players, VCRs, etc.)<br />
1.<br />
2.<br />
Connect the VIDEO port with the yellow<br />
plug of the the supplied AV cable.<br />
Connect the L/R port with the red & white<br />
plug of the supplied AV cable to input the<br />
audio signal.<br />
NOTE:<br />
We supply the AV cable and the power cord<br />
with this product.<br />
The white/red plug of the AV cable is for the<br />
audio connection and the yellow plug for the<br />
video connection.<br />
The white/red plug of the AV cable can also<br />
be used separately to input the audio signal<br />
in the S-video/Component connection.<br />
Cable Connections<br />
NOTE:<br />
1. Be sure to have all necessary connections properly done<br />
before connect the power supply.<br />
2.<br />
When input the AV signal, refer to the manual of the<br />
external sources as well.<br />
7
TV Function<br />
Preparations<br />
1. Connect the cables.(Refer to the “Cable Connections” section for details).<br />
2. Press the POWER button to turn on the player.<br />
3. Press the MODE button to select the TV signal mode.<br />
4. Press the CH+/- buttons to skip channels. Or you can press the number buttons to input channels<br />
directly. For initial use, you need to scan channels under the Channel Menu. See the "Channel Menu"<br />
section for details.<br />
TV Setup Menu<br />
Various features can be preset through the TV setup menu.<br />
• Press MENU to display the setup menu, TV setup menu consists of PICTURE, AUDIO, TIME, SETUP,<br />
LOCK as well as CHANNEL.<br />
• Press the left/right direction button to select the desired submenu, press OK to enter.<br />
While working with the menu,<br />
1. Press the up/down direction button to select the option.<br />
2. Press the left/right direction button to adjust.<br />
3. Press MENU to exit/back up menu.<br />
Picture Menu<br />
ITEM DESCRIPTION<br />
TV Function<br />
Warm<br />
Picture Mode Setup the picture mode (Personal, Standard, Dynamic, Soft).<br />
Contrast Adjust the display contrast<br />
Brightness Adjust the display brightness<br />
Color Adjust the display color<br />
Tint Adjust the display tint<br />
Sharpness Adjust the image sharpness<br />
Color Mode Set the color mode (Normal, Warm, Cool).<br />
8
Audio Menu<br />
ITEM DESCRIPTION<br />
Sound Mode Set the sound mode. (Standard, Music, Movie, Sports, Personal).<br />
Bass Adjust the bass.<br />
Treble Adjust the treble.<br />
Balance Adjust the sound balance.<br />
Surround Set the audio surround effect on/off.<br />
AVC Set AVC on/off.<br />
Audio Set the audio language.<br />
Time Menu<br />
ITEM DESCRIPTION<br />
TV Function<br />
Sleep Timer The unit will shut down automatically on the Sleep Time.<br />
The available option is 5/10/15/30/45/60/90/120/180/240 min,<br />
Off. The count down would start immediately after setting.<br />
You can access this function by repeatedly pressing the SLEEP<br />
button on the remote also. To check the timer left, press the<br />
SLEEP button on the remote once. To cancel the sleep timer,<br />
set the timer to Off.<br />
Time Zone Set the DTV time zone.<br />
(Pacific, Alaska, Hawaii, Eastern, Central, Mountain)<br />
Daylight<br />
Saving Time Set the DTV daylight saving function on/off.<br />
Clock Display the DTV clock information.<br />
9
Setup Menu<br />
ITEM DESCRIPTION<br />
Menu Language Set the menu language.<br />
Transparency Set the transparency on/off.<br />
Zoom Mode Set the screen effect. (4:3, Cinema, Normal, 16:9)<br />
Noise Reduction Adjust the screen noise appearance. (Weak, Middle, Strong, Off)<br />
Closed Press the right direction button to access the Closed Caption menu.<br />
Lock Menu<br />
There are four options lised under the Closed Caption menu.<br />
Caption CC Mode - Set the CC mode. ( Off, On, CC On Mute)<br />
Basic Selection - Set the basic CC type. (CC1~4, Text 1~4)<br />
Advanced Selection - Set the advanced CC type for DTV. (Service 1~6)<br />
Option -Press the right direction button to enter Option.<br />
Under the option menu, set Mode as Custom to edit the DTV<br />
CC type to your own liking.<br />
DLC Set DLC on/off<br />
Restore Default Set the player to the factory default.<br />
ITEM DESCRIPTION<br />
TV Function<br />
Enter You are required to enter the 4-digit password to access the<br />
Lock menu. The initial password is 0000.<br />
Change To change the password, input the old password - - > input the<br />
Password new password- - >verify again.<br />
Please remember the password since the player’s reset<br />
function would not revert the password.<br />
System Lock Set the system lock funtion on/off.<br />
Set the lock function On to access the parental control setup.<br />
US Setup the US parental control.<br />
TV(TV Rating) - Y, Y7, G, PG, 14, MA.<br />
Press the direction buttons to move between options, press OK<br />
to set block. To release, press OK again.<br />
MPAA(Movie Rating) - PG-13, R, NC-17, X, N/A, G, PG)<br />
Press the left/right direction button to set the movie rating.<br />
Canada Setup the Canada parental control<br />
Canada English - G, PG, 14+, 18+, E, C, C8+.<br />
Canada French - E, G, 8ans+, 13ans+, 16ans+, 18ans+.<br />
RRT Setting Set the rating region table.<br />
Reset RRT Restore RRT to the default.<br />
10
Channel Menu<br />
ITEM DESCRIPTION<br />
TV Function<br />
Air/Cable Setup the antenna type as Air or Cable.<br />
Auto Scan Search channels automatically.<br />
Select this option, press the right button to start searching,<br />
press MENU to stop. When use Cable system, you need to<br />
select the cable system first from AUTO, STD, IRC and HRC<br />
before scaning.<br />
Favorite Make the favorite channels collection. Select this option, press<br />
the right direction button to access the Favorite List.<br />
In the Favorite List, press the up/down direction button to select<br />
the desired channel. Press OK to set it as a favorite channel. To<br />
release, press OK again.<br />
Press the left/right button to turn pages in the FAV list.<br />
Show/Hide Hide the unwanted channels. Select this option, press the right<br />
direction button to access the Show/Hide menu. In the Show/<br />
Hide menu, press the up/down direciton button to select the<br />
channel, press OK to hide the channel, press OK again to<br />
release. Press the left/right button to turn pages in the Show/<br />
Hide list.<br />
Channel No Press the left/right direction button to select the channel.<br />
Channel Label Edit the channel label.<br />
1. Select the channel you want to put a label.<br />
You can use the Channel No option or directly locate the<br />
channel by the number button/CH+/- button.<br />
2. Select “Channel Label”, press the right direction button to<br />
show the edit menu. In the menu, press the left/right direction<br />
button to move left/right, press the up/down direction button to<br />
change characters.<br />
DTV Signal Display the DTV signal intensity.<br />
11
AV Function<br />
AV Function<br />
The player’s AV input function enables the user to view programs from external input sources.<br />
1. Connect the external AV signal source. Refer to the “Cable Connection” section for details<br />
2. Press the MODE button to select the relevant AV mode (AV, S-Video, Component, HDMI)<br />
AV Setup Menu<br />
Various features can be preset through the AV menu.<br />
• Press the MENU button to display the AV menu. AV setup menu consists of PICTURE, AUDIO, TIME,<br />
SETUP as well as LOCK.<br />
• Press the left/right direction button to select the desired sub-menu, press OK to enter.<br />
While working with the menu<br />
1. Press the up/down direction buttons to select the desired item.<br />
2. Press the left/right direction button to adjust.<br />
3. Press MENU to exit/back up the menu.<br />
Warm<br />
NOTE: Please see the TV section for menu descriptions<br />
12
PC Function<br />
PC Function<br />
You can use the unit’s TFT LCD as your computer’s monitor.<br />
1. Shut down both units and connect the VGA jack and PC Audio In jack. See the<br />
section.<br />
“Cable Connection”<br />
2. Turn on the units and press the MODE button to select VGA<br />
PC Setup Menu<br />
Various features can be preset through the PC menu.<br />
• Press the MENU button to display the PC menu. PC setup menu consists of PICTURE, AUDIO, TIME as<br />
well as SETUP.<br />
• Press the left/right direction button to select the desired sub-menu, press OK to enter.<br />
While working with the menu<br />
1. Press the up/down direction buttons to select the desired item.<br />
2. Press the left/right direction button to adjust.<br />
3. Press MENU to exit/back up the menu.<br />
NOTE: Please see the TV section for menu descriptions<br />
Adjust the PC Screen<br />
Upon switching to the PC mode, the moniter will be automatically regulated for a<br />
proper functioning. If the result is not up to your expectation, please perform the<br />
following steps to adjust the screen manually .<br />
1.<br />
2.<br />
Enter the “Advanced” sub-menu from the SETUP menu, select “Auto” and<br />
press the left/right direction button to adjust the monitor automatically.<br />
Or if you still have problem with the monitor after, adjust “H-Pos”, “V-Pos”,<br />
”Clock“ as well as “Phase” accordingly under the SETUP menu.<br />
13
If you have a problem with this device, please read the troubleshooting guide section and check our website<br />
at www.cobyusa.com for Frequently Asked Questions (FAQs) and firmware updates. If these resources do<br />
not resolve the problem, please contact Technical Support.<br />
Address<br />
<strong>COBY</strong> <strong>Electronics</strong> Technical Support<br />
56-65 Rust Street<br />
Maspeth, NY 11378<br />
Email<br />
techsupport@cobyusa.com<br />
Web<br />
www.cobyusa.com<br />
Phone<br />
800-727-3592: Weekdays 8:30AM -9:00PM EST<br />
Saturdays 9:00AM -5:30PM EST<br />
718-416-3197: Weekdays 8:00AM -5:30PM EST<br />
Symptom Check and Action<br />
No Power<br />
No Picture<br />
No Sound<br />
Color Distorted<br />
Picture and Sound<br />
are interfered<br />
R e m o t e C o n t r o l<br />
does not work<br />
Malfunction<br />
•<br />
•<br />
•<br />
•<br />
•<br />
•<br />
•<br />
•<br />
•<br />
•<br />
•<br />
•<br />
•<br />
•<br />
•<br />
•<br />
•<br />
•<br />
•<br />
•<br />
•<br />
Trouble Shooting<br />
Make sure the unit has been powered on manually.<br />
Check if the power cord has been properly connected to the power<br />
outlet.<br />
Check if the main power has been switched on.<br />
Try another TV channel<br />
Check if the system connection is proper and secure.<br />
Check if the connection cables are damaged.<br />
Increase the volume.<br />
Check if the MUTE function of the unit has been activated.<br />
Check if the sound system has been properly set.<br />
Check if the AV audio signal input cable has been connected properly.<br />
Reset the color system of the unit.<br />
Check if the system has been properly connected.<br />
Check if the AV video signal input cable is connected properly.<br />
Check if the system has been properly connected.<br />
If using antenna, adjust the antenna.<br />
Make sure the POWER button on the unit has been turned on manually.<br />
Remove the obstacles between the remote control and the player.<br />
Point the remote control towards the remote sensor on the player.<br />
Check if the batteries of the remote control have been loaded with<br />
correct polarities.<br />
Replace the batteries of the remote control.<br />
Should the player develop a malfunction, unplug the player for 30<br />
minutes. After that, power on the player and the restore function should<br />
reset the player.<br />
14
TFTV 1524<br />
TFT Panel<br />
Characteristic<br />
TV Charactoristic<br />
Standard<br />
Active Area<br />
Resolution<br />
Display Color<br />
Pixel Pitch<br />
TV System<br />
Antenna Impedance<br />
Power Consumption<br />
Specification<br />
Operating Temperature Range<br />
Dimension<br />
Wall Mounting<br />
P/N:<br />
Specifications and manual are subject to change without prior notice.<br />
15<br />
15.6"<br />
1366X768<br />
6-bit, 262.144 colors<br />
0.252(H) x 0.252(V)<br />
ATSC/NTSC<br />
75Ω<br />
100-240V 50/60Hz<br />
On Working 40W(Max)<br />
Speaker 2x(4Ω,3W)<br />
1ºc-41ºc<br />
378X133X334 MM<br />
VESA M4 75X75 MM