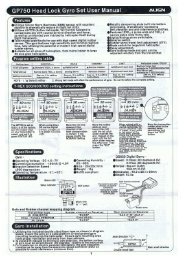
DUO2 User Manual - Hyperion
DUO2 User Manual - Hyperion
DUO2 User Manual - Hyperion

You also want an ePaper? Increase the reach of your titles
YUMPU automatically turns print PDFs into web optimized ePapers that Google loves.
Press DOWN to SAFETY TIMER - Adjustable between 20 and 300 minutes. An alarm will sound during charging after selected<br />
time interval during charging has elapsed. Set the time for about 30% longer than it should take your pack to charge.<br />
Keep in mind that a badly balanced pack may take longer than normal to charge, so don’t set this too tight. A Lipo pack at 1C<br />
rate might take as much as 120 minutes to charge, so timer of about 160~180 minutes may be appropriate. Note that while<br />
other safety checks based on capacity and voltage are also working for you, charging should never be left unattended in any<br />
case.<br />
Press DOWN to TCS CAPACITY – For LiPo and LiIon battery types Terminal Capacity Selection is available from 50% to 100% of<br />
pack capacity. During the charge, the charger will continually estimate capacity in the pack, and either terminate the charge or<br />
sound a signal tone (and continue charging) when your selected TCS percentage is reached, depending on the value for you set<br />
for TCS END ACTION. See end of manual for more details on TCS.<br />
Press DOWN to TCS END ACTION – Values are CONTINUE and STOP. CONTINUE is the default. In this case, when TCS% is<br />
reached for settings 50% to 95%, the charger will “beep” 10 times, but continue charging to 100% until stopped. If TCS<br />
ACTION is set to STOP, the charger will stop charging at that TCS setting and - if balancing is complete – then give COMPLETE<br />
(END) Buzzer according to you buzzer settings. (or continue till balanced, then give End buzzer).<br />
Press DOWN to TVC = YOUR RISK! NEVER change this from default 0mV setting, unless you have CAREFULLY read and<br />
understood the information on TVC function given on pages 5&6, AND FULLY ACCEPT ANY CONSEQUENCES AND ALL RISKS!<br />
Press DOWN to DSCH CURRENT – If you’ll be discharging, you’ll set the discharge current here. Note that depending on the voltage of the<br />
pack, the current you set may not be obtainable if the total Volts multiplied by Current (A) exceeds 50W.<br />
Press DOWN to DSCH VOLTAGE per cell – Lithium types should only be discharged for storage, so we recommend that you use STORE<br />
MODE for that. Otherwise, you need to be sure of the V/cell setting yourself, according to your battery type. Over-discharge can damage packs.<br />
Pressing DOWN for a last time returns you to the ‘Memory Select’ screen.<br />
At this point, see flowchart (7) LiIo / LiPo / LIFE BATTERY START. Holding the ENTER key pressed down for two seconds or<br />
more will start the CHARGE, STORE, DISCHARGE, or CYCLE process (select desired with UP/DOWN Keys) for LiPo, LiIon, and<br />
LIFE types, no matter where in the MEMORY (CHARGE) screens you may be. Additionally- if balancer circuit is connected – SYNC<br />
MODE is available via ENTER (short push) and UP/DOWN arrow keys.<br />
With “CHARGE START SOLO MODE” selected, hold down ENTER for 2 seconds. Hold down ENTER again, the charger will then<br />
read **BATTERY CHECK** and then ask you to confirm the number of cells in your battery pack. Press ENTER (short press) for<br />
a final time to start charging. (if balancer is connected, a 10-second countdown occurs, then auto start). If TVC Function is set<br />
to anything other than the default 0mV, the TVC setting will show on the screen for a few seconds before charging begins. IF<br />
the TVC setting is NOT as you wish (default STRONGLY SUGGESTED), STOP and reset TVC, then begin charge again!<br />
(see pages 5&6 for full details on TVC function)<br />
Note: If the Lithium-based pack is NOT connected to the balancer port, the Charger will read NO BALANCER.<br />
Holding down ENTER (2 seconds) at any time while charging a battery will then STOP charging (or discharging, etc…).<br />
MODE SELECTIONS<br />
Before Charging/Discharging/Store are in progress, Pressing the MODE button will scroll you through the MEMORY, DATA VIEW,<br />
BALANCER and USER SETUP screens, allowing you to change parameters as you like (see charts for each)<br />
During Charging/Discharging/Store , Pressing the MODE button will scroll you through the MEMORY, BALANCER and QUICK<br />
VIEW Data screens. (see chart (9) OPERATION and FINISH DISPLAY)<br />
* MEMORY – Short-press UP/DOWN buttons to scroll through the data presented. At the top memory screen (showing C: A),<br />
you can press ENTER and UP/DOWN to change charge current if desired. You can also LONG-press (2-seconds) UP button to<br />
see each screen presented in turn at two-second intervals.<br />
* BALANCER – UP/DOWN buttons to see detailed information on cell balancing, and individual cell voltages<br />
* QUICK VIEW – Shows the following useful info on a single screen:<br />
CAPACITY mAh/Ah (Charged in “C” or Discharged out “D”)<br />
INPUT VOLTAGE (Vi)<br />
PACK VOLTAGE (V)<br />
CHARGE CURRENT (A)<br />
CAPACITY (%) of the pack at current time.<br />
---- DATA VIEW<br />
Press the MODE button until you reach the DATA VIEW screen. (see chart (3) Data View Display)<br />
Use the UP or DOWN key to scroll through the various information presented:<br />
*INPUT – Current input voltage from the power supply<br />
*OUTPUT – The output voltage of charger while charging, or pack voltage of the battery while connected but not charging<br />
*BAT. RES – The internal resistance (IR) of the battery pack in mΩ. (Most accurate near charge END. Temp affects readings)<br />
*TEMP and PEAK TEMP – Current Temp, and Peak Temp recorded during the charge (requires optional temp sensor)<br />
*CHARGE TIME, CHARGE CURRENT<br />
*PEAK CHARGE VOLTAGE<br />
(see chart for other information screens available under Data View)<br />
3