CR Manual CP L&M en - Creation Willi Geller
CR Manual CP L&M en - Creation Willi Geller
CR Manual CP L&M en - Creation Willi Geller

You also want an ePaper? Increase the reach of your titles
YUMPU automatically turns print PDFs into web optimized ePapers that Google loves.
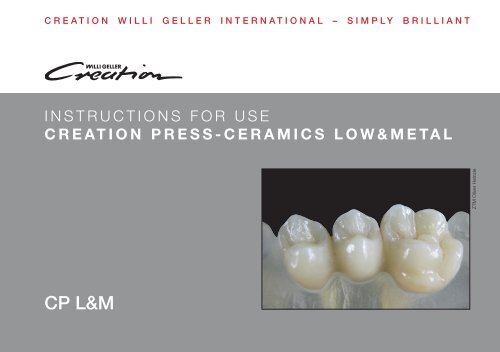
<strong>CR</strong>EATION WILLI GELLER INTERNATIONAL – SIMPLY BRILLIANT<br />
INSTRUCTIONS FOR USE<br />
<strong>CR</strong>EATION PRESS-CERAMICS LOW&METAL<br />
<strong>CP</strong> L&M<br />
1<br />
ZTM Oliver Heinzle
2<br />
CONTENT<br />
Introduction 3-4<br />
<strong>CP</strong> Low / Technique 5-16<br />
<strong>CP</strong> Low & Metal / Investing 9<br />
<strong>CP</strong> Low & Metal / Injecting 10, 30<br />
<strong>CP</strong> Low & Metal / Devesting 11<br />
<strong>CP</strong> Low & Metal / Colour Chart 17<br />
<strong>CP</strong> Low / Adhesively Cem<strong>en</strong>ting 18<br />
<strong>CP</strong> Metal / Introduction 19<br />
<strong>CP</strong> Metal / Cut Back Technique 20-26<br />
<strong>CP</strong> Metal / Cut Back Easy Technique 27-28<br />
<strong>CP</strong> Metal / Staining Posteriors 29<br />
<strong>CP</strong> Metal / Cut Back - Combination Charts 31<br />
<strong>CP</strong> Metal / Cut Back Easy - Combination Charts 32<br />
<strong>CP</strong> Metal / Staining Posteriors - Combination Charts 33<br />
Physical Properties 34<br />
Imprint<br />
Editor: <strong>Creation</strong> <strong>Willi</strong> <strong>Geller</strong> International AG<br />
Cont<strong>en</strong>t: ZTM Patrick Boche, ZTM Oliver Heinzle<br />
Picture credits: ZTM Oliver Heinzle<br />
Layout: hellblau. visuelle kommunikation
3<br />
I N T R O D U C T I O N<br />
<strong>Creation</strong> <strong>CP</strong> L & M is an injection moulded ceramic for fabricating<br />
inlays, onlays, v<strong>en</strong>eers and single crowns using the staining as well<br />
as the build-up technique. A further indication is the „Metal Overpress“<br />
technique. This technique op<strong>en</strong>s a new dim<strong>en</strong>sion both<br />
economically and aesthetically. Its physical properties, aesthetics<br />
and unique shade stability are impressive.
4<br />
I N T R O D U C T I O N<br />
BUILD-UP TECHNIQUE<br />
Inlays, onlays, v<strong>en</strong>eers and single crowns can be fabricated effici<strong>en</strong>tly<br />
and aesthetically using this technique. Units are waxed-up<br />
to their final shape on conv<strong>en</strong>tional section models and th<strong>en</strong> injected<br />
using the appropriate transluc<strong>en</strong>t pellet. After the injectionmoulded<br />
units have be<strong>en</strong> prepared, <strong>Creation</strong> CC.LF. Make Up<br />
Instant stains are used to add the finishing touches.<br />
STAINING TECHNIQUE<br />
This technique is used for restorations which require high-quality<br />
aesthetics. Fully anatomically waxed-up units can be injectedmoulded<br />
and th<strong>en</strong> reduced, or units can be waxed-up in reduced<br />
form and injected using appropriate pellet. <strong>Creation</strong> LF and <strong>Creation</strong><br />
CC.LF. Make Up Instant stains are used for facing (The stain can<br />
be mixed in or used on the surface). The d<strong>en</strong>tal technician’s creativity<br />
is unlimited using this combination of materials.
TOOTH PREPARATION<br />
1,5<br />
2,0<br />
1,5<br />
1,5<br />
2,0<br />
2,0 2,0<br />
1,5<br />
0,7<br />
0,5<br />
1,5 - 2,0<br />
0,5<br />
1,5<br />
5 | L O W<br />
I N L AY S<br />
Inner walls should not be prepared parallel, but op<strong>en</strong> out approx.<br />
15 ° towards the occlusal surface. Occlusal preparations<br />
should be approx. 2 mm deep. Box preparations should have<br />
rounded corners and edges with no contact to the opposing bite<br />
at the junction of the tooth and inlay and no feather edges.<br />
<strong>CR</strong>OWNS<br />
Reduce the incisal edge by 2 mm and labial and buccal walls by<br />
1 – 1,5 mm. Prepare a well-formed deep chamfer or 90° shoulder.<br />
There should be no sharp edges and a minimum space of 1 mm<br />
palatally.<br />
L A M I N AT E V E N E E R S<br />
Prepare labially to a minimum of 0,5 mm at the gingival deep<br />
chamfer and up to 1 mm at the incisal edge. All preparation margins<br />
should be deep chamfers.
WA X I N G - U P - B U I L D - U P T E C H N I Q U E<br />
6 | L O W<br />
M E T H O D A<br />
The restoration is waxed-up fully anatomically and th<strong>en</strong> reduced<br />
using appropriate cutting instrum<strong>en</strong>ts. The pattern can be used<br />
as a diagnostic wax-up.<br />
METHOD B<br />
The restoration is waxed-up in reduced form and th<strong>en</strong> injected.<br />
Important: - Minimum thickness 0,8 mm!<br />
- 2/3 of the anatomical form must be made<br />
of press material!
WA X I N G - U P - S TA I N I N G T E C H N I Q U E<br />
7 | L O W<br />
The restoration is fully waxed-up. The pattern does not show any<br />
dim<strong>en</strong>sional changes during the injection.
S P R U E I N G<br />
8 | L O W<br />
The wax wire with 3 – 3,5 mm in diameter should be 5 – 6 mm<br />
long and should not taper towards the pattern. Wax the pattern<br />
in an angle of 35 – 45 ° on the edge of the crucible former. The<br />
distance betwe<strong>en</strong> the patterns should be 3 mm.<br />
Note: Maximum of 0,6 g wax weight for 1 pellet 2 g<br />
Maximum of 1,4 g wax weight for 2 pellets 2 g<br />
Maximum 2,8 g wax weight with 2 pellets 5 g
INVESTING<br />
9 | LOW & M E TA L<br />
Push the silicone ring on the crucible former. Fill to just below<br />
the edge of the silikon ring with special investm<strong>en</strong>t for injection<br />
moulded ceramics. Put on the mould base former turning g<strong>en</strong>tly<br />
(investm<strong>en</strong>t should exude easily through the op<strong>en</strong>ing). After the<br />
investm<strong>en</strong>t has set, turn the mould base former and mould former<br />
carefully to remove them. Smooth the underside with a plaster<br />
knife. Follow the directions for preheating in the instructions for<br />
use for the investm<strong>en</strong>t.<br />
Important: Do not preheat the pellets!<br />
Preheat the aluminium plunger!<br />
Do not preheat the one-way plunger!
I N J E C T I N G<br />
KLEMA Press 100g Mould 200g Mould 300g Mould<br />
Stand-by Temperature 800 °C 800 °C 800 °C<br />
Sealing Time 00:00 min. 00:00 min. 00:00 min.<br />
Heat Rate 60 °C/min. 60 °C/min. 60 °C/min.<br />
Vacuum Start 800 °C 800 °C 800 °C<br />
Vacuum Hold 30:00 min. 30:00 min. 37:00 min.<br />
Vacuum Limit 730 mm 730 mm 730 mm<br />
Firing Temperature 930 °C 940 °C 975 °C<br />
Holding Time 20:00 min. 20:00 min. 25:00 min.<br />
Injection Temperature 930 °C 940 °C 975 °C<br />
Injection Time 10:00 min. 10:00 min. 12:00 min.<br />
These firing parameters repres<strong>en</strong>t standard values and have to be adjusted to respective situation.<br />
10 | LOW & M E TA L
DEVESTING<br />
11 | LOW & M E TA L<br />
Mark the l<strong>en</strong>gth of the plunger on the mould and separate along<br />
the l<strong>en</strong>gth of the mark. Th<strong>en</strong> carefully break apart the sections of<br />
the mould. The pressings should be roughly blasted with glass<br />
beads (50 μm) at 4 bars with a p<strong>en</strong> blaster, th<strong>en</strong> carefully with glass<br />
beads (50 μm) at 2 bars.<br />
Do not use aluminium oxide for blasting!
F I N I S H I N G<br />
12 | L O W<br />
Carefully remove the sprue pins with a suitable cut-off disc.<br />
Now fit the pressed parts onto the die and th<strong>en</strong> dep<strong>en</strong>ding on<br />
the technique used - carry out the finishing.<br />
BUILD-UP TECHNIQUE<br />
The fully anatomically modelled restoration should be reduced<br />
with finishing abrasives that are suitable for working porcelain or<br />
if the restoration was reduced before wax-up, prepare it for v<strong>en</strong>eering.<br />
Before layering, the surface should be blasted with aluminium<br />
oxide (50 μm) and very slight pressure (1bar). Layering can be<br />
started after through cleaning (steam blaster/ultrasonic cleaner).<br />
Minimum framework thickness 0,8 mm or rather 2/3 of the anatomical<br />
form must consist of pressable ceramic!
STAINING TECHNIQUE<br />
13 | L O W<br />
The objects are ready-finished (contact points, surface texture<br />
etc.). Wh<strong>en</strong> using silicone rubber polisher, blasting with aluminium<br />
oxide (50 μm) and slight pressure (1bar) are required. Any<br />
corrections can still be made with the <strong>Creation</strong> LF layering porcelain<br />
before staining. Individual characterisation is th<strong>en</strong> done with the<br />
<strong>Creation</strong> CC.LF. Make Up Instant stains. One or more stain firings<br />
may be carried out, dep<strong>en</strong>ding on the situation. Th<strong>en</strong> glaze the<br />
ready-stained restoration once or twice.
B U I L D - U P<br />
14 | L O W<br />
Layering with <strong>Creation</strong> LF. Before layering, a characterisation<br />
firing with <strong>Creation</strong> CC.LF. Make Up Instant stains can be fixed.<br />
Missing areas of d<strong>en</strong>tine can be added using d<strong>en</strong>tine porcelain.<br />
The incisal parts are added to the anatomical form, th<strong>en</strong> fired as<br />
specified in the firing chart. Firing is performed on firing cotton<br />
or thin metal firing pins (use platinfoil), but molars should only<br />
be fired on firing pad. A correction firing can be carried out, if<br />
necessary.<br />
A minimum thickness of 0,8 mm must be observed or 2/3 of the<br />
anatomical form must consist of pressable ceramic!
G L A Z E F I R I N G<br />
15 | L O W<br />
Small individual nuances can now be added with <strong>Creation</strong> CC.LF.<br />
Make Up Instant stains.<br />
Finally, carry out glazing or mechanical polishing.
F I R I N G I N S T R U C T I O N S<br />
STAINING TECHNIQUE<br />
Start Temp. Drying Time Raise of Temp. V 1 st Firing 2 nd Firing Holding Time<br />
Stains 450 °C 4 min. 45 °C/min. - 750 °C 750 °C 1 min.<br />
Glaze 450 °C 4 min. 45 °C/min. - 750 °C 740 °C 1 min.<br />
BUILD-UP TECHNIQUE<br />
16 | L O W<br />
Start Temp. Drying Time Raise of Temp. V Final Temp. Holding Time<br />
1 st D<strong>en</strong>tine Firing 450 °C 6 min. 45 °C/min. + 770 °C 1 min.<br />
2 nd D<strong>en</strong>tine Firing 450 °C 6 min. 45 °C/min. + 760 °C 1 min.<br />
Glaze Firing 480 °C 2 min. 45 °C/min. - 770 °C -<br />
Glaze Firing with Glaze Powder 480 °C 4 min. 45 °C/min. - 750 °C 1 min.<br />
These firing parameters repres<strong>en</strong>t standard values and have to be adjusted to respective situation. Decisive is the firing result.
COLOUR CHART<br />
TRANSPARENT PELLETS 2g<br />
Labial V<strong>en</strong>eer 3 LV 1 LV 2 LV 3<br />
Occlusal Enamel 4 OC 1 OC 2 OC 3 OC 4<br />
Occlusal Opaque 4 OO 1 OO 2 OO 3 OO 4<br />
DENTINE PELLETS 2g<br />
Vita ® Shade A1 A2 A3 A3,5 A4 B1 B2 B3 B4 C1 C2 C3 C4 D2 D3 D4<br />
D<strong>en</strong>tine 16 A1 A2 A3 A3,5 A4 B1 B2 B3 B4 C1 C2 C3 C4 D2 D3 D4<br />
Transpar<strong>en</strong>t D<strong>en</strong>tine 9 TA1 TA2 TA3 - - TB1 TB2 TB3 - TC1 TC2 - - TD2 - -<br />
Bleach D<strong>en</strong>tine 3 BD-A BD-B BD-B0<br />
Transp. Bleach D<strong>en</strong>tine 3 TBD-A TBD-B TBD-B0<br />
DENTINE PELLETS 5g<br />
Vita ® Shade A1 A2 A3 A3,5 A4 B1 B2 B3 B4 C1 C2 C3 C4 D2 D3 D4<br />
D<strong>en</strong>tine 9 A1 A2 A3 - - B1 B2 B3 - C1 C2 - - D2 - -<br />
Transpar<strong>en</strong>t D<strong>en</strong>tine 9 TA1 TA2 TA3 - - TB1 TB2 TB3 - TC1 TC2 - - TD2 - -<br />
Bleach D<strong>en</strong>tine 3 BD-A BD-B BD-B0<br />
Transpar<strong>en</strong>t Bleach D<strong>en</strong>tine 3 TBD-A TBD-B TBD-B0<br />
Vita ® is a registered trademark of VITA Zahnfabrik H. Rauter GmbH & Co. KG, Bad Säcking<strong>en</strong>, Germany.<br />
17 |<br />
LOW & M E TA L
CEMENTING ALL-CERAMIC PRESSED <strong>CR</strong>OWNS<br />
The restoration fabricated from <strong>Creation</strong> <strong>CP</strong> Low has to be<br />
adhesively cem<strong>en</strong>ted!<br />
18 | L O W<br />
Pre-treatm<strong>en</strong>t of the restoration before bonding (please follow<br />
the manufacturer’s instructions):<br />
• Carefully sandblast the inside of the crowns with Al 2O 3 (50 μm)<br />
and 1 bar of pressure.<br />
• Sandblasted surface.<br />
• Etch the rough<strong>en</strong>ed surface with maximum 10 % hydrofluoric<br />
acid for two minutes, according to the manufacturer’s<br />
instructions.<br />
• Thoroughly remove the acid residues under running water.<br />
Th<strong>en</strong> clean with ultrasound or steam blaster. In the dry state,<br />
a milky white surface (fluorosilicate crystals) is visible.<br />
• Acidify the fluorosilicate crystals with phosphoric acid (39%)<br />
for one minute. Th<strong>en</strong> thoroughly clean under running water.<br />
• The microret<strong>en</strong>tive surface is ready for adhesive bonding.
19 | M E TA L<br />
I N T R O D U C T I O N<br />
PRESS OVER METAL<br />
The press over metal technique combines in an unique way<br />
economic effici<strong>en</strong>cy and aesthetics. This technique offers unlimited<br />
possibilities to the technician, perfect ceramic shoulders<br />
for crowns as well as for bridges. „Press over metal“ combines<br />
the b<strong>en</strong>efits of a metal ceramic with the possibilities of press<br />
ceramics.<br />
· Cut back technique: For highly aesthetic restorations.<br />
· Cut back easy technique: Effici<strong>en</strong>t and ev<strong>en</strong> aesthetical with<br />
perfect accordance to the Vita ® Classic shade guide.<br />
· Staining posteriors: Easy, fast and beautiful.
C U T B A C K T E C H N I Q U E - M E TA L PA R T<br />
1<br />
20 | M E TA L<br />
ALLOY<br />
Overpress technique: Alloys with a coeffici<strong>en</strong>t thermal expansion<br />
betwe<strong>en</strong> 13,8 – 14,2 (25 ° – 500 °C) can be used.<br />
This information is not obligatory. Please check the alloys suitabilities<br />
for the press over technique before you start using it.<br />
WAXING-UP<br />
It is recomm<strong>en</strong>ded to produce a diagnostic wax-up to position<br />
the framework pattern correctly. You wax-up a little reduced as<br />
with the MC technique with full shoulder. The pattern should<br />
correspond to the reduced tooth mould to guarantee constant<br />
layer thickness. The later metal part should be kept as small as<br />
possible to avoid t<strong>en</strong>sion with the press ceramics.
C U T B A C K T E C H N I Q U E - M E TA L PA R T<br />
2<br />
3<br />
4<br />
21 | M E TA L<br />
SPRUEING - CASTING - FINISHING - OXIDIZING<br />
Refer to the alloy manufacturer`s instructions.<br />
FIRST OPAQUE FIRING<br />
Use the <strong>Creation</strong> CC Paste or Powder Opaque. Apply the<br />
opaque ev<strong>en</strong>ly that the metal is masked 75%.<br />
SECOND OPAQUE FIRING<br />
The opaque should have a shiny surface after firing. The second<br />
coating of opaque should mask the metal completely. The fired<br />
surface should shine lightly.
C R E AT I O N C C O P A Q U E - F I R I N G I N S T R U C T I O N S<br />
PASTE OPAQUE<br />
Preheating Drying Time Raise of Temp. V Final Temp. Holding Time<br />
1 st Opaque Firing 550 °C 6 min. 80 °C/min. + 980 °C * 1 min.<br />
2 nd Opaque Firing 550 °C 6 min. 80 °C/min. + 950 °C 1 min.<br />
<strong>CR</strong>EATION CC POWDER OPAQUE<br />
Preheating Drying Time Raise of Temp. V Final Temp. Holding Time<br />
1 st Opaque Firing 600 °C 2 min. 80 °C/min. + 980 °C * 1 min.<br />
2 nd Opaque Firing 600 °C 2 min. 80 °C/min. + 950 °C 1 min.<br />
*Wh<strong>en</strong> firing non-precious alloy: final temperature 1.000°C.<br />
These firing parameters repres<strong>en</strong>t standard values and have to be adjusted to respective situation. Decisive is the firing result.<br />
22 | M E TA L
C U T B A C K T E C H N I Q U E<br />
23 | M E TA L<br />
WAXING-UP<br />
The model is isolated and th<strong>en</strong> the framework is put on the model<br />
without pressure. According to the technique used you can<br />
either wax-up completely or reduce. The minimum thickness of<br />
the restoration is 0,8 mm.<br />
Important: Check internally for wax, keeping wax free!<br />
SPRUEING<br />
The objekt is sprued directly. The wax wire should be 3 mm in<br />
diameter, 5 – 7 mm long and should not taper towards the pattern.<br />
The pattern is waxed onto the crucible former in a c<strong>en</strong>tral<br />
position.<br />
P E L L E T<br />
Use a d<strong>en</strong>tine pellet (e.g.: D-A2).
C U T B A C K T E C H N I Q U E - P R E S S PA R T<br />
24 | M E TA L<br />
INVESTING<br />
See low technique (p. 8 – 9).<br />
P R E S S I N G<br />
See press parameter (p. 10, 30).<br />
DEVESTING<br />
See low technique (p. 11).
C U T B A C K T E C H N I Q U E - P R E S S PA R T<br />
25 | M E TA L<br />
FINISHING<br />
Cut off the sprues carefully using a suitable cut-off-disc. Work<br />
with low pressure and low r.p.m. (revolutions per minute). After<br />
separating, the work is carefully fitted onto the die (caution in<br />
the area metal press ceramic. Int<strong>en</strong>se heat can cause breaks!).<br />
The fully anatomically modelled restoration should be reduced<br />
or prepare the already reduced restoration for v<strong>en</strong>eering.
C U T B A C K T E C H N I Q U E - P R E S S PA R T<br />
1 2<br />
3 4<br />
5<br />
26 | M E TA L<br />
Layering with <strong>Creation</strong> LF. Additional staining with <strong>Creation</strong><br />
CC.LF. Make Up Instant can be carried out and fired before building-up.<br />
Build-up the incisal sections and fire according to the<br />
firing chart. D<strong>en</strong>tine porcelain can be used to build up sections<br />
with insuffici<strong>en</strong>t d<strong>en</strong>tine. A further add-on firing is carried out if<br />
required. Small acc<strong>en</strong>tuating high-lights can still be added using<br />
<strong>Creation</strong> CC.LF. Make Up Instant stains. Firing is carried out on<br />
pins, but be careful that the shoulder does not touch the firing pin.<br />
Restoration can be glazed or polished.
C U T B A C K E A S Y T E C H N I Q U E<br />
1<br />
2<br />
3<br />
27 | M E TA L<br />
METAL FRAMEWORK AND OPAQUE<br />
Follow the instructions „Cut back technique“.<br />
WAXING-UP<br />
Full contour wax-up.<br />
SPRUEING - INVESTING - PRESSING<br />
Follow the instructions for „Cut back technique“.<br />
Select a transpar<strong>en</strong>t d<strong>en</strong>tine pellet (e.g. TD-A1).
CUT BACK EASY TECHNIQUE<br />
1<br />
3<br />
5<br />
28 | M E TA L<br />
2<br />
4<br />
C U T B A C K<br />
Reduce the d<strong>en</strong>tine only in the upper third to provide space for<br />
the corresponding <strong>en</strong>amel (e.g.: E-58 for A2).<br />
E N A M E L B U I L D - U P<br />
Build-up the incisal area with a small amount of the corresponding<br />
<strong>en</strong>amel. You can make a correction if necessary.<br />
FINISHING<br />
Cut the crowns and finish them using glaze powder.
STAINING POSTERIORS<br />
1<br />
4<br />
7<br />
29 | M E TA L<br />
2<br />
5<br />
3<br />
6<br />
Use <strong>Creation</strong> CC past or powder<br />
opaque. Select a transpar<strong>en</strong>t<br />
d<strong>en</strong>tine pellet (e. g.: TD-A1).<br />
Finish with <strong>Creation</strong> CC.LF.<br />
Make Up Instant stains.<br />
Firing: See firing chart (p. 16).
INJECTING<br />
KLEMA Press 100g Mould 200g Mould 300g Mould<br />
Stand-by Temperature 800 °C 800 °C 800 °C<br />
Sealing Time 00:00 min. 00:00 min. 00:00 min.<br />
Heat Rate 60 °C/min. 60 °C/min. 60 °C/min.<br />
Vacuum Start 800 °C 800 °C 800 °C<br />
Vacuum Hold 30:00 min. 30:00 min. 37:00 min.<br />
Vacuum Limit 730 mm 730 mm 730 mm<br />
Firing Temperature 930 °C 940 °C 975 °C<br />
Holding Time 20:00 min. 20:00 min. 25:00 min.<br />
Injection Temperature 930 °C 940 °C 975 °C<br />
Injection Time 10:00 min. 10:00 min. 12:00 min.<br />
These firing parameters repres<strong>en</strong>t standard values and have to be adjusted to respective situation.<br />
30 | LOW & M E TA L
C U T B A C K - C O M B I N AT I O N C H A R T<br />
VITA ® SHADE<br />
Shade A1 A2 A3 A3,5 A4 B1 B2 B3 B4 C1 C2 C3 C4 D2 D3 D4<br />
Pellet A1 A2 A3 A3,5 A4 B1 B2 B3 B4 C1 C2 C3 C4 D2 D3 D4<br />
Opaque A1 A2 A3 A3,5 A4 B1 B2 B3 B4 C1 C2 C3 C4 D2 D3 D4<br />
Enamel E58 E58 E59 E59 E60 E57 E59 E59 E59 E60 E59 E59 E60 E60 E59 E59<br />
Vita ® is a registered trademark of VITA Zahnfabrik H. Rauter GmbH & Co. KG, Bad Säcking<strong>en</strong>, Germany.<br />
BLEACH<br />
Shade A B B0<br />
Pellet BD-A BD-B BD-B0<br />
Opaque 0-AB 0-AB 0-AB<br />
Enamel S-AB S-AB S-AB<br />
31
CUT BACK EASY - COMBINATION CHART<br />
VITA ® SHADE<br />
Shade A1 A2 A3 A3,5 A4 B1 B2 B3 B4 C1 C2 C3 C4 D2 D3 D4<br />
Pellet TA1 TA2 TA3 TA3 TA3 TB1 TB2 TB3 TB3 TC1 TC2 TC2 TC2 TD2 TD2 TD2<br />
Opaque A1 A2 A3 A3,5 A4 B1 B2 B3 B4 C1 C2 C3 C4 D2 D3 D4<br />
Enamel E58 E58 E59 E59 E60 E57 E59 E59 E59 E60 E59 E59 E60 E60 E59 E59<br />
Stains - - - A A - - - B - - C C - D D<br />
Vita ® is a registered trademark of VITA Zahnfabrik H. Rauter GmbH & Co. KG, Bad Säcking<strong>en</strong>, Germany.<br />
B L E A C H<br />
Shade A B B0<br />
Pellet TBD-A TBD-B TBD-B0<br />
Opaque 0-AB 0-AB 0-AB<br />
Enamel S-AB S-AB S-AB<br />
Stains - - -<br />
32
S TA I N I N G P O S T E R I O R - C O M B I N AT I O N C H A R T<br />
VITA ® SHADE<br />
Shade A1 A2 A3 A3,5 A4 B1 B2 B3 B4 C1 C2 C3 C4 D2 D3 D4<br />
Pellet TA1 TA1 TA2 TA3 TA3 TB1 TB1 TB2 TB3 TC1 TC1 TC2 TC2 TD2 TD2 TD2<br />
Opaque A1 A3,5 A3,5 A3,5 A4 B1 B3 B3 B3 C1 C3 C3 C4 D2 D3 D4<br />
Stains A A A A A B B B B B B C C D D D<br />
Vita ® is a registered trademark of VITA Zahnfabrik H. Rauter GmbH & Co. KG, Bad Säcking<strong>en</strong>, Germany.<br />
B L E A C H<br />
Shade A B B0<br />
Pellet TBD-A TBD-B TBD-B0<br />
Opaque 0-AB 0-AB 0-AB<br />
Stains - - -<br />
33
P H Y S I C A L P R O P E R T I E S<br />
Properties Measure Value Norm<br />
Coeffici<strong>en</strong>t Thermal Expansion (25 ° – 500 °C) 10 -6 xK -1<br />
13,1 ± 0,3<br />
Glass Transition Temperature °C 585 ± 10<br />
Solubility μg/cm 2<br />
20 max. 100<br />
Flexural Str<strong>en</strong>gth MPa (Nmm 2 ) 115 min. 100<br />
All tested materials conform to EN ISO 9693:2000. The technical and physical values quoted relate to samples produced in-house and to our own measuring<br />
instrum<strong>en</strong>ts.<br />
34 | L O W & M E TA L
36<br />
Distributor<br />
<strong>Creation</strong> <strong>Willi</strong> <strong>Geller</strong> International GmbH<br />
Koblacherstraße 3, 6812 Meining<strong>en</strong>, Austria<br />
Tel. +43 (0)5522 76784<br />
Fax. +43 (0)5522 73699<br />
info@creation-willigeller.com<br />
www.creation-willigeller.com<br />
Technical inquiries:<br />
technic@creation-willigeller.com<br />
Errors and printing errors exepted.<br />
Subject to changes at any time.<br />
Manufacturer<br />
KLEMA D<strong>en</strong>talprodukte GmbH<br />
Koblacherstr. 3a, 6812 Meining<strong>en</strong>, Austria<br />
0483<br />
910161 03/09<br />
© <strong>Creation</strong> <strong>Willi</strong> <strong>Geller</strong> International GmbH