instructions for use creation press-ceramics zirconium oxide
instructions for use creation press-ceramics zirconium oxide
instructions for use creation press-ceramics zirconium oxide

You also want an ePaper? Increase the reach of your titles
YUMPU automatically turns print PDFs into web optimized ePapers that Google loves.
CREATION WILLI GELLER INTERNATIONAL – SIMPLY BRILLIANT<br />
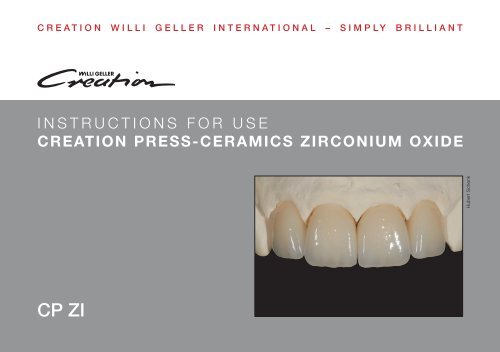
INSTRUCTIONS FOR USE<br />
CREATION PRESS-CERAMICS ZIRCONIUM OXIDE<br />
CP ZI<br />
1<br />
Hubert Schenk
2<br />
CONTENT<br />
Introduction 3<br />
Frame 4<br />
Frame Shade 5<br />
Cut Back Technique 6-11<br />
Injecting 8<br />
Cut Back Easy Technique 12<br />
Staining Posterior 13<br />
Firing Instructions 14<br />
Colour Chart 15<br />
Combination Charts 16-18<br />
Physical Properties 19<br />
Imprint<br />
Editor: Creation Willi Geller International AG<br />
Content: ZTM Patrick Boche, ZTM Oliver Heinzle<br />
Picture credits: Hubert Schenk 1/3, ZTM Oliver Heinzle 4/5/6/7/8/9/10/11/12/13<br />
Layout: hellblau. visuelle kommunikation
3<br />
INTRODUCTION<br />
It is possible with Creation CP ZI to over<strong>press</strong> <strong>zirconium</strong> <strong>oxide</strong><br />
frame works with a special <strong>press</strong>able ceramic. Both the build-up<br />
and staining technique can be <strong>use</strong>d to do this. This technique<br />
makes efficient yet extremely aesthetic fabrication of <strong>zirconium</strong>supported<br />
restorations possible. Thus CAD/CAM technology is<br />
combined with the advantages of <strong>press</strong>able ceramic in a unique<br />
way.
FRAME<br />
4<br />
Well equipped <strong>for</strong> the future: Creation CP ZI is a <strong>press</strong>able <strong>for</strong><br />
over<strong>press</strong> all kinds of <strong>zirconium</strong> <strong>oxide</strong> frameworks – whether<br />
sintered or HIP-ed.<br />
PREPARATION OF FRAMEWORK<br />
Firstly work the milled or sintered <strong>zirconium</strong> <strong>oxide</strong> framework<br />
with suitable instruments. The minimum thickness <strong>for</strong> frameworks<br />
and the thickness of connectors stipulated by the manufacturer<br />
should strictly observed.
FRAME SHADE<br />
5<br />
It’s recommended to <strong>use</strong> the Creation ZI Frame Shades <strong>for</strong><br />
white frames. The mixing of the Frame Shades is recomended<br />
with modelling liquid.<br />
The four Frame Shades FS-1 to FS-4 were developed to reduce<br />
the high brightness of the framework <strong>zirconium</strong> <strong>oxide</strong>. They are<br />
perfectly matched to the different colour groups from the Vita ®<br />
Classic shade selection system and rein<strong>for</strong>ce the natural, fluorescent<br />
effect of the eventual restoration.<br />
Apply the frame shade thinly and evenly to the <strong>zirconium</strong> <strong>oxide</strong><br />
framework, then fire under vacuum at 900 °C.
CUT BACK TECHNIQUE – WAXING-UP<br />
6<br />
MODELLATION<br />
The model is isolated and then the framework is put on the<br />
model without <strong>press</strong>ure. According to the technique <strong>use</strong>d you<br />
can either wax up completely or reduce.<br />
Important: Check internally <strong>for</strong> wax, keeping wax free!<br />
SPRUEING<br />
The object is sprued directly. The wax wire should be 3 mm in<br />
diameter, 5 – 7 mm long and should not taper towards the pattern.<br />
The pattern is waxed onto the crucible <strong>for</strong>mer in a central position.<br />
PELLET<br />
Use a dentine pellet (e.g.: D-A2).<br />
Note: Maximum of 0,6 g wax weight <strong>for</strong> 1 pellet 2 g<br />
Maximum of 1,4 g wax weight <strong>for</strong> 2 pellets 2 g<br />
Maximum of 2,8 g wax weight with 2 pellets 5 g
INVESTING<br />
7<br />
Push the silicon ring on the crucible <strong>for</strong>mer. Fill to just below the<br />
edge of the silicon ring with special investment <strong>for</strong> injection-moulded<br />
<strong>ceramics</strong>. Put on the mould base <strong>for</strong>mer turning gently (investment<br />
should exude easily through the opening).<br />
After the investment has set, turn the mould base <strong>for</strong>mer and<br />
mould <strong>for</strong>mer carefully to remove them. Smooth the underside<br />
with a plaster knife. Follow the directions <strong>for</strong> preheating in the<br />
<strong>instructions</strong> <strong>for</strong> <strong>use</strong> <strong>for</strong> the investment.<br />
Important: Do not preheat the pellets!<br />
Preheat the alux plunger!<br />
Do not preheat the one-way plunger!
INJECTING<br />
These firing parameters represent standard values and have to be adjusted to respective situation.<br />
8<br />
KLEMA Press 100g Mould 200g Mould 300g Mould<br />
Stand-by Temperature 800 °C 800 °C 800 °C<br />
Sealing Time 00:00 min. 00:00 min. 00:00 min.<br />
Heat Rate 60 °C/min. 60 °C/min. 60 °C/min.<br />
Vacuum Start 800 °C 800 °C 800 °C<br />
Vacuum Hold 30:00 min. 32:00 min. 37:00 min.<br />
Vacuum Limit 730 mm 730 mm 730 mm<br />
Firing Temperature 950 °C 980 °C 1.010 °C<br />
Holding Time 20:00 min. 20:00 min. 20:00 min.<br />
Injection Temperature 950 °C 980 °C 1.010 °C<br />
Injection Time 10:00 min. 12:00 min. 17:00 min.
DEVESTING<br />
9<br />
Mark the length of the plunger on the mould and separate along<br />
the length of the mark. Then carefully break apart the sections of<br />
the mould. The <strong>press</strong>ings should be roughly blasted with glass<br />
beads (50 µm) at 4 bars with a pen blaster, then carefully with<br />
glass beads (50 µm) at 2 bars.<br />
Do not <strong>use</strong> aluminium <strong>oxide</strong> <strong>for</strong> blasting!
CUT BACK TECHNIQUE – FINISHING<br />
10<br />
Cut off the sprues carefully using a suitable cut-off-disc. Work<br />
with low <strong>press</strong>ure and low r.p.m. (revolutions per minute). After<br />
separating, the work is carefully fitted onto the die.<br />
Caution in the area <strong>zirconium</strong> <strong>oxide</strong>/<strong>press</strong> ceramic: Intense heat<br />
can ca<strong>use</strong> breaks!<br />
The fully anatomically modelled restoration should be reduced<br />
or prepare the already reduced restoration <strong>for</strong> veneering.
CUT BACK TECHNIQUE – BUILD-UP<br />
3a<br />
1 2<br />
11<br />
3b<br />
4 5<br />
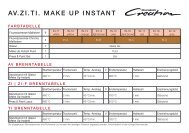
Use Creation ZI or ZI-F <strong>for</strong> the build-up. Additional staining with<br />
Creation AV.ZI.TI. Make Up Instant can be carried out and fired<br />
be<strong>for</strong>e building-up. Build up the incisal sections and fire according<br />
to the firing chart. Dentine porcelain can be <strong>use</strong>d to build up<br />
sections with insufficient dentine. A further add-on firing is carried<br />
out if required. Small accentuating highlights can still be added<br />
using stains. Firing is carried out on pins, but be careful that<br />
the shoulder doesn’t touch the firing pin. Restoration can be<br />
glazed or polished.
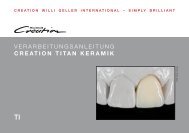
CUT BACK EASY TECHNIQUE<br />
12<br />
1. F R A M E S H A D E<br />
2. M O D E L L AT I O N<br />
Full contour wax-up<br />
3. S P R U E I N G – I N V E S T I N G – P R E S S I N G<br />
Follow the <strong>instructions</strong> <strong>for</strong> cut back technique!<br />
Select a transparent dentine pellet (e.g.: TD-A1).<br />
4. C U T B A C K<br />
Reduce the dentine only in the upper third to provide space<br />
<strong>for</strong> the corresponding enamel (e.g.: E-58 <strong>for</strong> A2).<br />
5. E N A M E L B U I L D - U P<br />
Build up the incisal area with a small amount of the corresponding<br />
enamel.You can make a correction if necessary.<br />
6. F I N I S H I N G<br />
Grind the crowns and finish them using glaze powder.
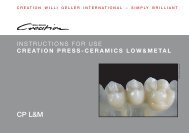
STAINING POSTERIOR<br />
1 2 3<br />
4 5 6<br />
13<br />
Select a transparent dentine<br />
pellet (e.g.: TD-A1).<br />
Finish with Creation AV.ZI.TI.<br />
Make Up Instant stains.<br />
Firing: See firing chart<br />
staining technique!
FIRING INSTRUCTIONS<br />
STAINING TECHNIQUE<br />
Start Temp. Drying Time Raise of Temp. V 1 st Firing 2 nd Firing Holding Time<br />
Stains 450 °C 4 min. 45 °C/min. - 810 °C 810 °C 1 min.<br />
Glaze 450 °C 4 min. 45 °C/min. - 800 °C 800 °C 1 min.<br />
BUILD-UP TECHNIQUE<br />
14<br />
Start Temp. Drying Time Raise of Temp. V Final Temp. Holding Time<br />
Frame Shade 450 °C 2 min. 55 °C/min. + 900 °C 1 min.<br />
1 st Dentine Firing 450 °C 6 min. 45 °C/min. + 810 °C 1 min.<br />
2 nd Dentine Firing 450 °C 6 min. 45 °C/min. + 800 °C 1 min.<br />
Glanzbrand/Glaze Firing 480 °C 2 min. 45 °C/min. - 820 °C -<br />
Glaze Firing with Glaze Powder 480 °C 2 min. 45 °C/min. - 790 °C 1 min.<br />
These firing parameters represent standard values and have to be adjusted to respective situation. Decisive is the firing result.
COLOUR CHART<br />
DENTINE PELLETS 2g<br />
Vita ® Shade A1 A2 A3 A3,5 A4 B1 B2 B3 B4 C1 C2 C3 C4 D2 D3 D4<br />
Dentine 9 A1 A2 A3 - - B1 B2 B3 - C1 C2 - - D2 - -<br />
Transparent Dentine 9 TA1 TA2 TA3 - - TB1 TB2 TB3 - TC1 TC2 - - TD2 - -<br />
Bleach Dentine 3 BD-A BD-B BD-B0<br />
Transparent Bleach Dentine 3 TBD-A TBD-B TBD-B0<br />
DENTINE PELLETS 5g<br />
Vita ® Shade A1 A2 A3 A3,5 A4 B1 B2 B3 B4 C1 C2 C3 C4 D2 D3 D4<br />
Dentine 9 A1 A2 A3 - - B1 B2 B3 - C1 C2 - - D2 - -<br />
Transparent Dentine 9 TA1 TA2 TA3 - - TB1 TB2 TB3 - TC1 TC2 - - TD2 - -<br />
Bleach Dentine 3 BD-A BD-B BD-B0<br />
Transparent Bleach Dentine 3 TBD-A TBD-B TBD-B0<br />
Vita ® is a registered trademark of VITA Zahnfabrik H. Rauter GmbH & Co. KG, Bad Säckingen, Germany.<br />
15
C U T B A C K – C O M B I N AT I O N C H A R T<br />
VITA ® SHADE<br />
Shade A1 A2 A3 A3,5 A4 B1 B2 B3 B4 C1 C2 C3 C4 D2 D3 D4<br />
Frame Shade FS-1 FS-1 FS-2 FS-2 FS-4 FS-1 FS-1 FS-2 FS-4 FS-1 FS-3 FS-3 FS-4 FS-3 FS-3 FS-3<br />
Pellet A1 A2 A3 A3 A3 B1 B2 B3 B3 C1 C2 C2 C2 D2 D2 D2<br />
Enamel E58 E58 E59 E59 E60 E57 E59 E59 E59 E60 E59 E59 E60 E60 E59 E59<br />
Stains - - - A A - - - B - - C C - D D<br />
Vita ® is a registered trademark of VITA Zahnfabrik H. Rauter GmbH & Co. KG, Bad Säckingen, Germany.<br />
BLEACH<br />
Shade A B B0<br />
Frame Shade - - -<br />
Pellet BD-A BD-B BD-BO<br />
Enamel S-AB S-AB S-AB<br />
Stains - - -<br />
16
C U T B A C K E A S Y – C O M B I N AT I O N C H A R T<br />
VITA ® SHADE<br />
Shade A1 A2 A3 A3,5 A4 B1 B2 B3 B4 C1 C2 C3 C4 D2 D3 D4<br />
Frame Shade FS-1 FS-1 FS-2 FS-2 FS-4 FS-1 FS-1 FS-2 FS-4 FS-1 FS-3 FS-3 FS-4 FS-3 FS-3 FS-3<br />
Pellet TA1 TA2 TA3 TA3 TA3 TAB1 TB2 TB3 TB3 TC1 TC2 TC2 TC2 TD2 TD2 TD2<br />
Enamel E58 E58 E59 E59 E60 E57 E59 E59 E59 E60 E59 E59 E60 E60 E59 E59<br />
Stains - - - A A - - - B - - C C - D D<br />
Vita ® is a registered trademark of VITA Zahnfabrik H. Rauter GmbH & Co. KG, Bad Säckingen, Germany.<br />
BLEACH<br />
Shade A B B0<br />
Frame Shade - - -<br />
Pellet TBD-A TBD-B TBD-B0<br />
Enamel S-AB S-AB S-AB<br />
Stains - - -<br />
17
S TA I N I N G P O S T E R I O R – C O M B I N AT I O N C H A R T<br />
VITA ® SHADE<br />
Shade A1 A2 A3 A3,5 A4 B1 B2 B3 B4 C1 C2 C3 C4 D2 D3 D4<br />
Frame Shade FS-1 FS-1 FS-2 FS-2 FS-4 FS-1 FS-1 FS-2 FS-4 FS-1 FS-3 FS-3 FS-4 FS-3 FS-3 FS-3<br />
Pellet TA1 TA1 TA1 TA2 TA3 TB1 TB1 TB2 TB2 TC1 TC1 TC1 TC2 TD2 TD2 TD2<br />
Stains A A A A A B B B B B B C C D D D<br />
Vita ® is a registered trademark of VITA Zahnfabrik H. Rauter GmbH & Co. KG, Bad Säckingen, Germany.<br />
BLEACH<br />
Shade A B B0<br />
Frame Shade - - -<br />
Pellet TBD-A TBD-B TBD-B0<br />
Stains - - -<br />
18
PHYSICAL PROPERTIES<br />
Properties Measure Value<br />
Coefficient Thermal Expansion (25 ° – 500 °C) 10 -6 xK -1<br />
19<br />
<strong>press</strong>ed 9,8 ± 0,3<br />
Glass Transition Temperature °C 590 ± 10<br />
Solubility µg/cm 2<br />
Flexural Strength MPa (Nmm 2 ) > 90<br />
All tested materials con<strong>for</strong>m to EN ISO 9693:2000.<br />
The technical and physical values quoted relate to samples produced in-ho<strong>use</strong> and to our own measuring instruments.<br />
15
Distributor<br />
Creation Willi Geller International GmbH<br />
Koblacherstraße 3, 6812 Meiningen, Austria<br />
Tel. +43 (0)5522 76784<br />
Fax. +43 (0)5522 73699<br />
info@<strong>creation</strong>-willigeller.com<br />
www.<strong>creation</strong>-willigeller.com<br />
Technical inquiries:<br />
technic@<strong>creation</strong>-willigeller.com<br />
Errors and printing errors exepted.<br />
Subject to changes at any time.<br />
Manufacturer<br />
KLEMA Dentalprodukte GmbH<br />
Koblacherstr. 3a, 6812 Meiningen, Austria<br />
0483<br />
910171 03/09<br />
© Creation Willi Geller International GmbH