Nutech Decrabond & Decramastic Guidelines - Roof Coatings
Nutech Decrabond & Decramastic Guidelines - Roof Coatings
Nutech Decrabond & Decramastic Guidelines - Roof Coatings

You also want an ePaper? Increase the reach of your titles
YUMPU automatically turns print PDFs into web optimized ePapers that Google loves.
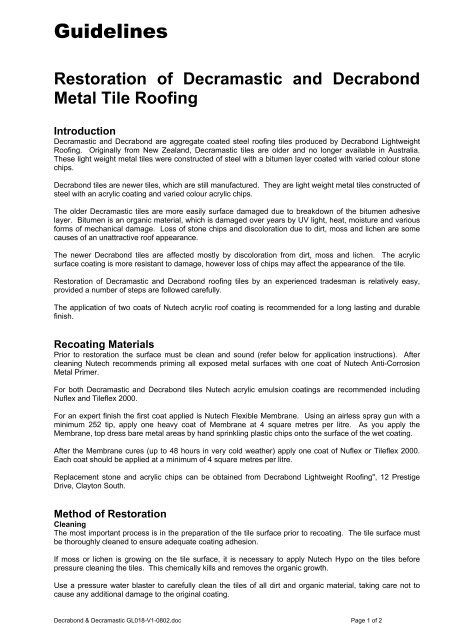
<strong>Guidelines</strong><br />
Restoration of <strong>Decramastic</strong> and <strong>Decrabond</strong><br />
Metal Tile <strong>Roof</strong>ing<br />
Introduction<br />
<strong>Decramastic</strong> and <strong>Decrabond</strong> are aggregate coated steel roofing tiles produced by <strong>Decrabond</strong> Lightweight<br />
<strong>Roof</strong>ing. Originally from New Zealand, <strong>Decramastic</strong> tiles are older and no longer available in Australia.<br />
These light weight metal tiles were constructed of steel with a bitumen layer coated with varied colour stone<br />
chips.<br />
<strong>Decrabond</strong> tiles are newer tiles, which are still manufactured. They are light weight metal tiles constructed of<br />
steel with an acrylic coating and varied colour acrylic chips.<br />
The older <strong>Decramastic</strong> tiles are more easily surface damaged due to breakdown of the bitumen adhesive<br />
layer. Bitumen is an organic material, which is damaged over years by UV light, heat, moisture and various<br />
forms of mechanical damage. Loss of stone chips and discoloration due to dirt, moss and lichen are some<br />
causes of an unattractive roof appearance.<br />
The newer <strong>Decrabond</strong> tiles are affected mostly by discoloration from dirt, moss and lichen. The acrylic<br />
surface coating is more resistant to damage, however loss of chips may affect the appearance of the tile.<br />
Restoration of <strong>Decramastic</strong> and <strong>Decrabond</strong> roofing tiles by an experienced tradesman is relatively easy,<br />
provided a number of steps are followed carefully.<br />
The application of two coats of <strong>Nutech</strong> acrylic roof coating is recommended for a long lasting and durable<br />
finish.<br />
Recoating Materials<br />
Prior to restoration the surface must be clean and sound (refer below for application instructions). After<br />
cleaning <strong>Nutech</strong> recommends priming all exposed metal surfaces with one coat of <strong>Nutech</strong> Anti-Corrosion<br />
Metal Primer.<br />
For both <strong>Decramastic</strong> and <strong>Decrabond</strong> tiles <strong>Nutech</strong> acrylic emulsion coatings are recommended including<br />
Nuflex and Tileflex 2000.<br />
For an expert finish the first coat applied is <strong>Nutech</strong> Flexible Membrane. Using an airless spray gun with a<br />
minimum 252 tip, apply one heavy coat of Membrane at 4 square metres per litre. As you apply the<br />
Membrane, top dress bare metal areas by hand sprinkling plastic chips onto the surface of the wet coating.<br />
After the Membrane cures (up to 48 hours in very cold weather) apply one coat of Nuflex or Tileflex 2000.<br />
Each coat should be applied at a minimum of 4 square metres per litre.<br />
Replacement stone and acrylic chips can be obtained from <strong>Decrabond</strong> Lightweight <strong>Roof</strong>ing", 12 Prestige<br />
Drive, Clayton South.<br />
Method of Restoration<br />
Cleaning<br />
The most important process is in the preparation of the tile surface prior to recoating. The tile surface must<br />
be thoroughly cleaned to ensure adequate coating adhesion.<br />
If moss or lichen is growing on the tile surface, it is necessary to apply <strong>Nutech</strong> Hypo on the tiles before<br />
pressure cleaning the tiles. This chemically kills and removes the organic growth.<br />
Use a pressure water blaster to carefully clean the tiles of all dirt and organic material, taking care not to<br />
cause any additional damage to the original coating.<br />
<strong>Decrabond</strong> & <strong>Decramastic</strong> GL018-V1-0802.doc Page 1 of 2
Warning<br />
Warning: If too much water pressure is applied, the stone or acrylic chips can be stripped from the tile<br />
surface increasing the cost of restoration.<br />
It is important to only stand on the tile valley. Do not stand on the tile ridge to avoid bending or damage the<br />
metal tile profile. If tiles are already damaged or are inadvertently damaged during restoration, a small pinch<br />
bar can be used to straighten the metal tile sheets.<br />
First Coat<br />
A coloured acrylic Membrane coating is applied to the roof using a suitable spray gun, providing a minimum<br />
wet thickness of approximately 150 microns per coat. The best finish is achieved with an airless spray gun.<br />
Using a horizontal spray technique apply one coat of an acrylic roof coating over the whole exposed tile<br />
surface. The recommended <strong>Nutech</strong> coating is Flexible Membrane applied at 4 square metres per litre.<br />
Where stone or acrylic chips are missing the tile surface will be smooth and will appear different to the rough<br />
aggregated surface.<br />
After coating the surface sprinkle a sufficient quantity of the supplied chips (stone or acrylic as original) on<br />
any smooth areas to match the original aggregate appearance. The chips will adhere to the wet coating.<br />
If a hopper spray gun is used the acrylic chips can be pre-mixed in the Membrane coating using a low speed<br />
drill mixer. The addition rate for the acrylic chips will vary subject to the appearance of the existing roof. A<br />
suggested rate is 2 kgs of acrylic chips per 20 litres.<br />
Second Coat<br />
The final coat should be applied in a horizontal technique, carefully coating any exposed chips applied after<br />
the first coat. The application of one coat at 4 square metres per litre should achieve a finished coating with<br />
a total dry film thickness of not less than 95 microns.<br />
A matt coat of Nuflex or Tileflex 2000 is recommended. This will achieve a flat even colour, texture and<br />
appearance over the whole roof surface. Standard gloss Nuflex or Tileflex 2000 can be used, however the<br />
appearance may vary subject to gloss and texture appearance.<br />
<strong>Decrabond</strong> & <strong>Decramastic</strong> GL018-V1-0802.doc Page 2 of 2