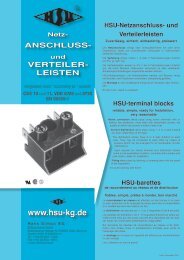
All-In-One Netzanschlussleisten
All-In-One Netzanschlussleisten
All-In-One Netzanschlussleisten

Create successful ePaper yourself
Turn your PDF publications into a flip-book with our unique Google optimized e-Paper software.
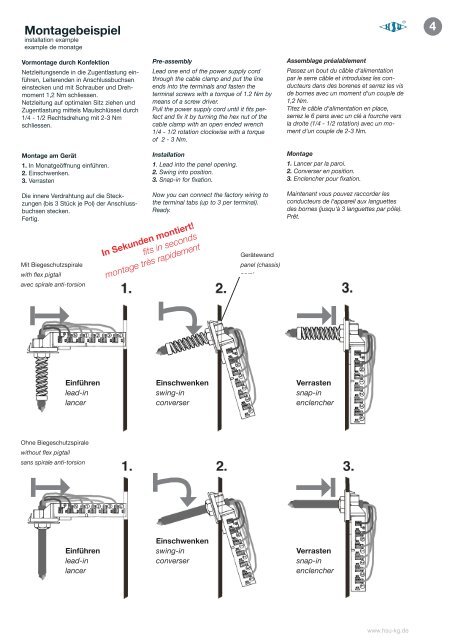
Montagebeispiel<br />
installation example<br />
example de monatge<br />
Vormontage durch Konfektion<br />
Netzleitungsende in die Zugentlastung einführen,<br />
Leiterenden in Anschlussbuchsen<br />
einstecken und mit Schrauber und Drehmoment<br />
1,2 Nm schliessen.<br />
Netzleitung auf optimalen Sitz ziehen und<br />
Zugentlastung mittels Maulschlüssel durch<br />
1/4 - 1/2 Rechtsdrehung mit 2-3 Nm<br />
schliessen.<br />
Montage am Gerät<br />
1. <strong>In</strong> Monatgeöffnung einführen.<br />
2. Einschwenken.<br />
3. Verrasten<br />
Die innere Verdrahtung auf die Steckzungen<br />
(bis 3 Stück je Pol) der Anschlussbuchsen<br />
stecken.<br />
Fertig.<br />
Mit Biegeschutzspirale<br />
with flex pigtail<br />
avec spirale anti-torsion<br />
Ohne Biegeschutzspirale<br />
without flex pigtail<br />
Einführen<br />
lead-in<br />
lancer<br />
sans spirale anti-torsion<br />
Einführen<br />
lead-in<br />
lancer<br />
Pre-assembly<br />
Lead one end of the power supply cord<br />
through the cable clamp and put the line<br />
ends into the terminals and fasten the<br />
terminal screws with a torrque of 1.2 Nm by<br />
means of a screw driver.<br />
Pull the power supply cord until it fits perfect<br />
and fix it by turning the hex nut of the<br />
cable clamp with an open ended wrench<br />
1/4 - 1/2 rotation clockwise with a torque<br />
of 2 - 3 Nm.<br />
<strong>In</strong>stallation<br />
1. Lead into the panel opening.<br />
2. Swing into position.<br />
3. Snap-in for fixation.<br />
Now you can connect the factory wiring to<br />
the terminal tabs (up to 3 per terminal).<br />
Ready.<br />
<strong>In</strong> Sekunden montiert!<br />
fits in seconds<br />
montage très rapidement<br />
Einschwenken<br />
swing-in<br />
converser<br />
Einschwenken<br />
swing-in<br />
converser<br />
Gerätewand<br />
panel (chassis)<br />
paroi<br />
Assemblage préalablement<br />
Passez un bout du câble d‘alimentation<br />
par le serre câble et introduisez les conducteurs<br />
dans des borenes et serrez les vis<br />
de bornes avec un moment d‘un couple de<br />
1,2 Nm.<br />
Titez le câble d‘alimentation en place,<br />
serrez le 6 pans avec un clé a fourche vers<br />
la droite (1/4 - 1/2 rotation) avec un moment<br />
d‘un couple de 2-3 Nm.<br />
Montage<br />
1. Lancer par la paroi.<br />
2. Converser en position.<br />
3. Enclencher pour fixation.<br />
Maintenant vous pouvez raccorder les<br />
conducteurs de l‘appareil aux languettes<br />
des bornes (jusqu‘à 3 languettes par pôle).<br />
Prêt.<br />
Verrasten<br />
snap-in<br />
enclencher<br />
Verrasten<br />
snap-in<br />
enclencher<br />
www.hsu-kg.de<br />
4