

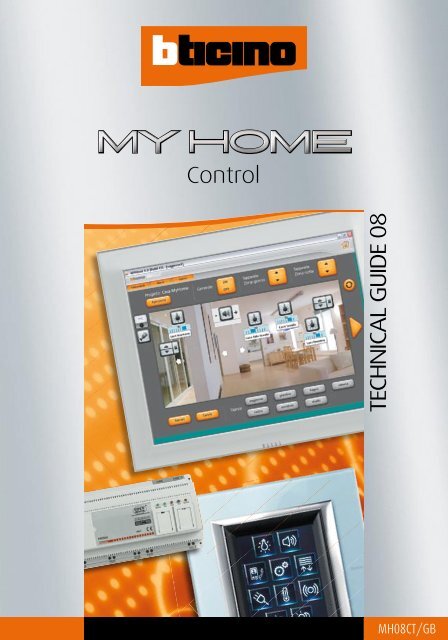
TECHNICAL GUIDE 08 Control - BTicino - Online Catalog
TECHNICAL GUIDE 08 Control - BTicino - Online Catalog
TECHNICAL GUIDE 08 Control - BTicino - Online Catalog

Create successful ePaper yourself
Turn your PDF publications into a flip-book with our unique Google optimized e-Paper software.
<strong>Control</strong><br />
<strong>TECHNICAL</strong> <strong>GUIDE</strong> <strong>08</strong><br />
MH<strong>08</strong>CT/GB
<strong>BTicino</strong> answers<br />
For all the technical or commercial<br />
information go to the <strong>BTicino</strong> sites.<br />
To send a free fax<br />
forward it to<br />
www.bticino.it<br />
www.bticino.com<br />
E-mail:<br />
bticino.international@bticino.it<br />
+39.02.34807<strong>08</strong>
CONTENTS<br />
Numeric index 2<br />
MY HOME general features 3<br />
General features 3<br />
INTRODUCTION TO THE CONTROL 12<br />
Introduction to the local control 12<br />
Introduction to the remote control 16<br />
MY HOME LOCAL CONTROL 18<br />
General features 20<br />
<strong>Catalog</strong>ue 32<br />
General rules for installation 35<br />
Wiring diagrams 44<br />
Configuration/Programmation 48<br />
Technical features 90<br />
Dimensional data 102<br />
MY HOME REMOTE CONTROL 104<br />
General features 106<br />
<strong>Catalog</strong>ue 126<br />
General rules for installation 128<br />
Wiring diagrams 134<br />
Programmation 137<br />
Technical features 142<br />
Dimensional data 149<br />
CONTENTS<br />
MY HOME CONTROL <strong>TECHNICAL</strong> <strong>GUIDE</strong><br />
1
2<br />
Numeric<br />
index<br />
<strong>Catalog</strong>ue Configuration Techn. features<br />
Item page page page<br />
3477 70<br />
344162 33 89 100<br />
344172 34 88 99<br />
346000 34<br />
349210 33<br />
349211 33<br />
349212 33<br />
349310 33 86 97<br />
349311 33 87 98<br />
349312 33 87 98<br />
349319 33<br />
392100 34<br />
3500GSM 127 140 143<br />
3500N 127 140 143<br />
AM5831/2 32 57<br />
AM5832/2 32 60<br />
AM5832/3 32 61<br />
AM5834 66<br />
C9450 126 148<br />
C9455 126 147<br />
F420 34 74<br />
F422 80 91<br />
F428 70<br />
F452 34,126 78,138 101,143<br />
F453AV 34,126 78,137 101,142<br />
F461/2 127 146<br />
F462 127 145<br />
H4651/2 32 57<br />
H4652/2 32 60<br />
H4652/3 32 61<br />
H4684 33 77 90<br />
H4687 34<br />
HC4563 32 64<br />
HC4653/2 32 62<br />
HC4653/3 32 62<br />
HC4654 66<br />
HC4680 32 77<br />
HS4563 32 64<br />
HS4653/2 32 62<br />
HS4653/3 32 62<br />
HS4654 66<br />
HS4680 32 75<br />
L4563 32 64<br />
L4651/2 32 57<br />
L4652/2 32 60<br />
L4652/3 32 61<br />
L4654N 66<br />
L4680 32 75<br />
L4684 33 72 90<br />
MH200 34 76 92<br />
MH300 126 139<br />
MH301 126 139<br />
CaTalOgO<br />
NUMERIC INDEX<br />
<strong>Catalog</strong>ue Configuration Techn. features<br />
Item page page page<br />
MHVISUAL 34 79<br />
N4563 32 64<br />
N4654N 66<br />
N4680 32 75<br />
NT4563 32 64<br />
NT4654N 66<br />
NT4680 32 75<br />
<strong>Catalog</strong>ue Configuration Techn. features<br />
Item page page page
Item<br />
Code Page<br />
Item<br />
Code Code Page Page<br />
MY HOME<br />
gENERal FEaTURES<br />
Item<br />
Code Page Page<br />
MY HOME CONTROL <strong>TECHNICAL</strong> <strong>GUIDE</strong><br />
3
MY HOME<br />
The home as you want it<br />
My HoME is a home automation system which offers<br />
state-of-the-art solutions, which are in increasing<br />
demand in the home and in the service sector.<br />
It offers all the home automation functions and<br />
applications concerning comfort, safety, energy<br />
saving, communication and control and is available in<br />
AXoLUTE, LIVING, LIGHT, LIGHT TECH and MÀTIX series.<br />
sAVING<br />
• Temperature control<br />
• Energy management<br />
• Activating the load<br />
timetable<br />
COMMUNICATION<br />
• 2 wire digital door<br />
entry and video door<br />
entry systems<br />
LOCAL CONTROL<br />
• SCENARy ToUCH<br />
• ToUCH SCREEN<br />
• VIDEo ToUCH SCREEN<br />
4 MY HOME - CONTROl<br />
A common feature of all the My HoME devices is that<br />
they use the same system technology, based on the<br />
digital bus, so that the various system components<br />
can be combined as the customer chooses and<br />
requires.<br />
COMFORT<br />
• Sound system<br />
• Automation of lights and scenarios<br />
• Automation of shutters<br />
• Automatic switchboard rearming<br />
sAFETY<br />
• Burglar-alarm<br />
• Remote assistance<br />
• Technical alarms<br />
• Home CCTV<br />
REMOTE CONTROL<br />
• Web server (audio/video)<br />
• Burglar-alarm control unit<br />
with Dialling device<br />
• Telephone switchboard<br />
• GSM
The installation modularity and functional integration<br />
of the various devices also allows optimisation of<br />
costs, as the user can select which applications he<br />
wants to adopt now and which he will choose in the<br />
future.<br />
www<br />
My HoME can, moreover, communicate with the<br />
outside world by means of special devices which<br />
interact with the home through fixed-line telephones<br />
and mobile phones and/or any Personal Computer<br />
via local network or Internet.<br />
PERsONAL COMPUTER<br />
HAND-HELD COMPUTER<br />
MOBILE PHONE<br />
FIXED-LINE TELEPHONE<br />
gENERal FEaTURES 5<br />
MY HOME CONTROL <strong>TECHNICAL</strong> <strong>GUIDE</strong>
MY HOME<br />
Totally free to choose the control<br />
My HoME brings you the maximum choice in selecting<br />
the control, thus enabling you to manage your own home<br />
■ BAsIC CONTROL<br />
Enabling and adjusting<br />
a single function with:<br />
• standard controls<br />
• infrared controls<br />
• touch controls<br />
6 MY HOME - CONTROl<br />
automation system; from simple controls to controls for<br />
rooms, scenarios and local and remote monitoring.<br />
■ ROOM CONTROL<br />
Colour Touch Screen:<br />
• customizable icons<br />
• control of all functions<br />
of a single room<br />
Standard control Touch control Infrared control with<br />
Burglar-alarm detector<br />
Colour Touch Screen<br />
■ sCENARIO CONTROL<br />
The scenarios, complete with all the My HoME functions, are<br />
saved in the scenario module and can be called by various<br />
devices depending on the user’s requirements.<br />
Touch Screen<br />
Other devices<br />
Scenario<br />
module<br />
Scenario<br />
control<br />
Standard<br />
control
■ LOCAL AND REMOTE MONITORING CONTROL<br />
• control of all system functions<br />
• many customization possibilities<br />
• simple and intuitive interface thanks to the<br />
use of sounds and images via the VIDEo<br />
STATIoN, VIDEo DISPLAy, VIDEo ToUCH<br />
SCREEN and PC with Internet.<br />
VIDEO TOUCH SCREEN with MHVISUAL program<br />
VIDEO DISPLAY<br />
WEB page to control with Internet<br />
VIDEO STATION<br />
gENERal FEaTURES 7<br />
MY HOME CONTROL <strong>TECHNICAL</strong> <strong>GUIDE</strong>
MY HOME<br />
The home as you want it<br />
The My HoME system, also available in MÀTIX and<br />
AXoLUTE series, can cover all the home automation<br />
solutions associated with comfort, security, saving,<br />
communication and control.<br />
Advanced AXoLUTE devices such as the colour Touch<br />
Screen, the VIDEoDISPLAy and the VIDEoSTATIoN, add<br />
images to the control, thus providing the user with a<br />
simpler and more intuitive interface.<br />
The Bus technology and the confi guration of the<br />
products have not changed and are common to all<br />
My HoME systems achieved so far with the LIVING,<br />
LIGHT and LIGHT TECH series.<br />
MÀTIX<br />
8 MY HOME - CONTROl<br />
LIVING TOUCH SCREEN<br />
LIGHT TECH LIGHT
LIGHT flat radio control<br />
AXOLUTE VIDEO STATION<br />
LIVING<br />
AXOLUTE<br />
gENERal FEaTURES 9<br />
MY HOME CONTROL <strong>TECHNICAL</strong> <strong>GUIDE</strong>
The available<br />
functions<br />
10 MY HOME - CONTROl<br />
COMFORT - AUTOMATION<br />
MOTORISED ROllINg<br />
SHUTTERS<br />
When you wake up you can<br />
control the movement of<br />
one or more rolling shutters<br />
to give more light in the<br />
home effortlessly.<br />
COMFORT - sOUND sYsTEM<br />
SOUND SYSTEM<br />
aMplIFIER<br />
With a simple movement you<br />
can switch the radio on from<br />
anywhere in the home and listen<br />
to your favourite program.<br />
sAFETY<br />
bURglaR-alaRM<br />
CONTROl UNIT<br />
you can monitor the<br />
whole house or just<br />
one particular room.<br />
gaS-STOp DETECTOR<br />
Just a small leak and the<br />
solenoid valve stops the<br />
gas escaping.
��������������������������������������<br />
��������������� ���������<br />
sWITCHBOARD<br />
�������<br />
MY HOME<br />
FlaTWall<br />
Solution for the<br />
centralisation of<br />
home automation<br />
devices.<br />
REMOTE CONTROL<br />
������������������<br />
���������<br />
��������<br />
�������������������<br />
���������<br />
WEb SERvER<br />
By means of<br />
the computer<br />
you can control<br />
and activate<br />
your home even<br />
when you are<br />
away.<br />
sAVING - TEMPERATURE CONTROL<br />
TEMpERaTURE SENSOR<br />
you can set different<br />
temperatures for each<br />
room and for every hour of<br />
the day.<br />
With savings up to 30%.<br />
LOCAL CONTROL<br />
sAVING - ENERGY MANAGEMENT<br />
TOUCH SCREEN<br />
Just one room<br />
command for<br />
several My HoME<br />
functions.<br />
SOCkET WITH aCTUaTOR<br />
To disconnect the less<br />
important loads and avoid<br />
a blackout because of an<br />
overload.<br />
COMMUNICATION<br />
MINIaTURISED<br />
CaMERaS<br />
A friendly eye in each<br />
room lets you check the<br />
whole house.<br />
“pOlYX vIDEO DISplaY”<br />
SpEakER pHONE<br />
HaNDSET<br />
In each device you will<br />
fi nd all the communication<br />
you need with all the<br />
audio/video door entry<br />
and home automation<br />
functions.<br />
gENERal FEaTURES 11<br />
MY HOME CONTROL <strong>TECHNICAL</strong> <strong>GUIDE</strong>
Introduction<br />
to the <strong>Control</strong><br />
The <strong>BTicino</strong> My HoME CoNTRoL system can monitor<br />
and control your home or offi ce in total safety<br />
and privacy. The control can take place locally<br />
using various ways of interacting from the simple<br />
command on the ToUCH SCREEN or remotely by<br />
means of PC, hand-held computer, telephone or<br />
mobile phone.<br />
LOCAL CONTROL<br />
The system can command and control the My HoME<br />
system, using the controls installed inside the home.<br />
A single movement commands several devices inside<br />
the home (blinds, rolling shutters, lights....).<br />
12 MY HOME - CONTROl<br />
With the <strong>BTicino</strong> control you can check what is<br />
happening for example in the children’s bedroom<br />
while sitting comfortably at your office desk<br />
ON
The system can also be monitored and commanded<br />
using a PC with MHVISUAL software. With a simple<br />
graphic interface which you can customise you can<br />
command lights and rolling shutters, see the pictures<br />
of the cameras installed in the various rooms, change<br />
the temperature and check any alarms which have<br />
been given (from a different place from where the<br />
My HoME system is installed).<br />
REMOTE CONTROL<br />
The system can control and monitor the system<br />
remotely (not from the place where the My<br />
HoME system is installed) by internet point-point<br />
connection. The extremely quick, private and safe<br />
system can control your home from anywhere else<br />
and can also implement the home CCTV functions<br />
and monitoring of the burglar-alarm system (sending<br />
SMS or e-mail with attachment).<br />
Burglar-alarm in<br />
the living room<br />
gENERal FEaTURES 13<br />
MY HOME CONTROL <strong>TECHNICAL</strong> <strong>GUIDE</strong>
Introduction<br />
to the local <strong>Control</strong><br />
The My HoME system can be commanded and controlled by various interfaces, from<br />
the simplest such as the basic control to the most advanced like the ToUCH SCREEN.<br />
14 MY HOME - CONTROl<br />
SpECIal CONTROl<br />
Electronic control which<br />
can call scenarios, scenarios, manage<br />
the My HoME commands<br />
and activate/deactivate activate/deactivate the<br />
scenarios scenarios saved in MH200.<br />
SOFT-TOUCH<br />
Electronic touch control. Just<br />
touch the SoFT ToUCH surface<br />
to switch the brightness oN or<br />
oFF or or adjust it.<br />
SCENaRY TOUCH<br />
Four-key control to call<br />
the scenarios saved in the<br />
scenario module.<br />
Special control<br />
SoFT ToUCH<br />
SCENARy ToUCH<br />
Colour ToUCH SCREEN to<br />
monitor and and control<br />
the My HoME functions.<br />
It can manage up to<br />
8 systems (lighting,<br />
automation, temperature<br />
control, burglar-alarm,<br />
energy management,<br />
scenarios, sound system,<br />
mono and multi-channel,<br />
open gate and switch oN<br />
staircase lights).<br />
Can be wall or table<br />
installed with base item<br />
349319.
AXOLUTE VIDEO STATION<br />
Colour ToUCH SCREEN<br />
HaNDSETS<br />
video handsets with<br />
menus with text or icons.<br />
Can have all the video<br />
door entry functions,<br />
the “door state” and<br />
“professional studio”<br />
functions and control and<br />
monitor the My HoME<br />
system.<br />
Video door system audio<br />
handsets with menus<br />
with text or icons<br />
AXoLUTE VIDEo DISPLAy<br />
can also be table<br />
installed with base item<br />
349319<br />
AXOLUTE VIDEO DISPLAY Table base<br />
Monitoring and control<br />
software for My HoME<br />
systems. From any<br />
PC you can interact<br />
with the My HoME<br />
systems. The icons,<br />
background and layout<br />
can be completely<br />
personalised.<br />
VIDEo ToUCH SCREEN<br />
with MHVISUAL software<br />
gENERal FEaTURES 15<br />
MY HOME CONTROL <strong>TECHNICAL</strong> <strong>GUIDE</strong>
Introduction<br />
to the Remote <strong>Control</strong><br />
The remote connection can take:<br />
- by means of PoINT-PoINT connection (the control<br />
system must be connected with ADSL line with<br />
fi xed IP).<br />
POINT-POINT CONNECTION:<br />
Direct connection to the devices by means of ADSL<br />
line. The ADSL line gives access to the My HoME<br />
system by means of the Internet connecting directly<br />
to the fi xed IP address of the line dedicated to the<br />
control system.<br />
16 MY HOME - CONTROl
Hand-held computer PC<br />
F453AV<br />
www Internet<br />
gENERal FEaTURES 17<br />
MY HOME CONTROL <strong>TECHNICAL</strong> <strong>GUIDE</strong>
18<br />
lOCal<br />
CONTROl<br />
THE NEWS<br />
F420<br />
Scenario module to save<br />
scenarios<br />
(max 16 scenarios per module)<br />
MH200<br />
Event programming<br />
(max 300 scenarios per<br />
module)<br />
VIDEO TOUCH sCREEN<br />
PC panel to use with MHVISUAL<br />
software to monitor and control My<br />
HoME systems
SECTION CONTENTS<br />
20 General features<br />
32 <strong>Catalog</strong>ue<br />
35 General rules for installation<br />
44 Wiring diagrams<br />
48 Configuration/Programmation<br />
90 Technical features<br />
102 Dimensional data<br />
MY HOME CONTROL <strong>TECHNICAL</strong> <strong>GUIDE</strong><br />
19
general<br />
features<br />
The My HoME system can be commanded and<br />
controlled by various interfaces, from the simplest<br />
such as the basic control to the most advanced like<br />
the ToUCH SCREEN. Just one command manages<br />
simple functions such as switching on a light and<br />
advanced functions such as scenarios (which with<br />
just one touch let you switch oN lights, raise rolling<br />
shutters, switch on the sound system, set the<br />
temperature etc....).<br />
Call a scenario from special control<br />
<strong>Control</strong> a dimmer from SOFT TOUCH<br />
Call scenarios with SCENARIO TOUCH<br />
General General<br />
General General<br />
°C<br />
20 MY HOME - CONTROl<br />
ON<br />
OFF<br />
OFF<br />
Input Relax<br />
Output TV<br />
ON<br />
ON<br />
80%<br />
OFF ON<br />
ON OFF
■ MONITORINg aND CONTROl OF THE TEMpERaTURE CONTROl FROM aXOlUTE vIDEO STaTION<br />
VIDEOSTATION with icons<br />
■ MONITORINg aND CONTROl OF THE bURglaR-alaRM FROM TOUCH SCREEN<br />
gENERal FEaTURES 21<br />
MY HOME CONTROL <strong>TECHNICAL</strong> <strong>GUIDE</strong>
general<br />
features<br />
WHAT A sCENARIO Is<br />
A scenario is a set of commands which activate/<br />
deactivate a series of devices of various My HoME<br />
applications at the same time.<br />
Input Relax<br />
TV Output<br />
sCENARIOs<br />
22 MY HOME - CONTROl<br />
COMMANDS SENT<br />
by just pressing one key<br />
The scenarios are saved in the scenario module item<br />
F420 and are called by special commands, from<br />
the SCENARy ToUCH, the ToUCH SCREEN, the audio<br />
handsets (VIDEo STATIoN, VIDEo DISPLAy etc...) and<br />
the MHVISUAL Software.<br />
The out scenario can for example:<br />
- switch oFF all the home lights<br />
- lower all the rolling shutters<br />
- switch oFF the Sound system amplifi ers<br />
MY HOME APPLICATION<br />
INVOLVED<br />
General command lights OFF LIGHT AUTOMATION<br />
General command rolling shutters down rOLLING SHUTTEr AUTOMATION<br />
General command amplifi ers OFF SOUND SYSTEM<br />
F420<br />
OFF<br />
DOWN<br />
OFF
ADVANCED sCENARIOs<br />
Advanced scenarios let you perform particular actions<br />
at a set time or following an event which occurs.<br />
The devices which can manage the advanced<br />
scenarios are:<br />
• TOUCH sCREEN: programming of basic events to<br />
create simple advanced scenarios (switching the<br />
watering oN at 8 p.m. or switching the garden<br />
lights oN when it becomes dark)<br />
• MH200: programming complex events to create<br />
advanced scenarios with the management of time<br />
conditions and AND or oR logics (close the blinds if<br />
it is windy oR if it is dark).<br />
The ToUCH SCREEN or the controls confi gured with<br />
CEN can be used to call the advanced scenarios saved<br />
in MH200.<br />
TOUCH SCREEN<br />
MH200<br />
At 8 p.m.<br />
the ToUCH SCREEN<br />
switches the watering oN<br />
At 8 p.m. oR when it<br />
becomes dark MH200<br />
switches the garden<br />
lights oN<br />
h. 20.00<br />
h. 20.00<br />
or<br />
sunset<br />
MH200<br />
TOUCH SCREEN<br />
watering oN<br />
garden lights oN<br />
gENERal FEaTURES 23<br />
MY HOME CONTROL <strong>TECHNICAL</strong> <strong>GUIDE</strong>
MY HOME<br />
basic control<br />
The basic My HoME control can activate or call<br />
from 1 to 4 functions in the 2-module version<br />
and from 2 to 6 in the 3-module version.<br />
■ FUNCTION NUMbER<br />
1 2<br />
3 4<br />
1 2 3<br />
4 5 6<br />
To be completed with the key<br />
covers of the domestic series<br />
you choose<br />
1 module<br />
1 function<br />
1 module<br />
2 functions<br />
24 MY HOME - CONTROl<br />
2 modules<br />
1 function<br />
H4652/2 H4652/3<br />
L4652/2<br />
L4652/3<br />
AM5832/2<br />
AM5832/3<br />
- Light control<br />
oN/oFF cyclic<br />
oN/oFF bistable (also dimmer)<br />
General, room, group commands<br />
Timed controls<br />
- Rolling shutter control<br />
UP/DoWN in normal mode<br />
UP/DoWN in safe mode<br />
General, room, group commands<br />
- Activation of saved scenarios<br />
in the MH200 scenario programmer<br />
(CEN confi gurator)<br />
2 modules<br />
2 functions
Special<br />
control<br />
The special control can manage 1 or 2<br />
My HoME functions.<br />
■ FUNCTION NUMbER<br />
1<br />
To be completed with the key<br />
covers of the domestic series<br />
you choose<br />
2 modules<br />
1 function<br />
2<br />
2 modules<br />
2 functions<br />
H4651/2<br />
L4651/2<br />
AM5831/2<br />
- Light control<br />
oN/oFF cyclic<br />
oN/oFF bistable (also dimmer)<br />
General, room, group commands<br />
Timed controls<br />
- Rolling shutter controls<br />
UP/DoWN in normal mode<br />
UP/DoWN in safe mode<br />
General, room, group commands<br />
- Call scenarios saved<br />
in the F420 scenario module<br />
- <strong>Control</strong> and command of the Sound<br />
System functions<br />
- <strong>Control</strong> and command of the<br />
Video door entry functions<br />
- Activation of saved scenarios<br />
in the MH200 scenario programmer<br />
(CEN confi gurator)<br />
gENERal FEaTURES 25<br />
MY HOME CONTROL <strong>TECHNICAL</strong> <strong>GUIDE</strong>
knob<br />
control<br />
The control knob can control and set<br />
the lights and the Sound system. The<br />
lights or Sound system amplifi ers are<br />
switched oN by pressing the central<br />
key, while they are adjusted by turning<br />
the knob.<br />
swivel adjustment<br />
ring nut<br />
26 MY HOME - CONTROl<br />
activation<br />
deactivation key<br />
HC4563<br />
HS4563<br />
<strong>Control</strong>: SOFT TOUCH<br />
Just touch the Soft Touch control to<br />
switch the brightness oN or oFF and<br />
adjust it or adjust the sound system.<br />
signalling LED<br />
touch zone<br />
The signalling LEDs make the device easy<br />
to fi nd even in the dark. In fact they vary<br />
their intensity if the device is touched and<br />
depending on their charge.<br />
Also available in dark fi nish HS4653/2 and<br />
HS4653/3.<br />
L4563<br />
N4563<br />
NT4563<br />
- Light control<br />
oN/oFF lights and control<br />
brightness<br />
- sound system<br />
oN/oFF amplifi er, change track<br />
and adjust volume<br />
HC4653/2<br />
HC4653/3<br />
- Light control<br />
oN/oFF lights and control<br />
brightness<br />
- scenario activation<br />
programmed in scenario<br />
module F420<br />
- sound system<br />
oN/oFF amplifi er, change track<br />
and adjust volume<br />
- Activation saved scenarios<br />
in scenario programmer MH200<br />
(CEN confi gurator)
<strong>Control</strong>:<br />
SCENaRY TOUCH<br />
4-key control to use to call 4 of the 16<br />
scenarios programmed in scenario module<br />
F420.<br />
Also available in LIVING (L4680), LIGHT<br />
(N4680) and LIGHT TECH (NT4680) fi nish.<br />
Scenario 1<br />
(M)<br />
Scenario 3<br />
(M+2)<br />
Scenario 2<br />
(M+1)<br />
Scenario 4<br />
(M+3)<br />
TOUCH SCREEN<br />
3.5” colour ToUCH SCREEN display to<br />
monitor and control all the My HoME<br />
functions.<br />
Simplifi ed and intuitive interface with<br />
graphic icons.<br />
HC4680<br />
- scenario activation<br />
saved in F420<br />
HS4680<br />
- Activation saved scenarios<br />
in scenario programmer MH200<br />
(CEN confi gurator)<br />
H4684 L4684<br />
Lighting<br />
Automation<br />
Scenarios<br />
Sound system<br />
(mono or multi-channel)<br />
Temperature control<br />
Burglar-alarm<br />
Energy management<br />
other (Touch Screen<br />
settings)<br />
Advanced scenarios<br />
Video door entry<br />
system (gate<br />
opening and oN<br />
staircase lights)<br />
gENERal FEaTURES 27<br />
MY HOME CONTROL <strong>TECHNICAL</strong> <strong>GUIDE</strong>
Handsets<br />
The audio handsets can receive<br />
calls from the entrance panel and<br />
control and command the My HoME<br />
applications. The PoLyX series (PoLyX<br />
VIDEo DISPLAy and PoLyX MEMoRy<br />
STATIoN) terminals can interact<br />
with the My HoME applications by<br />
means of a text menu, while the<br />
AXoLUTE (AXoLUTE VIDEo DISPLAy<br />
and AXoLUTE VIDEo STATIoN)<br />
terminals interact via an icon menu.<br />
The AXoLUTE VIDEo DISPLAy audio<br />
handsets can also be table installed<br />
with base item 349319.<br />
The icons<br />
28 MY HOME - CONTROl<br />
Video door entry system<br />
Sound system<br />
349311<br />
349312<br />
349312 344172<br />
Scenarios<br />
Temperature control<br />
344162<br />
Alarms<br />
other<br />
The PoLyX MEMoRy STATIoN can also<br />
have the audio/video memory of<br />
calls from the entrance panel and the<br />
video door entry answering machine,<br />
so that a message can be left which<br />
will be heard by people calling at the<br />
entrance panel. Pushbuttons to manage the memory and the video door entry answering<br />
machine.
MHvISUal and<br />
vIDEO TOUCH SCREEN<br />
The VIDEo ToUCH SCREEN together<br />
with the MHVISUAL software allows<br />
complete and total control of the<br />
home. The icons and background<br />
of the various pages can be<br />
customised with pictures, dwg fi les<br />
or photographs.<br />
H4687<br />
SCS AV<br />
IN<br />
LAN<br />
2 2<br />
SCS<br />
AI<br />
MHVISUAL<br />
F453AV<br />
H4687<br />
MHVISUAL<br />
The MHVISUAL software can also be<br />
installed on PC (Windows) different<br />
from VIDEo ToUCH SCREEN<br />
(item H4687)<br />
gENERal FEaTURES 29<br />
MY HOME CONTROL <strong>TECHNICAL</strong> <strong>GUIDE</strong>
F420<br />
scenario modules<br />
Can save up to 16 basic scenarios inside it. The<br />
scenarios can be called from ToUCH SCREEN,<br />
SCENARy ToUCH or by the My HoME controls.<br />
MH200 scenario<br />
programmer<br />
Scenario programmer (max 300) to save<br />
scheduled advanced scenarios. Can activate/<br />
deactivate the scenarios following an external<br />
event, pressing a control confi gured with CEN<br />
or when an actuator changes state. Manages<br />
the AND and oR logic functions.<br />
no wind<br />
and<br />
h. 10.00<br />
30 MY HOME - CONTROl<br />
MH200<br />
F420<br />
dawn day<br />
scenario<br />
rolling<br />
shutter<br />
and sun blind<br />
scenario<br />
garden lights<br />
oFF<br />
sun blinds<br />
open<br />
rolling<br />
shutters up<br />
rolling<br />
shutters up
Actuators<br />
Conditions and events which activate the<br />
advanced scenarios saved in MH200<br />
Devices to activate the advanced<br />
scenarios saved in MH200<br />
clock<br />
MY HOME EVENTs<br />
H4684<br />
L/N/NT4684<br />
MH200 scenario programmer<br />
tower<br />
ON<br />
H/L4652/2<br />
configured with<br />
The devices activate and call the basic and advanced scenarios saved<br />
in the MH200 scenario programmer<br />
chandelier<br />
air speed indicator<br />
moisture meter<br />
dusk<br />
ON<br />
H/L4652/2<br />
configured with<br />
gENERal FEaTURES 31<br />
MY HOME CONTROL <strong>TECHNICAL</strong> <strong>GUIDE</strong>
<strong>Catalog</strong>ue<br />
H4652/2 H4652/3<br />
H4651/2<br />
HC4563 HS4563<br />
HC4653/2 HC4653/3<br />
N4680 NT4680<br />
32 MY HOME - CONTROl<br />
CONTROlS FOR SINglE aND DOUblE lOaDS<br />
Item Description<br />
H4652/2 control which can drive a single actuator for single or double loads<br />
or two actuators for single loads or independent double loads – to<br />
be completed with 1 2-module key cover for controls with one or<br />
two functions or 2 1-module key covers with one or two functions<br />
- AXOLUTE<br />
L4652/2 as above - LIVING, LIGHT, LIGHT TECH<br />
AM5832/2 as above - MàTIX<br />
H4652/3 control which can drive three actuators for single or independent<br />
double loads – to be completed with 3 1-module key covers for<br />
controls with one or two functions - AXOLUTE<br />
L4652/3 as above - LIVING, LIGHT, LIGHT TECH<br />
AM5832/3 as above - MàTIX<br />
CONTROlS FOR SpECIal FUNCTIONS<br />
Item Description<br />
H4651/2 control for special functions (timed ON, scenarios) which can<br />
control one actuator for single or double loads or 4 scenarios stored<br />
in the F420 module - to be completed with 1 or 2 key covers with<br />
one or two functions – AXOLUTE<br />
L4651/2 as above - LIVING, LIGHT, LIGHT TECH<br />
AM5831/2 as above - Màtix<br />
kNOb CONTROl<br />
Item Description<br />
HC4563 knob control for enhanced adjustment of the dimmer (level from<br />
1 - 99%, soft-start switching ON, etc.). Central pushbutton for<br />
switching ON/OFF. AXOLUTE light.<br />
HS4563 device as above - AXOLUTE dark<br />
L4563 device as above - LIVING<br />
N4563 device as above - LIGHT<br />
NT4563 device as above - LIGHT TECH<br />
SOFT TOUCH CONTROl<br />
Item Description<br />
HC4653/2 2 module touch control to actuate/set one actuator or one scenario<br />
stored in the item F420 scenario module, adjustable LED intensity<br />
- AXOLUTE light finish<br />
HS4653/2 as above - AXOLUTE dark finish<br />
HC4653/3 3 module touch control to actuate/set one actuator or one scenario<br />
stored in the item F420 scenario module, adjustable LED intensity<br />
- AXOLUTE light finish<br />
HS4653/3 as above - AXOLUTE dark finish<br />
SCENaRIO CONTROl<br />
Item Description<br />
HC4680 scenario control that can be customised to control 4 independent<br />
automation, temperature control or sound system “room<br />
situations” stored in the F420 scenario module - AXOLUTE<br />
HS4680 as above - AXOLUTE dark finish<br />
L4680 as above - serie LIVING<br />
N4680 as above - serie LIGHT<br />
NT4680 as above - serie LIGHT TECH
H4684<br />
L4684<br />
349311 349312<br />
344162<br />
349310<br />
349210<br />
349211<br />
349319<br />
349212<br />
TOUCH SCREEN<br />
Item Description<br />
H4684 colour room control to be installed where there are several MY<br />
HOME functions. Interface to control scenarios, lighting, automation,<br />
burglar-alarm, temperature control and energy management<br />
- AXOLUTE<br />
L4684 as above - LIVING, LIGHT and LIGHT TECH<br />
aXOlUTE vIDEO DISplaY<br />
Item Description<br />
349311 AXOLUTE speaker phone video door entry terminal with 2.5” colour<br />
display and OSD menu with icons. To be completed with surround<br />
plate for 506E of the AXOLUTE series - light finish<br />
349312 as above - dark finish<br />
pOlYX vIDEO DISplaY<br />
Item Description<br />
344162 wall-mounted video handset terminal with 3.5” colour monitor and<br />
OSD menu. Available in WHITE finish<br />
aXOlUTE baSE FOR THE TablE<br />
Item Description<br />
349319 base for the table installation of AXOLUTE VIDEO DISPLAY and TOUCH<br />
SCrEEN. To be completed with rectangular front cover plates for<br />
box 506E AXOLUTE (in the case of TOUCH SCrEEN L4684 with LIGHT<br />
or LIGHT TECH front cover plates)<br />
aXOlUTE vIDEO STaTION<br />
Item Description<br />
349310 AXOLUTE speaker phone video door entry terminal with 5.6” colour<br />
monitor and OSD menu with icons. To be completed with dedicated<br />
surround plate in glass, wood or aluminium<br />
349210 brushed aluminium surround plate<br />
349211 KrISTALL glass surround plate<br />
349212 TEAK wood surround plate<br />
CaTalOgUE<br />
MY HOME CONTROL <strong>TECHNICAL</strong> <strong>GUIDE</strong><br />
33
34<br />
<strong>Catalog</strong>ue<br />
344172<br />
H4687<br />
F452<br />
F453AV<br />
F420 MH200<br />
MY HOME - CONTROl<br />
392100<br />
346000<br />
MHVISUAL<br />
pOlYX MEMORY STaTION<br />
Item Description<br />
344172 wall-mounted speaker phone video door entry terminal with 5.6”<br />
colour monitor, OSD menu, audio/video memory and video door<br />
entry answering machine. Available in WHITE finish<br />
vIDEO TOUCH SCREEN<br />
Item Description<br />
H4687 PC panel with 15” TOUCH SCrEEN monitor to manage the home via<br />
MHVISUAL software<br />
MHvISUal<br />
Item Description<br />
MHVISUAL home MONITOrING AND CONTrOL SOFTWArE.<br />
Can customise the icons and backgrounds<br />
aUDIO/vIDEO WEb SERvER<br />
Item Description<br />
F453AV AUDIO/VIDEO WEB SErVEr to use the TOUCH SCrEEN with MHVI-<br />
SUAL in local control applications<br />
346000 power supply for F453AV<br />
F452 WEB SErVEr to monitor and control SCS systems commands<br />
392100 power supply for F452<br />
SCENaRIO MODUlE<br />
Item Description<br />
F420 device to save 16 scenarios for the automation, sound system,<br />
temperature control and video door entry applications - 2 DIN<br />
modules<br />
SCENaRIO pROgRaMMER<br />
Item Description<br />
MH200* device to run scenarios (max. 300) programmed with the TIMH200<br />
program. The scenario can be matched to times, date, manual<br />
activations, events managed on AUX channels or generated in the<br />
automation, temperature control and burglar-alarm systems. Size 6<br />
DIN modules.<br />
* Item in IMQ certification phase
gENERal RUlES<br />
FOR INSTallaTION<br />
To make a MY HOME system with local control the “GENErAL rULES OF<br />
INSTALLATION” of the individual systems present must be respected. The<br />
specifi c controls for local control should be installed bearing in mind some<br />
rules which make the use of MY HOME and the system functions easier.<br />
gENERal CONTROlS<br />
The LIGHTS and rOLLING SHUTTErS general control should be installed near<br />
the main entrance of the home so that the lights can be switched ON or OFF<br />
or the rolling shutters raised and lowered from a single point before going<br />
out or coming back.<br />
children<br />
bedroom<br />
kitchen<br />
bathroom<br />
living room<br />
bedroom<br />
ROOM CONTROlS<br />
The room controls can control a set of actuators.<br />
They should be installed near the entrance of the room to be controlled.<br />
children<br />
bedroom<br />
kitchen<br />
bathroom<br />
living room<br />
bedroom<br />
Light rolling shutter NIGHT ZONE room DAY ZONE room control<br />
general<br />
general<br />
control (switches all<br />
(switches all the living<br />
control<br />
control<br />
the bedroom lights ON<br />
room and kitchen lights<br />
and OFF)<br />
ON and OFF)<br />
gENERal RUlES FOR INSTallaTION<br />
MY HOME CONTROL <strong>TECHNICAL</strong> <strong>GUIDE</strong><br />
35
gENERal RUlES<br />
FOR INSTallaTION<br />
SCENaRY TOUCH<br />
The SCENArY TOUCH should be installed near the main entrance of the home<br />
and in the points where the whole house must be controlled. Installing it in<br />
the bedroom, for example, lets you lower all the rolling shutters and switch<br />
OFF all the lights in the home before going to bed.<br />
children<br />
bedroom<br />
kitchen<br />
Scenary TOUCH<br />
36 MY HOME - CONTROl<br />
bathroom<br />
living room<br />
bedroom<br />
main<br />
entrance<br />
home<br />
TOUCH SCREEN<br />
The installation of the TOUCH SCrEEN must be central, so that it is visible and<br />
can be reached from a room in the home.<br />
The TOUCH SCrEEN lets you control and manage all the MY HOME applications<br />
installed in the home.<br />
children<br />
bedroom<br />
kitchen<br />
TOUCH SCrEEN<br />
bathroom<br />
living room<br />
bedroom
vIDEO TOUCH SCREEN aND MHvISUal<br />
The installation of the VIDEO TOUCH SCrEEN should be central and, in<br />
industrial and service applications, in the reception.<br />
The MHVISUAL software can be used to customise the pages and functions<br />
which can be controlled.<br />
children<br />
bedroom<br />
kitchen<br />
VIDEO TOUCH SCrEEN<br />
with MHVISUAL software<br />
bathroom<br />
living room<br />
bedroom<br />
vIDEO DOOR ENTRY TERMINalS<br />
The video door entry terminals should be installed in zones of the home<br />
which can be reached easily both during the day and at night.<br />
They have double use because they can receive the call from the entrance<br />
panel and control and command all the MY HOME applications in the home.<br />
VIDEO DISPLAY<br />
children<br />
bedroom<br />
kitchen<br />
bathroom<br />
living room<br />
VIDEO STATION<br />
bedroom<br />
main<br />
entrance<br />
home<br />
gENERal RUlES FOR INSTallaTION 37<br />
MY HOME CONTROL <strong>TECHNICAL</strong> <strong>GUIDE</strong>
gENERal RUlES<br />
FOR INSTallaTION<br />
bOX INSTallaTION SET-Up<br />
The components must be installed at the following heights from the ground.<br />
RECOMMENDED HEIgHTS<br />
MINIMUM HEIgHTS<br />
38 MY HOME - CONTROl<br />
90 CM<br />
Handle height<br />
70 to 80 CM<br />
30 CM<br />
17.5 CM<br />
7 CM<br />
4 CM<br />
Fixed burglar-alarm Ir controls and sensors<br />
<strong>Control</strong>s and bedhead sockets<br />
Flush-mounted wall sockets<br />
(power, telephone, TV, data)<br />
Flush-mounted or protruding wall sockets<br />
Sockets on trunking or skirting boards<br />
Sockets on towers or covers protruding from the fl oor
RECOMMENDED HEIgHTS<br />
265 CM<br />
230 to 250 CM<br />
OvER 225 CM<br />
160 CM<br />
150 CM<br />
110 CM<br />
100 CM<br />
Sockets for the power supply of kitchen extractor hood and fan<br />
Methane gas detectors (20 – 40 cm ceiling)<br />
internal burglar-alarm siren, loudspeakers<br />
Cameras, swivel Ir sensors, pushbuttons and cord pulls for<br />
showers and baths socket for exhaust fans in bathrooms<br />
with no ventilation<br />
Audio handsets, video handsets, TOUCH SCrEEN,<br />
VIDEO TOUCH SCrEEN<br />
Temperature control sensor – sockets and light controls<br />
in the garage and cellar<br />
<strong>Control</strong>s and sockets in the bathrooms and on the<br />
kitchen working surface<br />
Loudspeakers for listening points at seated height<br />
gENERal RUlES FOR INSTallaTION 39<br />
MY HOME CONTROL <strong>TECHNICAL</strong> <strong>GUIDE</strong>
gENERal RUlES<br />
FOR INSTallaTION<br />
laYINg THE CORRUgaTED pIpE<br />
In the individual home, fl ush-mounted installations require the use of<br />
corrugated pipes of different colours, so that work is easier in the installation<br />
phase and to allow colour-system identifi cation. The corrugated pipes must<br />
have a diameter of at least 25 mm.<br />
Use Pipe colour<br />
Energy, automation, temperature control, energy management<br />
CHOICE OF CablE<br />
The table below helps in selecting the type of wire to use depending on the<br />
MY HOME application. It should be remembered that two or more systems<br />
MY HOME applICaTIONS<br />
<strong>BTicino</strong> item336904<br />
wich can be burried<br />
(white)<br />
<strong>BTicino</strong> item L4669<br />
(grey)<br />
<strong>BTicino</strong> item L4669S<br />
(red)<br />
<strong>BTicino</strong> item L4668CM<br />
UTP 5<br />
Multipair UTP 5E<br />
<strong>BTicino</strong><br />
item C9881U/SE C9882U/5E<br />
Telephone pair<br />
RG6 Cable<br />
40 MY HOME - CONTROl<br />
Lighting<br />
Automation<br />
COMFORT<br />
Temperature<br />
control<br />
■ ■ ■<br />
Black<br />
Burglar-alarm and alarms Brown<br />
Data network, TV and satellite White<br />
Sound system, video door entry system Purple/Violet<br />
Telephone system Green<br />
Sound system<br />
■<br />
■ ■ ■ ■<br />
Wire burglar-alarm<br />
■<br />
with different wiring can be combined using interface item F422.<br />
SaFETY SavINg COMMUNICaTION CONTROl<br />
CCTV<br />
Energy<br />
management<br />
● ● ● ● ■ ●<br />
(1) (1) (1) (1)<br />
(1)<br />
Video door entry<br />
system<br />
■<br />
Integrated<br />
telephone system<br />
●<br />
● ■ ● ●<br />
● ■<br />
■ Wires RECOMMENDED by <strong>BTicino</strong> (conform to the installation rules) ● Wires WHICH CAN BE USED (check for each system with the installation rules)<br />
NOTE (1): must be used in the buried stretches of the individual systems<br />
●<br />
TV/SAT<br />
■<br />
Data network<br />
■<br />
■<br />
Web Server video<br />
■<br />
■<br />
■<br />
■<br />
■
TYpE OF WIRINg<br />
The systems can be made with two different types of structure or mode of<br />
distribution:<br />
• free structure<br />
• star-centre structure<br />
Example of wiring with Free structure<br />
actuator<br />
control<br />
junction<br />
box<br />
home<br />
automation<br />
panel<br />
Generally the wiring with free structure is used for the traditional distribution<br />
of power sockets and is also valid for the MY HOME light automation systems<br />
and rolling shutters, temperature control, power management and burglaralarm.<br />
It should also be used when installing AUDIO/VIDEO WEB SErVEr item<br />
F453AV not connected to the video door entry system and/or sound system.<br />
The selection is made depending on the installation requirements, functions<br />
required, (Installation of the applications; lightning, automation, burglaralarm,<br />
CCTV etc.), wall restrictions, refurbishments or new builds. These<br />
modes can cover and make all the MY HOME types of system.<br />
Example of wiring with star-centre structure<br />
Flush-mounting<br />
actuator<br />
control<br />
junction<br />
box<br />
home<br />
automation<br />
panel<br />
Star-centre wiring is used for data transmission systems, telephone, TC and<br />
SAT signals, video door entry and Sound systems.<br />
For video door entry and Sound systems and every time AUDIO/VIDEO WEB<br />
SErVEr item F453AV is used connected to these systems item F441 or F441M<br />
must be used for the star wiring.<br />
gENERal RUlES FOR INSTallaTION 41<br />
MY HOME CONTROL <strong>TECHNICAL</strong> <strong>GUIDE</strong>
gENERal RUlES<br />
FOR INSTallaTION<br />
THE SWITCHbOaRD OR HOME aUTOMaTION DISTRIbUTION bOaRD<br />
regardless of the type of wiring used, star or free, fitting the various MY<br />
HOME systems into the building involves grouping all the active (power<br />
supplies, interfaces, telephone switchboards etc.) or passive devices which<br />
are needed to control and manage all the functions in a single central point.<br />
This point in fact forms the “brain” of the whole building home automation<br />
system and must be sized taking account of the following general rules:<br />
SCS/SCS interface<br />
Dimmer actuator<br />
Thermal-magnetic and<br />
earth-leakage circuit<br />
breakers<br />
Energy Management<br />
<strong>Control</strong> Unit<br />
Patch panel<br />
Telephone line protection<br />
Burglar-alarm Power Supply<br />
Transformer<br />
HOME aUTOMaTION paNEl aCCESSORIES<br />
42 MY HOME - CONTROl<br />
Example of a technological cabinet made with Tiboard 120-module DIN switchboard.<br />
The accessories for the home automation distribution board allow a rational<br />
arrangement in a small space of the devices needed to make a MY HOME<br />
system. With these components, among other things, one can position DIN<br />
devices on top of each other, or easily fasten devices which are not in DIN<br />
modularity, such as MH rOUTEr etc., batteries etc.<br />
a) provide extra available space to allow the installation of further devices<br />
required by new and different needs.<br />
b) whenever power supplies are used, these must be installed in the lowest<br />
position of the switchboard to help any heat loss.<br />
c) select the switchboard which can consume a power greater than the sum<br />
of the powers consumed by all the devices which must be installed.<br />
Video door entry system<br />
Power Supply<br />
Web Server<br />
Light and rolling shutter actuators<br />
Door Entry Interface<br />
Relay expansion module<br />
Telephone switchboard<br />
Automation Power Supply<br />
Range of accessories:<br />
- fastening clips item F496/FF<br />
- fastening springs on DIN rail item F496/MF<br />
- fastening bracket on DIN rail item F496/PF for batteries, modems, routers, etc.<br />
- shallow section for DIN rail item F496/Pr<br />
Bell
MY HOME FlaTWall<br />
As an alternative to the switchboard or home automation distribution<br />
board, <strong>BTicino</strong> proposes MY HOME FLATWALL, an innovative solution for the<br />
centralised installation of electronic devices and user interfaces. This product<br />
can house up to 288 DIN modules and has parts which are only accessible to<br />
the installer (e.g. actuators, power supplies for maintenance/updating) and<br />
parts which can be used by the fi nal user (burglar-alarm control unit, fl ushmounted<br />
video handset etc.).<br />
In new buildings MY HOME FLATWALL answers two different installation<br />
needs:<br />
• in the home, as an innovative centralised installation solution for all<br />
electrical services, fully fi tting in with the home’s appearance<br />
• in the building riser, as a solution which houses the distribution of the<br />
main wiring of the whole building.<br />
Housing the devices in the home<br />
Riser for the distribution of the apartment<br />
block electrical services<br />
gENERal RUlES FOR INSTallaTION 43<br />
MY HOME CONTROL <strong>TECHNICAL</strong> <strong>GUIDE</strong>
WIRINg<br />
DIagRaMS<br />
2F lC DIagRaM - SCHEMa 16<br />
MY HOME SINglE-FaMIlY INTEgRaTED SYSTEM<br />
230Va.c.<br />
346000<br />
PE EP<br />
342550<br />
342170<br />
1 2<br />
44 MY HOME - CONTROl<br />
349310<br />
1<br />
P N T S<br />
9<br />
The entrance panels ring<br />
as with S = 0<br />
2<br />
N = 1<br />
P = 0<br />
BUS PL S+ S-<br />
PS<br />
BUS<br />
ON<br />
OUT<br />
IN<br />
S1<br />
Loudspeakers Loudspeakers<br />
OUT1 OUT2 OUT3 OUT4<br />
IN1 IN2 IN3 IN4<br />
H/L4562<br />
F441<br />
SCS<br />
BUS<br />
oN<br />
oFF<br />
A = 1<br />
PF = 1<br />
230Va.c.<br />
346000<br />
BUS 2 1<br />
AUDIO/VIDEO WEB SERVER<br />
347400 F500<br />
P N Z<br />
12V 1 V<br />
max 3 m<br />
P N Z<br />
1<br />
Tlc 12V d.c.<br />
150 mA<br />
F453AV 346000<br />
Interface<br />
between<br />
systems<br />
SCS<br />
radio<br />
S = 1<br />
OUT<br />
ART.F422<br />
F422<br />
LAN<br />
SCS<br />
SCS<br />
AV IN AI D C<br />
12<br />
LAN<br />
I1 = -<br />
I2 = -<br />
I3 = -<br />
I4 = 1<br />
MOD = -<br />
S = 2<br />
RCA input for<br />
external sound<br />
source
H4687<br />
To other automation/<br />
temperature control<br />
devices<br />
HC/HS/<br />
L/N/NT4692<br />
To other automation/<br />
temperature control<br />
devices<br />
L/H4684<br />
E46ADCN<br />
BUS<br />
230V a.c.<br />
F430/2<br />
MH200<br />
ZA = 0<br />
ZB = 1<br />
P = CEN<br />
MOD = CEN<br />
SLA = -<br />
DEL = -<br />
BUS<br />
Touch<br />
Screen<br />
To the valve<br />
and the boiler<br />
ZA = 0<br />
ZB = 1<br />
1 2 3 4<br />
1 2 3 4<br />
N1 = 1<br />
ART. F430/2<br />
ZBI = OFF<br />
N2 = -<br />
MH200<br />
BUS<br />
DEL<br />
BUS<br />
Automation<br />
system<br />
power supply<br />
A = 0<br />
PL = 1<br />
F420<br />
Scenario<br />
module<br />
To other automation/<br />
temperature control<br />
devices<br />
BUS<br />
BUS<br />
Lights ON/OFF<br />
control<br />
Light<br />
1 2 3<br />
OK<br />
1 2 3<br />
4 5 6<br />
7 8 9<br />
0<br />
ART.F411/1N<br />
PL1<br />
A<br />
PL2<br />
G<br />
M<br />
A = 1<br />
PL = 1<br />
ON/OFF<br />
actuator<br />
F411/1N<br />
A = 1<br />
PL = 1<br />
Temperature<br />
control<br />
unit<br />
3550 +<br />
3507/6<br />
Dimmer control<br />
Light<br />
BUS BUS<br />
BUS<br />
L<br />
T5H 250V<br />
F414<br />
230V~ 50Hz 60÷1000VA<br />
A = 2<br />
PL = 1<br />
MOD = 0/I<br />
0245 06<br />
A PL MG<br />
Dimmer<br />
actuator<br />
F414<br />
A = 2<br />
PL = 1<br />
WIRINg DIagRaMS<br />
to page 48<br />
MY HOME CONTROL <strong>TECHNICAL</strong> <strong>GUIDE</strong><br />
45
WIRINg<br />
DIagRaMS<br />
2F lC DIagRaM - SCHEMa 16<br />
MY HOME SINglE-FaMIlY INTEgRaTED SYSTEM<br />
OUT<br />
ART.F422<br />
F422<br />
from page 47<br />
I1 = -<br />
I2 = -<br />
I3 = -<br />
I4 = 1<br />
MOD = 4<br />
46 MY HOME - CONTROl<br />
Burglar-alarm system<br />
power Supply<br />
E46ADCN<br />
Z = 1<br />
N = 1<br />
MOD = 1<br />
AUX = 0<br />
Z = 0<br />
N = 1<br />
MOD = 0<br />
AUX = 0<br />
Other IR detectors<br />
IR detector<br />
BUS<br />
BUS<br />
HC/HS/L/N/NT4611<br />
Connector transponder<br />
BUS<br />
HC/HS/L/N/NT4607<br />
Other burglar-alarm<br />
system devices<br />
BUS<br />
BUS<br />
BUS<br />
IR detector<br />
HC/HS/L/N/NT4611<br />
OK<br />
1 2 3<br />
4 5 6<br />
7 8 9<br />
0<br />
Z = 2<br />
N = 1<br />
MOD = 1<br />
AUX = 0<br />
4072L +<br />
3505/12<br />
External siren<br />
with back-up<br />
battery<br />
3500N +<br />
3507/6<br />
Burglaralarm<br />
unit
2F lC DIagRaM - SCHEMa 26<br />
CONNECTION MODE F453av<br />
One or more systems (for more systems a HUB device or switch must be<br />
used) can be controlled by means of an Ethernet card confi gured for access<br />
LAN mode of connection<br />
LAN mode of connection (with extended system)<br />
Local Pc<br />
Local Pc<br />
Ethernet<br />
F453AV<br />
F453AV<br />
Ethernet<br />
Ethernet<br />
Ethernet HUB<br />
HUB<br />
Lighting<br />
to one or more installed <strong>BTicino</strong> web servers (F452, F453AV). In this way the<br />
control, safety, load controls and CCTV functions can be managed.<br />
Lighting<br />
Ethernet<br />
Safety<br />
F452<br />
Safety<br />
Automation<br />
Lighting<br />
Lighting<br />
Automation<br />
F452<br />
CCTV<br />
CCTV<br />
Lighting<br />
Automation<br />
Temperature control<br />
Sound<br />
system<br />
BUS SCS<br />
OUT<br />
M=2<br />
IN<br />
Safety<br />
BUS SCS<br />
Temperature control<br />
Safety<br />
Automation<br />
LOCAL BUS<br />
Sound<br />
system<br />
BUS SCS<br />
BUS SCS<br />
Automation<br />
F422<br />
WIRINg DIagRaMS<br />
MY HOME CONTROL <strong>TECHNICAL</strong> <strong>GUIDE</strong><br />
47
configurAtion<br />
ActuAtors: Address And type of control<br />
To understand the addressing logical it is useful to define some terms which<br />
will occur frequently in this text.<br />
Room (A)<br />
Set of devices belonging to a logical area (in a home, for example, the living<br />
room, the bedroom, etc.).<br />
Light Point (PL)<br />
Numeric identification of the single actuators inside the Room.<br />
Group (G)<br />
Set of devices also belonging to different rooms but which must be<br />
controlled at the same time (e.g. the rolling shutters of the North side of the<br />
home, the lighting of the day area, etc.).<br />
logicAl extension<br />
��������<br />
���������<br />
48 my Home - control<br />
A = GR<br />
PL = 1<br />
�������<br />
�������<br />
�������<br />
�������<br />
�������<br />
�������<br />
������<br />
������<br />
�����<br />
������<br />
1 2 3 4 5 1 2 3 4 5 1 2 3 4 5<br />
�����<br />
������<br />
�����������<br />
�����<br />
������<br />
�����<br />
������<br />
�����<br />
������<br />
�������<br />
����������<br />
�����<br />
������<br />
�����<br />
������<br />
For special applications such as extended systems in houses or service/<br />
industrial rooms, where the use of many devices may exceed the<br />
configuration limits mentioned above (9 addresses for each of the 9 rooms<br />
planned), interface item F422 can be used, configured in the “logical<br />
expansion” mode.<br />
�������<br />
Actuator address<br />
The address of each actuator is defined uniquely by assigning the numeric<br />
configurators 1 to 9 in positions A (Room) and PL (Light Point inside the<br />
Room).<br />
A maximum of 9 addresses can be defined for each room; a maximum of 9<br />
rooms can be defined in a system.<br />
The group of belonging is defined by inserting a third numeric configurator in<br />
the housing identified with G (Group).<br />
Some actuators have several G positions (G1, G2 and G3) as they can belong<br />
to several different groups at the same time.<br />
Example: The actuator configured with A = 1, PL = 3 and G = 4 is device 3 of<br />
room 1 belonging to group 4.<br />
������<br />
�����<br />
������<br />
1 2 3 4 5 1 2 3 4 5 1 2 3 4 5<br />
�����<br />
������<br />
�����������<br />
�����<br />
������<br />
�����<br />
������<br />
�����<br />
������<br />
�����<br />
������<br />
�����<br />
������<br />
Up to 9 room addresses can be<br />
managed in one system.<br />
For each room up to 9 addresses can be<br />
managed for each actuator.<br />
To these addresses are added any<br />
belonging to one or more groups.<br />
This mode can make an extension system made up of several individual<br />
systems, each of which may thus use all the 81 addresses, connected<br />
together on a single bus with riser function. A typical use may be the house<br />
distributed over several floors: a system can be made for each floor and they<br />
can be connected by means of interface item F422.
controls: Addresses And type of control<br />
The control devices also have positions A and PL to define the addresses of<br />
the devices which receive the control (actuators).<br />
For these positions there are numeric configurators with graphics which<br />
enable the device to send the control with the various ways listed in the<br />
table below.<br />
Device address mode<br />
Type of control <strong>Control</strong> device Actuator device<br />
configurator configurator configurator configurator<br />
housing value housing value<br />
Point-point A �� �� �� ��<br />
��� ��� A<br />
� �� �<br />
PL � �� �<br />
��� PL<br />
Room A � �� �<br />
���<br />
��� ���<br />
�� �� A<br />
PL ���� �� �<br />
���<br />
��<br />
PL<br />
Group A ���<br />
��<br />
G1<br />
PL ���� �� �<br />
��� �� G2<br />
G3<br />
General A � �� �<br />
��� ���<br />
��<br />
PL —<br />
AUXILIARY<br />
control<br />
A<br />
PL<br />
���<br />
AUX<br />
��<br />
� �� �<br />
���<br />
exAmples of configurAtion<br />
Point-point control<br />
If the No. 3 control is configured with A = 2 and PL = 3, this device sends the<br />
control to the actuator identified with A = 2 and PL = 3.<br />
230V a.c.<br />
1<br />
A = 1<br />
PL = 1<br />
Group control<br />
� �� �<br />
���� �� �<br />
��� � �� �<br />
���� �� �<br />
���� �� �<br />
���� �� �<br />
���<br />
���<br />
���<br />
���<br />
��� ��<br />
���<br />
��<br />
��� ��<br />
��� ��<br />
��� ��<br />
<strong>Control</strong><br />
If the No. 7 control is configured with A = GR and PL = 1, this device sends the<br />
control to the actuator identified with G = 1 (thus belonging to group 1).<br />
2 3 4 1 2 1 2<br />
A = 1<br />
PL = 2<br />
A = 1<br />
PL = 1<br />
G = 1<br />
���<br />
point-point<br />
controls<br />
A = 1<br />
PL = 3<br />
A = 1<br />
PL = 2<br />
G = 1<br />
��<br />
A = 2<br />
PL = 1<br />
A = 1<br />
PL = 3<br />
G = 2<br />
A =AMB<br />
PL = 1<br />
room<br />
controls<br />
A = 2<br />
PL = 1<br />
G = 2<br />
A =AMB<br />
PL = 2<br />
1 2 3 4 5 6<br />
A = 2<br />
PL = 2<br />
G = 1<br />
A =GR<br />
PL = 1<br />
��<br />
��<br />
group<br />
controls<br />
actuators<br />
A = 2<br />
PL = 3<br />
G = 1<br />
A =GR<br />
PL = 2<br />
general<br />
control<br />
A =GEN<br />
PL =<br />
BUS<br />
= Point-point controls<br />
= Group controls<br />
configurAtion<br />
MY HOME cOntROL technical GUiDe<br />
49
configurAtion<br />
Addressing levels<br />
For a better understanding of the concepts described in the previous page,<br />
the four addressing modes are described below.<br />
Point-point control<br />
Direct control to one actuator identified by a “room number” and a “light<br />
point number”.<br />
<strong>Control</strong> device: A = n* PL = n*<br />
Actuator: A = n* PL = n*<br />
Example: control for a single load (lamp, fan, rolling shutter, etc.)<br />
������<br />
Room control<br />
Direct control to all the actuators identified by the same room number.<br />
<strong>Control</strong> device: A = AMB PL = n*<br />
Actuator: A = n* PL = n*<br />
Example: control for all the lamps of a room<br />
������<br />
�������<br />
������<br />
n* = any numeric configurator from 1 to 9�������<br />
50 my Home - control<br />
�����������<br />
��������<br />
�����������<br />
��������<br />
���������<br />
���������<br />
�����������<br />
��������<br />
�����������<br />
��������<br />
���������<br />
���������<br />
�����<br />
������<br />
�����<br />
������<br />
�����<br />
������<br />
�����<br />
������<br />
�����<br />
������<br />
�����<br />
������<br />
�����<br />
������<br />
�����<br />
������<br />
������<br />
�����<br />
������<br />
�����<br />
������<br />
�����<br />
������<br />
�����<br />
������<br />
�����<br />
������<br />
The control devices (senders) can activate the actuators (receivers) with the<br />
following modes.<br />
�����<br />
������<br />
�����<br />
������<br />
������ ������<br />
�����<br />
������<br />
�����<br />
������<br />
�������<br />
������<br />
�����<br />
������<br />
�����<br />
������<br />
�����<br />
������<br />
�����<br />
������<br />
�����<br />
������<br />
�����<br />
������<br />
�����<br />
������<br />
�����<br />
������<br />
������<br />
�������<br />
������<br />
�������<br />
������<br />
�����<br />
������<br />
�����<br />
������<br />
������ ������<br />
�����<br />
������<br />
�����<br />
������<br />
�������<br />
������<br />
�����<br />
������<br />
�����<br />
������<br />
�����<br />
������<br />
�����<br />
������<br />
�����<br />
������<br />
�����<br />
������<br />
������<br />
�����<br />
������<br />
�����<br />
������<br />
�����<br />
������<br />
�����<br />
������<br />
�����<br />
������<br />
�������<br />
������<br />
�������<br />
������<br />
�����<br />
������<br />
�����<br />
������<br />
�����<br />
������<br />
�����<br />
������<br />
�����<br />
������<br />
�����<br />
������<br />
�����<br />
������<br />
�����<br />
������
Addressing levels<br />
Group control<br />
Direct control to all the actuators which perform particular functions even if they <strong>Control</strong> device: A = GR PL = n*<br />
belong to different rooms and are identified by the same “group number”.<br />
Room 1<br />
Example: control of all the lamps of Point-point a floor, on the North side of the building<br />
Actuator: A = n* PL = n* G = n*<br />
Room 2<br />
Group 1<br />
control<br />
A = GR<br />
PL = 1<br />
controls<br />
Point-point<br />
controls<br />
A = 1<br />
PL = 1<br />
A = 1<br />
Room PL = 2 1<br />
A = 1<br />
PL = 3<br />
A = 2<br />
PL = 1<br />
A = 2<br />
Room PL = 2 2<br />
General control<br />
Group 1<br />
Group 2<br />
control<br />
control<br />
Group 2<br />
control<br />
A = GR A = GR<br />
PL = 2PL<br />
= 1<br />
A = GR<br />
PL = 2<br />
Direct control to all the system actuators.<br />
Group 1<br />
control<br />
Group 1<br />
control<br />
Group 2<br />
control<br />
Group 2<br />
control<br />
General<br />
control A = GEN<br />
General PL =<br />
control<br />
A = GR<br />
PL = 1<br />
A = GR<br />
PL = 1<br />
A = GR<br />
PL = 2<br />
A = GR<br />
PL = 2<br />
A = GEN<br />
PL =<br />
Actuators<br />
Actuators<br />
Example: control of all the lamps of the building<br />
n* = any numeric configurator from 1 to 9<br />
<strong>Control</strong>s<br />
<strong>Control</strong>s<br />
Actuators<br />
Actuators<br />
A = 1<br />
PL = 1<br />
A = 1<br />
PL = 1<br />
G = 1<br />
A = 1<br />
PL = 1<br />
G = 1<br />
Room 1<br />
control<br />
Room 1<br />
control<br />
A = 1<br />
PL = 1<br />
A = 1<br />
PL = 1<br />
A = 1<br />
PL = 1<br />
G = A 1=<br />
1<br />
PL = 1<br />
G = 1<br />
Room 1<br />
control Room 1<br />
control<br />
A = 1<br />
PL = 2<br />
A = AMB<br />
PL = 1<br />
A = 1<br />
PL = 3<br />
A = 1 A = 1<br />
PL = 2 PL = 3<br />
G = 1 G = 2<br />
A = 1 A = 1<br />
PL = 2 PL = 3<br />
G = 1 G = 2<br />
A = AMB<br />
PL = 1<br />
A = 2<br />
PL = 1<br />
Room 1<br />
control<br />
Room 1<br />
control<br />
A = 2<br />
PL = 2<br />
A = AMB<br />
PL = 2<br />
A = 2<br />
PL = 3<br />
<strong>Control</strong> device: A = GEN PL = /<br />
Actuator: A = n* PL = n* G = n*<br />
Room 1<br />
A = 1<br />
A = 1<br />
A = 2<br />
Room 2<br />
A = 2<br />
PL = 2 PL = 3<br />
PL = 1<br />
PL = 2<br />
A = 1<br />
A = 1<br />
A = 2<br />
A = 2<br />
PL = 2 PL = 3<br />
PL = 1<br />
PL = 2<br />
A = 1<br />
PL = 2<br />
G = A 1=<br />
1<br />
PL = 2<br />
G = 1<br />
A = AMB<br />
PL A = = 1 AMB<br />
PL = 1<br />
A = 1<br />
PL = 3<br />
G A = 2=<br />
1<br />
PL = 3<br />
G = 2<br />
A = 2<br />
PL = 1<br />
G = 2<br />
A = 2<br />
PL = 1<br />
G = 2<br />
A = 2<br />
PL = 1<br />
G A = 2<br />
PL = 1<br />
G = 2<br />
Room 2<br />
control Room 2<br />
control<br />
A = 2<br />
PL = 2<br />
G = 1<br />
A = 2<br />
PL = 2<br />
G = 1<br />
A = AMB<br />
PL = 2<br />
Room 1 Room 2<br />
A = 2<br />
PL = 2<br />
G A = 12<br />
PL = 2<br />
G = 1<br />
A = AMB<br />
PL A = AMB 2<br />
PL = 2<br />
A = 2<br />
PL = 3<br />
A = 2<br />
PL = 3<br />
G = 1<br />
A = 2<br />
PL = 3<br />
G = 1<br />
A = 2<br />
PL = 3<br />
A = 2<br />
PL = 3<br />
A = 2<br />
PL = 3<br />
A G = 21<br />
PL = 3<br />
G = 1<br />
configurAtion<br />
MY HOME cOntROL technical GUiDe<br />
51
ON<br />
OFF<br />
O/I<br />
ON<br />
OFF<br />
mAin control operAting modes<br />
The devices in the automation system can perform different functions, such<br />
as setting the brightness, switching lamps on/off or opening/closing rolling<br />
shutters.<br />
The function performed, i.e. what the device must do, is defined by putting<br />
table<br />
configurAtion<br />
Key covers Configurator (M) value Function performed<br />
1 function<br />
2 functions<br />
M 1√4<br />
M 1√4<br />
52 my Home - control<br />
M<br />
M<br />
M<br />
M<br />
M<br />
1√8<br />
SPE 1√8<br />
no configurator<br />
M ON<br />
M ON<br />
M ON<br />
M ON<br />
1√8<br />
configurator ON<br />
M OFF<br />
M OFF SLA<br />
M OFF<br />
M OFF<br />
configurator OFF<br />
M<br />
M O/I<br />
M PUL<br />
M O/I<br />
M O/I<br />
M O/I<br />
configurator PUL<br />
M ON<br />
M<br />
M<br />
M<br />
configurator<br />
M<br />
M OFF<br />
M<br />
M<br />
configurator M<br />
M<br />
1√8 O/I<br />
SPE 1√8<br />
configurator O/I<br />
M<br />
1√8<br />
configurators into the housings marked with M of the control devices and<br />
completing the devices with keys and key covers (if the devices are flush<br />
mounted). The table below lists the various operating modes as a function of<br />
the configurator and type of key cover used in the device.<br />
Cyclical ON-OFF control<br />
M<br />
M<br />
M<br />
M<br />
Pressing the device used with relay actuators M several M times on<br />
M<br />
M<br />
the key covers sends the ON and OFF control alternately.<br />
With dimmer actuators keeping the pushbutton pressed adjusts<br />
the load power.<br />
M 1√4<br />
M 1√4<br />
M 1√4<br />
M 1√4<br />
M<br />
1√8<br />
SPE M<br />
SPE M<br />
SPE<br />
M<br />
SPE<br />
1√8<br />
1√8<br />
1√8<br />
1√8<br />
1√8<br />
1√8<br />
ON control<br />
On pressing the key cover the device sends the ON control.<br />
OFF control<br />
1√8<br />
1√8<br />
On pressing the key cover the device sends the 1√8 OFF control.<br />
M<br />
M<br />
M<br />
1√8<br />
M SLA<br />
M<br />
M M<br />
SLA<br />
SLA<br />
SLA<br />
Monostable ON-OFF control (pushbutton)<br />
This mode can perform an ON/OFF control similar to the control<br />
of a traditional point-point pushbutton, thus intended just for one<br />
address.<br />
Bistable control with hold (UP-DOWN M for rolling PUL shutters)<br />
M 1√4<br />
M<br />
1√8<br />
By pressing the key cover (lower or SPE upper) M quickly PUL 1√8 it sends the<br />
M PUL<br />
UP-DOWN control for a rolling shutter Mmotor.<br />
After PUL the control has<br />
been given, pressing the lower or upper key cover again stops<br />
the rolling shutter in the position required.<br />
Monostable control (UP-DOWN for rolling M shutters)<br />
1√8<br />
The device sends an UP-DOWN control for a rolling shutter motor<br />
as long as the lower or upper key cover is pressed.<br />
When the key cover is released the motors STOPS.<br />
ON/OFF control<br />
Used with relay actuators, when the Mupper key SLA cover is pressed<br />
the device sends an ON control; when the lower key cover is<br />
pressed the device sends an OFF control.<br />
With dimmer actuators pressing the upper and lower key cover<br />
adjusts the load power.<br />
M<br />
PUL
cen operAting mode<br />
This particular mode is used to manage scenario programmer devices item<br />
MH200.<br />
As described in the pages of this guide, the device can manage even<br />
complex scenarios activated automatically after events in the system or<br />
manually by pressing a key of a control device configured with the CEN<br />
configurator in the M position. The key (upper or lower) of the control device<br />
and the scenario to be activated are linked through the TiMH200 program<br />
written to create the scenarios and then saving them in the MH200 device.<br />
For example, two independent scenarios can be activated using the control<br />
item L4652/2 by pressing the T1 (upper) and T4 (lower) pushbuttons.<br />
AuxiliAry controls<br />
M<br />
M<br />
Some special functions can be performed using a resource common to all the<br />
SCS systems: the auxiliary channels. There are 9 transmission channels on<br />
which controls can be sent. <strong>Control</strong>s can be sent on auxiliary channels from<br />
any control device, configuring A = AUX and PL = 1 to 9. The configurator<br />
in LP specifies on which auxiliary channel the control must be transmitted,<br />
mAin ActuAtor operAting modes<br />
M 1√4<br />
M 1√4<br />
M<br />
1√8<br />
M<br />
1√8<br />
M<br />
SPE 1√8<br />
SPE 1√8<br />
The actuators can be configured for the following operating modes:<br />
table<br />
M ON<br />
M OFF<br />
M O/I<br />
M<br />
Configurator (M) value Function performed<br />
M<br />
M 1 1√8<br />
1√8<br />
- 4<br />
configurator 1 to 4<br />
M SLA<br />
M SLA<br />
configurator SLA<br />
M<br />
PUL<br />
PUL<br />
configurator PUL<br />
while the operating mode is specified by configurator M as for all the other<br />
controls. The actuators do not recognise these controls directly; the special<br />
control which translates the auxiliary into a control which the actuators can<br />
perform must therefore be used.<br />
M<br />
Special functions<br />
This M mode 1 can - 8 perform special functions (OFF delayed, STOP<br />
SPE timed) on 1 the - 8 basis of the type of actuator used (single or<br />
double) and the numeric configurator inserted.<br />
Slave<br />
This mode can perform a control with two or more actuators. In<br />
practice the actuators with the SLA (Slave) configurator repeat the<br />
function M performed by another actuator which acts as Master.<br />
The actuators 1 - 8must<br />
have the same addresses and must be of<br />
the same type (either all light actuators or all rolling shutter<br />
actuators).<br />
M SLA<br />
M<br />
T1<br />
T3<br />
A=1 to 9<br />
PL=1 to 9<br />
T4<br />
MH200<br />
Scenario programmer<br />
M=CEN<br />
T1 key = Scenario 1<br />
The control device address is T2 key = Scenario 2<br />
specified in positions A and PL. T3 key = Scenario 3<br />
T4 key = Scenario 4<br />
PUL<br />
M<br />
PUL<br />
The device does not operate with the Room and General controls.<br />
M CEN CEN<br />
The device activates the advanced scenarios saved in MH200.<br />
configurator CEN<br />
T2<br />
configurAtion<br />
MY HOME cOntROL technical GUiDe<br />
53
configurAtion<br />
exAmples of configurAtion<br />
The drawing shows a system for the management of three lamps and three<br />
rolling shutters. Each actuator is identified by three numbers: Room number<br />
(A), device progressive number (PL for light actuators and PL1 and PL2 for<br />
rolling shutter actuators) and Group (G) of belonging.<br />
The control devices are instead distinguished from the configurators in<br />
positions A and PL which specify the addresses of the actuators receiving<br />
the control (one only, a group or several room actuators) and from the<br />
configurators in position M to define the function (ON/OFF or ON/DOWN).<br />
Defining the addresses<br />
Point-point control<br />
<strong>Control</strong> 1 (A = 1, PL = 1) controls actuators 1 (A = 1, PL = 1 and G = 1). In the<br />
same way control 2 (A = 1, PL = 2) controls actuator 2 (A = 1, PL = 2 and<br />
G = 1) etc..<br />
Room control<br />
Room control 8 (A=AMB, PL=2) controls actuators 4 and 5 marked with A=2<br />
Group control<br />
Group control 7 marked with A=GR and PL=1, controls actuators 1 and 2<br />
marked with G=1<br />
230V a.c.<br />
54 my Home - control<br />
1<br />
A = 1<br />
PL = 1<br />
M = 0/I<br />
General control<br />
The devices identified A=GEN and PL= - (no configurator) send a general<br />
control to all the actuators, for the lights and for the rolling shutters, in the<br />
system.<br />
NOTE: The actuators which manage the rolling shutters, unlike those for the<br />
lights, are configured in the same way in the two positions PL1 and PL2.<br />
control operating mode<br />
The configurator inserted in position M of each control device identifies the<br />
operating mode.<br />
The O/I configurator specifies a lamp switching on control which is given by<br />
pressing the upper key cover (ON) and the lower key cover (OFF).<br />
The configurators and M in position M instead specify a control to<br />
manage the rolling shutters intended for actuators 4, 5 and 6.<br />
point-point control group<br />
control<br />
BUS<br />
room<br />
control<br />
2 3 4 5 6 7 8<br />
A = 1<br />
PL = 2<br />
M = 0/I<br />
A = 1<br />
PL = 3<br />
M = 0/I<br />
A = 2<br />
PL = 1<br />
M = M<br />
A = 2<br />
PL = 2<br />
M = M<br />
A = 3<br />
PL = 1<br />
M = M<br />
A = GR<br />
PL = 1<br />
M = 0/I<br />
1 2 3 4 5 6<br />
actuators<br />
A = 1<br />
PL = 1<br />
G = 1<br />
A = 1<br />
PL = 2<br />
G = 1<br />
A = 1<br />
PL = 3<br />
G = 2<br />
A = 2<br />
PL1 = 1<br />
PL2 = 1<br />
A = 2<br />
PL1 = 2<br />
PL2 = 2<br />
A = 3<br />
PL1 = 1<br />
PL2 = 1<br />
A = AMB<br />
PL = 2<br />
M = M<br />
general control<br />
9 10<br />
A = GEN<br />
PL = -<br />
M = 0/I<br />
A = GEN<br />
PL = -<br />
M = M
device configurAtion mode<br />
The Automation devices can be confi gured in two modes:<br />
- physical<br />
- virtual<br />
Physical confi guration<br />
This is done by inserting special click-in components called confi gurators,<br />
which differ in number, letter, colour or symbol, into special sockets of each<br />
device using pliers, (item 3501/..).<br />
This mode is indicated for systems of small-average complexity. For systems<br />
with many devices intended for houses on several fl oors, hotels and the<br />
service sector we recommend using the virtual confi guration described in the<br />
pages below.<br />
Overview of the confi gurators<br />
description of the<br />
confi gurator housings<br />
confi gurator<br />
housing<br />
numbered<br />
confi gurator<br />
tool for installation<br />
of confi gurator<br />
configurAtion<br />
MY HOME cOntROL technical GUiDe<br />
55
configurAtion<br />
virtuAl configurAtion<br />
In systems with many devices the confi guration operations can be simplifi ed<br />
considerably using the virtual confi guration kit item 3503 and a handheld<br />
computer with Wireless connection as an alternative to the manual<br />
confi guration. This mode, called “virtual confi guration”, allows confi guring<br />
each device without using the usual alphanumeric confi gurators. The device<br />
address and operating mode are established with special software installed in<br />
the hand-held computer and sent to the system via wireless by means of the<br />
Kit connected to the bus; this mode is thus particularly advantageous in large<br />
systems for modifying the confi guration at any time without having to act<br />
manually on each device.<br />
The virtual confi guration is applicable to all types of Automation system, either<br />
individual or combined together in “logical extension” mode.<br />
For more information, consult the documentation supplied with the item 3503 kit.<br />
Single system<br />
power supply<br />
Automation system<br />
56 my Home - control<br />
rolling shutter<br />
control<br />
fl ush-mounting<br />
actuator<br />
dimmer<br />
control<br />
DIN dimmer<br />
NOTE: the hand-held computer is not supplied with the kit but must be purchased separately.<br />
Pocket PC Requirements<br />
• Operating system Microsoft Windows Mobile TM<br />
• 300 Mhz Processor or higher<br />
• System memory: 64 Mb or higher<br />
• Secure Digital expansion Slot<br />
(only for installation from SD Card)<br />
• Screen:<br />
- Resolution 240x320 pixels or greater<br />
- Colours 65.000 or more<br />
• Touch screen pointing device with pen<br />
• Wireless Wi-Fi technology<br />
• USB external communication port<br />
(for the connection to the PC)<br />
Pocket PC<br />
Main page of the VIRTUAL CONFIGURATOR program<br />
WiFi<br />
rolling shutter<br />
control<br />
DIN actuator<br />
230V a.c.<br />
BUS<br />
Access the selection page of the device to be confi gured<br />
Access the selection page of the device to check<br />
Access the page which allows the test of an actuator<br />
Access the page which checks the software options<br />
Allows the management of the connection with the system.<br />
Kit 3503<br />
BUS<br />
12V a.c.
This device can be configured to perform typical functions (ON, OFF, timed<br />
ON) and special functions (otherwise possible in traditional systems with<br />
many devices and complex wiring).<br />
Operating mode<br />
The following table lists all the operating modes expected with the<br />
configurator in position M.<br />
The “—” symbol indicates the configurator/key cover combinations which<br />
cannot be used.<br />
table<br />
control for single load<br />
item H/l4651/2 and item Am5831/2<br />
LED<br />
front view<br />
Possible function Combination key cover<br />
used and configurator in M<br />
Cyclical ON-OFF for short push no —<br />
and adjustment for long push configurator<br />
ON control ON —·<br />
Timed ON control 1) 2) 1 to 8 —<br />
OFF control OFF —<br />
ON pressing the upper key – OFF pressing the lower key<br />
and adjustment for long pressure (dimmer) — O/I 3)<br />
Rolling shutter up-down to end of stroke —<br />
Monostable rolling shutter up-down — M<br />
Pushbutton (ON monostable) PUL -<br />
Activation of 2 scenarios managed by the programmer item MH200 CEN<br />
1) The device puts the actuator which it has in address in OFF after a time laid<br />
down by the configurators used, as indicated in the table below:<br />
Configurator Time (minutes)<br />
1 1<br />
2 2<br />
3 3<br />
4 4<br />
5 5<br />
6 15<br />
7 30 seconds<br />
8 0.5 seconds<br />
upper pushbutton<br />
lower pushbutton<br />
rear view<br />
L4651/2<br />
A<br />
PL<br />
M<br />
SPE<br />
AUX<br />
L4652/3<br />
A1<br />
PL1<br />
A2<br />
PL2<br />
A3<br />
PL3<br />
M<br />
position M<br />
configurator<br />
housing<br />
A<br />
PL<br />
M<br />
SPE<br />
AUX<br />
L/N4681<br />
2) Extra times to table 1. To actuate them both positions M and SPE must be<br />
configured.<br />
Configurator Time<br />
M SPE<br />
1 7 2 seconds<br />
2 7 10 minutes<br />
3) As a function of the receiver actuator operating mode<br />
BUS<br />
A<br />
PL<br />
M<br />
configurAtion<br />
MY HOME cOntROL technical GUiDe<br />
57
configurAtion<br />
control for single load item H/l4651/2 and item Am5831/2<br />
AdvAnced operAting modes<br />
In combination with the configurator in position M, by configuring positions<br />
SPE and AUX the device can be enabled to perform special functions.<br />
Operating functions possible with configurator in position SPE<br />
Possible function Configurator Combination key cover<br />
in position SPE used and configurator in M<br />
Locks the state of the devices to which the control is addressed 1 1 —<br />
Unlocks the state of the devices to which the control is addressed 1 2 —<br />
Locks with lower key and unlocks with upper key 1 — 3<br />
ON with flash 1) 2 none to 9 —<br />
Selection fixed adjustment level at 10 to 90% of the dimmer 2) 3 1 to 9 —<br />
Repeating of key 1 to 9 of the scenario unit<br />
whose address is specified in A and PL<br />
4 1 to 9 —<br />
1) The flashing time is indicated in the table:<br />
2) The function is active if the device address corresponds to the address of a<br />
dimmer actuator.<br />
The configurator in M defines the adjustment in % of the load power.<br />
Configurator Time (seconds)<br />
none 0.5<br />
1 1<br />
2 1.5<br />
3 2<br />
4 2.5<br />
5 3<br />
6 3.5<br />
7 4<br />
8 4.5<br />
9 5<br />
58 my Home - control<br />
T T<br />
A<br />
PL<br />
M<br />
SPE<br />
AUX<br />
position M<br />
position SPE<br />
Configurator %P on the load<br />
1 10<br />
2 20<br />
3 30<br />
4 40<br />
5 50<br />
6 60<br />
7 70<br />
8 80<br />
9 90<br />
Activating the device only puts the load at the value selected in ON. To turn OFF<br />
use a second control with configurator OFF in M.
L4651/2<br />
A<br />
PL<br />
M<br />
SPE<br />
AUX<br />
L4652/3<br />
A1<br />
PL1<br />
A2<br />
PL2<br />
A3<br />
PL3<br />
M<br />
Other operating functions possible with configurator in position SPE<br />
Possible function Configurator Combination key cover<br />
in position SPE used and configurator in M<br />
Operating functions possible with configurators in position AUX<br />
The configurator in AUX indicates the auxiliary channel number which activates the control.<br />
A<br />
PL<br />
M<br />
SPE<br />
AUX<br />
A1<br />
PL1<br />
PL2<br />
M<br />
SPE<br />
On receiving a message sent on the AUX channel indicated, the device sends the control for which it is configured as if its control pushbutton had been pressed.<br />
No. of auxiliary channel Combination key cover<br />
which enable the control used and configurator in AUX<br />
L/N4681<br />
AUX position<br />
L/N4688<br />
L4671/1<br />
L4671/2<br />
A<br />
A<br />
A<br />
PL<br />
PL<br />
PL<br />
M M<br />
M<br />
G1<br />
G<br />
G2<br />
Channel 1 to 9 1 to 9 1 to 9<br />
A<br />
PL<br />
M<br />
SPE<br />
AUX<br />
position M<br />
position SPE<br />
T3 T4<br />
Scenario module control (see configuration item F420) 6 SCENARIO<br />
M T1 T2 T3 T4<br />
1 1 2 3 4<br />
2 5 6 7 8<br />
3 9 10 11 12<br />
4 13 14 15 16<br />
Sound system function 8<br />
A = 1 to 9 address of the room of the amplifier to be controlled<br />
PL/PF = 0 to 9 address of the amplifier to be controlled<br />
SPE = 8 Sound system mode<br />
M<br />
or<br />
= 0 (follow me mode)*<br />
A = AMB room configuration<br />
PL/PF = 1 to 9 configuration of the room to be controlled (in this case all the amplifiers of the same room are controlled)<br />
SPE = 8 Sound system mode<br />
M<br />
or<br />
= 1 (activation source S = 1)*<br />
A = GEN this command activates all the amplifiers in the home<br />
PL/PF = /<br />
SPE = 8 Sound system mode<br />
M = 4 (activation source S = 4)*<br />
Door entry and video door entry system functions<br />
NOTE (*):<br />
9 see Communication Technical Guide<br />
M = 1 to 4 indicates the source to activate before switching the amplifier ON. If M = 0 source 1 is switched ON without switching the sources OFF (follow-me mode).<br />
Example:<br />
- if A = 1, PL1/PF1 and M1 = 3 the radio control will manage the amplifier with address A = 1 and PF = 1 and will activate source 3.<br />
A1<br />
PL1<br />
PL2<br />
M<br />
SPE<br />
T1<br />
T2<br />
configurAtion<br />
MY HOME cOntROL technical GUiDe<br />
59
configurAtion<br />
control item H/l4652/2 and item Am5832/2<br />
operAting mode<br />
Made up of two independent controls, on the back the device has two<br />
distinct positions M1 and M2.<br />
If the device is to be used for just one control, configure only the positions<br />
for control 1 (positions A1, PL1 and M1). If instead two separate controls<br />
are to be generated, configure the positions of control 1 and control 2<br />
independently.<br />
table<br />
A<br />
PL1<br />
M1<br />
A2<br />
PL2<br />
M2<br />
Possible function Combination of key covers used/Configurator in M1 and M2<br />
ON control ON —<br />
OFF control OFF —<br />
Timed ON control 2) 1 to 8 —<br />
Dimmer - ON control (upper key)<br />
OFF (lower key) + adjustment<br />
— O/I<br />
1)<br />
Cyclical ON-OFF control and adjustment 1) no configurator —<br />
Rolling shutter up-down to end of stroke —<br />
Monostable rolling shutter up-down — M<br />
Pushbutton (ON monostable) PUL —<br />
Activation of scenarios managed by the programmer MH200 3) 1) If the control is sent to a dimmer actuator.<br />
2) For operating times and description see the table for the device item L4651/2.<br />
CEN<br />
3) If the device is used only to manage the scenario programmer MH200, do not configure positions A2, PL2.<br />
60 my Home - control<br />
position M1<br />
position M2<br />
front view<br />
rear view<br />
upper pushbuttons<br />
lower pushbuttons<br />
control 1 control 2 control 1 control 2<br />
→ →<br />
→ →<br />
LED<br />
control 1<br />
control 2<br />
BUS
control item H/l4652/3<br />
and item Am5832/3<br />
Device with three independent controls.<br />
Can drive actuators for single loads with 1 relay or actuators with 2<br />
interlocked relays and send controls for the management of advanced<br />
devices if configured with CEN configurator.<br />
operAting mode<br />
L4651/2<br />
A<br />
On the back the device has PLthree<br />
distinct A and PL positions PL which refer to<br />
M<br />
M<br />
three keys on the front part. SPE<br />
SPE<br />
Going from left to right the AUX three front keys correspond to AUXcontrol<br />
1 (A1,<br />
PL1), control 2 (A2, PL2) and control 3 (A3, PL3).<br />
The following table lists all the operating modes with the configurator in<br />
position M.<br />
L4652/3<br />
A1<br />
PL1<br />
A2<br />
PL2<br />
A3<br />
PL3<br />
M<br />
position M<br />
Configurator value in position M Key covers used/function<br />
A<br />
L/N4681<br />
no configurator cyclical ON-OFF<br />
NOTE: if the control is associated with a dimmer actuator item H/L4678 item H/<br />
L4674 with operating modes cyclical ON-OFF, ON (upper key) and OFF (lower key)<br />
the brightness can also be adjusted.<br />
Configurator value in position M Key covers used/function<br />
3 up-down<br />
6 up-down monostable<br />
9 ON (upper key)<br />
OFF (lower key)<br />
CEN enabling the T1-T2-T3 (upper) and<br />
T4-T5-T6 (lower) keys to manage<br />
scenarios of the programmer<br />
MH200.*<br />
NOtE (*): Do not configure positions A2, PL2 and A3, PL3.<br />
A<br />
PL<br />
front view<br />
rear view<br />
L/N4688<br />
A1<br />
PL1<br />
PL2<br />
M<br />
SPE<br />
L4671/1<br />
M M<br />
G1<br />
G2<br />
A<br />
PL<br />
A1<br />
PL1<br />
PL2<br />
M<br />
SPE<br />
upper<br />
pushbuttons<br />
lower<br />
pushbuttons<br />
LED<br />
control 1<br />
control 2<br />
control 3<br />
Configurator value in position M Key covers used/function<br />
1 ON-OFF up-down<br />
cyclic<br />
4 ON-OFF up-down<br />
cyclic monostable<br />
7 ON-OFF ON (upper key)<br />
cyclic OFF (lower key)<br />
Configurator value in position M Key covers used/function<br />
2 ON-OFF up-down<br />
cyclic<br />
5 ON-OFF up-down<br />
cyclic monostable<br />
8 ON-OFF ON (upper key)<br />
cyclic OFF (lower key)<br />
BUS<br />
configurAtion<br />
MY HOME cOntROL technical GUiDe<br />
61<br />
L4671/2<br />
A<br />
PL<br />
M<br />
G
touch control<br />
item Hc/Hs4653/2 and item Hc/Hs4653/3<br />
The touch control is included in the catalogue in two versions (AXOLUTE series):<br />
one has two modules and the other has three modules. The difference between<br />
these two versions is simply mechanical (2 or 3 modules), the configuration<br />
procedures and the functioning modes are the same.<br />
If the device is properly configured, it is possible to send controls for the<br />
automation, sound system, video door entry and to manage the scenarios stored<br />
in the scenario module item F420. The tables below describe the configuration<br />
procedures for the automation and the management of the scenarios; as for the<br />
functions of the sound system and video door entry system, please refer to the<br />
documentation thereof.<br />
A<br />
PL/PF<br />
M<br />
M2<br />
SPE<br />
INT<br />
Automation operating mode table<br />
62 my Home - control<br />
A room<br />
PL/PF light point/voice point (sound system SPE=8)<br />
M mode<br />
M2 mode 2 (scenario selection SPE=6)<br />
SPE special<br />
INt LED intensity adjustment<br />
LED<br />
sensitive<br />
area<br />
Possible function SPE M<br />
For point-point controls, it executes the cyclical ON/OFF function for short approaching and load power None None<br />
adjustment (dimmer actuators) for long approaching. As for the other controls, it executes only ON/OFF<br />
Timed ON control. The device sets the actuator to OFF after a predetermined time (see table 1) None 1 to 8<br />
ON control None ON<br />
OFF control None OFF<br />
Pushbutton (monostable ON) None PUL<br />
Cyclic ON/OFF without adjustment 1 7<br />
ON control with flash. The flashing time is specified in the table 2 2 None to 9<br />
Selects the fixed adjustment level of the dimmer (see table 3) 3 1 to 9<br />
Sound system function 8 *<br />
Audio and video door entry functions None *<br />
Activation of scenarios managed by the scenario programmer MH200 9 CEN<br />
table 1 SPE = none<br />
M Time<br />
1 1 min<br />
2 sec (SPE=7)<br />
2 2 min<br />
10 min (SPE=7)<br />
3 3 min<br />
4 4 min<br />
5 5 min<br />
6 15 min<br />
7 30 sec<br />
8 0.5 sec<br />
table 2 SPE=2<br />
M Time<br />
None 0.5 sec<br />
1 1 sec<br />
2 1.5 sec<br />
3 2 sec<br />
4 2.5 sec<br />
5 3 sec<br />
6 3.5 sec<br />
7 4 sec<br />
8 4.5 sec<br />
9 5 sec<br />
* see the “Sound system” and “Communication” technical guides.<br />
table 3 SPE=3<br />
configurator<br />
housing<br />
BUS<br />
M % power on the load<br />
1 10 %<br />
2 20 %<br />
3 30 %<br />
4 40 %<br />
5 50 %<br />
6 60 %<br />
7 70 %<br />
8 80 %<br />
9 90 %
Operating modes for scenario management<br />
Setting configurator 6 in the SPE socket, the touch <strong>Control</strong> can call, program<br />
and cancel any of the 16 scenarios contained in a Scenario Module item<br />
F420. The scenario number can be selected using configurators 1-9 in<br />
table 4<br />
M M2 Scenario number<br />
0 1 1<br />
0 2 2<br />
... ... ...<br />
1 6 16<br />
Programming a scenario<br />
1) the Scenario Module must be enabled in order to execute the<br />
programming process;<br />
2) put your hand near the detector zone of the control (the LEDs will switch<br />
on at their maximum intensity) and keep it in position. The intensity of<br />
the LEDs will decrease to their lowest level after 3 seconds; now move<br />
your hand away from the control;<br />
3) the LEDs will begin to flash with a very low frequency, hence indicating<br />
the activation of the programming mode;<br />
4) set the scenario using the controls and/or actuators;<br />
5) put your hand briefly near the control to exit the programming mode; the<br />
LEDs will stop flashing and will return to their lowest level of intensity.<br />
modes of operAtion for sound system<br />
A = 1 to 9 room receiving the command<br />
PF/PL = 0 to 9 address of the amplifier to be controlled<br />
M = 0 follow me mode<br />
1 to 4address of the first source to activate<br />
SPE = 8 Sound system mode<br />
or<br />
A = AMB room configuration<br />
PF/PL = 0 to 9 room to control<br />
M = 0 follow me mode<br />
1 to 4address of the first source to activate<br />
SPE = 8 Sound system mode<br />
or<br />
A = GEN this command activates all the amplifiers in the home<br />
PF/PL = /<br />
M = 0 follow me mode<br />
1 to 4address of the first source to activate<br />
SPE = 8 Sound system mode<br />
positions M and M2, as in the following table. The address of the Scenario<br />
Module to control must be indicated in positions A and PL.<br />
A - PL<br />
Address (2 digits) of the Scenario Module to be controlled<br />
cancelling a scenario<br />
1) the Scenario Module must be enabled in order to execute the<br />
programming process;<br />
2) put your hand near the detector zone of the control (the LEDs will switch<br />
on at their maximum intensity) and keep it in position. The intensity of the<br />
LEDs will decrease to their lowest level after 3 seconds; keep your hand in<br />
position for about another 5 seconds;<br />
3) the LEDs will start flashing with a high frequency, thus indicating that the<br />
scenario has been cancelled; they will then return to their lowest level of<br />
intensity.<br />
NOtE: To cancel all scenarios of the module, use the reset key directly on the<br />
scenario module.<br />
configurAtion<br />
MY HOME cOntROL technical GUiDe<br />
63
configurAtion<br />
Knob control item Hc/Hs/l/n/nt4563<br />
Fitted with a knob and a central pushbutton this device is suitable for the<br />
enhanced management of dimmer actuators and Sound systems (SPE = 1,<br />
see Sound system guide).<br />
The central pushbutton switches the dimmers controlled with times (softstart<br />
and soft-stop) and switching on level (from 1-99%) which can be set by<br />
configuration of the device itself ON and OFF.<br />
The rotary knob instead accurately adjusts the controlled power from the<br />
minimum to the maximum value (also for GEN, AMB and GR controls).<br />
PL/PF<br />
A<br />
M<br />
LIV1<br />
LIV2<br />
SPE<br />
I<br />
64 my Home - control<br />
A room<br />
PL/PF light point/voice point<br />
M mode<br />
LIV1 adjustment level 10 to 90<br />
LIV2 adjustment level 1 to 9<br />
SPE Automation mode – configurator 0<br />
I address of the device to be controlled<br />
(see table 1 for details)<br />
Automation Mode SPE = 0 (enhanced dimmer functions)<br />
Can switch a dimmer actuator ON, selecting the level from 1% to 99% and<br />
the soft-start and soft-stop speed, according to the table given below;<br />
the times given refer to the maximum level.<br />
The knob regulates on 99 levels.<br />
Possible function Configurator in M Configurator in LIV1 (tens) Configurator in LIV2 (unit)<br />
ON-OFF cyclic with selection of soft-start 1 to 9 0 to 9 0 to 9<br />
and soft-stop speed (see table 2)<br />
If LIV1=LIV2=0 the load switches ON<br />
at the last level saved<br />
ON-OFF cyclic with switching ON - 0 to 9 0 to 9<br />
at the level from 1-99%. If LIV1=LIV2=0 the load<br />
switches ON at the last level saved<br />
Sound system Mode SPE = 1<br />
See Sound system Technical Guide for details<br />
Mode Automation SPE = 2 (Basic dimmer functions)<br />
Can switch a dimmer ON, selecting the level from 1 to 9. If M = 0 the load<br />
switches ON at the last level saved. Unlike the mode with SPE=0 the knob<br />
regulates on 9 levels.<br />
Possible function Configurator in M Configurator in LIV1 (tens) Configurator in LIV2 (unit)<br />
ON-OFF cyclic with switching ON 0 to 9 - -<br />
at the level from 1-9<br />
1) Address of the device to control:<br />
Configurator in I Address<br />
1 to 9 Systems with logical extension. Address of interface item<br />
F422 on whose BUS the dimmer to be driven is found<br />
0 The dimmer is found in the same system as the knob<br />
control<br />
CEN Systems with logical extension. The dimmer is found in<br />
the riser BUS and the knob control in one of the connected<br />
systems<br />
Front view item HC/HS4563<br />
Rear view<br />
2) Start/stop time:<br />
Configurator in M Time<br />
0 default<br />
1 1 sec.<br />
2 3 sec.<br />
3 5 sec.<br />
4 10 sec.<br />
5 20 sec.<br />
6 40 sec.<br />
7 1 min.<br />
8 2 min.<br />
9 4 min. and 15 sec.<br />
Knob -<br />
Pushbutton/LED<br />
Configurator<br />
housing
spe = 1 sound system mode<br />
A = 1 to 9 room receiving the command<br />
PF/PL = 0 to 9 address of the amplifier to be controlled<br />
M = 0 follow me mode<br />
1 to 4address of the first source to activate<br />
LIV1 = 1 to 9 volume level when the amplifier is activated (without<br />
configurators it activates at the last level set)<br />
LIV2 = 0 do not configure<br />
I 0 do not configure<br />
SPE = 1 Sound system mode<br />
or<br />
A = AMB room configuration<br />
PF/PL = 0 to 9 room to control<br />
M = 0 follow me mode<br />
1 to 4address of the first source to activate<br />
LIV1 = 1 to 9 volume level when the amplifier is activated (without<br />
configurators it activates at the last level set)<br />
LIV2 = 0 do not configure<br />
I 0 do not configure<br />
SPE = 1 Sound system mode<br />
or<br />
A = GEN this command activates all the amplifiers in the home<br />
PF/PL = /<br />
M = 0 follow me mode<br />
1 to 4address of the first source to activate<br />
LIV1 = 1 to 9 volume level when the amplifier is activated (without<br />
configurators it activates at the last level set)<br />
LIV2 = 0 do not configure<br />
I 0 do not configure<br />
SPE = 1 Sound system mode<br />
configurAtion<br />
MY HOME cOntROL technical GUiDe<br />
65
ir receiver item Hc/Hs4654,<br />
item l/n/nt4654n and item Am5834<br />
The receiver can add the remote control by means of infrared ray controls<br />
(item 4482/7 – 4482/16) to the manual control or replace the manual<br />
control by the remote control.<br />
<strong>Control</strong>s intended for 1-relay actuators for single loads and 2-relay actuators<br />
for double loads (rolling shutter motor etc.), scenario managements, Sound<br />
Remote controls<br />
item 4482/7<br />
7 channels<br />
66 my Home - control<br />
item 4482/16<br />
16 channels<br />
Correspondence between remote control pushbuttons and loads controlled<br />
(mode A)<br />
The IR receiver can be set up for 4 different operating modes depending on<br />
the configuration of positions A, PL 1 to 4 and M:<br />
table<br />
PL1<br />
PL2<br />
PL3<br />
PL4<br />
system and Video door entry system (only in self-learning mode) can be<br />
associated to the remote control pushbuttons On the front the device has,<br />
as well as the IR receiving lens, a programming pushbutton and a LED to<br />
indicate the programming phase and reception of the IR signal sent by the<br />
remote control.<br />
LED<br />
room number<br />
receiving the<br />
control<br />
operating<br />
mode<br />
selector switch to<br />
enable<br />
programming<br />
front view<br />
rear view<br />
receiving lens<br />
programming/<br />
reset pushbutton<br />
channel<br />
selection<br />
Mode M Functions which can be performed<br />
A 1 to 4 Repeating of 4 generic controls (ON/OFF, UP/DOWN) with the 4 remote control keys.<br />
Remote The receiver saves the controls required in the installation phase,<br />
control by inserting configurators in positions A, PL 1 to 4 and M.<br />
Changing the pre-set functions involves the reconfiguration of the IR receiver.<br />
B CEN Activation of scenarios managed by the scenario programmer item MH200<br />
Advanced scenarios<br />
C none Repeating of generic controls (ON/OFF, UP/DOWN) with the remote control keys.<br />
Remote In this case the receiver saves the controls with a self-learning procedure.<br />
self-learning The customer can change the succession and the controls saved to be recalled<br />
with the remote control at any time.<br />
D 6 Management with the remote control of a maximum of 16 recorded scenarios in the scenario module item F420.<br />
Scenario module<br />
control<br />
E 9 See “Sound system” Technical guide.<br />
Sound system
mode "A" (remote control) m = 1 to 4<br />
This mode lets the user associate generic controls (ON/OFF, UP/DOWN)<br />
intended for single loads or double loads with the remote control keys.<br />
The correspondence between the remote control keys and the loads<br />
controlled is determined in the installation phase by the configuration of<br />
positions A and PL 1 to PL 4 of the IR receiver, as shown in the table below.<br />
The following can be associated with the remote control pushbuttons:<br />
- Point-point controls, i.e. intended for single or double loads (rolling shutter<br />
motor) whose address is specified by configurator 1 to 9 in positions PL 1<br />
to PL 4. The various operating modes are determined by the association of<br />
the configurators with the PL positions.<br />
- <strong>Control</strong>s intended for actuators for single and double loads belonging to the<br />
room defined with configurator 1 to 9 in position A. In this case the operating<br />
modes are defined by the configurators marked by the graphics of the<br />
function performed, inserted in positions PL 1 to 4.<br />
table<br />
Function Type of Position Position Position Position Position<br />
control A PL1/PF1 PL2/PF2 PL3/PF3 PL4/PF4<br />
cyclical ON-OFF Light point 1 to 9 1 to 9 1 to 9 1 to 9 1 to 9<br />
for short press in the room<br />
+ adjustment (dimmer) indicated in R<br />
cyclical ON-OFF Room<br />
control<br />
1 to 9 AMB AMB AMB AMB<br />
2)<br />
Rolling shutter Light point 1 to 9 1 to 9 1 to 9<br />
up-down 1) in the room 1 to 9 1 to 9<br />
indicated in A 1 to 9 1 to 9<br />
1 to 9 1 to 9<br />
1 to 9 1 to 9<br />
1 to 9 1 to 9<br />
Monostable Room 1 to 9 M M<br />
rolling shutter control 2) M M<br />
up-down 1) M M<br />
M M<br />
M M<br />
M M<br />
Rolling shutter Room 1 to 9<br />
up-down control 2)<br />
to end of stroke 1)<br />
ON control Room 1 to 9 ON ON ON ON<br />
control 2)<br />
OFF control Room<br />
control<br />
1 to 9 OFF OFF OFF OFF<br />
2)<br />
1) The two PL positions must have the same configurator. The UP control is associated<br />
with the first PL position and the DOWN control with the second PL position.<br />
2) The control is intended for devices belonging to the room indicated in A.<br />
Example 1<br />
If on the receiver positions PL2 and PL3 have configurator 7, the remote<br />
control operates double actuator 7 of the room indicated in A, raising the<br />
rolling shutters with pushbutton 2 and lowering them with pushbutton 3.<br />
definition of<br />
channels 1 to 16 of<br />
the remote control<br />
rear view<br />
addresses/<br />
operating mode<br />
Example 2<br />
If on the receiver positions PL2 and PL3 have configurator and position A has<br />
configurator 2, the remote control operates all the actuators in room 2, raising<br />
the rolling shutters with pushbutton 2 and lowering them with pushbutton 3.<br />
configurAtion<br />
MY HOME cOntROL technical GUiDe<br />
67
ir receiver item Hc/Hs4654,<br />
item l/n/nt4654n and item Am5834<br />
Up to 4 IR receivers can be installed in the room considered. They can<br />
manage up to a maximum of 16 separate controls.<br />
The correspondence between the channels of a remote control and the<br />
respective IR receiver is established by configuring position M of the IR<br />
receiver correctly.<br />
7-channel remote control<br />
Configurator<br />
in position M<br />
CH1 1<br />
CH2 2<br />
CH3 3<br />
CH4 4<br />
CH5 5<br />
CH6 6<br />
CH7 7<br />
16-channel remote control<br />
Configurator Configurator<br />
in position M in position M<br />
CH1 CH9 1<br />
CH2 CH10 2<br />
CH3 CH11 3<br />
CH4 CH12 4<br />
CH5 CH13 5<br />
CH6 CH14 6<br />
CH7 CH15 7<br />
CH8 CH16 8<br />
mode “B” (AdvAnced scenArios) m=cen<br />
This mode uses the IR remote controls item 4482/7 and item 4482/16 as<br />
“scenario control” to activate one or more enhanced scenarios saved in the<br />
Programmer item MH200.<br />
The IR receiver must be also configured in positions A and PL with the<br />
numeric configurators for the definition of the address in the system.<br />
The association between one or more remote control pushbuttons (maximum<br />
6) with the scenarios created and saved in the Programmer item MH200 is<br />
performed when creating the scenario itself using the TiMH200 application.<br />
68 my Home - control<br />
configurator M<br />
rear view<br />
item 4482/7<br />
item 4482/16<br />
Detail of the TiMH200<br />
program to define<br />
pushbutton 3 of the<br />
remote control for the<br />
activation of the Night<br />
scenario.<br />
Address A=1 and PL=3<br />
of the IR receiver is<br />
specified in the field<br />
identified with “Object”.
mode “B” (self-leArning - remote) m=0<br />
This mode enables you to associate a single control with any key of the<br />
remote control. It is possible to associate up to 16 controls with a remote<br />
control using only one receiver (using the 16 channel remote control -<br />
4482/16). Configure the receiver with address A=0 and PL=1-9 which cannot<br />
be used by actuators.<br />
<strong>Control</strong>s that the receiver can “learn”:<br />
- ON/OFF actuator (ON/OFF cyclical functioning for short pressure and<br />
adjustment for long pressure)<br />
- Timed ON<br />
- Flashing<br />
- UP-DOWN rolling shutter (up-down until end of stroke)<br />
- Lock/Unlock actuator<br />
- ON/OFF, lights – auxiliary (cyclic ON/OFF functioning)<br />
- UP-DOWN rolling shutter auxiliary (up-down until end of stroke)<br />
- Video door entry system (door lock and Staircase lights)<br />
- Sound system (see “Sound system” Technical guide)<br />
to associate a different control with each of the remote control channels,<br />
follow the procedure below:<br />
1) press the pin pushbutton for 3 seconds: the LED will turn on steadily;<br />
2) within 20 seconds press the key of the channel you want to program<br />
on the remote control: the LED will begin to flash, hence indicating the<br />
activation of the programming mode;<br />
3) set up the control you want to associate with the remote control key using<br />
the controls and/or corresponding actuator: the LED will turn on steadily;<br />
4) you can now repeat 2) and 3) for all keys, even for a key that has already<br />
been associated, in case you want to change it;<br />
5) press the pin key to exit the programming mode: the LED will turn off.<br />
mode “c” (scenArio module control item f420) m=6<br />
This mode can be used only if the system includes a scenario module item<br />
F420. It lets you create, cancel or modify the scenarios contained in the<br />
scenario module, thus activating them with the remote control. The procedure<br />
lets you store up to 16 scenarios using all 16 channels of the 16-channel<br />
remote control. The following table shows the correspondence between the<br />
number of the scenario stored in the scenario module and the remote control<br />
channels:<br />
Number of 16-channel remote 7-channel remote<br />
scenario module control 4482/16 control 4482/7<br />
Scenario 1 Ch1 Ch1<br />
Scenario 2 Ch2 Ch2<br />
Scenario 3 Ch3 Ch3<br />
Scenario 4 Ch4 Ch4<br />
Scenario 5 Ch5 Ch5<br />
Scenario 6 Ch6 Ch6<br />
Scenario 7 Ch7 Ch7<br />
Scenario 8 Ch8<br />
Scenario 9 Ch9<br />
Scenario 10 Ch10<br />
Scenario 11 Ch11<br />
Scenario 12 Ch12<br />
Scenario 13 Ch13<br />
Scenario 14 Ch14<br />
Scenario 15 Ch15<br />
Scenario 16 Ch16<br />
rear view<br />
room number<br />
light point number<br />
not used<br />
local address<br />
of the IR receiver<br />
to cancel the programming of one of the remote control channels, follow<br />
the procedure below:<br />
1) press the pin pushbutton for at least 8 seconds: the LED will turn on<br />
steadily after 3 seconds; it will turn off after another 5 seconds; release<br />
the key within 4 seconds: the LED will turn on steadily;<br />
2) within 20 seconds press the key of the channel you want to cancel on the<br />
remote control: The LED will start flashing quickly for about 4 seconds,<br />
thus confirming the cancellation;<br />
3) from now on, the cancelled key will no longer activate any control until it<br />
is re-programmed.<br />
to cancel the programming of all remote control channels simultaneously,<br />
press the pin pushbutton for about 12 seconds: the LED will turn on steadily<br />
after 3 seconds; it will turn off after another 5 seconds; after another 4<br />
seconds, it will start flashing quickly for about 4 seconds, thus confirming the<br />
cancellation of all programming conditions.<br />
NOTE: with the two-way switch in the “closed padlock” position<br />
programming and cancelling the device are forbidden.<br />
The scenario module must be configured with self-learning function enabled (it<br />
is necessary to press the self-learning key so that the associated LED is green<br />
– if it is red, the function is not enabled) and the two-way switch on the back<br />
side of the IR receiver must be in the “padlock open” position.<br />
To program a scenario, follow the procedure below:<br />
1) press the pin pushbutton for 3 seconds: the LED will turn on steadily;<br />
release the key;<br />
2) within 20 seconds press the key of the scenario you want to program<br />
on the remote control: the LED will begin to flash, hence indicating the<br />
activation of the programming mode;<br />
3) set the scenario using the controls and/or actuators;<br />
4) press the pin key to exit the programming mode: the LED will turn off;<br />
5) repeat 1) and 4) for all the scenarios you want to program.<br />
To cancel a scenario, follow the procedure below:<br />
1) press the pin pushbutton for 8 seconds: the LED will turn on steadily after<br />
3 seconds; it will turn off again after another 5 seconds; release the key<br />
within 4 seconds: the LED will turn on steadily;<br />
2) within 20 seconds press the key of the scenario you want to cancel on the<br />
remote control: when the scenario module confirms the cancellation, the<br />
LED will start flashing quickly for about 2 seconds and then it will turn off;<br />
3) repeat 1) and 2) for all the scenarios you want to cancel.<br />
NOTE: configure the device with address A=0 and PL=1-9 which cannot be<br />
used by actuators.<br />
configurAtion<br />
MY HOME cOntROL technical GUiDe<br />
69
configuration<br />
two-input interface item f428 and item 3477<br />
This device is made in a 2 module DIN enclosure and a shallow enclosure<br />
for Basic automation. The interface includes two independent control units,<br />
identified with positions PL1 and PL2. The two units can send:<br />
- controls to two actuators for two independent loads (ON, OFF or<br />
adjustment) identified with the address PL1 and PL2 and mode specified in<br />
M or;<br />
- a control to the scenario module item F420;<br />
- a double control intended for a single load (motor for rolling shutter UP-<br />
DOWN, OPEN-CLOSE curtains) identified with the address PL1 and PL2 and<br />
mode specified M.<br />
Interface item F428<br />
key<br />
LED<br />
Interface item 3477<br />
BUS<br />
70 my Home - control<br />
front view<br />
The interface has one LED (two for interface item F428) to signal correct<br />
operation and three cords (or terminals for interface item F428) to connect to<br />
traditional devices such as:<br />
- two traditional NO (normally open) and NC (normally closed) switches or<br />
pushbuttons;<br />
- a two-way switch.<br />
Interface item F428 also has a pushbutton to enable the virtual configuration<br />
while device item 3477 uses the keys connected to the cords.<br />
terminals for<br />
connection to<br />
traditional devices<br />
configurator<br />
housing<br />
configurator<br />
housing<br />
LED<br />
cords for connection to<br />
traditional devices<br />
side view
Single function<br />
If pushbuttons or switches are connected to the contacts, the interface can<br />
be assimilated to a control for double loads equipped with two one-module<br />
Double function<br />
PL2<br />
PL1<br />
BUS<br />
If a two-way switch is connected to the contacts, the interface can be<br />
assimilated to a control for double loads equipped with a double-function<br />
PL1<br />
PL2<br />
PL1<br />
COM<br />
PL2 COM<br />
PL2 COM<br />
BUS PL1<br />
is the same as<br />
is the same as<br />
is the same as<br />
is the same as<br />
key covers. In this case the ON, OFF or adjustment function, for two separate<br />
loads, can be assigned to each key cover.<br />
1 2<br />
Devices for two separate loads<br />
(switches, pushbuttons, etc.)<br />
two-module key cover. In this case the ON, OFF, rolling shutter UP-DOWN for<br />
one load, can be assigned to the key cover.<br />
1 1<br />
Devices for one double-function load<br />
(two-way switch, interlocked switches, etc.)<br />
or<br />
configurAtion<br />
MY HOME cOntROL technical GUiDe<br />
71
configurAtion<br />
two-input interface item f428 and item 3477<br />
Operating mode<br />
The various functions performed by the configurator in position M are listed<br />
A<br />
A<br />
in the table below.<br />
PL<br />
PL<br />
M<br />
M<br />
If PL1 = PL2 two connected switches form SPE a double control (two-way switch, SPE<br />
etc.).<br />
AUX<br />
AUX<br />
table<br />
72 my Home - control<br />
L4651/2<br />
L/N4688<br />
Possible function<br />
L4652/3<br />
L/N4681<br />
Value configurator in M<br />
single function L4671/1 double function<br />
Cyclical ON-OFF for short press no —<br />
and adjustment for long press A1<br />
ON PL1<br />
A2<br />
ON timed PL2<br />
A3<br />
PL3<br />
M<br />
A<br />
PL<br />
M<br />
configurator<br />
ON<br />
A<br />
PL<br />
M<br />
G1<br />
G2<br />
—<br />
1) OFF<br />
OFF pressing the key connected in PL1 or N2 (item F428)- ON pressing the key<br />
connected in PL2 or N1 (item F428) and adjustment for long press (dimmer)<br />
1 to 8<br />
OFF<br />
—<br />
—<br />
— O/I<br />
2)<br />
Up-down rolling shutter to end of stroke 3) —<br />
Up-down rolling shutter monostable 3) — M<br />
Pushbutton PUL —<br />
1) The device sends an OFF control after a time set by the configurators used as<br />
indicated in the table below.<br />
Configurator Time (minutes)<br />
1 1<br />
2 2<br />
3 3<br />
4 4<br />
5 5<br />
6 15<br />
7 30 seconds<br />
8 0.5 seconds<br />
commands to MH200<br />
On configuring M = CEN SPE = 0 pushing a connected pushbutton sends a<br />
command to MH200.<br />
PL1 = PL2<br />
Pressing pushbutton 1 sends MH200 a command with address A – PL1 and<br />
number pushbutton 1, pressing pushbutton 2 sends MH200 a command with<br />
address A – PL1 and number pushbutton 2.<br />
PL1 PL2<br />
Pressing pushbutton 1 sends MH200 a command with address A – PL1 and<br />
number pushbutton 1, pressing pushbutton 2 sends MH200 a command with<br />
address A – PL2 and number pushbutton 1.<br />
A1<br />
PL1<br />
PL2<br />
M<br />
SPE<br />
2) As a function of the receiver actuator operating mode.<br />
position M<br />
A1<br />
PL1<br />
PL2<br />
M<br />
SPE<br />
3) In this mode the grey cable corresponds to the up control while the white cable<br />
corresponds to the down control.<br />
NOTE: If circuits are connected to the interface terminals, the operating mode to<br />
select is PUL.<br />
If normally open (NO) pushbuttons are connected all the other operating modes<br />
indicated in the table are performed.
Advanced operating mode<br />
If position SPE is correctly configured as well as position M the device<br />
performs special functions listed in the table below.<br />
A<br />
PL<br />
M<br />
SPE<br />
AUX<br />
Operating functions possible with configurator in position SPE<br />
Possible function Configurator Value configurator in M<br />
in position SPE single function double function<br />
Locks the state of the devices to which the control is addressed 1 1 —<br />
Unlocks the state of the devices to which the control is addressed<br />
Unlocks with key connected in PL2 or N1 (item F428)<br />
and locks with key connected in PL1 or N2 (item F428)<br />
1<br />
1<br />
2<br />
—<br />
—<br />
3<br />
On with flash 1) ON (key in PL2 or N1 for item F428) - OFF (key in PL1 or N2<br />
for item F428) without adjustment<br />
cyclical ON/OFF without adjustment<br />
(only NO contact)<br />
2<br />
1<br />
1<br />
none to 9<br />
—<br />
7<br />
—<br />
0/I<br />
—<br />
Selection adjustment level fixed at 10 to 90 % of the dimmer 2) 3 1 to 9 —<br />
Call the scenarios of module F420<br />
whose address is specified in A and PL<br />
4 1 to 4 —<br />
3)<br />
Management of scenario module item F420 5) L/N4681<br />
L4671/1<br />
L4671/2<br />
A<br />
PL<br />
M<br />
A<br />
PL<br />
M<br />
G1<br />
G2<br />
A<br />
PL<br />
M<br />
G<br />
6 (see table in the following page)<br />
ON timed (2 seconds) 8 1<br />
ON timed (10 minutes) 8 2<br />
1) Device to be combined with an OFF control for switching off. The flash time is<br />
indicated in the table:<br />
Configurator Time (seconds)<br />
none 0.5<br />
1 1<br />
2 1.5<br />
3 2<br />
4 2.5<br />
5 3<br />
6 3.5<br />
7 4<br />
8 4.5<br />
9 5<br />
2) Device to be combined with the dimmer actuator and an OFF control for switching<br />
off. The configurator defines the adjustment in % of the load power.<br />
Configurator % of load<br />
1 10<br />
2 20<br />
3 30<br />
4 40<br />
5 50<br />
6 60<br />
7 70<br />
8 80<br />
9 90<br />
Operating mode with SPE = 7<br />
L/N4688<br />
A1<br />
PL1<br />
PL2<br />
M<br />
SPE<br />
This mode can perform the controls envisaged by the Basic operating mode with<br />
SPE = no configurator when NC (normally closed) pushbuttons or switches are<br />
connected to the interface terminals.<br />
3) Example of configuration:<br />
If you want to call scenario 3 of module item F420 with a traditional connected<br />
pushbutton contact PL1 or N1, you must configure SPE=4 and M=3.<br />
In positions A and PL1 you must configure the address of the scenario module<br />
F420 to be controlled with the traditional pushbutton (for example A=1 and<br />
PL1=1 for the unit with address A=1 and PL=1).<br />
T T<br />
A1<br />
PL1<br />
PL2<br />
M<br />
SPE<br />
position SPE<br />
If position PL2 is configured as well (e.g. with configurator 2), the interface is<br />
enabled to repeat scenario 3 of a second scenario module with address A=1<br />
and PL=2 with a traditional pushbutton connected to contact PL2 or N2.<br />
If positions PL1 and PL2 instead have the same configurator, both pushbuttons<br />
connected to the interface repeat scenario 3.<br />
Instead two different scenarios of the same module cannot be controlled with<br />
one interface.<br />
Whenever only a traditional device is to be connected to the interface, this<br />
must be connected only to contact PL1 or N1 and positions A and PL1 must be<br />
configured.<br />
4) M=1 to 8: group of scenarios to be controlled with the 4 keys:<br />
M First contact (PL1) Second contact (PL2)<br />
1 1 2<br />
2 3 4<br />
3 5 6<br />
4 7 8<br />
5 9 10<br />
6 11 12<br />
7 13 14<br />
8 15 16<br />
Room (A) and Light point (LP):<br />
A=0 to 9 and PL1=1 to 9 are the room and the light point of the scenario<br />
module to be controlled.<br />
PL2 must be the same as PL1, or not configured (in this case the second<br />
contact is disabled).<br />
The functioning mode is the same as the control item H/L5651/2, item<br />
AM5831/2 and scenario control item HC/HS/L/N/NT4680:<br />
- short contact closing (less than 3 seconds) scenario activation<br />
- long contact closing (from 3 to 8 seconds) programming start<br />
- long contact closing (more than 8 seconds) cancellation<br />
- when programming, the LED flashes slowly<br />
- when cancellation is confirmed, the LED will start flashing quickly for 4<br />
seconds.<br />
configurAtion<br />
MY HOME cOntROL technical GUiDe<br />
73
configurAtion<br />
scenario module item f420<br />
This device allows you to manage scenarios for Automation, Sound system<br />
and Temperature <strong>Control</strong> systems which have been created, modified and<br />
activated from different control devices such as:<br />
- the special control, item H/L4651/2 and item AM5831/2<br />
- the scenario control, item HC/HS/L/N/NT4680<br />
- the touch control item HC/HS4653/2 and item HC/HS4653/3<br />
- the TOUCH SCREEN, item H/L/N/NT4684<br />
- the IR receiver with remote control, item HC/HS4654 and item L/N/<br />
NT4654N<br />
- the radio receiver, item HC/HS4575 and item L/N/NT4575N with remote<br />
control item 3528, item 3527 and with radio controls, item HA/HB/L4572<br />
and item H/L4572PI.<br />
- the radio receiver, item HC/HS/L/N/NT4575SB with radio control, no<br />
batteries, item HA/HB/L4572SB.<br />
For different configurations of these devices, please refer to the related<br />
pages in this guide.<br />
The combination of a Scenario Module with one of the listed devices can<br />
be made by assigning the same address to both items, identified by the<br />
configurators having a numeric value 0 to 9 in positions A and 1 to 9 in<br />
position PL. If a TOUCH SCREEN is used, the address of the Scenario Module<br />
must be specified when programming with the Tidisplay software. Several<br />
Scenario Modules can also be installed in a system, thus giving them<br />
different addresses.<br />
progrAmming tHe scenArios<br />
In order to program, change or cancel a scenario, it is necessary to enable<br />
the programming mode of the Module item F422 so that the programming<br />
state LED is green (use the lock/unlock key on the Scenario Module for at<br />
least 0.5 seconds).<br />
Now follow the indications of the control device (special <strong>Control</strong>, capacitive<br />
<strong>Control</strong>, etc.) used in the Automation system to create the scenario.<br />
For example, if the device used is the special <strong>Control</strong> item L4651/2 or item<br />
AM5831/2, continue with the following operations:<br />
1) Press one of the four keys on the special control to which the scenario is<br />
to be associated for 3 seconds, the corresponding orange LED lights up<br />
and then flashes signalling the learning phase. Wait for the orange LED to<br />
flash before continuing.<br />
2) Construct the scenario by means of the controls belonging to the various<br />
Automation, Temperature control, Sound System, etc. functions.<br />
3) Confirm the scenario by pressing the corresponding pushbutton on the<br />
special control quickly; the LED changes from flashing orange to green.<br />
4) To change or create new scenarios to be linked to the other keys, repeat<br />
the procedure starting from point 1.<br />
If the Scenario module does not receive a control within 30 minutes from<br />
the beginning of the learning phase, the programming is automatically<br />
interrupted.<br />
To call a set scenario just press its pushbutton on the special control quickly.<br />
To cancel a scenario completely, keep the corresponding pushbutton pressed<br />
for about ten seconds. The orange LED signals the cancellation by flashing<br />
quickly. To cancel the entire memory keep the DEL pushbutton on the<br />
Scenario module pressed for 10 seconds, the yellow “reset scenarios” LED<br />
flashes quickly.<br />
Once the operations have been performed lock the programming,<br />
pressing the lock/unlock pushbutton for at least 0.5 seconds, so that the<br />
corresponding LED becomes red.<br />
74 my Home - control<br />
item F420<br />
key 1 key 2<br />
key 3 key 4<br />
LED key 1-3 LED key 2-4<br />
Keys to manage the scenarios in the control item L4651/2<br />
configurator<br />
housing<br />
NOtES:<br />
Inside the system itself one Scenario module can be programmed at<br />
once as the other devices are temporarily locked; during this phase the<br />
“programming state” LED becomes orange signalling the temporary Lock.<br />
During the learning phase and when there are timed controls or group<br />
controls, the Scenario module does not save events for 20 seconds<br />
respectively. You must thus wait before continuing with creating the scenario.<br />
During the scenario learning phase only the changes of state are saved.<br />
The Scenario module should be configured with a different A and PL address<br />
from that of an actuator. Use A=0 and PL=1 to 9, which cannot be used by<br />
actuators. If the configuration is wrong the programming state LED flashes<br />
ORANGE. If the configuration is “virtual” the LED flashes RED.
configurAtion<br />
scenario control item Hc/Hs/l/n/nt4680<br />
The Scenario <strong>Control</strong> is a device that does not directly manage the scenarios<br />
by storing them inside of it. It Basically acts as a control to activate, create<br />
and change 4 scenarios stored in the Scenario Module item F420 provided<br />
that the latter is enabled for being modified with the enable/disable key.<br />
configurAtion<br />
Positions A and PL of the scenario control must correspond to those in the<br />
scenario module item F420. The association of each key of the control with<br />
one of the scenarios stored by the module is made by configuring housing<br />
M. It is possible to configure positions N and DEL to set the number of the<br />
scenario to be activated with a delay and the period of the delay (from 15s<br />
to 15m).<br />
For more information, please see the following tables.<br />
Commands to MH200<br />
Configuring M = CEN N = 0 DEL = 0. Pressing a key sends MH200 a<br />
command with address A – PL and the same pushbutton number as the key<br />
pressed.<br />
Programming a scenario<br />
1) the Scenario Module must be enabled in order to execute the<br />
programming process;<br />
2) press the key you want to associate the scenario with for 4 seconds.<br />
When the LED turns on, release the key. The corresponding LED will begin to flash,<br />
hence indicating the activation of the programming mode;<br />
3) set the scenario using the controls and/or actuators;<br />
4) when the scenario is set, press the pushbutton with the flashing LED again<br />
to exit the programming mode;<br />
5) repeat par. 2, 3 and 4 for all the other keys, including those that are<br />
already programmed if you need to add controls to the associated<br />
scenario.<br />
NOtE: when you finish programming, it is recommended to disable the<br />
possibility to modify the scenarios by acting on the enable/disable key of<br />
the scenario module.<br />
to cancel a scenario<br />
A<br />
PL<br />
M<br />
N<br />
DEL<br />
Front view<br />
Details of rear view<br />
Correspondence between the 4 keys of the scenario control and the number of scenarios stored in the scenario module item F420:<br />
configurator M Key 1 Key 2 Key 3 Key 4<br />
1 Scenario 1 Scenario 2 Scenario 3 Scenario 4<br />
2 Scenario 5 Scenario 6 Scenario 7 Scenario 8<br />
3 Scenario 9 Scenario 10 Scenario 11 Scenario 12<br />
4 Scenario 13 Scenario 14 Scenario 15 Scenario 16<br />
Depending on the configurators inserted in position N, it is possible to set a<br />
delay to be associated with one or all scenarios before being actually actuated.<br />
configurator n Key 1 Key 2 Key 3 Key 4<br />
0 None None None None<br />
1 Delay ON None None None<br />
2 None Delay ON None None<br />
3 None None Delay ON None<br />
4 None None None Delay ON<br />
5 Delay ON Delay ON Delay ON Delay ON<br />
key 1<br />
key 3<br />
The configurator in the DEL position determines the delay on activating the<br />
scenario.<br />
DEL configurator Delay<br />
key 2<br />
key 4<br />
0 None<br />
1 1 minute<br />
2 2 minutes<br />
3 3 minutes<br />
4 4 minutes<br />
5 5 minutes<br />
6 10 minutes<br />
7 15 minutse<br />
8 15 seconds<br />
9 30 seconds<br />
1) the Scenario Module must be enabled in order to execute the<br />
programming process;<br />
2) press the pushbutton of the scenario you want to cancel for at least 8<br />
seconds:<br />
the red LED will turn on after 3 seconds; it will turn off after another 5<br />
seconds; release the key. The corresponding LED will start flashing quickly<br />
for about 2 seconds, thus indicating that the scenario has been cancelled.<br />
If the LED does not flash, it means that the control has failed.<br />
NOtE: To cancel all scenarios of the module, use the reset key directly on the<br />
scenario module item F420.<br />
configurAtion<br />
MY HOME cOntROL technical GUiDe<br />
75
configurAtion<br />
scenario programmer item mH200<br />
For the Programming the scenarios managed by device item MH200<br />
must use the TiMH200. program. This application can construct scenarios<br />
(activation of light points, rolling shutters, etc.), dealing with time events or<br />
events detected on the system (alarms, pressing pushbuttons, etc.).<br />
In this mode the user can, for example, simulate that someone is at home<br />
(setting that every day at a certain time the rolling shutters are raised and<br />
that at another time the lights are switched on and the rolling shutters<br />
lowered).<br />
The scenarios created are grouped in a collection which is saved directly<br />
in the design. The collection can save different scenarios and activate only<br />
those involved.<br />
connecting the scenario programmer to the Personal computer<br />
Personal Computer<br />
with TIMH200 software<br />
76 my Home - control<br />
Ethernet<br />
Cross-over<br />
Cable<br />
Interface<br />
item 3559<br />
MH200 scenario<br />
programmer<br />
The design created must be then downloaded to the scenario Programmer.<br />
This operation is performed by connecting the device to the PC with a “crossover”<br />
cable connected to the Scenario Programmer LAN network connector<br />
and to the PC Ethernet network card or by means of cable item 3559.<br />
In the same way, the file can be uploaded from the device to check the<br />
configuration contained and saved in it. The TiMH200 program can update<br />
the version of the MH200 device Basic permanent software by means of<br />
new revisions distributed by <strong>BTicino</strong> (Firmware Update) and, if the scenario<br />
is activated by control devices (configurators M=CEN), the association can be<br />
made between the control key and the scenario itself.<br />
TIMH200 software<br />
Main screen for definition<br />
of the scenario
configurAtion<br />
toucH screen item H/l4684<br />
For the confi guration the device must be connected to a Personal Computer<br />
through the interface cord item 335919 and using the TiDisplay Color IP<br />
software.<br />
TiDisplay color software: Is used to defi ne the link between the preconfi gured<br />
icons which will be shown on the display and the functions which must be<br />
managed and actuated by the devices of the Automation, Energy management,<br />
Sound system, Burglar-alarm and Temperature <strong>Control</strong> systems. A new<br />
confi guration can be created or an existing one modifi ed on the basis of the<br />
installer’s and customer’s requirements. The program can also confi gure extra<br />
functions in the TOUCH SCREEN such as scenarios with logical or time conditions,<br />
time activations, displaying the time and date, setting a protection password<br />
and updating the fi rmware version. The graphic style of the icons to be matched<br />
to the device version, AXOLUTE or LIVING, can also be defi ned. For more<br />
information refer to the documentation supplied with the software.<br />
connecting the touch Screen item H/L4684 to the Personal computer<br />
USB<br />
Item 3559<br />
335919<br />
Front view<br />
Bus SCS<br />
TiDisplay Color software<br />
Example of defi nition of the icons<br />
for the Scenario function<br />
configurAtion<br />
MY HOME cOntROL technical GUiDe<br />
77
configurAtion<br />
Audio/video Web server item f453Av<br />
f453Av<br />
The F453AV audio/video WEB SERVER is configured with the TiF453AV<br />
software. The program is downloaded to the device using a LAN connection<br />
(with cross-over cable if the PC-F453AV is direct, without using HUB/SWITCH)<br />
or via the USB cable item 3559.<br />
connecting F453AV to the Personal computer<br />
Personal Computer<br />
with TIMH200 software<br />
78 my Home - control<br />
Ethernet<br />
Cross-over<br />
Cable<br />
Interface<br />
item 3559<br />
Audio/video<br />
Web Server<br />
F453AV<br />
configurAtion<br />
Web server item f452<br />
The (F452) Web Server is programmed with a software called TiServer whose<br />
installation and configuration are described in detail in the user manual in<br />
the CD supplied with the device.<br />
The following main parameters must be configured:<br />
- IP address: This is the address for the communication of packets over the<br />
Internet needed to identify the Web Server. This address must be static<br />
(fixed); This address must be static (fixed): if static (fixed) addresses are<br />
not available, contact your network administrator. The “Subnet Mask”<br />
parameter, typical of networks which use the TCP/IP protocol, must be<br />
set together with the IP address. In this case also, contact your network<br />
administrator for the assignment of this parameter.<br />
F453AV<br />
- login and password: This is the identification name (login) and password<br />
for the connection. Those entered as default in the factory are “<strong>BTicino</strong>”,<br />
which the user can modify and personalise.<br />
- e-mail address: This is the address for sending electronic mail warnings<br />
of intrusion and auxiliary alarms. The IP address of the SMTP (Simple Mail<br />
Transfer Protocol) Server must be set and if necessary that of the mail<br />
Router.<br />
- Web pages: For the management and control, via pushbuttons which can<br />
be personalised, of the devices of the Automation, Burglar-alarm, Energy<br />
Management and CCTV systems via remote PC with Internet Explorer 5.5<br />
browser program or similar.
mHvisuAl<br />
configurAtion<br />
The MHVISUAL software can create a synoptic, i.e. a customised<br />
representation of the SCS system installed, to supply a tool which can<br />
simulate and then control the system itself.<br />
Using a simple and intuitive interface various objects can be positioned in<br />
the project to recreate the reality of the system installed. One can:<br />
• Send a comfort command (lighting, automation and scenarios) even to<br />
systems with logic extension<br />
• Manage the cameras<br />
• Display the alarms from the burglar-alarm system:<br />
anti-intrusion and auxiliaries<br />
• Manage the load control<br />
• Manage the Temperature <strong>Control</strong> and Sound systems<br />
• Recall scenarios (MH200, F420)<br />
The MHVISUAL work environment is divided into two parts:<br />
Design Area<br />
This is the MHVISUAL area where a project can be created, configured and<br />
managed.<br />
Monitoring Area<br />
This is the MHVISUAL area where you can interact with the components<br />
installed in the system, by means of the objects previously entered in the<br />
Design area. In this area modifications cannot be made to the appearance or<br />
configuration of the project and the entered objects.<br />
configurAtion<br />
MY HOME cOntROL technical GUiDe<br />
79
configurAtion<br />
scs-scs interface item f422<br />
The device can communicate between buses based on SCS technology, even<br />
if they are dedicated to different functions. Whatever the mode of use of<br />
the interface remember that the two buses connected to it for all purposes<br />
form two systems and, as such, are subject to all the dimensioning and<br />
installation rules laid down.<br />
Address configuration (configurators I1 I2 I3 I4)<br />
Housings I1, I2, I3 and I4 are used to identify the interface inside the system<br />
uniquely.<br />
With actuators and controls this function is performed by the configurators<br />
in housings A (room) and PL (light point). In both cases configuring the<br />
device means giving it an address which identifies it. The interface address<br />
must be different from any other address on the two buses connected to it.<br />
Depending on the mode of use the interface may have an address defined<br />
with only two configurators, I3 and I4, leaving the housings for I1 and I2<br />
empty, or with all four:<br />
- Only I3 and I4; when the interface is used in the physical expansion,<br />
logical expansion, burglar-alarm/automation interface<br />
- I1, I2, I3 and I4; when the interface is used in the public riser mode.<br />
Operating mode configuration (MOD configurator)<br />
The following five modes are available:<br />
1 Physical expansion (configurator MOD=1):<br />
can increase the total bus length or exceed the absorption limit of 1200<br />
mA for the individual power supply.<br />
As for the installation limitations, please refer to the chapter “General<br />
rules for installation”.<br />
2 Logical expansion (configurator MOD=2):<br />
can increase the number of devices of a system, which is 81 (max 9 rooms<br />
with 9 light points each).<br />
As for the installation limitations, please refer to the chapter “General<br />
rules for installation”.<br />
3 Public riser (configurator MOD=3):<br />
can interface the digital door entry or video door entry systems with the<br />
other buses of the burglar-alarm or automation systems.<br />
4 Burglar-alarm/automation interface (configurator MOD=4):<br />
allows the automation and burglar-alarm systems to communicate.<br />
5 Galvanic separation (configurator MOD = no configurator required):<br />
can interface different functions (ex.: Sound system with Automation).<br />
80 my Home - control<br />
terminal OUT<br />
pushbutton for<br />
virtual configuration<br />
signalling LED<br />
terminal IN<br />
front view<br />
I1 I 2 I3 I4 M<br />
O<br />
D<br />
configurator<br />
housing
“Logic expansion” operating mode<br />
For this mode configurator 2 must be put in the MOD position.<br />
The positions identified with I1 and I2 must not be configured, while in<br />
positions I3 and I4 the “interface address” must instead be configured (I3 =<br />
0, I4 = 1-9) connected to the riser.<br />
Installation example<br />
System No. 1<br />
System No. 2<br />
System No. 3<br />
A/PL = 11 99<br />
A/PL = 11 99<br />
A/PL = 11 99<br />
OUT<br />
IN<br />
OUT<br />
IN<br />
OUT<br />
IN<br />
I1 = -<br />
I2 = -<br />
I3 = -<br />
I4 = 1<br />
MOD = 2<br />
I1 = -<br />
I2 = -<br />
I3 = -<br />
I4 = 2<br />
MOD = 2<br />
I1 = -<br />
I2 = -<br />
I3 = -<br />
I4 = 3<br />
MOD = 2<br />
Main<br />
riser<br />
Energy<br />
management<br />
control unit<br />
<strong>Control</strong> unit with<br />
telephone dialling<br />
device<br />
item 3500N<br />
item 3500GSM<br />
configurAtion<br />
MY HOME cOntROL technical GUiDe<br />
81
configurAtion<br />
interface scs-scs item f422<br />
Positioning the devices in the system control configuration and logic<br />
In configuring the global Automation system, remember that:<br />
1. each system connected to the common riser may use all the 81 addresses<br />
provided (9 light points for 9 Rooms) apart from the address of interface<br />
item F422 which will be assigned in positions I3 and I4.<br />
Single<br />
Automation<br />
system<br />
Type of control<br />
POINT - POINT<br />
ROOM<br />
GROUP<br />
GENERAL<br />
AUXILIARY<br />
ENERGY<br />
MANAGEMENT<br />
82 my Home - control<br />
Bus 2<br />
Bus 1<br />
Interface<br />
F422<br />
SINGLE INSTALLATION MAIN RISER<br />
Example: the Point-Point control and the Room control are only possible<br />
between control devices and actuators belonging to each individual system<br />
or to the common riser. The interface does not in fact allow the control to<br />
transit from an individual system to the riser and vice versa.<br />
2. The common riser must be made up of an Automation system in which<br />
the Energy management <strong>Control</strong> unit and the control unit with dialling<br />
device item 3500 can be installed as well as the control devices and<br />
actuators.<br />
3. Interface F422 allows the transit of the controls between the individual<br />
systems and the common riser as follows:<br />
MOD = 2<br />
Main<br />
riser<br />
control for extended systems item H/L4655<br />
Special control<br />
item L4651/2<br />
<strong>Control</strong> unit with<br />
telephone dialling device<br />
item 3500N<br />
item 3500GSM<br />
Using this device in a system with logical expansion enables you to send,<br />
from a single system connected to the main riser, any type of control (room<br />
control, point-point control, etc.) directed to actuators situated in the riser<br />
itself or in another system connected with interface item F422.<br />
This is made possible by configuring the address of the interface item F422<br />
- used for transferring the information - in the cross control device. For more<br />
information, please refer to chapter “Configuration” (control item H/L4655).
“Physical expansion” operating mode<br />
For this operating mode configurator 1 must be inserted in the MOD position<br />
of the interface.<br />
The positions identified with I1 and I2 must not be configured.<br />
The “separation address” between the two buses connected to the<br />
interface must instead be defined in positions I3 and I4.<br />
Supposing as in the example that I3=3, I4=2:<br />
- on the input bus (IN) the addresses must go from A=1 / PL=1 to A=3 /<br />
PL=1;<br />
- on the output bus (OUT) the addresses must go from A=3 / PL=3 to A=9<br />
/PL=9 or to the address of the next interface.<br />
Example: physical expansion made connecting three systems with interfaces item F422<br />
<strong>Control</strong> device Actuator<br />
<strong>Control</strong><br />
device<br />
I1 =-<br />
I2 =-<br />
I3 = 3<br />
I4 = 2<br />
MOD=1<br />
OUT<br />
A/PL = 01 31 A/PL = 55 99<br />
Scenario<br />
module<br />
A/PL = 33 53<br />
IN<br />
As can be seen from the example, all the automation bus 1 addresses are<br />
lower than that of the interface, while all the automation bus 2 addresses<br />
are higher; the interface address thus separates all the addresses of which<br />
the complete system may be made up into two or more blocks.<br />
To position the devices in the global system, remember the indications of the<br />
next page.<br />
The commands can be entered indifferently in any stretch, independent of<br />
the configuration.<br />
Actuator<br />
I1 =-<br />
I2 =-<br />
I3 = 5<br />
I4 = 4<br />
MOD=1<br />
System No. 2<br />
System No. 1 System No. 3<br />
<strong>Control</strong><br />
device<br />
configurAtion<br />
MY HOME cOntROL technical GUiDe<br />
83
configurAtion<br />
scs-scs interface item f422<br />
Positioning the devices in the system control configuration and logic<br />
When configuring the devices which will be connected to the global<br />
Automation system, remember that:<br />
1. all the control devices configured to send Point-point, Room, Group and<br />
General controls can be connected on either branch of the system (1 or 2)<br />
regardless of their addresses in A and PL positions.<br />
2. This is also true in the case of actuators configured in the “slave”<br />
operating mode and for actuators item F412 and L/N/NT4672 of the<br />
Energy management system.<br />
Automation system No. 1<br />
addresses included<br />
between A = 1 PL = 1<br />
and A = 3 PL = 1<br />
84 my Home - control<br />
Scenario<br />
module<br />
Point-Point, Group, Room and General <strong>Control</strong>s<br />
BUS BUS<br />
Interface<br />
F422<br />
3. As indicated in the figure, the scenario modules item F420, the actuators<br />
(including those configured as “master”) and the IR receivers item<br />
HC/HS4654, L/N/NT4654N and item AM5834 are installed on the stretch<br />
of bus 1 or 2 corresponding to their own local address. Example: if the<br />
scenario module is configured as A=2, PL=1 it will be put on system 1.<br />
4. Interface item F422 allows the transit between the various systems of the<br />
Point-Point, Group, Room and General controls.<br />
As an example, install a control configured A=1 and PL=5 in system 2 to<br />
control actuator A=1 and PL=5 installed in system 1.<br />
I1= —<br />
I2= —<br />
I3 = 3<br />
I4 = 2<br />
MOD = 1<br />
Automation system No. 2<br />
addresses included<br />
between A = 3 PL = 3<br />
and A = 9 PL = 9<br />
IR receiver IR receiver<br />
Actuator (*)<br />
NOTE (*): except the actuators in “SLAVE” mode which can be<br />
connected both in system No. 1 and in system No. 2.<br />
Actuator (*)<br />
Scenario<br />
module
BurglAr-AlArm/AutomAtion interfAce or BurglAr-AlArm/video door entry system -sound system interfAce<br />
I 1 = -<br />
I 2 = -<br />
I 3 = -<br />
I 4 =<br />
MOD = 4<br />
gAlvAnic sepArAtion<br />
I 1 = -<br />
I 2 = -<br />
I 3 = -<br />
I 4 =<br />
MOD = 4<br />
identification number<br />
increasing inside the system<br />
Video door entry system<br />
Sound system<br />
identification number<br />
increasing inside the system<br />
Burglar-alarm Burglar-alarm<br />
Automation<br />
Video door entry system<br />
Sound system<br />
Automation<br />
configurAtion<br />
MY HOME cOntROL technical GUiDe<br />
85
configurAtion<br />
Handsets<br />
Axolute video stAtion<br />
AXOLUTE VIDEO STATION item 349310<br />
With AXOLUTE VIDEO STATION you can select from 16 types of ring tone<br />
with already programmed tunes, which can be freely associated with the<br />
following calls:<br />
- Call from entrance panel (configured with S = 0)<br />
- Call from entrance panel (configured with S = 1)<br />
- Floor call<br />
- Intercom call<br />
AXOLUTE VIDEO STATION can be configured with 3 different levels of detail:<br />
1) Advanced configuration*<br />
allows the greatest degree of customisation by the user who can:<br />
- write the menus in flexible mode<br />
- customise the messages<br />
- access all the MY HOME modes of operation. This configuration is made via<br />
PC and dedicated software (included in the product package)<br />
2) Guided configuration*<br />
clets the user access on the screen the video door entry and control menus<br />
of the MY HOME applications with less customisation than the advanced<br />
configuration. This configuration is made by means of OSD menu directly<br />
from the AXOLUTE VIDEO STATION monitor. The customer can select<br />
predefined video door entry/home automation pages where he can enter<br />
the commands of the devices of his own home.<br />
3) Quick configuration<br />
lets the user access menus with video door entry functions. It is the classic<br />
configuration with configurators to be put in the socket on the back of the<br />
device itself.<br />
86 my Home - control<br />
N P M<br />
N – number of the entrance panel<br />
Configurator N assigns a recognition number inside the system to each video<br />
handset. The audio handsets must be configured progressively. With audio<br />
handsets connected in parallel (in apartments without item 346850, max 3)<br />
these must be configured with the same configurator N. Audio handsets,<br />
video handsets and/or extra bells can be installed in parallel with the basic<br />
video handset.<br />
P – association of the entrance panel<br />
Configurator P identifies the associated EP, i.e. the first entrance panel<br />
to auto-switch ON the first time the key is pressed and which<br />
door lock with video handset at rest is activated by pressing the key<br />
.<br />
M – operating modes<br />
Configurator M identifies the main AXOLUTE VIDEO STATION menu and thus<br />
the functions which can be used.<br />
* For more information consult the Installation Manual supplied with the item
Axolute video displAy<br />
AXOLUTE VIDEO DISPLAY item 349311 (light)<br />
AXOLUTE VIDEO DISPLAY item 349312 (dark)<br />
With AXOLUTE VIDEO DISPLAY you can select from 16 types of ring tone<br />
with already programmed tunes, which can be freely associated with the<br />
following calls:<br />
- Call from entrance panel (configured with S = 0)<br />
- Call from entrance panel (configured with S = 1)<br />
- Floor call<br />
- Intercom call<br />
AXOLUTE VIDEO DISPLAY can be configured with 3 different levels of detail:<br />
1) Advanced confi guration*<br />
allows the greatest degree of customisation by the user who can:<br />
- write the menus in flexible mode<br />
- customise the messages<br />
- access all the MY HOME modes of operation. This configuration is made via<br />
PC and dedicated software (included in the product package)<br />
2) Guided confi guration*<br />
clets the user access on the screen the video door entry and control menus<br />
of the MY HOME applications with less customisation than the advanced<br />
configuration. This configuration is made by means of OSD menu directly<br />
from the AXOLUTE VIDEO DISPLAY monitor. The customer can select<br />
predefined video door entry/home automation pages where he can enter<br />
the commands of the devices of his own home.<br />
3) Quick confi guration<br />
lets the user access menus with video door entry functions. It is the classic<br />
configuration with configurators to be put in the socket on the back of the<br />
device itself.<br />
* For more information consult the Installation Manual supplied with the item<br />
N P M<br />
N – number of the entrance panel<br />
Configurator N assigns a recognition number inside the system to each<br />
video handset. The audio handsets must be configured progressively. With<br />
audio handsets connected in parallel (in apartments without item 346850,<br />
max 3) these must be configured with the same configurator N. Audio<br />
handsets, video handsets and/or extra bells can be installed in parallel with<br />
the basic video handset.<br />
P – association of the entrance panel<br />
Configurator P identifies the associated EP, i.e. the first entrance panel to<br />
auto-switch ON the first time the key is pressed and which door lock<br />
with video handset at rest is activated by pressing the key<br />
M – operating modes<br />
Configurator M identifies the main AXOLUTE VIDEO DISPLAY menu and thus<br />
the functions which can be used.<br />
configurAtion<br />
MY HOME cOntROL technical GUiDe<br />
87
configurAtion<br />
Handsets<br />
polyx memory stAtion<br />
344172 POLYX MEMORY STATION<br />
With POLYX MEMORY STATION you can select from 16 types of ring tone<br />
with already programmed tunes, which can be freely associated with the<br />
following calls:<br />
- Call from entrance panel (configured with S = 0)<br />
- Call from entrance panel (configured with S = 1)<br />
- Floor call<br />
- Intercom call<br />
POLYX MEMORY STATION can be configured with 3 different levels of detail:<br />
1) Advanced configuration*<br />
allows the greatest degree of customisation by the user who can:<br />
- write the menus in flexible mode<br />
- customise the messages<br />
- access all the MY HOME modes of operation. This configuration is made via<br />
PC and dedicated software (included in the product package)<br />
2) Guided configuration*<br />
clets the user access on the screen the video door entry and control menus<br />
of the MY HOME applications with less customisation than the advanced<br />
configuration. This configuration is made by means of OSD menu directly<br />
from the POLYX MEMORY STATION monitor. The customer can select<br />
predefined video door entry/home automation pages where he can enter<br />
the commands of the devices of his own home.<br />
3) Quick configuration<br />
lets the user access menus with video door entry functions. It is the classic<br />
configuration with configurators to be put in the socket on the back of the<br />
device itself.<br />
88 my Home - control<br />
N P M<br />
N – number of the entrance panel<br />
Configurator N assigns a recognition number inside the system to each video<br />
handset. The audio handsets must be configured progressively. With audio<br />
handsets connected in parallel (in apartments without item 346850, max 3)<br />
these must be configured with the same configurator N. Audio handsets,<br />
video handsets and/or extra bells can be installed in parallel with the basic<br />
video handset.<br />
P – association of the entrance panel<br />
Configurator P identifies the associated EP, i.e. the first entrance panel to<br />
auto-switch ON the first time the key is pressed and which door lock<br />
with video handset at rest is activated by pressing the key<br />
M – operating modes<br />
Configurator M identifies the main POLYX MEMORY STATION menu and thus<br />
the functions which can be used.<br />
* For more information consult the Installation Manual supplied with the item
polyx video displAy<br />
POLYX VIDEO DISPLAY item 344162<br />
With POLYX VIDEO DISPLAY you can select from 16 types of ring tone<br />
with already programmed tunes, which can be freely associated with the<br />
following calls:<br />
- Call from entrance panel (configured with S = 0)<br />
- Call from entrance panel (configured with S = 1)<br />
- Floor call<br />
- Intercom call<br />
POLYX VIDEO DISPLAY can be configured with 3 different levels of detail:<br />
1) Advanced configuration*<br />
allows the greatest degree of customisation by the user who can:<br />
- write the menus in flexible mode<br />
- customise the messages<br />
- access all the MY HOME modes of operation. This configuration is made via<br />
PC and dedicated software (included in the product package)<br />
2) Guided configuration*<br />
clets the user access on the screen the video door entry and control menus<br />
of the MY HOME applications with less customisation than the advanced<br />
configuration. This configuration is made by means of OSD menu directly<br />
from the POLYX VIDEO DISPLAY monitor. The customer can select predefined<br />
video door entry/home automation pages where he can enter the<br />
commands of the devices of his own home.<br />
3) Quick configuration<br />
lets the user access menus with video door entry functions. It is the classic<br />
configuration with configurators to be put in the socket on the back of the<br />
device itself.<br />
* For more information consult the Installation Manual supplied with the item<br />
N P M<br />
N – number of the entrance panel<br />
Configurator N assigns a recognition number inside the system to each video<br />
handset. The audio handsets must be configured progressively. With audio<br />
handsets connected in parallel (in apartments without item 346850, max 3)<br />
these must be configured with the same configurator N. Audio handsets,<br />
video handsets and/or extra bells can be installed in parallel with the basic<br />
video handset.<br />
P – association of the entrance panel<br />
Configurator P identifies the associated EP, i.e. the first entrance panel to<br />
auto-switch ON the first time the key is pressed and which door lock<br />
with video handset at rest is activated by pressing the key<br />
M – operating modes<br />
Configurator M identifies the main POLYX VIDEO DISPLAY menu and thus the<br />
functions which can be used.<br />
configurAtion<br />
MY HOME cOntROL technical GUiDe<br />
89
tecHnicAl feAtures<br />
toucH screen item H/l4684<br />
This special device lets you centralise and control the MY HOME system with<br />
a simple touch of your finger; it is included in the catalogue and is available<br />
in two versions, AXOLUTE item H4684 and LIVING/LIGHT/LIGHT TECH item<br />
L4684.<br />
Touching the icons for the various functions which appear on a wide display,<br />
the touch screen can in fact switch the lights on and off, lower or raise the<br />
rolling shutters, water the garden, adjust the temperature in the various<br />
rooms, select the sound level of the Sound System amplifiers etc...<br />
The wide backlit display presents a “home page” which shows the<br />
applications it can manage graphically. Touching the icon of the application<br />
to be managed (e.g. lighting), a page will appear with the icons for the light<br />
points to be controlled.<br />
Always with a simple touch on the icon chosen, the lamp or lamps<br />
associated with it will switch on or off. The device is programmed by<br />
connecting to a PC and using special software which can create the link<br />
between the icon of the function to be controlled and the respective MY<br />
HOME system in the home.<br />
The TOUCH SCREEN can be easily installed on the wall by means of box<br />
item 506E and fits perfectly in any room in the home because it is finished<br />
off with all the colours finishes of the cover plates of the <strong>BTicino</strong> AXOLUTE,<br />
LIVING, LIGHT or LIGHT TECH domestic series.<br />
technical features<br />
Power supply: 27 V d.c. da BUS<br />
Absorption: stand-by 80 mA (max.)<br />
Operating temperature: 0°C to 40°C<br />
Installation<br />
90 my Home - control<br />
1<br />
506E<br />
2<br />
H4684<br />
L4684<br />
front view with AXOLUTE icons<br />
HA4826<br />
HB4826<br />
L4826<br />
N4826<br />
NT4826
tecHnicAl feAtures<br />
scs-scs interface item f422<br />
The SCS-SCS interface communicates between buses based on the SCS<br />
technology, even if their functions are different.<br />
The interface can work in five different ways:<br />
1 Physical extension of automation systems<br />
It can increase the distance covered by the SCS bus or exceed the limits<br />
due to the absorption of the individual components without increasing<br />
the maximum number. It is useful with systems with many actuators.<br />
2 Logical extension of automation systems<br />
It can increase the maximum number of devices which an be connected<br />
to a system.<br />
Very useful for making large systems, e.g. houses on several floors.<br />
The installation of the device in these two modes is described in the section<br />
“GENERAL RULES FOR INSTALLATION”.<br />
3 common riser<br />
Allows communication between the Terraneo door entry systems or<br />
digital video door entry system and the automation or burglar-alarm<br />
systems in the individual dwellings. Useful for centralising the alarms of<br />
the apartments in an apartment block switchboard.<br />
4 Interface between the automation and burglar-alarm systems<br />
Useful for making automations following events on the burglar-alarm<br />
system, such as switching on the garden lights if there is an attempted<br />
intrusion.<br />
5 Galvanic separation<br />
Connects the video door entry system with an automation system<br />
allowing supervision via Web Server A/V.<br />
The use of the interface in modes 3, 4 and 5 is described in the Guide<br />
MH06IN, chapter “System integration”.<br />
Absorption: 2mA<br />
OUT terminal<br />
IN terminal<br />
configurators<br />
tecHnicAl feAtures<br />
MY HOME cOntROL technical GUiDe<br />
91
tecHnicAl feAtures<br />
scenario programmer item mH200<br />
The device, installed in a MY HOME system, runs the scenarios previously<br />
programmed with the TIMH200 software, supplied with the CD provided with<br />
the device. Installing the scenario Programmer item MH200 requires just the<br />
connection to the power supply and to the MY HOME Automation bus (see<br />
instruction sheet); some types of system which can be made are shown<br />
below.<br />
technical features<br />
Installation: in switchboards for DIN modular devices<br />
Connection network: Automation system Bus<br />
Power supply: 12 Vdc not polarised with item 392100<br />
Maximum absorbed current : 200mA<br />
Operating temperature: +5 to +40°C<br />
Programming: with Personal Computer<br />
Mechanical features: 1 2-way connector for power supply;<br />
1 2-way connector for SCS bus;<br />
1 6-pole male connector for<br />
connection to Personal Computer by means<br />
of interface cable item 3559 (not supplied).<br />
Connection to the basic system<br />
BUS<br />
92 my Home - control<br />
2<br />
M = CEN<br />
Connection to the PC serial port<br />
Ethernet network<br />
connector<br />
2<br />
Automation<br />
BUS<br />
BUS<br />
A/PL =11 99<br />
State<br />
indication<br />
LED<br />
Reset key<br />
Power supply<br />
12V d.c.
system WitH pHysicAl expAnsion<br />
Large systems or systems with power consumption greater than the 1200mA<br />
limit of the individual power supply are made up of several branches<br />
connected by interface item F422. In this case the scenario programmer must<br />
be connected to the system branch with higher addresses.<br />
The programmable scenarios can concern the whole Automation system.<br />
BUS<br />
BUS<br />
M = CEN<br />
(*)<br />
2<br />
2<br />
NOTE (*): if so designed, the control devices configured with mode M = CEN<br />
can be connected at any point of the system.<br />
A/PL =43 99<br />
2<br />
I1 = -<br />
I2 = -<br />
I3 = 4<br />
I4 = 2<br />
M = 1<br />
BUS<br />
A/PL =11 41<br />
2<br />
BUS<br />
F422<br />
tecHnicAl feAtures<br />
MY HOME cOntROL technical GUiDe<br />
93
tecHnicAl feAtures<br />
scenario programmer item mH200<br />
system WitH logicAl expAnsion<br />
To exceed the limit of actuators which can be installed several systems can<br />
be connected on an automation bus by means of SCS/SCS interfaces. The<br />
bus on which all the others are connected performs the function of “private<br />
Local<br />
BUS<br />
Local<br />
BUS<br />
Local<br />
BUS<br />
M = CEN<br />
(*)<br />
94 my Home - control<br />
2<br />
A/PL =11-99<br />
2<br />
A/PL =11-99<br />
2<br />
A/PL =11-99<br />
NOTE (*): if so designed, the control devices configured with mode M = CEN<br />
can be connected at any point of the system.<br />
F422<br />
I1 = -<br />
I2 = -<br />
I3 = 0<br />
I4 = 4<br />
M = 2<br />
F422<br />
I1 = -<br />
I2 = -<br />
I3 = 0<br />
I4 = 3<br />
M = 2<br />
F422<br />
I1 = -<br />
I2 = -<br />
I3 = 0<br />
I4 = 2<br />
M = 2<br />
riser”.<br />
In this type of system the scenario Programmer can only be connected to the<br />
“private riser”, but the scenarios which can be produced can concern all the<br />
connected systems.<br />
Private<br />
riser<br />
2<br />
2<br />
2<br />
M = CEN
comBined system<br />
The conditions described in the previous sections can be present in just one<br />
system; the MH200 scenario Programmer must be connected directly to the<br />
“private riser”, the scenarios which can be produced can concern all the<br />
connected systems, also including actions which concern different systems<br />
inside the same scenario.<br />
AUDIO/VIDEO 2 WIRE SYSTEM<br />
BURGLAR-ALARM BUS<br />
AUTOMATION BUS<br />
AUTOMATION BUS<br />
M = CEN<br />
2<br />
2<br />
Galvanic separation<br />
Burglar alarm/Automation interface<br />
Logical expansion<br />
2 2<br />
2<br />
Logical expansion<br />
F422<br />
I1 = -<br />
I2 = -<br />
I3 = -<br />
I4 = 1<br />
M = -<br />
F422<br />
I1 = -<br />
I2 = -<br />
I3 = -<br />
I4 = 1<br />
M = 4<br />
F422<br />
I1 = -<br />
I2 = -<br />
I3 = 0<br />
I4 = 2<br />
M = 2<br />
F422<br />
I1 = -<br />
I2 = -<br />
I3 = 0<br />
I4 = 1<br />
M = 2<br />
2<br />
2<br />
2<br />
2<br />
TO PAGE 98<br />
Private<br />
riser<br />
M = CEN<br />
tecHnicAl feAtures<br />
MY HOME cOntROL technical GUiDe<br />
95
tecHnicAl feAtures<br />
scenario programmer item mH200<br />
SOUND SYSTEM<br />
TEMPERATURE CONTROL SYSTEM<br />
96 my Home - control<br />
2<br />
2<br />
Automation/Sound system interface<br />
2 2<br />
Temperature control/Automation interface<br />
2<br />
F422<br />
I1 = -<br />
I2 = -<br />
I3 = -<br />
I4 = 2<br />
M = -<br />
F422<br />
I1 = -<br />
I2 = -<br />
I3 = -<br />
I4 = 3<br />
M = -<br />
from page 97<br />
2<br />
Private<br />
riser
tecHnicAl feAtures<br />
Axolute video stAtion<br />
Axolute video stAtion item 349310<br />
The speaker phone video handset terminal with 5.6” colour display and OSD<br />
menu has two <strong>BTicino</strong> sound system loudspeakers.<br />
Description<br />
1 - 5.6” colour TFT display<br />
2 - Navigation keys for OSD menu<br />
3 - 2 wire sound system loudspeakers<br />
4 - Connection/answer key<br />
5 - Microphone<br />
6 - Audio-video active connection LED<br />
7 - Call exclusion LED<br />
8 - Door lock, door state and professional studio LEDs<br />
9 - Open door lock key (associated EP or connected EP)<br />
10 - Video door entry function keys<br />
11 - Connection to the BUS terminal<br />
12 - Configurator housing<br />
13 - Dip Switch to be positioned on ON in the last apartment or riser audio<br />
handset<br />
14 - Connector for PC connection with RS232 interface item 335919<br />
15 - Connector for PC connection with MINI-BUS wire<br />
16 - Extra power supply connection terminal<br />
The device must be configured.<br />
Video door entry keys and function LEDs<br />
9<br />
6<br />
8<br />
4<br />
17<br />
18<br />
19<br />
20<br />
17 - MUTE key activates/<br />
deactivates the microphone<br />
during conversations.<br />
18 - EP/cycling activation.<br />
19 - Switching staircase lights ON.<br />
20 - Call bell exclusion (with door<br />
lock excluded the red LED (6)<br />
shines).<br />
Door lock key<br />
When connected opens the door<br />
lock of the connected Entrance<br />
panel, at rest opens the door<br />
lock of the associated Entrance<br />
Panel. The LED (red) signals the<br />
activation.<br />
Connection key<br />
Activates/deactivates the<br />
connection. When a call is received<br />
the LED (green) flashes. During the<br />
conversation it shines steadily. At<br />
rest it activates the pager function<br />
(if enabled).<br />
Front view<br />
3<br />
10<br />
9<br />
Rear view<br />
16<br />
15<br />
14<br />
8<br />
7<br />
6<br />
tecHnicAl feAtures<br />
MY HOME cOntROL technical GUiDe<br />
1<br />
2<br />
3<br />
4<br />
5<br />
11<br />
12<br />
13<br />
97
tecHnicAl feAtures<br />
Axolute video displAy<br />
Axolute video displAy item 349311 - 349312<br />
The flush-mounted video door entry speaker phone terminal with 2.5”<br />
colour display and OSD menu implements the video door entry functions and<br />
controls the MY HOME applications.<br />
Description<br />
1 - Colour LCD display: displays the menus which guide the use and<br />
programming operations, shows the pictures taken by the entrance<br />
panel or other cameras<br />
2 - Loudspeaker<br />
3 - Call bell exclusion LED<br />
4 - Connection key; activates/deactivates the sound connection<br />
5 - Connection LED<br />
6 - Entrance panel and cycling connection key<br />
7 - Door lock/door state LED<br />
8 - Door lock key; activates the electric door lock of the associated or<br />
connected entrance panel<br />
9 - Navigation key pad; navigates inside the menus, confirms (OK key) or<br />
cancels (C key) the programming operations<br />
10 - Microphone<br />
11 - Mini-USB connector for the connection to the PC<br />
12 - Configurator housing<br />
13 - Connection terminals to the <strong>BTicino</strong> 2 wire digital system BUS.<br />
14 - ON/OFF stretch ending microswitch to be positioned on ON in the last<br />
audio handset of the riser<br />
15 - Extra power supply connection terminal<br />
The device must be configured.<br />
Video door entry keys and function LEDs<br />
98 my Home - control<br />
Door lock key<br />
When connected opens the door<br />
lock of the connected Entrance<br />
panel, at rest opens the door<br />
lock of the associated Entrance<br />
Panel. The LED (red) signals the<br />
activation.<br />
Entrance Panel/Cycling Activation<br />
Activates the switching ON of the<br />
associated Entrance Panel and cycles any<br />
other Entrance Panels or cameras.<br />
Connection key<br />
Activates/deactivates the connection.<br />
When a call is received the LED (green)<br />
flashes. During the conversation it shines<br />
steadily. At rest it activates the pager<br />
function (if enabled).<br />
10<br />
9<br />
8<br />
15<br />
Front view<br />
Rear view<br />
7 6 5<br />
AXOLUTE<br />
1 2<br />
BUS<br />
OFF<br />
ON<br />
1<br />
2<br />
3<br />
4<br />
11<br />
12<br />
12<br />
14
polyx memory stAtion item 344172<br />
Video door entry speaker phone terminal with 5.6” colour display and OSD<br />
menu implements the door entry functions and controls the MY HOME<br />
applications. It also gives the audio-video memory of the video door entry<br />
calls and the video door entry answering machine.<br />
Description<br />
1 - Microphone<br />
2 - Colour LCD display: displays the menus which guide the use and<br />
programming operations, shows the pictures taken by the entrance<br />
panel or other cameras<br />
3 - Navigation key pad; navigates inside the menus, confirms or cancels the<br />
programming operations<br />
4 - Call exclusion LED<br />
5 - Connection key; activates/deactivates the connection<br />
6 - Connection LED<br />
7 - Answering machine functions<br />
8 - Door lock LED<br />
9 - Door lock key; activates the electric door lock of the associated or<br />
connected entrance panel<br />
10 - Video door entry function keys<br />
11 - Loudspeaker<br />
12 - Connection to the BUS of the <strong>BTicino</strong> 2 wire digital system.<br />
13 - Configurator housing<br />
14 - ON/OFF stretch ending microswitch<br />
15 - Connector for the connection to the PC via wire-RS232 interface item<br />
335919<br />
16 - Mini-USB connector for the connection to the PC<br />
17 - Connector for extra power supply<br />
The device must be configured.<br />
Video door entry keys and function LEDs<br />
10<br />
9<br />
4<br />
tecHnicAl feAtures<br />
polyx memory stAtion<br />
Mute<br />
Deactivates/activates the microphone during a<br />
sound connection.<br />
Entrance Panel/Cycling Activation<br />
Activates the switching ON of the associated<br />
Entrance Panel and cycles any other Entrance<br />
Panels or cameras.<br />
Staircase lights<br />
Activates the staircase light relay.<br />
Call exclusion<br />
Deactivates/activates the call bell. If the bell is<br />
disabled the LED (red) shines.<br />
Door lock key<br />
When connected opens the door lock of the<br />
connected Entrance panel, at rest opens the door<br />
lock of the associated Entrance Panel. The LED (red)<br />
signals the activation.<br />
Connection key<br />
Activates/deactivates the connection. When a call<br />
is received the LED (green) flashes. During the<br />
conversation it shines steadily. At rest it activates the<br />
pager function (if enabled).<br />
Front view<br />
11<br />
10<br />
9 5<br />
Rear view<br />
17<br />
16<br />
15<br />
Answering machine functions<br />
Answering<br />
machine LED<br />
active<br />
1<br />
8 7 6<br />
ON/OFF<br />
Deactivates/activates the video door entry answering machine.<br />
Bin<br />
During the playing, cancels the video door entry messages.<br />
Rec<br />
Activates the recording during the connection (green connection<br />
LED flashing) with the entrance panel.<br />
Play/Pause<br />
Activates/pauses the playing of the video door entry messages.<br />
N P M<br />
tecHnicAl feAtures<br />
MY HOME cOntROL technical GUiDe<br />
2<br />
3<br />
4<br />
12<br />
13<br />
14<br />
New<br />
message LED<br />
99
tecHnicAl feAtures<br />
polyx video displAy<br />
polyx video displAy Art. 344162<br />
Video door entry speaker phone terminal with 3.5” colour display and OSD<br />
display implements the door entry functions and controls the MY HOME<br />
applications.<br />
Description<br />
1 - Microphone<br />
2 - Colour LCD display: displays the menus which guide the use and<br />
programming operations, shows the pictures taken by the entrance<br />
panel or other cameras<br />
3 - Navigation key pad; navigates inside the menus, confirms or cancels the<br />
programming operations<br />
4 - Entrance panel and cycling connection key<br />
5 - Connection key; activates/deactivates the connection to the entrance<br />
panel<br />
6 - Connection LED<br />
7 - Loudspeaker<br />
8 - Door lock LED; activates the electric door lock of the associated or<br />
connected entrance panel<br />
9 - Door lock key<br />
10 - Call exclusion key<br />
11 - Call exclusion LED<br />
12 - Mini-USB connector for the connection to the PC<br />
13 - Configurator housing<br />
14 - Connector for extra power supply<br />
15 - ON/OFF stretch ending microswitch<br />
16 - Connection to the BUS of the <strong>BTicino</strong> 2 wire digital system<br />
The device must be configured.<br />
Video door entry function keys<br />
100 my Home - control<br />
Entrance Panel/Cycling Activation<br />
Activates the switching ON of the<br />
associated Entrance Panel and cycles any<br />
other Entrance Panels or cameras.<br />
Call exclusion<br />
Deactivates/activates the call bell. If the<br />
bell is disabled the LED (red) shines.<br />
Door lock key<br />
When connected opens the door lock of<br />
the connected Entrance panel, at rest<br />
opens the door lock of the associated<br />
Entrance Panel. The LED (red) signals the<br />
activation.<br />
Connection key<br />
Activates/deactivates the connection.<br />
When a call is received the LED (green)<br />
flashes. During the conversation it shines<br />
steadily. At rest it activates the pager<br />
function (if enabled).<br />
Front view<br />
11<br />
10<br />
9 5<br />
Rear view<br />
16<br />
15<br />
8 7 6<br />
1<br />
2<br />
3<br />
4<br />
12<br />
13<br />
14
tecHnicAl feAtures<br />
f453Av and f452<br />
f453Av<br />
1 - RJ 45 for Ethernet 10/100Mbit LAN<br />
2 - 2 wire BUS for video door entry system connection<br />
3 - For future use<br />
4 - 2 wire BUS for anti-intrusion system<br />
5 - Power supply item 346000 connection<br />
6 - Only for assistance<br />
7 - USB port for configuration via PC and Firmware updating<br />
8 - User interface:<br />
- Speed: Connection speed on = 100 Mbit;<br />
off = 10Mbit<br />
- Full: On = full duplex, Off = half duplex<br />
- Link: ON indicates the presence of the Ethernet network<br />
- Aux: Key for future use<br />
- System: On connecting the power supply it lights up, goes out and the<br />
next time it lights up indicates that the web server is operating.<br />
f452<br />
• DIN rail 6 modules.<br />
• Power supply 12Vd.c. with power supply item 392100.<br />
• Absorption on terminals SCS (bus): 8 mA<br />
• Absorption on terminals 12 V ~ :<br />
- 60 mA (at rest)<br />
- 110 mA (with send and receive commands remotely).<br />
• Max power dissipated: 1.5 W<br />
1 - RJ 45 for Ethernet 10/100Mbit LAN<br />
2 - BUS for MY HOME system connection<br />
3 - Power supply 12V a.c.<br />
4 - Connector for programming cable<br />
5 - Reset key<br />
4<br />
F452<br />
F453AV<br />
0319 06<br />
USB USB<br />
Speed Full Link Aux System<br />
SCS<br />
SCS SCS SCS<br />
ETH AV IN<br />
AV<br />
AV OUT AI<br />
DC<br />
1 2 3 4 5<br />
5<br />
Reset<br />
OPEN<br />
web net<br />
Ethernet SCS 12V<br />
1 2 3<br />
6<br />
Reset<br />
7<br />
6<br />
Red LED Flashing = switching<br />
on/maintenance<br />
Steady = normal working<br />
Green LED ON = Ethernet<br />
connection active<br />
Off = problems of<br />
connection to the<br />
Ethernet<br />
tecHnicAl feAtures<br />
MY HOME cOntROL technical GUiDe<br />
8<br />
101
dimensionAl<br />
dAtA<br />
Axolute modulAr devices<br />
22,5<br />
45<br />
22 44<br />
44<br />
1 module 2 modules 3 modules<br />
102 my Home - control<br />
45<br />
1 module 2 modules 3 modules<br />
living/ligHt/ligHt tecH modulAr devices<br />
màtix modulAr devices<br />
45<br />
44<br />
46 69<br />
44<br />
2 modules 3 modules<br />
din rAil devices<br />
B c<br />
a<br />
Item Dimensions (mm) No. of DIN modules<br />
A B C<br />
346000 140 90 60 8<br />
392100 105 90 60 5<br />
F420 35 105 47+20 2<br />
F453AV 175 90 60 10<br />
F452 105 90 60 6<br />
MH200 105 90 60 6<br />
44<br />
68<br />
66<br />
toucH screen<br />
H4684<br />
L4684<br />
105<br />
45<br />
44<br />
117<br />
30<br />
20
Axolute video stAtion<br />
Speaker phone video handset<br />
349310<br />
Axolute video displAy<br />
Speaker phone video handset<br />
349311<br />
349312<br />
161<br />
5,6”<br />
105,5<br />
2,5”<br />
118<br />
256<br />
polyx video displAy<br />
Speaker phone video handset<br />
151<br />
344162<br />
9,5<br />
30,2<br />
36<br />
168 30<br />
3,5”<br />
Axolute video stAtion surround plAte<br />
Surround plate<br />
349210<br />
349211<br />
349212<br />
226<br />
154<br />
polyx memory stAtion<br />
Speaker phone video handset and speaker phone with memory<br />
344172<br />
200<br />
5,6”<br />
video toucH screen<br />
PC panel<br />
H4687<br />
257<br />
251<br />
305<br />
43,4<br />
39<br />
10<br />
440 80<br />
360<br />
dimensionAl dAtA<br />
MY HOME cOntROL technical GUiDe<br />
103
104<br />
rEMOTE<br />
CONTrOL<br />
THE NEwS<br />
F462<br />
GSM telephone activator. By<br />
means of SMS it can activate and<br />
deactivate electrical loads and<br />
timer thermostats.<br />
Alarm contacts on board.<br />
F453AV<br />
F453AV audio/video Web Server<br />
for the remote control of MY<br />
HOME systems.<br />
Can interface the 2 wire Video<br />
door entry systems.<br />
Dedicated connection terminals<br />
for burglar-alarm system.
SECTION CONTENTS<br />
106 General features<br />
126 <strong>Catalog</strong>ue<br />
128 General rules for installation<br />
134 Wiring diagrams<br />
137 Programmation<br />
142 Technical features<br />
149 Dimensional data<br />
MY HOME COnTrOl <strong>TECHNICAL</strong> <strong>GUIDE</strong><br />
105
emote<br />
control<br />
My Home can command and control all the combined<br />
functions in the home using a PC connected to a local<br />
network or to the Internet.<br />
The PC can be connected locally or remotely.<br />
The control is performed using the device called Web<br />
Server which can work remotely on My Home by<br />
means of icons displayed with web pages which can<br />
be consulted with a standard navigation program<br />
(browser).<br />
All the functions in the home (automation, burglaralarm,<br />
etc.) lead to the Web Server, by means of the<br />
■ MY HOME FuNCTIONS wHICH THE wEb SErVEr CAN MANAGE<br />
Burglar-alarm<br />
Home CCTV<br />
106 MY HOME - CONTrOL<br />
F453AV<br />
Video door entry system Energy management<br />
My Home system bus: it is connected to the outside<br />
world by the Ethernet network or by connection via<br />
modem over a telephone line.<br />
From any remote PC the user can operate and control<br />
the My Home systems as well as, for example,<br />
checking the home by activating the cameras after a<br />
burglar-alarm event has been signalled.<br />
The control web pages are personalised and the<br />
connection parameters confi gured by means of<br />
specifi c software supplied with the Web Server.<br />
Automation<br />
Lighting<br />
Monitoring, command and control of<br />
the system by means of web pages<br />
and/or management programs
■ ExAMpLE OF THE “VIdEO dOOr SYSTEM ANSwErING MACHINE” dISpLAY<br />
2 wire video door<br />
entry system<br />
2<br />
2<br />
2<br />
F453AV<br />
Internet/LAn<br />
www<br />
2 2 2<br />
CCTV Automation Lights<br />
°C<br />
Temperature<br />
control<br />
2<br />
Remote PC to see the message<br />
video door entry saved by the<br />
WEB Server<br />
Burglar-alarm<br />
system<br />
GENErAL FEATurES 107<br />
MY HOME COnTrOl <strong>TECHNICAL</strong> <strong>GUIDE</strong>
MY HOME<br />
<strong>Control</strong><br />
■ FuNCTIONS pErFOrMEd bY THE dEVICES<br />
Automation<br />
- Lighting ON/OFF<br />
- Rolling shutter UP/down<br />
* *<br />
Burglar-alarm * *<br />
Energy management * *<br />
CCTV *<br />
max 96 cameras<br />
(connecting the F453AV<br />
to a 2 wire digital video door<br />
entry system)<br />
Display the pictures<br />
in black and white<br />
and colour<br />
FuNCTIONS<br />
Temperature control * *<br />
Sending e-mail messages following instrusions and technical alarm * *<br />
Sending an SMS following specific events, request for current state, alarms * *<br />
Only with MY HOME portal<br />
Sending voice calls in case of burglar intrusion and<br />
technical alarm<br />
Sending e-mail with attachment in case of burglar intrusion *<br />
and technical alarm<br />
Video door entry answering machine: saving and sending the *<br />
message and pictures recorded by the entrance panel with e-mail<br />
1<strong>08</strong> MY HOME - CONTrOL<br />
AdSL<br />
ITEM F453AV ITEM F452
GSM<br />
* * * *<br />
<strong>Control</strong> of single electric loads <strong>Control</strong> of single electric loads<br />
* *<br />
* *<br />
* * *<br />
Switching On and OFF remotely<br />
*<br />
GSM + pSTN<br />
ITEM F462 ITEM 3500GSM<br />
ITEM 3500N<br />
* * *<br />
ANALOGuE TELEpHONE LINE (pSTN)<br />
ITEM F461/2<br />
QuICK SELECTION TAbLE<br />
MY HOME COnTrOl <strong>GUIDE</strong><br />
109
Audio/video<br />
wEb Server item F453AV<br />
This device can control and supervise a My Home<br />
system installed in the home or offi ce, by means of<br />
a Personal Computer connected to a local network<br />
or to the Internet and can directly interface with<br />
the burglar-alarm system and the 2 wire video door<br />
entry system.<br />
■ GENErAL FEATurES<br />
The Web Server can be connected to the control PC<br />
by modem and/or local data network or Internet.<br />
Using a Personal Computer with commercial browser<br />
(e.g. Internet Explorer ® , Netscape, Opera), the<br />
user can connect locally or remotely with the Web<br />
Server and, by means of Web pages which can<br />
be personalised with icon menus and command<br />
pushbuttons, perform the following operations:<br />
- supervise and/or command the Automation<br />
(management of loads, lights, shutters, etc.) and<br />
Energy Management systems;<br />
- supervise the Burglar-alarm system by receiving<br />
status messages (alarm on the system or no alarm<br />
signals);<br />
110 MY HOME - CONTrOL<br />
- activate the cameras in the video door entry<br />
system to view the picture taken in black and white<br />
or colour, being able to alter the picture quality, the<br />
shot and the zoom;<br />
- display of the pictures and listening to the audio<br />
messages sent to the Web Server from the 2 wire<br />
audio entrance panel when the “Video door entry<br />
answering machine” function is active.<br />
The audio messages and the pictures can also be<br />
sent via e-mail to an electronic mail address which<br />
can be confi gured with the TiF453AV program. One<br />
can also receive an e-mail message with picture<br />
attachments, in the mailbox, to signal that events<br />
have occurred in the burglar-alarm system (intrusion<br />
alarm, technical alarm, etc.).<br />
In the room using the MHVISUAL program one can<br />
control lights and automation, monitor the burglaralarm<br />
system, control cameras and manage/force<br />
the state of the power management loads.
The Web Server can only connect one user with the<br />
My Home system; this is fundamental to guarantee<br />
the confidentiality, the coherence and the univocity<br />
of the operations performed.<br />
Access to the system command pushbuttons is<br />
conditional on passing an “identification page”, which<br />
asks for a login (identification name) and a password<br />
known only to the user.<br />
If the identification is successful the list of all the<br />
functions which can be activated and defined when<br />
programming the Web Server with the TIF453AV<br />
software can be displayed.<br />
The privacy of the information<br />
exchanged and of the pictures<br />
displayed is also guaranteed by the<br />
SSL 128 bit protocol.<br />
<strong>Control</strong> Home<br />
Page<br />
Two types of user can access the Web pages:<br />
- administrator<br />
- user<br />
The administrator, as well as navigating in the same<br />
pages as the user, can access the CONFIGURATION<br />
function and define certain Web Server parameters,<br />
such as the number of pictures to be saved in the<br />
video door entry answering machine, the e-mail<br />
address to which alarm signals and/or messages<br />
in the answering machine, login and password for<br />
access to the pages as user, date, time and time zone<br />
and display language of the WEB pages. With control<br />
by means of MY HOME WEB service the access is<br />
from the MY HOME portal via a double identification.<br />
Identification<br />
page<br />
GENErAL FEATurES 111<br />
MY HOME COnTrOl <strong>TECHNICAL</strong> <strong>GUIDE</strong>
wEb Server<br />
item F452<br />
This device can control and manage a My Home<br />
system installed in the home or offi ce, by means of a<br />
Personal Computer connected to a local network.<br />
The Web Server can be connected to the control PC by<br />
modem and/or local data network or Internet.<br />
Using a Personal Computer with commercial<br />
browser (e.g. Internet Explorer® 5.5), the user can<br />
connect locally or remotely with the Web Server<br />
and, navigating by means of Web pages which can<br />
be personalised with icon menus and command<br />
pushbuttons, perform the following operations:<br />
F452<br />
112 MY HOME - CONTrOL<br />
- supervise and/or command the Automation<br />
(management of loads, lights, shutters, etc.), Energy<br />
Management systems and Temperature control;<br />
- supervise the Burglar-alarm system by receiving state<br />
messages (alarm on the system or no alarm signals);<br />
Using the MHVISUAL program one can control lights<br />
and automation, monitor the burglar-alarm system,<br />
control cameras and manage/force the state of the<br />
power management loads.<br />
Burglar-alarm siren<br />
Switching on control<br />
WEB Server<br />
F452<br />
LAn<br />
BUS SCS<br />
Rolling<br />
shutters<br />
up/down<br />
Garden<br />
lighting<br />
F452
Access to the system command pushbuttons is<br />
subordinate to correctly filling in an “identification<br />
page”, which requires a login (identification name)<br />
and a password known only to the user.<br />
If the identification has been successful you can<br />
display the list of all the types of system command<br />
and monitoring functions, defined with the TiF452<br />
program.<br />
<strong>Control</strong><br />
Home Page<br />
Identification page<br />
In the WEB page you can also set the clock, date,<br />
time band and the display language of the WEB<br />
pages themselves. The e-mail addresses to send<br />
notification messages if there has been an intrusion<br />
or technical alarm must instead be programmed by<br />
means of Software.<br />
When controlling by means of the MY HOME WEB<br />
service access is from the MY HOME portal via a<br />
double identification.<br />
GENErAL FEATurES 113<br />
MY HOME COnTrOl <strong>TECHNICAL</strong> <strong>GUIDE</strong>
AdSL Modem router<br />
item MH300<br />
The MH300 is a Wi-Fi ADSL Modem router which<br />
allows you to connect the system to the MY HOME<br />
portal.<br />
The MH300 can be confi gured with a browser or<br />
through a special confi guration program supplied by<br />
<strong>BTicino</strong> (included in the item).<br />
www<br />
Internet<br />
Public IP<br />
114 MY HOME - CONTrOL<br />
IP: 192.168.1.35<br />
SM:255.255.225.0<br />
F453AV<br />
F452<br />
LAN<br />
MH300<br />
IP: 192.168.1.1<br />
SM:255.255.225.0<br />
<strong>BTicino</strong> ADSL Wi-Fi Modem routers also allow you to<br />
create a LAN network or a Wi-Fi LAN network within<br />
the system.<br />
MH300<br />
ITEM<br />
MH300 + C9450<br />
MH300 + C9455<br />
MH300 + MH301<br />
ADSL line<br />
connection<br />
* * 4 DOORS *<br />
* * 10 DOORS *<br />
* * *<br />
8 DOORS<br />
* * *<br />
LAN Wi-Fi<br />
LAN<br />
3 DOORS + repeating<br />
on several fl oors<br />
PC1<br />
IP: 192.168.1.36<br />
SM:255.255.225.0<br />
PC3<br />
PC2<br />
IP: 192.168.1.37<br />
SM:255.255.225.0<br />
IP: 192.168.1.38<br />
SM:255.255.225.0
point access<br />
item MH301<br />
The MH301 is a Wi-Fi access point and has the<br />
function of “repeating” to create Wi-Fi networks in<br />
homes with several fl oors where one cannot have<br />
connections with the existing network.<br />
1 st fl oor<br />
ground fl oor<br />
www<br />
Internet<br />
Public IP<br />
LAN<br />
LAN<br />
IP: 192.168.1.35<br />
SM:255.255.225.0<br />
F453AV<br />
F452<br />
IP: 192.168.1.2<br />
SM:255.255.225.0<br />
MH301<br />
MH300<br />
IP: 192.168.1.1<br />
SM:255.255.225.0<br />
The confi guration is achieved through the browser.<br />
An MH301 is required for each fl oor of the house.<br />
All MH301s must be wired with a LAN cable to the<br />
Wi-Fi Modem router or Wi-Fi Modem router used for<br />
the Internet connection.<br />
The MH301 must be confi gured before it is put into<br />
the system.<br />
PC1<br />
IP: 192.168.1.36<br />
SM:255.255.225.0<br />
PC3<br />
IP: 192.168.1.37<br />
SM:255.255.225.0<br />
GENErAL FEATurES 115<br />
MY HOME COnTrOl <strong>TECHNICAL</strong> <strong>GUIDE</strong>
urglar-alarm control unit<br />
with pSTN or GSM telephone dialling device<br />
The telephone dialling device is a device of the<br />
MY HOME home automation system, which can<br />
automatically dial the telephone numbers previously<br />
set and forward one or more pre-recorded messages<br />
on the PSTN (3500N) or GSM (3500GSM) telephone<br />
line.<br />
It allows two-way communication between the<br />
user, the burglar-alarm system and the automation<br />
system. The programming and the remote use are<br />
password (PSW) protected. The PSW is made up of<br />
5 numeric characters and can be customised by the<br />
user; if it is not modifi ed it is 12345. The password<br />
(PSW) must also be entered during an alarm call to<br />
send the commands. The burglar-alarm control unit<br />
with combined telephone dialling device performs<br />
the same functions as the telephone dialling device<br />
also combining the burglar-alarm functions.<br />
Its functions can be divided into 4 categories:<br />
■ ALArM MANAGEMENT<br />
When the burglar-alarm system detects an alarm, it<br />
activates to call the numbers set specifying the type<br />
of alarm detected.<br />
■ AuTOMATION<br />
Following events detected by the burglar-alarm<br />
system, it can determine the automatic operation of<br />
other devices in the home.<br />
Burglar-alarm Burglar-alarm<br />
control unit with<br />
control unit with<br />
PSTn telephone<br />
GSM telephone<br />
dialling device<br />
dialling device<br />
item 3500n<br />
item 3500n GSM<br />
116 MY HOME - CONTrOL<br />
■ TELEpHONE COMMANdS<br />
The devices installed in the home can be<br />
commanded using the fi xed-line or the mobile phone<br />
by using predefi ned codes.<br />
■ MAIN FuNCTIONS<br />
The telephone dialling device:<br />
- allows two-way communication between the user,<br />
the burglar-alarm system and the automation<br />
system;<br />
- when there are particular events such as an<br />
alarm (example: intrusion alarm) or system fault,<br />
it automatically calls the telephone numbers<br />
previously set, specifying by means of pre-recorded<br />
messages the type of alarm detected;<br />
- commands an automatic operation following an<br />
event detected by the burglar-alarm system;<br />
- can be called by the user and by means of the<br />
“open web net” commands or simplifi ed commands<br />
arranging the operation of devices inside the home;<br />
- can be questioned by telephone to give information<br />
on the state of the burglar-alarm system;<br />
- allows continuous monitoring of the system<br />
allowing, for example, a communication that there<br />
has been a power cut for more than 2 hours.<br />
The device also makes available:<br />
- the possibility of setting an extra joker telephone<br />
number, common for all the messages, for easier<br />
tracing;<br />
- automatic recording of the internal memory of the<br />
events which have happened and been detected by<br />
the system.
The user is called when there is a:<br />
- intrusion alarm<br />
- remote call for help alarm<br />
- technical alarm<br />
(gas-water-temperature)<br />
GAS detector<br />
Being able to manage<br />
technical alarms as well<br />
guarantees greater safety<br />
in the home even when<br />
away for a long time<br />
Automation System<br />
Automation<br />
Lights and rolling shutters can<br />
be activated by means of the<br />
telephone or be automatically<br />
activated following events<br />
Burglar-alarm System<br />
The user can call to:<br />
- activate devices<br />
- check the system state<br />
- listen to sounds in the room<br />
- broadcast the voice in the room<br />
GENErAL FEATurES 117<br />
MY HOME COnTrOl <strong>TECHNICAL</strong> <strong>GUIDE</strong>
urglar-alarm control unit<br />
with pSTN or GSM telephone dialling device<br />
■ ExAMpLES OF uSE<br />
6 examples of use of the burglar-alarm control unit<br />
with PSTN or GSM telephone dialling device are<br />
proposed below in graphic form. Remember that<br />
each device can supply all the performance indicated<br />
simultaneously.<br />
■ INTruSION ALArM<br />
Following an intrusion alarm the dialling device calls<br />
the pre-set telephone numbers.<br />
Contact<br />
interface<br />
Fixed-line telephone<br />
118 MY HOME - CONTrOL<br />
Unit<br />
3500n<br />
Alarms<br />
Relay<br />
actuator<br />
Mobile phone<br />
Garden lighting<br />
IR detector<br />
Fixed-line telephone<br />
Unit<br />
3500n<br />
Alarms<br />
Mobile phone<br />
■ TAMpErING ALArM ANd SwITCHING ON THE<br />
GArdEN LIGHTING<br />
Following an tampering alarm the dialling device calls<br />
the pre-set telephone numbers and switches on the<br />
lamps in the garden.
■ QuESTIONING THE STATE OF THE burGLAr-<br />
ALArM SYSTEM<br />
By calling the home number the dialling device can<br />
be questioned to receive information on the state<br />
of the burglar-alarm system (e.g. on/off, events<br />
detected).<br />
■ <strong>TECHNICAL</strong> ALArM (GAS LEAK)<br />
By combining the gas detector in the burglar-alarm<br />
system via an interface, when there is a gas leak the<br />
dialling device will call and inform the user.<br />
SYSTEM<br />
STATE<br />
Fixed-line telephone<br />
Gas<br />
detector<br />
Unit<br />
3500n<br />
Unit<br />
3500n<br />
Fixed-line telephone<br />
Alarms<br />
Mobile phone<br />
Mobile phone<br />
GENErAL FEATurES 119<br />
MY HOME COnTrOl <strong>TECHNICAL</strong> <strong>GUIDE</strong>
GSM telephone activator<br />
item F462<br />
Can make actuations remotely via GSM telephone<br />
line. Loads are activated or deactivated with a simple<br />
SMS. The device is set up to have 2 alarm contacts.<br />
When the state of one of the contacts changes the<br />
device sends an alarm SMS to the saved number.<br />
The device can be interfaced with the <strong>BTicino</strong><br />
timer thermostats to switch the system ON or OFF<br />
remotely. Using the L/N/NT4550 timer thermostat<br />
one can also interrogate the system state remotely<br />
and set it to a particular temperature.<br />
■ uSE wITH TIMEr TErMOSTAT<br />
120 MY HOME - CONTrOL<br />
SMS<br />
(only with item 4450)<br />
ON-OFF system<br />
Interaction with<br />
the system<br />
Timer termostat<br />
L/N/NT4450
■ uSE FOr LOAdS ON/OFF<br />
SMS<br />
■ uSE FOr LOAdS ON/OFF<br />
SMS<br />
light<br />
ON-OFF<br />
watering<br />
ON-OFF<br />
close alarm<br />
contacts<br />
GENErAL FEATurES 121<br />
MY HOME COnTrOl <strong>TECHNICAL</strong> <strong>GUIDE</strong>
Telephone actuator<br />
item F461/2<br />
The telephone actuator can control two users (e.g.<br />
boilers, watering the garden, staircase light, garden<br />
light, etc.) at a distance by means of the fi xed-line<br />
telephone or from the mobile phone.<br />
The programming and the commands at a distance<br />
are PSW protected. The PSW is a 4-fi gure number<br />
code which the customer can customise. If it is<br />
not modifi ed it is 1234. During programming three<br />
different operating modes can be selected:<br />
LIGHTING<br />
Can be used to activate/deactivate users such as<br />
staircase light, garden light, boilers etc.<br />
AuTOMATIC OpErATION<br />
Can be used to operate the rolling shutter (up/down)<br />
motors or other electric motors.<br />
TEMpErATurE CONTrOL<br />
To activate or deactivate the boiler in combination<br />
with <strong>BTicino</strong> timer thermostats.<br />
Telephone actuator item F461/2<br />
122 MY HOME - CONTrOL<br />
The activation, deactivation, check and<br />
programming commands must only be sent to<br />
the actuator from a telephone with touch tone<br />
dialling (DTMF), while using telephones with pulse<br />
dialling (PD) or rotary dial the actuator does not<br />
work.<br />
The telephone commands can be sent in the<br />
simplifi ed version, with a small number of<br />
codes for easier use, or in the complete version<br />
according to a standard defi ned by the “Open<br />
Web Net” protocol.<br />
Also, the users can be activated locally using the<br />
two pushbuttons (C1 and C2) on the front panel.<br />
Up to four actuators in parallel on the line can be<br />
installed on the same telephone line to command<br />
more than two users. Actuator operation is<br />
guaranteed even if there is an answering<br />
machine on the telephone line.<br />
The actuator can also be installed as an extension<br />
on a <strong>BTicino</strong> PABX telephone switchboard. In this<br />
application the users can be controlled both from<br />
the extensions and from an external telephone<br />
line.<br />
When there is a power cut (230V a.c.) the<br />
actuator keeps all the programming in the<br />
memory, including the state of the relays.
■ ExAMpLES OF uSE<br />
Some examples of telephone actuator operation are<br />
proposed below.<br />
fixed-line telephone<br />
mobile phone<br />
fixed-line telephone<br />
mobile phone<br />
telephone actuator<br />
Telephone actuator<br />
■ LIGHT ANd TEMpErATurE CONTrOL MOdE<br />
Remotely controls the switching ON and OFF of lights<br />
and rolling shutters and the temperature control.<br />
garden lighting<br />
timer thermostat<br />
item L4449/n4449<br />
Rolling shutters<br />
up/down<br />
GENErAL FEATurES 123<br />
MY HOME COnTrOl <strong>TECHNICAL</strong> <strong>GUIDE</strong>
programming<br />
software<br />
<strong>BTicino</strong> has developed Software dedicated to<br />
programming the Web Servers. A CD containing<br />
the TiF453AV and TiF452 Software is supplied with<br />
the WEB Servers (item F452 and item F453AV). The<br />
Software is designed for Windows 98B environments<br />
or higher.<br />
■ TIF453AV<br />
This program supplied with F453AV configures them<br />
and creates the remote management web pages of<br />
the My Home system displayed with standard web<br />
navigation programs (browsers).<br />
The program can program:<br />
- the functions to be displayed and managed on the<br />
PC such as CCTV, automation, scenario management<br />
etc.<br />
124 MY HOME - CONTrOL<br />
- the e-mail addresses for the automatic sending of<br />
messages linked to events such as burglar-alarms<br />
or technical alarms<br />
- the IP addresses of F453AV and the PC for<br />
communication within the LAN or Internet.<br />
The program can also import the Web Server<br />
programming on PC for updates following<br />
modifications to the MY HOME system.
■ TIF452<br />
This program, supplied with the WEB server, allows the<br />
programming of these devices as well as the creation of<br />
remote management WEB pages of the MY HOME system,<br />
displayed with standard browser programs (browsers).<br />
The program allows you to program:<br />
- the functions you need to display and manage from a PC,<br />
e.g. CCTV, automation, scenario management, etc.<br />
Example of a WEB page programmed with TiF452<br />
- e-mail addresses to automatically send messages<br />
associated with events such as burglar-alarms or technical<br />
alarms<br />
- IP addresses of the WEB Server and of the PC for<br />
communicating on the LAN network or on the Internet.<br />
The program also allows you to import the WEB Server<br />
programming into the PC in order to perform an update in<br />
connection with changes made to the MY HOME system.<br />
GENErAL FEATurES 125<br />
MY HOME COnTrOl <strong>TECHNICAL</strong> <strong>GUIDE</strong>
<strong>Control</strong><br />
devices<br />
F453AV<br />
F452<br />
C9450<br />
126 MY HOME - CONTrOL<br />
C9455<br />
MH300 MH301<br />
wEb SErVEr<br />
Item Description no. of DIn mod.<br />
F453AV WEB Server to monitor 2 wire audio/video<br />
systems and MY HOME one-family systems 10<br />
by means of WEB pages on LAn, internet<br />
or telephone line - allows two-way<br />
communication between user, anti-intrusion<br />
system, electrical system, temperature<br />
control and 2 wire video door entry system.<br />
It also implements the CCTV home functions<br />
- power supply 346000<br />
F452 WEB Server to monitor and<br />
control SCS systems by means of 6<br />
WEB pages - allows two-way<br />
communication between user<br />
and SCS system - power supply 392100<br />
MOdEM rOuTEr AdSL<br />
Item Description<br />
C9455 HUB-Switch to be used with item MH300 to create a LAn. Power<br />
supply between 10 to 35 V d.c. - 6 DIn modules.<br />
C9450 HUB-Switch to be used with item MH300 to amplify a LAn. Power<br />
supply 230V a.c. - Magnet for anchoring.<br />
MH300 Wi-Fi ADSL Modem Router. To be used for connecting WEB Servers<br />
to an ADSL. It allows wireless connection to the WEB Server and<br />
the creation of a Wi-Fi LAn. Power supply unit and management<br />
software included.<br />
MH301 Wi-Fi Access Point. To be used in systems where an ADSL Modem<br />
router is already installed in order to create a Wi-Fi LAn. When<br />
used in “repeater” mode, it allows you to create Wi-Fi networks on<br />
different floors of a house. Power supply unit included.
3500n 3500GSM<br />
F461/2<br />
F462<br />
burGLAr-ALArM CONTrOL uNIT wITH dIALLING dEVICE<br />
Item Description<br />
3500N Burglar-alarm control unit with integrated telephone dialling device.<br />
Set up for the connection of the new <strong>BTicino</strong> stereo sound system.<br />
3500GSM Burglar-alarm control unit with integrated GSM telephone dialling<br />
device. Set up for the connection of the new <strong>BTicino</strong> stereo sound<br />
system. When there is no GSM signal reception, the dialling device<br />
can be connected to the PSTn telephone line. Module with GSM<br />
antenna included.<br />
pSTN TELEpHONE ACTuATOr<br />
Item Description no. of DIn modules<br />
F461/2 telephone actuator with 2 relays 3<br />
independent with contact<br />
in switchboard, power supply 230 V a.c.<br />
GSM TELEpHONE ACTuATOr<br />
Item Description no. of DIn modules<br />
F462 GSM telephone activator for 4<br />
activation/deactivation of 2 loads by<br />
means of SMS. It can interact with the<br />
<strong>BTicino</strong> timer thermostats and manage<br />
2 alarm inputs.<br />
CATALOGuE<br />
MY HOME COnTrOl <strong>TECHNICAL</strong> <strong>GUIDE</strong><br />
127
GENErAL ruLES FOr INSTALLATION<br />
web Server item F452 and item F453AV<br />
The Ethernet cable should not be a crossover cable (pin to pin) if the WEB<br />
Server is connected to an HUB. It should be a crossover cable if the WEB<br />
Server is connected directly (point-to-point) to a PC. If the correct cable is<br />
used, the green LED of the device will flash (more or less fast) whenever<br />
network traffic is detected.<br />
wArNINGS<br />
• Installation and maintenance procedures shall be carried out by qualified<br />
personnel only.<br />
• Use insulated screwdrivers and do not touch the terminals to prevent<br />
electrostatic discharges.<br />
• Do not install the WEB Server near water (for example, laundries,<br />
swimming pools, damp surfaces) or heat sources (radiators, stoves,<br />
heaters).<br />
• Do not install the device in particularly dusty places or in the presence of<br />
corrosive vapours.<br />
• Room temperature from +5° to +40°C, relative humidity ranging between<br />
20% and 80%, non-condensating.<br />
INSTALLATION ANd MAIN OpErATIONS<br />
1. Carry out wiring operations as described below and in the following page.<br />
2. Install the TiServer program (for item F452) or the TiF453AV program (for<br />
item F453AV) on the PC which will be used for the configuration. The<br />
PC should be connected to the WEB Server through a serial port or USB<br />
(please see the TiF453AV or TiServer user manual).<br />
F452 INSTALLATION ruLES<br />
F452<br />
Reset<br />
Ethernet SCS 12V<br />
Reset<br />
Ethernet SCS 12V<br />
128 MY HOME - CONTrOL<br />
392100<br />
F452 392100<br />
NO<br />
OK<br />
230Va.c.<br />
230Va.c.<br />
During the first installation and whenever the setting of the WEB Server<br />
needs to be modified, the PC serial port or USB must be used. The same<br />
method must be used when uploading programming already saved in the<br />
WEB Server and when updating firmware.<br />
The WEB Server installation requires a connection:<br />
- to the mains by means of a dedicated power supply item 346000 (for<br />
item F452V) or item 392100 (for item F452);<br />
- to the BUS of the burglar-alarm system (F453AV);<br />
- to the BUS of the automation system (F452);<br />
- to the 2 WIRE video door entry system/automation BUS (F453AV);<br />
- to the 10BASET Ethernet communication network.<br />
3. Define the static (fixed) IP address of the WEB Server and the Subnet<br />
Mask of the Ethernet network to which the device will be connected.<br />
230Va.c.<br />
NO<br />
E46ADCN<br />
BUS Automation<br />
F452<br />
Reset<br />
Ethernet SCS 12V<br />
392100<br />
F452<br />
Reset<br />
NO<br />
NOTE:<br />
connect the Automation system power<br />
supply item E46ADCn and the WEB Server<br />
power supply item 392100 to a common<br />
two-pole switch.<br />
Ethernet SCS 12V<br />
T
GENErAL ruLES FOr INSTALLATION- burglar-alarm control<br />
unit with pSTN or GSM dialling device<br />
The dialling device can be installed in any room in the home, in an easily<br />
accessible area for easy modification of settings or reading of events.<br />
The dialling device can be installed on the wall using the fastening plate.<br />
Telephone<br />
line<br />
Box 503<br />
SCS pair<br />
Or flush-mounted in a Multibox switchboard<br />
Telephone<br />
line<br />
Pair for <strong>BTicino</strong> BUS (item L4669S)<br />
2<br />
Flush-mounting<br />
box<br />
1<br />
OK<br />
1 2 3<br />
4 5 6<br />
7 8 9<br />
0<br />
1<br />
Cable<br />
fastening<br />
hole<br />
After establishing the exact point where the dialling device must be<br />
installed set up the system; trunking for the passage of the cables for BUS<br />
and telephone system, flush-mounting box and any finishings if installed in<br />
MULTIBOx switchboards.<br />
NOTE: detailed information on the installation in Multibox switchboards can be<br />
found in the instruction sheets with the switchboards themselves.<br />
Installation kit<br />
complete<br />
with surround<br />
plates<br />
Fastening to the plate To remove the dialling plate from<br />
A<br />
the plate lower the tab and push<br />
upwards. A<br />
3<br />
OK<br />
1 2 3<br />
4 5 6<br />
7 8 9<br />
0<br />
OK<br />
1 2 3<br />
4 5 6<br />
7 8 9<br />
0<br />
3<br />
1 2 3<br />
4 5 6<br />
7 8 9<br />
0<br />
Before fastening it, make the connections as described in the technical<br />
features – terminal board connection, insert and connect the back-up battery<br />
in the compartment on the back and for installation in MULTIBOx move the<br />
tamper jumper from -/T1 to - /T2.<br />
GENErAL ruLES FOr INSTALLATION 129<br />
1<br />
2<br />
MY HOME COnTrOl <strong>TECHNICAL</strong> <strong>GUIDE</strong><br />
OK
GENErAL ruLES FOr INSTALLATION - burglar-alarm control<br />
unit with pSTN or GSM dialling device<br />
uSAbLE CAbLE<br />
The sheathed, non-shielded, twisted telephone pair or the red <strong>BTicino</strong> SCS<br />
pair for Burglar-alarm system (item L4669S) should be used to connect the<br />
device. The power supply, the operating signals and the alarm signals are<br />
distributed through this pair. Interrupting or sabotage of the connections<br />
causes an immediate system alarm.<br />
The <strong>BTicino</strong> pair (item L4669) is 300/500V insulated and therefore can be<br />
tubed with 230V a.c. cables<br />
bACK-up bATTErY<br />
Connect the battery item 3507/6 to the connector in the compartment<br />
on the back of the dialling device, after the battery has been put in the<br />
compartment itself and then connect to the BUS, to avoid the battery<br />
discharging uselessly.<br />
pOSITION IN THE SYSTEM<br />
The telephone dialling device must be the first component of the internal<br />
telephone system: it must be connected immediately downstream of the line<br />
130 MY HOME - CONTrOL<br />
����<br />
������<br />
��������<br />
���������������<br />
��<br />
� � �<br />
� � �<br />
� � �<br />
�<br />
���������<br />
Red SCS cabl<br />
for burglar-alarm<br />
system (item L4669S)<br />
Back-up battery connection<br />
protection fuses and of the surge arrester.<br />
Example of the connection of the telephone dialling device inside a home.<br />
���<br />
SCS cable<br />
item L4669<br />
item 3507/6
uSE<br />
Activation – Deactivation of loads<br />
Can activate and deactivate electrical loads and timer thermostats by sending<br />
an SMS to the device.<br />
Activation – Deactivation of boiler by means of <strong>BTicino</strong> timer thermostats<br />
By means of SMS can activate/deactivate the boiler connecting the output<br />
contact at F462 to the timer thermostat remote contact.<br />
INSTALLATION OF GSM CONTrOL uNIT<br />
Install the device in a plastic DIn switchboard positioned in a protected zone<br />
and where there is a field.<br />
Use a mobile phone to check the zone reception. Also use a mobile phone to<br />
remove the card PIn code and set the service centre number.<br />
<strong>Control</strong> and setting of the l/n/nT4450 timer thermostat<br />
By means of SMS can receive the timer thermostat temperature and set the<br />
switching On temperature.<br />
Alarm contacts<br />
The device sends an SMS when the alarm contacts of the device itself open<br />
(or close)<br />
GENErAL ruLES FOr INSTALLATION 131<br />
MY HOME COnTrOl <strong>TECHNICAL</strong> <strong>GUIDE</strong>
uSE<br />
GENErAL ruLES FOr INSTALLATION<br />
Telephone actuator<br />
Activation, deactivation and check commands<br />
The activation, deactivation and check commands must only be sent to the<br />
actuator from a telephone with touch tone dialling (DTMF) connected to the<br />
fixed-line or the mobile network (mobile phone), while using telephones<br />
with pulse dialling (PD) or rotary dial the actuator does not work.<br />
Two types of command can be sent to the telephone actuator:<br />
• Simplified commands. Commands formed of a small number of characters<br />
to type.<br />
• Complete commands (Open Web Net). Commands formed of a large<br />
number of characters.<br />
These commands belong to the <strong>BTicino</strong> “Open Web net” protocol and are<br />
common to all the products belonging to the My Home family.<br />
Simplified commands for remote operation from telephone<br />
This is the simple version of the activation, deactivation and check<br />
commands. These are made up of a limited number of characters, for easy<br />
use.<br />
LOCALE COMMANdS THrOuGH FrONT puSHbuTTONS<br />
The C1 and C2 pushbuttons allow to control (activate and deactivate) the<br />
relays in relation to the mode and function set.<br />
The C1 pushbutton activates relay 1, the C2 pushbutton activates relay 2.<br />
132 MY HOME - CONTrOL<br />
To use the actuator, the PROG/LInE selector (on the front part) should be<br />
moved to LInE and the green light should be permanently on. Activation,<br />
disabling, and check controls can be sent from an external line. Using the<br />
check command one can check the operating condition of the user (activated<br />
or deactivated) from a fixed-line or mobile telephone line.<br />
If an answering machine is also present on the same telephone line, all<br />
actuators should be set to answer after a higher number of rings than those<br />
set for the activation of the answering machine.<br />
The actuators only answer after a valid number of consecutive rings (call<br />
from outside telephone line or internal call from extension connected to the<br />
switchboard) which is the same as those programmed (base 5) while invalid<br />
rings are those produced by an auto-dial call.<br />
These commands can activate, deactivate or check the state of the relays<br />
of the main and secondary actuators and are valid for all modes - lighting,<br />
automatic operation and temperature control.<br />
C1 C2<br />
230V 0,5A<br />
2A<br />
C1 C2<br />
C1 C2<br />
F461/2<br />
230V 50 Hz<br />
50 mA<br />
PRI<br />
PROG<br />
5A cos=0,5<br />
6A<br />
LINEA<br />
LU<br />
a b
OpErATION ANd TEST ExAMpLES<br />
Garden lighting, “lighting” mode and pulse operation (monostable relay,<br />
e.g. for 2 minutes)<br />
C1 C2<br />
230V 0,5A<br />
2A<br />
C1 C2<br />
C1 C2<br />
F461/2<br />
230V 50 Hz<br />
50 mA<br />
PRI<br />
230V 0,5A<br />
2A<br />
PROG LINEA<br />
C1 C2<br />
C1 C2<br />
F461/2<br />
230V 50 Hz<br />
50 mA<br />
PRI<br />
230V 0,5A<br />
2A<br />
5A cos=0,5<br />
6A<br />
LU<br />
a b<br />
PROG LINEA<br />
C1 C2<br />
C1 C2<br />
F461/2<br />
230V 50 Hz<br />
50 mA<br />
PRI<br />
ON<br />
ON<br />
5A cos=0,5<br />
6A<br />
LU<br />
a b<br />
OFF<br />
5A cos=0,5<br />
6A<br />
PROG LINEA<br />
LU<br />
a b<br />
Garden lighting, “lighting” mode and “switch on-switch off” operation<br />
(bistable relay)<br />
C1 C2<br />
C1 C2<br />
230V 0,5A<br />
2A<br />
C1 C2<br />
F461/2<br />
PRI<br />
230V 0,5A<br />
2A<br />
C1 C2<br />
F461/2<br />
PRI<br />
230V 0,5A<br />
2A<br />
C1 C2<br />
230V 50 Hz<br />
50 mA<br />
C1 C2<br />
230V 50 Hz<br />
50 mA<br />
C1 C2<br />
C1 C2<br />
F461/2<br />
230V 50 Hz<br />
50 mA<br />
PRI<br />
ON<br />
5A cos=0,5<br />
6A<br />
PROG LINEA<br />
ON<br />
LU<br />
a b<br />
5A cos=0,5<br />
6A<br />
PROG LINEA<br />
LU<br />
a b<br />
OFF<br />
5A cos=0,5<br />
6A<br />
PROG LINEA<br />
LU<br />
a b<br />
GENErAL ruLES FOr INSTALLATION 133<br />
MY HOME COnTrOl <strong>TECHNICAL</strong> <strong>GUIDE</strong>
C -dIAGrAM 2<br />
Ethernet SCS 12V<br />
���<br />
wIrING<br />
dIAGrAMS<br />
rC -dIAGrAM 1<br />
����<br />
LAn<br />
Reset<br />
�������<br />
������<br />
134 MY HOME - CONTrOL<br />
�<br />
���<br />
F453AV - CONNECTION TO THE MY HOME SYSTEM<br />
F453AV<br />
0319 06<br />
F452 - CONNECTION TO THE MY HOME SYSTEM<br />
������<br />
USB USB<br />
ETH DC<br />
SCS SCS SCS SCS<br />
Burglar-alarm<br />
system<br />
Automation system<br />
2 wire video door entry system<br />
2 WIRE sound system<br />
��������<br />
���������������<br />
NOTE:<br />
connect power supply item E46ADCn of the<br />
Automation system and power supply item<br />
392100 to a standard switch.<br />
������������<br />
�������� ���������
C -dIAGrAM 3<br />
external<br />
battery<br />
GSM TELEpHONE ACTIVATOr<br />
In1 GnD In2 GnD nO CM<br />
F462<br />
BAT A B 1 2 3<br />
external<br />
power supply<br />
3<br />
2<br />
1<br />
L/N/NT4450<br />
Timer termostat<br />
or electrical load<br />
wIrING prOGrAMMING<br />
dIAGrAMS 135<br />
MY HOME COnTrOl <strong>TECHNICAL</strong> <strong>GUIDE</strong>
C -dIAGrAM 4<br />
136 MY HOME - CONTrOL<br />
TELEpHONE ACTuATOr<br />
�������������<br />
������������<br />
������������<br />
�������������<br />
������������<br />
������������<br />
�<br />
������<br />
������<br />
Up to 4 devices can be connected to the same telephone call.<br />
��������������<br />
���������<br />
����������<br />
���������<br />
��������<br />
�����<br />
wIrING<br />
dIAGrAMS<br />
a b<br />
IN<br />
OUT<br />
a b<br />
230V 0,5A<br />
2A<br />
�� ��<br />
C1 C2<br />
F461/2<br />
230V 50 Hz<br />
50 mA<br />
PRI<br />
PROG<br />
�<br />
��������������<br />
������<br />
���� ����<br />
��<br />
�� ��<br />
�� ��<br />
������<br />
���� �� ��<br />
�� ��<br />
���<br />
����<br />
��������<br />
�����<br />
�� �������<br />
��<br />
������<br />
��<br />
� �<br />
���������<br />
��������<br />
�����������<br />
�<br />
��������������<br />
� �<br />
��<br />
���<br />
� �<br />
NOTE<br />
All devices should be numbered progressively<br />
during setting; it is important not to set more<br />
�� �� than one device with the same “identification”<br />
number.<br />
�� C1 C2<br />
5A cos=0,5<br />
6A<br />
LINEA<br />
LU<br />
a b<br />
��������������<br />
�����������<br />
� �<br />
230V 0,5A<br />
2A<br />
���������<br />
����������<br />
���������<br />
�� ��<br />
C1 C2<br />
C1 C2<br />
F461/2<br />
230V 50 Hz<br />
50 mA<br />
PRI<br />
PROG<br />
5A cos=0,5<br />
6A<br />
LINEA<br />
LU<br />
a b<br />
Remote<br />
activation<br />
Closed contact<br />
manual antifreeze<br />
program<br />
Timer termostat<br />
NA C NC<br />
�������������<br />
����������������<br />
Remote ext NTC<br />
Open contact<br />
automatic program<br />
(last selected)
prOGrAMMATION<br />
web Server item F453AV<br />
F453AV<br />
The F453AV audio/video WEB SERVER is configured with the TiF453AV<br />
software. The program is downloaded to the device using a LAn connection<br />
(with cross-over cable if the PC-F453AV is direct, without using HUB/SWITCH)<br />
or via the USB cable item 3559).<br />
Connecting F453AV to the Personal Computer<br />
Personal Computer<br />
with TIMH200 software<br />
Crossed<br />
Ethernet<br />
cable<br />
Interface<br />
item 3559<br />
WEB SERVER<br />
F453AV<br />
wIrING dIAGrAMS 137<br />
MY HOME COnTrOl <strong>TECHNICAL</strong> <strong>GUIDE</strong>
prOGrAMMATION<br />
web Server item F452<br />
The Web Server (F452) is programmed with a software called TiF452 whose<br />
installation and configuration are described in detail in the user manual in<br />
the CD supplied with the devices.<br />
The following main parameters must be configured:<br />
- IP address: This is the address for the communication of packets over the<br />
Internet needed to identify the Web Server. This address must be static<br />
(fixed); if static (fixed) addresses are not available, contact your network<br />
administrator. The “Subnet Mask” parameter, typical of networks which<br />
use the TCP/IP protocol, must be set together with the IP address. In this<br />
case also, contact your network administrator for the assignment of this<br />
parameter.<br />
TiServer program window<br />
where the lights page is<br />
defined<br />
138 MY HOME - CONTrOL<br />
- login and password: This is the identification name (login) and password<br />
for the connection. Those entered as default in the factory are “<strong>BTicino</strong>”,<br />
which the user can modify and personalise.<br />
- e-mail address: This is the address for sending electronic mail warnings<br />
of intrusion and auxiliary alarms. The IP address of the SMTP (Simple Mail<br />
Transfer Protocol) Server must be set and if necessary that of the mail<br />
Router.<br />
- Web pages: For the management and control, via pushbuttons which can<br />
be personalised, of the devices of the Lighting, Automation, Burglar-alarm,<br />
Energy Management and CCTV systems via remote PC with Internet Explorer<br />
5.5 browser program or similar.
prOGrAMMING<br />
router item MH300<br />
prOGrAMMING THrOuGH dEdICATEd SOFTwArE<br />
<strong>BTicino</strong> has developed a dedicated Software for MH300 setting. When the<br />
MH300.exe program is run, a guided path will enable you to enter the data<br />
of the ADSL line used for connecting the system into the MH300.<br />
The configuration must be sent to the address 192.168.1.254 (device default<br />
address).<br />
prOGrAMMING<br />
Access point item MH301<br />
prOGrAMMING THrOuGH brOwSEr<br />
The MH301 must be connected using a browser.<br />
From your browser, go to address 192.168.1.1 to access the programming<br />
mode. Select Access Point and click on apply.<br />
Restart your browser and go to address 192.168.1.2 to program the Access<br />
Point.<br />
prOGrAMMING 139<br />
MY HOME COnTrOl <strong>TECHNICAL</strong> <strong>GUIDE</strong>
prOGrAMMING<br />
burglar-alarm control unit item 3500 and item 3500GSM<br />
prOGrAMMING VIA A SOFTwArE<br />
The control unit can be programmed by means of TiSecurity programming<br />
software.<br />
prOGrAMMING bY MEANS OF OSd MENu<br />
The control unit can also be programmed by means of OSD menu displayed<br />
directly on the control unit display.<br />
140 MY HOME - CONTrOL<br />
MANUTENZIONE<br />
Lingua<br />
Programma chiavi<br />
Test sistema<br />
Apprendimento<br />
Deutsch<br />
English<br />
Español<br />
Français<br />
English<br />
Español<br />
Français<br />
Italiano<br />
LINGUA<br />
LINGUA<br />
ATTENZIONE<br />
il tasto OK<br />
reinizializzerà<br />
tutti i nomi<br />
Conferma = OK<br />
Annulla = CLEAR<br />
When switching On the first<br />
time, the Language menu is<br />
already selected<br />
Enter by pressing OK<br />
Choose required language<br />
Enter by pressing OK<br />
A check page is displayed,<br />
which allows you to choose<br />
if you want to reinitialize all<br />
set names
prOGrAMMING<br />
Telephone actuator item F461/2<br />
prOGrAMMING<br />
Programming is performed by means of a common touch-tone telephone<br />
connected to the RJ8 socket of the actuator, with a special cable supplied.<br />
The actuator can be programmed to work in three different ways:<br />
- lighting: to activate or deactivate lights, boilers or other;<br />
- automation: to operate rolling shutter (open/close) motors or other<br />
motors.<br />
- temperature control: to activate or deactivate the heating or air<br />
conditioning system in combination with <strong>BTicino</strong> timer thermostat item<br />
L4449/n4449 Living and Light series.<br />
Moreover in the three different modes of operation the two relays can in<br />
turn be programmed to work with the monostable function (timed, the<br />
relay closes for the programmed time, ideal e.g. for the timed switching on<br />
LIGHTING MOdE<br />
In this mode the two relays can be activated independently and also be<br />
programmed with different functions.<br />
A user can be activated with “impulsive” monostable operation with relay<br />
1 (example 1: timed staircase light switching on) and with bistable “on-off”<br />
operation with relay 2 (example: boiler on/off).<br />
AuTOMATIC OpErATING MOdE<br />
In this mode the two relays are both controlled with the same command and<br />
cannot be activated independently.<br />
On programming relay 1, the actuator will therefore automatically also<br />
manage relay 2.<br />
The automatic operating mode is recommended to control users which are<br />
interlocked, such as the operation of a rolling shutter (up/down), motors<br />
(forwards/backwards), etc.<br />
TEMpErATurE CONTrOL MOdE<br />
This mode can exclusively combine the telephone actuator with the<br />
operation of the <strong>BTicino</strong> timer thermostat item L4449/n4449 of the LIVInG<br />
and LIGHT series.<br />
This mode can modify the operation of the timer thermostat at a distance.<br />
If the timer thermostat is in any condition - AUTO, MAn, AnTI-FREEZE, PARTY,<br />
HOLIDAY and OFF - on activating the following commands on the actuator:<br />
- AnTIFREEZE, the timer thermostat changes to the anti-freeze condition<br />
staying there until the unlock command is given;<br />
- AUTO, the timer thermostat returns to automatic operation.<br />
of staircase lights), or bistable function (on–off, at each command the relay<br />
changes its state and keeps it until a new command is given, it behaves like<br />
a switch).<br />
The actuator can also be connected instead of an extension when there<br />
is a <strong>BTicino</strong> PABx telephone switchboard (to expand the number of relays<br />
which can be remotely operated); also up to 4 actuators can be connected in<br />
parallel on the same telephone line even if there is an answering machine.<br />
At the end of each programming operation the actuator always sends the<br />
telephone handset a tone either of confirmation (programming correct) or of<br />
error (programming wrong).<br />
230V 0,5A<br />
2A<br />
C1 C2<br />
C1 C2<br />
F461/2<br />
230V 50 Hz<br />
50 mA<br />
PRI<br />
C1 C2<br />
230V 0,5A 5A cos=0,5<br />
2A 6A<br />
C1 C2<br />
230V 0,5A<br />
C1 C2<br />
2A<br />
F461/2<br />
C1 C2<br />
230VF461/2<br />
50 Hz<br />
50 mA<br />
PRI<br />
230V 50 Hz<br />
50 mA<br />
PRI<br />
C1 C2<br />
230V 0,5A 5A cos=0,5<br />
2A 6A<br />
C1 C2<br />
230V 0,5A 5A cos=0,5<br />
C1 C2<br />
2A 6A<br />
C1 C2<br />
230VF461/2 0,5A<br />
C1 2AC2<br />
230VF461/2<br />
50 Hz<br />
50 mA C1 C2<br />
F461/2 PRI<br />
230V 50 Hz<br />
50 mA<br />
230V PRI 50 Hz<br />
50 mA<br />
PRI<br />
F461/2<br />
C1 C2<br />
230VF461/2<br />
50 Hz<br />
50 mA<br />
PRI<br />
5A cos=0,5<br />
6A<br />
PROG LINEA<br />
LU<br />
a b<br />
PROG LINEA<br />
LU<br />
a b<br />
PROG LINEA<br />
LU<br />
a b<br />
230V 0,5A 5A cos=0,5<br />
2A<br />
C1<br />
6A<br />
C2<br />
230V 0,5A<br />
C1 2AC2<br />
230V PRI 50 Hz<br />
50 mA<br />
PROG LINEA<br />
5A cos=0,5<br />
6A<br />
PROG LINEA<br />
PROG LINEA<br />
C1 C2<br />
5A cos=0,5<br />
6A<br />
LU<br />
a b<br />
LU<br />
a b<br />
LU<br />
a b<br />
5A cos=0,5<br />
6A<br />
PROG LINEA<br />
PROG LINEA<br />
LU<br />
a b<br />
LU<br />
a b<br />
°C<br />
prOGrAMMING 141<br />
MY HOME COnTrOl <strong>TECHNICAL</strong> <strong>GUIDE</strong>
<strong>TECHNICAL</strong> FEATurES<br />
web Server item F453AV<br />
F453AV<br />
1 - RJ 45 for LAN Ethernet 10/100Mbit<br />
2 - 2 wire BUS for connection of digital Video door entry system<br />
3 - For future use<br />
4 - 2 WIRE BUS for anti-intrusion system<br />
5 - Power supply item 346000 connection<br />
6 - Only for assistance<br />
7 - USB port for configuration via PC and Firmware updating<br />
8 - User interface:<br />
- Speed: Connection speed; on = 100 Mbit;<br />
off = 10Mbit<br />
- Full: on = full duplex, off = half duplex<br />
- Link: ON indicates the presence of the Ethernet network<br />
- Aux: Key for future use<br />
- System: Connecting the power supply it lights up, goes out and the<br />
next time it lights up indicates that the web server is operating.<br />
LAn<br />
142 MY HOME - CONTrOL<br />
F453AV<br />
0319 06<br />
USB USB<br />
SCS<br />
SCS SCS SCS<br />
ETH AV IN<br />
AV<br />
AV OUT AI<br />
DC<br />
Automation system<br />
2 WIRE video door entry system<br />
2 WIRE sound system<br />
Burglar-alarm<br />
system<br />
Speed Full Link Aux System<br />
346000<br />
F453AV<br />
0319 06<br />
USB USB<br />
Speed Full Link Aux System<br />
SCS<br />
SCS SCS SCS<br />
ETH AV IN<br />
AV<br />
AV OUT AI<br />
DC<br />
1 2 3 4 5<br />
6<br />
7<br />
6<br />
8
<strong>TECHNICAL</strong> FEATurES<br />
web Server item F452 and burglar-alarm control unit<br />
<strong>TECHNICAL</strong> FEATurES F452<br />
• WEB server to monitor and control the MY HOME system by means of WEB<br />
pages on Internet / LAn and MY HOME WEB portal.<br />
• Software configuration with TiServer program.<br />
• Surfing via hypertext pages which can be customised, with icon menu and<br />
command pushbuttons.<br />
• Operation of activations (lights and rolling shutters etc.) with <strong>BTicino</strong> Virtual<br />
Switch ® software<br />
• DIn rail 6 modules.<br />
• Power supply 12Vd.c. with power supply item 392100.<br />
• Absorption on terminals SCS (bus): 8 mA<br />
• Absorption on terminals 12 V ~ :<br />
- 60 mA (at rest)<br />
- 110 mA (with send and receive commands remotely).<br />
• Max power dissipated: 1.5 W<br />
Connector connection to PC serial<br />
port for maintenance/configuration<br />
(with item 335919)<br />
Reset<br />
burGLAr-ALArM CONTrOL uNIT wITH pSTN ANd GSM dIALLING dEVICE<br />
1<br />
2<br />
4<br />
5<br />
6<br />
F452<br />
Ethernet SCS 12V<br />
Reset<br />
3<br />
F452<br />
F452<br />
A<br />
Reset key<br />
Reset<br />
Reset OPEN<br />
web net<br />
B<br />
7 8 7 8 7 8 7 8<br />
Ethernet SCS 12V<br />
C<br />
D<br />
OPEN<br />
web net<br />
Ethernet SCS 12V<br />
BUS of the MY HOME system to<br />
be controlled<br />
RJ45 Connector Ethernet 10 Basis T port for<br />
connection to the LAn<br />
Red LED Flashing = switching<br />
on/maintenance<br />
Steady = normal working<br />
Reset<br />
Reset<br />
Green LED On = Ethernet<br />
connection active<br />
Off = problems of<br />
connection to the<br />
Ethernet<br />
12Vdc Power supply<br />
1 Loudspeaker: allows listening to recorded messages and playing voice<br />
messages in the room sent to the dialling device by means of telephone<br />
line.<br />
2 Alphanumeric display: displays the messages which guide the<br />
programming operations and the events which have occurred.<br />
3 IR infrared receiver: used to receive the IR access code to the dialling<br />
device from the system burglar-alarm remote control<br />
4 Programming keypad: can move inside the guided menus and confirm or<br />
cancel the operations performed.<br />
5 Digital keypad manual: allows manual entry of all those programming<br />
operations which require the use of numbers and/or symbols<br />
6 Microphone: used to record the messages and to listen to the room<br />
remotely by means of telephone.<br />
<strong>TECHNICAL</strong> FEATurES 143<br />
MY HOME COnTrOl <strong>TECHNICAL</strong> <strong>GUIDE</strong>
GENErAL FEATurES<br />
burglar-alarm control unit<br />
Rear view<br />
bACK-up bATTErIES<br />
144 MY HOME - CONTrOL<br />
Tamper<br />
a<br />
LU b<br />
T1<br />
a<br />
b<br />
T1<br />
T2<br />
•<br />
+<br />
•<br />
C<br />
Sin<br />
Sout<br />
Before installation the dialling device must be fitted with a back-up battery<br />
to be placed in the compartment on the back (fig. 1); its function is to<br />
provide power when there is a power cut: the operation of the device<br />
and the saving in the memory of the data set. Use the <strong>BTicino</strong> battery<br />
item 3507/6, 6V – 0.5 Ah, already fitted with cord and connector for the<br />
connection (fig. 2).<br />
1<br />
2<br />
3<br />
4<br />
5<br />
6<br />
7<br />
1 Telephone line OUT<br />
2 Telephone line In<br />
3 Local tamper (protects against the removal of the dialling device<br />
from the bracket)<br />
4 Tamper line:<br />
(-/T1) protection against cutting wires and local tampering by<br />
removing from the bracket<br />
(-/T2) protection against cutting wires without protection against<br />
removing from the bracket (installation in <strong>BTicino</strong> MULTIBOx<br />
series boxes)<br />
5 MY HOME system BUS<br />
6 Connection to the sound system<br />
7 Reset pushbutton<br />
NOTE: The dialling device is supplied with the tamper line terminals<br />
(-/T1) circuited.<br />
NOTE: battery item 3507/6 is supplied separately. T1<br />
Technical data<br />
Power supply: from bus: from 18V to 28V<br />
Connection to the mains: Two wire with telephone pair<br />
Absorption: 20 mA<br />
Operating temperature: 5 to 40 °C<br />
Dialling system: only with dialling in DTMF<br />
Telephone network: DTMF/IMPULSES<br />
Number of messages: 6 (4 pre-recorded which can be personalised<br />
nd 2 which can be totally personalised)<br />
Degree of protection: IP 30<br />
Number of telephones<br />
which can be saved: Joker number + 16<br />
Number of telephone<br />
commands: 4 with the simplified commands<br />
Fig. 1<br />
BATTERY<br />
COMPARTMENT<br />
Fig. 2<br />
a<br />
b<br />
a<br />
LU b
<strong>TECHNICAL</strong> FEATurES<br />
GSM telephone activator item F462<br />
<strong>TECHNICAL</strong> FEATurES<br />
Quad band E GSM850/900/1800/1900 MHz<br />
Power in output:<br />
– Class 4 (2W) for 850/900 MHz<br />
– Class 1 (1W) for 1800/1900 MHz<br />
Sensitivity:<br />
– 107dBm@ 850/900MHz<br />
– 106dBm@ 1800/1900MHz<br />
Power supply voltage 10 to 20 Vac/Vdc<br />
Consumption: Idle 30mA 500mA MAx<br />
Operating temperature -20 to +60°C / -30 to +80°C *<br />
Mounting on back of panel on En 50022 rail, 4 modules<br />
E n 60529 degree of protection : IP40<br />
(if correctly installed)<br />
Output contacts 4(2)A-250Vac<br />
Contacts free of voltage<br />
* Reduced sensitivity<br />
11<br />
5 6<br />
7 8 9 10<br />
2 3 1 4<br />
ExTERnAL BATTERY<br />
*nC = nOT COnnECTED<br />
POWER SUPPLY<br />
1) Power supply inlet<br />
2) Housing for SIM card (remove the lower cover)<br />
3) Connections for battery<br />
4) Connections for timer thermostat item L/n/nT4450<br />
5) Connections for alarm inputs<br />
6) Connections for output relay or timer thermostat item HC/HS/L/n/nT4451<br />
7) network state indicator LED<br />
8) Input 1 (alarm 1) state indicator LED<br />
9) Input 2 (alarm 2) state indicator LED<br />
10) Relay state indicator LED<br />
11) Connector for external antenna<br />
TIMER TERMOSTAT<br />
ITEM L/n/nT4450<br />
ALARM SIGnAL<br />
(1 max. 3 m)<br />
ELECTRICAL USER<br />
OR ITEM<br />
HC/HS4451<br />
L/n/nT4451<br />
<strong>TECHNICAL</strong> FEATurES 145<br />
MY HOME COnTrOl <strong>TECHNICAL</strong> <strong>GUIDE</strong>
GENErAL FEATurES<br />
Telephone actuators item F461/2<br />
Mains power supply: 230 V a.c. ± 10%<br />
Mains frequency: 50 Hz<br />
Power required: 11 VA<br />
Absorption: 50 mA<br />
Operating temperature: 0 to 35°C<br />
Telephone network: analogue (PSTn)<br />
Size: 3 DIn modules (53 x 90 x 65 mm)<br />
Weight: 270 grams<br />
General view<br />
�<br />
�<br />
��<br />
��<br />
�<br />
230V 0,5A<br />
2A<br />
C1 C2<br />
C1 C2<br />
F461/2<br />
230V 50 Hz<br />
50 mA<br />
230V 0,5A<br />
2A<br />
Programming<br />
PRI<br />
C1 C2<br />
F461/2<br />
PROG<br />
PRI<br />
5A cos=0,5<br />
6A<br />
146 MY HOME - CONTrOL<br />
������<br />
230V 50 Hz<br />
50 mA<br />
C1 C2<br />
��������<br />
�����<br />
LINEA<br />
LU<br />
a b<br />
PROG<br />
������<br />
5A cos=0,5<br />
6A<br />
•••••••••••••••• •••••••••••••••••••<br />
•LINEA<br />
LU<br />
a b<br />
���������<br />
����<br />
�<br />
�<br />
�<br />
�<br />
�<br />
�<br />
To program the telephone actuator move selector<br />
switch (3) to “PROG” and type the commands on the<br />
telephone connected to the connector (4).<br />
The programming cable is supplied.<br />
Connection to the telephone network: two wire with telephone pair<br />
Connection to the PABx: two wire with telephone pair<br />
Dialling system: only with touch-tone dialling (DTMF)<br />
number of relays available: 2 relays with independent control with contacts<br />
in exchange<br />
Relay contacts: output 230V a.c. 6A resistive, 2A inductive both between<br />
n-nC and n-nO<br />
Description of the actuator<br />
1) Screw terminals (PRI) 230V a.c. power supply<br />
2) Screw terminals (LL) telephone line input<br />
3) PROG/LInE selector switch on position:<br />
- PROG operation in programming mode<br />
- LInE operation in normal mode<br />
4) RJ8 female connector to connect the actuator to the telephone, using<br />
the cable supplied, and activate the programming procedure<br />
5) Screw terminals (C2) output contacts in exchange of relay 2<br />
6) Screw terminals (C2) output contacts in exchange of relay 1<br />
7) Yellow LED which signals the relay state (C2) (LED on relay activated)<br />
8) Yellow LED which signals the relay state (C1) (LED on relay activated)<br />
9) Pushbutton (C2) for local activation of relay 2<br />
10) Pushbutton (C2) for local activation of relay 1<br />
11) Green LED which signals the operating mode:<br />
- Off = actuator faulty or not correctly supplied<br />
- On steadily = supplied and working correctly<br />
- On flashing = supply and working in programming mode<br />
1.............. 4.............. 7..............<br />
2.............. 5.............. 8..............<br />
3.............. 6.............. 9..............
<strong>TECHNICAL</strong> FEATurES<br />
Switch<br />
SwITCH C9455<br />
6-port switch on DIn rail. It must be supplied with a dedicated power supply<br />
with output between 10 and 35V d.c.<br />
legend<br />
1 - Power<br />
2 - Transmission speed:<br />
- OFF 10Mb/s<br />
- On 100 Mb/s<br />
3 - Link activity<br />
Expansion<br />
Max. distance between SWITCH = 100 m.<br />
1<br />
DC - In<br />
L<br />
2 3 4 5 6<br />
1<br />
DC - In<br />
2 3 4 5 6<br />
3<br />
2<br />
10 to 35 V d.c.<br />
1<br />
DC - In<br />
1 2 3 4 5 6<br />
DC - In<br />
2 3 4 5 6<br />
L L L<br />
1<br />
DC - In<br />
2 3 4 5 6<br />
1<br />
DC - In<br />
<strong>TECHNICAL</strong> FEATurES 147<br />
MY HOME COnTrOl <strong>TECHNICAL</strong> <strong>GUIDE</strong><br />
1<br />
2 3 4 5 6
<strong>TECHNICAL</strong> FEATurES<br />
Switch<br />
SwITCH C9450<br />
Surface-mounted 8-port switch.<br />
Features<br />
- Weight: 350 gr<br />
- Operating temperature: from 0° to 40° C<br />
from 20% to 80% humidity (without condensation)<br />
- Power supply voltage: from 100 to 240V a.c. - 50/60Hz<br />
- Consumption: 15W maximum<br />
Mounting<br />
The C9450 can be mounted in 2 ways:<br />
1. Using the magnetic bands mounted on the back of the object.<br />
2. By means of screws inserted in the side eyelets.<br />
Expansion<br />
148 MY HOME - CONTrOL<br />
1 x 2 x 3 x 4 x 5 x 6 x 7 x 8x<br />
POWER<br />
POWER<br />
100M<br />
100M<br />
FDX/COL<br />
FDX/COL<br />
POWER MEM<br />
MEM<br />
Ethernet Switch 10/100 Mbps<br />
OVER<br />
Ethernet 1 Switch 10/100 2 Mbps 3 4 OVER 5<br />
MEM<br />
Ethernet Switch 10/100 Mbps<br />
OVER<br />
1 2 3 4<br />
16 5<br />
27 6<br />
LN/ACT100M<br />
38 4 FDX/COL 5<br />
LN/ACT<br />
7 8<br />
6 7<br />
LN/ACT<br />
8<br />
2 x Ø 3,5 mm<br />
2 x Ø 3,5 mm<br />
2 x Ø 3,5 mm<br />
Eternet Switch 10/100 Mbps<br />
Eternet Switch 10/100 Mbps<br />
1 x 2 x 3 x 4 x 5 x 6 x 7 x 8x<br />
1 x 2 x 3 x 4 x 5 x 6 x 7 x 8x<br />
POWER<br />
MEM<br />
OVER<br />
POWER<br />
MEM<br />
OVER<br />
1 2 3 4 5 6 7 8<br />
Eternet Switch 10/100 Mbps<br />
100M<br />
FDX/COL<br />
LN/ACT<br />
1 2 3 4 5 6 7 8<br />
100M<br />
FDX/COL<br />
LN/ACT<br />
POWER<br />
MEM<br />
OVER<br />
Eternet Switch 10/100 Mbps<br />
Eternet Switch 10/100 Mbps<br />
POWER<br />
MEM<br />
OVER<br />
POWER<br />
MEM<br />
OVER<br />
1 2 3 4 5 6 7 8<br />
1 2 3 4 5 6 7 8<br />
100M<br />
FDX/COL<br />
LN/ACT<br />
100M<br />
FDX/COL<br />
LN/ACT<br />
POWER<br />
MEM<br />
OVER<br />
1 2 3 4 5 6 7 8<br />
Eternet Switch 10/100 Mbps<br />
100M<br />
FDX/COL<br />
LN/ACT<br />
1 2 3 4 5 6 7 8<br />
100M<br />
FDX/COL<br />
LN/ACT
dIMENSIONAL<br />
dATA<br />
dEVICES ON dIN rAIL<br />
Item Dimensions (mm) no. of DIn<br />
modules<br />
A B C<br />
F461/2 52.5 90 60 3<br />
F452 105 90 60 6<br />
F453AV 175 90 60 10<br />
F462 70 90 60 4<br />
140<br />
OK<br />
1 2 3<br />
4 5 6<br />
7 8 9<br />
0<br />
A C<br />
35<br />
3500n 3500GSM<br />
B<br />
burGLAr-ALArM CONTrOL uNIT wITH pSTN ANd GSM TELEpHONE dIALLING dEVICE<br />
SwITCH C9450<br />
255<br />
210<br />
1 x 2 x 3 x 4 x 5 x 6 x 7 x 8x<br />
60<br />
37<br />
210<br />
OK<br />
1 2 3<br />
4 5 6<br />
7 8 9<br />
0<br />
Item Dimensions (mm) no. of DIn<br />
modules<br />
A B C<br />
C9455 105 90 30 6<br />
346000 140 90 61 8<br />
392100 105 90 61 6<br />
35<br />
210<br />
<strong>TECHNICAL</strong> dIMENSIONAL FEATurES dATA<br />
MY HOME COnTrOl <strong>TECHNICAL</strong> <strong>GUIDE</strong><br />
149
NOTES<br />
150 MY HOME - CONTrOL
NOTES<br />
prOGrAMMING NOTES 151<br />
MY HOME COnTrOl <strong>TECHNICAL</strong> <strong>GUIDE</strong>
NOTES<br />
152 MY HOME - CONTrOL
NOTES<br />
NOTES<br />
153
<strong>BTicino</strong> SpA<br />
Via Messina, 38<br />
20154 Milan - Italy<br />
www.bticino.it<br />
www.bticino.com<br />
07/20<strong>08</strong><br />
Bticino SpA reserves at any time the right to modify the contents of this booklet and to communicate,<br />
in any form and modality, the changes brought to the same. Version
