Endoscopic Light Source XL180/L3 - Humatem
Endoscopic Light Source XL180/L3 - Humatem
Endoscopic Light Source XL180/L3 - Humatem

Create successful ePaper yourself
Turn your PDF publications into a flip-book with our unique Google optimized e-Paper software.
Handbuch<br />
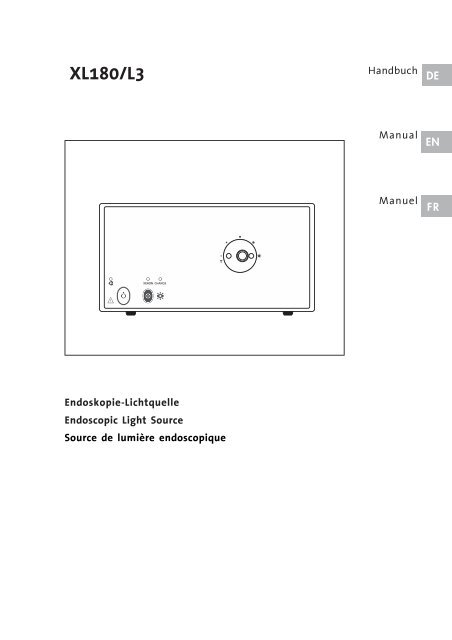
<strong>XL180</strong>/<strong>L3</strong> DE<br />
Endoskopie-Lichtquelle<br />
<strong>Endoscopic</strong> <strong>Light</strong> <strong>Source</strong><br />
<strong>Source</strong> de lumière endoscopique<br />
Manual<br />
Manuel<br />
EN<br />
FR
Dieses Handbuch enthält eigentumsrechtlich geschützte<br />
Informationen, die dem Urheberrecht unterliegen. Alle<br />
DE Rechte sind geschützt. Ohne ausdrückliche, schriftliche<br />
Genehmigung von der W.O.M. WORLD OF MEDICINE AG darf<br />
dieses Handbuch weder vollständig noch in Auszügen<br />
durch Photokopie, Mikrofilm oder andere Verfahren<br />
vervielfältigt oder verbreitet werden.<br />
Durch die ständige Weiterentwicklung unserer Produkte behalten wir<br />
uns DE technische Änderungen ohne Ankündigung vor. Funktion oder<br />
Design können teilweise von der Beschreibung im Handbuch<br />
abweichen. Bitte kontaktieren Sie uns, um weitere Informationen zu<br />
diesem oder anderen Produkten zu erhalten.<br />
Bezeichnungen, die zugleich eingetragenes Warenzeichen sind,<br />
wurden nicht besonders gekennzeichnet. Es kann nicht aus dem<br />
Fehlen des Warenzeichens geschlossen werden, daß eine<br />
Bezeichnung ein freies Warenzeichen ist. Ebensowenig ist zu<br />
entnehmen, ob Patente oder Gebrauchsmuster vorliegen.<br />
Die W.O.M. WORLD OF MEDICINE AG ist den Anwendern ihrer Produkte<br />
dankbar für jeden Hinweis auf mögliche Fehler oder Unklarheiten<br />
dieses Handbuches.<br />
Copyright © W.O.M. WORLD OF MEDICINE AG<br />
EN<br />
This manual contains information that is subject to copyright.<br />
All rights reserved.<br />
This manual should not be photocopied, duplicated on microfilm<br />
or otherwise copied or distributed, completely or<br />
in part, without the approval of W.O.M. WORLD OF MEDI-<br />
CINE AG.<br />
Some of the parts and equipment referred to in this<br />
manual bear registered trademarks but are not identified as such. It<br />
should therefore not be assumed that the absence of the trademark<br />
indicates that any given designation is not subject to trademark protection.<br />
Users of W.O.M. WORLD OF MEDICINE AG products should not hesitate<br />
to point out to us any errors or unclarities in this manual.<br />
Copyright © W.O.M. WORLD OF MEDICINE AG<br />
Ce manuel contient des informations protégées par la<br />
législati-on des droits de propriété et des droits d’auteur.<br />
FR Tous droits sont protégés. Il est interdit de reproduire ou<br />
de distribuer ce manuel - que ce soit intégralement ou<br />
partiellement par photocopie, microfilm ou autres<br />
procédés de reproduction sans l’autorisati-on écrite<br />
expresse de l’entreprise W.O.M. WORLD OF MEDICINE AG.<br />
En raison du perfectionnement permanent de nos produits, nous<br />
nous réser-vons le droit de procéder à des modifications techniques<br />
sans avis préalable. Il se peut que les fonctionnalités ou que le<br />
design des produits diffèrent partiel-lement de la description<br />
figurant dans le manuel. Pour de plus amples infor-mations<br />
concernant ce produit ou d’autres produits, n’hésitez pas à nous<br />
contacter.<br />
Les désignations qui représentent en même temps des marques<br />
déposées n’ont pas été spécifiquement caractérisées. L’absence du<br />
logotype ne peut en aucun cas faire supposer que la désignation<br />
représente une marque non dé-posée. De la même manière, cela<br />
n’indique pas la présence de brevets ou de modèles déposés.<br />
W.O.M. WORLD OF MEDICINE AG remercie d’avance les utilisateurs de<br />
ses produits qui lui fourni-ront des informations eu égard à des<br />
errata possibles ou à des imprécisions su-sceptibles d’être contenus<br />
dans ce présent manuel.<br />
COPYRIGHT © W.O.M. WORLD OF MEDICINE AG<br />
Hersteller/Manufacturer/Fabricant<br />
WORLD OF MEDICINE AG<br />
Alte Poststraße 11<br />
D-96337 Ludwigsstadt<br />
Germany<br />
Tel.: +49 9263/877-0<br />
Fax: +49 9263/877-178<br />
CE-Kennzeichnung gemäß Richtlinie 93/42/EWG<br />
CE marking according to Directive 93/42/EEC<br />
Sigle CE conforme à la directive 93/42/CEE<br />
Baureihe/Model/Série<br />
<strong>XL180</strong>/<strong>L3</strong> - X21 / 200-9733-B / 0206 / ksc
INHALTSVERZEICHNIS<br />
Lieferumfang .............................................................................................................................................. 2<br />
Allgemeines ............................................................................................................................................... 2<br />
Technische Daten ...................................................................................................................................... 2<br />
Sicherheitshinweise .................................................................................................................................. 3<br />
Gerätebeschreibung Front ....................................................................................................................... 4<br />
LED STBY, Tasten OFF, LED/Taste XENON .................................................................................. 4<br />
LED CHANGE, Lichtbuchse, Leuchtstifte ......................................................................................... 4<br />
Gerätebeschreibung Rückseite ............................................................................................................... 4<br />
Lüftungsschlitze, Potentialausgleich ................................................................................................. 4<br />
Netzsicherungshalter, Netzanschluss ............................................................................................... 4<br />
Inbetriebnahme .......................................................................................................................................... 4<br />
Service ................................................................................................................................................. 5<br />
Öffnen/Schließen der Klappe, Lampenwechsel ................................................................................ 5<br />
Wechsel der Lichtbuchse .................................................................................................................. 6<br />
Sicherungswechsel ........................................................................................................................... 6<br />
Reinigung .......................................................................................................................................... 6<br />
Entsorgung ........................................................................................................................................ 6<br />
Fehlerbeschreibung .................................................................................................................................. 7<br />
Änderungen-Reparaturen ....................................................................................................................... 8<br />
Seite 1 von 8
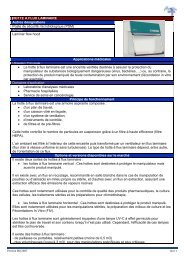
Lieferumfang<br />
• Lichtquelle <strong>XL180</strong><br />
• 1 XBO Lampe (eingebaut)<br />
• 1 Netzkabel<br />
• Gebrauchsanweisung<br />
• Prüfprotokoll<br />
• Transportverpackung<br />
Bitte kontrollieren Sie sofort die im Lieferumfang<br />
angegebenen Teile.<br />
Sollten Teile fehlen oder beschädigt sein, wenden<br />
Sie sich bitte an Ihren Händler.<br />
Allgemeines<br />
• Die Lichtquelle <strong>XL180</strong> ist speziell für die<br />
Beleuchtung Chirurgischer Eingriffe und deren<br />
Dokumentation entwickelt worden.<br />
• Die Lichtintensität kann durch Drehung der<br />
Lichtbuchse reguliert werden.<br />
• Die lange Lebensdauer der XBO-Lampe<br />
machen einen Ersatz der Lampe kalkulierbar.<br />
• Einfacher Austausch einer defekten Lampe.<br />
Technische Daten<br />
Netzspannung Weltnetzteil, (AVS:<br />
automatic voltage switch)<br />
100 bis 120V AC und<br />
220 bis 240V AC,<br />
±10% 50/60 Hz<br />
Nennstrom max. 2,7 – 1 A (am Ende<br />
der XBO-Lebensdauer<br />
bis zu 3,9 – 1,5 A)<br />
Spitzeneinschaltstrom max. 8 – 3,5 A<br />
Sicherungen 2 x 250V T 4A<br />
Abmessungen 267 x 138 x 360 mm<br />
(B x H x T)<br />
Gewicht 5600 g<br />
Lampe XBO R180W / 45C<br />
Farbtemperatur ca. 6000 K<br />
Lebensdauer min. 500 h<br />
Bedienung Folientastatur:<br />
Off<br />
Xenon<br />
Betriebsbedingungen<br />
Temperatur +5°C bis +40°C<br />
Druck 700 bis 1.060 hPa<br />
Luftfeuchte 30 bis 85%<br />
(nicht kondensierend)<br />
Bedingungen bei Lagerung und Transport<br />
Temperatur -10°C bis +40°C<br />
Druck 700 bis 1.060 hPa<br />
Luftfeuchte max. 90%<br />
Sicherheit Bauartprüfung nach<br />
EN60601-1, in An-<br />
lehnung EN 60601-2-18<br />
EMV geprüft nach<br />
EN60601-1-2<br />
Typ des Schutzes gegen<br />
elektrischen Schlag:<br />
Schutzklasse Ι<br />
Grad des Schutzes gegen<br />
elektrischen Schlag:<br />
Anwenderteil Typ CF<br />
CE - Zeichen<br />
TÜV - Zeichen<br />
Technische Änderungen vorbehalten<br />
Seite 2 von 8
Sicherheitshinweise<br />
Die Gebrauchsanweisung ist an einer gut<br />
sichtbaren Stelle in Gerätenähe aufzubewahren.<br />
Wir erklären in allgemeiner Verantwortung,<br />
dass das Produkt auf das sich diese Erklärung<br />
bezieht, mit den MDD Richtlinien 93/42/EWG<br />
bzw. mit dem MPG übereinstimmt.<br />
WARNUNG: Um die Gefahr von Brand oder<br />
Stromschlag zu verhindern, darf dieses Gerät<br />
weder Regen noch Feuchtigkeit ausgesetzt<br />
werden. Um einen elektrischen Schlag zu<br />
vermeiden, öffnen Sie das Gerät nicht. Es enthält<br />
keine Bauteile, die vom Kunden gewartet werden<br />
können.<br />
Aufstellort<br />
Das Gerät darf in medizinisch genutzten<br />
Räumen nur betrieben werden, wenn diese<br />
nach den VDE-Vorschriften 0107 installiert<br />
sind.<br />
Es ist nicht für den<br />
Betrieb in explosionsgefährdeten<br />
Bereichen<br />
bestimmt. Bei Verwendung<br />
von explosiven<br />
Narkosegasen darf das<br />
Gerät nicht in der dargestellten Gefahrenzone<br />
betrieben werden.<br />
Netzanschluss<br />
Wechselstrom 100 bis 120V und 220 bis 240V AC<br />
±10%, 50/60Hz<br />
Der mittlere Stift im Geräteeinbaustecker ist der<br />
Schutzleiter.<br />
ACHTUNG: Standby-Betrieb.<br />
Das Gerät ist erst dann allpolig vom<br />
Versorgungsnetz getrennt, wenn der Netzstecker<br />
gezogen ist.<br />
Potentialausgleich<br />
Das Gerät ist an der Rückseite mit einer<br />
Steckvorrichtung nach DIN 42801 für den<br />
Anschluss eines Potentialausgleichs ausgerüstet,<br />
über den sie zu erden ist. ("Richtlinien zur<br />
Vermeidung von Zündgefahren infolge<br />
elektrostatischer Aufladung.")<br />
Gebrauchsanweisung lesen!<br />
Personenschutzzeichen<br />
Grad des Schutzes gegen elektrischen Schlag -<br />
Gerät des Typs CF<br />
HINWEIS: Werden mehrere netzbetriebene Geräte<br />
über Verteiler gleichzeitig an einer Steckdose<br />
betrieben, kann durch die Summierung der<br />
einzelnen Ableitströme der zulässige Grenzwert<br />
überschritten werden.<br />
Warnhinweise zu Gefahren, die durch das Licht<br />
mit hoher Strahlungsenergie ausgehen können.<br />
• Um Gefährdungen durch Temperaturerhöhung<br />
am Lichtaustritt des Lichtkabels und des<br />
Endoskops zu vermeiden, ist es notwendig,<br />
einen Sicherheitsabstand einzuhalten, oder die<br />
Lichtintensität zu reduzieren.<br />
• Eine direkte Beobachtung der Lichtaustritte ist<br />
zu vermeiden.<br />
Vorsicht: – Hot Surface –<br />
Die Temperatur von Anwenderteilen (z.B. der<br />
Lichtbuchse) kann 41°C überschreiten.<br />
Vermeiden Sie eine Berührung mit dem Gehäuse<br />
in der Nähe der Lichtbuchse bzw. eine direkte<br />
Berührung mit der Lichtbuchse.<br />
Die Temperatur des Gehäuses und der Lichtbuchse<br />
ist in keinem Fall höher als 45°C.<br />
Warnhinweise zum Lampenwechsel<br />
ACHTUNG, beim Betrieb der Lichtquelle werden<br />
die verwendeten Lampen heiß.<br />
Bevor die Lampen gewechselt werden:<br />
• Gerät vom Netz trennen<br />
• Lampe abkühlen lassen<br />
• Schutzbrille und<br />
Schutzhandschuhe<br />
verwenden!<br />
Vorsicht! Die XBO-Lampe kann aufgrund ihres<br />
hohen Innendruckes sowohl im kalten, als auch<br />
heißen Zustand explodieren. Während des<br />
Betriebs emittiert die Lampe eine intensive UV-<br />
Strahlung, die für Augen und Haut gefährlich ist.<br />
Die hohe Leuchtdichte kann bei direkter Beobachtung<br />
des Lichtbogens schwere Schädigungen der<br />
Augennetzhaut hervorrufen.<br />
XBO Lampen sind grundsätzlich immer in der<br />
mitgelieferten Schutzhülle zu handhaben!<br />
Beim Packen und Lampenein- bzw.-ausbau immer<br />
Schutzkleidung tragen!<br />
Der Lampenbetrieb ist nur in eigens dafür<br />
konstruierten Lampengehäusen zulässig, die eine<br />
ungeschützte Beobachtung des Lichtbogens<br />
verhindern und im Falle eines Lampenplatzers<br />
Splitter zurückhalten.<br />
Seite 3 von 8
Gerätebeschreibung Front<br />
XENON CHANGE<br />
1 2 3 4 5<br />
6<br />
1 LED Stand-by<br />
Anzeige des Zustandes "Gerät am Netz". Sobald<br />
die Netzverbindung hergestellt ist, befindet sich<br />
das Gerät im „Stand-by“-Zustand. Die LED<br />
leuchtet.<br />
2 Taste OFF<br />
� Schaltet die Lampe aus.<br />
ACHTUNG: Standby-Betrieb<br />
Das Gerät ist erst allpolig vom Netz<br />
getrennt, wenn der Netzstecker gezogen ist.<br />
3 LED XENON<br />
LED leuchtet, wenn Lampe eingeschaltet ist.<br />
4 Taste XENON<br />
� Schaltet die Lampe ein.<br />
(→ LED (3) leuchtet)<br />
5 LED CHANGE<br />
Die LED blinkt wenn die Xenon Lampe ausgetauscht<br />
werden muss.<br />
6 Lichtbuchse<br />
Anschlussbuchse für das Lichtkabel.<br />
Lichtkabel fest einstecken - Rastpunkt beachten.<br />
- Aus Sicherheitsgründen ist die Lichtaustrittsöffnung<br />
verschlossen. Sie öffnet sich automatisch<br />
beim Einstecken des Lichtkabels.<br />
- Bei eingeschalteter XBO-Lampe ist ein<br />
Wärmeschutzfilter aktiv. Die Wärme am<br />
Lichteintritt des Lichtkabels und am Endoskop<br />
wird so reduziert.<br />
7 Leuchtstifte<br />
Durch Drehen der Lichtbuchse mittels der Leuchtstifte<br />
kann die Helligkeit der Lampe verändert<br />
werden.<br />
Maximale Helligkeit:<br />
Blauer Leuchtstift erhellt<br />
(in Position rechts)<br />
Minimale Helligkeit:<br />
Blauer Leuchtstift<br />
weniger erhellt<br />
(in Position links)<br />
7<br />
Gerätebeschreibung Rückseite<br />
8 Lüftungsgitter, Lüftungsschlitze<br />
Um eine optimale Kühlung des Gerätes zu<br />
gewährleisten, müssen die Lufteintritts- und<br />
austrittsöffnungen frei sein!<br />
9 Potentialausgleich<br />
Anschlussmöglichkeit für den Potentialausgleich<br />
nach DIN42801<br />
10 Netzsicherungshalter<br />
Herausnehmbarer Netzsicherungshalter für<br />
Sicherungen 2 x 250V T 4A (5 x 20 mm).<br />
Sicherungswechsel siehe „Service“.<br />
11 Netzeingang<br />
Anschlussbuchse für das Netzkabel<br />
Betriebsspannung:<br />
100 bis 120V und 220 bis 240V AC ±10% 50/60Hz<br />
Standby –Betrieb<br />
Inbetriebnahme<br />
1. Lichtquelle auf eine ebene Fläche stellen<br />
2. Netzkabel anschließen (Standby-Betrieb)<br />
3. Potentialausgleich vornehmen<br />
4. Lichtkabel einstecken<br />
5. Lampe einschalten<br />
Die Lichtquelle ist betriebsbereit<br />
Seite 4 von 8
Service<br />
Öffnen der Klappe<br />
- Verschluss mit einem Schraubendreher gegen<br />
den Uhrzeigersinn drehen<br />
→ Klappe öffnet sich leicht und kann abge-<br />
nommen werden.<br />
HINWEIS: Bei geöffneter Klappe schaltet das<br />
Gerät ab, bzw. lässt sich nicht starten.<br />
Zum Schließen der Gehäuseklappe diese<br />
Tätigkeiten in umgekehrter Reihenfolge ausführen.<br />
- Klappe an der Gehäuseseite einhängen und<br />
schließen.<br />
- Mit dem Schraubendreher Verschluss im<br />
Uhrzeigersinn drehen.<br />
HINWEIS:<br />
Ist die Klappe nicht ordnungsgemäß geschlossen,<br />
lässt sich das Gerät aus Sicherheitsgründen nicht<br />
einschalten.<br />
Lampenausbau Xenon Lampe<br />
Vor dem Wechsel der Xenon Lampe:<br />
• Gerät vom Netz trennen<br />
• Gerät abkühlen lassen<br />
• ACHTUNG: Sicherheitshinweise beachten!<br />
Schutzhandschuhe und Schutzbrille benutzen!<br />
- Klappe öffnen<br />
2.<br />
1. Die Stecker abziehen.<br />
2. Die Lampenbefestigung durch Zug in Pfeil-<br />
richtung aushängen.<br />
- Die Xenon Lampe vorsichtig entnehmen.<br />
Lampeneinbau Xenon Lampe<br />
- Die Lampe vorsichtig aus der Verpackung<br />
nehmen. Dabei die Sicherheitshinweise<br />
beachten.<br />
- Die Lampe in die richtige Position drehen. Das<br />
Kabel, das aus dem Keramikring des<br />
Reflektors herausragt, muss sich auf der<br />
oberen Seite befinden.<br />
- Die Lampe so einsetzen, dass die Kerbe im<br />
Keramikring des Reflektors in den Metallstift<br />
der Lampenfassung einrastet.<br />
2.<br />
3.<br />
Osram XBO R180 W / 45 C<br />
LEMKE Part No.: V.L180XBO01<br />
Osram XBO R180 W / 45 C<br />
LEMKE Part No.: V.L180XBO01<br />
1. Die 2 Haken der Lampenbefestigung<br />
einhängen (Haken müssen nach rechts<br />
weisen).<br />
2. Kerbe der Lampe in Position bringen<br />
3. Die Lampenbefestigung in Pfeilrichtung<br />
ziehen und in den Schlitz einhängen.<br />
4. Stecker aufstecken (verwechslungssicher).<br />
- Klappe schließen<br />
- Mit dem Schraubendreher festschrauben<br />
Lampenwechsel-Anzeige<br />
Durch das Erkennen bestimmter Parameter wird<br />
die LED CHANGE (5) nach dem Lampenwechsel<br />
automatisch zurückgesetzt. Die LED blinkt nicht<br />
mehr.<br />
1.<br />
1.<br />
4.<br />
Seite 5 von 8
Wechsel der Lichtbuchse<br />
WARNUNG:<br />
• Schalten Sie die Lichtquelle vor dem Wechsel<br />
der Lichtbuchse ab.<br />
HINWEIS:<br />
• Vermeiden Sie bei eingeschalteter Lichtquelle<br />
eine direkte Beobachtung der Lichtaustritte, da<br />
dies zu schwerwiegenden Augenschäden<br />
führen kann.<br />
Für Lichtleiter verschiedener Hersteller stehen<br />
passende Lichtbuchsen zur Verfügung. Bitte<br />
fragen Sie Ihren Händler.<br />
Sicherungswechsel<br />
Der Netzsicherungshalter enthält 2 x 250V T 4A Sicherungen (5 x 20 mm).<br />
- Netzstecker (11) ziehen.<br />
- Kappe des Netzsicherungshalters (10) mit geeignetem Werkzeug<br />
(z.B. Schraubendreher) lösen.<br />
- Sicherungshalter herausziehen.<br />
- Sicherungen mit den angegebenen Werten ersetzen.<br />
- Sicherungshalter hineinschieben, bis er einrastet.<br />
- Netzstecker wieder einstecken.<br />
- Gerät auf ordnungsgemäße Funktion prüfen.<br />
Reinigung<br />
Lichtbuchse ausschrauben:<br />
- Lichtbuchse gegen Uhrzeigersinn in Richtung<br />
minimale Helligkeit drehen (siehe „Gerätebe-<br />
schreibung Front“<br />
- über den Rastpunkt hinaus weiterdrehen; die<br />
Lichtbuchse schraubt sich aus dem Gehäuse<br />
- Lichtbuchse herausziehen<br />
Beim Einschrauben der Lichtbuchse in<br />
umgekehrter Reihenfolge verfahren:<br />
- Lichtbuchse einführen; der blaue Leuchtstift<br />
muss sich dabei in „3-Uhr-Stellung“ befinden<br />
- um 180° im Uhrzeigersinn bis über den<br />
Rastpunkt drehen; die Lichtbuchse schraubt<br />
sich in das Gehäuse hinein<br />
- um weitere 180° drehen<br />
- die Lichtbuchse sitzt nun fest im Gehäuse;<br />
die Lichtquelle ist funktionsfähig<br />
• Aus Sicherheitsgründen muss bei allen Reinigungsarbeiten das Gerät vom Netz getrennt werden.<br />
• Es können Reinigungsflüssigkeiten verwendet werden, die Aldehyd oder Isoprophyl-Alkohol (70%)<br />
enthalten<br />
• Ein- und Austrittsflächen der Lichtleiter reinigen.<br />
• Die Frontseite der Lichtquelle kann feucht gereinigt und desinfiziert werden.<br />
• Die lackierte Leichtmetalloberfläche des Gerätes kann ebenfalls feucht abgewischt werden.<br />
• Achten Sie darauf, dass keine Flüssigkeit in das Innere der Lichtquelle eindringt.<br />
Entsorgung<br />
Am Ende der Produktlebenszeit sollten die Bauteile der Lichtquelle ordnungsgemäß entsorgt werden.<br />
Achten Sie dabei auf eine sorgfältige Materialtrennung.<br />
Die Lichtquelle beinhaltet keine Gefahrengüter. Das Gehäusematerial ist recyclingfähig.<br />
Die Elektronikleiterplatten sollten einem entsprechenden Recyclingverfahren zugeführt werden<br />
FUSE<br />
2x250V<br />
T 4A<br />
10<br />
11<br />
Seite 6 von 8
Fehlerbeschreibung<br />
Fehlerbeschreibung Abhilfe<br />
• Keine Funktion, Stand By LED • Netzanschluss überprüfen<br />
leuchtet nich, Kein Licht,<br />
Lüfter läuft nicht • Netzsicherungen überprüfen, ggf. ersetzen<br />
• Gerät zum Service/Hersteller geben<br />
• XBO-Lampe lässt sich nicht • Lampe überprüfen, ggf. ersetzen<br />
einschalten, Lüfter läuft nicht • Bei geringer Anzahl von Betriebsstunden mit dem Service<br />
bzw. dem Hersteller in Verbindung setzen<br />
• Gerät zum Service/Hersteller geben<br />
• Licht zu dunkel • Überprüfen Sie die manuelle Einstellung der Lichtbuchse;<br />
ggf. auf Maximum stellen (s. „Gerätebeschreibung Front“)<br />
• Falls Einstellung schon auf Maximum; Lampe wechseln<br />
• Überprüfen Sie Lichtkabel und Instrument; ggf. austauschen.<br />
• Bild überstrahlt • Zuviel Licht<br />
• Überprüfen der manuellen Einstellung der Lichtbuchse;<br />
ggf. auf Minimum stellen<br />
• Kamera mit Shutter betreiben.<br />
Seite 7 von 8
Änderungen - Reparaturen<br />
Änderungen und Reparaturen dürfen nur von W ORLD OF MEDICINE oder von W ORLD OF<br />
MEDICINE autorisierten Fachleuten vorgenommen werden.<br />
Eigenmächtiges Öffnen, Änderungen und Reparaturen am Gerät entbinden W ORLD OF MEDICINE<br />
von jeglicher Haftung für die Betriebssicherheit des Gerätes. Die Gewährleistung erlischt.<br />
Serviceunterlagen sind auf Wunsch lieferbar.<br />
• Garantieansprüche können nur geltend gemacht werden, wenn die komplette Lichtquelle eingesandt<br />
wird.<br />
• Bitte geben Sie Typ- und Seriennummer, die Sie auf der Rückseite des Gerätes finden bei Fragen und<br />
Ersatzteilbestellungen an.<br />
• Wenn Sie die Lichtquelle direkt zu W ORLD OF MEDICINE schicken, erfolgt die Reparatur<br />
schnellstmöglich.<br />
Seite 8 von 8
<strong>Endoscopic</strong> <strong>Light</strong> <strong>Source</strong> <strong>XL180</strong>/<strong>L3</strong><br />
Important Note<br />
Read this manual<br />
Read the manual carefully and become familiar about the operation<br />
and function of the device and the accessories before use<br />
during surgical procedures. Nonobservance of the manual can<br />
lead to<br />
• life-threatening injuries of the patient,<br />
• severe injuries of the surgical team, nursing or service<br />
personnel or<br />
• damage or malfunction of device and/or accessories.<br />
Modification<br />
The manufacturer reserves the right to modify the appearance<br />
and technical performance of the product through continued<br />
development of the production of the product.<br />
Accessory list<br />
The accessory list is included in the manual in chapter<br />
"3-3 Accessories".<br />
Manual<br />
Please read this manual completely and follow its instructions<br />
carefully. The words DANGER, WARNING and NOTE carry special<br />
meanings and they should be read attentively.<br />
DANGER<br />
The safety and/or health of the patient, user, or a third party is<br />
at risk. Comply with this warning to avoid injury to the<br />
patient, user, or third party.<br />
WARNING<br />
These paragraphs contain information concerning the<br />
intended use of the device or accessory.<br />
NOTE<br />
Here you read information about the maintenance of the<br />
device or accessory.<br />
EN-1<br />
EN
CONTENTS 1 SAFETY INSTRUCTIONS<br />
1 SAFETY INSTRUCTIONS .................................................................... 2<br />
1-1 Warnings ................................................................................... 3<br />
2 PURPOSE OF THE DEVICE ................................................................ 4<br />
2-1 Device-inherent dangers ..................................................... 4<br />
2-2 Notes .......................................................................................... 4<br />
3 INITIAL USE OF THE DEVICE ............................................................ 5<br />
3-1 Inspection of the device ....................................................... 5<br />
3-2 Preparing the device ............................................................. 5<br />
3-3 Accessories ............................................................................... 5<br />
4 OPERATING THE DEVICE .................................................................. 6<br />
4-1 Front of the device ................................................................. 6<br />
4-2 Rear of the device ................................................................... 6<br />
4-3 Turning on / turning off the device ................................. 7<br />
4-4 Adjustment of light illumination ...................................... 7<br />
5 SERVICE AND MAINTENANCE ........................................................ 8<br />
5-1 Changing the xenon lamp ................................................... 8<br />
• Deinstalling the xenon lamp .......................................... 8<br />
• Installing the xenon lamp ................................................ 8<br />
• Display and reset of lamp change indication ............ 8<br />
5-2 Changing the optical jack .................................................... 9<br />
5-3 Changing fuses ....................................................................... 9<br />
5-4 Instructions for cleaning ..................................................... 9<br />
6 TECHNICAL DATA .............................................................................. 10<br />
7 INDEX ....................................................................................................11<br />
8 TROUBLESHOOTING ........................................................................ 12<br />
Federal law (only for US-market)<br />
U.S. Federal law restricts this device to sale by or on the order of<br />
a physician.<br />
No liability<br />
The manufacturer is not liable for direct or resulting damage,<br />
and the warranty becomes void if:<br />
• the device or the accessories are improperly used, prepared<br />
or maintenanced;<br />
• the instructions and rules in the manual are not adhered to;<br />
• non-authorized persons perform repairs, adjustments or alterations<br />
on the device or accessories;<br />
• a non-authorized person opens the device;<br />
• the prescribed inspection and maintenance schedule is not<br />
adhered to.<br />
Receipt of technical documentation from the manufacturer<br />
does not authorize individuals to perform repairs, adjustments<br />
or alterations on the device or accessories.<br />
Authorized service technician<br />
Only an authorized service technician may perform repairs, adjustments<br />
or alterations on the device or accessories and use<br />
the service menu. Any violation will void the manufacturer’s<br />
warranty. Authorized service technicians are only trained and<br />
certified by the manufacturer.<br />
Care and maintenance<br />
To guarantee safe operation, it is absolutely necessary to carry<br />
out proper care and maintenance of the device and accessories.<br />
For the protection of the patient and the operating team, check<br />
that the device is complete and functional before each use.<br />
Brand-new products, as well as repaired products, must be prepared<br />
and tested according to the manual instructions prior to<br />
use.<br />
Contamination<br />
For the protection of the service personnel, and for safety during<br />
transportation, all devices and accessory parts that are sent in<br />
to be repaired must be prepared for shipment as described in<br />
the manual.<br />
If this is not possible,<br />
• the product must be clearly marked with a contamination<br />
warning and<br />
• should be double-sealed in safety foil.<br />
The manufacturer has the right to refuse to carry out repairs if<br />
the product is contaminated.<br />
Waste management<br />
Observe national waste management regulations.<br />
EN-2<br />
EN
1 SAFETY INSTRUCTIONS 1 SAFETY INSTRUCTIONS<br />
1-1 Warnings<br />
WARNING<br />
Condensation / Water penetration<br />
Protect the device from moisture. Do not use if moisture has<br />
penetrated the device.<br />
Original accessories<br />
For your own safety, and that of your patient, use only original<br />
accessories.<br />
Factory settings<br />
Check all user menu settings and values.<br />
Such internal standard settings are not necessarily prescribed<br />
for the doctor. The doctor is responsible for all settings that<br />
pertain to his/her operation.<br />
Specific technique and procedure<br />
Only the physician can evaluate the clinical factors involved<br />
with each patient and determine if the use of this device is<br />
indicated. The physician must determine the specific<br />
technique and procedure that will accomplish the desired<br />
clinical effect.<br />
Available mains voltage<br />
Check to make sure that the available mains voltage matches<br />
the data listed on the label attached to the back of the device.<br />
Incorrect voltage can cause errors and malfunction and destroy<br />
the equipment.<br />
Not explosion-proof<br />
Electrical components are not explosion-proof. Do not use in<br />
an area where flammable gases are present.<br />
Risk of electrical shock<br />
To prevent electrical shock, do not open this device unless<br />
otherwise indicated in this manual. Never try to repair this<br />
device yourself. Refer servicing to qualified service personnel.<br />
Professional qualification<br />
This manual does not provide a detailed description of<br />
operation techniques, nor is it suitable for introducing a beginner<br />
to this operating technique. Medical accessories and<br />
devices may be used only by physicians and medical assistants<br />
under the direction of a physician with the appropriate<br />
technical qualification.<br />
Sterile substances and accessories<br />
Always work exclusively with sterile substances, sterile fluids,<br />
and sterile accessories.<br />
Cleaning the device<br />
Do not sterilize the device.<br />
Specific device warnings<br />
Read the warnings specific to this device in chapter 2 Purpose<br />
of the device.<br />
Device deficiency<br />
If a device deficiency is suspected or confirmed, stop using the<br />
device until it has been checked by authorized service<br />
personnel. This is also true if the device fails to maintain the<br />
indicated tolerance levels.<br />
Replacing fuse<br />
For continued protection against fire hazard, replace the fuse<br />
only with a fuse of the same type and rating.<br />
Endoscope<br />
The device may only be connected to endoscopes which, in<br />
their intended use and technical specifications, are appropriate<br />
for use with the device for the intended medical procedure.<br />
The endoscopes must comply with the most recent version<br />
of DIN EN 60601-2-18 and ISO 8600.<br />
Powered accessory<br />
The leakage current through the patient could increase by<br />
using endoscopes with powered accessory.<br />
Electrical interference<br />
This equipment is designed and tested to minimize electrical<br />
interference with other equipment. However, if interference<br />
occurs with other equipment, it may be corrected by one or<br />
more of the following measures:<br />
- Reorient or relocate this equipment, the other equipment,<br />
or both<br />
- Increase the separation between the parts of equipment<br />
- Consult a biomedical engineer.<br />
Obvious defects<br />
Never use the device if it has obvious defects, especially if<br />
these involve the power plugs or the power supply connection<br />
cables. Have the device repaired by authorized service personnel.<br />
Leakage current<br />
If more power consuming units are connected simultaneously<br />
to one socket by means of distribution boxes the sum of the<br />
individual leakage currents may exceed the tolerated limits.<br />
EN-3<br />
EN
2 PURPOSE OF THE DEVICE 2 PURPOSE OF THE DEVICE<br />
Intended use<br />
The <strong>XL180</strong>/<strong>L3</strong> is a light source. It is to be used with fiber optics<br />
for endoscopic surgery and for diagnostic purposes.<br />
Indications for use<br />
The light source <strong>XL180</strong>/<strong>L3</strong> is to be used with endoscopes when<br />
performing minimal invasive surgical operations in order to illuminate<br />
the operating field inside of body cavities in such a way<br />
that the view of the cavity can be transferred to an endoscopic<br />
camera via the optics of the endoscope.<br />
Contraindications<br />
Do not use this device if endoscopic operation is contraindicated.<br />
Operating features<br />
The <strong>XL180</strong>/<strong>L3</strong> is equipped with a 180W xenon lamp. It can be<br />
used for surgery and diagnostic cases. The light intensity can be<br />
adjusted easily.<br />
Bulb changes can be carried out by the user. The lamp is positioned<br />
in a specially designed holding device. This guarantees<br />
that the lamp is exactly centralized onto the light cable in order<br />
to maximize the use of the given light power.<br />
The <strong>XL180</strong>/<strong>L3</strong> is equipped with a digital microprocessor, which<br />
optimizes the unit's light intensity performance and supports<br />
an easy operation of the device.<br />
2-1 Device-inherent dangers<br />
DANGERS<br />
Stand-by operation<br />
The unit is only separated from mains completely if the power<br />
plug is disconnected from the power supply socket.<br />
Danger of burns<br />
Contact with the open end of a light cable or of the endoscope<br />
that are connected to the light source can result in burns due<br />
to the high energy of the emitted light.<br />
Risk of fire<br />
Combustible materials such as cloths or other textiles could<br />
catch fire from the heat at the open end of the light cable or<br />
of the endoscope.<br />
Never place such equipment at or near these materials.<br />
UV / IR radiation<br />
The lamp emits an intensive UV/IR ray during operation.<br />
Avoid looking directly into the high intensity light as this can<br />
result in serious eye damage.<br />
Hot surface<br />
The temperature of application parts (e.g. the optical jack)<br />
may cross 41°C/ 106°F.<br />
Avoid body contact with the housing of the device in the surrounding<br />
of the optical jack or with the optical jack itself. The<br />
temperature of the housing and the optical jack will never<br />
cross 45°C/113°F.<br />
Replacing the lamp<br />
The lamp gets very hot during the operation of the light<br />
source. Unplug the device from the power supply and allow<br />
the lamp to cool sufficiently before changing.<br />
The lamp can explode due to its high pressure. Always use<br />
protection gloves and goggles!<br />
Follow the instructions concerning replacement of the lamp<br />
mentioned herein.<br />
2-2 Notes<br />
NOTES<br />
The lamp is an expendable material, so it is possible that it<br />
may fail during use. For this reason a spare lamp should be<br />
kept available when performing therapeutic interventions.<br />
Additional peripheral equipment connected to interfaces of<br />
the light source have to meet the requirements of following<br />
specifications: EN 60601-2-18 for endoscopic devices and<br />
EN 60601-1 for electro medical equipment.<br />
All configurations have to comply to EN 60601-1-1.<br />
Whoever connects additional equipment to signal output or<br />
signal input is obliged to meet requirements of the standard<br />
EN 60601-1-1.<br />
The sturgeon influencing of electronic devices by electromagnetic<br />
waves (e.g. by cellular phones) are well-known. For this<br />
reason we advise the users of our devices to prevent the occurring<br />
of these risks.<br />
EN-4<br />
EN
3 INITIAL USE OF THE DEVICE<br />
3-1 Inspection of the device<br />
Check the device and all accessories immediately upon receipt<br />
to make sure the contents are complete and that nothing is<br />
damaged. The manufacturer considers only replacement claims<br />
that have been immediately submitted or reported to a sales<br />
representative or an authorized service company.<br />
Scope of delivery<br />
• endoscopic light source <strong>XL180</strong>/<strong>L3</strong><br />
• 1 xenon lamp (short: XBO lamp), pre-installed<br />
• 1 mains cable<br />
• instruction manual<br />
• test certificate<br />
• transport and storage case<br />
NOTE<br />
The light source can only be used as indicated with an endoscopic<br />
fiber optic. The endoscopic fiber optics are not part of<br />
the scope of delivery and must be ordered separately.<br />
Please refer to chapter "3-3 Accessories" for further information.<br />
Returning the device<br />
If it becomes necessary to return the device, use of the original<br />
packaging is required. The manufacturer does not take responsibility<br />
for damage that has occurred during transportation if the<br />
damage was caused by inadequate transport packaging. Please<br />
make sure that all required information has been supplied:<br />
• owner’s name<br />
• owner’s address<br />
• type<br />
• serial number of the equipment (see identification<br />
plate)<br />
• detailed description of the damage.<br />
Setting up the device<br />
Place the device on a level surface in a dry place.<br />
The ambient temperature should be between +5°C to +40°C<br />
(+41°F to +104°F) and the relative air humidity should be between<br />
30 to 85% (not condensing).<br />
3-2 Preparing the device<br />
It is in the responsibility of the user to make sure the unit is safe<br />
and operates properly before using it.<br />
While using the light source the patient must be treated and<br />
kept under observation with the usual medical care. Guarantee<br />
sterile application conditions, provided they are required.<br />
WARNING<br />
Do not block or cover the ventilation grid and the ventilation<br />
slits of the device's housing.<br />
Adequate cooling is required for proper operation of the unit.<br />
Mains connection<br />
Use the provided mains cable. Once the mains connection is established<br />
the device is in a stand-by condition.<br />
DANGER<br />
Stand-by operation.<br />
The unit is only separated from mains completely if the power<br />
plug is disconnected from the power supply socket.<br />
3 INITIAL USE OF THE DEVICE<br />
Inserting the fiber optic cable<br />
Insert the light cable into the optical jack until it reaches the<br />
catch point. Always grip the plug when connecting the cable.<br />
Never disconnecting by pulling the cable itself.<br />
Connecting the endoscope<br />
Connect the light cable to the endoscope. Follow the instructions<br />
of the manufacturer of this equipment.<br />
Potential equalization<br />
The unit is equipped with a connector for potential equalization<br />
according to DIN 42801. Integrate the device into the potential<br />
equalization that corresponds to your local electrical system.<br />
The light source is now ready for use.<br />
3-3 Accessories<br />
The <strong>XL180</strong>/<strong>L3</strong> is available with different optical jacks. By installation<br />
of the right optical jack the device can be adapted to most<br />
common endoscopic fiber optics without using an adapter, thus<br />
ensuring the perfect fit of the light cable.<br />
WARNING<br />
When using glued light cables the glue may burn, blackening<br />
the polished light jack. The cable can then no longer be used.<br />
We therefore strongly recommend not to use glued light<br />
cables. Please contact your local dealer for more information.<br />
Which optical jack is necessary for the functionality of the device<br />
depends on the fiber optic the device is to be used with.<br />
Available optical jacks<br />
Item Ordering number<br />
Optical jack Storz V.LX202BKS1<br />
Optical jack Wolf V.LX202BRW1<br />
Optical jack Olympus V.LX202BWI1<br />
Others … please contact the<br />
manufacturer<br />
If not otherwise indicated, the endoscopic light source <strong>XL180</strong>/<strong>L3</strong><br />
will be equipped with an optical jack for standard endoscopic fiber<br />
optics manufactured by the company Karl Storz, Germany.<br />
WORLD OF MEDICINE Lemke will help with ordering numbers and<br />
addresses on demand.<br />
The optical jack can easily be changed by the user, allowing the<br />
use of different endoscopic fiber optics. For further instructions<br />
please refer to chapter "5-2 Changing the optical jack".<br />
Testing instrument ´fiber jack´<br />
For testing the light power a testing device is available . It can<br />
be ordered under the ordering number V.LLE701P06.<br />
EN-5<br />
EN
4 OPERATING THE DEVICE 4 OPERATING THE DEVICE<br />
4-1 Front of the device<br />
Familiarize yourselves with the operating and the displaying elements<br />
of the light source <strong>XL180</strong>/<strong>L3</strong>.<br />
1 stand-by LED<br />
2 OFF key (lamp)<br />
3 LED xenon ON<br />
4 ON key (lamp)<br />
5 LED change lamp<br />
6 optical jack (light cable socket)<br />
7 light sensors (adjustment of brightness)<br />
4-2 Rear of the device<br />
The functional elements at the rear of the light source.<br />
NOTE<br />
The identification label is placed on the bottom of the<br />
housing.<br />
8 ventilation grid, ventilation slits<br />
the ventilation intake and exit slit have to be open and<br />
unobstructed to ensure optimal device cooling!<br />
9 potential equalization<br />
connector for potential equalization according to DIN<br />
42801<br />
10 mains fuse mount<br />
removable mains fuse mount for fuses (dimension<br />
5x20mm) 2 x 250V T 4A (SB)<br />
11 power input<br />
appliance inlet for mains cable<br />
world power supply (AVS: automatic voltage switch)<br />
100 to 120V and 220 to 240V AC ±10% 50/60Hz<br />
EN-6<br />
EN
4 OPERATING THE DEVICE 4 OPERATING THE DEVICE<br />
4-3 Turning on / turning off the device<br />
4-3-1 Turning on<br />
Once the power connection is established, the device is in a<br />
stand-by condition. The stand-by LED (1) is illuminated.<br />
To switch on the lamp press the ON key (4). The assigned LED (3)<br />
is illuminated.<br />
4-3-2 Turning off<br />
Press the OFF key (2) to turn off the lamp. The device remains in<br />
a stand-by condition.<br />
The light source can only be switched off by pressing the<br />
OFF key (2). Pushing the ON key (4) will have no effect on the<br />
functioning of the light source during operation.<br />
GENERAL NOTE<br />
With no fiber cable inserted the light emission exit of the optical<br />
jack (6) is closed due to safety reasons. It opens automatically<br />
when the fiber optic cable is inserted.<br />
4-4 Adjustment of light illumination<br />
Turning the optical jack (6) using the light sensors (7) allows a<br />
manual adjustment of brightness.<br />
With this the brightness can be adapted according to the requirements<br />
of the treatment.<br />
MAX brightness: Blue light sensor is illuminated<br />
on the right side of the optical<br />
jack<br />
MIN brightness: Blue light sensor is illuminated<br />
on the left side of the optical<br />
jack<br />
EN-7<br />
EN
5 SERVICE AND MAINTENANCE<br />
5-1 Changing the xenon lamp<br />
When the lamp has arrived at the end of its life time it has to be<br />
replaced.<br />
The flashing LED change lamp (5) indicates this condition.<br />
WARNING<br />
Observe the instructions and the warnings of the manufacturer<br />
of the xenon lamp when handling with the lamp.<br />
The device is equipped with a housing lid. This offers the user<br />
the possibility to change the xenon lamp himself.<br />
Opening and closing the housing lid<br />
DANGER<br />
Disconnect the device from mains before opening the lid.<br />
• use a screwdriver to turn the lock button counterclockwise<br />
• the lid unlocks easily and can then be opened<br />
• lift the lid from the housing<br />
To close the housing lid perform instructions in reverse manner.<br />
NOTE<br />
If the lid is not closed correctly the device cannot be operated.<br />
5-1-1 Deinstalling the xenon lamp<br />
DANGER<br />
The lamp has a high inner pressure. If not handled carefully it<br />
can explode. Always wear protective goggles and gloves when<br />
changing the lamp.<br />
• pull all plugs (1.)<br />
• unhinge the lamp mount by pulling in the direction of the<br />
arrow (2.)<br />
• carefully remove the xenon lamp<br />
5 SERVICE AND MAINTENANCE<br />
5-1-2 Installing the xenon lamp<br />
• carefully remove the new lamp from its packaging material;<br />
observe the safety notes!<br />
• turn the lamp in the correct position;<br />
the cable extending from the ceramic ring of the reflector<br />
has to be at the top in a "1-o'clock-position"<br />
• insert the lamp; keep the notch in the ceramic ring of the<br />
reflector aligned to the metal pin of the lamp socket until<br />
locked into place (1.)<br />
• keep the lamp’s notch in correct manner (1.)<br />
• pull lamp mount in the direction of the arrow and hang in<br />
slot (2.)<br />
• insert plugs (3.); the plugs are equipped with coded sockets<br />
(they cannot be reversed)<br />
• close the housing lid in correct manner<br />
• turn the lock button clockwise by means of a screwdriver<br />
DANGER<br />
As the wasted lamp can also explode due to its high inner<br />
pressure always store the lamp in the original packaging material<br />
or any other safe deposit.<br />
5-1-3 Display and reset of lamp change indication<br />
Certain operating parameters of the lamp are evaluated by the<br />
internal microprocessor. These parameters change continuously<br />
during the operation determined by the actual working time of<br />
the lamp.<br />
It is recognized if given values of the parameters are crossed;<br />
this condition is indicated by the flashing LED change lamp (5).<br />
The xenon lamp has to be replaced.<br />
After the xenon lamp has been replaced the operating parameters<br />
of the new lamp are detected automatically and a<br />
manual reset of the lamp change indication is not required. The<br />
LED change lamp (5) is not illuminated any longer.<br />
EN-8<br />
EN
5 SERVICE AND MAINTENANCE 5 SERVICE AND MAINTENANCE<br />
5-2 Changing the optical jack<br />
DANGER<br />
Disconnect the device from mains before changing the optical<br />
jack.<br />
Screwing out the optical jack:<br />
• turn the optical jack (6) to the minimum illumination point<br />
counter-clockwise (see chapter "4-4 Adjustment of light illumination")<br />
• continue turning past lock point counter-clockwise; the optical<br />
jack will turn out of the housing<br />
• pull out the optical jack<br />
Reverse the instructions to screw in the optical jack:<br />
• insert optical jack; the blue light sensor must be in a<br />
"3-o'clock-position"<br />
• turn clockwise by 180° past the lock point; the optical jack<br />
will turn into the housing<br />
• turn another 180°<br />
• the optical jack is now firmly fastened inside the case; the<br />
light source is operational<br />
5-3 Changing fuses<br />
At the rear side of the device there is the removable fuse mount<br />
for the mains fuses (5x20 mm) 2 x 250V T 4A (SB).<br />
WARNING<br />
Always use the prescribed fuse type with correct rating.<br />
Replacing the fuses<br />
• pull the power plug from<br />
the socket (11)<br />
• use a suitable tool (e.g. screwdriver)<br />
to loosen the mains fuse mount (10)<br />
• remove fuse mount<br />
• replace fuses with the<br />
indicated values<br />
• insert fuse mount until it<br />
snaps into place<br />
• reconnect the power plug<br />
• test the unit for proper operation<br />
5-4 Instructions for cleaning<br />
DANGER<br />
Always unplug the device from the power supply when performing<br />
any cleaning tasks!<br />
Recommended cleaning/disinfection liquids are those containing<br />
aldehyd or isoprophyl alcohol (70%).<br />
WARNING<br />
Do not sterilize (for example by autoclaving) any part of the<br />
device! The parts may be damaged.<br />
All flat surfaces of the device can be cleaned with recommended<br />
cleaning and disinfection liquids by means of a soft piece of<br />
cloth. The liquids may not be aggressive against the finish.<br />
WARNING<br />
Make sure that no liquid or moisture penetrate into interior<br />
parts of the device.<br />
Cleaning<br />
All common cleaning methods are to be used. Note the recommendations<br />
of the manufacturer of the detergent you use.<br />
Clean the device regularly.<br />
Destination of the cleaning process is to prepare the equipment<br />
for further use. All visible pollution parts should be removed<br />
from the surface of the device. Use detergents recommended<br />
above.<br />
Clean all parts with a dampened soft cloth and afterwards dry<br />
the surface of the device carefully with a soft piece of cloth or<br />
pressured air.<br />
EN-9<br />
EN
6 TECHNICAL DATA<br />
Lamp XBO R180W / 45C<br />
Color temperature approx. 6000 K<br />
Service life min. 500 h<br />
Operation membrane keys:<br />
- OFF<br />
- ON (XENON)<br />
Mains world power supply<br />
AVS: automatic voltage switch<br />
100 to 120 V AC and 220 to 240 V AC<br />
±10%, 50/60Hz<br />
Current consumption<br />
Peak current (on ignition)<br />
2.7 to 1 A<br />
(at the end of the xenon lamp lifespan<br />
up to 3.9 to 1.5 A)<br />
max. 8 to 3.5 A<br />
Fuses 2 x 250 V T 4 A (SB)<br />
Safety type tested according to EN 60601-1,<br />
following EN 60601-2-18<br />
EMC tested according to EN 60601-1-2<br />
type of protection against electric shock:<br />
Protection Class I<br />
degree of protection against electric<br />
shock: applied part of type CF<br />
CE-sign<br />
TÜV Mark<br />
6 TECHNICAL DATA<br />
Operating conditions<br />
Transport and storage conditions<br />
temperature +5°C to +40°C<br />
(+41°F to +104°F)<br />
pressure 700 to 1060 hPa<br />
humidity 30 to 85%<br />
(non-condensing)<br />
temperature -10°C to +40°C<br />
(14°F to +104°F)<br />
pressure 700 to 1060 hPa<br />
humidity max. 90%<br />
Dimensions 267 x 138 x 360 mm<br />
(W x H x D) (10.5 x 5.4 x 14.2 inches)<br />
Weight 5.1 kg (11.2 lb)<br />
Technical data subject to modification, revision and<br />
improvement without notice<br />
EN-10<br />
EN
7 INDEX 7 INDEX<br />
A<br />
Accessories 3, 5<br />
Adjustment 7<br />
Authorized personnel 2, 3, 4<br />
Available voltage 3<br />
B<br />
Brightness 7<br />
C<br />
Care and maintenance 2<br />
Changing optical jack 9<br />
Changing xenon lamp 8<br />
Cleaning 3, 9<br />
Contamination 2<br />
Contraindications 4<br />
D<br />
Dangers 4<br />
Deinstalling xenon lamp 8<br />
Device deficiency 3<br />
E<br />
Electrical interference 3<br />
Electrical shock 3<br />
F<br />
Factory settings 3<br />
Federal law 2<br />
Fiber optic cable 5<br />
Front 6<br />
Fuses 9, 10<br />
H<br />
Housing lid 8<br />
I<br />
Illumination 7<br />
Installing xenon lamp 8<br />
Intended use 4<br />
L<br />
Lamp 10<br />
Lamp, actual working time 8<br />
Leakage current 3<br />
LED 6<br />
Liability 2<br />
Lock button 8<br />
M<br />
Mains 10<br />
Mains connection 5, 6<br />
Mains fuse mount 6, 9<br />
N<br />
Not explosion-proof 3<br />
O<br />
Obvious defects 3<br />
OFF 6, 7<br />
Operating conditions 10<br />
Operating features 4<br />
Optical jack 5, 9<br />
P<br />
Peripheral equipment 4<br />
Potential equalization 5, 6<br />
Power input 6<br />
Powered accessory 3<br />
Preparing 5<br />
Professional qualification 3<br />
R<br />
Rear 6<br />
Returning 5<br />
S<br />
Safety 10<br />
Scope of delivery 5<br />
Service life 10<br />
Specific dangers 4<br />
Specific technique and procedure 3<br />
Sturgeon influencing 4<br />
Switch on xenon 7<br />
T<br />
Technical Data 10<br />
Temperature 4<br />
Testing instrument 5<br />
Transport, storage conditions 10<br />
Turning on 7<br />
U<br />
UV/IR ray 4<br />
V<br />
Ventilation 5, 6, 12<br />
W<br />
Warnings 3<br />
Warranty 2<br />
Waste management 2<br />
World power supply 6, 10<br />
EN-11<br />
EN
8 TROUBLESHOOTING<br />
SYMPTOMS<br />
• no function; no display; the standby LED is not<br />
illuminated; no light; ventilator not working<br />
• lamp cannot be turned on; ventilator not working<br />
• light too dark<br />
• image blooming<br />
CORRECTIVE ACTION<br />
• check power connection<br />
• check mains fuses and replace if necessary<br />
• return unit to the service center or manufacturer<br />
• check lamp and replace if necessary<br />
• if few operation hours, contact the service center<br />
or manufacturer<br />
• return unit to the service center or manufacturer<br />
• check manual setting of optical jack; turn to max.<br />
(see chapter "4-4 Adjustment of light illumination"<br />
• if setting is already at max., replace lamp<br />
• check fiber optic cable and instrument;<br />
replace if necessary<br />
• too much light<br />
• check manual setting of optical jack; turn to min.<br />
• use camera with shutter<br />
EN-12<br />
ENN
SOMMAIRE<br />
Contenu de la livraison ............................................................................................................................. 2<br />
Généralités ................................................................................................................................................. 2<br />
Caractéristiques techniques .................................................................................................................... 2<br />
Consignes de sécurité .............................................................................................................................. 3<br />
Descriptif de l'appareil face frontale ........................................................................................................ 4<br />
DEL STBY, Touches OFF, DEL/touche XENON .............................................................................. 4<br />
DEL CHANGE, douille, photostyles .................................................................................................. 4<br />
Descriptif du produit au dos ..................................................................................................................... 4<br />
Fentes d'aération, compensation de potentiel ................................................................................... 4<br />
Support à fusible de secteur, raccordement au réseau .................................................................... 4<br />
Mise en service .......................................................................................................................................... 4<br />
Service ................................................................................................................................................. 5<br />
Ouverture/fermeture du clapet, changement d'ampoule ................................................................... 5<br />
Changement de douille ..................................................................................................................... 6<br />
Changement de fusible ..................................................................................................................... 6<br />
Nettoyage .......................................................................................................................................... 6<br />
Mise au rebut ..................................................................................................................................... 6<br />
Description des défauts ............................................................................................................................ 7<br />
Modification et réparation.......................................................................................................................... 8<br />
Page 1 de 8
Contenu de la livraison<br />
• <strong>Source</strong> lumineuse<br />
• 1 ampoule XBO (intégrée)<br />
• 1 câble secteur<br />
• Instructions d'utilisation<br />
• Compte rendu de contrôle<br />
• Emballage utilisé pour le transport<br />
Veuillez contrôler immédiatement que les pièces<br />
mentionnées dans le contenu de la livraison vous<br />
ont bien été livrées.<br />
Si des pièces manquent ou sont endommagées,<br />
veuillez vous adresser à votre vendeur.<br />
Généralités<br />
• La source lumineuse a été spécialement mise<br />
au point pour l'éclairage d'interventions<br />
chirurgicales et leur documentation.<br />
• Pour régler l'intensité de la lumière, il suffit de<br />
tourner la douille.<br />
• La longue durée de vie de l'ampoule XBO<br />
permet de calculer le moment où elle devra<br />
être remplacée<br />
• Remplacement simple d'une ampoule<br />
défectueuse.<br />
Caractéristiques techniques<br />
Tension de secteur adaptateur universel,<br />
(AVS: automatic voltage<br />
switch)<br />
100 à 120V AC et<br />
220 à 240V AC,<br />
±10% 50/60 Hz<br />
Courant nominal max. 2,7 - 1 A (à la fin<br />
de la durée de vie de la<br />
XBO jusqu'à 3,9 - 1,5 A)<br />
Courant de pointe<br />
max. lors de la<br />
fermeture du circuit 8 - 3,5 A<br />
Fusibles 2 x 250V T 4A<br />
Dimensions 267 x 138 x 360 mm<br />
(L x H x P)<br />
Poids 5,6 kg<br />
Ampoule XBO R180W / 45C<br />
Température de<br />
couleur env. 6000 K<br />
Durée de vie min. 500 h<br />
Utilisation clavier à effleurement:<br />
- Off<br />
- Xénon<br />
Conditions d'utilisation<br />
Température +5°C à +40°C<br />
Pression 700 à 1.060 hPa<br />
Humidité 30 à 85%<br />
(sans condensation)<br />
Conditions d'entreposage et de transport<br />
Température -10°C à +40°C<br />
Pression 700 à 1.060 hPa<br />
Humidité de l'air max. 90%<br />
Sécurité Contrôle du type de<br />
construction selon<br />
EN60601-1, selon<br />
EN60601-2-18<br />
Compatibilité<br />
électromagnétique selon<br />
vérifiée EN60601-1-2<br />
Modèle de protection<br />
contre les décharges<br />
électriques:<br />
Classe de protection Ι<br />
Degré de protection contre<br />
les décharges<br />
électriques: partie<br />
utilisateur<br />
type CF<br />
Sigle CE, Sigle TÜV<br />
Sous réserve de modifications techniques<br />
Page 2 de 8
Consignes de sécurité<br />
Les instructions d'utilisation doivent être<br />
conservées dans un endroit bien visible, à<br />
proximité de l'appareil.<br />
Nous déclarons sous notre propre<br />
responsabilité que le produit auquel la<br />
présente déclaration fait référence est<br />
conforme aux directives MDD 93/42/CEE ou à la<br />
loi allemande MPG.<br />
AVERTISSEMENT: Pour éviter tout risque<br />
d'incendie ou d'électrocution, cet appareil ne doit<br />
pas être exposé à la pluie ni à l'humidité. Afin<br />
d'éviter de recevoir une décharge électrique,<br />
n'ouvrez pas l'appareil. Il ne contient aucun<br />
élément pouvant être entretenu par le client<br />
Lieu d'installation<br />
L'appareil ne doit être utilisé que dans des<br />
locaux médicaux conformes aux prescriptions<br />
VDE 0107.<br />
Il n'est pas conçu pour<br />
être utilisé dans des<br />
zones soumises à des<br />
explosions. Lors de<br />
l'utilisation de gaz<br />
narcotiques explosifs,<br />
l'appareil ne doit pas être utilisé dans la zone<br />
dangereuse représentée.<br />
Raccordement au réseau<br />
Courant alternatif 100 à 120V et 220 à 240V AC<br />
±10%, 50/60Hz<br />
La broche centrale située dans la fiche intégrée de<br />
l'appareil est le conducteur de terre.<br />
ATTENTION: Mode veille.<br />
L'appareil n'est totalement hors secteur qu'une fois<br />
débranché.<br />
Compensation de potentiel<br />
L'appareil est équipé au dos d'une prise<br />
conformément à DIN 42801 servant au<br />
raccordement d'une liaison équipotentielle et par<br />
laquelle il doit être relié à la terre. ("Directives<br />
visant à éviter les risques d'incendie dus à la<br />
charge électrostatique.")<br />
Lisez les instructions d'utilisation !<br />
Symbole protection personnelle<br />
Degré de protection contre les décharges<br />
électriques - appareil de type CF<br />
REMARQUE: Si plusieurs appareils sont utilisés<br />
simultanément sur secteur par le biais d'une prise<br />
multiple, par leur addition, les différents courants<br />
de dérivation pourront dépasser la valeur limite<br />
autorisée.<br />
Avertissements sur les dangers pouvant<br />
découler de la lumière à forte énergie<br />
rayonnante.<br />
• Pour éviter les dangers dus à une<br />
augmentation de la température sur la sortie<br />
de lumière du câble pour éclairage et de<br />
l'endoscope, respectez une distance de<br />
sécurité ou réduisez l'intensité de la lumière.<br />
• Evitez d'observer directement les sorties de<br />
lumière.<br />
ATTENTION: - Hot Surface -<br />
La température des parties utilisateur (par exemple<br />
de la douille) peut dépasser 41 °C.<br />
Evitez de toucher le boîtier situé à proximité de la<br />
douille ou de toucher directement cette dernière.<br />
La température du boîtier et de la douille ne<br />
dépasse en aucun cas 45 °C.<br />
Avertissements relatifs au changement<br />
d'ampoule<br />
Attention, lors de l'utilisation de la source<br />
lumineuse, les ampoules utilisées chauffent.<br />
Avant de changer les ampoules:<br />
• Mettez l'appareil hors secteur<br />
• Laissez refroidir l'ampoule<br />
• Utilisez des lunettes et des<br />
gants de protection!<br />
ATTENTION: Compte tenu de sa forte pression<br />
intérieure, l'ampoule XBO peut exploser à froid<br />
comme à chaud. Pendant le fonctionnement,<br />
l'ampoule émet un rayonnement UV intense nocif<br />
pour les yeux et la peau. En cas d'observation<br />
directe de l'arc électrique, la haute densité<br />
d'éclairage pourra avoir de graves conséquences<br />
sur la rétine.<br />
En principe, utilisez toujours la gaine de protection<br />
fournie pour manipuler les ampoules XBO!<br />
Lors de l'emballage et de l'installation ou du<br />
démontage de l'ampoule, portez toujours des<br />
vêtements de protection!<br />
L'ampoule doit uniquement être utilisée dans des<br />
boîtiers spécialement prévus à cet effet,<br />
empêchant l'observation de l'arc électrique sans<br />
protection ainsi que la projection d'éclats en cas<br />
d'explosion de l'ampoule.<br />
Page 3 de 8
Descriptif de l'appareil face frontale<br />
1 DEL STBY<br />
Affichage de l'état "Appareil sur secteur". Dès qu'il<br />
est raccordé au secteur, l'appareil se trouve en<br />
mode "veille". La DEL s'allume.<br />
2 Touche OFF<br />
� Eteint l'ampoule.<br />
ATTENTION: Mode veille.<br />
L'appareil n'est totalement hors secteur<br />
qu'une fois débranché.<br />
3 DEL XENON<br />
La DEL s'allume lorsque l'ampoule est allumée.<br />
4 Touche XENON<br />
� Allume l'ampoule.<br />
(→ DEL (3) allumée)<br />
5 DEL CHANGE<br />
La DEL clignote lorsque l'ampoule Xénon doit être<br />
remplacée.<br />
6 Douille<br />
XENON CHANGE<br />
1 2 3 4 5<br />
6<br />
Douille de raccordement du câble pour éclairage.<br />
Insérez bien le câble pour éclairage - tenez<br />
compte du point d'enclenchement.<br />
- Pour des raisons de sécurité, l'ouverture de<br />
sortie de lumière est verrouillée. Elle s'ouvre<br />
automatiquement lors de l'insertion du câble<br />
pour éclairage.<br />
- Lorsque l'ampoule XBO est allumée, un filtre<br />
de protection thermique est activé. La chaleur<br />
à l'entrée de lumière du câble pour éclairage<br />
et sur l'endoscope est ainsi réduite .<br />
7 Photostyles<br />
Tournez la douille à l'aide des photostyles pour<br />
modifier la luminosité de l'ampoule.<br />
Luminosité maximale:<br />
Photostyle bleu éclairé<br />
(position droite)<br />
Luminosité minimale:<br />
Photostyle bleu<br />
moins éclairé<br />
(position gauche)<br />
7<br />
Descriptif de l'appareil au dos<br />
8 Grille de ventilation, fentes d'aération<br />
Afin de garantir un refroidissement optimal de<br />
l'appareil, les ouvertures d'arrivée et de sortie d'air<br />
doivent être dégagées!<br />
9 Compensation de potentiel<br />
Possibilité de raccordement de la liaison<br />
équipotentielle conformément à DIN42801<br />
10 Support à fusible de secteur<br />
Support amovible pour fusibles de secteur<br />
2 x 250V T 4A (5 x 20 mm).<br />
Changement de fusible, voir „Service".<br />
11 Entrée secteur<br />
Douille de raccordement du câble secteur<br />
Tension de service:<br />
100 à 120V et 220 à 240V AC ±10% 50/60Hz<br />
Mode veille<br />
Mise en service<br />
1. Placez la source lumineuse sur une surface<br />
plane<br />
2. Raccordez le câble secteur (mode veille)<br />
3. Procédez à la compensation de potentiel<br />
4. Insérez le câble pour éclairage<br />
5. Allumez l'ampoule<br />
La source lumineuse est prête à fonctionner<br />
Page 4 de 8
Service<br />
Ouverture du clapet<br />
- Tournez la serrure dans le sens inverse des<br />
aiguilles d’une montre à l'aide d'un tournevis<br />
→ Le clapet s'ouvre aisément et peut être<br />
enlevé.<br />
REMARQUE: Lorsque le clapet est ouvert,<br />
l'appareil se désactive ou ne peut pas démarrer.<br />
Fermeture du clapet<br />
Pour fermer le clapet, procédez dans l'ordre<br />
inverse des opérations:<br />
- Réinstallez et positionnez le clapet.<br />
- A l'aide du tournevis, tournez la dans le sens<br />
des aiguilles d’une montre<br />
Démontage de l'ampoule Xénon<br />
Avant de changer l'ampoule Xénon:<br />
• Mettez l'appareil hors secteur<br />
• Laissez refroidir l'appareil<br />
• ATTENTION: Respectez les consignes de<br />
sécurité !<br />
Portez des gants et des lunettes de protection!<br />
- Ouvrez le clapet<br />
2.<br />
Osram XBO R180 W / 45 C<br />
LEMKE Part No.: V.L180XBO01<br />
1.<br />
1. Retirez les fiches.<br />
2. Décrochez la fixation de l'ampoule en tirant<br />
dans le sens de la flèche.<br />
- Enlevez l'ampoule Xénon avec soin.<br />
Montage de l'ampoule Xénon<br />
- Sortez prudemment l'ampoule de son<br />
-<br />
emballage. Respectez alors les consignes de<br />
sécurité.<br />
Tournez l'ampoule dans la position correcte.<br />
Le câble dépassant de la bague en céramique<br />
du réflecteur doit se trouver sur la face<br />
supérieure.<br />
- Installez l'ampoule de sorte que l'encoche<br />
située dans la bague en céramique du<br />
réflecteur s'enclenche dans la broche en métal<br />
de la douille de lampe.<br />
2.<br />
3.<br />
Osram XBO R180 W / 45 C<br />
LEMKE Part No.: V.L180XBO01<br />
1. Accrochez les 2 crochets de la fixation de<br />
l'ampoule (les crochets doivent être tournés<br />
vers la droite).<br />
2. Mettez l'encoche de l'ampoule en position.<br />
3. Tirez la fixation de l'ampoule dans le sens de<br />
la flèche et accrochez-la dans la fente.<br />
4. Branchez la fiche (anti-confusion).<br />
- Fermez le clapet<br />
- Vissez bien à l'aide du tournevis<br />
Affichage de changement de lampe<br />
Affichage de changement de lampe<br />
Grâce à la reconnaissance de certains paramètres<br />
la LED CHANGE (5) sera automatiquement remise<br />
à zéro, après que la nouvelle lampe ait été<br />
insérée. La LED ne clignote plus.<br />
1.<br />
4.<br />
Page 5 de 8
Changement de la douille<br />
AVERTISSEMENT:<br />
• Eteignez la source lumineuse avant de<br />
changer la douille.<br />
REMARQUE:<br />
• Lorsque la source lumineuse est allumée,<br />
évitez de regarder directement les sorties de<br />
lumière car cela pourrait provoquer de graves<br />
lésions oculaires.<br />
Il existe des douilles adaptées pour les guides<br />
de lumière des différents fabricants. Veuillez<br />
consulter votre vendeur.<br />
Changement de fusible<br />
Le support à fusible de secteur contient 2 x fusibles 250V T 4A (5 x 20 mm).<br />
- Retirez la fiche secteur (11).<br />
Dévissez la douille:<br />
- Tournez la douille dans le sens inverse des<br />
aiguilles d’une montre dans le sens de la<br />
luminosité minimale (voir "Descriptif de<br />
l'appareil Face frontale"<br />
- tournez au-delà du point d'enclenchement; la<br />
douille se détache du boîtier<br />
- Retirez la douille<br />
Pour visser la douille, procédez dans l'ordre<br />
inverse des opérations:<br />
- Installez la douille; Le photostyle bleu doit<br />
alors se trouver en "position 3 heures"<br />
- de 180° dans le sens des aiguilles d’une<br />
montre au-delà du point d'enclenchement; la<br />
douille se visse dans le boîtier<br />
- tournez de 180° supplémentaires<br />
- la douille est maintenant bien fixée dans le<br />
boîtier;<br />
la source lumineuse est prête à fonctionner<br />
- Retirez le capuchon du support à fusible de secteur (10) à l'aide d'un outil adapté<br />
(par exemple tournevis).<br />
- Retirez le support à fusible.<br />
- Remplacez les fusibles par des fusibles conformes aux valeurs indiquées.<br />
- Insérez le support à fusible jusqu'à ce qu'il s'enclenche.<br />
- Branchez à nouveau la fiche.<br />
- Vérifiez que l'appareil fonctionne correctement.<br />
Nettoyage<br />
• Pour des raisons de sécurité, l'appareil doit être débranché lors de tous les travaux de nettoyage.<br />
• Vous pouvez utiliser des liquides de nettoyage contenant de l'aldéhyde ou de l'alcool isopropylique<br />
(70%).<br />
• Nettoyez les surfaces d'entrée et de sortie des guides de lumière.<br />
• La face frontale de la source lumineuse peut être nettoyée à l'aide d'un chiffon humide et être<br />
désinfectée.<br />
• La surface en métal léger laqué de l'appareil peut également être essuyée avec un chiffon humide.<br />
• Veillez à ce qu'aucun liquide ne pénètre à l'intérieur de la source lumineuse.<br />
Elimination des résidus<br />
A la fin de la durée de vie du produit, mettez les composants de la source lumineuse au rebut correctement.<br />
Veillez alors à ce que les matériaux soient soigneusement triés.<br />
La source lumineuse ne contient aucune matière dangereuse. Le matériau du boîtier est recyclable.<br />
Les cartes imprimées électroniques doivent être recyclées de manière adaptée.<br />
FUSE<br />
2x250V<br />
T 4A<br />
10 11<br />
Page 6 de 8
Description des défauts<br />
Description des défauts Remède<br />
• Aucune fonction, La DEL standby<br />
ne s’allume pas • Vérifiez le raccordement au secteur.<br />
pas de lumière, la ventilation ne • Vérifiez les fusibles de secteur, remplacez-les si nécessaire.<br />
fonctionne pas. • Confiez l'appareil au service après-vente/fabricant.<br />
• Impossible d'allumer l'ampoule XBO,<br />
la ventilation ne fonctionne pas • Vérifiez l’ampoule et remplacez-la si nécessaire<br />
• Si l'ampoule n'a été utilisée que quelques heures<br />
seulement, contactez le service après-vente<br />
• Confiez l'appareil au service après-vente/fabricant.<br />
• Lumière trop sombre. • Vérifiez le réglage manuel de la douille;<br />
si nécessaire, réglez-la au maximum (voir „Descriptif de<br />
l'appareil face frontale").<br />
• Si elle est déjà au maximum; remplacez l'ampoule.<br />
• Vérifiez le câble pour éclairage et l'appareil; remplacez-les<br />
si nécessaire.<br />
• Image hyper lumineuse. • Trop de lumière.<br />
• Vérifiez le réglage manuel de la douille;<br />
si nécessaire, réglez-la au minimum.<br />
• Utilisez une caméra avec obturateur.<br />
Page 7 de 8
Modification et réparation<br />
Les modifications et les réparations ne doivent être effectuées que par du personnel qualifié habilité de<br />
WORLD OF MEDICINE AG.<br />
En cas d'ouverture, de modification et de réparation personnelles sur l'appareil, WORLD OF MEDICINE AG se<br />
dégage de toute responsabilité en matière de sécurité de fonctionnement de l'appareil. La garantie est<br />
annulée.<br />
Des documents de service peuvent être fournis sur demande.<br />
• Les réclamations en matière de garantie ne pourront être fait valoir que si la source lumineuse complète<br />
est envoyée.<br />
• En cas de questions et de commande de pièces de rechange, veuillez indiquer le numéro de modèle et<br />
de série figurant au dos de l'appareil.<br />
• Si vous envoyez directement la source lumineuse à WORLD OF MEDICINE AG, la réparation sera<br />
effectuée dans les meilleurs délais.<br />
Page 8 de 8