VWR Micro 1814, Micro 1816, Micro 2416 - VWR International
VWR Micro 1814, Micro 1816, Micro 2416 - VWR International
VWR Micro 1814, Micro 1816, Micro 2416 - VWR International
- TAGS
- micro
- us.vwr.com

Create successful ePaper yourself
Turn your PDF publications into a flip-book with our unique Google optimized e-Paper software.
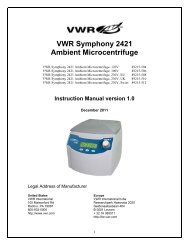
<strong>VWR</strong> <strong>Micro</strong> <strong>1814</strong>, <strong>Micro</strong> <strong>1816</strong>, <strong>Micro</strong> <strong>2416</strong><br />
INSTRUCTION MANUAL<br />
North American Catalog Number(s):<br />
<strong>Micro</strong> <strong>1814</strong>: 37001-296<br />
<strong>Micro</strong> <strong>1816</strong>: 37001-298<br />
<strong>Micro</strong> <strong>2416</strong>: 37001-300<br />
Version: 3<br />
Issued: 1, January, 2011
Legal Address of Manufacturer<br />
United States Europe<br />
<strong>VWR</strong> <strong>International</strong> <strong>VWR</strong> <strong>International</strong> bvba<br />
1310 Goshen Parkway Researchpark Haasrode 2020<br />
West Chester, PA 19380 Geldenaaksebaan 464<br />
800-932-5000 B-3001 Leuven<br />
http://www.vwr.com + 32 16 385011<br />
http://be.vwr.com<br />
Country of origin USA
Table of Contents<br />
Warning 1<br />
Safety information 1<br />
Package Contents 2<br />
Installation 2<br />
Intended Use 3<br />
Symbols and conventions 3<br />
Product Specifications 3<br />
Instructions for use 3<br />
Centrifuge Rotor Usage Guide 6<br />
Troubleshooting 8<br />
General maintenance 9<br />
Accessories and spares 10<br />
Technical Service 10<br />
Warranty 11<br />
Disposal 11
Warning<br />
Use of this product in a manner not specified by the manufacturer may impair any<br />
safety protection provided by the equipment and may result in physical damage and/or<br />
personal injury. Please read all operating instructions in the Operation Manual prior to<br />
use of this device. See Good Laboratory Safety Precautions listed below.<br />
Safety Information<br />
Please follow the guidelines below, and read this manual in its entirety to ensure safe<br />
operation of the unit.<br />
Blocking the air inlet reduces cooling air to the motor and may cause the rotor to come off.<br />
Good Laboratory Safety Precautions<br />
<strong>VWR</strong> recommends good laboratory practice which requires the following safety precautions be<br />
observed:<br />
• The unit must be placed at least 300mm from any bench edge. A boundary area of 300mm around<br />
the centrifuge should be marked and laboratory management procedures should require that no<br />
person or any hazardous materials or breakable items be located within this boundary while the<br />
centrifuge is operating.<br />
• An emergency switch for disconnection of the AC (mains) power to the centrifuge, in case of<br />
malfunction, is required. This switch must be located away from the centrifuge, preferably outside<br />
the room in which the centrifuge is housed or adjacent to the exit from that room.<br />
• Always wear OSHA approved, wraparound eye protection. Observe appropriate safety precautions<br />
for the materials being centrifuged as detailed by the Material Safety Data Sheets.<br />
• The centrifuge must not be used with flammable or explosive materials, or with materials which could<br />
chemically interact.<br />
• Do not expose the centrifuge, rotor, rotor cover or accessories to materials or processes which could<br />
cause chemical or mechanical damage. Refer to Rotor Usage Guide and cleaning instructions.<br />
• Thoroughly inspect the centrifuge, rotor and accessories for mechanical and chemical damage prior<br />
to each use. Mechanical damage can often be visually observed, and includes cracks, scratches or<br />
gouges on the centrifuge lid or rotor. Chemical damage can often be visually observed and includes<br />
crazing, peeling or similar deterioration, especially on the rotor and the inner surfaces of the<br />
centrifuge.<br />
• DO NOT USE THE CENTRIFUGE OR ROTOR IF DAMAGE IS EVIDENT. REPLACE DEFECTIVE<br />
PARTS IMMEDIATELY.<br />
• Do not dispose of the centrifuge by incineration.<br />
• Use only manufacturer-approved accessories with the unit.<br />
• Replace rotors on an annual basis, or immediately if dropped or damaged. (Refer to the “Rotor<br />
Usage Guide” in this manual for guidelines on replacing heavily used rotors.)<br />
• Sample tubes used must be compatible with the maximum Relative Centrifugal Force (RCF) rating of<br />
the centrifuge. Sample tubes have a limited life and should be used per the sample tube<br />
manufacturer’s recommendations. Do not mix the sample tube types within a rotor. The weight of<br />
each sample should be within 5% of all other samples. To maintain balance, equally distribute<br />
loaded sample tubes in the rotor.<br />
• The rotor cover provided is not intended to be a bioseal (as defined by IEC 1010-2-020) for<br />
containment of pathogenic microbiological specimens during use.<br />
• Do not move the centrifuge during operation, as the unit may become unbalanced the rotor may<br />
become dislodged.<br />
• While a small amount of vibration during rotor acceleration or deceleration is normal, immediately<br />
stop the centrifuge if excessive vibration is evident at any time.<br />
• Do not obstruct any air inlet or exhaust vent on the centrifuge.<br />
• The centrifuge is not designed to spin more than 2.5 grams of fluid per sample tube.<br />
• Additional safety information can be found in the “Centrifuge Rotor Usage Guide” section of this<br />
manual.
Package Contents<br />
Centrifuge 1<br />
Power cord 1<br />
Rotor and wrench 1<br />
Operation manual 1<br />
Purchase registration card 1<br />
Installation<br />
1. Remove unit from packaging; verify rotor is clear and all package contents are<br />
included.<br />
2. Locate the centrifuge at least 300mm from the all edges of the lab bench.<br />
3. Connect the centrifuge to the power cord first, then plug the power cord into the wall<br />
AC outlet.<br />
4. A soft beep can be heard as the microcentrifuge powers up. Factory default settings<br />
will be displayed on the front panel. NOTE: If the lid latch does not release after power<br />
up, press the RED stop button.<br />
Intended use<br />
This product is intended for indoor use only. Applications include microfiltration, mini or quick<br />
spin columns, small volume pelleting of cells in liquid culture, quick spin downs, and low speed<br />
sedimentation.<br />
Symbols and conventions<br />
The following chart is an illustrated glossary of the symbols that are used in this manual.<br />
CAUTION This symbol indicates a potential risk and alerts you to<br />
proceed with caution<br />
Product Specifications<br />
<strong>1814</strong>: <strong>1816</strong> <strong>2416</strong><br />
- Maximum speed: 13,000 rpm / 14,000 xg 13,300 rpm / 16,000 xg<br />
14,000rpm/16,000xg<br />
- Maximum capacity: 18 x 1.5/2.0 ml 24 x 1.5/2.0 ml<br />
- Timer: 99 minutes 99 minutes<br />
- Dimensions: 26.7 x 23.8 x 17.8 cm 26.7 x 23.8 x 17.8 cm<br />
- Operating temperature: 4º to 40ºC 4º to 40ºC<br />
- Operating humidity: 0% to 95% humidity 0% to 95% humidity<br />
- The weight: 5.0 kg (11 pounds) 5.3 kg (11.75 pounds)<br />
- Electrical: 220 V, 50/60 Hz 220 V, 50/60 Hz<br />
Instruction for Use<br />
This microcentrifuge has been carefully designed and constructed for easy operation and<br />
proven durability. Digital displays, quiet operation, simple controls, autoclavable rotors and<br />
rotor covers are a few of this microcentrifuge’s features<br />
Operation<br />
1. Inspect the rotor and inner centrifuge surfaces for cracks and crazing.<br />
2. Load the rotor with sample tubes. Note: It is recommended that the rotor be loaded<br />
and the lid placed on the rotor while the rotor is out of the centrifuge.<br />
3. Always use the rotor cover on the rotor. Press the rotor cover onto the rotor by<br />
applying pressure and twisting slightly.<br />
4. Open the centrifuge lid and press the rotor onto the octagonal rotor drive spindle. The
otor is precision balanced for quiet operation at maximum speed. To minimize<br />
vibration and maintain quiet operation, the point of the black arrow on the underside of<br />
the rotor should be aligned with the black mark on the octagonal drive spindle.<br />
5. Close the lid and select the mode of operation<br />
Modes of Operation - Normal<br />
To program for normal operation, do the following:<br />
1. On the right hand side of the microcentrifuge, press the MODE key once to select<br />
RPM or g-force as indicated by the Display Mode Indicator.<br />
2. Press either the up or down arrow key to select the desired speed or g<br />
Manual Lid Lock Release<br />
Should a power failure occur while the centrifuge is in operation, the lid of the centrifuge will<br />
remain locked until power is restored. However, it is possible to gain access to valuable<br />
samples by releasing the lid lock manually.<br />
1. Locate the plastic release button on the front of the centrifuge.<br />
2. Pry the button out of the centrifuge housing.<br />
3. A wire is attached to the button. Once the button is free of the housing, tug firmly on<br />
the button and wire to release the lid lock.<br />
4. The lid of the centrifuge can now be opened and samples removed.<br />
5. Before operating the centrifuge again, replace the release button.<br />
NOTE: Do not attempt to operate the release while the rotor is spinning.<br />
To Calculate Separation Acceleration & RPM:<br />
Where: r = radius in cm<br />
n = speed in rpm<br />
RCF = 11.18 x r x (n/1000) 2<br />
The effective centrifugal radius of the 18 x 1.5ml rotor is 7.3 cm; 24 x 1.5ml rotor is 8.1 cm<br />
RCF Quick Reference (approx.)<br />
RPM <strong>1814</strong>/16 <strong>2416</strong><br />
1000 82 91<br />
2000 326 362<br />
3000 735 815<br />
4000 1306 1449<br />
5000 2040 2264<br />
6000 2938 3260<br />
7000 3999 4437<br />
8000 5223 5796<br />
9000 6611 7335<br />
10000 8161 9056<br />
11000 9875 10958<br />
12000 11752 13040<br />
13000 13793 16019*<br />
14000 15996<br />
*Value given is for the maximum speed of the centrifuge, 13,300 rpm.<br />
Centrifuge Rotor Usage Guide<br />
The rotors are intended for the sole purpose of spinning samples in the microcentrifuge.<br />
Use of this product in a manner not specified by the manufacturer may impair or negate<br />
any safety protection provided by the maker.<br />
Good laboratory practice includes observing and following the safety precautions listed in this<br />
guide.<br />
As with any centrifuge, always wear shatterproof, full coverage, wraparound eye
protection and laboratory clothing with long sleeves. Observe all appropriate safety<br />
precautions for the materials in use as detailed by Material Safety Data Sheets.<br />
Rotor Maintenance<br />
Visually inspect the rotor for mechanical or chemical damage prior to each use. Do not use the<br />
rotor if any damage or change is evident. Clean any spills immediately.<br />
Routinely perform mechanical and chemical inspections as follows:<br />
• Check the web area for cracks and crazing.<br />
• Check the rotor underside, including hub area for cracks and crazing.<br />
• Check the outer rim of the rotor.<br />
- Chemical damage appears as discoloration, crazing, granulation, peeling or similar<br />
deterioration of the finish.<br />
- Hidden mechanical damage may be detected by an increase in noise or vibration<br />
during a spin. If noise level increases, stop use immediately.<br />
If any such changes are apparent, discontinue use immediately.<br />
Loading Samples<br />
• Never spin samples which are flammable, explosive or which chemically interact vigorously<br />
when mixed.<br />
• Discard any rotor and rotor cover that becomes contaminated by radioactive samples, as<br />
the exposure may reduce the strength of the rotor material.<br />
• The rotor cover should not be applied nor should the rotor be loaded while it is mounted on<br />
the centrifuge; doing so may damage the motor. Place the rotor on a tabletop to load<br />
samples and apply the rotor cover.<br />
• Never use underrated tubes or tubes that are of poor quality. Sample tubes must be<br />
compatible with the Relative Centrifugal Force (RCF) rating of the centrifuge (see instruction<br />
manual). Use only tubes that are rated at or above the g-level of the spin.<br />
The fit of the sample tube within the rotor tube slot is critical. Use only sample tubes that are<br />
shaped so as to be fully supported by tube inserts. Sample tubes have a limited life and should<br />
be used as per the sample tube manufacturer’s recommendations.<br />
� Never overload sample tubes. Most sample tubes are designed to be used with liquid<br />
samples only. Do not load solid material into tubes.<br />
� Never attempt to centrifuge any liquid or substance having a homogenous density greater<br />
than 1.2g/ml.<br />
� Never mix the sample tube type within a rotor. The weight of each sample should be within<br />
5% of all other samples by weight. To maintain proper balance, place loaded sample tubes<br />
into the into tube slots that are opposite each other.<br />
� Always use the rotor cover. The rotor cover is designed to minimize wind resistance on<br />
the spinning rotor enabling it to achieve speed more quickly. Spinning without the rotor<br />
cover may result in motor failure.<br />
� The rotor cover is not intended to be a bioseal (as defined by IEC 1010-2-020) for<br />
containment of pathogenic microbiological specimens; however, it does provide an extra<br />
layer of protection against contamination in the event of tube breakage.<br />
Rotor Installation<br />
• To install the rotor in the centrifuge: Center the rotor and push down until the rotor locks into<br />
position. Spin the rotor by hand and check that it is flat and evenly spaced within the<br />
chamber.<br />
• The centrifuge must be located at least 300mm from the any bench edge. Never stand<br />
within the safety zone of 300mm of a centrifuge during a spin. Wait until the rotor has<br />
stopped spinning before opening the unit. Never attempt to open or move the unit while the<br />
rotor is still in motion.
Rotor Use and Handling<br />
• The rotor may be cleaned using methyl or isopropyl alcohol, soap solutions, heptane,<br />
hexane, naptha or Freon® TF cleaner. Do not use corrosive cleaning solvents with<br />
partially halogenated hydrocarbons, such as 1,1,1 trichloroethane, phenol, methylene<br />
chloride or ketones such as MEK.<br />
• When necessary, the rotor and cover may be autoclaved at 115 kPa absolute pressure<br />
(121ºC to 124ºC). Note: autoclaving decreases the usable life of the rotor. If the<br />
rotors are autoclaved frequently (once a day) replace your rotors every 3 months. If<br />
you autoclave your rotors more than once a day, please replace them after 60<br />
autoclaving cycles.<br />
IMPORTANT NOTICE<br />
The use of IsoQuick ® brand nucleic acid extraction kits with this product is not advised. If the<br />
IsoQuick ® extraction matrix or dye components come in contact with the Ultem ® rotor used in<br />
the product, they may cause cracks or striations. Cracked rotors may disrupt during use. If any<br />
IsoQuick ® brand components come in contact with the rotor in this product, immediately<br />
replace the rotor. Please fully read the Rotor Usage Guide section of this manual to learn more<br />
about rotor safety.<br />
Troubleshooting<br />
If a problem should arise with the centrifuge, please refer to this troubleshooting guide. For<br />
additional assistance, contact the service department.<br />
Problem Solution<br />
Lid will not open* • Is the rotor spinning? Allow rotor to come to a complete stop<br />
before attempting to open the lid.<br />
• Check for and remove any obstructions in the lid latch holes.<br />
• Has the unit lost power? Lid will remain locked until power is<br />
restored.<br />
• Turn power switch off then on again.<br />
Unit will not start/does • Lid is open. Press lightly on the lid while<br />
not achieve speed pressing the green start key.<br />
• Rotor is unbalanced. Reload properly.<br />
• Rotor cover is missing. Replace cover.<br />
No power • Check that power cord is intact and not pinched and is connected<br />
to both unit and outlet. Check the outlet. Check power switch.<br />
• Check fuse. Replace with properly rated fuse if necessary.<br />
• The unit may have received a large static discharge. Turn off the<br />
unit, wait one minute, and turn unit back on.<br />
Excessive vibration • Load is not balanced. Redistribute the sample tubes in the rotor.<br />
• Check installation of the rotor and cover.<br />
• Replace rotor.<br />
No display • Check the power connections. (See “No power”, above.)<br />
Tone sounds when started. • This indicates that the lid has not been closed or that the safety<br />
latch is not engaged. Confirm that the lid is completely closed<br />
and there are no obstructions in the latch holes. Press lightly on<br />
the lid while pressing the green start button to restart the unit.<br />
*It is possible to release the lid lock manually to open the lid and remove samples in the event<br />
of a power failure. Follow the instructions under “Manual Lid Lock Release” to open the lid and<br />
retrieve samples.
General Maintenance<br />
• There are no user serviceable parts within the unit. Opening the case will void the warranty.<br />
• The unit should be wiped down after each use with a soft cloth. Periodic cleaning of the<br />
rotor and chamber should be performed to keep the unit in proper operating condition.<br />
Clean any spills immediately.<br />
• Disconnect electrical power from the microcentrifuge before cleaning.<br />
• Do not immerse the body of the centrifuge in any liquid<br />
• Use mild soap or diluted bleach and a soft cloth. Do not use chemical solvents for cleaning.<br />
• The removable rotor and rotor cover may be autoclaved at 115 kPa absolute pressure<br />
(121º to 124ºC - see Rotor Usage Guide section of this manual).<br />
• Before using any cleaning or decontamination method, except those recommended by the<br />
manufacturer, verity with the manufacturer that the proposed method will not damage the<br />
equipment<br />
Note: An excessive buildup of dirt and grime in the centrifuge or on the rotor may affect<br />
operation of the unit. It is the responsibility of the user to maintain the centrifuge in<br />
the proper manner. Failure to do so may affect the warranty coverage.<br />
Accessories<br />
Description Quantity Cat. No.<br />
Adapter for 500µl tubes pack of 6 521-2817<br />
Adapter for 250/400µl tubes pack of 6 521-2818<br />
Adapter for 200µl tubes pack of 6 521-2819<br />
*All adapters fit into 1.5ml rotor, each adapter holds one tube.<br />
Technical service<br />
Web Resources<br />
Visit the <strong>VWR</strong>’s website at www.vwr.com for:<br />
• Complete technical service contact information<br />
• Access to <strong>VWR</strong>’s Online Catalogue, and information about accessories and related products<br />
• Additional product information and special offers<br />
Contact us For information or technical assistance contact your local <strong>VWR</strong> representative or<br />
visit. www.vwr.com.<br />
Warranty<br />
<strong>VWR</strong> <strong>International</strong> warrants that this product will be free from defects in material and<br />
workmanship for a period of two (2) years from date of purchase. If a defect is present, <strong>VWR</strong><br />
will, at its option, repair, replace, or refund the purchase price of this product at no charge to<br />
you, provided it is returned during the warranty period. This warranty does not apply if the<br />
product has been damaged by accident, abuse, misuse, or misapplication, or from ordinary<br />
wear and tear.<br />
For your protection, items being returned must be insured against possible damage or loss.<br />
This warranty shall be limited to the replacement of defective products. IT IS EXPRESSLY<br />
AGREED THAT THIS WARRANTY WILL BE IN LIEU OF ALL WARRANTIES OF FITNESS<br />
AND IN LIEU OF THE WARRANTY OF MERCHANTABILITY.
Equipment disposal<br />
This equipment is marked with the crossed out wheeled bin symbol to indicate that this<br />
equipment must not be disposed of with unsorted waste.<br />
Instead it's your responsibility to correctly dispose of your equipment at lifecycle -end by<br />
handling it over to an authorized facility for separate collection and recycling. It's also your<br />
responsibility to decontaminate the equipment in case of biological, chemical and/or<br />
radiological contamination, so as to protect from health hazards the persons involved in the<br />
disposal and recycling of the equipment.<br />
For more information about where you can drop off your waste of equipment, please contact<br />
your local dealer from whom you originally purchased this equipment.<br />
By doing so, you will help to conserve natural and environmental resources and you will<br />
ensure that your equipment is recycled in a manner that protects human health.<br />
Thank you
Your distribution partner<br />
Europe<br />
Austria<br />
<strong>VWR</strong> <strong>International</strong> GmbH<br />
Graumanngasse 7<br />
1150 Wien<br />
Tel.: 01 97 002 0<br />
Fax: 01 97 002 600<br />
E-mail: info@at.vwr.com<br />
Belgium<br />
<strong>VWR</strong> <strong>International</strong> bvba<br />
Researchpark Haasrode<br />
2020<br />
Geldenaaksebaan 464<br />
3001 Leuven<br />
Tel.: 016 385 011<br />
Fax: 016 385 385<br />
E-mail:<br />
customerservice@be.vwr.<br />
com<br />
Denmark<br />
<strong>VWR</strong> - Bie & Berntsen<br />
Transformervej 8<br />
2730 Herlev<br />
Tel.: 43 86 87 88<br />
Fax: 43 86 87 90<br />
E-mail: info@dk.vwr.com<br />
Finland<br />
<strong>VWR</strong> <strong>International</strong> Oy<br />
Valimotie 9<br />
00380 Helsinki<br />
Tel.: 09 80 45 51<br />
Fax: 09 80 45 52 00<br />
E-mail: info@fi.vwr.com<br />
France<br />
<strong>VWR</strong> <strong>International</strong> S.A.S.<br />
Le Périgares – Bâtiment B<br />
201, rue Carnot<br />
94126<br />
Fontenay-sous-Bois cedex<br />
Tel.: 0 825 02 30 30 (0,15<br />
EUR TTC/min)<br />
Fax: 0 825 02 30 35 (0,15<br />
EUR TTC/min)<br />
E-mail: info@fr.vwr.com<br />
Germany<br />
<strong>VWR</strong> <strong>International</strong> GmbH<br />
Hilpertstrasse 20a<br />
D - 64295 Darmstadt<br />
Tel.: 0180 570 20 00*<br />
Fax: 0180 570 22 22*<br />
E-mail: info@de.vwr.com<br />
*0,14 €/min. aus d. dt. Festnetz,<br />
Mobilfunk max. 0,42 €/min.<br />
Hungary<br />
Spektrum-3D Ltd.<br />
A <strong>VWR</strong> <strong>International</strong><br />
Company<br />
Simon László u. 4.<br />
4034 Debrecen<br />
Tel.: (52) 521-131<br />
Fax: (52) 470-069<br />
E-mail:<br />
info@spektrum-3d.hu<br />
Ireland / Northern<br />
Ireland<br />
<strong>VWR</strong> <strong>International</strong> Ltd /<br />
<strong>VWR</strong> <strong>International</strong><br />
(Northern Ireland) Ltd<br />
Orion Business Campus<br />
Northwest Business Park<br />
Ballycoolin<br />
Dublin 15<br />
Tel.: 01 88 22 222<br />
Fax: 01 88 22 333<br />
E-mail: sales@ie.vwr.com<br />
Italy<br />
<strong>VWR</strong> <strong>International</strong> s.r.l.<br />
Via Stephenson 94<br />
20157 Milano (MI)<br />
Tel.: 02 332 03 11<br />
Fax: 800 152 999<br />
E-mail: info@it.vwr.com<br />
The Netherlands<br />
<strong>VWR</strong> <strong>International</strong> B.V.<br />
Postbus 8198<br />
1005 AD Amsterdam<br />
Tel.: 020 4808 400<br />
Fax: 020 4808 480<br />
E-mail: info@nl.vwr.com<br />
Norway<br />
<strong>VWR</strong> <strong>International</strong> AS<br />
Haavard Martinsens vei 30<br />
0978 Oslo<br />
Tel.: 02290<br />
Fax: 815 00 940<br />
E-mail: info@no.vwr.com<br />
Poland<br />
Labart Sp. z o.o.<br />
A <strong>VWR</strong> <strong>International</strong><br />
Company<br />
Limbowa 5<br />
80-175 Gdansk<br />
Tel.: 58 32 38 210<br />
Fax. 58 32 38 205<br />
E-mail: labart@labart.pl<br />
Portugal<br />
<strong>VWR</strong> <strong>International</strong> -<br />
Material de Laboratório,<br />
Lda<br />
Edifício Neopark<br />
Av. Tomás Ribeiro, 43- 3 D<br />
2790-221 Carnaxide<br />
Tel.: 21 3600 770<br />
Fax: 21 3600 798/9<br />
E-mail: info@pt.vwr.com<br />
Spain<br />
<strong>VWR</strong> <strong>International</strong> Eurolab<br />
S.L.<br />
C/ Tecnología 5-17<br />
A-7 Llinars Park<br />
08450 - Llinars del Vallès<br />
Barcelona<br />
Tel.: 902 222 897<br />
Fax: 902 430 657<br />
E-mail: info@es.vwr.com<br />
Sweden<br />
<strong>VWR</strong> <strong>International</strong> AB<br />
Fagerstagatan 18a<br />
163 94 Stockholm<br />
Tel.: 08 621 34 00<br />
Fax: 08 621 34 66<br />
E-mail: info@se.vwr.com<br />
Switzerland<br />
<strong>VWR</strong> <strong>International</strong> AG<br />
Lerzenstrasse 16/18<br />
8953 Dietikon<br />
Tel.: 044 745 13 13<br />
Fax: 044 745 13 10<br />
E-mail: info@ch.vwr.com<br />
Go to www.vwr.com for the latest news, special offers and details<br />
of your local <strong>VWR</strong> distribution partner.<br />
UK<br />
<strong>VWR</strong> <strong>International</strong> Ltd<br />
Customer Service Centre<br />
Hunter Boulevard<br />
Magna Park<br />
Lutterworth<br />
Leicestershire<br />
LE17 4XN<br />
Tel.: 0800 22 33 44<br />
Fax: 01455 55 85 86<br />
E-mail:<br />
uksales@uk.vwr.com<br />
Asia Pacific<br />
China<br />
<strong>VWR</strong> <strong>International</strong> China<br />
Co., Ltd<br />
Suite 1802 - 1803, Xing Ye<br />
Bank Mansion, No 168,<br />
168 Jiangning Road<br />
Shanghai 200041, China<br />
Tel.: +86- 21 521 388 22<br />
Fax: +86- 21 521 33 933<br />
E-mail:<br />
sales_china@vwr.com<br />
India<br />
<strong>VWR</strong> Lab Products Pte Ltd<br />
2nd Floor, Front Wing,<br />
135/12, Brigade Towers<br />
Brigade Road<br />
Bangaluru 560025 India<br />
Tel.: +91-2522-277876<br />
(Mumbai)<br />
Tel.: +91-80-41117124<br />
(Bangalore)<br />
Fax: +91-80-41117120<br />
E-mail:<br />
vwr_india@vwr.com<br />
Singapore<br />
<strong>VWR</strong> Singapore Pte Ltd<br />
18 Gul Drive<br />
Singapore 629468<br />
Tel.: +65 6505 0760<br />
Fax: +65 6264 3780<br />
E-mail: sales@sg.vwr