Betriebsanleitung T24 - Kroll GmbH
Betriebsanleitung T24 - Kroll GmbH
Betriebsanleitung T24 - Kroll GmbH
Create successful ePaper yourself
Turn your PDF publications into a flip-book with our unique Google optimized e-Paper software.
T T 24<br />
24<br />
880403<br />
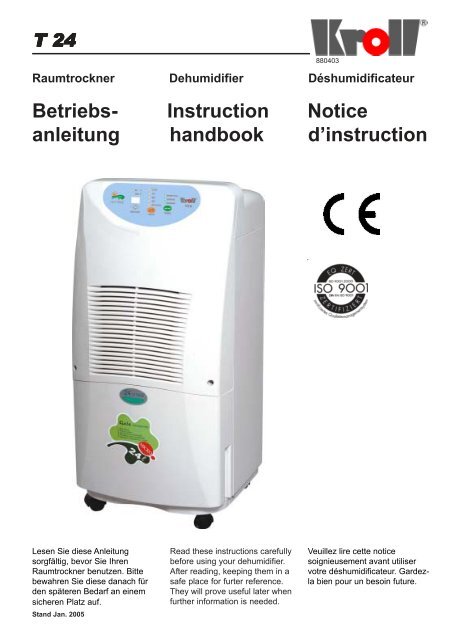
Raumtrockner Dehumidifier Déshumidificateur<br />
Betriebs- Instruction Notice<br />
anleitung handbook d’instruction<br />
Lesen Sie diese Anleitung<br />
sorgfältig, bevor Sie Ihren<br />
Raumtrockner benutzen. Bitte<br />
bewahren Sie diese danach für<br />
den späteren Bedarf an einem<br />
sicheren Platz auf.<br />
Stand Jan. 2005<br />
Read these instructions carefully<br />
before using your dehumidifier.<br />
After reading, keeping them in a<br />
safe place for furter reference.<br />
They will prove useful later when<br />
further information is needed.<br />
Veuillez lire cette notice<br />
soignieusement avant utiliser<br />
votre déshumidificateur. Gardezla<br />
bien pour un besoin future.
Ausgabe 03 / 2004<br />
Technische Änderungen vorbehalten<br />
Inhaltsverzeichnis Seite<br />
Sicherheitshinweise 3<br />
Einzelteile 4<br />
Richtlinien 5<br />
Entfeuchtung, Kondensatablauf 6<br />
Entfernung des Wassertanks 7<br />
Wartung 8<br />
Technische Daten 10<br />
Störungen und Abhilfe 11<br />
2<br />
Contents Page<br />
Cautions 3<br />
Illustration of the outlook 4<br />
Directions 5<br />
Dehumidifying, drainage 6<br />
Removal of water tank 7<br />
Maintenance 8 Entretien 8<br />
Technical data 10 Données techniques 10<br />
Bei nicht bestimmungsgemäßer Verwendung , Aufstellung, Wartung , wie in der <strong>Betriebsanleitung</strong><br />
vorgegeben oder eigenmächtigen Änderungen an der werkseitig gelieferten Geräteausführung erlischt<br />
jeglicher Gewährleistungsanspruch.<br />
Im Übrigen gelten unsere „Verkaufs- und Lieferbedingungungen“<br />
Technische Änderungen im Sinne der Produktverbesserung vorbehalten.<br />
Any use, installation, maintenance that is not effected according to the rules as asserted in the technical<br />
manual, or unauthorized modifications on the original version as delivered from manufacturer leads to<br />
expiration of any right to warranty.<br />
Furtheron our „Conditions of Sales and Delivery“ are valid.<br />
Technical modification for product improvement are subject to change without notice.<br />
Toute utilisation, installation et maintenance qui ne soit pas effectué conformément aux directives fixés dans<br />
le manuel technique, ainsi que toute modification à l’appareil livré du fabricant dans sa version originale,<br />
entraîne l’expiration du droit de garantie.<br />
En plus, nos „Conditions de vente et de livraison“ sont en vigueur.<br />
Sommaire Page<br />
Cautions de sécurité importants 3<br />
Vue éclatée 4<br />
Directives 5<br />
Déshumdification, Sortie de l’eau<br />
condensation 6<br />
Enlèvement du récipient d’eau 7<br />
Trouble shooting 11 Les pannes et moyens d’y remedier 11<br />
Sous réserve de modification technique dans le sens d’amélioration du produit.
Ausgabe 03 / 2004<br />
Technische Änderungen vorbehalten<br />
Sicherheitshinweise<br />
Important safety precautions / Cautions de sécurité importants<br />
1.<br />
2.<br />
3.<br />
4.<br />
5.<br />
6.<br />
7.<br />
8.<br />
9.<br />
10.<br />
Bevor Sie das Gerät anschließen<br />
überprüfen Sie bitte, ob die auf<br />
dem Typenschild<br />
(Geräterückseite) angegebene<br />
Netzspannung mit der in Ihrem<br />
Haushalt vorhandenen<br />
übereinstimmt. =220V+5%<br />
Schalten Sie das Gerät am<br />
Bedienfeld ein und aus<br />
Stellen Sie den Luftentfeuchter<br />
auf einen geraden, glatten<br />
Untergrund.<br />
Keine Gegenstände in die<br />
Luftgitter stecken<br />
Stellen Sie immer sicher, dass<br />
das Gerät eben steht um<br />
Wasserverschmutzungen zu<br />
vermeiden<br />
Keine brennbaren Flüssigkeiten<br />
an das Gerät bringen<br />
Blockieren Sie nicht die<br />
Luftansaug- und –Ausblasgitter<br />
Öffnen Sie das Gerät nicht und<br />
arbeiten Sie nicht daran,<br />
während das Netzkabel<br />
eingesteckt ist<br />
Der Einsatzbereich ist von 5°C<br />
bis 35 °C (Das Gerät kann<br />
zeitweise auf Sicherheit<br />
schalten, wenn die Umgebungstemperatur<br />
außerhalb dieser<br />
Temperaturen liegt)<br />
Unterhalb einer Temperatur von<br />
5°C ist eine Luftentfeuchtung im<br />
Haushalt nicht notwendig<br />
11. Sobald der gewünschte<br />
Feuchtigkeitsgrad erreicht ist,<br />
schaltet das Gerät ab. Es<br />
schaltet automatisch wieder ein,<br />
wenn die Luftfeuchtigkeit diesen<br />
eingestellten Wert wieder<br />
übersteigt.<br />
12. Das Gerät schaltet ab, sobald<br />
der Wasserbehälter voll ist.<br />
13. Sollte das Gerät aufhören zu<br />
arbeiten oder unnormal wieder<br />
einschalten, nehmen Sie bitte<br />
Kontakt auf zu Ihrem Händler.<br />
1.<br />
2.<br />
3.<br />
4.<br />
4.<br />
6.<br />
7.<br />
8.<br />
9.<br />
10.<br />
11.<br />
12.<br />
13.<br />
Make sure the voltage is within<br />
220V +5%.<br />
Please utilise control panel for<br />
switching on/off.<br />
Dehumidifier should be placed<br />
firmly and should not be tilted.<br />
Do not place any objects through<br />
inlet /outlet grill.<br />
Always make sure unit is on level<br />
floor to avoid water spillage.<br />
Avoid putting flammable liquids<br />
on unit.<br />
Do not block air inlet/outlet.<br />
Do not open unit and tamper with<br />
electrical wiring with unit plugged<br />
in.<br />
The operating temperature range<br />
is from 5°C to 35° C (The<br />
machine shall periodically switch<br />
off on safety operated outside this<br />
range)<br />
Dehumidification for domestic<br />
purposes should not be<br />
necessary when room<br />
temperature is below 5°C.<br />
Once the desired humidity level<br />
within the room is reached, the<br />
unit shall switch off. It shall once<br />
again start automatically when<br />
the room humidity has risen<br />
above the desired set point.<br />
The machine shall automatically<br />
switch off when the water tank is<br />
full.<br />
When machine stops amd starts<br />
abnormally and is operating with<br />
in the range mentioned above,<br />
please contact your nearest<br />
GALA agent.<br />
1.<br />
2.<br />
3.<br />
4.<br />
5.<br />
6.<br />
8.<br />
7.<br />
9.<br />
10.<br />
11.<br />
12.<br />
13.<br />
Avant brancher l’appareil vérifier,<br />
si la tension électrique indiquée<br />
sur le type étiquette (recto de<br />
l’appareil) corresponde bien à la<br />
tension électrique domestique.<br />
= 220V+5%<br />
Pour la mise en et hors service,<br />
utilisez le bord<br />
Mettre le déshumidificateur sur<br />
un sol bien plat et droit.<br />
Ne pas mettre des objets dans<br />
les grilles d’air<br />
Assurez toujours, que l’appareil<br />
soit sur un sol égal pour éviter<br />
des dégat d’eau<br />
Ne toucher pas l’appareil avec du<br />
liquide inflammable<br />
Ne bloquer pas les grilles d’air<br />
d’entrée et de sortie<br />
N’ ouvriez pas l’appareil ni<br />
travaillez au-dessus quand il est<br />
branché<br />
La domaine d’application est de<br />
5°C à 35°C (L’appareil peut se<br />
mettre en sécurité en travaillant<br />
hors de cette marge)<br />
Au-dessous d’une température<br />
de 5°C, une déshumidification<br />
domestique n’est guère<br />
nécessaire<br />
Quand le niveau hygrométrique<br />
souhaité est atteint, l’appareil se<br />
met hors service. Il se remet en<br />
service automatiquement dès<br />
que ce taux soit excédé de<br />
nouveau.<br />
L’appareil se met hors service<br />
dès que le reservoir d’eau est<br />
plein.<br />
Si l’appareil arrète à travailler ou<br />
s’il se remet en route de manière<br />
irrégulière, veuillez contacter<br />
votre distributeur.<br />
3
Ausgabe 03 / 2004<br />
Technische Änderungen vorbehalten Einzelteile<br />
Illustration of the outloook / Vue éclatée<br />
4<br />
Luftfeuchtigkeit RH % Humidité ambiante<br />
Temp.°C Temp.°C Temp.°C<br />
Temp/ Feuchtigkeit Temp/ Humidity Temp./ humdité<br />
Inhalt Contents Contenu<br />
Saubere Luft Air clean Air propre<br />
Auswahl Select Choix<br />
Wasserbehälter voll Water full Récipient d’eau plein<br />
Enteisung Defrost dégivrage<br />
Funktion „ein“ Function “ein” Fontion „marche“<br />
Ein/Aus ON/OFF Marche/ Arrêt
Ausgabe 03 / 2004<br />
Technische Änderungen vorbehalten<br />
Richtlinien<br />
Directions / Directives<br />
1. Stecken Sie das Netzkabel ein (Die<br />
Raumfeuchtigkeit wird im Display<br />
angezeigt)<br />
2. Sobald der Ein/Aus-Schalter gedrückt<br />
wurde, beginnt der Luftentfeuchter zu<br />
arbeiten. Die Lampen „Running“, „Cont.“,<br />
“air clean” und “RH” leuchten.<br />
3. Feuchtigkeitskontrollfunktionen: Um die<br />
Feuchtigkeitsüberwachung zu verändern,<br />
wählen Sie “cont.” 70%, 60%, 50% oder<br />
„Air Clean“ mittels der „Select“- Taste<br />
4. Sobald die „Select“ – Taste gedrückt<br />
wurde und die Lampe „70%“ leuchtet,<br />
bedeutet dies, dass die Luft entfeuchtet<br />
wird, bis der Feuchtigkeitsgehalt 70%<br />
beträgt.<br />
a) Das Gerät arbeitet nicht mehr, sobald<br />
die Feuchtigkeit unter 70% absinkt, der<br />
Kompressor schaltet ab, aber das Gebläse<br />
läuft weiter, „Air Clean“ –Lampe leuchtet.<br />
a) Das Gerät arbeitet erneut, sobald die<br />
Feuchtigkeit 70% überstiegen hat.<br />
5. Der gleiche Ablauf tritt ein, wenn 60% oder<br />
50% Feuchtigkeit eingestellt wurde. ( Das<br />
Gerät wird 15 Sekunden nach Anwählen<br />
der entsprechenden Funktion zu arbeiten<br />
beginnen)<br />
6. Das Gerät wird nur dann die Luft reinigen<br />
und entfeuchten, wenn die Funktion „Air<br />
Clean“ gewählt wurde.<br />
7. Das Gerät wird ständig die Luft<br />
entfeuchten, wenn die „Cont“- Funktion<br />
angewählt wurde, ungeachtet des<br />
Feuchtigkeitsgehalts, solange, bis der<br />
Wasserbehälter voll ist.<br />
8. Ein Summton ertönt und die Lampe „Water<br />
Full“ blinkt. Die Lampe hört erst auf zu<br />
blinken und der Entfeuchter arbeitet erst<br />
wieder, wenn der Wasserbehälter geleert<br />
und wieder eingesetzt wurde.<br />
9. Wenn die „Defrost“- Lampe leuchtet,<br />
bedeutet das, dass der Luftentfeuchter im<br />
Enteisungsmodus ist. In diesem Modus<br />
wird der Kompressor ausgeschaltet, aber<br />
die Feuchtigkeitskontrolllampe „air clean“<br />
leuchtet und das Bedienfeld bleibt<br />
beleuchtet. Der Kompressor wird nach<br />
15 Minuten wieder beginnen zu arbeiten.<br />
10. Die Temperatur- und Feuchtigkeitsanzeige<br />
zeigt die Raumtemperatur und<br />
Raumfeuchtigkeit in unmittelbarer Nähe<br />
des Luftentfeuchters an. Das Bedienfeld<br />
zeigt die Raumfeuchtigkeit nur an,<br />
nachdem das Gerät eingeschaltet wurde.<br />
Um die Temperatur angezeigt zu<br />
bekommen, drücken Sie die TEMP/HUM<br />
Taste und die Temperatur wird im oberen<br />
Teil des Bedienfeldes angezeigt. Drücken<br />
Sie die TEMP/HUM Taste ein zweites Mal,<br />
um die Feuchtigkeit angezeigt zu<br />
bekommen. (Ersetzen Sie die Batterien,<br />
wenn das Bedienfeld nicht mehr zwischen<br />
Temperatur und Feuchtigkeit wechselt.)<br />
11. Drücken Sie die POWER- Taste einmal,<br />
um das Gerät auszuschalten.<br />
1. Plug in power socket. (The ambient<br />
humidity will be shown in the display<br />
window)<br />
2. The dehumidifier will begin operating as<br />
soon as the power ON/OFF button has<br />
been pressed. At that time the RUNNING<br />
CONT. AIR CLEAN and RH light should<br />
all be on.<br />
3. Humidity control functions: To change<br />
humidity control, select CONT. 70%, 60%,<br />
50% or AIR CLEAN using the SELECT<br />
button.<br />
4. When the SELECT button has been<br />
pressed and the 70% indicator light<br />
becomes on, this means that the air will be<br />
dehumidified until the humidity is 70%.<br />
a. The device will automatically stop<br />
operating if the humidity goes below 70%,<br />
the compressor will turn off, but fan will<br />
continue running, "AIR CLEAN" light<br />
will blink.<br />
b. The device will start operating again<br />
after the humidity rises above 70%.<br />
5. The same process will occur when 60% or<br />
50% humidity has been selected. (The<br />
device will start operating 15 seconds after<br />
a function has been selected.)<br />
6. The device will only clean the air, and will<br />
be dehumidify, when the AIR CLEAN<br />
function has been selected.<br />
7. The device will dehumidify continuously<br />
remove moisture when the CONT.<br />
function has been selected. No matter<br />
whether the ambient humidity is high or<br />
low, dehumidification will continue until the<br />
water tank is full.<br />
8. A buzzer will sound three times and the<br />
WATER FULL light will flash continuously<br />
when the water tank is full. The light will<br />
stop flashing and the dehumidifier will<br />
begin operating again as soon as the water<br />
tank has been emptied and replaced.<br />
9. When the DEFROST lamp goes on, this<br />
indicates that the dehumidifier is in the<br />
defrost model. In this model the<br />
compressor will be shut off, but the<br />
humidity control light, AIR CLEAN light,<br />
and display will remain lit. The compressor<br />
will begin operating again after 15<br />
minutes.<br />
10. The temperature and humidity display<br />
show the ambient temperature and<br />
humidity of the air around the dehumidifier.<br />
The display will show only humidity<br />
when the device is first turned on. To view<br />
the temperature, press the TEMP/HUM<br />
button and the temperature will appear in<br />
the upper part of the window. Press the<br />
TEMP/HUM button a second time to<br />
display the humidity. (Replace the battery if<br />
the display no longer switches between the<br />
temperature and humidity.)<br />
11. Press the POWER button once to shut off<br />
the dehumidifier.<br />
1. Branchez le câble d’alimentation<br />
(l’humidité est indiquée sur le bord)<br />
2. Dès que l’interrupteur marche/arrêt est<br />
touché, le déshumidificateur commence à<br />
travailler. Les lampes «Running», «Cont”,<br />
“Air clean” et “RH” s’allument.<br />
3. Fonctions de contrôle de<br />
déshumidification: Pour changer la<br />
surveillance l’humidification, choisissez<br />
«cont» 70%, 60%, 50% ou «Air clean» par<br />
la touche «Select».<br />
4. Dès que la touche «select» a été touché et<br />
la lampe «70%» est allumée, cela signifie<br />
que l’air est déshumidifié jusqu’à l’humidité<br />
s’élève à 70%.<br />
a. L’appareil ne fonctionne plus, dès que<br />
l’humidité se diminue au dessous de<br />
70%, le compresseur s’arrête, mais le<br />
ventilateur continue à travailler, la lampe<br />
«air clean» s’allume.<br />
b. L’appareil redémarre dès que l’humidité<br />
est au dessus de 70%.<br />
5. Le même procès s’avère avec le réglage<br />
hygrométrie de 60% ou 50% (l’appareil<br />
commencera son travail 15 sec. après la<br />
mise de la fonction correspondante).<br />
6. L’appareil purifiera et déshumidifiera l’air<br />
seulement, quand la fonction «air clean» a<br />
été choisie.<br />
7. L’appareil déshumidifiera de manière<br />
constante quand la fonction «cont» a été<br />
choisie, n’importe du contenu d’humidité,<br />
jusqu’à le récipient d’eau est plein.<br />
8. Un signal sonore se fait entendre et la<br />
lampe “water full” clignote. La lampe arrête<br />
de clignoter seulement et le<br />
déshumidificateur recommence à travailler<br />
seulement après avoir vidé et remis le<br />
récipient d’eau.<br />
9. Quand la lampe «defrost» s’allume, le<br />
déshumidificateur est en fonction<br />
dégivrage. Dans cette fonction, le<br />
compresseur est hors service, mais la<br />
lampe de contrôle d’humidité AIR CLEAN<br />
est allumée et le bord demeure également<br />
allumé. Le compresseur redémarrera après<br />
15 minutes.<br />
10. L’indication de température et d’humidité<br />
indique la température et l’humidité<br />
ambiante autours du déshumidificateur. L’<br />
hygrométrie ambiante est indiquée sur le<br />
bord seulement, après que l’appareil soit<br />
en marche. Pour voir la température,<br />
touchez la touche TEMP/HUM, et la<br />
température est indiquée dans la partie<br />
supérieure du bord. Poussez la touche<br />
TEMP/HUM une deuxième fois pour voir<br />
l’hygrométrie ambiante. (Remplacer les<br />
piles quand le bord ne change plus entre<br />
température et humidité.)<br />
11. Poussez la touche POWER une fois pour<br />
arrêter l’appareil.<br />
5
Ausgabe 03 / 2004<br />
Technische Änderungen vorbehalten<br />
Entfeuchtung, Kondensatablauf<br />
Dehumdifying, Drainage / Déshumidification, Sortie de l’eau condensation<br />
1. Entfeuchtungsautomatik:<br />
nachdem die Feuchtigkeit am Hygrostat<br />
eingestellt wurde, wird das Gerät<br />
automatisch ein- und ausschalten und so<br />
den Feuchtigkeitsgrad konstant halten.<br />
Das ist bequem und stromsparend.<br />
2. Dieser Luftentfeuchter ist mit einem<br />
Hygrostat ausgestattet, den Sie beliebig<br />
einstellen können.<br />
3. Betrieb Dauerenfteuchtung:<br />
Auf der Basis hoher Temperaturen und<br />
hoher Luftfeuchtigkeit wurde das Gerät<br />
nicht zur Hängemontage während des<br />
Betriebs konzipiert, und ist speziell zur<br />
Trocknung von Kleidung geeignet.<br />
4. Filterdesign:<br />
Regelmäßige Filterreinigung ist wichtig für<br />
einwandfreie Funktion. (Entnehmen Sie<br />
den Wasserbehälter und ziehen Sie den<br />
Filter unter der Frontplatte heraus.)<br />
Kondensatablauf<br />
1. Wenn der Wasserbehälter voll ist<br />
a. wird das Gerät aufhören zu arbeiten<br />
und<br />
die TANK VOLL –Lampe ( rote Lampe)<br />
leuchtet auf.<br />
b. Entnehmen Sie den Wasserbehälter<br />
am Griff unter dem Wasserbehälter<br />
und leeren sie ihn.<br />
c. Danach schieben Sie ihn leicht in<br />
seine Position zurück<br />
Achtung!<br />
Um den Kompressor vor einer Störung durch<br />
unterbrochenes Starten zu schützen, bitte<br />
nehmen sie nicht wiederholt den<br />
Wasserbehälter heraus und setzen ihn<br />
abwechselnd wieder ein.<br />
6<br />
2. Für Dauerablauf (Benutzen Sie einen<br />
Abflussschlauch für Dauerablauf)<br />
a. Entnehmen Sie den<br />
Wasserbehälter<br />
b. Öffnen Sie die Wasserablauföffnung<br />
hinten am Gerät mit einem spitzen<br />
Gegenstand.<br />
c. Führen Sie einen PVC-Schlauch mit<br />
Ø 14mm von der Wasserablauföffnung<br />
zu einem Abfluß.<br />
d. Befestigen Sie diesen Schlauch gut<br />
(leicht fallend)<br />
e. Schieben Sie den Wasserbehälter<br />
wieder an seinen Platz (mittlerweile ist<br />
die Betrieblampe wieder an und die<br />
Tank-Voll Lampe geht aus.<br />
1. Auto-dehumidifying<br />
After the humidistat is set, the machine<br />
will start and stop running automatically<br />
and maintain the humidity. It is<br />
convenient and can save electricity.<br />
2. This dehumidifier is equipped with<br />
humidity adjustable control button. You<br />
can adjust it at will.<br />
3. Function of continuous dehumidifying<br />
Based on high temperature and high<br />
humidity, this dehumidifier was designed<br />
not to suspend during running, it is<br />
especially suitable for drying clothes.<br />
4. Design of filter<br />
It is convenient to clean and ensure the<br />
dehumidifier can function properly.<br />
(Take out the water tank, then pull out the<br />
filter under the front plate)<br />
Drainage<br />
1. When the water tank is full<br />
a. When the water tank is full, the machine<br />
will stop running and the tank full light will<br />
be on (red light).<br />
b. Meanwhile, please take out the water<br />
tank<br />
slightly with the handle under the<br />
water tank and pour out the water.<br />
c. After pouring, push the water tank back<br />
into the dehumidifier slightly until it is in<br />
position.<br />
Caution<br />
To prevent the compressor from breakdown by<br />
interrupted starting, please do not "Take out"<br />
and "Put back "repeatedly.<br />
2. When it is draining continuously. (Use the<br />
drainpipe to drain continuously)<br />
a. Take out water tank.<br />
b. Open the drainage hole at the back of the<br />
machine with something sharp.<br />
c. Insert a caliber of Ø 14mm PVC<br />
drainpipe<br />
from the drainage hole through to<br />
drainage outlet.<br />
d. Connect the drainpipe with drape outlet<br />
tightly.<br />
e. Put the water tank back in position.<br />
(Meanwhile, the running light is on and<br />
the full light goes off.)<br />
1. Déshumidification automatique:<br />
Après que l’humidité a été réglée à<br />
l’hygrostat, l’appareil se mettra en route et<br />
s’ arrêtera automatiquement et ainsi<br />
maintenir l’hygrométrie constante. Cela<br />
est confortable est économique.<br />
2. Ce déshumidificateur est équipé d’un<br />
hygrostat que vous pouvez régler selon<br />
volonté.<br />
3. Fonction déshumidification<br />
permanente: Sur la base des<br />
températures élevées et d’une humidité<br />
élevée, l’appareil n’est pas construit pour<br />
montage suspendu pendant son opération<br />
et il est spécialement approprié pour le<br />
séchage de vêtement.<br />
4. Filtre:<br />
Le nettoyage régulière est important pour<br />
la fonction impeccable. (Enlever le<br />
récipient d’eau et tirer le filtre au dessous<br />
du front.)<br />
Sortie de l’eau de condensation<br />
1. Si le récipient d’eau est plein<br />
a. L’appareil s’arrêtera et la lampe<br />
«récipient plein» (lampe rouge) s’allume<br />
b. Enlevez le récipient d’eau à la poignée<br />
et vider le.<br />
c. Puis remettez-le légèrement à sa place<br />
dans le déshumidificateur.<br />
Attention!<br />
Pour protéger le compresseur d’une panne<br />
causé par démarrage interrompu, n’enlevez et<br />
ne remettez pas le récipient d’eau de manière<br />
répétée.<br />
2. Pour le vidange permanent (Utilisez un<br />
tuyaux)<br />
a. Enlevez le récipient d’eau<br />
b. Ouvriez la sortie d’eau de condensation à<br />
l’arrière de l’appareil par un objet<br />
tranchant.<br />
c.. Mettez un tuyau PVC de diamètre 14mm<br />
de la sortie à l’appareil à la voie<br />
d’écoulement<br />
d. Fixer bien ce tuyau en descente<br />
e. Remettez le récipient d’eau à son place<br />
(entre- temps la lampe de fonction est<br />
de nouveau allumée et la lampe TANK<br />
FULL
Ausgabe 03 / 2004<br />
Technische Änderungen vorbehalten<br />
Entfernung des Wassertanks<br />
Removal of water tank / Enlèvement du récipient d’eau<br />
1. Entnehmen Sie den Wasserbehälter<br />
am konkaven Griff unterhalb des Behälters<br />
2. Heben Sie den Wasserbehälter am Griff<br />
unter dem Wasserbehälter<br />
1. Take out water tank from the concave under the water tank.<br />
2. Lift the water tank by the handle on water tank<br />
1. Take out the water tank.<br />
2. Pull down the nylon filter set from the bottom of front panel.<br />
3. Take out the nylon filter set(back) & put the charcoal filter in.<br />
Then nylon filter set(front).The position for placing as below.<br />
1. Tirez le récipient d’eau à la poignée concave en bas du récipient<br />
2. levez le récipient d’eau à la poignée au dessous du récipient d’eau<br />
1. Entnehmen Sie den Wasserbehälter<br />
2. Ziehen Sie den Nylonfiltersatz aus dem Unterteil der<br />
Vorderwand<br />
3. Nehmen Sie den Nylonfiltersatz (hinten) heraus und<br />
setzen Sie den Kohlefilter ein. Danach den Nylonfilter<br />
(vorn). Die Positionen wie unten gezeigt beachten.<br />
WARNUNG: Entfernen Sie die Plastiktasche, in die der<br />
Kohlefilter eingehüllt ist.<br />
WARNING: The polybag wrapped the charcoal filter<br />
should be taken off before<br />
putting into the nylon filter set.<br />
ATTENTION: Enlevez le sac plastique, dans laquelle<br />
le filtre carbonique a été enveloppé.<br />
1. Enlevez le récipient d’eau<br />
2. Tirez le kit filtre nylon de la partie en bas du front<br />
3. Enlevez le kit filtre nylon (derrière) et mettez le filtre<br />
carbonique, puis le filtre nylon (avant). La position de<br />
placement comme indiquée ci-dessous.<br />
7
Ausgabe 03 / 2004<br />
Maintenance / Entretien<br />
Stellen Sie das Gerät nicht auf unebenen Boden<br />
Do not place unit on uneven surface<br />
Ne poser pas l’appareil sur un sol inégal.<br />
.<br />
Lassen Sie das Gerät nicht direkt neben<br />
Heizstrahlern oder Dampfkesseln arbeiten<br />
Do not operate unit in same area as radiators / kettles.<br />
Ne fait pas opérer l’appareil directement à côté<br />
des radiateurs ou des chaudières à vapeur.<br />
Bitte behindern Sie nicht die Luftströme vom<br />
und zum Gerät<br />
Please do not obstruct air passages to<br />
and from unit...<br />
1. N’empêcher pas le libre courant d’air<br />
d’entrée et d’air de sortie<br />
Technische Änderungen vorbehalten Wartung<br />
8<br />
Do not insert any sharp objects into air - inlet / outlet.<br />
Führen Sie keine spitzen Gegenstände in die<br />
Luftein- und –auslässe<br />
N’insérer pas des objets à vives dans les grilles d’air<br />
Betreiben Sie das Gerät nicht im Freien oder bei<br />
geöffneten Fenster und Türen<br />
Do not operate unit with windows / door open to<br />
outside air<br />
Ne fait pas opérer l’appareil dehors ou avec<br />
les fenêtres ou portes ouvertes.<br />
Stecken Sie das Gerät aus, wenn es<br />
über längere Zeit nicht in Betrieb ist.<br />
Unplug unit when not in use for extended periods.<br />
Débrancher l’appareil lors de non-fonctionnement<br />
pour un longue période.
Ausgabe 03 / 2004<br />
Technische Änderungen vorbehalten<br />
Wartung<br />
Maintenance / Entretien<br />
Sprühen Sie keine Flüssigkeiten in das Gerät<br />
Do not spray any liquid to unit<br />
Ne vaporiser riens en fines gouttelettes dans l’appareil<br />
Reinigen Sie den Luftfilter<br />
14-tägig mit kaltem Wasser<br />
Wash the air filter once every 2 weekswith cold water.<br />
Nettoyez le filtre tous les 15<br />
jours par de l’eau froide<br />
Stellen Sie keine schweren Gegenstände auf das Gerät<br />
Do not put heavy objects on top of unit.<br />
Ne posez pas des objets lourds sur l’appareil<br />
Bei Dauerkondensatabfluß: Versichern Sie sich,<br />
dass der Abflussschlauch ungehindert mit Gefälle<br />
verläuft<br />
Make sure drain hose is not kinked when using<br />
continuous drainage<br />
En cas de vidange de l’eau de condensation<br />
permanente: Assurez que le tuyau d’écoulement<br />
sans obstacle et en descente.<br />
Trocknen Sie den Filter<br />
Leeren Sie den Wasserbehälter bevor<br />
nicht in der Sonne<br />
Sie das Gerät bewegen<br />
Do not dry filter under the sun. Empty water tank before moving unit.<br />
Ne sécher pas le filtre au soleil<br />
Vider le récipient d’eau avant de bouger<br />
l’appareil<br />
9
Ausgabe 03 / 2004<br />
Technical data / données techniques<br />
Technische Änderungen vorbehalten Technische Daten<br />
10<br />
Schalten Sie das Gerät aus und nehmen Sie Kontakt auf mit Ihrem Vertragshändler, sobald die folgenden<br />
Anzeichen vorliegen:<br />
1. Wenn die Sicherungen im Gerät mehrmals ausgehen<br />
2. Wenn das Netzkabel heiß wird<br />
Bitte überprüfen Sie die folgenden Punkte zuerst selbst – öffnen Sie jedoch das Gerät nicht ohne den<br />
Techniker.<br />
Please stop using unit and contact your nearest GALA dealer when the following situations occur.<br />
1. The unit fuse blows periodically.<br />
2. Power supply cable gets hot. When you need to ask technicians for help<br />
Please check your dehumidifier by yourself according to the following items.<br />
(Do not open the outer except a technician is with you.)<br />
T 24<br />
Type Einphasig / B type / monophasé<br />
Spannung + -Frequenz<br />
Rated voltage and frequency<br />
Branchement électrique et fréquence<br />
Belastung<br />
Rated load<br />
charge<br />
Stromaufnahme<br />
Rated running current<br />
Tension<br />
Gewicht<br />
Weight<br />
Poids<br />
Entfeuchtungsleistung<br />
Rated dehumdifying capacity<br />
Puissance<br />
Maße<br />
Dimension<br />
Dimensions<br />
Einsatzbereich<br />
Applicable temperature<br />
Domaine d’application<br />
Inhalt Wasserbehälter<br />
Capacity of water tank<br />
contenu récipient d’eau<br />
Single 230 V / 50 Hz<br />
600 W<br />
3,2 A<br />
17,0 kg<br />
12l /Tag/day/jour<br />
Raumfeuchtigkeit/RH/humidité ambiente 60%<br />
24l /Tag/day/jour<br />
Raumfeuchtigkeit/RH/humidité ambiente 80%<br />
Breite/ Width/ Largeur 300 mm<br />
Tiefe/Depht/profondeur 310 mm<br />
Höhe/Height/hauteur 620 mm<br />
5°C ~ 35°C<br />
5.0 l
Ausgabe 03 / 2004<br />
Technische Änderungen vorbehalten<br />
Störung und Abhilfe<br />
Trouble shooting / Les pannes et moyens d’y remedier<br />
Fehler Prüfen<br />
Das Gerät arbeitet<br />
nicht, obwohl<br />
eingeschaltet<br />
Das Gerät entfeuchtet<br />
nicht richtig<br />
Das Gerät arbeitet<br />
permanent ohne<br />
abzuschalten<br />
Das Gerät macht viel<br />
Lärm<br />
1. Ist der Wasserbehälter richtig eingesetzt?<br />
2. Ist das Gerät eingesteckt und angeschaltet?<br />
3. Ist die Sicherung draußen?<br />
1. Ist der Filter sauber?<br />
2. Ist die Raumtemperatur oder die Luftfeuchtigkeit zu niedrig?<br />
3. Ist der Luftein- und –austritt frei?<br />
1. Sind Fenster oder Türen offen?<br />
2. Sind dampferzeugende Geräte im Raum?<br />
3. Ist der Raum zu groß ?<br />
1. Ist der Luftfilter schmutzig?<br />
2. Sind alle Gehäuseteile fest?<br />
3. Ist die Raumtemperatur über 35°C?<br />
Fault Checks<br />
The machine does not<br />
operate when switched<br />
on.<br />
Unit is inefficient.<br />
Unit runs continuously<br />
without switching off.<br />
The unit is noisy.<br />
1. Is the position of water tank correct?<br />
2. Is the unit plugged in and switched on?<br />
3. Is the fuse blown?<br />
1. Is the filter clean?<br />
2. Is the ambient temperature or humidity too low?<br />
3. Are the inlet / outlet clear?<br />
1. Are the door and windows open?<br />
2. Are there any appliances producing steam within the same<br />
area?<br />
3. Is the room too big?<br />
1. Is the air filter dirty?<br />
2. Are all the panels secured?<br />
3. Is the room temperature too high it.<br />
Above 35°C?<br />
Panne Vérifier<br />
L’appareil ne travaille<br />
pas même s’il est mis<br />
en marche<br />
L’unité ne déshumidifie<br />
de manière efficace<br />
L’unité travaille sans<br />
interruption<br />
L’appareil fait<br />
beaucoup de bruit<br />
1. Le récipient d’eau, est-il bien placé?<br />
2. Est-ce que l’appareil est branché et mise en service<br />
3. Le fusible, est il bien active?<br />
4. Le filtre, est-il propre?<br />
5. La température ou l’humidité ambiante, est-elle trop basse?<br />
6. Est le fusible hors service?<br />
1. Sont des fenêtres ou des portes ouvertes?<br />
2. Sont des appareils dans le local que produisent de la<br />
vapeur?<br />
3. Est-ce que le local est trop grand?<br />
4. le filtre d’air, est-il encrassé?<br />
5. Sont tous les éléments de coffret bien fixés?<br />
6. Est la température d’air au dessus de 35°C?<br />
11
Wartungsintervalle / Servicing intervals / Intervalles de maintenance<br />
Tag der Wartung<br />
Day of servicing<br />
Jour de maintenance<br />
Name<br />
Name<br />
Nom<br />
Bemerkungen<br />
Notes<br />
Notes<br />
Any use, installation, maintenance that is not effected according to the rules as asserted in the technical manual, or<br />
unauthorized modifications on the original version as delivered from manufacturer leads to expiration of any right to<br />
warranty.<br />
Furtheron our „Conditions of Sales and Delivery“ are valid.<br />
Technical modification for product improvement are subject to change without notice.<br />
<strong>Kroll</strong> <strong>GmbH</strong> · Wärme- und Lüftungstechnik<br />
Pfarrgartenstraße 46 · Postfach 67<br />
D-71737 Kirchberg/Murr · Telefon +49(0)7144 830-0<br />
Telefax +49(0)7144 830-100<br />
<strong>Kroll</strong> (UK) · Ltd. Azura Close, Unit 49<br />
Woolsbridge Ind. Estate-Dorset - Wimborne BH<br />
216 SZ Three Legged Cross<br />
Telefon +44(0)120 28 222 21 · Telefax +44(0)120 28 222 22


