The LCD Controllers - High End Systems
The LCD Controllers - High End Systems
The LCD Controllers - High End Systems

Create successful ePaper yourself
Turn your PDF publications into a flip-book with our unique Google optimized e-Paper software.
<strong>The</strong> <strong>LCD</strong> <strong>Controllers</strong>
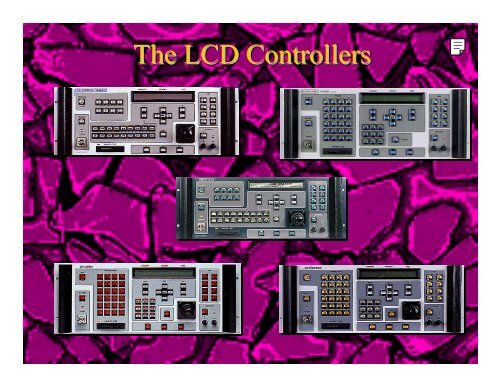
<strong>LCD</strong> CONTROLLERS<br />
AF1000 <strong>LCD</strong> CONTROLLER<br />
EMULATOR <strong>LCD</strong> CONTROLLER<br />
CYBERLIGHT <strong>LCD</strong> CONTROLLER<br />
TECHNOBEAM <strong>LCD</strong> CONTROLLER<br />
INTELLABEAM <strong>LCD</strong> CONTROLLER<br />
STUDIO COLOR <strong>LCD</strong> CONTROLLER
<strong>LCD</strong> <strong>Controllers</strong> Offer:<br />
• Product-specific Product specific programming control<br />
• Ability to create complex lighting scenes and<br />
sequences<br />
• Playback of cues with the touch of a button<br />
• Storage and Transfer of shows using a<br />
removable memory card or by serial<br />
communication
Overview of <strong>LCD</strong> <strong>Controllers</strong><br />
• 9 memories<br />
– (6 Memories for EMULATOR <strong>LCD</strong> CONTROLLER)<br />
• 99 Pages in each memory<br />
• Up to 1023 Possible Presets<br />
• Create Static Scenes (Pages)<br />
• Create Sequences (Pages that Loop)<br />
• RAM Card Backup<br />
• 12 Submasters<br />
• 8 User-Programmable User Programmable Macros<br />
• Audio Input Jack<br />
• Analog Input Connectors<br />
• Midi In and Thru Ports<br />
• Master/Slave Capabilities
Agenda<br />
• Front & Rear Panel<br />
• Programming Quick Start<br />
• Advanced Features<br />
• Additional Programming Features<br />
• Menu Features<br />
• Remote Access Control
Hands On Exercise<br />
• Power up the Controller<br />
– <strong>The</strong> STANDBY LED will be on; this is<br />
the DEFAULT mode upon startup of<br />
Controller<br />
• Toggle the Standby Key OFF<br />
DO NOT touch JOYSTICK upon<br />
powering up controller due to<br />
initialization procedure
<strong>LCD</strong> Controller<br />
Hardware<br />
• Front Panel Overview
<strong>LCD</strong> Controller Front Panel<br />
• Power Keyswitch<br />
• Slave Mode Indicator LED<br />
• Standby Key<br />
• Address/Preset Select Key<br />
• Address/Preset Keypad<br />
• <strong>LCD</strong> Window<br />
• Construct (Up/Down) Keys<br />
• Construct Keys<br />
• <strong>LCD</strong> Power Keyswitch
<strong>LCD</strong> Controller Front Panel<br />
• Menu Key<br />
• Cursor Up/Down Left/Right Arrow Keys<br />
• Page Up/Down Arrow Keys<br />
• Joystick<br />
• Erase Key<br />
• Record Key<br />
• Select Key<br />
• Home Key
<strong>LCD</strong> Controller Front Panel<br />
• Auto Advance Key<br />
• Rate Knob<br />
• Audio Level Indicator LED<br />
• Audio Knob<br />
• User Keys
<strong>LCD</strong> Controller<br />
Hardware<br />
• Rear Panel Overview
<strong>LCD</strong> Controller Rear Panel<br />
• Data Link Out<br />
• Personality DIP Switches<br />
• RS232 Serial Port<br />
• Midi IN & OUT Ports<br />
• Master/Slave Jacks
Data Link Out<br />
• 3 PIN XLR<br />
– Pin 1=Shield<br />
– Pin 2=Negative<br />
– Pin 3=Positive<br />
• Daisy Chain all units
Personality DIP Switches<br />
• A side is reserved for future use<br />
• B side defines controller's mode of operation<br />
• Personality B DIP Switch Settings<br />
– 1-ON=SLAVE ON=SLAVE MODE<br />
– 2-NOT NOT USED<br />
– 3-ON=PRESET ON=PRESET ACCESS<br />
– 4-NOT NOT USED<br />
– 5-ON=BINARY ON=BINARY ACCESS<br />
– 6-ON=INDEPENDENT<br />
ON=INDEPENDENT<br />
– 7-NOT NOT USED<br />
– 8-NOT NOT USED
RS 232 Port<br />
• LWB Backup Program<br />
– Backup data to a computer<br />
• LCC software hookup to a MAC, PC
MIDI IN & OUT Ports<br />
• Controller supports MIDI SHOW CONTROL “GO”<br />
COMMANDS<br />
• Also supports MIDI System Exclusive Backup<br />
• MIDI CUE numbers are one-for one for one with the<br />
Controller's PRESET numbers<br />
• Controller only accepts whole CUE numbers<br />
• MIDI OUT is switchable between OUT & THRU;<br />
OUT is DEFAULT.<br />
• When RS 232 PORT is active, MIDI OUT functions<br />
as MIDI THRU.
Master/Slave Ports<br />
• 1/4” Stereo Jack<br />
• Link up to 32 SLAVES to one MASTER without<br />
using DATA Distributor<br />
• Assign Personality B DIP Switch 1 to either "ON" or<br />
"OFF" according to your configuration
Analog Input Connectors<br />
• 8-PIN PIN DIN connector<br />
• Enables remote recall of Memory PAGES or<br />
PRESETS using an analog control device<br />
– Dimmer Console<br />
– TD12
Remote Enable<br />
• Enable/Disable STANDBY mode from a remote<br />
location<br />
• 1/8" Mini Phone Jack
Stereo Audio Input<br />
• 1/4" Stereo Audio Input Jack
Fuse<br />
• 5 mm x 20 mm, 1.5 amp slow blow fuse
Voltage Select<br />
• 115 volts AC<br />
• 230 volts AC
<strong>LCD</strong><br />
CONTROLLER<br />
Programming Quick Start<br />
Topics:<br />
Pages<br />
Address<br />
Address Mode<br />
Memories<br />
Preset Mode<br />
Presets
Frequently Used Terms<br />
• Fixture<br />
– <strong>The</strong> Automated lighting device controlled by an <strong>LCD</strong><br />
Controller<br />
• Constructs<br />
– Features of the Fixtures: Gobo, Color, Dim, Gate and<br />
Position are examples of Constructs<br />
• Parameters<br />
– Values for the Constructs
<strong>The</strong> Page<br />
What is a Page?<br />
• Pages are the building blocks of SCENES<br />
• A Page is one static look specifying CONSTRUCTS<br />
for one or more Fixtures<br />
• <strong>The</strong> <strong>LCD</strong> Controller has 891 programmable Pages<br />
(Cyberlight, Studio Color, Technobeam, AF1000,<br />
Intellabeam)
Address Mode/IMP Mode<br />
• To program a PAGE, you must be in ADDRESS<br />
MODE<br />
– Toggle the ADDRESS/PRESET key until the ADDRESS<br />
LED is on:<br />
• In ADDRESS MODE you may select an ADDRESS<br />
or several ADDRESSES to be edited on the PAGE<br />
• Address Mode is also known as IMP Mode<br />
– Intensity, Memory, and Page Information is displayed in<br />
the <strong>LCD</strong> Window
What is an Address?<br />
• An ADDRESS is a unique number that you<br />
assign to each fixture connected to the<br />
controller<br />
– <strong>The</strong> number of Addresses an <strong>LCD</strong> Controller can<br />
control is unique to the specific type of fixture you<br />
are controlling<br />
• Fixture Addresses are assigned<br />
via DIP Switches or Menus on<br />
the Fixtures
Selecting an Address<br />
• To select an Address to edit:<br />
– Press the SELECT Key (located near bottom center of<br />
Controller)<br />
– Press the Address Number Key of the Fixture to be edited<br />
– <strong>The</strong> SELECT and Address Number Keys selected will flash<br />
simultaneously<br />
• To select a block of Fixtures, use RANGE SELECT<br />
– Simultaneously press both the highest and lowest numbered<br />
address keys of the desired range<br />
NOTE: Pressing SELECT again will abort this action
Editing a Page<br />
Adjusting Constructs<br />
To edit an Address once selected, press the desired<br />
Construct Key of the Construct you want to<br />
change; Construct Keys are located near the<br />
Address Keys and are labeled GOBO, COLOR,<br />
DIM, etc.<br />
– NOTE: GATE is defaulted to CLOSED. You must<br />
open the gate in order to see the output of the lamp<br />
• Use the CONSTRUCT UP/DOWN Arrow Keys<br />
to change the value of the active Construct
Recording a Page<br />
• Make all desired value changes to all Constructs for<br />
the selected Fixture<br />
• Press RECORD (located on bottom center of<br />
controller) when the value changes are completed for<br />
that Fixture<br />
– NOTE: You must press RECORD after each Fixture is<br />
finished; otherwise, when a second Fixture is selected, it<br />
will automatically accept all Construct Values of the first<br />
Fixture.<br />
• Select the next Address on the Page and continue to<br />
adjust Constructs. When finished, press RECORD
Programming a Page<br />
Review<br />
To record a PAGE using the 4-STEP 4 STEP method:<br />
• From ADDRESS MODE:<br />
– 1. Press SELECT<br />
– 2. Select ADDRESS(ES)<br />
– 3. EDIT CONSTRUCTS<br />
– 4. Press RECORD<br />
• You can ABORT at any time before pressing<br />
RECORD by pressing the SELECT key again
Hands On Exercise<br />
Building a Page<br />
• Program Page 1:<br />
– Cyberlight in Gobo 2, RGB Yellow, MSpeed 93 with<br />
XFade of 1.0 sec
Changing Pages<br />
• To change to another PAGE, press the PAGE<br />
UP/DOWN Arrow keys to select the desired PAGE<br />
number<br />
– NOTE: PAGES loop around after 99 back to 1 and from 1<br />
to 99 without having to scroll through all PAGES in<br />
between<br />
– Press and HOLD the PAGE UP/DOWN Arrow key to<br />
quickly scroll through the 99 PAGES
Hands On Exercise<br />
Building a Page<br />
• Program Page 2<br />
– Cyberlight in Gobo 2, RGB Cyan, Mspeed 93 with XFade<br />
of 1.0 sec. Move image to different position in room.
Pages and Memories<br />
• <strong>The</strong> <strong>LCD</strong> Controller’s data storage is sub-divided sub divided into<br />
9 sections. Each one of these sections is called a<br />
MEMORY<br />
• Each MEMORY contains 99 PAGES<br />
• Press the CURSOR UP/DOWN Arrow Key (located<br />
above and below the MENU Key) to select a different<br />
MEMORY
<strong>LCD</strong> Controller Hierarchy<br />
<strong>LCD</strong> Controller Internal Memory<br />
– Memory 1<br />
• Pages 1-99 1 99<br />
– Memory 2<br />
• Pages 1-99 1 99<br />
– Memory 4<br />
• Pages 1-99 1 99<br />
– Memory 5<br />
• Pages 1-99 1 99<br />
– Memory 6<br />
• Pages 1-99 1 99<br />
– Memory 7<br />
• Pages 1-99 1 99<br />
– Memory 8<br />
• Pages 1-99 1 99<br />
– Memory 9<br />
• Pages 1-99 1 99
Hands On Exercise<br />
Building Pages in Different Memories<br />
• Program Page 1 in Memories 2-9 2 9 using a different<br />
Color and Gobo Combination on each Page for the<br />
Cyberlight. Set Mspeed to 95 and XFade for 1.2 sec<br />
on each Page
Recording a Loop<br />
Loops<br />
• A LOOP is a SEQUENCE or SERIES of programmed<br />
PAGES that runs continuously in a loop when played<br />
back<br />
• To record a Loop, first program each PAGE<br />
separately
Hands On Exercise<br />
Building a Loop<br />
• Program Memory 1 Pages 5-8 5 8 using Cyberlight.<br />
– On each Page chose the same Color and Gobo combination,<br />
and set MSpeed to be 94.
Creating a Loop<br />
• Every LOOP must be bracketed with a NON- NON<br />
INITIALIZED PAGE before the first recorded PAGE<br />
and after the last recorded PAGE of the sequence<br />
• To record a NON-INITIALIZED NON INITIALIZED PAGE (NIP):<br />
– Press SELECT, ERASE, ERASE<br />
• It is not necessary to record an NIP before Page 1 or<br />
after Page 99<br />
• NOTE: all Pages of a Loop must be in the same<br />
Memory and in sequential order
Hands On Exercise<br />
NIP<br />
• Program an NIP on Memory 1 Pages 4 & 9
Playing Back a Loop<br />
• Go to any recorded Page between the first and last NIP<br />
• Press AUTO Key<br />
– Advances PAGES automatically at rate set by RATE KNOB<br />
• Adjust the RATE KNOB<br />
• Delay time programmed into the PAGE is added to the<br />
rate set by RATE KNOB<br />
– Programmed DELAY times are completed before PAGE<br />
advancement regardless of the RATE KNOB setting
Hands On Exercise<br />
Running a Loop<br />
• Playback the Loop recorded on Memory 1 Pages 4-8<br />
4
Recording a Preset<br />
• From ADDRESS Mode, select the PAGE or PAGES<br />
to be recorded as a PRESET using PAGE UP/DOWN<br />
Arrow keys and Press the Auto Knob<br />
NOTE:<br />
SEQUENCES MUST BE RUNNING TO<br />
BE RECORDED CORRECTLY<br />
• Toggle to PRESET mode<br />
• Press SELECT<br />
• SELECT the PRESET NUMBER KEY where you<br />
want to record<br />
• Press RECORD
Hands On Exercise<br />
Recording a Preset<br />
• Record the the Loop recorded on Memory 1 Pages 4-8 4 8<br />
onto Preset #1<br />
• Record Memory 3 Page 1 onto Preset #2
Preset Playback<br />
• Toggle ADDRESS/PRESET mode key to PRESET<br />
mode<br />
• Press the PRESET number key of your choice<br />
• <strong>The</strong> preset plays back automatically, including the<br />
RATE knob setting (Loop)<br />
• <strong>The</strong>re are multiple BANKS of Presets<br />
– While in Preset Mode, use the Menu Cursor Left/Right<br />
Keys to navigate the Banks of Presets<br />
• Total number of Presets=1023
Hands On Exercise<br />
Banks of Presets<br />
• Record Memory 4 Page 1 into Bank 2 Preset # 1
Advanced<br />
Programming<br />
Features<br />
• Position Memories<br />
• Page Copy<br />
• Block Copy<br />
• Address Parameter Copy<br />
• MSpeed for Color and Gobo<br />
• Erasing a Page (Blackout Page)
Position Memory<br />
• Allows a PAGE to reference another PAGE for PAN<br />
and TILT Position information<br />
• 99 PAGES of Memory 9 are designated as reference<br />
pages or POSITION MEMORIES (also called<br />
PRESET FOCUSES)<br />
• Assign these positions to a selected address by<br />
pressing the POS key, then selecting a position<br />
number using the CONSTRUCT Up/Down Arrow<br />
Keys
Hands On Exercise<br />
Position Memory 9<br />
• Record A Position on Memory 9 Pages 1-4 1<br />
• Re-record Re record Memory 1 Pages 4-8 4 8 and change the POS<br />
values on each Page to use Positions 1-4 1 4
Position Memory 9<br />
• If a Position is changed on a reference PAGE in<br />
Memory 9, all PAGES referring to that Position will<br />
automatically update<br />
* It is recommended to build all Pages using Positions<br />
from Memory 9; this reduces the amount of time<br />
necessary in updating all Pages if a Position is<br />
changed
Hands On Exercise<br />
Updating Positions in Memory 9<br />
• Record a different Position for the Cyberlight on<br />
Memory 9 Pages 1-4 1<br />
• Playback the Preset stored in Bank 1 Preset 1 to see<br />
the same Loop but with new Positions
Copying Features<br />
• Entire PAGE to another PAGE in any memory<br />
– PAGE COPY<br />
• Block of PAGES to another block of PAGES in any<br />
memory<br />
– BLOCK COPY<br />
• Copy parameters of one ADDRESS to another<br />
ADDRESS(ES)<br />
– PARAMETER COPY
Page Copy<br />
• From ADDRESS Mode, choose PAGE to be copied<br />
• Press SELECT<br />
• Use PAGE UP/DOWN keys to select destination<br />
PAGE<br />
• Press RECORD<br />
NOTES:<br />
• Use PAGE COPY to quickly get all Construct<br />
information for all Fixtures from one PAGE to<br />
another<br />
• You may also use PAGE COPY to copy a PAGE<br />
from one MEMORY to another
Hands On Exercise<br />
Page Copy<br />
• Using Page Copy, copy Memory 2 Page 1 to Memory<br />
2 Page 3<br />
• Change the Gobo on Memory 2 Page 3 and record
Block Copy<br />
• From ADDRESS mode, choose any PAGE within the<br />
group of pages to be copied<br />
• Press SELECT<br />
• Press the AUTO key 3 times<br />
• Use PAGE UP/DOWN arrow<br />
keys to select Destination Page<br />
• Press RECORD
Hands On Exercise<br />
Block Copy<br />
• Block Copy Memory 1 Pages 4-8 4 8 to Memory 1 Pages<br />
10-13 10 13<br />
• Change the Color on the Cyberlight on the newly<br />
copied Pages 10-13 10 13<br />
• Record an NIP on Memory 1 Page 14<br />
• Record this new Loop to Bank 1 Preset 3
Reverse Block Copy<br />
• Copies the series of Pages in reverse order so that the<br />
first Page being copied becomes the last Page after<br />
copied<br />
• To execute the Reverse Block Copy, use the same<br />
steps to do a Block Copy and then:<br />
– After selecting the destination Page, press the<br />
CONSTRUCT UP/DOWN arrow keys to toggle between<br />
COPY and COPY REVERSE<br />
– Press Record to finish
Hands On Exercise<br />
Reverse Block Copy<br />
• Reverse Block Copy Memory 1 Pages 10-13 10 13 to<br />
Memory 2 Pages 5-8 5<br />
• Record NIPs on Memory 2 Pages 4 & 9<br />
• Record this new Loop on Bank 1 Preset 4
Address Parameter Copy 1<br />
• Copy Parameters from One Address to Another<br />
Address on the SAME PAGE<br />
– Press SELECT<br />
– Select source ADDRESS<br />
– Select Construct Parameters to be copied(press the<br />
corresponding CONSTRUCT keys)<br />
– Select destination ADDRESS(ES)<br />
– Press RECORD
Hands On Exercise<br />
Address Parameter Copy on Same Page<br />
• Using Address Parameter Copy, copy Cyberlight<br />
Constructs of Address 1 to Address 2
Address Parameter Copy 2<br />
• Copy Selected Addresses from One Page to<br />
Another Page<br />
– Select source ADDRESSES to be copied<br />
– Press the PAGE UP/DOWN keys and select the destination<br />
PAGE<br />
– Press RECORD<br />
• This applies ONLY when the controller is set for<br />
"SHARE ALL CONSTRUCTS UNTIL SELECTED"<br />
from the EDIT/COPY menu item
Hands On Exercise<br />
Address Parameter Copy of Same Address<br />
to Different Page<br />
• Copy all Cyberlight Constructs for Address #2 of<br />
Memory 1 Page 1 to Memory 1 Page 15<br />
• Record this new Page to Preset 2 in Bank 2
Address Parameter Copy 3<br />
Forced Parameter Copy<br />
• Copy selected Constructs of one Address from one<br />
PAGE to Another PAGE: POSITION COPY<br />
– PRESS AND HOLD SELECT KEY<br />
– Select source ADDRESS<br />
– Select CONSTRUCTS to be copied<br />
– PAGE UP/DOWN to select the destination PAGE<br />
– Press RECORD
Hands On Exercise<br />
Forced Parameter Copy<br />
• Copy only Gate & Color information for Cyberlight<br />
Address #1 on Memory 1 Page 6 to Memory 1 Page<br />
16<br />
• Record this new Page to Preset 3 in Bank 2
MSPEED<br />
• MSpeed is changing from one Color or Gobo on the<br />
wheel to another Color or Gobo on the wheel at the<br />
same rate of change as the speed of the mirror<br />
movement<br />
• Changing from one wheel position to a different<br />
wheel position has two options<br />
– FAST CHANGE<br />
– MSPEED CHANGE<br />
• Access Mspeed for Color and Gobo through the Menu<br />
by pressing the Construct Key and then pressing the<br />
Cursor Right Key to Mspeed option
Hands On Exercise<br />
Using MSpeed<br />
• 1. Record Memory 3 Page 2<br />
– Cyberlight Color 1 Gobo 2 Mspeed 90<br />
• 2. Page Copy up to Page 3<br />
• 3. Change the Cyberlight to Color 2 and assign<br />
MSpeed to the Color Wheel<br />
• Record both Pages to Presets 5 & 6 in Bank 1<br />
• Playback each Preset and examine the MSpeed change
Erasing a Page<br />
Creating a Blackout Page<br />
• Resets all parameters for all addresses on<br />
a PAGE to default values<br />
• Press SELECT<br />
• Press ERASE<br />
• Press RECORD
Hands On Exercise<br />
Erasing a Page<br />
• Erase Memory 1 Pages 1&2
Additional<br />
Features of the<br />
<strong>LCD</strong> Controller<br />
• Home a Fixture<br />
• Viewing an<br />
Address<br />
• Address<br />
Lockout<br />
• Master/Slave<br />
Capabilities<br />
• Grand Master<br />
• Instant Blackout<br />
• Audio Playback<br />
Effects (User<br />
Keys)<br />
• Macros
Home Key<br />
• Press the HOME key and the Address of the Fixture<br />
you want to reset<br />
• Pressing HOME a second time will turn off the<br />
flashing LED and allow playback of Pages or Presets<br />
to continue while the selected Fixture resets
Viewing an Address on a Page<br />
• To instantly see the Construct Parameters of an<br />
Address while in Address mode, press and hold the<br />
Address key.<br />
• All Parameters will be displayed in the <strong>LCD</strong> window<br />
• CAUTION! Holding the Address Key in for 15<br />
seconds will result in ADDRESS LOCKOUT, LOCKOUT,<br />
and<br />
signal will be shut off to the fixture
Address Lockout<br />
• Temporarily shuts off signal to that Address being<br />
locked out<br />
• Press and Hold in the Address Key for 15 seconds to<br />
Lockout and Unlock the Address<br />
• Turning off the Controller unlocks all Addresses
MASTER/SLAVE<br />
• Using Master/Slave increases the<br />
number of individual Addresses that<br />
can be controlled<br />
• Slave Mode Requires Personality B<br />
DIP Switch #1 ON<br />
– SLAVE Mode Indicator LED will be on<br />
• Slaved controllers only allow<br />
programming features<br />
– PLAYBACK features are DISABLED<br />
• Master Controller controls PAGE<br />
AND PRESET to be played back
Grand Master Function<br />
• In either Address or Preset Mode, the<br />
intensity of the output can be adjusted<br />
– USE CONSTRUCT UP/DOWN ARROW<br />
KEYS TO ADJUST SETTING
Standby<br />
• Provides an instant blackout feature<br />
• Closes GATES of all Fixtures<br />
• Page advancement is halted<br />
• All other functions are available
Audio Input Playback<br />
• <strong>The</strong> <strong>LCD</strong> Controller can receive an external stereo<br />
source to control playback of recorded Pages<br />
• Audio input playback affects how recorded Pages play<br />
back regardless of whether those Pages are part of a<br />
Loop or not<br />
• To use the Audio effects:<br />
– Plug a stereo source into the Stereo Audio Input connector<br />
on the Rear Panel<br />
– Select a Recorded Page or Pages<br />
– Select a User Key effect
Audio Level Indicator LED<br />
& Audio Knob<br />
• LED displays the strength of the AUDIO INPUT<br />
SIGNAL<br />
• Knob adjusts the controller's sensitivity to the AUDIO<br />
INPUT SIGNAL<br />
• Signal is necessary to use the controller's built in<br />
AUDIO ADVANCE Functions and EFFECTS<br />
Functions
User Keys<br />
• Pre-Programmed Pre Programmed Audio Effects and Page<br />
Advancement Effects<br />
– USER 1 Random Advance Key (use with Auto Advance<br />
Key and/or All-Mem All Mem Playback)<br />
– USER 3 Audio Advance With Beat<br />
– USER 5 Audio Halt With Beat<br />
– USER 2 Color Modulate<br />
– USER 4 Gobo Modulate<br />
– USER 6 Dim Modulate
Macros<br />
• Series of keystrokes stored onto a single button<br />
• Playback of button activates the MACRO stored<br />
within<br />
• MACROS are stored on the USER KEYS of the <strong>LCD</strong><br />
Controller
Macros/USER Key Programming<br />
• Three States of the USER Keys<br />
– PLAYBACK USER KEY<br />
– EDIT USER KEY<br />
– ABORT USER KEY<br />
• Playback a recorded USER Key by pressing the<br />
USER Key once (Press it again to STOP<br />
PLAYBACK of Audio Effect)<br />
• To enter the EDIT menu, press and HOLD the USER<br />
Key in; RELEASE when EDIT is displayed in the<br />
<strong>LCD</strong> window<br />
• ABORT PLAYBACK and EDIT by holding the<br />
USER Key in until ABORT is displayed
Recording a USER KEY<br />
• Press and HOLD User Key to be recorded until EDIT<br />
USER KEY is displayed<br />
• Press CURSOR RIGHT key 2 times to RECORD<br />
• Press CURSOR DOWN key to start recording<br />
• EXECUTE keystrokes to be recorded as the MACRO<br />
• Press CURSOR RIGHT Key 2 times to STOP<br />
RECORD<br />
• Press CURSOR DOWN Key to stop recording
Hands On Exercise<br />
Macros<br />
• Make a Macro for executing a Page Copy
<strong>LCD</strong> Controller<br />
Menu Features
<strong>LCD</strong> Controller Menu Features<br />
Menu Mode<br />
• Menu provides options for you to define the characteristics of<br />
the controller<br />
• Menu also provides some shortcut methods for some controller<br />
functions<br />
• ITEMS INCLUDE:<br />
– HELP<br />
– BACKUP<br />
– SUBMASTERS<br />
– SETUP<br />
– FUNCTION
Menu Mode<br />
• Press MENU Key to display SUBMENU items<br />
• Use Cursor Left/Right keys to select the submenu<br />
items<br />
• Selected item will be displayed in all CAPITAL<br />
letters
HELP<br />
• Displays information about<br />
each of the SUBMENU items
Backup<br />
• Backup Options include:<br />
– OS to RAMCard<br />
• Transfer <strong>LCD</strong> Controller Operating System to another<br />
controller<br />
– Save to RAMCard<br />
• Save the <strong>LCD</strong> Controller's internal RAM to a removable<br />
Memory Card<br />
– Load from RAMCard<br />
• Load the internal RAM from a Memory Card<br />
– PCMCIA CARD<br />
– Removable device that allows you to backup or store the<br />
controller's internal memory<br />
– Each card holds one <strong>LCD</strong> Controller show
Updating Operating <strong>Systems</strong><br />
Software<br />
• Allows the O/S from one <strong>LCD</strong> Controller to be easily<br />
copied to another <strong>LCD</strong> Controller<br />
• To execute an O/S Update,<br />
– Turn OFF the controller<br />
– Insert Memory Card with newer O/S version<br />
– Turn Power ON<br />
– Press ERASE key to install O/S when prompted<br />
– Press ERASE again to continue<br />
– Follow instructions displayed in <strong>LCD</strong> window
Saving to a RAMCard<br />
• Press MENU<br />
• Press CURSOR RIGHT arrow key to BACKUP<br />
submenu<br />
• Press CURSOR DOWN key to view selections<br />
• With MEM->CARD MEM >CARD displayed in ALL CAPITALS,<br />
Press RECORD two times to save to RAMCard<br />
NOTE: Always Lock the RAMCard after<br />
backing up the Controller’s Memory
Loading from a RAMCard<br />
• Press MENU<br />
• Press CURSOR RIGHT arrow key to BACKUP<br />
submenu<br />
• Press CURSOR DOWN to view selections<br />
• Press CURSOR RIGHT arrow key to CARD->MEM<br />
CARD >MEM<br />
• Press ERASE two times to load from RAMCard
Hands On Exercise<br />
Backing up the Controller<br />
• Backup the Memory of the Controller to a RAMCard
Submasters<br />
• External Control board that lets you remotely adjust<br />
constructs in real time<br />
• DIM, COLOR, & GOBO can be controlled<br />
• 12 SUBMASTERS can be assigned<br />
• Submaster control overrides the controller<br />
programming<br />
• 2 modes:<br />
– PROPORTIONAL LEVEL: Submaster value is multiplied<br />
by the programmed fixture value<br />
– REMOTE LEVEL: Device with the higher level has<br />
control: "HTP"
Setup<br />
• Set Device ID for Show Control operation<br />
• Lock out Memories to prevent inadvertent editing<br />
• Configure controller to use RS232 or MIDI port<br />
• Configure the COPY Command Parameters<br />
• Erase all of Controller's Memories<br />
• Erase USER Keys (Restores to Pre-Programmed<br />
Pre Programmed<br />
Audio Effects)
Edit/Copy Command<br />
• SHARE ALL UNTIL SELECTED<br />
– Copies all Constructs until specific Constructs are selected<br />
– This is the Controller’s Default setting<br />
• DON’T SHARE ALL UNTIL SELECTED<br />
– Only copies specified Constructs
Erasing the Controller’s<br />
• Erase either<br />
Memory<br />
– Entire Memory<br />
– User Key Memory only
Hands On Exercises<br />
Erasing the Controller’s Memory<br />
• Erase the Memory of the Controller<br />
• Load your show from RAMCard back into the<br />
Controller
Function<br />
• Provides access to the six pre-programmed<br />
pre programmed<br />
USER key functions when Macros are<br />
stored on the keys
Automatic All-Memory All Memory Playback*<br />
• Automatically sequences through all 99 PAGES in all<br />
9 MEMORIES<br />
• From ADDRESS Mode, Press CURSOR UP/DOWN<br />
arrow keys until "1-all" "1 all" or "9-all" "9 all" is displayed<br />
• Press AUTO Button<br />
• Adjust RATE knob<br />
• To Stop the sequence, press AUTO again and select<br />
Memory 1-9 1<br />
*Use Use this in conjunction with the Random Audio<br />
advance function
<strong>LCD</strong> Controller<br />
Remote Access Control
Remote Access Control<br />
• Method of using a remote control device like a<br />
dimmer console or TD 12 to remotely access the <strong>LCD</strong><br />
Controller's Memory<br />
• 12 Channels are required on the remote device<br />
• Connect the remote device using the ANALOG<br />
INPUT CONNECTORS on rear panel<br />
NOTE: Flashing STANDBY KEY LED indicates the<br />
controller is being controlled through the ANALOG<br />
INPUTS (when analog input is present)
Three Methods of Remote<br />
Access Control<br />
• Page Access<br />
• 12 Level Preset Access<br />
• Binary Preset Access
Page Access Mode<br />
• Personality B DIP Switches 3 & 5 "OFF"<br />
• Allows you to remotely call up Pages from within the<br />
Memory that you first select on the Controller's front<br />
panel<br />
• You can not remotely select Memories
Page Access Mode cont.<br />
• Channels 1-12 1 12 correspond to PAGES 1-12 1 12<br />
• Any simultaneous combination of 2 channels calls up<br />
the corresponding PAGE number ( i.e.. "3" and "7"=<br />
"37")<br />
• Channel 10 is also a tens-times tens times multiplier ("4" and<br />
"10"= "40")<br />
• Channel 11 is also a number doubler ( "5" and<br />
"11"="55")<br />
• Channel 12 is also a number inverter ("6"& "5" &<br />
"12"="65”)
Hands On Exercise<br />
Page Access<br />
• Playback Pages 34, 40, 55, and 82 in Memory 1
12 Level Preset Access Mode<br />
• Personality B DIP Switch "3"=ON, "5"=OFF<br />
• Each Channel activates a different level of Presets<br />
• Presets are called up from Controller's Front Panel
Recording Presets in 12 Level<br />
• First Method<br />
Access Mode<br />
– Activate the Channel corresponding to the level you want<br />
– Select the Page or Pages to be recorded as a Preset<br />
– Press SELECT<br />
– Select the Preset number key to be recorded<br />
– Press RECORD
Recording Presets in 12 Level<br />
• Second Method<br />
Access Mode<br />
– Choose Page to be recorded<br />
– Press SELECT<br />
– Activate a channel on the remote device corresponding to<br />
the level you want<br />
– Select a Preset number key on controller's front panel<br />
– Press RECORD
Playback Presets in 12 Level<br />
Access<br />
• Activate Channel on Remote device<br />
• Press Preset number on front panel of <strong>LCD</strong> Controller
Hands On Exercise<br />
12 Level Preset Access<br />
• Program a Preset on Level 2 Preset 1<br />
• Program a Preset on Level 10 Preset 5<br />
• Playback each Preset
Binary Preset Access Mode<br />
• Expands controller's number of Presets to 1023<br />
• Personality B DIP Switches "3" and "5"=ON<br />
• To record a Binary Preset:<br />
– Toggle to Preset Mode<br />
– Select Page or Pages that you want to record as a Preset<br />
– Press SELECT Key<br />
– Activate any binary combination of channels 1-10 1 10<br />
– Select the lighted Preset number key on the <strong>LCD</strong> Controller<br />
– Press RECORD
Playing back a Binary Preset<br />
• Activate the Binary channel<br />
combination for the desired PRESET<br />
on the remote control device<br />
• Sit back and watch!
Hands On Exercise<br />
Binary Preset Access<br />
• Program Preset # 658
<strong>High</strong> <strong>End</strong> <strong>Systems</strong><br />
Further Information Sources<br />
• www.highend.com<br />
• Show Technology magazine<br />
• Status Cue User’s Group<br />
• Seminars<br />
– Programming<br />
– Technical