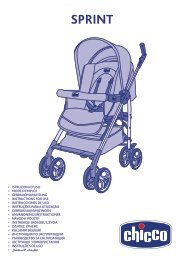
istruzioni d'uso • mode d'emploi • gebrauchsanleitung ... - Chicco
istruzioni d'uso • mode d'emploi • gebrauchsanleitung ... - Chicco
istruzioni d'uso • mode d'emploi • gebrauchsanleitung ... - Chicco

You also want an ePaper? Increase the reach of your titles
YUMPU automatically turns print PDFs into web optimized ePapers that Google loves.
HOW TO USE THE SAFETY HARNESS<br />
7. Always remember to fasten the safety harness, passing<br />
it through the plastic “D” rings (diagram 10) and the fabric<br />
crotch strap. After sitting the child into the table seat, fasten<br />
the plastic buckle as shown in diagram 11. Check that the<br />
table seat is fi tted and fi xed correctly into position.<br />
HOW TO ADJUST THE SEAT<br />
The table seat can be adjusted to different positions.<br />
8. To adjust the position of the seat, raise the handle (D)<br />
located on the backrest of the table seat and release the<br />
locking button from the tube (diagram 12). Turn the table<br />
seat in a clockwise or anticlockwise direction (diagram 13),<br />
until the 360° symbol on the movable part of the seat (B) is<br />
in correspondence with the selected symbol, located on the<br />
fi xed part of the table seat (C). When the selected position is<br />
reached, release the handle to insert the locking button into<br />
the hole located on the tube: a click will indicate that the<br />
button is locked correctly into position.<br />
The table seat has six positions of use:<br />
- 1 “FEEDING BOTTLE” position (diagram 14 and 14a), 2<br />
“COOKIE” positions (diagram 15 and 15a/15b): the 360°<br />
indicator is placed in correspondence with the “FEEDING<br />
BOTTLE/BISCUIT” symbol shown on the tube of the seat<br />
(C). The child is facing outwards and is able to drink from the<br />
feeding bottle or eat a snack independently, whilst always<br />
maintaining visual contact with the mother, who is able to<br />
move freely in the surrounding area.<br />
- 2 “CUP” positions (diagrams 16 and 16a/16b): the 360°<br />
indicator is placed in correspondence with the “CUP” symbol<br />
shown on the tube of the seat (C). Weaning is experienced<br />
maintaining appropriate contact between mother and child.<br />
The child is able to independently take the cup from the table,<br />
while the mother is able to assume the correct position with<br />
respect to the baby during feeding.<br />
- 1 “CUTLERY” position (diagrams 17 and 17a): the 360°<br />
indicator is placed in correspondence with the “CUTLERY”<br />
symbol shown on the front part of the fi xed frame (C). Once<br />
the child has acquired greater autonomy, it faces the table<br />
and shares the pleasure of eating together with its mother<br />
and father.<br />
Warning! Do not adjust the table seat to a position that<br />
is different from those for use shown in this instructions<br />
booklet.<br />
The table seat can be adjusted also with the child in place,<br />
although this could be slightly more diffi cult.<br />
HOW TO REMOVE THE COVER<br />
The cover of the table seat can be removed and cleaned.<br />
9. Unfasten the safety harness and remove it from the from<br />
the crotch strap and plastic ”D” rings.<br />
10. Unfasten the 4 press studs located on the fabric cover<br />
(diagram 18a and 18b).<br />
11. Remove the plastic “D” rings, sliding them through the<br />
appropriate openings located on the fabric seat.<br />
12. Remove the two rear metal buckles of the seat, sliding<br />
them through the openings located on the backrest, and the<br />
three front metal buckles, sliding them trough the front edge<br />
of the seat (diagram 19a and 19b). The fabric cover can now<br />
be removed.<br />
13. Unfasten the press stud located on the seat (diagram 20)<br />
and remove the HDPE insert.<br />
To replace the fabric cover onto the table seat, proceed as<br />
follows.<br />
14<br />
14. Place the HDPE insert on the bottom of the seat and<br />
fasten the press stud.<br />
15. Insert the metal buckles through their housings and ensure<br />
they are fi xed correctly, as shown in diagram 21a and 21b.<br />
16. Pass the plastic “D” rings through the appropriate<br />
openings located on the fabric seat.<br />
17. Fasten the press studs of the fabric cover to the table seat<br />
frame.<br />
18. Pass the safety harness through the plastic “D” rings and<br />
the crotch strap. The table seat is now ready for use.<br />
DISASSEMBLY AND TRANSPORT<br />
To dismantle the table seat, proceed as follows.<br />
19. Press the locking buttons located on the armrest (G – H)<br />
and remove them from the seat.<br />
20. Place the seat (A) and the two disassembled arms into the<br />
mesh bag (diagram 22). The product is ready for transport.<br />
FOR FURTHER INFORMATION, PLEASE CONTACT:<br />
<strong>Chicco</strong> UK Ltd<br />
Prospect Close<br />
Lowmoor Road Business Park<br />
Kirkby in Ashfi eld<br />
Nottinghamshire NG17 7LF<br />
Customer Services Helpline Tel: 01623 750870<br />
(offi ce hours only)<br />
www.chicco.com