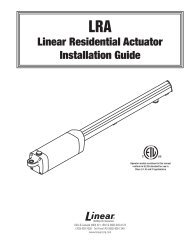
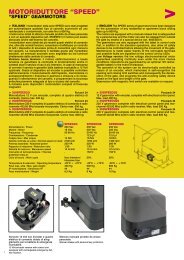
automations for gates sistema de automatización para portones ...
automations for gates sistema de automatización para portones ...
automations for gates sistema de automatización para portones ...

You also want an ePaper? Increase the reach of your titles
YUMPU automatically turns print PDFs into web optimized ePapers that Google loves.
FIXING THE SMALL BRACKET<br />
FIJACION DE LA BRIDA PEQUEÑA<br />
1. anchor the actuator to the large bracket using the screw provi<strong>de</strong>d (see Fig. 8)<br />
2. unscrew the actuator arm until it is nearly completely out (leave one turn of the screw)<br />
3. tighten the small bracket to the actuator arm using the screw provi<strong>de</strong>d (similar to the <strong>de</strong>scription in Fig. 10) and rest the small<br />
bracket against the gate when it is completely shut to see where it has to be wel<strong>de</strong>d. Be<strong>for</strong>e going on to the next phase please carry<br />
out the following test:<br />
1. manually open the gate to the maximum required angle<br />
2. activate the manual unlock (see relative <strong>para</strong>graph)<br />
3. tighten the arm until the small bracket finds itself over the position just marked on the gate. If the small bracket does cover the<br />
position marked it means installation has been done correctly. This method can be used to establish where the small bracket will<br />
have to be wel<strong>de</strong>d <strong>for</strong> each opening angle (X°) required provi<strong>de</strong>d it is possible (<strong>para</strong>meters A and B and the actuator’s useful travel<br />
permitting).<br />
1. sujetar el operador a la brida gran<strong>de</strong> mediante el tornillo en equipamiento (ver la Fig. 8 )<br />
2. <strong>de</strong>stornillar el brazo <strong>de</strong>l operador hasta que se extienda casi <strong>de</strong>l todo (<strong>de</strong>jarlo atornillado con un giro)<br />
3. Atornillar la brida pequeña al brazo <strong>de</strong>l operador con el tornillo en equipamiento (como se <strong>de</strong>scribe en la Fig.10) y colocar la brida<br />
pequeña en la verja, que <strong>de</strong>be estar completamente cerrada, a fin <strong>de</strong> <strong>de</strong>terminar dón<strong>de</strong> se soldará. Antes <strong>de</strong> pasar a la fase<br />
sucesiva, hay que comprobar lo siguiente:<br />
1. abrir manualmente la verja hasta el máx. ángulo <strong>de</strong>seado<br />
2. activar el bloqueo manual (ver el apartado relativo)<br />
3. atornillar el brazo hasta que la brida pequeña se pueda superponer a la posición que se acaba <strong>de</strong> marcar en la verja. Si esta<br />
operación se pue<strong>de</strong> realizar, significa que la instalación es correcta. Es posible llevar a cabo este método a fin <strong>de</strong> establecer dón<strong>de</strong><br />
hay que soldar la brida pequeña por cada ángulo <strong>de</strong> apertura (X°) <strong>de</strong>seado, siempre y cuando sea posible (o sea, con los<br />
parámetros A y B y la carrera útil <strong>de</strong>l operador justos).