ROTISSERIE ASADOR ESTILO ROTISSERIE - Brinkmann
ROTISSERIE ASADOR ESTILO ROTISSERIE - Brinkmann
ROTISSERIE ASADOR ESTILO ROTISSERIE - Brinkmann

You also want an ePaper? Increase the reach of your titles
YUMPU automatically turns print PDFs into web optimized ePapers that Google loves.
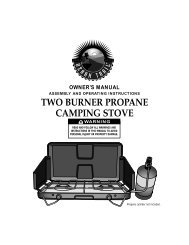
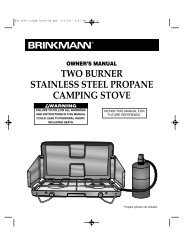
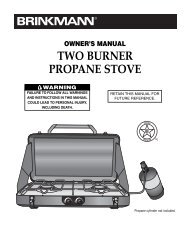
<strong>ROTISSERIE</strong><br />
<strong>ASADOR</strong> <strong>ESTILO</strong> <strong>ROTISSERIE</strong><br />
OWNER’S MANUAL<br />
MANUAL DEL PROPIETARIO<br />
ASSEMBLY AND OPERATING INSTRUCTIONS<br />
INSTRUCCIONES DE ARMADO Y OPERACIÓN<br />
WARNING<br />
READ AND FOLLOW ALL<br />
WARNINGS AND INSTRUCTIONS IN<br />
THIS MANUAL TO AVOID PERSONAL<br />
INJURY, INCLUDING DEATH OR<br />
PROPERTY DAMAGE.<br />
SAVE THIS<br />
MANUAL FOR<br />
FUTURE REFERENCE<br />
ADVERTENCIA<br />
LEA Y SIGA TODAS LAS<br />
ADVERTENCIAS E INSTRUCCIONES<br />
EN ESTE MANUAL PARA EVITAR<br />
LESIONES PERSONALES, INCLUSO<br />
MUERTE O DAÑOS MATERIALES.<br />
GUARDE ESTE MANUAL<br />
PARA REFERENCIA<br />
FUTURA
1<br />
IMPORTANT SAFETY<br />
WARNINGS<br />
WE WANT YOU TO ASSEMBLE AND USE YOUR <strong>ROTISSERIE</strong> AS SAFELY AS POSSIBLE.<br />
THE PURPOSE OF THIS SAFETY ALERT SYMBOL IS TO ATTRACT YOUR ATTENTION<br />
TO POSSIBLE HAZARDS AS YOU ASSEMBLE AND USE YOUR <strong>ROTISSERIE</strong>.<br />
WHEN YOU SEE THE SAFETY ALERT SYMBOL<br />
PAY CLOSE ATTENTION TO THE INFORMATION WHICH FOLLOWS!<br />
READ ALL SAFETY WARNINGS AND INSTRUCTIONS CAREFULLY<br />
BEFORE ASSEMBLING AND OPERATING YOUR <strong>ROTISSERIE</strong>.<br />
WARNING<br />
ELECTRICAL GROUNDING INSTRUCTIONS:<br />
This appliance (rotisserie motor) is equipped with a three-prong (grounding) plug for<br />
your protection against electrical shock hazard. It should be plugged directly into a<br />
properly grounded three-prong receptacle. DO NOT cut or remove the grounding prong<br />
from this plug.<br />
• Always check the grill prior to each use as indicated in the “Pre-Start Check List” section of<br />
the Charmglow ® Owner’s Manual.<br />
• Keep children and pets away. DO NOT allow children to use or play near the grill or rotisserie.<br />
• DO NOT leave the grill unattended while in use.<br />
• DO NOT use the side burner when using a rotisserie. Burner lid could be hot from prior use.<br />
• To avoid body injury, DO NOT touch spit rod while in use or soon after use, rod can be<br />
EXTREMELY HOT.<br />
• Keep any electrical supply cords away from water or hot surfaces.<br />
• DO NOT operate with a damaged cord or plug.<br />
• Turn rotisserie motor switch to “OFF” before removing plug from outlet.<br />
• Unplug the rotisserie motor when not in use and before cleaning.<br />
• DO NOT exceed 12 lbs. of food on the rotisserie.<br />
• Keep a fire extinguisher acceptable for use with gas products close by. Refer to your local<br />
authority to determine proper size and type.<br />
• For household use only. DO NOT use the grill or this rotisserie for anything other than its<br />
intended purpose.<br />
• DO NOT use while under the influence of drugs or alcohol.<br />
• When using an AC current rotisserie, it must be electrically grounded in<br />
accordance with local codes, or in the absence of local codes:<br />
• In the US: The National Electrical Code – ANSI-NFPA No. 70 – Latest Edition<br />
• In Canada: the Canadian Electrical Code – CSA C22.1<br />
USE CAUTION AND COMMON SENSE WHEN OPERATING YOUR GAS GRILL.<br />
FAILURE TO ADHERE TO THE SAFETY WARNINGS AND GUIDELINES IN THIS MANUAL<br />
COULD RESULT IN SEVERE BODILY INJURY OR PROPERTY DAMAGE.<br />
SAVE THIS MANUAL FOR FUTURE REFERENCE.
ASSEMBLY INSTRUCTIONS<br />
READ ALL SAFETY WARNINGS & ASSEMBLY INSTRUCTIONS CAREFULLY<br />
BEFORE ASSEMBLING OR OPERATING YOUR <strong>ROTISSERIE</strong>.<br />
READ THE OWNERS MANUAL TO THE GRILL<br />
BEFORE ASSEMBLING OR USING THIS <strong>ROTISSERIE</strong>.<br />
The following tools are required to assemble this Charmglow ® Gas Outdoor Grill Rotisserie:<br />
• Phillips & Flathead Screwdrivers<br />
• Adjustable Wrench<br />
PARTS LIST:<br />
1 1 Motor<br />
2 1 Spit Rod<br />
3 2 Forks<br />
4 1 Motor Mount Bracket<br />
1<br />
4<br />
2<br />
5<br />
6<br />
7<br />
8<br />
4 Screws<br />
4 Nuts<br />
1 Right Support Bracket<br />
1 Sliding Collar<br />
FOR MISSING PARTS, PLEASE CALL CUSTOMER SERVICE AT 800-527-0717.<br />
(Proof of purchase will be required.)<br />
Inspect contents of the box to ensure all parts are included and undamaged.<br />
5<br />
3<br />
8<br />
6<br />
7<br />
2
3<br />
ASSEMBLY STEPS<br />
Step 1<br />
Open grill hood and remove<br />
cooking grills. Refer to your<br />
Charmglow ® owner’s manual.<br />
Step 2<br />
Attach the motor mount<br />
bracket on the left hand side<br />
of the grill using two screws<br />
and two nuts.<br />
If your rotisserie is for<br />
model 810-7440-S<br />
Charmglow Stainless Steel<br />
Gas Grill follow Step 3a,<br />
for model 810-7600-S<br />
Charmglow Chef Island<br />
follow Step 3b.<br />
Step 3a<br />
Attach the spit rod support<br />
bracket to the outside right<br />
hand side of the grill using<br />
two screws and two nuts.<br />
Step 3b<br />
Attach the spit rod support<br />
bracket to the inside right<br />
hand side of the grill using<br />
two screws and two nuts.<br />
810-7440-S<br />
Step 3a<br />
810-7600-S<br />
Step 3b
810-7440-S<br />
810-7600-S<br />
Sliding Collar<br />
Spit Rod<br />
Sliding Collar<br />
Groove<br />
Right Side<br />
Rotisserie Bracket<br />
Sliding Collar<br />
Groove<br />
Right Side<br />
Rotisserie Bracket<br />
Step 4<br />
Loosen set screw and slide<br />
grooved end of collar onto<br />
the spit rod.<br />
Step 5<br />
Align collar groove with right<br />
side bracket as illustrated.<br />
Tighten set screw to lock<br />
sliding collar into place.<br />
4
5<br />
READ ALL WARNINGS ON PAGE 1 AND IN THE<br />
OWNERS MANUAL TO THE GRILL.<br />
WARNING<br />
ELECTRICAL GROUNDING INSTRUCTIONS:<br />
This appliance (rotisserie motor) is equipped with a three-prong (grounding) plug for<br />
your protection against electrical shock hazard. It should be plugged directly into a<br />
properly grounded three-prong receptacle. DO NOT cut or remove the grounding prong<br />
from this plug.<br />
OPERATING THE <strong>ROTISSERIE</strong>:<br />
1. Your grill was pre-drilled from the factory to include mounting holes for the<br />
Charmglow ® Gas Outdoor Grill Rotisserie.<br />
2. Install the rotisserie motor onto the motor mount bracket.<br />
3. Ensure that the rotisserie motor is turned to “OFF.”<br />
Note: Rotisserie motor is capable of turning up to a 12 lb. cut of meat or poultry.<br />
4. Place one fork onto the spit rod with the prongs facing away from the handle. Do<br />
not tighten set screw at this time.<br />
5. Skewer meat with the spit rod and slide to the center of the rod.<br />
6. Place second fork onto the spit rod with the prongs facing the meat.<br />
7. Slide both forks tightly against the meat and securely tighten the fork set screws.<br />
8. Check the balance of the food on the rod by rotating the loaded spit rod loosely<br />
in your hands. The rod should rotate evenly with little effort. Adjust the food on<br />
the spit to achieve a balanced assembly.<br />
9. Place the loaded spit rod into the motor assembly and support bracket.<br />
10. Close the grill lid and turn the rotisserie motor “ON.”<br />
Note: Erratic noises from the motor are a sign of an unbalanced spit rod. Which<br />
could cause severe damage to motor gears.<br />
WARNING: Always use oven mitts/gloves to protect your hands. Metal parts<br />
become hot during use. Use extreme caution when handling spit rod<br />
and forks.<br />
11. Always turn the rotisserie motor to “OFF” when opening the grill lid.
<strong>ROTISSERIE</strong> COOKING CONTINUED:<br />
12. When food is done, use oven mitts/gloves to remove spit rod from motor<br />
assembly.<br />
13. Loosen fork set screws and remove meat by sliding off the end of the spit rod.<br />
GRILLING TO PROPER TEMPERATURE:<br />
• Use a meat thermometer to be sure food has reached a safe internal temperature.<br />
• The US Department of Agriculture recommends the minimum temperature be reached<br />
for the following food items:<br />
Pork ----------- 160 degrees F (71° C)<br />
Poultry ------- 180 degrees F (82° C)<br />
Roasts ------- 145 degrees F (62.8° C)<br />
HELPFUL HINTS<br />
• If you pre-cook meat or poultry, do so immediately before grilling.<br />
• Never defrost meat at room temperature or on a countertop.<br />
• Refrigerate leftovers within 2 hours of taking food off the grill.<br />
For additional information, please phone the USDA’s toll free Meat & Poultry Hotline at:<br />
800-535-4555<br />
CLEANING AND MAINTENANCE:<br />
• Spit rod and forks can be disassembled and washed in dish soap and warm water.<br />
Note: All metal parts, with exception of the motor, are dishwasher safe.<br />
• After first use, it is likely that the stainless steel adjacent to the burner will darken.<br />
This is a normal property of stainless steel used on the rotisserie.<br />
• Store motor and other parts in a cool, clean and dry place.<br />
• To prevent electrical shock hazard, DO NOT immerse the motor or cord in water.<br />
6
7<br />
ADVERTENCIAS<br />
IMPORTANTES DE SEGURIDAD<br />
ES NUESTRO DESEO QUE ARME Y UTILICE SU <strong>ASADOR</strong> <strong>ESTILO</strong> <strong>ROTISSERIE</strong> EN LA<br />
FORMA MÁS SEGURA POSIBLE.<br />
EL PROPÓSITO DE ESTE SÍMBOLO DE ALERTA DE SEGURIDAD ES QUE USTED<br />
PRESTE ATENCIÓN A LOS POSIBLES PELIGROS CUANDO ARME Y UTILICE SU <strong>ASADOR</strong><br />
<strong>ESTILO</strong> <strong>ROTISSERIE</strong>.<br />
¡CUANDO VEA ESTE SÍMBOLO DE ALERTA DE SEGURIDAD,<br />
PRESTE ESPECIAL ATENCIÓN A LA INFORMACIÓN A CONTINUACIÓN!<br />
LEA DETENIDAMENTE TODAS LAS ADVERTENCIAS DE SEGURIDAD E<br />
INSTRUCCIONES ANTES DE ARMAR Y USAR EL <strong>ASADOR</strong> <strong>ESTILO</strong> <strong>ROTISSERIE</strong>.<br />
ADVERTENCIA<br />
INSTRUCCIONES PARA CONECTAR A TIERRA LOS ARTEFACTOS<br />
ELÉCTRICOS:<br />
Este artefacto (motor del asador estilo rotisserie) está equipado con un enchufe de tres<br />
clavijas (de puesta a tierra) para proteger al usuario contra el electrochoque. Este<br />
enchufe debe conectarse directamente a un receptáculo para tres clavijas conectado<br />
correctamente a tierra. No corte ni quite la clavija de puesta a tierra del enchufe.<br />
• Siempre revise la parrilla antes de cada uso, tal como se indica en la sección "Lista de<br />
verificación preliminar al encendido" del manual del propietario de Charmglow ® .<br />
• Mantenga a los niños y animales de compañía alejados de este artefacto. NO permita que los<br />
niños usen o jueguen cerca de la parrilla o del asador estilo rotisserie.<br />
• NO deje la parrilla desatendida mientras está en uso.<br />
• NO use la hornilla lateral cuando esté usando un asador estilo rotisserie. La tapa de la hornilla<br />
podría estar caliente si se usó anteriormente.<br />
• Para evitar lesiones personales, NO toque la varilla en uso o poco después de su uso ya que<br />
puede estar MUY CALIENTE.<br />
• Mantenga todos los cables de alimentación eléctrica alejados del agua o superficies calientes.<br />
• No opere la unidad con un cordón o enchufe dañado.<br />
• Coloque el interruptor del motor del asador en “OFF” (apagado) antes de desenchufarlo.<br />
• Desenchufe el motor del asador cuando no esté en uso y antes de limpiarlo.<br />
• NO coloque más de 12 libras de comida en el asador estilo rotisserie.<br />
• Mantenga en un lugar cercano un extinguidor de incendios aceptable para usar con productos<br />
de gas. Consulte con su autoridad local para determinar el tamaño y tipo correctos.<br />
• Para uso doméstico únicamente. NO use la parrilla o este asador estilo rotisserie para ningún<br />
propósito que no sea el previsto.<br />
• NO use la parrilla bajo la influencia de alcohol o drogas.<br />
• Cuando use un asador estilo rotisserie de corriente alterna, debe estar conectado a<br />
tierra de acuerdo con los códigos locales o, si no los hay:<br />
• En EE.UU.: El Código Eléctrico de EE.UU. – ANSI-NFPA Nº 70 – última edición<br />
• En Canadá: el Código Eléctrico Canadiense – CSA C22.1<br />
SEA PRECAVIDO Y UTILICE SENTIDO COMÚN CUANDO OPERE LA PARRILLA DE GAS.<br />
HACER CASO OMISO A LAS ADVERTENCIAS DE SEGURIDAD E INSTRUCCIONES EN ESTE<br />
MANUAL PUEDE PRODUCIR GRAVES LESIONES PERSONALES O DAÑOS MATERIALES.<br />
GUARDE ESTE MANUAL PARA REFERENCIA FUTURA.
INSTRUCCIONES DE ARMADO<br />
LEA DETENIDAMENTE TODAS LAS ADVERTENCIAS DE SEGURIDAD E INSTRUCCIONES<br />
DE ARMADO ANTES DE ARMAR O USAR EL <strong>ASADOR</strong>.<br />
LEA EL MANUAL DEL PROPIETARIO DE LA PARRILLA ANTES DE ARMAR O USAR<br />
ESTE <strong>ASADOR</strong>.<br />
SE NECESITAN LAS SIGUIENTES HERRAMIENTAS PARA ARMAR ESTE <strong>ASADOR</strong> <strong>ESTILO</strong><br />
<strong>ROTISSERIE</strong> CHARMGLOW ® GRILL ISLAND:<br />
• Destornilladores Phillips y de punta plana<br />
• Llave ajustable<br />
LISTA DE PARTES:<br />
1 1 Motor<br />
2 1 Varilla<br />
3 2 Trinches<br />
4 1 Soporte de montaje del motor<br />
1<br />
4<br />
2<br />
5<br />
6<br />
7<br />
8<br />
4 Tornillos<br />
4 Tuercas<br />
1 Soporte de la varilla<br />
1 Collarín Deslizante<br />
SI FALTAN PARTES, LLAME A SERVICIO AL CLIENTE AL 800-527-0717.<br />
(Se requerirá el comprobante de compra.)<br />
Inspeccione el contenido de la caja para verificar que todas las partes están incluidas e intactas.<br />
5<br />
3<br />
8<br />
6<br />
7<br />
8
9<br />
PASOS DE ARMADO<br />
Paso 1<br />
Abra la cubierta de la parrilla<br />
y quite las rejillas para<br />
cocinar. Consulte su manual<br />
del propietario de<br />
Charmglow ® .<br />
Paso 2<br />
Instale el soporte de montaje<br />
del motor en el lado<br />
izquierdo de la parrilla con<br />
dos tornillos y dos tuercas.<br />
Si su rotisserie está para<br />
modelo 810-7440-S<br />
Charmglow Parrilla de Gas<br />
de Acero Inoxidable siga<br />
el Paso 3a, para modelo<br />
810-7600-S Charmglow<br />
Chef Island siga el Paso<br />
3b.<br />
Paso 3a<br />
Instale el soporte para la<br />
varilla afuera de el lado<br />
derecho de la parrilla con<br />
dos tornillos y dos tuercas.<br />
Paso 3b<br />
Instale el soporte para la<br />
varilla adentro de el lado<br />
derecho de la parrilla con<br />
dos tornillos y dos tuercas.<br />
810-7440-S<br />
Paso 3a<br />
810-7600-S<br />
Paso 3b
810-7440-S<br />
810-7600-S<br />
Collarín<br />
Deslizante<br />
Varilla<br />
Hueco para collarín<br />
deslizante<br />
Soporte Derecho de<br />
Rotisserie<br />
Hueco para collarín<br />
deslizante<br />
Soporte Derecho de<br />
Rotisserie<br />
Paso 4<br />
Afloje el tornillo y el<br />
resbaladero fijo acanaló el fin<br />
de cuello en la varilla.<br />
Paso 5<br />
Alinee la ranura del cuello<br />
con el paréntesis del lado<br />
ilustrado. Apriete el tornillo<br />
fijo a cerrar el deslizando<br />
cuello en su lugar.<br />
10
LEA TODAS LAS ADVERTENCIAS EN LA PÁGINA 7 Y EN EL MANUAL<br />
DEL PROPIETARIO DE LA PARRILLA.<br />
11<br />
ADVERTENCIA<br />
INSTRUCCIONES PARA CONECTAR A TIERRA LOS ARTEFACTOS<br />
ELÉCTRICOS:<br />
Este artefacto (motor del asador estilo rotisserie) está equipado con un enchufe de tres<br />
clavijas (de puesta a tierra) para proteger al usuario contra el electrochoque. Este<br />
enchufe debe conectarse directamente a un receptáculo para tres clavijas conectado<br />
correctamente a tierra. No corte ni quite la clavija de puesta a tierra del enchufe.<br />
FUNCIONAMIENTO DEL <strong>ASADOR</strong> <strong>ESTILO</strong> <strong>ROTISSERIE</strong>:<br />
1. La parrilla viene preparada de la fábrica con agujeros de montaje para instalar el<br />
asador estilo rotisserie Charmglow ® Gas Outdoor Grill.<br />
2. Instale el motor del asador en el soporte de montaje.<br />
3. Verifique que el motor del asador está en la posición “OFF” (apagado).<br />
Nota: El motor del asador puede hacer girar un corte de carne o pollo de 12 libras<br />
máximo.<br />
4. Coloque un trinche en la varilla con las puntas en sentido opuesto a la manija.<br />
Por ahora no apriete el tornillo de fijación.<br />
5. Atraviese la carne con la varilla y deslícela hasta el centro de la misma.<br />
6. Coloque el segundo trinche en la varilla con las puntas hacia la carne.<br />
7. Deslice ambos trinches firmemente contra la carne y apriete bien los tornillos de<br />
fijación de los trinches.<br />
8. Verifique que la carne en la varilla está balanceada girando la varilla con la carne<br />
con las manos. La varilla debe girar en forma pareja sin mucho esfuerzo. Ajuste<br />
la carne en la varilla hasta que quede balanceada.<br />
9. Coloque la varilla con la carne en el motor y soporte.<br />
10. Cierre la tapa de la parrilla y coloque el interruptor del motor del asador en la<br />
posición “ON” (encendido).<br />
Nota: Los ruidos irregulares del motor indican que la varilla está desbalanceada y<br />
se podrían dañar seriamente los engranajes del motor.<br />
ADVERTENCIA: Siempre use guantes para el horno para protegerse las manos. Las<br />
partes metálicas pueden calentarse durante el uso. Tenga mucho<br />
cuidado cuando toque la varilla y los trinches.
COCCIÓN <strong>ESTILO</strong> <strong>ROTISSERIE</strong> - CONTINUACIÓN:<br />
11. Siempre coloque el interruptor del motor de asador en “OFF” (apagado) cuando<br />
abra la tapa de la parrilla.<br />
12. Una vez que la comida esté lista, use guantes para el horno para sacar la varilla<br />
del motor.<br />
13. Afloje los tornillos de fijación de los trinches y saque la carne deslizándola del<br />
extremo de la varilla.<br />
COCINAR A LA PARRILLA A LA TEMPERATURA APROPIADA:<br />
• Utilice un termómetro para carne para verificar que haya alcanzado una<br />
temperatura interna segura.<br />
• El Departamento de Agricultura de EE.UU. recomienda que los siguientes alimentos<br />
alcancen las siguientes temperaturas mínimas:<br />
Cerdo ----------------------- 160 grados F (71° C)<br />
Ave -------------------------- 180 grados F (82° C)<br />
Asados de carne ------- 145 grados F (62.8° C)<br />
CONSEJOS ÚTILES<br />
• Si precocina carne o pollo, hágalo inmediatamente antes de cocinarlo en la parrilla.<br />
• Nunca descongele carne a la temperatura ambiente o sobre un mostrador.<br />
• Refrigere los restos a más tardar 2 horas después de haber sacado la comida de la<br />
parrilla.<br />
Para mayor información, llame a la Línea de Información sobre Carne y Pollo de USDA<br />
al número sin cargo:<br />
800-535-4555<br />
LIMPIEZA Y MANTENIMIENTO:<br />
• La varilla y los trinches pueden desarmarse y lavarse con agua tibia y jabón para<br />
platos.<br />
Nota: Todas las partes metálicas, con excepción del motor, pueden lavarse en la<br />
lavadora de platos.<br />
• Es posible que después del primer uso el acero inoxidable al lado de la hornalla se<br />
oscurezca. Ésta es una propiedad normal del acero inoxidable utilizado en el<br />
asador.<br />
• Guarde el motor y las otras piezas en un lugar limpio y seco.<br />
• NO sumerja en motor o el cordón en agua para evitar los peligros de electrochoque.<br />
12
©2006 The <strong>Brinkmann</strong> Corporation<br />
Dallas, Texas 75244 U.S.A<br />
www.brinkmann.net<br />
FOR GRILL REPLACEMENT PARTS, COVERS & ACCESSORIES, PLEASE VISIT US ONLINE AT<br />
www.grillpartsonline.com<br />
PARA ENCONTRAR PARTES DE REEMPLAZO PARA SU PARRILLA, CUBIERTAS Y<br />
ACCESORIOS, FAVOR DE VISITARNOS AL www.grillpartsonline.com<br />
For 1-year from date of purchase, The <strong>Brinkmann</strong> Corporation warrants the Charmglow ® Gas Outdoor Grill Rotisserie against defects due to<br />
workmanship or materials to the original purchaser. The <strong>Brinkmann</strong> Corporation’s obligations under this warranty are limited to the following<br />
guidelines:<br />
• This warranty does not cover rotisseries that have been altered/modified or damaged due to: normal wear, rust, abuse, improper<br />
maintenance and/or improper use.<br />
• This warranty does not cover surface scratches, rust or heat damage to the finish, which is considered normal wear.<br />
• The <strong>Brinkmann</strong> Corporation may elect to repair or replace damaged units covered by the terms of this warranty.<br />
• This warranty extends to the original purchaser only and is not transferable or assignable to subsequent purchasers.<br />
The <strong>Brinkmann</strong> Corporation requires reasonable proof of purchase. Therefore, we strongly recommend that you retain your sales receipt or<br />
invoice. To obtain replacement parts for your Charmglow ® Gas Outdoor Grill Rotisserie under the terms of this warranty, please call Customer<br />
Service Department at 800-527-0717. A receipt will be required. The <strong>Brinkmann</strong> Corporation will not be responsible for any rotisseries<br />
forwarded to us without prior authorization.<br />
EXCEPT AS ABOVE STATED, THE BRINKMANN CORPORATION MAKES NO OTHER EXPRESS WARRANTY.<br />
THE IMPLIED WARRANTIES OF MERCHANTABILITY AND FITNESS FOR A PARTICULAR PURPOSE ARE LIMITED IN DURATION TO<br />
1-YEAR FROM THE DATE OF PURCHASE. SOME STATES DO NOT ALLOW LIMITATIONS ON HOW LONG AN IMPLIED WARRANTY<br />
LASTS, SO THE ABOVE LIMITATION MAY NOT APPLY TO YOU.<br />
ANY LIABILITY FOR INDIRECT, INCIDENTAL OR CONSEQUENTIAL DAMAGES ARISING FROM THE FAILURE OF THE CHARMGLOW ®<br />
GAS OUTDOOR GRILL <strong>ROTISSERIE</strong> TO COMPLY WITH THIS WARRANTY OR ANY IMPLIED WARRANTY IS EXCLUDED. CUSTOMER<br />
ACKNOWLEDGES THAT THE PURCHASE PRICE CHARGED IS BASED UPON THE LIMITATIONS CONTAINED IN THE WARRANTY SET<br />
OUT ABOVE. SOME STATES DO NOT ALLOW THE EXCLUSION OR LIMITATION OF INCIDENTAL OR CONSEQUENTIAL DAMAGES, SO<br />
THE ABOVE LIMITATION OR EXCLUSION MAY NOT APPLY TO YOU. THIS WARRANTY GIVES YOU SPECIFIC LEGAL RIGHTS, AND<br />
YOU MAY ALSO HAVE OTHER RIGHTS WHICH VARY FROM STATE TO STATE.<br />
Durante un año a partir de la fecha de compra, The <strong>Brinkmann</strong> Corporation garantiza al comprador original que el Asador estilo rotisserie<br />
Charmglow ® Gas Outdoor Grill está libre de defectos de materiales o mano de obra. Las obligaciones de The <strong>Brinkmann</strong> Corporation con<br />
respecto a esta garantía se limitan a lo siguiente:<br />
• Esta garantía no cubre rotisseries que hayan sido alteradas/modificado o dañadas debido a: uso normal, herrumbre, maltrato, mantenimiento<br />
inadecuado y/o uso inapropiado.<br />
• Esta garantía no cubre rayones superficiales, daño por herrumbre o por calor al acabado, lo cual se considera como uso normal.<br />
• The <strong>Brinkmann</strong> Corporation puede decidir reparar o reemplazar las unidades dañadas cubiertas bajo los términos de esta garantía<br />
• Esta garantía se otorga al comprador original únicamente y no es transferible o asignable a los compradores posteriores.<br />
The <strong>Brinkmann</strong> Corporation exige un comprobante de compra razonable. Por lo tanto, le recomendamos enfáticamente que retenga su recibo<br />
o factura de venta. Para obtener repuestos para el asador estilo rotisserie Charmglow ® Gas Outdoor Grill según los términos de esta garantía,<br />
sírvase contactar al Departamento de Servicio al Cliente al 800-527-0717. Se exigirá la presentación de un recibo. The <strong>Brinkmann</strong><br />
Corporation no será responsable de ningún asador estilo rotisserie devuelto a nosotros sin autorización previa.<br />
EXCEPTO POR LO INDICADO ARRIBA, THE BRINKMANN CORPORATION NO OTORGA NINGUNA OTRA GARANTÍA EXPRESA.<br />
LAS GARANTÍAS IMPLÍCITAS DE COMERCIABILIDAD Y ADECUACIÓN CON UN FIN EN PARTICULAR SON DE DURACIÓN LIMITADA DE<br />
1 AÑO A PARTIR DE LA FECHA DE COMPRA. ALGUNOS ESTADOS NO PERMITEN LIMITACIONES DE DURACIÓN DE UNA GARANTÍA<br />
IMPLÍCITA; POR LO TANTO, LA LIMITACIÓN ANTERIOR PODRÍA NO SER APLICABLE EN SU CASO.<br />
SE EXCLUYE CUALQUIER RESPONSABILIDAD POR DAÑOS INDIRECTOS, INCIDENTALES O CONSIGUIENTES DERIVADOS DE LA<br />
FALTA DE CUMPLIMIENTO DE ESTA GARANTÍA O DE CUALQUIER GARANTÍA IMPLÍCITA DEL <strong>ASADOR</strong> <strong>ESTILO</strong> <strong>ROTISSERIE</strong><br />
CHARMGLOW ® GAS OUTDOOR GRILL. EL CLIENTE RECONOCE QUE EL PRECIO DE COMPRA COBRADO SE BASA EN LAS<br />
LIMITACIONES CONTENIDAS EN LA GARANTÍA ANTERIOR. ALGUNOS ESTADOS NO PERMITEN LA EXCLUSIÓN O LIMITACIÓN DE<br />
LOS DAÑOS INCIDENTALES O CONSIGUIENTES; POR LO TANTO, LA LIMITACIÓN O EXCLUSIÓN ANTERIOR PODRÍA NO SER<br />
APLICABLE EN SU CASO. ESTA GARANTÍA LE OTORGA DERECHOS LEGALES ESPECÍFICOS Y USTED PUEDE TENER ADEMÁS<br />
OTROS DERECHOS QUE VARÍAN DE UN ESTADO A OTRO.<br />
140-7440-R<br />
7/06, 9/06, 12/06<br />
1-YEAR LIMITED WARRANTY<br />
1 AÑO DE GARANTÍA LIMITADA<br />
Owner’s Manual for Model:<br />
Manual del Propietario para el Modelo:<br />
812-7440-S