advertencia - Brinkmann
advertencia - Brinkmann
advertencia - Brinkmann

You also want an ePaper? Increase the reach of your titles
YUMPU automatically turns print PDFs into web optimized ePapers that Google loves.
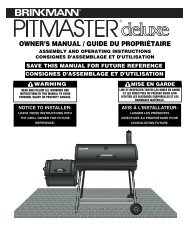
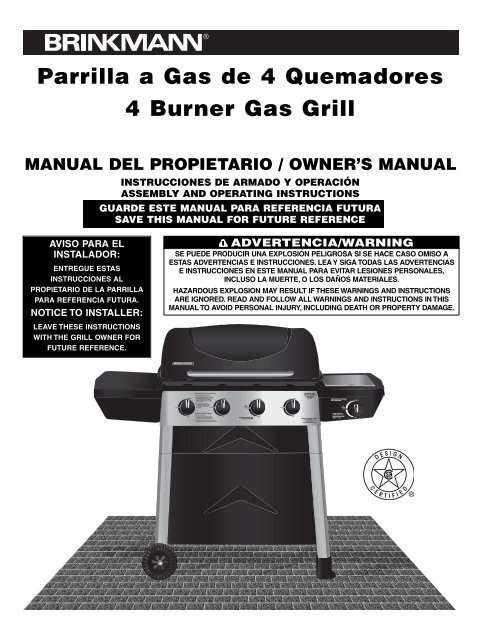
Parrilla a Gas de 4 Quemadores<br />
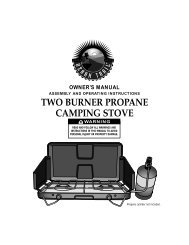
4 Burner Gas Grill<br />
MANUAL DEL PROPIETARIO / OWNER’S MANUAL<br />
INSTRUCCIONES DE ARMADO Y OPERACIÓN<br />
ASSEMBLY AND OPERATING INSTRUCTIONS<br />
GUARDE ESTE MANUAL PARA REFERENCIA FUTURA<br />
SAVE THIS MANUAL FOR FUTURE REFERENCE<br />
AVISO PARA EL<br />
INSTALADOR:<br />
ENTREGUE ESTAS<br />
INSTRUCCIONES AL<br />
PROPIETARIO DE LA PARRILLA<br />
PARA REFERENCIA FUTURA.<br />
NOTICE TO INSTALLER:<br />
LEAVE THESE INSTRUCTIONS<br />
WITH THE GRILL OWNER FOR<br />
FUTURE REFERENCE.<br />
ADVERTENCIA/WARNING<br />
SE PUEDE PRODUCIR UNA EXPLOSIÓN PELIGROSA SI SE HACE CASO OMISO A<br />
ESTAS ADVERTENCIAS E INSTRUCCIONES. LEA Y SIGA TODAS LAS ADVERTENCIAS<br />
E INSTRUCCIONES EN ESTE MANUAL PARA EVITAR LESIONES PERSONALES,<br />
INCLUSO LA MUERTE, O LOS DAÑOS MATERIALES.<br />
HAZARDOUS EXPLOSION MAY RESULT IF THESE WARNINGS AND INSTRUCTIONS<br />
ARE IGNORED. READ AND FOLLOW ALL WARNINGS AND INSTRUCTIONS IN THIS<br />
MANUAL TO AVOID PERSONAL INJURY, INCLUDING DEATH OR PROPERTY DAMAGE.
IMPORTANTES ADVERTENCIAS<br />
DE SEGURIDAD<br />
ES NUESTRO DESEO QUE ARME Y UTILICE SU PARRILLA EN LA FORMA MÁS<br />
SEGURA POSIBLE. EL PROPÓSITO DE ESTE SÍMBOLO DE ALERTA DE SEGURIDAD<br />
ES QUE USTED PRESTE ATENCIÓN A LOS POSIBLES PELIGROS CUANDO ARME<br />
Y UTILICE SU PARRILLA.<br />
¡CUÁNDO VEA ESTE SÍMBOLO DE ALERTA DE SEGURIDAD PRESTE ESPECIAL<br />
ATENCIÓN A LA INFORMACIÓN A CONTINUACIÓN!<br />
LEA DETENIDAMENTE TODAS LAS ADVERTENCIAS DE SEGURIDAD E<br />
INSTRUCCIONES ANTES DE ARMAR Y USAR LA PARRILLA.<br />
SI HUELE GAS:<br />
PELIGRO<br />
1. Apague el gas al artefacto.<br />
2. Apague cualquier llama expuesta.<br />
3. Abra la tapa.<br />
4. Si el olor persiste, subsistencia lejos de la aplicación y llame de inmediato a su proveedor de gas o<br />
a los bomberos.<br />
ADVERTENCIA<br />
1. No guarde ni use gasolina ni otros líquidos inflamables con vapores en las cercanías de este o de<br />
ningún otro artefacto.<br />
2. Un cilindro de propano líquido que no esté conectado para ser utilizado no debe ser mantenido<br />
cerca de éste o ningún otro artefacto.<br />
PELIGRO<br />
a) NO guarde un cilindro de gas de propano líquido de reserva debajo o cerca de este artefacto.<br />
b) Nunca llene el cilindro más de 80%.<br />
c) Si la información en (a) y (b) no se sigue exactamente, se puede producir un incendio y<br />
causar lesiones o hasta la muerte.<br />
1
ÍNDICE<br />
Advertencias generales . . . . . . . . . . . . . . . . . . . . . . . . . . . . . . . . . . . . . . . . . . . . . . . . . . . . . . . . . . . 3<br />
Instalación, especificaciones y uso seguro del cilindro de propano líquido . . . . . . . . . . . . . . . . . 4–6<br />
Conexión del cilindro de propano líquido y de la manguera / regulador a la parrilla . . . . . . . . . . 6–7<br />
Pruebas de detección de fugas . . . . . . . . . . . . . . . . . . . . . . . . . . . . . . . . . . . . . . . . . . . . . . . . . . 8–9<br />
Lista de verificación preliminar al encendido. . . . . . . . . . . . . . . . . . . . . . . . . . . . . . . . . . . . . . . . . . . 9<br />
Instrucciones de encendido. . . . . . . . . . . . . . . . . . . . . . . . . . . . . . . . . . . . . . . . . . . . . . . . . . . . 10–11<br />
Funcionamiento de la parrilla y recomendaciones útiles . . . . . . . . . . . . . . . . . . . . . . . . . . . . . 12–13<br />
Cuidado y mantenimiento apropiados . . . . . . . . . . . . . . . . . . . . . . . . . . . . . . . . . . . . . . . . . . . . 13–15<br />
Transporte y almacenaje . . . . . . . . . . . . . . . . . . . . . . . . . . . . . . . . . . . . . . . . . . . . . . . . . . . . . . 15–16<br />
Identificación y resolución de problemas. . . . . . . . . . . . . . . . . . . . . . . . . . . . . . . . . . . . . . . . . . . . . 16<br />
Preguntas frecuentes. . . . . . . . . . . . . . . . . . . . . . . . . . . . . . . . . . . . . . . . . . . . . . . . . . . . . . . . . 17–18<br />
Lista de partes e instrucciones de armado . . . . . . . . . . . . . . . . . . . . . . . . . . . . . . . . . . . . . . . . 19–27<br />
Información de la garantía. . . . . . . . . . . . . . . . . . . . . . . . . . . . . . . . . . . . . . . . . . . . . Cubierta trasera<br />
PELIGRO:<br />
Indica una situación peligrosa inminente la cual, si no se evita, producirá lesiones<br />
graves o aún la muerte.<br />
ADVERTENCIA:<br />
Manténgase alerta a la posibilidad de lesiones corporales graves si no se siguen las<br />
instrucciones. Asegúrese de leer y seguir cuidadosamente todos los mensajes.<br />
PRECAUCIÓN:<br />
Indica una situación posiblemente peligrosa la cual, si no se evita, puede producir<br />
lesiones menores o moderadas.<br />
PARA CUBIERTAS, ACCESORIOS Y OTROS PRODUCTOS, FAVOR DE VISITARNOS POR LA RED<br />
MUNDIAL EN: www.brinkmann.net<br />
PARA PARTES DE REEMPLAZO DE PARRILLA BAJO GARANTIA, FAVOR DE VISITARNOS POR LA<br />
RED MUNDIAL EN: www.grillpartsonline.com<br />
2
ADVERTENCIAS GENERALES<br />
ADVERTENCIA<br />
• Nunca use gas natural en una unidad diseñada para gas de propano líquido.<br />
• Nunca use briquetas de carbón en una parrilla de gas. Los pedacitos de madera para dar sabor se deben<br />
colocar en una cajita de fumar de metal para contener la ceniza y para prevenir fuegos.<br />
• Realice una prueba de detección de fugas en todas las conexiones antes de usar la parrilla por primera<br />
vez, aún si compró la parrilla armada, y después de cada llenado del tanque.<br />
• Nunca use un cerillo o llama expuesta para detectar fugas.<br />
CUIDADO: Los olores fuertes, los resfríos o la congestión nasal pueden impedir la detección de propano.<br />
Sea precavido y utilice sentido común cuando realice pruebas de detección de fugas.<br />
• Siempre mantenga la parrilla de gas alejada de la gasolina, fluido de encendedor, diluyente de pintura u<br />
otros vapores o líquidos inflamables o materiales combustibles.<br />
• Siempre revise la parrilla antes de cada uso, tal como se indica en la sección "Lista de verificación<br />
preliminar al encendido" de este manual.<br />
• NO obstruya el flujo del aire de combustión o ventilación.<br />
• Nunca coloque más de 15 libras sobre las mesas laterales. NO se apoye sobre las mesas laterales.<br />
• Mantenga a los niños y las mascotas alejados de la parrilla caliente. NO permita que los niños usen o<br />
jueguen cerca de esta parrilla.<br />
• NO deje la parrilla desatendida mientras está en uso.<br />
• NO permita que la manguera de gas haga contacto con superficies calientes.<br />
• NO permita que la grasa del agujero de drenaje caiga sobre la manguera o el conjunto del regulador de la<br />
válvula.<br />
• Mantenga todos los cables de alimentación eléctrica alejados del agua o superficies calientes.<br />
• Mantenga a mano un extinguidor de incendios aceptable para usar con productos de gas. Consulte con su<br />
autoridad local para determinar el tamaño y tipo correctos.<br />
• Para uso doméstico únicamente. NO use esta parrilla para ningún propósito que no sea el previsto.<br />
• NO use la parrilla bajo la influencia de alcohol o drogas.<br />
• La parrilla está caliente cuando está en uso. Para evitar las quemaduras:<br />
• NO trate de mover la parrilla.<br />
• Trabe las ruedas para que la parrilla no se mueva accidentalmente.<br />
• Use guantes protectores o guantes para el horno.<br />
• NO toque ninguna superficie caliente de la parrilla.<br />
• NO use ropa suelta ni permita que el cabello haga contacto con la parrilla.<br />
SEA PRECAVIDO Y UTILICE SENTIDO COMÚN CUANDO OPERE LA PARRILLA DE GAS.<br />
HACER CASO OMISO A LAS ADVERTENCIAS DE SEGURIDAD E INSTRUCCIONES EN ESTE MANUAL PUEDE<br />
PRODUCIR GRAVES LESIONES PERSONALES O DAÑOS MATERIALES.<br />
GUARDE ESTE MANUAL PARA REFERENCIA FUTURA.<br />
3
ADVERTENCIA<br />
• PARA USO EXTERIOR ÚNICAMENTE. NO opere la parrilla en áreas interiores o en un área cerrada<br />
como un garaje, cobertizo o pasadizo.<br />
• Use la parrilla AL AIRE LIBRE en un espacio bien ventilado alejado de viviendas u otros edificios para<br />
prevenir los peligros asociados con la acumulación de gas y los vapores tóxicos. Aunque el espacio<br />
libre mínimo son 36 pulgadas (91 cm), le recomendamos ampliamente que no opere este equipo a<br />
menos de 10 pies (3 m) de cualquier estructura, material combustible o cilindros de gas LP extra que<br />
no estén conectados al equipo. No adherirse a estas distancias prevendrá ventilación apropiada y<br />
puede aumentar el riesgo de daño de fuego y/o a propiedad, que podría resultar también en heridas<br />
personales.<br />
• Mantenga un espacio mínimo de 36 pulgadas (91 cm) entre todos los costados de la parrilla,<br />
barandas de terraza, paredes u otros materiales combustibles. NO use la parrilla debajo de<br />
construcciones combustibles elevadas desprotegidas.<br />
• NO use ni instale esta parrilla en o sobre un vehículo recreativo y/o un bote.<br />
INFORMACIÓN DE INSTALACIÓN:<br />
Este artefacto debe instalarse de acuerdo con:<br />
Todos los códigos locales relevantes o, si no existen códigos locales, ya sea:<br />
• Código de Gas Combustible de EE.UU. ANSI Z223.1 NFPA 54<br />
• Código de instalación de gas natural y propano: CAN/CGA B149.1<br />
• Código de instalación de gas natural: CAN/CGA B149.1 (Canadá)<br />
• Código de instalación de propano: CAN/CGA B149.2 (Canadá)<br />
Consulte con su distribuidor local de gas de propano líquido o con la compañía de gas natural con<br />
respecto a los códigos locales. Esta parrilla no fue diseñada para conectarla a una línea de<br />
suministro de gas natural. Si se utiliza una fuente eléctrica externa, debe estar conectada a tierra de<br />
acuerdo con los códigos locales o, en caso que no los haya, con el Código Eléctrico de EE.UU.,<br />
ANSI/NFPA 70, o el Código Eléctrico Canadiense, CSA 22.1.<br />
ADVERTENCIA<br />
CILINDRO DE GAS DE PROPANO LÍQUIDO (NO SE INCLUYE CON ESTA PARRILLA)<br />
El cilindro de propano líquido puede comprarse en el mismo lugar donde compró la parrilla.<br />
El cilindro de gas de propano líquido diseñado específicamente para usarse con esta parrilla debe tener<br />
una capacidad de 20 libras (9,1 kg) e incorporar una válvula de cilindro tipo 1 y un dispositivo de<br />
protección contra el llenado excesivo (OPD).<br />
• Esta parrilla esta diseñada para usarse con Worthington, Manchester o marca SMPC 20 libras<br />
(9,1 kg) cilindros. Cilindros de diferentes marcas DOT pueden utilizarse en esta parrilla si el<br />
cilindro tiene las dimensiones semejantes de la cima y anillos inferiores.<br />
• NO conecte esta parrilla a una válvula de cilindro POL #510 existente con roscas izquierdas. La<br />
válvula de tipo 1 puede identificarse con las roscas externas grandes en la salida<br />
de la válvula.<br />
• NO conecte un cilindro de propano que exceda esta capacidad.<br />
• NO conecte la parrilla a un cilindro que utilice cualquier otro tipo de dispositivo de conexión de<br />
válvula.<br />
4
ESPECIFICACIONES DEL CILINDRO:<br />
Cuando compre o cambie un cilindro para la parrilla de gas, debe estar construido y marcado de acuerdo<br />
con las especificaciones para cilindros de gas de propano líquido del Departamento de Transporte (DOT)<br />
de EE.UU. o la Norma Nacional de Canadá, CAN/CSA-B339: Cilindros, esferas y tubos para el transporte<br />
de artículos peligrosos; y de la Comisión, según corresponda; y debe estar equipado con un dispositivo de<br />
protección contra el llenado excesivo (OPD) aprobado y con un dispositivo de conexión de cilindro<br />
compatible con la conexión para artefactos para cocinar al aire libre.<br />
Además, el cilindro debe estar equipado con:<br />
• Una válvula de cierre que termine en una salida de válvula para cilindro de gas de Tipo 1.<br />
• Una válvula de Tipo 1 que prevenga el flujo de gas hasta que exista un sello positivo.<br />
• Un mecanismo para extraer el vapor.<br />
• Un collar para proteger la válvula de cierre del cilindro.<br />
• Un dispositivo de alivio de seguridad comunicado directamente con el espacio de vapor del cilindro.<br />
• Un dispositivo de protección contra el llenado excesivo (OPD) aprobado.<br />
ADVERTENCIA<br />
• Cierre la válvula del cilindro cuando no esté usando la parrilla.<br />
• Maneje el tanque con cuidado.<br />
• Siempre mantenga el cilindro en posición vertical.<br />
• Nunca conecte un cilindro de gas de propano líquido no regulado a la parrilla.<br />
• NO exponga los cilindros de gas de propano líquido a calor excesivo o a fuentes de encendido.<br />
• NO guarde un cilindro de gas de propano líquido de reserva debajo o cerca de la parrilla.<br />
• Sólo los distribuidores de gas de propano líquido capacitados deben llenar o reparar su<br />
cilindro.<br />
• NO permita que el cilindro sea llenado más del 80% de su capacidad.<br />
• Lea y siga todas las <strong>advertencia</strong>s e instrucciones en el cilindro y que acompañan a este<br />
producto.<br />
PELIGRO<br />
• Nunca guarde un cilindro de gas de propano líquido de reserva debajo o cerca de la parrilla.<br />
Esto puede causar una descarga de presión excesiva a través de la válvula de alivio de vapor<br />
y producir un incendio, explosión o lesiones personales graves, incluso la muerte.<br />
Nota:<br />
EL GAS DE PROPANO ES MÁS PESADO QUE EL AIRE Y SE ACUMULARÁ EN<br />
ÁREAS BAJAS. LA VENTILACIÓN APROPIADA ES EXTREMADAMENTE IMPORTANTE.<br />
• Mantenga el (los) orificio(s) de ventilación del gabinete del cilindro de gas de propano líquido<br />
despejados y sin obstrucciones o residuos.<br />
• NO inserte ningún objeto extraño en la salida de la válvula. Esto puede dañar el mecanismo de<br />
retención de retroceso. Un mecanismo de retención de retroceso puede causar una fuga y<br />
posiblemente producir una explosión, incendio, lesiones corporales graves o aún la muerte.<br />
5
ADVERTENCIA<br />
LLENADO DEL CILINDRO DE GAS DE PROPANO LÍQUIDO:<br />
• Sólo los distribuidores de gas de propano líquido capacitados deben llenar o reparar su cilindro.<br />
• Los tanques nuevos deben ser purgados antes de llenarlos; dígale al distribuidor de gas si está<br />
usando un tanque nuevo.<br />
• NO permita que el cilindro sea llenado más del 80% de su capacidad. Los tanques llenados en exceso<br />
pueden crear una condición peligrosa. Los tanques llenados en exceso pueden acumular presión y<br />
hacer que la válvula de alivio expulse vapores de gas de propano. El vapor es combustible y, si hace<br />
contacto con una fuente de chispas o una llama, puede producirse una explosión y causar<br />
quemaduras graves, lesiones corporales o hasta la muerte.<br />
• Siempre utilice una tapa de protección del cilindro cuando la parrilla no esté conectada al mismo.<br />
• Si cambia un cilindro en un programa de cambio apropiado, verifique que el cilindro tenga una válvula<br />
de Tipo 1 y un dispositivo de protección contra el llenado excesivo (OPD).<br />
INSTALACIÓN DEL CILINDRO DE GAS DE<br />
PROPANO LÍQUIDO EN LA PARRILLA:<br />
1. Verifique que la válvula del cilindro está cerrada girando la<br />
perilla en sentido horario.<br />
2. Coloque el cilindro en el sostenedor del tanque en la parte<br />
inferior de piernas correctas. Después resbale el apoyo del<br />
tanque sobre la manija del cilindro y asegúrelo firmemente.<br />
3. Sitúe el cilindro de manera que la abertura de la válvula<br />
apunte hacia el frente de la parrilla y de modo que la<br />
manguera no esté doblada o dañada<br />
4. Conecte o desconecte el regulador al cilindro de gas de<br />
propano líquido sólo cuando el cilindro está asentado en el<br />
portatanque.<br />
MANGUERA Y REGULADOR:<br />
1. El sistema no permitirá que fluya gas desde el cilindro hasta que<br />
haya una conexión positiva a la válvula.<br />
Nota: La válvula del cilindro debe cerrarse<br />
antes de conectar o desconectar.<br />
2. Un dispositivo térmico cerrará el flujo de gas si se expone a<br />
temperaturas de más de 240 ºF a 300 ºF (115 ºC a 150 ºC). Si<br />
esto ocurre, retire el conjunto completo del regular y deséchelo<br />
correctamente. Puede comprar un conjunto de regulador de<br />
repuesto comunicándose con el servicio de atención al cliente al<br />
800-527-0717. Se debe determinar la causa del calor excesivo y<br />
se debe corregir antes de usar la parrilla nuevamente.<br />
3. Cuando está activado, un dispositivo limitador de flujo del<br />
regulador restringe el flujo de gas a 10 pies cúbicos por hora. Si<br />
el dispositivo limitador de flujo está activado, aplique el<br />
Procedimiento de Reposición del Regulador.<br />
Sostenedor<br />
del Tanque<br />
PROCEDIMIENTO DE REPOSICIÓN DEL REGULADOR<br />
1. Gire las perillas de control de las hornillas a "OFF" (apagado), apague la válvula del cilindro y desconecte el<br />
regulador del tanque de gas de propano líquido. Espere aproximadamente dos minutos.<br />
2. Reconecte el regulador y gire lentamente la válvula del cilindro para encenderla. Ahora el dispositivo limitador<br />
de flujo está reposicionado.<br />
6
ADVERTENCIA<br />
• Nunca use la parrilla sin haber verificado que no hay fugas en las conexiones y mangueras de gas.<br />
Consulte los procedimientos apropiados en la sección de "Pruebas de detección de fugas" en este manual.<br />
ADVERTENCIA<br />
Se debe utilizar el conjunto del regulador de presión y manguera suministrado con la parrilla de gas.<br />
• NO procure conectar parrilla, como comprado para gas propano líquido (LP), a cualquier otra<br />
fuente del suministro del combustible tal como una línea de gas natural.<br />
• NO use ningún otro conjunto de regulador de presión/manguera que no sea el suministrado con la<br />
parrilla. El número de parte del conjunto de regulador de presión/manguera de repuesto debe ser<br />
<strong>Brinkmann</strong> Nº 155-9410-0 y puede obtenerse comunicándose con <strong>Brinkmann</strong> al 800-527-0717.<br />
• NO intente ajustar o reparar el regulador. El regulador está diseñado para operar a una presión de<br />
salida máxima de 11 pulgadas de columna de agua (2,74 kPa).<br />
Durante la instalación y/o reemplazo del cilindro de gas, mantenga la manguera de suministro sin<br />
dobleces ni daños.<br />
Inspeccione visualmente la manguera antes de cada uso para detectar daños, desgaste excesivo o<br />
deterioro. Si detecta daños, reemplace el conjunto antes de usar la parrilla. Sólo debe usarse el repuesto<br />
suministrado por el fabricante.<br />
ADVERTENCIA<br />
CONEXIÓN DE LA MANGUERA Y REGULADOR A UN CILINDRO DE GAS DE PROPANO LÍQUIDO<br />
• Verifique que la válvula del tanque está CERRADA antes de conectar el cilindro de gas de propano líquido a<br />
la parrilla. Gire la perilla de la válvula en sentido horario para cerrarla correctamente. Lea y siga todas las<br />
instrucciones y <strong>advertencia</strong>s en las etiquetas de seguridad de la manguera de suministro. Lea y siga todas<br />
las <strong>advertencia</strong>s en este manual con respecto al uso seguro de los cilindros de gas de propano líquido y de<br />
la manguera y regulador antes de conectar el cilindro a la parrilla. Lea y siga todas las <strong>advertencia</strong>s en el<br />
cilindro de propano líquido.<br />
CONEXIÓN DE LA MANGUERA Y REGULADOR<br />
1. Verifique que la válvula del cilindro está cerrada girando la perilla en sentido horario.<br />
2. Verifique que las perillas de control de las hornillas de la parrilla están en las posiciones OFF (de<br />
apagado).<br />
3. Quite la tapa de protección de plástico de la válvula del cilindro y del dispositivo de conexión.<br />
4. Sujete el regulador e inserte el niple del dispositivo de conexión en la salida de la válvula del cilindro<br />
de propano líquido. Asegúrese de que el dispositivo esté centrado correctamente.<br />
5. Gire la tuerca de acoplamiento grande en sentido horario con la mano y apriétela por completo. Tenga<br />
cuidado de no estropear las roscas de la tuerca de acoplamiento al instalarla en la válvula del cilindro.<br />
No apriete excesivamente la perilla en la válvula. No utilice herramientas para apretar la conexión.<br />
Nota: Si no puede hacer la conexión, repita los Pasos 4 y 5.<br />
6. Asegúrese de que la manguera no esté doblada, que no haga contacto con bordes afilados o<br />
superficies que puedan calentarse durante el uso.<br />
7. Revise todos los accesorios para asegurar que no haya fugas antes de encender la parrilla. Consulte<br />
la sección de "Pruebas de detección de fugas" en este manual.<br />
7
PRUEBAS DE DETECCIÓN DE FUGAS:<br />
Para impedir los peligros de incendio o explosión:<br />
• NO fume ni permita que haya fuentes de encendido en el área mientras realiza la prueba de<br />
detección de fugas.<br />
• Realice la prueba AL AIRE LIBRE únicamente, en un área bien ventilada.<br />
• Nunca realice una prueba para detectar fugas con un cerillo o llama expuesta.<br />
• Nunca realice una prueba para detectar fugas mientras está usando la parrilla o con la<br />
parrilla caliente.<br />
CUÁNDO REALIZAR UNA PRUEBA DE DETECCIÓN DE FUGAS:<br />
• Después de haber armado la parrilla y antes de encenderla por primera vez, aún cuando la haya<br />
comprado totalmente armada.<br />
• Cada vez que se llene nuevamente el cilindro de gas de propano líquido o si se reemplaza alguno<br />
de los componentes de gas.<br />
• Cada vez que haya movido la parrilla.<br />
• Por lo menos una vez al año si no ha usado la parrilla más de 60 días.<br />
VERIFICACIÓN DE AUSENCIA DE FUGAS:<br />
PELIGRO<br />
ADVERTENCIA<br />
1. Prepare una mezcla de 50% de agua y 50% de jabón<br />
líquido para lavar platos.<br />
2. Abra la tapa.<br />
3. Asegúrese de que todas las perillas de control estén<br />
en la posición "OFF" (de apagado).<br />
4. Encienda el suministro de combustible en la válvula del cilindro.<br />
Gire la perilla de la válvula del cilindro una vuelta en<br />
sentido contrahorario.<br />
5. Aplique la mezcla de agua jabonosa a los siguientes<br />
elementos:<br />
Preste atención a las burbujas<br />
I<br />
H F<br />
G<br />
A<br />
Soldadura del tanque (cilindro) de suministro.<br />
B<br />
Tuerca de conexión a la válvula del tanque.<br />
C<br />
Lado posterior de la tuerca de conexión al niple de<br />
latón.<br />
D<br />
Conexión del niple de latón al regulador.<br />
E<br />
Conexiones del regulador a las mangueras de<br />
suministro de gas.<br />
E<br />
J<br />
F<br />
Conexión de la manguera de suministro de gas al<br />
conjunto de la válvula de la hornilla lateral.<br />
K<br />
G<br />
Tapa del vástago de la válvula de la hornilla lateral.<br />
D<br />
H<br />
Conexión de la hornilla lateral a la manguera.<br />
C<br />
I<br />
J<br />
K<br />
Conexión de la manguera al múltiple de gas.<br />
El largo completo de la manguera de suministro de gas.<br />
Válvula del tanque al cilindro.<br />
B<br />
A<br />
8
6. Inspeccione cada uno de los elementos indicados (A-K) para ver si hay burbujas, lo cual indica una fuga.<br />
7. Cierre el suministro de gas en la válvula del cilindro.<br />
8. Gire las perillas de control para descargar la presión de gas en la manguera.<br />
9. Gire las perillas de control a la posición "OFF" (de apagado).<br />
10. Apriete todas las conexiones con fuga.<br />
11. Repita la prueba con agua jabonosa hasta que no detecte ninguna fuga.<br />
12. Apague el suministro de gas en la válvula del cilindro hasta que esté listo para usar la parrilla.<br />
13. Limpie el residuo jabonoso con agua fría y seque con una toalla.<br />
14. Espere 5 minutos para permitir la evacuación de todo el gas del área antes de encender la parrilla.<br />
¡PRECAUCIÓN!<br />
NO use la parrilla si no puede eliminar las fugas. Llame a un servicio capacitado<br />
de reparación de artefactos a gas.<br />
Nota:<br />
La prueba de detección de fugas debe realizarse en un área con iluminación adecuada<br />
para ver si se forman burbujas.<br />
ADVERTENCIA<br />
LISTA DE VERIFICACIÓN PRELIMINAR AL ENCENDIDO:<br />
Si hace caso omiso a estos pasos de seguridad, se pueden causar daños materiales, lesiones<br />
corporales, quemaduras graves o hasta la muerte. Estos pasos deben realizarse después de haber<br />
armado la parrilla y antes de cada uso. NO opere esta parrilla hasta que haya leído y entendido<br />
TODAS las <strong>advertencia</strong>s e instrucciones en este manual.<br />
LISTA DE VERIFICACIÓN PRELIMINAR AL ENCENDIDO:<br />
• Asegúrese de que la parrilla está armada correctamente.<br />
• Inspeccione la manguera de suministro de gas para detectar quemaduras, rozaduras, dobleces y<br />
verificar la trayectoria correcta antes de cada uso. Si hay evidencia de abrasión o desgaste excesivo,<br />
o si la manguera está cortada, debe reemplazarse antes de usar la parrilla. Reemplácela con una<br />
manguera y regulador Modelo Nº 155-9410-0 que puede obtenerse comunicándose con el servicio<br />
de atención al cliente al 800-527-0717.<br />
• Realice una prueba de detección de fugas en todas las conexiones y en la manguera de gas.<br />
Consulte la sección de "Pruebas de detección de fugas".<br />
• Asegúrese de que todos los cables de suministro eléctrico estén adecuadamente conectados a tierra.<br />
Mantenga todos los cables de suministro eléctrico y la manguera de suministro de combustible<br />
alejados de cualquier superficie calentada. La manguera debe estar a una distancia mínima de 3<br />
pulgadas de las superficies calientes.<br />
• Sitúe la parrilla en un sitio con suelo nivelado y con buena ventilación, a una distancia segura de<br />
materiales combustibles, edificios y salientes.<br />
• Instale correctamente la bandeja de recolección de grasa vacía debajo del agujero de drenaje de<br />
grasa en el extremo inferior de la parrilla para contener la grasa durante el uso.<br />
• NO obstruya el flujo del aire de combustión y ventilación.<br />
9
Lea, entienda y siga todas las <strong>advertencia</strong>s e instrucciones indicadas en este manual. NO pase por alto ninguna<br />
de las <strong>advertencia</strong>s o instrucciones indicadas en las secciones anteriores de este manual.<br />
INSTRUCCIONES DE ENCENDIDO:<br />
Siga las instrucciones al pie de la letra.<br />
ADVERTENCIA<br />
ADVERTENCIA<br />
1. ABRA LA TAPA DE LA PARRILLA antes de tratar de encender una hornilla para que no se acumulen vapores dentro<br />
de la parrilla. Puede producirse una explosión si la tapa de la parrilla no está abierta.<br />
2. Verifique que todas las perillas de control de las hornillas y la válvula del cilindro están en la posición OFF (apagado).<br />
3. Abra el suministro de combustible girando la perilla de la válvula del cilindro en sentido contrahorario a la posición<br />
totalmente abierta.<br />
4. NO se pare con la cabeza, el cuerpo o los brazos sobre la parrilla cuando la encienda.<br />
Nota:<br />
Si la hornilla no se enciende o la llama es muy baja, quizás esté bloqueada con un insecto o se haya activado el<br />
dispositivo limitador de flujo. Consulte "Instalación/Mantenimiento de las Hornillas" en la sección Cuidado y<br />
mantenimiento apropiados o el "Procedimiento de Reposición del Regulador" en la sección Conexión del cilindro<br />
de propano líquido y de la manguera / regulador a la parrilla.<br />
ENCENDIDO DE LAS HORNILLAS PRINCIPALES:<br />
1. Abra la tapa antes de encender la hornilla.<br />
2. Verifique que todas las perillas de control estén en la posición "OFF" (apagado).<br />
3. Empuje y gire la PERILLA DE CONTROL de la hornilla lentamente (2 a 3 segundos) a<br />
la posición “IGNIITE” (encender). Se debería escuchar el sonido clik del encendedor.<br />
Nota: Puede ser que el Paso 3 se necesite repetir 2-3 veces para<br />
encender parrilla.<br />
4. Si la hornilla NO se enciende en 5 segundos, gire la perilla de control a la posición<br />
"OFF" (apagado), espere 5 minutos para que se disipe el gas y repita el procedimiento de encendido.<br />
5. Para encender otras hornillas, primero encienda hornillas adyacentes empujando y girando perilla de control a “HIGH”.<br />
Siga Paso 4.<br />
6. Si no se enciende la hornilla al usar el encendedor, espere 5 minutos; consulte la sección de “Encendido de las<br />
hornillas principales con un cerillo”.<br />
7. Para apagar, gire cada perilla de control en sentido horario hasta que se trabe en la posición “OFF” (de apagado). Esto<br />
no apaga el flujo de gas del cilindro.<br />
ENCENDIDO DE LAS HORNILLAS PRINCIPALES CON UN CERILLO:<br />
1. Abra la tapa antes de encender.<br />
2. Gire las perillas de control de hornillas a posición "OFF" (apagado).<br />
3. Coloque un cerillo de papel en el extremo de encendedor con cerillo. Prenda el<br />
cerillo y colóquelo a través del agujero de encendido en el lado izquierdo de la<br />
parrilla aproximadamente a 1/2" pulgada (1 a 2 cm) de la hornilla.<br />
4. Gire la perilla de control de hornilla de EXTREMA IZQUIERDA a "HIGH" (llama<br />
fuerte). Hornilla debe encender en 5 segundos.<br />
5. Si la hornilla no se enciende, gire la perilla de control a la posición<br />
"OFF" (apagado) y espere 5 minutos para que se disipe el gas y repita<br />
el procedimiento de encendido.<br />
Agujero de Encendido<br />
Encendedor con Cerillo<br />
6. Para encender las demás hornillas, oprima y gire las perillas de control a la posición "HIGH" (llama fuerte) en<br />
secuencia de la izquierda a la derecha. Siga Paso 5.<br />
7. Si la hornilla no se enciende después de varios intentos con un cerillo, entonces hay un problema con el<br />
suministro de gas. Cierre el gas en la hornilla y en el cilindro. NO trate de operar la parrilla hasta haber<br />
encontrado y corregido el problema. Consulte la sección de "Identificación y corrección de problemas" de<br />
este manual.<br />
10
Nota:<br />
Si la hornilla no se enciende o la llama es muy baja, quizás esté bloqueada con un insecto o se haya<br />
activado el dispositivo limitador de flujo. Consulte "Instalación/Mantenimiento de las Hornillas" en la<br />
sección Cuidado y mantenimiento apropiados o el "Procedimiento de Reposición del Regulador" en la<br />
sección Conexión del cilindro de propano líquido y de la manguera / regulador a la parrilla.<br />
ENCENDIDO DE LA HORNILLA LATERAL:<br />
1. Abra la tapa antes de encender la hornilla lateral.<br />
2. Verifique que la perilla de control esté en la posición "OFF" (apagado).<br />
3. Empuje y gire la PERILLA DE CONTROL de la hornilla lentamente<br />
(2 a 3 segundos) a la posición “IGNIITE” (encender). Se debería escuchar<br />
el sonido clik del encendedor.<br />
Nota: Puede ser que el Paso 3 se necesite repetir 2-3 veces para<br />
encender parrilla.<br />
4. Si la hornilla NO se enciende en 5 segundos, gire la perilla de control a la<br />
posición "OFF" (apagado), espere 5 minutos para que se disipe el gas y repita<br />
el procedimiento de encendido.<br />
5. Para apagar, gire cada perilla de control en sentido horario hasta que se trabe en la posición "OFF"<br />
(apagado).<br />
ENCENDIDO DE LA HORNILLA LATERAL CON UN CERILLO:<br />
1. Abra la tapa de la hornilla lateral antes de encenderla.<br />
2. Gire la perilla de control de la hornilla a la posición "OFF" (apagado).<br />
3. Prenda y coloque un cerillo aproximadamente a 1/2" pulgada (1 a 2 cm) de la hornilla.<br />
4. Gire la perilla de control de la hornilla lateral a la posición "HIGH" (llama fuerte). La hornilla debe<br />
encenderse en 5 segundos.<br />
5. Si la hornilla no se enciende, gire la perilla de control a la posición "OFF" (apagado) y espere<br />
5 minutos para que se disipe el gas y repita el procedimiento de encendido.<br />
6. Si la hornilla no se enciende después de varios intentos con un cerillo, entonces hay un problema con el<br />
suministro de gas. Cierre el gas en la hornilla y en el cilindro. NO trate de operar la parrilla hasta haber<br />
encontrado y corregido el problema. Consulte la sección de "Identificación y corrección de problemas" de<br />
este manual.<br />
Nota:<br />
Observe llame: Llama deberia estar<br />
azul/amarillo entre 1"–2" cuando esta en<br />
"HIGH" (llama fuerte)<br />
APAGADO DE LA PARRILLA:<br />
1. Cierre la válvula del cilindro.<br />
2. Gire todas las perillas de control de las hornillas a la posición "OFF" (apagado).<br />
Nota:<br />
Apague el cilindro de propano líquido primero para evitar<br />
que quede gas en el sistema bajo presión.<br />
¡CUIDADO!<br />
• La válvula del cilindro siempre debe estar en la posición de<br />
apagado o cerrada cuando la parrilla no está en uso<br />
11<br />
Para cerrar la válvula del cilindro, gire la perilla<br />
en sentido horario hasta que se detenga.
OPERACIÓN DE LA PARRILLA:<br />
Nunca use carbón o fluido de encendedor dentro de la parrilla de gas. Lea y siga todas las<br />
<strong>advertencia</strong>s e instrucciones indicadas en las secciones anteriores de este manual.<br />
PREPARACIÓN DE LA PARRILLA PARA USARLA POR PRIMERA VEZ:<br />
• Debido al proceso de fabricación y preservación de los componentes de la parrilla, puede haber<br />
residuo de aceite presente en la hornillas y en las superficies de cocción de la parilla.<br />
• Antes de cocinar por primera vez en la parrilla, precaliéntela durante 15 minutos en "HIGH" (llama<br />
fuerte) para quemar este aceite residual.<br />
PRECALENTAMIENTO DE LA PARRILLA:<br />
• Se recomienda que precaliente la parrilla antes de usarla. Esto asegura que las superficies para<br />
cocinar estén a las temperaturas deseadas para dorar los azúcares de los alimentos cuando cocine.<br />
Después de encender la parrilla, coloque las perillas de control de las hornillas principales a la<br />
posición "HIGH" (llama fuerte) durante 10 a 15 minutos. Cierre la cubierta durante el período de<br />
precalentamiento.<br />
CONTROL DE LAS LLAMARADAS:<br />
• Las llamaradas son parte de cocinar carnes en una parrilla de gas. Esto agrega un sabor único a los<br />
alimentos cocinados en una parrilla de gas. Las llamaradas excesivas pueden cocinar demasiado los<br />
alimentos y producir una situación peligrosa para usted y la parrilla. Las llamaradas excesivas son el<br />
resultado de la acumulación de grasa en la sección inferior de la parrilla. Si esto ocurre, NO eche<br />
agua a las llamas. Esto puede producir salpicaduras de grasa y causar quemaduras graves o<br />
lesiones corporales. Si la grasa produce un incendio, cierre la tapa y apague las hornillas principales<br />
hasta que la grasa se queme. Tenga cuidado cuando abra la tapa ya que se pueden producir<br />
llamaradas repentinas.<br />
• NO deje la parrilla desatendida mientras está en uso.<br />
• NO mueva la parrilla cuando esté en uso. Trabe las ruedas en posición para estabilizar la<br />
parrilla.<br />
• NO utilice agua para apagar las llamaradas.<br />
ADVERTENCIA<br />
ADVERTENCIA<br />
• Tenga a mano un extinguidor de incendios adecuado para usar con artefactos a gas.<br />
PARA REDUCIR AL MÍNIMO LAS LLAMARADAS:<br />
• Recorte el exceso de grasa de la carne antes de cocinarla.<br />
• Cocine la carne con alto contenido de grasa (pollo o puerco) con llama suave o indirecta.<br />
• Verifique que la parrilla está sobre suelo nivelado y que la grasa puede salir de la parrilla a través del<br />
agujero de drenaje en la sección inferior y acumularse en la gaveta para grasa.<br />
COCCIÓN INDIRECTA:<br />
• La cocción indirecta es el proceso de cocinar sus alimentos sin que la fuente de calor esté<br />
directamente debajo de los mismos. Puede dorar carnes sobre una llama fuerte en un lado de la<br />
parrilla y cocinar lentamente un asado en el otro lado (sin encender) de la parrilla.<br />
12
RECOMENDACIONES PARA COCINAR EN LA PARRILLA<br />
LIMPIEZA<br />
• Siempre lávese bien las manos con agua caliente y jabón antes de manipular alimentos y después de<br />
tocar carne, pollo o mariscos crudos.<br />
• Cuando utilice una fuente para llevar carne, pollo o mariscos crudos a la parrilla, asegúrese de lavar bien<br />
la fuente con agua caliente y jabón antes de colocar alimentos cocidos en ella, o utilice fuentes distintas<br />
para los alimentos crudos y cocidos.<br />
• Nunca utilice los mismos utensilios para manipular carne cruda, pollo crudo o mariscos, a menos que los<br />
lave bien con agua caliente y jabón.<br />
• Nunca reutilice el adobo de la carne o pollo crudo en alimentos ya cocidos y listos para servir.<br />
COCINAR A LA PARRILLA A LA TEMPERATURA APROPIADA<br />
• Utilice un termómetro para carne para verificar que haya alcanzado una temperatura interna segura.<br />
• El Departamento de Agricultura de EE.UU. recomienda que los siguientes alimentos alcancen las<br />
siguientes temperaturas mínimas:<br />
Chuletas . . . . . . . . . . . . . . . . . . . . . . .145 grados F (62.8° C)<br />
Carne molida . . . . . . . . . . . . . . . . . . .160 grados F (71° C)<br />
Cerdo . . . . . . . . . . . . . . . . . . . . . . . . .160 grados F (71° C)<br />
Pollo . . . . . . . . . . . . . . . . . . . . . . . . . .180 grados F (82° C)<br />
Asados . . . . . . . . . . . . . . . . . . . . . . . .145 grados F (62.8° C)<br />
Mariscos . . . . . . . . . . . . . . . . . . . . . .140 grados F (60° C)<br />
Verduras . . . . . . . . . . . . . . . . . . . . . . .145 grados F (62.8° C)<br />
RECOMENDACIONES ÚTILES<br />
• Si precocina carne o pollo, hágalo inmediatamente antes de cocinarlo en la parrilla.<br />
• Nunca descongele carne a la temperatura ambiente o sobre un mostrador.<br />
• Refrigere los restos a más tardar 2 horas después de haber sacado la comida de la parrilla.<br />
• Para mayor información, llame a la Línea de Información sobre Carne y Pollo de USDA al número sin cargo<br />
800-535-4555.<br />
CUIDADO Y MANTENIMIENTO APROPIADOS<br />
• Para proteger su parrilla contra la oxidación excesiva, manténgala limpia y cubierta todo el tiempo cuando no<br />
la esté usando.<br />
• Lave las rejillas para cocinar y las placas de distribución de calor con agua jabonosa caliente, enjuáguelas<br />
bien y séquelas. Aplique una capa ligera de aceite vegetal líquido o en aerosol a las rejillas para cocinar.<br />
• Limpie el interior y exterior de la parrilla con un paño húmedo. Aplique una capa ligera de aceite vegetal<br />
líquido o en aerosol a la superficie interior para impedir la oxidación.<br />
• Mantenga exterior de parrilla limpia utilizando producto de limpieza para superficies de acero inoxidable.<br />
• Nunca aplique pintura a la superficie interior. Las manchas de oxidación en la superficie interior pueden<br />
pulirse, limpiarse y luego cubrirse con una capa ligera de aceite vegetal líquido o en aerosol para reducir al<br />
mínimo la oxidación.<br />
13
LIMPIEZA Y MANTENIMIENTO:<br />
• Mantenga el artefacto alejado de materiales combustibles, gasolina u otros vapores o líquidos inflamables.<br />
• Mantenga los orificios de ventilación del gabinete del cilindro sin residuos.<br />
• Observe las llamas de las hornillas para verificar que estén funcionando bien (consulte el dibujo en<br />
"Instalación/Mantenimiento de las Hornillas" en la sección de Cuidado y mantenimiento apropiados). Las<br />
arañas y otros insectos pueden formar nidos en la hornilla y bloquear el paso del gas.<br />
• Verifique lo siguiente por lo menos dos veces al año o después de largos períodos de almacenaje para cocinar<br />
sin peligro y obtener el mejor rendimiento de su parrilla.<br />
• Asegúrese de apretar toda la tornillería (tuercas, pernos, tornillos, etc.) por lo menos dos veces por año.<br />
CUIDADO: Algunas partes pueden tener bordes afilados. Use guantes de protección si es necesario.<br />
• Retire las rejillas para cocinar, las placas de distribución de calor y las hornillas del interior de la parrilla.<br />
Utilice un cepillo con agua caliente y detergente para quitar el exceso de residuos. NUNCA use un<br />
limpiahornos comercial. Enjuague bien con agua. Seque con una toalla y reinstale todos los componentes<br />
en la forma descrita en las instrucciones de armado.<br />
INSTALACIÓN/MANTENIMIENTO DE LAS HORNILLAS<br />
• Si bien las hornillas están fabricadas de acero Inoxidable, pueden oxidarse debido al calor extremo y a los<br />
ácidos de los alimentos. Inspeccione regularmente las hornillas para ver si tienen agujeros anormales y<br />
otras señales de daños por corrosión. Si detecta daños, reemplace la hornilla.<br />
• NO obstruya el flujo del aire de combustión y ventilación. Las arañas u otros insectos pueden hacer<br />
nidos y bloquear los tubos de las hornillas. Los tubos bloqueados impiden que fluya gas a las hornillas y<br />
puede producirse un incendio en el tubo o debajo de la parrilla. Siga las instrucciones a continuación<br />
para limpiar el tubo y/o reemplazar partes de la hornilla, o si tiene dificultad para encender la parrilla.<br />
1. Apague el gas en las perillas de control y en la válvula del tanque del cilindro de propano líquido.<br />
2. Retire las rejillas para cocinar y las placas de distribución del calor.<br />
3. Remueva tornillo de cada “pie” con desarmador.<br />
4. Levante con cuidado cada canal de paso y retírelo de las hornillas.<br />
5. Levante con cuidado las hornillas y retírelas de las bocas de las<br />
válvulas.<br />
Residuos<br />
6. Introduzca un cepillo angosto para botellas o un alambre doblado en<br />
forma de gancho pequeño en el tubo y en el orificio de la llama de cada hornilla varias veces.<br />
Nota: Use protección para los ojos cuando ejecute el procedimiento 7.<br />
Tuerca M5<br />
7. Utilice aire comprimido para soplar el tubo de cada hornilla; el aire<br />
debe salir por los orificios de las llamas. Verifique que salga aire de<br />
cada orificio.<br />
Tornillo M5<br />
8. Limpie con un cepillo de alambre la superficie exterior completa de la<br />
hornilla para quitar los restos de alimentos y residuos.<br />
9. Revise la hornilla para detectar daños; si nota grietas o agujeros<br />
grandes, reemplace la hornilla.<br />
Canal de Paso<br />
IMPORTANTE: La abertura de la hornilla debe deslizarse sobre la boquilla de la válvula.<br />
10. Cuidadosamente alinee los canales de paso entre las hornillas<br />
CORRECTAMENTE alineando el agujero del tornillo a la izquierda<br />
como ilustrado.<br />
Boquilla de la Válvula<br />
11. Reinstale los tornillos M5 y tuerca M5 en cada hornilla y canal de<br />
paso.<br />
Abertura de la Hornilla<br />
14
CONTINUACION DE INSTALACIÓN/MANTENIMIENTO DE LAS HORNILLAS<br />
Nota:<br />
Siga la sección “Verificación de Ausencia de Fugas” de este manual. Vuelva a encender las<br />
hornillas para verificar la operación apropiada)<br />
12. Reinstale las placas de distribución del calor y las rejillas para cocinar.<br />
OPERACION APROPIADA DE HORNILLA<br />
REJILLAS PARA COCINAR<br />
• Límpielas con agua y detergente de jabón suave. Se puede usar un cepillo con cerdas de latón o una<br />
esponja de limpieza de nilón para quitar los residuos de las superficies de acero inoxidable. No use<br />
cerdas de acero para limpiar las parrillas. El acero puede picar o agrietar el acabado. NO use un<br />
limpiahornos comercial.<br />
PLACAS DE DISTRIBUCIÓN DEL CALOR<br />
• Puede ser necesario inspeccionar y limpiar periódicamente la placa de distribución de calor para<br />
evitar la acumulación excesiva de grasa. Retire la rejilla para cocinar cuando la parrilla esté fría.<br />
Inspeccione las placas de distribución de calor y reemplácelas si están rotas o dañadas. No permita<br />
que las placas de distribución de calor se dañen hasta el punto que puedan caerse sobre las<br />
hornillas. Reemplace las placas de distribución de calor y las rejillas para cocinar y encienda las<br />
hornillas. Haga funcionar la parilla en "HIGH" (llama fuerte) durante 10 minutos para quitar el exceso<br />
de grasa.<br />
TRANSPORTE Y ALMACENAJE:<br />
ADVERTENCIA<br />
• Nunca mueva una parrilla cuando está caliente o con objetos sobre las superficies de cocción.<br />
• Asegúrese de que la válvula del cilindro esté cerrada. Después de mover la parrilla, verifique que no haya<br />
fugas en ninguna de las conexiones de gas. Consulte las instrucciones para las Pruebas de detección de<br />
fugas.<br />
• NO guarde un cilindro de gas de propano líquido de reserva (lleno o vacío) debajo o cerca de la parrilla.<br />
• Nunca guarde líquidos inflamables o latas de aerosol debajo o cerca de la parrilla.<br />
• NO apague incendios de grasa con agua.<br />
• Si el artefacto a gas para cocinar al aire libre no está en uso, se debe apagar el gas en el cilindro de<br />
suministro.<br />
• Se permite guardar un artefacto a gas para cocinar al aire libre en un área interior sólo si el cilindro se<br />
desconecta y se retira del artefacto.<br />
• Los cilindros deben guardarse afuera, fuera del alcance de los niños y no en un área interior, garaje u otra<br />
área cerrada.<br />
• Podría haber nidos de arañas u otros residuos bloqueando la hornilla cuando saque la parrilla del<br />
almacenaje. Consulte "Instalación/Mantenimiento de las Hornillas" en la sección de Cuidado y<br />
mantenimiento apropiados.<br />
15
ANTES DE GUARDAR LA PARRILLA:<br />
• Verifique que la válvula del cilindro está bien cerrada.<br />
• Limpie todas las superficies.<br />
• Aplique una capa ligera de aceite para cocinar a las hornillas para evitar la oxidación excesiva.<br />
• Si va a guardar la parrilla en un área interior, desconecte el tanque de propano líquido y déjelo<br />
AFUERA.<br />
• Coloque una tapa de protección sobre el tanque de propano líquido y guarde el tanque afuera en un<br />
área bien ventilada y fuera de la luz directa del sol.<br />
• Limpie la hornilla antes de usar después del almacenaje, al comienzo de la temporada de uso de la<br />
parrilla o si no usa la parrilla por un mes. Las arañas y otros insectos pueden formar nidos en los<br />
tubos de las hornillas (especialmente durante los meses de frío). Estos nidos pueden producir<br />
llamaradas en los tubos de las hornillas o debajo de la parrilla.<br />
• Si está guardando la parrilla afuera, cúbrala con la cubierta para protegerla del tiempo.<br />
IDENTIFICACIÓN Y CORRECCIÓN DE PROBLEMAS<br />
Problema:<br />
• La hornilla no enciende<br />
Causas posibles:<br />
1. Revise el nivel de combustible en el cilindro de propano líquido.<br />
2. Chispa de electrodo defectuosa. Vea si puede encender la<br />
parrilla con un cerillo. Puede ser necesario ajustar el electrodo o<br />
colector.<br />
3. Es posible que la hornilla no esté bien asentada.<br />
4. Es posible que la hornilla esté obstruida.<br />
5. Es posible que la válvula del cilindro esté cerrada.<br />
6. El regulador no está asentado correctamente sobre la válvula<br />
del cilindro.<br />
• Llamas en la perilla de control<br />
• Llamas amarillas en la hornilla<br />
• La llama se apaga en la<br />
posición "LOW" (llama suave)<br />
• La hornilla no se calienta lo<br />
suficiente<br />
• La parrilla está demasiado<br />
caliente<br />
1. Es posible que los agujeros de la hornilla estén obstruidos.<br />
Consulte "Instalación/Mantenimiento de las Hornillas" en la<br />
sección de Cuidado y mantenimiento apropiados.<br />
2. La hornilla está asentada incorrectamente sobre la válvula de<br />
control.<br />
3. Las conexiones de gas pueden estar sueltas. Revise para<br />
verificar que no haya fugas y ajuste todas las conexiones.<br />
1. La hornilla está obstruida. Consulte "Instalación/Mantenimiento<br />
de las Hornillas" en la sección de Cuidado y mantenimiento<br />
apropiados.<br />
1. Es posible que los agujeros de la hornilla estén obstruidos.<br />
Consulte "Instalación/Mantenimiento de las Hornillas" en la<br />
sección de Cuidado y mantenimiento apropiados.<br />
2. La parrilla no se precalentó lo suficiente.<br />
3. La hornilla está asentada incorrectamente sobre la válvula de<br />
control.<br />
1. Se activó el dispositivo de control de flujo en el regulador.<br />
Consulte el Procedimiento de reposición del regulador en la<br />
sección Conexión del cilindro de propano líquido y de la<br />
manguera / regulador a la parrilla.<br />
1. Acumulación excesiva de grasa produce llamaradas.<br />
2. Regulador dañado o defectuoso. Reemplácelo con partes<br />
autorizadas de fábrica.<br />
3. Cocine en una posición de temperatura más baja.<br />
16
El número de modelo y número de serie de la parrilla y la información para contactarse con el Servicio de atención al cliente<br />
de <strong>Brinkmann</strong> se incluyen en una etiqueta plateada abajo del panal de control o en el costado de la caja de la misma,<br />
debajo del estante lateral y tambien atras del assador en el panal.<br />
Estas preguntas y respuestas son para su conocimiento general y podrían no ser aplicables a su modelo de parrilla.<br />
Pregunta: ¿Por qué mi parrilla no enciende correctamente<br />
Respuesta: Siempre siga las instrucciones de encendido indicadas en el panel de control o en este manual. También<br />
revise estas causas:<br />
• Revise el suministro de gas de propano líquido.<br />
• Verifique que todas las conexiones de gas están seguras.<br />
• Quizás sea necesario reemplazar la pila AA del encendedor.<br />
• Los cables de encendido pueden estar sueltos. Quite la pila, inspeccione la caja de conexiones del encendedor<br />
situada detrás el panel de control y conecte los cables sueltos.<br />
• Puede ser necesario reemplazar las puntas de los electrodos de chispa. Con el suministro de gas cerrado y la<br />
perilla de control en la posición "OFF" (apagado), presione el botón del encendedor y haga que otra persona<br />
verifique la presencia de una chispa en las puntas de los electrodos. El espacio entre la punta del electrodo de<br />
chispa y el receptor de chispa debe ser de aproximadamente 3/16 pulg. Si es necesario ajustar la punta del<br />
electrodo, dóblela para dejar el espacio apropiado.<br />
• Verifique que el extremo del tubo venturi de cada hornilla está situado correctamente sobre su accesorio del orificio<br />
de la válvula de gas.<br />
• Puede haber una obstrucción en la línea de gas. Para corregirla, quite la manguera / regulador de gas de propano<br />
líquido o la línea combustible de gas natural de la parrilla. Abra el suministro de gas durante un segundo para<br />
determinar si hay obstrucción. Si no hay obstrucción, reconecte la línea de combustible. Si la línea de combustible<br />
está bloqueada, reemplácela con un nuevo conjunto de manguera / regulador.<br />
• Si sospecha una obstrucción en el conjunto de la manguera / regulador, en el orificio o en las válvulas de gas, llame<br />
al Servicio de atención al cliente de <strong>Brinkmann</strong> al 800-527-0717.<br />
Pregunta: ¿Por qué mi parilla de gas de propano líquido tiene una llama suave o de color anaranjado / amarillo<br />
Respuesta: Es necesario purgar el aire de la línea de gas o reposicionar el dispositivo limitador de flujo del regulador. Si<br />
se abre la válvula por completo o demasiado rápido, se activa el dispositivo limitador de flujo del regulador para que<br />
apague el flujo de gas, lo cual impide que fluya demasiado gas a la parrilla. NOTA: Se debe seguir este procedimiento<br />
cada vez que se conecte un nuevo tanque de gas de propano líquido a la parrilla:<br />
REPOSICIÓN DEL DISPOSITIVO LIMITADOR DE FLUJO DEL REGULADOR<br />
• Gire la perilla de control a la posición "OFF" (apagado).<br />
• Apague el tanque de gas de propano líquido en la válvula del cilindro.<br />
• Desconecte el regulador del tanque de gas de propano líquido.<br />
• Deje estar durante dos minutos.<br />
PREGUNTAS FRECUENTES<br />
• Reconecte el regulador al tanque de gas de propano líquido.<br />
• Abra la tapa de la parrilla o de la hornilla lateral. Gire lentamente la válvula del cilindro a 1/4 ó 1/2 abierta.<br />
• Encienda la parrilla siguiendo las instrucciones en el panel de control o en el manual del propietario<br />
Pregunta: ¿Cómo y cuándo limpio los componentes de cocción interiores de la parrilla<br />
Respuesta: Use un cepillo de limpieza de fibra o latón para limpiar el interior de la parrilla, las rejillas para cocinar, las<br />
placas de distribución de calor y los recipientes de grasa. Nunca use un cepillo de alambre o raspador metálico en las<br />
partes de acabado de porcelana ya que puede rayar o estropear el acabado de porcelana y fomentar la oxidación.<br />
17
PREGUNTAS FRECUENTES<br />
Limpieza de las rejillas para cocinar de acero inoxidable: Lave las rejillas con un detergente suave y enjuáguelas<br />
con agua caliente antes del uso inicial y según sea necesario. NO use un limpiahornos comercial. Para residuos de<br />
alimentos persistentes, utilice un desgrasador y un cepillo de limpieza de fibra o latón.<br />
Limpieza de rejillas para cocinar de hierro fundido con acabado de porcelana: Lave las rejillas con un detergente<br />
suave y enjuáguelas con agua caliente antes del uso inicial y según sea necesario. Para residuos de alimentos<br />
persistentes, utilice un desgrasador y un cepillo de limpieza de fibra o latón. Séquelas de inmediato con un paño suave o<br />
toallas de papel.<br />
Limpieza de la placa de distribución de calor: Las placas de distribución de calor se deben limpiar cada vez que se<br />
acumula comida o gotas de grasa para reducir la posibilidad de llamaradas. Lave las placas de distribución de calor con<br />
un detergente suave y enjuáguelas con agua caliente. Para residuos de alimentos persistentes, utilice un desgrasador y<br />
un cepillo de limpieza de fibra o latón. Nunca use un cepillo de alambre o raspador metálico en las placas de distribución<br />
de calor con acabado de porcelana ya que puede rayar o estropear el acabado de porcelana y fomentar la oxidación.<br />
Limpieza de la bandeja para grasa y/o la gaveta para grasa: Es necesario inspeccionar la bandeja para grasa y/o<br />
gaveta para grasa (en algunos modelos) antes de cada uso de la parrilla para reducir la probabilidad de incendio. Quite<br />
la grasa (una espátula de plástico funciona bien) y lave todas las partes con jabón suave o desgrasador y una solución<br />
de agua tibia<br />
Pregunta: ¿Qué es lo que causa la oxidación de las partes de la parrilla y cuál es su efecto en los materiales de la<br />
misma<br />
Respuesta: La oxidación es un proceso natural que puede ocurrir en piezas de hierro fundido y acero. La oxidación no<br />
afectará el funcionamiento a corto plazo de la parrilla. Las partes de la parrilla de acero inoxidable no se oxidarán. Sin<br />
embargo, la exposición a la intemperie y el calor extremo pueden hacer que la tapa de acero inoxidable se torne de un<br />
color bronce. Esto es decoloración, no oxidación, y no se considera un defecto de fabricación.<br />
Pregunta: ¿Por qué la tapa de la parrilla de acero inoxidable se descolora y cómo la puedo limpiar<br />
Respuesta: El humo, la exposición a la intemperie y el calor extremo pueden hacer que la tapa de acero inoxidable se<br />
torne de un color bronce. Esto no debe confundirse con oxidación y no es un defecto del producto. Los aceites para<br />
maquinaria utilizados en el proceso de fabricación del acero inoxidable, y también el aceite para cocinar y la tapa sucia<br />
de la parrilla pueden fomentar la decoloración de la tapa si no se limpian antes de usar la parrilla. Después de armar la<br />
parrilla, quite la película de protección de PVC de la tapa y utilice un limpiador de acero inoxidable y un paño suave para<br />
quitar el adhesivo residual y los aceites de adentro y afuera de la tapa. Nunca use limpiadores o fregadores abrasivos.<br />
Además de la limpieza inicial, la limpieza de rutina para quitar el polvo, la grasa y los aceites ayudará a prevenir la<br />
decoloración de la tapa.<br />
Pregunta: ¿Puedo convertir la parrilla de gas de propano a gas natural<br />
Respuesta: La mayoria de parrillas de gas están fabricadas de acuerdo con especificaciones exactas y están<br />
certificadas únicamente para uso con gas de propano o gas natural. Sin embargo, algunos modelos pueden convertirse<br />
con seguridad utilizando juegos de conversión disponibles para ciertos modelos. Por favor llame a servicio al cliente de<br />
<strong>Brinkmann</strong> al 800-527-0717 para averiguar si su parrilla su puede convertir.<br />
Pregunta: ¿Por qué el conjunto de la manguera / regulador incluido con mi parrilla no calza en el tanque de gas de<br />
propano líquido antiguo que he usado durante años<br />
Respuesta: El Gobierno de EE.UU. regula los artefactos de gas y los tanques de gas de propano líquido. Los<br />
conectores del tanque de gas de propano líquido fueron actualizados para garantizar el cumplimiento de los<br />
reglamentos que fueron cambiados. Si su tanque de gas de propano líquido no calza en la manguera /regulador<br />
suministrado con su nueva parrilla, el tanque está obsoleto y debe ser reemplazado. NOTA: A partir del 1º de Abril de<br />
2002, todos los tanques de gas de propano líquido deben incluir un dispositivo "OPD" de protección contra el sobreflujo.<br />
Este dispositivo interno impide que un tanque de gas de propano líquido se llene en exceso. Los tanques sin una válvula<br />
OPD no pueden volver a llenarse.<br />
Pregunta: Algunas veces escucho un zumbido proveniente del regulador de gas. ¿Debo preocuparme de eso<br />
Respuesta: El zumbido se debe al flujo de gas a través del regulador. Un poco de ruido es normal y no interfiere con el<br />
funcionamiento de la parrilla. Si el zumbido es fuerte y excesivo, puede ser necesario purgar el aire de la línea de gas o<br />
reposicionar el dispositivo limitador de flujo del regulador siguiendo el Procedimiento de reposición del regulador en la<br />
sección "Conexión del cilindro de propano líquido y de la manguera / regulador a la parrilla. Se debe seguir este<br />
procedimiento cada vez que se conecte un nuevo tanque de gas de propano líquido a la parrilla. Si necesita ayuda,<br />
consulte el manual del propietario o llame al Servicio de atención del cliente de <strong>Brinkmann</strong> al 800-527-0717.<br />
18
INSTRUCCIONES DE ARMADO<br />
LEA DETENIDAMENTE TODAS LAS ADVERTENCIAS DE SEGURIDAD<br />
E INSTRUCCIONES ANTES DE ARMAR Y USAR LA PARRILLA<br />
RECOMENDAMOS QUE ESTA UNIDAD SEA ARMADA POR DOS PERSONAS<br />
Se necesitan las siguientes herramientas incluidas para armar esta <strong>Brinkmann</strong> ® Parrilla a Gas de<br />
4 Quemadores:<br />
• Destornillador<br />
LISTA DE PARTES:<br />
1 1 Montaje del Cuerpo de la Parrilla<br />
2 1 Anaquel para Calentar<br />
3 3 Parrillas para Cocinar<br />
4 4 Placas de Distribución del Calor<br />
5 1 Recipiente para Grasa<br />
6 1 Mesa Lateral Izquierda<br />
7 1 Rejilla de la Hornilla Lateral<br />
8 1 Mesa Lateral Derecha<br />
9 2 Abrazaderas del Carro<br />
10 1 Montaje del Carro<br />
11 2 Ruedas<br />
12 2 Topes de las Patas del Carro<br />
13 1 Apoyo del Tanque<br />
14 2 Pernos del Eje<br />
1 Perilla del Quemador Lateral<br />
15<br />
19
1<br />
2<br />
3<br />
4<br />
6<br />
7<br />
5<br />
8<br />
9<br />
10<br />
12<br />
11<br />
13<br />
14 15<br />
PARA CUBIERTAS, ACCESORIOS Y OTROS PRODUCTOS, FAVOR DE VISITARNOS POR LA RED<br />
MUNDIAL EN: www.brinkmann.net<br />
PARA PARTES DE REEMPLAZO DE PARRILLA BAJO GARANTIA, FAVOR DE VISITARNOS POR LA<br />
RED MUNDIAL EN: www.grillpartsonline.com<br />
(Se requerirá el comprobante de compra.)<br />
Inspeccione el contenido de la caja para verificar que todas las partes estén incluidas e intactas.<br />
20
CONTENIDO DE LA BOLSA DE PARTES<br />
Verifique que tiene todos los artículos indicados en la LISTA DE PARTES y en el<br />
CONTENIDO DE LA BOLSA DE PARTES antes de comenzar con el proceso de instalación.<br />
LA BOLSA DE PARTES INCLUIRÁ LO SIGUIENTE:<br />
Cant.<br />
1 Destornillador<br />
Destornillador<br />
21
Elija un área de montaje buena,<br />
despejada y consiga un amigo para<br />
que lo ayude a armar la parrilla.<br />
Coloque cartones debajo para<br />
proteger el acabado de la parrilla y<br />
el área de montaje.<br />
PRECAUCIÓN: Algunas piezas<br />
pueden contener<br />
bordes cortantes.<br />
Use guantes<br />
protectores de ser<br />
necesario.<br />
Paso 1<br />
Extienda el montaje del carro<br />
hasta que los brazos plegables se<br />
traben en su lugar.<br />
Abrazadera<br />
(izquierda) del Carro<br />
Paso 2<br />
El montaje del carro posee dos<br />
pernos pre anexados a cada lado<br />
de las patas del carro. Anexe la<br />
abrazadera derecha del carro<br />
(con el soporte del tanque) a las<br />
patas derechas del carro,<br />
deslícelas y luego ajuste los<br />
pernos firmemente. Anexe la<br />
abrazadera izquierda del carro a<br />
las patas izquierdas del carro,<br />
deslícelas y luego ajuste los<br />
pernos firmemente.<br />
Sostenedor del Tanque<br />
Abrazadera (derecha)<br />
del Carro<br />
22
Nota: Con la ayuda de un amigo, de<br />
vuelta el carro ensamblado.<br />
Trate de minimizar la tensión<br />
en las patas.<br />
Rueda<br />
Pierna<br />
Paso 3<br />
Instale las ruedas como muestra la<br />
ilustración, quitando primero el<br />
perno de tirón. Inserte los pernos<br />
del eje de la rueda a través de las<br />
patas asegurándolos con el perno<br />
de tirón.<br />
Perno del Eje<br />
Perno<br />
de Tirón<br />
Paso 4<br />
Anexe los topes de las patas a las<br />
patas derechas del carro.<br />
Nota:<br />
Con la ayuda de un amigo,<br />
coloque el carro en su<br />
posición vertical. Al ejecutar el<br />
Paso 5, levante el cuerpo de<br />
la parrilla desde los paneles<br />
frontal y trasero para evitar<br />
lesiones en las manos y<br />
dedos. Asegúrese de pasar el<br />
montaje de la<br />
manguera/regulador sobre la<br />
barra transversal del armazón<br />
del carro.<br />
23
Montaje del<br />
Cuerpo de la<br />
Parrilla<br />
Paso 5<br />
El cuerpo de la parrilla se apoyará<br />
sobre la parte superior de las patas<br />
del carro. Alinee los orificios de los<br />
pernos ubicados en la parte interna de<br />
los soportes del cuerpo de la parrilla.<br />
Asegure firmamente los pernos preatados.<br />
Advertencia:<br />
Nunca use la parrilla sin<br />
antes haber verificado la<br />
existencia de fugas en todas<br />
las mangueras y conexiones<br />
de gas. Consulte la sección<br />
sobre "Pruebas de Detección<br />
de Fugas" en este manual<br />
para cumplir con los<br />
procedimientos apropiados.<br />
Paso 6<br />
Anexe el montaje de la mesa lateral<br />
izquierda al lateral izquierdo del<br />
cuerpo de la parrilla. Coloque la mesa<br />
sobre los pernos y deslícela hacia<br />
atrás de la parrilla, luego ajuste los<br />
pernos firmemente. Fije el panel<br />
frontal de la mesa lateral izquierda al<br />
cuerpo de la parrilla apretando<br />
firmamente el perno pre-atado.<br />
Paso 7<br />
Ate el apoyo del tanque insertando el<br />
perno de carro pre-atado a través del<br />
orificio de llave, resbale hacia abajo y<br />
después utilice la tuerca de ala para<br />
asegurar.<br />
Tuerca de Ala<br />
Apoyo del Tanque<br />
Soporte del Tanque<br />
Perno de Carro<br />
24
Paso 8<br />
Anexe el montaje del quemador<br />
lateral derecho al cuerpo de la<br />
parrilla lateral derecho. Coloque el<br />
montaje del quemador lateral<br />
derecho sobre los pernos y<br />
deslícelo hacia atrás de la parrilla,<br />
luego ajuste los pernos<br />
firmemente. Fije el panel frontal de<br />
la mesa lateral derecha al cuerpo<br />
de la parrilla apretando firmamente<br />
el perno pre-atado.<br />
Venturi del Quemador<br />
Válvula del<br />
Quemador<br />
Lateral<br />
Boquilla<br />
de la<br />
Válvula<br />
Paso 9<br />
Inserte la boquilla de la válvula del<br />
quemador lateral en el venturi del<br />
quemador lateral. Luego inserte el<br />
montaje de la válvula del<br />
quemador lateral a través de los<br />
orificios principales en el panel<br />
frontal de la mesa del quemador<br />
lateral. Deslice hacia atrás para<br />
trabarlo en su lugar. Ajuste los<br />
pernos firmemente.<br />
Conductor del<br />
Encendedor de la<br />
Hornilla Lateral<br />
Paso 10<br />
Anexe el cable conductor del<br />
encendedor del quemador lateral<br />
al electrodo, como se ilustra.<br />
25
Paso 11<br />
Coloque la reijlla de la hornilla<br />
lateral sobre la hornilla. Instale la<br />
perilla del control del quemador<br />
sobre el vástago de la válvula.<br />
Perilla del<br />
Quemador<br />
Lateral<br />
Paso 12<br />
Cuelgue el recipiente para la grasa<br />
sobre los soportes en la parte<br />
inferior del montaje del cuerpo de<br />
la parrilla.<br />
Paso 13<br />
Coloque las placas de<br />
distribución del calor en el nivel<br />
inferior del montaje del cuerpo de<br />
la parrilla, directamente sobre los<br />
quemadores.<br />
Recipiente para Grasa<br />
Anaquel para<br />
Calentar<br />
Paso 14<br />
Inserte el anaquel para calentar a<br />
través de los orificios en la tapa de<br />
la parrilla y luego inserte las patas<br />
del anaquel para calentar a través<br />
de los orificios en el cuerpo de la<br />
parrilla.<br />
Parrillas para<br />
Cocinar<br />
Placas de<br />
Distribución<br />
del Calor<br />
Paso 15<br />
Coloque las parrillas para cocinar<br />
sobre las nervaduras de apoyo<br />
directamente sobre las placas de<br />
distribución del calor.<br />
26
27<br />
<strong>Brinkmann</strong> ® 9410 (Armada)
IMPORTANT SAFETY<br />
WARNINGS<br />
WE WANT YOU TO ASSEMBLE AND USE YOUR GRILL AS SAFELY AS POSSIBLE.<br />
THE PURPOSE OF THIS SAFETY ALERT SYMBOL IS TO ATTRACT YOUR<br />
ATTENTION TO POSSIBLE HAZARDS AS YOU ASSEMBLE AND USE YOUR GRILL.<br />
WHEN YOU SEE THE SAFETY ALERT SYMBOL<br />
PAY CLOSE ATTENTION TO THE INFORMATION WHICH FOLLOWS!<br />
READ ALL SAFETY WARNINGS AND INSTRUCTIONS CAREFULLY<br />
BEFORE ASSEMBLING AND OPERATING YOUR GRILL.<br />
IF YOU SMELL GAS:<br />
DANGER<br />
1. Shut off gas to the appliance.<br />
2. Extinguish any open flame.<br />
3. Open Lid.<br />
4. If odor continues, keep away from the appliance and immediately call your gas supplier or your<br />
fire department.<br />
WARNING<br />
1. DO NOT store or use gasoline or other flammable liquids or vapors in the vicinity of this or any<br />
other appliance.<br />
2. An LP cylinder not connected for use shall not be stored in the vicinity of this or any other<br />
appliance.<br />
DANGER<br />
a) DO NOT store a spare LP cylinder under or near this appliance.<br />
b) Never fill the cylinder beyond 80% full.<br />
c) If the information in (a) and (b) are not followed exactly, a fire causing death or<br />
serious injury may occur.<br />
28
TABLE OF CONTENTS<br />
General Warnings . . . . . . . . . . . . . . . . . . . . . . . . . . . . . . . . . . . . . . . . . . . . . 30<br />
Installation and LP Cylinder Specifications and Safe Use. . . . . . . . . . . . 31–33<br />
Connecting LP Cylinder and Hose / Regulator to Grill . . . . . . . . . . . . . . 33–34<br />
Leak Testing. . . . . . . . . . . . . . . . . . . . . . . . . . . . . . . . . . . . . . . . . . . . . . . 35–36<br />
Pre-start Check List . . . . . . . . . . . . . . . . . . . . . . . . . . . . . . . . . . . . . . . . . . . . 36<br />
Lighting Instructions. . . . . . . . . . . . . . . . . . . . . . . . . . . . . . . . . . . . . . . . . 37–38<br />
Operating Grill and Helpful Hints . . . . . . . . . . . . . . . . . . . . . . . . . . . . . . . 39–40<br />
Proper Care and Maintenance . . . . . . . . . . . . . . . . . . . . . . . . . . . . . . . . 40–42<br />
Transporting and Storage . . . . . . . . . . . . . . . . . . . . . . . . . . . . . . . . . . . . 42–43<br />
Trouble Shooting . . . . . . . . . . . . . . . . . . . . . . . . . . . . . . . . . . . . . . . . . . . . . . 43<br />
Frequently Asked Questions . . . . . . . . . . . . . . . . . . . . . . . . . . . . . . . . . . 44–45<br />
Parts List and Assembly Instructions. . . . . . . . . . . . . . . . . . . . . . . . . . . . 46–54<br />
Warranty Information . . . . . . . . . . . . . . . . . . . . . . . . . . . . . . . . . . . . Back Cover<br />
DANGER:<br />
Indicates an imminently hazardous situation which, if not avoided, will result in death or serious injury.<br />
WARNING: Be alert to the possibility of serious bodily injury if the instructions are not followed. Be sure to read and<br />
carefully follow all of the messages.<br />
CAUTION:<br />
Indicates a potentially hazardous situation which, if not avoided, may result in minor or moderate injury.<br />
FOR COVERS, ACCESSORIES AND OTHER PRODUCTS, PLEASE VISIT US ONLINE AT:<br />
www.brinkmann.net<br />
FOR GRILL WARRANTY REPLACEMENT PARTS, PLEASE VISIT US AT:<br />
www.grillpartsonline.com<br />
29
GENERAL WARNINGS<br />
WARNING<br />
• Never use natural gas in a unit designed for liquid propane gas.<br />
• Never use charcoal or wood briquets in a gas grill. Flavoring chips must be contained in a metal<br />
smoking box to contain ash and prevent fires.<br />
• Leak test all connections before first use, even if grill was purchased fully assembled and after<br />
each tank refill.<br />
• Never check for leaks using a match or open flame.<br />
CAUTION:<br />
Strong odors, colds, sinus congestion, etc. may prevent the detection of<br />
propane. Use caution and common sense when testing for leaks.<br />
• Always keep your gas grill free and clear of gasoline, lighter fluid, paint thinner, or other<br />
flammable vapors and liquids or combustible materials.<br />
• Always check the grill prior to each use as indicated in the "Pre-Start Check List" section of this<br />
manual.<br />
• DO NOT obstruct the flow of combustion or ventilation air.<br />
• Never place more than 15 pounds on the side tables. DO NOT lean on the side tables.<br />
• Keep children and pets away from hot grill. DO NOT allow children to use or play near this grill.<br />
• DO NOT leave the grill unattended while in use.<br />
• DO NOT allow the gas hose to come in contact with hot surfaces.<br />
• DO NOT allow grease from drain hole to fall on hose or valve regulator assembly.<br />
• Keep any electrical supply cords away from water or heated surfaces.<br />
• Keep a fire extinguisher on hand acceptable for use with gas products. Refer to your local<br />
authority to determine proper size and type.<br />
• For household use only. DO NOT use this grill for anything other than its intended purpose.<br />
• DO NOT use while under the influence of drugs or alcohol.<br />
• Grill is hot when in use. To avoid burns:<br />
• DO NOT attempt to move the grill.<br />
• Block the wheels so the unit does not accidentally move.<br />
• Wear protective gloves or oven mitts.<br />
• DO NOT touch any hot grill surfaces.<br />
• DO NOT wear loose clothing or allow hair to come in contact with grill.<br />
USE CAUTION AND COMMON SENSE WHEN OPERATING YOUR GAS GRILL.<br />
FAILURE TO ADHERE TO THE SAFETY WARNINGS AND GUIDELINES IN THIS MANUAL<br />
COULD RESULT IN SEVERE BODILY INJURY OR PROPERTY DAMAGE.<br />
SAVE THIS MANUAL FOR FUTURE REFERENCE.<br />
30
WARNING<br />
• FOR OUTDOOR USE ONLY. DO NOT operate indoors or in an enclosed area such as a garage, shed<br />
or breezeway.<br />
• Use your grill OUTDOORS in a well ventilated space away from dwellings or other buildings to<br />
prevent dangers associated with gas accumulation and toxic vapors. Although minimum clearance is<br />
36 inches (91 cm), we strongly recommend that you do not operate this appliance within 10 ft. (3.0 m)<br />
of any structure, combustible material or extra LP gas cylinders not attached to the appliance. Not<br />
adhering to these clearances will prevent proper ventilation and may increase the risk of a fire and/or<br />
property damage, which could also result in personal injury.<br />
• Maintain a minimum clearance of 36 inches (91 cm) between all sides of grill, deck railings, walls or<br />
other combustible material. DO NOT use grill under overhead unprotected combustible construction.<br />
• DO NOT use or install this grill in or on a recreational vehicle and/or boat.<br />
INSTALLATION INFORMATION:<br />
The installation of this appliance must be in accordance with:<br />
All applicable local codes, or in the absence of local codes, either:<br />
• National Fuel Gas Code ANSI Z223.1 NFPA 54<br />
• Natural Gas and Propane Installation Code: CAN/CGA B149.1<br />
• Natural Gas Installation Code: CAN/CGA B149.1 (Canada)<br />
• Propane Installation Code: CAN/CGA B149.2 (Canada)<br />
To check your local codes, see your local LP gas dealer or natural gas company. This grill was not<br />
intended to be connected to a natural gas supply line. If an external electrical source is utilized, it<br />
must be electrically grounded in accordance with local codes, or in the absence of local codes, with<br />
the National Electrical Code, ANSI/NFPA 70, or the Canadian Electrical Code, CSA 22.1.<br />
WARNING<br />
LP GAS CYLINDER (NOT SUPPLIED WITH THIS GRILL)<br />
The LP cylinder is available for purchase at the same location the grill was purchased.<br />
The LP (Liquid Propane) gas cylinder specifically designed to be used with this grill must have<br />
a 20 lb. (9.1 kg) capacity incorporating a Type 1 cylinder valve and an over-filling protection<br />
device (OPD).<br />
• This grill is designed to fit Worthington, Manchester or SMPC brand 20 lb. (9.1 kg) cylinders.<br />
Other brand DOT cylinders may fit this grill if the cylinder has similar dimensions of the top and<br />
bottom rings.<br />
• DO NOT connect this grill to an existing #510 POL cylinder valve with Left Hand threads. The<br />
Type 1 valve can be identified with the large external threads on the valve outlet.<br />
• DO NOT connect to a propane cylinder exceeding this capacity.<br />
• DO NOT connect to a cylinder that uses any other type of valve connection device.<br />
31
CYLINDER SPECIFICATIONS:<br />
When purchasing or exchanging a cylinder for your gas grill, it must be constructed and marked in<br />
accordance with the specifications for LP gas cylinders of the U.S. Department of Transportation<br />
(DOT) or the National Standard of Canada, CAN/CSA-B339 Cylinders, Spheres and Tubes for<br />
Transportation of Dangerous Goods; and Commission, as applicable; and provided with a listed<br />
over-filling prevention device (OPD), and provided with a cylinder connection device compatible with<br />
the connection for outdoor cooking appliances.<br />
The cylinder must also be equipped with:<br />
• A shut-off valve terminating in a Type 1 gas cylinder valve outlet.<br />
• A Type 1 valve that prevents gas flow until a positive seal is obtained.<br />
• An arrangement for vapor withdrawal.<br />
• A collar to protect the cylinder shut-off valve.<br />
• A safety relief device having direct communication with the vapor space of the cylinder.<br />
• A listed over-filling prevention device (OPD).<br />
• Turn off the cylinder valve when your grill is not in use.<br />
• Handle the tank with care.<br />
WARNING<br />
• Always secure the cylinder in an upright position.<br />
• Never connect an unregulated LP gas cylinder to your grill.<br />
• DO NOT expose LP gas cylinders to excessive heat or ignition sources.<br />
• DO NOT store a spare LP gas cylinder under or near your grill.<br />
• Allow only qualified LP gas dealers to fill or repair your LP gas cylinder.<br />
• DO NOT allow the cylinder to be filled beyond 80% capacity.<br />
• Read and follow all warnings and instructions that are on the cylinder and that accompany this<br />
product.<br />
DANGER<br />
• Never store a spare LP gas cylinder under or near your grill. This could cause excess pressure<br />
to be expelled through the vapor relief valve resulting in fire, explosion, or severe personal<br />
injury including death.<br />
Note:<br />
PROPANE GAS IS HEAVIER THAN AIR AND WILL COLLECT IN LOW AREAS.<br />
PROPER VENTILATION IS EXTREMELY IMPORTANT.<br />
• Keep the ventilation opening(s) of the LP gas cylinder enclosure free and clear from<br />
obstructions and debris.<br />
• DO NOT insert any foreign objects into the valve outlet. Damage to the back-check could<br />
result. A damaged back-check can cause a leak, possibly resulting in explosion, fire, severe<br />
bodily harm, or death.<br />
32
33<br />
FILLING THE LP GAS CYLINDER:<br />
• Allow only qualified LP gas dealers to properly fill or repair your LP gas cylinder.<br />
• New tanks should be purged prior to filling; inform LP gas dealer if you are using a new tank.<br />
• DO NOT allow the cylinder to be filled beyond 80% capacity. Over-filled tanks can create a<br />
dangerous condition. Over-filled tanks can build-up pressure and cause the relief valve to expel<br />
propane gas vapors. The vapor is combustible and if it comes in contact with a spark source or<br />
flame an explosion causing severe burns, bodily harm, or death could occur.<br />
• Always use a protective cylinder cap when grill is not connected to cylinder.<br />
• If you exchange a cylinder with a qualified exchange program, be sure the cylinder has<br />
a Type 1 valve and an over-filling prevention device (OPD).<br />
INSTALLING THE LP GAS CYLINDER ONTO THE GRILL:<br />
1. Check that the cylinder valve is closed by turning the knob<br />
clockwise.<br />
2. Place the cylinder into the tank holder on the bottom of<br />
right legs. Then slide tank brace over cylinder handle and<br />
secure tightly.<br />
3. Orient the cylinder such that the valve opening faces the<br />
front of the grill, and so that the hose is not kinked or<br />
damaged.<br />
4. Attach or detach regulator to the LP gas cylinder only<br />
when cylinder is at rest in tank holder.<br />
HOSE AND REGULATOR:<br />
Your grill is equipped with a Type 1 connection device with<br />
the following features:<br />
1. The system will not allow gas flow from the cylinder until<br />
a positive connection to the valve has been made.<br />
Note:<br />
WARNING<br />
The cylinder valve must be turned off before any<br />
connection is made or removed.<br />
2. A thermal device that will shut off the gas flow if the device is<br />
subject to temperatures above 240°F to 300°F (115°C to<br />
150°C). If this should happen, remove the entire regulator<br />
assembly and dispose of properly. A replacement regulator<br />
assembly can be purchased by contacting customer service<br />
at 800-527-0717. The cause of the excessive heat should be<br />
determined and corrected before using your grill again.<br />
3. A regulator flow limiting device, when activated, restricts the<br />
flow of gas to 10 cubic feet per hour. If the flow limiting device<br />
is activated, perform Regulator Resetting Procedure .<br />
REGULATOR RESETTING PROCEDURE<br />
Tank Holder<br />
1. Turn burner control knobs to "OFF", turn off the cylinder valve and disconnect regulator from LP gas<br />
tank. Wait approximately two minutes.<br />
2. Reattach regulator and slowly turn cylinder valve back on. The flow limiting device will now be reset.
WARNING<br />
• Never use your grill without leak testing all gas connections and hoses. See the section on<br />
"Leak Testing" in this manual for proper procedures.<br />
The pressure regulator and hose assembly supplied with your gas grill must be used.<br />
• DO NOT attempt to connect grill, as purchased for LP (propane) gas, to any other fuel supply<br />
source such as a natural gas line.<br />
• DO NOT use any other pressure regulator/hose assembly other than the one supplied with your grill.<br />
Replacement pressure regulator/hose assembly must be part No 155-9410-0, which can be obtained<br />
by contacting customer service at 800-527-0717.<br />
• DO NOT attempt to adjust or repair the regulator. The regulator is designed to operate at a<br />
maximum output pressure of 11 inches of water column (2.74 kPa).<br />
During assembly and/or replacement of the gas cylinder, keep the gas supply hose free of kinks and/or<br />
damage.<br />
Visually inspect the hose assembly prior to each use for evidence of damage, excess wear, or<br />
deterioration. If found, replace the assembly before using your grill. Only the manufacturer's supplied<br />
replacement should be used.<br />
CONNECTING HOSE AND REGULATOR TO AN LP GAS CYLINDER<br />
• Ensure the tank valve is CLOSED prior to connecting the LP gas cylinder to your grill. Turn the<br />
valve knob clockwise to properly close the valve. Read and follow all instructions and warnings<br />
on the supply hose safety tags. Read and follow all warnings in this manual concerning the safe<br />
use of LP gas cylinders and the hose and regulator before connecting cylinder to grill. Read and<br />
follow all warnings on the LP cylinder.<br />
CONNECTING HOSE AND REGULATOR<br />
WARNING<br />
WARNING<br />
1. Check that the cylinder valve is closed by turning the knob clockwise.<br />
2. Check that the grill’s burner control knobs are in the "OFF" positions.<br />
3. Remove the protective plastic cap from the cylinder valve and the connection device.<br />
4. Hold regulator and insert the nipple of connection device into the LP cylinder valve outlet. Ensure that<br />
the device is centered properly.<br />
5. Turn the large coupling nut clockwise by hand and tighten to a full stop. Take care not to cross thread<br />
the coupling nut onto the cylinder valve. Do not over-tighten the knob onto the valve. Do not use tools to<br />
tighten connection.<br />
Note: If you are unable to make the connection, repeat Steps 4 and 5.<br />
6. Check that the hose does not contain kinks, does not contact sharp edges, and does not contact<br />
surfaces that may become hot during use.<br />
7. Leak check all fittings before lighting your grill. See section on "Leak Testing" in this manual.<br />
34
DANGER<br />
LEAK TESTING:<br />
To prevent fire or explosion hazard:<br />
• DO NOT smoke or permit ignition sources in the area while conducting a leak test.<br />
• Perform test OUTDOORS only in a well ventilated area.<br />
• Never perform a leak test with a match or open flame.<br />
• Never perform a leak test while the grill is in use or while grill is still hot.<br />
WHEN TO PERFORM A LEAK TEST:<br />
• After assembling your grill and before lighting for the first time, even if purchased fully assembled.<br />
• Every time the LP gas cylinder is refilled or if any of the gas components are replaced.<br />
• Any time your grill has been moved.<br />
WARNING<br />
• At least once per year or if your grill has not been used for more than 60 days.<br />
CHECKING FOR LEAKS:<br />
1. Create a mixture of 50% water and 50% liquid dishwashing soap.<br />
2. Open the lid.<br />
3. Ensure all control knobs are set to the "OFF" position.<br />
4. Turn on the fuel supply at the cylinder valve. Turn the<br />
cylinder valve knob one turn counter-clockwise.<br />
5. Apply the soap water mixture to the following:<br />
Watch For Bubbles<br />
A<br />
Supply tank (cylinder) weld.<br />
I<br />
H<br />
F<br />
G<br />
B<br />
Connection nut to tank valve.<br />
C<br />
Back side of connection nut to brass<br />
nipple.<br />
D<br />
Brass nipple connection into regulator.<br />
E<br />
Regulator connections to gas supply hoses.<br />
F<br />
Gas supply hose connection to side burner<br />
valve assembly.<br />
E<br />
J<br />
G<br />
Side burner valve stem cap.<br />
H<br />
I<br />
J<br />
K<br />
Side burner connection to hose.<br />
Hose connection to gas manifold.<br />
The full length of gas supply hose.<br />
Tank valve to cylinder.<br />
K<br />
D<br />
C<br />
B<br />
A<br />
35
6. Check each place listed (A–K) for growing bubbles which indicates a leak.<br />
7. Turn off gas supply at cylinder valve.<br />
8. Turn on control knobs to release gas pressure in hose.<br />
9. Turn control knobs to "OFF" position.<br />
10. Tighten any leaking connections.<br />
11. Repeat soapy water test until no leaks are detected.<br />
12. Turn off gas supply at cylinder valve until you are ready to use your grill.<br />
13. Wash off soapy residue with cold water and towel dry.<br />
14. Wait 5 minutes to allow all gas to evacuate the area before lighting grill.<br />
CAUTION:<br />
DO NOT use the grill if leaks cannot be stopped. Contact a qualified gas appliance<br />
repair service.<br />
Note:<br />
The leak test must be performed in an area that has adequate lighting in order to see if<br />
bubbles are developing.<br />
PRE-START CHECK LIST:<br />
WARNING<br />
Property damage, bodily harm, severe burns, and death could result from failure to follow these<br />
safety steps. These steps should be performed after the grill has been assembled and prior to each<br />
use. DO NOT operate this grill until you have read and understand ALL of the warnings and<br />
instructions in this manual.<br />
PRE-START CHECK LIST:<br />
• Ensure that the grill is properly assembled.<br />
• Inspect the gas supply hose for burns, chaffing, kinks, and proper routing before each use. If it is<br />
evident there is excessive abrasion or wear, or the hose is cut, it must be replaced prior the grill being<br />
used. Replace with hose and regulator, Model No. 155-9410-0, which can be obtained by contacting<br />
customer service at 800-527-0717.<br />
• Leak check all gas connections and hose. See section on "Leak Testing".<br />
• Ensure that all electrical supply cords are properly grounded. Keep any electrical supply cord and the<br />
fuel supply hose away from any heated surfaces. Hose should be at least 3 inches from hot surfaces.<br />
• Position your grill on level ground in a well ventilated location, a safe distance from combustible<br />
materials, buildings and overhangs.<br />
• Properly place the empty grease tray under the grease drain hole in the bottom of the grill to catch<br />
grease during use.<br />
• DO NOT obstruct the flow of combustion and ventilation air.<br />
36
37<br />
LIGHTING INSTRUCTIONS:<br />
Follow the instructions exactly.<br />
1. OPEN THE GRILL LID before attempting to light a burner so that fumes do not accumulate inside<br />
the grill. An explosion could occur if grill lid is down.<br />
2. Check that all burner control knobs and the cylinder valve are turned to the "OFF" position.<br />
3. Turn on the fuel supply by rotating the cylinder valve knob counter-clockwise to full open.<br />
4. DO NOT stand with head, body, or arms over the grill when lighting.<br />
Note:<br />
If burner does not light or flame is too low, you may have spider or other insect blockage in burner,<br />
or the flow limiting device has been activated. See "Burner Assembly/Maintenance" under Proper<br />
Care and Maintenance, or "Regulator Resetting Procedure" under Connecting LP Cylinder and<br />
Hose/Regulator to Grill.<br />
LIGHTING THE MAIN BURNERS:<br />
1. Open lid before lighting burner.<br />
2. Make sure all control knobs are in the "OFF" position.<br />
3. Push and hold down the IGNITION BURNER control knob and turn SLOWLY<br />
(2 to 3 seconds) to "IGNITE".You should hear the igniter click.<br />
Note: Step 3 may need to be repeated 2-3 times to light grill.<br />
4. If ignition does NOT occur in 5 seconds, turn control knob to OFF, wait 5<br />
minutes to allow gas to dissipate and repeat lighting procedure.<br />
5. To light other burners light adjacent burners first, push and turn control knobs to HIGH. Follow Step 4.<br />
6. If burner does not ignite using the igniter, wait 5 minutes, see "Match Lighting the Main Burners"<br />
section.<br />
7. To turn off, turn each control knob clockwise until it locks in the "OFF" position. This does not turn off<br />
the gas flow from the cylinder.<br />
MATCH LIGHTING THE MAIN BURNERS:<br />
WARNING<br />
Read, understand and follow all warnings and instructions contained in this manual. DO NOT skip<br />
any of the warnings and instructions contained in the preceding sections of this manual.<br />
WARNING<br />
Lighting Hole<br />
1. Open lid before lighting.<br />
2. Turn the burner control knobs to "OFF".<br />
3. Place a paper match in the end of the matchlighter. Strike the match<br />
and place through lighting hole in the left hand side of the grill to<br />
approximately 1/2" (1 to 2 cm) from the burner.<br />
4. Turn on the FAR LEFT burner control knob to the "HIGH" Matchlighter<br />
position. The burner should light within 5 seconds.<br />
5. If the burner does not light, turn the control knob to "OFF" and wait<br />
5 minutes for gas to dissipate and repeat lighting procedure.<br />
6. To light other burners, push and turn control knobs to HIGH in sequence from left to right.<br />
Follow Step 5.<br />
7. If the burner does not light within the first few attempts of match lighting, there is a problem with the<br />
gas supply. Turn off the gas at the burner and cylinder. DO NOT attempt to operate the grill until the<br />
problem is found and corrected. See "Trouble Shooting" section of this manual.
Note:<br />
If burner does not light or flame is too low, you may have spider or other insect blockage in burner,<br />
or the flow limiting device has been activated. See "Burner Assembly/Maintenance" under Proper<br />
Care and Maintenance, or "Regulator Resetting Procedure" under Connecting LP Cylinder and<br />
Hose/Regulator to Grill.<br />
LIGHTING THE SIDE BURNER:<br />
1. Open lid before lighting side burner.<br />
2. Make sure control knob is in the "OFF" position.<br />
3. Push and hold down side burner control knob and SLOWLY<br />
(2 to 3 seconds ) turn to " IGNITE ". You should hear the<br />
igniter click.<br />
Note: Step 3 may need to be repeated 2-3 times to light<br />
side burner.<br />
4. If ignition does NOT occur in 5 seconds, turn control knob<br />
to OFF, wait 5 minutes to allow gas to dissipate and repeat<br />
lighting procedure.<br />
5. To turn off, turn control knob clockwise until it locks in OFF position.<br />
MATCH LIGHTING THE SIDE BURNER:<br />
1. Open the lid to the side burner before lighting.<br />
2. Turn the burner control knob to "OFF”.<br />
3. Strike and carefully place a match approximately 1/2" (1 to 2 cm) from the burner.<br />
4. Turn the side burner control knob to the "HIGH" position. The burner should light within 5 seconds.<br />
5. If the burner does not light, turn the control knob to "OFF" and wait 5 minutes for gas to dissipate and<br />
repeat lighting procedure.<br />
6. If the burner does not light within the first few attempts of match lighting, there is a problem with the<br />
gas supply. Turn off the gas at the burner and cylinder. DO NOT attempt to operate the grill until the<br />
problem is found and corrected. See "Trouble Shooting" section of this manual.<br />
Note: Observe flame height when lit: Flame<br />
should be a Blue/Yellow color between<br />
1"–2" when burner is on "HIGH”.<br />
TURNING OFF THE GRILL:<br />
1. Turn off the cylinder valve.<br />
2. Turn all burner control knobs to the "OFF" position.<br />
Note:<br />
Turn off LP cylinder first to prevent gas from<br />
being left in the system under pressure.<br />
CAUTION!<br />
• The cylinder valve should always be in the off,<br />
or closed, position when the grill is not in use.<br />
To turn off the cylinder valve,<br />
turn knob clockwise until it stops.<br />
38
OPERATING THE GRILL:<br />
Never use Charcoal or Lighter Fluid inside your Gas Grill. Read and follow all warnings and<br />
instructions contained in the preceding sections of this manual.<br />
BREAKING IN YOUR GRILL:<br />
• In manufacturing and preserving the components of your grill, oil residue may be present on the<br />
burner and cooking surfaces of your grill.<br />
• Before cooking on your grill for the first time you should preheat it for 15 minutes on "HIGH" to burn<br />
off these residual oils.<br />
PREHEATING THE GRILL:<br />
• Prior to use, it is recommended that you preheat your grill. This ensures that the grilling surfaces are<br />
at the desired temperatures to sear the food sugars when cooking. After lighting your grill, set the<br />
main burner control knobs to the "HIGH" position for 10 to 15 minutes. Close the cover during the<br />
preheat period.<br />
CONTROLLING FLARE-UPS:<br />
• Flare-ups are a part of cooking meats on a gas grill. This adds to the unique flavor of cooking on a<br />
gas grill. Excessive flare-ups can over-cook your food and cause a dangerous situation for you and<br />
your grill. Excessive flare-ups result from the build-up of grease in the bottom of your grill. If this<br />
should occur, DO NOT pour water onto the flames. This can cause the grease to splatter and could<br />
result in serious burns or bodily harm. If grease fire occurs close the lid and turn off the main burners<br />
until the grease burns out. Use caution when opening the lid as sudden flare-ups may occur.<br />
• DO NOT leave your grill unattended while in use.<br />
• DO NOT move grill when in use. Block wheels in place to stabilize grill.<br />
• DO NOT use water to extinguish flare-ups.<br />
WARNING<br />
WARNING<br />
• Have fire extinguisher readily accessible suitable for use with gas appliances.<br />
39<br />
TO MINIMIZE FLARE-UPS:<br />
• Trim excess fat from meats prior to cooking.<br />
• Cook meats with high fat contents (chicken or pork) on Low settings or indirectly.<br />
• Ensure that your grill is on level ground and the grease is allowed to evacuate the grill through the<br />
drain hole in the bottom and into grease cup.<br />
INDIRECT COOKING:<br />
• Indirect cooking is the process of cooking your food without the heat source being directly under your<br />
food. You can sear meats over a high flame on one side of the grill while slow cooking a roast on the<br />
other (unlit) side of the grill.
CLEANLINESS<br />
GRILL COOKING TIPS<br />
• Always wash hands thoroughly with soap and hot water prior to handling food and after handling raw<br />
meat, uncooked poultry or seafood.<br />
• When using a platter to carry raw meat, uncooked poultry or seafood to the grill, make sure to wash the<br />
platter thoroughly with soap and hot water before placing cooked foods back on the platter or use different<br />
platters for raw and cooked foods.<br />
• Never use the same utensils when handling raw meat, uncooked poultry or seafood unless you wash the<br />
utensils thoroughly with soap and hot water.<br />
• Never re-use marinade from raw meat or uncooked poultry on foods that have been cooked and are<br />
ready to be served.<br />
GRILLING TO PROPER TEMPERATURE<br />
• Use a meat thermometer to be sure food has reached a safe internal temperature.<br />
• The US Department of Agriculture recommends the minimum temperature be reached for the<br />
following food items:<br />
Chops . . . . . . . . . . . . . . . . . . . . .145 degrees F (62.8° C)<br />
Ground Meat . . . . . . . . . . . . . . .160 degrees F (71° C)<br />
Pork . . . . . . . . . . . . . . . . . . . . . . .160 degrees F (71° C)<br />
Poultry . . . . . . . . . . . . . . . . . . . . .180 degrees F (82° C)<br />
Roasts . . . . . . . . . . . . . . . . . . . . .145 degrees F (62.8° C)<br />
Seafood . . . . . . . . . . . . . . . . . . . .140 degrees F (60° C)<br />
Vegetables . . . . . . . . . . . . . . . . .145 degrees F (62.8° C)<br />
HELPFUL HINTS<br />
• If you pre-cook meat or poultry, do so immediately before grilling.<br />
• Never defrost meat at room temperature or on a countertop.<br />
• Refrigerate leftovers within 2 hours of taking food off the grill.<br />
• For additional information, please phone the USDA’s toll free Meat & Poultry Hotline at 800-535-4555.<br />
PROPER CARE & MAINTENANCE<br />
• To protect your grill from excessive rust, the unit must be kept clean and covered at all times when not<br />
in use.<br />
• Wash cooking grills and heat distribution plates with hot, soapy water, rinse well and dry. Lightly coat<br />
cooking grill with vegetable oil or vegetable oil spray.<br />
• Clean inside and outside of grill by wiping off with a damp cloth. Apply a light coat of vegetable oil or<br />
vegetable oil spray to the interior surface to prevent rusting.<br />
• The stainless steel exterior surface of your grill, can be cleaned with stainless steel cleaner.<br />
• Never apply paint to the interior surface. Rust spots on the interior surface can be buffed, cleaned, then<br />
lightly coated with vegetable oil or vegetable oil spray to minimize rusting.<br />
40
CLEANING AND MAINTENANCE:<br />
• Keep the appliance free and clear of combustible materials, gasoline and other flammable vapors<br />
and liquids.<br />
• Keep the ventilation openings of the cylinder enclosure free and clear of debris.<br />
• Visually check burner flames for proper operation (see pictorial in "Burner Assembly/Maintenance" under<br />
Proper Care and Maintenance). Spiders or other insects can nest in the burner causing gas blockage.<br />
• For safe grilling and peak performance of your grill, perform these checks at least twice per year or<br />
after extended periods of storage.<br />
• Be sure to tighten up all hardware (nuts, bolts, screws, etc.) at least twice per year.<br />
CAUTION: Some parts may contain sharp edges. Wear protective gloves if necessary.<br />
• Remove the cooking grills, heat distribution plates, and burners from inside your grill. Use a brush with<br />
hot water and detergent to remove excess residue. NEVER use a commercial oven cleaner. Rinse<br />
completely with water. Towel dry and replace all components as described in the assembly instructions.<br />
BURNER ASSEMBLY/MAINTENANCE<br />
• Although your burners are constructed of stainless steel, they may corrode as a result of the extreme<br />
heat and acids from cooking foods. Regularly inspect the burners for cracks, abnormal holes, and other<br />
signs of corrosion damage. If found, replace the burner.<br />
• DO NOT obstruct the flow of combustion and ventilation air. Burner tubes can become blocked by<br />
spiders and other insects building their nests. Blocked burner tubes can prevent gas flow to the burners<br />
and could result in a burner tube fire or fire beneath the grill. To clean the Burner Assembly follow these<br />
instructions to clean and/or replace parts of burner assembly or if you have trouble igniting the grill.<br />
1. Turn gas off at control knobs and LP cylinder tank valve.<br />
2. Remove cooking grills and heat distribution plates.<br />
3. Remove screw from each burner "foot" using a screwdriver.<br />
4. Carefully lift each crossover channel and up and away from<br />
burners.<br />
5. Carefully lift each burner up and away from valve openings.<br />
6. Use a narrow bottle brush or a stiff wire bent into a small hook to<br />
run through each burner tube and flame port several times.<br />
Note: Wear eye protection when performing procedure 7.<br />
7. Use compressed air to blow into burner tube and out the flame<br />
ports. Check each port to make sure air comes out each hole.<br />
M5 Bolt<br />
Debris<br />
M5 Nut<br />
8. Wire brush entire outer surface of burner to remove food residue<br />
and dirt.<br />
Crossover Channel<br />
9. Check burner for damage, if any large cracks or holes are found replace burner.<br />
IMPORTANT: Burner opening must slide over valve nozzle.<br />
10. Carefully align crossover channels between burners and orient<br />
burners CORRECTLY by aligning screw hole in burner to the left<br />
as shown.<br />
11. Replace M5 bolt and M5 Nut to each burner and crossover<br />
channel.<br />
Valve Nozzle<br />
Burner Opening<br />
41
BURNER ASSEMBLY/MAINTENANCE CONTINUED<br />
Note:<br />
Follow the "Gas Leak Testing" section of this manual. Relight burners to verify proper<br />
operation.<br />
12. Replace heat distribution plates and cooking grills.<br />
PROPER BURNER OPERATION<br />
COOKING GRILLS<br />
• Clean with mild soap detergent and water. A brass bristled brush or a nylon cleaning pad can be used<br />
to remove residue from the stainless steel surfaces. Do not use steel wire bristles to clean the cooking<br />
grills. Steel can cause the finish to chip or crack. DO NOT use a commercial oven cleaner.<br />
HEAT DISTRIBUTION PLATES<br />
• Periodically, it may be necessary to inspect and clean the heat distribution plate to prevent excess<br />
grease build-up. When the grill is cold, remove the cooking grills. Inspect the heat distribution plates<br />
and replace if broken or damaged. Do not allow heat distribution plates to become damaged to the<br />
extent that they may fall through onto the burners. Replace the heat distribution plates and cooking<br />
grills and light the burners. Operate the grill on "HIGH" for 10 minutes to remove the excess grease.<br />
TRANSPORTING AND STORAGE:<br />
WARNING<br />
• Never move a grill when it is hot or when objects are on the cooking surfaces.<br />
• Make sure that cylinder valve is shut off. After moving the grill check that all gas connections<br />
are free of leaks. Refer to instructions for Leak Testing.<br />
• DO NOT store a spare LP gas cylinder (filled or empty) under or near the grill.<br />
• Never store flammable liquids or spray canisters under or near the grill.<br />
• DO NOT extinguish grease fires using water.<br />
• If the outdoor cooking gas appliance is not in use, the gas must be turned off at the supply<br />
cylinder.<br />
• Storage of an outdoor cooking gas appliance indoors is permissible only if the cylinder is<br />
disconnected and removed from the outdoor cooking gas appliance.<br />
• Cylinders must be stored outdoors out of reach of children and must not be stored in a<br />
building, garage or any other enclosed area.<br />
• When removing the grill from storage, spider webs or other debris may be blocking the burner.<br />
See "Burner Assembly/Maintenance" under Proper Care and Maintenance.<br />
42
BEFORE STORING YOUR GRILL:<br />
• Ensure that the cylinder valve is fully closed.<br />
• Clean all surfaces.<br />
• Lightly coat the burners with cooking oil to prevent excess rusting.<br />
• If storing the grill indoors, disconnect the LP tank and leave the LP tank OUTDOORS.<br />
• Place a protective cap cover on the LP tank and store the tank outdoors in a well ventilated area out<br />
of direct sunlight.<br />
• Clean burner prior to use after storing, at the beginning of grilling season or after a period of one<br />
month not being used. Spiders and insects like to build nests in burner tubes (especially during colder<br />
months). These nests can cause fires in burner tubes or under grill.<br />
• If storing the grill outdoors, cover the grill with a grill cover for protection from the weather.<br />
TROUBLE SHOOTING<br />
Problem:<br />
• Burner will not light<br />
• Fire at control knob<br />
• Yellow Flames at burner<br />
• Flame blows out on "LOW"<br />
• Burner does not get hot enough<br />
• Grill is Too Hot<br />
Possible Causes:<br />
1. Check LP cylinder fuel level.<br />
2. Bad electrode spark.<br />
Check to see if the grill will match light.<br />
Electrode or collector may need adjustment.<br />
3. Burner may not be properly seated.<br />
4. Burner may be obstructed.<br />
5. The cylinder valve may be closed.<br />
6. Regulator is not properly seated on cylinder valve.<br />
1. Burner holes may be obstructed. See section on<br />
"Burner Assembly/Maintenance" under Proper Care<br />
and Maintenance.<br />
2. Burner is improperly seated on control valve.<br />
3. Gas connections may be loose.<br />
Leak Check and tighten all connections.<br />
1. Burner is obstructed. See section on<br />
"Burner Assembly/Maintenance" under Proper Care<br />
and Maintenance.<br />
1. Burner holes may be obstructed. See section on<br />
"Burner Assembly/Maintenance" under Proper Care<br />
and Maintenance.<br />
2. Grill is not sufficiently preheated.<br />
3. Burner is improperly seated on control valve.<br />
1. Flow control device has been activated in regulator.<br />
See Regulator Resetting Procedure under<br />
Connecting LP Cylinder and Hose/Regulator to Grill.<br />
1. Excess grease build-up causing grease fires.<br />
2. Damaged or faulty regulator.<br />
Replace with factory authorized parts.<br />
3. Cook on a lower temperature setting.<br />
43
Your grill's serial number and model number, and the contact information for <strong>Brinkmann</strong> Customer Service, are<br />
listed on a silver label found beneath the control panel, on the back of the grill or on the side of the grill body,<br />
under the side shelf.<br />
These questions and answers are for your general knowledge, and may not be applicable to your model grill.<br />
Question: Why does my grill not light properly<br />
Answer: Always follow lighting instructions as listed on the control panel or in this manual. Also check these<br />
causes:<br />
• Check LP gas supply.<br />
• Check to ensure all gas connections are secure.<br />
• The igniter AA battery may need replacing.<br />
• Ignition wires may be loose. Remove the battery, inspect the igniter junction box found behind the control<br />
panel and connect any loose wires.<br />
• Spark electrode tips may need repositioning. With the gas supply closed and control knob set to the "OFF"<br />
position, press the igniter button and have another person watch for the presence of a spark at the<br />
electrode tips. The gap between the spark electrode tip and spark receiver should be about 3/16". If the<br />
electrode tip needs to be adjusted, bend it to the appropriate gap distance.<br />
• Check that the end of each burner venturi tube is properly located over its gas valve orifice fitting.<br />
• There may be an obstruction in the gas line. To correct this, remove LP gas hose / regulator or natural gas<br />
fuel line from your grill. Open gas supply for one second to test for obstruction. If no obstruction is present,<br />
reconnect fuel line. If the fuel line is blocked, replace with a new hose / regulator assembly.<br />
• If an obstruction is suspected in the hose / regulator assembly, orifice or gas valves call <strong>Brinkmann</strong><br />
Customer Service at 800-527-0717.<br />
Question: Why does my LP gas grill have a low flame or a flame with orange / yellow color<br />
Answer: You need to purge air from the gas line or reset the regulator's flow limiting device. Opening the<br />
cylinder valve all the way or too quickly triggers the regulator’s flow limiting device to shut down the gas flow,<br />
which prevents excessive gas flow to your grill. Note: This procedure should be done every time a new LP gas<br />
tank is connected to your grill:<br />
RESETTING THE REGULATOR FLOW LIMITING DEVICE<br />
• Turn control knob to the "OFF" position.<br />
• Turn off the LP gas tank at the cylinder valve.<br />
• Disconnect regulator from LP gas tank.<br />
• Let tank stand for two minutes.<br />
FREQUENTLY ASKED QUESTIONS<br />
• Reconnect regulator to the LP gas tank.<br />
• Open grill lid or side burner lid. Turn the cylinder valve on slowly until 1/4 or 1/2 open.<br />
• Light the grill by following the instructions on your control panel or in this owner's manual.<br />
Question: How and when do I clean the interior cooking components of my grill<br />
Answer: Use a fiber or brass cleaning brush to clean the interior of the grill, cooking grills, heat distribution<br />
plates and grease containers. Never use a wire brush or metal scraper on porcelain-finished parts, as they can<br />
scratch or chip the porcelain finish and promote rusting.<br />
44
FREQUENTLY ASKED QUESTIONS<br />
Cleaning Stainless Steel Cooking Grills: Wash grills with a mild detergent and rinse with hot water before<br />
initial use and as needed. DO NOT use a commercial oven cleaner. For stubborn food residue, use a<br />
degreaser and fiber or brass cleaning brush.<br />
Cleaning Porcelain-Finished Cast-Iron Cooking Grills: Wash grills with a mild detergent and rinse with hot<br />
water before initial use and as needed. For stubborn food residue, use a degreaser and fiber or brass cleaning<br />
brush. Dry immediately using a soft cloth or paper towels.<br />
Cleaning Heat Distribution Plate: Heat distribution plates should be cleaned whenever food or grease<br />
drippings accumulate to reduce the chance of flare-ups. Wash heat distribution plates with a mild detergent and<br />
rinse with hot water. Use a degreaser and fiber or brass cleaning brush to remove stubborn food residue. Do<br />
not use a wire brush or metal scraper on porcelain-finished heat distribution plates, as they can scratch or chip<br />
the porcelain finish and promote rusting.<br />
Cleaning the Grease Tray and/or Grease Cup: The grease tray and/or grease cup (some models) should be<br />
inspected before each grill use to reduce the chance of fire. Remove grease (a plastic spatula works well) and<br />
wash all parts with a mild soap or degreaser and warm water solution.<br />
Question: What causes grill parts to rust and what effect does it have on the grill materials<br />
Answer: Rusting is a natural oxidation process and may appear on cast-iron and steel parts. Rust will not<br />
affect the short-term performance of your grill. However, weathering and extreme heat can cause a stainless<br />
steel lid to turn a bronze color. This is discoloration, not rust, and is not considered a manufacturing defect.<br />
Question: What causes my stainless steel grill lid to discolor and how do I clean my grill lid<br />
Answer: Smoke, weathering and high heat can cause a stainless steel grill lid to turn bronze in color. This is<br />
not to be confused with rust and is not a product defect. Machine oils used in the manufacturing process of<br />
stainless steel as well as cooking oils and a dirty grill lid can also encourage discoloration if the lid is not<br />
cleaned prior to grill use. After your grill is assembled, remove the protective PVC film from your grill lid and<br />
use a stainless steel cleaner and soft cloth to remove residual adhesive and oils from the inside and outside of<br />
your grill lid. Never use abrasive cleaners or scrubbers. In addition to the initial cleaning, routine cleaning to<br />
remove dirt, grease and oils will help discourage lid discoloration.<br />
Question: Can I convert my grill from propane gas to natural gas<br />
Answer: Most gas grills are manufactured to exact specifications and are certified for either propane gas or<br />
natural gas use only. However, some models can be converted safely with conversion kits available for specific<br />
models. Contact <strong>Brinkmann</strong> Customer Service at 800-527-0717 to see if your grill can be converted.<br />
Question: Why does the hose / regulator assembly supplied with my grill not fit the older LP gas tank I’ve<br />
used for years<br />
Answer: U.S. Government regulates gas appliances and LP gas tanks. When regulations were changed, the<br />
LP gas tank fittings were updated to ensure compliance. If your LP gas tank does not fit the hose / regulator<br />
supplied with your new grill, the tank is outdated and must be replaced. Note: Effective April 1, 2002, all LP gas<br />
tanks sold must include an "OPD" overflow protection device. This internal device prevents the LP gas tank<br />
from being overfilled. Tanks without an OPD valve cannot be refilled.<br />
Question: Sometimes I hear a humming sound coming from my gas regulator. Should I be concerned<br />
Answer: The humming sound is gas flowing through the regulator. A low volume of noise is normal and will not<br />
interfere with the operation of your grill. If the humming noise is loud and excessive, you need to purge air from<br />
the gas line or reset the regulator flow limiting device following the Regulator Resetting Procedure under<br />
Connecting LP Cylinder and Hose/Regulator to Grill. This procedure should be done every time a new LP gas<br />
tank is connected to your grill. For help, refer to your owner’s manual or call <strong>Brinkmann</strong> Customer Service at<br />
800-527-0717.<br />
45
PARTS BAG CONTENTS<br />
Make sure you have all items listed under PARTS LIST and PARTS CARD CONTENTS before<br />
you begin the installation process.<br />
PARTS CARD CONTAINS:<br />
Qty.<br />
1 Screwdriver<br />
Screwdriver<br />
46
ASSEMBLY INSTRUCTIONS<br />
READ ALL SAFETY WARNINGS & ASSEMBLY INSTRUCTIONS CAREFULLY<br />
BEFORE ASSEMBLING OR OPERATING YOUR GRILL.<br />
WE RECOMMEND TWO PEOPLE WORK TOGETHER WHEN ASSEMBLING THIS UNIT.<br />
The following provided tools are required to assemble this <strong>Brinkmann</strong> ® 4 Burner Gas Grill:<br />
• Screwdriver<br />
PARTS LIST:<br />
1 1 Grill Body Assembly<br />
2 1 Warming Rack<br />
3 3 Cooking Grills<br />
4 4 Heat Distribution Plates<br />
5 1 Grease Cup<br />
6 1 Left Side Table<br />
7 1 Side Burner Grate<br />
8 1 Right Side Table<br />
9 2 Cart Braces<br />
10 1 Cart Assembly<br />
11 2 Wheels<br />
12 2 Cart Leg Caps<br />
13 1 Tank Brace<br />
14 2 Axle Bolts w/ Hitch Pins<br />
15 1 Side Burner Knob<br />
47
1<br />
2<br />
3<br />
4<br />
6<br />
7<br />
5<br />
8<br />
9<br />
10<br />
12<br />
11<br />
13<br />
14 15<br />
FOR COVERS, ACCESSORIES AND OTHER PRODUCTS, PLEASE VISIT US ONLINE AT:<br />
www.brinkmann.net<br />
FOR GRILL WARRANTY REPLACEMENT PARTS, PLEASE VISIT US AT:<br />
www.grillpartsonline.com<br />
(Proof of purchase will be required.)<br />
Inspect contents of the box to ensure all parts are included and undamaged.<br />
48
Choose a good, cleared assembly<br />
area and get a friend to help you put<br />
your grill together. Lay cardboard<br />
down to protect grill finish and<br />
assembly area.<br />
CAUTION:<br />
Some parts may<br />
contain sharp edges.<br />
Wear protective gloves<br />
if necessary.<br />
Step 1<br />
Unfold the cart assembly until<br />
folding arms lock into place.<br />
Step 2<br />
The cart assembly has two preattached<br />
bolts on each side of the<br />
cart legs. Attach the right cart<br />
brace (with tank holder) to right<br />
cart legs, slide down, then tighten<br />
bolts securely. Attach left cart<br />
brace to left cart legs, slide down,<br />
then tighten bolts securely.<br />
Left Cart Brace<br />
Tank Holder<br />
Right Cart Brace<br />
49
Wheel axle<br />
bolt<br />
Wheel<br />
Leg<br />
Hitch Pin<br />
Note: With the help of a friend, turn<br />
the assembled cart over. Try<br />
to minimize the stress to the<br />
legs.<br />
Step 3<br />
Install the wheels as illustrated, pull<br />
pre-attached hitch pins from axle<br />
bolt. Insert the wheel axle bolts<br />
through the legs and secure with<br />
hitch pins.<br />
Step 4<br />
Attach leg caps to right cart legs.<br />
Note:<br />
With the help of a friend, turn<br />
the cart to its upright position.<br />
When performing Step 5,<br />
lift grill body from front and<br />
rear panels to avoid injury to<br />
hands and fingers. Be sure to<br />
pass hose/regulator assembly<br />
above cart frame crossbar.<br />
50
Step 5<br />
Grill body will rest on top of cart<br />
legs. Align bolt holes located on the<br />
inside of the grill body supports.<br />
Tighten pre-attached bolts securely.<br />
Grill Body<br />
Assembly<br />
Warning: Never use your grill<br />
without leak testing all<br />
gas connections and<br />
hoses. See the section<br />
on “Leak Testing” in this<br />
manual for proper<br />
procedures.<br />
Step 6<br />
Attach the left side table assembly<br />
to the left side of grill body. Place<br />
table over bolts and slide toward<br />
back of grill, then tighten bolts<br />
securely. Fasten left side table front<br />
panel to grill body with pre-attached<br />
bolt. Tighten securely.<br />
Step 7<br />
Attach the tank brace by inserting<br />
the pre-attached carriage bolt<br />
through the keyhole, slide down<br />
and then use the wing nut to<br />
secure.<br />
Wing Nut<br />
Tank Brace<br />
Tank Bracket<br />
Carriage Bolt<br />
51
Step 8<br />
Attach the right side burner<br />
assembly to the right side of grill<br />
body. Place right side burner<br />
assembly over bolts and slide<br />
toward back of grill, then tighten<br />
bolts securely. Fasten right side<br />
table front panel to grill body with<br />
pre-attached bolt. Tighten securely.<br />
Burner Venturi<br />
Side<br />
Burner<br />
Valve<br />
Valve<br />
Nozzle<br />
Step 9<br />
Insert the side burner valve nozzle<br />
into the side burner venturi. Then,<br />
insert side burner valve assembly<br />
through the key holes in the side<br />
burner table front panel. Slide<br />
down to lock in place. Tighten bolts<br />
securely.<br />
Side Burner<br />
Igniter Lead<br />
Step 10<br />
Attach side burner igniter lead wire<br />
to the electrode as illustrated.<br />
52
Step 11<br />
Place the side burner grate on the<br />
side burner. Install burner control<br />
knob onto valve stem.<br />
Step 12<br />
Hang grease cup from brackets on<br />
bottom of grill body assembly.<br />
Side<br />
Burner<br />
Control<br />
Knob<br />
Step 13<br />
Place the heat distribution plates<br />
on lower level of grill body<br />
assembly directly above burners.<br />
Grease Cup<br />
Step 14<br />
Insert warming rack through holes<br />
in grill lid and then insert the<br />
warming rack legs through the<br />
holes in the grill body.<br />
Warming Rack<br />
Cooking Grills<br />
Heat<br />
Distribution<br />
Plates<br />
Step 15<br />
Place cooking grills on support<br />
ribs directly above heat<br />
distribution plates.<br />
53
<strong>Brinkmann</strong> ® 9410 (Assembled)<br />
54
PARA CUBIERTAS, ACCESORIOS Y OTROS PRODUCTOS, FAVOR DE VISITARNOS POR LA RED MUNDIAL EN:<br />
www.brinkmann.net<br />
PARA PARTES DE REEMPLAZO DE PARRILLA BAJO GARANTIA, FAVOR DE VISITARNOS POR LA RED MUNDIAL<br />
EN: www.grillpartsonline.com<br />
FOR COVERS, ACCESSORIES AND OTHER PRODUCTS, PLEASE VISIT US ONLINE AT:<br />
www.brinkmann.net<br />
FOR GRILL WARRANTY REPLACEMENT PARTS, PLEASE VISIT US AT:<br />
www.grillpartsonline.com<br />
GARANTÍA<br />
The <strong>Brinkmann</strong> Corporation garantiza al comprador original que la parrilla <strong>Brinkmann</strong> ® Parilla a Gas de 4 Quemadores está libre de defectos de materiales o<br />
mano de obra:<br />
Cinco-años: los quemadores de acero inoxidable<br />
Tres-años: en todas las piezas de acero inoxidable restantes<br />
Un-año: en válvulas, armazón, envoltura, carro, encendedor, rejillas de cocinar y piezas relacionadas<br />
Las obligaciones de The <strong>Brinkmann</strong> Corporation con respecto a esta garantía se limitan a lo siguiente:<br />
• Esta garantía no cubre parrillas que hayan sido alteradas/modificado o dañadas debido a: uso normal, herrumbre, maltrato, mantenimiento inadecuado y o<br />
uso inapropiado.<br />
• Esta garantía no cubre rayones superficiales, daño por herrumbre o por calor al acabado, lo cual se considera como uso normal.<br />
• The <strong>Brinkmann</strong> Corporation puede decidir reparar o reemplazar las unidades dañadas cubiertas bajo los términos de esta garantía.<br />
• Esta garantía se otorga al comprador original únicamente y no es transferible o asignable a los compradores posteriores.<br />
The <strong>Brinkmann</strong> Corporation exige un comprobante de compra razonable. Por lo tanto, le recomendamos enfáticamente que retenga su recibo o factura de venta.<br />
Para obtener partes de repuesto para la parrilla <strong>Brinkmann</strong> ® Parilla a Gas de 4 Quemadores bajo los términos de esta garantía, sírvase contactar al<br />
Departamento de Servicio al Cliente al 800-527-0717. Se exigirá la presentación de un recibo.The <strong>Brinkmann</strong> Corporation no será responsable de<br />
ninguna parrilla devuelta a nosotros sin autorización previa.<br />
EXCEPTO POR LO INDICADO ARRIBA, THE BRINKMANN CORPORATION NO OTORGA NINGUNA OTRA GARANTÍA EXPRESA.<br />
LAS GARANTÍAS IMPLÍCITAS DE COMERCIABILIDAD Y ADECUACIÓN CON UN FIN EN PARTICULAR SON DE DURACIÓN LIMITADA DE ACUERDO A<br />
LO INDICADO ARRIBA A PARTIR DE LA FECHA DE COMPRA. ALGUNOS ESTADOS NO PERMITEN LIMITACIONES DE DURACIÓN DE UNA GARANTÍA<br />
IMPLÍCITA; POR LO TANTO, LA LIMITACIÓN ANTERIOR PODRÍA NO SER APLICABLE EN SU CASO.<br />
SE EXCLUYE CUALQUIER RESPONSABILIDAD POR DAÑOS INDIRECTOS, INCIDENTALES O CONSIGUIENTES DERIVADOS DE LA FALTA DE<br />
CUMPLIMIENTO DE ESTA GARANTÍA O DE CUALQUIER GARANTÍA IMPLÍCITA DE THE BRINKMANN ® PARILLA A GAS DE 4 QUEMADORES. EL<br />
CLIENTE RECONOCE QUE EL PRECIO DE COMPRA COBRADO SE BASA EN LAS LIMITACIONES CONTENIDAS EN LA GARANTÍA ANTERIOR.<br />
ALGUNOS ESTADOS NO PERMITEN LA EXCLUSIÓN O LIMITACIÓN DE LOS DAÑOS INCIDENTALES O CONSIGUIENTES; POR LO TANTO, LA<br />
LIMITACIÓN O EXCLUSIÓN ANTERIOR PODRÍA NO SER APLICABLE EN SU CASO. ESTA GARANTÍA LE OTORGA DERECHOS LEGALES<br />
ESPECÍFICOS Y USTED PUEDE TENER ADEMÁS OTROS DERECHOS QUE VARÍAN DE UN ESTADO A OTRO.<br />
WARRANTY<br />
The <strong>Brinkmann</strong> Corporation warrants to the original purchaser that the <strong>Brinkmann</strong> ® 4 Burner Gas Grill is free from defects due to workmanship or materials for:<br />
Five-year: on stainless steel burners<br />
Three-year: on all other stainless steel parts<br />
One-year: on valves, frame, housing, cart, igniter, cooking grates and other related parts<br />
The <strong>Brinkmann</strong> Corporation’s obligations under this warranty are limited to the following guidelines:<br />
• This warranty does not cover grills that have been altered/modified or damaged due to: normal wear, rust, abuse, improper maintenance, improper use.<br />
• This warranty does not cover surface scratches, rust or heat damage to the finish, which is considered normal wear.<br />
• The <strong>Brinkmann</strong> Corporation may elect to repair or replace damaged units covered by the terms of this warranty.<br />
• This warranty extends to the original purchaser only and is not transferable or assignable to subsequent purchasers.<br />
The <strong>Brinkmann</strong> Corporation requires reasonable proof of purchase. Therefore, we strongly recommend that you retain your sales receipt or invoice. To obtain<br />
replacement parts for your <strong>Brinkmann</strong> ® 4 Burner Gas Grill under the terms of this warranty, please call Customer Service Department at<br />
800-527-0717. A receipt will be required. The <strong>Brinkmann</strong> Corporation will not be responsible for any grills forwarded to us without prior authorization.<br />
EXCEPT AS ABOVE STATED, THE BRINKMANN CORPORATION MAKES NO OTHER EXPRESS WARRANTY.<br />
THE IMPLIED WARRANTIES OF MERCHANTABILITY AND FITNESS FOR A PARTICULAR PURPOSE ARE LIMITED IN DURATION TO THOSE LISTED<br />
ABOVE FROM THE DATE OF PURCHASE. SOME STATES DO NOT ALLOW LIMITATIONS ON HOW LONG AN IMPLIED WARRANTY LASTS, SO THE<br />
ABOVE LIMITATION MAY NOT APPLY TO YOU.<br />
ANY LIABILITY FOR INDIRECT, INCIDENTAL OR CONSEQUENTIAL DAMAGES ARISING FROM THE FAILURE OF THE BRINKMANN ® STAINLESS<br />
STEEL GAS GRILLTO COMPLY WITH THIS WARRANTY OR ANY IMPLIED WARRANTY IS EXCLUDED. CUSTOMER ACKNOWLEDGES THAT THE<br />
PURCHASE PRICE CHARGED IS BASED UPON THE LIMITATIONS CONTAINED IN THE WARRANTY SET OUT ABOVE. SOME STATES DO NOT ALLOW<br />
THE EXCLUSION OR LIMITATION OF INCIDENTAL OR CONSEQUENTIAL DAMAGES, SO THE ABOVE LIMITATION OR EXCLUSION MAY NOT APPLY<br />
TO YOU. THIS WARRANTY GIVES YOU SPECIFIC LEGAL RIGHTS, AND YOU MAY ALSO HAVE OTHER RIGHTS WHICH VARY FROM STATE TO STATE.<br />
140-9410-M<br />
8/08<br />
©2008 The <strong>Brinkmann</strong> Corporation<br />
Dallas, Texas 75244 U.S.A<br />
www.brinkmann.net<br />
Manual del Propietario para el Modelo:<br />
Owner’s Manual for Model:<br />
810-9410-M