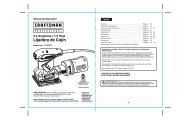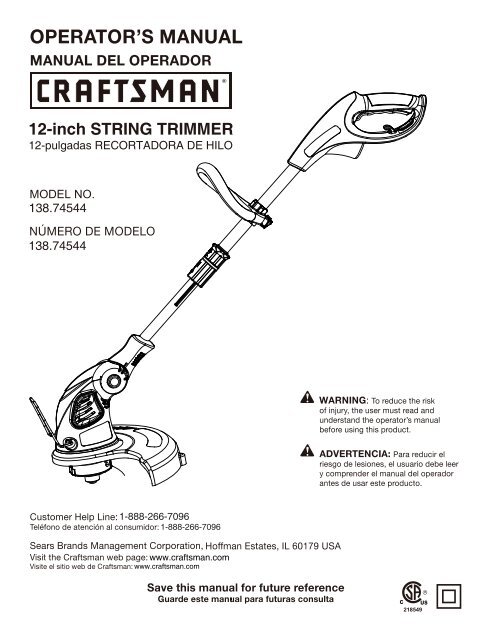
12-inch STRING TRIMMER - Sears
12-inch STRING TRIMMER - Sears
12-inch STRING TRIMMER - Sears

You also want an ePaper? Increase the reach of your titles
YUMPU automatically turns print PDFs into web optimized ePapers that Google loves.
<strong>12</strong>-<strong>inch</strong> <strong>STRING</strong> <strong>TRIMMER</strong><br />
<strong>12</strong>-pulgadas RECORTADORA DE HILO<br />
MODEL NO.<br />
138.74544<br />
138.74544<br />
1-888-266-7096<br />
1-888-266-7096<br />
www.craftsman.com<br />
www.craftsman.com
.7-8<br />
......9<br />
this product is warrantied against any defects in material or workmanship.<br />
A defective product will be replaced free of charge.<br />
, los productos defectuosos se remplazaran sin cargo.<br />
7<br />
.7-9<br />
.9-10
For safe operation, read and understand all<br />
instructions before using this product. Follow<br />
all safety instructions. Failure to follow all safety<br />
instructions listed below, can result in serious<br />
personal injury.<br />
Do not allow children or untrained individuals to<br />
use this unit.<br />
Check the work area before each use. Remove<br />
all objects such as rocks, broken glass, nails,<br />
wire, or string which can be thrown or become<br />
entangled in the machine.<br />
Wear eye protection which is marked to comply<br />
with ANSI Z87.1 when operating this product.<br />
Use Safety Glasses – Always use face or dust<br />
mask if operation is dusty.<br />
Always wear safety glasses with side shields.<br />
Everyday glasses have only impact resistant<br />
lenses. They are NOT safety glasses.<br />
Following this rule will reduce the risk of eye<br />
injury. Use face mask if operation is dusty.<br />
Dress Properly – Use rubber gloves and<br />
substantial footwear is recommended when<br />
workingoutdoors.<br />
Wear heavy, long pants, boots, and gloves. Do<br />
not wear loose fitting clothing, short pants, or<br />
go barefoot. Do not wear jewelry of any kind.<br />
Secure long hair above shoulder level to<br />
prevent entanglement in moving parts.<br />
Keep children away - Keep all bystanders,<br />
children, and pets at least 50 ft. away.<br />
Stay alert - Do not operate this unit when you<br />
are tired, ill, or under the influence of alcohol,<br />
drugs, or medication.<br />
Do not operate in poor lighting.<br />
Keep all parts of your body away from any<br />
moving part.<br />
Do not operate power tools in explosive<br />
atmospheres, such as in the presence of<br />
flammable liquids, gases, or dust. Power tools<br />
create sparks which may ignite the dust or<br />
fumes.<br />
To reduce the risk of electric shock, this tool<br />
has a polarized plug (one blade is wider than<br />
the other) and will require the use of a<br />
polarized extension cord. The plug will fit into<br />
a polarized extension cord only one way. If the<br />
plug does not fit fully into the extension cord,<br />
reverse the plug. If the plug still does not fit,<br />
obtain a correct polarized extension cord. A<br />
polarized extension cord will require the use of<br />
a polarized wall outlet. This plug will fit into the<br />
polarized wall outlet only one way. If the plug<br />
does not fit fully into the wall outlet, reverse<br />
the plug. If the plug still does not fit, contact a<br />
qualified electrician to install the proper wall<br />
outlet. Do not change the equipment plug,<br />
extension cord receptacle, or extension cord<br />
plug in any way.<br />
Avoid body contact with grounded surfaces<br />
such as pipes, radiators, ranges, and<br />
refrigerators. There is an increased risk of<br />
electric shock if your body is grounded.<br />
Avoid Dangerous Environments - Don’t e<br />
xpose power tools to rain or wet conditions.<br />
Waterentering a power tool will increase the<br />
risk of electric shock.<br />
Ground Fault Circuit Interrupter (GFCI)<br />
protection should be provided on the circuit (s)<br />
or outlet(s) to be used for the gardening<br />
appliance. Receptacles are available having<br />
built-in GFCI protection and may be used for<br />
this measure of safety.<br />
Use Right Appliance - Do not force tool. Use<br />
the correct tool for your application. The<br />
correct tool will do the job better and safer at<br />
the rate for which it is designed.<br />
Do not operate the equipment while barefoot or<br />
when wearing sandals or similar lightweight<br />
footwear. Wear protective footwear that will<br />
protect your feet and improve your footing on<br />
slippery surfaces.<br />
Do not overreach. Keep firm footing and<br />
balance. Over-reaching can result in loss of<br />
balance.
Avoid Accidental Start – Do not carry plugged<br />
in appliance with finger on trigger. Be sure the<br />
switch trigger is not en-gaged before plugging<br />
in.<br />
Do not use tool if switch trigger does not turn it<br />
on or off. Any tool that cannot be controlled with<br />
the switch trigger is dangerous and must be<br />
repaired.<br />
Disconnect appliance from power source<br />
before storing, servicing, changing accessories<br />
such as cutting line. Such preventive safety<br />
measures reduce the risk of starting the tool<br />
accidentally.<br />
Use only identical manufacturer’s replacement<br />
parts and accessories. Use of any other parts<br />
may create a hazard or cause product damage.<br />
Maintain appliance with care - Replace string<br />
head if cracked, chipped, or damaged in any<br />
way.<br />
Be sure the string head is properly installed<br />
and securely fastened. Failure to do so can<br />
causeserious injury.<br />
Make sure all guards, straps, deflectors and<br />
handles are properly and securely attached.<br />
Use only the manufacturer’s replacement<br />
string in the cutting head. Do not use any other<br />
cutting attachment, for example, metal wire,<br />
rope, or the like. To install any other brand of<br />
cutting head to this string trimmer can result in<br />
serious personal injury.<br />
Never operate unit without the grass deflector<br />
in place and in good condition.<br />
Check damaged parts. Before further use of<br />
the tool, a guard or other part that is damaged<br />
should be carefully checked to determine that<br />
it will operate properly and perform its intended<br />
function. Check for alignment of moving parts,<br />
binding of moving parts, breakage of parts,<br />
mounting and any other conditions that may<br />
affect its operation. A guard or other part that is<br />
damaged must be properly repaired or<br />
replaced by an authorized service center to<br />
avoid riskof personal injury.<br />
Maintain a firm grip on both handles while<br />
trimming. Keep string head below waist level.<br />
Nevercut with the string head located over 30in,<br />
or more above the ground.<br />
Store idle appliances - When not in use, string<br />
trimmer should be stored indoors in a dry,<br />
locked place out of the reach of children.<br />
Make sure your extension cord is in good<br />
condition. When using an extension cord, be<br />
sure to use one heavy enough to carry the<br />
current your product will draw. A wire gauge<br />
size (A.W.G.) of at least 16 is recommended<br />
for an extension cord 50 feet or less in length.<br />
A cord exceeding 100 feet is not<br />
recommended. If in doubt, use the next heavier<br />
gauge. The smaller the gaugenumber, the<br />
heavier the cord. An undersized cord will cause<br />
a drop in line voltage resulting in loss of power<br />
and overheating.<br />
Never use blades or flailing devices. Unit is<br />
designed for line trimmer use only. Use of any<br />
other accessories or attachments will increase<br />
the risk of injury. Inspect area to be cut.<br />
Remove objects (rocks, broken glass, nails,<br />
wire, string, etc.) which can be thrown or<br />
become entangled in cutting head.<br />
Keep the air vents clean and free of debris to<br />
avoid overheating the motor. Clean after each<br />
use.<br />
Stop the unit and disconnect the power source<br />
when not in use. Carry the unit with the motor<br />
stopped.<br />
Store unplugged and out of the reach of<br />
children.<br />
Do not hang unit so that the switch trigger is<br />
depressed.<br />
Do not use multiple cords.<br />
Do not abuse the cord. Never carry the unit by<br />
the extension cord or yank extension cord to<br />
disconnect unit.<br />
Keep the extension cord clear of operator and<br />
obstacles at all times. Do not expose cords to<br />
heat, oil, water, or sharp edges.<br />
If the power supply cord is damaged, it must be<br />
replaced only by the manufacturer or by an<br />
authorized service center to avoid risk.<br />
Save these instructions. Refer to them<br />
frequently and use them to instruct others who<br />
may use this power tool. If you loan someone<br />
this power tool, loan them these instructions<br />
also.
SYMBOL<br />
V<br />
A<br />
Hz<br />
W<br />
min<br />
NAME<br />
Volts<br />
Amperes<br />
Hertz<br />
Watt<br />
Minutes<br />
DESIGNATION<br />
/ EXPLANATION<br />
Voltage<br />
Current<br />
Frequency<br />
( cycles<br />
per<br />
second)<br />
Power<br />
Time<br />
Alternating Current Type of current<br />
Direct Current Type or a characteristic of current<br />
Class II Construction Double-insulated construction<br />
Wet Conditions Alert Do not expose to rain or use in damp locations<br />
Read The Operator’s Manual<br />
To reduce the risk of injury user must read and<br />
understand<br />
operator’<br />
s manual<br />
before<br />
using<br />
this<br />
product.<br />
Safety Alert Precautions that involve your safety.<br />
Keep Bystanders Away Keep all bystanders at least 50 ft. away.<br />
Eye Protection<br />
Always wear safety goggles or safety glasses<br />
with<br />
side<br />
shields<br />
and,<br />
as<br />
necessary,<br />
a full<br />
face<br />
shield<br />
when<br />
operating<br />
this<br />
product.
1-888-266-7096<br />
If any parts are damaged or missing do<br />
not operate this product until the parts are replaced. Use<br />
of this product with damaged or missing parts could result<br />
in serious personal injury.<br />
Do not attempt to modify this product<br />
or create accessories not recommended for use with<br />
this product. Any such alteration or modification is<br />
misuse and could result in a hazardous condition leading<br />
to possible serious personal injury.<br />
If any parts are damaged or missing,<br />
do not operate this product until the parts are<br />
replaced. Failure to heed this warning could result in<br />
serious personal injury.<br />
Do not attempt to modify this product<br />
or create accessories not recommended for use with<br />
this product. Any such alteration or modification is<br />
misuse and could result in a hazardous condition<br />
leading to possible serious personal injury.<br />
Do not connect to power supply until<br />
assembly is complete. Failure to comply could result<br />
in accidental starting and possible serious personal<br />
injury.<br />
STARTING/STOPPING THE <strong>TRIMMER</strong><br />
See Figure 4 - 5, page i.<br />
Attach the outlet end of an extension cord to the plug on<br />
the rear of the string trimmer.<br />
NOTE: Use only approved outdoor extension cords.<br />
Route the extension cord through the slot located on<br />
the rear of the string trimmer housing and place<br />
underneath the cord retainer.<br />
Remove supplied screw with a phillips screwdriver from<br />
the trimmer head.<br />
Fit the grass deflector into the slots on trimmer head.<br />
Turn counterclockwise to lock grass deflector into place.<br />
Line up the screw hole in the grass deflector with the<br />
center hole in the trimmer head.<br />
Install supplied screw and tighten by turning clockwise<br />
with a phillips screwdriver.<br />
See Figure 3, page i.<br />
Loosen and remove the knob from the handle.<br />
Install the handle on the rear handle pole in the area<br />
indicated by the illustration.<br />
Adjust handle up or down, if necessary, to desired<br />
operating position.<br />
Reinstall the knob. Tighten it to secure.<br />
To start the string trimmer, press the switch trigger.<br />
To stop the string trimmer, release the switch trigger.<br />
If any parts are damaged or missing, please call<br />
1-888-266-7096 for assistance.<br />
OPERATING THE <strong>TRIMMER</strong><br />
See Figure 6, page i.<br />
Folow these tips when using the string trimer:<br />
Hold the trimmer with your right hand on the rear<br />
handle and your left hand on the front handle.<br />
Keep a firm grip with both hands while in operation.<br />
Trimmer should be held at a comfortable position with<br />
the rear handle about hip height.<br />
Cut tall grass from the top down. This will prevent<br />
grass from wrapping around the shaft housing and<br />
string head.<br />
If grass becomes wrapped around the string head:<br />
Stop the trimmer.<br />
Unplug the string trimmer.<br />
Remove the grass.
THE CUTTING LINE<br />
DO NOT grasp the exposed cutting line<br />
when picking up or holding the trimmer.<br />
A single 0.065-<strong>inch</strong> round cutting line is pre-installed on the<br />
trimmer. When the cutting line needs replacing, install a<br />
new pre-wound spool. Craftsman 71-85967.<br />
EXTENDING THE CUTTING LINE<br />
See Figure 7, page ii.<br />
During operation, cutting lines shorten due to normal wear.<br />
For greater convenience and efficiency, your trimmer has<br />
been equipped with a bump feed head that allows you to<br />
simply bump the trimmer head to extend the cutting lines<br />
while the trimmer is operating. Cutting line will wear faster<br />
and require more feeding if the cutting or edging is done<br />
along sidewalks or other abrasive surfaces or heavier<br />
weeds are being cut.<br />
While the trimmer is on and spinning, gently bump the<br />
spool housing on a firm surface (hard ground or<br />
sidewalk). This should release additional cutting line<br />
from the spool.<br />
If no line is released, bump the trimmer head more<br />
sharply or try bumping it on a firmer surface.<br />
If there is no change in the cutting line length, un-plug<br />
the trimmer’s pigtail power cord from the extension<br />
cord. After the trimmer head stops rotating, gently pull at<br />
the cutting lines manually. Once the lines are pulled out<br />
(extended), plug the trimmer’s pigtail power cord into the<br />
extension cord and resume cutting.<br />
If the cutting line still does not feed from the spool, the<br />
spool might be empty or the cutting line may be tangled<br />
or jammed on the spool. Un-plug the trimmer’s pigtail<br />
power cord from the extension cord. After the trimmer<br />
head stops rotating,remove the spool (see steps1<br />
through 3 in “Removing the Spool” on page 9).<br />
If the line is tangled or jammed, untangle and replace<br />
the line. If the spool is empty, replace the spool.<br />
To avoid injury, ALWAYS turn off and<br />
disconnect the trimmer from the power outlet BEFORE<br />
installing parts or cleaning the trimmer or making any<br />
adjustments.<br />
CUTTING TIPS<br />
See Figure 8, page ii.<br />
Keep the trimmer tilted toward the area being cut; this is<br />
the best cutting area.<br />
The string trimmer cuts when passing the unit from left<br />
to right. This will avoid throwing debris at the operator.<br />
Avoid cutting in the dangerous area shown in figure 8.<br />
Use the tip of the string to do the cutting; do not force<br />
string head into uncut grass.<br />
Wire and picket fences cause extra string wear, even<br />
breakage. Stone and brick walls, curbs, and wood may<br />
wear strings rapidly.<br />
Avoid trees and shrubs. Tree bark, wood moldings,<br />
siding, and fence posts can easily be damaged by the<br />
strings.<br />
TELESCOPING BOOM<br />
See Figure 9, page ii.<br />
The boom can be extended or shortened for ease of use.<br />
Unplug the string trimmer.<br />
Unscrew telescoping boom coupler and slide to desired<br />
position.<br />
Tighten telescoping boom coupler.<br />
THREE-POSITION PIVOTING HEAD<br />
See Figure 10, page ii.<br />
Unplug the string trimmer.<br />
Depress the pivot button and move the trimmer head<br />
up or down to one of the three positions indicated by<br />
the notches.<br />
ROTATING REAR HANDLE<br />
Unplug the string trimmer.<br />
Pull up edging coupler and turn handle end<br />
counterclockwise.<br />
Release edging boom coupler when handle has been<br />
rotated 180°.<br />
EDGING<br />
See Figure 11-13, page ii.<br />
The rotating handle can be used in combination with the<br />
edger guide for edging sidewalks and walkways. To use<br />
the edger guide, flip down from it’s stored position.
Please call 1-888-266-7096 for service and<br />
location of nearest authorized service center.<br />
Please call 1-888-266-7096.<br />
TO REPLACE CUTTING LINE<br />
REMOVE THE SPOOL See Figure 14, page ii.<br />
For easy spool replacement we recommend using<br />
Craftsman 71-85967, bump feed replacement spool with<br />
0.065 cutting line. It is factory wound for maximum<br />
reliability.<br />
Disconnect the trimmer from the power supply. Turn<br />
trimmer over to access spool head cover.<br />
To avoid injury, ALWAYS turn off and<br />
disconnect the trimmer from the power outlet BEFORE<br />
installing parts or cleaning the trimmer or making any<br />
adjustments.<br />
Press the release tabs on the spool head cover and<br />
remove cover, pulling it straight off of spool.<br />
Lift the spool out of the spool housing.<br />
REPLACE THE SPOOL<br />
Replace the spool with a new factory pre-wound spool,<br />
Craftsman 71-85967, available from your <strong>Sears</strong> store or<br />
other Craftsman outlet.<br />
Insert the end of one line through an eyelet in the spool<br />
housing. Insert the other line through the other eyelet.<br />
Insert the spool into housing and press it down gently<br />
until you feel it drop into place.Take care to keep the<br />
line from becoming trapped under the spool.<br />
Snap the spool head cover back on and at the same<br />
time pull lines and be sure that they are released from<br />
spool rail notch.<br />
FILLING SPOOL WITH CUTTING LINE<br />
See Figure 15, page ii.<br />
Replacement packs of 0.065 <strong>inch</strong> (1.65mm) Craftsman<br />
Cutting Line 71-85822 are available from your <strong>Sears</strong> store.<br />
Remove the empty spool from the tool as described in<br />
“REMOVE THE SPOOL”.<br />
Remove any remaining cutting line from the spool.<br />
First wind new line onto the uppermost part of the<br />
spool. Feed 3/4 <strong>inch</strong> of cutting line into one of the line<br />
spool rail notches. Wind the cutting line onto the spool<br />
in the direction of the arrow on the spool. Make sure to<br />
wind the line neatly and in layers Do not crisscross.<br />
FILLING SPOOL WITH CUTTING LINE<br />
See Figure 15, page ii.<br />
When the wound cutting line reaches the eyelets<br />
(recesses), cut the line. Temporarily park the line in<br />
the spool rail notch on one side of the spool.<br />
Repeat the above procedure for the second cutting<br />
line on the lower section of the spool.<br />
Fit the spool onto the tool as described in “REPLACE<br />
THE SPOOL”.<br />
Before you begin trimming, only use<br />
the appropriate type of cutting line. Ensure that cutting<br />
line is present in both sections of the spool.
Strings will not feed when<br />
bumping during use as<br />
per instructions:<br />
Grass wraps around drive<br />
shaft housing and string<br />
head.<br />
Motor fails to start when<br />
switch trigger is depressed.<br />
1. Strings have become<br />
stuck together due to heat<br />
or storage time.<br />
2. Not enough string<br />
present in spool.<br />
3. Strings are tangled<br />
on spool<br />
1. Cutting tall grass at<br />
ground level.<br />
1. Power cord is not plugged<br />
in or connection is loose.<br />
2. Household circuit breaker<br />
is tripped.<br />
3. Extension cord may be<br />
faulty.<br />
1. Unplug trimmer. Open spool<br />
cover. Remove spool, unwind line<br />
and then rewind onto spool housing.<br />
2. Unplug trimmer. Open spool<br />
cover. Remove spool and replace<br />
with new line or new spool<br />
assembly as per instructions in<br />
manual.<br />
3. Unplug trimmer. Open spool<br />
cover. Remove spool unwind and<br />
remove tangled line. Rewind line<br />
as per instructions in this manual.<br />
1. Cut tall grass from the top<br />
down to prevent wrapping.<br />
1. Plug in the power cord.<br />
2. Check circuit breaker.<br />
3. Try another extension cord or<br />
connect into another wall<br />
receptacle socket on a different<br />
circuit.
NOTES<br />
<strong>12</strong> - English
D<br />
C<br />
E<br />
G<br />
F<br />
B<br />
A<br />
A - Cord retainer (reten para el cable)<br />
B - Switch trigger (gatillo del interruptor)<br />
C - Rotating rear handle (cómo rotar el<br />
mango trasero)<br />
D - Front handle (mango delantero)<br />
E - Telescoping boom (brazo telescópico)<br />
F - Grass deflector (deflector de hierba)<br />
G - Edger guide (guía para el recorte de<br />
bordes)<br />
A<br />
A - Grass deflector (deflector de hierba)<br />
B - Slide over head and turn counter<br />
clockwise deslizarlo sobre el cabezal<br />
y girarlo en sentido antihorario<br />
B<br />
C<br />
A - Screw(tornillo)<br />
B - Screw hole(orificio del tornillo)<br />
C - Button(botón)<br />
A<br />
A<br />
C<br />
A - Front handle ( poignée avant )<br />
B - Rear handle shaft (arbre de la poignée<br />
arrière)<br />
C - Knob (mando)<br />
B B<br />
B<br />
B<br />
A<br />
A - Switch trigger (gatillo del interruptor)<br />
B - Attach outlet end of extension cord here<br />
(acople aquí el extremo del enchufe del<br />
cable de extensión<br />
A - Cord warp(para enrollar el cable)<br />
B - Outlet end (extremo del enchufe)<br />
A<br />
PROPER OPERATING<br />
POSITION<br />
POSICIÓN CORRECTA<br />
PARA EL MANEJO DE<br />
LA HERRAMIENTA
Fig. 7<br />
Fig. 8<br />
Fig. 9<br />
Bump on firm surface<br />
Golpeé en superficie firme<br />
C<br />
2<br />
180°<br />
1<br />
A<br />
A - Telescoping boom coupler (botón<br />
del brazo telescópico)<br />
2<br />
180°<br />
1<br />
B<br />
A<br />
Fig. 10<br />
B<br />
A<br />
A - Pivot button (botón del pivote)<br />
B - Notches 1 and 2: trimming and edging<br />
(muescas 1 y 2: rocartar y cortar bordes)<br />
C - Notch 3: storage position only<br />
(muesca 3: posición solamente)<br />
Fig. 11<br />
A - Rear handle(mango trasero)<br />
B - Pull up edging coupler to rotate<br />
(arránquese el botón del recorte<br />
de bordes para rotar)<br />
Fig. <strong>12</strong><br />
A<br />
A - Edger guide (guía para el recorte de<br />
bordes)<br />
ii<br />
C<br />
2<br />
1<br />
° 0 8 1<br />
A<br />
Fig. 13<br />
Fig. 14<br />
A<br />
WIND CLOCKWISE<br />
ENROLLE HACIA<br />
LA DERECHA<br />
B<br />
C<br />
E<br />
D<br />
A - Spool Head Cover (Tapa de Carcasa de Bobina)<br />
B - Tabs (Lenguetas de Suelta )<br />
C - Spool Rail Notch (Muesca de Riel de Bobina)<br />
D - Eyelet (Ojete)<br />
E - Cutting Line (Línea de corte)<br />
Fig. 15<br />
RIGHT WRONG
Para la operación segura, lea y entienda todas las<br />
instrucciones antes de usar este producto. Siga todas las<br />
instrucciones de seguridad. La inobservancia de todas las<br />
instrucciones de seguridad señaladas abajo puede causar<br />
lesiones corporales graves.<br />
No permita que utilicen esta unidad niños ni personas<br />
carentes de la debida instrucción para su manejo.<br />
Limpie el área de trabajo cada vez antes de usar la unidad.<br />
Retire todos los objetos tales como piedras, vidrios rotos,<br />
clavos, alambre o cuerdas que pudiesen resultar<br />
lanzados o enredados en el hilo de corte o cuchilla, según<br />
sea el caso.<br />
Para utlizar este producto póngase anteojos de<br />
seguridad o gafas protectoras marcados con el sello de<br />
cumplimiento dela norma ANSI Z87.1.<br />
Utilice anteojos seguridad – siempre cara de uso o<br />
máscara de polvo si la operación está polvorienta.<br />
Siempre use gafas de seguridad con protección lateral.<br />
Los anteojos comunes sólo tienen lentes resistentes a los<br />
impactos. NO son anteojos de seguridad. Con el<br />
cumplimiento de esta regla se reduce el riesgo de posibles<br />
lesiones oculares. Si el proceso es polvoriento, utilice una<br />
careta.<br />
Vista apropiadamente – guantes de goma de Uso y<br />
calzado substancial son recomendados al trabajar fuera.<br />
Póngase pantalones largos de tela gruesa, botas y<br />
guantes. No se ponga ropa holgada o pantalones cortos,<br />
ni ande descalzo. No se ponga joyas de ninguna clase.<br />
Recójase el cabello largo arriba del nivel de los hombros<br />
para evitar que se enrede en las piezas móviles.<br />
Mantenga alejados a los niños - Mantenga alejados a<br />
todos los circunstantes, niños y animales a una distancia<br />
mínima de 15 m (50 pies).<br />
Permanezca alerta - No use esta unidad cuando se<br />
encuentre fatigado, enfermo o bajo los efectos del alcohol,<br />
drogas o medicamentos.<br />
No utilice la unidad en condiciones deficientes de<br />
iluminación. Mantenga todas las partes del cuerpo<br />
alejadas de toda pieza en movimiento.<br />
No utilice herramientas motorizadas en atmósferas<br />
explosivas, como las existentes alrededor de líquidos,<br />
gases y polvos inflamables. Las herramientas eléctricas<br />
generan chispas que pueden encender el polvo y los<br />
vapores inflamables.<br />
Para reducir el riesgo de una descarga eléctrica, esta<br />
herramienta dispone de una clavija polarizada (una patilla<br />
es más ancha que la otra) y requiere un cable de<br />
extensión polarizado. Esta clavija encaja de una sola<br />
manera en un cable de extensión polarizado. Si la clavija<br />
no entra completamente en el enchufe del cable de<br />
extensión, invierta la posición de la misma.<br />
Si aún así no entra la clavija, consiga un cable de<br />
extensión polarizado correcto. Un cable de extensión<br />
polarizado requerirá una toma de corriente polarizada.<br />
Esta clavija encaja de una sola manera en una toma de<br />
corriente polarizada. Si la clavija no entra completamente<br />
en la toma de corriente, invierta la posición de la clavija.<br />
Si aún así no entra la clavija, llame a un electricista<br />
calificado para encargarle la instalación de una toma de<br />
corriente adecuada. No cambie de ninguna manera la<br />
clavija del equipo ni el enchufe o la clavija del cable de<br />
extensión.<br />
Evite el contacto del cuerpo con objetos conectados a<br />
tierra, como las tuberías, radiadores, estufas y<br />
refrigeradores. Existe un mayor riesgo de descargas<br />
eléctricas si el cuerpo está en contacto con tierra.<br />
Evite los entornos de trabajo peligrosos - No exponga<br />
las herramientas eléctricas a la lluvia ni a condiciones<br />
de humedad. La introducción de agua en una<br />
herramienta eléctrica aumenta el riesgo de descargas<br />
eléctricas.<br />
Use el aparato adecuado El (los) circuito(s) o la(s)<br />
toma(s) de corriente donde se conecta el aparato para<br />
labores de jardinería deben estar protegidos con un<br />
interruptor de circuito accionado por falla de conexión a<br />
tierra (GFCI). Hay receptáculos con la protección de un<br />
GFCI integrado, y pueden utilizarse para contar con esta<br />
característica de seguridad.<br />
Utilice aparato correcto - no fuerza instrumento. Utilice<br />
el instrumento correcto para su aplicación. El<br />
instrumento correcto hará el trabajo mejor y más seguro<br />
en la tasa para que es diseñado.<br />
No accione el equipo cuando esté descalzo o al llevar<br />
puestas sandalias o calzado liviano similar. Use calzado<br />
de seguridad que le proteja sus pies y mejore su postura<br />
en superficies resbaladizas.<br />
No estire el cuerpo para alcanzar mayor distancia.<br />
Mantenga los pies bien afirmados y el equilibrio. No trate<br />
de alcanzar demasiado lejos.<br />
Evite los arranques accidentales – Evite un arranque<br />
accidental de la unidad. Asegúrese de que el gatillo del<br />
interruptor no esté oprimido antes de conectar la<br />
herramienta.<br />
No utilice la herramienta si el interruptor no enciende o<br />
no apaga. Una herramienta que no pueda controlarse<br />
con el interruptor es peligrosa y debe repararse.<br />
Desconecte la clavija de la toma de corriente antes de<br />
guardar la herramienta. Tales medidas preventivas de<br />
seguridad reducen el riesgo de poner en marcha<br />
accidentalmente la herramienta.<br />
Sólo utilice piezas de repuesto idénticas y accesorios<br />
del fabricante original. El empleo de piezas diferentes<br />
puede causar un peligro o dañar el producto.
Proporcione mantenimiento con cuidado al aparato -<br />
Cambie el cabezal del hilo, si está agrietado, desportillado<br />
o dañado de cualquier forma. Asegúrese de que el<br />
cabezal del hilo, o cuchilla, según sea el caso, esté<br />
debidamente instalado y firmemente asegurado. La<br />
inobservancia de esta advertencia puede causar lesiones<br />
corporales serias.<br />
Asegúrese de que todas las protecciones, correas,<br />
mangos y deflectores estén acoplados debidamente y de<br />
manera segura.<br />
En el cabezal de corte use únicamente hilo de repuesto<br />
del fabricante original. No use ningún otro aditamento de<br />
corte, por ejemplo, cable metálico, cuerda o producto<br />
similar. Instalar cualquier otra marca de hilo de corte en<br />
esta recortadora de hilo puede producir lesiones<br />
corporales serias.<br />
Nunca utilice la unidad si el deflector de pasto no está<br />
montado en su lugar y en buenas condiciones de<br />
funcionamiento.<br />
Revise para ver si hay piezas dañadas. Antes de seguir<br />
utilizando la herramienta, es necesario inspeccionar<br />
cuidadosamente toda protección o pieza dañada para<br />
determinar si funcionará correctamente y desempeñará la<br />
función a la que está destinada. Verifique la alineación de<br />
las partes móviles, que no haya atoramiento de partes<br />
móviles, que no haya piezas rotas, el montaje de las<br />
piezas y cualquier otra condición que pudiera afectar su<br />
funcionamiento. Toda protección o pieza que esté dañada<br />
debe repararse apropiadamente o reemplazarse en un<br />
centro de servicio autorizado para evitar todo riesgo de<br />
lesiones.<br />
Al usar la recortadora, sujétela firmemente por ambos<br />
mangos. Mantenga el cabezal del hilo por debajo del nivel<br />
de la cintura. Nunca corte con el cabezal del hilo a más<br />
de 762 mm (30 pulg.) del suelo.<br />
Guarde los aparatos que no se están usando - Mientras<br />
no se esté utilizando, la sopladora debe almacenarse en<br />
el interior, en un sitio seco y bajo llave, lejos del alcance<br />
de los niños.<br />
Asegúrese de que esté en buen estado el cordón de<br />
extensión. Al utilizar un cordón de extensión, utilice uno<br />
del suficiente calibre para soportar la corriente que<br />
consume el producto. Se recomienda que los conductores<br />
sean de calibre 16 (A.W.G.) por lo menos para un cordón<br />
de extensión de 15 metros (50 pies) de largo o menos. Si<br />
tiene dudas, utilice un cordón del calibre más grueso<br />
siguiente. Cuanto menor es el número de calibre, mayor<br />
es el grueso del cordón. Un cordón de un grueso<br />
insuficiente causa una caída en el voltaje de línea, y<br />
produce recalentamiento y pérdida de potencia.<br />
Nunca use hojas ni dispositivos que flameen. Esta<br />
unidad se diseñó para usar con recortadora de hilo<br />
únicamente. El uso de cualquier otro accesorio o<br />
aditamento aumenta el riesgo de lesiones.<br />
Inspeccione el área por cortar. Retire todos los objetos<br />
(piedras, vidrio roto, clavos, alambre, hilo, etc.) que<br />
puedan salir disparados o enredarse en el cabezal de<br />
corte.<br />
Mantenga las rejillas de ventilación limpias y sin<br />
desechos para evitar que se recaliente el motor.<br />
Límpielas cada vez, después de usar la herramienta.<br />
Apague la unidad y desconecte el suministro de<br />
corriente cuando no esté en uso. Traslade la unidad con<br />
el motor apagado.<br />
Guarde la unidad desenchufada y fuera del alcance<br />
de los niños.<br />
No cuelgue la unidad de modo que el gatillo del<br />
interruptor quede presionado.<br />
No use múltiples cordones.<br />
No maltrate el cordón. Nunca traslade la unidad<br />
sujetándola por el cordón de extensión ni tire del cordón<br />
de extensión para desconectarla.<br />
Mantenga el cordón de extensión alejado del operador<br />
y de los obstáculos en todo momento. No exponga los<br />
cordones al calor, aceite, agua ni bordes afilados.<br />
Si está dañado el cordón de corriente, debe ser<br />
reemplazado únicamente por el fabricante o en un<br />
centro de servicio autorizado para evitar riesgos.<br />
Guarde estas instrucciones. Consúltelas con frecuencia<br />
y empléelas para instruir a otras personas que puedan<br />
utilizar esta herramienta. Si presta a alguien esta<br />
herramienta, facilítele también las instrucciones.
SÍMBOLO NOMBRE DESIGNACIÓN/<br />
EXPLICACIÓN<br />
V<br />
A<br />
Hz<br />
W<br />
min<br />
Volts<br />
Amperios<br />
Hertz<br />
Watt<br />
Minutos<br />
Voltaje<br />
Corriente<br />
Frecuencia<br />
Potencia<br />
Tiempo<br />
Corriente alterna Tipo de corriente<br />
( ciclos<br />
por<br />
segundo)<br />
Corriente continua Tipo o característica de corriente<br />
Fabricación Clase II Fabricación con doble aislamiento<br />
Alerta de condiciones húmedas No exponga la unidad a la lluvia ni la use en l<br />
ugares<br />
húmedos.<br />
Lea el manual del operador Para reducir el riesgo de lesiones, el usuario<br />
debe<br />
leer<br />
y comprender<br />
el<br />
manual<br />
del<br />
operador<br />
antes<br />
de<br />
usar<br />
este<br />
producto.<br />
Alerta de seguridad Precauciones para su seguridad.<br />
Mantenga alejadas a Mantenga a los circunstantes a una distancia<br />
las personas presentes mínima de 15 m (50 pies).<br />
Protección ocular Al utilizar este producto, póngase siempre gafas<br />
de<br />
seguridad<br />
con<br />
protección<br />
lateral,<br />
y en<br />
la<br />
medida<br />
en<br />
que<br />
sea<br />
necesario,<br />
utilice<br />
un<br />
protector<br />
para<br />
toda<br />
la<br />
cara.
CARACTERISTIQUES ELECTRIQUES<br />
Entrada..............................................<strong>12</strong>0V, AC only, 60Hz<br />
Corte De Ruta........................................................305 MM<br />
Tipo De Alimentación........1.65 MM golpe de alimentación<br />
línea de corte<br />
......................71-85967<br />
..................71-85822
1-888-266-7096<br />
No permita que su familiarización<br />
con los productos le haga perder la atención. Tenga<br />
presente que un descuido de un instante es<br />
suficiente para causar una lesión seria.<br />
MONTAJE DEL MANGO DELANTERO<br />
See Figure 3, page i<br />
Afloje y retire la tuerca de mariposa, la arandela y el<br />
mando.<br />
Instale el mango en el alojamiento del eje de impulsión,<br />
en el lugar que indica la etiqueta en el eje.<br />
Si es necesario, suba o baje el mango para ajustarlo a<br />
la posición de manejo deseada.<br />
Reinstale el mando y la tuerca de mariposa. Ajuste la<br />
mando por seguridad.<br />
Cuando utilice productos,<br />
póngase siempre gafas de seguridad o anteojos<br />
protectores con protección lateral. La inobservancia<br />
de esta advertencia puede causar el lanzamiento de<br />
objetos a los ojos y, consecuentemente, posibles<br />
lesiones serias.
No utilice ningún aditamento o<br />
accesorio no recomendado por el fabricante de este<br />
producto. El empleo de aditamentos o accesorios no<br />
recomendados puede causar lesiones graves.<br />
ENCENDIDO Y APAGADO DE LA<br />
RECORTADORA See Figure 4 - 5, page i.<br />
NOTA: Use solamente cables de extensión aprobados<br />
para exteriores.<br />
Pase el cable de extensión a través del ranura del asa<br />
situada en la parte trasera del alojamiento de la<br />
recortadora y póngalo debajo del retén del cable.<br />
Para encender la recortadora de hilo, presione el gatillo<br />
del interruptor de encendido.<br />
Para detener la recortadora de hilo, suelte el gatillo del<br />
interruptor.<br />
Si alguna pieza falta o está dañado, por favor llame al<br />
1-888-266-7096 para obtener ayuda<br />
MANEJO DE LA RECORTADORA<br />
See Figure 6, page i.<br />
Siga las siguientes recomendaciones a manejar la<br />
recortadora de hilo:<br />
Sujete la recortadora con la mano derecha en el<br />
mango trasero y la izquierda en el delantero.<br />
Sujete firmemente la unidad con ambas manos<br />
durante la operación.<br />
Se recomienda sujetar la recortadora en una posición<br />
cómoda, con el mango trasero a la altura de la cadera<br />
aproximadamente.<br />
Corte la hierba alta desde arriba hacia abajo. Esto<br />
evitará que la hierba se enrolle alrededor del<br />
alojamiento del eje y del cabezal del hilo, lo que puede<br />
causar daños por calentamiento excesivo.<br />
Si la hierba se enrolla en el cabezal del hilo:<br />
Apague la recortadora.<br />
Desenchufe la recortadora de hilo.<br />
Quite la hierba.<br />
LA LÍNEA DE CORTE<br />
NO haga contacto con la línea de<br />
corte expuesta cuando levanta o sostiene la recortadora.<br />
Una línea redondo individual de 0.065 pulgadas se<br />
preinstala en la recortadora. Cuando la línea de corte<br />
necesita reemplace, instale nueva bobina devanada.<br />
Craftsman 71-85967.<br />
EXTENSIÓN DE LA LÍNEA DE CORTE<br />
See Figure 7, page ii.<br />
8<br />
Durante el funcionamiento, las líneas de corte se acortan<br />
por el uso normal. Para una mayor conveniencia y<br />
eficiencia, su recortadora ha sido equipada con un cabezal<br />
de alimentación por golpes que le permite simplemente<br />
golpear el cabezal de la recortadora para extender las<br />
líneas de corte mientras usa la recortadora. La línea de<br />
corte gastará más rápido y necesitará más alimentación si<br />
la recortando o bordeando está hecho contra pavimento u<br />
otros superficies abrasivos, o si cortas hierbajos más<br />
pesados.<br />
Mientras la recortadora está funcionamiento y girando,<br />
golpeé suavemente la carcasa de bobina contra una<br />
superficie firme (piso o pavimento). Esto debería soltar<br />
línea de corte adicional de la bobina.<br />
Si no se suelta ninguna línea, golpeé el cabezal de la<br />
recortadora con más fuerza o trate de golpearlo contra<br />
una superficie aún más dura.<br />
Si no hay ningún cambio en la longitud de la línea de<br />
corte, desenchufe el cordón eléctrico en espiral del<br />
cordón de extensión. Cuando el cabezal de la<br />
recortadora haya dejado de girar, tire con suavidad de<br />
las líneas de corte manualmente. Una vez que las<br />
líneas estén afuera (extendidas), enchufe el cordón<br />
eléctrico en espiral en el cordón de extensión y<br />
reanude el corte.<br />
Si la línea de corte sigue sin alimentar la bobina, la<br />
bobina podría estar vacía o la línea de corte podría<br />
estar enredada o atascada en la bobina. Desenchufe<br />
el cordón eléctrico en espiral de la recortadora del<br />
cordón de extensión. Cuando el cabezal de la<br />
recortadora haya dejado de girar, retire la bobina (ver<br />
Pasos 1 a 3 en “SACAR LA BOBINA” en página 9).<br />
Si la línea está enredado o atascada, desenrede y<br />
reemplace la línea. Si la bobina está vacía, reemplace<br />
la bobina.<br />
RECOMENDACIONES DE CORTE<br />
See Figure 8, page ii.<br />
Mantenga la recortadora inclinada hacia el área de<br />
corte; ésa es el área óptima.<br />
La recortadora de hilo efectúa el corte al pasar la unidad<br />
de izquierda a derecha. De esta manera se evita el<br />
lanzamiento de desechos hacia el operador. Evite<br />
recortar en el área peligrosa mostrada en la figura 8.<br />
Haga que el recorte sea efectuado por la punta del hilo;<br />
no fuerce el cabezal del hilo en la hierba sin cortar.<br />
Las cercas de alambre y de estacas causan desgaste<br />
adicional del hilo, incluso su ruptura. Los muros de<br />
piedra y de ladrillo, así como las banquetas (aceras) y<br />
la madera pueden desgastar rápidamente los hilos.<br />
Evite el contacto con árboles y arbustos. La corteza de<br />
los árboles, las molduras de madera, los revestimientos<br />
de las paredes y los postes de las cercas pueden<br />
resultar dañados fácilmente por los hilos.
BRAZO TELESCÓPICO See Figure 9, page ii.<br />
El brazo puede extenderse o acortarse para facilitar<br />
su manejo.<br />
Desenchufe la recortadora de hilo.<br />
Destornille el botón del brazo telescópico y<br />
extiéndalo o retráigalo hasta la posición deseada.<br />
Apriételo el botón del brazo telescópico.<br />
BRAZO TELESCÓPICO See Figure 10, page ii.<br />
El brazo puede extenderse o acortarse para facilitar<br />
su manejo.<br />
Desenchufe la recortadora de hilo.<br />
Destornille el botón del brazo telescópico y<br />
extiéndalo o retráigalo hasta la posición deseada.<br />
Apriételo el botón del brazo telescópico.<br />
Por favor llame al 1-888-266-7096 para el servicioy la ubicación<br />
en centro de servicio autorizado.<br />
Limpie todos los desechos presentes en la aberturas de la<br />
recortadora.Con frecuencia, usted mismo puede efectuar<br />
los ajustes y reparaciones indicados aquí.<br />
CÓMO ROTAR EL MANGO TRASERO<br />
Desenchufe la recortadora de hilo.<br />
Arránquese el botón del recorte de bordes y gire el<br />
mango a la izquierda.<br />
Liberación el boton del recorte de bordes cuando<br />
mango ha sido girado 180°.<br />
RECORTEECORTE DE BORDES<br />
See Figure 11 -13, page ii.<br />
El mango giratorio puede usarse en combinación con<br />
la guía para el recorte de bordes en banquetas (aceras)<br />
y veredas de entrada. Para utilizar la guía para el<br />
recorte de bordes, el golpe hacia abajo de lo ha<br />
almacenado la posición.<br />
Para otro tipo de reparaciones, lleve la recortadora a un<br />
establecimiento de servicio autorizado, Por favor llame al<br />
1-888-266-7096.<br />
REEMPLAZAR DE LA LÍNEA DE CORTE<br />
SACAR LA BOBINA See Figure 14, page ii.<br />
Para reemplazo fácil de la bobina, recomendamos usando<br />
Craftsman 71-85967, bobina reemplaza de alimentación<br />
por golpes con 0.065 línea de corte. Está devanada por<br />
fábrica por confiabilidad máxima.<br />
Desenchufe el cordón eléctrico. Volteé la<br />
recortadora para acceder la tapa de carcasa de<br />
bobina.<br />
Para evitar cualquier lesión,<br />
SIEMPRE apague y desconecte la recortadora del<br />
tomacorriente ANTES de instalar partes, limpiar la<br />
recortadora o de realizar ajustes.<br />
Presione las lenguetas de suelta en la tapa de<br />
carcasa de bobina y sacque la tapa, tirandola ponte<br />
derecho de la bobina.<br />
Quite la bobina de la carcasa de bobina.<br />
REEMPLAZAR LA BOBINA<br />
Reemplaza la bobina con una bobina nueva<br />
devanada por fábrica, Craftsman 71-85967,<br />
disponible a su tienda <strong>Sears</strong> u otro punto de venta<br />
Craftsman.<br />
Inserte el extremo de una línea de corte por uno de<br />
los ojetes en la carcasa de bobina. Inserte la otra<br />
línea por otro ojete.
REEMPLAZAR LA BOBINA<br />
Inserte la bobina en la carcasa y aprieta suavemente<br />
hasta que la sientas bajar al lugar. Ten cuidado que<br />
la línea no queda atrapada bajo la bobina.<br />
Se cierra con un clic la tapa de carcasa y al mismo<br />
tiempo, tire las líneas y asegure que son sueltos de<br />
las muescas de los rieles de bobina.<br />
LLENAR LA BOBINA CON LÍNEA DE CORTE<br />
Puedes devanar la línea nueva en una bobina vacía.<br />
Paquetes de reemplazo de 0.065 pulgada (1.65mm) Línea<br />
de Corte Craftsman 71-85822 son disponibles de la tienda<br />
<strong>Sears</strong>.<br />
Las cadenas no se utilizarán cuando<br />
golpes durante el uso como<br />
según las instrucciones:<br />
La hierba se envuelve alrededor de<br />
la unidad eje de la vivienda y la<br />
cadena de la cabeza.<br />
El motor no arranca cuando<br />
interruptor disparador se presiona.<br />
POSIBLE CAUSA SOLUCIÓN<br />
1. Las cadenas se han convertido en<br />
pegados debido al calor<br />
o tiempo de almacenamiento.<br />
2. No hay suficiente cuerda<br />
presentes en el carrete.<br />
3. Las cadenas se enredan<br />
en el carrete<br />
1. Corte de césped de alto en la<br />
nivel del suelo.<br />
1. El cable de alimentación no está<br />
enchufado o en conexión está suelta.<br />
2. Hogares disyuntor<br />
se ha disparado.<br />
3. El cable de extensión puede ser<br />
defectuoso.<br />
Saque la bobina vacía de la recortadora, como<br />
describido en “SACAR LA BOBINA” arriba.<br />
Saque cualquier línea quedando en la bobina.<br />
Primero, devana la línea nueva en el parte de la bobina<br />
más alto. Introduzca 3/4 pulgada de la línea de corte en<br />
unas de las muescas de la riel de bobina. Devana la<br />
línea de corte en la bobina en la dirección de la flecha<br />
en la bobina. Enseguras que devana la línea<br />
uniformamente y en estratos.<br />
1. Desenchufe la máquina. Abrir el carrete<br />
cubierta. Retire la corredera, relajarse línea<br />
y luego retroceder en la cubierta del carrete.<br />
2. Desenchufe la máquina. Abrir el carrete<br />
cubierta. Retire el carrete y reemplace<br />
con línea nueva o nuevo carrete<br />
montaje según las instrucciones en<br />
manual.<br />
3. Desenchufe la máquina. Abrir el carrete<br />
cubierta. Retire la corredera relajarse y<br />
eliminar la línea enredada. Rebobinar línea<br />
según las instrucciones en este manual.<br />
1. Cut tall grass from the top<br />
down to prevent wrapping.<br />
1. Plug in the power cord.<br />
2. Check circuit breaker.<br />
3. Try another extension cord or connect<br />
into another wall receptacle socket on a<br />
different circuit.
NOTAS<br />
11 - Español
Get it fixed, at your home or ours!<br />
Your Home<br />
For troubleshooting, product manuals and expert advice:<br />
www.managemylife.com<br />
For repair – in your home – of all major brand appliances,<br />
lawn and garden equipment, or heating and cooling systems,<br />
no matter who made it, no matter who sold it!<br />
For the replacement parts, accessories and<br />
owner’s manuals that you need to do-it-yourself.<br />
For <strong>Sears</strong> professional installation of home appliances<br />
and items like garage door openers and water heaters.<br />
1-800-4-MY-HOME ® (1-800-469-4663)<br />
Call anytime, day or night (U.S.A. and Canada)<br />
www.sears.com www.sears.ca<br />
Our Home<br />
For repair of carry-in items like vacuums, lawn equipment,<br />
and electronics, call anytime for the location of your nearest<br />
<strong>Sears</strong> Parts & Repair Service Center<br />
1-800-488-<strong>12</strong>22 (U.S.A.) 1-800-469-4663 (Canada)<br />
www.sears.com www.sears.ca<br />
To purchase a protection agreement on a product serviced by <strong>Sears</strong>:<br />
1-800-827-6655 (U.S.A.) 1-800-361-6665 (Canada)<br />
Para pedir servicio de reparación<br />
a domicilio, y para ordenar piezas:<br />
1-888-SU-HOGAR ®<br />
(1-888-784-6427)<br />
www.sears.com<br />
Au Canada pour service en français:<br />
1-800-LE-FOYER MC<br />
(1-800-533-6937)<br />
www.sears.ca<br />
® Registered Trademark / TM Trademark of KCD IP, LLC in the United States, or <strong>Sears</strong> Brands, LLC in other countries<br />
® Marca Registrada / TM Marca de Fábrica de KCD IP, LLC en Estados Unidos, o <strong>Sears</strong> Brands, LLC in otros países<br />
MC Marque de commerce / MD Marque déposée de <strong>Sears</strong> Brands, LLC