DELUXE PROFESSIONAL CHARCOAL GRILL - Brinkmann
DELUXE PROFESSIONAL CHARCOAL GRILL - Brinkmann
DELUXE PROFESSIONAL CHARCOAL GRILL - Brinkmann

Create successful ePaper yourself
Turn your PDF publications into a flip-book with our unique Google optimized e-Paper software.
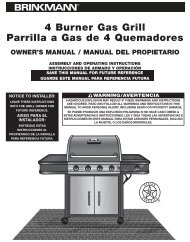
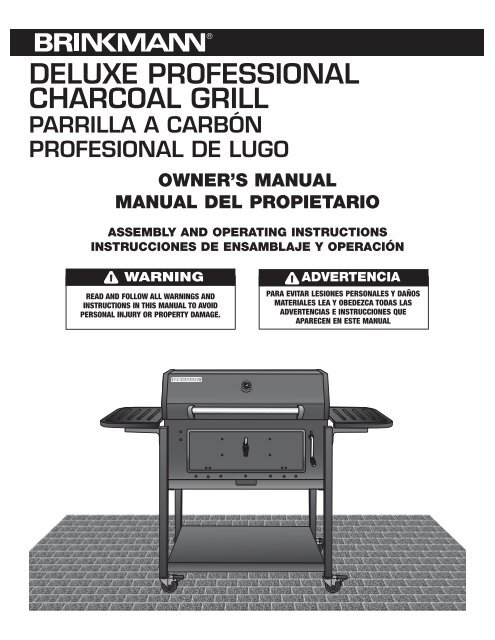
<strong>DELUXE</strong> <strong>PROFESSIONAL</strong><br />
<strong>CHARCOAL</strong> <strong>GRILL</strong><br />
PARRILLA A CARBÓN<br />
PROFESIONAL DE LUGO<br />
OWNER’S MANUAL<br />
MANUAL DEL PROPIETARIO<br />
ASSEMBLY AND OPERATING IN STRUC TIONS<br />
INSTRUCCIONES DE ENSAMBLAJE Y OPERACIÓN<br />
WARNING<br />
READ AND FOLLOW ALL WARNINGS AND<br />
INSTRUCTIONS IN THIS MANUAL TO AVOID<br />
PERSONAL INJURY OR PROPERTY DAMAGE.<br />
ADVERTENCIA<br />
PARA EVITAR LESIONES PERSONALES Y DAÑOS<br />
MATERIALES LEA Y OBEDEZCA TODAS LAS<br />
ADVERTENCIAS E INSTRUCCIONES QUE<br />
APARECEN EN ESTE MANUAL
IMPORTANT SAFETY WARNINGS<br />
WE WANT YOU TO ASSEMBLE AND USE YOUR <strong>GRILL</strong> AS SAFELY AS POSSIBLE.<br />
THE PURPOSE OF THIS SAFETY ALERT SYMBOL<br />
IS TO ATTRACT YOUR ATTENTION TO POSSIBLE HAZARDS AS YOU ASSEMBLE AND USE YOUR <strong>GRILL</strong>.<br />
WHEN YOU SEE THE SAFETY ALERT SYMBOL, PAY CLOSE ATTENTION TO THE INFORMATION WHICH FOLLOWS!<br />
READ ALL SAFETY WARNINGS AND INSTRUCTIONS CAREFULLY<br />
BEFORE ASSEMBLING AND OPERATING YOUR <strong>GRILL</strong>.<br />
WARNING<br />
• Only use this grill on a hard, level, non-combustible, stable surface (concrete, ground, etc.) capable of supporting the weight of the grill.<br />
Never use on wooden or other sur fac es that could burn.<br />
• DO NOT use grill without charcoal ash tray in place. DO NOT attempt to remove charcoal ash tray while tray contains hot coals.<br />
• Proper clearance of 10 feet between the grill and com bus ti ble material (bushes, trees, wooden decks, fences, buildings, etc.) or<br />
construction should be maintained at all times when grill is in use. Do not place grill under a roof overhang or other enclosed area.<br />
• For outdoor use only. Do not operate grill indoors or in an enclosed area.<br />
• For household use only. Do not use this grill for other than its intended purpose.<br />
• We recommend the use of a Charcoal Chimney Starter to avoid the dangers associated with charcoal lighting fluid. If you choose to use<br />
charcoal lighting fluid, only use lighting fluid approved for lighting charcoal. Care ful ly read man u fac tur er’s warnings and instructions on the<br />
charcoal lighting fluid and charcoal prior to the use of their product. Store charcoal lighting fluid safely away from grill.<br />
• When using charcoal lighting fluid, allow charcoal to burn with grill lid open until covered with a light ash (approximately 20 min utes). This<br />
will allow charcoal lighting fluid to burn off. Failure to do this could trap fumes from charcoal lighting fluid in grill and may result in a flash<br />
fire or explosion when lid is opened.<br />
• Never use charcoal that has been pre-treated with lighter fluid. Use only a high grade plain charcoal or charcoal/wood mixture.<br />
• Do not use gasoline, kerosene or alcohol for lighting char coal. Use of any of these or similar products could cause an explosion possibly<br />
leading to severe bodily injury.<br />
• Never add charcoal lighting fluid to hot or even warm coals as flashback may occur causing severe burns.<br />
• Place grill in an area where children and pets cannot come into contact with unit. Close supervision is necessary when<br />
grill is in use.<br />
• Do not leave grill unattended when in use.<br />
• When adding charcoal and/or wood, use extreme caution and follow instructions in “Adding Charcoal/Wood During Cooking” section of this<br />
manual.<br />
• Do not store or use grill near gasoline or other flammable liquids, gases or where flammable vapors may be present.<br />
• Use caution when adjusting charcoal grate height. Handle may be hot when in use.<br />
Grill is hot when in use. To avoid burns:<br />
• DO NOT attempt to move the grill.<br />
• Lock the casters so the unit does not accidentally move.<br />
• Wear protective gloves or oven mitts when adjusting door handle, ash tray, cooking height or air vents.<br />
• DO NOT touch any hot grill surfaces.<br />
• DO NOT wear loose clothing or allow hair to come in contact with grill.<br />
1
WARNING<br />
• When grilling, grease from meat may drip into the charcoal and cause a grease fire. If this should happen close lid to suffocate the flame.<br />
Do not use water to extinguish grease fires.<br />
• Use caution since flames can flare-up when fresh air sud den ly comes in contact with fire. When opening the lid, keep hands, face and<br />
body a safe distance from hot steam and flame flare-ups.<br />
• Never place more than 15 pounds on side tables. Do not lean on the side tables.<br />
• Do not exceed a temperature of 400°F. Do not allow charcoal and/or wood to rest on the walls of grill. Doing so will great ly reduce the life<br />
of the metal and finish of your grill.<br />
• Use caution when assembling and operating your grill to avoid scrapes or cuts from sharp edges of metal parts. Use caution when<br />
reaching into or under grill.<br />
• When opening lid, make sure it is pushed all the way open. If lid is not fully open, it could fall back to a closed position and cause bodily<br />
injury.<br />
• In windy weather, place grill in an outdoor area that is protected from the wind.<br />
• Close lid to suffocate flame.<br />
• Never leave coals and ashes in grill unattended. Before grill can be left unattended, remaining coals and ashes must be removed from<br />
grill. Use caution to protect yourself and property. Carefully place remaining coals and ashes in a non-combustible metal container and<br />
saturate completely with water. Allow coals and water to remain in metal container 24 hours prior to disposing.<br />
• Extinguished coals and ashes should be placed a safe distance from all structures and combustible materials.<br />
• With a garden hose, completely wet the surface beneath and around grill to extinguish any ashes, coals or embers which may have fallen<br />
during the cooking or cleaning pro cess.<br />
• After each use, clean the grill thoroughly and reapply a light coat of oil to interior to prevent rusting. Cover the grill to protect it from<br />
excessive rusting.<br />
• Use caution when lifting or moving grill to prevent strains and back injuries.<br />
• We advise that a fire extinguisher be on hand. Refer to your local authority to determine proper size and type of fire extinguisher.<br />
• Accessory attachments not manufactured by The <strong>Brinkmann</strong> Corporation for this particular product are not recommended and may lead to<br />
personal injury or property damage.<br />
• Store the grill out of reach of children and in a dry location when not in use.<br />
• Do not attempt to service grill other than normal main te nance as explained in “After-Use Safety” and “Proper Care & Maintenance”<br />
sections of this manual. Repairs should be performed by The <strong>Brinkmann</strong> Corporation only.<br />
• Properly dispose of all packaging material.<br />
USE CAUTION AND COMMON SENSE WHEN OPERATING YOUR <strong>GRILL</strong>.<br />
FAILURE TO ADHERE TO SAFETY WARNING AND GUIDELINES IN THIS MANUAL COULD RESULT<br />
IN BODILY INJURY OR PROPERTY DAMAGE.<br />
SAVE THIS MANUAL FOR FUTURE REFERENCE.<br />
2
ASSEMBLY INSTRUCTIONS<br />
READ ALL SAFETY WARNINGS & ASSEMBLY INSTRUCTIONS CAREFULLY<br />
BEFORE ASSEMBLING OR OPERATING YOUR <strong>GRILL</strong>.<br />
FOR MISSING PARTS, PLEASE CALL CUSTOMER SERVICE AT 800-527-0717.<br />
(Proof of purchase will be required.)<br />
Inspect contents of the box to ensure all parts are included and undamaged.<br />
We recommend two people work together when<br />
as sem bling this unit.<br />
The estimated time of assembly for this grill is<br />
approximately 30 minutes.<br />
1<br />
3<br />
1<br />
2<br />
The following tools are required to assemble this<br />
Deluxe Professional Charcoal Grill:<br />
4<br />
• Pliers<br />
• Phillips & Flathead Screwdrivers<br />
• Adjustable Wrench<br />
PARTS LIST - <strong>PROFESSIONAL</strong> <strong>GRILL</strong>:<br />
6<br />
5<br />
1<br />
1 Temperature Gauge<br />
2<br />
1 Handle<br />
3<br />
2 Handle Stands<br />
4<br />
5<br />
6<br />
1 Lid<br />
3 Cooking Grills<br />
2 Side Shelves<br />
7<br />
8<br />
9<br />
7<br />
4 Legs<br />
8<br />
1 Lower Grill Housing<br />
9<br />
1 Crank<br />
10<br />
11<br />
12<br />
13<br />
1 Bottom Shelf<br />
2 Air Vents<br />
1 Charcoal Ash Tray<br />
4 Steel Casters<br />
11<br />
10<br />
13<br />
12<br />
FOR COVERS, ACCESSORIES AND OTHER PRODUCTS, PLEASE VISIT US ONLINE AT:<br />
CALIFORNIA PROPOSITION 65 WARNING<br />
This product contains chemicals, including lead in the brass of certain component parts, that are known to the State of<br />
California to cause cancer, and birth defects or other reproductive harm. Wash hands after handling. When used, this product<br />
emits fuel combustion chemicals that are known to the State of California to cause cancer, and birth defects or other<br />
reproductive harm. Follow all instructions in this manual and use only in well ventilated, outdoor area.<br />
3
Parts Bag Contents<br />
1<br />
2<br />
3<br />
4<br />
1 10 X 8mm hexagonal nut<br />
1 Door locking plate<br />
1 Door handle<br />
6 6 X 5mm hexagonal nuts<br />
5<br />
6<br />
7<br />
8<br />
4 6 X 45mm Phillips head bolts<br />
14 6 X 12mm Phillips head bolts<br />
2 Cotter pins<br />
2 Hood pivot pins<br />
1 2 3<br />
4<br />
5<br />
6<br />
7 8<br />
4
Choose a good, cleared assembly area and get a friend<br />
to help you put your grill together. Lay<br />
card board down to protect grill finish and<br />
assembly area. Turn the grill on its side to begin<br />
assembly.<br />
Step 1<br />
Insert door handle through hole in door with handle<br />
pointing down. Place door locking plate over door<br />
handle pointing up and secure with a 10 X 8mm<br />
hexagonal nut.<br />
Heat<br />
Shield<br />
Nut<br />
Door<br />
Handle<br />
Locking<br />
Casters<br />
Door<br />
Locking<br />
Plate<br />
Door<br />
Step 2<br />
Attach steel casters to bottom of each leg. Tighten<br />
caster bolts securely.<br />
Legs<br />
Step 3<br />
Align the holes in one leg bracket with the holes in<br />
the body of the grill. Insert two 6 X 12mm Phillips<br />
head bolts through the leg bracket and secure to<br />
the grill body.<br />
Step 4<br />
Hang a shelf onto the lower stud of the leg that you<br />
have attached to the grill body.<br />
5
Step 5<br />
Insert the lower stud of the opposite leg<br />
bracket into the opposite side of the shelf.<br />
Align the holes in the leg bracket with the<br />
holes in the grill body. Insert two<br />
6 X 12mm Phillips head bolts through the leg<br />
bracket and secure to the grill body.<br />
Step 6<br />
With the help of a friend, turn grill onto<br />
opposite side. Try to minimize stress on the<br />
legs and shelf. Repeat steps 2<br />
through 5.<br />
Step 7<br />
With the help of a friend, set the unit upright.<br />
Try to minimize stress on the legs of the grill.<br />
Bolts<br />
Step 8<br />
Have a friend help you align holes in bottom<br />
shelf with screw holes in legs. Insert four<br />
6 X 45mm Phillips head bolts through the<br />
legs and secure to the bottom shelf.<br />
Bottom<br />
Shelf<br />
Handle<br />
Handle<br />
Stands<br />
Step 9<br />
Attach one handle stand using two<br />
6 X 12mm Phillips head bolts and two<br />
6 X 5mm hexagonal nuts. Next insert hood<br />
handle into handle stand. Place the other<br />
handle stand over handle and attach by<br />
using two 6 X 12mm Phillips head bolts and<br />
two 6 X 5mm hexagonal nuts.<br />
6
Step 10<br />
Rest lid on the body and align hinge holes,<br />
then thread hood pivot pins through hood<br />
and into grill body. Insert cotter pins into<br />
hood pivot pins and bend ends out slightly.<br />
Cotter Pin<br />
Hood Pivot Pin<br />
Step 11<br />
Attach two air vent covers to the inside of lid<br />
and body. Place air vent cover on the inside<br />
of the unit with the adjustment tab sticking<br />
through one of the air vent holes. Using<br />
6 x 12mm screw and nut, secure vent cover<br />
to the unit. Do not overtighten the nut as this<br />
will make the vent difficult to open and close.<br />
6 x 5mm Nut<br />
6 x 12mm<br />
Phillips Hex Bolt<br />
Step 12<br />
Insert crank through front of grill body and<br />
into crank bracket. Rotate clockwise until<br />
crank engages charcoal grate.<br />
7
Temperature Gauge<br />
Tightening Ring<br />
Step 13<br />
Remove tightening ring from temperature<br />
gauge. Insert temperature gauge through the<br />
opening on front of lid, re-thread tightening<br />
ring.<br />
Lip<br />
Step 14<br />
Place cooking grills on lip of body.<br />
Step 15<br />
Slide charcoal ash tray into guides at bottom<br />
of grill body.<br />
WARNING: DO NOT use grill without charcoal<br />
ash tray in place.<br />
DO NOT attempt to remove<br />
charcoal ash tray while tray<br />
contains hot coals.<br />
Charcoal Ash Tray<br />
Deluxe Professional Charcoal<br />
Grill (Assembled)<br />
8
PREPARATION FOR USE<br />
& LIGHTING IN STRUC TIONS<br />
PLACE THE <strong>GRILL</strong> OUTDOORS ON A HARD, LEVEL, NON-COMBUSTIBLE SURFACE<br />
AWAY FROM ROOF OVERHANG OR ANY COMBUSTIBLE MATERIAL. NEVER USE ON WOODEN OR OTHER SURFACES THAT<br />
COULD BURN. PLACE THE <strong>GRILL</strong> AWAY FROM OPEN WIN DOWS OR DOORS TO PREVENT SMOKE FROM ENTERING YOUR<br />
HOUSE. IN WINDY WEATHER, PLACE THE <strong>GRILL</strong> IN AN OUTDOOR AREA THAT IS PRO TECT ED FROM THE WIND.<br />
READ ALL SAFETY WARNINGS AND INSTRUCTIONS CAREFULLY<br />
BEFORE OPERATING YOUR <strong>GRILL</strong>.<br />
Curing Your Grill<br />
Prior to your first use of the <strong>Brinkmann</strong> Deluxe Professional Charcoal Grill,<br />
follow the in struc tions below carefully to cure your grill. Curing your grill will<br />
minimize damage to the exterior finish as well as rid the grill of paint odor that<br />
can impart unnatural flavors to the first meal prepared on your <strong>Brinkmann</strong><br />
Deluxe Professional Charcoal Grill.<br />
IMPORTANT: To protect your grill from excessive rust, the unit must be<br />
properly cured and covered at all times when not in use. A cover<br />
for your Deluxe Professional Charcoal Grill may be ordered<br />
directly from <strong>Brinkmann</strong> by calling 800-468-5252.<br />
Step 1<br />
Lightly coat all interior surfaces of the Deluxe Professional Charcoal Grill<br />
including cooking grill with vegetable oil or vegetable oil spray. Do not coat<br />
charcoal grate or charcoal tray.<br />
Step 2<br />
Follow the instructions below carefully to build a fire. You may use charcoal<br />
and/or wood as fuel in the Deluxe Professional Charcoal Grill (see “Adding<br />
Charcoal/Wood During Cooking” section of this manual).<br />
WARNING: Never use charcoal that has been pre-treated with lighter fluid.<br />
Use only a high grade plain charcoal or charcoal/wood mixture.<br />
If using a Charcoal Chimney Starter, follow all manufacturer’s warn ings and<br />
instructions regarding the use of their product. Start with 5 to 6 pounds of<br />
charcoal. This should be enough charcoal to cook with, once the curing<br />
process has been completed. When charcoal is burning strong, carefully<br />
place hot coals in center of charcoal grate.<br />
WARNING: DO NOT use grill without charcoal ash tray in place. DO NOT<br />
attempt to remove charcoal ash tray while tray contains hot<br />
coals.<br />
NOTE:<br />
To extend the life of your grill, make sure that hot coals and wood do<br />
not touch the walls of grill.<br />
IF USING <strong>CHARCOAL</strong> CHIMNEY STARTER, PROCEED TO STEP 5<br />
If you choose to use charcoal lighting fluid, ONLY use charcoal light ing fluid<br />
approved for lighting charcoal. Do not use gasoline, kerosene, alcohol or<br />
other flammable material for lighting charcoal. Follow all manufacturer’s<br />
warnings and instructions regarding the use of their product. Start with 5 to<br />
6 pounds of charcoal. This should be enough charcoal to cook with, once<br />
the curing process has been completed. Place the charcoal in center of<br />
charcoal grate.<br />
9
Step 3<br />
Saturate charcoal with lighting fluid. With lid open wait 2 to 3 minutes to<br />
allow lighting fluid to soak into charcoal. Store charcoal lighting fluid safely<br />
away from the grill.<br />
Step 4<br />
With grill lid and door open, stand back and carefully light charcoal through<br />
the door. Allow to burn until covered with a light ash<br />
(ap prox i mate ly 20 minutes).<br />
WARNING: Charcoal light ing fluid must be allowed to com plete ly burn off<br />
prior to closing grill lid (approximately 20 minutes). Failure to do<br />
this could trap fumes from charcoal lighting fluid in grill and may<br />
result in a flash-fire or explosion when lid is opened.<br />
WARNING: Wear protective gloves or oven mitts when adjusting door handle,<br />
ash tray, cooking height or air vents.<br />
Step 5<br />
With coals burning strong, close the lid and door. Allow the temperature to<br />
reach 225°F on the heat indicator. Maintain this temperature for 2 hours.<br />
Step 6<br />
Increase the temperature to 400°F on the heat indicator. This can be<br />
achieved by adding more charcoal and/or wood (see “Adding<br />
Charcoal/Wood During Cooking” section of this manual) and/or adjusting<br />
the air vents. Maintain this temperature for 1 hour then allow unit to cool<br />
completely.<br />
NOTE: It is important that the exterior of the grill is not scraped or rubbed<br />
during the curing process.<br />
IMPORTANT: To protect your smoker from excessive rust, the unit must be<br />
cured periodically and covered at all times when not in use. A<br />
smoker cover can be ordered directly from <strong>Brinkmann</strong> by<br />
calling 800-468-5252.<br />
YOUR BRINKMANN <strong>PROFESSIONAL</strong> <strong>GRILL</strong> IS NOW CURED<br />
AND READY FOR USE.<br />
10
OPERATING INSTRUCTIONS<br />
PLACE THE <strong>GRILL</strong> OUTDOORS ON A HARD, LEVEL, NON-COMBUSTIBLE SURFACE<br />
AWAY FROM ROOF OVERHANG OR ANY COMBUSTIBLE MATERIAL. NEVER USE ON WOODEN OR OTHER<br />
SURFACES THAT COULD BURN. PLACE THE <strong>GRILL</strong> AWAY FROM OPEN WIN DOWS OR DOORS TO PREVENT SMOKE<br />
FROM ENTERING YOUR HOUSE. IN WINDY WEATHER, PLACE THE <strong>GRILL</strong> IN AN OUTDOOR AREA THAT IS<br />
PRO TECT ED FROM THE WIND.<br />
READ ALL SAFETY WARNINGS AND INSTRUCTIONS CAREFULLY<br />
BEFORE OPERATING YOUR <strong>GRILL</strong>.<br />
Smoking<br />
Step 1<br />
Follow instructions below carefully to build a fire. You may use charcoal<br />
and/or wood as fuel in the Deluxe Professional Charcoal Grill (see “Adding<br />
Charcoal/Wood During Cooking” section of this manual).<br />
WARNING: Never use charcoal that has been pre-treated with lighter fluid.<br />
Use only a high grade plain charcoal or charcoal/wood mixture.<br />
If using a Charcoal Chimney Starter, follow all manufacturer’s warn ings and<br />
instructions regarding the use of their product. Carefully place 5 to 6<br />
pounds of hot coals on left side of charcoal grate.<br />
WARNING: DO NOT use grill without charcoal ash tray in place. DO NOT<br />
attempt to remove charcoal ash tray while tray contains hot coals.<br />
NOTE: To extend the life of your grill, make sure that hot coals and wood do<br />
not touch the walls of grill or lay inside of cooking chamber under<br />
charcoal tray.<br />
IF USING <strong>CHARCOAL</strong> CHIMNEY STARTER, PROCEED TO STEP 5<br />
If you choose to use charcoal lighting fluid, ONLY use charcoal<br />
lighting fluid approved for lighting charcoal. Do not use gasoline, kerosene,<br />
alcohol or other flammable material for lighting charcoal. Follow all<br />
manufacturer’s warnings and instructions regarding the use of their<br />
product. Place 5 to 6 pounds of charcoal on left side of charcoal grate.<br />
Step 2<br />
Saturate charcoal with lighting fluid. With lid open wait 2 to 3 minutes to<br />
allow lighting fluid to soak into charcoal. Store charcoal lighting fluid safely<br />
away from the grill.<br />
Step 3<br />
With grill lid and door open, stand back and carefully light charcoal and<br />
allow to burn until covered with a light ash (ap prox i mate ly<br />
20 minutes). Charcoal lighting fluid must be allowed to com plete ly burn off<br />
prior to closing grill lid.<br />
WARNING: Failure to do this could trap fumes from charcoal lighting fluid in<br />
grill and may result in a flash-fire or explosion when lid is<br />
opened.<br />
11
Step 4<br />
With coals burning well, carefully add wood chunks using long cook ing<br />
tongs (see “Fla vor ing Wood” and “Adding Charcoal/Wood During Cooking”<br />
sections of this man u al.)<br />
Step 5<br />
Place cooking grills on grill support lips. Use charcoal grate adjuster crank<br />
to position charcoal grate to lowest level.<br />
WARNING: Wear protective gloves or oven mitts when adjusting door handle,<br />
ash tray, cooking height or air vents.<br />
Step 6<br />
Place food on right side of cooking grill and close lid.<br />
Step 7<br />
The ideal smoking temperature is between 175°F and 250°F. For large cuts<br />
of meat, allow approximately one hour of cooking time per pound of meat.<br />
Always use a meat thermometer to ensure food is fully cooked before<br />
removing from grill.<br />
Step 8<br />
Allow grill to cool completely, then follow instructions in the<br />
“After-Use Safety” and “Proper Care & Maintenance” sections of this<br />
manual.<br />
During the smoking process, avoid the temptation to open lid to check<br />
food. Opening the lid allows heat and smoke to escape, making ad di tion al<br />
cooking time necessary.<br />
Food closest to the charcoal will cook and brown faster. Rotate food<br />
midway through the cooking cycle. If food is excessively browned or<br />
flavored with smoke, wrap food in aluminum foil after the first few hours of<br />
smoking. This will allow food to continue cooking without further browning<br />
or smoke flavoring.<br />
When cooking fish or extra lean cuts of meat, you may want to try water<br />
smoking to keep the food moist. Before starting a fire, place charcoal tray<br />
to lowest level. Use a flat bottom metal pan shallow enough to fit between<br />
charcoal grate and cooking grill as a water pan. Set the metal pan on<br />
charcoal grate under food and cooking grill. Fill with water or marinade<br />
until 2/3 full. Build your fire on the opposite side of water pan.<br />
CAUTION: Always use oven mitts/gloves to protect your hands. Liquid in<br />
water pan will be extremely hot and can scald or burn. Always<br />
allow liquid to cool completely before handling. Do not allow<br />
liquid to completely evap o rate from water pan.<br />
Charcoal grate<br />
Lower Charcoal Grate Level<br />
(Smoking)<br />
Smoke Cooking Tips<br />
12
Grilling/Searing<br />
Step 1<br />
Lightly coat all interior surfaces of the Deluxe Professional Charcoal Grill<br />
including cooking grill with vegetable oil or vegetable oil spray. Do not coat<br />
charcoal grate or charcoal ash tray.<br />
Step 2<br />
Follow the instructions below carefully to build a fire. You may use charcoal<br />
and/or wood as fuel in the Deluxe Professional Charcoal Grill (see “Adding<br />
Charcoal/Wood During Cooking” section of this manual).<br />
WARNING: Never use charcoal that has been pre-treated with lighter fluid.<br />
Use only a high grade plain charcoal or charcoal/wood mixture.<br />
Charcoal grate<br />
If using a Charcoal Chimney Starter, follow all manufacturer’s warn ings and<br />
instructions regarding the use of their product. Start with 5 to 6 pounds of<br />
charcoal. This should be enough charcoal to cook with, once the curing<br />
process has been completed. When charcoal is burning strong, carefully<br />
place hot coals in center of charcoal grate.<br />
WARNING: DO NOT use grill without charcoal ash tray in place. DO NOT<br />
attempt to remove charcoal ash tray while tray contains hot<br />
coals.<br />
Middle Low/Middle High Charcoal Tray Level<br />
(Grilling)<br />
Charcoal grate<br />
High Charcoal Tray Level<br />
(Searing)<br />
NOTE:<br />
To extend the life of your grill, make sure that hot coals and wood do<br />
not touch the walls of grill.<br />
IF USING <strong>CHARCOAL</strong> CHIMNEY STARTER, PROCEED TO STEP 5<br />
If you choose to use charcoal lighting fluid, ONLY use charcoal light ing fluid<br />
approved for lighting charcoal. Do not use gasoline, kerosene, alcohol or<br />
other flammable material for lighting charcoal. Follow all manufacturer’s<br />
warnings and instructions regarding the use of their product. Start with 5 to<br />
6 pounds of charcoal . This should be enough charcoal to cook with, once<br />
the curing process has been completed. Place the charcoal in center of<br />
charcoal grate.<br />
Step 3<br />
Saturate charcoal with lighting fluid. With lid open wait 2 to 3 minutes to<br />
allow lighting fluid to soak into charcoal. Store charcoal lighting fluid safely<br />
away from the grill.<br />
Step 4<br />
With grill lid open, stand back and carefully light charcoal and allow to burn<br />
until covered with a light ash (ap prox i mate ly 20 minutes).<br />
WARNING: Charcoal light ing fluid must be allowed to com plete ly burn off<br />
prior to closing grill lid (approximately 20 minutes). Failure to do<br />
this could trap fumes from charcoal lighting fluid in grill and may<br />
result in a flash-fire or explosion when lid is opened.<br />
13
Step 5<br />
Place cooking grill on grill support lips. Use charcoal grate adjuster crank<br />
to position charcoal grate to desired cooking level.<br />
WARNING: Wear protective gloves or oven mitts when adjusting door<br />
handle, ash tray, cooking height or air vents.<br />
Step 6<br />
Place food on cooking grill and close grill lid. Always use a meat<br />
thermometer to ensure food is fully cooked before removing from<br />
grill.<br />
Step 7<br />
Allow grill to cool completely, then follow instructions in the<br />
“After-Use Safety” and “Proper Care & Maintenance” sections<br />
of this manual.<br />
To obtain your favorite smoke flavor, ex per i ment by using chunks, sticks or<br />
chips of flavor producing wood such as hickory, pecan, apple, cherry, or<br />
mesquite. Most fruit or nut tree wood may be used for smoke flavoring. Do<br />
not use resinous wood such as pine as it will produce an unpleasant taste.<br />
Flavoring Wood<br />
Wood chunks or sticks 3" to 4" long and 1" to 2" thick work best. Unless<br />
the wood is still green, soak the wood in water for 30 minutes or wrap<br />
each piece in foil and tear several small holes in the foil to<br />
pro duce more smoke and prevent the wood from burning too quickly. A lot<br />
of wood is not required to obtain a good smoke flavor. A recommended<br />
amount for the Deluxe Professional Charcoal Grill is 5 to 6 wood chunks or<br />
sticks. Experiment by using more wood for stronger smoke flavor or less<br />
wood for milder smoke flavor.<br />
Additional flavoring wood should not have to be added during the cooking<br />
process. However, it may be necessary when cooking very large pieces of<br />
food. Follow instructions and cautions in the “Adding Charcoal/Wood During<br />
Cooking” section of this manual to avoid injury while adding wood.<br />
14
Regulating Heat<br />
To increase heat, more wood and/or char coal may be needed or an<br />
adjustment to the air vents may be necessary. Follow instructions in<br />
“Adding Charcoal/Wood During Cooking” section of this manual.<br />
To maintain the temperature, more wood and/or charcoal may need to<br />
be added or an adjustment to the air vents may be necessary during the<br />
cooking cycle.<br />
NOTE:<br />
Dry wood burns hotter than charcoal, so you may want to<br />
increase the ratio of wood to charcoal to increase the cooking<br />
tem per a ture. Hardwood such as oak, hickory, mesquite, fruit and<br />
nut wood are an excellent fuel because of their burning rate.<br />
When using wood as fuel, make sure the wood is seasoned and<br />
dry. DO NOT use resinous wood such as pine as it will produce an<br />
unpleasant taste.<br />
Adding Charcoal/Wood<br />
During Cooking<br />
Additional charcoal and/or wood or an adjustment to the air vents may be<br />
necessary to maintain or increase cooking tem per a ture.<br />
Step 1<br />
Stand back and carefully open grill lid. Use caution since flames can<br />
flare-up when fresh air suddenly comes in contact with fire.<br />
WARNING: Wear protective gloves or oven mitts when adjusting door<br />
handle, ash tray, cooking height or air vents.<br />
Step 2<br />
Use charcoal grate adjuster crank to place charcoal grate at the lowest<br />
level of cooking chamber. Open door to allow access to charcoal grate.<br />
Step 3<br />
Stand back a safe distance and use long cooking tongs to lightly brush<br />
aside ashes on hot coals. Use cooking tongs to add charcoal and/or<br />
wood to charcoal grate, being careful not to stir-up ashes and sparks. If<br />
necessary, use your Charcoal Chimney Starter to light additional<br />
charcoal and/or wood and add to existing fire.<br />
WARNING: Never add charcoal lighting fluid to hot or even warm coals as<br />
flashback may occur causing severe burns.<br />
Step 4<br />
When charcoal is burning strong again, wear oven mitts/gloves and<br />
carefully return charcoal grate to desired cooking level.<br />
Step 5<br />
Close the grill lid and door. Allow food to continue cooking.<br />
15
AFTER-USE SAFETY<br />
WARNING<br />
• Always allow grill and all components to cool completely before handling.<br />
• Never leave coals and ashes in grill unattended. Make sure coals and ashes are completely extinguished before removing.<br />
• Before grill can be left unattended, remaining coals and ashes must be removed from grill. Use caution to protect yourself and<br />
property. Place re main ing coals and ashes in a non-combustible metal container and completely saturate with water. Allow coals<br />
and water to remain in metal container 24 hours prior to disposing.<br />
• Extinguished coals and ashes should be placed a safe distance from all struc tures and combustible materials.<br />
• With a garden hose, completely wet surface beneath and around the grill to extinguish any ashes, coals or embers which may have<br />
fallen during the cooking or cleaning process.<br />
• Cover and store grill in a protected area away from children and pets.<br />
Proper Care<br />
& Maintenance<br />
• Cure your grill periodically throughout the year to protect<br />
against excessive rust.<br />
• To protect your grill from excessive rust, the unit must be properly cured<br />
and covered at all times when not in use. A smoker cover may be ordered<br />
directly from <strong>Brinkmann</strong> by calling 800-468-5252.<br />
• Wash cooking grill and charcoal grate with hot, soapy water, rinse<br />
well and dry. Lightly coat grill with vegetable oil or vegetable oil spray.<br />
• Clean inside and outside of grill by wiping off with a damp cloth. Apply a<br />
light coat of vegetable oil or vegetable oil spray to the interior surface to<br />
prevent rusting. Do not coat charcoal grate or charcoal ash tray.<br />
• If rust appears on the exterior surface of your grill, clean and buff the<br />
affected area with steel wool or fine grit emery cloth. Touch-up with a good<br />
quality high-temperature re sis tant paint.<br />
• Never apply paint to the interior surface. Rust spots on the interior surface<br />
can be buffed, cleaned, then lightly coated with vegetable oil or vegetable<br />
oil spray to minimize rusting.<br />
16
ADVERTENCIAS DE SEGURIDAD IMPORTANTES<br />
DESEAMOS QUE USTED ENSAMBLE Y USE SU PARRILLA DE LA MANERA MÁS SEGURA POSIBLE.<br />
EL PROPÓSITO DE ESTE SÍMBOLO DE ALERTA DE SEGURIDAD ES LLAMAR SU ATENCIÓN A POSIBLES PELIGROS<br />
MIENTRAS ENSAMBLA Y USA SU PARRILLA. ¡CUANDO VEA EL SÍMBOLO DE ALERTA DE SEGURIDAD , PRESTE<br />
ATENCIÓN A LA INFORMACIÓN QUE APARECE DESPUÉS!<br />
LEA TODAS LAS ADVERTENCIAS DE SEGURIDAD E INSTRUCCIONES CUIDADOSAMENTE ANTES<br />
DE ENSAMBLAR Y UTILIZAR SU PARRILLA.<br />
ADVERTENCIA<br />
• Use esta parrilla únicamente en una superficie dura, nivelada, no inflamable y estable (concreto, tierra, etc.) capaz de soportar el peso de la parrilla. Nunca la<br />
use en superficies de madera ni otras que pudieran quemarse.<br />
• NO USE la parrilla sin la bandeja para cenizas del carbón en su lugar. NO INTENTE quitar la bandeja para cenizas del carbón mientras contenga carbón<br />
caliente.<br />
• Debe mantenerse una distancia apropiada de 10 pies (3 metros) entre la parrilla y material inflamable (arbustos, árboles, terrazas de madera, cercas,<br />
edificios, etc.) o construcción mientras la parrilla está en uso. No coloque la parrilla bajo algún alero de techo ni bajo otra área cerrada.<br />
• Para uso en exteriores únicamente. No utilice la parrilla en interiores ni en áreas cerradas.<br />
• Para uso en el hogar únicamente. No use esta parrilla para propósitos distintos a los indicados.<br />
• Recomendamos que utilice un encendedor para chimenea de carbón para evitar los peligros relacionados con los líquidos encendedores para carbón. Si<br />
decidiera usar líquido encendedor para carbón, utilice únicamente el que ha sido aprobado para encender carbón. Lea cuidadosamente las instrucciones y<br />
advertencias del fabricante en el líquido encendedor para carbón y en el carbón antes de utilizar su producto. Guarde el líquido encendedor para carbón de<br />
manera segura alejado de la parrilla.<br />
• Cuando utilice líquido encendedor para carbón, permita que el carbón arda con la tapa de la parrilla abierta hasta que esté cubierto por una ligera capa de<br />
ceniza (aproximadamente 20 minutos). Esto permitirá que el líquido encendedor para carbón se consuma. No hacerlo podría atrapar los vapores del líquido<br />
en la parrilla y resultar en una llamarada o explosión cuando se levante la tapa.<br />
• Nunca utilice carbón que haya sido previamente tratado con líquido encendedor. Utilice únicamente carbón normal de alta calidad o una mezcla de<br />
carbón/madera.<br />
• No utilice gasolina, queroseno ni alcohol para encender el carbón. Utilizar cualquiera de estos productos o similares podría causar una explosión que<br />
posiblemente resultará en graves lesiones corporales.<br />
• Nunca agregue líquido encendedor para carbón sobre carbón caliente o, incluso, tibio pues podría ocurrir una llamarada que cause serias quemaduras.<br />
• Coloque la parrilla en un área donde niños y mascotas no puedan entrar en contacto con la unidad. Es necesaria una atenta supervisión mientras la parrilla<br />
está en uso.<br />
• No deje desatendida la parrilla mientras la utiliza.<br />
• Tenga extrema precaución cuando agregue carbón y/o madera y siga las instrucciones que aparecen en la sección de "Para agregar carbón/madera<br />
mientras cocina" de este manual.<br />
• No almacene ni utilice la parrilla cerca de gasolina u otros líquidos inflamables, gases ni donde pudiera haber vapores inflamables.<br />
• Tenga precaución cuando ajuste la altura de la rejilla para carbón. La manija podría estar caliente cuando la usa.<br />
La parrilla está caliente cuando se usa. Para evitar quemaduras:<br />
• NO INTENTE mover la parrilla.<br />
• Asegure las ruedecillas para que la unidad no se mueva accidentalmente.<br />
• Use guantes de horno protectores para ajustar el agarradero de puerta, bandeja de ceniza, para ajustar altura de cocción o las rejillas de ventilación.<br />
• NO TOQUE ninguna de las superficies calientes de la parrilla.<br />
• NO VISTA ropa floja ni permita que el cabello entre en contacto con la parrilla.<br />
17
• Cuando esté asando, la grasa de la carne podría gotear sobre el carbón y provocar un fuego de grasa. Si esto ocurriera cierre la tapa para sofocar la llama.<br />
No use agua para extinguir fuego de grasa.<br />
• Tenga precaución pues puede haber una llamarada cuando el aire fresco entre repentinamente en contacto con el fuego. Cuando abra la tapa, mantenga<br />
sus manos, cara y cuerpo a una distancia segura del vapor caliente y llamaradas.<br />
• Nunca coloque más de 6,8 kg en las mesas laterales. No se apoye en las mesas laterales.<br />
• No exceda una temperatura de 400°F (204°C). No permita que el carbón y/o la madera queden apoyados en las paredes de la parrilla. Hacer esto reducirá<br />
enormemente la vida útil del metal y el acabado de su parrilla.<br />
• Tenga precaución cuando ensamble y utilice su parrilla para evitar raspones o cortaduras causados por las esquinas filosas de las partes de metal. Tenga<br />
precaución cuando alcance cosas dentro o debajo de la parrilla.<br />
• Cuando levante la tapa, asegúrese que esté abierta totalmente. Si la tapa no está totalmente abierta, podría cerrarse de golpe y causar lesiones corporales.<br />
• En clima ventoso, coloque la parrilla en un área de exteriores que esté protegida del viento.<br />
• Cierre la tapa para sofocar las llamas.<br />
• Nunca desatienda el carbón y las cenizas en la parrilla. Antes de desatender la parrilla, el carbón y las cenizas restantes deben ser quitados de la parrilla.<br />
Tenga precaución para protegerse a sí mismo y a la propiedad. Cuidadosamente, coloque el carbón y las cenizas restantes en un contenedor de metal no<br />
inflamable y satúrelos con agua por completo. Permita que el carbón y el agua permanezcan en el contenedor durante 24 horas previo a desecharlos.<br />
• El carbón y las cenizas extinguidos deben de ser colocados a una distancia segura de todas las estructuras y materiales inflamables.<br />
• Con una manguera de jardín, empape la superficie debajo y alrededor de la parrilla para extinguir cualesquiera cenizas, carbón o brasas que pudieran haber<br />
caído durante el proceso de cocción o limpieza.<br />
• Después de cada uso, limpie la parrilla minuciosamente y reaplique una ligera capa de aceite al interior para prevenir la oxidación. Cubra la parrilla para<br />
protegerla de la oxidación excesiva.<br />
• Tenga precaución cuando levante o mueva la parrilla para prevenir estirones y lesiones a su espalda.<br />
• Le recomendamos que tenga a mano un extinguidor. Refiérase a sus autoridades locales para determinar el tamaño y tipo apropiados de extinguidor.<br />
• El uso de accesorios no fabricados por The <strong>Brinkmann</strong> Corporation para este producto en particular no se recomienda y podría resultar en lesiones<br />
personales o daños a la propiedad.<br />
• Guarde la parrilla fuera del alcance de los niños y en un lugar seco cuando no la esté usando.<br />
• No intente dar otros servicios a la parrilla distintos a los normales, según como se explica en las secciones de "Seguridad para después del uso" y<br />
"Mantenimiento y cuidado adecuados" de este manual. Las reparaciones deben ser hechas únicamente por The <strong>Brinkmann</strong> Corporation.<br />
• Deseche el material de empaque de la manera adecuada.<br />
ADVERTENCIA<br />
TENGA PRECAUCIÓN Y HAGA USO DEL SENTIDO COMÚN CUANDO UTILICE SU PARRILLA.<br />
NO SEGUIR LAS ADVERTENCIAS DE SEGURIDAD Y LOS LINEAMIENTOS DE ESTE MANUAL PODRÍA RESULTAR EN LESIONES<br />
CORPORALES O DAÑOS A LA PROPIEDAD.<br />
GUARDE ESTE MANUAL PARA FUTURAS REFERENCIAS.<br />
18
INSTRUCCIONES DE ENSAMBLAJE<br />
LEA TODAS LAS ADVERTENCIAS DE SEGURIDAD E INSTRUCCIONES<br />
DE ENSAMBLAJE CUIDADOSAMENTE ANTES DE ENSAMBLAR U OPERAR SU PARRILLA.<br />
PARA PIEZAS FALTANTES, POR FAVOR LLAME A SERVICIO AL CLIENTE AL 800-527-0717.<br />
Inspeccione el contenido de la caja para asegurarse que todas las partes estén incluidas y sin daños.<br />
Recomendamos que dos personas trabajen<br />
juntas cuando ensamblen esta unidad.<br />
Estimado tiempo de ensamblaje para esta<br />
parrilla es aproximadamente 30 minutos.<br />
1<br />
3<br />
1<br />
2<br />
Las siguientes herramientas son requeridas para<br />
ensamblar esta Parrilla a Carbón Profesional de<br />
Lugo:<br />
• Alicates<br />
• Destornilladores plano y Phillips<br />
• Llave inglesa ajustable<br />
6<br />
5<br />
4<br />
LISTADO DE PIEZAS – Parrilla a Carbón<br />
Profesional de Lugo:<br />
1<br />
1 Indicador de Temperatura<br />
2<br />
1 Manija<br />
3<br />
4<br />
2 Soportes para Manija<br />
1 Tapa<br />
7<br />
8<br />
9<br />
5<br />
3 Rejillas para Cocinar<br />
6<br />
2 Anaqueles Laterales<br />
7<br />
4 Patas<br />
8<br />
9<br />
10<br />
11<br />
1 Alojamiento Inferior para Parrilla<br />
1 Manivela<br />
1 Anaquel Inferior<br />
2 Conductos de Ventilación<br />
11<br />
10<br />
13<br />
12<br />
1 Bandeja para Cenizas del Carbón<br />
13<br />
4 Ruedecillas de Acero<br />
12<br />
PARA CUBIERTAS, ACCESORIOS Y OTROS PRODUCTOS, FAVOR DE VISITARNOS POR LA RED<br />
MUNDIAL EN:<br />
CALIFORNIA PROPOSICIÓN 65 ADVERTENCIA<br />
Este producto contiene químicos, incluyendo el plomo en el estaño en ciertas partes de sus componentes, conocido en el<br />
estado de California porque producen cáncer y defectos de nacimiento u otros daños reproductivos. Lávese las manos<br />
después de manejarlo. Cuando se usa, este producto emite químicos de combustión de combustible que son conocidos en el<br />
estado de California porque producen cáncer y defectos de nacimiento u otros daños reproductivos. Siga todas las<br />
instrucciones en este manual y úselo solamente en un área bien ventilada en exteriores.<br />
19
Contenido de la Bolsa de Piezas<br />
1<br />
2<br />
3<br />
4<br />
1 Tuerca hexagonal de 10 x 8mm<br />
1 Placa para asegurar la puerta<br />
1 Manija de la puerta<br />
6 Tuercas hexagonales de 6 x 5mm<br />
5<br />
6<br />
7<br />
8<br />
4 Pernos con cabeza Phillips de 6 x 45mm<br />
14 Pernos con cabeza Phillips de 6 x 12mm<br />
2 Pasadores con aletas<br />
2 Pasadores de pivote para la tapa<br />
1 2 3<br />
4<br />
5<br />
6<br />
7 8<br />
20
Escoja un área de ensamblaje adecuada y limpia, y<br />
consiga ayuda de un amigo para armar juntos su<br />
parrilla. Ponga cartón en el suelo para proteger el<br />
acabado de la parrilla y el área de ensamblaje. Voltee<br />
la parrilla hacia un lado para empezar el ensamblaje.<br />
Paso 1<br />
Inserte la manija de la puerta apuntando hacia<br />
abajo a través del agujero en la puerta. Ponga la<br />
placa para asegurar la puerta apuntando hacia<br />
arriba sobre la manija de la puerta y asegure con<br />
una tuerca hexagonal de 10 x 8mm.<br />
Escudo<br />
térmico<br />
Ruedecillas<br />
Asegurables<br />
Tuerca<br />
Manija de la<br />
Puerta<br />
Placa para<br />
Asegurar la<br />
Puerta<br />
Puerta<br />
Patas<br />
Paso 2<br />
Fije las ruedecillas de acero en la parte inferior de<br />
cada pata. Apriete los tornillos de las ruedecillas<br />
firmemente.<br />
Paso 3<br />
Alinee los agujeros en uno de los soportes de la<br />
pata con los agujeros en la unidad principal de la<br />
parrilla. Inserte dos pernos con cabeza Phillips de<br />
6 x 12mm a través del soporte de la pata y<br />
asegúrelo a la unidad principal de la parrilla.<br />
Paso 4<br />
Cuelgue un anaquel al montante inferior de la<br />
pata que ha fijado a la unidad principal de la<br />
parrilla.<br />
21
Paso 5<br />
Inserte el montante inferior del soporte para la pata<br />
opuesta dentro del lado opuesto del anaquel. Alinee los<br />
agujeros en el soporte de la pata con los agujeros en la<br />
unidad principal de la parrilla. Inserte dos pernos con<br />
cabeza Phillips de 6 x 12mm a través del soporte de la<br />
pata y asegúrelo a la unidad principal de la parrilla.<br />
Paso 6<br />
Con la ayuda de algún amigo, voltee la parrilla al lado<br />
opuesto. Trate de minimizar el estrés en las patas y el<br />
anaquel. Repita los pasos 2 al 5.<br />
Paso 7<br />
Con la ayuda de algún amigo, ponga la unidad de pie.<br />
Trate de minimizar el estrés en las patas de la parrilla.<br />
Pernos<br />
Paso 8<br />
Pídale a algún amigo que lo ayude a alinear los<br />
agujeros de la parte inferior del anaquel con los<br />
agujeros para tornillos en las patas. Inserte cuatro<br />
pernos con cabeza Phillips de 6 x 45mm a través de<br />
las patas y asegúrelos a la parte inferior del anaquel.<br />
Manija<br />
Anaquel Inferior<br />
Paso 9<br />
Fije un soporte para manija usando dos pernos con<br />
cabeza Phillips de 6 x 12mm y dos tuercas<br />
hexagonales de 6 x 5mm. Luego inserte la manija de la<br />
tapa dentro del soporte para manija. Coloque el otro<br />
soporte para manija sobre ésta y fíjelo usando dos<br />
pernos con cabeza Phillips de 6 x 12mm y dos tuercas<br />
hexagonales de<br />
6 x 5mm.<br />
Soportes<br />
para Manija<br />
22
Paso 10<br />
Descanse campana sobre cuerpo de parrilla y<br />
alinee hoyos de bisagra, entonces inserte<br />
alfileres de pivote de campana por la campana y<br />
el cuerpo de parrilla. Inserte chavetas en los<br />
alfileres de pivote de campana y dóblelos así<br />
afuera levemente.<br />
Pasador de Pivote<br />
para la Tapa<br />
Pasador con Aletas<br />
Paso 11<br />
Conecte dos ventiladores dentro de la tapa y el<br />
cuerpo de la parrilla. Coloque la cubierta del<br />
ventilador por dentro de la parrilla con el<br />
ajustsdor saliendo por uno de los hoyos del<br />
ventilador. Utilize los 6 X 12 mm pernos y la<br />
tuerca, asegure la tapa del ventilador a la parrilla.<br />
No apriete demasiado o hará la abertura difícil de<br />
abrir y cerrar.<br />
6 x 5mm Tuerca<br />
Paso 12<br />
Inserte la manivela a través del frente de la<br />
unidad principal de la parrilla y dentro del<br />
soporte de la manivela. Rótela en sentido de las<br />
manecillas del reloj hasta que la manivela trabe<br />
en la rejilla para carbón.<br />
6 x 12mm<br />
Pernos con Cabeza<br />
Phillips<br />
23
Indicador de Temperatura<br />
Anillo de Ajuste<br />
Paso 13<br />
Quite el anillo de ajuste del indicador de<br />
temperatura. Inserte el indicador de<br />
temperatura a través de la abertura al<br />
frente de la tapa, enrosque nuevamente<br />
el anillo de ajuste.<br />
Paso 14<br />
Coloque las parrillas para cocinar en el<br />
borde de la unidad principal.<br />
Borde<br />
Paso 15<br />
Deslice la bandeja para cenizas del<br />
carbón dentro de las guías en la parte<br />
inferior de la unidad principal de la<br />
parrilla.<br />
ADVERTENCIA:<br />
NO USE la parrilla sin la bandeja para<br />
cenizas del carbón en su lugar. NO<br />
INTENTE quitar la bandeja para cenizas<br />
del carbón mientras contenga carbón<br />
caliente.<br />
Bandeja para Cenizas del Carbón<br />
Parrilla a Carbón Profesional de<br />
Lugo (Ensamblada)<br />
24
INSTRUCCIONES DE PREPARACIÓN<br />
PARA USAR Y ENCENDER<br />
COLOQUE LA PARRILLA EN EXTERIORES, EN UNA SUPERFICIE DURA, NIVELADA Y NO INFLAMABLE ALEJADA DE<br />
CUALQUIER ALERO DE TECHO O CUALQUIER OTRO MATERIAL INFLAMABLE. NUNCA USE EN SUPERFICIES DE MADERA U<br />
OTRAS QUE PUDIERAN QUEMARSE. COLOQUE LA PARRILLA LEJOS DE VENTANAS ABIERTAS O PUERTAS PARA PREVENIR<br />
QUE EL HUMO ENTRE A SU CASA. EN CLIMA VENTOSO, COLOQUE LA PARRILLA EN UN ÁREA DE EXTERIORES EN LA QUE<br />
ESTÉ PROTEGIDA DEL VIENTO.<br />
LEA TODAS LAS ADVERTENCIAS DE SEGURIDAD E INSTRUCCIONES CUIDADOSAMENTE ANTES DE UTILIZAR SU<br />
PARRILLA.<br />
Curado de su Parrilla<br />
Antes del primer uso de su Parrilla a Carbón Profesional de Lugo <strong>Brinkmann</strong>, siga<br />
cuidadosamente las instrucciones que aparecen abajo para el curado de su parrilla.<br />
Curar su parrilla minimizará el daño al acabado exterior así como eliminará el olor a<br />
pintura que puede impartir sabores innaturales a la primera comida que prepare en<br />
su Parrilla a Carbón Profesional de Lugo <strong>Brinkmann</strong>.<br />
IMPORTANTE: Para proteger su parrilla de la oxidación excesiva, la unidad debe<br />
ser curada adecuadamente y cubierta todo el tiempo mientras no<br />
se use. Una cubierta para su parrilla puede ser encargada<br />
directamente de <strong>Brinkmann</strong> llamando al 800-468-5252.<br />
Paso 1<br />
Cubra con una ligera capa de aceite vegetal o aerosol vegetal para cocinar todas<br />
las superficies interiores de la Parrilla a Carbón Profesional de Lugo incluyendo la<br />
rejilla para cocinar. No cubra la rejilla para carbón o la bandeja para carbón.<br />
Paso 2<br />
Siga cuidadosamente las instrucciones que aparecen abajo para encender el<br />
fuego. Puede usar carbón y/o madera como combustible en la Parrilla a Carbón<br />
Profesional de Lugo (vea la sección "Para agregar carbón/madera mientras<br />
cocina" de este manual).<br />
ADVERTENCIA:<br />
Nunca use carbón que haya sido tratado con líquido encendedor<br />
para carbón. Usé únicamente carbón normal de alta calidad o una<br />
mezcla de carbón/madera.<br />
Si usa un encendedor para chimenea de carbón, siga todas las advertencias e<br />
instrucciones del fabricante con respecto al uso de su producto.<br />
Empiece con 2,27 kg a 2,72 kg de carbón. Esto debiera ser suficiente carbón para<br />
cocinar, una vez que se haya completado el proceso de curado. Cuando el carbón<br />
esté ardiendo con fuerza, coloque cuidadosamente el carbón caliente en el centro de<br />
la rejilla para carbón<br />
ADVERTENCIA:<br />
NOTA:<br />
NO USE la parrilla sin la bandeja para cenizas del carbón en su lugar.<br />
NO INTENTE quitar la bandeja para cenizas del carbón mientras<br />
contenga carbón caliente.<br />
Para extender la vida útil de su parrilla, asegúrese que el carbón y la<br />
madera calientes no toquen las paredes de la parrilla.<br />
SI USA UN ENCENDEDOR PARA CHIMENEA DE CARBÓN, PROSIGA AL PASO 5<br />
Si decide usar líquido encendedor para carbón, use ÚNICAMENTE líquido<br />
encendedor para carbón aprobado para encender carbón. No use gasolina,<br />
queroseno, alcohol ni algún otro material inflamable para encender el carbón.<br />
Siga todas las advertencias e instrucciones del fabricante con respecto al uso<br />
de su producto. Empiece con 2,3 kg a 2,7 kg de carbón. Esto debiera ser<br />
suficiente carbón para cocinar, una vez que se haya completado el proceso de<br />
curado. Coloque el carbón en el centro de la rejilla para carbón.<br />
25
Paso 3<br />
Sature el carbón con líquido encendedor para carbón. Con la tapa abierta<br />
espere de 2 minutos a 3 minutos para que el líquido sea absorbido por el<br />
carbón. Guarde el líquido encendedor para carbón de manera segura<br />
alejado de la parrilla.<br />
Paso 4<br />
Con la tapa de la parrilla y la puerta abiertas, aléjese y cuidadosamente<br />
encienda el carbón a través de la puerta. Permita que arda hasta que esté<br />
cubierto con una delgada capa de ceniza (aproximadamente 20 minutos).<br />
ADVERTENCIA:<br />
ADVERTENCIA:<br />
Debe permitirse que el líquido encendedor para carbón se<br />
queme completamente antes de cerrar la tapa de la parrilla.<br />
NO hacer esto podría atrapar los vapores del líquido en la<br />
parrilla y resultar en una llamarada o explosión cuando abra<br />
la tapa.<br />
Use guantes de horno protectores para ajustar el<br />
agarradero de puerta, bandeja de ceniza, para ajustar<br />
altura de cocción o las rejillas de ventilación.<br />
Paso 5<br />
Con el carbón ardiendo fuertemente, cierre la tapa y la puerta. Permita que<br />
la temperatura llegue a 225°F (107˚C) en el indicador de temperatura.<br />
Mantenga esta temperatura por 2 horas.<br />
Paso 6<br />
Incremente la temperatura a 400°F (204˚C) en el indicador de temperatura.<br />
Esto puede lograrse agregando más carbón y/o madera (vea la sección<br />
"Para agregar carbón/madera mientras cocina" de este manual) y/o<br />
ajustando ventilador. Mantenga esta temperatura por 1 hora y luego<br />
permita que la unidad se enfríe completamente.<br />
NOTA:<br />
Es importante que el exterior de la parrilla no sea raspado ni frotado<br />
durante el proceso de curado.<br />
IMPORTANTE: Para proteger su ahumador de la oxidación excesiva, la unidad<br />
debe ser curada periódicamente y cubierta todo el tiempo<br />
mientras no se use. Una cubierta para ahumador puede ser<br />
encargada directamente de <strong>Brinkmann</strong> llamando al 800-468-<br />
5252.<br />
SU PARRILLA A CARBÓN PROFESIONAL DE LUGO BRINKMANN<br />
HA QUEDADO CURADA Y ESTÁ LISTA PARA USARSE.<br />
26
INSTRUCCIONES DE USO<br />
COLOQUE LA PARRILLA EN EXTERIORES, EN UNA SUPERFICIE DURA, NIVELADA Y NO INFLAMABLE ALEJADA<br />
DE CUALQUIER ALERO DE TECHO O CUALQUIER OTRO MATERIAL INFLAMABLE. NUNCA USE EN SUPERFICIES<br />
DE MADERA U OTRAS QUE PUDIERAN QUEMARSE. COLOQUE LA PARRILLA LEJOS DE VENTANAS ABIERTAS O<br />
PUERTAS PARA PREVENIR QUE EL HUMO ENTRE A SU CASA. EN CLIMA VENTOSO, COLOQUE LA PARRILLA EN<br />
UN ÁREA DE EXTERIORES EN LA QUE ESTÉ PROTEGIDA DEL VIENTO.<br />
LEA TODAS LAS ADVERTENCIAS DE SEGURIDAD E INSTRUCCIONES<br />
CUIDADOSAMENTE ANTES DE UTILIZAR SU PARRILLA.<br />
Ahumar<br />
Paso 1<br />
Siga las instrucciones que aparecen abajo cuidadosamente para encender el<br />
fuego. Puede usar carbón y/o madera como combustible en la Parrilla a<br />
Carbón Profesional de Lugo (vea la sección "Para agregar carbón/madera<br />
mientras cocina" de este manual).<br />
ADVERTENCIA: Nunca use carbón que haya sido previamente tratado con<br />
líquido encendedor para carbón. Use únicamente un carbón<br />
normal de alta calidad o una mezcla de carbón/madera.<br />
Si usa un encendedor para chimenea de carbón, siga todas las advertencias e<br />
instrucciones del fabricante con respecto al uso de su producto.<br />
Cuidadosamente coloque 2,27 kg a 2,72 kg de carbón caliente en el lado<br />
izquierdo de la rejilla para carbón.<br />
ADVERTENCIA:<br />
NO USE la parrilla sin la bandeja para cenizas del carbón en su<br />
lugar. NO INTENTE quitar la bandeja para cenizas del carbón<br />
mientras contenga carbón caliente.<br />
NOTA:<br />
Para extender la vida útil de su parrilla, asegúrese que el carbón y la<br />
madera calientes no toquen las paredes de la parrilla o estén tendidos<br />
dentro de la cámara de cocción bajo la bandeja para carbón.<br />
SI USA UN ENCENDEDOR PARA CHIMENEA DE CARBÓN, PROSIGA AL PASO 5<br />
Si decide usar líquido encendedor para carbón, use ÚNICAMENTE líquido<br />
encendedor para carbón aprobado para encender carbón. No use gasolina,<br />
queroseno, alcohol ni algún otro material inflamable para encender el carbón.<br />
Siga todas las advertencias e instrucciones del fabricante con respecto al uso<br />
de su producto. Coloque 2,27 kg a 2,72 kg de carbón en el lado izquierdo de<br />
la rejilla para carbón.<br />
Paso 2<br />
Sature el carbón con líquido encendedor para carbón. Con la tapa abierta<br />
espere de 2 minutos a 3 minutos para permitir que el líquido sea absorbido<br />
por el carbón. Guarde el líquido encendedor para carbón de manera segura<br />
alejado de la parrilla.<br />
Paso 3<br />
Con la tapa de la parrilla y la puerta abiertas, aléjese y cuidadosamente<br />
encienda el carbón y permita que arda hasta que esté cubierto con una<br />
delgada capa de ceniza (aproximadamente 20 minutos). Debe permitirse que<br />
el líquido encendedor para carbón se queme completamente antes de cerrar<br />
la tapa de la parrilla.<br />
ADVERTENCIA:<br />
No hacer esto podría atrapar los vapores del líquido en la<br />
parrilla y resultar en una llamarada o explosión cuando abra la<br />
tapa.<br />
27
Paso 4<br />
Con el carbón ardiendo bien, agregue cuidadosamente trozos de madera usando<br />
tenazas largas para cocinar (vea las secciones "Madera saborizante" y "Para<br />
agregar carbón/madera mientras cocina" de este manual).<br />
Paso 5<br />
Coloque las rejillas para cocinar en los bordes de apoyo. Use la manivela para<br />
ajustar la rejilla para carbón al nivel más bajo.<br />
ADVERTENCIA: Use guantes de horno protectores para ajustar el agarradero<br />
de puerta, bandeja de ceniza, para ajustar altura de cocción o<br />
las rejillas de ventilación.<br />
Paso 6<br />
Coloque la comida en el lado derecho de la parrilla para cocinar y cierre la tapa.<br />
Paso 7<br />
La temperatura ideal para ahumar es entre 175°F y 250°F (79,5°C y 121°C). Para<br />
cortes grandes de carne, permita que pase aproximadamente una hora de<br />
tiempo de cocción por libra de carne. Use siempre un termómetro de carne<br />
para asegurar que la comida está completamente cocida antes de retirarla<br />
de la parrilla.<br />
Paso 8<br />
Permita que la parrilla se enfríe completamente, luego siga las instrucciones en<br />
las secciones de "Seguridad para después del uso" y "Mantenimiento y cuidado<br />
adecuados" de este manual.<br />
Rejilla para Carbón<br />
Nivel Inferior de la Rejilla para Carbón<br />
(Ahumar)<br />
Durante el proceso de ahumado, evite la tentación de abrir la tapa para revisar la<br />
comida. Levantar la tapa permite que el calor y humo escapen, haciendo que sea<br />
necesario un mayor tiempo de cocción.<br />
La comida más cercana al carbón se cocinará y dorará más rápido. Rote la<br />
comida a la mitad del ciclo de cocción. Si la comida está excesivamente dorada o<br />
con sabor a humo, envuelva la comida en papel de aluminio tras las primeras<br />
horas de ahumado. Esto permitirá que la comida se continúe cocinando sin<br />
dorarse más o sin adquirir más sabor a humo.<br />
Consejos de Cocina<br />
para Ahumar<br />
Cuando cocine pescado o cortes de carne magra, podría querer intentar ahumar<br />
con agua para mantener húmeda la comida. Antes de encender el fuego, coloque<br />
la bandeja para carbón al nivel más bajo. Use una bandeja de metal con el fondo<br />
plano, suficientemente baja, para que quepa entre la rejilla para carbón y la rejilla<br />
para cocinar, como una bandeja para agua. Ponga la bandeja de metal en la rejilla<br />
para carbón bajo la comida y la parrilla para cocinar. Llene con agua o marinada<br />
hasta que esté 2/3 llena. Encienda el fuego en el lado opuesto a la bandeja<br />
para agua.<br />
PRECAUCIÓN:<br />
Use siempre mitones/guantes resistentes al calor para proteger sus<br />
manos. El líquido en la bandeja para agua estará extremadamente<br />
caliente y podría quemarle. Permita siempre que el líquido se enfríe<br />
completamente antes de manipularlo. No permita que el líquido se<br />
evapore completamente de la bandeja para agua.<br />
28
Asar/Abrasar<br />
Paso 1<br />
Cubra con una ligera capa de aceite vegetal o aerosol vegetal para cocinar<br />
todas las superficies interiores de la Parrilla a Carbón Profesional de Lugo<br />
incluyendo la rejilla para cocinar. No recubra la rejilla para carbón o la bandeja<br />
para carbón.<br />
Paso 2<br />
Siga cuidadosamente las instrucciones que aparecen abajo para encender el<br />
fuego. Puede usar carbón y/o madera como combustible en la Parrilla a Carbón<br />
Profesional de Lugo (vea la sección "Para agregar carbón/madera mientras<br />
cocina" de este manual).<br />
Rejilla para Carbón<br />
ADVERTENCIA:<br />
Nunca use carbón que haya sido tratado con líquido<br />
encendedor para carbón. Use únicamente un carbón normal de<br />
alta calidad o una mezcla de carbón/madera.<br />
Si usa un encendedor para chimenea de carbón, siga todas las advertencias e<br />
instrucciones del fabricante con respecto al uso de su producto. Empiece con<br />
2,3 kg a 2,7 kg de carbón. Esto debiera ser suficiente carbón para cocinar, una<br />
vez que se haya completado el proceso de curado. Cuando el carbón esté<br />
ardiendo con fuerza, coloque cuidadosamente el carbón caliente en el centro<br />
de la rejilla para carbón.<br />
Nivel Medio Bajo/Medio Alto de la Bandeja para<br />
Carbón (Asar)<br />
Rejilla para Carbón<br />
ADVERTENCIA:<br />
NOTA:<br />
NO USE la parrilla sin la bandeja para cenizas del carbón en su<br />
lugar. NO INTENTE quitar la bandeja para cenizas del carbón<br />
mientras contenga carbón caliente.<br />
Para extender la vida útil de su parrilla, asegúrese que el carbón y la<br />
madera calientes no toquen las paredes de la parrilla.<br />
SI USA UN ENCENDEDOR PARA CHIMENEA DE CARBÓN, PROSIGA AL PASO 5<br />
Nivel Alto de la Bandeja para Carbón (Abrasar)<br />
Si decide usar líquido encendedor para carbón, use ÚNICAMENTE líquido<br />
encendedor para carbón aprobado para encender carbón. No use gasolina,<br />
queroseno, alcohol ni algún otro material inflamable para encender el carbón.<br />
Siga todas las advertencias e instrucciones del fabricante con respecto al uso<br />
de su producto. Empiece con 2,27 kg a 2,72 kg de carbón. Esto debiera ser<br />
suficiente carbón para cocinar, una vez que se haya completado el proceso de<br />
curado. Coloque el carbón en el centro de la rejilla para carbón.<br />
Paso 3<br />
Sature el carbón con líquido encendedor para carbón. Con la tapa abierta<br />
espere de 2 minutos a 3 minutos para permitir que el líquido sea absorbido por<br />
el carbón. Guarde el líquido encendedor para carbón de manera segura alejado<br />
de la parrilla.<br />
Paso 4<br />
Con la tapa de la parrilla abierta, aléjese y cuidadosamente encienda el carbón<br />
y permita que arda hasta que esté cubierto con una delgada capa de ceniza<br />
(aproximadamente 20 minutos).<br />
ADVERTENCIA:<br />
Debe permitirse que el líquido encendedor para carbón se<br />
queme completamente antes de cerrar la tapa de la parrilla<br />
(aproximadamente 20 minutos). No hacer esto podría atrapar<br />
los vapores del líquido en la parrilla y resultar en una llamarada<br />
o explosión cuando abra la tapa.<br />
29
Paso 5<br />
Ponga la rejilla para cocinar en los bordes de apoyo. Use la manivela de<br />
ajuste para colocar la rejilla para carbón en el nivel deseado para cocinar.<br />
ADVERTENCIA: Use guantes de horno protectores para ajustar el<br />
agarradero de puerta, bandeja de ceniza, para ajustar<br />
altura de cocción o las rejillas de ventilación.<br />
Paso 6<br />
Coloque la comida en la rejilla para cocinar y cierre la tapa de la parrilla.<br />
Use siempre un termómetro de carne para asegurar que la comida<br />
esté completamente cocida antes de retirarla de la parrilla.<br />
Paso 7<br />
Permita que la parrilla se enfríe completamente, luego siga las<br />
instrucciones en las secciones de "Seguridad para después del uso" y<br />
"Mantenimiento y cuidado adecuados" de este manual.<br />
Para conseguir su sabor ahumado favorito, experimente usando pedazos,<br />
palos y trozos de madera que produzca sabor, tal como nogal americano,<br />
pecana, manzana, cereza o mezquite. La mayoría de maderas de árboles<br />
frutales o de nueces pueden ser usadas para ahumar. No use maderas<br />
resinosas como el pino, pues producirán un sabor desagradable.<br />
Madera Saborizante<br />
Los trozos de madera o palos de 3" a 4" (8 cm a 10 cm) de largo y de 1" a<br />
2" (3 cm a 5 cm) de grosor funcionan mejor. Salvo que la madera aún esté<br />
verde, sumérjala en agua durante 30 minutos o envuelva cada pedazo en<br />
aluminio y abra pequeños agujeros en el aluminio para producir más humo<br />
e impedir que la madera se queme demasiado rápido. No se necesita<br />
demasiada madera para lograr un buen sabor ahumado. La cantidad<br />
recomendada para la Parrilla a Carbón Profesional de Lugo es de 5 a 6<br />
trozos o palos. Experimente utilizando más madera para un sabor ahumado<br />
más fuerte o menos para uno más suave.<br />
No debiera tener que agregar madera saborizante adicional durante el<br />
proceso de cocción, sin embargo, podría ser necesario cuando esté<br />
cocinando pedazos de comida muy grandes. Siga las instrucciones y<br />
precauciones en la sección "Para agregar carbón/madera mientras cocina"<br />
de este manual para evitar lesiones cuando agregue madera.<br />
30
Regulación de la<br />
Temperatura<br />
Para incrementar el calor, más madera y/o carbón podrían necesitarse<br />
y/o un ajuste del ventilador. Siga las instrucciones en la sección de<br />
"Para agregar carbón/madera mientras cocina" de este manual.<br />
Para mantener la temperatura, podría ser necesario agregar más<br />
madera y/o carbón y/o ajustar del ventilador durante el ciclo de<br />
cocción.<br />
NOTA:<br />
La madera seca se quema a más altas temperaturas que el<br />
carbón, así que talvez quiera incrementar la proporción entre<br />
madera y carbón para incrementar la temperatura de cocción y/o<br />
ajustando el ventilador. Maderas duras como roble, nogal<br />
americano, mezquite, de árboles frutales y de nueces son un<br />
excelente combustible por su forma de arder. Cuando use<br />
madera como combustible, asegúrese que la madera esté curada<br />
y seca. No use maderas resinosas como el pino, pues producirán<br />
un sabor desagradable.<br />
Para Agregar<br />
Carbón/Madera<br />
Mientras Cocina<br />
Carbón y/o madera adicional y/o ajustando el ventilador podrían ser<br />
necesarios para mantener o incrementar la temperatura de cocción.<br />
Paso 1<br />
Aléjese y cuidadosamente abra la tapa de la parrilla. Tenga precaución<br />
pues puede haber una llamarada cuando el aire fresco entre<br />
repentinamente en contacto con el fuego.<br />
ADVERTENCIA: Use guantes de horno protectores para ajustar el<br />
agarradero de puerta, bandeja de ceniza, para ajustar<br />
altura de cocción o las rejillas de ventilaciión.<br />
Paso 2<br />
Use la manivela que ajusta la rejilla para carbón para colocar la rejilla<br />
para carbón en el nivel más bajo de la cámara de cocción. Abra la puerta<br />
para permitir el acceso a la rejilla para carbón.<br />
Paso 3<br />
Párese a una distancia segura y use tenazas largas para cocinar para<br />
sacudir ligeramente las cenizas del carbón. Use las tenazas para agregar<br />
carbón y/o madera a la rejilla para carbón, teniendo cuidado de no<br />
levantar las cenizas y causar chispas. Si es necesario, use su<br />
encendedor para chimenea de carbón para encender el carbón y/o<br />
madera adicional y agréguelo al fuego existente.<br />
ADVERTENCIA: Nunca agregue líquido encendedor para carbón sobre<br />
carbón caliente o, incluso, tibio, pues puede ocurrir una<br />
llamarada que cause serias quemaduras.<br />
Paso 4<br />
Cuando el carbón esté ardiendo con fuerza nuevamente, use<br />
mitones/guantes resistentes al calor y cuidadosamente regrese la rejilla<br />
para carbón al nivel deseado para cocinar.<br />
Paso 5<br />
Cierre la tapa de la parrilla y la puerta. Permita que la comida se siga<br />
cocinando.<br />
31
SEGURIDAD PARA DESPUÉS DEL USO<br />
ADVERTENCIA<br />
• Siempre permita que la parrilla y sus partes se enfríen completamente antes de manipularlos.<br />
• Nunca desatienda el carbón y las cenizas en la parrilla. Asegúrese que el carbón y las cenizas se hayan extinguido completamente<br />
antes de quitarlos.<br />
• Antes de desatender la parrilla, el carbón y las cenizas restantes deben ser quitados de la parrilla. Tenga precaución para protegerse a<br />
sí mismo y a la propiedad. Coloque el carbón y las cenizas restantes en un contenedor de metal no inflamable y satúrelos con agua por<br />
completo. Permita que el carbón y el agua permanezcan en el contenedor durante 24 horas previo a desecharlos.<br />
• El carbón y las cenizas extinguidos deben de ser colocados a una distancia segura de todas las estructuras y materiales inflamables.<br />
• Con una manguera de jardín, empape la superficie debajo y alrededor de la parrilla para extinguir cualesquiera cenizas, carbón o brasas<br />
que pudieran haber caído durante los procesos de cocción o limpieza.<br />
• Cubra y guarde la parrilla en un área protegida, fuera del alcance de niños y mascotas.<br />
Mantenimiento y<br />
Cuidado Adecuados<br />
• Cure su parrilla periódicamente durante todo el año para protegerla contra<br />
el óxido excesivo.<br />
• Para proteger su parrilla del óxido excesivo, la unidad debe estar<br />
adecuadamente curada y cubierta todo el tiempo cuando no esté en uso.<br />
Una cubierta para ahumador puede ser encargada directamente de<br />
<strong>Brinkmann</strong> llamando al 800-468-5252.<br />
• Lave las rejillas para cocinar y rejilla para carbón con agua jabonosa<br />
caliente, enjuáguelas bien y séquelas. Cubra la parrilla con una ligera capa<br />
de aceite vegetal o aerosol vegetal para cocinar.<br />
• Limpie el interior y exterior de la parrilla con un trapo húmedo. Aplique una<br />
ligera capa de aceite vegetal o aerosol vegetal para cocinar a la superficie<br />
interior para prevenir la oxidación. No cubra la rejilla para carbón o la<br />
bandeja para cenizas del carbón.<br />
• Si apareciera óxido en la superficie exterior de su parrilla, limpie y pula la<br />
superficie con lana de acero o con una tela de grano fino para esmerilar.<br />
Retoque con una buena pintura resistente a temperaturas altas.<br />
• Nunca aplique pintura a la superficie interior. Las manchas de óxido en el<br />
interior pueden ser pulidas, limpiadas y luego cubiertas con una ligera capa<br />
de aceite vegetal o aerosol vegetal para cocinar para minimizar el óxido.<br />
32
FOR COVERS, ACCESSORIES AND OTHER PRODUCTS, PLEASE VISIT US ONLINE AT:<br />
PARA CUBIERTAS, ACCESORIOS Y OTROS PRODUCTOS, FAVOR DE VISITARNOS POR LA RED<br />
MUNDIAL EN:<br />
ONE YEAR LIMITED WARRANTY<br />
For one year from date of purchase, The <strong>Brinkmann</strong> Corporation warrants the Deluxe Professional Charcoal Grill against defects due to workmanship or materials to<br />
the original pur chas er. The <strong>Brinkmann</strong> Corporation’s obligations under this warranty are limited to the following guidelines:<br />
• This warranty does not cover grills that have been altered/modified or damaged due to: normal wear, rust, abuse, improper maintenance and/or improper use.<br />
• This warranty does not cover surface scratches or heat damage to the finish, which is considered normal wear.<br />
• The <strong>Brinkmann</strong> Corporation may elect to repair or replace damaged units covered by the terms of this warranty.<br />
• This warranty extends to the original purchaser only and is not trans fer able or assignable to subsequent purchasers.<br />
The <strong>Brinkmann</strong> Corporation requires reasonable proof of purchase. Therefore, we strongly recommend that you retain your sales receipt or invoice. To obtain<br />
replacement parts for your Deluxe Professional Charcoal Grill under the terms of this warranty, please call Customer Service Department at 800-527-0717. A<br />
receipt will be required. The <strong>Brinkmann</strong> Corporation will not be responsible for any cookers forwarded to us without prior authorization. Deluxe Professional<br />
Charcoal Grill must be returned to the original place of purchase for replacement of the unit.<br />
EXCEPT AS ABOVE STATED, THE BRINKMANN CORPORATION MAKES NO OTHER EXPRESS WARRANTY.<br />
THE IMPLIED WARRANTIES OF MERCHANTABILITY AND FITNESS FOR A PARTICULAR PURPOSE ARE LIMITED IN DURATION TO ONE YEAR FROM THE DATE OF<br />
PURCHASE. SOME STATES DO NOT ALLOW LIM I TA TIONS ON HOW LONG AN IMPLIED WARRANTY LASTS, SO THE ABOVE LIMITATION MAY NOT APPLY TO YOU.<br />
ANY LIABILITY FOR INDIRECT, INCIDENTAL OR CONSEQUENTIAL DAMAGES ARISING FROM THE FAILURE OF THE <strong>DELUXE</strong> <strong>PROFESSIONAL</strong> <strong>CHARCOAL</strong> <strong>GRILL</strong> TO<br />
COMPLY WITH THIS WARRANTY OR ANY IMPLIED WARRANTY IS EXCLUDED. CUSTOMER ACKNOWLEDGES THAT THE PURCHASE PRICE CHARGED IS BASED UPON THE<br />
LIMITATIONS CONTAINED IN THE WARRANTY SET OUT ABOVE. SOME STATES DO NOT ALLOW THE EXCLUSION OR LIMITATION OF INCIDENTAL OR CONSEQUENTIAL<br />
DAMAGES, SO THE ABOVE LIMITATION OR EXCLUSION MAY NOT APPLY TO YOU. THIS WARRANTY GIVES YOU SPECIFIC LEGAL RIGHTS, AND YOU MAY ALSO HAVE<br />
OTHER RIGHTS WHICH VARY FROM STATE TO STATE.<br />
GARANTÍA LIMITADA DE UN AÑO<br />
Por un año a partir de la fecha de compra, The <strong>Brinkmann</strong> Corporation garantiza la Parrilla a Carbón Profesional de Lugo contra defectos debidos a la mano de obra<br />
o materiales, al comprador original. Las obligaciones de The <strong>Brinkmann</strong> Corporation bajo esta garantía están limitadas a los siguientes lineamientos:<br />
• Esta garantía no cubre parrillas que han sido alteradas/modificadas o dañadas debido al: desgaste ordinario, óxido, abuso, mantenimiento inapropiado y/o uso<br />
inapropiado.<br />
• Esta garantía no cubre rayones en la superficie ni daño al acabado provocado por el calor, el cual es considerado desgaste ordinario.<br />
• The <strong>Brinkmann</strong> Corporation puede elegir reparar o reemplazar unidades dañadas cubiertas bajo los términos de esta garantía.<br />
• Esta garantía se extiende al comprador original únicamente y no es cedible ni asignable a compradores subsecuentes.<br />
The <strong>Brinkmann</strong> Corporation requiere una prueba de compra razonable. Por lo tanto le recomendamos fuertemente que conserve su recibo o factura. Para obtener<br />
piezas de reemplazo para su Parrilla a Carbón Profesional de Lugo conforme a los términos de esta garantía, por favor llame al Departamento de Servicio al Cliente<br />
al 800-527-0717. Un recibo será necesario. The <strong>Brinkmann</strong> Corporation no se hará responsable por cualquier parrilla que le sea remitida sin autorización previa. La<br />
Parrilla a Carbón Profesional de Lugo debe ser devuelta al lugar original de la compra para el reemplazo de la unidad.<br />
SALVO EN CUANTO A LO ANTERIORMENTE INDICADO, THE BRINKMANN CORPORATION NO HACE OTRA GARANTÍA EXPRESA.<br />
LAS GARANTÍAS IMPLÍCITAS DE CALIDAD E IDONEIDAD PARA UN FIN CONCRETO ESTÁN LIMITADAS EN DURACIÓN A UN AÑO A PARTIR DE LA FECHA DE COMPRA.<br />
ALGUNOS ESTADOS NO PERMITEN LIMITACIONES EN CUANTO AL TIEMPO DE DURACIÓN DE UNA GARANTÍA IMPLÍCITA, POR LO QUE LA ANTERIOR LIMITACIÓN<br />
PODRÍA NO APLICARLE A USTED.<br />
CUALQUIER RESPONSABILIDAD POR DAÑOS INDIRECTOS, INCIDENTALES O EMERGENTES RESULTANTE DE FALLAS DE LA PARRILLA A CARBÓN PROFESIONAL DE<br />
LUGO PARA CUMPLIR CON ESTA GARANTÍA O CUALQUIER GARANTÍA IMPLÍCITA QUEDA EXCLUIDA. EL CONSUMIDOR ACEPTA QUE EL PRECIO DE COMPRA ESTÁ<br />
BASADO EN LAS LIMITACIONES CONTENIDAS EN LA GARANTÍA ESTABLECIDA ARRIBA. ALGUNOS ESTADOS NO PERMITEN LA EXCLUSIÓN NI LIMITACIÓN DE LOS<br />
DAÑOS INCIDENTALES O EMERGENTES, ASÍ QUE LA LIMITACIÓN O EXCLUSIÓN QUE APARECE ARRIBA PODRÍA NO APLICARLE A USTED. ESTA GARANTÍA LE DA A<br />
USTED DERECHOS LEGALES ESPECÍFICOS, Y USTED TAMBIÉN PODRÍA TENER OTROS DERECHOS QUE VARÍAN DE ESTADO A ESTADO.<br />
140-3214-3<br />
1011<br />
©2011 The <strong>Brinkmann</strong> Corporation<br />
Dallas, Texas 75244 U.S.A.<br />
Owner’s Manual for Model<br />
Manual del Propietario para el Modelo<br />
810-3214-3