IAN 86342 IAN 86342 - Kompernass
IAN 86342 IAN 86342 - Kompernass
IAN 86342 IAN 86342 - Kompernass

Create successful ePaper yourself
Turn your PDF publications into a flip-book with our unique Google optimized e-Paper software.
Antes de empezar a leer abra la página que contiene las imágenes y,<br />
en seguida, familiarícese con todas las funciones del dispositivo.<br />
Prima di leggere aprire la pagina con le immagini e prendere<br />
confidenza con le diverse funzioni dell’apparecchio.<br />
Before reading, unfold the page containing the illustrations and<br />
familiarise yourself with all functions of the device.<br />
Klappen Sie vor dem Lesen die Seite mit den Abbildungen aus und<br />
machen Sie sich anschließend mit allen Funktionen des Gerätes vertraut.<br />
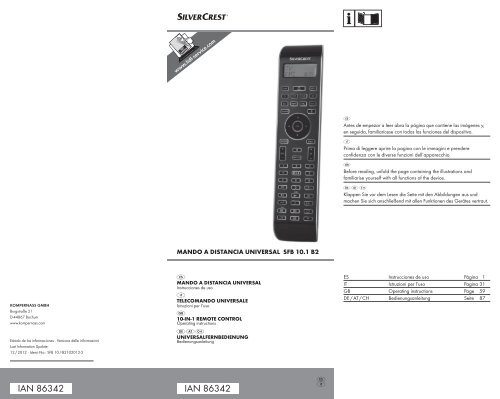
MANDO A DISTANCIA UNIVERSAL SFB 10.1 B2<br />
KOMPERNASS GMBH<br />
Burgstraße 21<br />
D-44867 Bochum<br />
www.kompernass.com<br />
MANDO A DISTANCIA UNIVERSAL<br />
Instrucciones de uso<br />
TELECOMANDO UNIVERSALE<br />
Istruzioni per l‘uso<br />
10-IN-1 REMOTE CONTROL<br />
Operating instructions<br />
ES Instrucciones de uso Página 1<br />
IT Istruzioni per l‘uso Pagina 31<br />
GB Operating instructions Page 59<br />
DE / AT / CH Bedienungsanleitung Seite 87<br />
Estado de las informaciones · Versione delle informazioni<br />
Last Information Update:<br />
12 / 2012 · Ident.-No.: SFB 10.1B2102012-3<br />
UNIVERSALFERNBEDIENUNG<br />
Bedienungsanleitung<br />
<strong>IAN</strong> <strong>86342</strong> <strong>IAN</strong> <strong>86342</strong>
ÍNDICE<br />
- 1 -<br />
PÁGINA<br />
Indicaciones de seguridad importantes 2<br />
Visión general del aparato 3<br />
Puesta en funcionamiento 4<br />
Desembalar el aparato/Comprobar el volumen de suministro 4<br />
Insertar las pilas 4<br />
Elementos de operación 5<br />
Pantalla LCD 5<br />
Botones 6<br />
El menú de configuración 9<br />
Configurar idiomas del menú 11<br />
Configurar código (programación del mando a distancia) 11<br />
Programación mediante búsqueda de código por marcas 11<br />
Programación introduciendo el código manualmente 12<br />
Programación mediante búsqueda automática de código 13<br />
Configurar el sistema 14<br />
Ajustar la hora 14<br />
Ajustar la fecha 15<br />
Ajustar el contraste 15<br />
Luz de fondo 15<br />
Ajustar el volumen/conmutador silenciador general 16<br />
Seleccionar el aparato de cinta/disco para el mando directo 17<br />
Ajustar la función de bloqueo 17<br />
Restaurar el sistema 18<br />
Configurar temporizador 18<br />
Temporizador de desconexión 18<br />
Temporizador de eventos 19<br />
Borrar Timer 20<br />
Configurar aprendizaje 20<br />
Función de programación de códigos 21<br />
Configurar macros 22<br />
Canal de favoritos 23<br />
Regulación del volumen 25<br />
Vol +/—, (silenciamiento) 25<br />
Para la operación 25<br />
Desconexión total 25<br />
Limpieza y almacenamiento 26<br />
Error / Solución 26<br />
Evacuación 27<br />
Características técnicas 28<br />
Indicación acerca de la conformidad 28<br />
Importador 28<br />
Garantía y asistencia técnica 28
MANDO A DISTANCIA UNIVERSAL<br />
SFB 10.1 B2<br />
Introducción<br />
Felicidades por la compra de su aparato nuevo.<br />
Ha optado por adquirir un producto de alta calidad. Las instrucciones<br />
de uso forman parte del producto. Contiene indicaciones<br />
importantes acerca de la seguridad, uso y evacuación.<br />
Antes de usar el producto familiaricese con todas las indicaciones<br />
de manejo y de seguridad. Utilice el producto como se<br />
describe y para los ámbitos de aplicación indicados. Guarde<br />
convenientemente estas instrucciones. Entregue todos los documentos<br />
cuando transfiera el producto a terceros.<br />
Derechos de autor<br />
Esta documentación está protegida por derechos de autor.<br />
Se reservan todos los derechos, también de reproducción<br />
fotomecánica, reproducción y difusión por medio de un procedimiento<br />
especial (por ejemplo, procesamiento de datos,<br />
soportes de datos y redes de datos), también parcialmente,<br />
así como las modificaciones técnicas y en el contenido.<br />
Indicaciones de seguridad<br />
importantes<br />
Finalidad de uso<br />
Los niños sólo deben utilizar el mando a distancia bajo la<br />
supervisión de adultos.<br />
El mando a distancia universal puede sustituir como máximo<br />
a diez mandos a distancia. Sólo se puede utilizar con aparatos<br />
audiovisuales con receptor de infrarrojos. Las funciones del<br />
mando a distancia universal se corresponden fundamentalmente<br />
con las de los mandos a distancia originales. El mando<br />
a distancia universal está indicado para el uso privado.<br />
No está indicado para el uso comercial.<br />
Cualquier uso distinto no se considerará conforme a lo previsto.<br />
El fabricante no asume ninguna responsabilidad por<br />
daños derivados de un uso no conforme a lo previsto.<br />
Advertencia<br />
Una advertencia de este nivel de peligro indica una posible<br />
situación de peligro. Si no puede evitarse la situación de peligro,<br />
pueden producirse lesiones. Deben seguirse las instrucciones<br />
de esta advertencia para evitar lesiones a personas.<br />
Atención<br />
Una advertencia de este nivel de peligro indica un posible<br />
daño material. Si no puede evitarse la situación, pueden producirse<br />
daños materiales. Deben seguirse las instrucciones de<br />
esta advertencia para evitar daños materiales.<br />
Advertencia<br />
Una indicación advierte de informaciones adicionales que<br />
facilitan el manejo del aparato.<br />
- 2 -
¡Advertencia ante peligro de lesiones debido<br />
a un uso inadecuado de las pilas!<br />
Se deben manejar las pilas con especial cuidado. Observe<br />
las siguientes indicaciones de seguridad:<br />
• Saque las pilas del compartimiento de las pilas cuando<br />
estén gastadas.<br />
• No tire las pilas al fuego. No se deben exponer las pilas<br />
a altas temperaturas.<br />
• Si no va a utilizar el aparato durante una temporada, retire<br />
las pilas para evitar que se descarguen.<br />
• ¡Riesgo de explosión! No se deben cargar las pilas.<br />
• No abra las pilas ni las cortocircuite.<br />
• El ácido derramado de las pilas puede provocar irritación<br />
en la piel. Lave la zona de contacto con abundante agua.<br />
Si el líquido alcanza los ojos, enjuáguelos bien con agua,<br />
no los frote y acuda inmediatamente al médico.<br />
• Cambie en su caso siempre todas las pilas a la vez y no<br />
mezcle nunca pilas de diferentes tipos.<br />
• Los niños no deben tener acceso a las pilas. Los niños<br />
pueden meterse las pilas en la boca y atragantarse. En<br />
caso de ingestión de una pila consulte inmediatamente<br />
con un médico.<br />
¡Atención!<br />
El mando a distancia universal incorpora un diodo infrarrojo<br />
láser de clase 1. Para evitar lesiones oculares, no lo observe<br />
con dispositivos ópticos.<br />
Daños en el aparato<br />
• Si el aparato estuviese defectuoso, no intente repararlo<br />
usted mismo. En caso de daños póngase en contacto con<br />
el fabricante o su línea directa de asistencia (véase la tarjeta<br />
de garantía).<br />
• Si penetrase líquido en el aparato o resultase dañado de<br />
otro modo, deberá ser revisado por el fabricante o<br />
su línea directa de asistencia. Póngase en contacto con el<br />
fabricante o su línea directa de asistencia (véase la información<br />
de la garantía).<br />
Visión general del aparato<br />
q Pantalla LCD<br />
w Botón /ALL OFF<br />
e Botones de aparato<br />
r Botón S<br />
t Botones de dirección<br />
y Botón EXIT<br />
u Botones P +/—<br />
i Botón MACRO<br />
o Botones numéricos<br />
a Botón para números de canal de una o dos cifras<br />
s Botones de función de teletexto<br />
- 3 -
d Tecla de iluminación<br />
f Tecla de la unidad de disco<br />
g Botón AV<br />
h Silenciamiento<br />
j Botones VOL +/—<br />
k Botón MENU<br />
l Botón OK<br />
1( Botón FAV / EPG<br />
2) Emisor / receptor de infrarrojos<br />
2! Tapa del compartimento de las pilas<br />
Nota:<br />
• Las funciones aquí descritas hacen referencia al caso ideal<br />
teórico, de que la estructura de los botones del mando a<br />
distancia original correspondiente sea idéntico con el presente<br />
mando a distancia universal. Esto corresponde a casos<br />
corresponden a casos poco frecuentes. Si no se pueden<br />
simular todas las funciones del mando a distancia original,<br />
no es una deficiencia del mando a distancia universal.<br />
• Todos los nombres de marcas en estas instrucciones o<br />
lista de códigos adjuntos son nombres comerciales de las<br />
empresas correspondientes.<br />
Puesta en funcionamiento<br />
Desembalar el aparato/Comprobar el<br />
volumen de suministro<br />
¡Cuidado!<br />
Mantenga los plásticos de embalaje fuera del alcance de<br />
los niños. Podrían asfixiarse.<br />
• Desembale el aparato y los accesorios.<br />
• Compruebe el volumen de suministro:<br />
- Mando a distancia universal (MDU),<br />
- Instrucciones de uso,<br />
- Índice de fabricantes con lista de códigos de los aparatos<br />
- 2 pilas de 1,5 V, tipo AAA/LR03 (micro)<br />
Indicación: Daños de transporte<br />
Si aprecia daños de transporte, póngase en contacto con<br />
el fabricante o bien su línea directa de asistencia (véase la<br />
información de la garantía).<br />
Insertar las pilas<br />
¡Atención!<br />
El mando a distancia universal<br />
sólo puede utilizarse<br />
con pilas de 1,5 Voltios<br />
(tamaño AAA, LR03).<br />
Realice el cambio de las<br />
pilas sin pérdida de tiempo.<br />
Los ajustes realizados<br />
- 4 -
permanecen memorizados durante aprox. 1 minuto. Si durante<br />
este tiempo no ha insertado pilas nuevas, ha de repetir<br />
todos los ajustes de nuevo. Se perderán la hora y la fecha.<br />
1. Abra la tapa del compartimento de las pilas 2! en el sentido<br />
de la flecha.<br />
2. Coloque las pilas como se indica en la figura y cierre el<br />
compartimiento de las pilas.<br />
La pantalla LCD q se encuentra activada mientras que estén<br />
las pilas insertadas. La figura siguiente muestre la pantalla<br />
LCD q después de insertar o bien de cambiar las pilas.<br />
Indicación:<br />
Si no se visualiza la pantalla LCD q, compruebe la polaridad<br />
de las pilas o inserte pilas nuevas.<br />
Elementos de operación<br />
Pantalla LCD<br />
La pantalla LCD q está dividida en campos.<br />
Campo de texto 2@<br />
Aquí se muestra el aparato actual seleccionado, por ejemplo<br />
DVD, TV, VCR, etc.<br />
Símbolo de infrarrojos 2#<br />
Con cada pulsación de botón en la cual se emite una señal<br />
por infrarrojos, se ilumina el símbolo de infrarrojos.<br />
Campo de código / hora 2$<br />
Aquí se muestra la hora o el código del aparato seleccionado<br />
actualmente. Cuando se muestra la hora, „:“ destella<br />
entre los bloques de cifras. Con indicación de la hora en<br />
formato de 12 horas se muestra a la izquierda de la hora la<br />
abreviatura del día.<br />
- 5 -
Campo del día de la semana 2%<br />
Aquí puede tomar lectura de la abreviatura del día de la semana<br />
actual una vez introducida al fecha.<br />
Indicación estándar:<br />
La indicación estándar de la pantalla LCD q se compone de<br />
las indicaciones del aparato actual, p. ej. „TV“, la abreviatura<br />
del día de la semana y la hora.<br />
Botones<br />
Indicación:<br />
Evidentemente podrá utilizar las funciones aquí descritas si<br />
el aparato a comandar dispone de dichas funciones.<br />
Botón /ALL OFF w<br />
; Encender/apagar el aparato; mantenerlo<br />
pulsado unos segundos para encender/<br />
apagar todos los aparatos.<br />
Botones de aparato e<br />
Con los botones de aparato puede seleccionar el aparato<br />
que desea utilizar.<br />
Televisor<br />
Videograbadora<br />
Aparato adicional 1<br />
Receptor con cable<br />
Reproductor de CD<br />
Reproductor BluRay Disc<br />
Amplificador de audio<br />
Reproductor DVD<br />
Receptor satélite digital<br />
Aparato adicional 2<br />
La combinación de teclas indicada no es obligatoria. También<br />
puede, por ejemplo, memorizar el código de una videocámara<br />
en la posición de memoria TV.<br />
Botón „S“ r<br />
Mantener accionada durante 3 segundos<br />
con el fin de llamar el menú de configuración,<br />
accionar brevemente para mostrar la<br />
fecha.<br />
Para acceder a la guía de programas<br />
electrónica (EPG) del aparato de destino,<br />
pulse brevemente la tecla S r, y continuación,<br />
la tecla FAV/EPG 1(.<br />
Para controlar la función “PIP” (imagen en<br />
- 6 -
imagen) del televisor,, pulse en primer lugar<br />
la tecla S r seguida de la tecla de<br />
las teclas de función - videotexto s.<br />
Botones de dirección t<br />
Moverse en los menús hacia arriba, a la<br />
derecha, hacia abajo y a la izquierda<br />
Botón EXIT y<br />
Regresar en el menú a un nivel superior.<br />
Botones P +/— u<br />
Cambiar el canal de recepción.<br />
En modo DVD y CD las teclas controlan<br />
está función SKIP.<br />
Botón MACRO i<br />
El botón MACRO i seguido de un botón<br />
numérico o 1-6, activa la secuencia de comandos<br />
memorizada previamente.<br />
Botones numéricos o<br />
Introducir números de programa y de<br />
código de aparato.<br />
Botón para números de canal de una o dos cifras a<br />
Según el tipo de aparato, para seleccionar<br />
un canal de dos cifras pulse primero el<br />
botón a y, acto seguido, introduzca el<br />
número del canal con los botones numéricos<br />
o. Pulsando de nuevo la indicación<br />
vuelve a ser de una sola cifra.<br />
Botones de función de teletexto s<br />
En modo de teletexto los botones tienen las funciones siguientes:<br />
Abrir la función de teletexto.<br />
Detener el cambio automático de páginas<br />
de teletexto compuestas por varias páginas.<br />
Aumentar la representación de páginas<br />
Superponer el texto y la imagen de televisión<br />
Cerrar la función de teletexto.<br />
Para llamar la función SWAP del aparato<br />
de destino, pulse brevemente la tecla S r,<br />
seguida de la tecla .<br />
- 7 -
Indicación:<br />
• Esta función de videotexto está disponible sólo en modo<br />
de TV europeo y su televisor deberá ser compatible con<br />
videotexto.<br />
• Además, los botones P +/- u controlan las funciones de<br />
teletexto siguientes:<br />
P + Avanzar una página<br />
P — Retroceder una página<br />
Teclas de la unidad de disco f<br />
Las teclas de la unidad de disco f controlan aparatos tales<br />
como reproductores de DVD/CD y videograbadoras:<br />
Iniciar la reproducción<br />
Conmutación de formato de imagen<br />
durante el manejo del TV<br />
Grabar<br />
Parar la reproducción/grabación/<br />
rebobinado<br />
Detener la reproducción<br />
Rebobinar<br />
Avanzar<br />
Las marcas de color de las teclas de la unidad de disco hacen<br />
referencia a los campos de color en el videotexto, estas son<br />
controladas mediante funciones de texto emergente.<br />
Botón AV g<br />
Cambiar a la entrada AV.<br />
Silenciamiento h<br />
Encender/apagar el sonido.<br />
Botones VOL+/— j<br />
Ajustar el volumen (Volume).<br />
Botón MENU k<br />
Abrir el menú del aparato controlado.<br />
Botón OK l<br />
Confirme con el botón OK una selección en el menú.<br />
Botón FAV/EPG 1(<br />
Pulse la tecla FAV/EPG para acceder a sus canales<br />
preferidos previamente programados.<br />
Para llamar la función EPG del aparato de destino,<br />
pulse primero brevemente la tecla S r.<br />
- 8 -
El menú de configuración<br />
En las configuraciones del sistema proceda del modo siguiente:<br />
• Programación del mando a distancia del aparato a controlar<br />
• Ajuste del idioma del menú, la hora, fecha, contraste de<br />
la pantalla, iluminación de fondo, volumen, función de<br />
bloqueo y restablecimiento del sistema<br />
• Configuración del temporizador<br />
• La "programación" de determinados comandos de botones<br />
• Creación de macros<br />
• Creación de favoritos<br />
• etc.<br />
La siguiente página contiene una visión general de la estructura<br />
del menú.<br />
- 9 -
- 10 -
Configurar idiomas del menú<br />
Para la representación del menú del aparato puede elegir<br />
entre 5 idiomas: Inglés, Alemán, Español, Francés e Italiano.<br />
1. Mantenga pulsado el botón S r durante algo más de 3<br />
segundos. Realice las entradas en el menú rápidamente,<br />
puesto que el menú se cierra sin transcurren 15 segundos<br />
sin realizar ninguna entrada.<br />
2. En la pantalla LCD q se visualiza „LANGUAGE SETUP“.<br />
Pulse la tecla OK l.<br />
3. En la pantalla LCD aparece ahora „ENGLISH“ q. Con<br />
las teclas t seleccione el idioma elegido y confirme<br />
con la tecla OK l.<br />
4. Con la tecla EXIT y finaliza el menú.<br />
El menú de aparatos se muestran ahora en el idioma seleccionado.<br />
Para el resto de las instrucciones presuponemos<br />
que ha seleccionado el idioma del país.<br />
Configurar código<br />
(programación del mando a distancia)<br />
Están disponibles 3 métodos de programación para el mando<br />
a distancia: Programación mediante búsqueda de código<br />
por marcas, mediante búsqueda de código automática y<br />
mediante entrada directa de código (manual).<br />
En primer lugar debería utilizar la búsqueda de códigos por<br />
marcas, puesto que éste representa el método más rápido de<br />
programación siempre que el fabricante de su aparato se encuentre<br />
en la lista de códigos. Como segunda opción se recomienda<br />
la entrada directa de código seguida de la búsqueda<br />
automática de código.<br />
Programación mediante búsqueda de código<br />
por marcas<br />
En este método seleccione directamente la marca y el código a<br />
través de la pantalla LCD q.<br />
Para programar su mando a distancia, siga las instrucciones<br />
de operación siguientes:<br />
1. Pulse el botón de aparatos e del aparato para el cual<br />
desea programar el mando a distancia.<br />
2. Mantenga pulsado el botón S r durante algo más de<br />
3 segundos. En la pantalla LCD q aparece „AJUSTAR<br />
IDIOM”. Con la tecla o bien t seleccione „AJUS-<br />
TAR CÓDIG“ y confirme con la tecla OK l.<br />
3. En la pantalla LCD q aparece ahora „INTROD CÓDIG“.<br />
Seleccione „CÓDIGO MARCA“ con los botones <br />
t y confirme con el botón OK l.<br />
4. A continuación aparece en orden alfabético la primera<br />
marca de la lista de aparatos preprogramados.<br />
- 11 -
5. Utilice los 34 botones t para seleccionar las distintas<br />
marcas.<br />
6. Para facilitar el acceso puede saltar con los botones<br />
numéricos o directamente a las letras de inicio:<br />
2 => A 3 => D 4 => G 5 => J<br />
6 => M 7 => P 8 => T 9 => W<br />
Ejemplo para la búsqueda de un código de marca de<br />
TV: Con el botón 5 la indicación salta a la „J“. La primera<br />
marca es „JEC“*. Si dispone por ejemplo de un<br />
aparato de la marca „Kenwood“*, pulse el botón 4 t<br />
para pasar de página hasta que aparezca esta marca.<br />
(* Todos los nombres de marcas son marcas comerciales<br />
de las empresas correspondientes.)<br />
7. La mayoría de los fabricantes utilizan varios códigos diferentes<br />
para el mando a distancia. Lo que tiene que descubrir<br />
ahora cuales de los códigos disponibles son los más adecuados<br />
para su aparato. En el lado derecho de la pantalla<br />
LCD q, debajo de la marca, se muestra el código actual.<br />
8. Oriente el mando a distancia sobre el aparato actual<br />
y pulse las teclas, que correspondan las funciones de<br />
este aparato, para comprobar estos códigos (excepto<br />
t, OK l, EXIT y, las teclas de los aparatos<br />
e o las teclas numéricas o).<br />
9. Si funcionan la mayoría de los botones, pulse el botón<br />
OK l, para memorizar el ajuste. En la pantalla LCD q<br />
aparece „OK”. A continuación, el menú se cierra automáticamente.<br />
10. Si no funcionan los botones o si sólo funcionan unas<br />
cuantas, utilice el botón 5 ó 6 t para seleccionar el<br />
siguiente código y vuelva a comprobarlo conforme a lo<br />
descrito bajo el punto 8.<br />
11. El botón EXIT y permite regresar un nivel en el menú.<br />
Repita estos pasos operativos para todos los aparatos que<br />
desea controlar con el mando a distancia.<br />
Programación introduciendo el código<br />
manualmente<br />
En este modo se puede programar el mando a distancia introduciendo<br />
directamente un número de código. Consulte el número<br />
código necesario en el índice de fabricantes adjunto a la<br />
lista de códigos de aparatos. Si el código nuevo no es válido,<br />
se restablece el código válido programado como último.<br />
1. Pulse el botón de aparatos e del aparato para el cual<br />
desea programar el mando a distancia.<br />
2. Mantenga pulsado el botón S r durante algo más de<br />
3 segundos. En la pantalla LCD q aparece „AJUSTAR<br />
IDIOM”. Con la tecla o bien t seleccione „AJUS-<br />
TAR CÓDIG“ y confirme con la tecla OK l.<br />
3. En la pantalla LCD q aparece ahora „INTROD CÓDIG“.<br />
Pulse el botón l para abrir esta función.<br />
4. En la pantalla LCD q aparece el código utilizado actualmente<br />
para el aparato seleccionado. Ahora parpadea el<br />
- 12 -
primer dígito del código esperando que se introduzca el<br />
código. Introduzca el nuevo código de cuatro cifras con los<br />
botones numéricos o. Después de introducir el cuarto dígito<br />
parpadea el código completo. Ahora puede comprobar<br />
si el MDU puede controlar con este código el aparato elegido.<br />
Pulse las teclas que correspondan a las funciones del<br />
aparato, en el televisor p. ej. PROG +/–. Si el aparato reacciona<br />
tal como se desea, confirme la entrada de código<br />
con la tecla OK l. De lo contrario introduzca el siguiente<br />
código posible de la lista y vuelva a comprobarlo.<br />
5. Si el CÓDIGO introducido es válido, se memoriza el<br />
código. En la pantalla LCD q aparece brevemente „OK“.<br />
A continuación, el menú se cierra automáticamente. En<br />
caso de un fallo la pantalla LCD q muestra brevemente<br />
„ERROR“ (error), quedando en espera a que se introduzca<br />
el código de nuevo. Repita el paso 4.<br />
6. El botón EXIT y permite subir un nivel en el menú.<br />
Programación mediante búsqueda automática<br />
de código<br />
Este proceso puede durar por aparato varios minutos ya que<br />
se ha de recorrer todos los códigos para el aparato seleccionado.<br />
Por ello se deberá utilizar este método en caso de no<br />
poder programar el aparato mediante la búsqueda directa<br />
por marcas o bien entrada de código directo y en el caso de<br />
que el aparato no figure en el índice de fabricante con lista<br />
de código de aparatos.<br />
Siga los pasos indicados a continuación para realizar la programación<br />
mediante búsqueda automática de códigos.<br />
1. Pulse el botón de aparato e correspondiente al aparato<br />
que quiere controlar (p.ej. VCR).<br />
2. Encienda el aparato que desea controlar con el mando<br />
a distancia. En los aparatos VCR/DVD/CD inserte una<br />
cinta o bien un disco.<br />
3. Mantenga pulsado el botón S r durante algo más de<br />
3 segundos. En la pantalla LCD q aparece „AJUSTAR<br />
IDIOM”. Con la tecla o bien t seleccione „AJUS-<br />
TAR CÓDIG“ y confirme con la tecla OK l.<br />
4. En la pantalla LCD q aparece ahora „INTROD CÓDIG“.<br />
Pulse el botón o bien t, hasta que en la pantalla<br />
LCD q aparezca „CERCA CODIC“. Oriente el mando a<br />
distancia hacia el aparato y, acto seguido, pulse el botón<br />
OK l para activar el modo "búsqueda automática de<br />
código".<br />
5. Comienza la búsqueda. Durante esta operación, el aparato<br />
envía los códigos uno tras otro en orden ascendente.<br />
Esta situación se indica mediante el símbolo de infrarrojos<br />
2#. Cada búsqueda comienza con el código actual<br />
ajustado.<br />
6. Si el aparato reacciona desconectándose, pulse inmediatamente<br />
el botón OK l para memorizar el código actual.<br />
En la pantalla LCD q se muestra brevemente „OK“.<br />
- 13 -
7. Compruebe si puede controlar con el mando a distancia la<br />
mayor parte de las funciones de su aparato. En caso afirmativo<br />
es muy probable que haya encontrado el código<br />
correcto. Si hay algunas funciones no operativas, puede<br />
iniciar de nuevo la búsqueda automática de códigos a<br />
partir del paso 1.<br />
8. Si el aparato deja de reaccionar, es posible que en el paso<br />
6 no haya pulsado el botón OK l con suficiente rapidez.<br />
En este caso, pulse repetidamente el botón EXIT y para salir<br />
del menú y regresar a la indicación estándar.<br />
9. A continuación, mantenga pulsado el botón de aparatos<br />
e correspondiente al aparato cuyo código está buscando.<br />
En el lado inferior derecho de la pantalla LCD q se<br />
muestra el código actual. Anote este número.<br />
10. Acto seguido, proceda tal como se explicó en el capítulo<br />
anterior "Programación introduciendo el código<br />
manualmente" y compruebe si el código funciona con la<br />
siguiente combinación de números más baja.<br />
Nota:<br />
1. Cuando la búsqueda de códigos están todos los botones<br />
sin función excepto OK l y EXIT y.<br />
2. Si ha alcanzado la búsqueda automática el final de la<br />
lista de códigos, se detendrá. La pantalla regresa entonces<br />
a „CERCA CODIC“.<br />
Configurar el sistema<br />
Ajustar la hora<br />
La pantalla LCD q le muestra la hora. La ajusta del modo<br />
siguiente:<br />
1. Mantenga pulsado el botón S r durante algo más de 3<br />
segundos. Aparece la indicación „AJUSTAR IDIOM“. Si<br />
transcurren 15 segundos sin que se realice ninguna entrada,<br />
el aparato sale del menú y regresa a la indicación<br />
estándar.<br />
2. Seleccione „AJUSTAR SIST“ con el botón o t y<br />
confirme con el botón OK l.<br />
3. En la pantalla LCD q se visualiza „AJUSTAR HORA“.<br />
Confirme con el botón OK l. En la pantalla LCD q ahora<br />
se muestra „TEMPO“ y el formato de la hora (24 HR)<br />
destella.<br />
4. Pulse el botón o t para cambiar al otro formato<br />
de hora (12 HR). Más adelante con la indicación de hora<br />
para visualizar la hora del día se muestra „AM“ o „PM“<br />
antespuesto a la hora. „AM“ representa „AM“ = „ante<br />
meridium“ (por la mañana, 0:00 horas hasta 12:00<br />
horas). „PM“ representa „PM“ = „post meridium“ (por la<br />
tarde, 12:00 horas hasta 0:00 horas). Pulse el botón OK<br />
l para confirmar.<br />
5. Ahora destella la indicación de las horas. Seleccione la<br />
hora actual con el botón o t y pulse el botón OK l.<br />
- 14 -
6. Ahora destella la indicación de los minutos. Seleccione<br />
los minutos actuales con el botón o t y pulse el<br />
botón OK l para guardar. Vuelve a aparecer la indicación<br />
„AJUSTAR HORA“.<br />
7. Para cerrar este menú o el siguiente, pulse el botón EXIT<br />
y repetidamente hasta que en la pantalla LCD q aparezca<br />
la indicación estándar.<br />
Ajustar la fecha<br />
Al pulsar el botón S r, en la pantalla LCD q se muestra la<br />
fecha. Para ajustar la fecha:<br />
1. Mantenga pulsado el botón S r durante algo más de<br />
3 segundos. Aparece la indicación „AJUSTAR IDIOM“.<br />
2. Seleccione „AJUSTAR SIST“ con el botón o t y<br />
confirme con el botón OK l.<br />
3. En la pantalla LCD q se visualiza „AJUSTAR HORA“.<br />
Pulse el botón t para cambiar a „AJUSTAR FECHA“.<br />
Confirme con el botón OK l.<br />
4. En la pantalla parpadea el año „2011“. Modifique el<br />
año con el botón o t y confirme con el botón OK<br />
l. A continuación, modifique el mes con el botón o<br />
t y confirme con el botón OK l. Finalmente destella<br />
el día, que también se puede modificar con el botón o<br />
t.<br />
5. Para guardar, pulse el botón OK l. Vuelve a aparecer la<br />
indicación „AJUSTAR FECHA“.<br />
Ajustar el contraste<br />
El contraste de la pantalla lo puede ajustar del modo siguiente:<br />
1. Mantenga pulsado el botón S r durante algo más de<br />
3 segundos. Aparece la indicación „AJUSTAR IDIOM“.<br />
2. Seleccione „AJUSTAR SIST“ con el botón o t<br />
y confirme con el botón OK l.<br />
3. Seleccione „AJUSTAR CONTR“ con el botón o t y<br />
confirme con el botón OK l.<br />
4. En la pantalla LCD q parpadea ahora el valor del contraste,<br />
que se puede ajustar con el botón o t:<br />
Indicación en la pantalla:<br />
0 = máximo contraste:<br />
15 = mínimo contraste<br />
5. El botón OK l permite memorizar el ajuste elegido. Vuelve<br />
a aparecer la indicación „AJUSTAR CONTR“.<br />
Luz de fondo<br />
Se puede ajustar el tiempo durante el cual permanecerá<br />
iluminado el fondo de la pantalla LCD q y las teclas al<br />
terminar de utilizar el mando. Tenga en cuenta que si la luz<br />
permanece encendida mucho rato disminuye la vida útil de<br />
las pilas.<br />
1. Mantenga pulsado el botón S r durante algo más de<br />
3 segundos. Aparece la indicación „AJUSTAR IDIOM“.<br />
- 15 -
2. Seleccione „AJUSTAR SIST“ con el botón o t<br />
y confirme con el botón OK l.<br />
3. Seleccione „LUZ FOND AJUST” con el botón o t<br />
y confirme con el botón OK l.<br />
4. En la pantalla LCD q destellan los segundos de la duración<br />
de la luz de fondo y se pueden ajustar entre 0 y 60<br />
con los botones t. Seleccione „0“ para desconectar<br />
completamente la luz de fondo.<br />
5. El botón OK l permite memorizar el ajuste elegido. Vuelve<br />
a aparecer la indicación „LUZ FOND AJUST“.<br />
Ajustar el volumen/conmutador silenciador<br />
general<br />
Para no tener que presionar una tecla de dispositivo cada<br />
vez que desee regular el volumen o utilizar el conmutador<br />
silenciador, el MDU dirige estas funciones siempre a un<br />
dispositivo. Puede definir usted mismo este dispositivo de<br />
destino.<br />
1. Mantenga pulsada la tecla S r durante un poco más de<br />
3 segundos. Aparece la indicación „AJUSTAR IDIOM“.<br />
2. Con la tecla o t, seleccione “AJUSTAR SIST” y<br />
confirme la selección con la tecla OK l.<br />
3. Con la tecla o t, seleccione “VOL/MUTE AJUST”<br />
y confirme la selección con la tecla OK l.<br />
4. La pantalla LCD q muestra „TODO VOL AJUST“. Al pulsar<br />
la tecla OK l, la indicación cambia a „TODO VOL<br />
MODO“.<br />
5. Pulse ahora la tecla de dispositivo e correspondiente al<br />
dispositivo que responderá a la regulación de volumen<br />
general.<br />
6. Si el dispositivo indicado dispone de regulación de volumen,<br />
se mostrará brevemente „CORRECTO“ y se cerrará<br />
el menú. La regulación de volumen afectará a partir de<br />
entonces al dispositivo indicado de este modo.<br />
7. Si este dispositivo no dispone de regulación de volumen,<br />
el MDU no permitirá la selección y mostrará “ERROR<br />
VOLUM”. También en este caso se cerrará el menú. La<br />
regulación de volumen seguirá entonces afectando al<br />
dispositivo anterior.<br />
También puede desactivar la regulación de volumen general<br />
para determinados aparatos.<br />
1. Seleccione para ello el menú „VOL/MUTE AJUST“ con<br />
la tecla o t la función „MODO VOL AJUST“ y<br />
confirme con la tecla OK l. En la pantalla LCD q aparece<br />
„MODO VOL MODO“.<br />
2. Pulse ahora la tecla de dispositivo e correspondiente<br />
al dispositivo que se debe excluir de la regulación de volumen<br />
general. La pantalla LCD q mostrará „CORRECTO“<br />
y la regulación de volumen general no estará activa al<br />
utilizar el MDU en el modo de funcionamiento de uno de<br />
los dispositivos seleccionados.<br />
- 16 -
Puede cancelar en cualquier momento la configuración<br />
efectuada en el menú “VOL/MUTE AJUST”.<br />
1. Seleccione para ello el menú „VOL/MUTE AJUST“ “<br />
con la tecla o t la función „VOL/MUTE RESET“<br />
y confirme con la tecla OK l.<br />
2. Con el mensaje CONFIRM RESET, la pantalla LCD q le<br />
solicitará que confirme la acción pulsando la tecla OK l.<br />
Si desea borrar las configuraciones pulse la tecla OK<br />
l, la indicación de “CORRECTO” confirma el borrado<br />
de la asignación de aparato respecto a la regulación de<br />
volumen global. Pulse en cambio la tecla EXIT y para<br />
cancelar la eliminación.<br />
Seleccionar el aparato de cinta/disco para el<br />
mando directo<br />
Puede seleccionar un aparato de cinta o de disco que desea<br />
manejar con las teclas de la unidad de disco f, sin tener que<br />
pulsar previamente a la tecla de aparato e correspondiente.<br />
1. Mantenga pulsado el botón S r durante algo más de<br />
3 segundos. Aparece la indicación “AJUSTAR IDIOM”.<br />
2. Con la tecla o tecla t seleccione „AJUSTAR SIST“<br />
y confirme la selección con la tecla OK l.<br />
3. En la pantalla LCD q se visualiza „AJUSTAR HORA“.<br />
Pulse el botón t, para cambiar a „AJUSTAR REPR“.<br />
Confirme con la tecla OK l.<br />
4. Con la tecla o tecla t seleccione el aparato que<br />
desea que reaccione al MDU, al usar las teclas de la<br />
unidad de disco f. Confirme con la tecla OK l.<br />
5. Si en vez de seleccionar un aparato, elige “OFF” y confirma<br />
con la tecla OK l, desconectará el mando directo.<br />
Si selecciona “REINIC” y confirma con la tecla OK l<br />
activará los ajustes de fábrica preprogramados para esta<br />
función.(DVD).<br />
6. La indicación LCD q muestra „CORRECTO“ y el aparato<br />
seleccionado no se puede manejar directamente con las<br />
teclas de la unidad de disco f.<br />
Ajustar la función de bloqueo<br />
Con la función de bloqueo puede bloquear el acceso a todos<br />
los menús de configuración.<br />
1. Mantenga pulsada la tecla S r durante un poco más de<br />
3 segundos.<br />
2. Con la tecla o t, seleccione “AJUSTAR SIST” y<br />
confirme la selección con la tecla OK l.<br />
3. Con la tecla o t, seleccione “BLOQUEO AJUST”<br />
y confirme la selección con la tecla OK l. La pantalla<br />
LCD q muestra la configuración actual.<br />
4. Con la tecla o t, seleccione la opción “BLO-<br />
QUEAD” (bloqueo activado) o bien “DESBLOQ” (bloqueo<br />
desactivado).<br />
5. Guarde la configuración pulsando la tecla OK l. En la<br />
pantalla LCD q aparecerá de nuevo “BLOQUEO AJUST”.<br />
- 17 -
Restaurar el sistema<br />
Con esta función puede cancelar la ocupación de todas o<br />
cada una de las teclas de aparatos.<br />
1. Mantenga pulsado el botón S r durante algo más de<br />
3 segundos. Aparece la indicación „AJUSTAR IDIOM“.<br />
2. Seleccione „AJUSTAR SIST“ con el botón o t<br />
y confirme con el botón OK l.<br />
3. Seleccione „SISTEMA RESET“ con el botón o t<br />
y confirme con el botón OK l.<br />
4. Ahora puede seleccionar con la tecla o tecla t la<br />
función deseada. Para borrar la ocupación (código) de<br />
todas las teclas de aparatos e así como todos los datos<br />
acerca de los macros, temporizador así como funciones<br />
aprendidas, seleccione „TODO RESET“ y confirme con la<br />
tecla OK l.<br />
5. En la pantalla LCD q se visualiza ahora „CONFIRM<br />
RESET“. Confirme el borrado con la tecla OK l. A<br />
continuación, la pantalla LCD q muestra “CORRECTO<br />
RESET”. Las informaciones han sido borradas y el menú<br />
es finalizado.<br />
6. Para borrar sólo la ocupación de teclas de aparatos individuales<br />
e, seleccione „MODO RESET“ y presione la<br />
tecla OK l. La pantalla LCD q muestra ahora „MODO“<br />
solicitando así que se pulse una tecla de aparato e cuya<br />
ocupación desea borrar. A continuación se visualiza brevemente<br />
„CORRECTO“ (= realizado) y de nuevo podrá<br />
leer “MODO” en la pantalla LCD. Pulse según necesidad<br />
otras teclas adicionales de aparato e, para borrar también<br />
sus ocupaciones correspondientes.<br />
7 También puede abandonar el menú pulsando la tecla<br />
EXIT y.<br />
Configurar temporizador<br />
El MDU dispone de dos modos de temporización: el temporizador<br />
de desconexión y el temporizador de eventos.<br />
Temporizador de desconexión<br />
1. Pulse el botón de aparato e correspondiente al aparato<br />
que quiere controlar (p.ej. VCR).<br />
2. Mantenga pulsado el botón S r durante algo más de<br />
3 segundos. Aparece la indicación „AJUSTAR IDIOM“.<br />
3. Pulse el botón o t hasta que aparezca „AJUSTAR<br />
TEMP“. Pulse el botón OK l para que en la pantalla<br />
LCD q aparezca „TEMPORIZ APAG“. Para seleccionar<br />
esta función, pulse el botón OK l.<br />
4. En la parte inferior derecha de la pantalla LCD q destellan<br />
ahora los minutos del tiempo de funcionamiento<br />
restante para el aparato seleccionado. Seleccione un<br />
valor entre 1 y 99 minutos utilizando el botón o t.<br />
Pulse el botón OK l para confirmar. Si está programado<br />
el temporizador Sleep, la pantalla LCD q muestra “zz ” a<br />
la derecha, junto a la hora.<br />
- 18 -
5. Coloque el mando a distancia de forma que las señales<br />
infrarrojas puedan llegar al aparato que se quiere desconectar.<br />
Una vez transcurrido el tiempo seleccionado, el<br />
mando a distancia apagará el aparato en cuestión.<br />
6. Si pulsa ahora la tecla S r, se mostrará “SL” en la parte<br />
inferior izquierda de la pantalla LCD q.<br />
Temporizador de eventos<br />
El mando a distancia dispone de 4 temporizadores de eventos<br />
que permiten enviar determinadas series de combinaciones<br />
de botones a una hora específica.<br />
1. Mantenga pulsado el botón S r durante algo más de<br />
3 segundos. Aparece la indicación „AJUSTAR IDIOM“.<br />
2. Seleccione „AJUSTAR TEMP“ con el botón o t y<br />
confirme con el botón OK l. en la pantalla LCD q aparece<br />
ahora „TEMPORIZ APAG“. Seleccione la posición de<br />
memoria que quiere utilizar („AJUSTAR TEMP 1“ a „AJUS-<br />
TAR TEMP 4“) con el botón o t y confirme con el<br />
botón OK l.<br />
3. Ahora destellan las horas de la hora en la cual se debe<br />
ejecutar la combinación de botones pertinente. Seleccione<br />
la hora deseada con el botón o t y pulse el<br />
botón OK l para confirmar.<br />
4. Ahora destellan los minutos de la hora en la cual se debe<br />
ejecutar la combinación de botones pertinente. Seleccione<br />
el minuto deseado con el botón o t y pulse el<br />
botón OK l para confirmar.<br />
5. En la pantalla LCD q se muestra „TEMP X TECLA“ (X representa<br />
el temporizador utilizado). A continuación, pulse<br />
el botón del aparato e que se debe utilizar seguido de<br />
la secuencia de botones deseada.<br />
6. De forma predeterminada, los comandos de temporizador<br />
se emiten a intervalos de 1 segundo. Dado que muchos<br />
dispositivos tardan un poco en reaccionar, es posible que<br />
la secuencia de comandos de temporizador se emita<br />
con excesiva rapidez al dispositivo. En ese caso puede<br />
programar una pausa de 5 - 21 segundos antes de cada<br />
comando. Para ello, pulse repetidas veces si es necesario<br />
la tecla MACRO i. En la parte derecha inferior de la<br />
pantalla LCD q se muestra la duración actual de las pausas<br />
en segundos.<br />
7. Para guardar las entradas y regresar a la visión general<br />
de temporizadores, pulse el botón S r.<br />
8. Si fuera necesario, proceda de la misma forma para programar<br />
más temporizadores en otra posición de memoria.<br />
9. Si está programado el temporizador de eventos, la pantalla<br />
LCD q mostrará el símbolo del temporizador “ ” a<br />
la derecha, junto a la hora.<br />
Nota:<br />
1. En cada posición de memoria del temporizador se pueden<br />
programar como máximo 14 botones. Después de<br />
indicar 14 botones, la secuencia se almacena automáticamente<br />
y en la pantalla LCD q aparece „COMPLET“.<br />
- 19 -
2. Si transcurren 15 segundos sin que se realice ninguna<br />
entrada, el aparato regresa a la indicación estándar también<br />
en este menú.<br />
Borrar Timer<br />
De este modo puede borrar un temporizador de evento o de<br />
Sleep programado:<br />
1. Seleccione el temporizador que desea borrar (véase<br />
capítulo temporizador Sleep / temporizador evento) y<br />
accione la tecla OK l. En la pantalla LCD q aparece<br />
„BORRAR TEMP“.<br />
2. Pulse la tecla OK l. La indicación LCD q cambia a<br />
„CONFIRM BORR“.<br />
3. Pulse de nuevo la tecla OK l, para borrar el temporizador.<br />
La pantalla LCD q confirma el borrado con exito<br />
con la indicación de „CORRECTO“.<br />
Configurar aprendizaje<br />
El mando a distancia universal (MDU) puede aprender y<br />
memorizar señales de botones de un mando a distancia original.<br />
Sino funciona el MDU conforme a los métodos<br />
de programación descritos o no puede ejecutar todos los<br />
comandos, intente realizar la programación del MDU con la<br />
ayuda del/ de los mando/s a distancia originales.<br />
• Utilice pilas nuevas para el MDU y para el mando a<br />
distancia original.<br />
• Mantenga al menos un metro de distancia respecto a<br />
otras fuentes de luz. Las fuentes de luz pueden interferir<br />
en la transmisión de infrarrojos.<br />
• Coloque el MDU y el mando a distancia original a una<br />
distancia de 20 hasta 50 mm entre sí sobre una base<br />
plana de modo que los diodos de infrarrojos 2) queden<br />
enfrentados.<br />
Nota:<br />
1. Utilice a continuación los botones siguientes pero no<br />
para la función de programación: todos los botones de<br />
aparato e, el botón MACRO i, el botón S r y el botón<br />
EXIT y.<br />
2. Si durante la programación, mientras aparece „PRO-<br />
GRAM“ (programación) en la pantalla, no se pulsa ningún<br />
botón del mando a distancia original en el transcurso de<br />
30 segundos, el menú de programación se cierra. Este<br />
modo no se puede cerrar pulsando un botón del MDU.<br />
3. La memoria puede alojar en total 150 comandos. Si la<br />
memoria esta llena, la pantalla LCD q muestra „LEARN<br />
FULL“ y cierra el modo de programación.<br />
4. Pulse el botón EXIT y para regresar al estado precedente<br />
(excepto durante las indicaciones „PROGRAM TECLA“ y<br />
„PROGRAM“).<br />
- 20 -
Función de programación de códigos<br />
1. Pulse el botón del aparato e para el cual debe programarse<br />
un código de botones en el MDU.<br />
2. Mantenga pulsado el botón S r durante algo más de<br />
3 segundos. Aparece la indicación „AJUSTAR IDIOM“.<br />
3. Seleccione „AJUSTAR PROGR“ (programación) con el<br />
botón o t y, acto seguido, pulse el botón OK l.<br />
4. En la pantalla LCD q se visualiza „AJUSTE PROGR“. A<br />
continuación, pulse el botón OK l. En la pantalla LCD<br />
q aparece „PROGRAM TECLA” (seleccionar botón).<br />
5. Pulse primero sobre el mando a distancia universal (MDU)<br />
el botón sometido a la programación. En la pantalla LCD<br />
q se visualiza „PROGRAM“. El MDU espera la señal de<br />
infrarrojos del mando a distancia original.<br />
Indicación:<br />
si la indicación no cambia a „PROGRAM“, ello significa<br />
que se ha seleccionado un botón para el cual no se puede<br />
programar ningún código de botones.<br />
6. Enfrente los sensores de infrarrojos 2) de ambos mandos a<br />
distancia entre sí.<br />
7. Mantenga pulsado el botón elegido del mando a distancia<br />
original hasta que en la pantalla LCD q del MDU<br />
aparezca „CORRECTO“ o bien „PROGR ERROR“.<br />
8. Si aparece en la pantalla LCD q „CORRECTO“ (proceso<br />
con éxito), puede continuar la programación de otros botones<br />
a partir del paso 5. Si aparece „PROGR ERROR“<br />
(el proceso no ha tenido éxito), repita de nuevo el proceso<br />
a partir del paso 5.<br />
9. Para cancelar / finalizar el proceso de aprendizaje, pulse<br />
la tecla S y a continuación durante la visualización de la<br />
“PROGRAM TECLA”, accione la tecla EXIT y, las veces<br />
necesarias hasta que aparezca la indicación estándar en<br />
la pantalla LCD q. Si mientras se muestra la indicación<br />
„PROGRAM“ transcurren 30 segundos sin que se realice<br />
ninguna operación, el aparato cierra el menú.<br />
Borrar todas las teclas programadas de todos los<br />
aparatos<br />
1. Mantenga pulsado el botón S r durante algo más de<br />
3 segundos. Aparece la indicación „AJUSTAR IDIOM“.<br />
2. Seleccione „AJUSTAR PROGR“ con el botón o t<br />
y, acto seguido, pulse el botón OK l. En la pantalla LCD<br />
q se visualiza „AJUSTE PROGR“.<br />
3. Seleccione „BORRAR PROGR“ (borrar programación)<br />
con el botón o t y confirme con el botón OK l.<br />
En la pantalla LCD q aparece „CONFIRM BORR“ (confirmar<br />
borrado).<br />
4. Confirme con el botón OK l. En la pantalla LCD q aparece<br />
„CORRECTO“. Se han eliminado todas las teclas programadas.<br />
Finalmente, el menú se cierra automáticamente.<br />
Indicación:<br />
Cuando en la pantalla LCD se muestra „CONFIRM BORR“,<br />
puede cancelar la operación de borrado con el botón EXIT y.<br />
- 21 -
Configurar macros<br />
Con la función MACRO puede ejecutar hasta 16 comandos<br />
de botones pulsándolos una sola vez, es decir que varios<br />
comandos de control memorizados previamente pueden<br />
activarse con un botón de MACRO. Para ello están a disposición<br />
6 posiciones de memoria de macros.<br />
Programar una macro<br />
Para la programación de macros proceda del modo siguiente:<br />
1. Mantenga pulsado el botón S r durante algo más de<br />
3 segundos. Aparece la indicación „AJUSTAR IDIOM“.<br />
2. Seleccione „AJUSTAR MACRO“ con el botón o t<br />
y confirme con el botón OK l. En la pantalla aparece<br />
„AJUSTAR MACR1“.<br />
3. Seleccione la posición de memoria que quiere programar<br />
(AJUSTAR MACR 1 - 6) con el botón o t y confirme<br />
con el botón OK l.<br />
4. En la pantalla LCD q se visualiza „PASO MACR”. A continuación,<br />
pulse consecutivamente los botones pertinentes<br />
(máx. 16). El primer botón de la secuencia debería ser<br />
un botón de aparato e.<br />
5. De forma predeterminada, los comandos macro se emiten<br />
a intervalos de 1 segundo. Dado que muchos dispositivos<br />
tardan un poco en reaccionar, es posible que la secuencia<br />
de comandos macro se emita con excesiva rapidez al<br />
dispositivo. En ese caso puede programar una pausa de<br />
5 - 21 segundos antes de cada comando. Para ello, pulse<br />
(repetidas veces si es necesario) la tecla MACRO i. En<br />
la parte inferior derecha en la pantalla LCD q se muestra<br />
la duración actual de la pausa en segundos.<br />
6. Una vez alcanzado el número máximo de botones, en la<br />
pantalla LCD q aparece „COMPLET“.<br />
7. Memorice la entrada con el botón S r. En la pantalla<br />
LCD q aparece „AJUSTAR MACRO”.<br />
8. Si al seleccionar la macro que se va a programar (paso<br />
3) se selecciona una posición de memoria que ya está<br />
ocupada, se sobrescribe la macro existente.<br />
9. Repita el proceso a partir del paso 3 para crear macros<br />
adicionales.<br />
10. Pulse el botón EXIT y para retroceder un nivel en el<br />
menú, excepto durante la entrada de comandos de<br />
botón.<br />
Nota:<br />
1. En una macro puede memorizar hasta 16 comandos de<br />
botones. Después de introducir el comando 16, aparece<br />
“COMPLET” en la pantalla LCD q.<br />
2. Para salir del modo sin guardar, deje que pasen 15 segundos<br />
sin realizar ninguna operación.<br />
3. En el modo „PASO MACR“ sólo se puede regresar al<br />
estado anterior con el botón S r.<br />
- 22 -
Ejemplo: Usted desea memorizar una cadena de comandos<br />
en una macro. Comenzamos en el modo „PASO MACR”.<br />
Cadena de comandos elegida: Encender la televisión =><br />
PAUSA => cambiar a la entrada AV => encender el dispositivo<br />
DVD => PAUSA => reproducir DVD.<br />
Para ello deberá introducir los siguientes comandos de<br />
botones en el modo „PASO MACR“:<br />
=> => (duración de pausa) => =><br />
=> => (duración de pausa) =><br />
Ejecutar la macro<br />
Para ejecutar una macro previamente programado deberá<br />
proceder del modo siguiente:<br />
1. Pulse el botón MACRO i.<br />
2. Pulse el botón numérico o correspondiente para abrir la<br />
macro deseada (1-6). Ejemplo: para ejecutar la macro 3,<br />
pulse en primer lugar el botón MACRO i seguido del botón<br />
numérico „ “ (dentro de un intervalo de 5 segundos).<br />
Borrar todas las macros<br />
Para borrar todas las macros programadas previamente,<br />
proceda del siguiente modo:<br />
1. Mantenga pulsado el botón S r durante algo más de<br />
3 segundos. Aparece la indicación „AJUSTAR IDIOM“.<br />
2. Seleccione „AJUSTAR MACRO“ con el botón o t<br />
y confirme con el botón OK l. En la pantalla aparece<br />
„AJUSTAR MACR1“.<br />
3. Seleccione „BORRAR MACRO“ con el botón o t<br />
y confirme con el botón OK l.<br />
4. En la pantalla LCD q aparece „CONFIRM BORR” (confirmar<br />
borrado). Confirme el proceso de borrado con el botón<br />
l. En la pantalla LCD q se muestra breve-mente „CORREC-<br />
TO“. Se borran todas las macros y se cierra el menú.<br />
Nota:<br />
1. Cuando en la pantalla LCD q se muestra „CONFIRM<br />
BORR“ la operación de borrado se puede cancelar con<br />
el botón EXIT y.<br />
2. Algunas macros no se pueden borrar, sólo sobrescribir.<br />
Canal de favoritos<br />
Indicación:<br />
Esta función permite guardar como favoritos todos sus<br />
canales predilectos.<br />
Programar los favoritos<br />
Su canal de televisión favorito lo puede memorizar del modo<br />
siguiente:<br />
1. Pulse el botón de aparatos e del aparato para el cual<br />
desea guardar un favorito.<br />
2. Mantenga pulsado el botón S r durante algo más de<br />
3 segundos. Aparece la indicación „AJUSTAR IDIOM“.<br />
- 23 -
3. Seleccione „AJUSTAR FAV“ con el botón o t<br />
y confirme con el botón OK l. En la pantalla aparece<br />
„AJUSTAR FAV 1“.<br />
4. Seleccione la posición de memoria que quiere programar<br />
(AJUSTAR FAV 1 - 4) con el botón o t y confirme<br />
con el botón OK l.<br />
5. En la pantalla LCD q se visualiza „FAV PASO”.<br />
A continuación, pulse de forma sucesiva los botones<br />
(4 como máximo) para abrir el canal favorito deseado.<br />
6. Una vez alcanzado el número máximo de botones, en la<br />
pantalla LCD q aparece „COMPLET“.<br />
7. Memorice la entrada con el botón S r. En la pantalla<br />
LCD q aparece „AJUSTAR FAV”.<br />
8. Si al seleccionar el favorito que se va a programar (paso<br />
4) se selecciona una posición de memoria que<br />
ya está ocupada, se sobrescribe el favorito existente.<br />
9. Repita los pasos para crear más favoritos.<br />
10. Pulse el botón EXIT y para retroceder un nivel en el menú,<br />
excepto durante la entrada de comandos de botón.<br />
Indicación:<br />
La entrada del número de canal puede variar según modelo<br />
y marca del aparato seleccionado. En algunos casos, antes<br />
de seleccionar un canal de más de un número debe pulsarse<br />
primero el botón a.<br />
Abrir los favoritos<br />
Para abrir un favorito programado previamente, pulse el botón<br />
FAV/EPG 1( seguido del botón numérico correspondiente<br />
a la posición de memoria deseada (1 - 4).<br />
Borrar todos los canales FAV<br />
Para borrar todos los favoritos programados previamente,<br />
proceda del siguiente modo:<br />
1. Mantenga pulsado el botón S r durante algo más de<br />
3 segundos.<br />
2. Seleccione „AJUSTAR FAV“ con el botón o t y<br />
confirme con el botón OK l. En la pantalla aparece<br />
„AJUSTAR FAV 1“.<br />
3. Seleccione „BORRAR FAVCH“ con el botón o t<br />
y confirme con el botón OK l.<br />
4. En la pantalla LCD q aparece „CONFIRM BORR” (confirmar<br />
borrado). Confirme el proceso de borrado con el<br />
botón OK l. En la pantalla LCD q se muestra brevemente<br />
„CORRECTO“. Se borran todos los favoritos y se<br />
cierra el menú.<br />
Nota:<br />
1. Cuando en la pantalla LCD q se muestra „CONFIRM<br />
BORR“ la operación de borrado se puede cancelar con<br />
el botón EXIT y.<br />
2. Algunos favoritos no se pueden borrar, sólo sobrescribir.<br />
- 24 -
Regulación del volumen<br />
Vol +/—, (silenciamiento)<br />
Para subir el volumen pulse el botón „VOL +“. Con el botón<br />
„VOL —“ lo reduce. Para enmudecer el sonido, pulse el botón<br />
h. Pulsando de nuevo el botón, se activa de nuevo el<br />
sonido.<br />
Si no ha ajustado ningún otro aparato como aparato destino<br />
para la regulación de volumen global, se activa al accionar<br />
las teclas VOL +/— j de la MDU de forma predeterminada,<br />
la regulación de volumen del televisor, indistintamente si ha<br />
pulsado previamente cualquier tecla del aparato e. Esto no<br />
se aplica a dispositivos “AMP”, “DVD” y “DSAT”, pues se<br />
puede presuponer que estos dispositivos disponen de regulación<br />
de volumen propia.<br />
Para la operación<br />
> > Para utilizar un aparato programado con el MDU, pulse<br />
primero el botón del aparato e correspondiente. Señale a<br />
continuación con el MDU sobre dicho aparato y presione<br />
el botón elegido.<br />
> > Utilice los botones numéricos o del mismo modo que el<br />
mando a distancia original. Antes de realizar una entrada<br />
de dos dígitos, pulse si procede el botón a.<br />
> > Pulse la tecla S r y a continuación la tecla FAV/EPG 1(,<br />
para iniciar en el aparato equipado con la función de<br />
guía de programa electrónico.<br />
> > Al pulsar la tecla S r, se muestra la hora en la parte inferior<br />
derecha de la pantalla LCD q durante 10<br />
segundos.<br />
> > Mientras se muestra pulsado un botón de aparato e, en<br />
la parte inferior derecha de la pantalla LCD q se muestra<br />
el código activo para este aparato.<br />
> > El botón MENU k permite activar el diálogo de configuración<br />
de los aparatos de destino correspondientes.<br />
> > Pulse la tecla de iluminación d para activar o desactivar<br />
la pantalla y la iluminación de las teclas.<br />
Desconexión total<br />
Nota:<br />
El botón ALL OFF (desconexión total) w permite apagar<br />
automáticamente todos los aparatos que están encendidos.<br />
Dependiendo del aparato, esta función puede volver a<br />
encender aquellos aparatos que ya están apagados. Para<br />
ello mantenga pulsada la tecla ALL OFF w durante algunos<br />
segundos. Puede tardar hasta 10 segundos hasta que se<br />
desconecten todos los aparatos. Funciona sólo bajo las condiciones<br />
siguientes:<br />
1. Existe una conexión visual entre todos los aparatos y el<br />
mando a distancia universal.<br />
- 25 -
2. La búsqueda automática de código, búsqueda de código<br />
por marcas y funciones de MACRO no se encuentran<br />
activas.<br />
3. Todos los aparatos de destino tienen que ser aptos para<br />
poder ser apagados mediante el mando a distancia.<br />
Para volver a encender automáticamente todos los aparatos,<br />
vuelva mantenga pulsado nuevamente el botón w<br />
hasta que se hayan encendido todos los aparatos.<br />
Limpieza y almacenamiento<br />
¡Atención!<br />
¡Al realizar la limpieza tenga cuidado de que no<br />
penetre humedad en la carcasa del aparato! ¡De lo<br />
contrario existe riesgo de un daño irreparable para<br />
el aparato!<br />
> > Limpie la carcasa del aparato únicamente con un paño<br />
ligeramente húmedo con detergente suave.<br />
> > Almacene el aparato exclusivamente en un entorno conforme<br />
a las indicaciones en las características técnicas.<br />
> > Antes de almacenar extraiga las pilas con el fin de que<br />
no se pueda dañar el aparato por si se derramasen durante<br />
el almacenamiento.<br />
Error / Solución<br />
Su aparato no reacciona al MDU.<br />
> > Compruebe las pilas. Tienen que disponer de tensión suficiente<br />
e insertadas correctamente.<br />
> > ¿Ha pulsado previamente el botón de aparato e correcto<br />
correspondiente al aparato de destino elegido?<br />
> > Compruebe si el aparato de destino tiene programado<br />
el código correcto (véase apartado „ Configuración de<br />
códigos“).<br />
El MDU no transmite los comandos correctamente.<br />
> > Pulse el botón del aparato e correspondiente para poner<br />
el MDU en el modo correcto.<br />
> > Las pilas tienen que disponer de tensión suficiente e insertadas<br />
correctamente.<br />
> > Posiblemente este usando un código incorrecto. Inicie la<br />
búsqueda de código por marcas, la búsqueda automática<br />
de códigos o bien la entrada directa de códigos (de forma<br />
manual).<br />
El MDU no cambia de canales en el aparato.<br />
> > Pulse el botón del aparato e correspondiente para poner<br />
el MDU en el modo correcto.<br />
> > Si el mando a distancia original no dispone del botón<br />
„-/- -“, cambie los canales con los botones P +/— u<br />
o con los botones numéricos o.<br />
> > Si sigue sin funcionar, la causa puede ser que está activado<br />
el bloqueo de censura en el aparato de destino.<br />
- 26 -
Algunos botones del MDU no funcionan correctamente.<br />
> > Su MDU posiblemente no disponga de todas las funciones<br />
del mando a distancia original del aparato.<br />
> > Posiblemente no ha programado el código más óptimo.<br />
Busque un código con el que pueda controlar más funciones<br />
del aparato de destino.<br />
El MDU no reacciona después de pulsar un botón.<br />
> > Las pilas tienen que disponer de tensión suficiente e insertadas<br />
correctamente.<br />
> > Oriente el MDU hacia el aparato.<br />
La pantalla LCD q no muestra nada.<br />
> > Las pilas tienen que disponer de tensión suficiente e insertadas<br />
correctamente.<br />
> > El contraste está ajustado demasiado bajo. Aumente el<br />
ajuste del contraste.<br />
Evacuación<br />
En ningún caso deberá tirar el aparato a la<br />
basura doméstica. Este producto está sujeto<br />
a la directiva europea 2002/96/EC.<br />
Mando a distancia universal<br />
• Evacue el mando a distancia universal o partes de ella<br />
por medio de una empresa de evacuación de residuos<br />
autorizada o a través de las instalaciones de evacuación<br />
de residuos municipales.<br />
• Preste atención a las normas en vigor. En caso de dudas<br />
póngase en contacto con su centro de evacuación.<br />
Pilas/baterías<br />
• Las pilas/baterías no pueden ser desechadas con la<br />
basura doméstica.<br />
• Las pilas pueden contener sustancias tóxicas perjudiciales<br />
para el medio ambiente. Por ello, evacue las pilas/baterías<br />
de acuerdo con las disposiciones oficiales vigentes.<br />
• Cada consumidor está obligado legalmente a entregar<br />
las pilas/baterías en un punto de recogida de residuos<br />
de su municipio, barrio o en un establecimiento. Con esta<br />
obligación se consigue que las pilas / baterías se desechen<br />
de forma respetuosa con el medio ambiente.<br />
• Devuelva las pilas/acumuladores en estado descargado.<br />
Embalajes<br />
• Evacue todos los materiales de embalaje respetando<br />
el medio ambiente.<br />
- 27 -
Características técnicas<br />
Aparatos que se<br />
pueden controlar: 10<br />
Medidas A x A x P: 217 x 50 x 22 mm<br />
Peso :<br />
133 g (incl. pilas)<br />
LED de infrarrojos: láser de clase 1<br />
Alimentación de corriente<br />
pilas:<br />
2 x 1,5 V tipo AAA/LR03 (Micro)<br />
(incluida en el volumen de suministro)<br />
Temperatura de servicio : + 5 – +35°C<br />
Temperatura de<br />
almacenamiento: -20 - +50 °C<br />
Humedad:<br />
5 - 90 % (sin condensación)<br />
Indicación acerca de la conformidad<br />
Este aparato cumple con los requisitos básicos y con<br />
las demás normas relevantes de la Directiva europea<br />
sobre compatibilidad electromagnética 2004/108/<br />
EC y de la Directiva RoHS 2011/65/EU.<br />
Importador<br />
KOMPERNASS GMBH<br />
BURGSTRASSE 21<br />
44867 BOCHUM, GERMANY<br />
www.kompernass.com<br />
Garantía y asistencia técnica<br />
Con este aparato recibe usted 3 años de garantía desde la<br />
fecha de compra. El aparato ha sido fabricado cuidadosamente<br />
y ha sido probado antes de su entrega. Guarde el comprobante<br />
de caja como justificante de compra. Si necesitara<br />
hacer uso de la garantía, póngase en contacto por teléfono<br />
con su centro de servicio habitual.<br />
Éste es el único modo de garantizar un envío gratuito.La<br />
garantía cubre sólo defectos de fabricación o del material,<br />
pero no los daños de transporte, piezas sujetas a desgaste y<br />
los daños sufridos por las piezas frágiles p. ej. el interruptor o<br />
baterías.<br />
Este producto ha sido diseñado exclusivamente para el uso<br />
particular y no para el uso industrial.En caso de manipulación<br />
indebida e incorrecta, uso de la fuerza y en caso de abrir el<br />
aparato personas extrañas a nuestros centros de asistencia<br />
técnica autorizados, la garantía pierde su validez.<br />
Esta garantía no reduce en forma alguna sus derechos<br />
legales.<br />
- 28 -
Por el mero hecho de hacer uso de la garantía no implica la<br />
prolongación del período de válidez de la garantía. Ello rige<br />
también para piezas sustituidas y reparadas. Los posibles<br />
daños y defectos detectados al comprar el producto, se han<br />
de notificar de inmediato o como muy tarde dos días desde<br />
la fecha de compra. . Finalizado el periodo de garantía, las<br />
reparaciones se han de abonar.<br />
Servicio España<br />
Tel.: 902 59 99 22<br />
(0,08 EUR/Min. + 0,11 EUR/llamada (tarifa normal))<br />
(0,05 EUR/Min. + 0,11 EUR/llamada (tarifa reducida))<br />
E-Mail: kompernass@lidl.es<br />
<strong>IAN</strong> <strong>86342</strong><br />
- 29 -
- 30 -
INDICE<br />
- 31 -<br />
PAGINA<br />
Importanti avvertenze di sicurezza 32<br />
Tasti e funzioni apparecchio 33<br />
Messa in funzione 34<br />
Disimballaggio dell'apparecchio/controllo<br />
del materiale in dotazione 34<br />
Inserimento delle pile 34<br />
Elementi di comando 35<br />
Display LCD 35<br />
Tasti 36<br />
I menu di configurazione 39<br />
Configurazione delle lingue del menu 41<br />
Configurazione del codice (Programmazione del telecomando) 41<br />
Programmazione per ricerca del codice marca 41<br />
Programmazione tramite immissione manuale dei codici 42<br />
Programmazione per ricerca automatica dei codici 43<br />
Configurazione del sistema 44<br />
Impostazione dell'ora 44<br />
Impostazione della data 45<br />
Impostazione contrasto 45<br />
Retroilluminazione 45<br />
Impostazione del volume globale/disattivazione del volume 46<br />
Selezionare apparecchio banda/disco per il comando diretto 47<br />
Impostazione della funzione Lock 47<br />
SYSTEM-REIMP 48<br />
Configurazione del timer 48<br />
Sleep-Timer 48<br />
Timer eventi 49<br />
Cancellazione timer 50<br />
Configurazione dell’apprendimento 50<br />
Funzione di apprendimento codici 50<br />
Configurazione macro 52<br />
Canale preferiti 53<br />
Regolazione volume 54<br />
Vol +/—, (disattivazione suono) 54<br />
Uso 55<br />
Tasto ALL OFF 55<br />
Pulizia e conservazione 56<br />
Guasti / Risoluzione 56<br />
Smaltimento 57<br />
Dati tecnici 57<br />
Avviso sulla conformità 58<br />
Importatore 58<br />
Garanzia & assistenza 58
TELECOMANDO UNIVERSALE SFB 10.1 B2<br />
Introduzione<br />
Congratulazioni per l’acquisto del nuovo apparecchio.<br />
Lei ha scelto un prodotto di alta qualità. Il manuale di istruzioni<br />
è parte integrante del presente prodotto. Esso contiene<br />
importanti indicazioni per la sicurezza, l’uso e lo smaltimento.<br />
Prima di utilizzare il prodotto, si familiarizzi con tutte le<br />
indicazioni relative ai comandi e alla sicurezza.Utilizzi il prodotto<br />
solo come descritto e per i campi di impiego indicati.<br />
Conservi con cura il manuale. In caso di cessione del prodotto<br />
a terzi, consegni anche tutta la documentazione relativa.<br />
Diritto d’autore<br />
La presente documentazione è tutelata dal diritto d'autore.<br />
Tutti i diritti, nonché la riproduzione fotomeccanica, la copia<br />
e la diffusione tramite procedimenti particolari (ad es. elaborazione<br />
dei dati, supporto dati e reti di dati) anche parziale,<br />
nonché le modifiche ai contenuti e le modifiche tecniche<br />
sono riservati.<br />
Importanti avvertenze di sicurezza<br />
Uso conforme<br />
I bambini devono utilizzare il telecomando soltanto sotto la<br />
supervisione di adulti. Il telecomando universale può sostituire<br />
un massimo di dieci telecomandi. Può essere utilizzato<br />
esclusivamente per apparecchi di elettronica di intrattenimento<br />
con un ricevitore a infrarossi. Le funzioni del telecomando<br />
universale corrispondono in essenza a quelle del telecomando<br />
originale. Il telecomando universale è concepito per l'uso<br />
privato. Non è idoneo all'uso commerciale.<br />
Ogni altro tipo di impiego non è conforme alla destinazione.<br />
Il produttore non si assume alcuna responsabilità per i danni<br />
derivanti da uso non conforme o da modifiche apportate autonomamente.<br />
Avviso<br />
Un'avvertenza contrassegnata da questo livello di pericolo<br />
indica una situazione potenzialmente pericolosa. Qualora<br />
sia impossibile evitare tale situazione pericolosa, essa può<br />
dare luogo a lesioni. Seguire le istruzioni contenute in questa<br />
avvertenza per evitare lesioni personali.<br />
Attenzione<br />
Un'avvertenza contrassegnata da questo livello di pericolo<br />
indica la possibilità di riportare danni materiali. Qualora sia<br />
impossibile evitare tale situazione pericolosa, essa può dare<br />
luogo a danni materiali. Seguire le istruzioni contenute in<br />
questa avvertenza, per evitare danni materiali.<br />
Avvertenza<br />
Un avviso contrassegna ulteriori informazioni volte a facilitare<br />
l'uso dell'apparecchio.<br />
- 32 -
Avviso relativo al pericolo di lesioni a causa<br />
dell'uso erroneo delle pile!<br />
Le pile devono essere trattate con particolare cautela.<br />
Rispettare le seguenti avvertenze di sicurezza:<br />
• Impedire ai bambini di entrare in possesso delle pile.<br />
I bambini potrebbero mettere in bocca le pile e ingoiarle. In<br />
caso di ingestione di una pila, consultare immediatamente<br />
un medico.<br />
• Non gettare le pile nel fuoco. Non sottoporre le pile ad<br />
elevate temperature.<br />
• Pericolo di esplosione! Le pile non devono essere ricaricate.<br />
• Non aprire né cortocircuitare le pile.<br />
• L'acido che fuoriesce dalle pile può provocare irritazioni<br />
cutanee. In caso di contatto con la pelle, risciacquare con<br />
acqua abbondante. Qualora il liquido avesse raggiunto gli<br />
occhi, sciacquare abbondantemente con acqua, non sfregare<br />
e consultare subito un medico.<br />
Attenzione!<br />
Il telecomando universale possiede un diodo a infrarossi della<br />
classe di laser 1. Non osservare con apparecchi ottici per<br />
evitare lesioni oculari.<br />
Danni all'apparecchio<br />
• Qualora l'apparecchio fosse guasto, non cercare di ripararlo<br />
autonomamente. In caso di danni, contattare il<br />
produttore o la hotline di assistenza (v. la scheda di garanzia).<br />
• In caso di penetrazione di liquidi all'interno dell'apparecchio<br />
o danni di altro genere, farlo controllare dal produttore<br />
o dalla hotline di assistenza. Mettersi in contatto con<br />
il produttore o con la relativa Hotline di assistenza (vedere<br />
le indicazioni di garanzia).<br />
• Rimuovere le pile dal vano pile non appena si scaricano.<br />
• In caso di inutilizzo prolungato dell'apparecchio, rimuovere<br />
le pile per evitarne lo scaricamento.<br />
• Sostituire le pile sempre contemporaneamente e utilizzare<br />
sempre pile dello stesso tipo.<br />
Tasti e funzioni apparecchio<br />
q Display LCD<br />
w Tasto /ALL OFF<br />
e Tasti dell'apparecchio<br />
r Tasto S<br />
t Tasti freccia<br />
y Tasto EXIT<br />
u Tasti P +/—<br />
i Tasto MACRO<br />
o Tasti numerici<br />
a Tasto per numeri di programma a una o due cifre<br />
s Tasti di funzione Videotext<br />
- 33 -
d Tasto di illuminazione<br />
f Tasti unità disco<br />
g Tasto AV<br />
h Disattivazione dell'audio<br />
j Tasti VOL +/—<br />
k Tasto MENU<br />
l Tasto OK<br />
1( Tasto FAV / EPG<br />
2) Emittente/ricevente a infrarossi<br />
2! Copertura vano pile<br />
Suggerimenti:<br />
• le funzioni qui descritte si riferiscono a un caso teorico<br />
ideale in cui la struttura dei tasti dei singoli telecomandi<br />
coincide perfettamente con quella di questo telecomando<br />
universale. Tale evento è tuttavia rarissimo nella<br />
realtà. Se pertanto non si potessero riprodurre tutte le<br />
funzioni del telecomando originale, tale impossibilità<br />
non dev'essere addebitata a qualche ipotetico difetto<br />
del telecomando universale.<br />
• Tutti i nomi di marchi menzionati nel presente manuale<br />
o nell'acclusa lista dei codici sono marchi commerciali<br />
di proprietà delle relative ditte.<br />
Messa in funzione<br />
Disimballaggio dell'apparecchio/controllo<br />
del materiale in dotazione<br />
Attenzione!<br />
Tenere fuori dalla portata dei bambini anche le pellicole<br />
di imballaggio. Pericolo di soffocamento!<br />
• Disimballare l'apparecchio e i relativi accessori.<br />
• Verificare la completezza del materiale in dotazione<br />
- Telecomando universale (UFB),<br />
- Manuale di istruzioni,<br />
- Guida del produttore con l'elenco dei codici degli<br />
apparecchi<br />
- 2 x 1,5 pile, tipo AAA/LR03 (micro)<br />
Avvertenza: danni da trasporto<br />
Qualora si rilevassero dei danni da trasporto, rivolgersi al<br />
produttore o alla relativa hotline di assistenza (v. indicazioni<br />
di garanzia).<br />
Inserimento delle pile<br />
Attenzione!<br />
Il telecomando universale dev'essere alimentato solo da<br />
pile da 1,5 Volt (AAA, LR03).<br />
Nella sostituzione di pile, inserire immediatamente le pile<br />
nuove. Le impostazioni eseguite restano memorizzate per<br />
circa 1 minuto.<br />
- 34 -
Se non si inseriscono le pile nuove entro tale periodo di tempo,<br />
tutte le impostazioni dovranno essere reinserite. L’orario e<br />
la data andranno tuttavia perduti in ogni caso.<br />
1. Aprire il coperchio del vano pile 2! nella direzione della<br />
freccia.<br />
2. Inserire le pile come illustrato in figura e chiudere il vano<br />
pile.<br />
Il display LCD q è attivato fino a quando le pile sono inserite.<br />
La seguente illustrazione mostra il display LCD q dopo l'inserimento<br />
o la sostituzione delle pile.<br />
Avvertenza:<br />
se non è visibile alcun display LCD q, controllare la polarità<br />
delle pile o inserire delle pile nuove.<br />
Elementi di comando<br />
Display LCD<br />
Il display LCD q è suddiviso in campi.<br />
Campo di testo 2@<br />
Qui viene visualizzato l'apparecchio correntemente selezionato,<br />
ad esempio DVD, TV, VCR, ecc.<br />
Simbolo a infrarossi 2#<br />
A ogni pressione del tasto viene inviato un segnale a infrarossi<br />
e si accende il simbolo Infrarossi.<br />
- 35 -
Campo Codice/Ora 2$<br />
Qui viene visualizzato il codice dell'apparecchio selezionato<br />
correntemente o l'ora. All'indicazione dell'ora lampeggia „:“ al<br />
centro dei numeri. Con l’indicazione dell’ora in formato 12 ore,<br />
a sinistra del-l’orologio viene indicata la sigla relativa all’ora.<br />
Campo del giorno della settimana 2%<br />
Qui si può leggere l’abbreviazione del giorno della settimana<br />
dopo aver inserito la data.<br />
Spia standard:<br />
La spia standard del display LCD q è composta dai dati<br />
relativi all'apparecchio corrente, ad es. „TV“, dalla sigla<br />
del giorno della settimana e dall'orario.<br />
Tasti<br />
Avvertenza:<br />
tutte le funzioni qui descritte possono naturalmente essere<br />
utilizzate solo se vengono supportate dal relativo apparecchio.<br />
Tasto /ALL OFF w<br />
Accendere/spegnere l’apparecchio; per<br />
accendere/spegnere tutti gli apparecchi,<br />
tenere premuto questo pulsante per alcuni<br />
secondi.<br />
Tasti apparecchi e<br />
Con i tasti apparecchi si selezionano gli apparecchi che devono<br />
essere azionati:<br />
Televisore<br />
Videoregistratore<br />
Apparecchio accessorio 1<br />
Ricevitore con cavo<br />
Lettore CD<br />
Lettore di dischi BluRay<br />
Amplificatore audio<br />
Lettore di DVD<br />
Ricevitore satellitare digitale<br />
Apparecchio accessorio 2<br />
L’attribuzione dei tasti menzionata non è obbligatoria.<br />
Ad es., sul tasto TV è possibile salvare anche il codice per il<br />
videoregistratore.<br />
Tasto „S“ r<br />
Tenere premuto per 3 secondi, al fine di<br />
richiamare il menu di configurazione, pre-<br />
- 36 -
mere brevemente per visualizzare la data.<br />
Per richiamare la guida elettronica ai programmi<br />
dell’apparecchio di destinazione,<br />
premere prima brevemente il tasto S r, e<br />
quindi il tasto FAV/EPG 1(.<br />
Per controllare la funzione “PIP” (immagine<br />
nell’immagine) del televisore, premere prima<br />
il tasto S r seguito dal tasto - dei tasti<br />
di funzione Videotext s.<br />
Tasti freccia t<br />
Per spostarsi in alto, a destra, in basso e<br />
a sinistra all'interno dei menu.<br />
Tasto EXIT y<br />
Tasti P +/— u<br />
Passaggio al livello inferiore del menu.<br />
Cambiare il canale di ricezione.<br />
Nei modi DVD e CD questi pulsanti controllano<br />
la funzione SKIP.<br />
Tasto MACRO i<br />
Tasto MACRO i seguito da un tasto<br />
numerico o 1-6, attiva una catena di<br />
comandi precedentemente memorizzata.<br />
Tasti numerici o<br />
Per immettere numeri di programma e di<br />
codici apparecchi.<br />
Tasto per numeri di programma a una/due cifre a<br />
Per i numeri di programmi a due cifre (in<br />
base al tipo di apparecchio) premere prima<br />
il tasto a e quindi inserire il numero del<br />
programma tramite i tasti numerici o.<br />
Un'ulteriore pressione riporterà la visualizzazione<br />
a una cifra.<br />
Tasti di funzione Videotext s<br />
Nella modalità Televideo, i tasti hanno le seguenti funzioni:<br />
Richiamo della funzione Videotext.<br />
Passaggio automatico in caso di notizie<br />
televideo su più pagine.<br />
Aumento dimensioni di visualizzazione della<br />
pagina<br />
Testo sovrapposto all'immagine TV<br />
Termine della funzione Videotext<br />
- 37 -
Per richiamare la funzione SWAP dell’apparecchio<br />
di destinazione, premere brevemente<br />
il pulsante S r e quindi il pulsante .<br />
Suggerimenti:<br />
• La funzione Videotext è a disposizione solo nella modalità<br />
TV europea e l’apparecchio di ricezione deve inoltre possedere<br />
l’apposito modulo per il Televideo.<br />
• Inoltre, i tasti P +/- u controllano le seguenti funzioni Televideo:<br />
P + sfogliare una pagina in avanti<br />
P — sfogliare una pagina all'indietro<br />
Tasti unità disco f<br />
I tasti unità disco f controllano apparecchi come lettori di<br />
DVD/CD e videoregistratori:<br />
Inizio riproduzione<br />
Commutazione del formato immagini<br />
con l'uso della TV<br />
Registrazione<br />
Arresto riproduzione/Registrazione/<br />
avvolgimento<br />
Arresto riproduzione<br />
Riavvolgimento<br />
Avanzamento<br />
le marcature colorate dei tasti unità disco si riferiscono ai<br />
campi colorati nel Videotext, tramite cui vengono controllate<br />
le funzioni Toptext.<br />
Tasto AV g<br />
Passaggio all’ingresso AV.<br />
Disattivazione del volume h<br />
Per inserire/disinserire il volume.<br />
Tasti VOL+/— j<br />
Regolazione del volume (Volume).<br />
Tasto MENU k<br />
Richiamo del menu dell'apparecchio<br />
controllato.<br />
Tasto OK l<br />
Con il tasto OK si conferma una selezione<br />
del menu.<br />
Tasto FAV/EPG 1(<br />
Per richiamare le emittenti preferite precedentemente<br />
programmate, premere il tasto FAV.CH.<br />
- 38 -
Per richiamare la funzione EPG dell’apparecchio di<br />
destinazione, premere prima brevemente il tasto S r.<br />
I menu di configurazione<br />
Nelle impostazioni di sistema, si può eseguire quanto segue:<br />
• La programmazione del telecomando per gli apparecchi<br />
da controllare<br />
• Impostazione di lingua del menu, ora, data, contrasto del<br />
display, retroilluminazione, volume, funzione Lock nonché<br />
System-Reset<br />
• Le impostazioni del Timer<br />
• L'„apprendimento“ di determinati comandi dei tasti<br />
• La creazione di macro<br />
• L'impostazione dei preferiti<br />
Sulle pagine che seguono è presente una panoramica della<br />
struttura del menu.<br />
- 39 -
- 40 -
Configurazione delle lingue del menu<br />
Per la visualizzazione del menu dell’apparecchio si può<br />
scegliere fra 5 lingue: inglese, tedesco, spagnolo, francese e<br />
italiano.<br />
1. Tenere premuto il tasto S r per oltre 3 secondi. Inserire<br />
subito i dati nel menu, poiché il menu termina dopo<br />
15 secondi senza immissioni di dati.<br />
2. Il display LCD q mostra il messaggio “LANGUAGE<br />
SETUP”. Premere il tasto OK l.<br />
3. Nel display LCD q compare “ENGLISH”. Con i tasti<br />
t selezionare la lingua desiderata e confermare<br />
con il tasto OK l.<br />
4. Uscire dal menu con il tasto EXIT y.<br />
I menu dell’apparecchio vengono così visualizzati nella lingua<br />
selezionata. Per le ulteriori istruzioni presumiamo che sia stata<br />
selezionata la lingua del proprio paese di origine.<br />
Configurazione del codice<br />
(Programmazione del telecomando)<br />
Sono a disposizione 3 metodi di programmazione per il<br />
telecomando: programmazione tramite ricerca del codice<br />
marca, ricerca automatica del codice e immissione diretta<br />
del codice (manuale).<br />
Utilizzare prima la ricerca con il codice marca, poiché si tratta<br />
del metodo di programmazione più rapido, se l'apparecchio<br />
è presente nell'elenco dei codici. Come seconda<br />
alternativa si consiglia l'immissione diretta del codice, seguita<br />
dalla ricerca automatica del codice.<br />
Programmazione per ricerca del codice marca<br />
Con questo metodo, selezionare la marca diretta e il codice<br />
tramite il display LCD q.<br />
Procedere in base alle seguenti istruzioni, per programmare<br />
il telecomando:<br />
1. Premere il tasto dell'apparecchio e per l'apparecchio<br />
rispetto al quale si desidera programmare il telecomando.<br />
2. Tenere premuto il tasto S r per oltre 3 secondi. Nel display<br />
LCD q compare “LINGUA SETUP”. Con il tasto o<br />
t selezionare “CODICE SETUP” e confermare con il<br />
tasto OK l.<br />
3. „INVIO CODIC“ compare quindi nel display LCD q. Con<br />
i tasti t selezionare „MARCHIO CODIC“ e confermare<br />
con il tasto OK l.<br />
4. Comparirà quindi il primo nome di marca in ordine alfabetico<br />
nell'elenco degli apparecchi preprogrammati.<br />
5. Con i tasti 34 t selezionare i vari nomi di marche.<br />
- 41 -
6. Per facilitare l'accesso, è possibile passare direttamente alle<br />
relative lettere alfabetiche iniziali con i tasti numerici o:<br />
2 => A 3 => D 4 => G 5 => J<br />
6 => M 7 => P 8 => T 9 => W<br />
Esempio per la ricerca di un codice TV: con il tasto 5 si<br />
arriva alla „J“. La prima marca è „JEC“*. Se si possiede<br />
ad es. un apparecchio marca „Kenwood“*, sfogliare in<br />
avanti con il tasto 4 t, fino alla comparsa del nome del<br />
marchio. (* Tutti i nomi di marchi qui utilizzati sono marchi<br />
commerciali di proprietà delle rispettive società).<br />
7. La maggior parte dei produttori utilizzano vari codici<br />
diversi per il telecomando. È necessario quindi scoprire<br />
quale dei codici disponibili si adatta meglio al proprio<br />
apparecchio. In basso a destra del nome del marchio viene<br />
visualizzato il codice nel relativo display LCD q.<br />
8. Dirigere il telecomando verso l’apparecchio corrente e<br />
premere i tasti corrispondenti alle funzioni di tale apparecchio,<br />
per controllare il codice (esclusi i tasti <br />
t, OK l, EXIT y, i tasti dell’apparecchio e o i<br />
tasti numerici o).<br />
9. Se la maggioranza dei tasti funziona, premere il tasto OK<br />
l, per salvare l'impostazione. Nel display LCD q compare<br />
il messaggio „OK“. Infine il menu viene terminato<br />
automaticamente.<br />
10. Se funziona solo uno o pochi tasti, con il tasto 5 o 6 t<br />
selezionare il codice successivo e controllare come già<br />
descritto al punto 8.<br />
11. Con il tasto EXIT y si avanza di un livello nel menu.<br />
Ripetere questi passaggi per tutti gli apparecchi che si intende<br />
comandare con il telecomando.<br />
Programmazione tramite immissione manuale<br />
dei codici<br />
In questa modalità, il telecomando può essere programmato<br />
con l'immissione diretta di un codice numerico. Il numero di<br />
codice necessario si rileva dalla guida dei produttori allegata<br />
con l'elenco dei codici degli apparecchi. Qualora il codice<br />
non fosse valido, verrà ripristinato l'ultimo codice valido<br />
programmato.<br />
1. Premere il tasto dell'apparecchio e per l'apparecchio<br />
rispetto al quale si desidera programmare il telecomando.<br />
2. Tenere premuto il tasto S r per oltre 3 secondi. Nel display<br />
LCD q compare “LINGUA SETUP”. Con il tasto o<br />
t selezionare “CODICE SETUP” e confermare con il<br />
tasto OK l.<br />
3. „INVIO CODIC“ compare quindi nel display LCD q. Per<br />
richiamare questa funzione premere il tasto OK l.<br />
4. Nel display LCD q compare il codice attualmente utilizzato<br />
per l'apparecchio selezionato. Ora la prima cifra<br />
del codice lampeggerà in attesa dell'immissione del codice<br />
da parte dell'utente. Inserire il nuovo codice a quattro<br />
cifre tramite i tasti numerici o. All’immissione del quarto<br />
- 42 -
carattere, tutto il codice lampeggia. Ora si può verificare<br />
se il telecomando universale riesce a controllare l’apparecchio<br />
desiderato con questo codice. Premere i tasti corrispondenti<br />
alle funzioni dell’apparecchio, in caso di apparecchio<br />
TV, ad es. PROG +/–. Se l’apparecchio reagisce<br />
come desiderato, confermare l’immissione del codice con il<br />
tasto OK l. In caso contrario, inserire il codice successivo<br />
nell’elenco ed eseguire una nuova prova.<br />
5. Se il CODE inserito è corretto, viene salvato. Nel display<br />
LCD q compare brevemente „OK“. Infine il menu viene<br />
terminato automaticamente. In caso di errore del codice,<br />
il display LCD q mostra brevemente il messaggio "ERROR"<br />
(errore) ed è necessario reinserire il codice. Ripetere il punto<br />
4.<br />
6. Con il tasto EXIT y si torna indietro di un livello nel menu.<br />
Programmazione per ricerca automatica dei<br />
codici<br />
Questo processo può durare vari minuti per apparecchio,<br />
poiché vengono scansionati tutti i codici per l'apparecchio<br />
selezionato. Utilizzare pertanto questo metodo solo se<br />
l'apparecchio non può essere programmati con la ricerca del<br />
codice della marca o con l'immissione diretta del codice, oppure<br />
se l'apparecchio non compare nell'elenco dei produttori<br />
con il relativo elenco dei codici degli apparecchi.<br />
Compiere i passaggi descritti di seguito per eseguire la<br />
programmazione tramite la ricerca automatica del codice.<br />
1. Premere il tasto dell'apparecchio e per l'apparecchio da<br />
controllare (ad es. VCR).<br />
2. Accendere l'apparecchio da controllare con il telecomando.<br />
Per gli apparecchi VCR/DVD/CD, inserire un nastro<br />
o un disco.<br />
3. Tenere premuto il tasto S r per oltre 3 secondi. Nel display<br />
LCD q compare “LINGUA SETUP”. Con il tasto o<br />
t selezionare “CODICE SETUP” e confermare con il<br />
tasto OK l.<br />
4. „INVIO CODIC“ compare quindi nel display LCD q. Premere<br />
il tasto o t, fino alla comparsa di „CERCA<br />
CODIC“ nel display LCD q.<br />
Dirigere il telecomando sull'apparecchio e premere quindi<br />
il tasto OK l, per richiamare la modalità „Ricerca automatica<br />
del codice“.<br />
5. La ricerca comincia. A tale scopo l'apparecchio invia<br />
i numeri dei codici consecutivamente in sequenza crescente.<br />
Il simbolo dell'infrarosso 2# lo indica. Ogni ricerca<br />
si avvia con il codice correntemente inserito.<br />
6. Se l'apparecchio reagisce spegnendosi, premere immediatamente<br />
il tasto OK l, per salvare il codice corrente.<br />
Il display LCD q mostra brevemente il messaggio "OK".<br />
- 43 -
7. Controllare che sia possibile eseguire la maggior parte<br />
delle funzioni dell'apparecchio con il telecomando. Se è<br />
possibile, si è probabilmente trovato il codice corretto. Se<br />
alcune funzioni non fossero operative, si può ricominciare<br />
la ricerca automatica del codice al punto 1.<br />
8. Se l'apparecchio non reagisce più, probabilmente al punto<br />
6 non si è premuto velocemente il tasto OK l.<br />
Premere quindi più volte il tasto EXIT y, per uscire dal<br />
menu e ritornare alla visualizzazione standard.<br />
9. Tenere premuto il tasto apparecchi e dell'apparecchio<br />
per il quale si cerca il codice adatto. In basso a destra<br />
nel display LCD q viene visualizzato il codice corrente.<br />
Annotarsi questo numero.<br />
10. Procedere quindi come descritto nel precedente capitolo<br />
„Programmazione tramite immissione manuale dei codici“<br />
e controllare se funziona il codice con la combinazione di<br />
numeri immediatamente inferiore.<br />
Suggerimenti:<br />
1. Con la ricerca attivata del codice tutti i tasti, tranne OK l<br />
ed EXIT y, sono privi di funzioni.<br />
2. Se la ricerca automatica è arrivata alla fine dell'elenco<br />
dei codici, si fermerà a tal punto. Il display torna alla visualizzazione<br />
del messaggio „CERCA CODIC“.<br />
Configurazione del sistema<br />
Impostazione dell'ora<br />
Il display LCD q indica l'orario. Per impostarlo, procedere<br />
come segue:<br />
1. Tenere premuto il tasto S r per oltre 3 secondi. Compare<br />
il messaggio „LINGUA SETUP“. Se si attende circa 15<br />
secondi senza inserire alcun dato, l'apparecchio esce dal<br />
menu e ritorna alla visualizzazione standard.<br />
2. Con il tasto o t selezionare „SISTEMA SETUP“<br />
e confermare con il tasto OK l.<br />
3. Il display LCD q mostra il messaggio „TEMPO SETUP“.<br />
Confermare con il tasto OK l. Il display LCD q mostra<br />
ora „TEMPO“ e il formato dell'ora (24 HR) lampeggia.<br />
4. Con il tasto o t si può passare all'altro formato<br />
dell'ora (12 HR). In tal caso, nell'indicazione dell'orario,<br />
davanti a esso comparirà la lettera „Am“ o „Pm“. „Am“ sta<br />
per „AM“ = „ante meridiem“ (mattina, dalle ore 0:00<br />
alle ore 12:00). „Pm“ sta per „PM“ = „post meridiem“<br />
(pomeriggio, dalle ore 12:00 alle ore 0:00). Premere<br />
il tasto OK l per la conferma.<br />
5. Lampeggerà quindi l'indicazione dell'ora. Con il tasto <br />
o t selezionare l'ora dell'orario corrente e<br />
confermare con il tasto OK l.<br />
6. Lampeggerà quindi l'indicazione dei minuti. Con il tasto <br />
o t selezionare i minuti dell'orario corrente e confermare<br />
con il tasto OK l. Comparirà nuovamente<br />
il messaggio „TEMPO SETUP“.<br />
- 44 -
7. Per uscire da questo menu o dai seguenti, premere il tasto<br />
EXIT y tante volte fino a ottenere il messaggio standard<br />
nel display LCD q.<br />
Impostazione della data<br />
Il display LCD q mostra la data se si preme il tasto S r.<br />
Per impostare la data:<br />
1. Tenere premuto il tasto S r per oltre 3 secondi.<br />
Compare il messaggio „LINGUA SETUP“.<br />
2. Con il tasto o t selezionare „SISTEMA SETUP“<br />
e confermare con il tasto OK l.<br />
3. Il display LCD q mostra il messaggio „TEMPO SETUP“.<br />
Premere il tasto t, per passare a „DATA SETUP“.<br />
Confermare con il tasto OK l.<br />
4. Nel display lampeggia l'indicazione dell'anno „2011“.<br />
Con il tasto o t si può modificare la cifra dell'anno<br />
e con il tasto OK l si può confermarla. Con il tasto <br />
o t si può modificare la cifra relativa ai mesi, mentre<br />
lampeggia, e confermare con il tasto OK l. Lampeggia<br />
quindi l'indicazione del giorno, che si può modificare<br />
nuovamente anche con il tasto o t.<br />
5. Per il salvataggio premere il tasto OK l. Comparirà nuovamente<br />
il messaggio „DATA SETUP“.<br />
Impostazione contrasto<br />
Il contrasto del display può essere impostato come segue:<br />
1. Tenere premuto il tasto S r per oltre 3 secondi.<br />
Compare il messaggio „LINGUA SETUP“.<br />
2. Con il tasto o t selezionare „SISTEMA SETUP“<br />
e confermare con il tasto OK l.<br />
3. Con il tasto o t selezionare „CONTR SETUP“ e<br />
confermare con il tasto OK l.<br />
4. Nel display LCD q lampeggia quindi il valore del contrasto,<br />
che si può impostare con il tasto o t:<br />
Messaggi nel display:<br />
0 = massimo contrasto<br />
15 = minimo contrasto<br />
5. Con il tasto OK l memorizzare le impostazioni desiderate.<br />
Comparirà nuovamente il messaggio „CONTR<br />
SETUP“.<br />
Retroilluminazione<br />
Si può impostare la durata dell'illuminazione dello sfondo<br />
del display LCD q e dei tasti al termine dell'immissione dei<br />
comandi. Ricordare che una durata maggiore dell'illuminazione<br />
riduce la durata di vita delle pile.<br />
1. Tenere premuto il tasto S r per oltre 3 secondi.<br />
Compare il messaggio „LINGUA SETUP“.<br />
2. Con il tasto o t selezionare „SISTEMA SETUP“<br />
e confermare con il tasto OK l.<br />
3. Con il tasto o t selezionare „RETROILL SETUP“<br />
e confermare con il tasto OK l.<br />
- 45 -
4. Nel display LCD q lampeggia quindi il numero dei secondi<br />
per la durata dell'illuminazione che si può impostare<br />
da 0 a 60 con i tasti t. Selezionando „0“, la<br />
retroilluminazione viene disattivata.<br />
5. Con il tasto OK l memorizzare le impostazioni desiderate.<br />
Comparirà nuovamente il messaggio „RETROILL<br />
SETUP“.<br />
Impostazione del volume globale/<br />
disattivazione del volume<br />
Per evitare di dover sempre premere prima un tasto dell’apparecchio<br />
per la regolazione e la disattivazione del volume,<br />
il TU per queste funzioni fa riferimento sempre a un unico<br />
apparecchio, di solito il televisore. Questo apparecchio di<br />
destinazione può essere stabilito.<br />
1. Tenere premuto il tasto S r per oltre 3 secondi. Compare il<br />
messaggio “LINGUA SETUP”.<br />
2. Con il tasto o t selezionare “SISTEMA SETUP” e<br />
confermare con il tasto OK l.<br />
3. Con il tasto o t selezionare “VOL/MUTE SETUP”<br />
e confermare con il tasto OK l.<br />
4. Il display LCD q mostra il messaggio “TUTTIVOL IMP”.<br />
Premere il tasto OK l, il display passa al messaggio<br />
“TUTTI VOL MOD”.<br />
5. Ora premere il tasto dell’apparecchio e per l’apparecchio<br />
che dev’essere controllato tramite la funzione globale<br />
di regolazione del volume.<br />
6. Se l’apparecchio indicato possiede un comando di<br />
regolazione del volume, verrà visualizzato brevemente<br />
“SUCCESSO” e il menu verrà terminato. La regolazione<br />
del volume funzionerà da subito sull’apparecchio appena<br />
impostato.<br />
7. Se questo apparecchio non dispone di comandi per la<br />
regolazione del volume, il TU non consente tale selezione<br />
e indica “VOLUME ERR” (= errore). Anche in tal caso il<br />
menu viene terminato. La regolazione del volume continuerà<br />
a funzionare sull’apparecchio precedente.<br />
La regolazione globale del volume per determinati apparecchi<br />
si può anche disattivare.<br />
1. Nel menu “VOL/MUTE SETUP” con il tasto o t selezionare<br />
la funzione “MOD VOL IMP” e confermare con<br />
il tasto OK l. Nel display LCD q compare “MOD VOL<br />
MOD”.<br />
2. Ora premere il tasto dell’apparecchio e per l’apparecchio<br />
che dev’essere escluso dalla funzione globale<br />
di regolazione del volume. Il display LCD q mostra<br />
“SUCCESSO” e la regolazione globale del volume viene<br />
disattivata se il TU funziona nella modalità di esercizio di<br />
uno degli apparecchi selezionati.<br />
È possibile eliminare nuovamente le impostazioni nel menu<br />
“VOL/MUTE SETUP”.<br />
- 46 -
1. Nel menu “VOL/MUTE SETUP”, con i tasti o t selezionare<br />
nuovamente la funzione “VOL/MUTE REIMP” e<br />
confermare con il tasto OK l.<br />
2. Il display LCD q con il messaggio CONFERMA REIMP<br />
chiede la conferma con il tasto OK su l. Premere il tasto<br />
OK l, se si desidera eliminare le impostazioni, il messaggio<br />
“ERFOLG” indica che è stata eseguita la cancellazione<br />
dell’attribuzione dell’apparecchio alla regolazione<br />
globale del volume. Oppure si può premere il tasto EXIT<br />
y per interrompere la cancellazione.<br />
Selezionare apparecchio banda/disco per il<br />
comando diretto<br />
Si può selezionare un apparecchio banda o disco che si può<br />
utilizzare con i tasti unità disco f, senza dover prima premere<br />
i relativi tasti dell’apparecchio e.<br />
1. Tenere premuto il tasto S r per oltre 3 secondi. Compare<br />
il messaggio “LINGUA SETUP”.<br />
2. Con il tasto o t selezionare “SISTEMA SETUP” e<br />
confermare con il tasto OK l.<br />
3. Il display LCD q mostra il messaggio „TEMPO SETUP“.<br />
Premere il tasto t, per passare a „RIPROD SETUP“.<br />
Confermare con il tasto OK l.<br />
4. Con il tasto o t selezionare l’apparecchio che deve<br />
reagire al telecomando universale con l’impiego dei tasti<br />
unità disco f. Confermare con il tasto OK l.<br />
5. Selezionando “OFF” al posto di un apparecchio e confermando<br />
con il tasto OK l, si passa al comando diretto.<br />
Selezionando “REIMP” e confermando con il tasto OK<br />
l, si attiva l’impostazione operativa preprogrammata<br />
(DVD) per questa funzione.<br />
6. Il display LCD q indica “SUCCESSO” e l’apparecchio<br />
selezionato può essere ora controllato direttamente con i<br />
tasti unità disco f.<br />
Impostazione della funzione Lock<br />
Con la funzione di blocco si può bloccare l’accesso a tutti i<br />
menu di configurazione.<br />
1. Tenere premuto il tasto S r per oltre 3 secondi.<br />
2. Con il tasto o t selezionare “SISTEMA SETUP”<br />
e confermare con il tasto OK l.<br />
3. Con il tasto o t selezionare “BLOCCA SETUP” e<br />
confermare con il tasto OK l. Il display LCD q indica<br />
l’impostazione corrente.<br />
4. Con il tasto o t selezionare ora scegliendo fra<br />
“BLOCCA” (blocco attivato) o “SBLOCCA” (blocco disattivato).<br />
5. Con il tasto OK l memorizzare l’impostazione. Nel display<br />
LCD q compare di nuovo il messaggio “BLOCCA<br />
SETUP”.<br />
- 47 -
SYSTEM-REIMP<br />
Tramite questa funzione si può eliminare la funzione di tutti o<br />
di singoli tasti dell’apparecchio.<br />
1. Tenere premuto il tasto S r per oltre 3 secondi.<br />
Compare il messaggio „LINGUA SETUP“.<br />
2. Con il tasto o t selezionare „SISTEMA SETUP“<br />
e confermare con il tasto OK l.<br />
3. Con il tasto o t selezionare „SYSTEM REIMP“<br />
e confermare con il tasto OK l.<br />
4. Con il tasto o t si può ora selezionare la funzione<br />
desiderata. Per cancellare la funzione (Code) di tutti i tasti<br />
dell’apparecchio e nonché tutti i dati relativi a macro,<br />
timer e funzioni apprese, selezionare “TUTTI REIMP” e<br />
confermare con il tasto OK l.<br />
5. Il display LCD q mostra il messaggio „CONFERMA<br />
REIMP“. Confermare la cancellazione con il tasto OK l.<br />
Quindi il display LCD q indica “SUCCESSO REIMP”. Le<br />
informazioni indicate vengono ora cancellate e il menu<br />
viene terminato.<br />
6. Per cancellare la funzione di singoli tasti dell’apparecchio<br />
e, selezionare “MOD REIMP” e premere il tasto OK l.<br />
Il display LCD q mostra quindi il messaggio “MOD” e la<br />
richiesta di premere un tasto dell’apparecchio e di cui si<br />
desidera eliminare la funzione. Infine viene brevemente<br />
visualizzato il messaggio “SUCCESSO” (= operazione<br />
riuscita), quindi nel display LCD compare nuovamente il<br />
messaggio “MOD”. Se necessario premere ulteriori tasti<br />
dell’apparecchio e, per cancellare anche queste funzioni.<br />
7. Altrimenti uscire dal menu, premendo il tasto EXIT y.<br />
Configurazione del timer<br />
Il telecomando universale offre 2 modalità di Timer:<br />
Sleep-Timer e Timer eventi.<br />
Sleep-Timer<br />
1. Premere il tasto dell'apparecchio e per l'apparecchio da<br />
controllare (ad es. VCR).<br />
2. Tenere premuto il tasto S r per oltre 3 secondi.<br />
Compare il messaggio „LINGUA SETUP“.<br />
3. Premere il tasto o t, fino a visualizzare „TIMER<br />
SETUP“. Premere il tasto OK l.„TIMER SLEEP“ compare<br />
quindi nel display LCD q. Con il tasto OK l confermare<br />
la selezione di questa funzione.<br />
4. In basso a destra nel display LCD q lampeggia il numero<br />
dei minuti del tempo di funzionamento residuo dell'apparecchio<br />
selezionato. Con il tasto o t impostare<br />
il valore desiderato da 1 a 99 minuti. Premere il tasto OK<br />
l per la conferma. Con lo Sleep-Timer programmato, il<br />
display LCD q mostra “zz ” a destra accanto all’ora.<br />
5. Posizionare il telecomando in modo tale che i suoi segnali<br />
a infrarossi riescano a raggiungere l'apparecchio da<br />
spegnere. Al termine del tempo impostato, il telecomando<br />
spegnerà l'apparecchio.<br />
- 48 -
6. Premendo ora il tasto S r, in basso a sinistra nel display<br />
LCD q viene mostrato il messaggio “SL”.<br />
Timer eventi<br />
Il telecomando dispone di 4 Timer eventi tramite cui si<br />
possono inviare determinate serie di combinazioni di tasti<br />
in determinati orari.<br />
1. Tenere premuto il tasto S r per oltre 3 secondi.<br />
Compare il messaggio „LINGUA SETUP“.<br />
2. Con il tasto o t selezionare „TIMER SETUP“ e confermare<br />
con il tasto OK l. „TIMER SLEEP“ compare quindi<br />
nel display LCD q. Con il tasto o t selezionare la<br />
posizione di memoria desiderata da „TIMER 1 SETUP“ a<br />
„TIMER 4 SETUP“ e confermare con il tasto OK l.<br />
3. Lampeggerà quindi l'indicazione delle ore dell'orario in<br />
cui si desidera l'esecuzione della combinazione di tasti<br />
selezionata. Con il tasto o t impostare l'ora desiderata<br />
e confermare con il tasto OK l.<br />
4. Lampeggerà quindi l'indicazione dei minuti dell'orario in<br />
cui si desidera l'esecuzione della combinazione di tasti<br />
selezionata. Con il tasto o t impostare i minuti desiderati<br />
e confermare con il tasto OK l.<br />
5. Nel display LCD q leggere „TIMER X KEY“ (X indica<br />
il Timer desiderato). Premere quindi il tasto dell'apparecchio<br />
e desiderato, seguito dalla sequenza desiderata<br />
dei comandi dei tasti.<br />
6. Come standard, i comandi macro vengono inviati a intervalli<br />
di 1 secondo. Poiché alcuni apparecchi non reagiscono<br />
rapidamente, potrebbe succedere che la sequenza<br />
dei comandi macro venga inviata troppo rapidamente<br />
all’apparecchio. Quindi si ha la possibilità di programmare<br />
una pausa compresa fra 5 e 21 secondi prima dell’invio<br />
di un comando di tasti. Se necessario, premere ripetutamente<br />
il tasto MACRO i. In basso a destra, il display<br />
LCD q mostra le lunghezze di pausa correnti espresse in<br />
secondi.<br />
7. Premere il tasto S r, per salvare i dati e ritornare alla<br />
panoramica del Timer.<br />
8. Procedere analogamente per programmare se necessario<br />
anche le altre posizioni di memoria del Timer.<br />
9. Con un timer degli eventi programmato, il display LCD q<br />
mostra il simbolo Timer “ ” in basso a destra accanto<br />
all’ora.<br />
Suggerimenti:<br />
1. Per ogni posizione di memoria del Timer si possono programmare<br />
fino a un massimo di 14 tasti. Dopo l'immissione<br />
del quattordicesimo tasto, la sequenza viene automaticamente<br />
salvata e nel display LCD q viene visualizzato<br />
"PIENO".<br />
2. Anche in questo menu, l'apparecchio ritorna alla visualizzazione<br />
standard dopo circa 15 secondi senza immissione<br />
di dati.<br />
- 49 -
Cancellazione timer<br />
Procedere in base alle seguenti istruzioni per cancellare un<br />
orario programmato nel timer (sleep o evento):<br />
1. Selezionare il timer che si desidera cancellare (v. capitolo<br />
Timer sleep/Timer evento) e premere il tasto OK l. Nel<br />
display LCD q si legge „TIMER ELIM“.<br />
2. Premere il tasto OK l. Il display LCD q passa a „CON-<br />
FERMA ELIM“.<br />
3. Premere nuovamente il tasto OK l, per cancellare il timer.<br />
Il display LCD q conferma la cancellazione riuscita con il<br />
display „SUCCESSO“.<br />
Configurazione dell’apprendimento<br />
Il telecomando universale può apprendere e memorizzare<br />
i segnali dei tasti di un telecomando originale. Se il telecomando<br />
universale non funziona o non riesce a eseguire tutti<br />
i comandi secondo i metodi di programmazione precedentemente<br />
descritti, tentare di istruire il telecomando universale<br />
tramite il telecomando/i originale/i.<br />
• Utilizzare pile nuove per il telecomando universale e per il<br />
telecomando originale.<br />
• Mantenere una distanza di almeno un metro da altre fonti<br />
luminose. Le fonti luminose possono interferire con la trasmissione<br />
di infrarossi.<br />
• Collocare il telecomando universale e quello originale a<br />
distanza di 20 - 50 mm l'uno dall'altro, su una superficie<br />
piana, orientando i diodi a infrarossi 2) l'uno verso l'altro.<br />
Suggerimenti:<br />
1. Non utilizzare i seguenti tasti per la funzione di apprendimento:<br />
tutti i tasti apparecchi e, MACRO i, tasto S r,<br />
EXIT y.<br />
2. Se durante l'apprendimento, mentre viene visualizzato il<br />
messaggio „LEARNING“ (apprendimento) non si preme<br />
alcun tasto del telecomando originale entro 30 secondi,<br />
il menu di apprendimento viene terminato. Questa modalità<br />
non può essere terminata tramite la pressione di un<br />
tasto del telecomando.<br />
3. La memoria comprende in tutto 150 comandi di tasti. Se<br />
la memoria è piena, il display LCD q mostrerà il messaggio<br />
„APPRENDI PIENO“ e la modalità di apprendimento<br />
verrà terminata.<br />
4. Con il tasto EXIT y si ritorna allo stato precedente (tranne<br />
che con il messaggio „APPRENDI TASTO“ o „APPREN-<br />
DI“).<br />
Funzione di apprendimento codici<br />
1. Premere il tasto dell'apparecchio e per l'apparecchio per<br />
il quale si desidera che il telecomando apprenda un codice<br />
tasti.<br />
- 50 -
2. Tenere premuto il tasto S r per oltre 3 secondi.<br />
Compare il messaggio „LINGUA SETUP“.<br />
3. Con il tasto o t selezionare il menu „APPRENDI<br />
SETUP“ (apprendimento) e premere quindi il tasto OK l.<br />
4. Il display LCD q mostra il messaggio „APPRENDI IMP".<br />
Premere quindi il tasto OK l. Nel display LCD q<br />
compare „APPRENDI TASTO“ (selezione tasto).<br />
5. Premere prima sul telecomando universale il tasto che<br />
dev'essere appreso. Nel display LCD q compare il messaggio<br />
„APPRENDI“. Il telecomando universale attende<br />
quindi il segnale a infrarossi del telecomando originale<br />
Avvertenza:<br />
se il messaggio non passa a „APPRENDI“, si è selezionato<br />
un tasto per il quale non è possibile eseguire l'apprendimento<br />
del codice tasto.<br />
6. Dirigere i sensori a infrarossi 2) di entrambi i telecomandi<br />
l'uno verso l'altro.<br />
7. Tenere ora premuto il tasto desiderato del telecomando<br />
originale, fino a ottenere nel display LCD q del telecomando<br />
universale il messaggio „SUCCESSO“ o „AP-<br />
PRENDI ERR“.<br />
8. Se nel display LCD q compare il messaggio „SUCCES-<br />
SO“ (procedimento riuscito), a partire dal punto 5, si<br />
può ottenere l'apprendimento di altri tasti. Se compare<br />
„APPRENDI ERR“ (procedimento non riuscito), ripetere il<br />
procedimento dal punto 5.<br />
9. Per interrompere/terminare il procedimento di apprendimento,<br />
premere il tasto S e infine durante la comparsa<br />
del messaggio “APPRENDI TASTO” premere il tasto EXIT<br />
y fino alla comparsa del messaggio standard nel display<br />
LCD q. Mentre è presente il messaggio “APPRENDI”, attendere<br />
semplicemente 30 secondi senza eseguire alcun<br />
comando e l’apparecchio terminerà automaticamente il<br />
menu.<br />
Cancellazione di tutti i tasti programmati di tutti gli<br />
apparecchi<br />
1. Tenere premuto il tasto S r per oltre 3 secondi.<br />
Compare il messaggio „LINGUA SETUP“.<br />
2. Con il tasto o t selezionare il menu „APPRENDI<br />
SETUP“ e premere quindi il tasto OK l. Nel display LCD<br />
q compare „APPRENDI IMP“.<br />
3. Con il tasto o t selezionare „APPRENDI ELIM“<br />
(eliminazione di quanto appreso) e confermare con il<br />
tasto OK l. Nel display LCD q compare „CONFERMA<br />
ELIM“ (conferma della cancellazione).<br />
4. Confermare con il tasto OK l. Il display LCD q mostra<br />
il messaggio „SUCCESSO”. Tutti i tasti programmati vengono<br />
cancellati. Infine il menu viene terminato automaticamente.<br />
Avvertenza:<br />
se il display LCD mostra „CONFERMA ELIM “, si può interrompere<br />
la cancellazione con il tasto EXIT y.<br />
- 51 -
Configurazione macro<br />
Con la funzione MACRO si possono eseguire fino a 16 comandi<br />
di tasti con una semplice pressione di un tasto, cioè è<br />
possibile eseguire con un tasto di macro vari comandi precedentemente<br />
salvati. Sono a disposizione 6 posizioni di macro.<br />
Programmazione di una macro<br />
Per la programmazione di una macro, procedere come segue:<br />
1. Tenere premuto il tasto S r per oltre 3 secondi.<br />
Compare il messaggio „LINGUA SETUP“.<br />
2. Con il tasto o t selezionare „MACRO SETUP"<br />
e confermare con il tasto OK l. Nel display compare<br />
„MACRO 1 SETUP".<br />
3. Con il tasto o t selezionare la posizione di<br />
memoria da programmare (MACRO SETUP 1 - 6) e<br />
confermare con il tasto OK l.<br />
4. Il display LCD q mostra il messaggio „MACRO FASE".<br />
Premere i tasti desiderati in sequenza (max. 16). La<br />
sequenza deve cominciare con un tasto apparecchi e.<br />
5. Come standard, i comandi macro vengono inviati a intervalli<br />
di 1 secondo. Poiché alcuni apparecchi non reagiscono<br />
rapidamente, potrebbe succedere che la sequenza<br />
dei comandi macro venga inviata troppo rapidamente<br />
all’apparecchio. Quindi si ha la possibilità di programmare<br />
una pausa compresa fra 5 e 21 secondi prima dell’invio di<br />
un comando di tasti. Premere eventualmente ripetutamente<br />
il tasto MACRO i. In basso a destra, il display LCD q mostra<br />
le lunghezze di pausa correnti espresse in secondi.<br />
6. Una volta raggiunta la quantità massima dei comandi<br />
di tasti, il display LCD q indica „PIENO“.<br />
7. Salvare l'immissione con il tasto S r. Il display LCD q<br />
mostra il messaggio „MACRO SETUP".<br />
8. Se durante la selezione della macro da programmare<br />
(punto 3) si seleziona una posizione di memoria già<br />
occupata, la macro preesistente verrà sovrascritta.<br />
9. Ripetere il procedimento dal punto 3 per la creazione<br />
di ulteriori macro.<br />
10. Con il tasto EXIT y si retrocede di un livello nel menu,<br />
tranne durante l’immissione dei comandi dei tasti.<br />
Suggerimenti:<br />
1. In una macro si possono memorizzare un massimo di 16<br />
comandi. Dopo l’immissione del sedicesimo comando di<br />
tasti, nel display LCD q compare la scritta “PIENO”.<br />
2. Per uscire dalla modalità senza salvare, attendere circa<br />
15 secondi senza eseguire immissioni.<br />
3. Nella modalità „MACRO FASE“ si può tornare allo stato<br />
precedente solo con il tasto S r.<br />
Esempio: si desidera salvare una sequenza di comandi in<br />
una macro. Cominciamo nella modalità „MACRO FASE”.<br />
Sequenza di comandi desiderata: accensione della TV =><br />
PAUSE => passaggio all’ingresso AV => accensione DVD =><br />
PAUSE => riproduzione DVD.<br />
- 52 -
Nella modalità "MACRO FASE"inserire la seguente sequenza<br />
di comandi:<br />
=> => (tempo di pausa) => =><br />
=> => (tempo di pausa) =><br />
Esecuzione macro<br />
Per eseguire una macro precedentemente programmata, procedere<br />
come segue:<br />
1. Premere il tasto MACRO i.<br />
2. Con il relativo tasto numerico o richiamare la macro<br />
desiderata (1-6). Esempio: se si desidera eseguire la<br />
Macro 3, premere prima il tasto MACRO i e quindi<br />
nel giro di 5 secondi il tasto numerico „ “.<br />
Cancellazione di tutte le macro<br />
Per eliminare tutte le macro precedentemente programmate,<br />
procedere come segue:<br />
1. Tenere premuto il tasto S r per oltre 3 secondi.<br />
Compare il messaggio „LINGUA SETUP“.<br />
2. Con il tasto o t selezionare „MACRO SETUP"<br />
e confermare con il tasto OK l. Nel display compare<br />
„MACRO SETUP 1".<br />
3. Con il tasto o t selezionare „MACRO ELIM“<br />
e confermare con il tasto OK l.<br />
4. Nel display LCD q compare „CONFERMA ELIM“ (conferma<br />
della cancellazione). Confermare l'eliminazione<br />
con il tasto OK l. Il display LCD q mostra il messaggio<br />
"SUCCESSO". Tutte le macro vengono annullate, il menu<br />
viene terminato.<br />
Suggerimenti:<br />
1. Se il display LCD q mostra „CONFERMA ELIM“, si può<br />
interrompere la cancellazione con il tasto EXIT y.<br />
2. Non è possibile cancellare le singole macro, ma solo sovrascriverle.<br />
Canale preferiti<br />
Avvertenza:<br />
con questa funzione si possono salvare le emittenti preferite<br />
come Preferiti.<br />
Programmazione dei Preferiti<br />
Le emittenti preferite possono essere memorizzate come segue:<br />
1. Premere il tasto dell'apparecchio e per l'apparecchio per<br />
il quale si desidera salvare un preferito.<br />
2. Tenere premuto il tasto S r per oltre 3 secondi.<br />
Compare il messaggio „LINGUA SETUP“.<br />
3. Con il tasto o t selezionare „PREF CH SETUP"<br />
e confermare con il tasto OK l. Nel display compare<br />
„PREF CH 1 SETUP".<br />
4. Con il tasto o t selezionare la posizione di<br />
memoria da programmare (PREF CH 1 - 4 SETUP) e<br />
confermare con il tasto OK l.<br />
- 53 -
5. Il display LCD q mostra il messaggio „PREF CH FASE".<br />
Premere in sequenza i tasti (max. 4) per richiamare l'emittente<br />
desiderata preferita.<br />
6. Una volta raggiunta la quantità massima dei comandi<br />
di tasti, il display LCD q indica „PIENO“.<br />
7. Salvare l'immissione con il tasto S r. Il display LCD q<br />
mostra il messaggio „PREF CH SETUP".<br />
8. Se durante la selezione del preferito da programmare<br />
(punto 4) si seleziona una posizione di memoria già<br />
occupata, il preferito preesistente verrà sovrascritto.<br />
9. Ripetere il procedimento per impostare nuovi preferiti.<br />
10. Con il tasto EXIT y si retrocede di un livello nel menu,<br />
tranne durante l'immissione dei comandi dei tasti.<br />
Avvertenza:<br />
L'immissione dei numeri dei canali può variare a seconda del<br />
modello e della marca dell'apparecchio selezionato. Eventualmente<br />
potrebbe essere necessario premere prima<br />
il tasto a in caso di numeri di canali a più cifre.<br />
Richiamo dei preferiti<br />
Per richiamare uno dei preferiti precedentemente programmati,<br />
premere il tasto FAV/EPG 1(, seguito dal relativo tasto<br />
numerico per la posizione di memoria desiderata (1 - 4).<br />
Eliminazione di tutti i canali PREF<br />
Per eliminare tutti i preferiti precedentemente programmati,<br />
procedere come segue:<br />
1. Tenere premuto il tasto S r per oltre 3 secondi.<br />
2. Con il tasto o t selezionare „PREF CH SETUP"<br />
e confermare con il tasto OK l. Nel display compare<br />
„PREF CH SETUP 1".<br />
3. Con il tasto o t selezionare „PREF CH CLEAR“<br />
e confermare con il tasto OK l.<br />
4. Nel display LCD q compare „CONFERMA ELIM“ (conferma<br />
della cancellazione). Confermare l'eliminazione<br />
con il tasto OK l. Il display LCD q mostra il messaggio<br />
"SUCCESSO". Tutti i preferiti vengono annullati, il menu<br />
viene terminato.<br />
Suggerimenti:<br />
1. Se il display LCD q mostra „CONFERMA ELIM“, si può<br />
interrompere la cancellazione con il tasto EXIT y.<br />
2. Non è possibile cancellare i singoli preferiti, ma solo sovrascriverli.<br />
Regolazione volume<br />
Vol +/—, (disattivazione suono)<br />
Premere il tasto "VOL+" per aumentare il volume. Con il tasto<br />
„VOL —“ si può diminuire il volume. Per disattivare il suono,<br />
premere il tasto h. Un'ulteriore pressione di questo<br />
tasto riattiverà il suono.<br />
- 54 -
Se non si è impostato alcun altro apparecchio come apparecchio<br />
di destinazione per la regolazione globale del volume,<br />
all’azionamento dei tasti VOL +/— j del telecomando,<br />
come standard viene azionata la regolazione del volume<br />
dell’apparecchio TV, indipendentemente dai tasti dell’apparecchio<br />
e premuti precedentemente. Ciò tuttavia non vale<br />
per gli apparecchi “AMP”, “DVD” e “DSAT”, poiché si può<br />
partire anche dal presupposto che questi apparecchi dispongano<br />
di regolazione autonoma del volume.<br />
Uso<br />
> > Per comandare uno degli apparecchi programmati con il<br />
telecomando universale, premere prima di tutto il relativo<br />
tasto apparecchi e. Dirigere quindi il telecomando universale<br />
su tale apparecchio e premere il tasto desiderato.<br />
> > Impostare i tasti numerici o esattamente come si farebbe<br />
con il telecomando originale. Prima di eseguire un'immissione<br />
a due cifre, premere il tasto a.<br />
> > Premere il tasto S r e infine il tasto FAV/EPG 1(, per avviare<br />
la guida dei programmi di un apparecchio provvisto<br />
di questa funzione.<br />
> > Premendo il tasto S r, in basso a destra verrà visualizzata<br />
la data per 10 secondi nel display LCD q.<br />
> > Premendo uno dei tasti apparecchi e, in basso a destra<br />
nel display LCD q viene visualizzato il codice attivo per<br />
l'apparecchio.<br />
> > Tramite il tasto MENU k richiamare il dialogo per le impostazioni<br />
del rispettivo apparecchio di destinazione.<br />
> > Premere il tasto di illuminazione d, per attivare o disattivare<br />
l’illuminazione del display e dei tasti.<br />
Tasto ALL OFF<br />
Suggerimenti:<br />
Con il tasto ALL OFF (tutto spento) w si possono<br />
spegnere automaticamente tutti gli apparecchi accesi.<br />
Questa funzione può riaccendere gli apparecchi già spenti<br />
(a seconda dell'apparecchio). Tenere premuto in tal caso<br />
per qualche secondo il tasto ALL OFF w. Possono essere<br />
necessari fino a 10 secondi per lo spegnimento di tutti gli<br />
apparecchi. Tale operazione funziona solo in presenza delle<br />
seguenti condizioni:<br />
1. Esiste una connessione visibile fra tutti gli apparecchi<br />
e il telecomando universale.<br />
2. Le funzioni di ricerca automatica del codice, ricerca del<br />
codice in base alla marca e MACRO non sono attive.<br />
3. Tutti gli apparecchi di arrivo devono essere idonei allo<br />
spegnimento tramite telecomando.<br />
Per riaccendere automaticamente tutti gli apparecchi, tenere<br />
premuto nuovamente il tasto w fino ad accendere tutti<br />
gli apparecchi.<br />
- 55 -
Pulizia e conservazione<br />
Attenzione!<br />
Impedire la penetrazione di umidità nell'apparecchio<br />
durante la pulizia! In caso contrario, possono verificarsi<br />
danni irreparabili all'apparecchio!<br />
> > Pulire l'alloggiamento dell'apparecchio solo con un<br />
panno leggermente umido e un detergente delicato.<br />
> > Collocare l'apparecchio esclusivamente in un ambiente<br />
corrispondente alle indicazioni contenute nella sezione<br />
Dati tecnici.<br />
> > Prima della conservazione, rimuovere le pile, in modo da<br />
impedire che esse danneggino l'apparecchio in caso di<br />
deterioramento delle stesse.<br />
Guasti / Risoluzione<br />
L'apparecchio non reagisce al telecomando universale.<br />
> > Controllare le pile. È necessaria una tensione sufficiente e<br />
il corretto inserimento delle pile.<br />
> > Si è premuto il tasto apparecchi e corretto per l'apparecchio<br />
di destinazione desiderato?<br />
> > Controllare che sia stato programmato il codice corretto<br />
per l'apparecchio di destinazione (v. paragrafo „CODI-<br />
CE SETUP“).<br />
Il telecomando universale non trasmette correttamente<br />
i comandi.<br />
> > Premere il relativo tasto apparecchi e per portare il telecomando<br />
nella modalità corretta.<br />
> > È necessaria una tensione sufficiente e il corretto inserimento<br />
delle pile.<br />
> > Probabilmente si sta utilizzando un codice errato. Avviare<br />
la ricerca dei codici delle marche, la ricerca automatica<br />
dei codici o l'immissione diretta del codice (manuale).<br />
Il telecomando universale non cambia l'emittente<br />
sull'apparecchio.<br />
> > Premere il relativo tasto apparecchi e per portare il telecomando<br />
nella modalità corretta.<br />
> > Se il telecomando originale non possiede tasti „-/- -“,<br />
cambiare i programmi con i tasti P +/— u o con i tasti<br />
numerici o.<br />
> > Se anche tale opzione non funzionasse, controllare che<br />
non sia attivata la protezione bambini per l'apparecchio<br />
di destinazione.<br />
Alcuni tasti del telecomando universale non funzionano<br />
correttamente.<br />
> > Il telecomando universale probabilmente non possiede<br />
tutte le funzioni del telecomando originale dell'apparecchio.<br />
- 56 -
Probabilmente non è stato programmato il codice ottimale.<br />
Cercare un codice che supporti maggiori funzioni<br />
dell'apparecchio di destinazione.<br />
Il telecomando universale non reagisce più a seguito<br />
della pressione di un tasto.<br />
> > È necessaria una tensione sufficiente e il corretto inserimento<br />
delle pile.<br />
> > Dirigere il telecomando universale verso l'apparecchio.<br />
Il display LCD q non mostra alcun messaggio.<br />
> > È necessaria una tensione sufficiente e il corretto inserimento<br />
delle pile.<br />
> > Il contrasto potrebbe essere troppo ridotto. Aumentare<br />
il contrasto.<br />
Smaltimento<br />
Non gettare per alcun motivo l'apparecchio<br />
insieme ai normali rifiuti domestici. Questo<br />
prodotto è soggetto alla direttiva europea<br />
2002/96/EC.<br />
Telecomando universale<br />
• Smaltire il telecomando universale o parti di esso tramite<br />
un'azienda autorizzata di smaltimento o tramite l'ente municipale<br />
competente.<br />
• Rispettare le prescrizioni attualmente in vigore. In caso di<br />
dubbi mettersi in contatto con l'ente di smaltimento competente.<br />
Pile/accumulatori<br />
• Pile e/o accumulatori non devono essere smaltiti insieme<br />
ai rifiuti domestici.<br />
• Le pile possono contenere sostanze tossiche dannose per<br />
l'ambiente. Smaltire pertanto le pile/gli accumulatori unicamente<br />
in conformità alle leggi vigenti.<br />
• Ogni utente è obbligato per legge a restituire le pile/gli<br />
accumulatori a un centro di raccolta comunale, locale<br />
o presso il rivenditore. Questo obbligo è finalizzato allo<br />
smaltimento ecologico delle pile e/o degli accumulatori.<br />
• Restituire pile/accumulatori solo se completamente scarichi.<br />
Imballaggi<br />
• Smaltire tutti i materiali dell'imballaggio in modo<br />
ecologicamente conforme.<br />
Dati tecnici<br />
Apparecchi comandabili: 10<br />
Dimensioni L x P x A: 217 x 50 x 22 mm<br />
Peso :<br />
133 g (incl. pile)<br />
LED a infrarossi: classe di laser 1<br />
Alimentazione Pile: 2 x 1,5 V tipo AAA/LR03 (micro)<br />
(incluse nella fornitura)<br />
- 57 -
Temperatura di esercizio: +15 – +35 °C<br />
Temperatura di<br />
conservazione: —0 – +50° C<br />
Umidità:<br />
≤ 75 % (senza condensa)<br />
Avviso sulla conformità<br />
Questo apparecchio è conforme ai requisiti di base e alle<br />
altre norme rilevanti della Direttiva europea per la compatibilità<br />
elettromagnetica 2004/108/EC nonché Direttiva RoHS<br />
2011/65/EU.<br />
Importatore<br />
KOMPERNASS GMBH<br />
BURGSTRASSE 21<br />
44867 BOCHUM, GERMANY<br />
www.kompernass.com<br />
Garanzia & assistenza<br />
Questo apparecchio è garantito per tre anni a partire dalla<br />
data di acquisto. L'apparecchio è stato prodotto con cura e<br />
debitamente collaudato prima della consegna. Conservare<br />
lo scontrino come prova d'acquisto. Nei casi contemplati dalla<br />
garanzia, mettersi in comunicazione telefonicamente con<br />
il centro di assistenza più vicino. Solo in tal modo è possibile<br />
garantire una spedizione gratuita della merce.<br />
La garanzia copre solo i difetti del materiale o di fabbricazione,<br />
ma non i danni da trasporto, danni alle parti soggette<br />
a usura o alle parti fragili, come ad esempio interruttori<br />
o accumulatori.<br />
Il prodotto è destinato esclusivamente all'uso domestico e non<br />
a quello commerciale. La garanzia decade in caso di impiego<br />
improprio o manomissione, uso della forza e interventi<br />
non eseguiti dalla nostra filiale di assistenza autorizzata.<br />
Questa garanzia non costituisce alcun limite ai diritti legali<br />
del consumatore.<br />
Il periodo di garanzia non viene prolungato da interventi in<br />
garanzia. Ciò vale anche per le parti sostituite e riparate.<br />
I danni e i difetti eventualmente presenti già all'acquisto<br />
devono essere comunicati immediatamente dopo il disimballaggio,<br />
e comunque entro e non oltre due giorni dalla data<br />
d'acquisto. Le riparazioni effettuate al termine del periodo di<br />
validità della garanzia sono a pagamento.<br />
Assistenza Italia<br />
Tel.: 02 36003201<br />
E-Mail: kompernass@lidl.it<br />
<strong>IAN</strong> <strong>86342</strong><br />
- 58 -
INDEX<br />
- 59 -<br />
PAGE<br />
Important safety instructions 60<br />
Device summary 61<br />
Initial use 62<br />
Unpacking the device/checking the package contents 62<br />
Inserting the batteries 62<br />
Operating components 63<br />
LCD display 63<br />
Buttons 64<br />
The configuration menu 67<br />
Menu language configuration 69<br />
Code configuration (Programming the remote control) 69<br />
Programming by brand code search 69<br />
Programming by manual code input 70<br />
Programming by automatic code search 71<br />
System configuration 72<br />
Setting the time 72<br />
Setting the date 72<br />
Adjust contrast 73<br />
Background Illumination 73<br />
Setting the global volume/mute switching 73<br />
Select a Tape-/Disc device for direct operation 74<br />
Setting the lock function 75<br />
System reset 75<br />
Timer configuration 76<br />
Sleep timer 76<br />
Event timer 76<br />
Delete Timer 77<br />
Learn configuration 77<br />
Code learn function 78<br />
Macro configuration 79<br />
Favourites channel 80<br />
Volume control 82<br />
Vol +/—, (Mute switching) 82<br />
For operation 82<br />
All OFF 82<br />
Cleaning and storage 83<br />
Faults / Remedies 83<br />
Disposal 84<br />
Technical data 84<br />
Note regarding conformity 85<br />
Importer 85<br />
Warranty & Service 85
10-IN-1 REMOTE CONTROL SFB 10.1 B2<br />
Introduction<br />
Congratulations on the purchase of your new appliance.<br />
You have clearly decided in favour of a quality product. These<br />
operating instructions are a part of this product. They contain<br />
important information in regard to safety, use and disposal.<br />
Before using the product, familiarise yourself with all of these<br />
operating and safety instructions. Use the product only as described<br />
and only for the specified areas of application. Retain<br />
these instructions for future reference. In addition, pass these<br />
documents on, together with the product, to any future owner.<br />
Copyright<br />
This documentation is copyright protected. All rights including<br />
those of photographic reproduction, duplication and<br />
distribution by means of particular methods (for example<br />
data processing, data carriers and data networks), wholly<br />
or partially as well as substantive and technical changes are<br />
reserved.<br />
Important safety instructions<br />
Proper use<br />
Children may only operate the remote control under adult<br />
supervision.<br />
The universal remote control can replace a maximum of ten<br />
remote controls. It can only be used for entertainment electronics<br />
with infrared receivers. The functions of the Universal<br />
remote control essentially correspond to those of the original<br />
remote control. The universal remote control is intended for<br />
private use. It is not suitable for commercial use.<br />
Any other use is considered improper use. The manufacturer<br />
accepts no responsibility for damage caused by improper<br />
handling or unauthorized reconstruction.<br />
Warning<br />
A warning of this danger level signifies a possible dangerous<br />
situation. If the dangerous situation is not avoided it can lead<br />
to injuries. The directives in this warning are there to avoid<br />
personal injuries.<br />
Important<br />
A warning of this danger level signifies possible property<br />
damage. If the situation is not avoided it can lead to property<br />
damage. The directives in this warning are there to avoid<br />
property damage.<br />
Note<br />
A note signifies additional information that assists in the<br />
handling of the device.<br />
- 60 -
Warning of injury danger as a result of<br />
improper handling of batteries!<br />
Batteries must be handled with special care. Take note of the<br />
following safety instructions:<br />
• Keep batteries well away from children. Children can<br />
put batteries into their mouths and swallow them. If a battery<br />
is swallowed medical assistance must be sought IM-<br />
MEDIATELY.<br />
• Do not throw batteries into a fire. Never subject batteries<br />
to high temperatures.<br />
• Explosion hazard! Non-rechargeable batteries must never<br />
be recharged.<br />
• Do not open the batteries or short-circuit them.<br />
• Battery acid leaking from a battery can cause inflammation<br />
of the skin. In event of contact with the skin, rinse with<br />
large amounts of water. If the liquid comes into contact<br />
with your eyes, rinse thoroughly with water, do not rub<br />
and immediately consult a doctor.<br />
Attention!<br />
The Universal remote control contains an infrared diode of laser<br />
class 1. In order to avoid eye injuries do not look at the<br />
diode with optical devices.<br />
Damage to the device<br />
• If the device is defective, do not attempt to repair it yourself.<br />
In case of damage, contact the manufacturer or the<br />
manufacturer's service hotline (see Warranty information).<br />
• If liquid escapes from the device or if the device has been<br />
otherwise damaged, it must be inspected by the manufacturer<br />
or the manufacturer's service hotline. Contact the<br />
manufacturer or the manufacturer's service hotline (see<br />
Warranty information).<br />
• Take the batteries out of the battery compartment as soon<br />
as they are depleted.<br />
• If you will not be using the device for a long period of time,<br />
remove the batteries to prevent them from discharging.<br />
• Always change all batteries at the same time and always<br />
use batteries of the same type.<br />
Device summary<br />
q LCD display<br />
w /ALL OFF button<br />
e Device buttons<br />
r S button<br />
t Arrow buttons<br />
y EXIT button<br />
u P +/— buttons<br />
i MACRO button<br />
o Number buttons<br />
a Button for one or two digit programme numbers<br />
- 61 -
s Teletext function buttons<br />
d Illumination button<br />
f Playback buttons<br />
g AV button<br />
h Mute switching<br />
j VOL +/— buttons<br />
k MENU button<br />
l OK button<br />
1( FAV / EPG button<br />
2) Infrared sender/receiver<br />
2! Battery compartment cover<br />
Tips:<br />
• The functions described here pertain to the theoretically<br />
ideal circumstance that the button structure of the respective<br />
original remote control is identical to this universal<br />
remote control. This only occurs, however, in rare cases. If,<br />
therefore, not all of the original remote control's functions<br />
can be reproduced it is not due to a dificiency in the Universal<br />
remote control.<br />
• All the brand names used in these instructions or in the<br />
accompanying code list are trademarks of the corresponding<br />
companies.<br />
Initial use<br />
Unpacking the device/checking the package<br />
contents<br />
Warning!<br />
Keep the plastic packaging well away from small children.<br />
There is a risk of suffocation!<br />
• Unpack the device and accessories.<br />
• Check the package contents<br />
- Universal remote control (URC),<br />
- Operating instructions,<br />
- Manufacturers directory with device code list:<br />
- 2 x 1,5 V Batteries, type AAA/LR03 (Micro)<br />
Note: Transport damage<br />
If you notice any transport damage contact the manufacturer or<br />
the manufacturer's Service-Hotline (see warranty information).<br />
Inserting the batteries<br />
Attention!<br />
The Universal remote control must only be operated with<br />
1.5 Volt batteries (Type AAA, LR03).<br />
Carry out the battery change as quickly as possible. Preset<br />
settings will remain saved for approx. 1 minute. If new batteries<br />
have not been installed within this time all of the settings<br />
will have to be carried out again. The time of day and date<br />
will, however, be lost in either case.<br />
- 62 -
1. Open the battery compartment cover 2! in the direction<br />
of the arrow.<br />
2. Insert the batteries as shown in the diagram and close the<br />
battery compartment.<br />
The LCD display q is activated as long as batteries are<br />
installed. The following diagram shows the LCD display q<br />
after the batteries have been installed or changed.<br />
Note:<br />
If no LCD display q is visible check the polarity of the<br />
batteries or install new ones.<br />
Operating components<br />
LCD display<br />
The LCD display q is divided into fields.<br />
Text field 2@<br />
Here is shown the currently selected device, for example<br />
DVD, TV VCR etc.<br />
Infrared symbol 2#<br />
Every time a button is pressed, with which an infrared signal<br />
is to be sent the Infrared symbol illuminates.<br />
- 63 -
Code/Time field 2$<br />
Here is shown the device code of the relevent selected device<br />
or the time of day. With the time of day indicator ":" the numbers<br />
blink in the middle. For time displays in the 12-hour format,<br />
the period of the day code is shown to the left of the time.<br />
Day of the week field 2%<br />
Here you can read the shortened form of the current day of<br />
the week after you have entered the date.<br />
Standard display:<br />
The standard readout of the LCD display q consists of the<br />
details for the relevent device, for example, "TV", the initial<br />
for the day of the week and the time of day indicator.<br />
Buttons<br />
Note:<br />
All the functions described here can, of course, only be used<br />
if they are supported by the device being controlled.<br />
/ALL OFF button. w<br />
To switch the device on/off; press and hold<br />
for a few seconds to switch all devices on/off.<br />
Device buttons e<br />
The device buttons are used to select the device that should<br />
be operated.<br />
Television<br />
Video recorder<br />
Accessory unit 1<br />
Cable receiver<br />
CD player<br />
BluRay Disc Player<br />
Audio amplifier<br />
DVD player<br />
Digital satellite receiver<br />
Accessory unit 2<br />
The mentioned button allocation is not compulsory. You can,<br />
for example, also save the code for the video recorder on<br />
the TV slot.<br />
"S" button r<br />
Press and hold for 3 seconds to access the<br />
configuration menu or press briefly to show<br />
the date.<br />
- 64 -
To access the target device’s electronic <br />
programme guide (EPG) first press briefly<br />
the S button r and then the FAV/EPG<br />
button 1(.<br />
To control the “PIP” function (picture in picture)<br />
of your television set, first press the<br />
S button r followed by the - button<br />
of the Videotext function buttons s.<br />
Arrow buttons t<br />
Move up, right, left and down in menus.<br />
EXIT button y<br />
Move a level backward in the menu.<br />
P +/— buttons u<br />
Changing the reception channel.<br />
In the DVD and CD-mode these buttons<br />
control the SKIP function<br />
MACRO button i<br />
MACRO button i followed by a number<br />
button o 1-6 activates a previously saved<br />
chain of commands.<br />
Number buttons o<br />
Enter programme and device code numbers.<br />
Button for one/two digit programme numbers a<br />
For two digit programme numbers (depending<br />
on the device type) first press<br />
the a button then via the number buttons o<br />
enter the programme number.<br />
When pressed again the display becomes<br />
single digit once more.<br />
Teletext function buttons s<br />
In teletext operation the buttons have the following functions:<br />
Access the teletext function.<br />
Stop automatic paging forward for<br />
multi-page teletexts.<br />
Enlarge page presentation<br />
Screen text and TV image one upon the<br />
other<br />
To end the teletext function.<br />
- 65 -
To access the SWAP function of the target<br />
device briefly press the S button r, followed<br />
by the -button.<br />
Note:<br />
• The teletext function is only available in the European TV<br />
mode and your reception device must be teletext ready.<br />
• In addition the P +/- buttons u control the following<br />
teletext functions:<br />
P + Leaf one page forward<br />
P — Leaf one page backwards<br />
Playback buttons f<br />
The playback buttons f control devices such as DVD/CD<br />
players and video recorders:<br />
Start playback<br />
Image format switching with TV operation.<br />
Record<br />
Stop Playback/Record/Wind<br />
Pause playback<br />
Rewind<br />
Wind forward<br />
The coloured marking of the playback buttons refer to the<br />
coloured fields in the video text, over which the Toptext functions<br />
can be controlled.<br />
AV button g<br />
Switch to the AV input.<br />
Mute switching h<br />
Switch sound on/off.<br />
VOL+/— buttons j<br />
Set volume (Volume).<br />
MENU button k<br />
Access the menu of the controlled device.<br />
OK button l<br />
You can confirm a menu selection with the OK<br />
button.<br />
FAV/EPG button 1(<br />
Press the FAV/EPG button to access your<br />
previously programmed favourite station.<br />
To access the EPG function of the target<br />
device first press briefly the S button r.<br />
- 66 -
The configuration menu<br />
In the system settings you undertake the following:<br />
• Programming the remote control to the devices to be controlled<br />
• Settings for the menu language, time of day, date, display<br />
contrast, background illumination, volume, lock function as<br />
well as system reset.<br />
• Timer settings<br />
• The "learning" of designated button commands<br />
• Setting up Macros<br />
• Assigning favourites<br />
On the following page you can see a summary of the menu<br />
structure.<br />
- 67 -
- 68 -
Menu language configuration<br />
For the device menu display you can select from 5 languages:<br />
English, German, Spanish, French and Italian.<br />
1. Hold down the S button r for a little longer than 3 seconds.<br />
Carry out entries in the menu quickly because after<br />
approx. 15 seconds without an entry the menu will end.<br />
2. “LANGUAGE SETUP” appears in the LCD display q.<br />
Press the OK button l.<br />
3. “ENGLISH” now appears in the LCD display q. With the<br />
buttons t select the desired language and confirm<br />
with the OK button l.<br />
4. With the EXIT button y you exit the menu.<br />
The device menu is now displayed in the selected language.<br />
For the following instructions we are assuming that you have<br />
selected your own language.<br />
Code configuration<br />
(Programming the remote control)<br />
3 Programming methods are available for the remote control:<br />
Programming by brand code search, by automatic code<br />
search and by direct code input (manual).<br />
First you should use the brand code search since this method is<br />
the fastest way of programming if the manufacturer of your device<br />
is itemized in the code list. As second is recommended the<br />
direct code input followed by the automatic code search.<br />
Programming by brand code search<br />
With this method you select the brand and code direct via<br />
the LCD display q.<br />
Observe the following operational references to programme<br />
the remote control:<br />
1. Press the device button e for the device that you want to<br />
programme the remote control.<br />
2. Hold down the S button r for a little longer than 3 seconds.<br />
“LANGUAGE SETUP” appears in the LCD display<br />
q. With the or button t select “CODE SETUP” and<br />
confirm with the OK button l.<br />
3. "ENTER CODE" now appears in the LCD display q. With<br />
the buttons t select "BRAND CODE" and confirm<br />
with the OK button l.<br />
4. Now appears the alphabetical first brand name from the<br />
list of pre-programmed devices.<br />
5. With the 34 buttons t select the various brand names.<br />
6. To make access easier you can skip directly to specific letters<br />
of the alphabet with the number buttons o:<br />
2 => A 3 => D 4 => G 5 => J<br />
6 => M 7 => P 8 => T 9 => W<br />
Example for the search of a TV brand code: With button<br />
- 69 -
number 5 the display skips to the letter "J". The first brand<br />
is "JEC"*. If, for example, you own a "Kenwood"* brand<br />
device, continue leafing with the 4 button t until this<br />
brand name appears. (* All brand names used here are<br />
trademarks of the corresponding manufacturer.)<br />
7. The majority of manufacturers use several different codes<br />
for the remote control. You must now ascertain which of<br />
the available codes is best suited to your device. On the<br />
right underneath the brand name the relevent code will<br />
be shown in the LCD display q.<br />
8. To test the code, point the remote control at the actual<br />
device and press the buttons that correspond to the functions<br />
of this device (except t, OK l, EXIT y,<br />
the device buttons e or the numeric buttons o).<br />
9. If most of the buttons function press the OK button l to<br />
save the setting. In the LCD display q "OK" appears.<br />
Subsequently the menu will close automatically.<br />
10. If, however, none or only a few of the buttons function<br />
select with the 5 or 6 button t the next code and test<br />
again as described in step 8.<br />
11. With the EXIT button y you move back one level in the<br />
menu.<br />
Repeat these operational steps for all devices that you would<br />
like to control with the remote control.<br />
Programming by manual code input<br />
In this mode the remote control can be programmed by direct<br />
input of a code number. You can obtain the necessary code<br />
number from the enclosed manufacturers directory with device<br />
code list. In the event that the new code is invalid the last valid<br />
programmed code will be restored.<br />
1. Press the device button e for the device that you want to<br />
programme the remote control.<br />
2. Hold down the S button r for a little longer than 3 seconds.<br />
“LANGUAGE SETUP” appears in the LCD display<br />
q. With the or button t select “CODE SETUP” and<br />
confirm with the OK button l.<br />
3. "ENTER CODE" now appears in the LCD display q. To<br />
access this function press the OK button l.<br />
4. In the LCD display q appears the presently used code for<br />
the selected device. Now the first digit of the code blinks<br />
and waits for your code input. Enter the new four digit<br />
code via the number buttons o. After entering the fourth<br />
digit the whole code flashes. You can now test if the URC<br />
can control the device you want with this code. Press<br />
those keys that correspond to the functions of the device,<br />
with a TV set for example, PROG +/–. If the device reacts<br />
as required, confirm the code input with the OK button<br />
l. If it does not, enter the next possible code from the<br />
list and try again.<br />
5. If the entered CODE is valid the code will be saved. In<br />
the LCD display q "OK" appears briefly. Subsequently<br />
- 70 -
the menu will close automatically. In the event of failure<br />
the LCD display q shows briefly "ERROR" and waits for a<br />
new code entry. Then you repeat step 4.<br />
6. With the EXIT button y you move back one level in the<br />
menu.<br />
Programming by automatic code search<br />
This process can take several minutes per device since all<br />
codes for the selected device have to be gone through.<br />
Therefore this method should only be used when the device<br />
cannot be programmed via brand code search or direct<br />
code input or if your device is not listed at all in the manufacturers<br />
directory with device code list.<br />
Follow the steps listed below to carry out programming by<br />
means of the automatic code search.<br />
1. Press the device button e for the device that is to be controlled<br />
(i.e. VCR).<br />
2. Switch the device that is to be controlled with the remote<br />
control on. With VCR/DVD/CD devices please insert a<br />
tape and/or disc.<br />
3. Hold down the S button r for a little longer than 3 seconds.<br />
“LANGUAGE SETUP” appears in the LCD display<br />
q. With the or button t select “CODE SETUP” and<br />
confirm with the OK button l.<br />
4. "ENTER CODE" now appears in the LCD display q. Press<br />
the or button t until "SEARCH CODE" is shown in<br />
the LCD display q. Point the remote control to the device<br />
and then press the OK button l to access the mode "automatic<br />
code search".<br />
5. The search begins. Thereby the device sends, one after<br />
the other, the code numbers in ascending order. The infrared<br />
symbol 2# indicates this. Every search starts with the<br />
currently programmed code.<br />
6. When the device reacts by switching off press immediately<br />
the OK button l to save the relevent code. The LCD<br />
display q shows briefly "OK".<br />
7. Check to see if the majority of your device's functions can<br />
now be controlled with the remote contol. If yes you have<br />
most probably found the correct code. In the event that a<br />
few functions are not working you can start the automatic<br />
code search again beginning with step 1.<br />
8. However if the device does not react any more you probably<br />
did not press the OK button l quick enough in step<br />
6. Then press repeatedly the EXIT button y to exit the<br />
menu and return to the standard display.<br />
9. Now hold down the device button e of the device for<br />
which you have just sought the relevent code. Below on<br />
the right in the LCD display q will thereby be shown the<br />
relevent code. Make a note of this number.<br />
- 71 -
10. Then proceed as described in the preceding chapter<br />
"Programming by manual code entry" and check to see<br />
if the code with the next lowest number combination will<br />
function.<br />
Tips:<br />
1. While the code search is activated none of the buttons<br />
will function apart from OK l and EXIT y.<br />
2. If the automatic search has reached the end of the code<br />
list it stops there. The display then returns to "SEARCH<br />
CODE".<br />
System configuration<br />
Setting the time<br />
The LCD display q shows you the time of day. You set this as<br />
follows:<br />
1. Hold down the S button r for a little longer than 3 seconds.<br />
The notice "LANGUAGE SETUP" appears. If appox.<br />
15 seconds passes without an entry the device exits<br />
the menu and returns to the standard display.<br />
2. With the or button t select "SYSTEM SETUP" and<br />
confirm with the OK button l.<br />
3. In the LCD display q "TIME SETUP" appears. Confirm<br />
with the OK button l. The LCD display q now shows<br />
"TIME" and the time format (24 HR) blinks.<br />
4. With the or button t you can switch to the other<br />
time format (12 HR). After which the time display for the<br />
time of day will show an “AM” or “PM” before the time.<br />
„AM“ stands fpr “AM” = “ante meridium” (Morning, 0:00<br />
o’clock midnight to 12:00 o’clock midday). „PM“ stands<br />
for “PM” = “post meridium” (Afternoon and evening,<br />
12:00 o’clock midday to 0:00 o’clock midnight). Press<br />
the OK button l to confirm.<br />
5. Now the hour indicator blinks. With the or button t<br />
select the hour number for the present time of day and<br />
press the OK button l.<br />
6. Now the minute indicator blinks. With the or button<br />
t select the minute number for the present time of day<br />
and press the OK button l to save. The "TIME SETUP"<br />
notice appears again.<br />
7. To exit this or the following menus press repeatedly the<br />
EXIT button y until the standard display appears in the<br />
LCD display q.<br />
Setting the date<br />
The LCD display q shows you the date when you press the S<br />
button r. You set the date in this way:<br />
1. Hold down the S button r for a little longer than 3 seconds.<br />
The notice "LANGUAGE SETUP" appears.<br />
2. With the or button t select "SYSTEM SETUP" and<br />
confirm with the OK button l.<br />
- 72 -
3. In the LCD display q "TIME SETUP" appears. Press the <br />
button t to change to "DATE SETUP". Confirm with the<br />
OK button l.<br />
4. In the display the year "2011" blinks. With the or<br />
button t you can change the year and confirm with<br />
the OK button l. With the or button t you can<br />
change the now blinking month and confirm with the OK<br />
button l. Now the day indicator blinks which you can<br />
also change with the or button t.<br />
5. To save press the OK button l. The "DATE SETUP"<br />
notice appears again.<br />
Adjust contrast<br />
You can set the display's contrast as follows:<br />
1. Hold down the S button r for a little longer than 3 seconds.<br />
The notice "LANGUAGE SETUP" appears.<br />
2. With the or button t select "SYSTEM SETUP" and<br />
confirm with the OK button l.<br />
3. With the or button t select "CONTRAST SETUP"<br />
and confirm with the OK button l.<br />
4. In the LCD display q the contrast value now blinks which<br />
you can set with the or button t.<br />
Display readout:<br />
0 = highest contrast:<br />
15 = lowest contrast<br />
5. With the OK button l you can save the desired setting.<br />
The notice "CONTRAST SETUP" appears again.<br />
Background Illumination<br />
You can set how long the LCD display’s q background and<br />
the button illuminations remain alight after completion of the<br />
operation.. Thereby taking into account that the longer the illumination<br />
remains lit the shorter the battery life will be.<br />
1. Hold down the S button r for a little longer than 3 seconds.<br />
The notice "LANGUAGE SETUP" appears.<br />
2. With the or button t select "SYSTEM SETUP" and<br />
confirm with the OK button l.<br />
3. With the or button t select "BACKLIT SETUP" and<br />
confirm with the OK button l.<br />
4. In the LCD display q now blinks the second count for the<br />
length of time that the light is to be left on which you can<br />
set with the buttons t from 0 to 60. If you select<br />
"0" the background illumination will shut off completely.<br />
5. With the OK button l you can save the desired setting.<br />
The notice "BACKLIT SETUP" appears again.<br />
Setting the global volume/mute switching<br />
So that you don’t always have to first press a device button for<br />
the volume control and mute switching, for these functions the<br />
URC always only responds to an individual device. You can<br />
determine this target device yourself.<br />
- 73 -
1. Hold the S button r down for a little longer than<br />
3 seconds. The notice „LANGUAGE SETUP“ appears.<br />
2. With the or button t select “SYSTEM SETUP” and<br />
confirm with the OK button l.<br />
3. With the or button t select “VOL/MUTE SETUP”<br />
and confirm with the OK button l.<br />
4. The LCD display q shows “ALL VOL SET”. Press the OK<br />
button l, the display changes to „ALL VOL MODE“.<br />
5. Now press the device button e for the device that is to be<br />
controlled by the global volume control.<br />
6. If the specified device is equipped with a volume control,<br />
“SUCCESS” will be displayed briefly and the menu will<br />
close. From now on the volume control functions on the<br />
device just specified.<br />
7. If this device is not equipped with its own volume control<br />
the URC will not allow this selection and shows “VOLUME<br />
ERROR”. Even then the menu will close. The volume control<br />
will then continue to function on the former device.<br />
You can also deactivate the global volume control for specific<br />
devices.<br />
1. For this select in the menu “VOL/MUTE SETUP” with the<br />
or button t the function “MODE VOL SET” and<br />
confirm with the OK button l. In the LCD display q appears<br />
„MODE VOL MODE”.<br />
2. Now press the device button e for the device that is to<br />
be excluded from the global volume control. The LCD<br />
display q shows „SUCCESS“ and the global volume<br />
control is deactivated if the URC is working in the operational<br />
mode of one of the selected devices.<br />
You can again override the settings in the “VOL/MUTE<br />
SETUP” menu.<br />
1. For this select in the menu “VOL/MUTE CONF” with the<br />
or button t the function “VOL/MUTE RESET” and<br />
confirm with the OK button l.<br />
2. The LCD display q prompts you, with CONFIRM RESET,<br />
to a confirmation which is done by pressing the OK<br />
button l. Press the OK button l if you want to delete<br />
the setting, the displayed “SUCCESS” then confirms the<br />
deletion of the device assignment to global volume control.<br />
Otherwise you press the EXIT button y to abort the<br />
deletion.<br />
Select a Tape-/Disc device for direct operation<br />
You can select a tape or disk device that you can control<br />
with the playback buttons f without first having to press the<br />
corresponding device button e.<br />
1. Hold down the S button r for a little longer than 3 seconds.<br />
The notice “LANGUAGE SETUP” appears.<br />
2. With the or button t select “SYSTEM SETUP” and<br />
confirm it with the OK button l.<br />
- 74 -
3. In the LCD display q “TIME SETUP” appears. Press the<br />
button t to switch to “PLAYBACK SETUP”. Confirm<br />
with the OK button l.<br />
4. With the or buttons t now select the device that<br />
should respond to the URC when you use the playback<br />
buttons f. Confirm with the OK button l.<br />
5. If instead of a device you select “OFF” and confirm it with<br />
the OK button l, you switch the direct operation off. If<br />
you select “RESET” and confirm with the OK button l<br />
you activate the pre-programmed default settings (DVD)<br />
for this function.<br />
6. The LCD display q shows “SUCCESS” and the selected<br />
device can now be directly controlled using the playback<br />
buttons f.<br />
Setting the lock function<br />
With the lock function you can block access to all configuration<br />
menus.<br />
1. Hold down the S button r for a little longer than 3 seconds.<br />
2. With the or button t select „SYSTEM SETUP“ and<br />
confirm with the OK button l.<br />
3. With the or button t select “LOCK SETUP and<br />
confirm with the OK button l. The LCD display q shows<br />
the current settings.<br />
4. With the or button t now select between „LOCK“<br />
(Block) or „UNLOCK“ (Unblock).<br />
5. With the OK button l you save the setting. In the LCD<br />
display q „LOCK SETUP“ then appears again.<br />
System reset<br />
With this function you can delete the assignment of all or individual<br />
device buttons.<br />
1. Hold down the S button r for a little longer than 3 seconds.<br />
The notice "LANGUAGE SETUP" appears.<br />
2. With the or button t select "SYSTEM SETUP" and<br />
confirm with the OK button l.<br />
3. With the or button t select "SYSTEM RESET" and<br />
confirm with the OK button l.<br />
4. With the or buttons t you can now select the<br />
desired function. To delete the assignments (Code) of all<br />
device buttons e, as well as all data to macros, timer and<br />
learned functions, select “ALL RESET” and confirm it with<br />
the OK button l.<br />
5. In the LCD display q there now appears “CONFIRM<br />
RESET”. Confirm the deletion with the OK button l.<br />
Then the LCD display q shows “SUCCESS RESET”. The<br />
detailed information is now deleted and the menu is terminated.<br />
6. To delete only the assignments of individual device keys e,<br />
select “MODE RESET” and then press the OK button l.<br />
The LCD display q now shows MODE” and asks you to<br />
- 75 -
press the device button e whose assignment you want to<br />
delete. To conclude, “SUCCESS” briefly appears, then you<br />
will again read “MODE” in the LCD display. Now press<br />
any other further desired device buttons e to also delete<br />
their assignment.<br />
7. Otherwise, you can exit the menu by pressing the EXIT<br />
button y.<br />
Timer configuration<br />
The URC offers 2 timer modes, sleep timer and event timer.<br />
Sleep timer<br />
1. Press the device button e for the device that is to be controlled<br />
(i.e. VCR).<br />
2. Hold down the S button r for a little longer than 3 seconds.<br />
The notice "LANGUAGE SETUP" appears.<br />
3. Press the or button t until "TIMER SETUP" is<br />
shown. Press the OK button l "TIMER SLEEP" appears in<br />
the LCD display q. Confirm the selection of this function<br />
with the OK button l.<br />
4. Now, below to the right in the LCD display q blinks the<br />
minutes for the remaining time of the selected device.<br />
Set with the or button t the desired value from 1<br />
to 99 minutes. Press the OK button l to confirm. With<br />
programmed sleep-timer the LCD display q shows “zz ”<br />
on the right next to the time.<br />
5. Position the remote control in such a way that your infrared<br />
signal can reach the device to be switched off. After<br />
expiration of the set time the remote control will switch the<br />
device off.<br />
6. If you now press the S button r “SL” is shown in the display<br />
q below on the left.<br />
Event timer<br />
The remote control has 4 event timers available via which<br />
you are allowed to send out specific series of button combinations<br />
at designated times.<br />
1. Hold down the S button r for a little longer than 3 seconds.<br />
The notice "LANGUAGE SETUP" appears.<br />
2. With the or button t select "TIMER SETUP" and<br />
confirm with the OK button l. "TIMER SLEEP" appears<br />
in the LCD display q. With the or button t select<br />
the desired memory slot "TIMER SETUP 1" to "TIMER<br />
SETUP 4" and confirm with the OK button l.<br />
3. Now the hour of the time of day, to which the desired<br />
button combinations are to be carried out, blinks. Set with<br />
the or button t the desired hour and press for confirmation<br />
the OK button l.<br />
4. Now the minutes of the time of day, to which the desired<br />
button combinations are to be carried out, blinks. Set with<br />
the or button t the desired minutes and press for<br />
confirmation the OK button l.<br />
- 76 -
5. In the LCD display q you will see "TIMER X KEY" (X<br />
stands for the desired timer). Now press the desired<br />
device button e followed by the desired sequence of the<br />
button commands.<br />
6. By default, the timer commands are sent at intervals of 1<br />
second. Since many devices react sluggishly, it is possible<br />
that the sequences of the timer commands are sent to the<br />
device too quickly. Then you have the option of programming,<br />
before a button command, a pause of between 5<br />
to 21 seconds. For this press, if necessary repeatedly, on<br />
the MACRO button i. Below and to the right the LCD<br />
display q shows the current pause length in seconds.<br />
7. Press the S button r to save your entry and to return to<br />
the timer menu.<br />
8. Procede in a similar manner in order to, if required,<br />
programme the other timer memory slots also.<br />
9. With programmed event timer the LCD display q shows<br />
the timer symbol „ ” on the right next to the time.<br />
Tips:<br />
1. Per timer memory slot a maximum of 14 buttons can be<br />
programmed. After entry of the 14th button the sequence<br />
will be automatically saved and "FULL" is shown in the<br />
LCD display q.<br />
2. In this menu also the device will return to the standard display<br />
after approx. 15 seconds without an entry.<br />
Delete Timer<br />
You can delete a programmed sleep or event timer as follows:<br />
1. Select the timer that you wish to delete (see chapter<br />
Sleep-Timer/Event-Timer) and then press the OK button l.<br />
In the LCD display q you will read „TIMER CLEAR“.<br />
2. Press the OK button l. The LCD display q changes to<br />
„CONFIRM CLEAR“.<br />
3. Press the OK button l once again to delete the timer.<br />
The LCD display q confirms the successful deletion with<br />
the message „SUCCESS“.<br />
Learn configuration<br />
The Universal remote control (URC) can learn and save button<br />
signals of an original remote control. If the URC does not<br />
work after applying the programming methods already described<br />
or cannot carry out all commands please attempt to<br />
teach the URC with the help of the original remote control.<br />
• Use new batteries for the URC and the original remote<br />
control.<br />
• Maintain a distance of at least one metre from other light<br />
sources. The light sources could disrupt the infrared transmission.<br />
• Place the URC and the original remote control at a distance<br />
of 20 to 50 mm from each other on an even surface<br />
so that the infrared diodes 2) are facing each other.<br />
- 77 -
Tips:<br />
1. Do not use the following buttons for the learn function: all<br />
device buttons e, MACRO i, S button r, EXIT y.<br />
2. If when teaching, during the notice "LEARNING", no<br />
button is pressed on the original RC after 25 seconds the<br />
learn menu will end. This mode can not be ended<br />
by pressing a button on the URC.<br />
3. The memory can accommodate 150 button commands.<br />
If the memory is full the LCD display q shows "LEARN<br />
FULL" and the learn mode will end.<br />
4. With the EXIT button y you return to the previous status<br />
(except with a notice of "LEARN KEY" and/or "LEARNING").<br />
Code learn function<br />
1. Press the device button e for the device that the URC<br />
should learn a button code.<br />
2. Hold down the S button r for a little longer than 3 seconds.<br />
The notice "LANGUAGE SETUP" appears.<br />
3. With the or button t select the menu "LEARN<br />
SETUP" and then press the OK button l.<br />
4. In the LCD display q "LEARN SET" appears. Then press<br />
the OK button l. In the LCD display q "LEARN KEY" appears.<br />
5. First press the button on the URC that is to be taught. In the<br />
LCD display q "LEARNING" appears. The URC now waits<br />
for the infrared signal from the original remote control.<br />
Note:<br />
Should the notice not change to "LEARNING" you have<br />
selected a button for which no button code can be<br />
taught.<br />
6. Point the infrared sensors 2) of both remote controls<br />
towards each other.<br />
7. Now hold down the desired button of the original<br />
remote control until "SUCCESS" or "LEARN ERROR"<br />
appears in the display q of the URC.<br />
8. If in the LCD display q "SUCCESS" appears (process<br />
successful), you can teach further buttons begining with<br />
step 5. If "LEARN ERROR" appears (process unsuccessful)<br />
repeat the process in any case from step 5.<br />
9. To stop/end the learn process press the S button and<br />
subsequently, while “LEARN KEY” is displayed, repeatedly<br />
the EXIT button y until the normal indicator appears in the<br />
LCD display q. During the displayed “LEARNING” simply<br />
allow 30 seconds to pass without any operation and the<br />
device will then exit the menu.<br />
Delete all programmed buttons of all devices<br />
1. Hold down the S button r for a little longer than 3 seconds.<br />
The notice "LANGUAGE SETUP" appears.<br />
2. With the or button t select the menu "LEARN<br />
SETUP" and then press the OK button l. In the LCD<br />
display q "LEARN SET" appears.<br />
- 78 -
3. With the or button t select "LEARN CLEAR"<br />
(taught delete) and confirm with the OK button l. In<br />
the LCD display q "CONFIRM CLEAR" (confirm delete)<br />
appears.<br />
4. Confirm with the OK button l. In the LCD display q<br />
"SUCCESS" appears. All programmed buttons are deleted.<br />
Finally the menu will automatically end.<br />
Note:<br />
When the LCD display shows “CONFIRM CLEAR” you can<br />
stop the deletion with the EXIT button y.<br />
Macro configuration<br />
With the MACRO function up to 16 button commands can<br />
be carried out with the press of a single button, that is to say,<br />
several previously saved control commands can be deleted<br />
with one MACRO button. There are 6 Macro memory slots<br />
available for you.<br />
To programme a Macro<br />
For Macro programming proceed as follows:<br />
1. Hold down the S button r for a little longer than 3 seconds.<br />
The notice "LANGUAGE SETUP" appears.<br />
2. With the or button t select "MACRO SETUP" and<br />
confirm with the OK button l. In the display "MACRO<br />
SETUP 1" appears.<br />
3. With the or button t select the memory slot to be<br />
programmed (MACRO SETUP 1 - 6) and confirm with the<br />
OK button l.<br />
4. In the LCD display q "MACRO STEP" appears. Now<br />
press, one after the other, the desired buttons (max. 16).<br />
The sequence should begin with a device button e.<br />
5. By default the Macro commands are sent in intervals of<br />
1 every second. Since many devices react sluggishly it is<br />
possible that the sequence of the Macro commands are<br />
sent too quickly to the device. Then you have the option<br />
of programming, before a button command, a pause<br />
of between 5 - 21 seconds. For this purpose press, if necessary<br />
repeatedly, the MACRO button i. Below<br />
and to the right the LCD display q shows the current<br />
pause length in seconds.<br />
6. When the maximum number of button commands is<br />
reached the LCD display q shows "FULL".<br />
7. Save the entry with the S button r. In the LCD display q<br />
"MACRO SETUP" appears.<br />
8. If, with the selection of the Macros to be programmed<br />
(step 3), you select a memory slot that is already occupied<br />
the existing Macro will be overwritten.<br />
9. Repeat the process from step 3 to create further Macros.<br />
10. With the EXIT button y you move back a level in the<br />
menu, except during the input of the button commands.<br />
- 79 -
Tips:<br />
1. A maximum of 16 button commands can be saved in a<br />
Macro. After input of the 16th button command, “FULL”<br />
appears in the LCD display q.<br />
2. To exit the mode without saving allow approx. 15 seconds<br />
to pass without an entry.<br />
3. In the mode "MACRO STEP" you can only return to the<br />
previous status with the S button r.<br />
Example: You want to save a command chain in a Macro.<br />
We begin in the mode "MACRO STEP".<br />
Desired command chain: Switch on TV => PAUSE => switch<br />
to the AV input => switch on DVD => PAUSE => Playback<br />
DVD.<br />
In the mode "MACRO STEP", for this you enter the following<br />
button commands:<br />
=> => (Pause time) => => =><br />
=> (Pause time) =><br />
Execute a Macro<br />
To execute a pre-programmed Macro proceed as follows:<br />
1. Press the MACRO button i.<br />
2. With the corresponding number button o you access the<br />
desired Macro (1-6). Example: If Macro 3 is to be implemented<br />
press first the Macro button i and then, within 5<br />
seconds, the number button " ".<br />
To delete all Macros<br />
To delete all pre-programmed Macros proceed as follows:<br />
1. Hold down the S button r for a little longer than 3 seconds.<br />
The notice "LANGUAGE SETUP" appears.<br />
2. With the or button t select "MACRO SETUP" and<br />
confirm with the OK button l. In the display "MACRO<br />
SETUP 1" appears.<br />
3. With the or button t select "MACRO CLEAR" and<br />
confirm with the OK button l.<br />
4. In the LCD display q "CONFIRM CLEAR" (confirm<br />
delete) appears. Confirm the delete process with the<br />
OK button l. The LCD display q shows "SUCCESS".<br />
All Macros are now deleted and the menu will end.<br />
Tips:<br />
1. When the LCD display q shows "CONFIRM CLEAR" you<br />
can stop the delete process with the EXIT button y.<br />
2. Individual Macros can not be deleted they can only be<br />
overwritten.<br />
Favourites channel<br />
Note:<br />
With this function you can save your preferred stations as<br />
favourites.<br />
- 80 -
To programme favourites<br />
Your favourite stations are saved as follows:<br />
1. Press the device button e for the device that you want to<br />
save a favourite.<br />
2. Hold down the S button r for a little longer than 3 seconds.<br />
The notice "LANGUAGE SETUP" appears.<br />
3. With the or button t select "FAV CH SETUP" and<br />
confirm with the OK button l. In the display "FAV CH 1<br />
SETUP" appears.<br />
4. With the or button t select the memory slot to be<br />
programmed (FAV CH 1 - 4 SETUP) and confirm with the<br />
OK button l.<br />
5. In the LCD display q "FAV CH STEP" appears. Now<br />
press, one after the other, the buttons (max. 4) for access<br />
to your desired favourite stations.<br />
6. When the maximum number of button commands is<br />
reached the LCD display q shows "FULL".<br />
7. Save the entry with the S button r. In the LCD display q<br />
"FAV CH SETUP 1 - 4" appears.<br />
8. If, with the selection of the favourites to be programmed<br />
(step 4), you select a memory slot that is already occupied<br />
the existing favourite will be overwritten.<br />
9. Repeat the steps to apply further favourites.<br />
10. With the EXIT button y you move a level backwards in the<br />
menu except during the entry of the button commands.<br />
Note:<br />
The input of the channel numbers can vary according to<br />
the model and brand of the selected devices. If necessary,<br />
with multi-digit channel numbers you must first press the<br />
button a.<br />
To access favourites<br />
To access a pre-programmed favourite press the FAV/EPG<br />
button 1( followed by the corresponding number button for<br />
the desired memory slot (1 - 4).<br />
Delete All FAV channels<br />
To delete all pre-programmed favourites proceed as follows:<br />
1. Hold down the S button r for a little longer than 3 seconds.<br />
2. With the or button t select "FAV CH SETUP" and<br />
confirm with the OK button l. In the display "FAV CH 1<br />
SETUP" appears.<br />
3. With the or button t select "FAV CH CLEAR" and<br />
confirm with the OK button l.<br />
4. In the LCD display q "CONFIRM CLEAR" (confirm delete)<br />
appears. Confirm the delete process with the OK button l.<br />
The LCD display q shows "SUCCESS". All favourites are<br />
now deleted and the menu will end.<br />
Tips:<br />
1. When the LCD display q shows "CONFIRM CLEAR" you<br />
can stop the delete process with the EXIT button y.<br />
- 81 -
2. Individual favourites can not be deleted they can only be<br />
overwritten.<br />
Volume control<br />
Vol +/—, (Mute switching)<br />
Press the "VOL+" button to increase the volume. With the<br />
"VOL —" button you reduce the volume. To mute the sound<br />
press the -button h. A further press of this button turns<br />
the sound back on.<br />
If you have not set any other device as the target for the global<br />
volume control, when you press the VOL +/- buttons j on<br />
the URC the volume control of the TV set is addressed by<br />
default, regardless of which device button e was previously<br />
pressed. However, this does not apply to the following devices:<br />
“AMP”, “DVD”, and “DSAT” since it can be assumed<br />
that these devices are equipped with their own volume control.<br />
For operation<br />
> > To operate one of the programmed devices with the URC<br />
first press the corresponding device button e. Then point<br />
the URC to this device and press the desired button.<br />
> > Put the number buttons o exactly as you do with the<br />
original remote control. Before you make a two digit<br />
entry press, if necessary, the button a.<br />
> > Press the S button r and subsequently the FAV/EPG button<br />
1( to start the electronic programme guide of a device<br />
equipped with this function.<br />
> > If you press the S button r the date is superimposed for<br />
10 seconds in the LCD display q below and on the right.<br />
> > Whilst you hold down one of the device buttons e the<br />
active code for this device will be superimposed below to<br />
the right in the LCD display q.<br />
> > Via the MENU button k you access the dialogue for the<br />
setting of the respective target device.<br />
> > Press the illumination button d to switch the display and<br />
button illuminations on and/or off.<br />
All OFF<br />
Tips:<br />
With the button ALL OFF (all off) w all devices that<br />
are switched on can be automatically switched off. This function<br />
can switch on again devices that have already been<br />
switched off (depending on the device). For this, press and<br />
hold the ALL OFF button w for a few seconds. It may take up<br />
to 10 seconds before all devices are switched off. This will<br />
only function under the following circumstances:<br />
1. A visible connection exists between all the devices and<br />
the URC.<br />
- 82 -
2. Automatic code search, brand code search and MACRO<br />
function are not active.<br />
3. All target devices must be suitable for remote control<br />
switch off.<br />
To again switch on all devices automatically hold down once<br />
more the button w until all devices are switched on.<br />
Cleaning and storage<br />
Attention!<br />
Ensure that moisture cannot permeate into the device<br />
during cleaning! Otherwise there is the danger of<br />
causing irreparable damage to the device!<br />
> > Clean the housing of the device exclusively with a soft<br />
moist cloth and a mild dishwashing detergent.<br />
> > Store the device exclusively in an environment that complies<br />
with the specifications given in the technical data.<br />
> > Before storing remove the batteries so that they will not<br />
cause damage to the device if, during storage, they<br />
happen to leak.<br />
Faults / Remedies<br />
Your device does not react to the URC.<br />
> > Check the batteries. They must have enough voltage and<br />
be properly installed.<br />
> > Firstly have you pressed the correct device button e for<br />
the desired target device?<br />
> > Check to see that the correct code is programmed in for<br />
the target device (see section "Code Setup").<br />
The URC is transmitting the commands incorrectly.<br />
> > Press the corresponding device button e to set the URC<br />
to the correct mode.<br />
> > The batteries must have enough voltage and be properly<br />
installed.<br />
> > It is possible that you are using the wrong code. Start the<br />
brand code search, the automatic code search or the direct<br />
code input (manual).<br />
The URC does not change the station on the device.<br />
> > Press the corresponding device button e to set the URC<br />
to the correct mode.<br />
> > In the event that the original RC does not have a "-/- -"<br />
button, change the programme with the P +/— buttons u or<br />
the number buttons o.<br />
> > If this also does not work the child protection for the<br />
target device could be activated.<br />
Some buttons on the URC do not function properly.<br />
> > It is possible that your URC does not have all of the functions<br />
that are on the device's original remote control.<br />
- 83 -
It is possible that you have not programmed in the optimal<br />
code. Search for a code that supports more of the target<br />
device's functions.<br />
The URC stops reacting after a button is pressed.<br />
> > The batteries must have enough voltage and be properly<br />
installed.<br />
> > Point the URC towards your device.<br />
The LCD display q shows nothing.<br />
> > The batteries must have enough voltage and be properly<br />
installed.<br />
> > The contrast could be set too low. Increase the contrast<br />
setting.<br />
Disposal<br />
Do not dispose of the device in your normal<br />
domestic waste. This product is subject to the<br />
European directive 2002/96/EC.<br />
Universal remote control<br />
• Have the universal remote control or parts of it disposed<br />
of by a professional disposal company or by your communal<br />
disposal facility.<br />
• Observe the currently applicable regulations. In case of<br />
doubt contact your disposal facility.<br />
Batteries/rechargeable batteries<br />
• Used batteries/rechargeable batteries may not be disposed<br />
of in household waste.<br />
• Batteries can contain poisons which are damaging to the<br />
environment. Therefore, dispose of the batteries/rechargeable<br />
batteries in accordance with statutory regulations.<br />
• Every consumer is legally obliged to surrender batteries/<br />
rechargeable batteries to a community collection centre<br />
in their district or to a dealer. The purpose of this obligation<br />
is to ensure that batteries are disposed of in a nonpolluting<br />
manner.<br />
• Only dispose of batteries when they are fully discharged.<br />
Packaging<br />
• Dispose of packaging materials in an environmentally<br />
responsible manner.<br />
Technical data<br />
Controllable devices: 10<br />
Dimensions<br />
L x W x H:<br />
217 x 50 x 22 mm<br />
Weight :<br />
133 g (incl. batteries)<br />
Infrared LED: Laser class 1<br />
Power supply<br />
Batteries:<br />
2 x 1.5 V, type AAA/LR03 (micro)<br />
(supplied)<br />
- 84 -
Operating temperature: +15 – +35 °C<br />
Storage temperature : —0 – +50 °C<br />
Humidity:<br />
≤ 75 % (No condensation)<br />
Note regarding conformity<br />
This device satisfies the fundamental requirements and other<br />
relevant regulations of the EMC Directive 2004/108/EC<br />
and the RoHS Directive 2011/65/EU.<br />
Importer<br />
KOMPERNASS GMBH<br />
BURGSTRASSE 21<br />
44867 BOCHUM, GERMANY<br />
www.kompernass.com<br />
Warranty & Service<br />
You receive a 3-year warranty for this appliance as of the<br />
purchase date. This appliance has been manufactured with<br />
care and meticulously examined before delivery.<br />
Please retain your receipt as proof of purchase. In the case<br />
of a warranty claim, please make contact by telephone with<br />
our service department. Only in this way can a post-free despatch<br />
for your goods be assured.<br />
The warranty covers only claims for material and manufacturing<br />
defects, but not for transport damage, wearing parts or<br />
for damage to fragile components, e.g. buttons or batteries.<br />
This product is for private use only and is not intended for<br />
commercial use. The warranty is void in the case of abusive<br />
and improper handling, use of force and internal modifications<br />
not carried out by our authorized Service Centre.<br />
Your statutory rights are not restricted in any way by this warranty.<br />
The warranty period is not extended through repairs made<br />
under warranty. This applies also for replaced or repaired<br />
parts. Any damages or deficiencies found on purchase must<br />
be reported as soon as possible after unpacking, at the latest<br />
two days after purchase. On expiry of the warranty, all<br />
repairs carried out are subject to payment.<br />
Service Great Britain<br />
Tel.: 0871 5000 720 (£ 0.10/Min.)<br />
E-Mail: kompernass@lidl.co.uk<br />
<strong>IAN</strong> <strong>86342</strong><br />
Service Ireland<br />
Tel.: 1890 930 034<br />
(0,08 EUR/Min., (peak))<br />
(0,06 EUR/Min., (off peak))<br />
E-Mail: kompernass@lidl.ie<br />
<strong>IAN</strong> <strong>86342</strong><br />
- 85 -
- 86 -
INHALTSVERZEICHNIS<br />
SEITE<br />
Wichtige Sicherheitshinweise 88<br />
Geräteübersicht 89<br />
Inbetriebnahme 90<br />
Gerät auspacken/Lieferumfang prüfen 90<br />
Batterien einsetzen 90<br />
Bedienelemente 91<br />
LCD-Anzeige 91<br />
Tasten 92<br />
Die Konfigurationsmenüs 95<br />
Menüsprachen konfigurieren 97<br />
Code konfigurieren (Programmierung der Fernbedienung) 97<br />
Programmierung per Marken-Code-Suche 97<br />
Programmierung per manueller Code-Eingabe 98<br />
Programmierung per automatischer Code-Suche 99<br />
System konfigurieren 100<br />
Uhrzeit einstellen 100<br />
Datum einstellen 101<br />
Kontrast einstellen 101<br />
Hintergrundbeleuchtung 101<br />
Globale Lautstärke/Stummschaltung einstellen 102<br />
Band-/Discgerät für Direktbedienung auswählen 103<br />
Sperr-Funktion einstellen 103<br />
System Reset 103<br />
Timer konfigurieren 104<br />
Sleep-Timer 104<br />
Ereignis-Timer 105<br />
Timer löschen 105<br />
Lernen konfigurieren 106<br />
Code-Lernfunktion 106<br />
Makros konfigurieren 107<br />
Favoritenkanal 109<br />
Lautstärkeregelung 110<br />
Vol +/—, (Stummschaltung) 110<br />
Zur Bedienung 111<br />
Alle AUS 111<br />
Reinigen und Lagerung 111<br />
Fehler / Abhilfe 112<br />
Entsorgen 113<br />
Technische Daten 113<br />
Hinweis zur Konformität 113<br />
Importeur 114<br />
Garantie & Service 114<br />
- 87 -
UNIVERSALFERNBEDIENUNG SFB 10.1 B2<br />
Einführung<br />
Herzlichen Glückwunsch zum Kauf Ihres neuen Gerätes. Sie<br />
haben sich damit für ein hochwertiges Produkt entschieden.<br />
Die Bedienungsanleitung ist Bestandteil dieses Produkts. Sie<br />
enthält wichtige Hinweise für Sicherheit, Gebrauch und Entsorgung.<br />
Machen Sie sich vor der Benutzung des Produkts<br />
mit allen Bedien- und Sicherheitshinweisen vertraut. Benutzen<br />
Sie das Produkt nur wie beschrieben und für die angegebenen<br />
Einsatzbereiche. Bewahren Sie diese Anleitung gut auf.<br />
Händigen Sie alle Unterlagen bei Weitergabe des Produkts<br />
an Dritte mit aus.<br />
Urheberrecht<br />
Diese Dokumentation ist urheberrechtlich geschützt. Alle<br />
Rechte, auch die der fotomechanischen Wiedergabe, der<br />
Vervielfältigung und der Verbreitung mittels besonderer Verfahren<br />
(zum Beispiel Datenverarbeitung, Datenträger und<br />
Datennetze), auch teilweise, sowie inhaltliche und technische<br />
Änderungen vorbehalten.<br />
Wichtige Sicherheitshinweise<br />
Bestimmungsgemäße Verwendung<br />
Kinder dürfen die Fernbedienung nur unter Aufsicht von<br />
Erwachsenen bedienen. Die Universalfernbedienung kann<br />
maximal zehn Fernbedienungen ersetzen. Sie kann nur<br />
für Geräte der Unterhaltungselektronik mit einem Infrarot-<br />
Empfänger eingesetzt werden. Die Funktionen der Universalfernbedienung<br />
entsprechen im Wesentlichen denen der<br />
Originalfernbedienungen. Die Universalfernbedienung ist<br />
für den privaten Gebrauch bestimmt. Sie ist nicht für eine gewerbliche<br />
Nutzung geeignet. Jede andere Verwendung gilt<br />
als nicht bestimmungsgemäß. Für Schäden aufgrund nicht<br />
bestimmungsgemäßer Verwendung oder eigenmächtiger<br />
Umbauten übernimmt der Hersteller keine Haftung.<br />
Warnung<br />
Ein Warnhinweis dieser Gefahrenstufe kennzeichnet eine<br />
mögliche gefährliche Situation. Falls die gefährliche Situation<br />
nicht vermieden wird, kann dies zu Verletzungen führen. Die<br />
Anweisungen in diesem Warnhinweis befolgen, um Verletzungen<br />
von Personen zu vermeiden.<br />
Achtung<br />
Ein Warnhinweis dieser Gefahrenstufe kennzeichnet einen möglichen<br />
Sachschaden. Falls die Situation nicht vermieden wird,<br />
kann dies zu Sachschäden führen. Die Anweisungen in diesem<br />
Warnhinweis befolgen, um Sachschäden zu vermeiden.<br />
Hinweis<br />
Ein Hinweis kennzeichnet zusätzliche Informationen, die den<br />
Umgang mit dem Gerät erleichtern.<br />
- 88 -
Warnung vor Verletzungsgefahr durch<br />
falschen Umgang mit Batterien!<br />
Batterien müssen mit besonderer Vorsicht behandelt werden.<br />
Beachten Sie folgende Sicherheitshinweise:<br />
• Batterien dürfen nicht in die Hände von Kindern gelangen.<br />
Kinder könnten Batterien in den Mund nehmen und<br />
verschlucken. Wurde eine Batterie verschluckt, muss sofort<br />
medizinische Hilfe in Anspruch genommen werden.<br />
• Batterien nicht ins Feuer werfen. Batterien keinen hohen<br />
Temperaturen aussetzen.<br />
• Explosionsgefahr! Batterien dürfen nicht aufgeladen werden.<br />
• Batterien nicht öffnen oder kurzschließen.<br />
• Batteriesäure, die aus einer Batterie austritt, kann zu<br />
Hautreizungen führen. Bei Hautkontakt mit viel Wasser<br />
abspülen. Wenn die Flüssigkeit in die Augen gelangt ist,<br />
gründlich mit Wasser ausspülen, nicht reiben und sofort<br />
einen Arzt aufsuchen.<br />
Achtung!<br />
Die Universalfernbedienung besitzt eine Infrarotdiode der<br />
Laserklasse 1. Betrachten Sie diese nicht mit optischen Geräten,<br />
um Augenverletzungen zu vermeiden.<br />
Schaden am Gerät<br />
• Sollte das Gerät defekt sein, versuchen Sie nicht, es eigenständig<br />
zu reparieren. Kontaktieren Sie in Schadensfällen<br />
den Hersteller oder dessen Service-Hotline (siehe Garantiekarte).<br />
• Sollte Flüssigkeit in das Gerät gelangt sein oder wurde<br />
es anderweitig beschädigt, muss es durch den Hersteller<br />
oder dessen Service-Hotline überprüft werden. Setzen Sie<br />
sich mit dem Hersteller oder dessen Service-Hotline (siehe<br />
Garantiehinweise) in Verbindung.<br />
• Entnehmen Sie die Batterien aus dem Batteriefach, sobald<br />
sie verbraucht sind.<br />
• Wenn Sie das Gerät längere Zeit nicht benutzen, entnehmen<br />
Sie die Batterien, um Entladung zu vermeiden.<br />
• Tauschen Sie ggf. immer alle Batterien gleichzeitig aus<br />
und mischen Sie nie Batterien unterschiedlichen Typs.<br />
Geräteübersicht<br />
q LCD-Anzeige<br />
w Taste /ALL OFF<br />
e Gerätetasten<br />
r S-Taste<br />
t Pfeiltasten<br />
y Taste EXIT<br />
u Tasten P +/—<br />
i Taste MACRO<br />
o Zifferntasten<br />
a Taste für ein- oder zweistellige Programm-Nummern<br />
- 89 -
s Videotext-Funktionstasten<br />
d Beleuchtungstaste<br />
f Laufwerkstasten<br />
g Taste AV<br />
h Stummschaltung<br />
j Tasten VOL +/—<br />
k Taste MENU<br />
l Taste OK<br />
1( Taste FAV / EPG<br />
2) Infrarot-Sender/Empfänger<br />
2! Batteriefachabdeckung<br />
Hinweise:<br />
• Die hier beschriebenen Funktionen beziehen sich auf den<br />
theoretischen Idealfall, dass die Tastenstruktur der jeweiligen<br />
Originalfernbedienung mit der dieser Universalfernbedienung<br />
identisch ist. Dies wird aber nur in den seltensten<br />
Fällen zutreffen. Wenn also nicht sämtliche Funktionen der<br />
Originalfernbedienung nachvollzogen werden können, ist<br />
dies kein Mangel der Universalfernbedienung.<br />
• Alle in dieser Anleitung oder der beiliegenden Codeliste<br />
verwendeten Markennamen sind Handelszeichen der entsprechenden<br />
Firmen.<br />
Inbetriebnahme<br />
Gerät auspacken/Lieferumfang prüfen<br />
Warnung!<br />
Halten Sie auch die Verpackungsfolien von Kindern fern. Es<br />
besteht Erstickungsgefahr.<br />
• Packen Sie das Gerät und die Zubehörteile aus.<br />
• Überprüfen Sie den Lieferumfang<br />
- Universalfernbedienung (UFB),<br />
- Bedienungsanleitung,<br />
- Herstellerverzeichnis mit Gerätecodeliste<br />
- 2 x 1,5 V Batterien, Typ AAA/LR03 (Micro)<br />
Hinweis: Transportschaden<br />
Sollten Sie einen Transportschaden bemerken, wenden Sie<br />
sich an den Hersteller oder dessen Service-Hotline (siehe<br />
Garantiehinweise).<br />
Batterien einsetzen<br />
Achtung!<br />
Die Universalfernbedienung darf nur mit 1,5 Volt Batterien<br />
(Größe AAA, LR03) betrieben werden.<br />
Führen Sie den Batteriewechsel zügig durch. Vorgenommene<br />
Einstellungen bleiben ca. 1 Minute lang gespeichert. Wenn<br />
in dieser Zeit keine neuen Batterien eingelegt wurden, müssen<br />
sämtliche Einstellungen erneut durchgeführt werden.<br />
- 90 -
Die Uhrzeit und das Datum gehen allerdings auf jeden Fall<br />
verloren.<br />
1. Batteriefachabdeckung 2! in Pfeilrichtung öffnen.<br />
2. Batterien entsprechend der Abbildung einsetzen und<br />
Batteriefach schließen.<br />
Die LCD-Anzeige q ist aktiviert, solange Batterien eingelegt sind.<br />
Die folgende Abbildung zeigt die LCD-Anzeige q, nachdem<br />
die Batterien eingelegt oder gewechselt wurden.<br />
Hinweis:<br />
Wenn keine LCD-Anzeige q sichtbar wird, überprüfen Sie<br />
die Polung der Batterien oder setzen Sie neue Batterien ein.<br />
Bedienelemente<br />
LCD-Anzeige<br />
Die LCD-Anzeige q ist in Felder eingeteilt.<br />
Textfeld 2@<br />
Hier wird das aktuell angewählte Gerät angezeigt, zum Beispiel<br />
DVD, TV, VCR etc.<br />
Infrarot-Symbol 2#<br />
Bei jedem Tastendruck, bei dem ein Infrarotsignal gesendet<br />
wird, leuchtet das Infrarot-Symbol auf.<br />
- 91 -
Code-/Zeitfeld 2$<br />
Hier wird der Gerätecode des aktuell angewählten Gerätes<br />
angezeigt oder die Uhrzeit. Bei der Uhrzeitanzeige blinkt „:“<br />
in der Mitte der Ziffern. Bei Zeitanzeige im 12-Stundenformat<br />
wird links von der Uhrzeit das Tageszeitkürzel angezeigt.<br />
Wochentagsfeld 2%<br />
Hier können Sie die Kurzform des aktuellen Wochentages<br />
ablesen, nachdem Sie das Datum eingegeben haben.<br />
Standardanzeige:<br />
Die Standardanzeige der LCD-Anzeige q besteht aus den<br />
Angaben für das aktuelle Gerät, z.B. „TV“, dem Kürzel für<br />
den Wochentag und der Uhrzeitanzeige.<br />
Tasten<br />
Hinweis:<br />
Alle hier beschriebenen Funktionen können Sie natürlich<br />
nur dann nutzen, wenn diese von dem zu steuernden Gerät<br />
auch unterstützt werden.<br />
Taste /ALL OFF w<br />
Gerät ein-/ausschalten; einige Sekunden<br />
lang gedrückt halten, um alle Geräte ein-/<br />
auszuschalten.<br />
Gerätetasten e<br />
Mit den Gerätetasten wählen Sie das Gerät aus, das bedient<br />
werden soll:<br />
Fernseher<br />
Videorecorder<br />
Zusatzgerät 1<br />
Kabelempfänger<br />
CD-Spieler<br />
BluRay Disc-Spieler<br />
Audio-Verstärker<br />
DVD-Spieler<br />
Digitaler Satellitenempfänger<br />
Zusatzgerät 2<br />
Die genannte Tastenzuordnung ist nicht zwingend. Sie können<br />
also z.B. auch den Code für den Videorecorder auf dem TV-<br />
Platz abspeichern.<br />
Taste „S“ r<br />
3 Sekunden gedrückt halten, um das<br />
Konfigurationsmenü aufzurufen,<br />
- 92 -
kurz drücken, um das Datum einzublenden.<br />
Um den elektronischen Programmführer<br />
(EPG) des Zielgerätes aufzurufen, drücken<br />
Sie zunächst kurz die S-Taste r, und dann<br />
die FAV/EPG-Taste 1(.<br />
Um die „PIP“-Funktion (Bild im Bild) Ihres<br />
Fernsehgerätes zu steuern, drücken Sie<br />
zunächst die S-Taste r gefolgt von der<br />
-Taste der Videotext-Funktionstasten s.<br />
Pfeiltasten t<br />
In Menüs nach oben, rechts, unten und<br />
links bewegen.<br />
Taste EXIT y<br />
Im Menü eine Ebene zurück wechseln oder<br />
das Menü verlassen.<br />
Tasten P +/— u<br />
Den Empfangskanal wechseln.<br />
Im DVD- und CD-Modus steuern diese<br />
Tasten die SKIP-Funktion.<br />
Taste MACRO i<br />
Taste MACRO i gefolgt von einer Zifferntaste<br />
o 1-6, aktiviert eine zuvor abgespeicherte<br />
Befehlskette.<br />
Zifferntasten o<br />
Programm- und Gerätecode-<br />
Nummern eingeben.<br />
Taste für ein-/zweistellige Programm-Nummern a<br />
Für zweistellige Programm-Nummern (je<br />
nach Gerätetyp) erst Taste a drücken,<br />
dann über die Zifferntasten o die Programm-Nummer<br />
eingeben.<br />
Durch erneutes Drücken wird die Anzeige<br />
wieder einstellig.<br />
Videotext-Funktionstasten s<br />
Im Videotextbetrieb haben die Tasten folgende Funktionen:<br />
Die Videotext-Funktion aufrufen.<br />
Automatischer Wechsel bei mehrseitigen<br />
Videotextseiten anhalten.<br />
Seitendarstellung vergrößern<br />
Text und TV-Bild übereinander blenden<br />
Die Videotext-Funktion beenden.<br />
- 93 -
Um die SWAP-Funktion des Zielgerätes aufzurufen,<br />
drücken Sie kurz die S-Taste r, gefolgt von der<br />
-Taste.<br />
Hinweise:<br />
• Die Videotext-Funktion steht nur im europäischen<br />
TV-Modus zur Verfügung und Ihr Empfangsgerät muss<br />
videotextfähig sein.<br />
• Darüber hinaus steuern die P +/- Tasten u folgende<br />
Videotextfunktionen:<br />
P + Eine Seite weiter blättern<br />
P — Eine Seite zurück blättern<br />
Laufwerkstasten f<br />
Die Laufwerkstasten f steuern Geräte wie DVD/CD-<br />
Spieler und Videorekorder:<br />
Wiedergabe beginnen<br />
Bildformatumschaltung bei TV-Bedienung<br />
Aufnahme<br />
Wiedergabe/Aufnahme/Spulen stoppen<br />
Wiedergabe anhalten<br />
Zurückspulen<br />
Vorspulen<br />
Farbliche Markierungen der Laufwerkstasten beziehen sich<br />
auf die Farbfelder im Videotext, über die die Toptext-Funktionen<br />
gesteuert werden.<br />
Taste AV g<br />
Auf den AV-Eingang umschalten.<br />
Stummschaltung h<br />
Ton ein-/ausschalten.<br />
Tasten VOL+/— j<br />
Lautstärke (Volume) einstellen.<br />
Taste MENU k<br />
Das Menü des gesteuerten Gerätes aufrufen.<br />
Taste OK l<br />
Mit der Taste OK bestätigen Sie eine Menü-<br />
Auswahl.<br />
Taste FAV/EPG 1(<br />
Drücken Sie die Taste FAV/EPG, um Ihre zuvor<br />
programmierten Lieblingssender aufzurufen.<br />
Um die EPG-Funktion des Zielgerätes aufzurufen,<br />
drücken Sie zuvor kurz die S-Taste r.<br />
- 94 -
Die Konfigurationsmenüs<br />
In den Systemeinstellungen nehmen Sie folgendes vor:<br />
• Die Programmierung der Fernbedienung auf die zu<br />
steuernden Geräte<br />
• Einstellung von Menüsprache, Uhrzeit, Datum, Displaykontrast,<br />
Hintergrundbeleuchtung, Lautstärke, Lock-Funktion<br />
sowie System-Reset<br />
• Timer-Einstellungen<br />
• Das „Lernen“ bestimmter Tastenbefehle<br />
• Anlegen von Makros<br />
• Festlegen von Favoriten<br />
Auf der folgenden Seite sehen Sie eine Übersicht über die<br />
Menüstruktur.<br />
- 95 -
- 96 -
Menüsprachen konfigurieren<br />
Für die Darstellung der Gerätemenüs können Sie aus 5 Sprachen<br />
auswählen: Englisch, Deutsch, Spanisch, Französisch<br />
und Italienisch.<br />
1. Halten Sie die S-Taste r für etwas länger als 3 Sekunden<br />
gedrückt. Nehmen Sie Eingaben im Menü zügig vor,<br />
denn nach ca. 15 Sekunden ohne Eingabe wird das<br />
Menü wieder beendet.<br />
2. In der LCD-Anzeige q erscheint „LANGUAGE SETUP“.<br />
Drücken Sie die OK-Taste l.<br />
3. „ENGLISH“ erscheint nun in der LCD-Anzeige q. Mit den<br />
Tasten t wählen Sie die gewünschte Sprache aus<br />
und bestätigen mit der OK-Taste l.<br />
4. Mit der EXIT-Taste y beenden Sie das Menü.<br />
Die Gerätemenüs werden nun in der gewählten Sprache angezeigt.<br />
Für die weitere Anleitung gehen wir davon aus, dass<br />
Sie Ihre Landessprache ausgewählt haben.<br />
Code konfigurieren<br />
(Programmierung der Fernbedienung)<br />
3 Programmiermethoden stehen für die Fernbedienung zur<br />
Verfügung: Programmierung per Marken-Code-Suche, per<br />
automatischer Code-Suche und direkte Code-Eingabe (manuell).<br />
Zunächst sollten Sie die Marken-Code-Suche verwenden,<br />
da sie die schnellste Methode der Programmierung darstellt,<br />
wenn der Hersteller Ihres Gerätes in der Code-Liste aufgeführt<br />
ist. Als Zweites empfiehlt sich die direkte Code-Eingabe,<br />
gefolgt von der automatischen Code-Suche.<br />
Programmierung per Marken-Code-Suche<br />
Bei dieser Methode wählen Sie direkt Marke und Code über<br />
die LCD-Anzeige q aus.<br />
Folgen Sie nachstehenden Bedienhinweisen, um die Fernbedienung<br />
zu programmieren:<br />
1. Drücken Sie die Gerätetaste e für das Gerät, auf das Sie<br />
die Fernbedienung programmieren wollen.<br />
2. Halten Sie die S-Taste r für etwas länger als 3 Sekunden<br />
gedrückt. In der LCD-Anzeige q erscheint „SPRACHE<br />
KONF“. Mit der oder Taste t wählen Sie „CODE<br />
KONF“ an und bestätigen mit der OK-Taste l.<br />
3. „EINGABE CODE“ erscheint nun in der LCD-Anzeige q.<br />
Mit den Tasten t wählen Sie „MARKEN CODE“<br />
und bestätigen mit der OK-Taste l.<br />
4. Nun erscheint der alphabetisch erste Markenname aus<br />
der Liste der vorprogrammierten Geräte.<br />
5. Mit den 34 Tasten t wählen Sie die verschiedenen<br />
Markennamen an.<br />
- 97 -
6. Um den Zugriff zu erleichtern, können Sie mit den Zifferntasten<br />
o direkt zu bestimmten Anfangsbuchstaben springen:<br />
2 => A 3 => D 4 => G 5 => J<br />
6 => M 7 => P 8 => T 9 => W<br />
Beispiel für die Suche nach einem TV-Markencode: Mit<br />
Taste 5 springt die Anzeige zum „J“. Die erste Marke<br />
ist „JEC“*. Besitzen Sie z.B. ein Gerät der Marke „Kenwood“*,<br />
blättern Sie mit der 4Taste t weiter, bis dieser<br />
Markenname erscheint. (* Alle hier verwendeten Markennamen<br />
sind Handelszeichen der entsprechenden Firmen.)<br />
7. Die meisten Hersteller verwenden mehrere unterschiedliche<br />
Codes für die Fernbedienung. Sie müssen nun herausfinden,<br />
welcher der verfügbaren Codes am besten zu Ihrem Gerät<br />
passt. Rechts unterhalb des Markennamens wird der<br />
aktuelle Code in der LCD-Anzeige q angezeigt.<br />
8. Richten Sie die Fernbedienung auf das aktuelle Gerät und<br />
drücken Sie die Tasten, die den Funktionen dieses Gerätes<br />
entsprechen, um den Code zu testen (ausgenommen<br />
t, OK l, EXIT y, die Gerätetasten e oder<br />
die Zifferntasten o).<br />
9. Wenn die meisten Tasten funktionieren, drücken Sie die<br />
OK-Taste l, um die Einstellung zu speichern. In der LCD-<br />
Anzeige q erscheint „OK“. Anschließend wird das Menü<br />
automatisch beendet.<br />
10. Funktionieren aber keine oder nur wenige Tasten, wählen<br />
Sie mit der 5 oder 6 Taste t den nächsten Code aus<br />
und testen wieder wie unter 8. beschrieben.<br />
11. Mit der EXIT-Taste y gelangen Sie eine Ebene im Menü<br />
zurück.<br />
Wiederholen Sie diese Bedienschritte für alle Geräte, die Sie<br />
mit der Fernbedienung steuern möchten.<br />
Programmierung per manueller Code-Eingabe<br />
In diesem Modus kann die Fernbedienung durch die direkte<br />
Eingabe einer Code-Nummer programmiert werden. Die<br />
benötigte Code-Nummer entnehmen Sie bitte dem beiliegenden<br />
Herstellerverzeichnis mit Gerätecodeliste. Falls der neue<br />
Code nicht gültig ist, wird der zuletzt programmierte, gültige<br />
Code wiederhergestellt.<br />
1. Drücken Sie die Gerätetaste e für das Gerät, auf das Sie<br />
die Fernbedienung programmieren wollen.<br />
2. Halten Sie die S-Taste r für etwas länger als 3 Sekunden<br />
gedrückt. In der LCD-Anzeige q erscheint „SPRACHE<br />
KONF“. Mit der oder Taste t wählen Sie „CODE<br />
KONF“ an und bestätigen mit der OK-Taste l.<br />
3. „EINGABE CODE“ erscheint nun in der LCD-Anzeige q.<br />
Drücken Sie zum Aufrufen dieser Funktion die OK-Taste l.<br />
4. In der LCD-Anzeige q erscheint der für das ausgewählte<br />
Gerät derzeit verwendete Code. Nun blinkt die erste Stelle<br />
des Codes und wartet auf Ihre Code-Eingabe. Geben Sie<br />
den neuen vierstelligen Code über die Zifferntasten o<br />
- 98 -
ein. Nach Eingabe der vierten Stelle blinkt der gesamte<br />
Code. Sie können nun testen, ob die UFB das gewünschte<br />
Gerät mit diesem Code steuern kann. Drücken Sie solche<br />
Tasten, die den Funktionen des Gerätes entsprechen,<br />
beim TV-Gerät z.B. PROG +/–. Reagiert das Gerät wie<br />
gewünscht, bestätigen Sie die Codeeingabe mit der OK-<br />
Taste l. Andernfalls geben Sie den nächsten möglichen<br />
Code aus der Liste ein und testen erneut.<br />
5. Wenn der eingegebene CODE gültig ist, wird der Code<br />
gespeichert. In der LCD-Anzeige q erscheint kurz „OK“,<br />
anschließend wird das Menü automatisch beendet. Bei<br />
einem Fehlschlag zeigt die LCD-Anzeige q kurz „ERROR“<br />
(Fehler) an und wartet auf eine erneute Eingabe des<br />
Codes. Wiederholen Sie dann Schritt 4.<br />
6. Mit der EXIT-Taste y gelangen Sie eine Ebene im Menü<br />
zurück.<br />
Programmierung per automatischer Code-Suche<br />
Dieser Vorgang kann pro Gerät mehrere Minuten dauern, da<br />
alle Codes für das gewählte Gerät durchgegangen werden<br />
müssen. Deshalb sollte diese Methode nur verwendet werden,<br />
wenn das Gerät per Marken-Code-Suche oder direkter<br />
Code-Eingabe nicht programmiert werden kann, oder wenn<br />
Ihr Gerät überhaupt nicht im Herstellerverzeichnis mit Gerätecodeliste<br />
aufgeführt ist.<br />
Folgen Sie den unten aufgeführten Schritten, um die Programmierung<br />
mittels der automatischen Code-Suche durchzuführen.<br />
1. Drücken Sie die Gerätetaste e für das zu steuernde<br />
Gerät (z. B. VCR).<br />
2. Schalten Sie das Gerät ein, das mit der Fernbedienung<br />
gesteuert werden soll. Bei VCR/DVD/CD-Geräten legen<br />
Sie bitte ein Band bzw. eine Disc ein.<br />
3. Halten Sie die S-Taste r für etwas länger als 3 Sekunden<br />
gedrückt. In der LCD-Anzeige q erscheint „SPRACHE<br />
KONF“. Mit der oder Taste t wählen Sie „CODE<br />
KONF“ an und bestätigen mit der OK-Taste l.<br />
4. „EINGABE CODE“ erscheint nun in der LCD-Anzeige<br />
q. Drücken Sie die oder Taste t, bis „SUCHE<br />
CODE“ in der LCD-Anzeige q angezeigt wird. Richten<br />
Sie die Fernbedienung auf das Gerät und drücken Sie<br />
dann die OK-Taste l, um den Modus „automatische<br />
Code-Suche“ aufzurufen.<br />
5. Die Suche beginnt. Dabei sendet das Gerät nacheinander<br />
die Codezahlen in aufsteigender Reihenfolge aus.<br />
Das Infrarot-Symbol 2# zeigt dies an. Jede Suche startet<br />
mit dem aktuell eingestellten Code.<br />
6. Wenn das Gerät reagiert, indem es sich abschaltet,<br />
drücken Sie sofort die OK-Taste l, um den aktuellen<br />
Code abzuspeichern. Die LCD-Anzeige q zeigt kurz<br />
„OK“ an.<br />
7. Überprüfen Sie, ob der Großteil der Funktionen Ihres<br />
Geräts jetzt mit der Fernbedienung gesteuert werden<br />
- 99 -
kann. Wenn ja, haben Sie sehr wahrscheinlich den<br />
korrekten Code gefunden. Falls einige Funktionen nicht<br />
funktionieren, können Sie beginnend mit Schritt 1 die automatische<br />
Code-Suche erneut starten.<br />
8. Reagiert das Gerät aber nicht mehr, haben Sie in Schritt<br />
6 wahrscheinlich nicht schnell genug die OK-Taste l<br />
gedrückt. Drücken Sie dann mehrfach die EXIT-Taste y,<br />
um das Menü zu verlassen und zur Standardanzeige zurückzukehren.<br />
9. Nun halten Sie die Gerätetaste e des Gerätes gedrückt,<br />
für das Sie gerade den passenden Code suchen. Unten<br />
rechts in der LCD-Anzeige q wird dabei der aktuelle<br />
Code angezeigt. Merken Sie sich diese Zahl.<br />
10. Dann gehen Sie wie im vorangehenden Kapitel<br />
„Programmierung per manueller Code-Eingabe“ beschrieben<br />
vor und prüfen, ob der Code mit der nächstniedrigeren<br />
Zahlenkombination funktioniert.<br />
Hinweise:<br />
1. Bei aktivierter Code-Suche sind alle Tasten bis auf<br />
OK l und EXIT y ohne Funktion.<br />
2. Wenn die automatische Suche das Ende der Code-Liste<br />
erreicht hat, stoppt sie dort. Die Anzeige kehrt dann zu<br />
„SUCHE CODE“ zurück.<br />
System konfigurieren<br />
Uhrzeit einstellen<br />
Die LCD-Anzeige q zeigt Ihnen die Uhrzeit an. So stellen Sie<br />
sie ein:<br />
1. Halten Sie die S-Taste r für etwas länger als 3 Sekunden<br />
gedrückt. Die Anzeige „SPRACHE KONF“ erscheint. Lassen<br />
Sie ca. 15 Sekunden ohne Eingabe verstreichen, verlässt<br />
das Gerät das Menü und kehrt zur Standardanzeige<br />
zurück.<br />
2. Mit der oder Taste t wählen Sie „SYSTEM KONF“<br />
an und bestätigen mit der OK-Taste l.<br />
3. In der LCD-Anzeige q erscheint „ZEIT KONF“. Bestätigen<br />
Sie mit der OK-Taste l. Die LCD-Anzeige q zeigt jetzt<br />
„ZEIT“ an und das Zeitformat (24 HR) blinkt.<br />
4. Mit der oder Taste t können Sie auf das andere<br />
Zeitformat (12 HR) umschalten. Dann steht später bei der<br />
Zeitanzeige zur Anzeige der Tageszeit ein „AM“ oder<br />
„PM“ vor der Uhrzeit. „AM“ steht für „AM“ = „ante meridium“<br />
(vormittags, 0:00 Uhr bis 12:00 Uhr). „PM“ steht<br />
für „PM“ = „post meridium“ (nachmittags, 12:00 Uhr bis<br />
0:00). Drücken Sie die OK-Taste l zur Bestätigung.<br />
5. Jetzt blinkt die Stundenanzeige. Mit der oder Taste<br />
t wählen Sie die Stundenzahl der aktuellen Uhrzeit und<br />
drücken die OK-Taste l.<br />
6. Jetzt blinkt die Minutenanzeige. Mit der oder Taste<br />
t wählen Sie die Minutenzahl der aktuellen Uhrzeit und<br />
- 100 -
drücken die OK-Taste l zum Speichern. Es erscheint wieder<br />
die Anzeige „ZEIT KONF“.<br />
7. Um dieses oder die folgenden Menüs zu verlassen, drücken<br />
Sie so oft die EXIT-Taste y, bis die Standardanzeige<br />
in der LCD-Anzeige q erscheint.<br />
Datum einstellen<br />
Die LCD-Anzeige q zeigt Ihnen das Datum an, wenn Sie die<br />
S-Taste r drücken. So stellen Sie das Datum ein:<br />
1. Halten Sie die S-Taste r für etwas länger als 3 Sekunden<br />
gedrückt. Die Anzeige „SPRACHE KONF“ erscheint.<br />
2. Mit der oder Taste t wählen Sie „SYSTEM<br />
KONF“ an und bestätigen mit der OK-Taste l.<br />
3. In der LCD-Anzeige q erscheint „ZEIT KONF“. Drücken<br />
Sie die Taste t, um auf „DATUM KONF“ zu wechseln.<br />
Bestätigen Sie mit der OK-Taste l.<br />
4. Im Display blinkt die Jahreszahl „2011“. Mit der oder<br />
Taste t können Sie die Jahreszahl ändern und mit der<br />
OK-Taste l bestätigen. Mit der oder Taste t können<br />
Sie die nun blinkende Monatszahl ändern und mit der OK-<br />
Taste l bestätigen. Nun blinkt die Tagesanzeige, die Sie<br />
auch wieder mit der oder Taste t ändern können.<br />
5. Drücken Sie zum Speichern die OK-Taste l. Es erscheint<br />
wieder die Anzeige „DATUM KONF“.<br />
Kontrast einstellen<br />
Den Kontrast des Displays können Sie wie folgt einstellen:<br />
1. Halten Sie die S-Taste r für etwas länger als 3 Sekunden<br />
gedrückt. Die Anzeige „SPRACHE KONF“ erscheint.<br />
2. Mit der oder Taste t wählen Sie „SYSTEM<br />
KONF“ an und bestätigen mit der OK-Taste l.<br />
3. Mit der oder Taste t wählen Sie „KONTRAST<br />
KONF“ und bestätigen mit der OK-Taste l.<br />
4. In der LCD-Anzeige q blinkt nun der Kontrastwert, den<br />
Sie mit der oder Taste t einstellen können:<br />
Anzeige im Display:<br />
0 = höchster Kontrast<br />
15 = niedrigster Kontrast<br />
5. Mit der OK-Taste l speichern Sie die gewünschte Einstellung.<br />
Es erscheint wieder die Anzeige „KONTRAST KONF“.<br />
Hintergrundbeleuchtung<br />
Sie können einstellen, wie lange der Hintergrund der LCD-<br />
Anzeige q und der Tasten nach Ende der Bedienung beleuchtet<br />
bleiben soll. Bedenken Sie dabei, dass eine längere<br />
Leuchtdauer die Lebensdauer der Batterien verringert.<br />
1. Halten Sie die S-Taste r für etwas länger als 3 Sekunden<br />
gedrückt. Die Anzeige „SPRACHE KONF“ erscheint.<br />
2. Mit der oder Taste t wählen Sie „SYSTEM<br />
KONF“ an und bestätigen mit der OK-Taste l.<br />
3. Mit der oder Taste t wählen Sie „LICHT KONF“<br />
und bestätigen mit der OK-Taste l.<br />
- 101 -
4. In der LCD-Anzeige q blinkt nun die Sekundenzahl für<br />
die Nachleuchtdauer, die Sie mit den Tasten t<br />
von 0 bis 60 einstellen können. Wählen Sie „0“, wird die<br />
Hintergrundbeleuchtung ganz abgeschaltet.<br />
5. Mit der OK-Taste l speichern Sie die gewünschte Einstellung.<br />
Es erscheint wieder die Anzeige „LICHT KONF“.<br />
Globale Lautstärke/Stummschaltung einstellen<br />
Damit Sie für die Lautstärkeregelung und Stummschaltung<br />
nicht immer erst eine Gerätetaste drücken müssen, spricht die<br />
UFB für diese Funktionen immer nur ein einzelnes Gerät an.<br />
Dieses Zielgerät können Sie festlegen.<br />
1. Halten Sie die S-Taste r für etwas länger als 3 Sekunden<br />
gedrückt. Die Anzeige „SPRACHE KONF“ erscheint.<br />
2. Mit der oder Taste t wählen Sie „SYSTEM<br />
KONF“ an und bestätigen mit der OK-Taste l.<br />
3. Mit der oder Taste t wählen Sie „VOL/STUM<br />
KONF“ und bestätigen mit der OK-Taste l.<br />
4. Die LCD-Anzeige q zeigt „VOLALLE EINST“ an. Drücken<br />
Sie die OK-Taste l, die Anzeige wechselt auf „VOLALLE<br />
MODUS“.<br />
5. Jetzt drücken Sie die Gerätetaste e für das Gerät, das von<br />
der globalen Lautstärkeregelung gesteuert werden soll.<br />
6. Verfügt das angegebene Gerät über eine Lautstärkeregelung,<br />
wird kurz „ERFOLG“ angezeigt und das Menü<br />
beendet. Die Lautstärkeregelung wirkt dann ab jetzt auf<br />
das soeben festgelegte Gerät.<br />
7. Verfügt dieses Gerät über keine eigene Lautstärkeregelung,<br />
lässt die UFB diese Auswahl nicht zu und zeigt<br />
„FEHLER VOL“ an. Auch dann wird das Menü beendet.<br />
Die Lautstärkeregelung wirkt dann weiterhin auf das bisherige<br />
Gerät.<br />
Sie können die globale Lautstärkeregelung für bestimmte Geräte<br />
auch deaktivieren.<br />
1. Wählen Sie dazu im Menü „VOL/STUM KONF“ mit der<br />
oder Taste t die Funktion „MODUSVOL EINST“<br />
aus und bestätigen mit der OK-Taste l. In der LCD-Anzeige<br />
q erscheint „MODUSVOL MODUS“.<br />
2. Jetzt drücken Sie die Gerätetaste e für das Gerät, das<br />
von der globalen Lautstärkeregelung ausgenommen werden<br />
soll. Die LCD-Anzeige q zeigt „ERFOLG“ an und die<br />
globale Lautstärkeregelung ist deaktiviert, wenn die UFB<br />
im Betriebsmodus eines der ausgewählten Geräte arbeitet.<br />
Sie können die Einstellungen im Menü „VOL/STUM KONF“<br />
auch wieder aufheben.<br />
1. Wählen Sie dazu im Menü „VOL/STUM KONF“ mit der<br />
oder Taste t die Funktion „VOL/STUM RESET“ aus<br />
und bestätigen mit der OK-Taste l.<br />
2. Die LCD-Anzeige q fordert Sie mit „BESTÄTIG RESET“<br />
zur Bestätigung mit der OK-Taste auf l. Drücken Sie die<br />
- 102 -
OK-Taste l, wenn Sie die Einstellungen löschen wollen,<br />
die „ERFOLG“-Anzeige bestätigt dann die Löschung der<br />
Gerätezuordnung zur globalen Lautstärkeregelung. Oder<br />
aber Sie drücken die EXIT-Taste y, um das Löschen abzubrechen.<br />
Band-/Discgerät für Direktbedienung<br />
auswählen<br />
Sie können ein Band- oder Discgerät auswählen, das Sie mit<br />
den Laufwerkstasten f bedienen können, ohne zuvor auf die<br />
zugehörige Gerätetaste e drücken zu müssen.<br />
1. Halten Sie die S-Taste r für etwas länger als 3 Sekunden<br />
gedrückt. Die Anzeige „SPRACHE KONF“ erscheint.<br />
2. Mit der oder Taste t wählen Sie „SYSTEM<br />
KONF“ an und bestätigen mit der OK-Taste l.<br />
3. In der LCD-Anzeige q erscheint „ZEIT KONF“. Drücken<br />
Sie die Taste t, um auf „WIEDERG.KONF“ zu wechseln.<br />
Bestätigen Sie mit der OK-Taste l.<br />
4. Mit der oder Taste t wählen Sie nun das Gerät<br />
aus, das auf die UFB reagieren soll, wenn Sie die Laufwerkstasten<br />
f verwenden. Bestätigen Sie mit der OK-<br />
Taste l.<br />
5. Wenn Sie anstelle eines Gerätes „OFF“ auswählen und<br />
mit der OK-Taste l bestätigen, schalten Sie die Direktbedienung<br />
aus. Wenn Sie „RESET“ auswählen und mit der<br />
OK-Taste l bestätigen, aktivieren Sie die vorprogrammierte<br />
Werkseinstellung (DVD) für diese Funktion.<br />
6. Die LCD-Anzeige q zeigt „ERFOLG“ an und das ausgewählte<br />
Gerät kann nun direkt mit den Laufwerkstasten f<br />
bedient werden.<br />
Sperr-Funktion einstellen<br />
Mit der Sperr-Funktion können Sie den Zugang zu allen Konfigurationsmenüs<br />
sperren.<br />
1. Halten Sie die S-Taste r für etwas länger als 3 Sekunden<br />
gedrückt. Die Anzeige „SPRACHE KONF“ erscheint.<br />
2. Mit der oder Taste t wählen Sie „SYSTEM KONF“<br />
an und bestätigen mit der OK-Taste l.<br />
3. Mit der oder Taste t wählen Sie „SPERREN<br />
KONF“ und bestätigen mit der OK-Taste l. Die LCD-<br />
Anzeige q zeigt die aktuelle Einstellung an.<br />
4. Mit der oder Taste t wählen Sie nun zwischen<br />
„SPERREN“ (Sperre an) oder „ENTSPER“ (Sperre aus).<br />
5. Mit der OK-Taste l speichern Sie die Einstellung. In<br />
der LCD-Anzeige q erscheint dann wieder „SPERREN<br />
KONF“.<br />
System Reset<br />
Über diese Funktion können Sie die Belegung aller oder einzelner<br />
Gerätetasten aufheben.<br />
- 103 -
1. Halten Sie die S-Taste r für etwas länger als 3 Sekunden<br />
gedrückt. Die Anzeige „SPRACHE KONF“ erscheint.<br />
2. Mit der oder Taste t wählen Sie „SYSTEM<br />
KONF“ an und bestätigen mit der OK-Taste l.<br />
3. Mit der oder Taste t wählen Sie „SYSTEM RESET“<br />
und bestätigen mit der OK-Taste l.<br />
4. Sie können nun mit der oder Taste t die gewünschte<br />
Funktion auswählen. Um die Belegung (Code)<br />
aller Gerätetasten e sowie sämtliche Daten zu Macros,<br />
Timer und gelernten Funktionen zu löschen, wählen Sie<br />
„ALLE RESET“ aus und bestätigen mit der OK-Taste l.<br />
5. In der LCD-Anzeige q erscheint nun „BESTÄTIG RESET“.<br />
Bestätigen Sie das Löschen mit der OK-Taste l. Dann<br />
zeigt die LCD-Anzeige q „ERFOLG“ an. Die genannten<br />
Informationen sind nun gelöscht und das Menü wird beendet.<br />
6. Um nur die Belegung einzelner Gerätetasten e zu löschen,<br />
wählen Sie „MODUS RESET“ aus und drücken die<br />
OK-Taste l. Die LCD-Anzeige q zeigt nun „MODUS“<br />
an und fordert Sie so zum Drücken einer Gerätetaste e<br />
auf, deren Belegung Sie löschen wollen. Anschließend<br />
wird kurz „ERFOLG“ angezeigt, dann lesen Sie wieder<br />
„MODUS“ in der LCD-Anzeige. Drücken Sie nun bei Bedarf<br />
weitere Gerätetasten e, um auch deren Belegung<br />
zu löschen.<br />
7. Oder aber Sie verlassen das Menü, indem Sie die EXIT-<br />
Taste y drücken.<br />
Timer konfigurieren<br />
Die UFB bietet 2 Timermodi, Sleep-Timer und Ereignis-Timer.<br />
Sleep-Timer<br />
1. Drücken Sie die Gerätetaste e für das zu steuernde Gerät<br />
(z. B. VCR).<br />
2. Halten Sie die S-Taste r für etwas länger als 3 Sekunden<br />
gedrückt. Die Anzeige „SPRACHE KONF“ erscheint.<br />
3. Drücken Sie die oder Taste t, bis „TIMER KONF“<br />
angezeigt wird. Drücken Sie die OK-Taste l, „TIMER<br />
SLEEP“ erscheint in der LCD-Anzeige q. Bestätigen Sie<br />
die Auswahl dieser Funktion mit der OK-Taste l.<br />
4. Jetzt blinkt unten rechts in der LCD-Anzeige q die Minutenzahl<br />
der Restlaufzeit für das ausgewählte Gerät.<br />
Stellen Sie mit der oder Taste t den gewünschten<br />
Wert von 1 bis 99 Minuten ein. Drücken Sie die OK-Taste<br />
l zur Bestätigung. Bei programmiertem Sleep-Timer zeigt<br />
die LCD-Anzeige q „zz “ rechts neben der Zeit an.<br />
5. Positionieren Sie die Fernbedienung so, dass ihre Infrarotsignale<br />
das abzuschaltende Gerät erreichen können.<br />
Nach Ablauf der eingestellten Zeit wird die Fernbedienung<br />
das Gerät abschalten.<br />
6. Wenn Sie jetzt die S-Taste r drücken, wird unten links in<br />
der LCD-Anzeige q „SL“ angezeigt.<br />
- 104 -
Ereignis-Timer<br />
Die Fernbedienung verfügt über 4 Ereignis-Timer, über die<br />
Sie bestimmte Serien von Tastenkombinationen zu bestimmten<br />
Zeiten aussenden lassen können.<br />
1. Halten Sie die S-Taste r für etwas länger als 3 Sekunden<br />
gedrückt. Die Anzeige „SPRACHE KONF“ erscheint.<br />
2. Mit der oder Taste t wählen Sie „TIMER KONF“<br />
an und bestätigen mit der OK-Taste l. „TIMER SLEEP“<br />
erscheint in der LCD-Anzeige q. Mit der oder <br />
Taste t wählen Sie den gewünschten Speicherplatz „TI-<br />
MER KONF 1“ bis „TIMER KONF 4“ aus und bestätigen<br />
mit der OK-Taste l.<br />
3. Jetzt blinkt die Stundenzahl der Uhrzeit, zu der die gewünschte<br />
Tastenkombination ausgeführt werden soll. Stellen<br />
Sie mit der oder Taste t die gewünschte Stunde<br />
ein und drücken Sie zur Bestätigung die OK-Taste l.<br />
4. Jetzt blinkt die Minutenzahl der Uhrzeit, zu der die gewünschte<br />
Tastenkombination ausgeführt werden soll. Stellen<br />
Sie mit der oder Taste t die gewünschte Minute<br />
ein und drücken Sie zur Bestätigung die OK-Taste l.<br />
5. In der LCD-Anzeige q lesen Sie „TIMER X TASTE“ (X<br />
steht für den gewünschten Timer). Drücken Sie nun die<br />
gewünschte Gerätetaste e gefolgt von der gewünschten<br />
Abfolge der Tastenbefehle.<br />
6. Standardmäßig werden die Timerbefehle im Abstand von<br />
je 1 Sekunde gesendet. Da manche Geräte etwas träge<br />
reagieren, kann es sein, dass die Abfolge der Timerbefehle<br />
zu schnell an das Gerät gesendet werden. Dann haben Sie<br />
die Möglichkeit, vor einem Tastenbefehl eine Pause von 5<br />
- 21 Sekunden zu programmieren. Drücken Sie dazu ggf.<br />
wiederholt die MACRO-Taste i. Unten rechts zeigt die<br />
LCD-Anzeige q die aktuelle Pausenlänge in Sekunden an.<br />
7. Drücken Sie die S-Taste r, um Ihre Eingaben zu speichern<br />
und zur Timer-Übersicht zurückzukehren.<br />
8. Gehen Sie analog vor, um bei Bedarf auch die anderen<br />
Timer-Speicherplätze zu programmieren.<br />
9. Bei programmiertem Ereignis-Timer zeigt die LCD-Anzeige<br />
q das Timer-Symbol„ “ rechts neben der Zeit an.<br />
Hinweise:<br />
1. Pro Timer-Speicherplatz können maximal 14 Tasten programmiert<br />
werden. Nach Eingabe der 14. Taste wird die<br />
Abfolge automatisch gespeichert und „VOLL“ in der LCD-<br />
Anzeige q angezeigt.<br />
2. Auch in diesem Menü kehrt das Gerät nach ca. 15 Sekunden<br />
ohne Eingabe zur Standardanzeige zurück.<br />
Timer löschen<br />
So können Sie einen programmierten Sleep- oder Ereignis-<br />
Timer löschen:<br />
1. Wählen Sie den Timer aus, den Sie löschen möchten (siehe<br />
Kapitel Sleep-Timer/Ereignis-Timer) und drücken Sie die OK-<br />
Taste l. In der LCD-Anzeige q lesen Sie „TIMER LÖSCH“.<br />
- 105 -
2. Drücken Sie die OK-Taste l. Die LCD-Anzeige q wechselt<br />
zu „BESTÄTIG LÖSCH“.<br />
3. Drücken Sie erneut die OK-Taste l, um den Timer zu<br />
löschen. Die LCD-Anzeige q bestätigt das erfolgreiche<br />
Löschen mit der Anzeige „ERFOLG“.<br />
Lernen konfigurieren<br />
Die Universalfernbedienung (UFB) kann Tastensignale einer<br />
Originalfernbedienung lernen und speichern. Wenn die UFB<br />
nach den bereits geschilderten Programmiermethoden nicht<br />
funktioniert oder nicht alle Befehle ausführen kann, versuchen<br />
Sie bitte, die UFB mithilfe der Originalfernbedienung(en)<br />
anzulernen.<br />
• Verwenden Sie neue Batterien für die UFB und die Originalfernbedienung.<br />
• Halten Sie mindestens einen Meter Abstand zu anderen<br />
Lichtquellen ein. Die Lichtquellen können die Infrarot-Übertragung<br />
stören.<br />
• Legen Sie die UFB und die Originalfernbedienung in einem<br />
Abstand von 20 bis 50 mm so zueinander auf eine<br />
ebene Unterlage, dass die Infrarot-Dioden 2) aufeinander<br />
gerichtet sind.<br />
Hinweise:<br />
1. Verwenden Sie folgende Tasten nicht für die Lernfunktion:<br />
alle Gerätetasten e, MACRO i, S-Taste r, EXIT y.<br />
2. Wenn beim Anlernen während der Anzeige von „LER-<br />
NEN“ nach 30 Sekunden noch keine Taste der Original-<br />
FB gedrückt wurde, wird das Lern-Menü beendet. Dieser<br />
Modus kann nicht durch Drücken einer Taste der UFB<br />
beendet werden.<br />
3. Der Speicher fasst insgesamt 150 Tastenbefehle. Wenn<br />
der Speicher voll ist, zeigt die LCD-Anzeige q „LERNEN<br />
VOLL“ an und der Lernmodus wird beendet.<br />
4. Mit der EXIT-Taste y kehren Sie zum vorigen Status zurück<br />
(Ausnahme bei Anzeige von „LERNEN TASTE“ bzw.<br />
„LERNEN“).<br />
Code-Lernfunktion<br />
1. Drücken Sie die Gerätetaste e für das Gerät, für das die<br />
UFB einen Tastencode lernen soll.<br />
2. Halten Sie die S-Taste r für etwas länger als 3 Sekunden<br />
gedrückt. Die Anzeige „SPRACHE KONF“ erscheint.<br />
3. Mit der oder Taste t wählen Sie das Menü „LER-<br />
NEN KONF“ aus und drücken dann die OK-Taste l.<br />
4. In der LCD-Anzeige q erscheint „LERNEN EINST“. Dann<br />
drücken Sie die OK-Taste l. In der LCD-Anzeige q erscheint<br />
„LERNEN TASTE“ (Taste auswählen).<br />
5. Drücken Sie zuerst die Taste auf der UFB, die angelernt<br />
werden soll. In der LCD-Anzeige q erscheint „LERNEN“.<br />
Die UFB wartet nun auf das Infrarotsignal der Original-FB.<br />
- 106 -
Hinweis:<br />
Sollte die Anzeige nicht auf „LERNEN“ wechseln, haben<br />
Sie eine Taste ausgewählt, für die kein Tastencode erlernt<br />
werden kann.<br />
6. Richten Sie die Infrarotsensoren 2) der beiden Fernbedienungen<br />
aufeinander aus.<br />
7. Jetzt halten Sie die gewünschte Taste der Original-FB<br />
gedrückt, bis in der LCD-Anzeige q der UFB „ERFOLG“<br />
oder „LEARN ERROR?“ erscheint.<br />
8. Wenn in der LCD-Anzeige q „ERFOLG“ erscheint (Vorgang<br />
erfolgreich), können Sie, beginnend mit Schritt 5,<br />
weitere Tasten anlernen. Wenn „LEARN ERROR?“ erscheint<br />
(Vorgang nicht erfolgreich), wiederholen Sie den Vorgang<br />
ebenfalls ab Schritt 5.<br />
9. Um den Lernvorgang abzubrechen/zu beenden, drücken<br />
Sie die S-Taste und anschließend während der Anzeige<br />
„LERNEN TASTE“ so oft die EXIT-Taste y, bis die Standardanzeige<br />
in der LCD-Anzeige q erscheint. Während<br />
der Anzeige „LERNEN“ lassen Sie einfach 30 Sekunden<br />
ohne Bedienung verstreichen, dann beendet das Gerät<br />
das Menü.<br />
Sämtliche programmierten Tasten aller Geräte löschen<br />
1. Halten Sie die S-Taste r für etwas länger als 3 Sekunden<br />
gedrückt. Die Anzeige „SPRACHE KONF“ erscheint.<br />
2. Mit der oder Taste t wählen Sie das Menü „LER-<br />
NEN KONF“ aus und drücken dann die OK-Taste l. In<br />
der LCD-Anzeige q erscheint „LERNEN EINST“.<br />
3. Mit der oder Taste t wählen Sie „LERNEN<br />
LÖSCH“ (Gelerntes löschen) und bestätigen mit der OK-<br />
Taste l. In der LCD-Anzeige q erscheint „BESTÄTIG<br />
LÖSCH“ (Löschen bestätigen).<br />
4. Bestätigen Sie mit der OK-Taste l. In der LCD-Anzeige<br />
q erscheint „ERFOLG“. Alle programmierten Tasten sind<br />
gelöscht. Abschließend wird das Menü automatisch<br />
beendet.<br />
Hinweis:<br />
Zeigt die LCD-Anzeige „BESTÄTIG LÖSCH“ an, können Sie<br />
das Löschen mit der Taste EXIT y abbrechen.<br />
Makros konfigurieren<br />
Mit der MAKRO-Funktion können bis zu 16 Tastenbefehle mit<br />
einem einzigen Tastendruck ausgeführt werden, d.h. mehrere<br />
zuvor gespeicherte Steuerbefehle können mit einer MAKRO-<br />
Taste ausgelöst werden. Es stehen Ihnen 6 Makrospeicherplätze<br />
zur Verfügung.<br />
Ein Makro programmieren<br />
Zur Programmierung eines Makros gehen Sie wie folgt vor:<br />
1. Halten Sie die S-Taste r für etwas länger als 3 Sekunden<br />
gedrückt. Die Anzeige „SPRACHE KONF“ erscheint.<br />
- 107 -
2. Mit der oder Taste t wählen Sie „MAKRO<br />
KONF” und bestätigen mit der OK-Taste l. Im Display<br />
erscheint „MAKRO KONF 1”.<br />
3. Mit der oder Taste t wählen Sie den zu programmierenden<br />
Speicherplatz aus (MAKRO KONF 1 - 6) und<br />
bestätigen mit der OK-Taste l.<br />
4. In der LCD-Anzeige q erscheint „MACRO STEP”. Drücken<br />
Sie nun nacheinander die gewünschten Tasten (max. 16).<br />
Die Sequenz sollte mit einer Gerätetaste e beginnen.<br />
5. Standardmäßig werden die Makrobefehle im Abstand<br />
von je 1 Sekunde gesendet. Da manche Geräte etwas<br />
träge reagieren, kann es sein, dass die Abfolge der Makrobefehle<br />
zu schnell an das Gerät gesendet werden.<br />
Dann haben Sie die Möglichkeit, vor einem Tastenbefehl<br />
eine Pause von 5 - 21 Sekunden zu programmieren.<br />
Drücken Sie dazu ggf. wiederholt die MACRO-Taste i.<br />
Unten rechts zeigt die LCD-Anzeige q die aktuelle Pausenlänge<br />
in Sekunden an.<br />
6. Wenn die maximale Anzahl der Tastenbefehle erreicht ist,<br />
zeigt die LCD-Anzeige q „FULL“ an.<br />
7. Speichern Sie die Eingabe mit der S-Taste r. In der LCD-<br />
Anzeige q erscheint „MAKRO KONF”.<br />
8. Wenn Sie bei der Auswahl des zu programmierenden<br />
Makros (Schritt 3) einen bereits belegten Speicherplatz<br />
auswählen, wird das bestehende Makro überschrieben.<br />
9. Wiederholen Sie den Vorgang ab Schritt 3 zum Anlegen<br />
weiterer Makros.<br />
10. Mit der EXIT-Taste y gelangen Sie eine Ebene im Menü<br />
zurück, ausgenommen während der Eingabe der<br />
Tastenbefehle.<br />
Hinweise:<br />
1. Maximal 16 Tastenbefehle können in einem Makro<br />
gespeichert werden. Nach der Eingabe des 16. Tastenbefehls<br />
erscheint „FULL” in der LCD-Anzeige q.<br />
2. Um den Modus ohne Speicherung zu verlassen, lassen<br />
Sie ca. 15 Sekunden ohne Eingabe verstreichen.<br />
3. Im Modus „MACRO STEP“ können Sie nur mit der S-Taste<br />
r zum vorigen Status zurückkehren.<br />
Beispiel: Sie möchten eine Befehlskette in einem Makro<br />
speichern. Wir beginnen im Modus „MACRO STEP”.<br />
Gewünschte Befehlskette: TV einschalten => PAUSE => auf<br />
den AV-Eingang umschalten => DVD einschalten => PAUSE<br />
=> DVD abspielen.<br />
Im Modus „MACRO STEP“ geben Sie dafür folgende Tastenbefehle<br />
ein:<br />
=> => (Pausenzeit) => => =><br />
=> (Pausenzeit) =><br />
Makro ausführen<br />
Um ein zuvor programmiertes Makro auszuführen, gehen Sie<br />
wie folgt vor:<br />
- 108 -
1. Drücken Sie die MACRO-Taste i.<br />
2. Rufen Sie mit der entsprechenden Zifferntaste o das gewünschte<br />
Makro auf (1-6). Beispiel: Soll Makro 3 ausgeführt<br />
werden, drücken Sie zunächst die MACRO-Taste i<br />
und dann innerhalb von 5 Sekunden die Zifferntaste „ “.<br />
Alle Makros löschen<br />
Um alle zuvor programmierten Makros zu löschen, gehen<br />
Sie wie folgt vor:<br />
1. Halten Sie die S-Taste r für etwas länger als 3 Sekunden<br />
gedrückt. Die Anzeige „SPRACHE KONF“ erscheint.<br />
2. Mit der oder Taste t wählen Sie „MAKRO<br />
KONF” und bestätigen mit der OK-Taste l. Im Display<br />
erscheint „MAKRO KONF 1”.<br />
3. Mit der oder Taste t wählen Sie „MAKRO<br />
LÖSCH“ aus und bestätigen mit der OK-Taste l.<br />
4. In der LCD-Anzeige q erscheint „BESTÄTIG LÖSCH“<br />
(Löschen bestätigen). Bestätigen Sie den Löschvorgang<br />
mit der OK-Taste l. Die LCD-Anzeige q zeigt „ERFOLG“<br />
an. Alle Makros sind nun gelöscht, das Menü wird beendet.<br />
Hinweise:<br />
1. Zeigt die LCD-Anzeige q „BESTÄTIG LÖSCH“ an,<br />
können Sie das Löschen mit der Taste EXIT y abbrechen.<br />
2. Einzelne Makros können nicht gelöscht, sondern nur überschrieben<br />
werden.<br />
Favoritenkanal<br />
Hinweis:<br />
Mit dieser Funktion können Sie Ihre bevorzugten Sender als<br />
Favoriten speichern.<br />
Favoriten programmieren<br />
Ihre Favoritensender speichern Sie wie folgt:<br />
1. Drücken Sie die Gerätetaste e für das Gerät, für das Sie<br />
einen Favoriten speichern wollen.<br />
2. Halten Sie die S-Taste r für etwas länger als 3 Sekunden<br />
gedrückt. Die Anzeige „SPRACHE KONF“ erscheint.<br />
3. Mit der oder Taste t wählen Sie „FAV KAN<br />
KONF” und bestätigen mit der OK-Taste l. Im Display<br />
erscheint „FAV KAN 1 KONF”.<br />
4. Mit der oder Taste t wählen Sie den zu programmierenden<br />
Speicherplatz aus (FAV KAN KONF 1 - 4)<br />
und bestätigen mit der OK-Taste l.<br />
5. In der LCD-Anzeige q erscheint „FAV KAN STEP”. Drücken<br />
Sie nun nacheinander die Tasten (max. 4) zum Aufruf<br />
Ihres gewünschten Favoritensenders.<br />
6. Wenn die maximale Anzahl der Tastenbefehle erreicht ist,<br />
zeigt die LCD-Anzeige q „VOLL“ an.<br />
7. Speichern Sie die Eingabe mit der S-Taste r. In der LCD-<br />
Anzeige q erscheint „FAV KAN KONF 1-4”.<br />
- 109 -
8. Wenn Sie bei der Auswahl des zu programmierenden<br />
Favoriten (Schritt 4) einen bereits belegten Speicherplatz<br />
auswählen, wird der bestehende Favorit überschrieben.<br />
9. Wiederholen Sie die Schritte zum Anlegen weiterer Favoriten.<br />
10. Mit der EXIT-Taste y gelangen Sie eine Ebene im Menü<br />
zurück, ausgenommen während der Eingabe der Tastenbefehle.<br />
Hinweis:<br />
Die Eingabe der Kanalnummern kann je nach Modell und<br />
Marke des gewählten Gerätes variieren. Ggf. müssen Sie<br />
bei mehrstelligen Kanalnummern zunächst die Taste a<br />
drücken.<br />
Favoriten aufrufen<br />
Um einen zuvor programmierten Favoriten aufzurufen, drücken<br />
Sie die FAV/EPG-Taste 1( gefolgt von der entsprechenden<br />
Zifferntaste für den gewünschten Speicherplatz (1 - 4).<br />
Alle FAV-Kanäle löschen<br />
Um alle zuvor programmierten Favoriten zu löschen, gehen<br />
Sie wie folgt vor:<br />
1. Halten Sie die S-Taste r für etwas länger als 3 Sekunden<br />
gedrückt. Die Anzeige „SPRACHE KONF“ erscheint.<br />
2. Mit der oder Taste t wählen Sie „FAV KAN<br />
KONF” und bestätigen mit der OK-Taste l. Im Display<br />
erscheint „FAV KAN 1 KONF”.<br />
3. Mit der oder Taste t wählen Sie „FAV KAN<br />
LÖSCH“ aus und bestätigen mit der OK-Taste l.<br />
4. In der LCD-Anzeige q erscheint „BESTÄTIG LÖSCH“<br />
(Löschen bestätigen). Bestätigen Sie den Löschvorgang mit<br />
der OK-Taste l. Die LCD-Anzeige q zeigt „ERFOLG“ an.<br />
Alle Favoriten sind nun gelöscht, das Menü wird beendet.<br />
Hinweise:<br />
1. Zeigt die LCD-Anzeige q „BESTÄTIG LÖSCH“ an, können<br />
Sie das Löschen mit der Taste EXIT y abbrechen.<br />
2. Einzelne Favoriten können nicht gelöscht, sondern nur<br />
überschrieben werden.<br />
Lautstärkeregelung<br />
Vol +/—, (Stummschaltung)<br />
Drücken Sie die Taste „VOL +“ um die Lautstärke zu erhöhen.<br />
Mit der Taste „VOL —“ verringern Sie sie. Um den Ton stumm<br />
zu schalten, drücken Sie die -Taste h. Ein weiteres Drücken<br />
dieser Taste schaltet den Ton wieder ein.<br />
Wenn Sie kein anderes Gerät als Zielgerät für die globale<br />
Lautstärkeregelung eingestellt haben, wird beim Betätigen<br />
der VOL +/— Tasten j der UFB standardmäßig die Lautstärkeregelung<br />
des TV-Gerätes angesprochen, und zwar unabhängig<br />
davon, welche Gerätetaste e zuvor gedrückt wurde.<br />
- 110 -
Dies gilt allerdings nicht für die Geräte „AMP“, „DVD“ und<br />
„DSAT“, da man davon ausgehen kann, dass diese Geräte<br />
über eine eigene Lautstärkeregelung verfügen.<br />
Zur Bedienung<br />
> > Um eines der programmierten Geräte mit der UFB bedienen<br />
können, drücken Sie zunächst die entsprechende Gerätetaste<br />
e. Dann richten Sie die UFB auf dieses Gerät<br />
und drücken die gewünschte Taste.<br />
> > Setzen Sie die Zifferntasten o genau so ein, wie Sie es mit<br />
der Originalfernbedienung tun. Bevor Sie eine zweistellige<br />
Eingabe machen, drücken Sie ggf. die Taste a.<br />
> > Drücken Sie die S-Taste r und anschließend die FAV/<br />
EPG-Taste 1(, um den elektronischen Programmführer eines<br />
mit dieser Funktion ausgestatteten Gerätes zu starten.<br />
> > Wenn Sie die S-Taste r drücken, wird unten rechts in der<br />
LCD-Anzeige q für 10 Sekunden das Datum eingeblendet.<br />
> > Während Sie eine der Gerätetasten e gedrückt halten,<br />
wird unten rechts in der LCD-Anzeige q der für dieses<br />
Gerät aktive Code eingeblendet.<br />
> > Über die MENU-Taste k rufen Sie den Dialog für die Einstellungen<br />
der jeweiligen Zielgeräte auf.<br />
> > Drücken Sie die Beleuchtungstaste d, um die Displayund<br />
Tastenbeleuchtung ein- bzw. auszuschalten.<br />
Alle AUS<br />
Hinweise:<br />
Mit der Taste ALL OFF (alle aus) w können sämtliche<br />
eingeschalteten Geräte automatisch abgeschaltet werden.<br />
Diese Funktion kann bereits ausgeschaltete Geräte wieder<br />
einschalten (geräteabhängig). Halten Sie dazu die ALL OFF-<br />
Taste w einige Sekunden lang gedrückt. Es kann bis zu 10<br />
Sekunden dauern, bis alle Geräte abgeschaltet sind. Dies<br />
funktioniert nur unter folgenden Bedingungen:<br />
1. Es besteht eine Sichtverbindung zwischen jedem Gerät<br />
und der UFB.<br />
2. Automatische Code-Suche, Marken-Code-Suche und<br />
MAKRO-Funktion sind nicht aktiv.<br />
3. Alle Zielgeräte müssen für ein Ausschalten per Fernbedienung<br />
geeignet sein.<br />
Um alle Geräte automatisch wieder einzuschalten, halten Sie<br />
wieder die Taste w gedrückt, bis alle Geräte eingeschaltet<br />
sind.<br />
Reinigen und Lagerung<br />
Achtung!<br />
Achten Sie darauf, dass bei der Reinigung keine Feuchtigkeit<br />
in das Gerät gelangt! Andernfalls besteht die<br />
Gefahr eines irreparablen Schadens für das Gerät!<br />
- 111 -
Reinigen Sie das Gehäuse des Gerätes ausschließlich mit<br />
einem leicht feuchten Tuch und einem milden Spülmittel.<br />
> > Lagern Sie das Gerät ausschließlich in einer Umgebung,<br />
die den Angaben in den Technischen Daten entspricht.<br />
> > Vor der Lagerung entnehmen Sie die Batterien, damit<br />
diese das Gerät nicht beschädigen können, sollten sie<br />
während der Lagerung auslaufen.<br />
Fehler / Abhilfe<br />
Ihr Gerät reagiert nicht auf die UFB.<br />
> > Überprüfen Sie die Batterien. Sie müssen genug<br />
Spannung haben und korrekt eingelegt sein.<br />
> > Haben Sie zunächst die richtige Gerätetaste e für das<br />
gewünschte Zielgerät gedrückt?<br />
> > Überprüfen Sie, ob für das Zielgerät der richtige Code<br />
einprogrammiert ist (siehe Abschnitt „CODE KONF“).<br />
Die UFB überträgt die Befehle nicht korrekt.<br />
> > Drücken Sie die entsprechende Gerätetaste e, um die<br />
UFB in den korrekten Modus zu versetzen.<br />
> > Die Batterien müssen genug Spannung haben und korrekt<br />
eingelegt sein.<br />
> > Möglicherweise verwenden Sie einen falschen Code.<br />
Starten Sie die Marken-Code-Suche, die automatische<br />
Codesuche oder die direkte Code-Eingabe (manuell).<br />
Die UFB wechselt nicht die Sender auf dem Gerät.<br />
> > Drücken Sie die entsprechende Gerätetaste e, um die<br />
UFB in den korrekten Modus zu versetzen.<br />
> > Falls die Original-FB keine „-/- -“ Taste besitzt, wechseln<br />
Sie die Programme mit den P+/— Tasten u oder den<br />
Zifferntasten o.<br />
> > Funktioniert auch dies nicht, könnte die Kindersicherung<br />
des Zielgerätes aktiviert sein.<br />
Manche Tasten der UFB funktionieren nicht korrekt.<br />
> > Ihre UFB besitzt möglicherweise nicht alle Funktionen der<br />
Original-Fernbedienung des Geräts.<br />
> > Möglicherweise haben Sie nicht den optimalen Code<br />
einprogrammiert. Suchen Sie einen Code, der mehr Funktionen<br />
des Zielgerätes unterstützt.<br />
Die UFB reagiert nicht mehr, nachdem eine Taste gedrückt<br />
wurde.<br />
> > Die Batterien müssen genug Spannung haben und korrekt<br />
eingelegt sein.<br />
> > Richten Sie die UFB auf Ihr Gerät aus.<br />
Die LCD-Anzeige q zeigt nichts an.<br />
> > Die Batterien müssen genug Spannung haben und korrekt<br />
eingelegt sein.<br />
> > Der Kontrast könnte zu gering eingestellt sein. Erhöhen<br />
Sie die Kontrasteinstellung.<br />
- 112 -
Entsorgen<br />
Werfen Sie das Gerät keinesfalls in den normalen<br />
Hausmüll. Dieses Produkt unterliegt der<br />
europäischen Richtlinie 2002/96/EC.<br />
Universalfernbedienung<br />
• Entsorgen Sie die Universalfernbedienung oder Teile<br />
davon über einen zugelassenen Entsorgungsbetrieb oder<br />
über Ihre kommunale Entsorgungseinrichtung.<br />
• Beachten Sie die aktuell geltenden Vorschriften. Setzen<br />
Sie sich im Zweifelsfall mit Ihrer Entsorgungseinrichtung in<br />
Verbindung.<br />
Batterien/Akkus<br />
• Batterien/Akkus dürfen nicht im Hausmüll entsorgt werden.<br />
• Batterien können Giftstoffe enthalten, die die Umwelt<br />
schädigen. Entsorgen Sie die Batterien/Akkus deshalb<br />
unbedingt entsprechend der geltenden gesetzlichen<br />
Bestimmungen.<br />
• Jeder Verbraucher ist gesetzlich verpflichtet, Batterien/<br />
Akkus bei einer Sammelstelle seiner Gemeinde, seines<br />
Stadtteils oder im Handel abzugeben. Diese Verpflichtung<br />
dient dazu, dass Batterien/Akkus einer umweltschonenden<br />
Entsorgung zugeführt werden können.<br />
• Geben Sie Batterien/Akkus nur im entladenen Zustand<br />
zurück.<br />
Verpackungen<br />
• Führen Sie alle Verpackungsmaterialien einer umweltgerechten<br />
Entsorgung zu.<br />
Technische Daten<br />
Steuerbare Geräte: 10<br />
Abmessungen<br />
L x B x H:<br />
217 x 50 x 22 mm<br />
Gewicht:<br />
133 g (inkl. Batterien)<br />
Infrarot-LED: Laserklasse 1<br />
Stromversorgung<br />
Batterien:<br />
2 x 1,5 V Typ AAA/LR03 (Micro)<br />
(im Lieferumfang enthalten)<br />
Betriebstemperatur: +15 – +35 °C<br />
Lagertemperatur: —0 – +50 °C<br />
Feuchtigkeit: ≤ 75 % (keine Kondensation)<br />
Hinweis zur Konformität<br />
Dieses Gerät entspricht hinsichtlich Übereinstimmung mit den<br />
grundlegenden Anforderungen und den anderen relevanten<br />
Vorschriften der europäischen Richtlinie für elektromagnetische<br />
Verträglichkeit 2004/108/EC und der RoHS Richtlinie<br />
2011/65/EU.<br />
- 113 -
Importeur<br />
KOMPERNASS GMBH<br />
BURGSTRASSE 21<br />
44867 BOCHUM, GERMANY<br />
www.kompernass.com<br />
Garantie & Service<br />
Sie erhalten auf dieses Gerät 3 Jahre Garantie ab Kaufdatum.<br />
Das Gerät wurde sorgfältig produziert und vor Anlieferung<br />
gewissenhaft geprüft. Bitte bewahren Sie den Kassenbon<br />
als Nachweis für den Kauf auf. Bitte setzen Sie sich im<br />
Garantiefall mit Ihrer Servicestelle telefonisch in Verbindung.<br />
Nur so kann eine kostenlose Einsendung Ihrer Ware gewährleistet<br />
werden.<br />
Die Garantieleistung gilt nur für Material-oder Fabrikationsfehler,<br />
nicht aber für Transportschäden, Verschleißteile oder<br />
für Beschädigungen an zerbrechlichen Teilen, z. B. Schalter<br />
oder Akkus.<br />
Das Produkt ist lediglich für den privaten und nicht für den<br />
gewerblichen Gebrauch bestimmt. Bei missbräuchlicher und<br />
unsachgemäßer Behandlung, Gewaltanwendung und bei<br />
Eingriffen, die nicht von unserer autorisierten Service-Niederlassung<br />
vorgenommen wurden, erlischt die Garantie.<br />
Ihre gesetzlichen Rechte werden durch diese Garantie nicht<br />
eingeschränkt.<br />
Die Garantiezeit wird durch die Gewährleistung nicht verlängert.<br />
Dies gilt auch für ersetzte und reparierte Teile. Eventuell<br />
schon beim Kauf vorhandene Schäden und Mängel müssen<br />
sofort nach dem Auspacken gemeldet werden, spätestens<br />
aber zwei Tage nach Kaufdatum. Nach Ablauf der Garantiezeit<br />
anfallende Reparaturen sind kostenpflichtig.<br />
Service Deutschland<br />
Tel.: 01805 772 033 (0,14 EUR/Min. aus dem dt. Festnetz, Mobilfunk max.<br />
0,42 EUR/Min.)<br />
E-Mail: kompernass@lidl.de<br />
<strong>IAN</strong> <strong>86342</strong><br />
Service Österreich<br />
Tel.: 0820 201 222 (0,15 EUR/Min.)<br />
E-Mail: kompernass@lidl.at<br />
<strong>IAN</strong> <strong>86342</strong><br />
Service Schweiz<br />
Tel.: 0842 665 566 (0,08 CHF/Min., Mobilfunk max. 0,40 CHF/Min.)<br />
E-Mail: kompernass@lidl.ch<br />
<strong>IAN</strong> <strong>86342</strong><br />
- 114 -
10-in-1 Remote Control SFB 10.1 B2<br />
Herstellerverzeichnis mit Gerätecodeliste<br />
Register van producenten met lijst van<br />
apparaatcodes<br />
Index des fabricants avec liste des<br />
codes appareil<br />
Registro produttori con elenco codici<br />
apparecchi<br />
Índice de fabricantes con lista de<br />
códigos de aparatos<br />
Manufacturer List with Device Code List<br />
Producentfortegnelse med apparat-kodeliste<br />
Wykaz producentów z listą kodów urządzeń<br />
Gyártók készülékkódját tartalmazó jegyzék<br />
Κατάλογος κατασκευαστή µε λίστα<br />
κωδικών συσκευών<br />
KOMPERNASS GMBH<br />
Burgstraße 21<br />
D-44867 Bochum<br />
www.kompernass.com<br />
Stand der Informationen · Last Information Update: 12 / 2012<br />
Ident.-No.: SFB 10.1B2102012-5<br />
Zoznam výrobcov s kódmi prístrojov<br />
Adresář výrobců se seznamem kódů pro přístroj<br />
Index producători cu lista de coduri ale<br />
aparatelor<br />
<strong>IAN</strong> <strong>86342</strong> <strong>IAN</strong> <strong>86342</strong>
A.R.SYSTEMS<br />
ACER<br />
ACME<br />
ACURA<br />
ADA<br />
ADC<br />
ADMIRAL<br />
ADYSON<br />
AGASHI<br />
AGAZI<br />
AGB<br />
AIKO<br />
AIM<br />
AIWA<br />
AKAI<br />
AKIBA<br />
AKURA<br />
ALARON<br />
ALBA<br />
ALBIRAL<br />
ALCYON<br />
ALHORI<br />
ALKOS<br />
ALLORGAN<br />
ALLSTAR<br />
ALTUS<br />
AMPLIVISION<br />
1223<br />
1585<br />
1211 1326<br />
1212 1219<br />
1315<br />
1210 1322 1323<br />
1209 1210 1214<br />
1215 1332 1416<br />
1315 1314 1360<br />
1313<br />
1211 1225 1226<br />
1232 1233 1316<br />
1232 1233<br />
1210 1315<br />
1238 1430<br />
1211 1212 1219<br />
1223 1225 1226<br />
1232 1233 1316<br />
1322 1317<br />
1223<br />
1193 1486 1519<br />
1523<br />
1212 1213 1216<br />
1218 1219 1223<br />
1226 1227 1231<br />
1232 1233 1238<br />
1572 1324 1394<br />
1322 1380 1317<br />
1319 1321 1364<br />
1374 1396 1474<br />
1497 1440 1448<br />
1381<br />
1213 1223 1227<br />
1228 1324<br />
1210 1213 1219<br />
1223 1227 1228<br />
1474 1384 1315<br />
1322 1324 1382<br />
1232<br />
1211 1212 1213<br />
1218 1219 1222<br />
1223 1225 1227<br />
1232 1237 1375<br />
1341 1340 1322<br />
1324 1316 1380<br />
1391 1474 1360<br />
1518 1519 1467<br />
1350<br />
1224<br />
1316<br />
1469<br />
1226 1233 1462<br />
1339<br />
1216 1223 1364<br />
1355<br />
1211 1226 1230<br />
1233 1237 1316<br />
- 1 -<br />
AMSTRAD<br />
ANAM<br />
ANGLO<br />
ANITECH<br />
ANSONIC<br />
AOC<br />
ARC EN CIEL<br />
ARCAM<br />
ARCAM DELTA<br />
ARCELIK<br />
ARDEM<br />
ARISTONA<br />
ART MITO<br />
ARTHUR MARTIN<br />
ASA<br />
ASBERG<br />
ASTRA<br />
ASUKA<br />
ATLANTIC<br />
ATORI<br />
AUCHAN<br />
AUDIO TON<br />
AUDIOSONIC<br />
AUDIOTON<br />
AUSIND<br />
AUTOVOX<br />
1210 1212 1213<br />
1219 1223 1227<br />
1238 1382 1381<br />
1343 1430 1326<br />
1324 1322 1380<br />
1384 1315 1416<br />
1212 1322 1378<br />
1417<br />
1212 1219 1322<br />
1210 1212 1219<br />
1223 1224 1322<br />
1315 1356 1417<br />
1212 1219 1221<br />
1223 1236 1237<br />
1322 1327<br />
1441<br />
1229 1433 1358<br />
1446<br />
1225 1226 1232<br />
1233 1316<br />
1211<br />
1466<br />
1347<br />
1216 1218 1221<br />
1223 1231 1474<br />
1364<br />
1543<br />
1463 1230<br />
1209 1215 1330<br />
1418 1329 1331<br />
1313 1334<br />
1216 1223 1224<br />
1364 1356<br />
1212 1322<br />
1210 1211 1213<br />
1225 1226 1227<br />
1228 1232 1233<br />
1324 1315 1316<br />
1211 1216 1218<br />
1223 1225 1232<br />
1474 1316 1364<br />
1462<br />
1212 1219 1322<br />
1230<br />
1211 1226 1233<br />
1237 1316<br />
1211 1212 1213<br />
1216 1218 1223<br />
1226 1227 1233<br />
1237 1462 1398<br />
1322 1316 1474<br />
1324 1364 1446<br />
1316<br />
1224 1356<br />
1209 1210 1211<br />
1224 1226 1233<br />
1315 1409 1462<br />
1313 1432 1356<br />
1316
AWA<br />
BAIRD<br />
BANG & OLUFSEN<br />
BARCO<br />
BASIC LINE<br />
BASTIDE<br />
BAUHN<br />
BAUR<br />
BAZIN<br />
BEKO<br />
BEON<br />
BEST<br />
BESTAR<br />
BIFONIC<br />
BIGSTON<br />
BINATONE<br />
BLACK DIAMONO<br />
BLACK PANTHER<br />
LINE<br />
BLACK STAR<br />
BLACKTRON<br />
BLACKWAY<br />
BLAUPUNKT<br />
BLOOM<br />
BLUE SKY<br />
BLUE STAR<br />
BONDSTEC<br />
BOOTS<br />
BPL<br />
BRANDT<br />
BRINKMANN<br />
BRIONVEGA<br />
BRITANNIA<br />
BROKSONIC<br />
BRUNS<br />
BSR<br />
1232 1233<br />
1226 1233 1419<br />
1446 1518<br />
1209 1313 1595<br />
1420<br />
1212 1213 1216<br />
1219 1223 1227<br />
1228 1233 1322<br />
1324 1364 1518<br />
1211 1226 1233<br />
1316<br />
1589<br />
1218 1220 1223<br />
1474 1426 1386<br />
1448 1439<br />
1226 1233 1316<br />
1065 1077 1223<br />
1237 1355 1391<br />
1347 1403 1554<br />
1320<br />
1216 1218 1223<br />
1474 1364<br />
1237 1421<br />
1216 1223 1237<br />
1364 1518<br />
1316<br />
1322<br />
1211 1226 1233<br />
1316<br />
1476<br />
1518<br />
1436<br />
1228<br />
1228<br />
1425 1499 1442<br />
1321 1335 1408<br />
1328<br />
1213 1223 1227<br />
1228 1586 1543<br />
1461 1324<br />
1228 1428<br />
1436<br />
1211 1226 1233<br />
1316<br />
1223 1228 1428<br />
1003 1006 1007<br />
1229 1434 1358<br />
1335 1349 1433<br />
1446 1359<br />
1223<br />
1209 1216 1218<br />
1223 1364 1474<br />
1313<br />
1211 1225 1226<br />
1232 1233 1316<br />
1527<br />
1209 1313 1320<br />
1217 1438 1339<br />
- 2 -<br />
BTC<br />
BUSH<br />
CAMPER<br />
CAPSONIC<br />
CARENA<br />
CARREFOUR<br />
CASCADE<br />
CATHAY<br />
CCE<br />
CEANN LATHA<br />
CENTRUM<br />
CENTURION<br />
CENTURY<br />
CGE<br />
CIMLINE<br />
CITY<br />
CLARIVOX<br />
CLATRONIC<br />
CMS<br />
CMS HIGHTEC<br />
COFADEL<br />
COMBITECH<br />
CONCORDE<br />
CONDOR<br />
CONRAC<br />
CONTEC<br />
CONTINENTAL-<br />
1213 1227 1324<br />
1034 1180 1184<br />
1193 1212 1213<br />
1214 1216 1217<br />
1218 1219 1222<br />
1223 1226 1227<br />
1228 1233 1472<br />
1518 1519 1337<br />
1439 1428 1375<br />
1341 1340 1345<br />
1322 1324 1332<br />
1502 1352 1364<br />
1380 1474 1415<br />
1423 1438 1446<br />
1448<br />
1210 1315<br />
1223<br />
1222 1340<br />
1212 1219 1223<br />
1322<br />
1216 1218 1223<br />
1364 1474<br />
1233<br />
1323 1322 1315<br />
1326<br />
1473 1502<br />
1216 1218 1223<br />
1364 1474<br />
1209 1313<br />
1217 1224 1237<br />
1436 1360 1438<br />
1356<br />
1212 1219 1227<br />
1322 1341<br />
1212 1219 1322<br />
1218 1474 1350<br />
1210 1211 1212<br />
1213 1216 1219<br />
1223 1224 1226<br />
1227 1233 1237<br />
1322 1324 1364<br />
1315 1391 1316<br />
1436 1343 1356<br />
1232<br />
1233<br />
1446 1433 1358<br />
1519<br />
1212 1219 1322<br />
1221 1216 1219<br />
1223 1225 1228<br />
1232 1237 1364<br />
1391 1316 1518<br />
1496<br />
1351 1568<br />
1211 1212 1219<br />
1222 1225 1232<br />
1316 1322 1340<br />
1343 1342<br />
1335 1419 1349
EDISON<br />
COSMEL<br />
CPRTEC<br />
CROSLEY<br />
CROWN<br />
CRYSTAL<br />
CS ELECTRO-<br />
NICS<br />
CTC<br />
CTC CLATRONIC<br />
CYBERCOM<br />
CYBERMAXX<br />
CYBERTRON<br />
CYMATIC<br />
CYTRON<br />
1358 1433 1446<br />
1362 1229 1359<br />
1212 1219 1322<br />
1461<br />
1436 1438 1313<br />
1356 1209 1217<br />
1224<br />
1322 1474 1391<br />
1360 1364 1518<br />
1429 1356 1212<br />
1216 1218 1219<br />
1223 1224 1237<br />
1474<br />
1211 1213 1225<br />
1227 1232 1324<br />
1436 1316<br />
1436<br />
1327<br />
1481 1351 1476<br />
1315 1322 1503<br />
1502 1504 1505<br />
1507 1474 1355<br />
1357 1434 1360<br />
1374 1376 1379<br />
1380 1411 1415<br />
1423 1459 1473<br />
1487 1516 1506<br />
1525 1528 1529<br />
1519 1523<br />
1481 1351 1476<br />
1315 1322 1503<br />
1497 1502 1504<br />
1505 1507 1508<br />
1474 1328 1355<br />
1357 1360 1361<br />
1362 1374 1376<br />
1379 1380 1395<br />
1411 1415 1423<br />
1434 1459 1460<br />
1473 1475 1487<br />
1516 1517 1506<br />
1514 1534 1526<br />
1525 1528 1529<br />
1519 1523<br />
1213 1227 1324<br />
1316<br />
1481 1351 1476<br />
1315 1322 1503<br />
1497 1502 1504<br />
1505 1507 1508<br />
1474 1328 1355<br />
1357 1360 1361<br />
1362 1374 1376<br />
1379 1380 1395<br />
1411 1415 1423<br />
1434 1459 1460<br />
1473 1475 1487<br />
1516 1517 1506<br />
1514 1534 1526<br />
- 3 -<br />
DAEWOO<br />
DAINICHI<br />
DANSAI<br />
DANTAX<br />
DATSURA<br />
DAYTON<br />
DAWA<br />
DAYTRON<br />
DCE<br />
DE GRAAF<br />
DECCA<br />
DECCACOLOR<br />
DELL<br />
DESMET<br />
DIAMANT<br />
DIAMOND<br />
DIGITOR<br />
DIGITREX<br />
DISNEY<br />
DIXI<br />
DTS<br />
DUAL<br />
DUAL-TEC<br />
1525 1528 1529<br />
1519 1523<br />
1018 1035 1066<br />
1240 1182 1192<br />
1194 1211 1212<br />
1216 1219 1223<br />
1225 1226 1227<br />
1232 1233 1322<br />
1493 1316 1364<br />
1423 1518 1402<br />
1213 1225 1227<br />
1232 1324<br />
1210 1216 1218<br />
1223 1225 1232<br />
1233 1315 1474<br />
1364<br />
1218 1237 1476<br />
1466 1474 1396<br />
1347 1421<br />
1429<br />
1322<br />
1223<br />
1212 1219 1518<br />
1502 1355<br />
1214 1332 1319<br />
1346<br />
1211 1216 1218<br />
1223 1226 1233<br />
1238 1316 1474<br />
1317 1364 1430<br />
1343<br />
1328<br />
1338<br />
1216 1218 1223<br />
1364 1474<br />
1223<br />
1232<br />
1515 1516<br />
1591<br />
1454<br />
1212 1216 1218<br />
1219 1223 1233<br />
1322 1474 1364<br />
1212 1219 1322<br />
1211 1217 1223<br />
1226 1233 1525<br />
1528 1529 1519<br />
1523 1433 1432<br />
1481 1351 1476<br />
1315 1322 1503<br />
1504 1505 1474<br />
1355 1357 1434<br />
1360 1374 1376<br />
1379 1380 1316<br />
1411 1415 1423<br />
1438 1446 1459<br />
1465 1473 1507<br />
1516 1397<br />
1211 1212 1217
DUMONT<br />
DURABRAND<br />
DUX<br />
DYNATRON<br />
ELBE<br />
ELBE-SHARP<br />
ELCIT<br />
ELECTRO TECH<br />
ELEKTA<br />
ELEKTRA<br />
ELIN<br />
ELITE<br />
ELMAN<br />
ELTA<br />
EMERSON<br />
EMPEROR<br />
ERAE<br />
ERRES<br />
ESC<br />
ETRON<br />
EUROFEEL<br />
EUROLINE<br />
EUROMAN<br />
EUROMANN<br />
EUROPHON<br />
EXPERT<br />
EXQUISIT<br />
FAIRTEC<br />
FENNER<br />
FERGUSON<br />
1226 1322 1438<br />
1316<br />
1209 1211 1226<br />
1233 1316 1327<br />
1330 1331 1313<br />
1516 1535 1536<br />
1537 1538 1529<br />
1555<br />
1218 1474<br />
1216 1218 1223<br />
1364 1474<br />
1223 1227 1233<br />
1236 1237 1238<br />
1416 1462 1350<br />
1238<br />
1209 1238 1313<br />
1212 1322<br />
1428<br />
1228<br />
1211 1216 1218<br />
1219 1223 1225<br />
1232 1316 1474<br />
1329 1331 1364<br />
1213 1216 1223<br />
1227 1324 1364<br />
1217 1327 1438<br />
1212 1219 1232<br />
1322<br />
1209 1223 1237<br />
1448 1434 1313<br />
1228<br />
1532<br />
1216 1218 1221<br />
1223 1474 1364<br />
1233 1518<br />
1212 1322<br />
1210 1233 1315<br />
1218 1455 1474<br />
1396<br />
1228 1232 1233<br />
1237 1316<br />
1210 1211 1216<br />
1223 1225 1226<br />
1315 1364 1316<br />
1211 1216 1217<br />
1223 1226 1232<br />
1233 1238 1316<br />
1327 1364 1438<br />
1430<br />
1230 1462<br />
1223<br />
1586 1578 1501<br />
1461<br />
1212 1219 1322<br />
1423<br />
1031 1060 1218<br />
1348 1474 1349<br />
1363 1365 1419<br />
1468 1350 1426<br />
- 4 -<br />
FERGUSON<br />
FIDELITY<br />
FILSAI<br />
FINLANDIA<br />
FINLUX<br />
FIRST LINE<br />
FISHER<br />
FLINT<br />
FORMENTI<br />
FORMENTI-PHOENIX<br />
FORTRESS<br />
FRABA<br />
FRIAC<br />
FRONTECH<br />
FUJITSU<br />
FUJITSU GENERAL<br />
FUNAI<br />
GALAXI<br />
GALAXIS<br />
GALAXY<br />
GALERIA<br />
GBC<br />
GEANT CASINO<br />
GEC<br />
1543 1434 1471<br />
1211 1214 1223<br />
1225 1232 1316<br />
1332 1380 1384<br />
1404<br />
1233 1316<br />
1214 1332 1319<br />
1418 1435<br />
1209 1211 1216<br />
1217 1218 1223<br />
1224 1226 1233<br />
1238 1430 1356<br />
1374 1395 1376<br />
1316 1317 1329<br />
1472 1418 1438<br />
1462 1474 1364<br />
1330 1331 1327<br />
1355 1313<br />
1211 1212 1216<br />
1219 1223 1225<br />
1226 1232 1233<br />
1364 1375 1339<br />
1461 1316 1436<br />
1322<br />
1209 1211 1217<br />
1222 1226 1233<br />
1237 1438 1313<br />
1340 1342 1353<br />
1319 1316 1331<br />
1391<br />
1216 1223 1227<br />
1364 1421<br />
1209 1211 1217<br />
1218 1224 1225<br />
1232 1438 1440<br />
1313 1356 1432<br />
1314 1474 1316<br />
1232<br />
1209 1314 1313<br />
1223 1237<br />
1237<br />
1210 1212 1214<br />
1215 1219 1233<br />
1380 1426 1436<br />
1428 1334 1322<br />
1332 1315<br />
1226 1233 1424<br />
1317 1462<br />
1233<br />
1210 1315 1339<br />
1223<br />
1223 1237<br />
1360 1391<br />
1322<br />
1212 1217 1219<br />
1227 1322 1340<br />
1438<br />
1230<br />
1211 1215 1216
GELOSO<br />
GENERAL<br />
TECHNIC<br />
GENEXXA<br />
GERICOM<br />
G<strong>IAN</strong>T<br />
GITEM<br />
GOLDHAND<br />
GOLDLINE<br />
GOLDSTAR<br />
GOODMANS<br />
GORENJE<br />
GPM<br />
GRAETZ<br />
GRANADA<br />
GRANDIN<br />
GRONIC<br />
GRUNDIG<br />
1218 1223 1226<br />
1233 1238 1364<br />
1448 1430 1439<br />
1474 1316 1317<br />
1354<br />
1212 1214 1217<br />
1219 1332 1322<br />
1438<br />
1212 1219 1322<br />
1519<br />
1213 1215 1216<br />
1223 1227 1324<br />
1364 1334<br />
1554 1362 1551<br />
1552<br />
1233<br />
1419 1474<br />
1232<br />
1223<br />
1211 1212 1214<br />
1216 1217 1218<br />
1219 1223 1225<br />
1226 1232 1233<br />
1234 1237 1316<br />
1322 1332 1364<br />
1438 1474 1476<br />
1520 1325 1401<br />
1392 1436<br />
1203 1210 1212<br />
1216 1218 1219<br />
1222 1223 1226<br />
1231 1233 1234<br />
1238 1240 1518<br />
1522 1401 1474<br />
1341 1364 1380<br />
1423 1434 1476<br />
1322 1419 1315<br />
1317 1340<br />
1237 1391<br />
1213 1227 1324<br />
1215 1448 1449<br />
1334<br />
1211 1214 1216<br />
1218 1221 1222<br />
1223 1224 1226<br />
1230 1233 1238<br />
1434 1332 1316<br />
1319 1474 1340<br />
1344 1364 1367<br />
1317 1377 1440<br />
1445 1435 1353<br />
1356 1430<br />
1212 1213 1218<br />
1228 1322 1474<br />
1324 1518 1428<br />
1233 1316<br />
1010 1075 1200<br />
1223 1224 1231<br />
1237 1442 1321<br />
- 5 -<br />
H & B<br />
HAAZ<br />
HALIFAX<br />
HAMPTON<br />
HANSEATIC<br />
HANSOL<br />
HANTAREX<br />
HANTOR<br />
HARWOOD<br />
HB<br />
HCM<br />
HEMA<br />
HIFIVOX<br />
HIGASHI<br />
HILINE<br />
HINARI<br />
HISAWA<br />
HISENSE<br />
HITACHI<br />
1330 1443 1356<br />
1425 1399 1422<br />
1409<br />
1525 1516<br />
1516<br />
1210 1211 1225<br />
1226 1232 1233<br />
1315 1316<br />
1211 1225 1226<br />
1232 1233 1316<br />
1211 1212 1216<br />
1217 1218 1219<br />
1223 1226 1228<br />
1233 1236 1237<br />
1322 1316 1340<br />
1474 1364 1391<br />
1426 1438 1448<br />
1320 1339<br />
1548<br />
1212 1219 1223<br />
1238 1322 1430<br />
1223<br />
1219 1223 1476<br />
1532 1473 1403<br />
1328 1355 1540<br />
1549 1562<br />
1210 1211 1212<br />
1219 1223 1226<br />
1227 1228 1233<br />
1322 1384 1428<br />
1315 1316<br />
1219 1226 1233<br />
1446<br />
1232 1316<br />
1223<br />
1212 1213 1216<br />
1218 1219 1222<br />
1223 1227 1474<br />
1519 1356 1444<br />
1476 1322 1324<br />
1340 1364 1319<br />
1213 1227 1228<br />
1230 1324 1421<br />
1428<br />
1587 1586 1579<br />
1578 1577 1501<br />
1461<br />
1058 1061 1240<br />
1238 1211 1214<br />
1215 1217 1222<br />
1223 1226 1233<br />
1543 1340 1332<br />
1393 1441 1458<br />
1510 1447 1451<br />
1316 1426 1317<br />
1329 1336 1354<br />
1358 1360 1438<br />
1440 1445 1542<br />
1334 1359 1346
HORNYPHON<br />
HORNYPHONE<br />
HOSHAI<br />
HUANYU<br />
HYGASHI<br />
HYPER<br />
HYPSON<br />
HYUNDAI<br />
IBERIA<br />
IBERVISAO<br />
ICE<br />
ICES<br />
IIYAMA<br />
IMPERIAL<br />
INDESIT<br />
IND<strong>IAN</strong>A<br />
INGELEN<br />
INGERSOL<br />
INNO HIT<br />
INNOVATION<br />
INTERACTIVE<br />
INTERBUY<br />
INTERDISCOUNT<br />
INTERFUNK<br />
1430 1449 1446<br />
1448<br />
1216 1364<br />
1223<br />
1213 1227 1324<br />
1211 1225 1232<br />
1316 1423<br />
1211 1225 1226<br />
1232 1233 1316<br />
1211 1212 1217<br />
1219 1225 1226<br />
1232 1233 1316<br />
1322 1436 1438<br />
1210 1211 1216<br />
1218 1223 1226<br />
1228 1230 1233<br />
1364 1474 1428<br />
1315 1316<br />
1539<br />
1223<br />
1448<br />
1210 1211 1212<br />
1213 1216 1219<br />
1223 1225 1226<br />
1227 1232 1233<br />
1322 1315 1316<br />
1324 1364 1380<br />
1225 1227 1232<br />
1576<br />
1215 1216 1217<br />
1223 1224 1237<br />
1364 1391 1436<br />
1438 1334 1356<br />
1360<br />
1337 1409<br />
1216 1218 1223<br />
1364 1474<br />
1215 1334<br />
1212 1219 1322<br />
1211 1212 1213<br />
1216 1218 1219<br />
1223 1224 1226<br />
1227 1233 1234<br />
1238 1543 1322<br />
1324 1316 1317<br />
1364 1474 1518<br />
1401 1409 1430<br />
1210 1212 1315<br />
1322 1474 1374<br />
1379 1380 1411<br />
1415 1423 1459<br />
1476 1419 1473<br />
1481 1519 1523<br />
1237<br />
1212 1219 1322<br />
1436 1417<br />
1474<br />
1209 1215 1216<br />
1218 1221 1223<br />
- 6 -<br />
INTERNATIONAL<br />
INTERTRONIC<br />
INTERVISION<br />
IRRADIO<br />
ISKRA<br />
ISUKAI<br />
ITC<br />
ITS<br />
ITT<br />
ITT/NOKIA<br />
ITV<br />
JEC<br />
JET POINT<br />
JOHNSON<br />
JVC<br />
KAISUI<br />
KAISUI<br />
KAMOSONIC<br />
KAMP<br />
KAPSCH<br />
KARCHER<br />
KAWASHO<br />
KENDO<br />
KENNEDY<br />
KIC<br />
KING TV<br />
KINGSLEY<br />
1237 1474 1446<br />
1448 1313 1334<br />
1364 1436<br />
1232<br />
1526<br />
1210 1211 1223<br />
1226 1227 1228<br />
1233 1237 1315<br />
1316 1327 1417<br />
1212 1213 1216<br />
1218 1219 1223<br />
1224 1227 1234<br />
1364 1474 1380<br />
1322 1324<br />
1316<br />
1213 1223 1227<br />
1228 1324<br />
1211 1217 1226<br />
1233 1316 1438<br />
1213 1216 1223<br />
1225 1227 1228<br />
1232 1324 1364<br />
1380 1428<br />
1212 1215 1374<br />
1322 1450 1344<br />
1440 1448 1334<br />
1449 1439<br />
1440 1449 1334<br />
1212 1218 1223<br />
1474 1476 1322<br />
1396 1518<br />
1469<br />
1474<br />
1316<br />
1216 1222 1227<br />
1364 1366 1340<br />
1380<br />
1211 1212 1213<br />
1219 1223 1225<br />
1226 1227 1228<br />
1232 1233 1428<br />
1322 1324 1316<br />
1211 1316<br />
1211 1225 1232<br />
1316<br />
1215 1462 1334<br />
1211 1212 1218<br />
1223 1228 1237<br />
1474 1316 1322<br />
1329 1350<br />
1232<br />
1214 1223 1237<br />
1543 1332 1327<br />
1341 1416 1518<br />
1217 1438 1462<br />
1233<br />
1328<br />
1211 1225 1232<br />
1316
KLARMAX<br />
KNEISSEL<br />
KOLSTER<br />
KONKA<br />
KORPEL<br />
KORTING<br />
KOSMOS<br />
KOYODA<br />
KRONNE<br />
KTV<br />
KUBA<br />
KURO<br />
KYOTO<br />
LASAT<br />
LENCO<br />
LENOIR<br />
LESA<br />
LEYCO<br />
LG<br />
LIESENK<br />
LIESENKOTTER<br />
LIFE<br />
LIFETEC<br />
1316<br />
1223 1236 1237<br />
1479<br />
1216 1223 1364<br />
1213 1227 1360<br />
1380 1517 1324<br />
1216 1218 1223<br />
1364 1474<br />
1209 1237 1313<br />
1223<br />
1212 1322<br />
1316<br />
1211 1233 1316<br />
1401<br />
1429<br />
1232 1233 1350<br />
1237<br />
1212 1219 1322<br />
1518<br />
1211 1212 1219<br />
1316 1322<br />
1436<br />
1210 1216 1218<br />
1223 1474 1315<br />
1317 1364 1339<br />
1234 1237 1233<br />
1195 1211 1212<br />
1214 1216 1217<br />
1218 1219 1223<br />
1225 1226 1232<br />
1455 1332 1316<br />
1364 1396 1438<br />
1474 1476 1322<br />
1392 1427 1436<br />
1520 1401<br />
1218 1474<br />
1223<br />
1315 1322 1374<br />
1379 1380 1411<br />
1415 1419 1423<br />
1459 1473 1474<br />
1476 1481 1502<br />
1523 1210 1212<br />
1210 1212 1219<br />
1223 1227 1534<br />
1526 1525 1528<br />
1529 1519 1523<br />
1481 1351 1476<br />
1315 1322 1503<br />
1502 1504 1505<br />
1507 1508 1474<br />
1328 1355 1357<br />
1360 1361 1362<br />
1374 1376 1379<br />
1380 1395 1411<br />
1415 1423 1434<br />
1459 1460 1473<br />
1475 1487 1516<br />
1517 1506 1514<br />
- 7 -<br />
LISENKOTTER<br />
LLOYDS<br />
LOEWE<br />
LOEWE OPTA<br />
LOGIK<br />
LS ELECTRONIK<br />
LUMA<br />
LUMATRON<br />
LUX MAY<br />
LUXOR<br />
M ELECTRONIC<br />
M+P<br />
MAGNADYNE<br />
MAGNAFON<br />
MAGNUM<br />
MANDOR<br />
MANESTH<br />
MARANTZ<br />
MARELLI<br />
MARK<br />
MASUDA<br />
MATSUI<br />
1474<br />
1219<br />
1014 1055 1223<br />
1236 1237 1238<br />
1571 1405 1406<br />
1364 1474 1313<br />
1209 1216 1218<br />
1427 1343<br />
1355<br />
1214 1218 1219<br />
1223 1332 1474<br />
1448 1462<br />
1214 1216 1218<br />
1223 1226 1233<br />
1364 1384 1474<br />
1415 1448 1462<br />
1315 1476 1332<br />
1396 1518<br />
1216 1364<br />
1211 1214 1233<br />
1234 1448 1332<br />
1360 1316 1387<br />
1445 1401 1439<br />
1211 1212 1215<br />
1216 1218<br />
1440<br />
1209 1217 1218<br />
1238 1327 1436<br />
1438 1474 1313<br />
1430<br />
1211 1224 1225<br />
1232 1238 1316<br />
1327 1356 1430<br />
1315 1419 1322<br />
1474 1476 1374<br />
1379 1380 1411<br />
1415 1423 1459<br />
1473 1481 1497<br />
1523 1210 1212<br />
1210 1315<br />
1210 1211 1216<br />
1218 1223 1226<br />
1233 1315 1474<br />
1316 1341 1364<br />
1216 1218 1223<br />
1583 1364 1474<br />
1209 1313<br />
1216 1218 1219<br />
1223 1225 1226<br />
1232 1233 1364<br />
1474<br />
1233<br />
1238 1211 1212<br />
1214 1216 1218<br />
1219 1222 1223<br />
1226 1231 1233<br />
1478 1407 1399<br />
1340 1482 1341<br />
1453 1316 1317
MATSUSHITA<br />
MAXMEDIA<br />
MCMICHAEL<br />
MEDIATOR<br />
MEDION<br />
M-ELECTRONIC<br />
MELVOX<br />
MEMOREX<br />
MEMPHIS<br />
MERCURY<br />
METZ<br />
MICROMAXX<br />
1322 1332 1364<br />
1380 1409 1469<br />
1474 1519 1421<br />
1430 1375 1339<br />
1343 1326<br />
1378<br />
1423<br />
1354<br />
1216 1218 1221<br />
1223 1231 1364<br />
1474<br />
1543 1592 1591<br />
1589 1588 1581<br />
1569 1568 1531<br />
1530 1481 1351<br />
1476 1315 1322<br />
1503 1544 1497<br />
1502 1504 1505<br />
1507 1508 1474<br />
1328 1355 1357<br />
1360 1361 1362<br />
1374 1376 1379<br />
1380 1395 1411<br />
1415 1423 1434<br />
1454 1459 1460<br />
1473 1475 1487<br />
1516 1517 1506<br />
1514 1534 1526<br />
1525 1528 1529<br />
1519 1523 1210<br />
1212 1223<br />
1322 1329 1474<br />
1331 1316 1349<br />
1364 1380 1418<br />
1423 1446 1334<br />
1417 1219 1223<br />
1225 1226 1232<br />
1233<br />
1230<br />
1212 1219 1322<br />
1527<br />
1212 1219 1353<br />
1322 1317<br />
1219 1223<br />
1570 1502 1371<br />
1351 1498 1442<br />
1415 1456 1457<br />
1313 1385 1209<br />
1481 1351 1476<br />
1315 1322 1503<br />
1497 1502 1504<br />
1505 1507 1508<br />
1474 1328 1355<br />
1357 1360 1361<br />
1362 1374 1376<br />
1379 1380 1395<br />
1411 1415 1423<br />
1434 1459 1460<br />
1473 1475 1487<br />
- 8 -<br />
MICROSTAR<br />
MIKOMI<br />
MINERVA<br />
MINOKA<br />
MITSUBISHI<br />
MIVAR<br />
MOTION<br />
MT LOGIC<br />
MTC<br />
MULTI SYSTEM<br />
MULTITECH<br />
MURPHY<br />
NAD<br />
NAIKO<br />
NAONIS<br />
NATIONAL<br />
NEC<br />
NECKERMANN<br />
1516 1517 1506<br />
1514 1534 1526<br />
1525 1528 1529<br />
1519 1523 1210<br />
1212<br />
1481 1351 1476<br />
1315 1322 1503<br />
1497 1502 1504<br />
1505 1507 1508<br />
1474 1328 1355<br />
1357 1360 1361<br />
1362 1374 1376<br />
1379 1380 1395<br />
1411 1415 1423<br />
1434 1459 1460<br />
1473 1475 1487<br />
1516 1517 1506<br />
1514 1534 1526<br />
1525 1528 1529<br />
1519 1523 1210<br />
1212<br />
1543<br />
1224 1238 1544<br />
1409 1442<br />
1216 1223 1364<br />
1209 1216 1222<br />
1223 1343 1364<br />
1367 1370 1373<br />
1406 1409 1442<br />
1313 1340 1502<br />
1211 1224 1225<br />
1232 1233 1234<br />
1235 1236 1237<br />
1238 1239 1356<br />
1368 1391 1316<br />
1401 1430<br />
1224 1356<br />
1398<br />
1232 1237 1439<br />
1218 1474<br />
1211 1212 1214<br />
1217 1218 1219<br />
1223 1225 1226<br />
1232 1233 1237<br />
1316 1322 1327<br />
1332 1474 1340<br />
1358 1436 1438<br />
1356<br />
1211 1225 1232<br />
1316 1440 1331<br />
1448<br />
1407<br />
1214 1332 1416<br />
1377 1409<br />
1222 1233 1583<br />
1584 1487 1340<br />
1369<br />
1209 1211 1214<br />
1216 1218 1220
NEI<br />
NEOVIA<br />
NESCO<br />
NEUFUNK<br />
NEW TECH<br />
NEW WORLD<br />
NEWMAR<br />
NEXIUS<br />
NICAMAGIC<br />
NIKKAI<br />
NOBLIKO<br />
NOGAMATIC<br />
NOKIA<br />
NORDIC<br />
NORDMENDE<br />
NORDVISION<br />
NOVATRONIC<br />
OCEANIC<br />
OCTAL<br />
OKANO<br />
ONCEAS<br />
ONWA<br />
OPERA<br />
ORBIT<br />
ORION<br />
1223 1226 1231<br />
1233 1237 1313<br />
1316 1474 1321<br />
1332 1335 1364<br />
1391 1426 1439<br />
1216 1218 1223<br />
1364 1380 1474<br />
1421<br />
1548<br />
1436<br />
1219 1223 1231<br />
1212 1216 1219<br />
1223 1226 1231<br />
1233 1322 1364<br />
1213 1227 1324<br />
1316<br />
1328<br />
1211 1225 1232<br />
1316<br />
1210 1211 1213<br />
1216 1218 1219<br />
1222 1223 1225<br />
1226 1227 1232<br />
1233 1315 1316<br />
1469 1317 1324<br />
1364 1474<br />
1211 1224 1225<br />
1232 1316 1327<br />
1356<br />
1446 1433<br />
1374 1450 1376<br />
1448 1387 1440<br />
1344 1334 1439<br />
1449 1215<br />
1233<br />
1209 1215 1216<br />
1313 1334 1337<br />
1349 1358 1364<br />
1433 1446 1377<br />
1564 1565 1567<br />
1543 1419 1434<br />
1218 1474<br />
1223<br />
1215 1230 1448<br />
1540 1449 1334<br />
1556<br />
1316<br />
1223 1237 1391<br />
1211 1322 1316<br />
1227 1381<br />
1223<br />
1216 1223 1364<br />
1062 1203 1212<br />
1216 1218 1219<br />
1223 1238 1326<br />
1375 1385 1339<br />
1407 1453 1464<br />
1322 1509 1341<br />
1364 1459 1474<br />
- 9 -<br />
ORLINE<br />
ORMOND<br />
ORSOWE<br />
OSAKI<br />
OSIO<br />
OSO<br />
OSUME<br />
OTTO VER-<br />
SAND<br />
PACKARD BELL<br />
PAEL<br />
PALLADIUM<br />
PALSONIC<br />
PANAMA<br />
PANASONIC<br />
PANAVISION<br />
PATHE CINEMA<br />
PATHE MARCONI<br />
PAUSA<br />
PERDIO<br />
PERFEKT<br />
PHILCO<br />
1476 1527 1519<br />
1522 1430 1449<br />
1343<br />
1223 1227<br />
1502<br />
1238<br />
1210 1211 1213<br />
1223 1226 1227<br />
1233 1316 1317<br />
1384 1324 1315<br />
1234<br />
1213 1227 1324<br />
1222 1227 1317<br />
1342<br />
1211 1216 1217<br />
1218 1220 1222<br />
1223 1226 1231<br />
1233 1238 1439<br />
1316 1474 1321<br />
1314 1340 1364<br />
1386 1419 1426<br />
1438 1446 1448<br />
1428 1429<br />
1501 1500<br />
1211 1225 1232<br />
1316<br />
1211 1220 1223<br />
1226 1231 1233<br />
1237 1316 1391<br />
1325<br />
1233<br />
1210 1211 1212<br />
1219 1223 1225<br />
1226 1232 1233<br />
1315 1316 1322<br />
1004 1013 1020<br />
1024 1026 1044<br />
1050 1057 1073<br />
1185 1198 1215<br />
1223 1238 1377<br />
1495 1383 1488<br />
1409 1448 1334<br />
1456 1449 1431<br />
1378 1379 1457<br />
1223<br />
1211 1217 1225<br />
1230 1232 1236<br />
1237 1316 1391<br />
1438 1350<br />
1335 1358 1433<br />
1446 1350 1359<br />
1229<br />
1212 1219 1322<br />
1223 1232 1317<br />
1223 1356<br />
1209 1217 1223<br />
1224 1237 1360<br />
1436 1438 1313<br />
1356
PHILEX<br />
PHILHARMONIC<br />
PHILIPS<br />
PHOCUS<br />
PHOENIX<br />
PHONOLA<br />
PIONEER<br />
PLANTRON<br />
PLAYSONIC<br />
POPPY<br />
PORTLAND<br />
PRANDONI-<br />
PRINCE<br />
PRECISION<br />
PRIMA<br />
PRINZ<br />
PRO2<br />
1426<br />
1211 1226 1233<br />
1316<br />
1002 1005 1009<br />
1012 1016 1019<br />
1021 1022 1023<br />
1029 1033 1036<br />
1037 1038 1041<br />
1042 1045 1052<br />
1059 1069 1076<br />
1231 1221 1223<br />
1181 1186 1187<br />
1188 1189 1190<br />
1191 1196 1197<br />
1209 1211 1216<br />
1217 1218 1423<br />
1438 1448 1459<br />
1313 1356 1397<br />
1364 1391 1419<br />
1497 1396 1513<br />
1499 1333 1474<br />
1316 1354 1483<br />
1355 1403 1554<br />
1209 1216 1218<br />
1223 1225 1232<br />
1237 1364 1474<br />
1313<br />
1209 1216 1218<br />
1221 1223 1225<br />
1231 1232 1364<br />
1474 1313<br />
1215 1216 1218<br />
1223 1237 1452<br />
1349 1364 1446<br />
1474 1334 1323<br />
1583 1580<br />
1210 1216 1219<br />
1223 1315 1364<br />
1226 1233<br />
1212 1219 1322<br />
1518<br />
1214 1224 1238<br />
1332 1448 1430<br />
1211 1226 1233<br />
1316<br />
1212 1215 1219<br />
1322 1334<br />
1360<br />
1504 1505 1507<br />
1508 1474 1328<br />
1355 1357 1360<br />
1361 1362 1374<br />
1376 1379 1380<br />
1395 1411 1415<br />
1423 1434 1459<br />
1460 1473 1475<br />
1487 1516 1517<br />
1506 1514 1534<br />
1526 1525 1528<br />
- 10 -<br />
PROFEX<br />
PROFILO<br />
PROFI-TRONIC<br />
PROLINE<br />
PROSONIC<br />
PROTECH<br />
PROVIEW<br />
PROVISION<br />
PYE<br />
PYMI<br />
QUANDRA VISION<br />
QUASAR<br />
QUELLE<br />
QUESTA<br />
RADIALVA<br />
RADIOLA<br />
RADIOMARELLI<br />
RADIONETTE<br />
RADIOSHACK<br />
RADIOTONE<br />
RANK<br />
RBM<br />
RCA<br />
RECOR<br />
REDIFFUSION<br />
REDSTAR<br />
REFLEX<br />
1529 1519 1523<br />
1481 1351 1476<br />
1315 1322 1503<br />
1497 1502<br />
1212 1219 1322<br />
1448 1356<br />
1476<br />
1216 1223 1364<br />
1216 1221 1223<br />
1317 1364 1375<br />
1211 1218 1223<br />
1225 1232 1233<br />
1237 1355 1396<br />
1415 1497 1380<br />
1466 1474 1316<br />
1328 1518<br />
1210 1211 1212<br />
1216 1217 1218<br />
1233 1364 1436<br />
1438 1439 1421<br />
1315 1316 1322<br />
1474 1327<br />
1581 1531 1530<br />
1218 1223 1240<br />
1474 1476 1328<br />
1216 1218 1221<br />
1223 1231 1474<br />
1364 1380<br />
1212 1219 1322<br />
1230<br />
1436<br />
1210 1211 1216<br />
1217 1218 1220<br />
1222 1223 1226<br />
1233 1234 1330<br />
1474 1502 1315<br />
1316 1329 1335<br />
1364 1436 1438<br />
1442 1448 1343<br />
1331 1339<br />
1222 1331 1339<br />
1343 1340<br />
1223 1227<br />
1216 1218 1221<br />
1223 1231 1233<br />
1364 1474<br />
1209 1223 1238<br />
1436 1313 1430<br />
1329 1331<br />
1223<br />
1216 1219 1223<br />
1237 1364 1320<br />
1330 1340<br />
1330<br />
1344<br />
1223<br />
1448<br />
1223<br />
1223
RELISYS<br />
REVOX<br />
REX<br />
RFT<br />
RHAPSODY<br />
R-LINE<br />
ROADSTAR<br />
ROBOTRON<br />
ROWA<br />
ROWSONIC<br />
ROYAL LUX<br />
RTF<br />
SABA<br />
SACCS<br />
SAISHO<br />
SALORA<br />
SAMBERS<br />
SAMSUNG<br />
SANDRA<br />
SANDRA COLOR<br />
1543<br />
1216 1218 1223<br />
1237 1364 1474<br />
1210 1214 1215<br />
1332 1315 1416<br />
1462 1334<br />
1209 1236 1237<br />
1313 1320<br />
1232<br />
1216 1218 1223<br />
1364 1474<br />
1193 1210 1212<br />
1213 1219 1227<br />
1315 1322 1324<br />
1518<br />
1209 1313<br />
1232 1233<br />
1316<br />
1237<br />
1209 1313<br />
1006 1060 1068<br />
1172 1209 1215<br />
1238 1334 1449<br />
1359 1313 1430<br />
1434 1419 1433<br />
1349 1358 1446<br />
1448 1518<br />
1350<br />
1341 1315 1316<br />
1322 1519 1343<br />
1430 1326 1238<br />
1219 1226 1233<br />
1210 1211 1212<br />
1415 1416 1426<br />
1438 1445 1448<br />
1401 1429 1435<br />
1439 1334 1374<br />
1332 1344 1360<br />
1214 1215 1217<br />
1234 1238<br />
1573 1327 1474<br />
1356 1430 1224<br />
1238<br />
1232 1233 1412<br />
1322 1364 1477<br />
1391 1315 1465<br />
1316 1317 1524<br />
1398 1413 1343<br />
1401 1218 1219<br />
1223 1225 1226<br />
1231 1212 1216<br />
1039 1043 1056<br />
1063 1070 1237<br />
1234 1201 1210<br />
1211<br />
1211 1225 1226<br />
1232 1233 1316<br />
1322<br />
1316<br />
- 11 -<br />
SANDSTROM<br />
SANSUI<br />
SANYO<br />
SAVILLE<br />
SBR<br />
SCHAUB LORENZ<br />
SCHNEIDER<br />
SCHWAIGER<br />
SEG<br />
SEI<br />
SEI-SINUDYNE<br />
SEITECH<br />
SELECO<br />
SENCORA<br />
SENTRA<br />
SERINO<br />
SHARP<br />
SHORAI<br />
1578 1577<br />
1216 1223 1364<br />
1527<br />
1049 1211 1217<br />
1219 1222 1225<br />
1226 1232 1233<br />
1236 1237 1519<br />
1319 1344 1316<br />
1340 1329 1331<br />
1391 1434 1465<br />
1438 1353 1356<br />
1543 1317 1342<br />
1343<br />
1519<br />
1218 1221 1223<br />
1231 1354 1474<br />
1215 1560 1561<br />
1562 1563 1334<br />
1449 1558 1559<br />
1355 1540 1549<br />
1448 1499 1502<br />
1532 1473 1403<br />
1328<br />
1211 1213 1216<br />
1217 1218 1221<br />
1223 1226 1227<br />
1231 1233 1432<br />
1481 1316 1474<br />
1324 1364 1380<br />
1438 1446 1465<br />
1518 1521 1382<br />
1553<br />
1210 1211 1217<br />
1218 1219 1222<br />
1223 1225 1226<br />
1232 1233 1356<br />
1476 1315 1502<br />
1316 1474 1322<br />
1327 1340 1396<br />
1436 1438 1543<br />
1473<br />
1220 1223 1238<br />
1209 1215 1238<br />
1327 1326 1334<br />
1339 1385 1430<br />
1313<br />
1328<br />
1214 1215 1217<br />
1332 1340 1438<br />
1416 1462 1334<br />
1212 1219 1322<br />
1219 1227 1469<br />
1232<br />
1017 1028 1048<br />
1051 1072 1222<br />
1238 1318 1340<br />
1489 1490 1342<br />
1314 1372<br />
1339
SIAREM<br />
SICATEL<br />
SIEMENS<br />
SIERRA<br />
SIESTA<br />
SILVA<br />
SILVER<br />
SILVERCREST<br />
SINGER<br />
SINUDYNE<br />
SKANTIC<br />
SKYMASTER<br />
SKYWORTH<br />
SLAVA<br />
SLIDING<br />
SOLAVOX<br />
SONITRON<br />
SONOKO<br />
SONOLOR<br />
SONTEC<br />
SONY<br />
SOUND &<br />
1209 1217 1223<br />
1238 1327 1438<br />
1313 1430<br />
1350<br />
1321 1335 1497<br />
1442 1342<br />
1216 1221 1223<br />
1231 1364<br />
1237 1465<br />
1225 1232<br />
1222 1340<br />
1270 1271 1273<br />
1274 1275 1276<br />
1277 1278 1279<br />
1280 1281 1282<br />
1283 1295 1296<br />
1297 1298 1299<br />
1300 1301 1303<br />
1306 1308 1309<br />
1310 1290 1291<br />
1292 1293 1294<br />
1312<br />
1209 1217 1230<br />
1327 1438 1436<br />
1516 1313<br />
1209 1217 1218<br />
1220 1223 1238<br />
1341 1328 1313<br />
1385 1326 1339<br />
1327 1438 1474<br />
1215 1445 1334<br />
1329<br />
1516<br />
1316<br />
1328<br />
1215 1400 1334<br />
1226 1233 1237<br />
1319 1344<br />
1210 1211 1212<br />
1216 1218 1219<br />
1223 1226 1228<br />
1233 1364 1518<br />
1322 1315 1474<br />
1316<br />
1215 1220 1230<br />
1319 1334<br />
1216 1218 1223<br />
1237 1364 1474<br />
1465<br />
1000 1001 1008<br />
1011 1015 1025<br />
1030 1040 1054<br />
1071 1199 1202<br />
1212 1220 1222<br />
1414 1386 1340<br />
1434 1322 1317<br />
1484 1342 1343<br />
1470 1437 1485<br />
1213 1227 1324<br />
- 12 -<br />
VISION<br />
SOUNDWAVE<br />
STANDARD<br />
STAR LITE<br />
STARLIGHT<br />
STENWAY<br />
STERN<br />
STRATO<br />
STVI<br />
STYLANDIA<br />
SUNGOO<br />
SUNKAI<br />
SUNSTAR<br />
SUNWOOD<br />
SUPERLA<br />
SUPERTECH<br />
SUPRA<br />
SUSUMU<br />
SUTRON<br />
SYDNEY<br />
SYSLINE<br />
SYTONG<br />
TANDBERG<br />
TANDY<br />
TARGA<br />
TASHIKO<br />
TATUNG<br />
TCM<br />
1327<br />
1216 1218 1223<br />
1364 1474<br />
1211 1212 1213<br />
1216 1219 1223<br />
1226 1227 1233<br />
1324 1364 1518<br />
1316 1322<br />
1219 1223<br />
1218 1474<br />
1227 1228 1428<br />
1214 1215 1332<br />
1462 1334<br />
1219 1223<br />
1316<br />
1233<br />
1577 1544 1503<br />
1212 1227 1322<br />
1339 1375<br />
1219 1223<br />
1212 1216 1219<br />
1223 1322 1364<br />
1211 1225 1232<br />
1233 1238 1316<br />
1219 1223 1225<br />
1231 1232 1426<br />
1212 1219 1322<br />
1213 1324<br />
1212 1219 1322<br />
1211 1225 1226<br />
1232 1233 1316<br />
1218 1474<br />
1225 1232<br />
1462 1339<br />
1211 1213 1215<br />
1226 1227 1233<br />
1316 1317 1324<br />
1440 1334 1314<br />
1273 1274 1275<br />
1276 1277 1278<br />
1302 1304 1305<br />
1307 1284 1285<br />
1286 1287 1288<br />
1289 1487 1547<br />
1532 1533<br />
1211 1214 1222<br />
1225 1226 1232<br />
1233 1332 1340<br />
1354 1369 1435<br />
1316<br />
1193 1211 1216<br />
1218 1223 1226<br />
1233 1238 1316<br />
1317 1474 1430<br />
1364<br />
1204 1205 1206<br />
1207 1208 1210<br />
1212 1241 1242<br />
1243 1244 1245
TEAC<br />
TEC<br />
TECHNICS<br />
TECHNIKA<br />
TECHNISAT<br />
TECHNISSON<br />
TECHNO<br />
TEDELEX<br />
TELE SYSTEM<br />
TELEAVIA<br />
TELECOR<br />
TELEFUNKEN<br />
TELEGAZI<br />
TELEMEISTER<br />
TELEOPTA<br />
TELESONIC<br />
TELESTAR<br />
TELETECH<br />
TELETON<br />
TELEVIDEON<br />
TELEVISO<br />
1246 1247 1248<br />
1249 1250 1251<br />
1252 1253 1254<br />
1255 1256 1257<br />
1258 1259 1260<br />
1261 1262 1263<br />
1264 1265 1266<br />
1267 1268 1523<br />
1575 1481 1351<br />
1476 1315 1322<br />
1503 1544 1546<br />
1557 1502 1504<br />
1505 1507 1474<br />
1355 1357 1360<br />
1374 1376 1379<br />
1380 1411 1415<br />
1423 1434 1459<br />
1473 1487 1508<br />
1516 1506 1534<br />
1525 1528 1529<br />
1519<br />
1223 1233<br />
1211 1212 1217<br />
1219 1226 1233<br />
1316 1322 1436<br />
1438 1440<br />
1378<br />
1543 1590 1511<br />
1427<br />
1396 1407 1459<br />
1355<br />
1543<br />
1233<br />
1543<br />
1335 1349 1358<br />
1419 1433 1446<br />
1229<br />
1223 1226 1227<br />
1233<br />
1471 1419 1434<br />
1492 1335 1348<br />
1468 1409 1410<br />
1349 1363 1364<br />
1365 1388 1416<br />
1446 1433 1389<br />
1216 1223<br />
1223 1227<br />
1223<br />
1322<br />
1223<br />
1223<br />
1212 1218 1219<br />
1223 1474 1322<br />
1396 1436 1421<br />
1211 1222 1226<br />
1233 1316 1462<br />
1426 1439<br />
1225 1232<br />
1230<br />
- 13 -<br />
TENSAI<br />
TESMET<br />
TEVION<br />
TEXET<br />
THOMSON<br />
THORN<br />
TOKAI<br />
TOKYO<br />
TOMASHI<br />
TOSHIBA<br />
TOWADA<br />
TRAKTON<br />
TRANS CONTINENS<br />
TRANTEC<br />
TRIDENT<br />
TRISTAR<br />
1212 1213 1216<br />
1219 1223 1226<br />
1227 1233 1331<br />
1364 1339 1473<br />
1324<br />
1216 1364<br />
1210 1212 1514<br />
1534 1545 1526<br />
1525 1528 1529<br />
1519 1523 1554<br />
1481 1351 1476<br />
1315 1322 1503<br />
1544 1497 1502<br />
1504 1505 1507<br />
1508 1474 1328<br />
1355 1357 1360<br />
1361 1362 1374<br />
1376 1379 1380<br />
1395 1411 1415<br />
1423 1434 1459<br />
1460 1473 1475<br />
1487 1516 1517<br />
1506 1511<br />
1211 1219 1226<br />
1232 1233 1316<br />
1003 1006 1032<br />
1060 1067 1172<br />
1211 1216 1223<br />
1229 1518 1359<br />
1566 1471 1434<br />
1419 1316 1335<br />
1349 1358 1480<br />
1409 1410 1363<br />
1364 1365 1433<br />
1446 1468 1487<br />
1218 1223 1240<br />
1331 1473 1348<br />
1367 1419 1434<br />
1448 1469 1350<br />
1317 1474<br />
1216 1223 1226<br />
1233 1317 1364<br />
1211 1225 1232<br />
1316<br />
1228 1428<br />
1027 1046 1047<br />
1053 1064 1074<br />
1090 1233 1183<br />
1193 1203 1222<br />
1583 1425 1469<br />
1491 1340 1330<br />
1527 1390 1596<br />
1215 1217 1233<br />
1438 1334<br />
1233<br />
1223 1226 1233<br />
1232<br />
1226 1233 1238<br />
1227
TRIUMPH<br />
UHER<br />
ULTRAVOX<br />
UNIC LINE<br />
UNIC RADIO<br />
UNITED<br />
UNITED QUICK STAR<br />
UNIVERSUM<br />
UNIVOX<br />
UTAX<br />
VANGUARD<br />
VECO<br />
VESTEL<br />
VEXA<br />
VICTOR<br />
VIDEO SYSTEM<br />
VIDEOCON<br />
VIDEOLOGIC<br />
VIDEOLO-<br />
GIQUE<br />
VIDEON<br />
VIDEOSAT<br />
VIDEOSYSTEM<br />
VIDEOTECHNIC<br />
VIDEOTON<br />
VISIOLA<br />
VISION<br />
VISOREX<br />
VISTAR<br />
VIVAX<br />
1223 1231 1238<br />
1326 1430 1390<br />
1215 1216 1223<br />
1224 1237 1364<br />
1462 1334 1356<br />
1316 1327 1436<br />
1438 1440 1313<br />
1209 1211 1217<br />
1223 1225 1232<br />
1223<br />
1316<br />
1218 1396 1474<br />
1518<br />
1210 1216 1217<br />
1218 1220 1222<br />
1223 1224 1226<br />
1233 1234 1237<br />
1410 1315 1329<br />
1331 1364 1374<br />
1474 1391 1418<br />
1597 1436 1438<br />
1450<br />
1223 1350<br />
1316<br />
1426 1322 1316<br />
1322 1474<br />
1214 1215 1216<br />
1217 1218 1223<br />
1226 1233 1473<br />
1494 1502 1334<br />
1543 1592 1512<br />
1593 1332 1364<br />
1474 1476 1391<br />
1400 1411 1415<br />
1426 1436 1438<br />
1445<br />
1212 1218 1219<br />
1223 1474 1322<br />
1216 1340 1364<br />
1378<br />
1364<br />
1574<br />
1232 1316<br />
1211 1213 1225<br />
1226 1227 1232<br />
1233 1324 1316<br />
1519<br />
1436<br />
1216 1223<br />
1225 1226 1232<br />
1233<br />
1426<br />
1211 1225 1232<br />
1316<br />
1216 1223 1233<br />
1364<br />
1404<br />
1440<br />
1328 1355 1537<br />
- 14 -<br />
VORTEC<br />
VOXSON<br />
WALTHAM<br />
WATSON<br />
WATT RADIO<br />
WEGA<br />
WEGAVOX<br />
WELLTECH<br />
WELTBLICK<br />
WESTON<br />
WHARFEDALE<br />
WHITE WES-<br />
TINGHOUSE<br />
WINDSTAR<br />
WORLD OF VISION<br />
XRYPTON<br />
YAKUMO<br />
YALOS<br />
YAMISHI<br />
YINHE<br />
YOKAN<br />
YOKO<br />
YORX<br />
ZANUSSI<br />
ZEPTO<br />
DIGITAL TV<br />
PHILIPS<br />
SAMSUNG<br />
SONY<br />
HT PROJECTOR<br />
MITSUBISHI<br />
PANASONIC<br />
PHILIPS<br />
SANYO<br />
SHARP<br />
SONY<br />
TOSHIBA<br />
1216 1218 1223<br />
1364 1474<br />
1209 1214 1215<br />
1216 1223 1224<br />
1332 1364 1416<br />
1334 1356 1313<br />
1211 1223 1226<br />
1233 1316 1440<br />
1445 1350<br />
1216 1218 1223<br />
1227 1364 1474<br />
1211 1217 1225<br />
1232 1316 1327<br />
1438 1350<br />
1209 1222 1223<br />
1313 1340<br />
1219 1328 1322<br />
1355<br />
1216 1218 1223<br />
1233 1364 1474<br />
1217 1438<br />
1407<br />
1211 1218 1223<br />
1225 1232 1474<br />
1316 1327 1356<br />
1228<br />
1550<br />
1223<br />
1541<br />
1313<br />
1223 1226 1227<br />
1228 1233<br />
1594<br />
1223<br />
1210 1211 1212<br />
1213 1216 1218<br />
1219 1223 1226<br />
1227 1232 1233<br />
1237 1322 1324<br />
1364 1474 1315<br />
1316<br />
1213 1227 1324<br />
1214 1226 1233<br />
1332 1462 1416<br />
1543<br />
1173 1176 1178<br />
1177<br />
1174 1175 1179<br />
1170<br />
1161<br />
1167<br />
1160<br />
1162<br />
1158 1159<br />
1169
LCD PROJEC-<br />
TION TV<br />
SHARP<br />
SONY<br />
TOSHIBA<br />
LCD TV<br />
BUSH<br />
DAEWOO<br />
DENVER<br />
GOODMANS<br />
HITACHI<br />
JVC<br />
LG<br />
MATSUI<br />
PANASONIC<br />
PHILIPS<br />
SAMSUNG<br />
SHARP<br />
SILVERCREST<br />
SONY<br />
TOSHIBA<br />
VIEWSONIC<br />
LCD TV/<br />
RADIO TUNER<br />
COMBO<br />
PHILIPS<br />
PLASMA DISPLAY<br />
HITACHI<br />
PANASONIC<br />
PHILIPS<br />
PIONEER<br />
SAMSUNG<br />
1131<br />
1108<br />
1130<br />
1101<br />
1106<br />
1096<br />
1123<br />
1089<br />
1132<br />
1081 1084 1094<br />
1095 1098 1105<br />
1110 1111 1114<br />
1118 1126 1136<br />
1168<br />
1133<br />
1091 1102 1112<br />
1078 1079<br />
1080 1082 1083<br />
1087 1093 1097<br />
1104 1113 1116<br />
1121<br />
1092 1103 1109<br />
1115 1119 1120<br />
1122 1127 1128<br />
1312<br />
1085 1086 1088<br />
1107 1117<br />
1099 1100 1124<br />
1125 1129<br />
1078<br />
1139 1144<br />
1137 1147<br />
1134 1152<br />
1141 1146 1149<br />
1151<br />
1150<br />
PHILIPS<br />
THOMSON<br />
PROJECTION TV<br />
HITACHI<br />
LG<br />
PIONEER<br />
SAMSUNG<br />
TELEFUNKEN<br />
TV/TUNER<br />
PHILIPS<br />
BLU-RAY / HD-DVD<br />
DENON<br />
INSIGNIA<br />
INTEGRA<br />
LG<br />
MAGNAVOX<br />
MARANTZ<br />
NAD<br />
OLEVIA<br />
ONKYO<br />
OPPO<br />
PANASONIC<br />
PHILIPS<br />
PIONEER<br />
SAMSUNG<br />
SHARP<br />
SONY<br />
SYLVANIA<br />
VIORE<br />
VIZIO<br />
YAMAHA<br />
BLACK DIAMOND<br />
BOMAN<br />
BRIGMTON<br />
ERRES (PHILIPS)<br />
DIKOM<br />
MKC<br />
KAOSHO (SAMSUNG)<br />
1143 1156<br />
1145 1157<br />
1171<br />
1164 1168<br />
1163<br />
1166<br />
1165<br />
1079<br />
2238<br />
2231 2242 2250<br />
2236<br />
2232 2261<br />
2231<br />
2241 2243<br />
2249<br />
2240<br />
2236<br />
2246<br />
2234 2264 2265<br />
2252<br />
2235 2244<br />
2229 2245<br />
2230<br />
2237<br />
2233 2266 2251<br />
2253<br />
2231<br />
2247<br />
2248<br />
2239<br />
2254 2255<br />
2256<br />
2257 2258<br />
2259<br />
2260<br />
2262 2263<br />
2267<br />
PLASMA TV<br />
LG<br />
PHILIPS<br />
SAMSUNG<br />
TOSHIBA<br />
PLASMA TV<br />
MONITOR<br />
DAEWOO<br />
HITACHI<br />
JVC<br />
LG<br />
1136<br />
1142<br />
1135<br />
1153<br />
1138<br />
1154<br />
1155<br />
1140 1148<br />
ACCOUSTIC<br />
SOLUTIONS<br />
AEG<br />
AFREEY<br />
AIM<br />
AIRIS<br />
AIWA<br />
AKAI<br />
AKASHI<br />
2320 2287<br />
1526 2271<br />
2323<br />
2369<br />
2294<br />
2049 2175 2320<br />
2314 1527<br />
2139 2306 2271<br />
2319 2287 1526<br />
2468<br />
2283<br />
- 15 -
AKURA<br />
ALBA<br />
ALL-TEL<br />
AMES<br />
AMOI<br />
AMSTRAD<br />
AMW<br />
ANABA<br />
ANSONIC<br />
APEX<br />
ARENA<br />
ASPIRE<br />
A-TREND<br />
AUDIOSONIC<br />
AUDIOVOX<br />
AVIOUS<br />
AXION<br />
B & K<br />
BAIER<br />
BAUHN<br />
BAZE<br />
BEKO<br />
BEST BUY<br />
BLACK<br />
DIAMOND<br />
BLAUPUNKT<br />
BLUE NOVA IN-<br />
TERNATIONAL<br />
BLUE SKY<br />
BLU-RAY<br />
BOMAN<br />
BRANDT<br />
BRITANIA<br />
BROKSONIC<br />
BUSH<br />
CAMBRIDGE<br />
CAMBRIDGE AUDIO<br />
CELESTIAL<br />
CENTREX<br />
CENTRIOS<br />
CENTRON<br />
CENTRUM<br />
CGV<br />
CINETEC<br />
CINEVISION<br />
2153<br />
2015 2023 2050<br />
2321 2287 2318<br />
2294 2307 2288<br />
2271<br />
2320<br />
2397<br />
2414 2287<br />
2442 2443<br />
2411<br />
2293<br />
2373 2321 2294<br />
2364 2327 2366<br />
2469 2399<br />
2375<br />
2402<br />
2284<br />
2319 2451<br />
2392<br />
2369<br />
2392<br />
2427<br />
2286<br />
1589<br />
2369 2294<br />
1554<br />
2152<br />
2287<br />
2321<br />
2440<br />
2312 2310 2294<br />
2287<br />
2511 2487 2486<br />
2485 2491 2467<br />
2312<br />
1526 2288<br />
2013 2040 2146<br />
2310 2297 2299<br />
2510<br />
1527 2416<br />
2025 2050 2051<br />
2122 2124 2130<br />
2147 2151 2369<br />
2321 2319 2287<br />
2318 2293 1527<br />
2313<br />
2149<br />
2294<br />
2154 2294<br />
2383 2401 2404<br />
2405<br />
2383<br />
2283 2377 2287<br />
2378 2379<br />
2149<br />
2287<br />
2312<br />
- 16 -<br />
CLASSIC<br />
CLATRONIC<br />
CMI<br />
COBRA<br />
COBY<br />
CONIA<br />
CONTEL<br />
CRITERION<br />
CROWN<br />
C-TECH<br />
CURTIS<br />
CYBERCOM<br />
CYBERHOME<br />
CYBERLINK<br />
CYBERMAXX<br />
CYBERVISION<br />
CYTRON<br />
2144 2320<br />
2151 2369 1526<br />
2294<br />
2375<br />
2283<br />
2270 2369 2396<br />
2397 2294 2440<br />
2398<br />
2147 2397<br />
2502 1526<br />
2281<br />
2310 2319<br />
2150 2279<br />
2400 2398<br />
2293 2381 2383<br />
2268 2273 2277<br />
2278 2279 2280<br />
2282 2289 2295<br />
2308 2375 2312<br />
1525 1528 1529<br />
2276 2272 2281<br />
2343 2309 2310<br />
2003 2029 2032<br />
2046 2284 2365<br />
2434 2461<br />
2482<br />
2293 2381 2310<br />
2383 2268 2273<br />
2277 2278 2279<br />
2280 2282 2289<br />
2295 2308 2348<br />
2349 2350 2351<br />
2352 2353 2354<br />
2355 2356 2357<br />
2375 2347 2409<br />
2457 2458 2459<br />
2455 2454 2456<br />
2495 2496 2358<br />
1525 1528 1529<br />
2312 2359 2276<br />
2309 2272 2281<br />
2343 1526<br />
2506<br />
2293 2381 2310<br />
2383 2268 2273<br />
2277 2278 2279<br />
2280 2282 2289<br />
2295 2308 2317<br />
2348 2349 2350<br />
2351 2352 2353<br />
2354 2355 2356<br />
2357 2375 2347<br />
2409 2457 2458<br />
2459 2455 2454<br />
2456 2495 2496<br />
2358 1525 1528<br />
1529 2312 2359<br />
2276 2309 2272<br />
2281 2343 1526
DAEWOO<br />
DANSAI<br />
DAYTEK<br />
DAYTRON<br />
DCE<br />
DEC<br />
DENON<br />
DENVER<br />
DENZEL<br />
DESAY<br />
DIAMOND<br />
DIGIFRAME<br />
DIGIHOME<br />
DIGITOR<br />
DIGITREX<br />
DIGITRON<br />
DIGIX<br />
DIK<br />
DISNEY<br />
DIVIDO<br />
DIVX<br />
DK DIGITAL<br />
DMTECH<br />
DRAGON SYSTEMS<br />
DUAL<br />
DURABRAND<br />
DVD<br />
DVX<br />
E:MAX<br />
EASY HOME<br />
E-BENCH<br />
ECLIPSE<br />
ELTA<br />
ELTAX<br />
EMERSON<br />
ENCORE<br />
ENTURER<br />
ENZER<br />
ESA<br />
2030 2109 2115<br />
2127 2290 2291<br />
2414 2292 2284<br />
2317 2376 2420<br />
2070 2414 2288<br />
2005 2026 2376<br />
2283<br />
2376<br />
2293<br />
2151<br />
2061 2063 2068<br />
2301 2326<br />
2151 2153 2440<br />
2369 1526 2318<br />
2148 2329<br />
2408<br />
2149 2150 2310<br />
2279<br />
2381<br />
2287<br />
2413 2319<br />
1591 2294<br />
2323<br />
2515<br />
2293<br />
2277 2355<br />
2317<br />
2312 2383<br />
2042 2159 2293<br />
2288 2271<br />
2293<br />
2148 2287 2293<br />
2433 2320 2406<br />
2310 2268 2273<br />
2275 2278 2329<br />
2279 2280 2282<br />
2289 2295 2308<br />
2375 2288 2271<br />
1525 2276 2309<br />
2272 2281 2343<br />
2312 1528 1529<br />
2271 2312 2293<br />
1529 2471 2472<br />
2473 1555<br />
2380 1553<br />
2150<br />
2414<br />
2152<br />
2279<br />
2149<br />
2045 2302 2319<br />
1526 2271<br />
2157 2440<br />
2317 2466 2277<br />
2312 2446<br />
2323<br />
2271<br />
2148 2329<br />
2406<br />
- 17 -<br />
EUROLINE<br />
FARENHEIT<br />
FERGUSON<br />
FINLUX<br />
FINTEC<br />
FIRSTLINE<br />
FISHER<br />
FUNAI<br />
GE<br />
GERICOM<br />
GLOBAL SOLUTIONS<br />
GLOBAL SPHERE<br />
GOLDEN SPHERE<br />
GOLDSTAR<br />
GOODMANS<br />
GO-VIDEO<br />
GPX<br />
GRADIENTE<br />
GRAETZ<br />
GRAN PRIX<br />
GRANDIN<br />
GRUNKEL<br />
GRUNDIG<br />
GVG<br />
H & B<br />
HAAZ<br />
HANSEATIC<br />
HARMON/KARDON<br />
HB<br />
HCM<br />
HD-DVD<br />
HE<br />
HIMAX<br />
HITACHI<br />
HITEKER<br />
HOHER<br />
HOME ELECTRONICS<br />
HOMITA<br />
HOYO<br />
HYUNDAI<br />
ILO<br />
INITIAL<br />
INNOVATION<br />
1526<br />
2410<br />
2310 1527<br />
2149 2414 2411<br />
2312 2288 2369<br />
2287<br />
2310<br />
2315<br />
2277<br />
2321<br />
2054 1554<br />
2150<br />
2150<br />
2279<br />
2017 2312 2360<br />
2421<br />
2056 2151 2154<br />
2310 2319 2287<br />
2271 2288<br />
2320 2448 2450<br />
2276 2304 2420<br />
2288<br />
2363<br />
2509 2508 2310<br />
2148 2329<br />
2293<br />
2294<br />
2414<br />
2048 2143 2154<br />
2322 2307 2317<br />
2310 2315 2313<br />
2287 2271<br />
2414<br />
2287 1525 2151<br />
2149 2150 2279<br />
2280<br />
2312 2288 2271<br />
2332<br />
2479 1556<br />
1526<br />
2511 2488 2487<br />
2486 2485 2467<br />
2312<br />
2320<br />
2152<br />
2012 2058 2145<br />
2148 2152 2168<br />
2181 2304 2305<br />
2329 2324 2287<br />
2294<br />
2293<br />
2320<br />
2384 2385 2386<br />
2387 2388<br />
2329<br />
2288<br />
2409<br />
2321<br />
2140 2145
INTEGRA<br />
INTERTRONIC<br />
JATON<br />
JBL<br />
JDB<br />
JVC<br />
JWIN<br />
KARCHER<br />
KAWASHI<br />
KENDO<br />
KENNEX<br />
KENWOOD<br />
KIIRO<br />
KINGAVON<br />
KISS<br />
KLH<br />
KODA<br />
KONKA<br />
KOSS<br />
KXD<br />
LASONIC<br />
LAWSON<br />
LECSON<br />
LENCO<br />
LENOXX<br />
LG<br />
LIFE<br />
LIFETEC<br />
LIMIT<br />
LINN<br />
LITEON<br />
LODOS<br />
2311<br />
2347 1529 1526<br />
2329<br />
2332<br />
2320<br />
2020 2052 2118<br />
2119 2146 2160<br />
2298 2447 2341<br />
2337 2413 2342<br />
2460 2299<br />
2462 2469<br />
2288<br />
2271<br />
2293 2375 2287<br />
2414 2287<br />
2047 2067 2171<br />
2330 2301<br />
2414<br />
2151<br />
2148 2329<br />
2321<br />
2151<br />
2361 2362<br />
2295 2310<br />
2152<br />
2279<br />
2150 2279 2317<br />
2313<br />
2151 2504 2369<br />
2310 2287 2293<br />
2382 2283 2319<br />
2017 2024 2031<br />
2126 2169 2514<br />
2513 2512 2495<br />
2312 2360 2421<br />
2140 2353 2310<br />
2495 2496 2309<br />
2140 2145 2189<br />
2293 2381 2310<br />
2383 2268 2273<br />
2277 2278 2279<br />
2280 2282 2289<br />
2295 2308 2348<br />
2349 2350 2351<br />
2352 2353 2354<br />
2355 2356 2357<br />
2375 2347 2409<br />
2457 2458 2459<br />
2455 2454 2456<br />
2495 2496 2358<br />
1525 1528 1529<br />
2312 2359 2276<br />
2309 2272 2281<br />
2343 1526<br />
2150 2279<br />
2274<br />
2431 2445 2448<br />
2409<br />
2287<br />
- 18 -<br />
LOEWE<br />
LOGICLAB<br />
LOGIX<br />
LUMATRON<br />
LUXMAN<br />
LUXOR<br />
MAGNAVOX<br />
MAGNEX<br />
MAGNUM<br />
MANHATTAN<br />
MARANTZ<br />
MARK<br />
MARQUANT<br />
MASTEC<br />
MATSUI<br />
MAXDORF<br />
MAXIM<br />
MBO<br />
MEDIENCOM<br />
MEDION<br />
MEMOREX<br />
MERID<strong>IAN</strong><br />
METZ<br />
MICO<br />
MICROMAXX<br />
2055 2307 2312<br />
2150<br />
2288 2317<br />
2270 2280 2440<br />
2287 2320 2317<br />
2304<br />
2154 2287 2320<br />
2146 2151 2155<br />
2299 2316 2428<br />
2429 2430 2307<br />
2287 2367<br />
2369<br />
2145<br />
2287 2317<br />
2060 2064 2065<br />
2142 2465 2307<br />
2316 2430 2312<br />
2299<br />
2287<br />
2414<br />
2273<br />
2040 2071 2310<br />
2294 2287<br />
1526<br />
2269 2287<br />
2333 2320 2319<br />
2280<br />
2140 2145 2189<br />
1592 1591 1589<br />
2514 2513 1530<br />
2369 2293 2381<br />
2310 2383 2268<br />
2273 2277 2278<br />
2279 2280 2282<br />
2289 2295 2308<br />
2288 2348 2349<br />
2350 2351 2352<br />
2353 2354 2355<br />
2356 2357 2375<br />
2347 2409 2457<br />
2458 2459 2455<br />
2454 2456 2493<br />
2494 2495 2496<br />
2358 1525 1528<br />
1529 2312 2359<br />
2276 2309 2272<br />
2281 2343 1526<br />
2293 2277 1527<br />
2299<br />
2305 2287 2374<br />
2138<br />
2149<br />
2140 2145 2293<br />
2347 2381 2310<br />
2383 2268 2273<br />
2277 2278 2279<br />
2280 2282 2289<br />
2295 2308 2348<br />
2349 2350 2351
MICROMEDIA<br />
MICROMEGA<br />
MICROSOFT<br />
MICROSTAR<br />
MINATO<br />
MINERVA<br />
MINTEK<br />
MIRROR<br />
MITSUBISHI<br />
MIZUDA<br />
MONYKA<br />
MT LOGIC<br />
MUSTEK<br />
MX ONDA<br />
MYSTRAL<br />
NAD<br />
NAIKO<br />
NAKAMICHI<br />
NAKIO<br />
NEC<br />
NEOTEK<br />
NEUFUNK<br />
NEVIR<br />
NEXXTECH<br />
NORCENT<br />
NORDMENDE<br />
NORIKO<br />
NORTEK<br />
NU-TEC<br />
OCEANIC<br />
2352 2353 2354<br />
2355 2356 2357<br />
2375 2409 2457<br />
2458 2459 2455<br />
2454 2456 2495<br />
2496 2358 1525<br />
1528 1529 2312<br />
2359 2276 2309<br />
2272 2281 2343<br />
1526 1527<br />
2146<br />
2307<br />
2481 2336<br />
2140 2145 2293<br />
2381 2310 2383<br />
2268 2273 2277<br />
2278 2279 2280<br />
2282 2289 2295<br />
2308 2348 2349<br />
2350 2351 2352<br />
2353 2354 2355<br />
2356 2357 2375<br />
2347 2409 2457<br />
2458 2459 2455<br />
2454 2456 2495<br />
2496 2358 1525<br />
1528 1529 2312<br />
2359 2276 2309<br />
2272 2281 2343<br />
1526<br />
2286<br />
2317 2369<br />
2321<br />
2286<br />
2287 2303<br />
2151 2152 2414<br />
2148 2329<br />
2451<br />
2001 2144 2163<br />
2320<br />
2149 2310<br />
2293<br />
2312 2331<br />
2154<br />
2335<br />
2414<br />
2312<br />
2323<br />
2148 2329<br />
2293<br />
2502 2383 2404<br />
2405 2406<br />
2270 2431 2394<br />
2395 2398<br />
2293<br />
2286<br />
2409<br />
2147<br />
1556<br />
- 19 -<br />
OKANO<br />
OMNI<br />
ONIX<br />
ONKYO<br />
OPTIMUS<br />
ORAVA<br />
ORION<br />
ORITRON<br />
P&B<br />
PACIFIC<br />
PACKARD BELL<br />
PALSONIC<br />
PANASONIC<br />
PANDA<br />
PHILCO<br />
PHILIPS<br />
PHOCUS<br />
PHONOTREND<br />
PIONEER<br />
POLAROID<br />
PORTLAND<br />
PRISM<br />
PRINZ<br />
PRO2<br />
2286 2299<br />
2319<br />
2283<br />
2141 2146 2155<br />
2311 2424<br />
2305 2374<br />
2151<br />
2069 2122 1527<br />
2273<br />
2140 2310<br />
2151<br />
2150 2293 2287<br />
2271<br />
2389 2390 2482<br />
2441<br />
2397 2294<br />
2014 2016 2039<br />
2111 2117 2131<br />
2162 2166 2167<br />
2176 2485 2338<br />
2301 2340 2419<br />
2423<br />
2288<br />
2507<br />
2000 2006 2027<br />
2034 2037 2043<br />
2060 2108 2125<br />
2142 2146 2155<br />
2158 2307 2316<br />
2428 2429 2430<br />
2299 2466 2500<br />
2501 2418 2277<br />
2505<br />
2452 1554<br />
2369<br />
2007 2008 2011<br />
2035 2057 2138<br />
2172 2487 2486<br />
2305 2426 2374<br />
2417 2425 2470<br />
2407 2399<br />
2319<br />
2273<br />
2293<br />
2293 2381 2310<br />
2383 2268 2273<br />
2277 2278 2279<br />
2280 2282 2289<br />
2295 2308 2348<br />
2349 2350 2351<br />
2352 2353 2354<br />
2355 2356 2357<br />
2375 2347 2409<br />
2457 2458 2459<br />
2455 2454 2456<br />
2358 1525 1528<br />
1529 2312 2359<br />
2276 2309 2272<br />
2281 2343 1526
PROCASTER<br />
PROLINE<br />
PROSCAN<br />
PROSON<br />
PROSONIC<br />
PROVIEW<br />
PROVISION<br />
QUADRO<br />
QUARTEK<br />
RADIONETTE<br />
RAITE<br />
RCA<br />
REDSTAR<br />
RELISYS<br />
REOC<br />
REX<br />
ROADSTAR<br />
RONIN<br />
ROTEL<br />
ROWA<br />
RTL<br />
S&V<br />
SABA<br />
SABAKI<br />
SAIVOD<br />
SALORA<br />
SAMPO<br />
SAMSUNG<br />
SANSUI<br />
SANYO<br />
SCAN<br />
SCANMAGIC<br />
SCHAUB LORENZ<br />
SCHEIDER<br />
SCHNEIDER<br />
SCHWAIGER<br />
SCIENTIFIC LABS<br />
SCOTT<br />
SEG<br />
SHARP<br />
2358<br />
2154 2310 2294<br />
2271 2313 2334<br />
2336<br />
2287<br />
2270 2279 2286<br />
1530<br />
2151 2318 2440<br />
2415 2379<br />
2463<br />
2312<br />
2148 2329<br />
2336 2321<br />
2153 1526 2414<br />
2375 2348<br />
2150 2279<br />
2283<br />
2066 2151 2287<br />
2320 2319<br />
2334<br />
2298<br />
2147 2154 2321<br />
2374<br />
2375<br />
2369<br />
2013 2040 2310<br />
2368 2297<br />
2150<br />
2293<br />
2312<br />
2279 2323 2375<br />
2348 2440<br />
2012 2019 2112<br />
2114 2116 2165<br />
2499 2492 2491<br />
2490 2304 2439<br />
2276 2412 2372<br />
2149 2150 2279<br />
1527<br />
2036 2044 2123<br />
2161 2170 2287<br />
2271 2449 2315<br />
2317<br />
2001<br />
2479 1556 2414<br />
2369 1526<br />
2287 2289 2293<br />
2310 2288 1526<br />
2271 2317<br />
2140<br />
2286<br />
2150 2279<br />
2021 2310 2294<br />
2015 2033 2148<br />
2150 2287 2279<br />
2329<br />
2038 2113 2120<br />
2511 2308 2331<br />
2444 2287<br />
- 20 -<br />
SHERWOOD<br />
SHINCO<br />
SHINSONIC<br />
SIGMATEK<br />
SILVA<br />
SILVA SCHNEIDER<br />
SILVERCREST<br />
SINGER<br />
SKYMASTER<br />
SKYWORTH<br />
SM ELECTRONIC<br />
SMART<br />
SONY<br />
SOUNDMASTER<br />
SOUNDMAX<br />
SOUNDSTORM<br />
SOUNDWAVE<br />
STANDARD<br />
STANDARO<br />
STAR CLUSTER<br />
STARMEDIA<br />
STRONG<br />
SUNGALE<br />
SUPERVISION<br />
SVA<br />
SYLVANIA<br />
SYNN<br />
TANDBERG<br />
TANGENT<br />
TARGA<br />
TCM<br />
2328<br />
2321<br />
2321<br />
2152<br />
2153 1526<br />
2293<br />
2183 2184 2186<br />
2185 2195 2196<br />
2205 2218 2219<br />
2222 2223 2224<br />
2225 2226 2279<br />
2477 2474 2475<br />
2476 2227 2228<br />
2149 2150 2279<br />
2319<br />
2033 2144 2150<br />
2319 2320<br />
2153<br />
2150 2319 2320<br />
2279<br />
2287 2317<br />
2004 2009 2010<br />
2018 2022 2028<br />
2041 2110 2156<br />
2164 2173 2174<br />
2467 2300 2436<br />
2437 2438 2339<br />
2435<br />
2150 2279<br />
2150 2279<br />
2268<br />
2288<br />
2150 2310<br />
2310<br />
2150<br />
2151<br />
2287<br />
2403<br />
2150 2319 2320<br />
2286<br />
2277<br />
2150 2279<br />
2287<br />
2440<br />
2185 2186 2197<br />
2198 2199 2200<br />
2201 2202 2203<br />
2204 2206 2207<br />
2208 2209 2210<br />
2211 2212 2213<br />
2214 2215 2216<br />
2217 2220 2221<br />
2193 2194 2312<br />
2493 2409 2345<br />
2495 2421 2478<br />
2498 2360<br />
2132 2134 2135<br />
2136 2137 2140<br />
2145 2177 2178
TEAC<br />
TEC<br />
TECHNICA<br />
TECHNICS<br />
TECHNIKA<br />
TECHWOOD<br />
TECO<br />
TEDELEX<br />
TELEDEVICE<br />
TELEFUNKEN<br />
TELETECH<br />
TENSAI<br />
TERAPIN<br />
TEVION<br />
THETA DIGTAL<br />
THOMSON<br />
TINY<br />
TOKAI<br />
TOKIWA<br />
TOSHIBA<br />
2179 2180 2187<br />
2188 2189 2190<br />
2191 2192 2353<br />
2293 2381 2310<br />
2383 2268 2273<br />
2277 2278 2271<br />
2279 2280 2282<br />
2289 2295 2308<br />
2375 1557 1525<br />
1528 1529 2276<br />
2309 2272 2281<br />
2343<br />
2062 2138 2147<br />
2150 2369 2305<br />
2271 2279 2321<br />
2312<br />
2153<br />
1527<br />
2301 2336<br />
2414 2413 2369<br />
2293<br />
2331 2287 2307<br />
2375 2348<br />
2319<br />
2440<br />
1526 2271<br />
2287<br />
2414 2310 2319<br />
2393<br />
2140 2145 2150<br />
2189 2293 2381<br />
2310 2383 2268<br />
2273 2275 2277<br />
2278 2279 2280<br />
2282 2289 2295<br />
2308 2345 2346<br />
2348 2349 2350<br />
2351 2352 2353<br />
2354 2355 2356<br />
2357 2375 2415<br />
2347 2409 2453<br />
2456 2457 2458<br />
2459 2455 2454<br />
2495 2496 2344<br />
2358 1525 1528<br />
1529 2312 2359<br />
2276 2370 2371<br />
2309 2272 2281<br />
2343 1526 1554<br />
2305<br />
2013 2128 2297<br />
2296 2336 2464<br />
2440<br />
2148 2153 1526<br />
2329<br />
2317<br />
2002 2121 2129<br />
2146 2155 2422<br />
2488 2497 2299<br />
- 21 -<br />
TRANS-CONTINENTS<br />
TRANSONIC<br />
TREDEX<br />
TRUTECH<br />
TRUVISION<br />
UMAX<br />
UNITED<br />
UNIVERSUM<br />
VESTEL<br />
VIETA<br />
VOXSON<br />
WALKVISION<br />
WELKIN<br />
WELLTECH<br />
WESTAR<br />
WHARFEDALE<br />
WHARTFEDALE<br />
WILSON<br />
X-BOX<br />
XENIUS<br />
XLOGIC<br />
XMS<br />
YAKUMO<br />
YAMADA<br />
YAMAHA<br />
YAMAKAWA<br />
YUKAI<br />
ZENITH<br />
DVD Recorder<br />
JVC<br />
LG<br />
Panasonic<br />
Philips<br />
Samsung<br />
Sony<br />
TCM<br />
Toshiba<br />
Yukai<br />
SAT/DVD<br />
Humax<br />
DVD-DVR<br />
Panasonic<br />
Philips<br />
Pioneer<br />
2432 1527 2489<br />
2440 2369 2293<br />
2369 2294<br />
2391<br />
2461<br />
2152<br />
2319<br />
2369 1526 2271<br />
2285 2294<br />
2287 2312 2271<br />
1592 1593 2287<br />
2317<br />
2320 2293 2319<br />
2321<br />
2293<br />
2480 2483 2484<br />
2287<br />
2313 2286 2279<br />
2323<br />
2149 2150<br />
2293<br />
2336<br />
2310 2295<br />
2150 2279<br />
1526<br />
2154 2294 2469<br />
2358<br />
2053 2154 2182<br />
2503 2301 2325<br />
2428 2429 2307<br />
2148 2334 2329<br />
2319<br />
2001 2320<br />
2146 2155 2312<br />
2360<br />
2085 2086 2087<br />
2088<br />
2095<br />
2081 2090 2092<br />
2079 2080 2089<br />
2091 2093 2094<br />
2075 2099 2107<br />
2072 2073 2074<br />
2076 2077 2078<br />
2082 2083 2084<br />
2133<br />
2096 2097 2098<br />
2100<br />
2059<br />
2081 2090<br />
2101 2105<br />
2102 2103 2104
Samsung<br />
Toshiba<br />
DVD-R<br />
AMSTRAD<br />
APEX<br />
ARENA<br />
ASPIRE<br />
BLUE NOVA<br />
INTERNATIONAL<br />
BLU:SENS<br />
CENTRIOS<br />
CMI<br />
COBY<br />
CYBERCOM<br />
CYBERHOME<br />
CYBERMAXX<br />
CYTRON<br />
DENVER<br />
DUAL<br />
ELTAX<br />
EMERSON<br />
GO-VIDEO<br />
HITACHI<br />
HB<br />
ILO<br />
JVC<br />
KENDO<br />
LG<br />
LIFE<br />
LIFETEC<br />
LITEON<br />
LUMATRON<br />
MAGNAVOX<br />
MAGNEX<br />
MAGNUM<br />
MEDION<br />
MICROMAXX<br />
MICROSTAR<br />
MUSTEK<br />
NETWAY<br />
NORTEK<br />
OCEANIC<br />
PACKARD BELL<br />
PANASONIC<br />
PHILIPS<br />
2106<br />
2096<br />
2440<br />
2364<br />
2375<br />
2402<br />
2440<br />
2440<br />
2401<br />
2375<br />
2440<br />
2375<br />
2365<br />
2348 2358 2359<br />
2375 2409 2459<br />
2495<br />
2348 2358 2359<br />
2375 2409 2459<br />
2495<br />
2440<br />
2375<br />
2440<br />
2446<br />
2320 2448 2450<br />
2324<br />
1556<br />
2409<br />
2447 2460<br />
2375<br />
2360<br />
2495<br />
2348 2358 2359<br />
2375 2409 2459<br />
2495<br />
2445 2448 2409<br />
2440<br />
2428 2429<br />
2440<br />
2440<br />
2348 2358 2359<br />
2375 2409 2459<br />
2495<br />
2348 2358 2359<br />
2375 2409 2459<br />
2495<br />
2348 2358 2359<br />
2375 2409 2459<br />
2495<br />
2320<br />
2440<br />
2409<br />
1556<br />
2390 2441<br />
2340<br />
2428 2429 2466<br />
2501<br />
- 22 -<br />
PHOCUS<br />
PIONEER<br />
PRINSTON<br />
PRO2<br />
PROVISION<br />
RTL<br />
SAMPO<br />
SAMSUNG<br />
SANYO<br />
SCHAUB LORENZ<br />
SHARP<br />
SONY<br />
TANGENT<br />
TARGA<br />
TCM<br />
TECHNIKA<br />
TELEDEVICE<br />
TEVION<br />
THOMSON<br />
TINY<br />
TOSHIBA<br />
TRANS-CONTINENTS<br />
UINITED<br />
YAKUMO<br />
YAMADA<br />
YAMAHA<br />
YAMAKAWA<br />
ZENITH<br />
ADELSOUND<br />
ADYSON<br />
AIWA<br />
AKAI<br />
AKIBA<br />
AKURA<br />
ALBA<br />
ALLORGAN<br />
AMBASSADOR<br />
2452<br />
2426 2470<br />
2440<br />
2348 2358 2359<br />
2375 2409 2459<br />
2440<br />
2375<br />
2440<br />
2490 2439<br />
2449<br />
1556<br />
2444<br />
2436 2437 2438<br />
2440<br />
2493 2409 2435<br />
2495 2360 2498<br />
2375<br />
2440<br />
2440<br />
2344 2435 2348<br />
2358 2359 2375<br />
2409 2453 2459<br />
2495 2345<br />
2297 2296 2464<br />
2440<br />
2422 2432 2299<br />
2489<br />
2440<br />
2440<br />
2358<br />
2440<br />
2428 2429<br />
2440<br />
2360<br />
3041<br />
3046<br />
3040 3044 3045<br />
3082 3086 3087<br />
3088 3107 3110<br />
3130 3160 3108<br />
1519 1523<br />
3043 3045 3087<br />
3165 3189 3172<br />
3114 3113 3115<br />
3116 3160<br />
3046 3093 3145<br />
3045 3046 3087<br />
3093 3145 3121<br />
3160<br />
3040 3043 3046<br />
3047 3088 3089<br />
3090 3093 1518<br />
1519 3122 3123<br />
3145 3110 3125<br />
3176<br />
3043 3090 3125
AMSTRAD<br />
ANITECH<br />
ANSONIC<br />
APEX<br />
ASA<br />
ASUKA<br />
AUDIOSONIC<br />
AUDIOTON<br />
BAIRD<br />
BASIC LINE<br />
BAUR<br />
BESTAR<br />
BLACK PANTHER LINE<br />
BLAUPUNKT<br />
BLUE SKY<br />
BONDSTEC<br />
BRANDT<br />
BROKSONIC<br />
BUSH<br />
CASIO<br />
CATHAY<br />
CATRON<br />
CGE<br />
CIMLINE<br />
CINEVISION<br />
CLATRONIC<br />
COMBITECH<br />
CONDOR<br />
CROWN<br />
CYBERCOM<br />
3040 3046 3047<br />
3086 3127 3108<br />
3128<br />
3046 3093 3145<br />
3041<br />
2399<br />
3044 3091 3092<br />
3131 3130<br />
3040 3044 3046<br />
3086 3091 3092<br />
3093 3145 3131<br />
3108 3130<br />
3047<br />
3043<br />
3040 3045 3047<br />
3086 3087 3089<br />
3133 3108 3132<br />
1518 3114 3160<br />
3043 3046 3047<br />
3088 3089 3090<br />
3093 3145 3110<br />
3125 1518<br />
3092 3136 3131<br />
3043 3045 3047<br />
3089 3090 3125<br />
1518<br />
3047 3089 1518<br />
3029 3042 3092<br />
3136 3131 3135<br />
3134 3174 3185<br />
3141<br />
3044 1519<br />
3043 3046 3090<br />
3125<br />
3045 3168 3170<br />
3146 2416<br />
3040 3046 3047<br />
3064 3074 3082<br />
3088 3089 3093<br />
3145 3110 1518<br />
1519 3122 3123<br />
3156<br />
3040<br />
3047<br />
3043 3090 3125<br />
3040 3045 3086<br />
3087 3108 3160<br />
3046 3088 3093<br />
3145 3110<br />
3130<br />
3043 3046 3090<br />
3125<br />
1519<br />
3043 3047 3089<br />
3090 3125 1518<br />
3043 3046 3047<br />
3089 3090 3093<br />
3145 3125 1518<br />
3110 3176 3135<br />
- 23 -<br />
CYBERMAXX<br />
CYTRON<br />
DAEWOO<br />
DANSAI<br />
DANTAX<br />
DAYTRON<br />
DE GRAAF<br />
DECCA<br />
DENKO<br />
DIAMANT<br />
DUAL<br />
DUMONT<br />
ELBE<br />
ELCATECH<br />
ELSAY<br />
ELTA<br />
EMERSON<br />
ESC<br />
ETZUKO<br />
EUROPHON<br />
FIDELITY<br />
FINLANDIA<br />
FINLUX<br />
FIRST LINE<br />
3139 3180 3130<br />
1519 1523 2276<br />
2358 2359<br />
3110 3176 3135<br />
3139 3180 3130<br />
1519 1523 2276<br />
2358 2359<br />
3110 3176 3135<br />
3139 3180 3130<br />
1519 1523 2276<br />
2358 2359<br />
3028 3043 3047<br />
3050 3056 3073<br />
3075 3089 3090<br />
3144 3194 3180<br />
1518 2420 3125<br />
3046 3047 3093<br />
3145<br />
3088 3110<br />
3047 3089 1518<br />
3092 3137 3131<br />
3040 3045 3086<br />
3087 3092 3131<br />
3108 3160<br />
3046<br />
3044<br />
3040 3045 3047<br />
3087 3092 3110<br />
3130 3131 3176<br />
3135 3180 3160<br />
1519 1523 2276<br />
2358 2359<br />
3040 3086 3092<br />
3137 3131 3108<br />
3132<br />
3047<br />
3046<br />
3046<br />
3046 3047 3093<br />
3145<br />
3046 3108 3130<br />
3166 2277<br />
3043 3047 3089<br />
1518<br />
3046 3093 3145<br />
3043 3040 3045<br />
3087 3161 3133<br />
3141 3147 3160<br />
3150 3170<br />
3040 3046 3086<br />
3176 3108<br />
3040 3092 3137<br />
3131 3132<br />
3040 3086 3087<br />
3092 3137 3163<br />
3131 3108 3132<br />
3160 3114<br />
3088 3091 3093<br />
3044 3046 3137
FISHER<br />
FLINT<br />
FORMENTI/PHOENIX<br />
FRONTECH<br />
FROTECH<br />
FUJITSU<br />
FUNAI<br />
GALAXY<br />
GBC<br />
GEC<br />
GELOSO<br />
GENERAL<br />
GENERAL<br />
TECHNIC<br />
GOLDHAND<br />
GOLDSTAR<br />
GOODMANS<br />
GO-VIDEO<br />
GRAETZ<br />
GRANADA<br />
GRANDIN<br />
GRUNDIG<br />
HAAZ<br />
HANSEATIC<br />
HANTOR<br />
HARWOOD<br />
HCM<br />
HINARI<br />
HISAWA<br />
3145 3110 3194<br />
3163 3130<br />
3043 3132 3148<br />
3088 3110<br />
3092 3131<br />
3125<br />
3043 3090<br />
3040 3086 3108<br />
3040 3086 3108<br />
2277<br />
3040 3086 3108<br />
3043 3090 3093<br />
3145 3125<br />
3092 3131<br />
3093 3145<br />
3043 3090 3125<br />
3029 3088 3135<br />
3110 3176 1519<br />
3046 3093 3145<br />
3040 3044 3086<br />
3091 3108 3130<br />
1520<br />
3040 3043 3044<br />
3046 3047 3085<br />
3086 3089 3090<br />
3091 3093 3145<br />
3125 3133 3130<br />
3108 1518 1522<br />
3151<br />
2276 2304 2420<br />
3045 3087 3132<br />
3160<br />
3040 3042 3044<br />
3092 3131 3137<br />
3117 3132 3141<br />
3040 3043 3044<br />
3046 3047 3086<br />
3089 3090 3091<br />
3093 3145 3125<br />
3130 3108 1518<br />
3042 3081 3092<br />
3093 3143 3140<br />
3136 3112 3120<br />
3131 3134 3142<br />
3145 3154 3155<br />
3158 3179 3141<br />
3156<br />
3110<br />
3044 3047 3091<br />
3092 3131 3130<br />
3043<br />
3046<br />
3046 3093 3145<br />
3156<br />
3041 3045 3046<br />
3047 3088 3093<br />
3145 3110 1519<br />
3156 3166<br />
3088 3110<br />
- 24 -<br />
HITACHI<br />
HYPSON<br />
IMPEGO<br />
IMPERIAL<br />
INGERSOL<br />
INNO HIT<br />
INNOVATION<br />
INTERBUY<br />
INTERFUNK<br />
INTERVISION<br />
IRRADIO<br />
ITT<br />
ITV<br />
JVC<br />
KAISUI<br />
KARCHER<br />
KENDO<br />
KENWOOD<br />
KORPEL<br />
KYOTO<br />
LENCO<br />
LEYCO<br />
LG<br />
LIFE<br />
LIFETEC<br />
LOEWE<br />
3021 3040 3041<br />
3045 3065 3086<br />
3087 3092 3137<br />
3131 3132 3108<br />
3160 2324 3195<br />
3046 3047 3088<br />
3093 3110 3145<br />
3043 3090 3125<br />
3040 3086 3108<br />
3041<br />
3043 3046 3047<br />
3089 3090 3092<br />
3093 3125 3131<br />
3135 1519 1523<br />
3145 1518<br />
3029 3088 3094<br />
3110 3176 3135<br />
1519 1523<br />
3044 3046 3091<br />
3130<br />
3092 3131 3132<br />
3040 3044 3047<br />
3086 3108<br />
3044 3046 3091<br />
3093 3145 3130<br />
3045 3087 3114<br />
3160 3132 3159<br />
3043 3044 3047<br />
3089 3091 3130<br />
1518<br />
3009 3027 3045<br />
3061 3062 3087<br />
3161 3162 3160<br />
2337<br />
3046 3093 3145<br />
3092 3131<br />
3044 3046 3088<br />
3089 3090 3110<br />
3125 3194 3165<br />
1518 3113 3114<br />
3045 3087 3160<br />
3046 3093 3145<br />
3046<br />
3089 1518<br />
3046 3093 3145<br />
3013 3019 3040<br />
3044 3057 3060<br />
3076 3086 3091<br />
3108 3130 1520<br />
2360<br />
1523 3130<br />
3029 3088 3094<br />
3110 3176 3135<br />
3139 3180 3130<br />
1519 1523 2359<br />
2276 2358<br />
3029 3138 3185<br />
3135 3131 3130<br />
3141
LOEWE OPTA<br />
LOGIK<br />
LUMATRON<br />
LUXOR<br />
MAGNASONIC<br />
MAGNAVOX<br />
MAGNUM<br />
MANESTH<br />
MARANTZ<br />
MARK<br />
MATSUI<br />
MEDIATOR<br />
MEDION<br />
M-ELECTRONIC<br />
MEMOREX<br />
MEMPHIS<br />
METZ<br />
MICROMAXX<br />
MICROSTAR<br />
MIGROS<br />
MINERVA<br />
MITSUBISHI<br />
MULTITECH<br />
MURPHY<br />
NATIONAL<br />
NEC<br />
NECKERMANN<br />
3041 3042 3044<br />
3091 3092<br />
3041 3046 3093<br />
3145<br />
3047 3089 3144<br />
1518<br />
3046 3163 3132<br />
3114 3150<br />
3132<br />
2367 3153<br />
3094 1523<br />
3046 3093 3145<br />
3194<br />
3042 3092 3131<br />
3141 3150 3164<br />
3047<br />
3040 3041 3044<br />
3088 3091 3110<br />
3130 1519 3166<br />
3092 3131<br />
3110 3176 3135<br />
3139 3180 3130<br />
1519 1523 2325<br />
2358 2359 3094<br />
3029 3088 2325<br />
3040 3044 3108<br />
3086<br />
3040 3044 3086<br />
3091 3117 3130<br />
3108 3132 3148<br />
3046 3093 3145<br />
3029 3042 3135<br />
3136 3138 3143<br />
3185 3141<br />
3029 3088 3094<br />
3110 3176 3135<br />
3139 3180 3130<br />
1519 1523 2325<br />
2358 2359 2276<br />
3029 3088 3094<br />
3110 3176 3135<br />
3139 3180 3130<br />
1519 1523 2325<br />
2358 2359 2276<br />
3040 3086 3108<br />
3136 3141<br />
3086 3092 3163<br />
3131 3157 3161<br />
3108<br />
3040 3043 3046<br />
3086 3090 3092<br />
3093 3145 3125<br />
3131 3108<br />
3040 3086 3108<br />
3029 3135 3134<br />
3045 3087 3161<br />
3160 3164<br />
3042 3045 3087<br />
3092 3131 3160<br />
- 25 -<br />
NEI<br />
NESCO<br />
NIKKAI<br />
NOKIA<br />
NORDMENDE<br />
OCEANIC<br />
OKANO<br />
ORION<br />
ORSON<br />
OSAKI<br />
OTTO VERSAND<br />
PALLADIUM<br />
PANASONIC<br />
PATHE CINEMA<br />
PATHE MARCONI<br />
PENTAX<br />
PERDIO<br />
PHILCO<br />
PHILIPS<br />
PHONOLA<br />
PIONEER<br />
POLAROID<br />
PORTLAND<br />
3166<br />
3092 3131<br />
3040 3046 3093<br />
3145<br />
3043 3046 3047<br />
3090 3125 3167<br />
3045 3047 3087<br />
3117 3165 3172<br />
3132 3114 3159<br />
3160<br />
3045 3087 3161<br />
3160 3168 3170<br />
3040 3045 3086<br />
3087 3117 3108<br />
3160<br />
3046 3047 3088<br />
3110 3165<br />
3041 3064 3085<br />
3088 3111 3110<br />
3169 1519 1522<br />
3166 3122<br />
3040 3086 3108<br />
3040 3044 3046<br />
3086 3091 3093<br />
3145 3108 3130<br />
3092 3131<br />
3041 3042 3044<br />
3045 3046 3087<br />
3091 3093 3165<br />
3130 3141 3160<br />
3145<br />
3002 3007 3010<br />
3011 3016 3017<br />
3025 3029 3033<br />
3052 3059 3079<br />
3135 3138 3134<br />
3178 3182 3185<br />
2360 2419<br />
3041 3166<br />
3045 3087 3160<br />
3137<br />
3040 3086 3108<br />
3046 3164<br />
3006 3008 3014<br />
3022 3024 3026<br />
3030 3034 3035<br />
3042 3049 3067<br />
3068 3069 3070<br />
3071 3072 3077<br />
3078 3092 3112<br />
3131 3158 3179<br />
3187 3154 3153<br />
3119 3141 3160<br />
2418<br />
3092 3131<br />
3092 3161 3131<br />
2470<br />
2399<br />
3043 3047 3089
PRINZ<br />
PRO2<br />
PROFEX<br />
PROLINE<br />
PROSONIC<br />
PYE<br />
QUARTZ<br />
QUELLE<br />
RADIALVA<br />
RADIOLA<br />
REX<br />
RFT<br />
ROADSTAR<br />
ROYAL<br />
SABA<br />
SAISHO<br />
SALORA<br />
SAMSUNG<br />
SAMURAI<br />
SANSUI<br />
SANWA<br />
SANYO<br />
SAVILLE<br />
SBR<br />
SCHAUB LO-<br />
RENZ<br />
SCHNEIDER<br />
SCHNEIEDER<br />
SEG<br />
3090 3125 1518<br />
3040 3086 3108<br />
3110 3176 3135<br />
3139 3180 3130<br />
1519 1523 2276<br />
2358 2359<br />
3093 3145<br />
3040 3086 3108<br />
3156<br />
3110 1518 3040<br />
3047 3088<br />
3006 3092 3131<br />
3132<br />
3042 3086 3092<br />
3131 3136 3132<br />
3108 3141 3166<br />
3044 3046<br />
3092 3131<br />
3045 3087 3160<br />
3043 3046 3090<br />
3092 3125 3131<br />
3044 3046 3047<br />
3082 3089 3091<br />
3093 3145 3130<br />
1518<br />
3046<br />
3045 3087 3184<br />
1518 3150 3160<br />
3168 3170<br />
3041 3088 3093<br />
3145 3110 1519<br />
3166<br />
3163 3132 3114<br />
3159<br />
3000 3032 3048<br />
3053 3055 3058<br />
3083 3094 3176<br />
3108 2276 2412<br />
1524<br />
3045 3046 3090<br />
3125<br />
3087 3161 3121<br />
3160 1527<br />
3041<br />
3066 3152 3132<br />
3148<br />
3047 1519<br />
3092 3131<br />
3040 3045 3086<br />
3087 3132 3114<br />
3108 3160<br />
3145 3110 3194<br />
3125 3131 3130<br />
3108 1521 1518<br />
3040 3044 3046<br />
3047 3086 3088<br />
3089 3090 3091<br />
3092 3093<br />
3046 3047 3093<br />
- 26 -<br />
SEI-SINUDYNE<br />
SELECO<br />
SENTRA<br />
SENTRON<br />
SHARP<br />
SHINTOM<br />
SHIVAKI<br />
SHORAI<br />
SIEMENS<br />
SILVA<br />
SILVER<br />
SILVERCOREST<br />
SILVERCREST<br />
SINUDYNE<br />
SOLAVOX<br />
SOLOVOX<br />
SONNECLAIR<br />
SONOKO<br />
SONOLOR<br />
SONTEC<br />
SONY<br />
SOUNDWAVE<br />
STANDARD<br />
STARLITE<br />
STERN<br />
STRONG<br />
SUNKAI<br />
SUNSTAR<br />
SUNTRONIC<br />
SUNWOOD<br />
SUPRA<br />
SYLVANIA<br />
SYMPHONIC<br />
TAISHO<br />
TANDBERG<br />
TARGA<br />
TASHIKO<br />
TATUNG<br />
TCM<br />
3145 3180<br />
3041 3092 3131<br />
3043 3044 3045<br />
3087 3160<br />
3043 3046 3090<br />
3125<br />
3046 3093 3145<br />
3001 3020 3054<br />
3117 3118 3188<br />
3150<br />
3046 3093 3145<br />
3132<br />
3044 3091 3130<br />
3041<br />
3042 3044 3091<br />
3136 3130 3132<br />
3141<br />
3044 3091 3130<br />
3047<br />
3130<br />
3102 3103 3104<br />
3106 3130<br />
3041 3092 3131<br />
3090 3125<br />
3043<br />
3046<br />
3047 3089 1518<br />
3117<br />
3044 3091 3130<br />
3003 3004 3005<br />
3018 3031 3036<br />
3051 3080 3084<br />
3109 3173 3174<br />
3175 3177 3124<br />
3126 3129 3191<br />
3044<br />
3047 3089 1518<br />
3044<br />
3047<br />
3121<br />
3088 3110<br />
3040 3086 3108<br />
3040 3086 3108<br />
3046 3093 3145<br />
3044<br />
2277 3108<br />
3040 3046<br />
3041 3088 3110<br />
3047 3136<br />
3105 3104 3130<br />
2360 3192<br />
3040 3044 3086<br />
3117 3108<br />
3040 3045 3082<br />
3086 3087 3092<br />
3131 3108 3160<br />
3029 3037 3038<br />
3039 3088 3094<br />
3095 3096 3097
TEAC<br />
TEC<br />
TECHNICS<br />
TELEAVIA<br />
TELEFUNKEN<br />
TELETECH<br />
TENOSAL<br />
TENSAI<br />
TEVION<br />
THOMSON<br />
THORN<br />
TIVO<br />
TOKAI<br />
TONSAI<br />
TOSHIBA<br />
TOWADA<br />
TOWIKA<br />
TRIUMPH<br />
TVA<br />
UHER<br />
ULTRAVOX<br />
UNITED QUICK STAR<br />
UNIVERSUM<br />
VICTOR<br />
VIDEON<br />
WELTBLICK<br />
3098 3099 3100<br />
3101 3110 3130<br />
3176 3135 3139<br />
3180 3190 1519<br />
1523 2325 2358<br />
2359 2276<br />
3040 3045 3047<br />
3043 3046 3047<br />
3090 3125<br />
3029 3135 3134<br />
3045 3087 3160<br />
3045 3087 3171<br />
3161 3184 3162<br />
3183 3149 3160<br />
3168 3170<br />
3046 3047<br />
3046 3093 3145<br />
3040 3041 3044<br />
3046 3086 3091<br />
3093 3145 3108<br />
3130<br />
3029 3088 3094<br />
3110 3176 3135<br />
3139 3180 3130<br />
1519 1523 2276<br />
2358 2359<br />
3012 3045 3087<br />
3161 3184 3162<br />
3183 3186 1518<br />
3119 3160 3170<br />
3044 3045 3087<br />
3132 3160 3166<br />
3119<br />
3044 3045 3046<br />
3091 3093 3145<br />
3130<br />
3093 3145<br />
3015 3023 3045<br />
3063 3074 3085<br />
3087 3092 3181<br />
3131 3194 3163<br />
3180 2299 3160<br />
3046 3093 3145<br />
3046 3093 3145<br />
3166<br />
3043 3090 3125<br />
3044 3091 3130<br />
3047<br />
3047 3089 1518<br />
3040 3042 3044<br />
3086 3091 3092<br />
3158 3112 3136<br />
3131 3179 3130<br />
3108 3114 3116<br />
3127 3141<br />
3161 3162<br />
3029 3088 3110<br />
3135 3176 1519<br />
3091 3130<br />
- 27 -<br />
WETBLICK<br />
YAMISHI<br />
YOKAN<br />
YOKO<br />
ZENITH<br />
ABC<br />
ALCATEL<br />
ARCON<br />
AXIS<br />
CABLETIME<br />
CLYDE CABLEVISION<br />
COMCRYPT<br />
CRYPTOVISION<br />
FIDELITY<br />
FILMNET<br />
FILMNET CABLECRYPT<br />
FILMNET COMCRYPT<br />
FINLUX<br />
FOXTEL<br />
FRANCE TELECOM<br />
FREEBOX<br />
GEC<br />
GENERAL INTRUMENT<br />
GOODING<br />
GRUNDIG<br />
HIRSCHMANN<br />
ITT NOKIA<br />
JERROLD<br />
JVC<br />
MACAB<br />
MASPRO<br />
MATSUI<br />
MINERVA<br />
MNET<br />
M-NET<br />
MOVIE TIME<br />
MR ZAPP<br />
MULTICHOICE<br />
NOKIA<br />
NOOS<br />
PALLADIUM<br />
PHILIPS<br />
PIONEER<br />
PVP STEREO<br />
VISUAL MATRIX<br />
SAGEM<br />
SAT<br />
SCIENTIFIC ATLANTA<br />
STARCOM<br />
TELE 1<br />
TELEPIU<br />
3044<br />
3046 3093 3145<br />
3046 3093 3145<br />
3043 3044 3046<br />
3090 3091 3093<br />
3145 3125 3130<br />
3130<br />
4025<br />
4023 4024<br />
4000<br />
4000<br />
4001 4002 4019<br />
4021<br />
4003<br />
4026<br />
4004<br />
4000<br />
4026<br />
4005 4020<br />
4005<br />
4007<br />
4028<br />
4022 4027<br />
4029<br />
4003<br />
4018 4025<br />
4006<br />
4000 4006<br />
4007<br />
4007<br />
4008 4014 4016<br />
4018 4025<br />
4006<br />
4027<br />
4006<br />
4006<br />
4006<br />
4026<br />
4020<br />
4013<br />
4027<br />
4026<br />
4007<br />
4027<br />
4006<br />
4006 4015 4022<br />
4027<br />
4000 4009 4010<br />
4016<br />
4027<br />
4000<br />
4011 4012<br />
4025<br />
4005 4020 4026<br />
4020 4026
TORX<br />
UNITED CABLE<br />
UNIVERSUM<br />
VIDEOWAY<br />
VISIOPASS<br />
WITTENBERG<br />
AKURA<br />
ALBA<br />
AMSTRAD<br />
ARCOM<br />
ARION<br />
BSKYB<br />
BOCA<br />
BUSH<br />
CANAL SATELLITE<br />
CANAL+<br />
COMAG<br />
CONRAD<br />
CYBERCOM<br />
CYBERMAXX<br />
CYTRON<br />
DIGIFUSION<br />
DIG<strong>IAN</strong><br />
DIGIHOME<br />
DMSIS<br />
DMT<br />
DREAMBOX<br />
DUAL<br />
EASYONE<br />
ECHOSTAR<br />
EMTEC<br />
EUROSKY<br />
EVESHAM<br />
FORCE<br />
FORTEC STAR<br />
FOXTEL IQ<br />
FREEBOX<br />
GLOBO<br />
GOODMANS<br />
GRUNDIG<br />
HB<br />
HIRSCHMANN<br />
HITACHI<br />
HOMECAST<br />
HUMAX<br />
HYUNDAI<br />
ILO<br />
I-SET<br />
4025<br />
4016<br />
4006 4007<br />
4017<br />
4007 4022 4027<br />
4000<br />
HDD-DVR<br />
4068<br />
4068<br />
5353<br />
5457<br />
5504<br />
5353<br />
5497<br />
4067<br />
5397<br />
5397<br />
5497<br />
5466<br />
5240 5250 5323<br />
2358 5240 5250<br />
5323 5434 5438<br />
5446 2409 2459<br />
2495<br />
2358 5240 5250<br />
5323 5434 5438<br />
5446 2409 2459<br />
2495<br />
4047<br />
5301<br />
4068<br />
5301<br />
5240<br />
5443<br />
4068 5240 5250<br />
5323<br />
5540<br />
5444<br />
6137 6138<br />
5466<br />
4068<br />
5352<br />
5288<br />
5495<br />
4058<br />
5466<br />
4068 4067<br />
5537 4068<br />
5485<br />
5466<br />
4068<br />
5493<br />
5523 5513 4049<br />
5522<br />
5301<br />
2409<br />
5540<br />
- 28 -<br />
JVC<br />
KATHREIN<br />
KOSCOM<br />
LASAT<br />
LIFE<br />
LIFESAT<br />
LIFETEC<br />
LG<br />
LITEON<br />
LOGIK<br />
LOGISAT<br />
LORENTZEN<br />
LOEWE<br />
LUXOR<br />
MAPLIN<br />
MARMITEK OCTOPUS<br />
MARNED<br />
MEDION<br />
MICROELECTRONIC<br />
MICROMAXX<br />
MICROSTAR<br />
MORETV<br />
NEUF TELECOM<br />
NEUF TV<br />
NORTEK<br />
ONN<br />
PACE<br />
PACKARD BELL<br />
PANASONIC<br />
PHILIPS<br />
PHOCUS<br />
PINNACLE<br />
PIONEER<br />
PRO2<br />
PROCASTER<br />
RADIX<br />
SAGEM<br />
SAMSUNG<br />
SCHAUB LORENZ<br />
SCHWAIGER<br />
SETONE<br />
2460<br />
5491 5481<br />
5457<br />
5466 5467<br />
2495<br />
5240 5250 5323<br />
2358 5240 5250<br />
5323 5434 5438<br />
5446 2409 2459<br />
2495<br />
2514 2513 2495<br />
2409<br />
4069<br />
5497<br />
5466<br />
1571<br />
4068<br />
4068<br />
5440<br />
5485<br />
2514 2513 5520<br />
2358 5240 5250<br />
5323 5434 5438<br />
5446 2409 2459<br />
2459 5453 2493<br />
5478 2495<br />
5497<br />
2358 5240 5250<br />
5323 5434 5438<br />
5446 2409 2459<br />
5453 2495<br />
2358 5240 5250<br />
5323 5434 5438<br />
5446 2409 2459<br />
2495<br />
5434 5446 5478<br />
4074<br />
4074<br />
2409<br />
4068<br />
5495 5353 4033<br />
2441<br />
2340<br />
2505 2501 3119<br />
2452<br />
5439<br />
2426<br />
2358 5240 5250<br />
5323 5434 5438<br />
5446 2409 2459<br />
2358<br />
5462<br />
5397 4052 6164<br />
2490<br />
5485<br />
5497 5467 5466<br />
5462 5448 5323<br />
5240<br />
5540
SHARP<br />
SIEMENS<br />
SKARDIN<br />
SKY<br />
SKY DIGITAL<br />
SKY+<br />
SKYMASTER<br />
SKYPEX<br />
SKYVISION<br />
SMART<br />
SM ELECTRONIC<br />
SONY<br />
TARGA<br />
TCM<br />
TECHNIKA<br />
TECHNOTREND<br />
TECHWOOD<br />
TELEFONICA<br />
TELEFUNKEN<br />
TEVION<br />
THOMSON<br />
TITAN<br />
TIVO<br />
TONBURY<br />
TOPFIELD<br />
TOSHIBA<br />
TVONICS<br />
UNIVERSUM<br />
VESTEL<br />
WHARFEDALE<br />
WYSI<br />
YAKUMO<br />
ACOUSTIC SOLUTIONS<br />
ADECQ<br />
AKURA<br />
ALBA<br />
ARCOM<br />
BOSTON<br />
BRAIN WAVE<br />
BUBH<br />
CANAL+<br />
CGV<br />
CROWN<br />
4068<br />
5467<br />
5469<br />
5461<br />
5353<br />
5353<br />
4072 5536 1355<br />
5530 5527 5472<br />
5469 5468 5317<br />
5240<br />
5466<br />
5497<br />
5509 5508<br />
4072 5536 1355<br />
5530 5527 5472<br />
5469 5468 5317<br />
5240<br />
2436 2437 2438<br />
2493 2495 5480<br />
5240 5250 5323<br />
4068<br />
5496<br />
4068<br />
6148<br />
5538<br />
2344 2358 5240<br />
5250 5323 5434<br />
5438 5446 2409<br />
2453 2459 2495<br />
4042 3119 3186<br />
5466 2464<br />
5540<br />
3119<br />
5468<br />
5484 5482 5317<br />
5483<br />
2432 2489<br />
4069<br />
5466<br />
4068<br />
4068<br />
5466<br />
2358<br />
DVB<br />
4032<br />
4064<br />
4068<br />
4068 4032 2343<br />
4046<br />
4066<br />
4061<br />
5475 4035<br />
4067 5475 4047<br />
4032 1345<br />
4057<br />
4062<br />
4032<br />
- 29 -<br />
CYBERMAXX<br />
CYTRON<br />
DENVER<br />
DIGENIUS<br />
DIGIFUSION<br />
DIGIHOME<br />
DIGILOGIC<br />
DIGIO2<br />
DIGIPAL<br />
DIGITABOX<br />
DMT<br />
DUAL<br />
DURABRAND<br />
ECHOSTAR<br />
EMTECH<br />
EVESHAM<br />
FREEBOX<br />
FREEVIEW<br />
GBSAT<br />
GERICOM<br />
GOODMANS<br />
GOODWAY<br />
GRUNDIG<br />
HAUPPAUGE<br />
HB<br />
HITACHI<br />
HOMECAST<br />
HUMAX<br />
INTERSTAR<br />
INVION<br />
JEPSSEN<br />
JVC<br />
KATHREIN<br />
KENDO<br />
LABGEAR<br />
LASAT<br />
LIDCOM<br />
LIFETEC<br />
LODOS<br />
LOGIK<br />
LUXOR<br />
M&S<br />
MARKS & SPENCER<br />
MAPLIN<br />
MARMITEK OCTOPUS<br />
MATSUI<br />
MAXIMUM<br />
MEDION<br />
MICO<br />
MICROELECTRONICS<br />
MICROMAXX<br />
4045 5436<br />
4045 5436<br />
4062<br />
4045<br />
4047<br />
4068<br />
4032<br />
4053<br />
4063<br />
1313<br />
5240<br />
4068<br />
4040 4032<br />
5442<br />
4035<br />
4068<br />
4058<br />
4031 4032 4033<br />
4034 4036 4037<br />
4038 4039 4040<br />
4042 4043 4046<br />
4047 5435 4048<br />
4049<br />
4035<br />
4030<br />
4068 4067 4040<br />
4032<br />
4054 4055<br />
4068 5475 5474<br />
4037 4032<br />
4036<br />
1540 4060 4062<br />
4035<br />
4068 4040 4032<br />
4035<br />
4049<br />
4035<br />
4061<br />
4035<br />
4040<br />
5481<br />
4062<br />
4038<br />
5466<br />
4032<br />
4045 5436<br />
4032<br />
4069 4032<br />
4068<br />
4040<br />
4040<br />
4068<br />
5440<br />
4048 4040 4032<br />
4061<br />
4045 5436<br />
4050<br />
4065 5454 5449<br />
4045 5436
MICROSTAR<br />
NOKIA<br />
NOOS<br />
OCEANIC<br />
OGGLE<br />
ON-DIGITAL<br />
ONN<br />
OPTEX<br />
OPTICUM<br />
ORBITECH<br />
PACE<br />
PACIFIC<br />
PANASONIC<br />
PHILIPS<br />
PIONEER<br />
PREMIERE<br />
PRO BASIC<br />
PROLINE<br />
PRO2<br />
REBOX<br />
SAGEM<br />
SCHAUB LORENZ<br />
SCHWAIGER<br />
SEG<br />
SHARP<br />
SKARDIN<br />
SKYMASTER<br />
SMART<br />
SM ELECTRONIC<br />
SONY<br />
TCM<br />
TECHNIKA<br />
TECHNISAT<br />
TECHNOSONIC<br />
TECHNOTREND<br />
TECHWOOD<br />
TELESTAR<br />
TELE SYSTEM<br />
TELEVES<br />
TEVION<br />
THOMSON<br />
TOPFIELD<br />
TOP-UP TV<br />
TVONICS<br />
VESTEL<br />
VIVAX<br />
VISTRON<br />
WHARFEDALE<br />
WORLDSAT<br />
YUNG FU<br />
4045 5436<br />
4039 4041<br />
4059<br />
1540<br />
4051<br />
5330 4041 4044<br />
4068 4032<br />
5441<br />
4061<br />
4063<br />
4033 5330<br />
4040<br />
1383 2340<br />
4043<br />
4034 4044<br />
4043 4039<br />
4062<br />
4032<br />
4045 5436<br />
5285<br />
5435 4052<br />
1540 4060 4061<br />
4062 4035<br />
5466 4070 5475<br />
5425 4065<br />
4040<br />
4068 1372<br />
5441<br />
4072 4071 1285<br />
4056 5472 4055<br />
4054 5454 5441<br />
5240 5526<br />
5510 4075 4066<br />
5472 5449<br />
4072 4071 1285<br />
4056 5472 4055<br />
4054 5454 5441<br />
5240 5526<br />
4031<br />
1575 1546 1557<br />
4068<br />
4063<br />
5475<br />
5475<br />
4068 4032<br />
4063<br />
4054 5441<br />
4035<br />
5475 5436 4045<br />
5254 4042<br />
5483 5317<br />
5330 4041 5442<br />
4069<br />
4068<br />
4061<br />
4062<br />
4068 4032<br />
4035<br />
4056<br />
- 30 -<br />
DTV Setup Box<br />
Panasonic<br />
Satellite<br />
AB SAT<br />
ADECQ<br />
AGS<br />
AKAI<br />
ALBA<br />
ALDES<br />
ALLSAT<br />
ALLSONIC<br />
ALLTECH<br />
ALPHA<br />
ALTAI<br />
AMITRONICA<br />
AMPERE<br />
AMSTRAD<br />
ANGLO<br />
ANKARO<br />
ANTTRON<br />
APOLLO<br />
ARCOM<br />
ARCON<br />
ARENA<br />
ARION<br />
ARMSTRONG<br />
ARNION<br />
ASA<br />
ASAT<br />
ASCI<br />
ASLF<br />
5001<br />
5161 5189 5190<br />
5199<br />
5539<br />
5189<br />
5093 5122 5351<br />
5051 5052 5053<br />
5054 5081 5095<br />
5131 5144 5190<br />
5319 5360 5541<br />
5235<br />
5053 5054 5055<br />
5126 5131 5236<br />
5237<br />
5056 5075 5093<br />
5112 5121 5122<br />
5280 5238 5351<br />
5054 5060 5126<br />
5182 5236 5255<br />
5147 5190<br />
5122<br />
5133<br />
5190<br />
5058 5133 5177<br />
5249<br />
5057 5094 5010<br />
5125 5129 5133<br />
5149 5151 5155<br />
5162 5177 5183<br />
5190 5194 5195<br />
5382 5353 5341<br />
5243 5244 5245<br />
5247<br />
5190<br />
5054 5060 5123<br />
5126 5182 5190<br />
5236 5255 5251<br />
5051 5054 5121<br />
5144 5541 5235<br />
5051 5541<br />
5476 5472<br />
5251 5281 5464<br />
5058 5059 5076<br />
5153 5177 5243<br />
5249 5465 5457<br />
5463<br />
5492<br />
5504<br />
5057 5122 5247<br />
5460<br />
5134<br />
5093 5122 5351<br />
5452<br />
5190
AST<br />
ASTACOM<br />
ASTON<br />
ASTRA<br />
ASTRO<br />
AUDIO TON<br />
AURORA<br />
AUSTAR<br />
AVALON<br />
AXIEL<br />
AXIS<br />
BARCOM<br />
BEST<br />
BLAUPUNKT<br />
BLUE SKY<br />
BOCA<br />
BOSTON<br />
BRAIN WAVE<br />
BRANDT<br />
BROADCAST<br />
BROCO<br />
BSKYB<br />
BT<br />
BT SATELLITE<br />
BUBU SAT<br />
BUSH<br />
BVV<br />
CAMBRIDGE<br />
CANAL SATELLITE<br />
CANAL+<br />
5064 5127 5262<br />
5154 5189<br />
5104 5392 5234<br />
5057 5061 5062<br />
5063 5087 5115<br />
5130 5138 5186<br />
5190 5256 5247<br />
5241 5259 5313<br />
5054 5055 5060<br />
5067 5119 5144<br />
5148 5180 5181<br />
5182 5183 5186<br />
5255 5266 5367<br />
5235 5237<br />
5054 5075 5144<br />
5280 5235<br />
5193 5399<br />
5017 5193 5494<br />
5399 5433 5432<br />
5133<br />
5189<br />
5060 5063 5071<br />
5132 5138 5182<br />
5325 5255 5243<br />
5259 5276<br />
5059 5251<br />
5059 5060 5182<br />
5255 5251<br />
5067 5119 5180<br />
5266<br />
5190 5195<br />
5057 5087 5142<br />
5150 5177 5190<br />
5503 5502 5499<br />
5497 5472 5247<br />
5313<br />
5177 5189<br />
5069 5128 5153<br />
5475 5270 5349<br />
5447<br />
5099 5363 5364<br />
5365 5372<br />
5068 5130<br />
5138 5190<br />
5010 5162 5382<br />
5353<br />
5189<br />
5099 5154 5372<br />
5190<br />
5052 5056 5070<br />
5081 5095 5112<br />
5121 5131 5319<br />
5360 5238<br />
5153<br />
5150 5183<br />
5163 5181 5367<br />
5397<br />
5097 5181 5367<br />
5397<br />
- 31 -<br />
CHANNEL MASTER<br />
CHAPARRAL<br />
CHEROKEE<br />
CHESS<br />
CITYCOM<br />
CLATRONIC<br />
CLEMENS KAMPHUS<br />
CNT<br />
COLOMBIA<br />
COLUMBUS<br />
COMAG<br />
COMMANDER<br />
COMMLINK<br />
COMTEC<br />
COMTECH<br />
CONDOR<br />
CONNEXIONS<br />
CONRAD<br />
CONRAD ELECTRONIC<br />
COSHIP<br />
CONTEC<br />
COSAT<br />
CROWN<br />
CYBERCOM<br />
CYBERMAXX<br />
CYTRON<br />
5053 5131<br />
5090 5318<br />
5189 5199<br />
5103 5179 5185<br />
5190 5347 5384<br />
5052 5072 5017<br />
5159 5176 5186<br />
5191 5319 5430<br />
5300 5277<br />
5069 5128 5270<br />
5306 5083<br />
5055 5237<br />
5177<br />
5078 5293<br />
5177 5503 5502<br />
5499 5497 5472<br />
5289<br />
5123<br />
5054 5126 5236<br />
5126 5132<br />
5071 5276<br />
5060 5182 5186<br />
5255 5430<br />
5066 5133 5182<br />
5265 5274<br />
5141 5142 5176<br />
5177 5182 5183<br />
5186 5430 5466<br />
5186 5190<br />
5254<br />
5071 5072 5132<br />
5142 5276 5277<br />
5075 5280<br />
5057 5247<br />
5240 5241 5250<br />
5255 5269 5308<br />
5315 5322 5323<br />
5346 5364 5381<br />
5384 5385 5414<br />
5415<br />
5108 5240 5241<br />
5250 5255 5269<br />
5284 5294 5299<br />
5308 5315 5322<br />
5323 5335 5346<br />
5364 5381 5384<br />
5385 5414 5415<br />
5434 5436 5437<br />
5438 5446 5452<br />
5451<br />
5240 5241 5250<br />
5255 5269 5284<br />
5294 5299 5308<br />
5315 5322 5323<br />
5335 5346 5364<br />
5381 5384 5385<br />
5414 5415 5434<br />
5436 5437 5438<br />
5446 5452 5451
DAERYUNG<br />
DAEWOO<br />
DANSAT<br />
D-BOX<br />
DDC<br />
DECCA<br />
DELAT ELECTRONICS<br />
DELEGA<br />
DEW<br />
DIAMOND<br />
DIGIALITY<br />
DIG<strong>IAN</strong><br />
DIGIPRO<br />
DIGIQUEST<br />
DIGITALBOX<br />
DIGLTAL M SERIE<br />
DISCOVERER<br />
DISCOVERY<br />
DISEQC<br />
DISKXPRESS<br />
DISTRATEL<br />
DISTRISAT<br />
DITRISTRAD<br />
DMSIS<br />
DMT<br />
DNR<br />
DNT<br />
DONG WOO<br />
DRAKE<br />
DREAM MULTIMEDIA<br />
DREAMBOX<br />
DSTV<br />
DUAL<br />
DUNE<br />
DYNASAT<br />
EASYONE<br />
ECHOSTAR<br />
EDISION<br />
EINHELL<br />
ELAP<br />
ELEKTA<br />
ELSAT<br />
ELTA<br />
5066 5265<br />
5002 5190<br />
5056 5112 5121<br />
5238<br />
5166 5362 5401<br />
5053 5131<br />
5073 5278<br />
5492<br />
5053<br />
5071 5132 5276<br />
5074 5279<br />
5186 5430<br />
5301<br />
5196<br />
5460 5300 5254<br />
5449<br />
5512<br />
5179 5185<br />
5189<br />
5189<br />
5059 5251 5274<br />
5195<br />
5122<br />
5075 5280<br />
5301<br />
5240<br />
5153<br />
5066 5093 5122<br />
5133 5265 5351<br />
5086<br />
5076 5355 5281<br />
5443<br />
5443<br />
5193 5399<br />
5240 5241 5250<br />
5255 5308 5315<br />
5322 5364 5381<br />
5384 5385 5414<br />
5323<br />
5182<br />
5188<br />
5532 5540 5507<br />
5515 5454 5519<br />
5066 5103 5133<br />
5163 5165 5190<br />
5199 5430 5379<br />
5384 5252 5297<br />
5376 5377 5378<br />
5442 5444 5282<br />
5283 5285<br />
5449<br />
5051 5054 5057<br />
5125 5126 5177<br />
5183 5190 5236<br />
5245 5541 5247<br />
5189 5190<br />
5055 5237<br />
5151 5190<br />
5051 5060 5075<br />
- 32 -<br />
ELTA SAT<br />
EMANON<br />
EMME ESSE<br />
EMTECH<br />
ENGEL<br />
ENIGMA<br />
EP SAT<br />
E-TEK<br />
EURIEULT<br />
EUROCRYPT<br />
EURODEC<br />
EUROPA<br />
EUROPHON<br />
EUROSAT<br />
EUROSKY<br />
EUROSPACE<br />
EUROSTAR<br />
EUTELSAT<br />
EUTRA<br />
EVA<br />
EXATOR<br />
FAVAL<br />
FENNER<br />
FERGUSON<br />
FIDELITY<br />
FINLANDIA<br />
FINLUX<br />
FINNSAT<br />
FIULUX<br />
FLAIR MATE<br />
FORCE<br />
FORTEC STAR<br />
FOXTEL<br />
FOXTELIQ<br />
FRACARRO<br />
FRANCE<br />
SATELLITE/TV<br />
5093 5122 5182<br />
5255 5280 5541<br />
5351<br />
5255<br />
5051 5541<br />
5060 5070 5083<br />
5165 5182 5188<br />
5255 5319 5306<br />
5471<br />
5190<br />
5511<br />
5052 5319 5306<br />
5454<br />
5178 5194 5195<br />
5115<br />
5106<br />
5122 5123 5142<br />
5183 5186<br />
5177 5186 5430<br />
5057 5247<br />
5057 5060 5176<br />
5177 5182 5183<br />
5186 5255 5430<br />
5466 5247<br />
5077 5286<br />
5057 5167 5176<br />
5186 5188 5191<br />
5265 5247<br />
5190<br />
5147<br />
5386 5387<br />
5051 5054 5144<br />
5541 5235<br />
5507<br />
5179 5182 5185<br />
5190 5396 5385<br />
5052 5056 5070<br />
5106 5049 5112<br />
5121 5145 5319<br />
5290 5400 5238<br />
5291<br />
5125 5149 5183<br />
5243 5245<br />
5052 5115 5319<br />
5052 5061 5080<br />
5115 5136 5141<br />
5071 5106 5400<br />
5276<br />
5319 5256 5404<br />
5292 5296 5302<br />
5190<br />
5375 5352 5335<br />
5288<br />
5017 5193 5198<br />
5494 5495 5399<br />
5495<br />
5095 5165 5360<br />
5078 5293
FREECOM<br />
FREESAT<br />
FTE<br />
FTEMAXIMAL<br />
FUBA<br />
FUGIONKYO<br />
FUNTACH<br />
GALAXI<br />
GALAXIS<br />
GALAXISAT<br />
GALAXY<br />
GARDINER<br />
GLOBECAST<br />
GLOBO<br />
GMI<br />
GOLDBOX<br />
GOLDSTAR<br />
GOODING<br />
GOODMANS<br />
GRANADA<br />
GRANDIN<br />
GRANVISION<br />
GROTHUSEN<br />
GRUNDIG<br />
G-SAT<br />
HANDAN<br />
HANREATIC<br />
5051 5082 5180<br />
5183 5541 5304<br />
5147 5194<br />
5058 5084 5142<br />
5150 5249 5310<br />
5182 5190<br />
5051 5059 5060<br />
5062 5066 5067<br />
5078 5080 5093<br />
5115 5133 5176<br />
5180 5182 5348<br />
5266 5255 5265<br />
5541 5251 5258<br />
5293 5296 5351<br />
5196<br />
5385<br />
5059<br />
5054 5060 5063<br />
5071 5075 5081<br />
5101 5017 5126<br />
5132 5138 5164<br />
5176 5182 5193<br />
5325 5255 5236<br />
5280 5294 5299<br />
5300 5335 5380<br />
5381 5399 5415<br />
5259 5276<br />
5127<br />
5251<br />
5191<br />
5455<br />
5470 5466 5452<br />
5447<br />
5057 5247<br />
5163 5181 5367<br />
5082 5304<br />
5184 5298<br />
5052 5081 5319<br />
5061 5115 5256<br />
5113 5178<br />
5501 5500<br />
5051 5082 5541<br />
5304<br />
5052 5054 5067<br />
5070 5094 5105<br />
5010 5029 5031<br />
5032 5034 5043<br />
5118 5119 5129<br />
5156 5158 5162<br />
5180 5183 5184<br />
5193 5195 5537<br />
5534 5474 5447<br />
5266 5263 5298<br />
5309 5319 5344<br />
5287 5399 5382<br />
5235 5350<br />
5121<br />
5347 5473<br />
5315 5089 5143<br />
- 33 -<br />
HANSEL & GRETEL<br />
HANTOR<br />
HANURI<br />
HASE & IGEL<br />
HAUPPAUGE<br />
HB<br />
HEAD<br />
HELIOCOM<br />
HELIUM<br />
HINARI<br />
HIRSCHMANN<br />
HISAWA<br />
HITACHI<br />
HNE<br />
HOMECAST<br />
HOUSTION<br />
HOUSTON<br />
HUMAX<br />
HUTH<br />
HYPSON<br />
HYUNDAI<br />
ID DIGITAL<br />
IMEX<br />
IMPERIAL<br />
INGELEN<br />
INNOVATION<br />
INTERNATIONAL<br />
INTERSTAR<br />
INTERTRONIC<br />
INTERVISION<br />
5185<br />
5177 5186<br />
5051 5069 5086<br />
5128 5270 5541<br />
5055 5237<br />
5153<br />
5025 5044<br />
5471 5241 5485<br />
5486 5487<br />
5516 5515 5514<br />
5058 5186 5249<br />
5186<br />
5053 5121 5131<br />
5067 5083 5030<br />
5119 5133 5134<br />
5135 5137 5141<br />
5180 5182 5183<br />
5186 5189 5194<br />
5325 5266 5328<br />
5347 5348 5466<br />
5472 5476 5302<br />
5303 5306 5356<br />
5069 5128 5270<br />
5052 5070 5319<br />
5337<br />
5177<br />
5492 5493 5471<br />
5123<br />
5075 5280<br />
5100 5009 5017<br />
5024 5026 5229<br />
5523 5522 5521<br />
5513 5300 5326<br />
5380<br />
5054 5057 5068<br />
5069 5071 5075<br />
5083 5123 5126<br />
5128 5130 5132<br />
5142 5177 5186<br />
5197 5236 5239<br />
5270 5280 5247<br />
5306<br />
5178<br />
5301<br />
5017 5300<br />
5178<br />
5081 5095 5490<br />
5489 5447 5360<br />
5194<br />
5060 5089 5101<br />
5103 5108 5255<br />
5308 5315 5322<br />
5381 5384 5385<br />
5414<br />
5177<br />
5196<br />
5057 5247<br />
5075 5146 5186<br />
5280
IRDETO<br />
i-SET<br />
ITT/NOKIA<br />
JOHANSSON<br />
JOK<br />
JSR<br />
JVC<br />
KAMM<br />
KAON<br />
KATELCO<br />
KATHREIN<br />
KATHREIN EUROSTAR<br />
KEY WEST<br />
KLAP<br />
KONIG<br />
KOSCOM<br />
KOSMOS<br />
KR<br />
KREILING<br />
KREISELMEYER<br />
K-SAT<br />
KYOSTAR<br />
L&S ELECTRONIC<br />
LASAT<br />
LEMON<br />
LENCO<br />
5399<br />
5532 5540 5507<br />
5515 5454 5519<br />
5115 5134 5141<br />
5166 5256 5319<br />
5348 5345 5302<br />
5337 5061 5070<br />
5052 5274<br />
5069 5128 5270<br />
5152 5154 5189<br />
5075 5280<br />
5184 5298<br />
5190<br />
5460<br />
5325<br />
5067 5072 5084<br />
5090 5093 5003<br />
5008 5012 5021<br />
5022 5023 5026<br />
5119 5122 5137<br />
5144 5148 5159<br />
5169 5176 5180<br />
5189 5190 5191<br />
5199 5491 5481<br />
5447 5349 5413<br />
5426 5403 5429<br />
5266 5277 5310<br />
5318 5351<br />
5176<br />
5177<br />
5189<br />
5186<br />
5457<br />
5082 5083 5084<br />
5137 5304 5306<br />
5310<br />
5054 5144 5147<br />
5235<br />
5349 5426 5451<br />
5498<br />
5067 5119 5180<br />
5266<br />
5190<br />
5051 5144 5177<br />
5541<br />
5177 5182<br />
5055 5060 5085<br />
5086 5087 5132<br />
5150 5176 5177<br />
5179 5182 5186<br />
5255 5363 5364<br />
5365 5425 5466<br />
5467 5237 5313<br />
5153<br />
5051 5082 5088<br />
5123 5138 5153<br />
5176 5182 5186<br />
5190 5541 5304<br />
5314<br />
- 34 -<br />
LENG<br />
LENNOX<br />
LENSON<br />
LEXUS<br />
LG<br />
LIFE<br />
LIFESAT<br />
LIFETEC<br />
LION<br />
LOGISAT<br />
LORENZEN<br />
LORRAINE<br />
LUPUS<br />
LUXOR<br />
LYONNAISE<br />
M&B<br />
M&B1<br />
MACAB<br />
MANATA<br />
MANHATTAN<br />
MARANTZ<br />
MARMITEK<br />
MARMITEK OCTOPUS<br />
MARNED<br />
MASCOM<br />
MASPRO<br />
MATSUI<br />
5069 5270<br />
5075 5280<br />
5079 5183 5295<br />
5122<br />
5082 5304<br />
5101 5381<br />
5060 5089 5101<br />
5103 5108 5143<br />
5177 5179 5182<br />
5185 5190 5240<br />
5241 5250 5255<br />
5269 5308 5315<br />
5322 5323 5346<br />
5364 5381 5384<br />
5385 5445 5415<br />
5060 5089 5101<br />
5103 5108 5284<br />
5294 5299 5308<br />
5315 5322 5323<br />
5240 5241 5250<br />
5255 5269 5385<br />
5414 5415 5434<br />
5436 5437 5438<br />
5335 5346 5364<br />
5381 5384 5446<br />
5452 5451<br />
5077 5286<br />
5503 5502 5499<br />
5497 5472<br />
5123 5153 5155<br />
5177 5186 5447<br />
5466<br />
5082 5304<br />
5060 5182 5255<br />
5061 5115 5129<br />
5141 5166 5183<br />
5245 5256 5348<br />
5337<br />
5106<br />
5143<br />
5185<br />
5106 5400<br />
5154 5177 5178<br />
5189 5190<br />
5052 5055 5070<br />
5075 5154 5189<br />
5280 5319 5355<br />
5427 5248 5237<br />
5093 5351<br />
5431<br />
5440<br />
5485<br />
5055 5137 5237<br />
5052 5070 5090<br />
5114 5119 5147<br />
5153 5156 5180<br />
5184 5190 5298<br />
5319 5318 5356<br />
5099 5119 5131
MAX<br />
MAX COMMUNICATION<br />
MB<br />
MBOX<br />
MEDIABOX<br />
MEDIACOM<br />
MEDIAMARKT<br />
MEDIASAT<br />
MEDION<br />
MEDISON<br />
MEGA<br />
M-ELECTRONIC<br />
METRONIC<br />
METRONIC<br />
METZ<br />
MICRO<br />
MICRO ELECT-<br />
RONIC<br />
MICRO TECH-<br />
NOLOGY<br />
MICROMAXX<br />
MICROSTAR<br />
5154 5180 5184<br />
5189 5298 5372<br />
5186<br />
5531<br />
5089 5143 5185<br />
5315<br />
5269<br />
5163 5181 5367<br />
5317<br />
5057 5247<br />
5063 5138 5163<br />
5181 5183 5367<br />
5259<br />
5060 5089 5101<br />
5103 5108 5177<br />
5182 5190 5284<br />
5294 5299 5308<br />
5521 5520 5488<br />
5240 5241 5250<br />
5255 5269 5385<br />
5414 5415 5434<br />
5315 5322 5323<br />
5335 5346 5364<br />
5381 5384 5453<br />
5452 5451 5478<br />
5436 5437 5438<br />
5446<br />
5190<br />
5093 5122 5351<br />
5191<br />
5051 5054 5055<br />
5059 5113 5126<br />
5144 5159 5178<br />
5190 5191 5195<br />
5236 5373 5408<br />
5409 5410 5411<br />
2341 5237 5251<br />
5541 5235<br />
5067 5119 5180<br />
5266<br />
5183 5186 5190<br />
5190 5518 5512<br />
5503 5497 5454<br />
5452 5449<br />
5077 5138 5190<br />
5286<br />
5060 5089 5101<br />
5103 5108 5182<br />
5294 5299 5308<br />
5315 5322 5323<br />
5240 5241 5250<br />
5255 5269 5284<br />
5414 5415 5434<br />
5436 5437 5438<br />
5335 5346 5364<br />
5381 5384 5385<br />
5446 5453 5452<br />
5451<br />
5060 5089 5101<br />
- 35 -<br />
MICROTEC<br />
MINERVA<br />
MITSUBISHI<br />
MITSUMI<br />
MORETV<br />
MORGAN SYDNEY<br />
MORGAN‘S<br />
MOTOROLA<br />
MULTICHOICE<br />
MULTISTAR<br />
MULTITEC<br />
MURATTO<br />
MUSTEK<br />
MYSAT<br />
NANOXX<br />
NAVEX<br />
NEC<br />
NEOTION<br />
NETWORK<br />
NEUHAUS<br />
NEUSAT<br />
NEXT WAVE<br />
NIKKO<br />
NOKIA<br />
NOMEX<br />
NORDMENDE<br />
5103 5108 5284<br />
5294 5299 5308<br />
5315 5322 5323<br />
5240 5241 5250<br />
5255 5269 5385<br />
5414 5415 5434<br />
5436 5437 5438<br />
5335 5346 5364<br />
5381 5384 5446<br />
5452 5451<br />
5190<br />
5067 5184 5298<br />
5266<br />
5052 5067 5099<br />
5319 5266 5372<br />
5087 5313<br />
5434 5250 5446<br />
5478<br />
5107 5407<br />
5057 5087 5093<br />
5122 5142 5150<br />
5177 5190 5407<br />
5247 5313 5351<br />
5192<br />
5105 5193 5399<br />
5084 5086 5310<br />
5103 5179 5384<br />
5385 5065 5082<br />
5127<br />
5264 5304 5065<br />
5082 5127<br />
5449<br />
5190<br />
5517 5449<br />
5069 5128 5270<br />
5091 5120 5320<br />
5321<br />
5452<br />
5121<br />
5063 5075 5079<br />
5123 5138 5142<br />
5153 5183 5186<br />
5190 5280 5295<br />
5259<br />
5153 5190<br />
5102 5197 5242<br />
5383<br />
5057 5190 5247<br />
5052 5061 5070<br />
5015 5019 5033<br />
5115 5134 5141<br />
5166 5170 5175<br />
5542 5362 5252<br />
5256 5319 5348<br />
5361 4041 5274<br />
5302 5401<br />
5109 5417<br />
5051 5052 5053<br />
5055 5106 5128
NOVA<br />
NOVIS<br />
OAK<br />
OCEANIC<br />
OCTAGON<br />
OKANO<br />
ONDIGITAL<br />
OPENBOX<br />
OPENTEL<br />
OPTEX<br />
OPTUS<br />
ORBIT<br />
ORBITECH<br />
ORIGO<br />
OSAT<br />
OTTO VERSAND<br />
PACE<br />
PACIFIC<br />
PACKSAT<br />
PALCOM<br />
PALLADIUM<br />
PALSAT<br />
PALTEC<br />
PANASAT<br />
PANASONIC<br />
PANDA<br />
PANSAT<br />
PANTECH<br />
PATRIOT<br />
PBI<br />
PHILIPS<br />
5131 5145 5349<br />
5290 5319 5400<br />
5541 5237<br />
5193<br />
5069 5128 5270<br />
5251<br />
5074 5077 5279<br />
5286<br />
5051 5054 5071<br />
5123 5132 5144<br />
5541 5235 5276<br />
5057 5083 5084<br />
5247 5306 5310<br />
5116 5117 5124<br />
5457<br />
5241<br />
5072 5075 5280<br />
5277 5441<br />
5181 5193 5197<br />
5494 5399<br />
5064 5262<br />
5051 5139 5140<br />
5142 5179 5181<br />
5183 5490 5489<br />
5541<br />
5077 5286<br />
5054 5129 5235<br />
5067 5266<br />
5052 5056 5067<br />
5070 5081 5094<br />
5010 5040 5047<br />
5112 5121 5124<br />
5157 5162 5189<br />
5199 5382 5353<br />
5266 5357 5330<br />
5319 5238 5413<br />
5495<br />
5074 5279<br />
5189<br />
5053 5062 5078<br />
5079 5131 5295<br />
5258 5293<br />
5057 5183 5184<br />
5298 5247<br />
5179 5183<br />
5062 5258<br />
5187 5193<br />
5052 5070 5094<br />
5010 5162 5382<br />
5319 5342<br />
5052 5056 5112<br />
5115 5180 5186<br />
5319 5238<br />
5305<br />
5389<br />
5177 5189<br />
5452<br />
5052 5070 5093<br />
5039 5041 5116<br />
- 36 -<br />
PHOENIX<br />
PHONOTREND<br />
PILOTIME<br />
PINNACLE<br />
PIONEER<br />
POLLIN<br />
POLSAT<br />
POLYTRON<br />
PREDKI<br />
PREISNER<br />
PREMIER<br />
PREMIERE<br />
PREMIUMX<br />
PRIESNER<br />
PRO2<br />
PROFI<br />
PROFILE<br />
PROMAX<br />
PROSAT<br />
PROSONIC<br />
PROTEK<br />
PROVISION<br />
PYE<br />
QUADRAL<br />
5117 5119 5121<br />
5122 5123 5142<br />
5144 5154 5156<br />
5158 5159 5163<br />
5169 5180 5181<br />
5184 5189 5191<br />
5490 5479 5312<br />
5351 5263 5298<br />
5308 5309 5319<br />
5343 5261 5367<br />
5372 5402 5414<br />
5275 5359 5350<br />
5276 5324 5401<br />
5071 5081 5121<br />
5132 5276<br />
5052 5054 5075<br />
5083 5126 5164<br />
5236 5280 5306<br />
5437<br />
5397<br />
5439<br />
5163 5181 5367<br />
5466<br />
5106 5400<br />
5072 5277<br />
5069 5128 5270<br />
5133 5142 5150<br />
5177<br />
5181 5367<br />
5075 5097 5017<br />
5163 5181 5447<br />
5401 5367 5362<br />
5342 5300 5280<br />
5269<br />
5450<br />
5057 5503 5449<br />
5271 5247<br />
5240 5241 5250<br />
5255 5269 5284<br />
5294 5299 5308<br />
5315 5322 5323<br />
5335 5346 5364<br />
5381 5384 5385<br />
5414 5415 5434<br />
5436 5437 5438<br />
5446 5452 5451<br />
5088 5314<br />
5189<br />
5052 5319<br />
5053 5054 5081<br />
5095 5126 5131<br />
5146 5236 5360<br />
5155<br />
5074 5279<br />
5055 5237<br />
5184<br />
5053 5054 5060<br />
5126 5131 5142<br />
5146 5154 5182
QUELLE<br />
QUIERO<br />
RADIOLA<br />
RADIX<br />
RAINBOW<br />
RED STAR<br />
REDIFFUSION<br />
REDPOINT<br />
REDSTAR<br />
RFT<br />
ROADSTAR<br />
ROCH<br />
ROVER<br />
RUEFACH<br />
SAB<br />
SABA<br />
SABRE<br />
SAGEM<br />
SAKURA<br />
SALORA<br />
SAMSUNG<br />
SAT<br />
SAT CRUISER<br />
SAT TEAM<br />
SAT+<br />
SATCOM<br />
SATEC<br />
SATELCO<br />
5189 5199 5236<br />
5255<br />
5067 5125 5176<br />
5186 5266 5245<br />
5106 5400<br />
5093 5122 5351<br />
5066 5011 5018<br />
5037 5133 5147<br />
5168 5171 5174<br />
5194 5425 5265<br />
2341 5462<br />
5054 5144 5147<br />
5235<br />
5182<br />
5091 5321<br />
5063 5138 5259<br />
5060 5255<br />
5054 5093 5122<br />
5123 5126 5139<br />
5236 5351<br />
5190<br />
5178<br />
5146 5182 5190<br />
5088 5314<br />
5451 5457 5458<br />
5459 5460<br />
5055 5070 5077<br />
5095 5121 5145<br />
5152 5153 5154<br />
5176 5186 5189<br />
5195 5290 5319<br />
5343 5354 5360<br />
5363 5369 5370<br />
5371 5372 5373<br />
5237 5286<br />
5052 5319<br />
5106 5160 5368<br />
5401 5397 5400<br />
5435<br />
5071 5081 5132<br />
5276<br />
5061 5091 5115<br />
5256 5330 5320<br />
5327<br />
5051 5006 5007<br />
5016 5028 5253<br />
5541 5317<br />
5053 5064 5065<br />
5127 5149 5183<br />
5460 5262 5264<br />
5197 5183<br />
5190<br />
5346 5451<br />
5068 5089 5130<br />
5143 5185 5186<br />
5430 5315 5329<br />
5070 5121 5190<br />
5319<br />
5182<br />
- 37 -<br />
SATFORD<br />
SATLINE<br />
SATMASTER<br />
SATPARTNER<br />
SATPLUS<br />
SCHACKE<br />
SCHAUB LO-<br />
RENZ<br />
SCHNEIDER<br />
SCHWAIGER<br />
SCS<br />
SEDEA ELECTRON<br />
SEEMANN<br />
SEG<br />
SELECO<br />
SEPTIMO<br />
SERVI SAT<br />
SETONE<br />
SIEMENS<br />
SILVA<br />
SILVERCREST<br />
5068 5130<br />
5146<br />
5068 5130<br />
5051 5054 5055<br />
5069 5082 5083<br />
5128 5270 5541<br />
5235 5237 5304<br />
5306<br />
5179<br />
5144<br />
5460 5471 5485<br />
5486 5487<br />
5060 5101 5103<br />
5108 5158 5179<br />
5189 5255 5275<br />
5317 5322 5381<br />
5384 5385 5414<br />
5072 5074 5089<br />
5100 5102 5121<br />
5142 5143 5177<br />
5179 5185 5186<br />
5195 5503 5502<br />
5499 5497 5467<br />
5466 5448 5365<br />
5363 5255 5237<br />
5518 5240 5241<br />
5254 5257 5260<br />
5267 5315 5319<br />
5325 5364 5371<br />
5239 5374 5375<br />
5380 5323 5381<br />
5383 5385 5396<br />
5412 5425 5426<br />
5373 5429 5448<br />
5449 5460 5462<br />
5476 5277 5427<br />
5447 5475<br />
5176<br />
5177 5196<br />
5057 5063 5066<br />
5138 5265 5247<br />
5259<br />
5051 5060 5069<br />
5089 5128 5143<br />
5155 5182 5185<br />
5255 5270 5315<br />
5341 5426 5428<br />
5541<br />
5075 5165 5280<br />
5195<br />
5178 5190<br />
5532 5540 5507<br />
5515 5454 5519<br />
5067 5119 5150<br />
5180 5447 5467<br />
5266<br />
5082 5304<br />
5222 5223 5224<br />
5225 5226 5227
SKANTIN<br />
SKINSAT<br />
SKR<br />
SKT<br />
SKY<br />
SKY DIGITAL<br />
SKY HD<br />
SKY ITALIA<br />
SKY+<br />
SKYMASTER<br />
SKYMAX<br />
SKYPEX<br />
SKYPLUS<br />
SKYSAT<br />
SKYVISION<br />
SL<br />
SM ELECTRONIC<br />
SMART<br />
SONY<br />
SR<br />
5228 5230 5233<br />
5190 5063 5138<br />
5259 5384 5346<br />
5469<br />
5183<br />
5190<br />
5466<br />
5192 5452 5353<br />
5382 1423<br />
5094 5382 5353<br />
5461<br />
5382 5353<br />
5353<br />
5054 5089 5103<br />
5004 5020 5126<br />
5143 5146 5167<br />
5179 5185 5190<br />
5536 5533 5232<br />
5530 5529 5528<br />
5527 5526 5525<br />
5524 5473 5471<br />
5470 5469 5468<br />
5454 5452 5273<br />
5416 5390 5389<br />
5388 5387 5386<br />
5385 5384 5346<br />
5316 5315 5240<br />
5236 5543 5347<br />
5317<br />
5093 5122 5351<br />
5466<br />
5452<br />
5179 5183 5185<br />
5186 5190<br />
5075 5503 5502<br />
5499 5497 5472<br />
5280<br />
5153 5177 5466<br />
5179 5190 5385<br />
5530 5529 5528<br />
5527 5526 5525<br />
5524 5473 5536<br />
5533 5469 5468<br />
5454 5452 5273<br />
5416 5390 5389<br />
5388 5387 5471<br />
5470 5384 5346<br />
5316 5315 5240<br />
5236 5386 5347<br />
5543 5317<br />
5176 5177 5190<br />
5194 5508 5507<br />
5506 5505 5500<br />
5476 5472 5449<br />
5512 5511 5510<br />
5509<br />
5094 5181 5382<br />
5367 5246 5272<br />
5057 5087 5177<br />
- 38 -<br />
STAR TRAK<br />
STARBOX<br />
STARLAND<br />
STARRING<br />
START TRAK<br />
STRONG<br />
STVI<br />
SUMIDA<br />
SUNNY SOUND<br />
SUNSAT<br />
SUNSTAR<br />
SUPER SAT<br />
SUPERMAX<br />
SYSTEC<br />
TANDBERG<br />
TANDY<br />
TANTEC<br />
TARGA<br />
TATUNG<br />
TCM<br />
TECHNIHALL<br />
TECHNILAND<br />
TECHNISAT<br />
TECHNOLOGY<br />
TECHNOMATE<br />
TECHNOSAT<br />
TECHNOTREND<br />
TECHNOWELT<br />
TECO<br />
5290 5247 5313<br />
5541<br />
5254<br />
5103 5190 5384<br />
5069 5128 5270<br />
5051<br />
5051 5054 5060<br />
5082 5095 5182<br />
5193 5196 5470<br />
5413 5360 5255<br />
5399 5345 5274<br />
5304 5541 5235<br />
5178<br />
5057 5247<br />
5182<br />
5138 5190<br />
5057 5087 5177<br />
5182 5330 5247<br />
5313<br />
5188<br />
5197<br />
5177<br />
5106 5400<br />
5054 5235<br />
5052 5070 5078<br />
5079 5319 5295<br />
5293<br />
5221 5480<br />
5073 5278<br />
5060 5089 5101<br />
5103 5108 5205<br />
5206 5207 5208<br />
5209 5210 5211<br />
5212 5213 5214<br />
5215 5216 5217<br />
5218 5219 5220<br />
5240 5241 5250<br />
5255 5269 5308<br />
5315 5322 5323<br />
5346 5364 5381<br />
5385 5414 5415<br />
5384<br />
5244<br />
5068 5130<br />
5066 5079 5000<br />
5013 5014 5027<br />
5111 5122 5139<br />
5140 5172 5173<br />
5179 5181 5183<br />
5489 5490 5317<br />
5265 5295 5367<br />
5418 5331 5332<br />
5193<br />
5268 5456<br />
5197<br />
5496 5475 5460<br />
5447<br />
5177 5186 5195<br />
5057 5087 5247
TELANOR<br />
TELASAT<br />
TELECIEL<br />
TELECOM<br />
TELEDIREKT<br />
TELEFUNKEN<br />
TELEKA<br />
TELEMASTER<br />
TELEMAX<br />
TELESAT<br />
TELESTAR<br />
TELETECH<br />
TELEVES<br />
TELEWIRE<br />
TEMPO<br />
TEN HAAFT<br />
TEVION<br />
THOMSON<br />
THORENS<br />
THORN<br />
TIOKO<br />
TITAN<br />
5313<br />
5053<br />
5089 5143 5176<br />
5185 5186 5430<br />
5144<br />
5190<br />
5121<br />
5051 5070 5099<br />
5154 5189 5538<br />
5535 5358 5319<br />
5363 5364 5365<br />
5372 5541<br />
5054 5057 5066<br />
5133 5137 5144<br />
5153 5156 5183<br />
5186 5265 5430<br />
5235 5247<br />
5055 5237<br />
5085<br />
5089 5143 5185<br />
5183 5315<br />
5079 5179 5181<br />
5193 5490 5489<br />
5452 5295 5367<br />
5167<br />
5052 5107 5177<br />
5183 5319 5406<br />
5407<br />
5075 5280<br />
5197<br />
5250<br />
5060 5089 5101<br />
5103 5108 5190<br />
5294 5299 5308<br />
5315 5322 5323<br />
5240 5241 5250<br />
5255 5269 5284<br />
5414 5415 5434<br />
5436 5437 5438<br />
5335 5346 5364<br />
5381 5384 5385<br />
5446 5454 5452<br />
5451<br />
5052 5096 5099<br />
5106 5035 5038<br />
5042 5045 5046<br />
5048 5145 5176<br />
5181 5186 5189<br />
5190 5307 5319<br />
5358 5366 5367<br />
5400 5254 5466<br />
5290 5398 5368<br />
5372<br />
5074 5279<br />
5052 5056 5070<br />
5319 5238 5291<br />
5072 5177 5277<br />
5532 5540 5507<br />
5515 5454 5519<br />
- 39 -<br />
TIVIDI<br />
TOKAI<br />
TONBURY<br />
TONNA<br />
TOPFIELD<br />
TPS<br />
TPS PLATINUM<br />
TRIAD<br />
TRIASAT<br />
TRIAX<br />
TT-MICRO<br />
TURNSAT<br />
TVONICS<br />
TWINNER<br />
UEC<br />
UHER<br />
UNIDEN<br />
UNISAT<br />
UNITOR<br />
UNITYDIGITALTV<br />
UNIVERSUM<br />
VANTAGE<br />
VARIOSAT<br />
VARIOSTAT<br />
VECTOR<br />
VEGA<br />
VENTANA<br />
VESTEL<br />
VIA DIGITAL<br />
VIA SAT<br />
VISIONIC<br />
VISIOSAT<br />
VIVA<br />
VIVANCO<br />
VIVID<br />
VORTEC<br />
V-TECH<br />
5447<br />
5122<br />
5271 5468<br />
5052 5068 5075<br />
5130 5183 5190<br />
5346 5319 5280<br />
5484 5483 5482<br />
5311 5316 5317<br />
5098 5368<br />
5477<br />
5064 5065 5082<br />
5127 5262 5264<br />
5333 5304<br />
5080 5136 5183<br />
5296<br />
5067 5079 5136<br />
5176 5177 5183<br />
5190 5266 5295<br />
5363 5405 5415<br />
5447<br />
5190<br />
5049<br />
5107 5177 5178<br />
5190 5406 5407<br />
5193 5198 5399<br />
5179<br />
5092 5149 5334<br />
5057 5071 5122<br />
5132 5177 5247<br />
5276<br />
5059 5069 5270<br />
5251<br />
5447<br />
5067 5119 5134<br />
5149 5155 5176<br />
5180 5184 5186<br />
5266 5298 5466<br />
5292 5302<br />
5517<br />
5119 5180<br />
5067 5266<br />
5077 5286<br />
5182<br />
5093 5122 5351<br />
5155<br />
5096 5366<br />
5366 5199<br />
5196<br />
5069 5075 5103<br />
5104 5152 5189<br />
5190 5392 5270<br />
5280 5384 5391<br />
5393 5394 5395<br />
5123<br />
5110 5336 5419<br />
5198<br />
5051 5124 5541<br />
5064 5127 5152<br />
5159 5264 5262
WELA<br />
WELLTECH<br />
WETEKOM<br />
WEVASAT<br />
WEWA<br />
WINERSAT<br />
WINTERGARTEN<br />
WISI<br />
WOORISAT<br />
WORLD<br />
WORLDSAT<br />
WITTENBERG<br />
XRYPTON<br />
XSAT<br />
XTREME<br />
YUMATU<br />
ZAUNKONIG<br />
ZEHNDER<br />
ZENITH<br />
ZINWELL<br />
ZODIAC<br />
SAT/DVD<br />
HUMAX<br />
SAT/DVR<br />
BSKYB<br />
HUMAX<br />
PACE<br />
ZEHNDER<br />
SATELLITE<br />
RECEIVER/<br />
RECORDER<br />
HUMAX<br />
KATHREIN<br />
5324 5337 5319<br />
5065 5191<br />
5142<br />
5179<br />
5179 5183 5185<br />
5052 5319<br />
5052 5319<br />
5069 5128 5270<br />
5126<br />
5052 5064 5065<br />
5066 5067 5119<br />
5127 5133 5142<br />
5152 5180 5183<br />
5186 5264 5265<br />
5266 5319 5333<br />
5338 5339 5340<br />
5395 5420 5421<br />
5262 5422 5423<br />
5424 5466<br />
5055 5237<br />
5128<br />
5189 5426<br />
5243<br />
5182<br />
5190 5199<br />
5460<br />
5458<br />
5153<br />
5055 5059 5060<br />
5065 5084 5036<br />
5127 5155 5159<br />
5176 5182 5191<br />
5231 5501 5500<br />
5452 5255 5264<br />
5429 5341 5426<br />
2341 5237 5251<br />
5451 5310<br />
5192<br />
5017 5300<br />
5054 5144 5235<br />
5050<br />
5203<br />
5200<br />
5204<br />
5202<br />
5005<br />
5201<br />
Digital Network<br />
Recorder<br />
Sony<br />
DVR<br />
ABS<br />
ALIENWARE<br />
CYBERPOWER<br />
DELL<br />
DIRECTV<br />
DISH NETWORK<br />
DISHPRO<br />
ECHOSTAR<br />
EXPRESSVU<br />
GATEWAY<br />
GOI<br />
HEWLETT PACKARD<br />
HOWARD<br />
COMPUTERS<br />
HP<br />
HTS<br />
HUGHES<br />
HUGHES NET<br />
WORKSYSTEMS<br />
HUMAX<br />
HUSH<br />
IBUYPOWER<br />
JVC<br />
LINKSYS<br />
MEDIA CENTER PC<br />
MICROSOFT<br />
MIND<br />
NIVEUS MEDIA<br />
NORTHGATE<br />
PANASONIC<br />
PC<br />
PHILIPS<br />
PROSCAN<br />
RCA<br />
REPLAYTV<br />
SONIC BLUE<br />
SONY<br />
STACK 9<br />
SYSTEMAX<br />
TAGAR SYSTEMS<br />
TCM<br />
TIVO<br />
TOSHIBA<br />
TOUCH<br />
ULTIMATETV<br />
VIEWSONIC<br />
VOODOO<br />
ZT GROUP<br />
6012<br />
6006<br />
6006<br />
6006<br />
6006<br />
6000 6004 6007<br />
6011<br />
6003<br />
6003<br />
6003<br />
6003<br />
6006<br />
6003<br />
6006<br />
6006<br />
6006<br />
6003<br />
6011<br />
6000<br />
6000<br />
6006<br />
6006<br />
6003 6011<br />
6006<br />
6006<br />
6006<br />
6006<br />
6006<br />
6006<br />
6009 6015<br />
6019<br />
6000 6011 6013<br />
6004<br />
6001 6004 6007<br />
6011<br />
6008 6009 6014<br />
6008 6009<br />
6005 6006<br />
6006<br />
6006<br />
6006<br />
6016 6017 6018<br />
6000 6005 6010<br />
6011<br />
6002 6006<br />
6006<br />
6007<br />
6006<br />
6006<br />
6006<br />
- 40 -
DECODER<br />
AUSTAR<br />
BMB<br />
BT<br />
CABLEAND WIRELESS<br />
CABLECRYPT<br />
CABLETIME<br />
CANAL PLUS<br />
CLYDE CABLEVISION<br />
COMCRYPT<br />
CRYPTOVISION<br />
EURODEC<br />
FILMNET<br />
FILMNET CABLECRYPT<br />
FILMNET COMCRYPT<br />
FOXTEL<br />
FOXTEL IQ<br />
GEC<br />
GI<br />
IMPULSE<br />
JERROLD<br />
KABELVISION<br />
LYONNAISE<br />
MARMITEK<br />
MELITA<br />
MNET<br />
MOTOROLA<br />
MOVIE TIME<br />
MULTICHOICE<br />
NOKIA<br />
NOOS<br />
NTL<br />
NUMERICABLE<br />
OPTUS<br />
PACE<br />
PHILIPS<br />
PIONEER<br />
PVP<br />
SAGEM<br />
SAMSUNG<br />
SCIENTIFICATLANTA<br />
SMART<br />
STS<br />
TECHNOTREND<br />
TELE+1<br />
TELEPIU<br />
TELEWEST<br />
THOMSON<br />
TIVIDI<br />
TT-micro<br />
UNITED<br />
UPC<br />
VIRGIN MEDIA<br />
VISIONETICS<br />
5494 6155<br />
6162<br />
6161<br />
6191<br />
7030<br />
6151 6152 6153<br />
7030<br />
5273<br />
7030<br />
6154<br />
5400<br />
7030<br />
7030<br />
7030<br />
5494 5399<br />
5495<br />
5273<br />
6155 6161<br />
6161<br />
6161 6155<br />
6161<br />
4059<br />
6162<br />
6161<br />
5399 7030<br />
6155<br />
6160<br />
7030 5399<br />
5362<br />
4052 6164 6165<br />
4059<br />
6191 6170 6190<br />
5400<br />
5494 6155<br />
6190<br />
5312 5302<br />
6156 6157<br />
6161<br />
5401<br />
6168 6163<br />
6158 6159<br />
5476<br />
6160<br />
5447<br />
7030<br />
7030<br />
6191 6161 6190<br />
6169<br />
6168<br />
5447<br />
6161<br />
4052 6165 6166<br />
6190<br />
6167<br />
- 41 -<br />
Auxiliary Set-Top Boxes<br />
Web & Computer<br />
TV<br />
BUSH<br />
CYBERLINK<br />
GERICOM<br />
HAUPPAUGE<br />
NOW TV<br />
PACKARD BELL<br />
PANASONIC<br />
PINNACLE<br />
PREMIERE<br />
PANASONICA<br />
THOMSON<br />
Media Receivers<br />
SONY NETWORK<br />
MECEIVER<br />
Scart Switch<br />
Boxes<br />
COUNTRYMAN<br />
FUNK<br />
MARMITEK<br />
SKARDIN<br />
SKYMASTER<br />
VIVANCO<br />
Digital Set Top<br />
Boxes<br />
ADECQ<br />
ECHOSTAR<br />
SKYMASTER<br />
TEVION<br />
YUNG FU<br />
Misc. Set Top<br />
Boxes<br />
PARDY LIGHT BOX<br />
Enteetainment Box<br />
EMTEC<br />
DMA<br />
Home Server<br />
MEDION<br />
Video On Demand<br />
MAXDOME<br />
Picture Frames<br />
AUDIOVOX<br />
COBY<br />
DIGITAL DECOR<br />
DIGITAL LIVING<br />
DYNEX<br />
INSIGNIA<br />
1352<br />
2482<br />
4030<br />
6144 4036<br />
6143<br />
2482<br />
5342<br />
6145 6146 6147<br />
5342<br />
6148<br />
5400<br />
5272<br />
6139<br />
6141<br />
6139 5431<br />
6140<br />
6140<br />
6027<br />
5539<br />
5442<br />
4056<br />
5436 4045 5250<br />
4056<br />
6142<br />
6137 6138<br />
6149<br />
6149<br />
6149<br />
6150<br />
MISC<br />
6180<br />
6178<br />
6184<br />
6183<br />
6180<br />
6181
KODAK<br />
MEMOREX<br />
NORCENT<br />
PANDIGITAL<br />
PHOTOSHARE<br />
POLAROID<br />
ROYAL<br />
SMARTPARTS<br />
TRUTECH<br />
Media Center PC<br />
MCE<br />
MICROSOFT<br />
VISTA<br />
ALICE TV<br />
DARTY<br />
FRANCE TELECOM<br />
FREEBOX TV<br />
MALIGNE TV<br />
MAXDOME<br />
NEUF TELECOM<br />
NEUFTV<br />
NOOS<br />
NUMERICABLE<br />
ORANGE<br />
SAGEM<br />
SAMSUNG<br />
TELE2BOX<br />
THOMSON<br />
TPS ADSL<br />
UPC<br />
VERSATEL<br />
CENTRUM<br />
CRITERION<br />
CYBERCOM<br />
CYBERMAXX<br />
CYTRON<br />
DENON<br />
DUAL<br />
ELTA<br />
GRUNDIG<br />
HARMON/KARDON<br />
KENWOOD<br />
LIFETEC<br />
LINN<br />
MARANTZ<br />
MEDION<br />
MICROMAXX<br />
MICROSTAR<br />
NAD<br />
NUVO<br />
6190 6171 6191<br />
6177<br />
6179<br />
6184 6174<br />
6176<br />
6184 6182 6173<br />
6174<br />
6184 6172<br />
6175<br />
2481<br />
2481<br />
2481<br />
ADSL<br />
6164<br />
6164 6188<br />
6164<br />
6186 4058<br />
6164 6188<br />
6150<br />
6187 4074<br />
6187 4074<br />
4052 6164 6165<br />
4059<br />
4059<br />
4059 6164 6188<br />
6164 4057 4052<br />
6185<br />
6187<br />
6165 6188<br />
6164 6187 6188<br />
4052 6164 6165<br />
6185<br />
AUX<br />
6028<br />
6067<br />
6113 6067 6068<br />
6113 6067 6068<br />
6113 6067 6068<br />
6136 6070 6072<br />
6113 6067 6086<br />
6022 6023<br />
6031 6032 6036<br />
6026<br />
6058<br />
6113 6067 6068<br />
6120<br />
6036<br />
6113 6067 6068<br />
6113 6067 6068<br />
6113 6067 6068<br />
6041 6042 6043<br />
6044 6087 6088<br />
6123 6124 6125<br />
- 42 -<br />
ONKYO<br />
PHILIPS<br />
PRO2<br />
SANSUI<br />
SCHNEIDER<br />
SHERWOOD<br />
SILVERCREST<br />
SONY<br />
TCM<br />
TEAC<br />
TECHNICS<br />
TEVION<br />
THEORIE &<br />
ANWENDING<br />
THOMSON<br />
XANTECH<br />
YAMAHA<br />
Audio Tape Players<br />
AIWA<br />
DENON<br />
GRUNDIG<br />
HARMON KARDON<br />
KENWOOD<br />
MAGNAVOX<br />
MARANTZ<br />
NAD<br />
ONKYO<br />
PHILIPS<br />
SANSUI<br />
SHERWOOD<br />
SONY<br />
TEAC<br />
TECHNICS<br />
THOMSON<br />
YAMAHA<br />
MINI Systems<br />
AIWA<br />
CYBERCOM<br />
CYBERMAXX<br />
CYTRON<br />
6126<br />
6076 6082 6083<br />
6105<br />
6109 6040 6117<br />
6036<br />
6113 6067 6068<br />
6036<br />
6081<br />
6073<br />
6021<br />
6045 6046 6052<br />
6054 6055 6056<br />
6057<br />
6113 6067 6068<br />
6091<br />
6084 6085<br />
6059 6069 6078<br />
6067 6068 6096<br />
6097 6113<br />
6090<br />
6114 6060<br />
6127<br />
6133 6132 6111<br />
6110 6035 6049<br />
6062 6063 6064<br />
6080<br />
6071<br />
6038 6032<br />
5445<br />
6058<br />
6038<br />
6038<br />
6087<br />
6075<br />
6038<br />
6038<br />
6074<br />
6051 6052 6053<br />
6084<br />
6059 6069 6077<br />
6114<br />
6035 6064<br />
6065 6066<br />
6119 6121 6033<br />
6048 6092 6093<br />
6099 6098<br />
6119 6121 6033<br />
6048 6092 6093<br />
6094 6095 6099<br />
6098<br />
6119 6121 6033<br />
6048 6092 6093<br />
6094 6095 6099<br />
6098
DUAL<br />
E-BENCH<br />
ELTA<br />
GRUNDIG<br />
INSIGNIA<br />
INTERTRONIC<br />
LIFE<br />
LIFETEC<br />
MEDION<br />
MICROMAXX<br />
MICROSTAR<br />
PIONEER<br />
PRO2<br />
SAMSUNG<br />
SHARP<br />
SILVERCREST<br />
SONY<br />
TCM<br />
TEVION<br />
WELLTECH<br />
Misc<br />
APPLE IPOD<br />
AUDIO COMBI<br />
CAR RADIO<br />
CDR<br />
DBS<br />
INTERNET RADIO<br />
IPOD<br />
SWITCH BOX<br />
VIDEO CD<br />
6119 6121 6033<br />
6048 6086 6099<br />
6098<br />
6094<br />
6029 6048<br />
6034<br />
6039<br />
6094<br />
6129 6102 6094<br />
6129 6102 6119<br />
6121 6033 6048<br />
6092 6093 6094<br />
6095 6099 6098<br />
6129 6102 6039<br />
6037 6119 6121<br />
6033 6048 6092<br />
6093 6094 6095<br />
6099 6098<br />
6119 6121 6033<br />
6048 6092 6093<br />
6094 6095 6099<br />
6098<br />
6119 6121 6033<br />
6048 6092 6093<br />
6094 6095 6099<br />
6098<br />
6050<br />
6119 6121 6033<br />
6048 6092 6093<br />
6094 6095 6099<br />
6098<br />
6061<br />
6079<br />
6107 6094 6108<br />
6128<br />
6047<br />
6129 6130 6119<br />
6121 6033 6048<br />
6092 6093 6094<br />
6099 6098 6030<br />
6102 6103 6104<br />
6129 6130 6119<br />
6121 6033 6048<br />
6092 6093 6094<br />
6095 6099 6098<br />
6100 6101 6102<br />
6131 6119 6093<br />
6099 6098 6030<br />
6089 6094 6106<br />
6135<br />
6115<br />
6122<br />
6118 6025<br />
6116<br />
6024<br />
6134<br />
6027<br />
6112<br />
- 43 -<br />
ADCOM<br />
AIWA<br />
AKAI<br />
ALBA<br />
ARCAM<br />
BESTAR<br />
BSR<br />
BUSH<br />
CARRERA<br />
CLASSIC<br />
CONDOR<br />
CYBERCOM<br />
CYBERMAXXX<br />
CYTRON<br />
DENON<br />
DUAL<br />
E-BENCH<br />
ELTA<br />
EMERSON<br />
FISHER<br />
GENEXXA<br />
GOLDSTAR<br />
GOODMANS<br />
GRUNDIG<br />
HARMAN/KARDON<br />
HITACHI<br />
7001 7103<br />
7002 7104 7105<br />
7106 7086<br />
7107 7108 7109<br />
7110<br />
7008 7077<br />
7111<br />
7112<br />
7003 7031<br />
7004 7032<br />
7095<br />
7112<br />
7102 2343 6023<br />
7039 6025 6030<br />
7076 7079 7080<br />
7081 6048 7082<br />
7083 7092 7093<br />
6089 7095 7096<br />
7100 6098<br />
7102 2343 6023<br />
7039 6025 6030<br />
7076 7079 7080<br />
7081 6048 7082<br />
7083 7092 7093<br />
6089 7095 7096<br />
7100 6098<br />
7102 2343 6023<br />
7039 6025 6030<br />
7076 7079 7080<br />
7081 6048 7082<br />
7083 7092 7093<br />
6089 7095 7096<br />
7100 6098<br />
7015 7019 7033<br />
7034<br />
7001 7103 2343<br />
6023 6025 6030<br />
7076 7079 7080<br />
7081 6048 7082<br />
7102 7091 7092<br />
7093 6089 7083<br />
6094<br />
6094<br />
7009 7114 6022<br />
6023 6029 6030<br />
6048<br />
7001 7103 7111<br />
7005 7035<br />
7111 7036 7037<br />
7038 6025 7040<br />
7041<br />
7004 7032<br />
7042 7043<br />
7008 7044 6031<br />
6032 7077<br />
7006 7045<br />
7001 7103 7046
INNOVATION<br />
JVC<br />
KENWOOD<br />
LG<br />
LIFE<br />
LIFETEC<br />
LINN<br />
LUXMAN<br />
MAGNUM<br />
MARANTZ<br />
MATSUI<br />
MEDION<br />
MEMOREX<br />
MERID<strong>IAN</strong><br />
MICROMAEGA<br />
MICROMAXX<br />
MICROMEGA<br />
MICROSTAR<br />
MISSION<br />
NAD<br />
NAIM<br />
NAKAMICHI<br />
NUVO<br />
ONKYO<br />
7047<br />
7076 7079 7080<br />
7081 6048 7082<br />
7083 7009<br />
7007 2342 7048<br />
7005 7035 7049<br />
7050 7051 7087<br />
7004 7032<br />
6102<br />
7009 7102 2343<br />
6023 7039 6025<br />
6030 7076 7079<br />
7080 7081 6048<br />
6102 7092 7093<br />
6089 7095 7096<br />
7100 6098 7082<br />
7083<br />
7008 7077<br />
7115<br />
7009 7076 7079<br />
7080 7081 6048<br />
7082 7083<br />
7008 7018 7021<br />
7052 7077<br />
7008 7053 7077<br />
7009 7102 6037<br />
2343 6023 7039<br />
6025 6030 7076<br />
7079 7080 7081<br />
6102 7082 7030<br />
7092 7093 6089<br />
7095 7096 7100<br />
6098 6048 7083<br />
7001 7103 7111<br />
7041<br />
7008 7077<br />
7008<br />
7009 2343 6023<br />
7039 6025 6030<br />
7076 7079 7080<br />
7081 6048 7082<br />
7102 7092 7093<br />
6089 7095 7096<br />
7100 6098 7083<br />
7077<br />
7009 2343 6023<br />
7039 6025 6030<br />
7076 7079 7080<br />
7081 6048 7082<br />
7102 7092 7093<br />
6089 7095 7096<br />
7100 6098 7083<br />
7008 7077<br />
7036 7078 6041<br />
6042 6043 6088<br />
7008 7077<br />
7054 7055<br />
7113<br />
7000 6112 7056<br />
- 44 -<br />
PANASONIC<br />
PHILIPS<br />
PHILIPS CD-V<br />
PIONEER<br />
PRO2<br />
PROTON<br />
QUAD<br />
REALISTIC<br />
ROADSTAR<br />
ROTEL<br />
SABA<br />
SAE<br />
SAMSUNG<br />
SANSUI<br />
SCHNEIDER<br />
SCOTT<br />
SHARP<br />
SHERWOOD<br />
SILVERCREST<br />
SINGER<br />
SKYMASTER<br />
SONY<br />
TANDBERG<br />
TCM<br />
TEAC<br />
TECHNICS<br />
TELEFUNKEN<br />
TEVION<br />
7057 7058 6076<br />
6082<br />
7003 7031 7059<br />
7008 7016 6118<br />
7060 7077<br />
7000 6112<br />
7014 7020 7038<br />
7041 6050<br />
7102 2343 6023<br />
7039 6025 6030<br />
7076 7079 7080<br />
7081 6048 7082<br />
7083 7092 7093<br />
6089 7095 7096<br />
7100 6098<br />
7008 7077<br />
7008 7077<br />
7001 7103 7111<br />
6025<br />
7060 7061<br />
7008 7022 7077<br />
7001 7103<br />
7008 7077<br />
7010 6061<br />
7008 6118 7062<br />
7063 7064 7077<br />
7008 7112 7077<br />
7111<br />
7037 7065 7066<br />
7067<br />
6073<br />
7026 7027 7028<br />
7029 6094<br />
6089<br />
7089<br />
7011 7036 7068<br />
7069 7070 6047<br />
7084 7085 7116<br />
7008 7077<br />
7009 7023 7024<br />
7025 7039 6025<br />
6030 7076 7079<br />
7080 7081 6048<br />
6130 7102 2343<br />
6023 6089 7095<br />
7096 6102 6103<br />
6104 7082 7083<br />
7092 7093<br />
7012 7090<br />
7017 7059 7072<br />
7088 7114 7117<br />
7001 7103<br />
7009 7102 2343<br />
6023 7039 6025<br />
6030 7076 7079<br />
7080 7081 6048<br />
6102 7083 7092<br />
7093 6089 7095<br />
7096 7097 7098
THEORIE &<br />
ANWENDING<br />
THOMSON<br />
TOSHIBA<br />
UNIVERSUM<br />
VECTOR RESEARCH<br />
VICTOR<br />
VICTOR RESEARCH<br />
WELLTECH<br />
YAMAHA<br />
YORX<br />
Amplifier<br />
BUSH<br />
DENON<br />
GOODMANS<br />
GRUNDIG<br />
KENWOOD<br />
LINN<br />
MARANTZ<br />
MERID<strong>IAN</strong><br />
MICROMEGA<br />
NAIM<br />
PHILIPS<br />
PIONEER<br />
QUAD<br />
ROTEL<br />
SILVERCREST<br />
SONY<br />
TEAC<br />
TECHNICS<br />
THORENS<br />
YAMAHA<br />
LCD TV/Radio<br />
Tuner Combo<br />
PHILIPS<br />
7099 7100 6098<br />
7082 6101 6100<br />
7094<br />
7001 6114 7103<br />
7073 7074<br />
7008 7077<br />
7032<br />
7007 7048<br />
7004<br />
6131 7095 6025<br />
6030 7081 6094<br />
6106 6107<br />
7013 7065 7071<br />
7075 6063<br />
7061<br />
8000<br />
8006 8028 8029<br />
8030 8062<br />
8023<br />
8000<br />
8012<br />
8000<br />
8000 8005 8009<br />
8024 8052<br />
8000<br />
8000<br />
8000<br />
8000<br />
8000 8004 8007<br />
8017 8020 8025<br />
8000<br />
8065<br />
8119<br />
8001 8010 8011<br />
8014 8044<br />
8015 8022 8027<br />
8002 8008 8016<br />
8000<br />
8003 8013 8018<br />
8019 8021 8026<br />
8090<br />
AKAI<br />
DENON<br />
DK DIGITAL<br />
ELTAX<br />
GOLDSTAR<br />
GOODMANS<br />
GRUNDIG<br />
HARMAN/KARDON<br />
HITACHI<br />
JVC<br />
KENWOOD<br />
LG<br />
MARANTZ<br />
MICROMEGA<br />
MITSUBISHI<br />
OKANO<br />
ONKYO<br />
PANASONIC<br />
PHILIPS<br />
PIONEER<br />
REVOX<br />
ROTEL<br />
SAMSUNG<br />
SANSUI<br />
SANYO<br />
SHARP<br />
SONY<br />
TCM<br />
TEAC<br />
TECHNICS<br />
THOMSON<br />
THORENS<br />
UNIVERSUM<br />
YAMAHA<br />
8036<br />
8062 8072 8073<br />
8074 8076 8077<br />
8078 8079 8080<br />
8082 8083<br />
8097<br />
8095<br />
8035<br />
8036<br />
8033 8034 8035<br />
8031 8033<br />
8106<br />
8064 8075 8098<br />
8056 8067 8109<br />
8035 8107<br />
8033 8034 8052<br />
8070 8085 8086<br />
8087 8089<br />
8033<br />
8036<br />
8036<br />
8032 8088<br />
8061 8100 8104<br />
8105 8113<br />
8033 8052 8060<br />
8096<br />
8043 8045 8047<br />
8053 8055 8066<br />
8092 8093 8110<br />
8033<br />
8065<br />
8103<br />
8033<br />
8034 8099 8108<br />
8081<br />
8037 8039 8040<br />
8041 8044 8046<br />
8058 8059 8094<br />
8102<br />
8114 8115 8116<br />
8117 8118<br />
8031<br />
8050 8051 8061<br />
8057 8069 8071<br />
8033<br />
8035 8036<br />
8013 8038 8042<br />
8048 8049 8054<br />
8063 8068<br />
Receiver<br />
PIONEER<br />
YAMAHA<br />
Receiver/Amplifier<br />
YAMAHA<br />
8043<br />
8018<br />
8013<br />
Tuner<br />
MUSTEK<br />
PHILIPS<br />
PIONEER<br />
SONY<br />
YAMAHA<br />
8101<br />
8090 8091<br />
8092 8093<br />
8111<br />
8003<br />
Receiver/Tuner<br />
AIWA<br />
8084 8112<br />
TV/Tuner<br />
PHILIPS<br />
8091<br />
- 45 -
HOME AUTO-<br />
MATION<br />
HOME AUTOMATION<br />
LUTRON<br />
X-10 HOME<br />
AUTOMATION<br />
8124<br />
8123<br />
8124<br />
LD<br />
DENON<br />
GRUNDIG<br />
MITSUBISHI<br />
NAD<br />
PIONEER<br />
TELEFUNKEN<br />
THORN<br />
8120 8121<br />
8121<br />
8121<br />
8121<br />
8121<br />
8121<br />
8122<br />
- 46 -
- 47 -
- 48 -