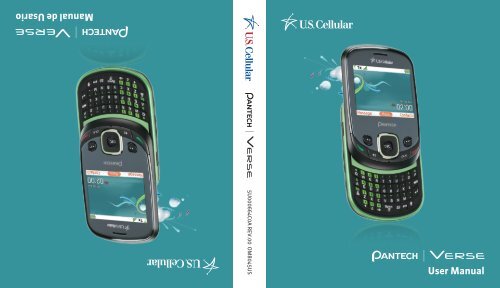
User Manual Manual de Usario
User Manual Manual de Usario
User Manual Manual de Usario

You also want an ePaper? Increase the reach of your titles
YUMPU automatically turns print PDFs into web optimized ePapers that Google loves.
<strong>Manual</strong> <strong>de</strong> <strong>Usario</strong><br />
5U000664C0A REV.00 OM8045US<br />
<strong>User</strong> <strong>Manual</strong>
<strong>User</strong> Gui<strong>de</strong>
CHAPTER 1. BEFORE USING<br />
BEFORE USING ..................................................................................................7<br />
HANDSET DESCRIPTIONS .........................................................................................8<br />
KEY DESCRIPTIONS ...................................................................................................8<br />
DISPLAY INDICATORS ............................................................................................ 12<br />
INSTALL BATTERY .................................................................................................. 16<br />
REMOVE BATTERY ................................................................................................. 17<br />
CHARGING YOUR BATTERY .................................................................................... 17<br />
USING A microSD TM CARD ..................................................................................... 19<br />
BATTERY HANDLING INFORMATION ..................................................................... 19<br />
CHAPTER 2. BASIC OPERATION<br />
BASIC OPERATION ..........................................................................................21<br />
TURNING THE PHONE ON/OFF .............................................................................. 22<br />
ACCESSING THE MENU .......................................................................................... 22<br />
USING THE TASK BAR............................................................................................. 23<br />
QUICK SWITCHING................................................................................................. 23<br />
MENU SUMMARY.................................................................................................. 24<br />
MAKING A CALL..................................................................................................... 29<br />
ANSWERING CALLS ............................................................................................... 29<br />
MISSED CALL NOTIFICATION ................................................................................. 30<br />
WAIT/PAUSE FEATURE .......................................................................................... 30<br />
MAKING AN INTERNATIONAL CALL ...................................................................... 31<br />
3-WAY CALLING .................................................................................................... 31<br />
CALL WAITING FUNCTION ..................................................................................... 32<br />
CALLING A NUMBER FROM CONTACTS ................................................................. 32<br />
ADJUSTING VOLUME ............................................................................................. 32<br />
CALLER ID FUNCTION ............................................................................................ 33<br />
VIBRATE MODE ...................................................................................................... 33<br />
SPEAKERPHONE MODE ......................................................................................... 33<br />
USING AUTO KEYPAD LOCK FUNCTION ................................................................. 33<br />
AVAILABLE OPTIONS DURING A CALL ................................................................... 34<br />
MAKING AN EMERGENCY CALL ............................................................................ 34<br />
DIALING LETTERS .................................................................................................. 35<br />
FAVORITES MENU .................................................................................................. 36<br />
CHAPTER 3. MEMORY FUNCTION<br />
MEMORY FUNCTION ......................................................................................37<br />
STORING A PHONE NUMBER ................................................................................. 38<br />
EDITING CONTACT ENTRIES ................................................................................... 41<br />
DEFAULT NUMBERS ............................................................................................... 43<br />
ENTERING LETTERS, NUMBERS & SYMBOLS ........................................................ 44<br />
ONE, TWO, THREE - TOUCH DIALING ..................................................................... 45<br />
CHAPTER 4. MENU FUNCTION<br />
CONTACTS ........................................................................................................48<br />
NEW CONTACT ....................................................................................................... 48<br />
CONTACT LIST ........................................................................................................ 48<br />
MY CONTACTS BACKUP ......................................................................................... 49<br />
GROUPS ................................................................................................................. 50<br />
SPEED DIALS .......................................................................................................... 54<br />
FAVORITE CONTACTS ............................................................................................. 55<br />
2 3
MY NAME CARD .................................................................................................... 57<br />
CALL HISTORY .................................................................................................59<br />
MISSED CALLS ....................................................................................................... 59<br />
RECEIVED CALLS .................................................................................................... 59<br />
DIALED CALLS........................................................................................................ 60<br />
ALL CALLS .............................................................................................................. 60<br />
CALL TIMERS ......................................................................................................... 61<br />
easyedge SM ......................................................................................................62<br />
easyedge SM ............................................................................................................ 62<br />
YOUR NAVIGATOR .................................................................................................. 62<br />
BROWSER ........................................................................................................64<br />
BROWSER .............................................................................................................. 64<br />
TONE ROOM DELUXE ......................................................................................65<br />
TONE ROOM DELUXE ............................................................................................. 65<br />
PAC-MAN .........................................................................................................65<br />
PAC-MAN ............................................................................................................... 65<br />
TOOLS ..............................................................................................................66<br />
VOICE COMMANDS................................................................................................ 66<br />
CALCULATOR .......................................................................................................... 71<br />
TIP CALCULATOR .................................................................................................... 72<br />
CALENDAR ............................................................................................................. 73<br />
E-DIARY ................................................................................................................. 75<br />
ALARM CLOCK ....................................................................................................... 77<br />
STOPWATCH .......................................................................................................... 79<br />
WORLD CLOCK ....................................................................................................... 79<br />
NOTEPAD + ........................................................................................................... 80<br />
USB MASS STORAGE ............................................................................................. 82<br />
SETTINGS .........................................................................................................83<br />
SOUNDS SETTINGS ................................................................................................ 83<br />
DISPLAY SETTINGS ................................................................................................ 87<br />
PHONE SETTINGS .................................................................................................. 90<br />
CALL SETTINGS ...................................................................................................... 94<br />
MEMORY ............................................................................................................... 96<br />
BLUETOOTH® ....................................................................................................... 100<br />
USB MODE ........................................................................................................... 103<br />
PHONE INFO ........................................................................................................ 104<br />
CHAPTER 5. MULTIMEDIA<br />
MULTIMEDIA .................................................................................................107<br />
PICTURE & VIDEO ................................................................................................ 108<br />
SOUNDS ............................................................................................................... 111<br />
RINGTONES .......................................................................................................... 113<br />
MUSIC .................................................................................................................. 114<br />
CHAPTER 6. MESSAGING<br />
MESSAGING ..................................................................................................117<br />
WHEN A NEW MESSAGE ARRIVES ...................................................................... 118<br />
NEW MESSAGE .................................................................................................... 118<br />
MESSAGES ........................................................................................................... 122<br />
INBOX .................................................................................................................. 124<br />
4 5
SENT .................................................................................................................... 125<br />
DRAFTS ................................................................................................................ 126<br />
ERASE ALL ........................................................................................................... 126<br />
VOICEMAIL .......................................................................................................... 127<br />
MOBILE E-MAIL ................................................................................................... 127<br />
SETTINGS ............................................................................................................. 129<br />
CHAPTER 7. SAFETY AND WARRANTY<br />
SAFETY ..........................................................................................................134<br />
SAFETY INFORMATION FOR WIRELESS HANDHELD PHONES ............................. 134<br />
SAFETY INFORMATION FOR FCC RF EXPOSURE .................................................. 139<br />
SAR INFORMATION .............................................................................................. 140<br />
HEARING AID COMPATIBILITY (HAC) FOR WIRELESS TELECOMMUNICATIONS<br />
DEVICES ............................................................................................................... 142<br />
FDA CONSUMER UPDATE .................................................................................... 144<br />
AVOID POTENTIAL HEARING LOSS ...................................................................... 152<br />
FCC COMPLIANCE INFORMATION ........................................................................ 154<br />
WARRANTY ...................................................................................................155<br />
12 MONTH LIMITED WARRANTY ........................................................................ 155<br />
1<br />
BEFORE USING<br />
This chapter provi<strong>de</strong>s important information about using the<br />
VERSE including:<br />
Handset Descriptions<br />
Key Descriptions<br />
Display Indicators<br />
Install Battery<br />
Remove Battery<br />
Charging Your Battery<br />
Using a microSD TM Card<br />
Battery Handling Information<br />
6 6
HANDSET DESCRIPTIONS<br />
1<br />
2<br />
3<br />
4<br />
5<br />
6<br />
15<br />
14 18<br />
13<br />
12<br />
11<br />
10<br />
9<br />
8<br />
7<br />
19<br />
17<br />
16<br />
KEY DESCRIPTIONS<br />
1. Left Soft Key: From the idle mo<strong>de</strong>, press to display the Message menu or<br />
access the function listed above the key.<br />
2. SEND Key: Press to make or receive a call. From the idle mo<strong>de</strong>, press to access<br />
the All Calls list.<br />
3. Speakerphone Key: Press to turn Speakerphone On or Off.<br />
4. Favorites Key / Mo<strong>de</strong> Change Key: From the idle mo<strong>de</strong>, press to access the<br />
Favorites menu. In text entry mo<strong>de</strong>, press to change the character input type.<br />
5. International Dial Key: Press to enter an asterisk (*) character for calling<br />
features. Press and hold to display the plus sign (+) for international dialing.<br />
6. Vibration Mo<strong>de</strong> Key: Press to enter the (#) character for calling features.<br />
From the idle mo<strong>de</strong>, press and hold to turn Vibration Mo<strong>de</strong> on or off.<br />
7. Notepad + / Space Key: Press to access the Notepad + menu or to add a<br />
space between characters.<br />
8. TXT Composer Key: Press to access the New TXT Message Composer.<br />
9. CLR Key: Press to clear a character from the display. Press and hold to clear all<br />
characters. Within a menu, press to return to the previous menu.<br />
10. END / POWER Key: Press to end calls or close applications. Press and hold to<br />
power your phone on or off.<br />
11. Right Soft Key: From the home screen, press to display the Contacts menu or<br />
access the function listed above the key.<br />
12. Directional Key: Press to scroll through phone menu options and provi<strong>de</strong>s a<br />
shortcut to phone functions from idle mo<strong>de</strong>.<br />
13. OK Key: Press to access the menu screen. It also allows you to accept choices<br />
when navigating through a menu.<br />
14. Display Screen: Displays the digital clock, messages, phone status and<br />
indicator icons.<br />
15. Earpiece: Allows you to hear the other caller.<br />
16. Camera Key / Vi<strong>de</strong>o Key: Press to access the built-in camera. Press and hold<br />
to activate the Vi<strong>de</strong>o Camera.<br />
17. Task Bar Key: Press to access the Task Bar menu.<br />
18. Headset Jack: Plug in an optional headset for convenient, hands-free<br />
conversations or for listening to music.<br />
19. Charging / Data Port: Connects the phone to the USB/Wall Charger, or other<br />
compatible accessories.<br />
01<br />
02<br />
03<br />
04<br />
05<br />
06<br />
07<br />
8<br />
9
HANDSET DESCRIPTIONS<br />
27. Internal Antenna Area<br />
20<br />
01<br />
21<br />
22<br />
23<br />
27<br />
24<br />
25<br />
26<br />
Correct<br />
Incorrect<br />
Holding the <strong>de</strong>vice by the internal antenna area might affect the quality of calls.<br />
02<br />
03<br />
04<br />
05<br />
06<br />
07<br />
20. Wrist Strap Eyelet: Accessory eyelet (attach optional straps and lanyards -<br />
purchased separately).<br />
21. External Speaker: Music, Ringtones and Sounds are played through the<br />
speaker.<br />
22. Camera Lens: The lens of your built-in camera/camcor<strong>de</strong>r.<br />
23. Self-Portrait Mirror: Displays your reflection when taking pictures or vi<strong>de</strong>os.<br />
24. microSD TM Card Slot: Insert a microSD TM Card(sold separately) here to<br />
increase memory capacity.<br />
25. Volume Keys: Press to adjust master volume from the idle mo<strong>de</strong>, adjust the<br />
earpiece volume during a call or adjust the volume when playing music.<br />
26. Voice Commands Key: Press to launch the VOICE COMMANDS menu.<br />
10<br />
11
DISPLAY INDICATORS<br />
Icon<br />
Icon Descriptions<br />
Icon<br />
Icon Descriptions<br />
“1x” Signal Strength: Indicates your phone is in the CDMA 1x network.<br />
More bars indicate a stronger signal.<br />
“D” Signal Strength: Indicates your phone is receiving digital data. More<br />
bars indicate a stronger signal.<br />
Airplane Mo<strong>de</strong>: Transmitting and receiving information is restricted.<br />
Roaming: The phone is outsi<strong>de</strong> of the home service area.<br />
SSL (Secured Socket Layer): Indicates that secure communication<br />
between client and server has been established during data<br />
communication using encryption.<br />
Voice Privacy: Indicates Voice Privacy mo<strong>de</strong> is active.<br />
Data Call: Indicates a Data Session is in progress.<br />
Dormant: Indicates phone is in a dormant state during a data call.<br />
Phone reverts to Dormant mo<strong>de</strong> when there hasn't been activity on a<br />
page for some time - the connection is still active and you can make and<br />
receive calls.<br />
Keypad Lock: Indicates external keys are locked.<br />
Bluetooth®: Indicates Bluetooth® mo<strong>de</strong>.<br />
Bluetooth Active: Indicates Bluetooth Active mo<strong>de</strong>.<br />
Bluetooth Connected: Indicates a Bluetooth Device is connected.<br />
Music Only: Indicates your phone is in Music Only mo<strong>de</strong>.<br />
Playing Music: Indicates that music is playing.<br />
Pause Music: Indicates that music playback has been paused.<br />
Numeric Entry Mo<strong>de</strong>: Enter numbers by pressing the corresponding key<br />
on the keypad.<br />
Alphabetical Entry Mo<strong>de</strong>: Enter characters by pressing the key with the<br />
<strong>de</strong>sired characters.<br />
Battery Level: Battery charging level - the more blocks, the stronger<br />
the charge.<br />
AVR Active: AVR mo<strong>de</strong> is active.<br />
01<br />
02<br />
03<br />
04<br />
05<br />
06<br />
07<br />
No Service: Phone cannot receive signal from the system.<br />
AVR Listening: Indicates AVR listening.<br />
TTY: TTY mo<strong>de</strong> is active.<br />
Voice Call: A call is in progress.<br />
* No icon indicates the phone is in idle mo<strong>de</strong>.<br />
E911: Global Positioning Service (GPS) for E911 is set to On for emergency<br />
calls only.<br />
Location On: GPS is set to On for Location Service and E911 calls.<br />
All Sounds Off: All sounds are set to off.<br />
Alarm Only: Phone will alert you only with an alarm tone.<br />
Vibrate Only: Indicates the Ringer Volume is set to Vibrate On.<br />
Speaker: Speakerphone mo<strong>de</strong> is active.<br />
12<br />
13
Icon<br />
Icon Descriptions<br />
Missed Calls: Indicates you have missed calls.<br />
Ringtone<br />
New Contact Icons<br />
Notes<br />
Message: Indicates you have a new message.<br />
Other Icon<br />
01<br />
MessageUrgent: Indicates you have urgent message.<br />
DST (Daylight Saving Time)<br />
02<br />
Calendar Appointment: Event Alarm is active.<br />
Voicemail: Indicates you have a voice mail message.<br />
Alarm On: Appears when an alarm is set.<br />
Call History Icons<br />
Dialed Call<br />
Missed Call<br />
Received Call<br />
Message Icons<br />
New/Unread Message<br />
Opened/Read Message<br />
Message Delivered<br />
Incomplete Delivery<br />
Sent Message, Delivery<br />
Failed<br />
Pending Message Sent<br />
Unread MMS<br />
Read MMS<br />
Sent Message<br />
Received Message<br />
03<br />
04<br />
05<br />
06<br />
07<br />
Mobile 1<br />
Mobile 2<br />
Home<br />
Business<br />
Personal Email<br />
Work Email<br />
Group<br />
Picture/Vi<strong>de</strong>o<br />
New Contact Icons<br />
Message Tone<br />
Fax<br />
Speed Dial<br />
Home Address<br />
Work Address<br />
Company<br />
Title<br />
Birthday<br />
Message Locked<br />
Text Message Draft<br />
Picture Message Draft<br />
Priority<br />
Unread MMS Notification<br />
Read MMS Notification<br />
Corrupt Message<br />
Unread WAP Push<br />
Read WAP Push<br />
Multiple Message<br />
Delivered<br />
Multiple Message Failed<br />
Multiple Message<br />
Incomplete<br />
Multiple Message<br />
Pending<br />
Multiple Message Sent<br />
14<br />
15
Do not allow metal objects to contact or short<br />
circuit the battery terminals. Do not incinerate<br />
laisser <strong>de</strong>s objets métaliques venir en contact<br />
avec les bornes <strong>de</strong> pile ni les court-circuiter.<br />
Cuidado: No exponga a alta temperatura (140<br />
cortocircuito con los terminales <strong>de</strong> la batería.<br />
No incinere ni exponga al fuego. Para eliminar<br />
A tenti<br />
A tention: Ne pas exposer a <strong>de</strong>s tempe atures<br />
140 /60 ). Ne pas démonter. Ne pas<br />
venir en contact<br />
INSTALL BATTERY<br />
1. Insert your finger tip into the slot (1), then push down on<br />
top of the battery cover and sli<strong>de</strong> it off to remove (2).<br />
2. Sli<strong>de</strong> the battery into the slot (3) by aligning the contacts<br />
and press down (4) until you hear the “click”.<br />
en forma a<strong>de</strong>cuada (Por ejemplo:Número <strong>de</strong><br />
reciclaje 1-800-822-8837)<br />
/60 ). No <strong>de</strong>sensamble. No permita que<br />
objetos <strong>de</strong> metal entren en contacto o hagan<br />
Ne pas incinérer ni faire brûler.<br />
Pour mettre au rebut adéquatement<br />
(Ex:numéro <strong>de</strong> recyclage 1-800-822-8837)<br />
Attention: Ne pas exposer a <strong>de</strong>s tempe atures<br />
élevées (140 /60 ). Ne pas démonter . Ne pas<br />
Caution:Do not expose to high temperature<br />
(140 /60 ). Do not disassemble .<br />
or expose to fire. To dispose of properly<br />
(Ex:Recycling number 1-800-822-8837)<br />
Correct<br />
3. Align the cover tabs with the slots on the back of the <strong>de</strong>vice<br />
(1) and sli<strong>de</strong> the battery cover onto the unit until it snaps<br />
into place (2).<br />
If the battery is not correctly placed in the compartment, the handset will not turn on<br />
and/or the battery may <strong>de</strong>tach during use.<br />
Correct<br />
Incorrect<br />
Incorrect<br />
REMOVE BATTERY<br />
1. To remove the battery cover, insert your finger tip into the<br />
slot (1), then push down on top of the battery cover and<br />
sli<strong>de</strong> it off (2).<br />
2. Insert your fingernail into the slot and lift the battery (3),<br />
and pull the battery (4).<br />
3. Align the cover tabs with the slots on the back of the<br />
<strong>de</strong>vice and sli<strong>de</strong> the battery cover onto the unit until it<br />
snaps into place.<br />
CHARGING YOUR BATTERY<br />
1. Connect the USB data cable into the cableless wall<br />
adapter.<br />
2. Plug the USB data cable into the phone’s Charging/Data<br />
Port (making sure to align the connector as it appears in<br />
the image to the right) and the wall adapter end into an<br />
electrical outlet.<br />
• If the battery connector is not properly aligned, damage could occur to the charging<br />
connector and the phone may not charge.<br />
• The main plug is used as the disconnect <strong>de</strong>vice and remains readily operable.<br />
01<br />
02<br />
03<br />
04<br />
05<br />
06<br />
07<br />
16<br />
17
Correct<br />
Correct<br />
Incorrect<br />
Incorrect<br />
3. To remove the Wall Charger, gently pull the charger from<br />
the <strong>de</strong>vice.<br />
• When you charge the battery with the handset powered<br />
off you will see a charging status screen. After the charging<br />
has completed, the Charge Complete message appears. You<br />
cannot operate the phone until it is powered on. To turn your<br />
phone on, press and hold the END/POWER Key until your<br />
display turns on.<br />
• The battery is not fully charged at the time of purchase. Fully charge the battery<br />
before use.<br />
• It is more efficient to charge the battery with the handset powered off.<br />
• Battery operating time gradually <strong>de</strong>creases over time.<br />
• If the battery fails to perform normally, you may need to replace the battery.<br />
USING A microSD TM CARD<br />
A microSD TM Card stores sounds, vi<strong>de</strong>os, images, photos, music, and other files.<br />
INSTALLING A microSD TM CARD<br />
To install your microSD TM Card:<br />
1. Remove the cover of microSD Card Slot.<br />
2. Press the microSD Card into the slot with the gold<br />
contacts facing up.<br />
3. Replace the cover of microSD Card Slot.<br />
REMOVING A microSD TM CARD<br />
To remove the microSD TM Card:<br />
1. Remove the cover of microSD Card Slot.<br />
2. Gently push the exposed edge of the microSD Card<br />
with your fingertip to release it from the slot.<br />
3. Remove the microSD Card.<br />
4. Replace the cover of microSD Card Slot.<br />
BATTERY HANDLING INFORMATION<br />
CAUTIONS: THERE IS A RISK OF EXPLOSION IF AN INCORRECT BATTERY IS USED.<br />
DISPOSE OF USED BATTERY ACCORDING TO LOCAL LAWS.<br />
DO’S<br />
• Only use the battery and charger approved for use with the VERSE.<br />
• Only use the battery for the system for which it is specified.<br />
• Only use or replace the battery with a charging system or another battery that has been qualified with the<br />
system per this standard, IEEE Std 1725-2006. Use of an unqualified battery or charger may present a risk of<br />
fire, explosion, leakage, or other hazard.<br />
• Only use the battery for its original purpose. As an improper battery use may result in a fire, explosion or<br />
other hazard.<br />
• Try to keep batteries in a temperature between 36°F (0°C) and 95°F (35°C). If the battery is stored in<br />
temperatures above or below the recommen<strong>de</strong>d range, give it time to warm up or cool down before using.<br />
01<br />
02<br />
03<br />
04<br />
05<br />
06<br />
07<br />
18<br />
19
• Store the discharged battery in a cool, dark, and dry place.<br />
• Purchase a new battery when its operating time gradually <strong>de</strong>creases after fully charging.<br />
• Properly and promptly dispose of the battery according to local laws.<br />
• Battery usage by children should be supervised.<br />
DON’TS<br />
• Do not attempt to disassemble or open the battery – it is a sealed unit with no serviceable parts.<br />
• Do not crush, bend or <strong>de</strong>form, puncture or shred the battery.<br />
• Do not drop the phone or battery. If the phone or battery is dropped, especially on a hard surface, and the user<br />
suspects damage, take it to a service center for inspection.<br />
• Do not leave the battery in extremely hot or cold temperatures. Otherwise, it could significantly reduce the<br />
capacity and lifetime of the battery.<br />
• Do not modify or remanufacture, attempt to insert foreign objects into the battery, immerse or expose to<br />
water or other liquids, expose to fire, explosion or other hazard.<br />
• Do not acci<strong>de</strong>ntally short-circuit the battery by carrying it in your pocket or purse with other metallic objects<br />
such as coins, clips and pens. This may critically damage the battery.<br />
• Do not short-circuit a battery or allow metallic conductive objects to contact battery terminals.<br />
• Do not dispose of the battery by placing into a fire.<br />
2<br />
BASIC OPERATION<br />
This chapter addresses and explains the basic features for<br />
Turning the Phone On/Off<br />
Accessing the Menu<br />
Using the Task Bar<br />
Quick Switching<br />
Menu Summary<br />
Making a Call<br />
Answering Calls<br />
Missed Call Notification<br />
Wait/Pause Feature<br />
Making an International Call<br />
3-Way Calling<br />
VERSE including:<br />
Call Waiting Function<br />
Calling a Number from Contacts<br />
Adjusting Volume<br />
Caller ID Function<br />
Vibrate Mo<strong>de</strong><br />
Speakerphone Mo<strong>de</strong><br />
Using Auto Keypad Lock Function<br />
Available Options During a Call<br />
Making an Emergency Call<br />
Dialing Letters<br />
Favorites Menu<br />
20 20
22<br />
TURNING THE PHONE ON/OFF<br />
TURNING THE PHONE ON<br />
1. Press and hold the END/POWER Key until the display turns on.<br />
• If “ENTER LOCK CODE” appears on the display, press the Key to unlock the keypad,<br />
and enter your 4-digit lock co<strong>de</strong> and press the Key.<br />
• The <strong>de</strong>fault lock co<strong>de</strong> is the last 4 digits of your phone number.<br />
TURNING THE PHONE OFF<br />
1. Press the END/POWER Key , then press the Key in less than three seconds<br />
to unlock the keypad. Press and hold the END/POWER Key until your display<br />
turns off.<br />
• Immediately change or recharge the battery when “BATTERY LOW” appears on the<br />
display. Memory may possibly be damaged if the phone turns off due to the battery<br />
completely draining.<br />
• Turn the phone off before removing or replacing the battery. If the phone is on,<br />
unsaved data may be lost.<br />
• To turn off your <strong>de</strong>vice while a Daily Perks alert window is open, Sli<strong>de</strong> the phone up<br />
and press and hold the END/POWER Key until your display turns off.<br />
ACCESSING THE MENU<br />
Your phone can be customized via the menu. Each function can be accessed by pressing<br />
the Directional Key or by pressing the number that corresponds with the menu item.<br />
1. To access the menu, sli<strong>de</strong> the phone up and press the Key [MENU].<br />
2. To scroll through the menu, press the Directional Key left, right, up or down<br />
or press the number that corresponds to the <strong>de</strong>sired menu item.<br />
3. To return to the previous page, press the CLR Key . To exit the current menu<br />
and return to the idle mo<strong>de</strong>, press the END/POWER Key .<br />
4. From the idle mo<strong>de</strong>, press the END/POWER Key , then press the Key<br />
in less than three seconds to unlock the keypad. Press the Left Soft Key<br />
[Message] to open the Messages menu or press the Right Soft Key<br />
[Contacts] to open your Contact List.<br />
This manual assumes that Menu Type is set to Grid, which are the <strong>de</strong>fault settings.<br />
USING THE TASK BAR<br />
The Task Bar is an alternative way to cycle through menus, requiring fewer key presses.<br />
Toggle between the following menus:<br />
DIALING, FAVORITES, CALL HISTORY, MESSAGING, MUSIC, PICTURES,<br />
CONTACTS, TOOLS<br />
1. From the idle mo<strong>de</strong>, press the END/POWER Key , then press the Key in<br />
less than three seconds to unlock the keypad. Press the Task Bar Key (located<br />
on the right si<strong>de</strong> of the <strong>de</strong>vice).<br />
2. Press the Directional Key left or right to scroll through Task Bar menus.<br />
Press up or down to choose a sub menu.<br />
3. Select a <strong>de</strong>sired task and press the Key.<br />
• Task Bar is not available for certain circumstances such as receiving an incoming call<br />
or message, displaying a notification message or displaying the main menu.<br />
QUICK SWITCHING<br />
While a menu is being accessed, you can quickly switch between the other menu<br />
options.<br />
1. Sli<strong>de</strong> the phone up and press the Key [MENU], then select a <strong>de</strong>sired menu<br />
from the following main menus:<br />
Contacts, Messaging, Call History, Multimedia, easyedge, Browser,<br />
Tone Room Deluxe, PAC-MAN, Tools & Settings.<br />
2. Press the Key.<br />
3. Once a menu is selected, press the Directional Key left or right to switch<br />
between the menus (except easyedge, Browser, Tone Room Deluxe, PAC-MAN).<br />
01<br />
02<br />
03<br />
04<br />
05<br />
06<br />
07<br />
23
24<br />
MENU SUMMARY<br />
Main Menu 2 ND DEPTH 3 RD DEPTH 4 TH DEPTH<br />
1. Contacts 1. New Contact<br />
2. Contact List<br />
3. Groups<br />
4. Speed Dials 1. Voicemail<br />
112. Reserved<br />
211. Reserved<br />
311. Reserved<br />
411. Directory Assistance<br />
5. Favorite Contacts<br />
6. My Name Card<br />
2. Messaging 1. New Message 1. TXT Message<br />
2. Picture Message<br />
3. Vi<strong>de</strong>o Message<br />
4. Voice Message<br />
2. Inbox<br />
3. Sent<br />
4. Drafts<br />
5. Voicemail<br />
6. Settings 1. Messages View<br />
2. Entry Mo<strong>de</strong><br />
3. Auto Save Sent<br />
4. Auto Erase Inbox<br />
5. Messaging Font Size<br />
6. TXT Auto View<br />
7. Multimedia Auto<br />
Receive<br />
8. Quick Text<br />
9. Voicemail #<br />
0. Callback #<br />
*. Signature<br />
#. Delivery Receipt<br />
3. Call History 1. Missed Calls<br />
2. Received Calls<br />
3. Dialed Calls<br />
4. All Calls<br />
Main Menu 2 ND DEPTH 3 RD DEPTH 4 TH DEPTH<br />
3. Call History 5. Call Timers 1. Last Call<br />
2. All Calls<br />
3. Received Calls<br />
4. Dialed Calls<br />
5. Roaming Calls<br />
6. Transmit Data<br />
7. Received Data<br />
8. Total Data<br />
9. Last Reset<br />
10. Lifetime Calls<br />
11. Lifetime Data Counter<br />
4. Multimedia 1. Picture & Vi<strong>de</strong>o 1. Pictures<br />
2. Vi<strong>de</strong>os<br />
3. Take Picture<br />
4. Record Vi<strong>de</strong>o<br />
2. Sounds 1. Record New<br />
3. Ringtones<br />
4. Music 1. All Songs<br />
2. Playlists<br />
3. Artists<br />
4. Genres<br />
5. Albums<br />
6. Manage Music 1. Erase<br />
2. Lock<br />
3. Unlock<br />
4. Move To Card<br />
5. Move To Phone<br />
7. Music Settings 1. Repeat<br />
2. Shuffle<br />
3. Player Skin<br />
4. Music Only Mo<strong>de</strong><br />
5. easyedge 1. easyedge<br />
6. Browser 1. Browser<br />
7. Tone Room 1. Tone Room Deluxe<br />
Deluxe<br />
01<br />
02<br />
03<br />
04<br />
05<br />
06<br />
07<br />
25
Main Menu 2 ND DEPTH 3 RD DEPTH 4 TH DEPTH<br />
8. PAC-MAN 1.PAC-MAN<br />
9. Tools & Settings 1. Tools 1. Voice Commands<br />
2. Calculator<br />
3. Tip Calculator<br />
4. Calendar<br />
5. E-Diary<br />
6. Alarm Clock<br />
7. Stopwatch<br />
8. World Clock<br />
9. Notepad +<br />
0. USB Mass Storage<br />
2. Sounds Settings 1. Call Sounds 1. Call Ringtone<br />
2. Call Vibrate<br />
3. Caller ID Readout<br />
2. Alert Sounds 1. TXT Message<br />
2. Multimedia Message<br />
3. Voicemail<br />
4. Emergency Tone<br />
5. Missed Call<br />
3. Keypad Sounds<br />
4. Keypad Volume<br />
5. Digit Dial Readout<br />
6. Service Alerts 1. Minute Beep<br />
2. Call Connect<br />
3. Software Update<br />
7. Device Connect<br />
8. Power On/Off 1. Power On<br />
2. Power Off<br />
9. Open/Close Sounds<br />
0. Master Volume<br />
3. Display Settings 1. Banner<br />
Main Menu 2 ND DEPTH 3 RD DEPTH 4 TH DEPTH<br />
9. Tools & Settings 3. Display Settings 2. Backlight 1. Display<br />
2. Keypad<br />
3. Wallpaper 1. Pictures<br />
2. Vi<strong>de</strong>os<br />
3. Animated Wallpapers<br />
4. Menu Type<br />
5. Font Type<br />
6. Dial Font Size<br />
7. Menu Font Size<br />
8. Clock Format<br />
9. Data Charge Popup<br />
4. Phone Settings 1. Airplane Mo<strong>de</strong><br />
2. Language<br />
3. Location<br />
4. Security 1. Edit Co<strong>de</strong>s<br />
1. Phone Only<br />
2. Calls & Services<br />
2. Restrictions<br />
1. Location Setting<br />
2. Calls<br />
1. Incoming<br />
2. Outgoing<br />
3. Text Messages<br />
1. Incoming<br />
2. Outgoing<br />
4. Picture Messages<br />
1. Incoming<br />
2. Outgoing<br />
5. Data Connection<br />
3. Phone Lock Setting<br />
4. Lock Phone Now<br />
5. Factory Reset<br />
5. System Select<br />
01<br />
02<br />
03<br />
04<br />
05<br />
06<br />
07<br />
26<br />
27
Main Menu 2 ND DEPTH 3 RD DEPTH 4 TH DEPTH<br />
9. Tools & Settings 5. Call Settings 1. Answer Options<br />
2. Auto Retry<br />
3. TTY Mo<strong>de</strong><br />
4. One Touch Dial<br />
5. Voice Privacy<br />
6. DTMF Tones<br />
7. Sli<strong>de</strong> Close<br />
6. Memory 1. Save Options 1. Pictures<br />
2. Vi<strong>de</strong>os<br />
3. Sounds<br />
2. Phone Memory 1. Phone Memory Usage<br />
2. Pictures<br />
3. Vi<strong>de</strong>os<br />
4. Sounds<br />
5. Music<br />
6. Contacts<br />
7. Move All To Card<br />
3. Card Memory 1. Card Memory Usage<br />
2. Pictures<br />
3. Vi<strong>de</strong>os<br />
4. Sounds<br />
5. Music<br />
6. Contacts<br />
7. Move All To Phone<br />
7. Bluetooth® 1. Add New Device<br />
8. USB Mo<strong>de</strong><br />
9. Phone Info 1. My Phone Number<br />
2. SW/HW Version<br />
3. MEID / pESN<br />
Main Menu 2 ND DEPTH 3 RD DEPTH 4 TH DEPTH<br />
9. Tools & Settings 9. Phone Info 4. Icon Glossary<br />
5. Software Update 1. Status<br />
2. Check for Update<br />
6. Operating System<br />
MAKING A CALL<br />
1. Sli<strong>de</strong> the phone up and enter the phone number (inclu<strong>de</strong> the area co<strong>de</strong> if<br />
nee<strong>de</strong>d).<br />
• To erase one digit at a time, press the CLR Key .<br />
• To erase the entire number, press and hold the CLR Key .<br />
• When you place or receive a call from phone numbers stored in your Contact List with<br />
a contact name, the name will be displayed.<br />
2. Press the SEND Key .<br />
3. To end a call, press the END/POWER Key .<br />
• If you activate the AUTO RETRY function, the phone will automatically re-dial the<br />
number (Refer to page 94).<br />
• You can also place calls using Voice-Activated Dialing. Please refer to page 66 for<br />
more <strong>de</strong>tails.<br />
ANSWERING CALLS<br />
1. When your phone rings or vibrates, sli<strong>de</strong> the phone up or press the Key and<br />
the SEND Key to answer the incoming call. (Depending on your Answer<br />
Options, you may also answer incoming calls by pressing any key. Sli<strong>de</strong> Open,<br />
Send Key is the <strong>de</strong>fault setting for this <strong>de</strong>vice.)<br />
2. To ignore incoming calls, press the Right Soft Key [Ignore].<br />
3. To end a call, press the END/POWER Key .<br />
If Answer Options is set to “Auto with Handsfree”, calls are answered automatically<br />
after about five seconds (Refer to page 94).<br />
01<br />
02<br />
03<br />
04<br />
05<br />
06<br />
07<br />
28<br />
29
MISSED CALL NOTIFICATION<br />
When an incoming call is not answered, the Missed Call notification appears on the<br />
display.<br />
TO DISPLAY THE MISSED CALL ENTRY FROM THE NOTIFICATION SCREEN:<br />
1. Highlight View Now and press the Key.<br />
2. Press the Key [OPEN] to view the call <strong>de</strong>tails.<br />
TO DISPLAY A MISSED CALL ENTRY FROM IDLE MODE:<br />
1. Sli<strong>de</strong> the phone up, press the Key [MENU], select 3. Call History, then<br />
press the Key.<br />
2. Press 1. Missed Calls.<br />
3. Highlight the entry you wish to view, and then press the Key [OPEN].<br />
4. To dial the phone number, press the SEND Key .<br />
WAIT/PAUSE FEATURE<br />
Pauses are used for automated systems (i.e., voicemail or calling cards). Insert a pause<br />
after a phone number and then enter another group of numbers. The second set of<br />
numbers is dialed automatically after the pause. This feature is useful for dialing into<br />
systems that require a co<strong>de</strong>.<br />
Add Wait<br />
The phone stops dialing until you press the SEND Key or [SEND] Key to advance<br />
to the next number.<br />
1. Sli<strong>de</strong> the phone up and enter the phone number.<br />
2. Press the Right Soft Key [Options].<br />
3. Select 2. Add Wait and press the Key.<br />
4. Enter additional number(s).<br />
5. Press the SEND Key to dial or press the Left Soft Key [Save] to save.<br />
Add 2-Sec Pause<br />
The phone waits 2 seconds before sending the next string of digits automatically.<br />
1. Sli<strong>de</strong> the phone up and enter the phone number.<br />
2. Press the Right Soft Key [Options].<br />
3. Select 1. Add 2-Sec Pause and press the Key.<br />
4. Enter additional number(s) (pin number or credit card number).<br />
5. Press the SEND Key to dial or the Left Soft Key [Save] to save.<br />
MAKING AN INTERNATIONAL CALL<br />
1. Sli<strong>de</strong> the phone up, then press and hold the * Key . The + required for<br />
international calls appears.<br />
2. Enter the country co<strong>de</strong>, area co<strong>de</strong>, and phone number, then press the SEND<br />
Key .<br />
3. To end the call, press the END/POWER Key .<br />
3-WAY CALLING<br />
With 3-Way Calling, you can talk to two people at the same time. When using this<br />
feature, normal airtime rates will be applied for each of the two calls.<br />
1. Sli<strong>de</strong> the phone up, enter the phone number you wish to call, then press the<br />
SEND Key .<br />
2. Once you have established the connection, enter the second phone number<br />
you wish to call and then press the SEND Key .<br />
3. When you’re connected to the second party, press the SEND Key again to<br />
begin your 3-Way call.<br />
If one of the people you called hangs up during your call, you and the remaining caller<br />
stay connected. If you initiated the call and are the first to hang up, all three calls will<br />
be disconnected.<br />
01<br />
02<br />
03<br />
04<br />
05<br />
06<br />
07<br />
30<br />
31
CALL WAITING FUNCTION<br />
If you are on a call and you receive another incoming call, you will hear a beep and the<br />
caller’s phone number will appear on the display. With Call Waiting, you may put the<br />
active call on hold while you answer the other incoming call.<br />
To answer another call while on the phone, press the SEND Key .<br />
This places the first call on hold. To switch back to the first caller, press the SEND<br />
Key again.<br />
CALLING A NUMBER FROM CONTACTS<br />
1. From idle mo<strong>de</strong>, press the END/POWER Key , then press the Key in<br />
less than three seconds to unlock the keypad. Press the Right Soft Key<br />
[Contacts].<br />
2. Select the Contact entry and press the Key [VIEW], then select the <strong>de</strong>sired<br />
phone number.<br />
3. Press the SEND Key to place the call.<br />
Selecting the Contact entry and then pressing the Send Key<br />
Number of the Contact entry automatically.<br />
will dial the Default<br />
ADJUSTING VOLUME<br />
TO ADJUST THE MASTER VOLUME:<br />
1. From idle mo<strong>de</strong>, press the END/POWER Key , then press the Key in less<br />
than three seconds to unlock the keypad. Press the Volume Keys / up or<br />
down (located on the left si<strong>de</strong> of the <strong>de</strong>vice).<br />
2. Select one of the following options and press the Key [SET] to save it.<br />
• All Sounds Off<br />
• Alarm Only<br />
• Vibrate Only<br />
• Low / Medium Low / Medium / Medium High / High<br />
Press the Volume Keys / up or down (located on the left si<strong>de</strong> of the <strong>de</strong>vice) to adjust<br />
Earpiece volume during a call.<br />
CALLER ID FUNCTION<br />
Caller ID displays the number of the person calling when your phone rings. If the caller’s<br />
i<strong>de</strong>ntity is stored in Contacts, the name appears on the screen. The caller ID is stored in<br />
the Call History menu.<br />
VIBRATE MODE<br />
Vibrate Mo<strong>de</strong> mutes key tones and alerts for an incoming call or message. To activate<br />
Vibrate Mo<strong>de</strong>:<br />
1. Sli<strong>de</strong> the phone up, then press and hold the Vibration Mo<strong>de</strong> Key (#) to<br />
activate vibration mo<strong>de</strong>.<br />
2. To <strong>de</strong>activate vibration mo<strong>de</strong>, press and hold the Vibration Mo<strong>de</strong> Key (#) .<br />
SPEAKERPHONE MODE<br />
The Speakerphone feature lets you hear audio through the speaker and talk without<br />
holding the phone.<br />
To activate, press the END/POWER Key , then press the Key in less than<br />
three seconds to unlock the keypad. Press the Speakerphone Key .<br />
To <strong>de</strong>activate, press the Speakerphone Key again.<br />
USING AUTO KEYPAD LOCK FUNCTION<br />
When the sli<strong>de</strong> is closed the Si<strong>de</strong> Keys and the Directional Key are locked. To unlock<br />
them, press any key on the external display with the phone in the closed position<br />
“Keypad Locked (Press END)” displays. “PRESS OK TO UNLOCK KEYPAD” will be<br />
displayed on the screen, then press the Key to unlock the keypad.<br />
01<br />
02<br />
03<br />
04<br />
05<br />
06<br />
07<br />
32<br />
33
AVAILABLE OPTIONS DURING A CALL<br />
During a phone call, you can access the following features by pressing the Right Soft<br />
Key [Options]:<br />
1. New Message: To access the Messages Menu during a call. Press the Right Soft<br />
Key [Options], select 1. New Message and press the Key.<br />
2. Contact List: To view your Contact List during a call. Press the Right Soft Key<br />
[Options], select 2. Contact List and press the Key.<br />
3. Call History: To view your Call History list during a call. Press the Right Soft Key<br />
[Options], select 3. Call History and press the Key.<br />
4. Bluetooth: To access the Bluetooth® Menu during a call. Press the Right Soft Key<br />
[Options], select 4. Bluetooth and press the Key.<br />
If a Bluetooth® Audio <strong>de</strong>vice is connected, Audio To Phone / Audio To Device is<br />
displayed in the options menu instead of Bluetooth.<br />
5. Main Menu: To access the Main Menu during a call. Press the Right Soft Key<br />
[Options], select 5. Main Menu and press the Key.<br />
6. Notepad +: To compose notes during a call. Press the Right Soft Key<br />
[Options], select 6. Notepad+ and press the Key.<br />
7. Voice Privacy: To turn the voice privacy feature On or Off. Press the Right Soft<br />
Key [Options], select 7. Voice Privacy and press the Key.<br />
The settings of Voice Privacy does not apply in GSM Mo<strong>de</strong>.<br />
8. DTMF On/Off: To access the DTMF On/Off during a call. Press the Right Soft Key<br />
[Options], select 8. DTMF On/Off and press the Key.<br />
MAKING AN EMERGENCY CALL<br />
The E911 feature automatically places the phone in Emergency Call Mo<strong>de</strong> when you<br />
dial the preprogrammed emergency number, “911”. It also operates in Lock Mo<strong>de</strong> and<br />
out of the service area.<br />
911 IN LOCK MODE<br />
To make an emergency call in Lock Mo<strong>de</strong>:<br />
1. Sli<strong>de</strong> the phone up, enter “911”, and then press the SEND Key .<br />
2. The call connects.<br />
3. The phone maintains Emergency Mo<strong>de</strong> for 5 minutes. After the 5 minutes, the<br />
phone returns to Lock Mo<strong>de</strong>.<br />
911 USING ANY AVAILABLE SYSTEM<br />
To make an Emergency Call using any available system:<br />
1. Sli<strong>de</strong> the phone up, enter “911”, and then press the SEND Key .<br />
2. The call connects.<br />
3. The phone will stay in Emergency Mo<strong>de</strong> for 5 minutes. While the phone is in<br />
the Emergency Mo<strong>de</strong> the phone can receive an incoming call or you can make<br />
outgoing calls even in the Emergency Callback Mo<strong>de</strong>. After the 5 minutes,<br />
finish the Emergency mo<strong>de</strong>.<br />
DIALING LETTERS<br />
Allows you to dial the number associated with a specific word.<br />
For example, to call “1-800-FLOWERS”:<br />
1. Sli<strong>de</strong> the phone up, enter “1-800”, then press and hold the Mo<strong>de</strong> Change Key<br />
.<br />
2. Enter “FLOWERS” with the QWERTY Keypad and press the SEND Key to<br />
connect.<br />
• If the Alphabetical Entry Mo<strong>de</strong> icon is turned on, only capital letters will be appeared.<br />
• Pressing the Mo<strong>de</strong> Change Key will change between Numeric Entry Mo<strong>de</strong> and<br />
Alphabetical Entry Mo<strong>de</strong>.<br />
01<br />
02<br />
03<br />
04<br />
05<br />
06<br />
07<br />
34<br />
35
FAVORITES MENU<br />
To assign up to 9 contacts as Favorites:<br />
1. Sli<strong>de</strong> the phone up and press the Favorites Key , press the Key<br />
[ASSIGN].<br />
2. Select the <strong>de</strong>sired contact and press the Key [MARK/UNMARK]. When<br />
finished, press the Left Soft Key [Done].<br />
To remove the assigned contacts from Favorites:<br />
1. Sli<strong>de</strong> the phone up and press the Favorites Key .<br />
2. Select the <strong>de</strong>sired contact and press the Right Soft Key [Options].<br />
3. Press 1. Remove or 2. Remove All and select Yes and press the Key.<br />
3<br />
MEMORY FUNCTION<br />
This chapter addresses memory functions including:<br />
Storing a Phone Number<br />
Editing Contact Entries<br />
Default Numbers<br />
Entering Letters, Numbers & Symbols<br />
One, Two, Three-Touch Dialing<br />
36 36
STORING A PHONE NUMBER<br />
The Contact List stores up to 1000 entries.<br />
ADDING A NEW CONTACT<br />
1. Sli<strong>de</strong> the phone up and enter the phone number you want to save (up to 32<br />
digits).<br />
2. Press the Left Soft Key [Save].<br />
3. Select 1. Add New Contact and press the Key.<br />
4. Press the Directional Key up or down to select the type of phone number<br />
you want to save, then press the Key.<br />
Mobile 1 / Mobile 2 / Home / Business / Fax<br />
Use Update Existing to add another phone number to a contact already stored in<br />
memory.<br />
5. Enter a name for the phone number (up to 32 characters), then press the<br />
Key [SAVE].<br />
6. “CONTACT SAVED” displays, then the phone number reappears on the screen.<br />
Press the END/POWER Key to exit, or press the SEND Key to call the<br />
number.<br />
OPTIONS TO CUSTOMIZE YOUR CONTACTS<br />
Once the basic phone number and name information is stored in your Contacts, you can<br />
edit and/or customize the entries.<br />
1. Sli<strong>de</strong> the phone up and press the Right Soft Key [Contacts], then highlight<br />
the Contact entry you want to edit.<br />
2. Press the Left Soft Key [Edit] to access the Edit Contact screen.<br />
3. Select the information field you want to customize. Fields inclu<strong>de</strong>:<br />
Name / Mobile 1 / Home / Business / Mobile 2 / Fax / Personal Email /<br />
Work Email / Pic/Vi<strong>de</strong>o / Ringtone / Message Tone / Group / Home<br />
Address / Work Address / Company / Title / Birthday / Notes<br />
4. Change the data as necessary, then press the Key [SAVE] to update the<br />
contact entry.<br />
ADDING OR CHANGING GROUPS<br />
To organize your Contacts into groups:<br />
1. Sli<strong>de</strong> the phone up, press the Right Soft Key [Contacts], then highlight the<br />
<strong>de</strong>sired Contact entry.<br />
2. Press the Left Soft Key [Edit].<br />
3. Highlight Group and press the Left Soft Key [Set / Edit]<br />
4. Select Personal or Business, then press the Key [MARK / UNMARK]. To<br />
create a new group, press the Right Soft Key [New], enter the new group<br />
name, then press the Key [SAVE].<br />
5. Press the Left Soft Key [Done] to set the group.<br />
6. Press the Key [SAVE] to update the contact entry.<br />
CHANGING THE CALL RINGTONE<br />
To i<strong>de</strong>ntify who is calling by setting different ringtones for different phone numbers in<br />
your Contacts:<br />
1. Sli<strong>de</strong> the phone up and press the Right Soft Key [Contacts], then highlight<br />
the <strong>de</strong>sired entry.<br />
2. Press the Left Soft Key [Edit].<br />
3. Highlight Ringtone, then press the Left Soft Key [Set].<br />
4. Select the new ringtone, then press the Key.<br />
• Press the Left Soft Key [Play] to listen to a highlighted ringtone or press the<br />
Right Soft Key [Options] to view the file information before you press the<br />
Key .<br />
• To remove the ringtone, press the Right Soft Key [Remove].<br />
“REMOVE RINGTONE” appears on the screen. Select Yes and press the Key.<br />
5. Press the Key [SAVE] to update the contact entry.<br />
38 39<br />
01<br />
02<br />
03<br />
04<br />
05<br />
06<br />
07
ADDING OR CHANGING THE PICTURE/VIDEO ID<br />
To select a picture or vi<strong>de</strong>o to assign to a Caller ID:<br />
1. Sli<strong>de</strong> the phone up and press the Right Soft Key [Contacts], then highlight<br />
the <strong>de</strong>sired entry.<br />
2. Press the Left Soft Key [Edit].<br />
3. Highlight Pic/Vi<strong>de</strong>o, and press the Left Soft Key [Set].<br />
4. Select 1. Pictures or 2. Vi<strong>de</strong>os, then press the Key.<br />
5. Press the Directional Key up, down, left or right to select a picture or a<br />
vi<strong>de</strong>o, and then press the Key.<br />
• To remove the picture or vi<strong>de</strong>o, press the Right Soft Key [Remove].<br />
“REMOVE PICTURE FROM CONTACT” appears on the screen. Select Yes and press<br />
the Key.<br />
6. When completed, press the Key [SAVE] to update the contact entry.<br />
ADDING OR CHANGING AN E-MAIL ADDRESS<br />
To enter or add an e-mail address to a Contact entry:<br />
1. Sli<strong>de</strong> the phone up, press the Right Soft Key [Contacts], then highlight<br />
the <strong>de</strong>sired entry.<br />
2. Press the Left Soft Key [Edit].<br />
3. Highlight Personal Email / Work Email.<br />
4. Enter an e-mail address using the QWERTY Keypad, then press the Key<br />
[SAVE] to update the contact entry.<br />
ADDING A SPEED DIAL ENTRY<br />
To add an entry to Speed Dial:<br />
1. Sli<strong>de</strong> the phone up and press the Right Soft Key [Contacts], then highlight<br />
a <strong>de</strong>sired entry.<br />
2. Press the Left Soft Key [Edit].<br />
3. Highlight the phone number you want to add to Speed Dial, then press the<br />
Right Soft Key [Options].<br />
4. Select 1. Set Speed Dial, then press the Key.<br />
5. Select a Speed Dial location, then press the Key [SET].<br />
6. Select Yes and press the Key.<br />
7. Press the Key [SAVE] to update the contact entry.<br />
Using the QWERTY Keypad press the corresponding speed dial number to select the<br />
<strong>de</strong>sired speed dial location.<br />
EDITING CONTACT ENTRIES<br />
ADDING A PHONE NUMBER FROM IDLE MODE<br />
1. Sli<strong>de</strong> the phone up and enter the phone number you want to save (up to 32<br />
digits).<br />
2. Press the Left Soft Key [Save].<br />
3. Highlight 2. Update Existing, then press the Key.<br />
4. Highlight the existing Contact entry, then press the Key.<br />
5. Highlight the following phone number type, then press the Key.<br />
Mobile 1 / Mobile 2 / Home / Business / Fax<br />
6. If a phone number is already assigned to the type you selected, select Yes to<br />
overwrite the existing entry, then press the Key.<br />
7. “CONTACT UPDATED” displays, then the phone number reappears on the<br />
screen. Press the END/POWER Key to exit, or press the SEND Key to call<br />
the number.<br />
ADDING A PHONE NUMBER FROM THE CONTACT LIST SCREEN<br />
1. Sli<strong>de</strong> the phone up and press the Right Soft Key [Contacts].<br />
2. Highlight the Contact entry you want to edit, then press the Left Soft Key<br />
[Edit].<br />
3. Highlight the phone number field and enter the number, then press the<br />
Key [SAVE] to update the contact entry. A confirmation message appears.<br />
40 41<br />
01<br />
02<br />
03<br />
04<br />
05<br />
06<br />
07
EDITING STORED PHONE NUMBERS<br />
1. Sli<strong>de</strong> the phone up and press the Right Soft Key [Contacts].<br />
2. Highlight the Contact entry you want to edit, then press the Left Soft Key<br />
[Edit].<br />
3. Select the phone number you want to edit.<br />
4. Edit the phone number as necessary, and then press the Key [SAVE] to<br />
update the contact entry.<br />
EDITING STORED NAMES<br />
1. Sli<strong>de</strong> the phone up, then press the Right Soft Key [Contacts].<br />
2. Highlight the Contact entry you want to edit, then press the Left Soft Key<br />
[Edit].<br />
3. Edit the name as necessary, and then press the Key [SAVE] to update the<br />
contact entry.<br />
DELETING A PHONE NUMBER FROM A CONTACT<br />
1. Sli<strong>de</strong> the phone up and then press the Right Soft Key [Contacts].<br />
2. Highlight the Contact entry, then press the Left Soft Key [Edit].<br />
3. Select the <strong>de</strong>sired phone number to be <strong>de</strong>leted.<br />
4. Press and hold the Clear Key to <strong>de</strong>lete the number.<br />
5. Press the Key [SAVE] to update the contact entry. A confirmation message<br />
appears.<br />
DELETING A CONTACT ENTRY<br />
1. Sli<strong>de</strong> the phone up and press the Right Soft Key [Contacts].<br />
2. Select the <strong>de</strong>sired Contact entry to be <strong>de</strong>leted.<br />
3. Press the Right Soft Key [Options], select 2. Erase and press the Key.<br />
4. Select Yes and press the Key. A confirmation message appears.<br />
DELETING A SPEED DIAL<br />
1. Sli<strong>de</strong> the phone up and press the Right Soft Key [Contacts].<br />
2. Highlight the entry that has a speed dial to be <strong>de</strong>leted.<br />
3. Press the Left Soft Key [Edit].<br />
4. Highlight the phone number that has a speed dial to be <strong>de</strong>leted.<br />
5. Press the Right Soft Key [Options], select 1. Remove Speed Dial and<br />
press the Key.<br />
6. Select Yes and press the Key. A confirmation message appears.<br />
7. Press the Key [SAVE] to update the contact entry.<br />
DEFAULT NUMBERS<br />
The phone number saved when a Contact is created is the Default Number. If more<br />
than one number is saved in a Contact entry, another number can be set as the Default<br />
Number.<br />
The Default Number cannot be <strong>de</strong>leted. The entire Contact entry can be <strong>de</strong>leted or<br />
another number can be assigned as the Default Number allowing you to <strong>de</strong>lete the<br />
original number and keep the Contact entry.<br />
CHANGING THE DEFAULT NUMBER<br />
1. Sli<strong>de</strong> the phone up and press the Right Soft Key [Contacts].<br />
2. Highlight the Contact entry you want to edit, then press the Left Soft Key<br />
[Edit].<br />
3. Highlight the phone number you want to assign as the Default Number, then<br />
press the Right Soft Key [Options].<br />
4. Select 2. Set As Default, then press the Key.<br />
5. Select Yes and press the Key. A confirmation message appears.<br />
6. Press the Key [SAVE] to update the contact entry.<br />
01<br />
02<br />
03<br />
04<br />
05<br />
06<br />
07<br />
42 43
ENTERING LETTERS, NUMBERS & SYMBOLS<br />
Your <strong>de</strong>vice has a QWERTY Keypad that provi<strong>de</strong>s a superior typing experience on a small<br />
handheld <strong>de</strong>vice for easy and comfortable input.<br />
1<br />
2 3 4<br />
1. [ ] Mo<strong>de</strong> Change Key:<br />
• When in Numeric entry mo<strong>de</strong><br />
- Press to change between entering numbers and letters that appear on the<br />
same key.<br />
• When in Text entry mo<strong>de</strong><br />
- Press to change between entering numbers and letters that appear on the<br />
same key.<br />
- Press and hold to lock in numeric or text entry mo<strong>de</strong>.<br />
2. [ ] Space Key: Press to accept a word and add a space while entering<br />
letters.<br />
3. [ ] Symbols Key: Press to open the symbols list.<br />
4. [ ] Caps Key: Press to select a letter case for the standard text [Abc] input<br />
mo<strong>de</strong>. [Abc], [ABC] and [abc] indicate the standard text input.<br />
7<br />
6<br />
5<br />
5. [ ] Enter Key: Press to insert a carriage return.<br />
6. [ ] Delete Key: When in a Text entry field and in entry mo<strong>de</strong>, press to<br />
<strong>de</strong>lete the character to the left of the cursor. Press and hold to <strong>de</strong>lete the entire<br />
word or character string that was just entered.<br />
7. [ ] CLR Key: When in a Text entry field and in entry mo<strong>de</strong>, press to <strong>de</strong>lete<br />
the character to the left of the cursor. Press and hold to <strong>de</strong>lete the entire word<br />
or character string that was just entered.<br />
For best performance in low-light environments, your handset inclu<strong>de</strong>s a backlight<br />
feature that can illuminate both the display and the keypad so you can keep reading<br />
and typing. (Please refer to page 87 for more <strong>de</strong>tails on Backlight.)<br />
ONE, TWO, THREE - TOUCH DIALING<br />
Once you have assigned speed dial numbers to your contact entries, use the following<br />
steps to use your speed dials:<br />
ONE - TOUCH DIALING:<br />
1-9: Sli<strong>de</strong> the phone up, then press and hold the number you wish to connect<br />
to for more than 1 second. (Voicemail) is already assigned to your<br />
voicemail box.<br />
TWO - TOUCH DIALING:<br />
10-99: Sli<strong>de</strong> the phone up, then press the first digit and press and hold the second<br />
digit of the number to dial.<br />
THREE - TOUCH DIALING:<br />
100-500: Sli<strong>de</strong> the phone up, press the first and second digits, then press and<br />
hold the third digit of the number to dial.<br />
112, 211, 311: Speed Dial entry 112, 211, 311 (Reserved) is already assigned.<br />
411: Speed Dial entry 411 (Directory Assistance) is already assigned.<br />
01<br />
02<br />
03<br />
04<br />
05<br />
06<br />
07<br />
44 45
4<br />
MENU FUNCTION<br />
This chapter addresses accessing the menu and using its functions<br />
CONTACTS<br />
New Contact<br />
Contact List<br />
My Contacts Backup<br />
Groups<br />
Speed Dials<br />
Favorite Contacts<br />
My Name Card<br />
CALL HISTORY<br />
Missed Calls<br />
Received Calls<br />
Dialed Calls<br />
All Calls<br />
Call Timers<br />
easyedge SM<br />
easyedge<br />
Your Navigator<br />
BROWSER<br />
Browser<br />
TONE ROOM DELUXE<br />
Tone Room Deluxe<br />
and features to customize your VERSE.<br />
PAC-MAN<br />
PAC-MAN<br />
TOOLS<br />
Voice Commands<br />
Calculator<br />
Tip Calculator<br />
Calendar<br />
E-Diary<br />
Alarm Clock<br />
Stopwatch<br />
World Clock<br />
Notepad+<br />
USB Mass Storage<br />
SETTINGS<br />
Sounds Settings<br />
Display Settings<br />
Phone Settings<br />
Call Settings<br />
Memory<br />
Bluetooth®<br />
USB Mo<strong>de</strong><br />
Phone Info
NEW CONTACT<br />
To add a new number to your Contact List:<br />
Using this submenu, the number is saved as a new Contact. To save the number into<br />
an existing Contact, edit the Contact entry.<br />
1. Sli<strong>de</strong> the phone up, press the Key [MENU], then press 1. Contacts,<br />
1. New Contact.<br />
2. In the Name field, enter a name for the Contact.<br />
To change the input mo<strong>de</strong>, press the Left Soft Key [Abc], select the <strong>de</strong>sired option,<br />
and press the Key.<br />
3. Press the Directional Key down to enter information in other fields for the<br />
contact. Fields inclu<strong>de</strong>:<br />
Mobile 1 / Home / Business / Mobile 2 / Fax / Personal Email /<br />
Work Email / Pic/Vi<strong>de</strong>o / Ringtone / Message Tone / Group / Home<br />
Address / Work Address / Company / Title / Birthday / Notes<br />
4. Press the Key [SAVE] to create the contact entry.<br />
CONTACT LIST<br />
You can review all the entries stored in your Contact List or quickly find an entry by<br />
entering a name or its character string in the Go To field.<br />
1. Sli<strong>de</strong> the phone up, press the Key [MENU], then press 1. Contacts,<br />
2. Contact List.<br />
Shortcut: From idle mo<strong>de</strong>, sli<strong>de</strong> the phone up and press the Right Soft Key<br />
[Contacts]. The list of names in your contacts is displayed alphabetically.<br />
2. Enter a name or part of a name in the Go To field at the bottom of the screen or<br />
press the Directional Key up or down to scroll through your Contact List.<br />
3. To edit the entry, press the Left Soft Key [Edit]. To view contact <strong>de</strong>tails,<br />
press the Key [VIEW].<br />
• By pressing the Right Soft Key [Options], you can choose from the following:<br />
1. New Contact: Add a new contact to your contact list.<br />
2. Erase: Deletes the contact from your contact list.<br />
3. New Message: You have the option to send a TXT, Picture, Vi<strong>de</strong>o or Voice Message.<br />
4. Call: Dial the contact.<br />
5. Manage Contacts: Allows you to manage your contacts with the following options:<br />
1. Erase / 2. Lock / 3. Unlock / 4. Copy to Card<br />
6. Send Name Card: Allows you to send a name card via Picture Message, Vi<strong>de</strong>o Message,<br />
Voice Message or Via Bluetooth®.<br />
4. To dial the selected number, press the Right Soft Key [Options], press the<br />
Directional Key up or down to select Call and press the Key or press the<br />
SEND Key to place a call.<br />
MY CONTACTS BACKUP<br />
Download My Contacts Backup, so if your phone is lost or stolen, you can easily transfer<br />
your numbers to a new phone.<br />
ACCESSING PRE-LOADED MY CONTACTS BACKUP<br />
1. Access the easyedge Main Menu via the <strong>de</strong>vice idle mo<strong>de</strong> shortcut or from<br />
<strong>de</strong>vice menu options.<br />
2. My Contacts Backup should appear within the list of applications downloa<strong>de</strong>d<br />
on the <strong>de</strong>vice. Select My Contacts Backup – application launches.<br />
SETTING UP MY CONTACTS BACKUP<br />
1. After the application is launched, you will come to the Welcome Screen.<br />
Select next to continue. You must accept the terms and conditions to proceed<br />
to the set up screen.<br />
2. At the set up screen, you will be prompted to enter your PIN. By <strong>de</strong>fault, the<br />
PIN will be the last 4 digits of your Cellular Telephone Number. (You can change<br />
your PIN later via the Set Up menu by selecting Change PIN). Select OK.<br />
01<br />
02<br />
03<br />
04<br />
05<br />
06<br />
07<br />
48<br />
49
50<br />
3. If you have contacts saved to your <strong>de</strong>vice, you can back up contacts stored<br />
on the <strong>de</strong>vice to My Contacts Backup server by selecting Backup from the<br />
application main screen.<br />
4. Within the Set Up menu, you can view your account information, you can set<br />
automatic backups to occur, change PIN, change language, and view the help<br />
section of the application.<br />
My Contacts Backup: easyedge SM Pay-As-You-Go users who incur data access<br />
charges for MCB while roaming should dial 611 for a bill credit.<br />
GROUPS<br />
Groups allow you to classify phone entries into groups with up to 20 members in each<br />
group. The <strong>de</strong>fault groups inclu<strong>de</strong> Business and Personal and they cannot be erased or<br />
renamed.<br />
TO ADD NEW GROUP<br />
1. Sli<strong>de</strong> the phone up, press the Key [MENU], then press 1. Contacts,<br />
3. Groups.<br />
2. Press the Left Soft Key [New].<br />
3. Enter a new group name and press the Key [SAVE].<br />
TO ASSIGN PHONE NUMBER TO GROUP<br />
1. Sli<strong>de</strong> the phone up, press the Key [MENU], then press 1. Contacts,<br />
3. Groups.<br />
2. Press the Directional Key up or down to select the group where you want to<br />
add the contact, and then press the Right Soft Key [Options].<br />
3. Press the Directional Key up or down to select 7. Add and press the Key.<br />
4. Your contact entries will be displayed in alphabetical or<strong>de</strong>r. Select the contact<br />
you want to add then press the Key [MARK/UNMARK].<br />
5. Press the Left Soft Key [Done].“MEMBER LIST UPDATED” will be<br />
displayed.<br />
TO CHANGE GROUP NAME<br />
1. Sli<strong>de</strong> the phone up, press the Key [MENU], then press 1. Contacts,<br />
3. Groups.<br />
2. Press the Directional Key up or down to select the group you want to<br />
rename then press the Right Soft Key [Options].<br />
3. Press the Directional Key up or down to select 5. Rename and press the<br />
Key.<br />
4. Enter the new group name, then press the Key [SAVE].<br />
ERASE GROUP<br />
1. Sli<strong>de</strong> the phone up, press the Key [MENU], then press 1. Contacts,<br />
3. Groups.<br />
2. Press the Directional Key up or down to select the existing group name that<br />
you want to erase, and then press the Right Soft Key [Options].<br />
3. Press the Directional Key up or down to select 6. Erase Group and press<br />
the Key.<br />
4. “ERASE GROUP” will appear on the screen.<br />
5. Press the Directional Key up or down to select Yes and press the Key.<br />
A confirmation message appears.<br />
TO SEND A TXT MESSAGE TO A GROUP<br />
1. Sli<strong>de</strong> the phone up, press the Key [MENU], then press 1. Contacts,<br />
3. Groups.<br />
2. Press the Directional Key up or down to select the group you want to send<br />
a message to, then press the Right Soft Key [Options].<br />
3. Press 1. New TXT Message.<br />
4. Input your message in the Text field and then press the Right Soft Key<br />
[Options] to select from the following: Insert Quick Text, Save As Draft, Add,<br />
Priority Level or Cancel Message.<br />
01<br />
02<br />
03<br />
04<br />
05<br />
06<br />
07<br />
51
52<br />
5. To send the TXT message, press the Key [SEND] or press the SEND Key .<br />
TO SEND A PICTURE MESSAGE TO A GROUP<br />
1. Sli<strong>de</strong> the phone up, press the Key [MENU], then press 1. Contacts,<br />
3. Groups.<br />
2. Press the Directional Key up or down to select the group you want to send<br />
a message to, then press the Right Soft Key [Options].<br />
3. Press 2. New Picture Message.<br />
4. Un<strong>de</strong>r Text, input your message and then press the Directional Key down.<br />
5. Un<strong>de</strong>r Picture, press the Left Soft Key [Pictures], select the picture you<br />
would like to send then press the Key. Press the Directional Key down.<br />
6. Un<strong>de</strong>r Sound, press the Left Soft Key [Sounds], press the Directional Key<br />
up or down to select the sound you would like to send then press the Key.<br />
Press the Directional Key down.<br />
7. Un<strong>de</strong>r Name Card, press the Left Soft Key [Add], press the Directional Key<br />
up or down to select 1. My Name Card or 2. From Contacts then press the<br />
Key. If 2.From Contacts is selected, select the <strong>de</strong>sired Contact and press<br />
the Key [MARK/UNMARK] then press the Left Soft Key [Done]. Press<br />
the Directional Key down.<br />
8. Un<strong>de</strong>r Subject, input a subject using the QWERTY Keypad.<br />
9. Press the Right Soft Key [Options] to select from the following:<br />
Preview, Save As Draft, Insert Quick Text, Add Sli<strong>de</strong>, Add Address From<br />
Contacts, Priority Level, or Cancel Message.<br />
These options will vary <strong>de</strong>pending on the message contents chosen.<br />
10. To send the Picture Message, press the Key [SEND] or press the SEND<br />
Key .<br />
TO SEND A VIDEO MESSAGE TO A GROUP<br />
1. Sli<strong>de</strong> the phone up, press the Key [MENU], then press 1. Contacts,<br />
3. Groups.<br />
2. Press the Directional Key up or down to select the group you want to send<br />
a message to, then press the Right Soft Key [Options].<br />
3. Press 3. New Vi<strong>de</strong>o Message.<br />
4. Un<strong>de</strong>r Text, input your message and then press the Directional Key down.<br />
5. Un<strong>de</strong>r Vi<strong>de</strong>o, press the Left Soft Key [Vi<strong>de</strong>os], select the vi<strong>de</strong>o you would like<br />
to send then press the Key. Press the Directional Key down.<br />
6. Un<strong>de</strong>r Name Card, press the Left Soft Key [Add], press the Directional Key<br />
up or down to select 1. My Name Card or 2. From Contacts then press the<br />
Key. If 2.From Contacts is selected, select the <strong>de</strong>sired Contact and press<br />
the Key [MARK/UNMARK] then press the Left Soft Key [Done]. Press<br />
the Directional Key down.<br />
7. Un<strong>de</strong>r Subject, input a subject using the QWERTY Keypad.<br />
8. Press the Right Soft Key [Options] to select from the following:<br />
Preview, Save As Draft, Insert Quick Text, Priority Level or Cancel<br />
Message.<br />
These options will vary <strong>de</strong>pending on the message contents chosen.<br />
9. To send the Vi<strong>de</strong>o Message, press the Key [SEND] or press the SEND Key .<br />
TO SEND A VOICE MESSAGE TO A GROUP<br />
1. Sli<strong>de</strong> the phone up, press the Key [MENU], then press 1. Contacts,<br />
3. Groups.<br />
2. Press the Directional Key up or down to select the group you want to send<br />
a voice message to, then press the Right Soft Key [Options].<br />
3. Press 4. New Voice Message.<br />
4. To record a new Voice Memo, press the Key to start recording, then press<br />
the Key [STOP] to finish recording and save the voice memo.<br />
01<br />
02<br />
03<br />
04<br />
05<br />
06<br />
07<br />
53
54<br />
5. Un<strong>de</strong>r Voice, your recor<strong>de</strong>d file name will appear. Press the Directional Key<br />
down.<br />
6. Un<strong>de</strong>r Text, input your message then press the Directional Key down.<br />
7. Un<strong>de</strong>r Name Card, press the Left Soft Key [Add], press the Directional Key<br />
up or down to select 1. My Name Card or 2. From Contacts then press the<br />
Key. If 2.From Contacts is selected, select the <strong>de</strong>sired Contact and press<br />
the Key [MARK/UNMARK] then press the Left Soft Key [Done]. Press<br />
the Directional Key down.<br />
8. Un<strong>de</strong>r Subject, input a subject using the QWERTY Keypad.<br />
9. Press the Right Soft Key [Options] to select from the following:<br />
Review, Save As Draft, Insert Quick Text, Priority Level or Cancel Message.<br />
These options will vary <strong>de</strong>pending on the message contents chosen.<br />
10. To send the Voice Message, press the Key [SEND] or press the SEND Key<br />
.<br />
SPEED DIALS<br />
From idle mo<strong>de</strong>, calls can be placed to numbers stored in speed dials by sliding the<br />
phone up, and pressing & holding the location number on the keypad.<br />
1. Sli<strong>de</strong> the phone up, press the Key [MENU], then press 1. Contacts,<br />
4. Speed Dials.<br />
2. Highlight the <strong>de</strong>sired Speed Dial position, or enter the Speed Dial digit(s), then<br />
press the Key [SET].<br />
3. Select the <strong>de</strong>sired Contact entry, then press the Key.<br />
4. Highlight the number you wish to set to speed dial then press the Key.<br />
5. “ASSIGN SPEED DIAL TO CONTACT” appears on the screen. Select Yes and<br />
press the Key. A confirmation message appears.<br />
“Unassigned” appears if the location is available.<br />
TO ERASE A SAVED SPEED DIAL<br />
1. Sli<strong>de</strong> the phone up, press the Key [MENU], then press 1. Contacts,<br />
4. Speed Dials.<br />
2. Select the Speed Dial entry you want to erase.<br />
3. Press the Right Soft Key [Remove].<br />
4. “REMOVE SPEED DIAL” appears on the screen. Select Yes and press the<br />
Key. A confirmation message appears.<br />
FAVORITE CONTACTS<br />
Allows you to save your most frequently accessed contacts for quick access.<br />
TO ASSIGN FAVORITE CONTACTS<br />
1. Sli<strong>de</strong> the phone up and press the Task Bar Key (located on the right si<strong>de</strong> of the<br />
<strong>de</strong>vice), swipe the Directional Key left or right to scroll to FAVORITES, then<br />
press the Key. Or sli<strong>de</strong> the phone up, press the Key [MENU], then press<br />
1. Contacts, 5. Favorite Contacts.<br />
Shortcut: From idle mo<strong>de</strong>, sli<strong>de</strong> the phone up, press the Favorites/Mo<strong>de</strong> Change Key<br />
.<br />
2. Swipe the Directional Key left, right, up or down to select an empty field,<br />
then press the Key [ASSIGN].<br />
3. Select the contact you want to assign, then press the Key [MARK].<br />
4. Press the Left Soft Key [Done].<br />
TO VIEW FAVORITE CONTACTS<br />
1. Sli<strong>de</strong> the phone up and press the Task Bar Key (located on the right si<strong>de</strong> of the<br />
<strong>de</strong>vice), swipe the Directional Key left or right to scroll to FAVORITES, then<br />
press the Key. Or sli<strong>de</strong> the phone up, press the Key [MENU], then press<br />
1. Contacts, 5. Favorite Contacts.<br />
Shortcut: From idle mo<strong>de</strong>, sli<strong>de</strong> the phone up, press the Favorites/Mo<strong>de</strong> Change Key<br />
.<br />
01<br />
02<br />
03<br />
04<br />
05<br />
06<br />
07<br />
55
2. Swipe the Directional Key left, right, up or down to select a <strong>de</strong>sired contact.<br />
3. Press the Left Soft Key [Messages]. Or, press the Right Soft Key<br />
[Options] to choose from the following:<br />
• Remove: Removes a contact from Favorites.<br />
• Remove All: Removes all contacts from Favorites.<br />
4. Press the Key [VIEW].<br />
TO ERASE FAVORITE CONTACTS<br />
1. Sli<strong>de</strong> the phone up and press the Task Bar Key (located on the right si<strong>de</strong> of the<br />
<strong>de</strong>vice), swipe the Directional Key left or right to scroll to FAVORITES, then<br />
press the Key. Or sli<strong>de</strong> the phone up, press the Key [MENU], then press<br />
1. Contacts, 5. Favorite Contacts.<br />
Shortcut: From idle mo<strong>de</strong>, sli<strong>de</strong> the phone up, press the Favorites/Mo<strong>de</strong> Change Key<br />
.<br />
2. Swipe the Directional Key left, right, up or down to select a <strong>de</strong>sired contact,<br />
then press the Key [VIEW].<br />
3. Press the Left Soft Key [Erase].<br />
4. “ERASE CONTACT” will be displayed on the screen. Select Yes and press the<br />
Key. A confirmation message appears.<br />
TO EDIT FAVORITE CONTACTS<br />
1. Sli<strong>de</strong> the phone up and press the Task Bar Key (located on the right si<strong>de</strong> of the<br />
<strong>de</strong>vice), swipe the Directional Key left or right to scroll to FAVORITES, then<br />
press the Key. Or sli<strong>de</strong> the phone up, press the Key [MENU], then press<br />
1. Contacts, 5. Favorite Contacts.<br />
Shortcut: From idle mo<strong>de</strong>, sli<strong>de</strong> the phone up, press the Favorites/Mo<strong>de</strong> Change Key<br />
.<br />
2. Swipe the Directional Key left, right, up or down to select a <strong>de</strong>sired contact,<br />
then press the Key [VIEW].<br />
3. Press the Key [EDIT].<br />
To edit the contact, please refer to page 48 for more <strong>de</strong>tails on Contact List.<br />
TO CALL A FAVORITE CONTACT ENTRY OR SEND A MESSAGE<br />
1. Sli<strong>de</strong> the phone up and press the Task Bar Key (located on the right si<strong>de</strong> of the<br />
<strong>de</strong>vice), swipe the Directional Key left or right to scroll to FAVORITES, then<br />
press the Key. Or sli<strong>de</strong> the phone up, press the Key [MENU], then press<br />
1. Contacts, 5. Favorite Contacts.<br />
Shortcut: From idle mo<strong>de</strong>, sli<strong>de</strong> the phone up, press the Favorites/Mo<strong>de</strong> Change Key<br />
.<br />
2. Swipe the Directional Key left, right, up or down to select a <strong>de</strong>sired contact.<br />
3. To make a call, press the SEND Key . To send a text message to the contact,<br />
press the TXT Composer Key .<br />
4. Swipe the Directional Key left, right, up or down to select a <strong>de</strong>sired contact,<br />
then press the Key [VIEW].<br />
Press the Right Soft Key [Options] to choose from the following:<br />
• New TXT Message / New Picture Message / New Vi<strong>de</strong>o Message /<br />
New Voice Message / Set Speed Dial / Call / Copy to Card / Copy All to Card.<br />
MY NAME CARD<br />
A Name Card with the handset’s mobile number automatically appears.<br />
EDIT MY NAME CARD<br />
1. Sli<strong>de</strong> the phone up, press the Key [MENU], then press 1. Contacts,<br />
6. My Name Card.<br />
2. Press the Left Soft Key [Edit].<br />
3. Edit the My Name Card options and then press the Key to save your<br />
changes.<br />
01<br />
02<br />
03<br />
04<br />
05<br />
06<br />
07<br />
56<br />
57
SEND MY NAME CARD<br />
1. Sli<strong>de</strong> the phone up, press the Key [MENU], then press 1. Contacts,<br />
6. My Name Card.<br />
2. Press the Right Soft Key [Send].<br />
3. Press 1. Send via Picture Message, 2. Send via Vi<strong>de</strong>o Message, 3. Send via<br />
Voice Message or 4. Send via Bluetooth.<br />
• Send via Picture Message: Allows you to send picture messages with the Name Card as<br />
an attachment.<br />
• Send via Vi<strong>de</strong>o Message: Allows you to send vi<strong>de</strong>o messages with the Name Card as an<br />
attachment.<br />
• Send via Voice Message: Allows you to send voice messages with the Name Card as an<br />
attachment.<br />
• Send via Bluetooth: Allows you to send Name Card to another Bluetooth® <strong>de</strong>vice.<br />
MISSED CALLS<br />
Displays information about the 90 most recently missed calls. Place a call to a missed<br />
call by simply pressing the SEND Key .<br />
1. Sli<strong>de</strong> the phone up, press the Key [MENU], then press 3. Call History,<br />
1. Missed Calls.<br />
2. Highlight an entry and perform one of the following options:<br />
• Press the Key [OPEN] to view the entry.<br />
• Press the Send Key to place a call to the number.<br />
• Press the Right Soft Key [Options] to select:<br />
Save to Contacts: Save the contact.<br />
Details: Displays <strong>de</strong>tails about the caller if entered in Contacts.<br />
Erase: Deletes the call from Missed calls list.<br />
Lock/Unlock: Locks or unlocks the entry.<br />
Erase All: Deletes all entries from Missed calls list.<br />
Call Timers: Displays usage time.<br />
• Press the Left Soft Key [Message] to select:<br />
TXT Message / Picture Message / Vi<strong>de</strong>o Message / Voice Message<br />
After 90 missed calls, the ol<strong>de</strong>st call will automatically be erased from the history.<br />
RECEIVED CALLS<br />
Displays information about the 90 most recently received calls. Place a call to a received<br />
call by simply pressing the SEND Key .<br />
1. Sli<strong>de</strong> the phone up, press the Key [MENU], then press 3. Call History,<br />
2. Received Calls.<br />
2. Highlight an entry and do one of the following options:<br />
• Press the Key [OPEN] to view the entry.<br />
• Press the Send Key to place a call to the number.<br />
• Press the Right Soft Key [Options] to select:<br />
Save to Contacts: Save the contact.<br />
Details: Displays <strong>de</strong>tails about the caller if entered in Contacts.<br />
Erase: Deletes the call from Received call list.<br />
Lock/Unlock: Locks or unlocks the entry.<br />
01<br />
02<br />
03<br />
04<br />
05<br />
06<br />
07<br />
58<br />
59
Erase All: Deletes all entries from Received calls list.<br />
Call Timers: Displays usage time.<br />
• Press the Left Soft Key [Message] to select:<br />
TXT Message / Picture Message / Vi<strong>de</strong>o Message / Voice Message<br />
After 90 received calls, the ol<strong>de</strong>st call will automatically be erased from the history.<br />
DIALED CALLS<br />
Displays information about the 90 most recently dialed numbers. Place a call to a dialed<br />
call by simply pressing the SEND Key .<br />
1. Sli<strong>de</strong> the phone up, press the Key [MENU], then press 3. Call History,<br />
3. Dialed Calls.<br />
2. Highlight an entry and do one of the following options:<br />
• Press the Key [OPEN] to view the entry.<br />
• Press the Send Key to place a call to the number.<br />
• Press the Right Soft Key [Options] to select:<br />
Save to Contacts: Save the contact.<br />
Details: Displays <strong>de</strong>tails about the caller if entered in Contacts.<br />
Erase: Deletes the call from Dialed calls list.<br />
Lock/Unlock: Locks or unlocks the entry.<br />
Erase All: Deletes all entries from Dialed calls list.<br />
Call Timers: Displays usage time.<br />
• Press the Left Soft Key [Message] to select:<br />
TXT Message / Picture Message / Vi<strong>de</strong>o Message / Voice Message<br />
After 90 dialed calls, the ol<strong>de</strong>st call will automatically be erased from the history.<br />
ALL CALLS<br />
Displays information about the most recently received, dialed and missed calls.<br />
1. Sli<strong>de</strong> the phone up, press the Key [MENU], then press 3. Call History,<br />
4. All Calls.<br />
2. Highlight an entry and select from the following options:<br />
• Press the Key [OPEN] to view the entry.<br />
• Press the Send Key to place a call to the number.<br />
• Press the Right Soft Key [Options] to select:<br />
Details: Displays <strong>de</strong>tails about the caller if entered in Contacts.<br />
Erase: Deletes the call from All call list.<br />
Lock/Unlock: Locks or unlocks the entry.<br />
Erase All: Deletes all entries from All calls list.<br />
Call Timers: Displays usage time.<br />
• Press the Left Soft Key [Message] to select:<br />
TXT Message / Picture Message / Vi<strong>de</strong>o Message / Voice Message<br />
• After the 270 received, dialed or missed calls, the ol<strong>de</strong>st call will automatically be<br />
erased from the history.<br />
• To view a quick list of all your calls, press the Send Key from idle mo<strong>de</strong>.<br />
CALL TIMERS<br />
Checks the usage time and manages your calls within the limit you set. To view 11<br />
timers (Last Call, All Calls, Received Calls, Dialed Calls, Roaming Calls, Transmit Data,<br />
Received Data, Total Data, Last Reset, Lifetime Calls, Lifetime Data Counter):<br />
1. Sli<strong>de</strong> the phone up, press the Key [MENU], then press 3. Call History,<br />
5. Call Timers.<br />
2. Highlight a call list. Call timers inclu<strong>de</strong>:<br />
Last Call / All Calls / Received Calls / Dialed Calls / Roaming Calls /<br />
Transmit Data / Received Data / Total Data / Last Reset / Lifetime Calls /<br />
Lifetime Data Counter<br />
• Press the Left Soft Key [Reset] to reset highlighted timer.<br />
• Press the Right Soft Key [Reset All] to reset all timers.<br />
• You cannot reset the Last Reset, Lifetime Calls and Lifetime Data Counter.<br />
01<br />
02<br />
03<br />
04<br />
05<br />
06<br />
07<br />
60<br />
61
easyedge SM<br />
easyedge SM allows you to do more than just talk on your phone. easyedge is a<br />
technology and service that allows you to download and use applications on your<br />
phone. With easyedge, it is quick and easy to personalize your phone to suit your<br />
lifestyle and tastes. Just download the applications that appeal to you. From ringtones<br />
and wallpapers to games and productivity tools, you can be assured you will find<br />
something useful, practical, or downright entertaining. There are new applications<br />
constantly available for your use.<br />
DOWNLOADING APPLICATIONS<br />
You can download applications and use easyedge where service is available.<br />
INCOMING CALLS<br />
When using applications, an incoming call will automatically pause the application<br />
and allow you to answer the call. When you complete your call, you can resume using<br />
the application.<br />
1. Sli<strong>de</strong> the phone up, press the Key [MENU], then press 5. easyedge.<br />
Shortcut: From idle mo<strong>de</strong>, sli<strong>de</strong> the phone up and press the Directional Key<br />
down.<br />
easyedge SM<br />
4. Select purchasing option.<br />
5. Select Phone or Card.<br />
6. Download will commence and application will install on <strong>de</strong>vice.<br />
LAUNCHING YOUR NAVIGATOR APPLICATION<br />
1. Access the easyedge Main Menu via <strong>de</strong>vice idle mo<strong>de</strong> shortcut or from <strong>de</strong>vice<br />
menu options.<br />
2. Your Navigator should appear within the list of applications downloa<strong>de</strong>d on<br />
the <strong>de</strong>vice. Select Your Navigator – application launches.<br />
FROM THE YOUR NAVIGATOR IDLE MODE YOU CAN SELECT<br />
• You can select Drive To for turn by turn direction to an address, airport, contacts<br />
addresses and more.<br />
• You can select Places to search for nearby businesses, the cheapest gas prices<br />
and more.<br />
• You can select Maps & Traffic to see where you currently are located on a map<br />
and what traffic is in the area.<br />
YOUR NAVIGATOR<br />
With Your Navigator, get all of the features of an advanced car navigation system on<br />
your mobile phone with voice turn-by-turn navigation enabled by GPS. Search for any<br />
<strong>de</strong>stination including gas stations, ATMs, restaurants, and more. Get <strong>de</strong>tailed maps of<br />
any location.<br />
DOWNLOAD INSTRUCTIONS FOR YOUR NAVIGATOR FROM easyedge SM<br />
1. Select easyedge by going into the phone menu and selecting (Show easyedge<br />
star).<br />
2. Use the up/down arrows to navigate to the shopping cart icon and select (may<br />
vary by navigation options). Select Catalog.<br />
3. Scroll to the Navigation fol<strong>de</strong>r.<br />
62 63
BROWSER<br />
VISITING A NEW WEB PAGE<br />
Use the web browser feature to access the Internet and surf the web.<br />
1. Sli<strong>de</strong> the phone up, press the Key [MENU], then press 6. Browser.<br />
2. From the U.S. Cellular® screen, press the Left Soft Key [Menu].<br />
3. Press the Directional Key down to highlight the Opera tab on the toolbar.<br />
4. Press the Key to display the Opera menu.<br />
5. Press the Directional Key down to select Start Page. Press the Key.<br />
6. The url entry box is highlighted. Press the Key. Use the keypad to enter the<br />
url address you want. Press the Key [Go].<br />
7. The new web page is displayed.<br />
ADDING A BOOKMARK<br />
The Bookmark feature makes it easy to visit your favorite websites. Bookmarked web<br />
pages can be quickly launched to re-visit at any time. You can bookmark any currently<br />
displayed web page.<br />
1. From a web page, press the Left Soft Key [Menu].<br />
2. Press the Directional Key down to highlight the Opera tab on the toolbar.<br />
3. Press the Key to display the Opera menu.<br />
4. Press the Directional Key down to select Bookmarks. Press the Key.<br />
5. Press the Directional Key up to highlight the web page you want to add<br />
(+) as a bookmark. Press the Key.<br />
6. The Add Bookmark screen is displayed. Press the Directional Key down to<br />
select the fol<strong>de</strong>r .<br />
7. Press the Left Soft Key [Save].<br />
8. The bookmark is now listed. Press the Directional Key up or down to<br />
highlight it.<br />
9. Press the Left Soft Key [Manage]. You can open it in a new tab, <strong>de</strong>lete,<br />
edit, or save it in a new fol<strong>de</strong>r.<br />
Browser<br />
TONE ROOM DELUXE<br />
Tone Room Deluxe is a service that enables you to access the latest and hottest content<br />
from your favorite artists for ringtones and ringback tones from your phone or the Web.<br />
This easy to use service features a music catalog with tens of thousands of titles for you<br />
to discover. Personalize your experience and express yourself by subscribing to Tone<br />
Room Deluxe and use ringback tones to customize music for your friends and family to<br />
hear when they call you.<br />
1. Sli<strong>de</strong> the phone up, press the Key [MENU], then press 7. Tone Room<br />
Deluxe.<br />
This app is only ma<strong>de</strong> available to U.S. Cellular customers.<br />
PAC-MAN<br />
Allows you to use the preloa<strong>de</strong>d PAC-MAN application.<br />
1. Sli<strong>de</strong> the phone up, press the Key [MENU], then press 8. PAC-MAN.<br />
<strong>User</strong> charges may apply.<br />
64 65
VOICE COMMANDS<br />
Your phone is equipped with an Advanced Voice Commands (AVC) feature. This feature<br />
allows you to make calls or use the phone’s functions by simply using your voice. All<br />
you have to do is talk into the phone and then the phone will recognize your voice and<br />
complete tasks by itself.<br />
1. Sli<strong>de</strong> the phone up, press the Key [MENU], then press 9. Tools & Settings,<br />
1. Tools, 1. Voice Commands.<br />
Shortcut: From idle mo<strong>de</strong>, press the Voice Commands Key (located on the left si<strong>de</strong> of<br />
the <strong>de</strong>vice) to access the Voice Commands menu.<br />
2. The phone displays the Voice Commands menu and prompts you to say the name<br />
of the command you want to use. To complete your task, simply follow the voice<br />
prompts. You can speak the name of the command after you hear a beep.<br />
3. Select one of the following options, then press the Key.<br />
Call / Send Text / Send Picture /<br />
Send Vi<strong>de</strong>o / Lookup / Go To / Redial /<br />
Play / Check <br />
Voice Commands menu information appears, press the Left Soft Key [Tutorial].<br />
Press the Right Soft Key [Settings] to access Voice Commands Settings. Please<br />
refer to page 69 for more <strong>de</strong>tails on Voice Commands Settings.<br />
4. When it recognizes one of these commands, the phone launches the associated<br />
application. If the phone does not hear a command within approximately eight<br />
seconds, AVC mo<strong>de</strong> will turn itself off.<br />
CALL <br />
Use the Call command to voice dial a name from your Contact List or a phone number.<br />
When dialing a number, pronounce each digit, but do not pause noticeably between<br />
the digits.<br />
1. You will hear Say a Command and the Voice Commands menu will be<br />
displayed.<br />
2. If calling a contact from your Contact List, say Call . Your phone will<br />
ask you to confirm the name you said. Say “Yes“ if it was repeated correctly.<br />
That phone number will be dialed. If there is more than one number saved for<br />
that contact, you will be asked to confirm which number to dial.<br />
Example: Call John Smith Mobile<br />
SEND TEXT < NAME OR #><br />
Use the Send Text command to send a text message to a specified name or number.<br />
1. You will hear Say a Command and the Voice Commands menu will be<br />
displayed.<br />
2. Say “Send Text“ followed immediately by Text Message.<br />
Example: Send Text Tom Smith.<br />
SEND PICTURE <br />
Use the Send Picture command to send a multimedia message to a specified name or<br />
number.<br />
1. You will hear Say a Command and the Voice Commands menu will be<br />
displayed.<br />
2. Say “Send Picture“ followed immediately by Picture Message.<br />
Example: Send Picture Tom Smith.<br />
SEND VIDEO <br />
Use the Send Vi<strong>de</strong>o command to send a multimedia message to a specified name or<br />
number.<br />
1. You will hear Say a Command and the Voice Commands menu will be<br />
displayed.<br />
2. Say “Send Vi<strong>de</strong>o“ followed immediately by Vi<strong>de</strong>o Message.<br />
Example: Send Vi<strong>de</strong>o Tom Smith.<br />
01<br />
02<br />
03<br />
04<br />
05<br />
06<br />
07<br />
66<br />
67
LOOKUP <br />
Use the Lookup command to retrieve and display information for any name stored in<br />
your Contacts.<br />
1. You will hear Say a Command and the Voice Commands menu will be<br />
displayed.<br />
2. Say “Lookup“.<br />
3. The contact name will be displayed.<br />
GO TO <br />
Use the Go To command to open an application on your phone. You can say “Go To”<br />
by itself and be prompted to say the application name, or you can skip the prompt by<br />
saying ”Go To” followed by the application name.<br />
1. You will hear Say a Command and the Voice Commands menu will be<br />
displayed.<br />
2. To access a menu within the phone, say “Go To” followed by the menu.<br />
Example: “Go To Calendar”. If no menu option is stated, a list of options will be<br />
provi<strong>de</strong>d.<br />
REDIAL<br />
Use the Redial command to make a call to the last number you dialed.<br />
1. You will hear Say a Command and the Voice Commands menu will be<br />
displayed.<br />
2. Say “Redial”.<br />
3. Your phone will make a call to the last number you dialed.<br />
PLAY <br />
Say “Play” followed by a playlist title and then your phone will play back the recognized<br />
playlist for you.<br />
1. You will hear Say a Command and the Voice Commands menu will be<br />
displayed.<br />
2. Say “Play” to play back individual playlist or say “All Songs” to play back all<br />
songs saved in your phone.<br />
CHECK <br />
The Check command lets you check status information for your phone. You can say<br />
“Check” or “Check Status” to see and hear all status information.<br />
1. You will hear Say a Command and the Voice Commands menu will be<br />
displayed.<br />
2. Say “Check” followed immediately by one of the following items:<br />
Status / Voicemail / Messages / Missed Calls / Time / Signal Strength /<br />
Battery /My Phone Number / Volume<br />
VOICE COMMANDS SETTINGS<br />
CONFIRMATION<br />
When the phone does not recognize your voice command, it will ask you to repeat<br />
your voice command. If it does not recognize the name or number, it will display a<br />
list of up to three choices and speak each one in turn. You can control how often the<br />
phone asks you to confirm the recognized name or number.<br />
1. Sli<strong>de</strong> the phone up, press the Key [MENU], then press<br />
9. Tools & Settings, 1. Tools, 1. Voice Commands.<br />
Shortcut: From idle mo<strong>de</strong>, press the Voice Commands Key (located on the left<br />
si<strong>de</strong> of the <strong>de</strong>vice) to access the Voice Commands menu and press the Right Soft<br />
Key [Settings].<br />
2. Press the Right Soft Key [Settings] and then press 1. Confirmation.<br />
3. Press the Directional Key up or down to select Automatic, Always<br />
Confirm or Never Confirm, then press the Key.<br />
To view information about each option, press the Left Soft Key [Help].<br />
01<br />
02<br />
03<br />
04<br />
05<br />
06<br />
07<br />
68<br />
69
ADAPTATION<br />
Voice Commands are speaker in<strong>de</strong>pen<strong>de</strong>nt, which means that no training or adaptation<br />
is required. Some users with heavy accents or unusual voice characteristics may find<br />
difficulty in achieving high accuracy with speaker in<strong>de</strong>pen<strong>de</strong>nt Voice Commands, so<br />
the Adapt Voice feature allows users to dramatically improve the recognition accuracy<br />
after adapting their voices. <strong>User</strong>s who get acceptable recognition accuracy will find no<br />
additional benefit to performing the Adapt Voice feature.<br />
1. Sli<strong>de</strong> the phone up, press the Key [MENU], then press<br />
9. Tools & Settings, 1. Tools, 1. Voice Commands.<br />
2. Press the Right Soft Key [Settings] and then press 2. Adaptation.<br />
3. Select 1. Adapt Voice then press the Key.<br />
• Adapt Voice: Requires that you make recordings of your voice to customize the voice<br />
recognition system. It will take a few minutes.<br />
• Reset Voice: Once you finish the adaptation process, you can reset the adaptation to<br />
factory <strong>de</strong>fault. Reset Voice option only appears after you finish the Adapt<br />
Voice process.<br />
4. “Adaptation will take a couple of minutes to complete. Adapt in a<br />
quiet room. Press Start to begin.” will appear on the screen. Press the Left<br />
Soft Key [Start Over]. Wait for the beep, and then repeat the sentences<br />
using a normal tone of voice.<br />
5. When you are finished with a full session, you will reach a screen that reads<br />
“Adaptation Complete”.<br />
AUDIO MODES<br />
Allows you to select audio mo<strong>de</strong>s for the voice command.<br />
1. Sli<strong>de</strong> the phone up, press the Key [MENU], then press<br />
9. Tools & Settings, 1. Tools, 1. Voice Commands.<br />
2. Press the Right Soft Key [Settings] and then press 3. Audio Mo<strong>de</strong>s.<br />
3. Select the voice command system mo<strong>de</strong> from the following:<br />
• Expert Mo<strong>de</strong>: For handset to provi<strong>de</strong> beeps only for audio guidance.<br />
• Prompt Mo<strong>de</strong>: For handset to prompt for required information (<strong>de</strong>fault).<br />
• Readout Mo<strong>de</strong>: For handset to prompt for required information and readout the<br />
contents of the screen.<br />
SPEAKERPHONE<br />
Allows you to select how the system uses the speakerphone.<br />
1. Sli<strong>de</strong> the phone up, press the Key [MENU], then press<br />
9. Tools & Settings, 1. Tools, 1. Voice Commands.<br />
2. Press the Right Soft Key [Settings] and then press 4. Speakerphone.<br />
3. Select the speakerphone mo<strong>de</strong> from the following:<br />
• Always On: Allows audio playback to play through the speakerphone.<br />
• Always Off: Allows audio playback to play through the internal speaker.<br />
ABOUT<br />
1. Sli<strong>de</strong> the phone up, press the Key [MENU], then press<br />
9. Tools & Settings, 1. Tools, 1. Voice Commands.<br />
2. Press the Right Soft Key [Settings] and then press 5. About.<br />
3. The Nuance version appears.<br />
4. To return to the previous screen, press the CLR Key or the Right Soft Key<br />
[Back].<br />
CALCULATOR<br />
The Calculator allows you to perform simple mathematical calculations. To access the<br />
calculator:<br />
1. Sli<strong>de</strong> the phone up, press the Key [MENU], then press 9. Tools & Settings,<br />
1. Tools, 2. Calculator.<br />
2. Follow the instructions below to calculate 8×6÷4-2.5=9.5<br />
• Input 8 and then press the Directional Key right.<br />
• Input 6 and then press the Directional Key left.<br />
01<br />
02<br />
03<br />
04<br />
05<br />
06<br />
07<br />
70<br />
71
• Input 4 and then press the Directional Key down.<br />
• Input 2 and then press the to input (.).<br />
• Input 5 and then press the Key and you will see the answer (9.5).<br />
3. To reset, press the Left Soft Key [Clear].<br />
• Directional Key right : X<br />
• Directional Key down : -<br />
• Directional Key left : ÷<br />
• Directional Key up : +<br />
• * Key : .<br />
• Left Soft Key : Clear<br />
• OK Key : =<br />
• To change the displayed number from positive (+) to negative (-) and vice versa,<br />
press # Key .<br />
• Press the Right Soft Key [Operator] to use parenthesis 1. (, 2. ) and 3. Exponent.<br />
TIP CALCULATOR<br />
Allows you to calculate the tip and <strong>de</strong>termine how much each person should pay for<br />
the bill.<br />
1. Sli<strong>de</strong> the phone up, press the Key [MENU], then press 9. Tools & Settings,<br />
1. Tools, 3. Tip Calculator.<br />
2. Input the amount in the Total Bill field and press the Directional Key down.<br />
3. Select the percentage of tip in the Tip (%) field by pressing the Directional Key<br />
left or right. Press the Directional Key down.<br />
4. In the Split field, input the number of persons by pressing the Directional Key<br />
left or right. The tip amount and cost per person is shown.<br />
5. The amount of a tip will be displayed in the Tip ($) field.<br />
6. Press the Left Soft Key [Reset] to clear the fields. Press the Right Soft Key<br />
[Close] to return to the previous menu.<br />
CALENDAR<br />
The Calendar tool provi<strong>de</strong>s easy and convenient access to your schedule. Simply store<br />
your appointments and your phone will alert you.<br />
1. Sli<strong>de</strong> the phone up, press the Key [MENU], then press 9. Tools & Settings,<br />
1. Tools, 4. Calendar.<br />
Shortcut: From idle mo<strong>de</strong>, sli<strong>de</strong> the phone up and press the Directional Key left.<br />
2. Highlight the scheduled day.<br />
3. Press the Left Soft Key [New].<br />
4. The Subject field is highlighted. Enter the name of the event using the<br />
QWERTY Keypad. Press the Directional Key down to set the other fields for<br />
the event:<br />
• Start Time: Press the Left Soft Key [Set] , set the start time and press the Key.<br />
• End Time: Press the Left Soft Key [Set] , set the end time and press the Key.<br />
• Start Date: Press the Left Soft Key [Set] , set the start date and press the Key.<br />
• End Date: Press the Left Soft Key [Set] , set the end date and press the Key.<br />
• Recurrence: Press the Left Soft Key [Set] and select the recurrence of the event from<br />
the following, and press the Key.<br />
None / Daily / Every X Days / Weekly / Monthly / Yearly<br />
• Alert Time: Press the Left Soft Key [Set] and select the alert time before the event<br />
takes place from the following, and press the Key.<br />
On time / 15 minutes before / 30 minutes before / 45 minutes before /<br />
1 hour before / 3 hours before / 5 hours before / 1 day before<br />
• Remin<strong>de</strong>r: Press the Left Soft Key [Set] and select a remin<strong>de</strong>r before the event from<br />
the following, and press the Key.<br />
Off / Once / Every 2 minutes / Every 15 minutes<br />
• Alert Tone: Press the Left Soft Key [Set] to select a new ringtone. Press the Left Soft<br />
Key [Play] to play a ringtone and press the Key [Set].<br />
• Vibrate: Press the Left Soft Key [Set] and select On or Off, and press the Key.<br />
01<br />
02<br />
03<br />
04<br />
05<br />
06<br />
07<br />
72<br />
73
• Event Type: Press the Left Soft Key [Set] and select a event type from the following,<br />
and press the Key.<br />
Event (<strong>de</strong>fault) / Important / Meal / Game/Practice/Exercise /<br />
Vacation/Holiday / Birthday / Anniversary / Business / Social /<br />
Medical/Dental / School / Concert/Performance / Play Date /<br />
Picnic/Outing / Personal / Phone Call / Must Attend / Travel<br />
Required / Needs Preparation / Woman / Man / Girl / Boy / Family<br />
• Attachment: Press the Left Soft Key [Add] and select Pictures or Vi<strong>de</strong>os to attach,<br />
and press the Key. Select the <strong>de</strong>sired picture or vi<strong>de</strong>o and press the<br />
Key.<br />
• Location: Enter the information of location. Press the Left Soft Key [Abc] to select<br />
the entry mo<strong>de</strong> and press the Key.<br />
• Notes: Enter memo of the schedule. Press the Left Soft Key [Abc] to select the entry<br />
mo<strong>de</strong> and press the Key.<br />
5. Press the Key [SAVE] to save it. The date of the event will be marked on<br />
your calendar.<br />
VIEW SAVED EVENT<br />
1. Sli<strong>de</strong> the phone up, press the Key [MENU], then press 9. Tools & Settings,<br />
1. Tools, 4. Calendar.<br />
2. Choose the event then press the Key [VIEW].<br />
ERASE SAVED EVENT<br />
1. Sli<strong>de</strong> the phone up, press the Key [MENU], then press 9. Tools & Settings,<br />
1. Tools, 4. Calendar.<br />
2. Choose the event then press the Key [VIEW].<br />
3. Press the Right Soft Key [Options], 4. Erase.<br />
4. “ERASE EVENT” appears on the display. Press the Directional Key up or<br />
down to select Yes and press the Key.<br />
ERASE ALL PAST EVENTS<br />
Allows you to <strong>de</strong>lete past events from today.<br />
1. Sli<strong>de</strong> the phone up, press the Key [MENU], then press 9. Tools & Settings,<br />
1. Tools, 4. Calendar.<br />
2. Choose the event then press the Key [VIEW].<br />
3. Press the Right Soft Key [Options], select 6. Erase All Old and press the<br />
Key.<br />
4. “ERASE ALL PAST EVENTS” appears on the display. Press the Directional Key<br />
up or down to select Yes, then press the Key.<br />
E-DIARY<br />
E-Diary is a simple diary application <strong>de</strong>signed to be easy to un<strong>de</strong>rstand and convenient<br />
for everyday use.<br />
1. Sli<strong>de</strong> the phone up, press the Key [MENU], then press 9. Tools & Settings,<br />
1. Tools, 5. E-Diary.<br />
2. Press the Left Soft Key [New].<br />
3. In the Weather & Feeling field, press the Left Soft Key [Set], then select<br />
an icon and press the Key.<br />
4. Press the Directional Key down to set the other fields for the E-diary:<br />
TITLE<br />
Enter the title of the diary.<br />
PICTURE<br />
Press the Left Soft Key [Set] to select an image stored in Pictures and press<br />
the Key. Please refer to page 108 for more <strong>de</strong>tails on PICTURES.<br />
TEXT<br />
Enter the message for the diary.<br />
01<br />
02<br />
03<br />
04<br />
05<br />
06<br />
07<br />
74<br />
75
BACKGROUND<br />
Press the Directional Key left or right to select one of the following<br />
backgrounds:<br />
Blackboard / Essay / Sky / Letter<br />
5. Press the Right Soft Key [Options] then press 1. Preview to preview the<br />
setting you selected or 2. Cancel E-Diary to discard your new E-diary.<br />
6. Press the Key [SAVE] to save your E-diary.<br />
SEND AN E-DIARY<br />
1. Sli<strong>de</strong> the phone up, press the Key [MENU], then press 9. Tools & Settings,<br />
1. Tools, 5. E-Diary.<br />
2. Highlight an E-Diary, then press the Right Soft Key [Options].<br />
3. Press the Directional Key up or down to select 1. Send and press the<br />
Key, then compose a Picture Message and press the Key [SEND]. Please<br />
refer to page 119 for more <strong>de</strong>tails on Picture Message.<br />
EDIT AN E-DIARY<br />
1. Sli<strong>de</strong> the phone up, press the Key [MENU], then press 9. Tools & Settings,<br />
1. Tools, 5. E-Diary.<br />
2. Highlight an E-Diary, then press the Right Soft Key [Options].<br />
3. Press the Directional up or down to select 2. Edit and press the Key<br />
then modify the E-Diary.<br />
4. Press the Key [SAVE] to save your modifications.<br />
ERASE E-DIARY<br />
1. Sli<strong>de</strong> the phone up, press the Key [MENU], then press 9. Tools & Settings,<br />
1. Tools, 5. E-Diary.<br />
2. Highlight an E-Diary, then press the Right Soft Key [Options].<br />
3. Press the Directional Key up or down to select 3. Erase to erase an E-Diary<br />
or 4. Erase All to erase all the E-Diary entries, then press the Key.<br />
4. Press the Directional Key up or down to select Yes and press the Key.<br />
ALARM CLOCK<br />
The Alarm Clock tool allows you to set up to three alarms. When you set an alarm, the<br />
current time is displayed on the top of the idle mo<strong>de</strong>. When the alarm goes off, the<br />
alarm will be displayed on the LCD screen and the alarm will sound.<br />
1. Sli<strong>de</strong> the phone up, press the Key [MENU], then press 9. Tools & Settings,<br />
1. Tools, 6. Alarm Clock.<br />
Shortcut: From idle mo<strong>de</strong>, press the Directional Key<br />
MY SHORTCUTS and then press 1. Alarm Clock.<br />
right to access<br />
2. Highlight an Alarm (1, 2 or 3), then press the Key.<br />
3. Press the Directional Key down to set the fields for the alarm:<br />
ON / OFF<br />
Press the Directional Key left or right to select On or Off.<br />
TIME<br />
Use the keypad to set a time for the alarm and highlight am or pm, then press<br />
the Left Soft Key am or pm.<br />
FREQUENCY<br />
Press the Directional Key left or right to select a setting from the following:<br />
Once / Daily / Weekdays / Weekends<br />
RINGTONE<br />
Press the Left Soft Key [Set] then select the alert tone you wish to set. Press<br />
the Left Soft Key [Play] to play a ringtone. Press the Key [SET] to make<br />
your selection.<br />
4. Press the Key [SAVE] to set the alarm.<br />
01<br />
02<br />
03<br />
04<br />
05<br />
06<br />
07<br />
76<br />
77
TURN ON/OFF THE ALARM SETTING<br />
1. Sli<strong>de</strong> the phone up, press the Key [MENU], then press 9. Tools & Settings,<br />
1. Tools, 6. Alarm Clock.<br />
2. Highlight an Alarm (1, 2 or 3), then press the Right Soft Key [Options].<br />
3. Press the Directional Key up or down to select 1.Turn On or 1. Turn Off<br />
then press the Key.<br />
RESET THE ALARM SETTING<br />
1. Sli<strong>de</strong> the phone up, press the Key [MENU], then press 9. Tools & Settings,<br />
1. Tools, 6. Alarm Clock.<br />
2. Highlight an Alarm (1, 2 or 3), then press the Right Soft Key [Options].<br />
3. Press the Directional Key up or down to select 2. Reset Alarm, then press<br />
the Key.<br />
4. “RESET ALARM (1, 2 or 3)” will appear on the screen. Press the Directional<br />
Key up or down to select Yes and press the Key.<br />
RESET ALL ALARM SETTINGS<br />
1. Sli<strong>de</strong> the phone up, press the Key [MENU], then press 9. Tools & Settings,<br />
1. Tools, 6. Alarm Clock.<br />
2. Highlight an Alarm (1, 2 or 3), then press the Right Soft Key [Options].<br />
3. Press the Directional Key up or down to select 3. Reset All, then press the<br />
Key.<br />
4. “RESET ALL ALARMS” will appear on the screen. Press the Directional Key<br />
up or down to select Yes and press the Key.<br />
TURN ON/OFF, RESET ALARM and RESET ALL ALARM are available on the Options menu<br />
for alarms previously set.<br />
STOPWATCH<br />
Simultaneously times up to eight different events. To operate the Stopwatch:<br />
1. Sli<strong>de</strong> the phone up, press the Key [MENU], then press 9. Tools & Settings,<br />
1. Tools, 7. Stopwatch.<br />
2. To start the Stopwatch, press the Key [START].<br />
3. To pause it, press the Key [STOP].<br />
4. To resume it, press the Key [START].<br />
5. To reset it, press the Right Soft Key [Reset].<br />
TO TIME UP TO EIGHT EVENTS AT ONCE<br />
1. To start the Stopwatch, press the Key [START].<br />
2. To stop a time period and continue measuring another one, press the Left Soft<br />
Key [Lap].<br />
3. To stop the second and continue measuring a third one, press the Left Soft Key<br />
[Lap].<br />
4. To measure up to eight time periods, repeat the above steps.<br />
5. To stop the Stopwatch, press the Key [STOP].<br />
6. To view the lap times, press the Left Soft Key [View].<br />
7. To reset it, press the Right Soft Key [Reset], then press the CLR Key to<br />
finish using the Stopwatch and return to the previous menu.<br />
WORLD CLOCK<br />
To display the time and date in pre-programmed cities:<br />
1. Sli<strong>de</strong> the phone up, press the Key [MENU], then press 9. Tools & Settings,<br />
1. Tools, 8. World Clock.<br />
2. Press the Direction Key left or right to select the <strong>de</strong>sired city on the world<br />
map.<br />
01<br />
02<br />
03<br />
04<br />
05<br />
06<br />
07<br />
78<br />
79
3. Press the Left Soft Key [Cities] to access the CITIES LIST. Press the Direction<br />
Key up or down to select the <strong>de</strong>sired city, then press the Key.<br />
4. The world map appears with the city, its date and time.<br />
5. Press the CLR Key to return to the previous menu.<br />
DAYLIGHT SAVING TIME (DST) SETTING<br />
1. Sli<strong>de</strong> the phone up, press the Key [MENU], then press 9. Tools & Settings,<br />
1. Tools, 8. World Clock.<br />
2. With the <strong>de</strong>sired location selected, press the Right Soft Key [DST] to set Daylight<br />
Saving Time, the DST icon appears.<br />
3. To turn off DST, press the Right Soft Key [DST] again.<br />
The DST option will adjust clocks forward one hour.<br />
NOTEPAD +<br />
Your phone inclu<strong>de</strong>s an internal notepad that can be used to compose and store<br />
remin<strong>de</strong>rs and notes. To create a note:<br />
1. Sli<strong>de</strong> the phone up, press the Key [MENU], then press 9. Tools & Settings,<br />
1. Tools, 9. Notepad +.<br />
Shortcut: Sli<strong>de</strong> the phone up and press the Notepad + Key .<br />
2. Press the Left Soft Key [New] to enter a new note.<br />
3. Enter the text for a new note.<br />
4. To create a note with a picture, vi<strong>de</strong>o or sound, press the Directional Key<br />
down to scroll through Picture/Vi<strong>de</strong>o/Sound, press the Left Soft Key [Add],<br />
select 1. Picture, 2. Vi<strong>de</strong>o or 3. Sound, then press the Key. Select your<br />
<strong>de</strong>sired picture, vi<strong>de</strong>o or sound and press the Key.<br />
5. To save the note, press the Right Soft Key [Save].<br />
VIEW SAVED MEMO<br />
To view a saved memo:<br />
1. Sli<strong>de</strong> the phone up, press the Key [MENU], then press 9. Tools & Settings,<br />
1. Tools, 9. Notepad +.<br />
2. Press the Directional Key up or down to select a note, then press the<br />
Key [VIEW].<br />
SEND SAVED MEMO<br />
To send a saved memo:<br />
1. Sli<strong>de</strong> the phone up, press the Key [MENU], then press 9. Tools & Settings,<br />
1. Tools, 9. Notepad +.<br />
2. Press the Directional Key up or down to select a note, press the Right Soft<br />
Key [Options], then press 2. Send.<br />
3. Press the Directional Key up or down to select 1. TXT Message, 2. Picture<br />
Message, 3. Vi<strong>de</strong>o Message or 4. Voice Message, then press the Key.<br />
If a note has a picture, vi<strong>de</strong>o or sound attachment, the corresponding message<br />
window will be opened automatically.<br />
4. Compose the message, then press the Key [SEND].<br />
ERASE SAVED MEMO<br />
To erase a saved memo:<br />
1. Sli<strong>de</strong> the phone up, press the Key [MENU], then press 9. Tools & Settings,<br />
1. Tools, 9. Notepad +.<br />
2. Press the Directional Key up or down to select a note, press the Right Soft<br />
Key [Options] then select 3. Erase and press the Key.<br />
3. “ERASE NOTEPAD+” will be displayed. Press the Directional Key up or<br />
down to select Yes and press the Key.<br />
01<br />
02<br />
03<br />
04<br />
05<br />
06<br />
07<br />
80<br />
81
ERASE ALL SAVED MEMOS<br />
To erase all saved memos:<br />
1. Sli<strong>de</strong> the phone up, press the Key [MENU], then press 9. Tools & Settings,<br />
1. Tools, 9. Notepad +.<br />
2. Press the Right Soft Key [Options], then press the Directional Key up<br />
or down to select 4. Erase All and press the Key.<br />
3. “ERASE All NOTEPAD+” will be displayed. Press the Directional Key up or<br />
down to select Yes and press the Key.<br />
USB MASS STORAGE<br />
USB Mass Storage allows you to transfer files to or from your PC.<br />
1. Sli<strong>de</strong> the phone up, press the Key [MENU], then press 9. Tools & Settings,<br />
1. Tools, 0. USB Mass Storage.<br />
2. Follow the on-screen prompts.<br />
Connect the Charging/Data port on your phone and the USB port on your PC with the<br />
inclu<strong>de</strong>d USB cable.<br />
SOUNDS SETTINGS<br />
CALL SOUNDS<br />
To set ringtones for types of incoming calls:<br />
CALL RINGTONE<br />
1. Sli<strong>de</strong> the phone up, press the Key [MENU], then press<br />
9. Tools & Settings, 2. Sounds Settings, 1. Call Sounds, 1. Call Ringtone.<br />
2. Press the Directional Key up or down to select a ringtone, then press the<br />
Key [SET]. To play the ringtone, press the Left Soft Key [Play].<br />
CALL VIBRATE<br />
1. Sli<strong>de</strong> the phone up, press the Key [MENU], then press<br />
9. Tools & Settings, 2. Sounds Settings, 1. Call Sounds, 2. Call Vibrate.<br />
2. Press the Directional Key up or down to select On or Off, then press the<br />
Key [SET].<br />
CALLER ID READOUT<br />
1. Sli<strong>de</strong> the phone up, press the Key [MENU], then press<br />
9. Tools & Settings, 2. Sounds Settings, 1. Call Sounds,<br />
3. Caller ID Readout.<br />
2. Press the Directional Key up or down to select Ring Only, Caller ID +<br />
Ring or Name Repeat, then press the Key [SET].<br />
ALERT SOUNDS<br />
To select the alert type for a new message:<br />
1. Sli<strong>de</strong> the phone up, press the Key [MENU], then press 9. Tools & Settings,<br />
2. Sounds Settings, 2. Alert Sounds.<br />
2. Press the Directional Key up or down to select 1. TXT Message,<br />
2. Multimedia Message, 3. Voicemail or 5. Missed Call, then press the<br />
Key .<br />
01<br />
02<br />
03<br />
04<br />
05<br />
06<br />
07<br />
82<br />
83
3. Press the Directional Key up or down to select 1. Tone, 2. Vibrate or<br />
3. Remin<strong>de</strong>r, then press the Key.<br />
• 1. Tone: Press the Directional Key up or down to select a ringer, then press the Key<br />
[SET]. To play the alert tone, press the Left Soft Key [Play].<br />
• 2. Vibrate: Press the Directional Key up or down to select On or Off, then press the<br />
Key [SET].<br />
• 3. Remin<strong>de</strong>r: Press the Directional Key up or down to select Once, Every 2 minutes,<br />
Every 15 minutes or Off, then press the Key [SET].<br />
EMERGENCY TONE<br />
1. Sli<strong>de</strong> the phone up, press the Key [MENU], then press<br />
9. Tools & Settings, 2. Sounds Settings, 2. Alert Sounds,<br />
4. Emergency Tone.<br />
2. Press the Directional Key up or down to select Alert, Vibrate or Off, then<br />
press the Key [SET].<br />
3. To view the help for Emergency Tone, press the Right Soft Key [Help].<br />
KEYPAD SOUNDS<br />
To select keypad sounds when using the Keypad.<br />
1. Sli<strong>de</strong> the phone up, press the Key [MENU], then press 9. Tools & Settings,<br />
2. Sounds Settings, 3. Keypad Sounds.<br />
2. Press the Directional Key up or down to select DTMF, Cloud or Simple,<br />
then press the Key [SET].<br />
DTMF is the <strong>de</strong>fault setting for this <strong>de</strong>vice.<br />
KEYPAD VOLUME<br />
To set the keypad volume:<br />
1. Sli<strong>de</strong> the phone up, press the Key [MENU], then press 9. Tools & Settings,<br />
2. Sounds Settings, 4. Keypad Volume.<br />
2. Adjust the volume by pressing the Directional Key up or down, then press<br />
the Key [SET] to save the setting. To test the volume level, press the Left<br />
Soft Key [Play].<br />
DIGIT DIAL READOUT<br />
The Digit Dial Readout setting controls if digits are read out loud when you enter a<br />
phone number with the QWERTY Keypad.<br />
1. Sli<strong>de</strong> the phone up, press the Key [MENU], then press 9. Tools & Settings,<br />
2. Sounds Settings, 5. Digit Dial Readout.<br />
2. Press the Directional Key up or down to select On or Off, then press the<br />
Key [SET].<br />
SERVICE ALERTS<br />
To set any of the three Alert options to either On or Off:<br />
1. Sli<strong>de</strong> the phone up, press the Key [MENU], then press 9. Tools & Settings,<br />
2. Sounds Settings, 6. Service Alerts.<br />
2. Press the Directional Key up or down to select one of the following options,<br />
then press the Key.<br />
• Minute Beep: Alerts you every minute during a call.<br />
• Call Connect: Alerts you when the call is connected.<br />
• Software Update: Alerts you when a software update is available.<br />
3. Press the Directional Key up or down to select On or Off, then press the<br />
Key [SET].<br />
DEVICE CONNECT<br />
Allows you to turn the Device Connect On or Off:<br />
1. Sli<strong>de</strong> the phone up, press the Key [MENU], then press 9. Tools & Settings,<br />
2. Sounds Settings, 7. Device Connect.<br />
2. Press the Directional Key up or down to select On or Off, then press the<br />
Key [SET].<br />
01<br />
02<br />
03<br />
04<br />
05<br />
06<br />
07<br />
84<br />
85
POWER ON/OFF<br />
To set the phone to sound a tone when the phone is powered on or off:<br />
1. Sli<strong>de</strong> the phone up, press the Key [MENU], then press 9. Tools & Settings,<br />
2. Sounds Settings, 8. Power On/Off.<br />
2. Press 1. Power On or 2. Power Off.<br />
3. Press the Directional Key up or down to select On or Off, then press the<br />
Key [SET].<br />
OPEN/CLOSE SOUNDS<br />
To set the phone to sound a tone when the sli<strong>de</strong> is open or closed:<br />
1. Sli<strong>de</strong> the phone up, press the Key [MENU], then press 9. Tools & Settings,<br />
2. Sounds Settings, 9. Open/Close Sounds.<br />
2. Press the Directional Key up or down to select Music, Simple, Beep or Off,<br />
then press the Key [SET].<br />
MASTER VOLUME<br />
1. Sli<strong>de</strong> the phone up, press the Key [MENU], then press 9. Tools & Settings,<br />
2. Sounds Settings, 0. Master Volume.<br />
2. Select one of the following options and press the Key [SET] to save it.<br />
• All Sounds Off<br />
• Alarm Only<br />
• Vibrate Only<br />
• Low / Medium Low / Medium / Medium High / High<br />
• Press the Volume Keys / up or down (located on the left si<strong>de</strong> of the <strong>de</strong>vice) to<br />
adjust Earpiece volume during a call.<br />
• To play/stop a ringtone, press the Left Soft Key [Play/Stop].<br />
DISPLAY SETTINGS<br />
Allows you to customize the display.<br />
BANNER<br />
The Banner can be up to 16 characters and is displayed on your phone’s screen from<br />
idle mo<strong>de</strong>.<br />
1. Sli<strong>de</strong> the phone up, press the Key [MENU], then press 9. Tools & Settings,<br />
3. Display Settings, 1. Banner.<br />
2. Enter the banner text (up to 16 characters), select a <strong>de</strong>sired font color, then<br />
press the Key [SET].<br />
BACKLIGHT<br />
To set the duration for backlight illumination of the Main Screen and Keypad:<br />
1. Sli<strong>de</strong> the phone up, press the Key [MENU], then press 9. Tools & Settings,<br />
3. Display Settings, 2. Backlight.<br />
2. Press 1. Display or 2. Keypad.<br />
3. Press the Directional Key up or down to select: 7 Seconds/15 Seconds/30<br />
Seconds/ Always On, then press the Key [SET].<br />
WALLPAPER<br />
To choose the kind of background to be displayed on the phone:<br />
1. Sli<strong>de</strong> the phone up, press the Key [MENU], then press 9. Tools & Settings,<br />
3. Display Settings, 3. Wallpaper.<br />
2. Press 1. Pictures, 2. Vi<strong>de</strong>os or 3. Animated Wallpapers.<br />
3. To view the image, press the Left Soft Key [View/Play].<br />
4. Select a <strong>de</strong>sired screen, then press the Key [SET].<br />
MENU TYPE<br />
To change Main menu type:<br />
1. Sli<strong>de</strong> the phone up, press the Key [MENU], then press 9. Tools & Settings,<br />
3. Display Settings, 4. Menu Type.<br />
01<br />
02<br />
03<br />
04<br />
05<br />
06<br />
07<br />
86<br />
87
2. To preview/list the selected menu type, press the Left Soft Key [Preview/<br />
List].<br />
3. Press Grid or List, then press the Key [SET].<br />
FONT TYPE<br />
To set the font type:<br />
1. Sli<strong>de</strong> the phone up, press the Key [MENU], then press 9. Tools & Settings,<br />
3. Display Settings, 5. Font Type.<br />
2. To preview/list the selected font type, press the Left Soft Key [Preview/<br />
List].<br />
3. Press the Directional Key up or down to select Dandy Font, Mo<strong>de</strong>rn Font<br />
or Episo<strong>de</strong> Font, then press the Key [SET].<br />
DIAL FONT SIZE<br />
To set the dial font size:<br />
1. Sli<strong>de</strong> the phone up, press the Key [MENU], then press 9. Tools & Settings,<br />
3. Display Settings, 6. Dial Font Size.<br />
2. To preview/list the selected dial font size, press the Left Soft Key [Preview/<br />
List]<br />
3. Press the Directional Key up or down to select Normal or Large Only, then<br />
press the Key [SET].<br />
MENU FONT SIZE<br />
To set the menu font size:<br />
1. Sli<strong>de</strong> the phone up, press the Key [MENU], then press 9. Tools & Settings,<br />
3. Display Settings, 7. Menu Font Size.<br />
2. Press the Directional Key up or down to select Normal or Large, then press<br />
the Key [SET].<br />
CLOCK FORMAT<br />
To choose the kind of clock to be displayed on the LCD screen:<br />
1. Sli<strong>de</strong> the phone up, press the Key [MENU], then press 9. Tools & Settings,<br />
3. Display Settings, 8. Clock Format.<br />
2. Press the Directional Key left or right to select Analog, Large Analog,<br />
Basic Digital, Digital, Large Digital or Off, then press the Directional Key<br />
down.<br />
3. Press the Left Soft Key [Preview/List] to preview the selected clock<br />
format, press the Right Soft Key [Help] to view the help for Clock Format.<br />
4. Press the Directional Key left or right to select the font color and then press<br />
the Key [SET].<br />
Basic Digital is the <strong>de</strong>fault setting for this <strong>de</strong>vice.<br />
DATA CHARGE POPUP<br />
To set the data charge popup:<br />
1. Sli<strong>de</strong> the phone up, press the Key [MENU], then press 9. Tools & Settings,<br />
3. Display Settings, 9. Data Charge Popup.<br />
2. Press the Directional Key up or down to select On or Off, then press the<br />
Key [SET].<br />
01<br />
02<br />
03<br />
04<br />
05<br />
06<br />
07<br />
88<br />
89
PHONE SETTINGS<br />
AIRPLANE MODE<br />
In Airplane Mo<strong>de</strong>, all menu functions can be accessed except making calls, receiving<br />
calls, data connection and Bluetooth®. Activating Airplane Mo<strong>de</strong> will disable all wireless<br />
communications. Services that support Location On functions are temporarily disabled.<br />
1. Sli<strong>de</strong> the phone up, press the Key [MENU], then press 9. Tools & Settings,<br />
4. Phone Settings, 1. Airplane Mo<strong>de</strong>.<br />
2. Press the Directional Key up or down to select On or Off, then press the<br />
Key [SET].<br />
LANGUAGE<br />
To set the bilingual feature to either English or Español:<br />
1. Sli<strong>de</strong> the phone up, press the Key [MENU], then press 9. Tools & Settings,<br />
4. Phone Settings, 2. Language.<br />
2. Press the Directional Key up or down to select either English or Español,<br />
then press the Key [SET].<br />
LOCATION<br />
1. Sli<strong>de</strong> the phone up, press the Key [MENU], then press 9. Tools & Settings,<br />
4. Phone Settings, 3. Location.<br />
2. The LOCATION gui<strong>de</strong> will be displayed on your phone, you will reach a screen<br />
that reads.<br />
3. Press the Key to set the Location.<br />
4. Select one of the following settings, then press the Key [SET].<br />
• Location On: Your location is now available to the network.<br />
• E911 Only: Your location will be hid<strong>de</strong>n from the network and applications, except for 911.<br />
When Lock Setting is set for Location Setting un<strong>de</strong>r Restrictions on the Phone Security<br />
menu, you will need to enter a lock co<strong>de</strong>. The <strong>de</strong>fault lock co<strong>de</strong> is the last 4 digits of<br />
your phone number.<br />
SECURITY<br />
The Security menu allows you to electronically secure the phone.<br />
The <strong>de</strong>fault lock co<strong>de</strong> is the last 4 digits of your phone number.<br />
EDIT CODES<br />
To set a new lock co<strong>de</strong>:<br />
1. Sli<strong>de</strong> the phone up, press the Key [MENU], then press<br />
9. Tools & Settings, 4. Phone Settings, 4. Security.<br />
2. Enter the four-digit lock co<strong>de</strong> and press the Key.<br />
3. Press 1. Edit Co<strong>de</strong>s.<br />
4. Press the Directional Key up or down to select one of the following<br />
settings, then press the Key.<br />
• Phone Only: Allows you to edit the lock co<strong>de</strong> for Security. (The <strong>de</strong>fault lock co<strong>de</strong> is the<br />
last 4 digits of your phone number.)<br />
• Calls & Services: Allows you to edit the lock co<strong>de</strong> for Restrictions. (The <strong>de</strong>fault lock co<strong>de</strong><br />
is the last 4 digits of your phone number.)<br />
5. If Phone Only is selected, enter the new four-digit co<strong>de</strong> in the Enter New<br />
Co<strong>de</strong> field. Enter the new four-digit co<strong>de</strong> again in the Re-enter New Co<strong>de</strong><br />
field to confirm your input, then press the Key [SET].<br />
6. If Calls & Services is selected, enter the current lock co<strong>de</strong> in the Enter<br />
Current Co<strong>de</strong> field. Enter the new four-digit co<strong>de</strong> in the Enter New Co<strong>de</strong><br />
field. Enter the new four-digit co<strong>de</strong> again in the Re-enter New Co<strong>de</strong> field,<br />
then press the Key [SET].<br />
RESTRICTIONS<br />
Use the following procedure to configure Location Setting, Calls, Messages<br />
restrictions and Data Connection.<br />
1. Sli<strong>de</strong> the phone up, press the Key [MENU], then press<br />
9. Tools & Settings, 4. Phone Settings, 4. Security.<br />
2. Enter the four-digit lock co<strong>de</strong> and press the Key.<br />
01<br />
02<br />
03<br />
04<br />
05<br />
06<br />
07<br />
90<br />
91
3. Press 2. Restrictions.<br />
4. Enter the four-digit lock co<strong>de</strong> and press the Key again.<br />
5. Press the Directional Key up or down to select one of the following<br />
settings:<br />
• Location Setting: Unlock Setting/Lock Setting.<br />
• Calls: Incoming/Outgoing.<br />
For Incoming Calls, set Allow All, Allow Contacts or Allow None.<br />
For Outgoing Calls, set Allow All, Allow Contacts or Allow None.<br />
• Text Messages: Incoming/Outgoing.<br />
For Incoming Messages, set Allow All, Allow Contacts or Allow None.<br />
For Outgoing Messages, set Allow All, Allow Contacts or Allow None.<br />
• Picture Messages: Incoming/Outgoing.<br />
For Incoming Messages, set Allow All, Allow Contacts or Allow None.<br />
For Outgoing Messages, set Allow All, Allow Contacts or Allow None.<br />
• Data Connection:<br />
Set Allow All or Allow None.<br />
6. Press the Key [SET].<br />
In emergency mo<strong>de</strong>, the settings of Incoming Calls does not apply.<br />
PHONE LOCK SETTING<br />
This setting specifies whether the phone should be locked whenever it is turned on.<br />
Lock Mo<strong>de</strong> prevents the unauthorized use of your phone. Once the phone is locked,<br />
it is in restricted mo<strong>de</strong> until the lock co<strong>de</strong> is entered. You can still make emergency<br />
calls.<br />
1. Sli<strong>de</strong> the phone up, press the Key [MENU], then press<br />
9. Tools & Settings, 4. Phone Settings, 4. Security.<br />
2. Enter the four-digit lock co<strong>de</strong> and press the Key.<br />
3. Press 3. Phone Lock Setting.<br />
4. Press the Directional Key up or down to select one of the following<br />
settings, then press the Key [SET].<br />
• Unlocked: Phone is unlocked.<br />
• On Power Up: Phone will lock when it is turned on.<br />
LOCK PHONE NOW<br />
Lock the phone now.<br />
1. Sli<strong>de</strong> the phone up, press the Key [MENU], then press<br />
9. Tools & Settings, 4. Phone Settings, 4. Security.<br />
2. Enter the four-digit lock co<strong>de</strong> and press the Key.<br />
3. Press 4. Lock Phone Now.<br />
4. To unlock the phone from idle mo<strong>de</strong>, sli<strong>de</strong> the phone up, then press the<br />
Right Soft Key [Unlock] and enter the four-digit lock co<strong>de</strong> and press<br />
the Key.<br />
Unlock co<strong>de</strong> is not nee<strong>de</strong>d unless the user sets it.<br />
FACTORY RESET<br />
To <strong>de</strong>lete all <strong>User</strong> Data and restore all settings to their initial <strong>de</strong>faults:<br />
1. Sli<strong>de</strong> the phone up, press the Key [MENU], then press<br />
9. Tools & Settings, 4. Phone Settings, 4. Security.<br />
2. Enter the four-digit lock co<strong>de</strong> and press the Key.<br />
3. Press 5. Factory Reset.<br />
4. A confirmation message appears in the display, press the Directional Key<br />
up or down to select Yes, and then press the Key.<br />
5. Enter the four-digit lock co<strong>de</strong>. The phone will turn off and then back on<br />
again automatically.<br />
SYSTEM SELECT<br />
You can set your phone to search or roam on another network when you are not in your<br />
home area. Leave this setting as <strong>de</strong>fault unless you want to alter the system selection as<br />
instructed by your service provi<strong>de</strong>r.<br />
1. Sli<strong>de</strong> the phone up, press the Key [MENU], then press 9. Tools & Settings,<br />
4. Phone Settings, 5. System Select.<br />
01<br />
02<br />
03<br />
04<br />
05<br />
06<br />
07<br />
92<br />
93
2. Press the Directional Key up or down to select Home Only or Automatic,<br />
then press the Key.<br />
• Home Only: Network is available only within your home area or home affiliated area.<br />
• Automatic: Scans radio channels based on the Automatic setting.<br />
The automatic setting can be displayed as Automatic <strong>de</strong>pending on PRL.<br />
CALL SETTINGS<br />
ANSWER OPTIONS<br />
To <strong>de</strong>termine how to answer an incoming call:<br />
1. Sli<strong>de</strong> the phone up, press the Key [MENU], then press 9. Tools & Settings,<br />
5. Call Settings, 1. Answer Options.<br />
2. Press the Directional Key up or down to select Sli<strong>de</strong> Open, Send Key,<br />
Any Key or Auto with Handsfree then press the Key [MARK/UNMARK].<br />
Sli<strong>de</strong> Open, Send Key is the <strong>de</strong>fault setting for this <strong>de</strong>vice.<br />
3. Press the Left Soft Key [Done].<br />
• Auto with Handsfree will function after about five seconds.<br />
• Auto with Handsfree is available only when a headset or handsfree <strong>de</strong>vice is<br />
connected.<br />
AUTO RETRY<br />
To set a period of time the phone waits before automatically redialing when an<br />
attempted call fails:<br />
1. Sli<strong>de</strong> the phone up, press the Key [MENU], then press 9. Tools & Settings,<br />
5. Call Settings, 2. Auto Retry.<br />
2. Press the Directional Key up or down to select one of the following settings,<br />
then press the Key [SET].<br />
10 Seconds / 30 Seconds / 60 Seconds / Off<br />
TTY MODE<br />
You can attach a TTY <strong>de</strong>vice to your phone enabling you to communicate with parties<br />
also using a TTY <strong>de</strong>vice. A phone with TTY support is able to translate typed characters<br />
to voice. Voice can also be translated into characters and then displayed on the TTY.<br />
1. Sli<strong>de</strong> the phone up, press the Key [MENU], then press 9. Tools & Settings,<br />
5. Call Settings, 3. TTY Mo<strong>de</strong>.<br />
2. Press the Directional Key up or down to select one of the following settings,<br />
then press the Key [SET].<br />
TTY Full / TTY + Talk / TTY + Hear / TTY Off<br />
ONE TOUCH DIAL<br />
To initiate a speed dial call by holding down the speed dial digit:<br />
1. Sli<strong>de</strong> the phone up, press the Key [MENU], then press 9. Tools & Settings,<br />
5. Call Settings, 4. One Touch Dial.<br />
2. Press the Directional Key up or down to select On or Off, then press the<br />
Key [SET].<br />
If One Touch Dial is disabled, a speed dial call will function by entering the speed dial<br />
number on the QWERTY Keypad, and then press the Send Key .<br />
VOICE PRIVACY<br />
Voice Privacy provi<strong>de</strong>s advanced voice encryption to prevent eavesdropping.<br />
To turn the voice privacy feature On or Off:<br />
1. Sli<strong>de</strong> the phone up, press the Key [MENU], then press 9. Tools & Settings,<br />
5. Call Settings, 5. Voice Privacy.<br />
2. Press the Directional Key up or down to select On or Off, then press the<br />
Key [SET].<br />
01<br />
02<br />
03<br />
04<br />
05<br />
06<br />
07<br />
94<br />
95
DTMF TONES<br />
To set the Key Tone length:<br />
1. Sli<strong>de</strong> the phone up, press the Key [MENU], then press 9. Tools & Settings,<br />
5. Call Settings, 6. DTMF Tones.<br />
2. Press the Directional Key up or down to select one of the following settings,<br />
then press the Key [SET].<br />
• Normal: Sends out a tone for a fixed period of time even if you continue to press the key.<br />
• Long: Sends out a continuous tone for the duration the key is pressed and held.<br />
SLIDE CLOSE<br />
1. Sli<strong>de</strong> the phone up, press the Key [MENU], then press 9. Tools & Settings,<br />
5. Call Settings, 7. Sli<strong>de</strong> Close.<br />
2. Press the Directional Key up or down to select Continue Call or End Call,<br />
then press the Key [SET].<br />
MEMORY<br />
SAVE OPTIONS<br />
To select whether to save the Phone Memory or the Card Memory when saving files:<br />
1. Sli<strong>de</strong> the phone up, press the Key [MENU], then press 9. Tools & Settings,<br />
6. Memory, 1. Save Options.<br />
2. Press the Directional Key up or down to select 1. Pictures, 2. Vi<strong>de</strong>os or<br />
3. Sounds, then press the Key.<br />
3. Press the Directional Key up or down to select Phone Memory or Card<br />
Memory, then press the Key.<br />
PHONE MEMORY<br />
Allows you to manage the memory usage for pictures, vi<strong>de</strong>os, music, sounds and<br />
contacts on your Phone Memory.<br />
PHONE MEMORY USAGE<br />
To check the available Phone Memory capacity, used capacity and total capacity:<br />
1. Sli<strong>de</strong> the phone up, press the Key [MENU], then press<br />
9. Tools & Settings, 6. Memory, 2. Phone Memory.<br />
2. Press 1. Phone Memory Usage.<br />
3. Press the Key to return to the previous screen.<br />
DELETING AND MOVING FILES<br />
To <strong>de</strong>lete files stored in Phone Memory or to move files from Phone Memory to Card<br />
Memory:<br />
1. Sli<strong>de</strong> the phone up, press the Key [MENU], then press<br />
9. Tools & Settings, 6. Memory, 2. Phone Memory.<br />
2. Press the Directional Key up or down to select 2. Pictures, 3. Vi<strong>de</strong>os,<br />
4. Sounds, 5. Music or 6. Contacts then press the Key.<br />
3. Press the Right Soft Key [Options].<br />
4. Select 1. Erase to <strong>de</strong>lete a file or 2. Move to move a file to Card Memory,<br />
then press the Key.<br />
If you have selected Contacts, you can select 1. View, 2. Copy or 3. Erase after pressing<br />
the Right Soft Key [Options].<br />
5. Press the Directional Key up or down to select a file, press the Key<br />
[MARK] or the Right Soft Key [Mark All], then press the Left Soft Key<br />
[Done].<br />
6. Press the Directional Key up or down to select Yes and press the Key.<br />
MOVING ALL FILES<br />
To move all files saved in Phone Memory to Card Memory (memory card sold<br />
separately).<br />
1. Sli<strong>de</strong> the phone up, press the Key [MENU], then press<br />
9. Tools & Settings, 6. Memory, 2. Phone Memory.<br />
01<br />
02<br />
03<br />
04<br />
05<br />
06<br />
07<br />
96<br />
97
2. Press the Directional Key up or down to select 7. Move All To Card, then<br />
press the Key.<br />
3. Press the Directional Key up or down to select Yes and press the Key.<br />
Do not remove the memory card from the phone while a file or files are being moved<br />
to Card Memory.<br />
CARD MEMORY<br />
Allows you to manage the memory usage for pictures, vi<strong>de</strong>os, music, sounds and<br />
contacts on your Card Memory. The memory card (sold separately) must be inserted<br />
into the phone to perform these functions.<br />
CARD MEMORY USAGE<br />
To check the available Card Memory capacity, used capacity and total capacity:<br />
1. Sli<strong>de</strong> the phone up, press the Key [MENU], then press<br />
9. Tools & Settings, 6. Memory, 3. Card Memory.<br />
2. Press 1. Card Memory Usage.<br />
3. Press the Key to return to the previous screen.<br />
FORMAT CARD<br />
To format the card inserted:<br />
1. Sli<strong>de</strong> the phone up, press the Key [MENU], then press<br />
9. Tools & Settings, 6. Memory, 3. Card Memory.<br />
2. Press 1. Card Memory Usage, then press the Right Soft Key [Options].<br />
3. Press 1. Format card, enter your 4-digit lock co<strong>de</strong> and press the Key.<br />
4. Press the Directional Key up or down to select Yes and press the Key.<br />
DELETING AND MOVING FILES<br />
To <strong>de</strong>lete files stored in Card Memory or to move files from Card Memory to Phone<br />
Memory:<br />
1. Sli<strong>de</strong> the phone up, press the Key [MENU], then press<br />
9. Tools & Settings, 6. Memory, 3. Card Memory.<br />
2. Press the Directional Key up or down to select 2. Pictures, 3. Vi<strong>de</strong>os,<br />
4. Sounds, 5. Music or 6. Contacts then press the Key.<br />
3. Press the Right Soft Key [Options].<br />
4. Press the Directional Key up or down to select 1. Erase to <strong>de</strong>lete a file or<br />
2. Move to move a file to Phone Memory, then press the Key.<br />
If you have selected Contacts, you can select 1. Copy or 2. Erase after pressing the Right<br />
Soft Key [Options].<br />
5. Press the Directional Key up or down to select a file, press the Key<br />
[MARK] or the Right Soft Key [Mark All], then press the Left Soft Key<br />
[Done].<br />
6. Press the Directional Key up or down to select Yes and press the Key.<br />
MOVING ALL FILES<br />
To move all files saved in Card Memory to Phone Memory:<br />
1. Sli<strong>de</strong> the phone up, press the Key [MENU], then press<br />
9. Tools & Settings, 6. Memory, 3. Card Memory.<br />
2. Press the Directional Key up or down to select 7. Move All To Phone,<br />
then press the Key.<br />
3. Press the Directional Key up or down to select Yes and press the Key.<br />
Do not remove the memory card from the phone while a file or files are being moved<br />
to Card Memory.<br />
01<br />
02<br />
03<br />
04<br />
05<br />
06<br />
07<br />
98<br />
99
BLUETOOTH®<br />
Bluetooth® technology connectivity enables wireless connections between electronic<br />
<strong>de</strong>vices. If connected with a Bluetooth handsfree <strong>de</strong>vice, you can use your phone more<br />
freely. Since <strong>de</strong>vices with Bluetooth connectivity communicate using radio waves, your<br />
phone and the other <strong>de</strong>vice do not need to be in direct line-of-sight. The two <strong>de</strong>vices<br />
only need to be within 10 meters (30 feet) of each other. The connection can be subject<br />
to interference from obstructions such as walls or other electronic <strong>de</strong>vices. This <strong>de</strong>vice is<br />
compliant with Bluetooth specification 3.0, supporting the following profiles: Headset,<br />
Handsfree, Stereo, Phonebook Access, Basic Printing, Basic Imaging, Object Push<br />
and Browse/Get Files. To ensure interoperability between other <strong>de</strong>vices supporting<br />
Bluetooth technology, use approved enhancements for this mo<strong>de</strong>l. Check with the<br />
manufacturers of other <strong>de</strong>vices to <strong>de</strong>termine their compatibility with this phone. There<br />
may be restrictions on using Bluetooth technology in some locations. If you want more<br />
information on this function, visit the Bluetooth Technology organization Web site:<br />
https://www.bluetooth.org/.<br />
Important: Features using Bluetooth technology, or allowing such features to run<br />
in the background while using other features, increase the <strong>de</strong>mand on<br />
battery power and reduce battery life.<br />
BLUETOOTH® ON/OFF<br />
To toggle Bluetooth power On/Off:<br />
1. Sli<strong>de</strong> the phone up, press the Key [MENU], then press 9. Tools & Settings,<br />
7. Bluetooth.<br />
2. Press the Left Soft Key [Turn On/Turn Off]. A confirmation window<br />
appears.<br />
ADD NEW DEVICE<br />
Pairing is the process that allows the handset to locate, establish and register a 1-to-1<br />
connection with the target <strong>de</strong>vice.<br />
1. Sli<strong>de</strong> the phone up, press the Key [MENU], then press 9. Tools & Settings,<br />
7. Bluetooth, 1. Add New Device.<br />
2. If the Bluetooth power is switched off, the following message will appear on<br />
the LCD screen “BLUETOOTH POWER ON”.<br />
3. The handset will prompt you with the following message on the LCD screen:<br />
“PLACE DEVICE YOU ARE CONNECTING TO IN DISCOVERABLE MODE” Press<br />
the Key.<br />
4. The <strong>de</strong>vice will appear in the ADD NEW DEVICE menu. Select the <strong>de</strong>vice you<br />
wish to pair to, then press the Key [PAIR].<br />
5. The handset will prompt you with the following message on the LCD screen:<br />
CONFIRM THE PASSKEY ON [DEVICE NAME]. Select Yes and<br />
press the Key. If you would like to always confirm before connecting to<br />
the Bluetooth <strong>de</strong>vice, select Always Ask, then press the Key. If you do not<br />
wish to confirm every time before connecting to the Bluetooth <strong>de</strong>vice, select<br />
Always Connect, then press the Key.<br />
• The handset may prompt you for the passkey. Consult the Bluetooth accessory (sold<br />
separately) instructions for the appropriate passkey (typically“0000”—4 zeroes).<br />
Enter the passkey, then press the Key.<br />
• You do not need to input the passkey for pairing when the passkey of the Bluetooth<br />
headset or hands-free kit is 0000. (except when Auto Pair Handsfree is Off)<br />
6. Once connected, you will see the <strong>de</strong>vice listed in the Bluetooth menu and the<br />
Bluetooth <strong>de</strong>vice connected icon will appear at the top of the screen when<br />
connected to the Bluetooth <strong>de</strong>vice.<br />
• In the Bluetooth menu, you can turn off the <strong>de</strong>vice by pressing the Left Soft Key<br />
[Turn Off]. Conversely, you can turn on by pressing the Left Soft Key [Turn On].<br />
• If multiple <strong>de</strong>vices are displayed, select the <strong>de</strong>vice you want to connect to.<br />
OPTIONS<br />
1. Sli<strong>de</strong> the phone up, press the Key [MENU], then press 9. Tools & Settings,<br />
7. Bluetooth.<br />
2. Select the paired <strong>de</strong>vice.<br />
3. Press the Right Soft Key [Options].<br />
01<br />
02<br />
03<br />
04<br />
05<br />
06<br />
07<br />
100<br />
101
4. Press the Directional Key up or down to select one of the following options,<br />
then press the Key.<br />
• Remove Device: Removes a <strong>de</strong>vice from the pairing list.<br />
• Rename Device: Renames a paired <strong>de</strong>vice.<br />
• Incoming Security: Sets permissions for connecting an incoming <strong>de</strong>vice.<br />
• Service Discovery: Searches for the services that the selected <strong>de</strong>vice supports.<br />
• Device Info: Displays <strong>de</strong>vice information.<br />
5. Or, press the Key to access 1. Send Name Card, 2. Send Picture,<br />
3. Send Vi<strong>de</strong>o, 4. Send Sound, 5. Send Calendar Event, 6. Get Name Card,<br />
7. Exchange Name Card or 8. Browse/Get Files.<br />
SETTINGS<br />
MY PHONE NAME<br />
To edit the Bluetooth® name of your phone:<br />
1. Sli<strong>de</strong> the phone up, press the Key [MENU], then press<br />
9. Tools & Settings, 7. Bluetooth.<br />
2. Press the Right Soft Key [Options].<br />
3. Press 1. My Phone Name.<br />
4. Use the QWERTY Keypad to enter a new custom name.<br />
5. Press the Key [SET] to save and exit.<br />
DISCOVERY MODE<br />
To set whether your <strong>de</strong>vice is able to be searched for by other Bluetooth® <strong>de</strong>vices in<br />
the area:<br />
1. Sli<strong>de</strong> the phone up, press the Key [MENU], then press<br />
9. Tools & Settings, 7. Bluetooth.<br />
2. Press the Right Soft Key [Options].<br />
3. Press 2. Discovery Mo<strong>de</strong>.<br />
If Bluetooth power is not on, it will be turned on automatically.<br />
4. Press the Directional Key up or down to select On or Off, then press the<br />
Key [SET].<br />
SUPPORTED PROFILES<br />
To view brief <strong>de</strong>scriptions of the profiles supported by the phone:<br />
1. Sli<strong>de</strong> the phone up, press the Key [MENU], then press<br />
9. Tools & Settings, 7. Bluetooth.<br />
2. Press the Right Soft Key [Options].<br />
3. Press 3. Supported Profiles.<br />
4. Press the Directional Key up or down to select one of the following<br />
profiles, then press the Key [VIEW] for information.<br />
1. Headset / 2. Handsfree / 3. Stereo / 4. Phonebook Access /<br />
5. Basic Printing / 6. Basic Imaging / 7. Object Push /<br />
8. Browse/Get Files<br />
AUTO PAIR HANDSFREE<br />
To set Auto Pair Handsfree On/Off:<br />
1. Sli<strong>de</strong> the phone up, press the Key [MENU], then press<br />
9. Tools & Settings, 7. Bluetooth.<br />
2. Press the Right Soft Key [Options].<br />
3. Press 4. Auto Pair Handsfree.<br />
4. Press the Directional Key up or down to select On or Off, then press the<br />
Key [SET].<br />
USB MODE<br />
You can use a USB data cable to transfer data between the <strong>de</strong>vice and a compatible PC.<br />
Important: To activate your <strong>de</strong>vice for data transfer, select USB Mo<strong>de</strong> before<br />
connecting the USB data cable.<br />
1. Sli<strong>de</strong> the phone up, press the Key [MENU], then press 9. Tools & Settings,<br />
8. USB Mo<strong>de</strong>.<br />
01<br />
02<br />
03<br />
04<br />
05<br />
06<br />
07<br />
102<br />
103
2. Press the Directional Key up or down to select Charge Only or Mass<br />
Storage, then press the Key [SET].<br />
• Charge Only: Allows you to only charge when connected to your computer.<br />
• Mass Storage: Allows you to use your phone as a mass storage for your computer when<br />
connecting with a USB data cable.<br />
• Mass Storage is the <strong>de</strong>fault setting for this <strong>de</strong>vice.<br />
PHONE INFO<br />
MY PHONE NUMBER<br />
To view your phone number:<br />
1. Sli<strong>de</strong> the phone up, press the Key [MENU], then press 9. Tools & Settings,<br />
9. Phone Info, 1. My Phone Number.<br />
2. The following information appears.<br />
MDN / MIN<br />
SW/HW VERSION<br />
To view your <strong>de</strong>vice SW/HW information:<br />
1. Sli<strong>de</strong> the phone up, press the Key [MENU], then press 9. Tools & Settings,<br />
9. Phone Info, 2. SW/HW Version.<br />
2. Software Version / PRL Version / PRI Version / Browser Version /<br />
HW Version / Software Update Client are displayed.<br />
3. Press the Key to return to the previous screen.<br />
MEID / PESN<br />
To view your MEID / pESN:<br />
1. Sli<strong>de</strong> the phone up, press the Key [MENU], then press 9. Tools & Settings,<br />
9. Phone Info, 3. MEID / pESN.<br />
2. MEID(Dec) / MEID(Hex) / pESN(Hex) are displayed.<br />
3. Press the Key to return to the previous screen.<br />
ICON GLOSSARY<br />
To view all the icons and their meanings:<br />
1. Sli<strong>de</strong> the phone up, press the Key [MENU], then press 9. Tools & Settings,<br />
9. Phone Info, 4. Icon Glossary.<br />
2. Press the Key to return to the previous screen.<br />
Please refer to Display Indicators on page 12 for more <strong>de</strong>tails about the icons.<br />
SOFTWARE UPDATE<br />
The Software Update option allows you to download and update the software in your<br />
phone automatically. Only the internal software is updated; Contact entries or other<br />
information saved to your phone will NOT be <strong>de</strong>leted.<br />
STATUS<br />
Check the latest Software Download/Update status.<br />
1. Sli<strong>de</strong> the phone up, press the Key [MENU], then press<br />
9. Tools & Settings, 9. Phone Info, 5. Software Update.<br />
2. Press 1. Status.<br />
CHECK FOR UPDATE<br />
To check Download Server for new Software updates:<br />
1. Sli<strong>de</strong> the phone up, press the Key [MENU], then press<br />
9. Tools & Settings, 9. Phone Info, 5. Software Update.<br />
2. Press 2. Check for Update.<br />
OPERATING SYSTEM<br />
To view information about your phone’s operating system:<br />
1. Sli<strong>de</strong> the phone up, press the Key [MENU], then press 9. Tools & Settings,<br />
9. Phone Info, 6. Operating System.<br />
2. Press the Key to return to the previous screen.<br />
01<br />
02<br />
03<br />
04<br />
05<br />
06<br />
07<br />
104<br />
105
5<br />
MULTIMEDIA<br />
This chapter addresses Picture & Vi<strong>de</strong>o, Sounds, Ringtones, Music functions:<br />
Picture & Vi<strong>de</strong>o<br />
Sounds<br />
Ringtones<br />
Music
PICTURE & VIDEO<br />
PICTURES<br />
The Pictures menu allows you to view all the pictures you have taken, store selected<br />
images in your phone, send pictures to the Online Album, <strong>de</strong>lete images and access<br />
additional picture options.<br />
1. Sli<strong>de</strong> the phone up, press the Key [MENU], then press 4. Multimedia,<br />
1. Picture & Vi<strong>de</strong>o, 1. Pictures.<br />
2. Select the <strong>de</strong>sired picture, then press the Right Soft Key [Options] to<br />
access the following options.<br />
• Send: Allows you to send a picture with following options:<br />
1. Picture Message / 2. To Online Album / 3. Via Bluetooth<br />
• Set As: Assigns the selected picture to display for specific tasks (Wallpaper / Picture ID).<br />
• Take Picture: Take a new picture.<br />
• Manage Pictures: To manage your picture files with following options:<br />
1. Erase / 2. Lock / 3. Unlock / 4. Move To Phone / 5. Move To Card<br />
• Rename: Rename the selected picture.<br />
• File Info: Displays the following information about the selected picture:<br />
File Name / Date / Time / Resolution / Size<br />
• Full View: To full view the picture.<br />
DELETING A PICTURE<br />
1. Sli<strong>de</strong> the phone up, press the Key [MENU], then press 4. Multimedia,<br />
1. Picture & Vi<strong>de</strong>o, 1. Pictures.<br />
2. Select the picture you want to erase, then press the Left Soft Key [Erase].<br />
3. “ERASE PICTURE” will appear on your display.<br />
4. Select Yes and press the Key. A confirmation message appears.<br />
MULTIMEDIA<br />
VIDEOS<br />
The Vi<strong>de</strong>os menu allows you to view all the vi<strong>de</strong>os you have recor<strong>de</strong>d, store selected<br />
vi<strong>de</strong>os in your phone, send vi<strong>de</strong>os to the Online Album, <strong>de</strong>lete vi<strong>de</strong>os and access<br />
additional vi<strong>de</strong>o options.<br />
1. Sli<strong>de</strong> the phone up, press the Key [MENU], then press 4. Multimedia,<br />
1. Picture & Vi<strong>de</strong>o, 2. Vi<strong>de</strong>os.<br />
2. Select the <strong>de</strong>sired vi<strong>de</strong>o, then press the Right Soft Key [Options] to access<br />
the following options.<br />
• Send: Allows you to send a picture with following options:<br />
1. Vi<strong>de</strong>o Message / 2. To Online Album / 3. Via Bluetooth<br />
• Set As: Set the selected vi<strong>de</strong>o as a Wallpaper or a Vi<strong>de</strong>o ID.<br />
• Record Vi<strong>de</strong>o: Record a new vi<strong>de</strong>o.<br />
• Manage Vi<strong>de</strong>os: To manage your vi<strong>de</strong>o files with following options:<br />
1. Erase / 2. Lock / 3. Unlock / 4. Move To Phone / 5. Move To Card<br />
• Rename: Rename the selected vi<strong>de</strong>o.<br />
• File Info: Displays the following information about the selected vi<strong>de</strong>o:<br />
Name / Date / Time / Duration / Size<br />
DELETING A VIDEO<br />
1. Sli<strong>de</strong> the phone up, press the Key [MENU], then press 4. Multimedia,<br />
1. Picture & Vi<strong>de</strong>o, 2. Vi<strong>de</strong>os.<br />
2. Select the vi<strong>de</strong>o you want to erase, then press the Left Soft Key [Erase].<br />
3. “ERASE VIDEO” will appear on your display.<br />
4. Select Yes and press the Key. A confirmation message appears.<br />
TAKE PICTURE<br />
1. Sli<strong>de</strong> the phone up, press the Key [MENU], then press 4. Multimedia,<br />
1. Picture & Vi<strong>de</strong>o, 3. Take Picture.<br />
Shortcut: From idle mo<strong>de</strong>, if the keypad is locked, press the END/POWER Key ,<br />
then press the Key in less than three seconds to unlock the keypad. Press the<br />
Camera Key (located on the right si<strong>de</strong> of the <strong>de</strong>vice) to access the camera viewfin<strong>de</strong>r.<br />
01<br />
02<br />
03<br />
04<br />
05<br />
06<br />
07<br />
108<br />
109
110<br />
2. Point the camera lens at your subject. You can check the picture framing<br />
through the display screen.<br />
• Press the Directional Key left or right to zoom in or out (except when resolution is<br />
set to 1600x1200).<br />
• Press the Right Soft Key [Options], and choose from the following and press the<br />
Key [SET]:<br />
1. Resolution: 1600X1200 / 1280x960 / 640x480 / 320x240 / 160x120<br />
2. Self Timer: Off / 3 Seconds / 5 Seconds / 10 Seconds<br />
3. Brightness: Press the Directional Key left or right to adjust the brightness from the<br />
following: -2 / -1 / 0 / +1 / +2<br />
4. White Balance: Press the Directional Key left or right to select from the following:<br />
Auto / Sunny / Cloudy / Tungsten / Fluorescent<br />
5. Shutter Sound: Allows you to select the shutter sound from the following:<br />
Shutter / Silent / Say “Cheez” / Ready! 123<br />
6. Color Effects: Press the Directional Key left or right to select color effects from the<br />
following: Normal / Antique / Black & White / Negative<br />
7. Capture Mo<strong>de</strong>: Set the capture mo<strong>de</strong> to take picture from the following:<br />
Landscape / Portrait<br />
8. Memory: Set the memory to save the captured picture from the following:<br />
Phone / Card<br />
3. Press the Key [TAKE] to take the picture.<br />
4. After taking the picture, it will be displayed. To save the picture, press the Left<br />
Soft Key [Save]. To take another picture without saving the picture you<br />
just took, press the Right Soft Key [Erase]. To send the picture to someone,<br />
press the Key [SEND].<br />
RECORD VIDEO<br />
1. Sli<strong>de</strong> the phone up, press the Key [MENU], then press 4. Multimedia,<br />
1. Picture & Vi<strong>de</strong>o, 4. Record Vi<strong>de</strong>o.<br />
Shortcut: From idle mo<strong>de</strong>, if the keypad is locked, press the END/POWER Key ,<br />
then press the Key in less than three seconds to unlock the keypad. Press and hold<br />
the Camera Key (located on the right si<strong>de</strong> of the <strong>de</strong>vice) to access the vi<strong>de</strong>o camera<br />
viewfin<strong>de</strong>r. To switch from the vi<strong>de</strong>o camera to camera or vice versa, press and hold<br />
the Camera Key (located on the right si<strong>de</strong> of the <strong>de</strong>vice).<br />
MULTIMEDIA<br />
2. Point the camera lens at your subject. You can check the vi<strong>de</strong>o framing through<br />
the display screen.<br />
• Press the Directional Key left or right to zoom in or out.<br />
• Press the Right Soft Key [Options] and choose from the following and press the<br />
Key [SET]:<br />
1. Brightness: Press the Directional Key left or right to adjust the brightness from the<br />
following: -2 / -1 / 0 / +1 / +2<br />
2. White Balance: Press the Directional Key left or right to select from the following:<br />
Auto / Sunny / Cloudy / Tungsten / Fluorescent<br />
3. Shutter Sound: Allows you to turn Shutter Sound On or Off.<br />
4. Recording Time: Limit the recording time to 15 Seconds for Vi<strong>de</strong>o MSG or<br />
1 Hour for Save.<br />
5. Memory: Set the memory to save the recor<strong>de</strong>d file from the following:<br />
Phone / Card<br />
3. Press the Key [REC] to record a vi<strong>de</strong>o.<br />
4. To pause/resume it, press the Left Soft Key [Pause/Resume].<br />
5. To mute/unmute it, press the Right Soft Key [Mute/Unmute].<br />
6. When finished recording, press the Key [STOP].<br />
7. After recording the vi<strong>de</strong>o, press the Left Soft Key [Save] to save the vi<strong>de</strong>o. To<br />
record another vi<strong>de</strong>o without saving the vi<strong>de</strong>o you just recor<strong>de</strong>d, press the Right<br />
Soft Key [Erase]. To send the vi<strong>de</strong>o to someone, press the Key [SEND].<br />
SOUNDS<br />
To select a <strong>de</strong>sired sound:<br />
1. Sli<strong>de</strong> the phone up, press the Key [MENU], then press 4. Multimedia,<br />
2. Sounds.<br />
2. Highlight the <strong>de</strong>sired sound, then press the Key [PLAY] to hear the sound.<br />
Press the Key [STOP] to stop playing the sound.<br />
3. Press the Right Soft Key [Options] to access the following options:<br />
• Send: Allows you to send a sound with following options:<br />
1. Sound Message / 2. Via Bluetooth<br />
01<br />
02<br />
03<br />
04<br />
05<br />
06<br />
07<br />
111
112<br />
• Rename: Renames the sound.<br />
• Move: Allows you to move the selected sound to the memory card or the phone.<br />
This option only appears if a memory card is inserted.<br />
• Lock/Unlock: Locks or unlock the current sound for a downloa<strong>de</strong>d sound.<br />
• Erase: Deletes the sound.<br />
• Erase All: Deletes all the sounds from your phone or memory card.<br />
• File Info: Displays information about the selected sound: Name / Size / Type<br />
RECORDING NEW SOUNDS<br />
1. Sli<strong>de</strong> the phone up, press the Key [MENU], then press 4. Multimedia,<br />
2. Sounds.<br />
2. Press 1. Record New.<br />
3. Press the Key to begin recording. When done, press the Key [STOP] to<br />
finish recording. The recording is automatically saved to your Sound list.<br />
4. Your recording is saved with a number. To rename your recording, press the<br />
Directional Key up or down to select the Sound you want to rename,<br />
then press the Right Soft Key [Options].<br />
5. Press 2. Rename.<br />
6. Press and hold the CLR Key to erase the number, enter the new name<br />
for your recording, then press the Key.<br />
SETTING SOUNDS<br />
1. Sli<strong>de</strong> the phone up, press the Key [MENU], then press 4. Multimedia,<br />
2. Sounds.<br />
2. Select the sound you want to set, press the Left Soft Key [Set As], then<br />
select one of the following options and press the Key.<br />
• Ringtone: Set as a ringtone. A confirmation message appears.<br />
• Contact ID: The SET AS CONTACT ID screen appears. Select the Contact you want to<br />
assign the ringtone to, then press the Key.<br />
• Alert Sounds: Press the corresponding number key to set the ringtone for one of the<br />
following options:<br />
1. All Messages / 2. Text Messages / 3. Multimedia Messages / 4. Voicemail<br />
MULTIMEDIA<br />
RINGTONES<br />
TO PLAY DOWNLOADED TUNES OR TONES:<br />
1. Sli<strong>de</strong> the phone up, press the Key [MENU], then press 4. Multimedia,<br />
3. Ringtones.<br />
2. Select the tune or tone you want to play, then press the Key [PLAY].<br />
3. To stop, press the Key [STOP].<br />
TO ERASE DOWNLOADED TUNES OR TONES:<br />
1. Sli<strong>de</strong> the phone up, press the Key [MENU], then press 4. Multimedia,<br />
3. Ringtones.<br />
2. Select the tune or tone to erase and press the Right Soft Key [Options].<br />
3. Select Erase and press the Key.<br />
4. Select Yes and press the Key.<br />
The preloa<strong>de</strong>d Ringtones cannot be erased.<br />
TO ASSIGN DOWNLOADED TUNES OR TONES:<br />
1. Sli<strong>de</strong> the phone up, press the Key [MENU], then press 4. Multimedia,<br />
3. Ringtones.<br />
2. Select the <strong>de</strong>sired ringtone, then press the Left Soft Key [Set As].<br />
3. Select one of the following options, then press the Key.<br />
• 1. Ringtone: Set as a ringtone. A confirmation message appears.<br />
• 2. Contact ID: The SET AS CONTACT ID screen appears. Select the Contact you want to<br />
assign the ringtone to, then press the Key.<br />
• 3. Alert Sounds: Press the corresponding number key to set the ringtone for one of the<br />
following: 1. All Messages / 2. Text Messages / 3. Multimedia Messages<br />
/ 4. Voicemail<br />
01<br />
02<br />
03<br />
04<br />
05<br />
06<br />
07<br />
113
MUSIC<br />
Music menu allows you to playback and manage music files stored in your phone’s<br />
memory and on a memory card (sold separately).<br />
1. Sli<strong>de</strong> the phone up, press the Key [MENU], then press 4. Multimedia,<br />
4. Music.<br />
2. Select one of the following options and press the Key.<br />
• Resume: Dynamic Options. This options shall be available if the Music Player has been<br />
used at least once.<br />
• Play All Songs: Dynamic Options. This options shall be available if songs.<br />
• 1. All Songs: Allows you to view or play songs.<br />
• 2. Playlists: Allows you to create or view playlists. Once you have created playlists, you can<br />
play songs by playlists.<br />
• 3. Artists: Allows you to view or play your songs by artists.<br />
• 4. Genres: Allows you to view or play your songs by genres.<br />
• 5. Albums: Allows you to view or play your songs by albums.<br />
• 6. Manage Music: Allows you to manage your music files with following options:<br />
1. Erase / 2. Lock / 3. Unlock / 4. Move To Card / 5. Move To Phone<br />
• 7. Music Settings: Allows you to set following player settings:<br />
1. Repeat / 2. Shuffle / 3. Player Skin / 4. Music Only Mo<strong>de</strong><br />
NATIVE MUSIC PLAYER<br />
Album jacket image<br />
Volume value<br />
Playing Icon<br />
Album Jacket<br />
information<br />
In<strong>de</strong>x<br />
Play Status Bar<br />
Shuffle / Repeat Key Gui<strong>de</strong> Play time / Total Time<br />
Icon Name Descriptions<br />
Volume value Indicates current music volume level<br />
Previous / Next<br />
Pause/Play<br />
Repeat<br />
Shuffle<br />
Press: Previous, Next<br />
Press and Hold: Rewind, Fast Forward<br />
Indicates player’s status<br />
Repeat All<br />
Repeat One<br />
Off<br />
On<br />
Off<br />
MULTIMEDIA<br />
PLAYING MUSIC<br />
1. With the phone closed, press the END/POWER Key , then press the<br />
Key in less than three seconds to unlock the keypad. Or sli<strong>de</strong> the phone up,<br />
press the Key [MENU], then press 4. Multimedia, 4. Music.<br />
2. Select 1. All Songs, press the Key, then select the <strong>de</strong>sired song and press<br />
the Key [PLAY]. To pause the song, press the Key again.<br />
3. Press the Left Soft Key [Mute] to mute or press the Right Soft Key<br />
[Options] to select from the following options:<br />
• Exit Player: Exits the music player and returns to previous screen.<br />
• Music Only Mo<strong>de</strong>: Sets Music Only Mo<strong>de</strong> On to disable all wireless communications.<br />
• Song Info: Displays the music file information.<br />
• Repeat: Select Repeat All, Repeat One or Off for the player’s repeat mo<strong>de</strong>.<br />
• Shuffle: Select On or Off for the player’s shuffle mo<strong>de</strong>.<br />
01<br />
02<br />
03<br />
04<br />
05<br />
06<br />
07<br />
114<br />
115
6<br />
MESSAGING<br />
This chapter addresses Voicemail, TXT, Picture, Vi<strong>de</strong>o, Voice<br />
Messaging functions including:<br />
When a New Message Arrives<br />
New Message<br />
Messages<br />
Inbox<br />
Sent<br />
Drafts<br />
Erase All<br />
Voicemail<br />
Mobile e-mail<br />
Settings
WHEN A NEW MESSAGE ARRIVES<br />
1. The following display appears when a new message<br />
arrives.<br />
2. To display the message, select View Now and then<br />
press the Key.<br />
NEW MESSAGE<br />
TXT MESSAGE<br />
1. Sli<strong>de</strong> the phone up, press the Left Soft Key [Message], then press<br />
New Message. Or sli<strong>de</strong> the phone up, press the Key [MENU],<br />
then press 2. Messaging, 1. New Message.<br />
2. Press 1. TXT Message.<br />
Shortcut: From idle mo<strong>de</strong>, press the TXT Composer Key .<br />
3. Un<strong>de</strong>r To, input the phone number or e-mail address of the recipient, then<br />
press the Key.<br />
• By pressing the Right Soft Key [Add], you can choose from the following:<br />
1. From Contacts: Search for a phone number which is stored in the Contact List.<br />
2. Call History: Search for a phone number which is stored in the Call History menu.<br />
3. Groups: Search for a group stored in the Groups menu.<br />
4. To Contacts: Save the number or e-mail address to the Contact List that you have<br />
entered in the To field.<br />
4. Un<strong>de</strong>r Text, input your message.<br />
• By pressing the Right Soft Key [Options], you can choose from the following:<br />
1. Insert Quick Text: Inserts pre<strong>de</strong>fined sentences in the text message.<br />
2. Save As Draft: Save the text message to Drafts.<br />
3. Add: Allows you to add a Address From Contacts.<br />
4. Priority Level: Set the level of the priority to High or Normal.<br />
5. Cancel Message: Cancel the message and select whether to save it in Drafts.<br />
5. When completed, press the Key [SEND] to send the text message.<br />
These options will vary <strong>de</strong>pending on the message contents chosen.<br />
PICTURE MESSAGE<br />
1. Sli<strong>de</strong> the phone up, press the Left Soft Key [Message], then press<br />
New Message. Or sli<strong>de</strong> the phone up, press the Key [MENU],<br />
then press 2. Messaging, 1. New Message.<br />
2. Press 2. Picture Message.<br />
3. Un<strong>de</strong>r To, input the phone number or e-mail address of the recipient, then<br />
press the Key.<br />
• By pressing the Right Soft Key [Add], you can choose from the following:<br />
1. From Contacts: Search for a phone number which is stored in the Contact List.<br />
2. Call History: Search for a phone number which is stored in the Call History menu.<br />
3. Groups: Search for a group stored in the Groups menu.<br />
4. To Online Album: Send the picture message to your Online Album.<br />
5. To Contacts: Save the number or e-mail address to the Contact List that you have<br />
entered in the To field.<br />
4. Un<strong>de</strong>r Text, input your message, then press the Directional Key down.<br />
5. Un<strong>de</strong>r Picture, press the Left Soft Key [Pictures] to select the picture you<br />
would like to send, then press the Key. Press the Directional Key down.<br />
6. Un<strong>de</strong>r Sound, press the Left Soft Key [Sounds] to select the sound you<br />
would like to send, then press the Key. Press the Directional Key down.<br />
7. Un<strong>de</strong>r Name Card, press the Left Soft Key [Add], press the Directional Key<br />
up or down to select 1. My Name Card or 2. From Contacts then press the<br />
Key. If 2.From Contacts is selected, select the <strong>de</strong>sired Contact and press<br />
the Key [MARK/UNMARK] then press the Left Soft Key [Done]. Press<br />
the Directional Key down.<br />
8. Un<strong>de</strong>r Subject, input the message subject.<br />
9. Press the Right Soft Key [Options] to access the following:<br />
• Preview: Shows the picture message before it is sent.<br />
• Save As Draft: Save the picture message to Drafts.<br />
• Insert Quick Text: Inserts pre<strong>de</strong>fined sentences in the picture message.<br />
118 119<br />
01<br />
02<br />
03<br />
04<br />
05<br />
06<br />
07
• Add Sli<strong>de</strong>: Allows you to insert multiple picture messages.<br />
• Priority Level: Set the level of the priority to High or Normal.<br />
• Cancel Message: Cancel the message and select whether to save it in Drafts.<br />
10. When completed, press the Key [SEND] to send the picture message.<br />
These options will vary <strong>de</strong>pending on the message contents chosen.<br />
VIDEO MESSAGE<br />
1. Sli<strong>de</strong> the phone up, press the Left Soft Key [Message], then press<br />
New Message. Or sli<strong>de</strong> the phone up, press the Key [MENU], then press<br />
2. Messaging, 1. New Message.<br />
2. Press 3. Vi<strong>de</strong>o Message.<br />
3. Un<strong>de</strong>r To, input the phone number or e-mail address of the recipient, then<br />
press the Key.<br />
• By pressing the Right Soft Key [Add], you can choose from the following:<br />
1. From Contacts: Search for a phone number which is stored in the Contact List.<br />
2. Call History: Search for a phone number which is stored in the Call History menu.<br />
3. Groups: Search for a group stored in the Groups menu.<br />
4. To Online Album: Send the vi<strong>de</strong>o message to your Online Album.<br />
5. To Contacts: Save the number or e-mail address to the Contact List that you have<br />
entered in the To field.<br />
4. Un<strong>de</strong>r Text, input your message, then press the Directional Key down.<br />
5. Un<strong>de</strong>r Vi<strong>de</strong>o, press the Left Soft Key [Vi<strong>de</strong>os] to select the vi<strong>de</strong>o you<br />
would like to send, then press the Key. Press the Directional Key down.<br />
6. Un<strong>de</strong>r Name Card, press the Left Soft Key [Add], press the Directional Key<br />
up or down to select 1. My Name Card or 2. From Contacts then press the<br />
Key. If 2.From Contacts is selected, select the <strong>de</strong>sired Contact and press<br />
the Key [MARK/UNMARK] then press the Left Soft Key [Done]. Press<br />
the Directional Key down.<br />
7. Un<strong>de</strong>r Subject, input the message subject.<br />
8. Press the Right Soft Key [Options] to access the following:<br />
• Preview: Shows the vi<strong>de</strong>o message before it is sent.<br />
• Save As Draft: Save the vi<strong>de</strong>o message to Drafts.<br />
• Insert Quick Text: Inserts pre<strong>de</strong>fined sentences in the vi<strong>de</strong>o message.<br />
• Priority Level: Set the level of the priority to High or Normal.<br />
• Cancel Message: Cancel the message and select whether to save it in Drafts.<br />
9. When completed, press the Key [SEND] to send the vi<strong>de</strong>o message.<br />
These options will vary <strong>de</strong>pending on the message contents chosen.<br />
VOICE MESSAGE<br />
1. Sli<strong>de</strong> the phone up, press the Left Soft Key [Message], then press<br />
New Message. Or sli<strong>de</strong> the phone up, press the Key [MENU], then press<br />
2. Messaging, 1. New Message.<br />
2. Press 4. Voice Message.<br />
3. Press the Key to start recording a voice memo, then press the Key<br />
[STOP] to finish recording and insert the voice memo into the voice message.<br />
4. Un<strong>de</strong>r To, input the phone number or e-mail address of the recipient, then<br />
press the Key.<br />
• By pressing the Right Soft Key [Add], you can choose from the following:<br />
1. From Contacts: Search for a phone number which is stored in the Contact List.<br />
2. Call History: Search for a phone number which is stored in the Call History menu.<br />
3. Groups: Search for a group stored in the Groups menu.<br />
4. To Online Album: Send the voice message to your Online Album.<br />
5. To Contacts: Save the number or e-mail address to the Contact List that you have<br />
entered in the To field.<br />
5. Un<strong>de</strong>r Text, input your message, then press the Directional Key down.<br />
6. Un<strong>de</strong>r Name Card, press the Left Soft Key [Add], press the Directional Key<br />
up or down to select 1. My Name Card or 2. From Contacts then press the<br />
Key. If 2.From Contacts is selected, select the <strong>de</strong>sired Contact and press<br />
the Key [MARK/UNMARK] then press the Left Soft Key [Done]. Press<br />
the Directional Key down.<br />
01<br />
02<br />
03<br />
04<br />
05<br />
06<br />
07<br />
120 121
7. Un<strong>de</strong>r Subject, input the message subject.<br />
8. Press the Right Soft Key [Options] to access the following:<br />
• Review: Shows the voice message before it is sent.<br />
• Save As Draft: Save the voice message to Drafts.<br />
• Insert Quick Text: Inserts pre<strong>de</strong>fined sentences in the voice message.<br />
• Priority Level: Set the level of the priority to High or Normal.<br />
• Cancel Message: Cancel the message and select whether to save it in Drafts.<br />
9. When completed, press the Key [SEND] to send the voice message.<br />
These options will vary <strong>de</strong>pending on the message contents chosen.<br />
MESSAGES<br />
The Messages menu is displayed when Inbox View is set to By Contact which is<br />
the <strong>de</strong>fault setting. All received and sent messages are stored un<strong>de</strong>r the Messages<br />
menu by contact name. By Contact is the <strong>de</strong>fault setting.<br />
1. Sli<strong>de</strong> the phone up, press the Left Soft Key [Message] Or sli<strong>de</strong> the phone<br />
up, press the Key [MENU], then press 2. Messaging, 2. Messages.<br />
2. Select a message and press the Key [OPEN] to view the message. To reply<br />
to the sen<strong>de</strong>r, press the Left Soft Key [Reply], select 1. TXT Message,<br />
2. Picture Message, 3. Vi<strong>de</strong>o Message or 4. Voice Message, then press the<br />
Key.<br />
3. Press the Directional Key up or down to highlight the text entry field, enter<br />
the message and press the Key [SEND] to reply. Or press the Directional Key<br />
up or down to highlight the message contents, press the Directional Key left or<br />
right to view the next or previous message.<br />
Press the Key [OPEN] to view the message with full screen or press the<br />
Key [Reply] to reply to the sen<strong>de</strong>r.<br />
4. While viewing the message with full screen, press the Key [REPLY] to reply.<br />
To erase the message, press the Left Soft Key [Erase], select Yes, then press<br />
the Key.<br />
5. When navigating through the Messages menu, press the Right Soft Key<br />
[Options] to display the following available options. Options are <strong>de</strong>pen<strong>de</strong>nt on<br />
the message type and may be different from each field.<br />
• Erase Sent/Received: Allows you to <strong>de</strong>lete unlocked sent and received messages.<br />
• Erase Drafts: Allows you to <strong>de</strong>lete unlocked messages stored in Drafts.<br />
• Erase All Messages: Allows you to <strong>de</strong>lete unlocked messages stored in your phone.<br />
• Add To Contacts: Saves the phone number to the Contact List.<br />
• Manage Messages: Allows you to manage messages with following options:<br />
- Erase: Deletes the messages.<br />
- Lock: Locks the messages.<br />
- Unlock: Unlocks the messages.<br />
- Mark as Read: Marks the messages as read.<br />
- Mark as Unread: Marks the messages as unread.<br />
• Sort Alphabetically/Sort By Time: Sorts the list in alphabetical or<strong>de</strong>r or by time.<br />
• Messaging Menu: Returns to the previous Messaging screen.<br />
• Insert Quick Text: Inserts pre<strong>de</strong>fined sentences in the message.<br />
• Save As Draft: Save the message to Drafts.<br />
• Add: Allows you to add a Address From Contacts.<br />
• Add Recipient: Allows you to add multiple recipients in the To field.<br />
• Priority Level: Set the level of the priority to High or Normal.<br />
• Cancel Message: Cancels the message and select whether to save it in Drafts.<br />
• Forward: Forwards the message to another recipient.<br />
• Reply w. copy: Allows you to reply to the recipient including the original message.<br />
• Save As Quick Text: Allows you to save the received message as quick text.<br />
• Lock: Locks the message.<br />
• Extract Addresses: Allows you to extract contacts from the message, then you can save<br />
them to the Contact List, make a call or send the message.<br />
• Message Info: Shows the message information.<br />
01<br />
02<br />
03<br />
04<br />
05<br />
06<br />
07<br />
122 123
INBOX<br />
The Inbox menu is displayed when Messages View is set to By Time. If By<br />
Contact is set, you cannot see the Inbox menu. The Inbox manages received text,<br />
picture, voice, vi<strong>de</strong>o and web alert messages.<br />
1. Sli<strong>de</strong> the phone up, press the Left Soft Key [Message], then press<br />
2. Inbox. Or sli<strong>de</strong> the phone up, press the Key [MENU], then press<br />
2. Messaging, 2. Inbox.<br />
2. Select a message and press the Key [OPEN] to view the message. To <strong>de</strong>lete<br />
the message, press the Left Soft Key [Erase], select Yes, then press the<br />
Key.<br />
3. Press the Directional Key left or right to view the previous or next message.<br />
4. To reply to the sen<strong>de</strong>r, press the Key [REPLY], select 1. TXT Message,<br />
2. Picture Message, 3. Vi<strong>de</strong>o Message or 4. Voice Message, then press the<br />
Key.<br />
5. When navigating through the Inbox menu, press the Right Soft Key<br />
[Options] to display the following available options. Options are <strong>de</strong>pen<strong>de</strong>nt on<br />
the message type and may be different from each field.<br />
• Reply: Allows you to reply to the recipient.<br />
• Reply w. copy: Allows you to reply to the recipient including the original message.<br />
• Forward: Forwards the message to another recipient.<br />
• Add To Contacts: Saves the phone number to the Contact List.<br />
• Extract Addresses: Allows you to extract contacts from the message, then you can save<br />
them to the Contact List, make a call or send the message.<br />
• Message Info: Shows the message information.<br />
• Manage Inbox: Allows you to manage messages with following options:<br />
- Erase: Deletes the message.<br />
- Lock: Locks the messages.<br />
- Unlock: Unlocks the messages.<br />
- Mark as Read: Marks the messages as read.<br />
- Mark as Unread: Marks the messages as unread.<br />
• Sort By Sen<strong>de</strong>r: Sorts the list by sen<strong>de</strong>r.<br />
• Sort By Time: Sorts the list by time.<br />
• Sort By Size: Sorts the list by size.<br />
• View By Contacts: Changes the Inbox View setting to Contacts.<br />
• Lock: Locks the message.<br />
SENT<br />
The Sent menu is displayed when Messages View is set to By Time. If By<br />
Contact is set, you cannot see the Sent menu. Sent manages already sent or<br />
waiting to be sent messages.<br />
1. Sli<strong>de</strong> the phone up, press the Left Soft Key [Message], then press<br />
3. Sent. Or sli<strong>de</strong> the phone up, press the Key [MENU], then press<br />
2. Messaging, 3. Sent.<br />
2. Select a message and press the Key [OPEN] to view the message. To <strong>de</strong>lete<br />
the message, press the Left Soft Key [Erase], select Yes, then press the<br />
Key.<br />
3. Press the Directional Key left or right to view the previous or next message.<br />
4. To send the message, press the Key [SEND].<br />
5. When navigating through the Sent menu, press the Right Soft Key<br />
[Options] to display the following available options. Options are <strong>de</strong>pen<strong>de</strong>nt on<br />
the message type and may be different from each field.<br />
• Forward: Forwards the message to another recipient.<br />
• Resend: Resends the message.<br />
• Lock / Unlock: Locks or unlocks the message.<br />
• Add To Contacts: Saves the phone number to the Contact List.<br />
• Erase Sent: Allows you to <strong>de</strong>lete unlocked messages stored in Sent.<br />
• Message Info: Shows the message information.<br />
01<br />
02<br />
03<br />
04<br />
05<br />
06<br />
07<br />
124 125
DRAFTS<br />
The Drafts menu manages draft messages. If message composition is interrupted by a<br />
voice call or other events, the message being composed is automatically saved in Drafts.<br />
1. Sli<strong>de</strong> the phone up, press the Key [MENU], then press 2. Messaging,<br />
4. Drafts.<br />
2. Select a message and press the Key [EDIT] to edit the message. To <strong>de</strong>lete<br />
the message, press the Left Soft Key [Erase], select Yes, then press the<br />
Key.<br />
3. When navigating through Drafts menu, press Right Soft Key [Options] to<br />
display the following available options.<br />
• Send: Sends the message.<br />
• Lock/Unlock: Locks or unlocks the message.<br />
• Add To Contacts: Saves the phone number to the Contact List.<br />
• Erase Drafts: Allows you to <strong>de</strong>lete unlocked messages stored in Drafts.<br />
ERASE ALL<br />
To erase all messages stored in your phone:<br />
1. From the idle mo<strong>de</strong>, press Key [MENU], then select 2. Messaging.<br />
2. Press the Right Soft Key [Options] to display the following available<br />
options.<br />
• Erase Inbox: Select All Messages or Only Read Messages, then press the Key.<br />
• Erase Sent: Select Yes or No, then press the Key.<br />
• Erase Drafts: Select Yes or No, then press the Key.<br />
• Erase All: Select All Messages including Unread or All except Unread Messages, then press<br />
the Key.<br />
3. A confirmation message appears.<br />
Locked messages cannot be erased.<br />
VOICEMAIL<br />
The Voicemail menu shows the number of new voicemail message recor<strong>de</strong>d in your<br />
voicemail box.<br />
1. Sli<strong>de</strong> the phone up, press the Key [MENU], then press 2. Messaging,<br />
5. Voicemail.<br />
2. To <strong>de</strong>lete information about new voicemail, press the Left Soft Key [Clear],<br />
select Yes, then press the Key.<br />
ACCESSING YOUR VOICEMAIL BOX<br />
1. Sli<strong>de</strong> the phone up, press the Key [MENU], press 2. Messaging,<br />
5. Voicemail, then press the Key [CALL]. Or dial my phone number and<br />
press the SEND Key .<br />
2. Follow the prompts to enter your password and retrieve your messages.<br />
Shortcut: Sli<strong>de</strong> the phone up, press and hold 1 or *86 and press SEND Key to<br />
access your voicemail box.<br />
MOBILE E-MAIL<br />
Mobile e-mail gives you access to your personal e-mail accounts such as Yahoo!, MSN,<br />
AOL and Gmail. Mobile e-mail works with any e-mail solution, even if your e-mail<br />
service provi<strong>de</strong>r is not listed, you can manually enter in the e-mail server address to<br />
add your account. Mobile e-mail even notifies you when a new message arrives in<br />
your inbox.<br />
DOWNLOAD INSTRUCTIONS FOR MOBILE E-MAIL FROM easyedge SM<br />
CATALOG<br />
1. From the <strong>de</strong>vice main screen, select Menu.<br />
2. From menu options, select the easyedge icon.<br />
3. Use the up/down arrows to navigate to the shopping cart icon and select (may<br />
vary by navigation options). Select Catalog.<br />
4. Scroll to the appropriate fol<strong>de</strong>r (Mobile e-mail will be found in Mobile Internet)<br />
and select.<br />
126 127<br />
01<br />
02<br />
03<br />
04<br />
05<br />
06<br />
07
5. Scroll to and select Free Mobile Email.<br />
6. Select purchasing option free. Select Phone or Card.<br />
7. Download progress will be shown.<br />
AUTOMATIC E-MAIL ACCOUNT SET UP<br />
1. Launch application and follow prompts through to the mail account provi<strong>de</strong>r<br />
screen. Select an e-mail account provi<strong>de</strong>r.<br />
2. Enter user i<strong>de</strong>ntification and password – account will sync and display e-mail<br />
inbox.<br />
POP AND IMAP E-MAIL ACCOUNT MANUAL SET UP<br />
1. Launch application and follow prompts through to the mail account provi<strong>de</strong>r<br />
screen. Scroll to and select more. Scroll to and select other.<br />
2. In the text fields, enter e-mail address, password and user name. Next you will<br />
be prompted to <strong>de</strong>fine account <strong>de</strong>tails from your e-mail provi<strong>de</strong>r. Select next.<br />
3. Select protocol (IMAP or POP).<br />
4. Enter incoming server settings. Select next.<br />
5. Enter outgoing server settings. Select next.<br />
6. Account will sync and display e-mail inbox.<br />
SETTINGS<br />
The Settings menu allows you to configure settings for messages sent or received on<br />
your phone. To access message settings:<br />
1. Sli<strong>de</strong> the phone up, press the Key [MENU], then press 2. Messaging,<br />
6. Settings.<br />
2. Select one of the following menus, then press the Key.<br />
Following menus: 1. Messages View / 2. Entry Mo<strong>de</strong> / 3. Auto Save Sent /<br />
4. Auto Erase Inbox / 5. Messaging Font Size / 6. TXT Auto View /<br />
7. Multimedia Auto Receive / 8. Quick Text / 9. Voicemail # / 0. Callback # /<br />
*. Signature / #. Delivery Receipt<br />
MESSAGES VIEW<br />
Select By Time or By Contact, then press the Key.<br />
• By Time: Sorts received and sent messages into Inbox and Sent fol<strong>de</strong>rs by time.<br />
• By Contact: Groups all received and sent messages by each contact.<br />
ENTRY MODE<br />
Allows you to set the <strong>de</strong>fault Entry Mo<strong>de</strong> for messaging. For example, if Abc mo<strong>de</strong> is set<br />
to Entry Mo<strong>de</strong>, its icon will appear in the text entry field as <strong>de</strong>fault.<br />
Select Abc, ABC or 123, then press the Key.<br />
AUTO SAVE SENT<br />
Select On, Off or Prompt, then press the Key.<br />
• On: All sent messages are saved in Sent.<br />
• Off: All sent messages are not saved in Sent.<br />
• Prompt: The Yes or No dialogue box will be displayed after sending a message.<br />
AUTO ERASE INBOX<br />
Allows you to set whether Inbox messages are <strong>de</strong>leted automatically when new<br />
messages arrive and Inbox is full.<br />
Select On or Off, then press the Key.<br />
• On: The ol<strong>de</strong>st message will be <strong>de</strong>leted from the Inbox automatically once full.<br />
• Off: The ol<strong>de</strong>st message will not be <strong>de</strong>leted automatically from the Inbox once full.<br />
128 129<br />
01<br />
02<br />
03<br />
04<br />
05<br />
06<br />
07
MESSAGING FONT SIZE<br />
Allows you to set the message font size.<br />
Select Small, Normal or Large, then press the Key.<br />
TXT AUTO VIEW<br />
Select On or Off, then press the Key.<br />
• On: TXT messages are displayed automatically when received.<br />
• Off: TXT messages are displayed by going into the Inbox, or by responding to the message<br />
prompt.<br />
MULTIMEDIA AUTO RECEIVE<br />
Select On or Off, then press the Key.<br />
• On: Picture, Vi<strong>de</strong>o and Voice messages are downloa<strong>de</strong>d automatically.<br />
• Off: Picture, Vi<strong>de</strong>o and Voice messages must be retrieved from the Inbox or by responding<br />
to the message prompt.<br />
QUICK TEXT<br />
Allows you to create a new Quick Text or edit the pre<strong>de</strong>fined Quick Text.<br />
1. To create a new Quick Text, press the Right Soft Key [Options], then press<br />
1. New. Enter the new text and press the Key [SAVE].<br />
2. To edit the pre<strong>de</strong>fined Quick Text, select the Quick Text from the list, then press<br />
the Key [EDIT].<br />
3. To change the Quick Text position, press the Right Soft Key [Options], then<br />
press 2. Move. Press the Directional Key up or down to scroll to <strong>de</strong>sired<br />
position, then press the Key [SAVE].<br />
4. To erase a saved Quick Text, press the Left Soft Key [Erase]. Select Yes and<br />
press the Key.<br />
VOICEMAIL #<br />
1. Enter a new voicemail number or edit the voicemail number then press the<br />
Key.<br />
2. Press the Left Soft Key [Add], then press 1. Wait or 2. 2-Sec Pause. Please<br />
refer to page 30 for more <strong>de</strong>tails on WAIT/PAUSE FEATURE.<br />
CALLBACK #<br />
Allows you to use or edit the <strong>de</strong>fault callback number so that the recipient can callback<br />
or reply.<br />
1. Select On or Off, then press the Key.<br />
2. If On is selected, enter a new callback number then press the Key.<br />
SIGNATURE<br />
Allows you to create a signature that can be automatically inserted at the end of each<br />
message.<br />
1. To <strong>de</strong>activate Signature function, select None and press the Key.<br />
2. To insert a Signature, select Custom, enter your signature in the text entry field<br />
then press the Key.<br />
DELIVERY RECEIPT<br />
Allows you to set <strong>de</strong>livery receipts for sent messages.<br />
Select On or Off, then press the Key.<br />
• On: Request to receive the <strong>de</strong>livery acknowledgement.<br />
• Off: Do not request to receive the <strong>de</strong>livery acknowledgement.<br />
01<br />
02<br />
03<br />
04<br />
05<br />
06<br />
07<br />
130 131
7<br />
SAFETY AND WARRANTY<br />
This chapter addresses the safety gui<strong>de</strong>lines and precautions to follow when<br />
operating your phone. Before operating your phone, please be aware of all<br />
the safety <strong>de</strong>tails. This chapter contains the terms and conditions of services<br />
and the warranty for your phone. Please review them thoroughly.<br />
SAFETY<br />
Safety Information for Wireless<br />
Handheld Phones<br />
Safety Information for FCC RF Exposure<br />
SAR Information<br />
Hearing Aid Compatibility (HAC) for<br />
Wireless Telecommunications Devices<br />
FDA Consumer Update<br />
Avoid Potential Hearing Loss<br />
FCC Compliance Information<br />
WARRANTY<br />
12 Month Limited Warranty
134<br />
SAFETY INFORMATION FOR WIRELESS HANDHELD PHONES<br />
READ THIS INFORMATION BEFORE USING YOUR HANDHELD<br />
PORTABLE CELLULAR TELEPHONE<br />
EXPOSURE TO RADIO FREQUENCY SIGNALS<br />
Your wireless handheld portable telephone is a low power radio transmitter and<br />
receiver. When it is ON, it receives and also sends out radiofrequency energy (RF)<br />
signals. In August 1996, the Fe<strong>de</strong>ral Communications Commissions (FCC) adopted<br />
RF exposure gui<strong>de</strong>lines with safety levels for handheld wireless phones. Those<br />
gui<strong>de</strong>lines are consistent with the safety standards previously set by both U.S. and<br />
international standards bodies:<br />
ANSI C95.1 (1992) *<br />
NCRP Report 86 (1986) *<br />
ICNIRP (1996) *<br />
Those standards were based on comprehensive and periodic evaluations of the<br />
relevant scientific literature. For example, over 120 scientists, engineers, and<br />
physicians from universities, government health agencies, and industry reviewed<br />
the available body of research to <strong>de</strong>velop the ANSI Standard (C951).<br />
The <strong>de</strong>sign of your phone complies with the FCC gui<strong>de</strong>lines (and those standards).<br />
1: American National Standards Institute.<br />
2: National Council on Radiation Protection and Measurements.<br />
3: International Commission on Nonionizing Radiation Protection.<br />
ANTENNA SAFETY<br />
Use only the supplied or an approved replacement antenna. Unauthorized<br />
antennas, modifications, or attachments could impair call quality, damage the<br />
phone, or result in violation of FCC regulations. Please contact your local <strong>de</strong>aler for<br />
replacement antenna.<br />
Do not use the phone with a damaged antenna. If a damaged antenna comes<br />
into contact with the skin, a minor burn may result. Please contact your local<br />
<strong>de</strong>aler for replacement antenna.<br />
DRIVING SAFETY<br />
Talking on the phone while driving is extremely dangerous and is illegal in some<br />
states. Remember, safety comes first. Check the laws and regulations on the use<br />
of phones in the areas where you drive. Always obey them. Also, if using your<br />
phone while driving, please:<br />
• Give full attention to driving. Driving safely is your first responsibility.<br />
• Use hands-free operation, if available.<br />
• Pull off the road and park before making or answering a call, if driving<br />
conditions so require.<br />
If you must use the phone while driving, please use one-touch, speed dialing, and<br />
auto answer mo<strong>de</strong>s.<br />
An airbag inflates with great force. DO NOT place objects, including both installed<br />
or portable wireless equipment, in the area over the airbag or in the air bag<br />
<strong>de</strong>ployment area. If in-vehicle wireless equipment is improperly installed and the<br />
air bag inflates, serious injury could result.<br />
WARNING: Failure to follow these instructions may lead to serious personal injury and<br />
possible property damage.<br />
ELECTRONIC DEVICES<br />
Your wireless handheld portable telephone is a low power radio transmitter<br />
and receiver. When it is ON, it receives and also sends out radio frequency<br />
radiofrequency energy (RF) signals. Most mo<strong>de</strong>rn electronic equipment is shiel<strong>de</strong>d<br />
from RF energy. However, certain electronic equipment may not be shiel<strong>de</strong>d<br />
against the RF signals from your wireless phone. Therefore, use of your phone must<br />
be restricted in certain situations.<br />
01<br />
02<br />
03<br />
04<br />
05<br />
06<br />
07<br />
135
PACEMAKERS<br />
The Health Industry Manufacturers Association recommends that a minimum<br />
separation of six (6”) inches be maintained between a handheld wireless<br />
phone and a pacemaker to avoid potential interference with the pacemaker.<br />
These recommendations are consistent with the in<strong>de</strong>pen<strong>de</strong>nt research by and<br />
recommendations of Wireless Technology Research. Persons with pacemakers:<br />
• ALWAYS keep the phone more than six inches from your pacemaker when<br />
the phone is turned on.<br />
• Do not carry the phone in a breast pocket.<br />
• Use the ear opposite the pacemaker to minimize the potential for<br />
interference.<br />
• If you have any reason to suspect that interference is taking place, turn your<br />
phone OFF immediately.<br />
HEARING AIDS<br />
Some digital wireless phones may interfere with some hearing aids. In the event of<br />
such interference, you may want to consult your service provi<strong>de</strong>r (or call the customer<br />
service line to discuss alternatives). Excessive sound pressure from earphones can<br />
cause hearing loss.<br />
OTHER MEDICAL DEVICES<br />
If you use any other personal medical <strong>de</strong>vice, consult the manufacturer of your<br />
<strong>de</strong>vice to <strong>de</strong>termine if they are a<strong>de</strong>quately shiel<strong>de</strong>d from external radiofrequency<br />
energy (RF).<br />
Your physician may be able to assist you in obtaining this information. Turn your<br />
phone OFF in healthcare facilities when any regulations posted in these areas instruct<br />
you to do so. Hospitals or healthcare facilities may be using equipment that could be<br />
sensitive to external RF energy.<br />
VEHICLES<br />
RF signals may affect improperly installed or ina<strong>de</strong>quately shiel<strong>de</strong>d electronic<br />
systems in motor vehicles. Check with the manufacturer or its representative<br />
regarding your vehicle. You should also consult the manufacturer of any equipment<br />
that has been ad<strong>de</strong>d to your vehicle.<br />
POSTED FACILITIES<br />
Turn your phone OFF where posted notices so require.<br />
OTHER SAFETY GUIDELINES<br />
AIRCRAFT<br />
FCC regulations prohibit using your phone while in the air. Turn your phone OFF<br />
before boarding an aircraft. Always request and obtain prior consent and approval of<br />
an authorized airline representative before using your phone aboard an aircraft.<br />
Always follow the instructions of the airline representative whenever using your<br />
phone aboard an aircraft, to prevent any possible interference with airborne<br />
electronic equipment.<br />
BLASTING AREAS<br />
To avoid interfering with blasting operations, turn your phone OFF when in a<br />
“blasting area” or in areas posted: “Turn off two-way radio.” Obey all signs and<br />
instructions.<br />
POTENTIALLY EXPLOSIVE ATMOSPHERES<br />
Turn your phone OFF when in any area with a potentially explosive atmosphere and<br />
obey all signs and instructions. Sparks in such areas could cause an explosion or fire<br />
resulting in bodily injury or even <strong>de</strong>ath.<br />
01<br />
02<br />
03<br />
04<br />
05<br />
06<br />
07<br />
136<br />
137
Areas with a potentially explosive atmosphere are often, but not always, clearly<br />
marked. They inclu<strong>de</strong> fueling areas such as gas stations; below <strong>de</strong>ck on boats;<br />
fuel or chemical transfer or storage facilities; vehicles using liquefied petroleum<br />
gas (such as propane or butane); areas where the air contains chemicals or<br />
particles, such as grain, dust, or metal pow<strong>de</strong>rs; and any other area where you<br />
would normally be advised to turn off your vehicle’s engine.<br />
PRECAUTIONS<br />
Your Handheld Portable Telephone is a high quality piece of equipment. Before<br />
operating, read all instructions and cautionary markings on (1) Wall/USB Charger<br />
(2) Battery and (3) Product Using Battery.<br />
Failure to follow the directions below could result in serious bodily injury and/or<br />
property damage due to battery liquid leakage, fire or rupture.<br />
• DO NOT use this equipment in an extreme environment where high temperature<br />
or high humidity exists.<br />
• DO NOT abuse the equipment. Avoid striking, shaking or shocking. When not<br />
using, lay down the unit to avoid possible damage due to instability.<br />
• DO NOT expose this equipment to rain or spilled beverages.<br />
• DO NOT use unauthorized accessories.<br />
• DO NOT disassemble the phone or its accessories. If service or repair is required,<br />
return unit to an authorized PCD cellular service center. If unit is disassembled,<br />
the risk of electric shock or fire may result.<br />
• DO NOT short-circuit the battery terminals with metal items etc.<br />
SAFETY INFORMATION FOR FCC RF EXPOSURE<br />
WARNING! READ THIS INFORMATION BEFORE USING<br />
CAUTIONS<br />
In August 1996 the Fe<strong>de</strong>ral Communications Commission (FCC) of the United<br />
States with its action in Report and Or<strong>de</strong>r FCC 96-326 adopted an updated safety<br />
standard for human exposure to radio frequency electromagnetic energy emitted<br />
by FCC regulated transmitters. Those gui<strong>de</strong>lines are consistent with the safety<br />
standard previously set by both U.S. and international standards bodies. The<br />
<strong>de</strong>sign of this phone complies with the FCC gui<strong>de</strong>lines and these international<br />
standards.<br />
BODY-WORN OPERATION<br />
This <strong>de</strong>vice was tested for typical body-worn operations with the back of the<br />
phone kept 2.0 cm. from the body. To maintain compliance requirements, use<br />
only belt-clips, holsters or similar accessories that maintain a 2.0 cm separation<br />
distance between the user’s Body and the back of the phone, including the<br />
antenna.<br />
The use of belt-clips, holsters and similar accessories should not contain metallic<br />
components in its assembly. The use of accessories that do not satisfy these<br />
requirements may not comply with FCC radiofrequency energy (RF) exposure<br />
requirements, and should be avoi<strong>de</strong>d.<br />
For more information about RF exposure, please visit the FCC website at www.fcc.gov.<br />
01<br />
02<br />
03<br />
04<br />
05<br />
06<br />
07<br />
138<br />
139
SAR INFORMATION<br />
THIS MODEL PHONE MEETS THE GOVERNMENT’S<br />
REQUIREMENTS FOR EXPOSURE TO RADIO WAVES.<br />
Your wireless phone is a radio transmitter and receiver. It is <strong>de</strong>signed and<br />
manufactured not to exceed the emission limits for exposure to radiofrequency<br />
energy (RF) set by the Fe<strong>de</strong>ral Communications Commission of the U.S.<br />
Government. These limits are part of comprehensive gui<strong>de</strong>lines and establish<br />
permitted levels of RF energy for the general population. The gui<strong>de</strong>lines are<br />
based on standards that were <strong>de</strong>veloped by in<strong>de</strong>pen<strong>de</strong>nt scientific organizations<br />
through periodic and thorough evaluation of scientific studies. The standards<br />
inclu<strong>de</strong> a substantial safety margin <strong>de</strong>signed to assure the safety of all persons,<br />
regardless of age and health.<br />
The exposure standard for wireless mobile phones employs a unit of<br />
measurement known as the Specific Absorption Rate, or SAR. The SAR limit set<br />
by the FCC is 1.6 W/kg. * Tests for SAR are conducted with the phone transmitting<br />
at its highest certified power level in all tested frequency bands. Although the<br />
SAR is <strong>de</strong>termined at the highest certified power level, the actual SAR level of the<br />
phone while operating can be well below the maximum value. This is because the<br />
phone is <strong>de</strong>signed to operate at multiple power levels so as to use only the power<br />
required to reach the network. In general, the closer you are to a wireless base<br />
station antenna, the lower the power output.<br />
Before a phone mo<strong>de</strong>l is available for sale to the public, it must be tested<br />
and certified to the FCC that it does not exceed the limit established by the<br />
government adopted requirement for safe exposure. The tests are performed in<br />
positions and locations (e.g., at the ear and worn on the body) as required by the<br />
FCC for each mo<strong>de</strong>l. The highest SAR value for this mo<strong>de</strong>l phone when tested for<br />
use at the ear is 1.25 W/kg and when worn on the body, as <strong>de</strong>scribed in this user<br />
gui<strong>de</strong>, is 1.17 W/kg (Body-worn measurements differ among phone mo<strong>de</strong>ls,<br />
<strong>de</strong>pending upon available accessories and FCC requirements). While there may<br />
be differences between the SAR levels of various phones and at various positions,<br />
they all meet the government requirement for safe exposure.<br />
The SAR testing for Body-worn operation was performed with a belt clip that<br />
provi<strong>de</strong>d a 20mm separation. The <strong>User</strong>’s <strong>Manual</strong> indicates that any holsters/clips<br />
used with this <strong>de</strong>vice should contain no metallic components.<br />
The FCC has granted an Equipment Authorization for this mo<strong>de</strong>l phone with<br />
all reported SAR levels evaluated as in compliance with the FCC RF exposure<br />
gui<strong>de</strong>lines.<br />
SAR information on this mo<strong>de</strong>l phone is on file with the FCC and can be found<br />
un<strong>de</strong>r the Display Grant section of http://www.fcc.gov/oet/ea after searching<br />
on JYCBUDDY.<br />
Additional information on Specific Absorption Rates (SAR) can be found on the<br />
Cellular Telecommunications Industry Association (CTIA) web-site at<br />
http://www.ctia.org.<br />
* In the United States and Canada, the SAR limit for mobile phones used by the<br />
public is 1.6 watts/kg (W/kg) averaged over one gram of tissue. The standard<br />
incorporates a substantial margin of safety to give additional protection for the<br />
public and to account for any variations in measurements.<br />
01<br />
02<br />
03<br />
04<br />
05<br />
06<br />
07<br />
140<br />
141
HEARING AID COMPATIBILITY (HAC) FOR WIRELESS<br />
TELECOMMUNICATIONS DEVICES<br />
PCD’S COMMITMENT<br />
PCD believes that all of our customers should be able to enjoy the benefits of<br />
digital wireless technologies.<br />
We are committed to providing a selection of compatible <strong>de</strong>vices for our<br />
customers who wear hearing aids.<br />
HAC RATING OF THIS PHONE - TXT8045(BASIC) : M3/T3 , TXT8045US(CLASS II) :<br />
M4/T3<br />
WHAT IS HEARING AID COMPATIBILITY<br />
The Fe<strong>de</strong>ral Communications Commission has implemented rules and a rating<br />
system <strong>de</strong>signed to enable people who wear hearing aids to more effectively<br />
use these wireless telecommunications <strong>de</strong>vices. The standard for compatibility of<br />
digital wireless phones with hearing aids is set forth in American National Standard<br />
Institute (ANSI) standard C63.19. There are two sets of ANSI standards with ratings<br />
from one to four (four being the best rating): an “M” rating for reduced interference<br />
making it easier to hear conversations on the phone when using the hearing aid<br />
microphone, and a “T” rating that enables the phone to be used with hearing aids<br />
operating in the telecoil mo<strong>de</strong> thus reducing unwanted background noise.<br />
HOW WILL I KNOW WHICH WIRELESS PHONES ARE HEARING AID<br />
COMPATIBLE<br />
The Hearing Aid Compatibility rating is displayed on the wireless<br />
phone box.<br />
A phone is consi<strong>de</strong>red Hearing Aid Compatible for acoustic coupling (microphone<br />
mo<strong>de</strong>) if it has an “M3” or “M4” rating. A digital wireless phone is consi<strong>de</strong>red<br />
Hearing Aid Compatible for inductive coupling (telecoil mo<strong>de</strong>) if it has a “T3” or<br />
“T4” rating.<br />
This phone has been tested and rated for use with hearing aids for some of the<br />
wireless technologies that it uses. However, there may be some newer wireless<br />
technologies used in this phone that have not been tested yet for use with<br />
hearing aids. It is important to try the different features of this phone thoroughly<br />
and in different locations, using your hearing aid or cochlear implant, to<br />
<strong>de</strong>termine if you hear any interfering noise. Consult your service provi<strong>de</strong>r about its<br />
return and exchange policies and for information on hearing aid compatibility.<br />
HOW WILL I KNOW IF MY HEARING AID WILL WORK WITH A PARTICULAR<br />
DIGITAL WIRELESS PHONE<br />
You’ll want to try a number of wireless phones so that you can <strong>de</strong>ci<strong>de</strong> which<br />
works the best with your hearing aids. You may also want to talk with your<br />
hearing aid professional about the extent to which your hearing aids are immune<br />
to interference, if they have wireless phone shielding, and whether your hearing<br />
aid has a HAC rating.<br />
FOR MORE INFORMATION ABOUT HEARING AIDS AND DIGITAL WIRELESS<br />
PHONE<br />
• FCC Hearing Aid Compatibility and Volume Control –<br />
http://www.fcc.gov/cgb/dro/hearing.html<br />
• Hearing Loss Association of America – http://www.hearingloss.org/<br />
• CTIA – http://www.accesswireless.org/Disability-Categories/Hearing.aspx<br />
• Gallau<strong>de</strong>t University, RERC – http://tap.gallau<strong>de</strong>t.edu/voice<br />
01<br />
02<br />
03<br />
04<br />
05<br />
06<br />
07<br />
142<br />
143
FDA CONSUMER UPDATE<br />
U.S. FOOD AND DRUG ADMINISTRATION - CENTER<br />
FOR DEVICES AND RADIOLOGICAL HEALTH<br />
CONSUMER UPDATE ON WIRELESS PHONES<br />
1. Do wireless phones pose a health hazard<br />
The available scientific evi<strong>de</strong>nce does not show that any health problems are<br />
associated with using wireless phones. There is no proof, however, that wireless<br />
phones are absolutely safe. Wireless phones emit low levels of radiofrequency<br />
energy (RF) in the microwave range while being used. They also emit very<br />
low levels of RF when in the idle mo<strong>de</strong>. Whereas high levels of RF can produce<br />
health effects (by heating tissue), exposure to low level RF that does not produce<br />
heating effects causes no known adverse health effects. Many studies of low<br />
level RF exposures have not found any biological effects. Some studies have<br />
suggested that some biological effects may occur, but such findings have not<br />
been confirmed by additional research. In some cases, other researchers have<br />
had difficulty in reproducing those studies, or in <strong>de</strong>termining the reasons for<br />
inconsistent results.<br />
2. What is FDA’s role concerning the safety of wireless phones<br />
Un<strong>de</strong>r the law, FDA does not review the safety of radiation-emitting consumer<br />
products such as wireless phones before they can be sold, as it does with new<br />
drugs or medical <strong>de</strong>vices. However, the agency has authority to take action if<br />
wireless phones are shown to emit radiofrequency energy (RF) at a level that<br />
is hazardous to the user. In such a case, FDA could require the manufacturers of<br />
wireless phones to notify users of the health hazard and to repair, replace or recall<br />
the phones so that the hazard no longer exists. Although the existing scientific<br />
data do not justify FDA regulatory actions, FDA has urged the wireless phone<br />
industry to take a number of steps, including the following:<br />
• Support nee<strong>de</strong>d research into possible biological effects of RF of the type<br />
emitted by wireless phones;<br />
• Design wireless phones in a way that minimizes any RF exposure to the user that<br />
is not necessary for <strong>de</strong>vice function; and<br />
• Cooperate in providing users of wireless phones with the best possible<br />
information on possible effects of wireless phone use on human health.<br />
FDA belongs to an interagency working group of the fe<strong>de</strong>ral agencies that have<br />
responsibility for different aspects of RF safety to ensure coordinated efforts at the<br />
fe<strong>de</strong>ral level. The following agencies belong to this working group:<br />
• National Institute for Occupational Safety and Health<br />
• Environmental Protection Agency<br />
• Fe<strong>de</strong>ral Communications Commission<br />
• Occupational Safety and Health Administration<br />
• National Telecommunications and Information Administration<br />
The National Institutes of Health participates in some inter-agency working group<br />
activities, as well. FDA shares regulatory responsibilities for wireless phones with<br />
the Fe<strong>de</strong>ral Communications Commission (FCC). All phones that are sold in the<br />
United States must comply with FCC safety gui<strong>de</strong>lines that limit RF exposure.<br />
FCC relies on FDA and other health agencies for safety questions about wireless<br />
phones. FCC also regulates the base stations that the wireless phone networks<br />
rely upon. While these base stations operate at higher power than do the wireless<br />
phones themselves, the RF exposures that people get from these base stations are<br />
typically thousands of times lower than those they can get from wireless phones.<br />
Base stations are thus not the subject of the safety questions discussed in this<br />
document.<br />
01<br />
02<br />
03<br />
04<br />
05<br />
06<br />
07<br />
144<br />
145
3. What kinds of phones are the subject of this update<br />
The term “wireless phone” refers here to hand-held wireless phones with built-in<br />
antennas, often called “cell,” “mobile,” or “PCS” phones. These types of wireless<br />
phones can expose the user to measurable radiofrequency energy (RF) because<br />
of the short distance between the phone and the user’s head. These RF exposures<br />
are limited by Fe<strong>de</strong>ral Communications Commission safety gui<strong>de</strong>lines that were<br />
<strong>de</strong>veloped with the advice of FDA and other fe<strong>de</strong>ral health and safety agencies.<br />
When the phone is located at greater distances from the user, the exposure to<br />
RF is drastically lower because a person’s RF exposure <strong>de</strong>creases rapidly with<br />
increasing distance from the source. The so-called “cordless phones,” which have<br />
a base unit connected to the telephone wiring in a house, typically operate at far<br />
lower power levels, and thus produce RF exposures far below the FCC safety limits.<br />
4. What are the results of the research done already<br />
The research done thus far has produced conflicting results, and many studies<br />
have suffered from flaws in their research methods. Animal experiments<br />
investigating the effects of radiofrequency energy (RF) exposures characteristic of<br />
wireless phones have yiel<strong>de</strong>d conflicting results that often cannot be repeated in<br />
other laboratories. A few animal studies, however, have suggested that low levels<br />
of RF could accelerate the <strong>de</strong>velopment of cancer in laboratory animals. However,<br />
many of the studies that showed increased tumor <strong>de</strong>velopment used animals<br />
that had been genetically engineered or treated with cancer-causing chemicals<br />
so as to be predisposed to <strong>de</strong>velop cancer in the absence of RF exposure. Other<br />
studies exposed the animals to RF for up to 22 hours per day. These conditions are<br />
not similar to the conditions un<strong>de</strong>r which people use wireless phones, so we don’t<br />
know with certainty what the results of such studies mean for human health.<br />
Three large epi<strong>de</strong>miology studies have been published since December 2000.<br />
Between them, the studies investigated any possible association between the use<br />
of wireless phones and primary brain cancer, glioma, meningioma, or acoustic<br />
neu-roma, tumors of the brain or salivary gland, leukemia, or other cancers. None<br />
of the studies <strong>de</strong>monstrated the existence of any harmful health effects from<br />
wireless phone RF exposures. However, none of the studies can answer questions<br />
about long-term exposures, since the average period of phone use in these<br />
studies was around three years.<br />
5. What research is nee<strong>de</strong>d to <strong>de</strong>ci<strong>de</strong> whether RF exposure from wireless<br />
phones poses a health risk<br />
A combination of laboratory studies and epi<strong>de</strong>miological studies of people<br />
actually using wireless phones would provi<strong>de</strong> some of the data that are nee<strong>de</strong>d.<br />
Lifetime animal exposure studies could be completed in a few years. However,<br />
very large numbers of animals would be nee<strong>de</strong>d to provi<strong>de</strong> reliable proof of a<br />
cancer promoting effect if one exists. Epi<strong>de</strong>miological studies can provi<strong>de</strong> data<br />
that is directly applicable to human populations, but 10 or more years’ follow-up<br />
may be nee<strong>de</strong>d to provi<strong>de</strong> answers about some health effects, such as cancer.<br />
This is because the interval between the time of exposure to a cancer-causing<br />
agent and the time tumors <strong>de</strong>velop - if they do -may be many, many years. The<br />
interpretation of epi<strong>de</strong>miological studies is hampered by difficulties in measuring<br />
actual radiofrequency energy (RF) exposure during day-to-day use of wireless<br />
phones. Many factors affect this measurement, such as the angle at which the<br />
phone is held, or which mo<strong>de</strong>l of phone is used.<br />
6. What is FDA doing to find out more about the possible health effects of<br />
wireless phone RF<br />
FDA is working with the U.S. National Toxicology Program and with groups of<br />
investigators around the world to ensure that high priority animal studies are<br />
conducted to address important questions about the effects of exposure to<br />
radiofrequency energy (RF). FDA has been a leading participant in the World<br />
Health Organization International Electromagnetic Fields (EMF) Project since its<br />
01<br />
02<br />
03<br />
04<br />
05<br />
06<br />
07<br />
146<br />
147
inception in 1996. An influential result of this work has been the <strong>de</strong>velopment<br />
of a <strong>de</strong>tailed agenda of research needs that has driven the establishment of<br />
new research programs around the world. The Project has also helped <strong>de</strong>velop<br />
a series of public information documents on EMF issues. FDA and the Cellular<br />
Telecommunications & Internet Association (CTIA) have a formal Cooperative<br />
Research and Development Agreement (CRADA) to do research on wireless<br />
phone safety. FDA provi<strong>de</strong>s the scientific oversight, obtaining input from experts<br />
in government, industry, and aca<strong>de</strong>mic organizations. CTIA-fun<strong>de</strong>d research is<br />
conducted through contracts to in<strong>de</strong>pen<strong>de</strong>nt investigators. The initial research<br />
will inclu<strong>de</strong> both laboratory studies and studies of wireless phone users. The<br />
CRADA will also inclu<strong>de</strong> a broad assessment of additional research needs in the<br />
context of the latest research <strong>de</strong>velopments around the world.<br />
7. How can I find out how much radiofrequency energy exposure I can get<br />
by using my wireless phone<br />
All phones sold in the United States must comply with Fe<strong>de</strong>ral Communications<br />
Commission (FCC) gui<strong>de</strong>lines that limit radiofrequency energy (RF) exposures.<br />
FCC established these gui<strong>de</strong>lines in consultation with FDA and the other<br />
fe<strong>de</strong>ral health and safety agencies. The FCC limit for RF exposure from wireless<br />
telephones is set at a Specific Absorption Rate (SAR) of 1.6 watts per kilogram<br />
(1.6 W/kg). The FCC limit is consistent with the safety standards <strong>de</strong>veloped by<br />
the Institute of Electrical and Electronic Engineering (IEEE) and the National<br />
Council on Radiation Protection and Measurement. The exposure limit takes<br />
into consi<strong>de</strong>ration the body’s ability to remove heat from the tissues that absorb<br />
energy from the wireless phone and is set well below levels known to have<br />
effects. Manufacturers of wireless phones must report the RF exposure level for<br />
each mo<strong>de</strong>l of phone to the FCC. The FCC website (http://transition.fcc.gov/<br />
oet/rfsafety/) gives directions for locating the FCC i<strong>de</strong>ntification number on your<br />
phone so you can find your phone’s RF exposure level in the online listing.<br />
8. What has FDA done to measure the radiofrequency energy coming from<br />
wireless phones <br />
The Institute of Electrical and Electronic Engineers (IEEE) is <strong>de</strong>veloping a technical<br />
standard for measuring the radiofrequency energy (RF) exposure from wireless<br />
phones and other wireless handsets with the participation and lea<strong>de</strong>rship of FDA<br />
scientists and engineers. The standard, “Recommen<strong>de</strong>d Practice for Determining<br />
the Spatial-Peak Specific Absorption Rate (SAR) in the Human Body Due to<br />
Wireless Communications Devices: Experimental Techniques,” sets forth the first<br />
consistent test methodology for measuring the rate at which RF is <strong>de</strong>posited<br />
in the heads of wireless phone users. The test method uses a tissue-simulating<br />
mo<strong>de</strong>l of the human head. Standardized SAR test methodology is expected to<br />
greatly improve the consistency of measurements ma<strong>de</strong> at different laboratories<br />
on the same phone. SAR is the measurement of the amount of energy absorbed<br />
in tissue, either by the whole body or a small part of the body. It is measured in<br />
watts/kg (or milliwatts/g) of matter. This measurement is used to <strong>de</strong>termine<br />
whether a wireless phone complies with safety gui<strong>de</strong>lines.<br />
9. What steps can I take to reduce my exposure to radiofrequency energy<br />
from my wireless phone<br />
If there is a risk from these products—and at this point we do not know that<br />
there is—it is probably very small. But if you are concerned about avoiding even<br />
potential risks, you can take a few simple steps to minimize your exposure to<br />
radiofrequency energy (RF). Since time is a key factor in how much exposure a<br />
person receives, reducing the amount of time spent using a wireless phone will<br />
reduce RF exposure.<br />
• If you must conduct exten<strong>de</strong>d conversations by wireless phone every day, you<br />
could place more distance between your body and the source of the RF, since the<br />
exposure level drops off dramatically with distance.<br />
01<br />
02<br />
03<br />
04<br />
05<br />
06<br />
07<br />
148<br />
149
For example, you could use a headset and carry the wireless phone away from<br />
your body or use a wireless phone connected to a remote antenna. Again, the<br />
scientific data do not <strong>de</strong>monstrate that wireless phones are harmful. But if you<br />
are concerned about the RF exposure from these products, you can use measures<br />
like those <strong>de</strong>scribed above to reduce your RF exposure from wireless phone use.<br />
10. What about children using wireless phones<br />
The scientific evi<strong>de</strong>nce does not show a danger to users of wireless phones,<br />
including children and teenagers. If you want to take steps to lower exposure<br />
to radiofrequency energy (RF), the measures <strong>de</strong>scribed above would apply to<br />
children and teenagers using wireless phones. Reducing the time of wireless<br />
phone use and increasing the distance between the user and the RF source will<br />
reduce RF exposure. Some groups sponsored by other national governments<br />
have advised that children be discouraged from using wireless phones at all.<br />
For example, the government in the United Kingdom distributed leaflets<br />
containing such a recommendation in December 2000. They noted that no<br />
evi<strong>de</strong>nce exists that using a wireless phone causes brain tumors or other ill<br />
effects. Their recommendation to limit wireless phone use by children was strictly<br />
precautionary; it was not based on scientific evi<strong>de</strong>nce that any health hazard<br />
exists.<br />
11. What about wireless phone interference with medical equipment<br />
Radiofrequency energy (RF) from wireless phones can interact with some<br />
electronic <strong>de</strong>vices. For this reason, FDA helped <strong>de</strong>velop a <strong>de</strong>tailed test method to<br />
measure electromagnetic interference (EMI) of implanted cardiac pacemakers<br />
and <strong>de</strong>fibrillators from wireless telephones. This test method is now part of<br />
a standard sponsored by the Association for the Advancement of Medical<br />
instrumentation (AAMI). The final draft, a joint effort by FDA, medical <strong>de</strong>vice<br />
manufacturers, and many other groups, was completed in late 2000. This<br />
standard will allow manufacturers to ensure that cardiac pacemakers and<br />
<strong>de</strong>fibrillators are safe from wireless phone EMI. FDA has tested hearing aids for<br />
interference from handheld wireless phones and helped <strong>de</strong>velop a voluntary<br />
standard sponsored by the Institute of Electrical and Electronic Engineers (IEEE).<br />
This standard specifies test methods and performance requirements for hearing<br />
aids and wireless phones so that that no interference occurs when a person<br />
uses a “compatible” phone and a “compatible” hearing aid at the same time. This<br />
standard was approved by the IEEE in 2000. FDA continues to monitor the use<br />
of wireless phones for possible interactions with other medical <strong>de</strong>vices. Should<br />
harmful interference be found to occur, FDA will conduct testing to assess the<br />
interference and work to resolve the problem.<br />
12. Where can I find additional information<br />
For additional information, please refer to the following resources:<br />
• FDA web page on wireless phones<br />
(http://www.fda.gov/Radiation-EmittingProducts/<br />
RadiationEmittingProductsandProcedures/<br />
HomeBusinessandEntertainment/CellPhones/<strong>de</strong>fault.htm)<br />
• Fe<strong>de</strong>ral Communications Commission (FCC) radiofrequency energy (RF) Safety<br />
Program<br />
(http://www.fcc.gov/oet/rfsafety)<br />
• International Commission on Non-Ionizing Radiation Protection<br />
(http://www.icnirp.<strong>de</strong>)<br />
• World Health Organization (WHO) International EMF Project<br />
(http://www.who.int/emf)<br />
• National Radiological Protection Board (UK)<br />
(http://www.hpa.org.uk/radiation/)<br />
01<br />
02<br />
03<br />
04<br />
05<br />
06<br />
07<br />
150<br />
151
152<br />
AVOID POTENTIAL HEARING LOSS<br />
Prolonged exposure to loud sounds (including music) is the most common cause<br />
of preventable hearing loss. Some scientific research suggests that using portable<br />
audio <strong>de</strong>vices, such as portable music players and cellular telephones, at high<br />
volume settings for long durations may lead to permanent noise-induced hearing<br />
loss. This inclu<strong>de</strong>s the use of headphones (including headsets, earbuds and<br />
Bluetooth® or other wireless <strong>de</strong>vices). Exposure to very loud sound has also been<br />
associated in some studies with tinnitus (a ringing in the ear), hypersensitivity to<br />
sound and distorted hearing. Individual susceptibility to noise-induced hearing<br />
loss and other potential hearing problems varies.<br />
The amount of sound produced by a portable audio <strong>de</strong>vice varies <strong>de</strong>pending on<br />
the nature of the sound, the <strong>de</strong>vice, the <strong>de</strong>vice settings and the headphones. You<br />
should follow some commonsense recommendations when using any portable<br />
audio <strong>de</strong>vice:<br />
• Set the volume in a quiet environment and select the lowest volume at which<br />
you can hear a<strong>de</strong>quately.<br />
• When using headphones, turn the volume down if you cannot hear the people<br />
speaking near you or if the person sitting next to you can hear what you are<br />
listening to.<br />
• Do not turn the volume up to block out noisy surroundings. If you choose to<br />
listen to your portable <strong>de</strong>vice in a noisy environment, use noise-cancelling<br />
headphones to block out background environmental noise.<br />
• Limit the amount of time you listen. As the volume increases, less time is<br />
required before your hearing could be affected.<br />
• Avoid using headphones after exposure to extremely loud noises, such as<br />
concerts, that might cause temporary hearing loss. Temporary hearing loss<br />
might cause unsafe volumes to sound normal.<br />
• Do not listen at any volume that causes you discomfort. If you experience ringing<br />
in your ears, hear muffled speech or experience any temporary hearing difficulty<br />
after listening to your portable audio <strong>de</strong>vice, discontinue use and consult your<br />
doctor.<br />
YOU CAN OBTAIN ADDITIONAL INFORMATION ON THIS SUBJECT FROM<br />
THE FOLLOWING SOURCES:<br />
AMERICAN ACADEMY OF AUDIOLOGY<br />
11730 Plaza American Drive, Suite 300<br />
Reston, VA 20190<br />
Voice: 800-AAA-2336<br />
E-mail: infoaud@audiology.org<br />
Internet: http://www.audiology.org/<br />
NATIONAL INSTITUTE ON DEAFNESS AND OTHER COMMUNICATION<br />
DISORDERS NATIONAL INSTITUTES OF HEALTH<br />
31 Center Drive, MSC 2320<br />
Bethesda, MD 20892-2320<br />
Voice: (301) 496-7243<br />
E-mail: wengerj@nidcd.nih.gov<br />
Internet: http://www.nidcd.nih.gov/<br />
NATIONAL INSTITUTE FOR OCCUPATIONAL SAFETY AND HEALTH<br />
1600 Clifton Rd. Atlanta, GA 30333, USA<br />
Voice: 800-CDC-INFO (800-232-4636)<br />
E-mail: cdcinfo@cdc.gov<br />
Internet: http://www.cdc.gov/<br />
01<br />
02<br />
03<br />
04<br />
05<br />
06<br />
07<br />
153
FCC COMPLIANCE INFORMATION<br />
This <strong>de</strong>vice complies with Part 15 of FCC Rules.<br />
Operation is subject to the following two conditions:<br />
(1) This <strong>de</strong>vice may not cause harmful interference, and<br />
(2) This <strong>de</strong>vice must accept any interference received. Including interference that<br />
may cause un<strong>de</strong>sired operation.<br />
INFORMATION TO THE USER<br />
This equipment has been tested and found to comply with the limits for a Class<br />
B digital <strong>de</strong>vice pursuant to Part 15 of the FCC Rules. These limits are <strong>de</strong>signed<br />
to provi<strong>de</strong> reasonable protection against harmful Interference in a resi<strong>de</strong>ntial<br />
installation. This equipment generates, uses, and can radiate radio frequency<br />
energy and, if not installed and used in accordance with the instructions, may<br />
cause harmful Interference to radio communications. However, there is no<br />
guarantee that interference will not occur in a particular Installation. If this<br />
equipment does cause harmful interference to radio or television reception, which<br />
can be <strong>de</strong>termined by turning the equipment off and on, the user is encouraged<br />
to try to correct the interference by one or more of the following measures:<br />
• Reorient or relocate the receiving antenna.<br />
Increase the separation between the equipment and receiver.<br />
• Connect the equipment into an outlet of a circuit different from that to which<br />
the receiver is connected.<br />
• Consult the <strong>de</strong>aler or an experienced radio/TV technician for assistance.<br />
CAUTION: • Changes or modification not expressly approved by the party responsible<br />
for Compliance could void the user’s authority to operate the equipment.<br />
Connecting of peripherals requires the use of groun<strong>de</strong>d shiel<strong>de</strong>d signal<br />
cables.<br />
• Excessive sound pressure from earphones can cause hearing loss.<br />
12 MONTH LIMITED WARRANTY<br />
Personal Communications Devices, LLC (the“Company”) warrants to the original<br />
retail purchaser of this cellular handset or wireless <strong>de</strong>vice (Product), that should<br />
this Product or any part thereof during normal consumer usage and conditions,<br />
be proven <strong>de</strong>fective in material or workmanship that results in the Product’s<br />
failure within the first twelve (12) month period from the date of purchase (proof<br />
of purchase required), such <strong>de</strong>fect(s) will be repaired or replaced (with new or<br />
rebuilt parts) at the Company’s option, without charge for parts or labor directly<br />
related to the <strong>de</strong>fect(s).<br />
The antenna, keypad, display, rechargeable battery and battery charger, if<br />
inclu<strong>de</strong>d with the Product, are similarly warranted for twelve (12) months from<br />
the date of purchase.<br />
This Warranty extends only to consumers who purchase the product in the United<br />
States or Canada and it is not transferable or assignable.<br />
This Warranty does not apply to:<br />
(a) Product subjected to abnormal use or conditions, acci<strong>de</strong>nt, mishandling,<br />
neglect, unauthorized alteration, misuse, improper installation or repair or<br />
improper storage;<br />
(b) Product whose mechanical serial number or electronic serial number has been<br />
removed, altered or <strong>de</strong>faced;<br />
(c) Damage from exposure to moisture, humidity, excessive temperatures or<br />
extreme environmental conditions;<br />
(d) Damage resulting from connection to, or use of any accessory or other product<br />
not approved or authorized by the Company;<br />
(e) Defects in appearance, cosmetic, <strong>de</strong>corative or structural items such as framing<br />
and non-operative parts;<br />
154 155<br />
01<br />
02<br />
03<br />
04<br />
05<br />
06<br />
07
(f ) Product damaged from external causes such as fire, flooding, dirt, sand,<br />
weather conditions, battery leakage, blown fuse, theft or improper usage of<br />
any electrical source;<br />
(g) Product subjected to unauthorized modifications to the software of the<br />
Product or to the Product itself;<br />
(h) Product subjected to the unauthorized opening or repair of the Product;<br />
( i ) Product subjected to hacking, password-mining, jail breaking, the unlocking<br />
of the boot loa<strong>de</strong>r using the fast boot program or the tampering with or shortcircuiting<br />
of the battery; or<br />
( j ) Product that has been modified to alter functionality or capability of the<br />
Product without the written permission of the Company.<br />
The Company disclaims liability for removal or reinstallation of the Product,<br />
for geographic coverage, for ina<strong>de</strong>quate signal reception by the antenna or for<br />
communications range or operation of the cellular system as a whole.<br />
When sending your wireless <strong>de</strong>vice to the Company for repair or service,<br />
please note that any personal data or software stored on the Product may be<br />
inadvertently erased or altered. Therefore, we strongly recommend you make<br />
a back up copy of all data and software contained on your Product before<br />
submitting it for repair or service. This inclu<strong>de</strong>s all contact lists, downloads (i.e.<br />
third-party software applications, ringtones, games and graphics) and any<br />
other data ad<strong>de</strong>d to your Product. In addition, if your Product utilizes a SIM or<br />
Multimedia card, please remove the card before submitting the Product and<br />
store for later use when your Product is returned. The Company is not responsible<br />
for and does not guarantee restoration of any third-party software, personal<br />
information or memory data contained in, stored on, or integrated with any other<br />
wireless <strong>de</strong>vice, whether un<strong>de</strong>r warranty or not, returned to the Company for<br />
repair or service.<br />
To obtain repairs or replacement within the terms of this Warranty, the Product<br />
should be <strong>de</strong>livered with proof of Warranty coverage (e.g. dated bill of sale),<br />
the consumer’s return address, daytime phone number and/or fax number and<br />
complete <strong>de</strong>scription of the problem, transportation prepaid, to the Company at<br />
the address shown below or to the place of purchase for repair or replacement<br />
processing. In addition, for reference to an authorized Warranty station in your<br />
area, you may telephone in the United States 1-800-229-1235, and in Canada<br />
1-800-465-9672 (in Ontario call 416-695-3060).<br />
THE EXTENT OF THE COMPANY’S LIABILITY UNDER THIS WARRANTY IS LIMITED TO<br />
THE REPAIR OR REPLACEMENT PROVIDED ABOVE AND, IN NO EVENT, SHALL THE<br />
COMPANY’S LIABILITY EXCEED THE PURCHASE PRICE PAID BY PURCHASER FOR<br />
THE PRODUCT.<br />
ANY IMPLIED WARRANTIES, INCLUDING ANY IMPLIED WARRANTY OF<br />
MERCHANTABILITY OR FITNESS FOR A PARTICULAR PURPOSE, SHALL BE LIMITED<br />
TO THE DURATION OF THIS WRITTEN WARRANTY. ANY ACTION FOR BREACH OF ANY<br />
WARRANTY MUST BE BROUGHT WITHIN A PERIOD OF 18 MONTHS FROM DATE<br />
OF ORIGINAL PURCHASE. IN NO CASE SHALL THE COMPANY BE LIABLE FOR AN<br />
SPECIAL CONSEQUENTIAL OR INCIDENTAL DAMAGES FOR BREACH OF THIS OR ANY<br />
OTHER WARRANTY, EXPRESS OR IMPLIED, WHATSOEVER. THE COMPANY SHALL<br />
NOT BE LIABLE FOR THE DELAY IN RENDERING SERVICE UNDER THIS WARRANTY OR<br />
LOSS OF USE DURING THE TIME THE PRODUCT IS BEING REPAIRED OR REPLACED.<br />
No person or representative is authorized to assume for the Company any liability<br />
other than expressed herein in connection with the sale of this product.<br />
Some states or provinces do not allow limitations on how long an implied<br />
warranty lasts or the exclusion or limitation of inci<strong>de</strong>ntal or consequential<br />
damage so the above limitation or exclusions may not apply to you. This Warranty<br />
gives you specific legal rights, and you may also have other rights, which vary<br />
from state to state or province to province.<br />
156 157<br />
01<br />
02<br />
03<br />
04<br />
05<br />
06<br />
07
IN USA:<br />
IN CANADA:<br />
Personal Communications Devices<br />
555 Wireless Blvd.<br />
Hauppauge, New York 11788<br />
1-800-229-1235<br />
Personal Communications Devices, LLC<br />
5535 Eglinton Avenue West, Suite 210<br />
Toronto, Ontario<br />
M9C 5K5<br />
1-800-465-9672<br />
01<br />
02<br />
03<br />
04<br />
05<br />
06<br />
07<br />
158 159
NOTE<br />
160<br />
161
Guía <strong>de</strong>l Usuario
CAPITULO 1. ANTES DE USAR<br />
ANTES DE USAR ................................................................................................7<br />
DESCRIPCIONES DEL TELEFONO ...............................................................................8<br />
DESCRIPCION DE LAS TECLAS...................................................................................8<br />
INDICADORES EN LA PANTALLA............................................................................ 12<br />
INSTALACION DE LA BATERIA ................................................................................ 16<br />
REMOCION DE LA BATERIA ................................................................................... 17<br />
CARGA DE SU BATERIA .......................................................................................... 17<br />
UTILIZACION DE UNA TARJETA microSD TM ............................................................ 19<br />
INFORMACIONES SOBRE LA MANIPULACION DE LA BATERIA ............................. 19<br />
CAPITULO 2. OPERACION BASICA<br />
OPERACION BASICA .......................................................................................21<br />
PARA ENCENDER/APAGAR EL TELEFONO (ON/OFF) ............................................. 22<br />
PARA ACCEDER EL MENU ...................................................................................... 22<br />
UTILIZACION DE LA BARRA DE TAREAS................................................................. 23<br />
CAMBIO RAPIDO ................................................................................................... 24<br />
RESUMEN DEL MENU ............................................................................................ 24<br />
REALIZACION DE UNA LLAMADA .......................................................................... 30<br />
CONTESTAR LLAMADAS ........................................................................................ 30<br />
NOTIFICACION DE LLAMADAS NO CONTESTADAS ................................................ 31<br />
FUNCION DE ESPERA/PAUSA ................................................................................ 31<br />
REALIZACION DE UNA LLAMADA INTERNACIONAL .............................................. 32<br />
LLAMADA DE 3 VIAS .............................................................................................. 33<br />
FUNCION DE LLAMADA EN ESPERA ...................................................................... 33<br />
LLAMADA DE UN NUMERO DE LA LISTA DE CONTACTOS ..................................... 33<br />
INDICE<br />
AJUSTE DEL VOLUMEN .......................................................................................... 34<br />
FUNCION DE IDENTIFICACION DEL INTERLOCUTOR .............................................. 34<br />
MODO VIBRACION ................................................................................................. 35<br />
MODO ALTAVOZ ..................................................................................................... 35<br />
UTILIZACION DE LA FUNCION DE BLOQUEO AUTOMATICO DEL TECLADO ............ 35<br />
OPCIONES DISPONIBLES DURANTE UNA LLAMADA ............................................ 35<br />
REALIZACION DE UNA LLAMADA DE EMERGENCIA .............................................. 37<br />
MARCADO CON LETRAS ........................................................................................ 37<br />
MENU FAVORITOS.................................................................................................. 38<br />
CAPITULO 3. FUNCION DE MEMORIA<br />
FUNCION DE MEMORIA .................................................................................39<br />
ALMACENAMIENTO DE UN NUMERO TELEFONICO ............................................... 40<br />
EDICION DE REGISTROS DE CONTACTOS ............................................................... 43<br />
NUMEROS ESTANDAR ........................................................................................... 46<br />
INSERCION DE LETRAS, NUMEROS Y SIMBOLOS .................................................. 47<br />
MARCADO CON UNO, DOS O TRES TOQUES ........................................................... 48<br />
CAPITULO 4. FUNCIONES DEL MENU<br />
CONTACTOS .....................................................................................................52<br />
NUEVO CONTACTO ................................................................................................. 52<br />
LISTA DE CONTACTOS ............................................................................................ 52<br />
BACKUP DE MIS CONTACTOS ................................................................................. 53<br />
GRUPOS ................................................................................................................. 54<br />
MARCADOS RAPIDOS ............................................................................................ 59<br />
CONTACTOS FAVORITOS ......................................................................................... 60<br />
2 3
MI TARJETA DE VISITAS .......................................................................................... 63<br />
HISTORICO DE LLAMADAS .............................................................................65<br />
LLAMADAS NO CONTESTADAS .............................................................................. 65<br />
LLAMADAS RECIBIDAS .......................................................................................... 65<br />
LLAMADAS MARCADAS ........................................................................................ 66<br />
TODAS LAS LLAMADAS ......................................................................................... 67<br />
TIMERS DE LLAMADAS.......................................................................................... 67<br />
easyedge SM ......................................................................................................69<br />
easyedge SM ............................................................................................................ 69<br />
SU NAVEGADOR .................................................................................................... 69<br />
NAVEGADOR ...................................................................................................71<br />
NAVEGADOR .......................................................................................................... 71<br />
TONE ROOM DELUXE ......................................................................................73<br />
TONE ROOM DELUXE ............................................................................................. 73<br />
PAC-MAN .........................................................................................................73<br />
PAC-MAN ............................................................................................................... 73<br />
HERRAMIENTAS ..............................................................................................74<br />
MANDOS DE VOZ ................................................................................................... 74<br />
CALCULADORA ...................................................................................................... 80<br />
CALCULADORA DE PROPINAS ............................................................................... 81<br />
CALENDARIO ......................................................................................................... 82<br />
DIARIO ELECTRONICO ............................................................................................ 84<br />
RELOJ DE ALARMA ................................................................................................ 87<br />
CRONOMETRO ....................................................................................................... 89<br />
RELOJ MUNDIAL .................................................................................................... 90<br />
INDICE<br />
BLOC DE NOTAS + ................................................................................................. 90<br />
ALMACENAMIENTO EN LOTES USB ....................................................................... 93<br />
AJUSTES ..........................................................................................................94<br />
AJUSTES DE LOS SONIDOS..................................................................................... 94<br />
AJUSTES DE LA PANTALLA .................................................................................... 99<br />
AJUSTES DEL TELEFONO ...................................................................................... 102<br />
AJUSTES DE LAS LLAMADAS ............................................................................... 107<br />
MEMORIA ............................................................................................................ 110<br />
BLUETOOTH® ....................................................................................................... 114<br />
MODO USB .......................................................................................................... 118<br />
INFORMACIONES DEL TELEFONO ........................................................................ 119<br />
CAPITULO 5. MULTIMEDIA<br />
MULTIMEDIA .................................................................................................123<br />
IMAGEN Y VIDEO .................................................................................................. 124<br />
SONIDOS .............................................................................................................. 128<br />
CAMPANILLAS ..................................................................................................... 130<br />
MUSICA ............................................................................................................... 131<br />
CAPITULO 6. CENTRO DE MENSAJES<br />
CENTRO DE MENSAJES ................................................................................135<br />
CUANDO SE RECIBE UN NUEVO MENSAJE .......................................................... 136<br />
NUEVO MENSAJE ................................................................................................ 136<br />
MENSAJES ........................................................................................................... 141<br />
BANDEJA DE ENTRADA ....................................................................................... 143<br />
4 5
ENVIADOS............................................................................................................ 144<br />
BORRADORES ...................................................................................................... 145<br />
BORRAR TODOS ................................................................................................... 146<br />
BUZON ................................................................................................................. 146<br />
E-MAIL MOVIL ..................................................................................................... 147<br />
AJUSTES............................................................................................................... 148<br />
CAPITULO 7. SEGURIDAD Y GARANTIA<br />
SEGURIDAD ...................................................................................................154<br />
INFORMACIONES DE SEGURIDAD PARA TELEFONOS PORTATILES<br />
INALAMBRICOS ................................................................................................... 154<br />
INFORMACIONES DE SEGURIDAD SOBRE LA EXPOSICION A LA<br />
RADIOFRECUENCIA SEGUN LA FCC ..................................................................... 159<br />
INFORMACIONES ACERCA DE SAR ...................................................................... 161<br />
COMPATIBILIDAD CON APARATOS DE AUDICION (HAC) PARA DISPOSITIVOS<br />
DE TELECOMUNICACIONES INALAMBRICOS ....................................................... 163<br />
ACTUALIZACION DEL CONSUMIDOR SEGUN LA FDA .......................................... 165<br />
PARA EVITAR PERDIDA POTENCIAL DE LA AUDICION ......................................... 174<br />
INFORMACIONES DE CONFORMIDAD CON LA FCC ............................................. 176<br />
GARANTIA .....................................................................................................178<br />
GARANTIA LIMITADA DE 12 MESES .................................................................... 178<br />
1<br />
ANTES DE USAR<br />
Este capítulo provee informaciones importantes sobre la utilización<br />
<strong>de</strong>l VERSE incluyendo:<br />
Descripciones <strong>de</strong>l Teléfono<br />
Descripciones <strong>de</strong> las Teclas<br />
Indicadores <strong>de</strong> la Pantalla<br />
Instalación <strong>de</strong> la Batería<br />
Remoción <strong>de</strong> la Batería<br />
Carga <strong>de</strong> su Batería<br />
Utilización <strong>de</strong> una Tarjeta microSD TM<br />
Informaciones sobre la Manipulación <strong>de</strong> la Batería<br />
6 6
8<br />
DESCRIPCIONES DEL TELEFONO<br />
1<br />
2<br />
3<br />
4<br />
5<br />
6<br />
14 18<br />
DESCRIPCION DE LAS TECLAS<br />
1. Tecla <strong>de</strong> Función Izquierda: En la pantalla inicial, presiónela para exhibir el<br />
menú Mensaje o acceda la función indicada arriba <strong>de</strong> la tecla.<br />
2. Tecla ENVIAR: Presione para hacer o contestar una llamada. En la pantalla <strong>de</strong>l<br />
menú inicial, presiónela para acce<strong>de</strong>r la lista Todas las Llamadas.<br />
3. Tecla Altavoz: Presiónela para Encen<strong>de</strong>r (On) o Apagar (Off) la función<br />
Altavoz.<br />
4. Tecla Favoritos / Tecla Cambio <strong>de</strong>l Modo: En el modo inactivo, presione<br />
para acce<strong>de</strong>r el menú Favoritos. En el modo <strong>de</strong> inserción <strong>de</strong> texto, presione<br />
para cambiar el tipo <strong>de</strong> inserción <strong>de</strong> caracteres.<br />
5. Tecla Marcado Internacional: Presione para insertar un asterisco (*) para<br />
funciones <strong>de</strong> llamada. Presione y mantenga presionada para exhibir el signo<br />
(+) para marcado internacional.<br />
15<br />
13<br />
12<br />
11<br />
10<br />
9<br />
8<br />
7<br />
19<br />
17<br />
16<br />
ANTES DE USAR<br />
6. Tecla Modo Vibración: Presione para insertar (#) para funciones <strong>de</strong> llamada.<br />
En el modo inactivo, presione y mantenga presionada para activar o<br />
<strong>de</strong>sactivar el Modo Vibración.<br />
7. Tecla Bloc <strong>de</strong> Notas+/Espacio : Presione para acce<strong>de</strong>r el menú Bloc <strong>de</strong><br />
Notas+ o para agregar un espacio entre caracteres.<br />
8. Tecla Compositor TXT: Presione para acce<strong>de</strong>r el Nuevo Compositor <strong>de</strong><br />
Mensajes <strong>de</strong> Texto.<br />
9. Tecla CLR: Presione para borrar un carácter <strong>de</strong> la pantalla. Presione y<br />
mantenga presionada para borrar todos los caracteres. Dentro <strong>de</strong> un menú,<br />
presione para volver al menú anterior.<br />
10. Tecla FIN/ALIMENTACION: Presione para finalizar las llamadas o cerrar<br />
aplicaciones. Presione y mantenga presionada para encen<strong>de</strong>r o apagar su<br />
teléfono.<br />
11. Tecla <strong>de</strong> Función Derecha: Presione para exhibir el menú Lista <strong>de</strong> Contactos,<br />
Contactos o acce<strong>de</strong>r la función indicada arriba <strong>de</strong> la tecla.<br />
12. Tecla <strong>de</strong> Dirección: Presione para <strong>de</strong>splazarse a través <strong>de</strong> las opciones <strong>de</strong>l<br />
menú <strong>de</strong>l teléfono y proveer un acceso rápido para las funciones <strong>de</strong>l teléfono a<br />
partir <strong>de</strong>l modo inactivo.<br />
13. Tecla OK: Presione para acce<strong>de</strong>r la pantalla <strong>de</strong>l menú. Ella también permite<br />
que usted acepte las opciones cuando navegue en un menú.<br />
14. Pantalla: Exhibe el reloj digital, mensajes, estado <strong>de</strong>l teléfono y iconos<br />
indicadores.<br />
15. Auricular: Permite que usted oiga el interlocutor.<br />
16. Tecla Cámara / Tecla Cámara <strong>de</strong> Ví<strong>de</strong>o: Presione para acce<strong>de</strong>r la cámara<br />
interna. Presione y mantenga presionada para activar la Cámara <strong>de</strong> Ví<strong>de</strong>o.<br />
17. Tecla Barra <strong>de</strong> Tareas: Presione para acce<strong>de</strong>r el menú Barra <strong>de</strong> Tareas.<br />
18. Conector para Audífonos: Conecte un audífono opcional para facilitar<br />
conversaciones con manos libres o para oír música.<br />
19. Puerto <strong>de</strong> Carga/Datos: Conecta el teléfono al Cargador USB/<strong>de</strong> pared u<br />
otros accesorios compatibles.<br />
01<br />
02<br />
03<br />
04<br />
05<br />
06<br />
07<br />
9
DESCRIPCIONES DEL TELEFONO<br />
27. Área <strong>de</strong> la Antena Interna<br />
ANTES DE USAR<br />
20<br />
01<br />
21<br />
22<br />
23<br />
27<br />
24<br />
25<br />
26<br />
Correcto<br />
Incorrecto<br />
Sujetar el dispositivo por la antena interna podrá afectar la calidad <strong>de</strong> las llamadas.<br />
02<br />
03<br />
04<br />
05<br />
06<br />
07<br />
10<br />
20. Encaje <strong>de</strong>l Tirante <strong>de</strong> Muñeca: Encaje <strong>de</strong> accesorios (acople los tirantes y<br />
cordones opcionales – adquiridos en separado).<br />
21. Parlante Externo: Música, Campanillas y Sonidos son reproducidos a través<br />
<strong>de</strong>l parlante.<br />
22. Lente <strong>de</strong> la Cámara: Lente <strong>de</strong> su cámara/cámara <strong>de</strong> ví<strong>de</strong>o incorporada.<br />
23. Espejo para Auto-Retrato: Exhibe su reflejo cuando captura imágenes o<br />
ví<strong>de</strong>os.<br />
24. Ranura para Tarjeta microSD TM : Inserte una tarjeta microSD TM (vendida en<br />
separado) en esta ranura para aumentar la capacidad <strong>de</strong> la memoria.<br />
25. Teclas <strong>de</strong> Volumen: Presione para ajustar el volumen maestro en la pantalla<br />
inicial, ajuste el volumen <strong>de</strong>l auricular durante una llamada o ajuste el<br />
volumen cuando reproduzca música.<br />
26. Tecla Mandos <strong>de</strong> Voz: Presione para acce<strong>de</strong>r el menú MANDOS DE VOZ.<br />
11
ANTES DE USAR<br />
12<br />
INDICADORES EN LA PANTALLA<br />
Icono<br />
Descripciones <strong>de</strong> los Iconos<br />
Intensidad <strong>de</strong> la Señal “1x”: Indica que su teléfono está en la red CDMA<br />
1x. Más barras indican una señal más fuerte.<br />
Intensidad <strong>de</strong> la Señal “D”: Indica que su teléfono está recibiendo datos<br />
digitales. Más barras indican una señal más fuerte.<br />
Modo Avión: La transmisión y recepción <strong>de</strong> informaciones es restringida.<br />
Roaming: El teléfono está fuera <strong>de</strong>l área <strong>de</strong> servicio local.<br />
SSL (Secured Socket Layer): Indica que la comunicación segura entre<br />
cliente y servidor fue establecida durante la comunicación <strong>de</strong> datos<br />
utilizando la criptografía.<br />
Privacidad <strong>de</strong> Voz: Indica que el modo Privacidad <strong>de</strong> Voz está activado.<br />
Llamada con Datos: Indica que una Sesión <strong>de</strong> Datos está en progreso.<br />
Durmiente: Indica que el teléfono está en un estado durmiente durante<br />
una llamada con datos. El teléfono será revertido al modo Dormant cuando<br />
no haya sido ejecutada ninguna actividad en una página durante algún<br />
tiempo – la conexión sigue activada y usted podrá hacer y recibir llamadas.<br />
Sin Servicio: El teléfono no pue<strong>de</strong> recibir la señal <strong>de</strong>l sistema.<br />
TTY: El modo TTY está activado.<br />
Llamada <strong>de</strong> Voz: Una llamada está en progreso.<br />
* La ausencia <strong>de</strong> iconos indica que el teléfono está en el modo inactivo.<br />
E911: GPS (Servicio <strong>de</strong> Posicionamiento Global) para E911 está ajustado<br />
en On (Activado) solamente para llamadas <strong>de</strong> emergencia.<br />
Localización Activada: GPS está ajustado en Activado para llamadas <strong>de</strong><br />
Servicio <strong>de</strong> Localización y E911.<br />
Icono<br />
Descripciones <strong>de</strong> los Iconos<br />
Bloqueo <strong>de</strong>l Teclado: Indica las teclas externas están bloqueados.<br />
Bluetooth®: Indica el modo Bluetooth®.<br />
Bluetooth Activado: Indica el modo Bluetooth Activo.<br />
Bluetooth Conectado: Indica que un Dispositivo Bluetooth está<br />
conectado.<br />
Solamente Música: Indica que su teléfono está en modo Solamente<br />
Música.<br />
Reproducción <strong>de</strong> Música: Indica que la música está siendo reproducida.<br />
Pausa <strong>de</strong> la Música: Indica que la reproducción <strong>de</strong> la música fue pausada.<br />
Modo <strong>de</strong> Inserción Numérica: Inserte los números presionando la tecla<br />
correspondiente en el teclado.<br />
Modo <strong>de</strong> Inserción Alfabética: Inserte caracteres presionando la tecla<br />
con los caracteres <strong>de</strong>seados.<br />
Nivel <strong>de</strong> la Batería: Nivel <strong>de</strong> carga <strong>de</strong> la batería – cuanto más barras,<br />
más carga.<br />
AVR Activado: El modo AVR está activado.<br />
Escucha AVR: Indica Escucha AVR.<br />
Todos los Sonidos Desactivados: Todos los sonidos serán <strong>de</strong>sactivados.<br />
Solamente Alarma: El teléfono alertará solamente con un tono <strong>de</strong><br />
alarma.<br />
Solamente Vibración: Indica que el Volumen <strong>de</strong> la Campanilla está<br />
ajustada en Vibración.<br />
01<br />
02<br />
03<br />
04<br />
05<br />
06<br />
07<br />
13
ANTES DE USAR<br />
Icono<br />
Descripciones <strong>de</strong> los Iconos<br />
Altavoz: El modo Altavoz está activado.<br />
Llamadas No Contestadas: Indica que llamadas no fueron contestadas.<br />
Mensaje: Indica que usted tiene nuevos mensajes.<br />
Mensaje Urgente: Indica que usted tiene un mensaje urgente.<br />
Compromiso en el Calendario: Una Alarma <strong>de</strong> Evento está activada.<br />
Buzón: Indica que usted tiene un mensaje <strong>de</strong> buzón.<br />
Alarma Activada: Exhibida cuando una alarma fue ajustada.<br />
Iconos <strong>de</strong> Histórico <strong>de</strong> Llamadas<br />
Llamada Marcada<br />
Llamada No Contestada<br />
Llamada Recibida<br />
New Contact Icons<br />
Móvil 1<br />
Tono <strong>de</strong> Mensaje<br />
Móvil 2<br />
Fax<br />
Resi<strong>de</strong>ncia<br />
Marcado Rápido<br />
Comercial<br />
Dirección Resi<strong>de</strong>ncial<br />
E-mail Personal<br />
Dirección <strong>de</strong>l Trabajo<br />
E-mail <strong>de</strong>l Trabajo<br />
Empresa<br />
Grupo<br />
Cargo<br />
Imagen/Ví<strong>de</strong>o<br />
Cumpleaños<br />
Campanilla<br />
New Contact Icons<br />
Otros Iconos<br />
DST (Horario <strong>de</strong> Verano)<br />
Iconos <strong>de</strong> Mensajes<br />
Mensaje Nuevo/No Leído<br />
Mensaje Abierto/Leído<br />
Mensaje Entregado<br />
Entrega Incompleta<br />
Mensaje Enviado, Falla al<br />
Entregar<br />
Mensaje Bloqueado<br />
Borrador <strong>de</strong> Mensaje <strong>de</strong><br />
Texto<br />
Borrador <strong>de</strong> Mensaje con<br />
Imagen<br />
Prioridad<br />
Notificación MMS No Leído<br />
Notificación MMS Leído<br />
Mensaje Corrompido<br />
Notas<br />
Mensaje Pendiente<br />
Enviado<br />
EMS No Leído<br />
EMS Leído<br />
Mensaje Enviado<br />
Mensaje Recibido<br />
Wap Push No Leído<br />
Wap Push Leído<br />
Mensajes Múltiples<br />
Entregados<br />
Múltiples Mensajes<br />
con Falla<br />
Múltiples Mensajes<br />
Incompletos<br />
Múltiples Mensajes<br />
Pendientes<br />
Múltiples Mensajes<br />
Enviados<br />
01<br />
02<br />
03<br />
04<br />
05<br />
06<br />
07<br />
14<br />
15
Do not allow metal objects to contact or short<br />
circuit the battery terminals. Do not incinerate<br />
laisser <strong>de</strong>s objets métaliques venir en contact<br />
avec les bornes <strong>de</strong> pile ni les court-circuiter.<br />
Cuidado: No exponga a alta temperatura (140<br />
cortocircuito con los terminales <strong>de</strong> la batería.<br />
No incinere ni exponga al fuego. Para eliminar<br />
A tenti<br />
A tention: Ne pas exposer a <strong>de</strong>s tempe atures<br />
140 /60 ). Ne pas démonter. Ne pas<br />
venir en contact<br />
INSTALACION DE LA BATERIA<br />
1. Inserte la punta <strong>de</strong>l <strong>de</strong>do en la ranura (1) y enseguida<br />
presione en la parte superior <strong>de</strong> la tapa <strong>de</strong> la batería y<br />
<strong>de</strong>splácela hacia fuera para remover (2).<br />
2. Desplace la batería en la ranura (3) alineando los contactos<br />
y presione (4) hasta oír que se encajó.<br />
en forma a<strong>de</strong>cuada (Por ejemplo:Número <strong>de</strong><br />
reciclaje 1-800-822-8837)<br />
/60 ). No <strong>de</strong>sensamble. No permita que<br />
objetos <strong>de</strong> metal entren en contacto o hagan<br />
Ne pas incinérer ni faire brûler.<br />
Pour mettre au rebut adéquatement<br />
(Ex:numéro <strong>de</strong> recyclage 1-800-822-8837)<br />
Attention: Ne pas exposer a <strong>de</strong>s tempe atures<br />
élevées (140 /60 ). Ne pas démonter . Ne pas<br />
Caution:Do not expose to high temperature<br />
(140 /60 ). Do not disassemble .<br />
or expose to fire. To dispose of properly<br />
(Ex:Recycling number 1-800-822-8837)<br />
Correcto<br />
Incorrecto<br />
REMOCION DE LA BATERIA<br />
1. Para remover la tapa <strong>de</strong> la batería, inserte la punta <strong>de</strong>l<br />
<strong>de</strong>do en la ranura (1) y enseguida presione en la parte<br />
superior <strong>de</strong> la tapa <strong>de</strong> la batería y <strong>de</strong>splácela hacia<br />
afuera (2).<br />
2. Inserte la punta <strong>de</strong>l <strong>de</strong>do en la ranura y levante la batería<br />
(3) y enseguida tire la batería (4).<br />
3. Alinee las lengüetas <strong>de</strong> la tapa con las ranuras en la parte<br />
trasera <strong>de</strong>l dispositivo y <strong>de</strong>splace la tapa <strong>de</strong> la batería en<br />
la unidad hasta que se trabe en el lugar.<br />
ANTES DE USAR<br />
01<br />
02<br />
03<br />
04<br />
05<br />
06<br />
07<br />
3. Alinee las lengüetas <strong>de</strong> la tapa con las ranuras en la parte<br />
trasera <strong>de</strong>l dispositivo (1) y <strong>de</strong>splace la tapa <strong>de</strong> la batería<br />
en la unidad hasta que sea encajada en el lugar (2).<br />
Si la batería no es correctamente insertada en el compartimiento, el teléfono no se<br />
encen<strong>de</strong>rá y/o la batería podrá soltarse durante el uso.<br />
Correcto<br />
Incorrecto<br />
CARGA DE SU BATERIA<br />
1. Conecte el cable <strong>de</strong> datos USB al adaptador <strong>de</strong> pared.<br />
2. Conecte el cable <strong>de</strong> datos USB al Puerto <strong>de</strong> Carga/<br />
Datos <strong>de</strong>l teléfono (certificándose <strong>de</strong> alinear el<br />
conector conforme indicado en la figura a la <strong>de</strong>recha)<br />
y el extremo <strong>de</strong>l adaptador <strong>de</strong> pared a una toma <strong>de</strong><br />
corriente.<br />
• Si el conector <strong>de</strong> la batería no estuviere a<strong>de</strong>cuadamente alineado, podrán ocurrir<br />
daños al conector <strong>de</strong> carga y al teléfono podrá no ser cargado.<br />
• El conector principal es utilizado como el dispositivo <strong>de</strong> <strong>de</strong>sconexión y permanece<br />
disponible para operación.<br />
16<br />
17
Correcto<br />
Correcto<br />
Incorrecto<br />
Incorrecto<br />
3. Para remover el Cargador <strong>de</strong> Pared, tire suavemente el<br />
cargador <strong>de</strong>l dispositivo.<br />
• Cuando usted cargar la batería con el teléfono apagado, la<br />
pantalla <strong>de</strong> estado <strong>de</strong> la carga se exhibirá. Tras la conclusión<br />
<strong>de</strong> la carga, el mensaje Carga Completa se exhibirá. Usted<br />
no podrá operar el teléfono hasta que sea encendido. Para<br />
encen<strong>de</strong>r su teléfono, presione y mantenga presionada la<br />
Tecla FIN / ALIMENTACION hasta que la pantalla sea activada.<br />
• La batería no estará completamente cargada en el momento <strong>de</strong> la compra. Cargue<br />
completamente la batería antes <strong>de</strong> utilizar.<br />
• Es más eficiente cargar la batería con el teléfono apagado.<br />
• El tiempo <strong>de</strong> operación <strong>de</strong> la batería será gradualmente reducido con el pasar <strong>de</strong>l<br />
tiempo.<br />
• Si la batería no opera normalmente, tal vez sea necesario reemplazarla.<br />
ANTES DE USAR<br />
UTILIZACION DE UNA TARJETA microSD TM<br />
Una tarjeta microSD TM almacena sonidos, ví<strong>de</strong>os, imágenes, fotos, música y otros<br />
archivos.<br />
INSTALACION DE UNA TARJETA microSD TM<br />
Para instalar la tarjeta microSD TM :<br />
1. Tire la tapa <strong>de</strong>l compartimento <strong>de</strong> la ranura <strong>de</strong> la<br />
tarjeta microSD.<br />
2. Presione la tarjeta microSD en la ranura con los<br />
contactos dorados volcados hacia arriba.<br />
3. Recoloque la tapa <strong>de</strong>l compartimento <strong>de</strong> la ranura <strong>de</strong> la tarjeta microSD.<br />
REMOVER LA TARJETA microSD TM<br />
Para remover la tarjeta microSD TM :<br />
1. Tire la tapa <strong>de</strong>l compartimento <strong>de</strong> la ranura <strong>de</strong> la<br />
tarjeta microSD.<br />
2. Tire suavemente el bor<strong>de</strong> expuesto <strong>de</strong> la tarjeta<br />
microSD con su uña <strong>de</strong>l <strong>de</strong>do para sacarla <strong>de</strong> la ranura.<br />
3. Remueva la tarjeta microSD.<br />
4. Recoloque la tapa <strong>de</strong>l compartimento <strong>de</strong> la ranura <strong>de</strong> la tarjeta microSD.<br />
INFORMACIONES SOBRE LA MANIPULACION DE LA BATERIA<br />
CUIDADO: HAY RIESGO DE EXPLOSION SI UNA BATERIA INCORRECTA ES UTILIZADA.<br />
DESCARTE LA BATERIA USADA DE ACUERDO CON LAS LESí LOCALES.<br />
HACER<br />
• Utilice solamente la batería y el cargador aprobado para uso con el VERSE.<br />
• Utilice solamente la batería especificada para el sistema.<br />
• Utilice solamente o sustituya por un sistema <strong>de</strong> carga u otra batería que haya sido calificado con el sistema<br />
<strong>de</strong> acuerdo con este estándar, IEEE-Std-1725-2006. El uso <strong>de</strong> una batería o cargador no calificado podrá<br />
representar un riesgo <strong>de</strong> fuego, explosión, vaciamiento u otro peligro.<br />
01<br />
02<br />
03<br />
04<br />
05<br />
06<br />
07<br />
18<br />
19
• Utilice solamente la batería para su finalidad original. Ya que el uso <strong>de</strong> una batería ina<strong>de</strong>cuada pue<strong>de</strong> resultar<br />
en fuego, explosión u otro peligro.<br />
• Trate <strong>de</strong> mantener las baterías en temperaturas entre 0°C y 35°C. Si la batería es almacenada en lugares con<br />
temperaturas arriba o abajo <strong>de</strong>l rango recomendado, déjela calentarse o enfriarse antes <strong>de</strong> usar.<br />
• Almacene la batería <strong>de</strong>scargada en un lugar frío, oscuro y seco.<br />
• Adquiera una nueva batería cuando su tiempo <strong>de</strong> operación sea gradualmente reducido tras una carga<br />
completa.<br />
• Descarte a<strong>de</strong>cuadamente y inmediatamente la batería <strong>de</strong> acuerdo con las leSí locales.<br />
• El uso <strong>de</strong> la batería por niños <strong>de</strong>be ser supervisado.<br />
NO HACER<br />
• No trate <strong>de</strong> <strong>de</strong>sarmar o abrir la batería – ella es una unidad vedada y no contiene piezas internas que puedan<br />
ser reparadas por el usuario.<br />
• No comprima, doble o <strong>de</strong>forme, dañe o divida la batería.<br />
• No <strong>de</strong>je caer el teléfono o la batería. Si esto ocurre, especialmente en una superficie rígida y el usuario<br />
sospecha <strong>de</strong> daños, consulte la asistencia técnica para inspección.<br />
• No <strong>de</strong>je la batería en lugares con temperaturas extremamente cálidas o frías. En caso contrario, la capacidad y<br />
la vida útil <strong>de</strong> la batería podrán ser significativamente reducidas.<br />
• No modifique o altere, intente insertar objetos extraños en la batería, colóquela o exponga al agua u otros<br />
líquidos, expóngala al fuego, explosión u otro peligro.<br />
• No aplique cortocircuito a la batería llevándola en el bolsillo o junto con otros objetos metálicos como por<br />
ejemplo, monedas, clips y lápices. Esto pue<strong>de</strong> dañar gravemente la batería.<br />
• No aplique cortocircuito a una batería ni permita que objetos conductores metálicos entren en contacto con<br />
los terminales <strong>de</strong> la batería.<br />
• No <strong>de</strong>scarte la batería tirándola al fuego.<br />
Para Encen<strong>de</strong>r/Apagar el Teléfono (On/Off)<br />
Para Acce<strong>de</strong>r el Menú<br />
Utilización <strong>de</strong> la Barra <strong>de</strong> Tareas<br />
Cambio Rápido<br />
Resumen <strong>de</strong>l Menú<br />
Realización <strong>de</strong> una Llamada<br />
Contestar Llamadas<br />
Notificación <strong>de</strong> Llamadas No Contestadas<br />
2<br />
OPERACION BASICA<br />
Este capítulo <strong>de</strong>scribe y explica las funciones básicas <strong>de</strong>l VERSE incluyendo:<br />
Llamada <strong>de</strong> un Número <strong>de</strong> la Lista <strong>de</strong><br />
Contactos<br />
Ajuste <strong>de</strong>l Volumen<br />
Función I<strong>de</strong>ntificación <strong>de</strong>l Interlocutor<br />
Modo Vibración<br />
Modo Altavoz<br />
Utilización <strong>de</strong> la Función <strong>de</strong> Bloqueo<br />
Automático <strong>de</strong>l Teclado<br />
Función <strong>de</strong> Espera/Pausa Opciones Disponibles Durante una Llamada<br />
Realización <strong>de</strong> una Llamada Internacional Realización <strong>de</strong> una Llamada <strong>de</strong> Emergencia<br />
Llamada en 3 Vías<br />
Marcado con Letras<br />
Función <strong>de</strong> Llamada en Espera<br />
Menú Favoritos<br />
20 20
PARA ENCENDER/APAGAR EL TELEFONO (ON/OFF)<br />
PARA ENCENDER EL TELEFONO<br />
1. Presione y mantenga presionada la Tecla FIN/ALIMENTACION hasta que la<br />
pantalla sea activada.<br />
• Si el mensaje “INSERTE EL CODIGO DE BLOQUEO” es exhibido en la pantalla, presione<br />
la Tecla para <strong>de</strong>sbloquear el teclado y inserte su código <strong>de</strong> bloqueo <strong>de</strong> 4 dígitos y<br />
presione la Tecla .<br />
• El código <strong>de</strong> bloqueo estándar son los últimos 4 dígitos <strong>de</strong>l número <strong>de</strong> su teléfono.<br />
PARA APAGAR EL TELEFONO<br />
1. Presione la Tecla FIN/ALIMENTACION y enseguida, presione la Tecla en<br />
menos <strong>de</strong> tres segundos para <strong>de</strong>sbloquear el teclado. Presione y mantenga<br />
presionada la Tecla FIN/ALIMENTACION hasta que la pantalla sea<br />
<strong>de</strong>sactivada.<br />
• Cambie inmediatamente o recargue la batería cuando el mensaje “BATERIA BAJA”<br />
sea exhibido en la pantalla. La memoria podrá ser dañada si el teléfono es apagado<br />
<strong>de</strong>bido a la <strong>de</strong>scarga completa <strong>de</strong> la batería.<br />
• Apague el teléfono antes <strong>de</strong> remover o sustituir la batería. Si el teléfono estuviere<br />
encendido, los datos no grabados podrán per<strong>de</strong>rse.<br />
• Para apagar el dispositivo mientras una ventana <strong>de</strong> alertaDiarias Perks está<br />
abierta, <strong>de</strong>slice el telefono arriba y presione y mantenga presionado la Tecla FIN/<br />
ALIMENTACION hasta que se apague la pantalla.<br />
PARA ACCEDER EL MENU<br />
Su teléfono pue<strong>de</strong> ser personalizado a través <strong>de</strong>l menú. Cada función pue<strong>de</strong> ser<br />
accedida presionando la Tecla <strong>de</strong> Dirección o presionando la tecla numérica que<br />
correspon<strong>de</strong> al ítem <strong>de</strong>l menú.<br />
1. Para acce<strong>de</strong>r el menú, <strong>de</strong>splace el teléfono hacia arriba y presione la Tecla<br />
[MENU].<br />
OPERACION BASICA<br />
2. Para <strong>de</strong>splazarse a través <strong>de</strong>l menú, presione la Tecla <strong>de</strong> Dirección hacia<br />
la izquierda, <strong>de</strong>recha, hacia arriba o abajo o presione la tecla numérica que<br />
correspon<strong>de</strong> al ítem <strong>de</strong>seado <strong>de</strong>l menú.<br />
3. Para volver a la página anterior, presione la Tecla CLR . Para salir <strong>de</strong>l menú<br />
actual y volver para el modo inactivo, presione la Tecla FIN/ALIMENTACION .<br />
4. A partir <strong>de</strong>l modo inactivo, presione la Tecla FIN/ALIMENTACION y enseguida,<br />
presione la Tecla en menos <strong>de</strong> tres segundos para <strong>de</strong>sbloquear el teclado.<br />
Presione la Tecla <strong>de</strong> Función izquierda [Mensaje] para abrir el menú<br />
Mensajes o presione la Tecla <strong>de</strong> Función Izquierda [Contactos] para abrir su<br />
Lista <strong>de</strong> Contactos.<br />
Este manual asume que el Tipo <strong>de</strong> Menú es ajustado para Cuadrícula, que son los<br />
ajustes pre<strong>de</strong>terminados.<br />
UTILIZACION DE LA BARRA DE TAREAS<br />
La Barra <strong>de</strong> Tareas es una manera alternativa para circular entre los menús, exigiendo el<br />
presionado <strong>de</strong> pocas teclas. Alterne entre los menús a continuación:<br />
MARCADO, FAVORITAS, HISTORICO DE LLAMADAS, CENTRO DE MENSAJES,<br />
MUSICAS, IMAGENES, CONTACTOS, HERRAMIENTAS<br />
1. En el modo inactivo, presione la Tecla FIN/ALIMENTACION y enseguida,<br />
presione la Tecla en menos <strong>de</strong> tres segundos para <strong>de</strong>sbloquear el teclado.<br />
presione la Tecla Barra <strong>de</strong> Tareas (ubicada en el lado <strong>de</strong>recho <strong>de</strong>l dispositivo).<br />
2. Presione la Tecla <strong>de</strong> Dirección hacia la izquierda o hacia la <strong>de</strong>recha para<br />
<strong>de</strong>splazarse a través <strong>de</strong> los menús Barra <strong>de</strong> Tareas. Presione hacia arriba o hacia<br />
abajo para seleccionar un menú secundario.<br />
3. Seleccione una tarea <strong>de</strong>seada y presione la Tecla .<br />
• La Barra <strong>de</strong> Tareas no estará disponible para <strong>de</strong>terminadas circunstancias como por<br />
ejemplo, el recibimiento <strong>de</strong> una llamada o mensaje recibido, exhibición <strong>de</strong> un mensaje<br />
<strong>de</strong> notificación o exhibición <strong>de</strong>l menú principal.<br />
01<br />
02<br />
03<br />
04<br />
05<br />
06<br />
07<br />
22<br />
23
24<br />
CAMBIO RAPIDO<br />
Mientras un menú esté siendo accedido, usted pue<strong>de</strong> cambiar rápidamente entre las<br />
otras opciones <strong>de</strong>l menú.<br />
1. Desplace el teléfono hacia arriba y presione la Tecla [MENU] y enseguida<br />
seleccione un menú <strong>de</strong>seado entre los menús principales a continuación:<br />
Contactos, Centro <strong>de</strong> Mensajes, Histórico <strong>de</strong> Llamadas, Multimedia,<br />
easyedge, Navegador, Tono Room Deluxe, PAC-MAN, Herramientas y<br />
Ajustes.<br />
2. Presione la Tecla .<br />
3. Cuando un menú es seleccionado, presione la Tecla <strong>de</strong> Dirección hacia<br />
la izquierda o <strong>de</strong>recha para cambiar entre los menús (excepto, easyedge,<br />
Navegador, Tonalidad Room Deluxe, PAC-MAN).<br />
RESUMEN DEL MENU<br />
Menú Principal 2º. NIVEL 3º. NIVEL 4º. NIVEL<br />
1. Contactos 1. Nuevo Contacto<br />
2. Lista <strong>de</strong> Contactos<br />
3. Grupos<br />
4. Marcados Rápidos 1. Buzón<br />
112. Reservado<br />
211. Reservado<br />
311. Reservado<br />
411. Asistencia <strong>de</strong> Directorio<br />
5. Contactos Favoritos<br />
6. Mi Tarjeta <strong>de</strong> Visitas<br />
2. Centro <strong>de</strong><br />
Mensajes<br />
1. Nuevo Mensaje 1. Mensaje <strong>de</strong> TEXTO<br />
2. Mensaje con Imagen<br />
3. Mensaje con Ví<strong>de</strong>o<br />
4. Mensaje <strong>de</strong> Voz<br />
2. Ban<strong>de</strong>ja <strong>de</strong> Entrada<br />
3. Enviados<br />
4. Borradores<br />
OPERACION BASICA<br />
Menú Principal 2º. NIVEL 3º. NIVEL 4º. NIVEL<br />
2. Centro <strong>de</strong><br />
Mensajes<br />
3. Histórico <strong>de</strong><br />
Chamadas<br />
5. Buzón<br />
6. Ajustes 1. Visualización <strong>de</strong><br />
Mensajes<br />
2. Modo <strong>de</strong> Inserción<br />
3. Grabado Automático <strong>de</strong><br />
Mensajes Enviados<br />
4. Borrado Automático <strong>de</strong><br />
la Ban<strong>de</strong>ja <strong>de</strong> Entrada<br />
5. Tamaño <strong>de</strong> la Fuente <strong>de</strong><br />
Texto <strong>de</strong> los Mensajes<br />
6. Visualización Automática<br />
<strong>de</strong>l TEXTO<br />
7. Recibimiento Automático<br />
<strong>de</strong> Multimedia<br />
8. Texto Rápido<br />
9. No. <strong>de</strong>l Buzón<br />
0. No. <strong>de</strong> la Llamada <strong>de</strong><br />
Retorno<br />
*. Firma<br />
#. Recibimiento <strong>de</strong> Entrega<br />
1. Llamadas No<br />
Contestadas<br />
2. Llamadas Recibidas<br />
3. Llamadas Realizadas<br />
4. Todas las Llamadas<br />
5. Timers <strong>de</strong> Llamadas 1. Última Llamada<br />
2. Todas las Llamadas<br />
3. Llamadas Recibidas<br />
4. Llamadas Realizadas<br />
5. Llamadas en Roaming<br />
6. Datos Transmitidos<br />
7. Datos Recibidos<br />
8. Total <strong>de</strong> Datos<br />
9. Última Reiniciación<br />
10. Llamadas <strong>de</strong> Por Vida<br />
11. Contador <strong>de</strong> la Vida Útil<br />
<strong>de</strong> Datos<br />
01<br />
02<br />
03<br />
04<br />
05<br />
06<br />
07<br />
25
Menú Principal 2º. NIVEL 3º. NIVEL 4º. NIVEL<br />
4. Multimedia 1. Imagen y Ví<strong>de</strong>o 1. Imágenes<br />
2. Ví<strong>de</strong>os<br />
3. Captura <strong>de</strong> Imagen<br />
4. Grabación <strong>de</strong> Ví<strong>de</strong>o<br />
2. Sonidos 1. Grabar Nuevo<br />
3. Campanilla<br />
4. Música: 1. Todas las Músicas<br />
2. Listas <strong>de</strong> Reproducción<br />
3. Artistas<br />
4. Géneros<br />
5. easyedge 1. easyedge<br />
6. Navegador 1. Navegador<br />
7. Tono Room 1. Tone Room Deluxe<br />
Deluxe<br />
8. PAC-MAN 1. PAC-MAN<br />
9. Herramientas y<br />
Ajustes<br />
5. Álbumes<br />
6. Administración <strong>de</strong><br />
Músicas<br />
7. Configuraciones <strong>de</strong><br />
Músicas<br />
1. Herramientas 1. Mandos <strong>de</strong> Voz<br />
2. Calculadora<br />
3. Calculadora <strong>de</strong> Propinas<br />
4. Calendario<br />
5. Diario Electrónico<br />
6. Reloj <strong>de</strong> Alarma<br />
7. Cronómetro<br />
1. Borrado<br />
2. Bloqueo<br />
3. Desbloqueo<br />
4. Mover a la Tarjeta<br />
5. Mover al Teléfono<br />
1. Repetición<br />
2. Aleatoria<br />
3. Player Skin<br />
4. Solamente en el Modo<br />
Música<br />
OPERACION BASICA<br />
Menú Principal 2º. NIVEL 3º. NIVEL 4º. NIVEL<br />
9. Herramientas y<br />
Ajustes<br />
1. Herramientas 8. Horario Mundial<br />
9. Bloc <strong>de</strong> Notas +<br />
0. Almacenamiento por<br />
Lotes USB<br />
2. Ajustes <strong>de</strong> los Sonidos 1. Sonidos <strong>de</strong> Llamadas 1. Campanillas <strong>de</strong> Llamadas<br />
2. Vibración al Llamar<br />
3. Lectura <strong>de</strong> la<br />
I<strong>de</strong>ntificación <strong>de</strong>l<br />
Interlocutor<br />
2. Sonidos <strong>de</strong> Alerta 1. Mensaje <strong>de</strong> TEXTO<br />
2. Mensaje <strong>de</strong> Multimedia<br />
3. Buzón<br />
4. Tono <strong>de</strong> Emergencia<br />
5. Llamada No Contestada<br />
3. Sonidos <strong>de</strong>l Teclado<br />
4. Volumen <strong>de</strong>l Teclado<br />
5. Lectura <strong>de</strong> Marcado<br />
<strong>de</strong> Dígitos<br />
6. Alertas <strong>de</strong> Servicio 1. Señal Audible <strong>de</strong> Minuto<br />
2. Conexión <strong>de</strong> la Llamada<br />
3. Actualización <strong>de</strong>l<br />
Software<br />
7. Conexión <strong>de</strong> Dispositivos<br />
8. Encen<strong>de</strong>r/Apagar 1. Encen<strong>de</strong>r<br />
2. Apagar<br />
3. Configuraciones <strong>de</strong> la<br />
Pantalla<br />
9. Sonidos <strong>de</strong> Apertura/<br />
Cierre<br />
0. Volumen Principal<br />
1. Banner<br />
2. Luz <strong>de</strong> Fondo 1. Pantalla<br />
2. Teclado<br />
01<br />
02<br />
03<br />
04<br />
05<br />
06<br />
07<br />
26<br />
27
28<br />
Menú Principal 2º. NIVEL 3º. NIVEL 4º. NIVEL<br />
9. Herramientas y<br />
Ajustes<br />
3. Configuraciones <strong>de</strong> la<br />
Pantalla<br />
4. Configuraciones <strong>de</strong>l<br />
Teléfono<br />
3. Papel <strong>de</strong> Pared 1. Imágenes<br />
2. Ví<strong>de</strong>os<br />
3. Papeles <strong>de</strong> Pared<br />
Animados<br />
4. Tipo <strong>de</strong>l Menú<br />
5. Tipo <strong>de</strong> Fuente<br />
6. Tamaño <strong>de</strong> la Fuente <strong>de</strong><br />
Marcado<br />
7. Tamaño <strong>de</strong> la Fuente<br />
<strong>de</strong>l Menú<br />
8. Formato <strong>de</strong>l Reloj<br />
9. Popup <strong>de</strong> Carga <strong>de</strong> Datos<br />
1. Modo Avión<br />
2. Idioma<br />
3. Localización<br />
4. Seguridad 1. Edición <strong>de</strong> Códigos<br />
1. Solamente Teléfono<br />
2. Llamadas y Servicios<br />
2. Restricciones<br />
1. Ajuste <strong>de</strong> Localización<br />
2. Llamadas<br />
1. Recibidas<br />
2. Enviadas<br />
3. Mensajes <strong>de</strong> Texto<br />
1. Recibidos<br />
2. Enviados<br />
4. Mensajes con Imagen<br />
1. Recibidos<br />
2. Enviados<br />
5. Conexión <strong>de</strong> Datos<br />
3. Ajuste <strong>de</strong> Bloqueo <strong>de</strong>l<br />
Teléfono<br />
4. Bloquear Teléfono Ahora<br />
5. Reiniciación a los Ajustes<br />
<strong>de</strong> Fábrica<br />
5. Selección <strong>de</strong>l Sistema<br />
OPERACION BASICA<br />
Menú Principal 2º. NIVEL 3º. NIVEL 4º. NIVEL<br />
9. Herramientas y<br />
Ajustes<br />
5. Configuraciones <strong>de</strong><br />
Llamadas<br />
1. Opciones <strong>de</strong> Contestar<br />
2. Reintento Automático<br />
3. Modo TTY<br />
4. Marcado con Un Toque<br />
5. Privacidad <strong>de</strong> Voz<br />
6. Tonos DTMF<br />
7. Cerrar Desplazando<br />
6. Memoria 1. Opciones <strong>de</strong> Grabado 1. Imágenes<br />
2. Ví<strong>de</strong>os<br />
3. Sonidos<br />
2. Memoria <strong>de</strong>l Teléfono 1. Uso <strong>de</strong> la Memoria <strong>de</strong>l<br />
Teléfono<br />
2. Imágenes<br />
3. Ví<strong>de</strong>os<br />
4. Sonidos<br />
5. Músicas<br />
6. Contactos<br />
7. Mover Todo a la Tarjeta<br />
3. Memoria <strong>de</strong> la Tarjeta 1. Uso <strong>de</strong> la Memoria <strong>de</strong><br />
la Tarjeta<br />
2. Imágenes<br />
3. Ví<strong>de</strong>os<br />
4. Sonidos<br />
5. Músicas<br />
6. Contactos<br />
7. Mover Todo al Teléfono<br />
7. Bluetooth® 1. Agregar Nuevo<br />
Dispositivo<br />
8. Modo USB<br />
01<br />
02<br />
03<br />
04<br />
05<br />
06<br />
07<br />
29
30<br />
Menú Principal 2º. NIVEL 3º. NIVEL 4º. NIVEL<br />
9. Herramientas y<br />
Ajustes<br />
9. Informaciones sobre el<br />
Teléfono<br />
1. Número <strong>de</strong> Mi Teléfono<br />
2. Versión <strong>de</strong>l Software/<br />
Hardware<br />
3. MEID / pESN<br />
4. Glosario <strong>de</strong> Iconos<br />
5. Actualización <strong>de</strong>l<br />
Software<br />
6. Sistema Operativo<br />
1. Estado<br />
2. Verificación <strong>de</strong><br />
Actualización<br />
REALIZACION DE UNA LLAMADA<br />
1. Desplace el teléfono hacia arriba y inserte el número <strong>de</strong>l teléfono (incluya el<br />
código <strong>de</strong> área en su caso).<br />
• Para borrar un dígito <strong>de</strong> cada vez, presione la Tecla CLR .<br />
• Para borrar el número entero, presione y mantenga presionada la Tecla CLR .<br />
• Cuando usted haga o reciba una llamada <strong>de</strong> números <strong>de</strong> teléfono almacenados en su<br />
Lista <strong>de</strong> Contactos con un nombre <strong>de</strong> contacto, el nombre será exhibido.<br />
2. Presione la Tecla ENVIA .<br />
3. Para finalizar una llamada, presione la Tecla FIN/ALIMENTACION .<br />
• Si usted activa la función REINTENTO AUTOMATICO, el teléfono remarcará<br />
automáticamente el número (Refiérase a la página 107).<br />
• Usted también pue<strong>de</strong> hacer llamadas utilizando la función Marcado Activado por<br />
Voz. Por favor, refiérase a la página 74 para mayores <strong>de</strong>talles.<br />
CONTESTAR LLAMADAS<br />
1. Cuando su teléfono suena o vibrar, <strong>de</strong>splace el teléfono hacia arriba o<br />
presione la Tecla y la Tecla ENVIAR para contestar la llamada recibida.<br />
(Dependiendo <strong>de</strong> sus Opciones <strong>de</strong> Contestar, usted también pue<strong>de</strong> contestar<br />
llamadas recibidas presionando cualquier tecla. Desplace para Abrir, Tecla<br />
Enviar es el ajuste estándar para este dispositivo.)<br />
OPERACION BASICA<br />
2. Para ignorar llamadas recibidas, presione la Tecla <strong>de</strong> Función Derecha<br />
[Ignorar].<br />
3. Para finalizar una llamada, presione FIN/ALIMENTACION .<br />
Si fuere ajustada Opciones <strong>de</strong> Contestar en “Automático con Altavoz”, las llamadas<br />
serán contestadas automáticamente <strong>de</strong>spués <strong>de</strong> cerca <strong>de</strong> cinco segundos (Refiérase<br />
a la página 107).<br />
NOTIFICACION DE LLAMADAS NO CONTESTADAS<br />
Cuando una llamada recibida no es contestada, la notificación Llamada No Contestado<br />
se exhibirá en la pantalla.<br />
PARA EXHIBIR UN REGISTRO DE UNA LLAMADA NO CONTESTADA EN LA<br />
PANTALLA DE NOTIFICACION:<br />
1. Seleccione Seleccione y presione la Tecla .<br />
2. Presione la Tecla [ABRIR] para visualizar los <strong>de</strong>talles <strong>de</strong> la llamada.<br />
PARA EXHIBIR UN REGISTRO DE UNA LLAMADA NO CONTESTADA EN<br />
EL MODO INACTIVO:<br />
1. Desplace el teléfono hacia arriba, presione la Tecla [MENU], seleccione<br />
3. Histórico <strong>de</strong> Llamadas, y enseguida presione la Tecla .<br />
2. Presione 1. Llamadas No Contestadas.<br />
3. Seleccione el registro que <strong>de</strong>sea visualizar y enseguida presione la Tecla<br />
[ABRIR].<br />
4. Para marcar el número <strong>de</strong> teléfono, presione la Tecla ENVIAR .<br />
FUNCION DE ESPERA/PAUSA<br />
Las pausas son utilizadas para sistemas automatizados (es <strong>de</strong>cir, buzón o tarjetas <strong>de</strong><br />
llamadas). Inserte una pausa tras un número <strong>de</strong> teléfono y enseguida inserte otro<br />
grupo <strong>de</strong> números. El segundo conjunto <strong>de</strong> números será marcado automáticamente<br />
tras la pausa. Esta función es útil para el marcado en sistemas que exigen un código.<br />
01<br />
02<br />
03<br />
04<br />
05<br />
06<br />
07<br />
31
Adición <strong>de</strong> Espera<br />
El teléfono interrumpe el marcado hasta que usted presione la Tecla ENVIAR o la<br />
Tecla [ENVIAR] para avanzar al número siguiente.<br />
1. Desplace el teléfono hacia arriba y inserte un número <strong>de</strong> teléfono.<br />
2. Presione la Tecla <strong>de</strong> Función Derecha [Opciones].<br />
3. Seleccione 2. Agregar Espera y presione la Tecla .<br />
4. Inserte el(los) número(s) adicional(es).<br />
5. Presione la Tecla ENVIAR para marcar o presione la Tecla <strong>de</strong> Función<br />
Izquierda [Grabar] para grabar.<br />
Agregar una Pausa <strong>de</strong> 2 segundos<br />
El teléfono esperará 2 segundos antes <strong>de</strong> enviar la próxima ca<strong>de</strong>na <strong>de</strong> dígitos<br />
automáticamente.<br />
1. Desplace el teléfono hacia arriba y inserte el número <strong>de</strong> teléfono.<br />
2. Presione la Tecla <strong>de</strong> Función Derecha [Opciones].<br />
3. Seleccione 1. Agregar Pausa <strong>de</strong> 2 Segundos y presione la Tecla .<br />
4. Inserte el(los) número(s) adicionales (número PIN o el número <strong>de</strong> la tarjeta<br />
<strong>de</strong> crédito).<br />
5. Presione la Tecla ENVIAR para marcar o la Tecla <strong>de</strong> Función Izquierda<br />
[Grabar] para grabar.<br />
REALIZACION DE UNA LLAMADA INTERNACIONAL<br />
1. Desplace el teléfono hacia arriba y enseguida presione y mantenga presionada<br />
la Tecla * . El carácter “+“ necesario para llamadas internacionales será<br />
exhibido.<br />
2. Inserte el código <strong>de</strong>l país, el código <strong>de</strong> área y el número <strong>de</strong> teléfono y<br />
enseguida presione la Tecla ENVIAR .<br />
3. Para finalizar la llamada, presione la Tecla FIN/ALIMENTACION .<br />
OPERACION BASICA<br />
LLAMADA DE 3 VIAS<br />
Con la función Llamada en 3 Vías, usted pue<strong>de</strong> hablar con dos personas al mismo<br />
tiempo. Cuando utilice esta función, tarifas <strong>de</strong> conexión normal serán aplicadas a cada<br />
uno <strong>de</strong> los dos interlocutores.<br />
1. Desplace el teléfono hacia arriba, inserte el número <strong>de</strong> teléfono que <strong>de</strong>sea<br />
llamar y enseguida presione la Tecla ENVIAR .<br />
2. Una vez establecida la conexión, inserte el segundo número <strong>de</strong> teléfono que<br />
<strong>de</strong>sea llamar y enseguida presione la Tecla ENVIAR .<br />
3. Cuando usted esté conectado al segundo interlocutor, presione la Tecla ENVIAR<br />
nuevamente para iniciar su Llamada <strong>de</strong> 3 Vías.<br />
Si una <strong>de</strong> las personas <strong>de</strong>sconecta durante su llamada usted y el interlocutor<br />
remanente permanecerán conectados. Si usted inició la llamada y es el primero a<br />
<strong>de</strong>sconectar, las tres llamadas serán <strong>de</strong>sconectadas.<br />
FUNCION DE LLAMADA EN ESPERA<br />
Si usted estuviere en una llamada y recibe otra llamada, oirá una señal audible y el<br />
número <strong>de</strong> teléfono <strong>de</strong>l interlocutor se exhibirá en la pantalla. Con la Llamada en<br />
Espera, usted pue<strong>de</strong> colocar la llamada activa en espera mientras contesta la otra<br />
llamada recibida.<br />
Para contestar otra llamada, presione la Tecla ENVIAR .Este procedimiento<br />
coloca la primera llamada en espera. Para volver al primer interlocutor, presione la<br />
Tecla ENVIAR nuevamente.<br />
LLAMADA DE UN NUMERO DE LA LISTA DE CONTACTOS<br />
1. En el modo inactivo, presione la Tecla FIN/ALIMENTACION y enseguida,<br />
presione la Tecla en menos <strong>de</strong> tres segundos para <strong>de</strong>sbloquear el teclado.<br />
Presione la Tecla <strong>de</strong> Función Derecha [Contactos].<br />
2. Seleccione el registro <strong>de</strong>l Contacto y presione la Tecla [VISUALIZAR] y<br />
enseguida seleccione el número <strong>de</strong> teléfono <strong>de</strong>seado.<br />
01<br />
02<br />
03<br />
04<br />
05<br />
06<br />
07<br />
32<br />
33
3. Presione la Tecla ENVIAR para realizar la llamada.<br />
Seleccione el registro <strong>de</strong>l Contacto y enseguida presione la Tecla Enviar<br />
el Número Estándar <strong>de</strong>l Contacto automáticamente.<br />
para marcar<br />
AJUSTE DEL VOLUMEN<br />
PARA AJUSTAR EL VOLUMEN PRINCIPAL:<br />
1. En el modo inactivo, presione la Tecla FIN/ALIMENTACION y enseguida,<br />
presione la Tecla en menos <strong>de</strong> tres segundos para <strong>de</strong>sbloquear el teclado.<br />
Presione las Teclas <strong>de</strong> Volumen / hacia arriba o hacia abajo (ubicadas en el<br />
lado izquierdo <strong>de</strong>l dispositivo).<br />
2. Seleccione una <strong>de</strong> las opciones a continuación y presione la Tecla<br />
[CONFIRMAR] para grabar.<br />
• Todos los Sonidos Desactivados<br />
• Solamente Alarma<br />
• Solamente Vibración<br />
• Bajo / Bajo Medio / Medio / Alto Medio / Alto<br />
Presione las Teclas <strong>de</strong> Volumen / hacia arriba o hacia abajo (ubicadas en el lado<br />
izquierdo <strong>de</strong>l dispositivo) para ajustar el volumen <strong>de</strong>l Auricular durante una llamada.<br />
FUNCION DE IDENTIFICACION DEL INTERLOCUTOR<br />
Esta función exhibe el número <strong>de</strong> la persona que está llamando cuando su teléfono<br />
suene. Si la i<strong>de</strong>ntidad <strong>de</strong>l interlocutor estuviere almacenada en Contactos, el nombre<br />
se exhibirá en la pantalla. La I<strong>de</strong>ntificación <strong>de</strong>l Interlocutor se almacenará en el menú<br />
Histórico <strong>de</strong> Llamadas.<br />
OPERACION BASICA<br />
MODO VIBRACION<br />
El Modo Vibración silencia los tonos <strong>de</strong> las teclas y alerta el recibimiento <strong>de</strong> una llamada<br />
o mensaje. Para activar el Modo Vibración:<br />
1. Desplace el teléfono hacia arriba y enseguida presione y mantenga presionada<br />
la Tecla Modo Vibración para activar el modo vibración.<br />
2. Para <strong>de</strong>sactivar el modo vibración, presione y mantenga presionada la Tecla<br />
Modo Vibración .<br />
MODO ALTAVOZ<br />
La función Altavoz permite que usted oiga el audio a través <strong>de</strong>l parlante y hable sin<br />
sujetar el teléfono.<br />
Para activar, presione la Tecla FIN/ALIMENTACION y enseguida, presione la<br />
Tecla en menos <strong>de</strong> tres segundos para <strong>de</strong>sbloquear el teclado. Presione la Tecla<br />
Altavoz . Para <strong>de</strong>sactivar, presione la Tecla Altavoz nuevamente.<br />
UTILIZACION DE LA FUNCION DE BLOQUEO AUTOMATICO DEL<br />
TECLADO<br />
Cuando el teléfono estuviere cerrado, las Teclas Laterales y la Tecla <strong>de</strong> Dirección<br />
serán bloqueadas. Para <strong>de</strong>sbloquearlas, presione cualquier tecla en la pantalla externa<br />
con el teléfono en la posición cerrada; el mensaje “Teclado Bloqueado (Presione FIN)”<br />
será exhibida. “PRESIONE OK PARA DESBLOQUEAR EL TECLADO” se exhibirá, presione<br />
la Tecla para <strong>de</strong>sbloquear el teclado.<br />
OPCIONES DISPONIBLES DURANTE UNA LLAMADA<br />
Durante una llamada telefónica, usted pue<strong>de</strong> acce<strong>de</strong>r las funciones siguientes<br />
presionando la Tecla <strong>de</strong> Función Derecha [Opciones]:<br />
1. Nuevo Mensaje: Para acce<strong>de</strong>r el Menú Mensajes durante una llamada.<br />
Presione la Tecla <strong>de</strong> Función Derecha [Opciones], seleccione 1. Nuevo<br />
Mensaje y presione la Tecla .<br />
01<br />
02<br />
03<br />
04<br />
05<br />
06<br />
07<br />
34<br />
35
2. Lista <strong>de</strong> Contactos: Para visualizar su Lista <strong>de</strong> Contactos durante una llamada.<br />
Presione la Tecla <strong>de</strong> Función Derecha [Opciones], seleccione 2. Lista <strong>de</strong><br />
Contactos y presione la Tecla .<br />
3. Histórico <strong>de</strong> Llamadas: Para visualizar la lista <strong>de</strong> su Histórico <strong>de</strong> Llamadas<br />
durante una llamada. Presione la Tecla <strong>de</strong> Función Derecha [Opciones],<br />
seleccione 3. Histórico <strong>de</strong> Llamadas y presione la Tecla .<br />
4. Bluetooth:Para acce<strong>de</strong>r el Menú Bluetooth® durante una llamada. Presione la<br />
Tecla <strong>de</strong> Función Derecha [Opciones], seleccione 4. Bluetooth y presione<br />
la Tecla .<br />
Si un dispositivo <strong>de</strong> Audio Bluetooth® estuviere conectado, las funciones Audio para<br />
Teléfono / Audio para Dispositivo serán exhibidas en el menú <strong>de</strong> opciones envés <strong>de</strong><br />
Bluetooth.<br />
5. Menú Principal: Para acce<strong>de</strong>r el Menú Principal durante una llamada.<br />
Presione la Tecla <strong>de</strong> Función Derecha [Opciones], seleccione 5. Menú<br />
Principal y presione la Tecla .<br />
6. Bloc <strong>de</strong> Notas +: Para crear notas durante una llamada. Presione la Tecla <strong>de</strong><br />
Función Derecha [Opciones], seleccione 6. Bloc <strong>de</strong> Notas + y presione<br />
la Tecla .<br />
7. Privacidad <strong>de</strong> Voz: Para Activar o Desactivar la función <strong>de</strong> privacidad <strong>de</strong> voz.<br />
Presione la Tecla <strong>de</strong> Función Derecha [Opciones], seleccione 7. Privacidad<br />
<strong>de</strong> Voz y presione la Tecla .<br />
Los ajustes <strong>de</strong> Privacidad <strong>de</strong> Voz no se aplican en el modo GSM.<br />
8. Activar/Desactivar DTMF: Para Activar o Desactivar la función DTMF durante<br />
una llamada. Presione la Tecla <strong>de</strong> Función Derecha [Opciones], seleccione<br />
8. Activar/Desactivar DTMF y presione la Tecla .<br />
OPERACION BASICA<br />
REALIZACION DE UNA LLAMADA DE EMERGENCIA<br />
La función E911 activa automáticamente el Modo Llamada <strong>de</strong> Emergencia cuando<br />
usted marca el número <strong>de</strong> emergencia programada, “911”. Esta función también opera<br />
en Modo Bloqueado y fuera <strong>de</strong>l área <strong>de</strong> servicio.<br />
911 EN EL MODO BLOQUEADO<br />
Para realizar una llamada <strong>de</strong> emergencia en el Modo Bloqueado:<br />
1. Desplace el teléfono hacia arriba, inserte “911” y enseguida presione la Tecla<br />
ENVIAR .<br />
2. La llamada será conectada.<br />
3. El teléfono sigue en el Modo <strong>de</strong> Emergencia durante 5 minutos. Tras 5 minutos,<br />
el teléfono volverá al Modo Bloqueado.<br />
911 UTILIZAR CUALQUIER SISTEMA DISPONIBLE<br />
Para realizar una Llamada <strong>de</strong> Emergencia utilizando cualquier sistema disponible:<br />
1. Desplace el teléfono hacia arriba, inserte “911” y enseguida presione la Tecla<br />
ENVIAR .<br />
2. La llamada será conectada.<br />
3. El teléfono permanecerá en el Modo <strong>de</strong> Emergencia durante 5 minutos.<br />
Mientras el teléfono esté en el Modo <strong>de</strong> Emergencia, el teléfono podrá recibir<br />
una llamada <strong>de</strong> cualquier sistema disponible o usted podrá realizar llamadas<br />
aun en el Modo <strong>de</strong> Llamada <strong>de</strong> Retorno <strong>de</strong> Emergencia. Tras los 5 minutos,<br />
cierre el modo Emergencia.<br />
MARCADO CON LETRAS<br />
Permite que usted marque el número asociado a una palabra específica.<br />
Por ejemplo, para llamar “1-800-FLORES”:<br />
1. Desplace el teléfono hacia arriba, inserte “1-800” enseguida presione y<br />
mantenga presionada la Tecla Cambiar Modo .<br />
01<br />
02<br />
03<br />
04<br />
05<br />
06<br />
07<br />
36<br />
37
2. Inserte “FLORES” con el teclado QWERTY y presione la Tecla ENVIAR para<br />
conectar.<br />
• Si el icono <strong>de</strong>l Modo <strong>de</strong> Inserción Alfabética estuviere activado, solamente serán<br />
exhibidas letras mayúsculas.<br />
• Presionar la Tecla Cambiar Modo cambiará entre el Modo <strong>de</strong> Inserción Numérica<br />
y Inserción Alfabética.<br />
MENU FAVORITOS<br />
Para <strong>de</strong>finir hasta 9 contactos como Favoritos:<br />
1. Para <strong>de</strong>finir hasta 9 contactos como Favoritos: , presione la Tecla<br />
[ATRIBUIR].<br />
2. Seleccione el contacto <strong>de</strong>seado y presione la Tecla [MARCAR/<br />
DESMARCAR]. Cuando termine, presione la Tecla <strong>de</strong> Función Izquierda<br />
[Hecho].<br />
Para remover los contactos <strong>de</strong>finidos como Favoritos:<br />
1. Desplace el teléfono hacia arriba y presione la Tecla Favoritos .<br />
2. Seleccione el contacto <strong>de</strong>seado y presione la Tecla <strong>de</strong> Función Derecha<br />
[Opciones].<br />
3. Pressione 1. Remover o 2. Remover Todos y seleccione Sí y presione la<br />
Tecla .<br />
3<br />
FUNCION DE MEMORIA<br />
Este capítulo abarca las funciones <strong>de</strong> memoria incluyendo<br />
Almacenamiento <strong>de</strong> un Número <strong>de</strong> Teléfono<br />
Edición <strong>de</strong> Registros <strong>de</strong> Contactos<br />
Números Estándar<br />
Inserción <strong>de</strong> Letras, Números y Símbolos<br />
Marcado con Uno, Dos o Tres Toques<br />
38 38
ALMACENAMIENTO DE UN NUMERO TELEFONICO<br />
La Lista <strong>de</strong> Contactos almacena hasta 1000 registros.<br />
LA LISTA DE CONTACTOS ALMACENA HASTA 1000 REGISTROS.<br />
1. Desplace el teléfono hacia arriba y inserte el número <strong>de</strong> teléfono que usted<br />
<strong>de</strong>sea grabar (hasta 32 caracteres).<br />
2. Presione la Tecla <strong>de</strong> Función Izquierda [Grabar].<br />
3. Seleccione 1. Agregar Nuevo Contacto y presione la Tecla .<br />
4. Presione la Tecla <strong>de</strong> Direccióna hacia arriba o hacia abajo para seleccionar<br />
el tipo <strong>de</strong>l número <strong>de</strong> teléfono que usted <strong>de</strong>sea grabar y enseguida presione<br />
la Tecla .<br />
Móvil 1 / Móvil 2 / Resi<strong>de</strong>ncia / Comercial / Fax<br />
Utilice Actualizar Existente para agregar otro número <strong>de</strong> teléfono a un contacto ya<br />
almacenado en la memoria.<br />
5. Inserte un nombre para el número <strong>de</strong> teléfono (hasta 32 caracteres) y<br />
enseguida presione la Tecla [GRABAR].<br />
6. El mensaje “CONTACTO GRABADO” será exhibido y enseguida el número <strong>de</strong><br />
teléfono será re-exhibido en la pantalla. Presione la Tecla FIN/ALIMENTACION<br />
para salir o presione la Tecla ENVIAR para llamar al número.<br />
OPCIONES PARA PERSONALIZAR SUS CONTACTOS<br />
Cuando el número <strong>de</strong> teléfono básico y las informaciones <strong>de</strong> nombre sean almacenados<br />
en sus Contactos, usted podrá editar y/o personalizar los registros.<br />
1. Desplace el teléfono hacia arriba y presione la Tecla <strong>de</strong> Función Derecha<br />
[Contactos] y enseguida seleccione el registro <strong>de</strong>l Contacto que <strong>de</strong>sea editar.<br />
2. Presione la Tecla <strong>de</strong> Función Izquierda [Editar] para acce<strong>de</strong>r la pantalla<br />
Editar Contacto.<br />
3. Seleccione el campo <strong>de</strong> informaciones que usted <strong>de</strong>sea personalizar. Los<br />
campos incluyen:<br />
FUNCION DE MEMORIA<br />
Nombre / Móvil 1 / Resi<strong>de</strong>ncia / Comercial / Móvil 2 / Fax / E-mail<br />
Personal / E-mail Comercial / Imagen/Ví<strong>de</strong>o / Campanilla / Tono <strong>de</strong><br />
Mensaje / Grupo / Dirección Resi<strong>de</strong>ncial / Dirección <strong>de</strong> Trabajo /<br />
Empresa / Cargo / Cumpleaños / Notas<br />
4. Cambie los datos conforme la necesidad y enseguida presione la Tecla<br />
[GRABAR] para actualizar el registro <strong>de</strong>l contacto.<br />
ADICION O MODIFICACION DE GRUPOS<br />
Para organizar sus Contactos en grupos:<br />
1. Desplace el teléfono hacia arriba, presione la Tecla <strong>de</strong> Función Derecha<br />
[Contactos], enseguida seleccione el registro <strong>de</strong> Contacto <strong>de</strong>seado.<br />
2. Presione la Tecla <strong>de</strong> Función Izquierda [Editar].<br />
3. Seleccione Grupo y presione la Tecla <strong>de</strong> Función Izquierda [Confirmar /<br />
Editar]<br />
4. Editar Personal o Personal y enseguida presione la Tecla [MARCAR /<br />
DESMARCAR]. Para crear un nuevo grupo, presione la Tecla <strong>de</strong> Función Derecha<br />
[Nuevo], inserte el nombre <strong>de</strong>l nuevo nombre <strong>de</strong>l grupo y enseguida<br />
presione la Tecla [GRABAR].<br />
5. Presione la Tecla <strong>de</strong> Función Izquierda [Hecho] para confirmar el grupo.<br />
6. Presione la Tecla [GRABAR] para actualizar el registro <strong>de</strong>l contacto.<br />
CAMBIAR LA CAMPANILLA DE LLAMADAS<br />
Para i<strong>de</strong>ntificar la persona que está llamando ajuste diferentes campanillas para<br />
diferentes números <strong>de</strong> teléfono en sus Contactos:<br />
1. Desplace el teléfono hacia arriba y presione la Tecla <strong>de</strong> Función Derecha<br />
[Contactos] y enseguida seleccione el registro <strong>de</strong>seado.<br />
2. Presione la Tecla <strong>de</strong> Función Izquierda [Editar].<br />
3. Seleccione Campanilla y enseguida presione la Tecla <strong>de</strong> Función Izquierda<br />
[Confirmar].<br />
01<br />
02<br />
03<br />
04<br />
05<br />
06<br />
07<br />
40 41
4. Seleccione la nueva campanilla y enseguida presione la Tecla .<br />
• Presione la Tecla <strong>de</strong> Función Izquierda [Reproducir] para oír una campanilla<br />
seleccionada o presione la Tecla <strong>de</strong> Función Derecha [Opciones] para visualizar<br />
las informaciones <strong>de</strong>l archivo antes <strong>de</strong> presionar la Tecla .<br />
• Para remover el tono <strong>de</strong> llamada, presione la Tecla <strong>de</strong> Función Derecha<br />
[Remover].“REMOVER CAMPANILLA” aparece en la pantalla. Seleccione Sí y pulse<br />
la Tecla .<br />
5. Presione la Tecla [GRABAR] para actualizar el registro <strong>de</strong>l contacto.<br />
ADICION O MODIFICACION DE LA IDENTIFICACION DE IMAGEN/VIDEO<br />
Para seleccionar una imagen o ví<strong>de</strong>o para atribución a una I<strong>de</strong>ntificación <strong>de</strong>l<br />
Interlocutor:<br />
1. Desplace el teléfono hacia arriba y presione la Tecla <strong>de</strong> Función Derecha<br />
[Contactos] y enseguida seleccione el registro <strong>de</strong>seado.<br />
2. Presione la Tecla <strong>de</strong> Función Izquierda [Editar].<br />
3. Seleccione Imagen/Ví<strong>de</strong>o y presione la Tecla <strong>de</strong> Función Izquierda<br />
[Confirmar].<br />
4. Seleccione 1. Imágenes o 2. Ví<strong>de</strong>os y enseguida presione la Tecla .<br />
5. Presione la Tecla <strong>de</strong> dirección hacia arriba, hacia abajo, hacia la izquierda<br />
o <strong>de</strong>recha para seleccionar una imagen o un ví<strong>de</strong>o y enseguida presione la<br />
Tecla .<br />
• Para remover el tono <strong>de</strong> llamada, presione la Tecla <strong>de</strong> Función Derecha<br />
[Remover].“REMOVE PICTURE FROM CONTACT” aparece en la pantalla. Seleccione<br />
Sí y pulse la Tecla .<br />
6. Cuando finalice, presione la Tecla [GRABAR] para actualizar el registro <strong>de</strong>l<br />
contacto.<br />
FUNCION DE MEMORIA<br />
ADICION O MODIFICACION DE UNA DIRECCION DE E-MAIL<br />
Para insertar o agregar una dirección <strong>de</strong> E-mail a un registro <strong>de</strong> Contacto:<br />
1. Desplace el teléfono hacia arriba, presione la Tecla <strong>de</strong> Función Derecha<br />
[Contactos] y enseguida seleccione el registro <strong>de</strong>seado.<br />
2. Presione la Tecla <strong>de</strong> Función Izquierda [Editar].<br />
3. Seleccione E-mail Personal / E-mail Comercial.<br />
4. Inserte una dirección <strong>de</strong> E-mail utilizando el Teclado QWERTY y enseguida<br />
presione la Tecla [GRABAR] para actualizar el registro <strong>de</strong>l contacto.<br />
ADICION DE UN REGISTRO DE MARCADO RAPIDO<br />
Para agregar un registro al grupo <strong>de</strong> Marcado Rápido:<br />
1. Desplace el teléfono hacia arriba y presione la Tecla <strong>de</strong> Función Derecha<br />
[Contactos] y enseguida seleccione un registro <strong>de</strong>seado.<br />
2. Presione la Tecla <strong>de</strong> Función Izquierda [Editar].<br />
3. Seleccione el número <strong>de</strong> teléfono que usted <strong>de</strong>sea agregar al grupo Marcado<br />
Rápido y enseguida presione la Tecla <strong>de</strong> Función Derecha [Opciones].<br />
4. Seleccione 1. Ajuste <strong>de</strong> Marcado Rápido y enseguida presione la Tecla .<br />
5. Seleccione una localización <strong>de</strong> Marcado Rápido y enseguida presione la Tecla<br />
[CONFIRMAR].<br />
6. Seleccione Sí y presione la Tecla .<br />
7. Presione la Tecla [GRABAR] para actualizar el registro <strong>de</strong>l contacto.<br />
Utilizando el Teclado QWERTY presione el número <strong>de</strong> marcado rápido correspondiente<br />
para seleccionar a localización <strong>de</strong>l marcado rápido <strong>de</strong>seado.<br />
EDICION DE REGISTROS DE CONTACTOS<br />
ADICION DE UN NUMERO DE TELEFONO EN EL MODO INACTIVO<br />
1. Desplace el teléfono hacia arriba y inserte el número <strong>de</strong> teléfono que <strong>de</strong>sea<br />
grabar (hasta 32 dígitos).<br />
01<br />
02<br />
03<br />
04<br />
05<br />
06<br />
07<br />
42 43
2. Presione la Tecla <strong>de</strong> Función Izquierda [Grabar].<br />
3. Seleccione 2. Actualizar Existente y enseguida presione la Tecla .<br />
4. Seleccione el registro <strong>de</strong> Contacto existente y enseguida presione la Tecla .<br />
5. Seleccione el tipo <strong>de</strong> número <strong>de</strong> teléfono a continuación y enseguida presione<br />
la Tecla .<br />
Móvil 1 / Móvil 2 / Resi<strong>de</strong>ncial / Comercial / Fax<br />
6. Si un número <strong>de</strong> teléfono ya haya sido atribuido al tipo seleccionado,<br />
seleccione Sí para sustituir el registro existente y enseguida presione la Tecla<br />
.<br />
7. El mensaje “CONTACTO ACTUALIZADO” se exhibirá y enseguida el número <strong>de</strong><br />
teléfono será re-exhibido en la pantalla. Presione la Tecla FIN/ALIMENTACION<br />
para salir, o presione la Tecla ENVIAR para llamar al número.<br />
ADICION DE UN NUMERO DE TELEFONO A PARTIR DE LA PANTALLA DE<br />
LA LISTA DE CONTACTOS<br />
1. Desplace el teléfono hacia arriba y presione la Tecla <strong>de</strong> Función Derecha<br />
[Contactos].<br />
2. Seleccione el registro <strong>de</strong> Contacto que <strong>de</strong>sea editar y enseguida presione la<br />
Tecla <strong>de</strong> Función Izquierda [Editar].<br />
3. Seleccione el campo <strong>de</strong>l número <strong>de</strong> teléfono y inserte el número. Enseguida<br />
presione la Tecla [GRABAR] para actualizar el registro <strong>de</strong>l contacto. Un<br />
mensaje <strong>de</strong> confirmación se exhibirá.<br />
EDICION DE NUMEROS DE TELEFONO ALMACENADOS<br />
1. Desplace el teléfono hacia arriba y presione la Tecla <strong>de</strong> Función Derecha<br />
[Contactos].<br />
2. Seleccione el registro <strong>de</strong>l Contacto que <strong>de</strong>sea editar y enseguida presione la<br />
Tecla <strong>de</strong> Función Izquierda [Editar].<br />
3. Seleccione el número <strong>de</strong> teléfono que <strong>de</strong>sea editar.<br />
FUNCION DE MEMORIA<br />
4. Edite el número <strong>de</strong> teléfono conforme necesario y enseguida presione la Tecla<br />
[GRABAR] para actualizar el registro <strong>de</strong>l contacto.<br />
EDICION DE LOS NOMBRES ALMACENADOS<br />
1. Desplace el teléfono hacia arriba y enseguida presione la Tecla <strong>de</strong> Función<br />
Derecha [Contactos].<br />
2. Seleccione el registro <strong>de</strong>l Contacto que <strong>de</strong>sea editar y enseguida presione la<br />
Tecla <strong>de</strong> Función Izquierda [Editar].<br />
3. Edite el nombre conforme necesario y enseguida presione la Tecla<br />
[GRABAR] para actualizar el registro <strong>de</strong>l contacto.<br />
BORRADO DE UN NUMERO DE TELEFONO DE UN CONTACTO<br />
1. Desplace el teléfono hacia arriba y enseguida presione la Tecla <strong>de</strong> Función<br />
Derecha [Contactos].<br />
2. Seleccione el registro <strong>de</strong>l Contacto y enseguida presione la Tecla <strong>de</strong> Función<br />
Izquierda [Editar].<br />
3. Seleccione el número <strong>de</strong> teléfono <strong>de</strong>seado a ser borrado.<br />
4. Presione y mantenga la Tecla Borrar para borrar el número.<br />
5. Presione la Tecla [GRABAR] para actualizar el registro <strong>de</strong>l contacto. Un<br />
mensaje <strong>de</strong> confirmación será exhibido.<br />
BORRADO DE UN REGISTRO DE CONTACTO<br />
1. Desplace el teléfono hacia arriba y presione la Tecla <strong>de</strong> Función Derecha<br />
[Contactos].<br />
2. Seleccione el registro <strong>de</strong>l Contacto <strong>de</strong>seado a ser borrado.<br />
3. Presione la Tecla <strong>de</strong> Función Derecha [Opciones], seleccione 2. Borrar y<br />
presione la Tecla .<br />
4. Seleccione Sí y presione la Tecla . Un mensaje <strong>de</strong> confirmación será<br />
exhibido.<br />
01<br />
02<br />
03<br />
04<br />
05<br />
06<br />
07<br />
44 45
BORRADO DE UN MARCADO RAPIDO<br />
1. Desplace el teléfono hacia arriba y presione la Tecla <strong>de</strong> Función Derecha<br />
[Contactos].<br />
2. Seleccione el registro que contenga el número <strong>de</strong> marcado rápido a ser<br />
borrado.<br />
3. Presione la Tecla <strong>de</strong> Función Izquierda [Editar].<br />
4. Seleccione el número <strong>de</strong> teléfono <strong>de</strong> marcado rápido a ser borrado.<br />
5. Presione la Tecla <strong>de</strong> Función Derecha [Opciones], seleccione 1. Remoción<br />
<strong>de</strong>l Marcado Rápido y presione la Tecla .<br />
6. Seleccione Sí y presione la Tecla . Un mensaje <strong>de</strong> confirmación será<br />
exhibido.<br />
7. Presione la Tecla [GRABAR] para actualizar el registro <strong>de</strong>l contacto.<br />
NUMEROS ESTANDAR<br />
El número <strong>de</strong> teléfono grabado cuando se crea un Contacto es el Número Estándar.<br />
Si más <strong>de</strong> un número es grabado en un registro <strong>de</strong> Contacto, otro número pue<strong>de</strong> ser<br />
ajustado como el Número Estándar.<br />
El Número Estándar no pue<strong>de</strong> ser borrado. Todo el registro <strong>de</strong>l Contacto pue<strong>de</strong> ser<br />
borrado u otro número pue<strong>de</strong> ser atribuido como el Número Estándar permitiendo<br />
que usted borre el número original y mantenga el registro <strong>de</strong>l Contacto.<br />
CAMBIO DEL NUMERO ESTANDAR<br />
1. Desplace el teléfono hacia arriba y presione la Tecla <strong>de</strong> Función Derecha<br />
[Contactos].<br />
2. Seleccione el registro <strong>de</strong>l Contacto que <strong>de</strong>sea editar y enseguida presione la<br />
Tecla <strong>de</strong> Función Izquierda [Editar].<br />
3. Seleccione el número <strong>de</strong> teléfono que <strong>de</strong>sea <strong>de</strong>finir como Número Estándar,<br />
enseguida presione la Tecla <strong>de</strong> Función Derecha [Opciones].<br />
4. Seleccione 2. Ajustar Como Estándar y enseguida presione la Tecla .<br />
FUNCION DE MEMORIA<br />
5. Seleccione Sí y presione la Tecla . Un mensaje <strong>de</strong> confirmación será<br />
exhibido.<br />
6. Presione la Tecla [GRABAR] para actualizar el registro <strong>de</strong>l contacto.<br />
INSERCION DE LETRAS, NUMEROS Y SIMBOLOS<br />
Su dispositivo tiene un Teclado QWERTY que proporciona una experiencia perfeccionada<br />
<strong>de</strong> digitación en un pequeño dispositivo portátil para inserciones fáciles y cómodas.<br />
1<br />
2 3 4<br />
1. [ ] Tecla Cambiar Modo:<br />
• Cuando esté en el modo <strong>de</strong> Inserción Numérica<br />
- Presione para cambiar entre números y letras que aparecen en la misma<br />
tecla.<br />
• Cuando esté en el modo <strong>de</strong> Inserción <strong>de</strong> Texto<br />
- Presione para cambiar entre la inserción <strong>de</strong> números y letras que aparecen<br />
en la misma tecla.<br />
- Presione y mantenga presionada para trabar en el modo <strong>de</strong> inserción<br />
numérica o <strong>de</strong> texto.<br />
7<br />
6<br />
5<br />
01<br />
02<br />
03<br />
04<br />
05<br />
06<br />
07<br />
46 47
2. [ ] Tecla Espacio: Presione para aceptar una palabra o agregar un espacio<br />
al insertar letras.<br />
3. [ ] Tecla <strong>de</strong> Símbolos: Presione para abrir la lista <strong>de</strong> símbolos.<br />
4. [ ] Tecla Caps: Presione para seleccionar una condición <strong>de</strong> letra para<br />
el modo <strong>de</strong> inserción <strong>de</strong> texto estándar [Abc]. [Abc], [ABC] y [abc] indican la<br />
inserción <strong>de</strong>l texto estándar.<br />
5. [ ] Tecla Enter: Presione para insertar un fin <strong>de</strong> línea.<br />
6. [ ] Tecla Borrar: Cuando esté en un campo <strong>de</strong> inserción <strong>de</strong> texto y en el<br />
modo <strong>de</strong> inserción, presione para borrar el carácter a la izquierda <strong>de</strong>l cursor.<br />
Presione y mantenga presionada para borrar toda la palabra o la ca<strong>de</strong>na <strong>de</strong><br />
caracteres insertada.<br />
7. [ ] Tecla CLR: Cuando esté en un campo <strong>de</strong> inserción <strong>de</strong> Texto y en el modo<br />
<strong>de</strong> inserción, presione para borrar el carácter a la izquierda <strong>de</strong>l cursor. Presione<br />
y mantenga presionada para borrar toda la palabra o la ca<strong>de</strong>na <strong>de</strong> caracteres<br />
insertada.<br />
Para mejor <strong>de</strong>sempeño en ambientes <strong>de</strong> poca iluminación, su teléfono incluye una<br />
función <strong>de</strong> luz <strong>de</strong> fondo que pue<strong>de</strong> iluminar tanto la pantalla como el teclado; por lo<br />
tanto usted pue<strong>de</strong> seguir leyendo y digitando. (Por favor, consulte la página 99 para<br />
mayores <strong>de</strong>talles sobre la Luz <strong>de</strong> Fondo.)<br />
MARCADO CON UNO, DOS O TRES TOQUES<br />
Una vez que haya asignado números <strong>de</strong> marcado rápido a las entradas <strong>de</strong> contacto,<br />
utilice los pasos siguientes para utilizar los números <strong>de</strong> marcado rápido:.<br />
MARCADO CON UN TOQUE:<br />
1-9: Desplace el teléfono hacia arriba y enseguida presione y mantenga<br />
presionada la tecla numérica que <strong>de</strong>sea conectar durante más <strong>de</strong> 1 segundo.<br />
(Buzón) ya es atribuido a su buzón.<br />
FUNCION DE MEMORIA<br />
MARCADO CON DOS TOQUES:<br />
10-99: Desplace el teléfono hacia arriba y enseguida presione el primer dígito y<br />
presione y mantenga presionado el segundo dígito <strong>de</strong>l número a marcar.<br />
MARCADO CON TRES TOQUES:<br />
100-500: Desplace el teléfono hacia arriba, presione el primero y segundo dígito y<br />
enseguida presione y mantenga presionado el tercer dígito <strong>de</strong>l número<br />
por marcar.<br />
112, 211, 311: Las entradas <strong>de</strong> Marcado Rápido 112, 211, 311 (Reservadas) ya<br />
están atribuidas.<br />
411: Entrada <strong>de</strong> Marcado Rápido 411 (Asistencia <strong>de</strong> Directorio) ya está<br />
atribuida.<br />
01<br />
02<br />
03<br />
04<br />
05<br />
06<br />
07<br />
48 49
4<br />
FUNCIONES DEL MENU<br />
Este capítulo abarca el acceso al menú y la utilización <strong>de</strong> sus funciones y<br />
CONTACTOS<br />
Nuevo Contacto<br />
Lista <strong>de</strong> Contactos<br />
Backup <strong>de</strong> Mis Contactos<br />
Grupos<br />
Marcados Rápidos<br />
Contactos Favoritos<br />
Mi Tarjeta <strong>de</strong> Visitas<br />
HISTORICO DE<br />
LLAMADAS<br />
Llamadas No<br />
Contestadas<br />
Llamadas Recibidas<br />
Llamadas Marcadas<br />
Todas las Llamadas<br />
Timers <strong>de</strong> Llamadas<br />
easyedge SM<br />
easyedge<br />
Su Navegador<br />
Navegador<br />
Navegador<br />
TONE ROOM DELUXE<br />
Tone Room Deluxe<br />
recursos para personalizar su VERSE.<br />
PAC-MAN<br />
PAC-MAN<br />
HERRAMIENTAS<br />
Mandos <strong>de</strong> Voz<br />
Calculadora<br />
Calculadora <strong>de</strong> Propinas<br />
Calendario<br />
Diario Electrónico<br />
Reloj <strong>de</strong> Alarma<br />
Cronómetro<br />
Reloj Mundial<br />
Bloc <strong>de</strong> Notas +<br />
Almacenamiento en<br />
Lotes USB<br />
AJUSTES<br />
Ajustes <strong>de</strong> los Sonidos<br />
Ajustes <strong>de</strong> la Pantalla<br />
Ajustes <strong>de</strong>l Teléfono<br />
Ajustes <strong>de</strong> Llamadas<br />
Memoria<br />
Bluetooth®<br />
Modo USB<br />
Informaciones <strong>de</strong>l<br />
Teléfono
52<br />
NUEVO CONTACTO<br />
Para agregar un nuevo número a su Lista <strong>de</strong> Contactos:<br />
Utilizando este menú secundario, el número será grabado como un nuevo Contacto.<br />
Para grabar el número en un Contacto existente, edite el registro <strong>de</strong>l Contacto.<br />
1. Desplace el teléfono hacia arriba, presione la Tecla [MENU] y a seguir<br />
presione 1. Contactos, 1. Nuevo Contacto.<br />
2. En el campo Nombre, ingrese un nombre para el Contacto.<br />
Para cambiar el modo <strong>de</strong> ingreso, presione la Tecla <strong>de</strong> Función Izquierda [Abc],<br />
seleccione la opción <strong>de</strong>seada y presione la Tecla .<br />
3. Presione la Tecla <strong>de</strong> Dirección hacia abajo para ingresar informaciones en<br />
otros campos para el contacto. Los campos incluyen:<br />
Móvil 1 / Resi<strong>de</strong>ncia / Trabajo / Móvil 2 / Fax / Email Personal / Email<br />
Comercial / Imagen/Vi<strong>de</strong>o / Campanilla / Tono <strong>de</strong> Mensaje / Grupo /<br />
Dirección Resi<strong>de</strong>ncial / Dirección <strong>de</strong>l Trabajo / Empresa / Título /<br />
Aniversario / Notas<br />
4. Presione la Tecla [GRABAR] para crear el registro <strong>de</strong>l contacto.<br />
LISTA DE CONTACTOS<br />
Usted pue<strong>de</strong> revisar todos los registros almacenados en su Lista <strong>de</strong> Contactos o<br />
rápidamente encontrar un registro ingresando un nombre o su ca<strong>de</strong>na <strong>de</strong> caracteres en<br />
el campo Ir Hacia.<br />
1. Desplace el teléfono hacia arriba, presione la Tecla [MENU] y a seguir<br />
presione 1. Contactos, 2. Lista <strong>de</strong> Contactos.<br />
Acceso Rápido: En el modo inactivo, <strong>de</strong>splace el teléfono hacia arriba y la Tecla <strong>de</strong><br />
Función Derecha [Contactos]. La lista <strong>de</strong> nombres existente en sus contactos será<br />
exhibida alfabéticamente.<br />
2. Ingrese un nombre o parte <strong>de</strong> un nombre en el campo Ir Hacia en la parte<br />
inferior <strong>de</strong> la pantalla o presione la Tecla <strong>de</strong> Dirección hacia arriba o hacia<br />
abajo para recorrer por su Lista <strong>de</strong> Contactos.<br />
CONTACTOS<br />
3. Para editar el registro, presione la Tecla <strong>de</strong> Función Izquierda [Editar]. Para<br />
visualizar los <strong>de</strong>talles <strong>de</strong>l contacto, presione la Tecla [VISUALIZAR].<br />
• Presionando la Tecla <strong>de</strong> Función Derecha [Opciones], usted podrá seleccionar entre las<br />
opciones que se muestran a continuación:<br />
1. Nuevo Contacto: Agrega un nuevo contacto a tu lista <strong>de</strong> contactos.<br />
2. Borrar: Borra el contacto <strong>de</strong> tu lista <strong>de</strong> contactos.<br />
3. Nuevo Mensaje: Usted tiene la opción <strong>de</strong> enviar un Mensaje <strong>de</strong> TEXTO, con Imagen,<br />
con Vi<strong>de</strong>o o Voz.<br />
4. Llamar: Realiza una llamada para el contacto.<br />
5. Administrar Contactos: Permite que usted administre sus contactos con las opciones a<br />
seguir: 1. Borrar / 2. Bloquear / 3. Desbloquear / 4. Copiar para la Tarjeta<br />
6. Enviar Tarjeta <strong>de</strong> Visitas: Permite que usted envíe una tarjeta <strong>de</strong> visitas a través <strong>de</strong><br />
Mensaje con Imagen, Mensaje con Vi<strong>de</strong>o, Mensaje <strong>de</strong> Voz o Bluetooth®.<br />
4. Para marcar el número seleccionado, presione la Tecla <strong>de</strong> Función Derecha<br />
[Opciones], Presione la Tecla <strong>de</strong> Dirección hacia arriba o hacia abajo para<br />
seleccionar Llamar y presione la Tecla o presione la Tecla ENVIAR para<br />
realizar una llamada.<br />
BACKUP DE MIS CONTACTOS<br />
Haga download <strong>de</strong>l Backup <strong>de</strong> Mis Contactos, así que si su teléfono se pier<strong>de</strong> o es<br />
robada, usted pue<strong>de</strong> transferir fácilmente sus números a un nuevo teléfono.<br />
ACCESO AL BACKUP DE MIS CONTACTOS PRE-CARGADO<br />
1. Acce<strong>de</strong>r el catálogo easyedge a través <strong>de</strong>l acceso directo <strong>de</strong>l dispositivo en<br />
modo <strong>de</strong> espera o <strong>de</strong>s<strong>de</strong> las opciones <strong>de</strong>l menú <strong>de</strong>l dispositivo.<br />
2. Backup <strong>de</strong> Mis Contactos <strong>de</strong>bería aparecer en la lista <strong>de</strong> aplicaciones<br />
<strong>de</strong>scargadas en el dispositivo. Seleccione Backup <strong>de</strong> Mis Contactos - la<br />
aplicación será abierta.<br />
01<br />
02<br />
03<br />
04<br />
05<br />
06<br />
07<br />
53
54<br />
CONFIGURANDO EL BACKUP DE MIS CONTACTOS<br />
1. Después <strong>de</strong> la aplicación se inicia, la Pantalla <strong>de</strong> Bienvenida será exhibida.<br />
Seleccione Siguiente para continuar. Debes aceptar los términos y condiciones<br />
para proce<strong>de</strong>r a la configuración <strong>de</strong> la pantalla.<br />
2. En la pantalla <strong>de</strong> configuracion, se le pedirá que introduzca su PIN. De forma<br />
pre<strong>de</strong>terminada, el pasador serán los últimos 4 dígitos <strong>de</strong> su número <strong>de</strong><br />
teléfono celular. (Usted pue<strong>de</strong> cambiar su código PIN a través <strong>de</strong>l menú<br />
Configuración seleccionando Cambiar código PIN). Seleccione el OK.<br />
3. Si tiene contactos guardados en su dispositivo, pue<strong>de</strong> realizar copias <strong>de</strong><br />
seguridad <strong>de</strong> contactos almacenados en el dispositivo en el Backup <strong>de</strong> Mis<br />
Contactos mediante la selección <strong>de</strong> Backup <strong>de</strong> la pantalla principal screen <strong>de</strong><br />
la aplicación.<br />
4. En el menú Configuración, pue<strong>de</strong> ver la información <strong>de</strong> su cuenta, usted<br />
pue<strong>de</strong> configurar copias <strong>de</strong> seguridad automáticas que se produzca, cambiar el<br />
PIN, cambiar el idioma, y ver la sección <strong>de</strong> ayuda <strong>de</strong> la aplicación.<br />
Backup <strong>de</strong> Mis Contactos: Los usuarios <strong>de</strong>l servicio easyedge SM Pay-As-You-Go que<br />
incurren en cargos <strong>de</strong> acceso a datos <strong>de</strong> MCB en roaming <strong>de</strong>berán marcar el número<br />
611 para un crédito a la factura.<br />
GRUPOS<br />
La función Grupos permite que usted clasifique los registros <strong>de</strong>l teléfono en grupos <strong>de</strong><br />
hasta 20 miembros en cada grupo. Los grupos estándar incluyen Trabajo y Personal y no<br />
se pue<strong>de</strong>n borrar o renombrar.<br />
PARA AGREGAR UN NUEVO GRUPO<br />
1. Desplace el teléfono hacia arriba, presione la Tecla [MENU] y a seguir<br />
presione 1. Contactos, 3. Grupos.<br />
2. Presione la Tecla <strong>de</strong> Función Izquierda [Nuevo].<br />
3. Ingrese un nuevo nombre <strong>de</strong> grupo y presione la Tecla [GRABAR].<br />
CONTACTOS<br />
PARA DESIGNAR UN NUMERO DE TELEFONO A UN GRUPO.<br />
1. Desplace el teléfono hacia arriba, presione la Tecla [MENU] y a seguir<br />
presione 1. Contactos, 3. Grupos.<br />
2. Presione la Tecla <strong>de</strong> Dirección hacia arriba o hacia abajo para seleccionar un<br />
grupo al cual usted <strong>de</strong>sea agregar el contacto y <strong>de</strong>spués presione la Tecla <strong>de</strong><br />
Función Derecha [Opciones].<br />
3. Presione la Tecla <strong>de</strong> Dirección hacia arriba o hacia abajo para seleccionar<br />
7. Agregar y presione la Tecla .<br />
4. Sus registros <strong>de</strong> contactos serán exhibidos en or<strong>de</strong>n alfabética. Seleccione<br />
el contacto que <strong>de</strong>sea agregar y a seguir presione la Tecla [MARCAR/<br />
UNMARK].<br />
5. Presione la Tecla <strong>de</strong> Función Izquierda [Hecho]. El mensaje “LISTA DE<br />
MIEMBROS ACTUALIZADA” será exhibido.<br />
PARA CAMBIAR EL NOMBRE DEL GRUPO<br />
1. Desplace el teléfono hacia arriba, presione la Tecla [MENU] y a seguir<br />
presione 1. Contactos, 3. Grupos.<br />
2. Presione la Tecla <strong>de</strong> Dirección hacia arriba o hacia abajo para seleccionar<br />
el grupo que <strong>de</strong>sea renombrar y a seguir presione la Tecla <strong>de</strong> Función Derecha<br />
[Opciones].<br />
3. Presione la Tecla <strong>de</strong> Dirección hacia arriba o hacia abajo para seleccionar<br />
5. Renombrar y presione la Tecla .<br />
4. Ingrese el nuevo nombre <strong>de</strong>l grupo y a seguir presione la Tecla [GRABAR].<br />
BORRAR GRUPO<br />
1. Desplace el teléfono hacia arriba, presione la Tecla [MENU] y a seguir<br />
presione 1. Contactos, 3. Grupos.<br />
2. Presione la Tecla <strong>de</strong> Dirección hacia arriba o hacia abajo para seleccionar el<br />
nombre <strong>de</strong>l grupo existente que usted <strong>de</strong>sea borrar y a seguir presione la Tecla<br />
<strong>de</strong> Función Derecha [Opciones].<br />
01<br />
02<br />
03<br />
04<br />
05<br />
06<br />
07<br />
55
3. Presione la Tecla <strong>de</strong> Dirección hacia arriba o hacia abajo para seleccionar<br />
6. Borrar Grupo y presione la Tecla .<br />
4. El mensaje “¿BORRAR GRUPO” será exhibido en la pantalla.<br />
5. Presione la Tecla <strong>de</strong> Dirección hacia arriba o hacia abajo para seleccionar Sí<br />
y presione la Tecla . Un mensaje <strong>de</strong> confirmación será exhibido.<br />
PARA ENVIAR UN MENSAJE DE TEXTO A UN GRUPO<br />
1. Desplace el teléfono hacia arriba, presione la Tecla [MENU] y a seguir<br />
presione 1. Contactos, 3. Grupos.<br />
2. Presione la Tecla <strong>de</strong> Dirección hacia arriba o hacia abajo para seleccionar<br />
el grupo para el cual <strong>de</strong>sea enviar un mensaje y a seguir presione la Tecla <strong>de</strong><br />
Función Derecha [Opciones].<br />
3. Presione 1. Nuevo Mensaje <strong>de</strong> TEXTO.<br />
4. Ingrese su mensaje en el campo Texto y a seguir presione la Tecla <strong>de</strong> Función<br />
Derecha [Opciones] para seleccionar entre las opciones a continuación:<br />
Ingresar Texto Rápido, Grabar Como Borrador, Agregar, Nivel <strong>de</strong><br />
Prioridad o Cancelar Mensaje.<br />
5. Para enviar el mensaje <strong>de</strong> TEXTO, presione la Tecla [ENVIAR] o presione la<br />
Tecla ENVIAR .<br />
PARA ENVIAR UN MENSAJE CON IMAGEN A UN GRUPO<br />
1. Desplace el teléfono hacia arriba, presione la Tecla [MENU] y a seguir<br />
presione 1. Contactos, 3. Grupos.<br />
2. Presione la Tecla <strong>de</strong> Dirección hacia arriba o hacia abajo para seleccionar<br />
el grupo para el cual <strong>de</strong>sea enviar un mensaje y a seguir presione la Tecla <strong>de</strong><br />
Función Derecha [Opciones].<br />
3. Presione 2. Nuevo Mensaje con Imagen.<br />
4. En Texto, ingrese su mensaje y a seguir presione la Tecla <strong>de</strong> Dirección hacia<br />
abajo.<br />
CONTACTOS<br />
5. En Imagen, presione la Tecla <strong>de</strong> Función Izquierda [Imágenes], seleccione<br />
la imagen que <strong>de</strong>sea enviar y a seguir presione la Tecla . Presione la Tecla <strong>de</strong><br />
Dirección hacia abajo.<br />
6. En Sonido, presione la Tecla <strong>de</strong> Función Izquierda [Sonidos], presione la<br />
Tecla <strong>de</strong> Dirección hacia arriba o hacia abajo para seleccionar el sonido que<br />
<strong>de</strong>sea enviar y a seguir presione la Tecla . Presione la Tecla <strong>de</strong> Dirección<br />
hacia abajo.<br />
7. En Tarjeta <strong>de</strong> Visitas, presione la Tecla <strong>de</strong> Función Izquierda [Agregar],<br />
presione la Tecla <strong>de</strong> Dirección hacia arriba o hacia abajo para seleccionar<br />
1. Mi Tarjeta <strong>de</strong> Visitas o 2. De Contactos y a seguir presione la Tecla . Si<br />
2. De Contactos fue seleccionado, seleccione el Contacto <strong>de</strong>seado y presione<br />
la Tecla [MARCAR / DESMARCAR] y a seguir presione la Tecla <strong>de</strong> Función<br />
Izquierda [Hecho]. Presione la Tecla <strong>de</strong> Dirección hacia abajo.<br />
8. En Asunto, ingrese un asunto utilizando el Teclado QWERTY.<br />
9. Presione la Tecla <strong>de</strong> Función Derecha [Opciones] para seleccionar entre<br />
las siguientes: Pré-visualizar, Grabar Como Borrador, Ingresar Texto<br />
Rápido, Agregar Diapositiva, Agregar Dirección <strong>de</strong>s<strong>de</strong> Contactos, Nivel<br />
<strong>de</strong> Prioridad o Cancelar Mensaje.<br />
Estas opciones pue<strong>de</strong>n variar <strong>de</strong> acuerdo con el contenido <strong>de</strong>l mensaje que se escoja.<br />
10. Para enviar el Mensaje con Imagen, presione la Tecla [ENVIAR] o presione<br />
la Tecla ENVIAR .<br />
PARA ENVIAR UN MENSAJE CON VIDEO A UN GRUPO<br />
1. Desplace el teléfono hacia arriba, presione la Tecla [MENU] y a seguir<br />
presione 1. Contactos, 3. Grupos.<br />
2. Presione la Tecla <strong>de</strong> Dirección hacia arriba o hacia abajo para seleccionar<br />
el grupo para el cual <strong>de</strong>sea enviar un mensaje y a seguir presione la Tecla <strong>de</strong><br />
Función Derecha [Opciones].<br />
3. Presione 3. Nuevo Mensaje con Vi<strong>de</strong>o.<br />
01<br />
02<br />
03<br />
04<br />
05<br />
06<br />
07<br />
56<br />
57
58<br />
4. En Texto, ingrese su mensaje y a seguir presione la Tecla <strong>de</strong> Dirección hacia<br />
abajo.<br />
5. En Vi<strong>de</strong>o, presione la Tecla <strong>de</strong> Función Izquierda [Vi<strong>de</strong>os], seleccione<br />
el vi<strong>de</strong>o que <strong>de</strong>sea enviar y a seguir presione la Tecla . Presione la Tecla <strong>de</strong><br />
Dirección hacia abajo.<br />
6. En Tarjeta <strong>de</strong> Visitas, presione la Tecla <strong>de</strong> Función Izquierda [Agregar],<br />
presione la Tecla <strong>de</strong> Dirección hacia arriba o hacia abajo para seleccionar<br />
1. Mi Tarjeta <strong>de</strong> Visitas o 2. De Contactos y a seguir presione la Tecla . Si<br />
2. De Contactos fue seleccionado, seleccione el Contacto <strong>de</strong>seado y presione<br />
la Tecla [MARCAR / DESMARCAR] y a seguir presione la Tecla <strong>de</strong> Función<br />
Izquierda [Hecho]. Presione la Tecla <strong>de</strong> Dirección hacia abajo.<br />
7. En Asunto, ingrese un asunto utilizando el Teclado QWERTY.<br />
8. Presione la Tecla <strong>de</strong> Función Derecha [Opciones] para seleccionar entre las<br />
siguientes: Pré-visualizar, Grabar Como Borrador, Ingresar Texto Rápido,<br />
Nivel <strong>de</strong> Prioridad o Cancelar Mensaje.<br />
Estas opciones pue<strong>de</strong>n variar <strong>de</strong> acuerdo con el contenido <strong>de</strong>l mensaje seleccionado.<br />
9. Para enviar el Mensaje <strong>de</strong> Vi<strong>de</strong>o, presione la Tecla [ENVIAR] o presione la<br />
Tecla ENVIAR .<br />
PARA ENVIAR UN MENSAJE DE VOZ A UN GRUPO<br />
1. Desplace el teléfono hacia arriba, presione la Tecla [MENU] y a seguir<br />
presione 1. Contactos, 3. Grupos.<br />
2. Presione la Tecla <strong>de</strong> Dirección hacia arriba o hacia abajo para seleccionar el<br />
grupo para el cual <strong>de</strong>sea enviar un mensaje <strong>de</strong> voz y a seguir presione la Tecla<br />
<strong>de</strong> Función Derecha [Opciones].<br />
3. Presione 4. Nuevo Mensaje <strong>de</strong> Voz.<br />
4. Para registrar una nova Nota <strong>de</strong> Voz, presione la Tecla para iniciar la<br />
grabación y a seguir presione la Tecla [DETENER] para finalizar la grabación<br />
y salvar la nota <strong>de</strong> voz.<br />
CONTACTOS<br />
5. En Voz, se exhibirá su nombre <strong>de</strong> <strong>de</strong>l archivo registrado. Presione la Tecla <strong>de</strong><br />
Dirección hacia abajo.<br />
6. En Texto, ingrese su mensaje y a seguir presione la Tecla <strong>de</strong> Dirección hacia<br />
abajo.<br />
7. En Tarjeta <strong>de</strong> Visitas, presione la Tecla <strong>de</strong> Función Izquierda [Agregar],<br />
presione la Tecla <strong>de</strong> Dirección hacia arriba o hacia abajo para seleccionar<br />
1. Mi Tarjeta <strong>de</strong> Visitas o 2. De Contactos y a seguir presione la Tecla . Si<br />
2. De Contactos fue seleccionado, seleccione el Contacto <strong>de</strong>seado y presione<br />
la Tecla [MARCAR / DESMARCAR] y a seguir presione la Tecla <strong>de</strong> Función<br />
Izquierda [Hecho]. Presione la Tecla <strong>de</strong> Dirección hacia abajo.<br />
8. En Asunto, ingrese un asunto utilizando el Teclado QWERTY.<br />
9. Presione la Tecla <strong>de</strong> Función Derecha [Opciones] para seleccionar entre las<br />
siguientes: Revisar, Grabar Como Borrador, Ingresar Texto Rápido, Nivel<br />
<strong>de</strong> Prioridad o Cancelar Mensaje.<br />
Estas opciones pue<strong>de</strong>n variar <strong>de</strong> acuerdo con el contenido <strong>de</strong>l mensaje seleccionado.<br />
10. Para enviar el Mensaje <strong>de</strong> Voz, presione la Tecla [ENVIAR] o presione la<br />
Tecla ENVIAR .<br />
MARCADOS RAPIDOS<br />
En el modo inactivo, las llamadas se pue<strong>de</strong>n realizar para números almacenados en<br />
marcados rápidos <strong>de</strong>splazando el teléfono hacia arriba, presionando y manteniendo<br />
presionada la tecla numérica <strong>de</strong> localización en el teclado.<br />
1. Desplace el teléfono hacia arriba, presione la Tecla [MENU] y a seguir<br />
presione 1. Contactos, 4. Marcados Rápidos.<br />
2. Seleccione la posición <strong>de</strong> Marcado Rápido <strong>de</strong>seada o ingrese el(los) dígito(s) <strong>de</strong><br />
Marcado Rápido y a seguir presione la Tecla [CONFIRMAR].<br />
3. Seleccione el registro <strong>de</strong>l Contacto <strong>de</strong>seado y a seguir presione la Tecla .<br />
01<br />
02<br />
03<br />
04<br />
05<br />
06<br />
07<br />
59
4. Seleccione el número que usted <strong>de</strong>sea ajustar como marcado rápido y a seguir<br />
presione la Tecla .<br />
5. El mensaje “¿DESIGNAR MARCADO RAPIDO AL CONTACTO” será exhibido en<br />
la pantalla. Seleccione Si y presione la Tecla . Un mensaje <strong>de</strong> confirmación<br />
será exhibido.<br />
El mensaje “No asignado” será exhibido cuando la localización esté disponible.<br />
PARA BORRAR UN MARCADO RAPIDO GRABADO<br />
1. Desplace el teléfono hacia arriba, presione la Tecla [MENU] y a seguir<br />
presione 1. Contactos, 4. Marcados Rápidos.<br />
2. Seleccione el registro Marcado Rápido que <strong>de</strong>sea borrar.<br />
3. Presione la Tecla <strong>de</strong> Función Derecha [Remover].<br />
4. El mensaje “¿REMOVER MARCADO RAPIDO” será exhibido en la pantalla.<br />
Seleccione Sí y presione la Tecla . Un mensaje <strong>de</strong> confirmación será<br />
exhibido.<br />
CONTACTOS FAVORITOS<br />
Permite que usted grabe sus contactos más frecuentemente accedidos para acceso<br />
rápido.<br />
PARA ATRIBUIR CONTACTOS FAVORITOS<br />
1. Desplace el teléfono hacia arriba y presione la Tecla Barra <strong>de</strong> Tareas<br />
(localizada en el lado <strong>de</strong>recho <strong>de</strong>l dispositivo), <strong>de</strong>splace la Tecla <strong>de</strong> Dirección<br />
hacia la izquierda o <strong>de</strong>recha para <strong>de</strong>splazar hasta FAVORITOS y enseguida<br />
presione la Tecla . O <strong>de</strong>splace el teléfono hacia arriba, presione la Tecla<br />
[MENU] y a seguir presione 1. Contactos, 5. Contactos Favoritos.<br />
Acceso Rápido: En el modo inactivo, <strong>de</strong>splace el teléfono hacia arriba y presione la Tecla<br />
Favoritos/Cambio <strong>de</strong> Modo .<br />
CONTACTOS<br />
2. Desplace la Tecla <strong>de</strong> Dirección hacia la izquierda, <strong>de</strong>recha, hacia arriba o<br />
hacia abajo para seleccionar un campo vacío y enseguida presione la Tecla<br />
[ATRIBUIR].<br />
3. Seleccione el contacto que <strong>de</strong>sea atribuir y enseguida presione la Tecla<br />
[MARCAR].<br />
4. Presione la Tecla <strong>de</strong> Función Izquierda [Hecho].<br />
PARA VISUALIZAR LOS CONTACTOS FAVORITOS<br />
1. Desplace el teléfono hacia arriba y presione la Tecla Barra <strong>de</strong> Tareas<br />
(localizada en el lado <strong>de</strong>recho <strong>de</strong>l dispositivo), <strong>de</strong>splace la Tecla <strong>de</strong> Dirección<br />
hacia la izquierda o <strong>de</strong>recha para <strong>de</strong>splazar hasta FAVORITOS y enseguida<br />
presione la Tecla . O <strong>de</strong>splace el teléfono hacia arriba, presione la Tecla<br />
[MENU] y a seguir presione 1. Contactos, 5. Contactos Favoritos.<br />
Acceso Rápido: En el modo inactivo, <strong>de</strong>splace el teléfono hacia arriba, presione la Tecla<br />
Favoritos/Cambiar Modo .<br />
2. Desplace la Tecla <strong>de</strong> Dirección hacia la izquierda, <strong>de</strong>recha, hacia arriba o<br />
hacia abajo para seleccionar un contacto <strong>de</strong>seado.<br />
3. Presione la Tecla <strong>de</strong> Función Izquierda [Mensajes]. O presione la Tecla<br />
<strong>de</strong> Función Derecha [Opciones] para seleccionar una <strong>de</strong> las siguientes<br />
opciones:<br />
• Remover: Remueve un contacto <strong>de</strong> la lista Favoritos.<br />
• Remover Todos: Remueve todos los contactos <strong>de</strong> la lista Favoritos.<br />
4. Presione la Tecla [VISUALIZAR].<br />
PARA BORRAR CONTACTOS FAVORITOS<br />
1. Desplace el teléfono hacia arriba y presione la Tecla Barra <strong>de</strong> Tareas<br />
(localizada en el lado <strong>de</strong>recho <strong>de</strong>l dispositivo), <strong>de</strong>splace la Tecla <strong>de</strong> Dirección<br />
hacia la izquierda o <strong>de</strong>recha para <strong>de</strong>splazar hasta FAVORITOS y enseguida<br />
presione la Tecla . O <strong>de</strong>splace el teléfono hacia arriba, presione la Tecla<br />
[MENU] y a seguir presione 1. Contactos, 5. Contactos Favoritos.<br />
01<br />
02<br />
03<br />
04<br />
05<br />
06<br />
07<br />
60<br />
61
CONTACTOS<br />
62<br />
Acceso Rápido: En el modo inactivo, <strong>de</strong>splace el teléfono hacia arriba, presione la Tecla<br />
Favoritos/Cambiar Modo .<br />
2. Desplace la Tecla <strong>de</strong> Dirección hacia la izquierda, <strong>de</strong>recha, hacia arriba o<br />
hacia abajo para seleccionar un contacto <strong>de</strong>seado y enseguida presione la Tecla<br />
[VISUALIZAR].<br />
3. Presione la Tecla <strong>de</strong> Función Izquierda [BORRAR].<br />
4. El mensaje “¿BORRAR CONTACTO” se exhibirá en la pantalla. Seleccione Sí y<br />
presione la Tecla . Un mensaje <strong>de</strong> confirmación se exhibirá.<br />
PARA EDITAR CONTACTOS FAVORITOS<br />
1. Desplace el teléfono hacia arriba y presione la Tecla Barra <strong>de</strong> Tareas<br />
(localizada en el lado <strong>de</strong>recho <strong>de</strong>l dispositivo), <strong>de</strong>splace la Tecla <strong>de</strong> Dirección<br />
hacia la izquierda o <strong>de</strong>recha para <strong>de</strong>splazar hasta FAVORITOS y enseguida<br />
presione la Tecla . O <strong>de</strong>splace el teléfono hacia arriba, presione la Tecla<br />
[MENU] y a seguir presione 1. Contactos, 5. Contactos Favoritos.<br />
Acceso Rápido: En el modo inactivo, <strong>de</strong>splace el teléfono hacia arriba, presione la Tecla<br />
Favoritos/Cambiar Modo .<br />
2. Desplace la Tecla <strong>de</strong> Dirección hacia la izquierda, <strong>de</strong>recha, hacia arriba o<br />
hacia abajo para seleccionar un contacto <strong>de</strong>seado y enseguida presione la Tecla<br />
[VISUALIZAR].<br />
3. Presione la Tecla [EDITAR].<br />
Para editar el contacto, por favor, refiérase a la página 52 para más <strong>de</strong>talles sobre la<br />
Lista <strong>de</strong> Contactos.<br />
PARA LLAMAR UN CONTACTO FAVORITO O ENVIAR UN MENSAJE<br />
1. Desplace el teléfono hacia arriba y presione la Tecla Barra <strong>de</strong> Tareas<br />
(localizada en el lado <strong>de</strong>recho <strong>de</strong>l dispositivo), <strong>de</strong>splace la Tecla <strong>de</strong> Dirección<br />
hacia la izquierda o <strong>de</strong>recha para <strong>de</strong>splazar hasta FAVORITOS y enseguida<br />
presione la Tecla . O <strong>de</strong>splace el teléfono hacia arriba, presione la Tecla<br />
[MENU] y a seguir presione 1. Contactos, 5. Contactos Favoritos.<br />
Acceso Rápido: En el modo inactivo, <strong>de</strong>splace el teléfono hacia arriba, presione la Tecla<br />
Favoritos/Cambiar Modo .<br />
2. Desplace la Tecla <strong>de</strong> Dirección hacia la izquierda, <strong>de</strong>recha, hacia arriba o<br />
hacia abajo para seleccionar un contacto <strong>de</strong>seado.<br />
3. Para realizar una llamada, presione la Tecla ENVIAR . Para enviar un<br />
mensaje <strong>de</strong> texto para el contacto, presione la Tecla Compositor <strong>de</strong> TEXTO .<br />
4. Desplace la Tecla <strong>de</strong> Dirección hacia la izquierda, <strong>de</strong>recha, hacia arriba o<br />
hacia abajo para seleccionar un contacto <strong>de</strong>seado y enseguida presione la Tecla<br />
[VISUALIZAR].<br />
Presione la Tecla <strong>de</strong> Función Derecha [Opciones] para seleccionar una <strong>de</strong> las<br />
opciones a continuación:<br />
• Nuevo Mensaje <strong>de</strong> TEXTO / Nuevo Mensaje con Imagen / Nuevo Mensaje con Ví<strong>de</strong>o /<br />
Nuevo Mensaje <strong>de</strong> Voz / Ajuste <strong>de</strong>l Marcado Rápido / Llamada / Copiar a la Tarjeta /<br />
Copiar Todo a la Tarjeta.<br />
MI TARJETA DE VISITAS<br />
Una Tarjeta <strong>de</strong> Visitas con el número <strong>de</strong>l teléfono móvil será exhibida automáticamente.<br />
EDITAR MI TARJETA DE VISITAS<br />
1. Desplace el teléfono hacia arriba, presione la Tecla [MENU] y a seguir<br />
presione 1. Contactos, 6. Mi Tarjeta <strong>de</strong> Visitas.<br />
2. Presione la Tecla <strong>de</strong> Función Izquierda [Editar].<br />
3. Edite las opciones Mi Tarjeta <strong>de</strong> Visitas y a seguir presione la Tecla para<br />
grabar sus alteraciones.<br />
ENVIAR MI TARJETA DE VISITAS<br />
1. Desplace el teléfono hacia arriba, presione la Tecla [MENU] y a seguir<br />
presione 1. Contactos, 6. Mi Tarjeta <strong>de</strong> Visitas.<br />
2. Presione la Tecla <strong>de</strong> Función Derecha [Enviar].<br />
01<br />
02<br />
03<br />
04<br />
05<br />
06<br />
07<br />
63
3. Presione 1. Enviar a través <strong>de</strong> Mensaje con Imagen, 2. Enviar a través <strong>de</strong><br />
Mensaje con Vi<strong>de</strong>o, 3. Enviar a través <strong>de</strong> Mensaje <strong>de</strong> Voz o 4. Enviar a<br />
través <strong>de</strong> Bluetooth.<br />
• Enviar a través <strong>de</strong> Mensaje con Imagen: Permite que usted envíe mensajes con imagen<br />
con la Tarjeta <strong>de</strong> Visitas como un anexo.<br />
• Enviar a través <strong>de</strong> Mensaje con Vi<strong>de</strong>o: Permite que usted envíe mensajes con vi<strong>de</strong>o con la<br />
Tarjeta <strong>de</strong> Visitas como un anexo.<br />
• Enviar a través <strong>de</strong> Mensajes <strong>de</strong> Voz: Permite que usted envíe mensajes <strong>de</strong> voz con la<br />
Tarjeta <strong>de</strong> Visitas como un anexo.<br />
• Enviar a través <strong>de</strong> Bluetooth: Permite que usted envíe la Tarjeta <strong>de</strong> Visitas para otro<br />
dispositivo Bluetooth®.<br />
HISTORICO DE LLAMADAS<br />
LLAMADAS NO CONTESTADAS<br />
Exhibe informaciones sobre las 90 llamadas no contestadas más recientes. Realice<br />
una llamada para un número <strong>de</strong> llamada no contestada apenas presionando la Tecla<br />
ENVIAR .<br />
1. Desplace el teléfono hacia arriba, presione la Tecla [MENU] y a seguir<br />
presione 3. Histórico <strong>de</strong> Llamadas, 1. Llamadas No Contestadas.<br />
2. Seleccione un registro y realice una <strong>de</strong> las siguientes opciones:<br />
• Presione la Tecla [ABRIR] para visualizar el registro.<br />
• Presione la Tecla Enviar para llamar al número.<br />
• Presione la Tecla <strong>de</strong> Función Derecha [Opciones] para seleccionar:<br />
Grabar en Contactos: Graba el contacto.<br />
Detalles: Exhibe las informaciones <strong>de</strong>l interlocutor se registrado en Contactos.<br />
Borrar: Borra la llamada <strong>de</strong> la lista <strong>de</strong> Llamadas No Contestadas.<br />
Bloquear/Desbloquear: Bloquea o <strong>de</strong>sbloquea el registro.<br />
Borrar Todos: Borra todos los registros <strong>de</strong> la lista <strong>de</strong> Llamadas No Contestadas.<br />
Timers <strong>de</strong> Llamadas: Exhibe el tiempo <strong>de</strong> uso.<br />
• Presione la Tecla <strong>de</strong> Función Izquierda [Mensaje] para seleccionar:<br />
Mensaje <strong>de</strong> TEXTO / Mensaje con Imagen / Mensaje con Vi<strong>de</strong>o / Mensaje <strong>de</strong> Voz<br />
Después <strong>de</strong> 90 llamadas no contestadas, la llamada más antigua será<br />
automáticamente borrada <strong>de</strong>l historial.<br />
LLAMADAS RECIBIDAS<br />
Exhibe informaciones sobre las 90 llamadas recibidas más recientes. Realice una<br />
llamada para un número recibido apenas presionando la Tecla ENVIAR .<br />
1. Desplace el teléfono hacia arriba, presione la Tecla [MENU] y a seguir<br />
presione 3. Histórico <strong>de</strong> Llamadas, 2. Llamadas Recibidas.<br />
2. Seleccione un registro y ejecute una <strong>de</strong> las opciones que se indican a<br />
continuación:<br />
• Presione la Tecla [ABRIR] para visualizar el registro.<br />
• Presione la Tecla Enviar para realizar una llamada para el número.<br />
• Presione la Tecla <strong>de</strong> Función Derecha [Opciones] para seleccionar:<br />
Grabar en Contactos: Graba el contacto.<br />
01<br />
02<br />
03<br />
04<br />
05<br />
06<br />
07<br />
64<br />
65
Detalles: Exhibe las informaciones <strong>de</strong>l interlocutor se registrado en Contactos.<br />
Borrar: Borra la llamada <strong>de</strong> la lista <strong>de</strong> Llamadas Recibidas.<br />
Bloquear/Desbloquear: Bloquea o <strong>de</strong>sbloquea el registro.<br />
Borrar Todos: Borra todos los registros <strong>de</strong> la Lista <strong>de</strong> Llamadas Recibidas.<br />
Timers <strong>de</strong> Llamadas: Exhibe el tiempo <strong>de</strong> uso.<br />
• Presione la Tecla <strong>de</strong> Función Izquierda [Mensaje] para seleccionar:<br />
Mensaje <strong>de</strong> TEXTO / Mensaje con Imagen / Mensaje <strong>de</strong> Vi<strong>de</strong>o / Mensaje <strong>de</strong> Voz<br />
Después <strong>de</strong> 90 llamadas recibidas, la llamada más antigua será automáticamente<br />
borrada <strong>de</strong>l historial.<br />
LLAMADAS MARCADAS<br />
Exhibe informaciones sobre los 90 números marcados más recientes. Realice una<br />
llamada para un número marcado apenas presionando la Tecla ENVIAR .<br />
1. Desplace el teléfono hacia arriba, presione la Tecla [MENU] y a seguir<br />
presione 3. Histórico <strong>de</strong> Llamadas, 3. Llamadas Marcadas.<br />
2. Seleccione un registro y ejecute una <strong>de</strong> las opciones que se indican a<br />
continuación:<br />
• Presione la Tecla [ABRIR] para visualizar el registro.<br />
• Presione la Tecla Enviar para llamar el número.<br />
• Presione la Tecla <strong>de</strong> Función Derecha [Opciones] para seleccionar:<br />
Grabar en Contactos: Graba el contacto.<br />
Detalles: Exhibe las informaciones <strong>de</strong>l interlocutor se registrado en Contactos.<br />
Borrar: Borra la llamada <strong>de</strong> la lista <strong>de</strong> Marcados.<br />
Bloquear/Desbloquear: Bloquea o <strong>de</strong>sbloquea el registro.<br />
Borrar Todos: Borra todos los registros <strong>de</strong> la lista <strong>de</strong> Llamadas Marcadas.<br />
Timers <strong>de</strong> Llamadas: Exhibe el tiempo <strong>de</strong> uso.<br />
• Presione la Tecla <strong>de</strong> Función Izquierda [Mensaje] para seleccionar:<br />
Mensaje <strong>de</strong> TEXTO / Mensaje con Imagen / Mensaje con Ví<strong>de</strong>o / Mensaje <strong>de</strong> Voz<br />
Después <strong>de</strong> 90 llamadas marcadas, la llamada más antigua será automáticamente<br />
borrada <strong>de</strong>l historial.<br />
HISTORICO DE LLAMADAS<br />
TODAS LAS LLAMADAS<br />
Exhibe informaciones sobre las llamadas recibidas, marcadas y no contestadas más<br />
recientes.<br />
1. Desplace el teléfono hacia arriba, presione la Tecla [MENU] y a seguir<br />
presione 3. Histórico <strong>de</strong> Llamadas, 4. Todas las Llamadas.<br />
2. Seleccione un registro y seleccione una <strong>de</strong> las opciones que se indican a<br />
continuación:<br />
• Presione la Tecla [ABRIR] para visualizar el registro.<br />
• Presione la Tecla Enviar para realizar una llamada para el número.<br />
• Presione la Tecla <strong>de</strong> Función Derecha [Opciones] para seleccionar:<br />
Detalles: Exhibe las informaciones <strong>de</strong>l interlocutor se registrado en Contactos.<br />
Borrar: Borra la llamada <strong>de</strong> la lista Todas las Llamadas.<br />
Bloquear/Desbloquear: Bloquea o <strong>de</strong>sbloquea el registro.<br />
Borrar Todos: Borra todos los registros <strong>de</strong> la lista Todas las Llamadas.<br />
Timers <strong>de</strong> Llamadas: Exhibe el tiempo <strong>de</strong> uso.<br />
• Presione la Tecla <strong>de</strong> Función Izquierda [Mensaje] para seleccionar:<br />
Mensaje <strong>de</strong> TEXTO / Mensaje con Imagen / Mensaje <strong>de</strong> Vi<strong>de</strong>o / Mensaje <strong>de</strong> Voz<br />
• Después <strong>de</strong> 270 llamadas recibidas, marcadas o perdidas, la llamada más antigua<br />
será automáticamente borrada <strong>de</strong>l historial.<br />
• Para visualizar una lista rápida <strong>de</strong> todas sus llamadas, presione la Tecla Enviar en<br />
el modo inactivo.<br />
TIMERS DE LLAMADAS<br />
Verifica el tiempo <strong>de</strong> uso y administra sus llamadas <strong>de</strong>ntro <strong>de</strong>l límite <strong>de</strong>finido. Para<br />
visualizar 11 timers (Última Llamada, Todas las Llamadas, Llamadas Recibidas,<br />
Llamadas Marcadas, Llamadas en Roaming, Datos Transmitidos, Datos Recibidos, Total<br />
<strong>de</strong> Datos, Última Restauración, Llamadas <strong>de</strong> Por Vida, Contador <strong>de</strong> Datos <strong>de</strong> Por Vida):<br />
1. Desplace el teléfono hacia arriba, presione la Tecla [MENU] y a seguir<br />
presione 3. Histórico <strong>de</strong> Llamadas, 5. Timers <strong>de</strong> Llamadas.<br />
2. Seleccione una lista <strong>de</strong> llamadas. Timers <strong>de</strong> llamadas incluyen:<br />
01<br />
02<br />
03<br />
04<br />
05<br />
06<br />
07<br />
66<br />
67
Última Llamada / Todas las Llamadas / Llamadas Recibidas / Llamadas<br />
Marcadas / Llamadas en Roaming / Datos Transmitidos / Dados<br />
Recibidos / Total <strong>de</strong> Datos / Última Restauración / Llamadas <strong>de</strong> Por Vida /<br />
Contador <strong>de</strong> Datos <strong>de</strong> Por Vida<br />
• Presione la Tecla <strong>de</strong> Función Izquierda [Restaurar] para reiniciar el timer<br />
seleccionado.<br />
• Presione la Tecla <strong>de</strong> Función Derecha [Restaurar Todos] para reiniciar todos los<br />
timers.<br />
• Usted no pue<strong>de</strong> reiniciar las opciones Reiniciar Último, Llamadas <strong>de</strong> Por Vida y<br />
Contador <strong>de</strong> Datos <strong>de</strong> Por Vida.<br />
easyedge SM<br />
easyedge SM<br />
easyedge SM le permite hacer más que sólo hablar por teléfono. Esta es una tecnología<br />
y un servicio que permite que usted haga un download y utilice aplicaciones en su<br />
teléfono. Con easyedge es rápido y fácil personalizar su teléfono para a<strong>de</strong>cuarlo a su<br />
estilo <strong>de</strong> vida y preferencias personales. Apenas haga el download <strong>de</strong> las aplicaciones<br />
<strong>de</strong>seadas. Des<strong>de</strong> campanillas y papeles <strong>de</strong> pared a juegos y herramientas <strong>de</strong><br />
productividad, usted pue<strong>de</strong> estar seguro que encontrará herramientas útiles, prácticas o<br />
mismo entretenimiento. Hay nuevas aplicaciones constantemente disponibles para uso.<br />
DOWNLOAD DE APLICACIONES<br />
Usted pue<strong>de</strong> <strong>de</strong>scargar aplicaciones y utilizar la tecnología easyedge SM por medio <strong>de</strong> los<br />
cuales el servicio está disponible.<br />
LLAMADAS RECIBIDAS<br />
Cuando utilice las aplicaciones, una llamada pausará automáticamente la aplicación y<br />
permitirá que usted conteste la llamada. Cuando finalice la llamada, podrá reiniciar el<br />
uso <strong>de</strong> la aplicación.<br />
1. Desplace el teléfono hacia arriba, presione la Tecla [MENU] y a seguir<br />
presione 5. easyedge.<br />
Acceso Rápido: En el modo inactivo, <strong>de</strong>splace el teléfono hacia arriba y presione la<br />
Tecla <strong>de</strong> Dirección hacia abajo.<br />
SU NAVEGADOR<br />
Con la función Su Navegador, obtenga todas las funciones <strong>de</strong> un sistema <strong>de</strong> navegación<br />
vehicular avanzado en su teléfono móvil con la navegación por voz habilitada por GPS<br />
paso a paso. Busque cualquier <strong>de</strong>stino incluyendo gasolineras, cajeros electrónicos,<br />
restaurantes y otros servicios. Obtenga mapas <strong>de</strong>tallados <strong>de</strong> cualquier localidad.<br />
68 69
DESCARGAR LAS INSTRUCCIONES DESDE SU NAVEGADOR DESDE<br />
easyedge SM<br />
1. Seleccione easyedge abriendo el menú <strong>de</strong>l teléfono y seleccionando (Exhibir<br />
easyedge star).<br />
2. las flechas hacia arriba / hacia abajo para navegar al icono “carro <strong>de</strong> compras”<br />
y seleccione “(pue<strong>de</strong> variar en las opciones <strong>de</strong> navegación). Seleccione el<br />
Catálogo.<br />
3. Desplace hacia la carpeta Navegación.<br />
4. Seleccione la opción <strong>de</strong> pago.<br />
5. Seleccione Teléfono o Tarjeta.<br />
6. El download será iniciado y la aplicación será instalada en el dispositivo.<br />
ACTIVACION DE LA APLICACION SU NAVEGADOR<br />
1. Acce<strong>de</strong>r al menú principal easyedge a través <strong>de</strong>l acceso directo <strong>de</strong>l dispositivo<br />
en modo <strong>de</strong> espera o <strong>de</strong>s<strong>de</strong> las opciones <strong>de</strong>l menú <strong>de</strong>l dispositivo.<br />
2. Su navegador <strong>de</strong>be aparecer en la lista <strong>de</strong> aplicaciones <strong>de</strong>scargadas en el<br />
dispositivo. Selecciona Su Navegador - la aplicación será abierta.<br />
A PARTIR DEL MODO INACTIVO DE SU NAVEGADOR QUE USTED PUEDE<br />
SELECCIONAR<br />
• Usted pue<strong>de</strong> seleccionar Dirigir Hasta con indicaciones paso a paso a una<br />
<strong>de</strong>terminada dirección, aeropuerto, direcciones <strong>de</strong> contactos y más.<br />
• Usted pue<strong>de</strong> seleccionar Lugares para buscar establecimientos comerciales más<br />
cercanos, gasolineras más baratas y más.<br />
• Usted pue<strong>de</strong> seleccionar Mapas y Tránsito para su localización actual en un<br />
mapa y el tráfico presente en el área.<br />
NAVEGADOR<br />
NAVEGADOR<br />
VISITA A UNA NUEVA PAGINA DE INTERNET<br />
Utilice el navegador <strong>de</strong> Internet para acce<strong>de</strong>r Internet y navegar en la red.<br />
1. Desplace el teléfono hacia arriba, presione la Tecla [MENU] y a seguir<br />
presione 6. Navegador.<br />
2. En la pantalla U.S. Cellular®, presione la Tecla <strong>de</strong> Función Izquierda<br />
[Menú].<br />
3. Presione la Tecla <strong>de</strong> Dirección hacia abajo para seleccionar la guía Opera en<br />
la barra <strong>de</strong> herramientas.<br />
4. Presione la Tecla para exhibir el menú Opera.<br />
5. Presione la Tecla <strong>de</strong> Dirección hacia abajo para seleccionar Página Inicial.<br />
Presione la Tecla .<br />
6. La ban<strong>de</strong>ja <strong>de</strong> entrada URL será seleccionada. Presione la Tecla . Utilice el<br />
teclado para insertar la URL <strong>de</strong>seada. Presione la Tecla [Vaya].<br />
7. La nueva página <strong>de</strong> Internet se exhibirá.<br />
ADICION DE UN MARCADOR<br />
La función Bookmark facilita el acceso a sus sitios <strong>de</strong> Internet favoritos. Las páginas <strong>de</strong><br />
la web marcadas pue<strong>de</strong>n ser rápidamente abiertas o visitadas nuevamente a cualquier<br />
momento. Usted pue<strong>de</strong> marcar cualquier página <strong>de</strong> la web exhibida en el momento.<br />
1. En la página <strong>de</strong> Internet, presione la Tecla <strong>de</strong> Función Izquierda [Menú].<br />
2. Presione la Tecla <strong>de</strong> Dirección hacia abajo para seleccionar la guía Opera en<br />
la barra <strong>de</strong> herramientas.<br />
3. Presione la Tecla para exhibir el menú Opera.<br />
4. Presione la Tecla <strong>de</strong> Dirección hacia abajo para seleccionar Marcadores.<br />
Presione la Tecla .<br />
5. Presione la Tecla <strong>de</strong> Dirección hacia arriba para seleccionar la página <strong>de</strong><br />
Internet que usted <strong>de</strong>sea agregar (+) como un marcador. Presione la Tecla .<br />
70 71
6. La pantalla Agregar Marcador se exhibirá. Presione la Tecla <strong>de</strong> Dirección<br />
hacia abajo para seleccionar la carpeta.<br />
7. Presione la Tecla <strong>de</strong> Función Izquierda [Grabar].<br />
8. El marcador será indicado. Presione la Tecla <strong>de</strong> Dirección hacia arriba o<br />
hacia abajo para seleccionarla.<br />
9. Presione la Tecla <strong>de</strong> Función Izquierda [Administración]. Usted pue<strong>de</strong><br />
abrirla en una nueva guía, borrar, editar o grabarla en una nueva carpeta.<br />
NAVEGADOR<br />
TONE ROOM DELUXE<br />
Tone Room Deluxe es un servicio que permite que usted acceda el contenido más<br />
reciente y más utilizado entre sus artistas favoritos para campanillas y tonos <strong>de</strong> llamada<br />
<strong>de</strong> retorno a partir <strong>de</strong> su teléfono o por Internet. Este servicio fácil <strong>de</strong> usar incorpora un<br />
catálogo musical con docenas <strong>de</strong> miles <strong>de</strong> títulos para su navegación. Personalice su<br />
experiencia y exprese quien usted realmente es firmando el servicio Tone room Deluxe y<br />
utilizando los tonos <strong>de</strong> llamada <strong>de</strong> retorno para personalizar la melodía a oscura <strong>de</strong> sus<br />
amigos y familia cuando se contacten por teléfono con usted.<br />
1. Desplace el teléfono hacia arriba, presione la Tecla [MENU] y a seguir<br />
presione 7. Tone room Deluxe.<br />
Esta aplicación solamente está disponible para clientes <strong>de</strong> U.S. Cellular.<br />
PAC-MAN<br />
Permite que usted utilice la aplicación PAC-MAN previamente cargado.<br />
1. Desplace el teléfono hacia arriba, presione la Tecla [MENU] y a seguir<br />
presione 8. PAC-MAN.<br />
Tarifas pue<strong>de</strong>n ser cobradas <strong>de</strong>l usuario.<br />
72 73
MANDOS DE VOZ<br />
Su teléfono viene equipado con una función Mandos <strong>de</strong> Voz Avanzados (AVC). Esta<br />
función permite que usted realice llamadas o utilice las funciones <strong>de</strong>l teléfono<br />
utilizando apenas su voz. Todo lo que usted tiene que hacer es hablar en el teléfono y a<br />
seguir el teléfono reconocerá su voz y completará las tareas automáticamente.<br />
1. Desplace el teléfono hacia arriba, presione la Tecla [MENU] y a seguir<br />
presione 9. Herramientas y Ajustes, 1. Herramientas, 1. Mandos <strong>de</strong> Voz.<br />
Acceso Rápido: En el modo inactivo, presione la Tecla Mandos <strong>de</strong> Voz (ubicada en el<br />
lado izquierdo <strong>de</strong>l dispositivo) para acce<strong>de</strong>r el menú Mandos <strong>de</strong> Voz.<br />
2. El teléfono exhibe el menú Mandos <strong>de</strong> Voz y solicita que usted pronuncie el<br />
nombre <strong>de</strong>l mando que <strong>de</strong>sea utilizar. Para concluir la tarea, simplemente siga<br />
los prompts <strong>de</strong> voz. Usted pue<strong>de</strong> pronunciar el nombre <strong>de</strong>l mando <strong>de</strong>spués <strong>de</strong><br />
oír el bip.<br />
3. Seleccione una <strong>de</strong> las opciones que se indican a continuación y a seguir<br />
presione la Tecla .<br />
Marcar / Enviar Texto < Nombre o no.> / Enviar Imagen<br />
< Nombre o no.> / Enviar Ví<strong>de</strong>o < Nombre o no.> / Mirar /<br />
Ir hacia / Remarcar / Reproducir /<br />
Verificar <br />
Las informaciones <strong>de</strong>l menú Mandos <strong>de</strong> Voz aparecen, presione la Tecla <strong>de</strong> Función<br />
Izquierda [Tutorial]. Presione la Tecla <strong>de</strong> Función Derecha [Ajustes] para<br />
acce<strong>de</strong>r los Ajustes <strong>de</strong> Mandos <strong>de</strong> Voz. Por favor, consulte la página 77 para obtener<br />
más <strong>de</strong>talles sobre Ajustes <strong>de</strong> Mandos <strong>de</strong> Voz.<br />
4. Cuando el aparato reconozca uno <strong>de</strong> estos mandos, activará la aplicación<br />
asociada. Si el teléfono no escucha un mando <strong>de</strong>ntro <strong>de</strong> aproximadamente<br />
ocho segundos, el modo AVC será automáticamente <strong>de</strong>sactivado.<br />
HERRAMIENTAS<br />
MARCAR < NOMBRE O No.><br />
Utilice el mando Marcar para realizar el marcado por voz <strong>de</strong> un nombre <strong>de</strong> su Lista<br />
<strong>de</strong> Contactos o un número <strong>de</strong> teléfono. Al marcar un número pronuncie cada dígito<br />
pausadamente, pero no haga largas pausas entre los dígitos.<br />
1. Usted escuchará Pronuncie un mando y el menú Mandos <strong>de</strong> Voz será<br />
exhibido.<br />
2. Si <strong>de</strong>sea hacer una llamada para un contacto <strong>de</strong> su Lista <strong>de</strong> Contactos,<br />
pronuncie Marcar . Su teléfono le solicitará que usted confirme el<br />
nombre pronunciado. Pronuncie “Si” cuando haya sido repetido correctamente.<br />
Este número <strong>de</strong> teléfono será marcado. Cuando exista más <strong>de</strong> un número<br />
grabado para contacto, usted tendrá que confirmar el número a marcar.<br />
Ejemplo: Marcar John Smith Móvil<br />
ENVIAR TEXTO < NOMBRE O No.><br />
Utilice el mando Enviar Texto para enviar un mensaje <strong>de</strong> texto para un nombre o<br />
número especificado.<br />
1. Usted escuchará Pronuncie un mando y el menú Mandos <strong>de</strong> Voz será<br />
exhibido.<br />
2. Pronuncie “Enviar Texto” seguido inmediatamente por el Mensaje <strong>de</strong> Texto.<br />
Ejemplo: Enviar Texto para Tom Smith<br />
ENVIAR IMAGEN < NOMBRE O No.><br />
Utilice el mando Enviar Imagen para enviar un mensaje multimedia para un nombre o<br />
número especificado.<br />
1. Usted escuchará Pronuncie un mando y el menú Mandos <strong>de</strong> Voz será<br />
exhibido.<br />
2. Pronuncie “Enviar Imagen” seguido inmediatamente por el Mensaje con<br />
Imagen.<br />
Ejemplo: Enviar Imagen para Tom Smith<br />
01<br />
02<br />
03<br />
04<br />
05<br />
06<br />
07<br />
74<br />
75
ENVIAR VIDEO < NOMBRE O No.><br />
Utilice el mando Enviar Ví<strong>de</strong>o para enviar un mensaje multimedia para un nombre o<br />
número especificado.<br />
1. Usted escuchará Pronuncie un mando y el menú Mandos <strong>de</strong> Voz será<br />
exhibido.<br />
2. Pronuncie “Enviar Ví<strong>de</strong>o” seguido inmediatamente por el Mensaje con Ví<strong>de</strong>o.<br />
Ejemplo: Enviar Ví<strong>de</strong>o para Tom Smith<br />
MIRAR < NOMBRE><br />
Utilice el mando Mirar para recuperar y exhibir informaciones sobre cualquier nombre<br />
almacenado en Contactos.<br />
1. Usted escuchará Pronuncie un mando y el menú Mandos <strong>de</strong> Voz será<br />
exhibido.<br />
2. Pronuncie “Mirar”.<br />
3. El nombre <strong>de</strong>l Contacto será exhibido.<br />
IR HACIA <br />
Utilice el mando Ir Hacia para abrir una aplicación en su teléfono. Usted pue<strong>de</strong><br />
pronunciar “Ir Hacia” y será solicitado que pronuncie el nombre <strong>de</strong> la aplicación o pue<strong>de</strong><br />
saltarse el prompt pronunciando “Ir Hacia” seguido <strong>de</strong>l nombre <strong>de</strong> la aplicación.<br />
1. Usted escuchará Pronuncie un mando y el menú Mandos <strong>de</strong> Voz será<br />
exhibido.<br />
2. Para acce<strong>de</strong>r un menú en el teléfono, pronuncie “Ir Hacia” seguido <strong>de</strong>l menú.<br />
Ejemplo: “Ir Hacia Calendario”. Si ninguna opción <strong>de</strong>l menú es establecida, será<br />
ofrecida una lista <strong>de</strong> opciones.<br />
REMARCADO<br />
Utilice el mando Remarcar para realizar una llamada para el último número marcado.<br />
1. Usted escuchará Pronuncie un mando y el menú Mandos <strong>de</strong> Voz será<br />
exhibido.<br />
HERRAMIENTAS<br />
2. Pronuncie “Remarcar”.<br />
3. Su teléfono hará una llamada para el último número marcado.<br />
REPRODUCIR <br />
Pronuncie “Reproducir” seguido por un título <strong>de</strong> la lista <strong>de</strong> reproducción y a seguir su<br />
teléfono reproducirá la lista <strong>de</strong> reproducción reconocida.<br />
1. Usted escuchará Pronuncie un mando y el menú Mandos <strong>de</strong> Voz será<br />
exhibido.<br />
2. Pronuncie “Reproducir” para reproducir una lista <strong>de</strong> reproducción individual,<br />
o pronuncie “Todas las Músicas” para reproducir todas las músicas grabadas<br />
en su teléfono.<br />
VERIFICAR <br />
El mando Verificar permite que usted verifique las informaciones <strong>de</strong> estado para su<br />
teléfono. Usted pue<strong>de</strong> pronunciar “Verificar” o “Verificar Estado” para visualizar y<br />
escuchar todas las informaciones <strong>de</strong> estado.<br />
1. Usted escuchará Pronuncie un mando y el menú Mandos <strong>de</strong> Voz será<br />
exhibido.<br />
2. Pronuncie “Verificar” seguido inmediatamente por uno <strong>de</strong> los ítems que se<br />
muestran a continuación:<br />
Estado / Buzón / Mensajes / Llamadas No Contestadas / Tiempo / Fuerza<br />
<strong>de</strong> la Señal / Batería / Mi Número <strong>de</strong> Teléfono / Volumen<br />
AJUSTES DE LOS MANDOS DE VOZ<br />
CONFIRMACION<br />
Cuando el teléfono no reconozca su mando <strong>de</strong> voz, solicitará que usted repita su<br />
mando <strong>de</strong> voz. Si el teléfono no reconoce el nombre o el número, exhibirá una lista <strong>de</strong><br />
hasta tres opciones y pronunciará cada una <strong>de</strong> ellas por vez. Usted pue<strong>de</strong> controlar la<br />
frecuencia con la que el teléfono solicita que usted confirme el nombre o el número<br />
reconocido.<br />
01<br />
02<br />
03<br />
04<br />
05<br />
06<br />
07<br />
76<br />
77
78<br />
1. Desplace el teléfono hacia arriba, presione la Tecla [MENU] y a seguir<br />
presione 9. Herramientas y Ajustes, 1. Herramientas, 1. Mandos <strong>de</strong> Voz.<br />
Acceso Rápido: En el modo inactivo, presione la Tecla Mandos <strong>de</strong> Voz (ubicada en<br />
el lado izquierdo <strong>de</strong>l dispositivo) para acce<strong>de</strong>r el menú Mandos <strong>de</strong> Voz y presione la<br />
Tecla <strong>de</strong> Función Derecha [AJUSTES].<br />
2. Presione la Tecla <strong>de</strong> Función Derecha [Ajustes] y a seguir presione<br />
1. Confirmación.<br />
3. Presione la Tecla <strong>de</strong> Dirección hacia arriba o hacia abajo para seleccionar<br />
Automático, Siempre Confirmar o Nunca Confirmar y a seguir presione<br />
la Tecla .<br />
Para visualizar la información sobre cada opción, presione la Tecla <strong>de</strong> Función<br />
Izquierda [Ayuda].<br />
ADAPTACION<br />
Los Mandos <strong>de</strong> Voz son pronunciados in<strong>de</strong>pendientemente, esto significa que ningún<br />
entrenamiento o adaptación es necesario. Algunos usuarios con acentos marcados o<br />
características <strong>de</strong> voz no comunes pue<strong>de</strong>n encontrar dificulta<strong>de</strong>s para obtener una alta<br />
precisión en los Mandos <strong>de</strong> Voz in<strong>de</strong>pendientes, <strong>de</strong> tal forma que la función Adaptar<br />
Voz permite que los usuarios mejoren dramáticamente la precisión <strong>de</strong>l reconocimiento<br />
<strong>de</strong>spués <strong>de</strong> adaptar sus voces. Los usuarios que alcanzan la precisión <strong>de</strong> reconocimiento <strong>de</strong><br />
voz no encontrarán ninguna ventaja para realizar la función Adaptar Voz.<br />
1. Desplace el teléfono hacia arriba, presione la Tecla [MENU] y a seguir<br />
presione 9. Herramientas y Ajustes, 1. Herramientas, 1. Mandos <strong>de</strong> Voz.<br />
2. Presione la Tecla <strong>de</strong> Función Derecha [Ajustes] y a seguir presione a<br />
tecla 2. Adaptación.<br />
3. Seleccione 1. Adaptar Voz y a seguir presione la Tecla .<br />
• Adaptar Voz: Requiere que usted haga algunas grabaciones <strong>de</strong> su voz para personalizar<br />
el sistema <strong>de</strong> reconocimiento <strong>de</strong> voz. Esto llevará apenas algunos minutos.<br />
• Restaurar Voz: Una vez finalizado el proceso <strong>de</strong> adaptación, usted pue<strong>de</strong> restaurar<br />
la adaptación a los valores <strong>de</strong> fábrica. La opción Restaurar Voz solamente aparece<br />
<strong>de</strong>spués <strong>de</strong> finalizar el proceso <strong>de</strong> Adaptar Voz.<br />
HERRAMIENTAS<br />
4. El mensaje “La adaptación tardará algunos minutos para que sea<br />
concluida. Adapte en un recinto silencioso. Presione OK para iniciar”<br />
será exhibido en la pantalla. Presione la Tecla <strong>de</strong> Función Izquierda<br />
[Empezar <strong>de</strong> nuevo]. Aguar<strong>de</strong> el bip y a seguir repita las frases utilizando<br />
un tono <strong>de</strong> voz normal.<br />
5. Cuando usted termina una sesión completa, acce<strong>de</strong>rá la pantalla que exhibe<br />
el mensaje: “Adaptación Concluida”.<br />
MODOS DE AUDIO<br />
Permite que usted seleccione los modos <strong>de</strong> audio para el mando <strong>de</strong> voz.<br />
1. Desplace el teléfono hacia arriba, presione la Tecla [MENU] y a seguir<br />
presione 9. Herramientas y Ajustes, 1. Herramientas, 1. Mandos <strong>de</strong> Voz.<br />
2. Presione la Tecla <strong>de</strong> Función Derecha [Ajustes] y a seguir presione<br />
3. Modos <strong>de</strong> Audio.<br />
3. Seleccione el sistema <strong>de</strong> mando <strong>de</strong> voz entre los siguientes:<br />
• Modo Experto: Para que el teléfono emita bips solamente para orientación <strong>de</strong> audio.<br />
• Modo Prompt: Para que el teléfono exhiba el prompt para informaciones necesarias<br />
(estándar).<br />
• Modo <strong>de</strong> Lectura: Para que el teléfono exhiba el prompt para informaciones necesarias<br />
y lectura <strong>de</strong>l contenido <strong>de</strong> la pantalla.<br />
ALTAVOZ<br />
Permite que usted seleccione como el sistema utilizará el altavoz.<br />
1. Desplace el teléfono hacia arriba, presione la Tecla [MENU] y a seguir<br />
presione 9. Herramientas y Ajustes, 1. Herramientas, 1. Mandos <strong>de</strong> Voz.<br />
2. Presione la Tecla <strong>de</strong> Función Derecha [Ajustes] y a seguir presione<br />
4. Altavoz.<br />
3. Selecione el modo altavoz entre los siguientes:<br />
• Siempre activado: Permite la reproducción <strong>de</strong> audio a través <strong>de</strong>l altavoz<br />
• Siempre <strong>de</strong>sactivado: Permite la reproducción <strong>de</strong> audio a través <strong>de</strong>l parlante interior.<br />
01<br />
02<br />
03<br />
04<br />
05<br />
06<br />
07<br />
79
SOBRE<br />
1. Desplace el teléfono hacia arriba, presione la Tecla [MENU] y a seguir<br />
presione 9. Herramientas y Ajustes, 1. Herramientas, 1. Mandos <strong>de</strong> Voz.<br />
2. Presione la Tecla <strong>de</strong> Función Derecha [Ajustes] y a seguir presione<br />
5. Sobre.<br />
3. La versión Nuance será exhibida.<br />
4. Para retornar a la pantalla anterior, presione la Tecla CLR o la Tecla <strong>de</strong><br />
Función Derecha [Volver].<br />
CALCULADORA<br />
La función Calculadora permite que usted realice cálculos matemáticos simples. Para<br />
acce<strong>de</strong>r la calculadora:<br />
1. Desplace el teléfono hacia arriba, presione la Tecla [MENU] y a seguir<br />
presione 9. Herramientas y Ajustes, 1. Herramientas, 2. Calculadora.<br />
2. Siga las instrucciones que se muestran a continuación para calcular<br />
8x6 ÷ 4-2,5 = 9,5<br />
• Ingrese 8 y a seguir presione la Tecla <strong>de</strong> Dirección <strong>de</strong>recha.<br />
• Ingrese 6 y a seguir presione la Tecla <strong>de</strong> Dirección izquierda.<br />
• Ingrese 4 y a seguir presione la Tecla <strong>de</strong> Dirección hacia abajo.<br />
• Ingrese 2 y a seguir presione la Tecla para inserir (.).<br />
• Ingrese 2 y a seguir presione la Tecla y se exhibirá la respuesta (9.5).<br />
3. Para reiniciar, presione la Tecla <strong>de</strong> Función Izquierda [Borrar].<br />
• Tecla <strong>de</strong> dirección <strong>de</strong>recha: X<br />
• Tecla <strong>de</strong> dirección hacia abajo; -<br />
• Tecla <strong>de</strong> Dirección izquierda: ÷<br />
• Tecla <strong>de</strong> Dirección hacia arriba: +<br />
• Tecla *: .<br />
• Tecla <strong>de</strong> Función Izquierda: Borrar<br />
• Tecla OK: =<br />
HERRAMIENTAS<br />
• Para cambiar el número exhibido <strong>de</strong> positivo (+) para negativo (-) y vice-versa,<br />
presione la Tecla # .<br />
• Presione la Tecla <strong>de</strong> Función Derecha [Operador] para utilizar paréntesis 1. (, 2. )<br />
y 3. Exponent.<br />
CALCULADORA DE PROPINAS<br />
Permite que usted calcule la propina y <strong>de</strong>termine el valor que cada persona tiene que<br />
pagar sobre la cuenta.<br />
1. Desplace el teléfono hacia arriba, presione la Tecla [MENU] y a seguir<br />
presione 9. Herramientas y Ajustes, 1. Herramientas, 3. Calculadora <strong>de</strong><br />
Propinas.<br />
2. Ingrese el valor en el campo Cuenta Total y presione la Tecla <strong>de</strong> Dirección<br />
hacia abajo.<br />
3. Seleccione el porcentaje <strong>de</strong> la propina en el campo Propina (%) presionando la<br />
Tecla <strong>de</strong> Dirección para la izquierda o <strong>de</strong>recha. Presione la Tecla <strong>de</strong> Dirección<br />
hacia abajo.<br />
4. En el campo Dividir, ingrese el número <strong>de</strong> personas presionando la Tecla <strong>de</strong><br />
Dirección para la izquierda o <strong>de</strong>recha. El valor <strong>de</strong> la propina y el valor por<br />
persona se exhibirán.<br />
5. El valor <strong>de</strong> la propina se exhibirá en el campo Propina ($).<br />
6. Presione la Tecla <strong>de</strong> Función Izquierda [Reiniciar] para borrar los campos.<br />
Presione la Tecla <strong>de</strong> Función Derecha [Cerrar] para retornar al menú<br />
anterior.<br />
01<br />
02<br />
03<br />
04<br />
05<br />
06<br />
07<br />
80<br />
81
CALENDARIO<br />
La herramienta Calendario ofrece un acceso fácil y conveniente a su programación.<br />
Simplemente basta con que usted almacene sus compromisos y su teléfono lo alarmará<br />
en el momento oportuno.<br />
1. Desplace el teléfono hacia arriba, presione la Tecla [MENU] y a seguir<br />
presione 9. Herramientas y Ajustes, 1. Herramientas, 4. Calendario.<br />
Acceso Rápido: En el modo inactivo, <strong>de</strong>splace el teléfono hacia arriba y presione la<br />
Tecla <strong>de</strong> Dirección izquierda.<br />
2. Seleccione el día programado.<br />
3. Presione la Tecla <strong>de</strong> Función Izquierda [Nuevo].<br />
4. Es seleccionado el campo Asunto. Ingrese el nombre <strong>de</strong>l evento utilizando el<br />
Teclado QWERTY. Presione la Tecla <strong>de</strong> Dirección hacia abajo para ajustar los<br />
<strong>de</strong>más campos para el evento:<br />
• Hora <strong>de</strong> Inicio: Presione la Tecla <strong>de</strong> Función Izquierda [Confirmar], ajuste la hora<br />
<strong>de</strong> inicio y presione la Tecla .<br />
• Hora <strong>de</strong> Término: Presione la Tecla <strong>de</strong> Función Izquierda [Confirmar], ajuste la<br />
hora <strong>de</strong> termino y presione la Tecla .<br />
• Fecha <strong>de</strong> Inicio: Presione la Tecla <strong>de</strong> Función Izquierda [Confirmar], ajuste la fecha<br />
<strong>de</strong> inicio y presione la Tecla .<br />
• Fecha <strong>de</strong> Término: Presione la Tecla <strong>de</strong> Función Izquierda [Confirmar], ajuste la<br />
fecha <strong>de</strong> término y presione la Tecla .<br />
• Recurrencia: Presione la Tecla <strong>de</strong> Función Izquierda [Confirmar] y seleccione la<br />
recurrencia <strong>de</strong>l evento entre las opciones que se muestran a continuación<br />
y presione la Tecla .<br />
Ninguna / Diariamente / A cada X Días / Semanalmente / Mensualmente /<br />
Anualmente<br />
• Hora <strong>de</strong> Alarma: Presione la Tecla <strong>de</strong> Función Izquierda [Confirmar] y seleccione<br />
la hora <strong>de</strong> alarma antes que <strong>de</strong> la realización <strong>de</strong>l evento entre las<br />
opciones que se indican a continuación y presione la Tecla .<br />
Una Vez / 15 minutos antes / 30 minutos antes / 45 minutos antes /<br />
1 hora antes / 3 horas antes / 5 horas antes / 1 día antes<br />
HERRAMIENTAS<br />
• Recordatorio: Presione la Tecla <strong>de</strong> Función Izquierda [Confirmar] y seleccione<br />
un recordatorio antes <strong>de</strong>l evento entre las opciones que se indican a<br />
continuación y presione la Tecla .<br />
Desactivado / Una Vez / A cada 2 Minutos / A cada 15 Minutos<br />
• Tono <strong>de</strong> Alarma: Presione la Tecla <strong>de</strong> Función Izquierda [Confirmar] para<br />
seleccionar una nueva campanilla. Presione la Tecla <strong>de</strong> Función<br />
Izquierda [Reproducir] para reproducir una campanilla y<br />
presione la Tecla [Confirmar].<br />
• Vibrar: Presione la Tecla <strong>de</strong> Función Izquierda [Confirmar] y seleccione Activar o<br />
Desactivar y presione la Tecla .<br />
• Tipo <strong>de</strong> Evento: Presione la Tecla <strong>de</strong> Función Izquierda [Confirmar] y seleccione<br />
un tipo <strong>de</strong> evento entre los que se indican a continuación y presione la<br />
Tecla .<br />
Evento (por <strong>de</strong>fecto) / Importante / Comida / Juego/Práctica/<br />
ejercicio / Vacaciones/Feriado / Cumpleaños / Aniversario /<br />
Negocio / Social / Médico/Dental / Escuela / Concert/<br />
Performance / Fecha <strong>de</strong> juego / Picnic / Salida / Personal /<br />
Llamada telefónica / Debe asistir / Viajar requerido / Necesita<br />
preparación / Mujer / Hombre / Niña / Niño / Familia<br />
• Anexo: Presione la Tecla <strong>de</strong> Función Izquierda [Agregar] y seleccione Imágenes o<br />
Vi<strong>de</strong>os para anexar y presione la Tecla . Seleccione la imagen o el vi<strong>de</strong>o <strong>de</strong>seado<br />
y presione la Tecla .<br />
• Localización: Ingrese las informaciones <strong>de</strong> la localización. Presione la Tecla <strong>de</strong> Función<br />
Izquierda [Abc] para seleccionar el modo <strong>de</strong> inserción y presione la<br />
Tecla .<br />
• Notas: Ingrese la nota <strong>de</strong> la programación. Presione la Tecla <strong>de</strong> Función Izquierda<br />
[Abc] para seleccionar el modo <strong>de</strong> inserción y presione la Tecla .<br />
5. Presione la Tecla [GRABAR] para grabar. La fecha <strong>de</strong>l evento será marcada<br />
en su calendario.<br />
VISUALIZACION DEL EVENTO GRABADO<br />
1. Desplace el teléfono hacia arriba, presione la Tecla [MENU] y a seguir<br />
presione 9. Herramientas y Ajustes, 1. Herramientas, 4. Calendario.<br />
2. Seleccione el evento y enseguida presione la Tecla [VISUALIZAR].<br />
01<br />
02<br />
03<br />
04<br />
05<br />
06<br />
07<br />
82<br />
83
BORRADO DEL EVENTO GRABADO<br />
1. Desplace el teléfono hacia arriba, presione la Tecla [MENU] y a seguir<br />
presione 9. Herramientas y Ajustes, 1. Herramientas, 4. Calendario.<br />
2. Seleccione el evento y enseguida presione la Tecla [VISUALIZAR].<br />
3. Presione la Tecla <strong>de</strong> Función Derecha [Opciones], 4. Borrar.<br />
4. El mensaje “¿BORRAR EVENTO” será exhibido en la pantalla. Presione la Tecla<br />
<strong>de</strong> Dirección hacia arriba o hacia abajo para seleccionar Sí y presione la<br />
Tecla .<br />
BORRAR TODOS LOS EVENTOS ANTERIORES<br />
Permite que usted borre los eventos anteriores a la fecha actual.<br />
1. Desplace el teléfono hacia arriba, presione la Tecla [MENU] y a seguir<br />
presione 9. Herramientas y Ajustes, 1. Herramientas, 4. Calendario.<br />
2. Seleccione el evento y enseguida presione la Tecla [VISUALIZAR].<br />
3. Presione la Tecla <strong>de</strong> Función Derecha [Opciones], seleccione 6. Borrar<br />
Todos los Eventos Antiguos y presione la Tecla .<br />
4. “BORRAR TODOS LOS EVENTOS ANTIGUOS” será exhibido en la pantalla.<br />
Presione la Tecla <strong>de</strong> Dirección hacia arriba o hacia abajo para seleccionar Sí<br />
y enseguida presione la Tecla .<br />
DIARIO ELECTRONICO<br />
El Diario Electrónico es una aplicación <strong>de</strong> diario simples proyectado para tener un fácil<br />
entendimiento y conveniente para uso diario.<br />
1. Desplace el teléfono hacia arriba, presione la Tecla [MENU] y a seguir<br />
presione 9. Herramientas y Ajustes, 1. Herramientas, 5. Diario<br />
Electrónico.<br />
2. Presione la Tecla <strong>de</strong> Función Izquierda [Nuevo].<br />
3. En el campo Clima y Sentimiento, presione la Tecla <strong>de</strong> Función Izquierda<br />
[Confirmar] y enseguida seleccione uno <strong>de</strong> los íconos y presione la Tecla .<br />
HERRAMIENTAS<br />
4. Presione la Tecla <strong>de</strong> Dirección hacia abajo para ajustar los <strong>de</strong>más campos<br />
para el Diario Electrónico:<br />
TITULO<br />
Ingrese el título <strong>de</strong>l diario.<br />
IMAGEN<br />
Presione la Tecla <strong>de</strong> Función Izquierda [Confirmar] para seleccionar una<br />
<strong>de</strong> las imágenes almacenadas en Imágenes y presione la Tecla . Por favor,<br />
consulte la página 124 para obtener más <strong>de</strong>talles sobre IMAGENES.<br />
TEXTO<br />
Ingrese el mensaje para el diario.<br />
INGRESE EL MENSAJE PARA EL DIARIO.<br />
Presione la Tecla <strong>de</strong> Dirección hacia la izquierda o <strong>de</strong>recha para seleccionar<br />
uno <strong>de</strong> los planes <strong>de</strong> fondo que se muestras a continuación:<br />
Blackboard / Essay / Sky / Letter<br />
5. Presione la Tecla <strong>de</strong> Función Derecha [Opciones] y enseguida presione<br />
1. Pre-visualizar para pre-visualizar los ajustes seleccionados o 2. Cancelar<br />
Diario Electrónico para <strong>de</strong>scartar su nuevo Diario Electrónico.<br />
6. Presione la Tecla [GRABAR] o save your E-diary.<br />
ENVIO DE UN DIARIO ELECTRONICO<br />
1. Desplace el teléfono hacia arriba, presione la Tecla [MENU] y a seguir<br />
presione 9. Herramientas y Ajustes, 1. Herramientas, 5. Diario<br />
Electrónico.<br />
2. Seleccione un Diario Electrónico y presione la Tecla <strong>de</strong> Función Derecha<br />
[Opciones].<br />
01<br />
02<br />
03<br />
04<br />
05<br />
06<br />
07<br />
84<br />
85
86<br />
3. Presione la Tecla <strong>de</strong> Dirección hacia arriba o hacia abajo para seleccionar<br />
1. Enviar y presione la Tecla y enseguida componga un Mensaje con<br />
Imagen y presione la Tecla [ENVIAR]. Por favor, consulte la página 137<br />
para obtener más <strong>de</strong>talles sobre Mensaje con Imagen.<br />
EDICION DE UN DIARIO ELECTRONICO<br />
1. Desplace el teléfono hacia arriba, presione la Tecla [MENU] y a seguir<br />
presione 9. Herramientas y Ajustes, 1. Herramientas, 5. Diario<br />
Electrónico.<br />
2. Seleccione un Diario Electrónico y enseguida presione la Tecla <strong>de</strong> Función<br />
Derecha [Opciones].<br />
3. Presione la Tecla <strong>de</strong> Dirección hacia arriba o hacia abajo para seleccionar<br />
2. Editar y presione la Tecla y enseguida modifique el Diario Electrónico.<br />
4. Presione la Tecla [GRABAR] para grabar sus modificaciones.<br />
BORRAR EL DIARIO ELECTRONICO<br />
1. Desplace el teléfono hacia arriba, presione la Tecla [MENU] y a seguir<br />
presione 9. Herramientas y Ajustes, 1. Herramientas, 5. Diario<br />
Electrónico.<br />
2. Seleccione un Diario Electrónico y enseguida presione la Tecla <strong>de</strong> Función<br />
Derecha [Opciones].<br />
3. Presione la Tecla <strong>de</strong> Dirección hacia arriba o hacia abajo para seleccionar<br />
3. Borrar para borrar un Diario Electrónico o 4.Borrar Todo para borrar todos<br />
los registros <strong>de</strong>l Diario Electrónico y enseguida presione la Tecla .<br />
4. Presione la Tecla <strong>de</strong> Dirección hacia arriba o hacia abajo para seleccionar Sí<br />
y presione la Tecla .<br />
HERRAMIENTAS<br />
RELOJ DE ALARMA<br />
La herramienta Reloj <strong>de</strong> Alarma permite que usted configure hasta tres alarmas.<br />
Cuando usted ajuste una alarma, la hora actual será exhibida en la parte superior <strong>de</strong>l<br />
modo inactivo en a la pantalla inicial. Cuando llega la hora programada para tocar, la<br />
alarma se exhibirá en la pantalla LCD y comenzará a tocar.<br />
1. Desplace el teléfono hacia arriba, presione la Tecla [MENU] y a seguir<br />
presione 9. Herramientas y Ajustes, 1. Herramientas, 6. Reloj <strong>de</strong> Alarma.<br />
Acceso Rápido: En el modo inactivo, presione la Tecla <strong>de</strong> Dirección hacia la <strong>de</strong>recha<br />
para acce<strong>de</strong>r MIS ACCESOS RÁPIDOS y enseguida presione 1. Reloj <strong>de</strong> Alarma.<br />
2. Seleccione un Alarma (1, 2 o 3) y enseguida presione la Tecla .<br />
3. Presione la Tecla <strong>de</strong> Dirección hacia abajo para ajustar los campos para la<br />
alarma:<br />
ACTIVACION/DESACTIVACION<br />
Presione la Tecla <strong>de</strong> Dirección hacia la izquierda o <strong>de</strong>recha para seleccionar<br />
Activar o Desactivar.<br />
HORA<br />
Utilice el teclado para ajustar una hora para la alarma y seleccione am o pm y<br />
enseguida presione la Tecla <strong>de</strong> Función Izquierda para ajustar am o pm.<br />
FRECUENCIA<br />
Presione la Tecla <strong>de</strong> Dirección hacia la izquierda o <strong>de</strong>recha para seleccionar<br />
un ajuste entre los que se indican a continuación:<br />
Una vez / Diariamente / Días <strong>de</strong> la Semana / Finales <strong>de</strong> Semana<br />
CAMPANILLA<br />
Presione la Tecla <strong>de</strong> Función Izquierda [Confirmar] y enseguida seleccione<br />
la campanilla <strong>de</strong> alerta que <strong>de</strong>sea establecer. Presione la Tecla <strong>de</strong> Función<br />
Izquierda [Reproducir] para reproducir una campanilla. Presione la Tecla<br />
[CONFIRMAR] para seleccionar.<br />
01<br />
02<br />
03<br />
04<br />
05<br />
06<br />
07<br />
87
4. Presione la Tecla [GRABAR] para seleccionar.<br />
ACTIVACION/DESACTIVACION DEL AJUSTE DE LA ALARMA<br />
1. Desplace el teléfono hacia arriba, presione la Tecla [MENU] y a seguir<br />
presione 9. Herramientas y Ajustes, 1. Herramientas, 6. Reloj <strong>de</strong> Alarma.<br />
2. Seleccione una Alarma (1, 2 o 3) enseguida presione la Tecla <strong>de</strong> Función Derecha<br />
[Opciones].<br />
3. Presione la Tecla <strong>de</strong> Dirección hacia arriba o abajo para seleccionar<br />
1. Activar o 2. Desactivar y enseguida presione la Tecla .<br />
REINICIAR EL AJUSTE DE LA ALARMA<br />
1. Desplace el teléfono hacia arriba, presione la Tecla [MENU] y a seguir<br />
presione 9. Herramientas y Ajustes, 1. Herramientas, 6. Reloj <strong>de</strong> Alarma.<br />
2. Seleccione una Alarma (1, 2 o 3) y enseguida presione la Tecla <strong>de</strong> Función<br />
Derecha [Opciones].<br />
3. Presione la Tecla <strong>de</strong> Dirección hacia arriba o abajo para seleccionar<br />
2. Reiniciar Alarma y enseguida presione la Tecla .<br />
4. El mensaje “¿REINICIAR ALARMA (1, 2 ó 3)” será exhibida en la pantalla.<br />
Presione la Tecla <strong>de</strong> Dirección hacia arriba o hacia abajo para seleccionar Sí<br />
y presione la Tecla .<br />
REINICIAR TODOS LOS AJUSTES DE LAS ALARMAS<br />
1. Desplace el teléfono hacia arriba, presione la Tecla [MENU] y a seguir<br />
presione 9. Herramientas y Ajustes, 1. Herramientas, 6. Reloj <strong>de</strong> Alarma.<br />
2. Seleccione una Alarma (1, 2 o 3) y enseguida presione la Tecla <strong>de</strong> Función<br />
Derecha [Opciones].<br />
3. Presione la Tecla <strong>de</strong> Dirección hacia arriba o hacia abajo para seleccionar<br />
3. Reiniciar Todos y enseguida presione la Tecla .<br />
4. El mensaje “¿REINICIAR TODAS LAS ALARMAS” será exhibida en la pantalla.<br />
Presione la Tecla <strong>de</strong> Dirección hacia arriba o hacia abajo para seleccionar Sí<br />
y presione la Tecla .<br />
88<br />
HERRAMIENTAS<br />
Las opciones ACTIVAR/DESACTIVAR LOS AJUSTES DE ALARMA, REINICIAR LOS AJUSTES<br />
DE ALARMA y REINICIAR TODOS LOS AJUSTES DE ALARMA están disponibles en el<br />
menú Opciones para alarmas previamente ajustadas.<br />
CRONOMETRO<br />
Cuenta simultáneamente el tiempo <strong>de</strong> hasta ocho eventos diferentes. Para operar el<br />
cronómetro:<br />
1. Desplace el teléfono hacia arriba, presione la Tecla [MENU] y a seguir<br />
presione 9. Herramientas y Ajustes, 1. Herramientas, 7. Cronómetro.<br />
2. Para iniciar el cronómetro, presione la Tecla [INICIAR].<br />
3. Para pausar, presione la Tecla [DETENER].<br />
4. Para reiniciar, presione la Tecla [INICIAR].<br />
5. Para reiniciar, presione la Tecla <strong>de</strong> Función Derecha [Reiniciar].<br />
PARA CRONOMETRAR HASTA OCHO EVENTOS DE UNA SOLA VEZ<br />
1. Para iniciar el cronómetro, presione la Tecla [INICIAR].<br />
2. Para parar un período <strong>de</strong> tiempo y continuar midiendo otro, presione la Tecla<br />
<strong>de</strong> Función Izquierda [Período].<br />
3. Para parar el segundo evento y continuar midiendo un tercer evento, presione<br />
la Tecla <strong>de</strong> Función Izquierda [Período].<br />
4. Para medir hasta ocho periodos <strong>de</strong> tiempo, repita los pasos arriba.<br />
5. Para parar el cronómetro, presione la Tecla [DETENER].<br />
6. Para visualizar rangos <strong>de</strong> tiempo, presione la Tecla <strong>de</strong> Función Izquierda<br />
[Visualizar].<br />
7. Para reiniciar, presione la Tecla <strong>de</strong> Función Derecha [Reiniciar], y enseguida<br />
presione la Tecla CLR para finalizar el uso <strong>de</strong>l cronómetro y retornar al menú<br />
anterior.<br />
01<br />
02<br />
03<br />
04<br />
05<br />
06<br />
07<br />
89
90<br />
RELOJ MUNDIAL<br />
Para exhibir la hora y fecha en las ciuda<strong>de</strong>s pré-programadas:<br />
1. Desplace el teléfono hacia arriba, presione la Tecla [MENU] y a seguir<br />
presione 9. Herramientas y Ajustes, 1. Herramientas, 8. Reloj Mundial.<br />
2. Presione la Tecla <strong>de</strong> Dirección hacia la izquierda o <strong>de</strong>recha para seleccionar<br />
la ciudad <strong>de</strong>seada en el mapamundi.<br />
3. Presione la Tecla <strong>de</strong> Función Izquierda [Ciuda<strong>de</strong>s] para acce<strong>de</strong>r la LISTA<br />
DE CIUDADES. Presione la Tecla <strong>de</strong> Dirección hacia arriba o hacia abajo para<br />
seleccionar la ciudad <strong>de</strong>seada y enseguida presione la Tecla .<br />
4. El mapamundi será exhibido con la ciudad, su fecha y hora.<br />
5. Presione la Tecla CLR para retornar al menú anterior.<br />
AJUSTE DEL HORARIO DE VERANO (DST)<br />
1. Desplace el teléfono hacia arriba, presione la Tecla [MENU] y a seguir<br />
presione 9. Herramientas y Ajustes, 1. Herramientas, 8. Reloj Mundial.<br />
2. Con la localización <strong>de</strong>seada seleccionada, presione la Tecla <strong>de</strong> Función Derecha<br />
[DST] para ajustar el Horario <strong>de</strong> Verano, el ícono DST será exhibido.<br />
3. Para <strong>de</strong>sactivar el DST, presione la Tecla <strong>de</strong> Función Derecha [DST]<br />
nuevamente.<br />
La opción DST avanzará el reloj en una hora.<br />
BLOC DE NOTAS +<br />
Su teléfono incluye un bloc <strong>de</strong> notas interno que po<strong>de</strong> ser utilizado para crear y<br />
almacenar recordatorios y notas. Para crear una nota:<br />
1. Desplace el teléfono hacia arriba, presione la Tecla [MENU] y a seguir<br />
presione 9. Herramientas y Ajustes, 1. Herramientas, 9. Bloc <strong>de</strong> Notas +.<br />
Acceso Rápido: Desplace el teléfono hacia arriba y presione la Tecla Bloc <strong>de</strong> Notas +<br />
.<br />
HERRAMIENTAS<br />
2. Presione la Tecla <strong>de</strong> Función Izquierda [Nueva] para inserir una nueva<br />
nota.<br />
3. Ingrese el texto para una nueva nota.<br />
4. Para criar una nota con una imagen, ví<strong>de</strong>o o sonido, presione la Tecla <strong>de</strong><br />
Dirección hacia abajo para moverse a través <strong>de</strong> Imagen / Vi<strong>de</strong>o / Sonido,<br />
presione la Tecla <strong>de</strong> Función Izquierda [Agregar], seleccione 1. Imagen,<br />
2. Vi<strong>de</strong>o o 3. Sonido y enseguida presione la Tecla . Seleccione su imagen,<br />
vi<strong>de</strong>o o sonido <strong>de</strong>seado y presione la Tecla .<br />
5. Para grabar la nota, presione la Tecla <strong>de</strong> Función Derecha [Grabar].<br />
VISUALIZACION DE NOTAS GRABADAS<br />
Para visualizar una nota grabada:<br />
1. Desplace el teléfono hacia arriba, presione la Tecla [MENU] y a seguir<br />
presione 9. Herramientas y Ajustes, 1. Herramientas, 9. Bloc <strong>de</strong> Notas +.<br />
2. Presione la Tecla <strong>de</strong> Dirección hacia arriba o abajo para seleccionar una nota<br />
y enseguida presione la Tecla [VISUALIZAR].<br />
ENVIO DE UNA NOTA GRABADA<br />
Para enviar una nota grabada:<br />
1. Desplace el teléfono hacia arriba, presione la Tecla [MENU] y a seguir<br />
presione 9. Herramientas y Ajustes, 1. Herramientas, 9. Bloc <strong>de</strong> Notas +.<br />
2. Presione la Tecla <strong>de</strong> Dirección hacia arriba o abajo para seleccionar una<br />
nota, presione la Tecla <strong>de</strong> Función Derecha [Opciones] y enseguida<br />
presione 2. Enviar.<br />
3. Presione la Tecla <strong>de</strong> Dirección hacia arriba o hacia abajo para seleccionar<br />
1. Mensaje <strong>de</strong> TEXTO, 2.Mensaje con Imagen, 3.Mensaje con Ví<strong>de</strong>o o<br />
4.Mensaje <strong>de</strong> Voz y enseguida presione la Tecla .<br />
Cuando una nota tenga un anexo <strong>de</strong> imagen, ví<strong>de</strong>o o sonido, la ventana <strong>de</strong>l mensaje<br />
correspondiente será abierta automáticamente.<br />
4. Cree el mensaje y enseguida presione la Tecla [ENVIAR].<br />
01<br />
02<br />
03<br />
04<br />
05<br />
06<br />
07<br />
91
BORRAR NOTAS GRABADAS<br />
Para borrar una nota grabada:<br />
1. Desplace el teléfono hacia arriba, presione la Tecla [MENU] y a seguir<br />
presione 9. Herramientas y Ajustes, 1. Herramientas, 9. Bloc <strong>de</strong> Notas +.<br />
2. Presione la Tecla <strong>de</strong> Dirección hacia arriba o abajo para seleccionar una<br />
nota, presione la Tecla <strong>de</strong> Función Derecha [Opciones] y enseguida<br />
seleccione 3. Borrar y presione la Tecla .<br />
3. “APAGAR BLOC DE NOTAS+” aparecerá en la pantalla. Presione la Tecla <strong>de</strong><br />
Dirección hacia arriba o abajo para seleccionar Si y presione la Tecla .<br />
BORRAR TODAS LAS NOTAS GRABADAS<br />
Para borrar todas las notas grabadas:<br />
1. Desplace el teléfono hacia arriba, presione la Tecla [MENU] y a seguir<br />
presione 9. Herramientas y Ajustes, 1. Herramientas, 9. Bloc <strong>de</strong> Notas +.<br />
2. Presione la Tecla <strong>de</strong> Función Derecha [Opciones] y enseguida presione<br />
la Tecla <strong>de</strong> Dirección hacia arriba o hacia abajo para seleccionar 4. Borrar<br />
Todas y presione la Tecla .<br />
3. “APAGAR TODO EL BLOC DE NOTAS+” aparecerá en la pantalla. Presione la<br />
Tecla <strong>de</strong> Dirección hacia arriba o abajo para seleccionar Sí y presione la<br />
Tecla .<br />
HERRAMIENTAS<br />
ALMACENAMIENTO EN LOTES USB<br />
El almacenamiento en Lotes USB permite que usted transfiera ficheros para o <strong>de</strong> su PC.<br />
1. Desplace el teléfono hacia arriba, presione la Tecla [MENU] y a seguir<br />
presione 9. Herramientas y Ajustes, 1. Herramientas, 0. Almacenamiento<br />
en Lotes USB.<br />
2. Siga los prompts en la pantalla.<br />
Conecte a puerta Carga/Datos en su teléfono y la puerta USB en su PC con el cable<br />
USB proveído.<br />
01<br />
02<br />
03<br />
04<br />
05<br />
06<br />
07<br />
92<br />
93
AJUSTES DE LOS SONIDOS<br />
SONIDOS DE LLAMADA<br />
Para ajustar campanilla para tipos <strong>de</strong> llamadas recibidas:<br />
CAMPANILLA DE LLAMADA<br />
1. Desplace el teléfono hacia arriba, presione la Tecla [MENU] y a seguir<br />
presione 9. Herramientas y Ajustes, 2. Ajustes <strong>de</strong> Sonidos, 1. Sonidos <strong>de</strong><br />
Llamadas, 1. Campanilla <strong>de</strong> Llamada.<br />
2. Presione la Tecla <strong>de</strong> Dirección hacia arriba o hacia abajo para seleccionar<br />
una campanilla y enseguida presione la Tecla [CONFIRMAR]. Para<br />
reproducir la campanilla, presione la Tecla <strong>de</strong> Función Izquierda<br />
[Reproducción].<br />
VIBRAR AL LLAMAR<br />
1. Desplace el teléfono hacia arriba, presione la Tecla [MENU] y a seguir<br />
presione 9. Herramientas y Ajustes, 2. Ajustes <strong>de</strong> Sonidos, 1. Sonidos <strong>de</strong><br />
Llamadas, 2. Vibrar al Llamar.<br />
2. Presione la Tecla <strong>de</strong> Dirección hacia arriba o hacia abajo para seleccionar<br />
Activar o Desactivar y enseguida presione la Tecla [CONFIRMAR].<br />
LECTURA DE LA IDENTIFICACION DEL INTERLOCUTOR<br />
1. Desplace el teléfono hacia arriba, presione la Tecla [MENU] y a seguir<br />
presione 9. Herramientas y Ajustes, 2. Ajustes <strong>de</strong> Sonidos, 1. Sonidos <strong>de</strong><br />
Llamadas, 3. Lectura <strong>de</strong> la I<strong>de</strong>ntificación <strong>de</strong>l Interlocutor.<br />
2. Presione la Tecla <strong>de</strong> Dirección hacia arriba o hacia abajo para seleccionar<br />
Solamente Suene, I<strong>de</strong>ntificación <strong>de</strong>l Interlocutor + Suene o Repetir<br />
Nombre y enseguida presione la Tecla [CONFIRMAR].<br />
AJUSTES<br />
SONIDOS DE ALERTA<br />
Para seleccionar el tipo <strong>de</strong> alerta para un nuevo mensaje:<br />
1. Desplace el teléfono hacia arriba, presione la Tecla [MENU] y a seguir<br />
presione 9. Herramientas y Ajustes, 2. Ajustes <strong>de</strong> Sonidos, 2. Sonidos <strong>de</strong><br />
Alerta.<br />
2. Presione la Tecla <strong>de</strong> Dirección hacia arriba o hacia abajo para seleccionar<br />
1. Mensaje <strong>de</strong> TEXTO, 2. Mensaje Multimedia, 3. Buzón o 5. Llamada No<br />
Contestada y enseguida presione la Tecla .<br />
3. Presione la Tecla <strong>de</strong> Dirección hacia arriba o hacia abajo para seleccionar<br />
1. Tono, 2. Vibración o 3. Membrete y enseguida presione la Tecla .<br />
• 1. Tono: Presione la Tecla <strong>de</strong> Dirección hacia arriba o hacia abajo para seleccionar una<br />
campanilla y enseguida presione la Tecla [CONFIRMAR]. Para reproducir el<br />
tono <strong>de</strong> alerta, presione la Tecla <strong>de</strong> Función Izquierda [Reproducción].<br />
• 2. Vibración: Presione la Tecla <strong>de</strong> Dirección hacia arriba o hacia abajo para seleccionar<br />
Activar o Desactivar y enseguida presione la Tecla [CONFIRMAR].<br />
• 3. Membrete: Presione la Tecla <strong>de</strong> Dirección hacia arriba o hacia abajo para seleccionar<br />
Una vez, A Cada 2 minutos, A Cada 15 minutos o Desactivada y enseguida<br />
presione la Tecla [CONFIRMAR].<br />
TONO DE EMERGENCIA<br />
1. Desplace el teléfono hacia arriba, presione la Tecla [MENU] y a seguir<br />
presione 9. Herramientas y Ajustes, 2. Ajustes <strong>de</strong> Sonidos, 2. Sonidos <strong>de</strong><br />
Alerta, 4. Tono <strong>de</strong> Emergencia.<br />
2. Presione la Tecla <strong>de</strong> Dirección hacia arriba o hacia abajo para seleccionar<br />
Alerta, Vibración o Desactivada y enseguida presione la Tecla<br />
[CONFIRMAR].<br />
3. Para visualizar ayuda para Tono <strong>de</strong> Emergencia, presione la Tecla <strong>de</strong><br />
Función Derecha [Ayuda].<br />
01<br />
02<br />
03<br />
04<br />
05<br />
06<br />
07<br />
94<br />
95
96<br />
SONIDOS DEL TECLADO<br />
Para seleccionar los sonidos <strong>de</strong>l teclado cuando utilice el teclado:<br />
1. Desplace el teléfono hacia arriba, presione la Tecla [MENU] y a seguir<br />
presione 9. Herramientas y Ajustes, 2. Ajustes <strong>de</strong> Sonidos, 3. Sonidos <strong>de</strong>l<br />
Teclado.<br />
2. Presione la Tecla <strong>de</strong> Dirección hacia arriba o hacia abajo para seleccionar<br />
DTMF, Cloud o Simple y enseguida presione la Tecla [CONFIRMAR].<br />
DTMF es el ajuste estándar para este dispositivo.<br />
VOLUMEN DEL TECLADO<br />
Para ajustar el volumen <strong>de</strong>l teclado:<br />
1. Desplace el teléfono hacia arriba, presione la Tecla [MENU] y a seguir<br />
presione 9. Herramientas y Ajustes, 2. Ajustes <strong>de</strong> Sonidos, 4. Volumen<br />
<strong>de</strong>l Teclado.<br />
2. Ajuste el volumen presionando la Tecla <strong>de</strong> Dirección hacia arriba o hacia<br />
abajo y enseguida presione la Tecla [CONFIRMAR] para grabar el ajuste.<br />
Para probar el nivel <strong>de</strong> volumen, presione la Tecla <strong>de</strong> Función Izquierda<br />
[Reproducir].<br />
LECTURA DEL MARCADO DE DIGITOS<br />
El ajuste Lectura <strong>de</strong>l Marcado <strong>de</strong> Dígitos controla la lectura <strong>de</strong> los dígitos (sonido alto)<br />
cuando un número <strong>de</strong> teléfono sea insertado con el teclado QWERTY.<br />
1. Desplace el teléfono hacia arriba, presione la Tecla [MENU] y a seguir<br />
presione 9. Herramientas y Ajustes, 2. Ajustes <strong>de</strong> Sonidos, 5. Lectura <strong>de</strong>l<br />
Marcado <strong>de</strong> Dígitos.<br />
2. Presione la Tecla <strong>de</strong> Dirección hacia arriba o hacia abajo para seleccionar<br />
Activar o Desactivar y enseguida presione la Tecla [CONFIRMAR].<br />
AJUSTES<br />
ALERTAS DE SERVICIO<br />
Para Activar/Desactivar cualquiera <strong>de</strong> las funciones <strong>de</strong> Alerta:<br />
1. Desplace el teléfono hacia arriba, presione la Tecla [MENU] y a seguir<br />
presione 9. Herramientas y Ajustes, 2. Ajustes <strong>de</strong> Sonidos, 6. Alertas <strong>de</strong><br />
Servicio.<br />
2. Presione la Tecla <strong>de</strong> Dirección hacia arriba o hacia abajo para seleccionar<br />
una <strong>de</strong> las opciones a continuación y enseguida presione la Tecla .<br />
• Señal Audible <strong>de</strong> Minuto: Alerta a cada minuto durante una llamada.<br />
• Conexión <strong>de</strong> la Llamada: Alerta cuando una llamada es conectada.<br />
• Actualización <strong>de</strong>l Software: Alerta cuando una actualización <strong>de</strong>l software estuviere<br />
disponible<br />
3. Presione la Tecla <strong>de</strong> Dirección hacia arriba o hacia abajo para seleccionar<br />
Activar o Desactivar y enseguida presione la Tecla [CONFIRMAR].<br />
CONEXION DEL DISPOSITIVO<br />
Permite que usted Encienda o Apague el Dispositivo:<br />
1. Desplace el teléfono hacia arriba, presione la Tecla [MENU] y a seguir<br />
presione 9. Herramientas y Ajustes, 2. Ajustes <strong>de</strong> Sonidos, 7. Conexión<br />
<strong>de</strong>l Dispositivo.<br />
2. Presione la Tecla <strong>de</strong> Dirección hacia arriba o hacia abajo para seleccionar<br />
Encen<strong>de</strong>r o Apagar y enseguida presione la Tecla [CONFIRMAR].<br />
ENCENDER/APAGAR EL TELEFONO<br />
Para ajustar el teléfono para emitir un tono cuando el teléfono sea encendido o<br />
apagado:<br />
1. Desplace el teléfono hacia arriba, presione la Tecla [MENU] y a seguir<br />
presione 9. Herramientas y Ajustes, 2. Ajustes <strong>de</strong> Sonidos, 8. Encen<strong>de</strong>r/<br />
Apagar.<br />
2. Presione 1. Encen<strong>de</strong>r o 2. Apagar.<br />
3. Presione la Tecla <strong>de</strong> Dirección hacia arriba o hacia abajo para seleccionar<br />
Encen<strong>de</strong>r o Apagar y enseguida presione la Tecla [CONFIRMAR].<br />
01<br />
02<br />
03<br />
04<br />
05<br />
06<br />
07<br />
97
98<br />
SONIDOS DE APERTURA/CIERRE<br />
Para ajustar el teléfono para emitir un tono cuando el teléfono es abierto o cerrado:<br />
1. Desplace el teléfono hacia arriba, presione la Tecla [MENU] y a seguir<br />
presione 9. Herramientas y Ajustes, 2. Ajustes <strong>de</strong> Sonidos, 9. Sonidos <strong>de</strong><br />
Apertura/Cierre.<br />
2. Presione la Tecla <strong>de</strong> Dirección hacia arriba o hacia abajo para seleccionar<br />
Música, Simple, Señal Audible o Desactivar y enseguida presione la Tecla<br />
[CONFIRMAR].<br />
VOLUMEN PRINCIPAL<br />
1. Desplace el teléfono hacia arriba, presione la Tecla [MENU] y a seguir<br />
presione 9. Herramientas y Ajustes, 2. Ajustes <strong>de</strong> Sonidos, 0. Volumen<br />
Principal.<br />
2. Seleccione una <strong>de</strong> las siguientes opciones y presione la Tecla [CONFIRMAR]<br />
para grabar.<br />
• Todos los Sonidos <strong>de</strong>sactivados.<br />
• Solamente Alarma<br />
• Solamente Vibración<br />
• Bajo / Mediano Bajo / Mediano / Mediano Alto / Alto<br />
• Presione las Teclas <strong>de</strong> Volumen / hacia arriba o hacia abajo (localizadas al lado<br />
izquierdo <strong>de</strong>l dispositivo) para ajustar el volumen <strong>de</strong>l Auricular durante una llamada.<br />
• Para reproducir/<strong>de</strong>tener una campanilla, presione la Tecla <strong>de</strong> Función Izquierda<br />
[Reproducción/Detección].<br />
AJUSTES<br />
AJUSTES DE LA PANTALLA<br />
Permite que usted personalice la pantalla.<br />
BANNER<br />
El Banner pue<strong>de</strong> contener hasta 16 caracteres y es exhibido en la pantalla <strong>de</strong> su teléfono<br />
en el modo inactivo.<br />
1. Desplace el teléfono hacia arriba, presione la Tecla [MENU] y a seguir<br />
presione 9. Herramientas y Ajustes, 3. Ajustes <strong>de</strong> la Pantalla, 1. Banner.<br />
2. Inserte el texto <strong>de</strong>l Banner (hasta 16 caracteres), seleccione un color <strong>de</strong> fuente<br />
<strong>de</strong>seada y enseguida presione la Tecla [CONFIRMAR].<br />
LUZ DE FONDO<br />
Para <strong>de</strong>finir la duración <strong>de</strong> la luz <strong>de</strong> fondo <strong>de</strong> la Pantalla Principal y Teclado:<br />
1. Desplace el teléfono hacia arriba, presione la Tecla [MENU] y a seguir<br />
presione 9. Herramientas y Ajustes, 3. Ajustes <strong>de</strong> la Pantalla, 2. Luz <strong>de</strong><br />
Fondo.<br />
2. Presione 1. Pantalla ó 2. Teclado.<br />
3. Presione la Tecla <strong>de</strong> Dirección hacia arriba o hacia abajo para seleccionar<br />
7 Segundos, 15 Segundos, 30 Segundos o Siempre Activado y enseguida<br />
presione la Tecla [CONFIRMAR].<br />
PAPEL DE PARED<br />
Para seleccionar el tipo <strong>de</strong> plan <strong>de</strong> fondo a ser exhibido en el teléfono:<br />
1. Desplace el teléfono hacia arriba, presione la Tecla [MENU] y a seguir<br />
presione 9. Herramientas y Ajustes, 3. Ajustes <strong>de</strong> la Pantalla, 3. Papel <strong>de</strong><br />
Pared.<br />
2. Presione 1. Imágenes, 2. Ví<strong>de</strong>os o 3. Papeles <strong>de</strong> Pared Animados.<br />
3. Para visualizar la imagen, presione la Tecla <strong>de</strong> Función Izquierda<br />
[Visualización /Reproducción].<br />
4. Seleccione una pantalla <strong>de</strong>seada y enseguida presione la Tecla<br />
[CONFIRMAR].<br />
01<br />
02<br />
03<br />
04<br />
05<br />
06<br />
07<br />
99
TIPO DE MENU<br />
Para cambiar el tipo <strong>de</strong>l menú principal:<br />
1. Desplace el teléfono hacia arriba, presione la Tecla [MENU] y a seguir<br />
presione 9. Herramientas y Ajustes, 3. Ajustes <strong>de</strong> la Pantalla, 4. Tipo <strong>de</strong><br />
Menú.<br />
2. Para pre-visualizar/listar el tipo <strong>de</strong> menú seleccionado, presione la Tecla <strong>de</strong><br />
Función Izquierda [Pre-visualización/Lista].<br />
3. Presione Cuadricula o Lista y enseguida presione la Tecla [CONFIRMAR].<br />
TIPO DE FUENTE<br />
Para ajustar el tipo <strong>de</strong> fuente:<br />
1. Desplace el teléfono hacia arriba, presione la Tecla [MENU] y a seguir<br />
presione 9. Herramientas y Ajustes, 3. Ajustes <strong>de</strong> la Pantalla, 5. Tipo <strong>de</strong><br />
Fuente.<br />
2. Para pre-visualizar/listar el tipo <strong>de</strong> fuente seleccionado, presione la Tecla <strong>de</strong><br />
Función Izquierda [Pre-visualización/Lista].<br />
3. Presione la Tecla <strong>de</strong> Dirección hacia arriba o hacia abajo para seleccionar la<br />
Fuente Dandy, Fuente Mo<strong>de</strong>rn o la Fuente Episo<strong>de</strong> y enseguida presione la<br />
Tecla [CONFIRMAR].<br />
TAMAÑO DE LA FUENTE DE MARCADO<br />
Para <strong>de</strong>finir el tamaño <strong>de</strong> la fuente <strong>de</strong> marcado:<br />
1. Desplace el teléfono hacia arriba, presione la Tecla [MENU] y a seguir<br />
presione 9. Herramientas y Ajustes, 3. Ajustes <strong>de</strong> la Pantalla, 6. Tamaño<br />
<strong>de</strong> la Fuente <strong>de</strong> Marcado.<br />
2. Para pre-visualizar/listar las fuentes <strong>de</strong> marcado seleccionadas, presione la<br />
Tecla <strong>de</strong> Función Izquierda [Pre-visualización/Lista].<br />
3. Presione la Tecla <strong>de</strong> Dirección hacia arriba o hacia abajo para seleccionar<br />
Normal o Solamente Gran<strong>de</strong> y enseguida presione la Tecla<br />
[CONFIRMAR].<br />
AJUSTES<br />
TAMAÑO DE LA FUENTE DEL MENU<br />
Para ajustar el tamaño <strong>de</strong> la fuente <strong>de</strong>l menú:<br />
1. Desplace el teléfono hacia arriba, presione la Tecla [MENU] y a seguir<br />
presione 9. Herramientas y Ajustes, 3. Ajustes <strong>de</strong> la Pantalla, 7. Tamaño<br />
<strong>de</strong> la Fuente <strong>de</strong>l Menú.<br />
2. Presione la Tecla <strong>de</strong> Dirección hacia arriba o hacia abajo para seleccionar<br />
Normal o Solamente Gran<strong>de</strong> y enseguida presione la Tecla<br />
[CONFIRMAR].<br />
FORMATO DEL RELOJ<br />
Para seleccionar el tipo <strong>de</strong> reloj a ser exhibido en la pantalla LCD:<br />
1. Desplace el teléfono hacia arriba, presione la Tecla [MENU] y a seguir<br />
presione 9. Herramientas y Ajustes, 3. Ajustes <strong>de</strong> la Pantalla, 8. Formato<br />
<strong>de</strong>l Reloj.<br />
2. Presione la Tecla <strong>de</strong> Dirección hacia la izquierda o <strong>de</strong>recha para seleccionar<br />
Analógico, Analógico Gran<strong>de</strong>, Digital Básico, Digital, Digital Gran<strong>de</strong> o<br />
Desactivado y enseguida presione la Tecla <strong>de</strong> dirección hacia abajo.<br />
3. Presione la Tecla <strong>de</strong> Función Izquierda [Pre-visualización/Lista] para<br />
pre-visualizar el formato <strong>de</strong>l reloj seleccionado, presione la Tecla <strong>de</strong> Función<br />
Derecha [Ayuda] para visualizar el archivo <strong>de</strong> ayuda al Formato <strong>de</strong>l Reloj.<br />
4. Presione la Tecla <strong>de</strong> Dirección hacia la izquierda o <strong>de</strong>recha para seleccionar<br />
el color <strong>de</strong> la fuente y enseguida presione la Tecla [CONFIRMAR].<br />
Digital Básico es el ajuste estándar para este dispositivo.<br />
EXHIBICION INSTANTANEA DE LA CARGA DE DATOS<br />
Para configurar la exhibición instantánea <strong>de</strong> la carga <strong>de</strong> datos:<br />
1. Desplace el teléfono hacia arriba, presione la Tecla [MENU] y a seguir<br />
presione 9. Herramientas y Ajustes, 3. Ajustes <strong>de</strong> la Pantalla, 9. Exhibición<br />
Instantánea <strong>de</strong> la Carga <strong>de</strong> Datos.<br />
01<br />
02<br />
03<br />
04<br />
05<br />
06<br />
07<br />
100<br />
101
102<br />
2. Presione la Tecla <strong>de</strong> Dirección hacia arriba o hacia abajo para seleccionar<br />
Activar o Desactivar y enseguida presione la Tecla [CONFIRMAR].<br />
AJUSTES DEL TELEFONO<br />
MODO AVION<br />
En el Modo Avión todas las funciones <strong>de</strong>l menú pue<strong>de</strong>n ser accedidas excepto la<br />
realización <strong>de</strong> llamadas, recibimiento <strong>de</strong> llamadas, conexión <strong>de</strong> datos y Bluetooth®. La<br />
activación <strong>de</strong>l Modo Avión <strong>de</strong>shabilitará todas las comunicaciones inalámbricas. Los<br />
servicios que soportan las funciones <strong>de</strong> Activación <strong>de</strong> Localización serán temporalmente<br />
<strong>de</strong>shabilitados.<br />
1. Desplace el teléfono hacia arriba, presione la Tecla [MENU] y a seguir<br />
presione 9. Herramientas y Ajustes, 4. Ajustes <strong>de</strong>l Teléfono, 1. Modo<br />
Avión.<br />
2. Presione la Tecla <strong>de</strong> Dirección hacia arriba o hacia abajo para seleccionar<br />
Activar o Desactivar y enseguida presione la Tecla [CONFIRMAR].<br />
IDIOMA<br />
Para configurar la función bilingüe a Inglés o Español:<br />
1. Desplace el teléfono hacia arriba, presione la Tecla [MENU] y a seguir<br />
presione 9. Herramientas y Ajustes, 4. Ajustes <strong>de</strong>l Teléfono, 2. Idioma.<br />
2. Presione la Tecla <strong>de</strong> Dirección hacia arriba o hacia abajo para seleccionar<br />
English o Español y enseguida presione la Tecla [CONFIRMAR].<br />
LOCALIZACION<br />
1. Desplace el teléfono hacia arriba, presione la Tecla [MENU] y a seguir<br />
presione 9. Herramientas y Ajustes, 4. Ajustes <strong>de</strong>l Teléfono,<br />
3. Localización.<br />
2. La guía LOCALIZACION se exhibirá en su teléfono; la pantalla <strong>de</strong> lectura se<br />
exhibirá.<br />
3. Presione la Tecla para <strong>de</strong>finir la Localización.<br />
AJUSTES<br />
4. Seleccione uno <strong>de</strong> los siguientes ajustes y presione la Tecla [CONFIRMAR].<br />
• Localización Activada: Su localización ahora está disponible en la red.<br />
• Solamente E911: Su localización será ocultada <strong>de</strong> la red y aplicaciones, excepto para 911.<br />
Cuando Configuración <strong>de</strong> Bloqueo es ajustada para Configuración <strong>de</strong> Localización en<br />
Restricciones en el menú Seguridad <strong>de</strong>l Teléfono, será necesario insertar un código<br />
<strong>de</strong> bloqueo. El código <strong>de</strong> bloqueo estándar es <strong>de</strong>, por lo menos, 4 dígitos <strong>de</strong>l número<br />
<strong>de</strong> su teléfono.<br />
SEGURIDAD<br />
El menú Seguridad permite que usted proteja electrónicamente el teléfono.<br />
El código <strong>de</strong> bloqueo estándar está compuesto por los últimos 4 dígitos <strong>de</strong>l número<br />
<strong>de</strong> su teléfono.<br />
EDICION DE CODIGOS<br />
Para ajustar un nuevo código <strong>de</strong> bloqueo:<br />
1. Desplace el teléfono hacia arriba, presione la Tecla [MENU] y a seguir<br />
presione 9. Herramientas y Ajustes, 4. Ajustes <strong>de</strong>l Teléfono,<br />
4. Seguridad.<br />
2. Inserte un código <strong>de</strong> bloqueo <strong>de</strong> cuatro dígitos y presione la Tecla .<br />
3. Presione 1. Editar Códigos.<br />
4. Presione la Tecla <strong>de</strong> Dirección hacia arriba o hacia abajo para seleccionar<br />
uno <strong>de</strong> los siguientes ajustes y enseguida presione la Tecla .<br />
• Solamente Teléfono: Permite que usted edite el código <strong>de</strong> bloqueo para Seguridad.<br />
(El código <strong>de</strong> bloqueo estándar está compuesto por los últimos 4<br />
dígitos <strong>de</strong>l número <strong>de</strong> su teléfono.)<br />
• Llamadas y Servicios: Permite que usted edite el código <strong>de</strong> bloqueo para Restricciones.<br />
(El código <strong>de</strong> bloqueo estándar son los últimos 4 dígitos <strong>de</strong>l<br />
número <strong>de</strong> su teléfono.)<br />
5. Si Solamente Teléfono es seleccionado, inserte el nuevo código <strong>de</strong> cuatro<br />
dígitos en el campo Insertar Nuevo Código. Inserte el nuevo código <strong>de</strong><br />
cuatro dígitos nuevamente en el campo Reinsertar Nuevo Código para<br />
confirmar su inserción y enseguida presione la Tecla [CONFIRMAR].<br />
01<br />
02<br />
03<br />
04<br />
05<br />
06<br />
07<br />
103
6. Si Llamadas y Servicios es seleccionada, inserte el código <strong>de</strong> bloqueo actual<br />
en el campo Insertar Código Actual. Inserte el nuevo código <strong>de</strong> cuatro<br />
dígitos en el campo Insertar Nuevo Código. Inserte su código <strong>de</strong> cuatro<br />
dígitos nuevamente en el campo Reinsertar Nuevo Código y enseguida<br />
presione la Tecla [CONFIRMAR].<br />
RESTRICCIONES<br />
Utilice el procedimiento a continuación para configurar la Configuración <strong>de</strong><br />
Localización, Llamadas, Restricciones <strong>de</strong> Llamadas y Conexión <strong>de</strong> Datos.<br />
1. Desplace el teléfono hacia arriba, presione la Tecla [MENU] y a seguir<br />
presione 9. Herramientas y Ajustes, 4. Ajustes <strong>de</strong>l Teléfono,<br />
4. Seguridad.<br />
2. Inserte el código <strong>de</strong> bloqueo <strong>de</strong> cuatro dígitos y presione la Tecla .<br />
3. Presione 2. Restricciones.<br />
4. Inserte el código <strong>de</strong> bloqueo <strong>de</strong> cuatro dígitos y presione la Tecla<br />
nuevamente.<br />
5. Presione la Tecla <strong>de</strong> Dirección hacia arriba o hacia abajo para seleccionar<br />
uno <strong>de</strong> los siguientes ajustes:<br />
• Ajuste <strong>de</strong> la Localización: Ajusta el Desbloqueo/Bloqueo.<br />
• Llamadas: Recibidas/Realizadas.<br />
Para Llamadas Recibidas, ajuste Permitir Todas, Permitir Contactos o Ninguna<br />
Permitida.<br />
Para Llamadas Realizadas, ajuste Permitir Todas, Permitir Contactos o Ninguna<br />
Permitida.<br />
• Mensajes <strong>de</strong> Texto: Recibidos/Realizados.<br />
Para Mensajes Recibidos, ajuste Permitir Todos, Permitir Contactos o Ninguno<br />
Permitido.<br />
Para Mensajes Enviados, ajuste Permitir Todos, Permitir Contactos o Ninguno<br />
Permitido.<br />
• Mensajes con Imágenes: Recibidos/Enviados.<br />
Para Mensajes Recibidos, ajuste Permitir Todos, Permitir Contactos o Ninguno<br />
Permitido.<br />
AJUSTES<br />
Para Mensajes Enviados, ajuste Permitir Todos, Permitir Contactos o Ninguno<br />
Permitido.<br />
• Conexión <strong>de</strong> Datos:<br />
Ajuste Permitir Todos o Ninguno Permitido.<br />
6. Presione la Tecla [CONFIRMAR].<br />
En el modo <strong>de</strong> emergencia, los ajustes <strong>de</strong> la función Llamadas Recibidas no se aplican.<br />
AJUSTES DE BLOQUEO EL TELÉFONO<br />
Esta configuración específica si el teléfono <strong>de</strong>be ser bloqueado siempre que sea<br />
encendido. El modo Bloqueo impi<strong>de</strong> el uso no autorizado <strong>de</strong> su teléfono. Cuando el<br />
teléfono esté bloqueado, permanecerá en el modo restringido hasta que el código <strong>de</strong><br />
bloqueo sea insertado. Sin embargo, se pue<strong>de</strong> hacer llamadas <strong>de</strong> emergencia.<br />
1. Desplace el teléfono hacia arriba, presione la Tecla [MENU] y a seguir<br />
presione 9. Herramientas y Ajustes, 4. Ajustes <strong>de</strong>l Teléfono,<br />
4. Seguridad.<br />
2. Inserte el código <strong>de</strong> bloqueo <strong>de</strong> cuatro dígitos y presione la Tecla .<br />
3. Presione 3. Ajustes <strong>de</strong> Bloqueo <strong>de</strong>l Teléfono.<br />
4. Presione la Tecla <strong>de</strong> Dirección hacia arriba o hacia abajo para seleccionar<br />
uno <strong>de</strong> los ajustes a continuación y enseguida presione la Tecla<br />
[CONFIRMAR].<br />
• Desbloqueado: El teléfono será <strong>de</strong>sbloqueado.<br />
• Al ser Encendido: El teléfono será bloqueado cuando sea encendido.<br />
BLOQUEAR TELEFONO AHORA<br />
Bloquea el teléfono ahora.<br />
1. Desplace el teléfono hacia arriba, presione la Tecla [MENU] y a seguir<br />
presione 9. Herramientas y Ajustes, 4. Ajustes <strong>de</strong>l Teléfono,<br />
4. Seguridad.<br />
2. Inserte el código <strong>de</strong> bloqueo <strong>de</strong> cuatro dígitos y presione la Tecla .<br />
3. Presione 4. Bloquear Teléfono Ahora.<br />
01<br />
02<br />
03<br />
04<br />
05<br />
06<br />
07<br />
104<br />
105
4. Para <strong>de</strong>sbloquear el teléfono en el modo inactivo, <strong>de</strong>splace el teléfono hacia<br />
arriba, presione la Tecla <strong>de</strong> Función Derecha [Desbloquear] e inserte el<br />
código <strong>de</strong> bloqueo <strong>de</strong> cuatro dígitos y presione la Tecla .<br />
El código <strong>de</strong> <strong>de</strong>sbloqueo no es necesario a menos que el usuario tenga ajustado un.<br />
REINICIACION A LOS AJUSTES DE FABRICA<br />
Para borrar todos los Datos <strong>de</strong> Usuario y recupere todos los ajustes a sus estándares<br />
iniciales:<br />
1. Desplace el teléfono hacia arriba, presione la Tecla [MENU] y a seguir<br />
presione 9. Herramientas y Ajustes, 4. Ajustes <strong>de</strong>l Teléfono,<br />
4. Seguridad.<br />
2. Inserte el código <strong>de</strong> bloqueo <strong>de</strong> cuatro dígitos y presione la Tecla .<br />
3. Presione 5. Reiniciación a los Ajustes <strong>de</strong> Fábrica.<br />
4. Un mensaje <strong>de</strong> confirmación se exhibirá en la pantalla, presione la Tecla<br />
<strong>de</strong> dirección hacia arriba o hacia abajo para seleccionar Sí y enseguida<br />
presione la Tecla .<br />
5. Inserte el código <strong>de</strong> bloqueo <strong>de</strong> cuatro dígitos. El teléfono será <strong>de</strong>sactivado y<br />
activado enseguida automáticamente.<br />
SELECCION DEL SISTEMA<br />
Usted pue<strong>de</strong> configurar su teléfono para buscar o <strong>de</strong>tectar por la función “roam” otra red<br />
cuando no se encuentre en su región <strong>de</strong> origen. Deje este ajuste como estándar excepto<br />
si <strong>de</strong>sea alterar la selección <strong>de</strong>l sistema según las instrucciones suministradas por su<br />
proveedor <strong>de</strong> servicios.<br />
1. Desplace el teléfono hacia arriba, presione la Tecla [MENU] y a seguir<br />
presione 9. Herramientas y Ajustes, 4. Ajustes <strong>de</strong>l Teléfono, 5. Selección<br />
<strong>de</strong>l Sistema.<br />
2. Presione la Tecla <strong>de</strong> Dirección hacia arriba o hacia abajo para seleccionar<br />
Solamente Origen o Automático y enseguida presione la Tecla .<br />
AJUSTES<br />
• Solamente Origen: La red estará disponible solamente <strong>de</strong>ntro <strong>de</strong> su región <strong>de</strong> origen o<br />
área <strong>de</strong> origen afiliada.<br />
• Automática: Ejecuta el barrido <strong>de</strong> los canales <strong>de</strong> audio con base en las Ajustes<br />
Automáticas.<br />
El ajuste automático se pue<strong>de</strong> exhibir como Automático, <strong>de</strong>pendiendo <strong>de</strong>l PRL.<br />
AJUSTES DE LAS LLAMADAS<br />
OPCIONES DE CONTESTAR<br />
Para <strong>de</strong>terminar cómo contestar una llamada:<br />
1. Desplace el teléfono hacia arriba, presione la Tecla [MENU] y a seguir<br />
presione 9. Herramientas y Ajustes, 5. Ajustes <strong>de</strong> llamadas, 1. Opciones<br />
<strong>de</strong> Contestar.<br />
2. Presione la Tecla <strong>de</strong> Dirección hacia arriba o hacia abajo para seleccionar<br />
Desplazar para Abrir, Tecla Enviar, Cualquier Tecla o Automático con<br />
Altavoz y enseguida presione la Tecla [MARCAR / DESMARCAR].<br />
Desplazar para Abrir, Tecla Enviar es el ajuste estándar para este dispositivo.<br />
3. Presione la Tecla <strong>de</strong> Función Izquierda [Hecho].<br />
• Automático con Altavoz funcionará tras cerca <strong>de</strong> cinco segundos.<br />
• Automático con Altavoz está disponible solamente cuando un teléfono o dispositivo<br />
Altavoz esté conectado.<br />
REMARCADO AUTOMATICO<br />
Para <strong>de</strong>finir un período <strong>de</strong> tiempo que el teléfono esperará antes <strong>de</strong> remarcar<br />
automáticamente cuando un intento <strong>de</strong> llamada falle:<br />
1. Desplace el teléfono hacia arriba, presione la Tecla [MENU] y a seguir<br />
presione 9. Herramientas y Ajustes, 5. Ajustes <strong>de</strong> llamadas, 2. Remarcado<br />
Automático.<br />
01<br />
02<br />
03<br />
04<br />
05<br />
06<br />
07<br />
106<br />
107
2. Presione la Tecla <strong>de</strong> Dirección hacia arriba o hacia abajo para seleccionar<br />
uno <strong>de</strong> los ajustes a continuación y enseguida presione la Tecla<br />
[CONFIRMAR].<br />
10 Segundos / 30 Segundos / 60 Segundos / Desactivado<br />
DESACTIVADO<br />
Usted pue<strong>de</strong> conectar un dispositivo TTY a su teléfono permitiendo que usted<br />
comuníquese con terceros utilizando un dispositivo TTY. Uno teléfono con soporte TTY<br />
pue<strong>de</strong> transponer caracteres insertados por voz. La voz también pue<strong>de</strong> ser transporta a<br />
caracteres y enseguida exhibida en forma <strong>de</strong> texto en el TTY.<br />
1. Desplace el teléfono hacia arriba, presione la Tecla [MENU] y a seguir<br />
presione 9. Herramientas y Ajustes, 5. Ajustes <strong>de</strong> llamadas, 3. MODO TTY.<br />
2. Presione la Tecla <strong>de</strong> Dirección hacia arriba o hacia abajo para seleccionar<br />
uno <strong>de</strong> los siguientes ajustes y enseguida presione la Tecla [CONFIRMAR].<br />
TTY Full / TTY + Habla / TTY + Escucha / TTY Desactivado<br />
MARCADO CON UN TOQUE<br />
Para iniciar una llamada <strong>de</strong> marcado rápido mantenga presionado el dígito <strong>de</strong> marcado<br />
rápido:<br />
1. Desplace el teléfono hacia arriba, presione la Tecla [MENU] y a seguir<br />
presione 9. Herramientas y Ajustes, 5. Ajustes <strong>de</strong> llamadas, 4. Marcado<br />
con Un Toque.<br />
2. Presione la Tecla <strong>de</strong> Dirección hacia arriba o hacia abajo para seleccionar<br />
Activar o Desactivar y enseguida presione la Tecla [CONFIRMAR].<br />
Si el Marcado con Un Toque es <strong>de</strong>shabilitado, una llamada <strong>de</strong> marcado rápido<br />
funcionará insertando el número <strong>de</strong> marcado rápido en el Teclado QWERTY y<br />
enseguida presione la Tecla Enviar .<br />
AJUSTES<br />
PRIVACIDAD DE VOZ<br />
La función Privacidad <strong>de</strong> Voz ofrece criptografía <strong>de</strong> voz para impedir escuchas no<br />
autorizadas. Para Activar o Desactivar la función <strong>de</strong> privacidad <strong>de</strong> voz:<br />
1. Desplace el teléfono hacia arriba, presione la Tecla [MENU] y a seguir<br />
presione 9. Herramientas y Ajustes, 5. Ajustes <strong>de</strong> llamadas, 5. Privacidad<br />
<strong>de</strong> Voz.<br />
2. Presione la Tecla <strong>de</strong> Dirección hacia arriba o hacia abajo para seleccionar<br />
Activar o Desactivar y enseguida presione la Tecla [CONFIRMAR].<br />
TONOS DTMF<br />
Para ajustar la extensión <strong>de</strong>l Tono <strong>de</strong> las Teclas:<br />
1. Desplace el teléfono hacia arriba, presione la Tecla [MENU] y a seguir<br />
presione 9. Herramientas y Ajustes, 5. Ajustes <strong>de</strong> llamadas, 6. Tonos<br />
DTMF.<br />
2. Presione la Tecla <strong>de</strong> Dirección hacia arriba o hacia abajo para seleccionar<br />
uno <strong>de</strong> los siguientes ajustes y enseguida presione la Tecla [CONFIRMAR].<br />
• Normal: Envía un tono durante un período fijo <strong>de</strong> tiempo aunque usted siga presionando<br />
la Tecla.<br />
• Largo: Envía una tono continuo mientras la Tecla es mantenida presionada.<br />
DESPLAZAR PARA CERRAR<br />
1. Desplace el teléfono hacia arriba, presione la Tecla [MENU] y a seguir<br />
presione 9. Herramientas y Ajustes, 5. Ajustes <strong>de</strong> llamadas, 7. Desplazar<br />
para Cerrar.<br />
2. Presione la Tecla <strong>de</strong> Dirección hacia arriba o hacia abajo para seleccionar<br />
Seguir Llamada o Finalizar Llamada y enseguida presione la Tecla<br />
[CONFIRMAR].<br />
01<br />
02<br />
03<br />
04<br />
05<br />
06<br />
07<br />
108<br />
109
110<br />
MEMORIA<br />
OPCIONES DE GRABACION<br />
Para seleccionar o no se <strong>de</strong>sea grabar en la Memoria <strong>de</strong>l Teléfono o en la Tarjeta <strong>de</strong><br />
Memoria cuando grabe archivos:<br />
1. Desplace el teléfono hacia arriba, presione la Tecla [MENU] y a seguir<br />
presione 9. Herramientas y Ajustes, 6. Memoria, 1. Grabar Opciones.<br />
2. Presione la Tecla <strong>de</strong> Dirección hacia arriba o hacia abajo para seleccionar<br />
1. Imágenes, 2. Ví<strong>de</strong>os o 3. Sonidos y enseguida presione la Tecla .<br />
3. Presione la Tecla <strong>de</strong> Dirección hacia arriba o hacia abajo para seleccionar<br />
Memoria <strong>de</strong>l Teléfono o Tarjeta <strong>de</strong> Memoria y enseguida presione la Tecla<br />
.<br />
MEMORIA DEL TELEFONO<br />
Permite que usted administre el uso <strong>de</strong> la memoria para imágenes, ví<strong>de</strong>os, músicas,<br />
sonidos y contactos en la Memoria <strong>de</strong>l Teléfono.<br />
USO DE LA MEMORIA DEL TELEFONO<br />
Para verificar la capacidad <strong>de</strong> la Memoria disponible <strong>de</strong>l Teléfono, capacidad utilizada<br />
y capacidad total:<br />
1. Desplace el teléfono hacia arriba, presione la Tecla [MENU] y a seguir<br />
presione 9. Herramientas y Ajustes, 6. Memoria, 2. Memoria <strong>de</strong>l<br />
Teléfono.<br />
2. Presione 1. Uso <strong>de</strong> la Memoria <strong>de</strong>l Teléfono.<br />
3. Presione la Tecla para volver a la pantalla anterior.<br />
BORRADO Y MOVIMIENTO DE ARCHIVOS<br />
Para borrar archivos almacenados en la Memoria <strong>de</strong>l Teléfono o para mover archivos<br />
<strong>de</strong> la Memoria <strong>de</strong>l Teléfono a la Memoria <strong>de</strong> la Tarjeta:<br />
1. Desplace el teléfono hacia arriba, presione la Tecla [MENU] y a seguir<br />
presione 9. Herramientas y Ajustes, 6. Memoria, 2. Memoria <strong>de</strong>l<br />
Teléfono.<br />
AJUSTES<br />
2. Presione la Tecla <strong>de</strong> Dirección hacia arriba o hacia abajo para seleccionar<br />
2. Imágenes, 3. Ví<strong>de</strong>os, 4. Sonidos, 5. Música o 6. Contactos y enseguida<br />
presione la Tecla .<br />
3. Presione la Tecla <strong>de</strong> Función Derecha [Opciones].<br />
4. Seleccione 1. Borrar para borrar un archivo o 2. Mover para mover un<br />
archivo a la Tarjeta <strong>de</strong> Memoria y enseguida presione la Tecla .<br />
Si usted seleccionó Contactos podrá seleccionar 1. Visualizar, 2. Copiar o 3. Borrar tras<br />
presionar la Tecla <strong>de</strong> Función Derecha [Opciones].<br />
5. Presione la Tecla <strong>de</strong> Dirección hacia arriba o hacia abajo para seleccionar<br />
un archivo, presione la Tecla [MARCAR] o la Tecla <strong>de</strong> Función Derecha<br />
[Marcar Todos] y enseguida presione la Tecla <strong>de</strong> Función Izquierda<br />
[Hecho].<br />
6. Presione la Tecla <strong>de</strong> Dirección hacia arriba o hacia abajo para seleccionar<br />
Sí y presione la Tecla .<br />
MOVIMIENTO DE ARCHIVOS<br />
Para mover todos los archivos grabados en la Memoria <strong>de</strong>l Teléfono a una Tarjeta <strong>de</strong><br />
Memoria (Tarjeta <strong>de</strong> memoria vendido en separado).<br />
1. Desplace el teléfono hacia arriba, presione la Tecla [MENU] y a seguir<br />
presione 9. Herramientas y Ajustes, 6. Memoria, 2. Memoria <strong>de</strong>l<br />
Teléfono.<br />
2. Presione la Tecla <strong>de</strong> Dirección hacia arriba o hacia abajo para seleccionar<br />
7. Mover Todos a la Tarjeta y enseguida presione la Tecla .<br />
3. Presione la Tecla <strong>de</strong> Dirección hacia arriba o hacia abajo para seleccionar<br />
Sí y presione la Tecla .<br />
No remueva la tarjeta <strong>de</strong> memoria <strong>de</strong>l teléfono mientras un archivo o archivos estén<br />
siendo movidos a la tarjeta <strong>de</strong> memoria.<br />
01<br />
02<br />
03<br />
04<br />
05<br />
06<br />
07<br />
111
TARJETA DE MEMORIA<br />
Permite que usted administre el uso <strong>de</strong> la memoria para imágenes, ví<strong>de</strong>os, músicas,<br />
sonidos y contactos en su Tarjeta <strong>de</strong> Memoria. La tarjeta <strong>de</strong> memoria (vendido en<br />
separado) <strong>de</strong>be ser insertada en el teléfono para realizar estas funciones.<br />
USO DE LA TARJETA DE MEMORIA<br />
Para verificar la capacidad <strong>de</strong> la Tarjeta <strong>de</strong> Memoria disponible, capacidad usada y<br />
capacidad total:<br />
1. Desplace el teléfono hacia arriba, presione la Tecla [MENU] y a seguir<br />
presione 9. Herramientas y Ajustes, 6. Memoria, 3. Tarjeta <strong>de</strong> Memoria.<br />
2. Presione 1. Uso <strong>de</strong> la Tarjeta <strong>de</strong> Memoria.<br />
3. Presione la Tecla para volver a la pantalla anterior.<br />
FORMATACION DE LA TARJETA<br />
Para formatear la tarjeta insertada:<br />
1. Desplace el teléfono hacia arriba, presione la Tecla [MENU] y a seguir<br />
presione 9. Herramientas y Ajustes, 6. Memoria, 3. Tarjeta <strong>de</strong> Memoria.<br />
2. Presione 1. Uso <strong>de</strong> la Tarjeta <strong>de</strong> Memoria y enseguida presione la Tecla <strong>de</strong><br />
Función Derecha [Opciones].<br />
3. Presione 1. Formatear Tarjeta, inserte su código <strong>de</strong> bloqueo <strong>de</strong> 4 dígitos y<br />
presione la Tecla .<br />
4. Presione la Tecla <strong>de</strong> Dirección hacia arriba o hacia abajo para seleccionar<br />
Sí y presione la Tecla .<br />
BORRADO Y MOVIMIENTO DE ARCHIVOS<br />
Para borrar archivos almacenados en la Tarjeta <strong>de</strong> Memoria o para mover archivos <strong>de</strong><br />
la Tarjeta <strong>de</strong> Memoria a la Memoria <strong>de</strong>l Teléfono:<br />
1. Desplace el teléfono hacia arriba, presione la Tecla [MENU] y a seguir<br />
presione 9. Herramientas y Ajustes, 6. Memoria, 3. Tarjeta <strong>de</strong> Memoria.<br />
AJUSTES<br />
2. Presione la Tecla <strong>de</strong> Dirección hacia arriba o hacia abajo para seleccionar<br />
2. Imágenes, 3. Ví<strong>de</strong>os, 4. Sonidos, 5. Músicas o 6. Contactos y<br />
enseguida presione la Tecla .<br />
3. Presione la Tecla <strong>de</strong> Función Derecha [Opciones].<br />
4. Presione la Tecla <strong>de</strong> Dirección hacia arriba o hacia abajo para seleccionar<br />
1. Borrar para borrar un archivo o 2. Mover para mover un archivo a la<br />
Memoria <strong>de</strong>l Teléfono y enseguida presione la Tecla .<br />
Si usted seleccionó Contactos podrá seleccionar 1. Copiar o 2. Borrar tras presionar la<br />
Tecla <strong>de</strong> Función Derecha [Opciones].<br />
5. Presione la Tecla <strong>de</strong> Dirección hacia arriba o hacia abajo para seleccionar<br />
un archivo, presione la Tecla [MARCAR] o la Tecla <strong>de</strong> Función Derecha<br />
[Marcar Todos] y enseguida presione la Tecla <strong>de</strong> Función izquierda<br />
[Hecho].<br />
6. Presione la Tecla <strong>de</strong> Dirección hacia arriba o hacia abajo para seleccionar<br />
Sí y presione la Tecla .<br />
MOVIMIENTO DE TODOS LOS ARCHIVOS<br />
Para mover todos los archivos grabados en la Tarjeta <strong>de</strong> Memoria a la Memoria <strong>de</strong>l<br />
Teléfono:<br />
1. Desplace el teléfono hacia arriba, presione la Tecla [MENU] y a seguir<br />
presione 9. Herramientas y Ajustes, 6. Memoria, 3. Tarjeta <strong>de</strong> Memoria.<br />
2. Presione la Tecla <strong>de</strong> Dirección hacia arriba o hacia abajo para seleccionar<br />
7. Mover Todos al Teléfono y enseguida presione la Tecla .<br />
3. Presione la Tecla <strong>de</strong> Dirección hacia arriba o hacia abajo para seleccionar<br />
Sí y presione la Tecla .<br />
No remueva la tarjeta <strong>de</strong> memoria <strong>de</strong>l teléfono mientras un archivo o archivos estén<br />
siendo movidos a la Tarjeta <strong>de</strong> Memoria.<br />
01<br />
02<br />
03<br />
04<br />
05<br />
06<br />
07<br />
112<br />
113
BLUETOOTH®<br />
La conectividad <strong>de</strong> la tecnología Bluetooth® permite conexiones inalámbricas entre<br />
dispositivos electrónicos. Conectándose a un dispositivo altavoz Bluetooth, usted pue<strong>de</strong><br />
utilizar su teléfono con mucho más libertad. Consi<strong>de</strong>rando que los dispositivos con la<br />
conectividad Bluetooth se comunican utilizando ondas <strong>de</strong> radio, su teléfono y el otro<br />
dispositivo no necesitan estar en línea directa <strong>de</strong> alineamiento. Los dos dispositivos<br />
solo necesitan estar a una distancia <strong>de</strong> 10 metros uno <strong>de</strong>l otro. La conexión po<strong>de</strong> estar<br />
sujeta a la interferencia <strong>de</strong> obstáculos como, por ejemplo, pare<strong>de</strong>s u otros dispositivos<br />
electrónicos. Este dispositivo está en conformidad con el Bluetooth especificación 3.0,<br />
soportando los siguientes perfiles: Audífono, Altavoz, Estéreo, Acceso a la Agenda<br />
Telefónica, Impresión Básica, Object Push y Navegar/Obtener Archivos. Para asegurar<br />
la interoperacionalidad entre otros dispositivos que soportan la tecnología Bluetooth,<br />
utilice las mejorías aprobadas para este mo<strong>de</strong>lo. Verifique con los fabricantes <strong>de</strong> los<br />
otros dispositivos para <strong>de</strong>terminar su compatibilidad con este teléfono. Pue<strong>de</strong>n haber<br />
restricciones en el uso da la tecnología Bluetooth en algunas localida<strong>de</strong>s. Verifique<br />
con las autorida<strong>de</strong>s locales o con la Verizon Wireless. Si usted <strong>de</strong>sea obtener más<br />
informaciones sobre esta función, acceda el sitio Web <strong>de</strong> la organización Bluetooth<br />
Technology: https://www.bluetooth.org/.<br />
Importante: Las funciones que utilizan la tecnología Bluetooth o que permiten<br />
que estas funciones operen en segundo plano en cuanto utiliza otras<br />
funciones, aumentan la <strong>de</strong>scarga <strong>de</strong> la batería y reducen la vida útil <strong>de</strong><br />
la batería.<br />
ACTIVACION/DESACTIVACION DEL BLUETOOTH®<br />
Para Activar/Desactivar la función Bluetooth ®:<br />
1. Desplace el teléfono hacia arriba, presione la Tecla [MENU] y a seguir<br />
presione 9. Herramientas y Ajustes, 7. Bluetooth.<br />
2. Presione la Tecla <strong>de</strong> Función Izquierda [Activar/Desactivar]. Una ventana<br />
<strong>de</strong> confirmación será exhibida.<br />
AJUSTES<br />
AGREGAR NUEVO DISPOSITIVO<br />
Emparejamiento es el proceso que permite que el teléfono localice, establezca y registre<br />
una conexión 1-para -1 con el dispositivo blanco.<br />
1. Desplace el teléfono hacia arriba, presione la Tecla [MENU] y a seguir<br />
presione 9. Herramientas y Ajustes, 7. Bluetooth, 1. Agregar Nuevo<br />
Dispositivo.<br />
2. Si la alimentación <strong>de</strong>l dispositivo Bluetooth es <strong>de</strong>sactivada, el mensaje<br />
que se indica a continuación será exhibido en la pantalla LCD “ ACTIVAR<br />
ALIMENTACION DEL DISPOSITIVO BLUETOOTH “.<br />
3. El teléfono exhibirá el mensaje que se indica a continuación en la pantalla LCD:<br />
“AJUSTE EL DISPOSITIVO AL CUAL ESTE TELEFONO SI ESTA CONECTANDO EN<br />
EL MODO DE DETECCION”. Presione la Tecla .<br />
4. El dispositivo será exhibido en el menú AGREGAR NUEVO DISPOSITIVO.<br />
Seleccione el dispositivo en el cual <strong>de</strong>sea realizar el pareo y enseguida presione<br />
la Tecla [PAREO].<br />
5. El teléfono exhibirá el mensaje que se muestra a continuación en la pantalla<br />
LCD: CONFIRME LA CONTRASEÑA ACTIVADO [NOMBRE DEL<br />
DISPOSITIVO] Seleccione Sí y presione la Tecla . Si usted <strong>de</strong>sea que<br />
siempre se confirme antes <strong>de</strong> conectarse al dispositivo Bluetooth, seleccione<br />
Preguntar Siempre y enseguida presione la Tecla . Si usted no <strong>de</strong>sea<br />
confirmar todas las veces antes <strong>de</strong> conectarse al dispositivo Bluetooth,<br />
seleccione Conectar Siempre y enseguida presione la Tecla .<br />
• El teléfono le pedirá la contraseña. Consulte las instrucciones <strong>de</strong>l accesorio Bluetooth<br />
(se ven<strong>de</strong> por separado) para ver la contraseña a<strong>de</strong>cuada (habitualmente “0000”-4<br />
ceros). Introduzca la contraseña, a continuación, pulse la Tecla .<br />
• No es necesario ingresar la contraseña para el pareo cuando la contraseña <strong>de</strong> acceso<br />
<strong>de</strong>l Bluetooth, <strong>de</strong>l audífono o <strong>de</strong>l dispositivo <strong>de</strong> manos libres es 0000. (excepto<br />
cuando el Pareo Automatico <strong>de</strong> manos libres está <strong>de</strong>sactivado)<br />
01<br />
02<br />
03<br />
04<br />
05<br />
06<br />
07<br />
114<br />
115
116<br />
6. Una vez conectado, usted visualizará el dispositivo listado en el menú<br />
Bluetooth y el ícono <strong>de</strong> dispositivo Bluetooth conectado será exhibido en la<br />
parte superior da la pantalla cuando este teléfono esté conectado al dispositivo<br />
Bluetooth.<br />
• En el menú Bluetooth, usted pue<strong>de</strong> apagar el dispositivo presionando la Tecla <strong>de</strong><br />
Función Izquierda [Desactivar]. Por el contrario, pue<strong>de</strong> activar presionando la<br />
Tecla <strong>de</strong> Función Izquierda [Activar].<br />
• Si hay varios dispositivos, seleccione el dispositivo que <strong>de</strong>sea conectar.<br />
OPCIONES<br />
1. Desplace el teléfono hacia arriba, presione la Tecla [MENU] y a seguir<br />
presione 9. Herramientas y Ajustes, 7. Bluetooth.<br />
2. Seleccione el dispositivo sometido al pareo.<br />
3. Presione la Tecla <strong>de</strong> Función Derecha [Opciones].<br />
4. Presione la Tecla <strong>de</strong> Dirección hacia arriba o abajo para seleccionar una <strong>de</strong><br />
las opciones que se muestran a continuación y enseguida presione la Tecla .<br />
• Retirar Dispositivo: Retira un dispositivo <strong>de</strong> la lista <strong>de</strong> pareo.<br />
• Renombrar Dispositivo: Renombra un dispositivo aparejado.<br />
• Seguridad <strong>de</strong> Recibimiento: Ajusta los permisos para conexión <strong>de</strong> un dispositivo recibido.<br />
• Exploración <strong>de</strong>l Servicio: Busca servicios que el dispositivo seleccionado soporta.<br />
• Informaciones <strong>de</strong>l Dispositivo: Exhibe informaciones <strong>de</strong>l dispositivo.<br />
5. O, presione la Tecla para acce<strong>de</strong>r 1. Enviar Tarjeta <strong>de</strong> Visitas, 2. Enviar<br />
Imagen, 3. Enviar Vi<strong>de</strong>o, 4. Enviar Sonido, 5. Enviar Evento <strong>de</strong> Calendario,<br />
6. Obtener Tarjeta <strong>de</strong> Visitas, 7. Cambiar Tarjeta <strong>de</strong> Visitas o 8. Navegar/<br />
Obtener Archivos.<br />
AJUSTES<br />
NOMBRE DE MI TELEFONO<br />
Para editar el nombre Bluetooth® <strong>de</strong> su teléfono:<br />
1. Desplace el teléfono hacia arriba, presione la Tecla [MENU] y a seguir<br />
presione 9. Herramientas y Ajustes, 7. Bluetooth.<br />
AJUSTES<br />
2. Presione la Tecla <strong>de</strong> Función Derecha [Opciones].<br />
3. Presione 1. Nombre <strong>de</strong> Mi Teléfono.<br />
4. Utilice el Teclado QWERTY para ingresar un nuevo nombre personalizado.<br />
5. Presione la Tecla [CONFIRMAR] para grabar y salir.<br />
MODO DE DETECCION<br />
Para <strong>de</strong>finir si su dispositivo está apto para ser rastreado por otros dispositivos<br />
Bluetooth en el área:<br />
1. Desplace el teléfono hacia arriba, presione la Tecla [MENU] y a seguir<br />
presione 9. Herramientas y Ajustes, 7. Bluetooth.<br />
2. Presione la Tecla <strong>de</strong> Función Derecha [Opciones].<br />
3. Presione 2. Modo Detección.<br />
Si la alimentación <strong>de</strong>l Bluetooth no está activada, ella será activada automáticamente.<br />
4. Presione la Tecla <strong>de</strong> Dirección hacia arriba o abajo para seleccionar<br />
Activar o Desactivar y enseguida presione la Tecla [CONFIRMAR].<br />
PERFILES SOPORTADOS<br />
Para visualizar las <strong>de</strong>scripciones resumidas <strong>de</strong> los perfiles soportados por el teléfono:<br />
1. Desplace el teléfono hacia arriba, presione la Tecla [MENU] y a seguir<br />
presione 9. Herramientas y Ajustes, 7. Bluetooth.<br />
2. Presione la Tecla <strong>de</strong> Función Derecha [Opciones].<br />
3. Presione 3. Perfiles Soportados.<br />
4. Presione la Tecla <strong>de</strong> Dirección hacia arriba o abajo para seleccionar uno<br />
<strong>de</strong> los perfiles que se muestran a continuación y enseguida presione la Tecla<br />
[VISUALIZAR] para más informaciones.<br />
1. Audífono / 2. Altavoz / 3. Estéreo / 4. Acceso a la Agenda Telefónica /<br />
5. Impresión Básica / 6. Imagen Básica / 7. Object Push /<br />
8. Navegar/Obtener Archivos<br />
01<br />
02<br />
03<br />
04<br />
05<br />
06<br />
07<br />
117
PAREO AUTOMATICO DE DISPOSITIVO ALTAVOZ<br />
Para Activar/Desactivar el Pareo <strong>de</strong>l Dispositivo Altavoz:<br />
1. Desplace el teléfono hacia arriba, presione la Tecla [MENU] y a seguir<br />
presione 9. Herramientas y Ajustes, 7. Bluetooth.<br />
2. Presione la Tecla <strong>de</strong> Función Derecha [Opciones].<br />
3. Presione 4. Pareo Automático <strong>de</strong> Dispositivo Altavoz.<br />
4. Presione la Tecla <strong>de</strong> Dirección hacia arriba o abajo para seleccionar<br />
Activar o Desactivar y enseguida presione la Tecla [CONFIRMAR].<br />
MODO USB<br />
Usted pue<strong>de</strong> utilizar un cable <strong>de</strong> datos USB para transferir datos entre el dispositivo y un<br />
Or<strong>de</strong>nador compatible.<br />
Important: Para activar su dispositivo para transferir datos, seleccione Modo USB antes<br />
<strong>de</strong> conectar el cabo <strong>de</strong> datos USB.<br />
1. Desplace el teléfono hacia arriba, presione la Tecla [MENU] y a seguir<br />
presione 9. Herramientas y Ajustes, 8. Modo USB.<br />
2. Presione la Tecla <strong>de</strong> Dirección hacia arriba o abajo para seleccionar<br />
Solamente Cargar o Almacenamiento en Lotes y enseguida presione la<br />
Tecla [CONFIRMAR].<br />
• Solamente Cargar: Permite que usted cargue su teléfono solamente cuando conectado<br />
a la computadora.<br />
• Almacenamiento en Lotes: Permite que usted utilice su teléfono como almacenamiento<br />
en lotes para su computadora al conectar un cable <strong>de</strong> datos<br />
USB.<br />
• Almacenamiento en Lotes es el ajuste estándar para este dispositivo.<br />
INFORMACIONES DEL TELEFONO<br />
AJUSTES<br />
MI NUMERO DE TELEFONO<br />
Para visualizar su número <strong>de</strong> teléfono:<br />
1. Desplace el teléfono hacia arriba, presione la Tecla [MENU] y a seguir<br />
presione 9. Herramientas y Ajustes, 9. Informaciones <strong>de</strong>l Teléfono, 1. Mi<br />
Número <strong>de</strong> Teléfono.<br />
2. Se exhibirán las informaciones que se indican a continuación:<br />
MDN / MIN<br />
VERSION DE SOFTWARE/HARDWARE<br />
Para visualizar las informaciones <strong>de</strong> Software/Hardware <strong>de</strong>l su dispositivo:<br />
1. Desplace el teléfono hacia arriba, presione la Tecla [MENU] y a seguir<br />
presione 9. Herramientas y Ajustes, 9. Informaciones <strong>de</strong>l Teléfono, 2.<br />
Versión <strong>de</strong>l Software/Hardware.<br />
2. Las opciones Versión <strong>de</strong>l Software / Versión PRL / Versión PRI / Versión <strong>de</strong>l<br />
Navegador / Versión <strong>de</strong>l Hardware / Actualización <strong>de</strong>l Software Cliente<br />
serán exhibidas.<br />
3. Presione la Tecla para retornar a la pantalla anterior.<br />
MEID / PESN<br />
Para visualizar su MEID o pESN<br />
1. Desplace el teléfono hacia arriba, presione la Tecla [MENU] y a seguir<br />
presione 9. Herramientas y Ajustes, 9. Informaciones <strong>de</strong>l Teléfono,<br />
3. MEID / pESN.<br />
2. MEID(Dec) / MEID(Hex) / pESN(Hex) son exhibidos.<br />
3. Presione la Tecla para retornar a la pantalla anterior.<br />
01<br />
02<br />
03<br />
04<br />
05<br />
06<br />
07<br />
118<br />
119
GLOSARIO DE ICONOS<br />
Para visualizar todos los íconos y sus significados:<br />
1. Desplace el teléfono hacia arriba, presione la Tecla [MENU] y a seguir<br />
presione 9. Herramientas y Ajustes, 9. Informaciones <strong>de</strong>l Teléfono,<br />
4. Glosario <strong>de</strong> Íconos.<br />
2. Presione la Tecla para retornar a la pantalla anterior.<br />
Por favor, véase Indicadores <strong>de</strong> la Pantalla en la página 12 para obtener más <strong>de</strong>talles<br />
sobre los íconos.<br />
ACTUALIZACION DEL SOFTWARE<br />
La opción Actualización <strong>de</strong>l Software permite que usted <strong>de</strong>scargue y actualice<br />
el software <strong>de</strong> su teléfono automáticamente. Solamente el software interno es<br />
actualizado. Registros <strong>de</strong> contacto u otras informaciones grabadas en su teléfono NO<br />
serán borrados.<br />
ESTADO<br />
Verifique el estado <strong>de</strong> Download/Actualización <strong>de</strong>l Software más reciente.<br />
1. Desplace el teléfono hacia arriba, presione la Tecla [MENU] y a seguir<br />
presione 9. Herramientas y Ajustes, 9. Informaciones <strong>de</strong>l Teléfono,<br />
5. Actualización <strong>de</strong>l Software.<br />
2. Presione 1. Estado.<br />
VERIFICAR ACTUALIZACIONES<br />
Para verificar el Servidor <strong>de</strong> Download para nuevas actualizaciones <strong>de</strong>l Software:<br />
1. Desplace el teléfono hacia arriba, presione la Tecla [MENU] y a seguir<br />
presione 9. Herramientas y Ajustes, 9. Informaciones <strong>de</strong>l Teléfono,<br />
5. Actualización <strong>de</strong>l Software.<br />
2. Presione 2. Verificar Novas Actualizaciones.<br />
AJUSTES<br />
SISTEMA OPERATIVO<br />
Para visualizar informaciones sobre el sistema operativo <strong>de</strong> su teléfono:<br />
1. Desplace el teléfono hacia arriba, presione la Tecla [MENU] y a seguir<br />
presione 9. Herramientas y Ajustes, 9. Informaciones <strong>de</strong>l Teléfono,<br />
6. Sistema Operativo.<br />
2. Presione la Tecla para retornar a la pantalla anterior.<br />
01<br />
02<br />
03<br />
04<br />
05<br />
06<br />
07<br />
120<br />
121
5<br />
MULTIMEDIA<br />
Este capítulo trata <strong>de</strong> Fotos y Ví<strong>de</strong>o, Sonidos, Campanillas y Música:<br />
Imagen y Vi<strong>de</strong>o<br />
Sonidos<br />
Campanillas<br />
Música
IMAGEN Y VIDEO<br />
IMAGENES<br />
El menú Imágenes permite que usted visualice todas las imágenes capturadas,<br />
almacene imágenes seleccionadas en su teléfono, envíe imágenes al Álbum En línea,<br />
borre imágenes y acceda opciones <strong>de</strong> imagen adicionales.<br />
1. Desplace el teléfono hacia arriba, presione la Tecla [MENU] y a seguir<br />
presione 4. Multimedia, 1. Imagen y Ví<strong>de</strong>o, 1. Imágenes.<br />
2. Seleccione la imagen <strong>de</strong>seada y enseguida presione la Tecla <strong>de</strong> Función<br />
Derecha [Opciones] para acce<strong>de</strong>r las opciones a continuación.<br />
• Enviar: Permite que usted envíe una imagen con las siguientes opciones:<br />
1. Mensaje con Imagen / 2. Para Álbum En línea / 3. Vía Bluetooth<br />
• Definir Como: Define la imagen seleccionada para exhibir tareas específicas<br />
(Papel <strong>de</strong> Pared / I<strong>de</strong>ntificación <strong>de</strong> la Imagen).<br />
• Capturar Imagen: Captura una nueva imagen.<br />
• Administrar Imágenes: Para administrar sus archivos <strong>de</strong> imagen con las siguientes<br />
opciones: 1. Borrar / 2. Bloquear / 3. Desbloquear / 4. Mover al<br />
Teléfono / 5. Mover a la Tarjeta<br />
• Renombrar: Renombra la imagen seleccionada.<br />
• Informaciones sobre el Archivo: Exhibe las informaciones a continuación sobre la imagen<br />
seleccionada: Nombre <strong>de</strong>l Archivo / Fecha / Hora /<br />
Resolución / Tamaño<br />
• Visualización Completa: Para visualizar la imagen completa.<br />
BORRADO DE UNA IMAGEN<br />
1. Desplace el teléfono hacia arriba, presione la Tecla [MENU] y a seguir<br />
presione 4. Multimedia, 1. Imagen y Ví<strong>de</strong>o, 1. Imágenes.<br />
2. Seleccione la imagen que usted <strong>de</strong>sea borrar y enseguida presione la Tecla <strong>de</strong><br />
Función Izquierda [Borrar].<br />
3. El mensaje “¿BORRAR IMAGEN” se exhibirá en su pantalla.<br />
4. Seleccione Sí y presione la Tecla . Un mensaje <strong>de</strong> confirmación será<br />
exhibido.<br />
MULTIMEDIA<br />
VIDEOS<br />
El menú Ví<strong>de</strong>os permite que usted visualice todos los ví<strong>de</strong>os grabados, almacene ví<strong>de</strong>os<br />
seleccionados en su teléfono, envíe ví<strong>de</strong>os al Álbum En línea, borre ví<strong>de</strong>os y acceda<br />
opciones adicionales <strong>de</strong> ví<strong>de</strong>o.<br />
1. Desplace el teléfono hacia arriba, presione la Tecla [MENU] y a seguir<br />
presione 4. Multimedia, 1. Imagen y Ví<strong>de</strong>o, 2. Ví<strong>de</strong>os.<br />
2. Seleccione el ví<strong>de</strong>o <strong>de</strong>seado y enseguida presione la Tecla <strong>de</strong> Función Derecha<br />
[Opciones] para acce<strong>de</strong>r las opciones a continuación.<br />
• Enviar: Permite que usted envíe una imagen con las opciones a continuación:<br />
1. Mensaje <strong>de</strong> Ví<strong>de</strong>o/ 2. Para Álbum En línea / 3. Vía Bluetooth<br />
• Definir como: Ajuste el ví<strong>de</strong>o seleccionado como Papel <strong>de</strong> Pared o una I<strong>de</strong>ntificación<br />
<strong>de</strong> Ví<strong>de</strong>o.<br />
• Grabar Ví<strong>de</strong>o: Graba un nuevo ví<strong>de</strong>o.<br />
• Administrar Ví<strong>de</strong>os: Para administrar sus archivos <strong>de</strong> ví<strong>de</strong>o con las siguientes opciones:<br />
1. Borrar / 2. Bloquear / 3. Desbloquear / 4. Mover al Teléfono /<br />
5. Mover a la Tarjeta<br />
• Renombrar: Renombra el ví<strong>de</strong>o seleccionado.<br />
• Informaciones <strong>de</strong>l Archivo: Exhibe las informaciones a continuación sobre el ví<strong>de</strong>o<br />
seleccionado: Nombre / Fecha / Hora / Duración / Tamaño<br />
BORRADO DE UN VIDEO<br />
1. Desplace el teléfono hacia arriba, presione la Tecla [MENU] y a seguir<br />
presione 4. Multimedia, 1. Imagen y Ví<strong>de</strong>o, 2. Ví<strong>de</strong>os.<br />
2. Seleccione el ví<strong>de</strong>o que usted <strong>de</strong>sea borrar y enseguida presione la Tecla <strong>de</strong><br />
Función Izquierda [Borrar].<br />
3. El mensaje “¿BORRAR VIDEO” se exhibirá en su pantalla.<br />
4. Seleccione Sí y presione la Tecla . Un mensaje <strong>de</strong> confirmación será<br />
exhibido.<br />
CAPTURA DE IMAGEN<br />
1. Desplace el teléfono hacia arriba, presione la Tecla [MENU] y a seguir<br />
presione 4. Multimedia, 1. Imagen y Ví<strong>de</strong>o, 3. Captura <strong>de</strong> Imagen.<br />
01<br />
02<br />
03<br />
04<br />
05<br />
06<br />
07<br />
124<br />
125
Acceso Rápido: En el modo inactivo, si el teclado estuviere bloqueado, presione<br />
la Tecla FIN/ALIMENTACION y enseguida, presione la Tecla en menos <strong>de</strong> tres<br />
segundos para <strong>de</strong>sbloquear el teclado. Presione la Tecla Cámara (localizada al lado<br />
<strong>de</strong>recho <strong>de</strong>l dispositivo) para acce<strong>de</strong>r el visor <strong>de</strong> la cámara.<br />
2. Apunte la lente <strong>de</strong> la cámara hacia su blanco. Usted pue<strong>de</strong> verificar el<br />
encuadramiento <strong>de</strong> la imagen a través <strong>de</strong> la pantalla.<br />
• Presione la Tecla <strong>de</strong> Dirección izquierda o <strong>de</strong>recha para aplicar el zoom <strong>de</strong><br />
acercamiento o alejamiento (excepto cuando la resolución esté ajustada para<br />
1600x1200).<br />
• Presione la Tecla <strong>de</strong> Función Derecha [Opciones] y seleccione una <strong>de</strong> las siguientes<br />
opciones y presione la Tecla [CONFIRMAR]:<br />
1. Resolution: 1600X1200 / 1280x960 / 640x480 / 320x240 / 160x120<br />
2. Timer Automático: Desactivado / 3 Segundos / 5 Segundos / 10 Segundos<br />
3. Brillo: Presione la Tecla <strong>de</strong> dirección hacia la izquierda o <strong>de</strong>recha para ajustar el brillo<br />
entre las opciones: -2 / -1 / 0 / +1 / +2<br />
4. Balance <strong>de</strong> Blanco: Presione la Tecla <strong>de</strong> dirección hacia la izquierda o <strong>de</strong>recha para<br />
seleccionar entre las siguientes opciones:<br />
Automático / Soleado / Nublado / Tungsteno / Fluorescente<br />
5. Sonido <strong>de</strong>l Disparador: Permite que usted seleccione el sonido <strong>de</strong>l disparador entre las<br />
siguientes opciones:<br />
Disparador / Silencioso / “Diga X” / ¡Listo! 123<br />
6. Efectos <strong>de</strong> Colores: Presione la Tecla <strong>de</strong> dirección hacia la izquierda o <strong>de</strong>recha para<br />
seleccionar los efectos <strong>de</strong> colores entre los siguientes:<br />
Normal / Antique / Blanco y Negro / Negativo<br />
7. Modo <strong>de</strong> Captura: Ajuste el modo <strong>de</strong> captura para capturar imágenes entre las<br />
siguientes opciones: Paisaje / Retrato<br />
8. Memoria: Ajuste la memoria para grabar la imagen capturada entre las opciones a<br />
continuación: Teléfono / Tarjeta<br />
3. Presione la Tecla [CAPTURAR] para capturar la imagen.<br />
4. Tras capturar la imagen, ella será exhibida. Para grabar la imagen, presione<br />
la Tecla <strong>de</strong> Función Izquierda [Grabar]. Para capturar otra imagen sin<br />
grabar la imagen recién-capturada, presione la Tecla <strong>de</strong> Función Derecha<br />
[Borrar]. Para enviar la imagen a alguien, presione la Tecla [ENVIAR].<br />
MULTIMEDIA<br />
GRABACION DE VIDEO<br />
1. Desplace el teléfono hacia arriba, presione la Tecla [MENU] y a seguir<br />
presione 4. Multimedia, 1. Imagen y Ví<strong>de</strong>o, 4. Grabación <strong>de</strong> Ví<strong>de</strong>o.<br />
Acceso Rápido: En el modo inactivo, si el teclado estuviere bloqueado, presione<br />
la Tecla FIN/ALIMENTACION y enseguida, presione la Tecla en menos <strong>de</strong> tres<br />
segundos para <strong>de</strong>sbloquear el teclado. Presione y mantenga presionada la Tecla<br />
Cámara (localizada al lado <strong>de</strong>recho <strong>de</strong>l dispositivo) para acce<strong>de</strong>r el visor <strong>de</strong> la cámara<br />
<strong>de</strong> ví<strong>de</strong>o. Para cambiar <strong>de</strong> cámara <strong>de</strong> ví<strong>de</strong>o a cámara o viceversa, presione y mantenga<br />
la Tecla Cámara presionada (localizada al lado <strong>de</strong>recho <strong>de</strong>l dispositivo).<br />
2. Apunte la lente <strong>de</strong> la cámara hacia su blanco. Usted pue<strong>de</strong> verificar el<br />
encuadramiento <strong>de</strong>l ví<strong>de</strong>o a través <strong>de</strong> la pantalla.<br />
• Presione la Tecla <strong>de</strong> Dirección hacia la izquierda o <strong>de</strong>recha para zoom <strong>de</strong> acercamiento<br />
o alejamiento.<br />
• Presione la Tecla <strong>de</strong> Función Derecha [Opciones] y seleccione entre las opciones a<br />
continuación y presione la Tecla [CONFIRMAR]:<br />
1. Brillo: Presione la Tecla <strong>de</strong> dirección hacia la izquierda o <strong>de</strong>recha para ajustar el brillo entre<br />
las siguientes opciones: -2 / -1 / 0 / +1 / +2<br />
2. Balance <strong>de</strong> Blanco: Presione la Tecla <strong>de</strong> dirección hacia la izquierda o <strong>de</strong>recha para<br />
seleccionar entre las opciones a continuación:<br />
Automático / Soleado / Nublado / Tungsteno / Fluorescente<br />
3. Sonido <strong>de</strong>l Disparador: Permite que usted Active o Desactive el Sonido <strong>de</strong>l Disparador.<br />
4. Tiempo <strong>de</strong> Grabación: Limita el tiempo <strong>de</strong> grabación a 15 Segundos para MENSAJE con<br />
Ví<strong>de</strong>o o 1 Hora para Grabado.<br />
5. Memoria: Ajuste la memoria para grabar el archivo grabado entre las opciones a continuación:<br />
Teléfono / Tarjeta<br />
3. Presione la Tecla [REC] para grabar un ví<strong>de</strong>o.<br />
4. Para pausar/reiniciar, presione la Tecla <strong>de</strong> Función Izquierda [Pausar/<br />
Reiniciar].<br />
5. Para silenciar/anular el silenciado, presione la Tecla <strong>de</strong> Función Derecha<br />
[Silenciar/No Silenciar].<br />
01<br />
02<br />
03<br />
04<br />
05<br />
06<br />
07<br />
126<br />
127
6. Cuando finalice la grabación, presione la Tecla [DETENER].<br />
7. Tras la grabación <strong>de</strong>l ví<strong>de</strong>o, presione la Tecla <strong>de</strong> Función Izquierda [Grabar]<br />
para grabar el ví<strong>de</strong>o. Para grabar otro ví<strong>de</strong>o sin grabar el ví<strong>de</strong>o recién-grabado,<br />
presione la Tecla <strong>de</strong> Función Derecha [Borrar]. Para enviar el ví<strong>de</strong>o a alguien<br />
presione la Tecla [ENVIAR].<br />
SONIDOS<br />
Para seleccionar un sonido <strong>de</strong>seado:<br />
1. Desplace el teléfono hacia arriba, presione la Tecla [MENU] y a seguir<br />
presione 4. Multimedia, 2. Sonidos.<br />
2. Seleccione el sonido <strong>de</strong>seado, presione la Tecla [REPRODUCIR] para oír<br />
el sonido. Presione la Tecla [DETENER] para <strong>de</strong>tener la reproducción <strong>de</strong>l<br />
sonido.<br />
3. Presione la Tecla <strong>de</strong> Función Derecha [Opciones] para acce<strong>de</strong>r las opciones<br />
a continuación:<br />
• Enviar: Permite que usted envíe un sonido con las siguientes opciones:<br />
1. Mensaje con Sonido / 2. Vía Bluetooth<br />
• Renombrar: Renombra el sonido.<br />
• Mover: Permite que usted mueva el sonido seleccionado a la tarjeta <strong>de</strong> memoria o<br />
al teléfono. Esta opción es exhibida solamente si una tarjeta <strong>de</strong> memoria es<br />
insertada.<br />
• Bloquear/Desbloquear: Bloquea o <strong>de</strong>sbloquea el sonido actual para un sonido<br />
<strong>de</strong>scargado.<br />
• Borrar: Borrar el sonido.<br />
• Borrar Todos: Borra todos los sonidos <strong>de</strong> su teléfono o tarjeta <strong>de</strong> memoria.<br />
• Informaciones sobre el Archivo: Exhibe informaciones sobre el sonido seleccionado.:<br />
Nombre / Tamaño / Tipo<br />
MULTIMEDIA<br />
GRABACION DE NUEVOS SONIDOS<br />
1. Desplace el teléfono hacia arriba, presione la Tecla [MENU] y a seguir<br />
presione 4. Multimedia, 2. Sonidos.<br />
2. Presione 1. Grabar Novo.<br />
3. Presione la Tecla para iniciar la grabación. Cuando termine, presione<br />
la Tecla [DETENER] para finalizar la grabación. La grabación será<br />
automáticamente grabada en su Lista <strong>de</strong> Sonidos.<br />
4. Su grabación será grabada con un número. Para renombrarla, presione la<br />
Tecla <strong>de</strong> Dirección hacia arriba o hacia abajo para seleccionar el sonido<br />
que usted <strong>de</strong>sea renombrar y enseguida presione la Tecla <strong>de</strong> Función<br />
Derecha [Opciones].<br />
5. Presione 2. Renombrar.<br />
6. Presione y mantenga presionada la Tecla CLR para borrar el número,<br />
inserte el nuevo nombre para su grabación y enseguida presione la Tecla<br />
.<br />
AJUSTE DE LOS SONIDOS<br />
1. Desplace el teléfono hacia arriba, presione la Tecla [MENU] y a seguir<br />
presione 4. Multimedia, 2. Sonidos.<br />
2. Seleccione el sonido que <strong>de</strong>sea ajustar, presione la Tecla <strong>de</strong> Función Izquierda<br />
[Definir Como] y enseguida seleccione una <strong>de</strong> las siguientes opciones y<br />
presione la Tecla .<br />
• Campanilla: Define como una campanilla. Un mensaje <strong>de</strong> confirmación será exhibido.<br />
• I<strong>de</strong>ntificación <strong>de</strong>l Contacto: La pantalla DEFINIR COMO IDENTIFICACION DE CONTACTO se<br />
exhibirá. Seleccione el Contacto que usted <strong>de</strong>sea atribuir a<br />
la campanilla y enseguida presione la Tecla .<br />
• Sonidos <strong>de</strong> Alerta: Presione la tecla numérica correspondiente para ajustar la<br />
campanilla parra una <strong>de</strong> las siguientes opciones:<br />
1. Todos los mensajes / 2. Mensajes <strong>de</strong> Texto / 3. Mensajes <strong>de</strong><br />
Multimedia / 4. Buzón<br />
01<br />
02<br />
03<br />
04<br />
05<br />
06<br />
07<br />
128<br />
129
130<br />
CAMPANILLAS<br />
PARA REPRODUCIR MELODIAS O TONOS DESCARGADOS:<br />
1. Desplace el teléfono hacia arriba, presione la Tecla [MENU] y a seguir<br />
presione 4. Multimedia, 3. Campanillas.<br />
2. Seleccione la melodía o tono que <strong>de</strong>sea reproducir y enseguida presione la<br />
Tecla [REPRODUCIR].<br />
3. Para <strong>de</strong>tener, presione la Tecla [DETENER].<br />
PARA BORRAR MELODIAS Y TONOS DESCARGADOS:<br />
1. Desplace el teléfono hacia arriba, presione la Tecla [MENU] y a seguir<br />
presione 4. Multimedia, 3. Campanillas.<br />
2. Seleccione la melodía o tono a ser borrada ye presione la Tecla <strong>de</strong> Función<br />
Derecha [Opciones].<br />
3. Seleccione Borrar y presione la Tecla .<br />
4. Seleccione Sí y presione la Tecla .<br />
Las Campanillas precargadas no pue<strong>de</strong>n ser borradas.<br />
PARA ATRIBUIR MELODIAS O TONOS DESCARGADOS:<br />
1. Desplace el teléfono hacia arriba, presione la Tecla [MENU] y a seguir<br />
presione 4. Multimedia, 3. Campanillas.<br />
2. Seleccione la campanilla <strong>de</strong>seada y presione la Tecla <strong>de</strong> Función Izquierda<br />
[Definir Como].<br />
3. Seleccione una <strong>de</strong> las opciones a continuación y enseguida presione la Tecla<br />
.<br />
• 1. Campanilla: Define como una campanilla. Un mensaje <strong>de</strong> confirmación se exhibirá.<br />
• 2. I<strong>de</strong>ntificación <strong>de</strong> Contacto: La pantalla DEFINIR COMO IDENTIFICACION DE CONTACTO<br />
se exhibirá. Seleccione el Contacto al cual <strong>de</strong>sea atribuir<br />
la campanilla y presione la Tecla .<br />
• 3. Sonidos <strong>de</strong> Alerta: Presione la Tecla numérica correspondiente para ajustar la<br />
campanilla para una <strong>de</strong> las siguientes: 1. Todos los mensajes /<br />
2. Mensajes <strong>de</strong> Texto / 3. Mensajes Multimedia / 4. Buzón<br />
MULTIMEDIA<br />
MUSICA<br />
El menú Música permite que usted reproduzca y administre archivos <strong>de</strong> música<br />
almacenados en la memoria <strong>de</strong> su teléfono y <strong>de</strong> una tarjeta <strong>de</strong> memoria (vendido en<br />
separado).<br />
1. Desplace el teléfono hacia arriba, presione la Tecla [MENU] y a seguir<br />
presione 4. Multimedia, 4. Música.<br />
2. Seleccione una <strong>de</strong> las siguientes opciones y presione la Tecla .<br />
• Reiniciar: Opciones Dinámicas. Estas opciones estarán disponibles si el Reproductor <strong>de</strong><br />
Música hubiere sido utilizado por lo menos una vez.<br />
• Reproducir Todas las Músicas: Opciones Dinámicas. Estas opciones estarán disponibles si<br />
músicas fueren reproducidas.<br />
• 1. Todas las Músicas: Permite visualizar o tocar músicas.<br />
• 2. Listas <strong>de</strong> Reproducción: Permite que usted críe o visualice sus listas <strong>de</strong> reproducción.<br />
Cuando las listas <strong>de</strong> reproducción estuvieren creadas, usted<br />
podrá reproducir las músicas utilizando estas listas.<br />
• 3. Artistas: Permite que usted visualice o reproduzca sus músicas por artista.<br />
• 4. Géneros: Permite que usted visualice o reproduzca sus músicas por género.<br />
• 5. Álbumes: Permite que usted visualice o reproduzca sus músicas por álbum.<br />
• 6. Administración <strong>de</strong> Músicas: Permite que usted administre sus archivos <strong>de</strong> música con<br />
las siguientes opciones: 1. Borrar / 2. Bloquear /<br />
3. Desbloquear / 4. Mover a la Tarjeta / 5. Mover al Teléfono<br />
• 7. Ajustes <strong>de</strong> Música: Permite que usted ajuste las siguientes configuraciones <strong>de</strong>l player:<br />
1. Repetir / 2. Aleatoria / 3. Player Skin / 4. Solamente Modo Música<br />
01<br />
02<br />
03<br />
04<br />
05<br />
06<br />
07<br />
131
MUSIC PLAYER NATIVE<br />
Imagen <strong>de</strong> la<br />
Portada <strong>de</strong>l Álbum<br />
Nivel <strong>de</strong> Volumen<br />
Icono <strong>de</strong> Reproducción<br />
Informaciones <strong>de</strong> la<br />
Portada <strong>de</strong>l Álbum<br />
Índice<br />
Barra <strong>de</strong> Estado <strong>de</strong> la<br />
Reproducción<br />
Aleatoria / Repetida Guía <strong>de</strong> Teclas Tiempo <strong>de</strong> Reproducción /<br />
Tiempo Total<br />
Icono Nombre Descripciones<br />
Nivel <strong>de</strong> Volumen Indica el nivel <strong>de</strong> volumen <strong>de</strong> la música actual<br />
Anterior /<br />
Siguiente<br />
Pausa/<br />
Reproducción<br />
Repetir<br />
Aleatoria<br />
Presione: Anterior, Siguiente<br />
Presionar y mantener presionada: Retroceso,<br />
Avance Rápido<br />
Indica el estado <strong>de</strong>l reproductor<br />
Repite Todas<br />
Repetir Una<br />
Desactivada<br />
Activada<br />
Desactivada<br />
MULTIMEDIA<br />
REPRODUCCION DE MUSICA<br />
1. Con el teléfono cerrado, presione la Tecla FIN/ALIMENTACION y enseguida,<br />
presione la Tecla en menos <strong>de</strong> tres segundos para <strong>de</strong>sbloquear el teclado.<br />
O <strong>de</strong>splace el teléfono hacia arriba, presione la Tecla [MENU] y<br />
enseguida presione 4. Multimedia, 4. Música.<br />
2. Seleccione 1. Todas las Músicas, presione la Tecla y enseguida<br />
seleccione la música <strong>de</strong>seada y presione la Tecla [REPRODUCIR]. Para<br />
pausar la música, presione la Tecla nuevamente.<br />
3. Presione la Tecla <strong>de</strong> Función Izquierda [Silenciar] para silenciar o<br />
presione la Tecla <strong>de</strong> Función <strong>de</strong>recha [Opciones] para seleccionar entre<br />
las siguientes opciones:<br />
• Salir <strong>de</strong>l Reproductor: Sale <strong>de</strong>l reproductor <strong>de</strong> músicas y vuelve a la pantalla anterior.<br />
• Modo Solamente Música: Activa el Modo Solamente Música para <strong>de</strong>shabilitar todas las<br />
comunicaciones inalámbricas.<br />
• Informaciones sobre la Música: Exhibe las informaciones sobre el archivo <strong>de</strong> música.<br />
• Repetir: Seleccione Repetir Todas, Repetir Una o Desactivada para el modo <strong>de</strong><br />
repetición <strong>de</strong>l player.<br />
• Aleatorio: Seleccione Activar o Desactivar para el modo aleatorio <strong>de</strong>l reproductor.<br />
01<br />
02<br />
03<br />
04<br />
05<br />
06<br />
07<br />
132<br />
133
6<br />
CENTRO DE MENSAJES<br />
Este capítulo trata <strong>de</strong> las funciones <strong>de</strong> Buzón, TEXTO, Imagen, Vi<strong>de</strong>o,<br />
Mensajes <strong>de</strong> Voz, incluyendo<br />
Cuando se Recibe un Nuevo Mensaje<br />
Nuevo Mensaje<br />
Mensajes<br />
Ban<strong>de</strong>ja <strong>de</strong> Entrada<br />
Enviados<br />
Borradores<br />
Borrar Todos<br />
Buzón<br />
E-Mail Móvil<br />
Ajustes
CUANDO SE RECIBE UN NUEVO MENSAJE<br />
1. La pantalla que se indica a continuación será exhibida<br />
cuando un nuevo mensaje es recibido.<br />
2. Para exhibir el mensaje, seleccione Visualizar Ahora y<br />
enseguida presione la Tecla .<br />
NUEVO MENSAJE<br />
NUEVO MENSAJE<br />
1. Desplace el teléfono hacia arriba, presione la Tecla <strong>de</strong> Función Izquierda<br />
[Mensaje] y enseguida presione Nuevo Mensaje. O <strong>de</strong>splace el teléfono<br />
hacia arriba, presione la Tecla [MENU] y enseguida presione 2. Centro <strong>de</strong><br />
Mensajes, 1. Nuevo Mensaje.<br />
2. Presione 1. Mensaje <strong>de</strong> TEXTO.<br />
Acceso Rápido: En el modo inactivo, presione la Tecla Compositor <strong>de</strong> TEXTO .<br />
3. En Para, ingrese el número <strong>de</strong> teléfono o dirección <strong>de</strong> email <strong>de</strong>l <strong>de</strong>stinatario y<br />
enseguida presione la Tecla .<br />
• Presionando la Tecla <strong>de</strong> Función Derecha [Agregar], usted po<strong>de</strong> seleccionar entre las<br />
siguientes opciones:<br />
1. De Contactos: busca un número <strong>de</strong> teléfono almacenado en la Lista <strong>de</strong> Contactos.<br />
2. Histórico <strong>de</strong> Llamadas : Busca un número <strong>de</strong> teléfono almacenado en el menú Histórico<br />
<strong>de</strong> Llamadas .<br />
3. Grupos: Busca un grupo almacenado en el menú Grupos.<br />
4. Para Contactos: Graba el número o dirección <strong>de</strong> email en la Lista Contactos que usted<br />
ingresó en el Campo Para.<br />
4. En Texto, ingrese su mensaje.<br />
• Presionando la Tecla <strong>de</strong> Función Derecha [Opciones], usted pue<strong>de</strong> seleccionar entre<br />
las opciones que se indican a continuación:<br />
1. Ingresar Texto Rápido: Ingrese frases pre-<strong>de</strong>finidas en el mensaje <strong>de</strong> texto.<br />
2. Grabar Como Borrador: Graba el mensaje <strong>de</strong> texto en Borradores.<br />
CENTRO DE MENSAJES<br />
3. Agregar: Permite que usted agregue una Dirección <strong>de</strong> Contactos.<br />
4. Nivel <strong>de</strong> Prioridad: Ajusta el nivel <strong>de</strong> prioridad para Alto o Normal.<br />
5. Cancelar Mensaje: Cancela el mensaje y selecciona para grabar o no grabar en<br />
Borradores.<br />
5. Cuando termine, presione la Tecla [ENVIAR] para enviar el mensaje <strong>de</strong><br />
texto.<br />
Estas opciones pue<strong>de</strong>n variar <strong>de</strong>pendiendo <strong>de</strong> los contenidos <strong>de</strong>l mensaje elegido.<br />
MENSAJE CON IMAGEN<br />
1. Desplace el teléfono hacia arriba, presione la Tecla <strong>de</strong> Función Izquierda<br />
[Mensaje] y a seguir presione Nuevo Mensaje. O <strong>de</strong>splace el teléfono hacia<br />
arriba, presione la Tecla [MENU] y enseguida presione 2. Centro <strong>de</strong><br />
Mensajes, 1. Nuevo Mensaje.<br />
2. Presione 2. Mensaje con Imagen.<br />
3. En Para, ingrese el número <strong>de</strong>l teléfono o dirección <strong>de</strong> email <strong>de</strong>l <strong>de</strong>stinatario y<br />
enseguida presione la Tecla .<br />
• Presionando la Tecla <strong>de</strong> Función Derecha [Agregar], usted pue<strong>de</strong> seleccionar entre las<br />
opciones que se indican a continuación:<br />
1. De Contactos: Busca un número <strong>de</strong> teléfono almacenado en la Lista <strong>de</strong> Contactos.<br />
2. Histórico <strong>de</strong> Llamadas : Busca un número <strong>de</strong> teléfono almacenado en el menú Histórico<br />
<strong>de</strong> Llamadas .<br />
3. Grupos: Busca un grupo almacenado en el menú Grupos.<br />
4. Para Álbum Online: Envía el Mensaje con Imagen para el Álbum Online.<br />
5. Para Contactos: Graba el número o dirección <strong>de</strong> e-mail para la Lista <strong>de</strong> Contactos que<br />
usted ingresó en el campo Para.<br />
4. En Texto, ingrese a su mensaje y enseguida presione la Tecla <strong>de</strong> Dirección<br />
hacia abajo.<br />
5. En Imagen, presione la Tecla <strong>de</strong> Función Izquierda [Imágenes] para<br />
seleccionar la imagen que <strong>de</strong>sea enviar y enseguida presione la Tecla .<br />
Presione la Tecla <strong>de</strong> Dirección hacia abajo.<br />
01<br />
02<br />
03<br />
04<br />
05<br />
06<br />
07<br />
136 137
6. En Sonido, presione la Tecla <strong>de</strong> Función Izquierda [Sonidos] para<br />
seleccionar el sonido que <strong>de</strong>sea enviar y enseguida presione la Tecla .<br />
Presione la Tecla <strong>de</strong> Dirección hacia abajo.<br />
7. En Tarjeta <strong>de</strong> Visitas, presione la Tecla <strong>de</strong> Función Izquierda [Agregar],<br />
presione la Tecla <strong>de</strong> Dirección hacia arriba o hacia abajo para seleccionar<br />
1. Mi Tarjeta <strong>de</strong> Visitas o 2. De Contactos y a seguir presione la Tecla . Si<br />
2. De Contactos fue seleccionado, seleccione el Contacto <strong>de</strong>seado y presione<br />
la Tecla [MARCAR / DESMARCAR] y a seguir presione la Tecla <strong>de</strong> Función<br />
Izquierda [Hecho]. Presione la Tecla <strong>de</strong> Dirección hacia abajo.<br />
8. En Asunto, ingrese el asunto <strong>de</strong>l mensaje.<br />
9. Presione la Tecla <strong>de</strong> Función Derecha [Opciones] para acce<strong>de</strong>r las opciones<br />
que se indican a continuación:<br />
• Pre-visualizar: Muestra el Mensaje con Imagen antes <strong>de</strong>l envío.<br />
• Grabar como Borrador: Graba el mensaje con Imagen en Borradores.<br />
• Ingresar Texto Rápido: Ingresa frases pre-<strong>de</strong>finidas en el mensaje con imagen.<br />
• Agregar Diapositiva: Permite que usted ingrese múltiplos mensajes con imagen.<br />
• Nivel <strong>de</strong> Prioridad: Ajusta el nivel <strong>de</strong> prioridad para Alto o Normal.<br />
• Cancelar Mensaje: Cancela el mensaje y selecciona grabar o no en Borradores.<br />
10. Cuando termine, presione la Tecla [ENVIAR] para enviar un Mensaje con<br />
Imagen.<br />
Estas opciones pue<strong>de</strong>n variar <strong>de</strong>pendiendo <strong>de</strong> los contenidos <strong>de</strong>l mensaje elegido.<br />
MENSAJE CON VIDEO<br />
1. Desplace el teléfono hacia arriba, presione la Tecla <strong>de</strong> Función Izquierda<br />
[Mensaje] y a seguir presione Nuevo Mensaje. O <strong>de</strong>splace el teléfono hacia<br />
arriba, presione la Tecla [MENU] y enseguida presione 2. Centro <strong>de</strong><br />
Mensajes, 1. Nuevo Mensaje.<br />
2. Presione 3. Mensaje con Vi<strong>de</strong>o.<br />
3. En Para, ingrese el número <strong>de</strong>l teléfono o dirección <strong>de</strong> e-mail <strong>de</strong>l <strong>de</strong>stinatario y<br />
enseguida presione la Tecla .<br />
CENTRO DE MENSAJES<br />
• Presionando la Tecla <strong>de</strong> Función Derecha [Agregar], usted pue<strong>de</strong> seleccionar entre las<br />
opciones que se indican a continuación:<br />
1. De Contactos: Busca un número <strong>de</strong> teléfono almacenado en la Lista <strong>de</strong> Contactos.<br />
2. Histórico <strong>de</strong> Llamadas : Busca un número <strong>de</strong> contacto almacenado en el menú Histórico<br />
<strong>de</strong> Llamadas .<br />
3. Grupos: Busca un grupo almacenado en el menú Grupos.<br />
4. Para Álbum Online: Envía el mensaje <strong>de</strong> vi<strong>de</strong>o para su Álbum en Línea.<br />
5. Para Contactos: Salva el número o dirección <strong>de</strong> email en la Lista <strong>de</strong> Contactos ingresado<br />
en el campo Para.<br />
4. En Texto, ingrese su mensaje y enseguida presione la Tecla <strong>de</strong> Dirección<br />
hacia abajo.<br />
5. En Vi<strong>de</strong>o, presione la Tecla <strong>de</strong> Función Izquierda [Vi<strong>de</strong>os] para seleccionar<br />
el vi<strong>de</strong>o que <strong>de</strong>sea enviar y enseguida presione la Tecla . Presione la Tecla<br />
<strong>de</strong> Dirección hacia abajo.<br />
6. En Tarjeta <strong>de</strong> Visitas, presione la Tecla <strong>de</strong> Función Izquierda [Agregar],<br />
presione la Tecla <strong>de</strong> Dirección hacia arriba o hacia abajo para seleccionar<br />
1. Mi Tarjeta <strong>de</strong> Visitas o 2. De Contactos y a seguir presione la Tecla . Si<br />
2. De Contactos fue seleccionado, seleccione el Contacto <strong>de</strong>seado y presione<br />
la Tecla [MARCAR / DESMARCAR] y a seguir presione la Tecla <strong>de</strong> Función<br />
Izquierda [Hecho]. Presione la Tecla <strong>de</strong> Dirección hacia abajo.<br />
7. En Asunto, ingrese el asunto <strong>de</strong>l mensaje.<br />
8. Presione la Tecla <strong>de</strong> Función Derecha [Opciones] para acce<strong>de</strong>r as opciones<br />
que se indican a continuación:<br />
• Pre-visualizar: Muestra el mensaje con vi<strong>de</strong>o antes que sea enviado.<br />
• Grabar Como Borrador: Grabar el mensaje con vi<strong>de</strong>o en Borradores.<br />
• Ingresar Texto Rápido: Ingresa frases pre-<strong>de</strong>finidas en el mensaje <strong>de</strong> vi<strong>de</strong>o.<br />
• Nivel <strong>de</strong> Prioridad: Ajusta el nivel <strong>de</strong> prioridad para Alto o Normal.<br />
• Cancelar Mensaje: Cancela el mensaje y selecciona grabar o no en Borradores.<br />
9. Cuando termine, presione la Tecla [ENVIAR] para enviar el mensaje <strong>de</strong><br />
vi<strong>de</strong>o.<br />
Estas opciones pue<strong>de</strong>n variar <strong>de</strong>pendiendo <strong>de</strong> los contenidos <strong>de</strong>l mensaje elegido.<br />
01<br />
02<br />
03<br />
04<br />
05<br />
06<br />
07<br />
138 139
MENSAJE DE VOZ<br />
1. Desplace el teléfono hacia arriba, presione la Tecla <strong>de</strong> Función Izquierda<br />
[Mensaje] y a seguir presione Nuevo Mensaje. O <strong>de</strong>splace el teléfono hacia<br />
arriba, presione la Tecla [MENU] y enseguida presione 2. Centro <strong>de</strong><br />
Mensajes, 1. Nuevo Mensaje.<br />
2. Presione 4. Mensaje <strong>de</strong> Voz.<br />
3. Presione la Tecla para iniciar la grabación <strong>de</strong> una nota <strong>de</strong> voz y enseguida<br />
presione la Tecla [PARAR] para finalizar la grabación y ingresar la nota <strong>de</strong><br />
voz en el mensaje <strong>de</strong> voz.<br />
4. En Para, ingrese el número <strong>de</strong> teléfono o dirección <strong>de</strong> email <strong>de</strong>l <strong>de</strong>stinatario y<br />
enseguida presione la Tecla .<br />
• Presionando la Tecla <strong>de</strong> Función Derecha [Agregar], usted po<strong>de</strong> seleccionar entre las<br />
opciones que se indican a continuación:<br />
1. De Contactos: Busca un número <strong>de</strong> teléfono almacenado en la Lista <strong>de</strong> Contactos.<br />
2. Histórico <strong>de</strong> Llamadas : Busca un número <strong>de</strong> teléfono almacenado en el Menú Histórico<br />
<strong>de</strong> Llamadas .<br />
3. Grupos: Busca un grupo almacenado en el menú Grupos.<br />
4. Para Álbum En Línea: Envía el mensaje <strong>de</strong> voz para su Álbum En Línea<br />
5. Para Contactos: Graba el número o dirección <strong>de</strong> email en la Lista <strong>de</strong> Contactos<br />
ingresado en el campo Para.<br />
5. En Texto, ingrese su mensaje y enseguida presione la Tecla <strong>de</strong> Dirección<br />
hacia abajo.<br />
6. En Tarjeta <strong>de</strong> Visitas, presione la Tecla <strong>de</strong> Función Izquierda [Agregar],<br />
presione la Tecla <strong>de</strong> Dirección hacia arriba o hacia abajo para seleccionar<br />
1. Mi Tarjeta <strong>de</strong> Visitas o 2. De Contactos y a seguir presione la Tecla . Si<br />
2. De Contactos fue seleccionado, seleccione el Contacto <strong>de</strong>seado y presione<br />
la Tecla [MARCAR / DESMARCAR] y a seguir presione la Tecla <strong>de</strong> Función<br />
Izquierda [Hecho]. Presione la Tecla <strong>de</strong> Dirección hacia abajo.<br />
7. En Asunto, ingrese el asunto <strong>de</strong>l mensaje.<br />
CENTRO DE MENSAJES<br />
8. Presione la Tecla <strong>de</strong> Función Derecha [Opciones] para acce<strong>de</strong>r entre las<br />
siguientes opciones:<br />
• Revisión: Muestra el mensaje <strong>de</strong> voz antes que sea enviado.<br />
• Grabar Como Borrador: Graba el mensaje <strong>de</strong> voz en Borradores.<br />
• Ingresar Texto Rápido: Ingresa frases pre-<strong>de</strong>finidas en el mensaje <strong>de</strong> voz.<br />
• Nivel <strong>de</strong> Prioridad: Ajusta el nivel <strong>de</strong> prioridad para Alto o Normal.<br />
• Cancelar Mensaje: Cancela el mensaje y selecciona grabar o no en Borradores.<br />
9. Cuando termine, presione la Tecla [ENVIAR] para enviar el mensaje <strong>de</strong> voz.<br />
Estas opciones pue<strong>de</strong>n variar <strong>de</strong>pendiendo <strong>de</strong> los contenidos <strong>de</strong>l mensaje elegido.<br />
MENSAJES<br />
El menú Mensajes es exhibido cuando Visualizar Ban<strong>de</strong>ja <strong>de</strong> Entrada es<br />
ajustada para Por Contacto, este es el ajuste estándar. Todos los mensajes recibidos y<br />
enviados se almacenan en el menú Mensajes por nombre <strong>de</strong> contacto. La opción Por<br />
Contactos es el ajuste estándar.<br />
1. Desplace el teléfono hacia arriba, presione la Tecla <strong>de</strong> Función Izquierda<br />
[Mensaje] O <strong>de</strong>splace el teléfono hacia arriba, presione la Tecla [MENU] y a<br />
seguir presione 2. Centro <strong>de</strong> Mensajes, 2. Mensajes.<br />
2. Seleccione un mensaje y presione la Tecla [ABRIR] para visualizar el<br />
mensaje. Para respon<strong>de</strong>r al remitente, presione la Tecla <strong>de</strong> Función Izquierda<br />
[Respon<strong>de</strong>r], 1. Mensaje <strong>de</strong> TEXTO, 2. Mensaje con Imagen,<br />
3. Mensaje con Vi<strong>de</strong>o o 4. Mensaje <strong>de</strong> Voz y enseguida presione la Tecla .<br />
3. Presione la Tecla <strong>de</strong> Dirección hacia arriba o hacia abajo para seleccionar el<br />
campo <strong>de</strong> ingreso <strong>de</strong> texto, ingrese el mensaje y presione la Tecla [ENVIAR]<br />
para respon<strong>de</strong>r. O presione la Tecla <strong>de</strong> Dirección hacia arriba o hacia abajo para<br />
seleccionar el contenido <strong>de</strong>l mensaje, presione la Tecla <strong>de</strong> Dirección izquierda o<br />
<strong>de</strong>recha para visualizar el mensaje, próximo o anterior.<br />
Presione la Tecla [ABRIR] para visualizar el mensaje con pantalla llena<br />
o presione la Tecla <strong>de</strong> Función izquierda [Respon<strong>de</strong>r] para respon<strong>de</strong>r al<br />
remitente.<br />
140 141<br />
01<br />
02<br />
03<br />
04<br />
05<br />
06<br />
07
4. En cuanto revisa el mensaje en la pantalla llena, presione la Tecla<br />
[RESPONDER] para respon<strong>de</strong>r. Para borrar el mensaje, presione la Tecla <strong>de</strong><br />
Función Izquierda [Borrar], seleccione Sí y enseguida presione la Tecla<br />
.<br />
5. Cuando navegar por el menú Mensajes, presione la Tecla <strong>de</strong> Función Derecha<br />
[Opciones] para mostrar las siguientes opciones disponibles. Las opciones<br />
son <strong>de</strong>pendientes <strong>de</strong>l tipo <strong>de</strong> mensaje y pue<strong>de</strong> ser diferente <strong>de</strong> cada campo.<br />
• Mensajes Borrados (Enviados / Recibidos): Le permite borrar mensajes enviados y<br />
recibidos <strong>de</strong>sbloqueados.<br />
• Borrar Borradores: Le permite borrar los mensajes bloqueados almacenados en<br />
Borradores.<br />
• Borrar Todos los Mensajes: Le permite borrar los mensajes bloqueados almacenados en<br />
su teléfono.<br />
• Agregar a Contactos: Graba el número <strong>de</strong> teléfono a la lista <strong>de</strong> contactos.<br />
• Administración <strong>de</strong> Mensajes: Permite administrar las mensajes con las opciones<br />
siguientes:<br />
- Borrar: Borra los mensajes.<br />
- Bloquear: Bloquea los mensajes.<br />
- Desbloquear: Desbloquea los mensajes.<br />
- Marcar como no Leído: Marca los mensajes como leídos.<br />
- Marcar como No leído: Marca los mensajes como no leídos.<br />
• Or<strong>de</strong>nar alfabéticamente / Or<strong>de</strong>nar por Hora: Or<strong>de</strong>na la lista por or<strong>de</strong>n alfabético o<br />
por hora.<br />
• Menú <strong>de</strong>l Centro <strong>de</strong> Mensajes: Vuelve a la pantalla <strong>de</strong>l Centro <strong>de</strong> Mensajes anterior.<br />
• Insertar Texto Rápido: Inserta frases pre<strong>de</strong>finidas en el mensaje.<br />
• Guardar como Borrador: Guarda el mensaje en Borradores.<br />
• Agregar: Permite agregar una Dirección <strong>de</strong> Contactos.<br />
• Agregar <strong>de</strong>stinatario: Le permite agregar varios <strong>de</strong>stinatarios en el campo Para.<br />
• Nivel <strong>de</strong> prioridad: Ajusta el nivel <strong>de</strong> prioridad para Alto o Normal.<br />
• Cancelar mensaje: Cancela el mensaje y selecciona si <strong>de</strong>sea guardarlo en Borradores.<br />
• Encaminar: Encamina el mensaje a otro <strong>de</strong>stinatario.<br />
• Respon<strong>de</strong>r con Cópia: Le permite respon<strong>de</strong>r al <strong>de</strong>stinatario, con el mensaje original.<br />
CENTRO DE MENSAJES<br />
• Grabar Como Texto Rápido: Permite que usted grabe el mensaje recibido como Texto<br />
Rápido.<br />
• Bloquear: Bloquea el mensaje.<br />
• Extraer Direcciones: Permite que usted extraiga contactos <strong>de</strong>l mensaje y enseguida usted<br />
pue<strong>de</strong> grabarlas en la Lista <strong>de</strong> Contactos, realizar una llamada o<br />
enviar el mensaje.<br />
• Información <strong>de</strong>l Mensaje: Muestra la información <strong>de</strong> la mensaje.<br />
BANDEJA DE ENTRADA<br />
El menú Visualización <strong>de</strong> Mensajes se exhibe cuando la opción Visualizar<br />
Ban<strong>de</strong>ja <strong>de</strong> Entrada se ajusta para Por Hora. Cuando se <strong>de</strong>fine Por Contacto,<br />
usted no podrá visualizar el menú Ban<strong>de</strong>ja <strong>de</strong> Entrada. La Ban<strong>de</strong>ja <strong>de</strong> Entrada<br />
administra los mensajes <strong>de</strong> texto, imagen, voz, vi<strong>de</strong>o y alertas <strong>de</strong> Internet recibidas.<br />
1. Desplace el teléfono hacia arriba, presione la Tecla <strong>de</strong> Función Izquierda<br />
[Mensaje] y a seguir presione 2. Ban<strong>de</strong>ja <strong>de</strong> Entrada. O <strong>de</strong>splace el teléfono<br />
hacia arriba, presione la Tecla [MENU] y a seguir presione 2. Centro <strong>de</strong><br />
Mensajes, 2. Ban<strong>de</strong>ja <strong>de</strong> Entrada.<br />
2. Seleccione el mensaje y presione la Tecla [ABRIR] para visualizar el<br />
mensaje. Para borrar el mensaje, presione la Tecla <strong>de</strong> Función Izquierda<br />
[Borrar], seleccione Sí y enseguida presione la Tecla .<br />
3. Presione la Tecla <strong>de</strong> Dirección hacia la izquierda o <strong>de</strong>recha para visualizar el<br />
mensaje anterior o próximo.<br />
4. Para respon<strong>de</strong>r al remitente, presione a Tecla [RESPONDER], seleccione<br />
1. Mensaje <strong>de</strong> TEXTO, 2. Mensaje con Imagen, 3. Mensaje con Vi<strong>de</strong>o o<br />
4. Mensaje <strong>de</strong> Voz y enseguida presione la Tecla .<br />
5. Al navegar por el menú Ban<strong>de</strong>ja <strong>de</strong> Entrada, presione la Tecla <strong>de</strong> Función<br />
Derecha [Opciones] para exhibir las opciones disponibles que se indican<br />
a continuación. Las opciones <strong>de</strong>pen<strong>de</strong>n <strong>de</strong>l tipo <strong>de</strong> mensaje y pue<strong>de</strong>n ser<br />
diferentes en cada campo.<br />
• Respon<strong>de</strong>r: Permite que usted responda al <strong>de</strong>stinatario.<br />
01<br />
02<br />
03<br />
04<br />
05<br />
06<br />
07<br />
142 143
• Respon<strong>de</strong>r con copia: Permite que usted responda al <strong>de</strong>stinatario incluyendo el mensaje<br />
original.<br />
• Encaminar: Encamina el mensaje para otro <strong>de</strong>stinatario.<br />
• Agregar a Contactos: Graba el número <strong>de</strong> teléfono en la Lista <strong>de</strong> Contactos.<br />
• Extraer Direcciones: Permite que usted retire contactos <strong>de</strong>l mensaje, entonces usted po<strong>de</strong><br />
grabarlos en la Lista <strong>de</strong> Contactos, realizar una llamada o enviar el<br />
mensaje.<br />
• Informaciones sobre el Mensaje: Muestra las informaciones <strong>de</strong>l mensaje.<br />
• Administración <strong>de</strong> la Ban<strong>de</strong>ja <strong>de</strong> Entrada: Permite que usted administre mensajes con las<br />
opciones que se indican a continuación:<br />
- Borrar: Borra los mensajes.<br />
- Bloquear: Bloquea los mensajes.<br />
- Desbloquear: Desbloquea los mensajes.<br />
- Marcar como Leídos: Marca los mensajes como leídos.<br />
- Marcar como No Leídos: Marca los mensajes como no leídos.<br />
• Clasificar por Remitente: Clasifica la lista por remitente.<br />
• Clasificar por Hora: Clasifica la lista por fecha/hora.<br />
• Clasificar por Tamaño: Clasifica la lista por tamaño.<br />
• Visualizar por Contactos: Cambia el ajuste Visualizar Ban<strong>de</strong>ja <strong>de</strong> Entrada para Contactos.<br />
• Bloquear: Bloquea el mensaje.<br />
ENVIADOS<br />
El menú Visualización <strong>de</strong> Mensajes será exhibido cuando Visualizar Ban<strong>de</strong>ja<br />
<strong>de</strong> Entrada se ajuste para Hora. Al <strong>de</strong>finir Por Contactos, usted no podrá<br />
visualizar el menú Enviados, mensajes ya Enviados o en espera <strong>de</strong> envío.<br />
1. Desplace el teléfono hacia arriba, presione la Tecla <strong>de</strong> Función Izquierda<br />
[Mensaje] y a seguir presione 3. Enviados. O <strong>de</strong>splace el teléfono hacia arriba,<br />
presione la Tecla [MENU] y a seguir presione 2. Centro <strong>de</strong> Mensajes,<br />
3. Enviados.<br />
2. Seleccione un mensaje y presione la Tecla [ABRIR] para visualizar el<br />
mensaje. Para borrar el mensaje, presione la Tecla <strong>de</strong> Función Izquierda<br />
[Borrar], seleccione Sí y enseguida presione la Tecla .<br />
CENTRO DE MENSAJES<br />
3. Presione la Tecla <strong>de</strong> Dirección hacia la izquierda o <strong>de</strong>recha para visualizar el<br />
mensaje anterior o próximo.<br />
4. Para enviar el mensaje, presione la Tecla [ENVIAR].<br />
5. Cuando navegue por el menú Enviados, presione la Tecla <strong>de</strong> Función Derecha<br />
[Opciones] para exhibir las opciones disponibles que se indican a<br />
continuación. Las opciones <strong>de</strong>pen<strong>de</strong>n <strong>de</strong>l tipo <strong>de</strong> mensaje y pue<strong>de</strong>n ser<br />
diferentes en cada campo.<br />
• Encaminar: Encamina el mensaje para otro <strong>de</strong>stinatario.<br />
• Reenviar: Reenvía el mensaje.<br />
• Bloquear/Desbloquear: Bloquea o <strong>de</strong>sbloquea el mensaje.<br />
• Agregar a Contactos: Graba el número <strong>de</strong> teléfono en la Lista <strong>de</strong> Contactos.<br />
• Borrar Enviados: Permite que usted borre los mensajes <strong>de</strong>sbloqueados almacenados en<br />
Enviados.<br />
• Informaciones sobre el Mensaje: Exhibe las informaciones sobre el mensaje.<br />
BORRADORES<br />
El menú Borradores administra los mensajes <strong>de</strong> borrador. Si la composición<br />
<strong>de</strong>l mensaje se interrumpe por una llamada <strong>de</strong> voz u otros eventos, el mensaje en<br />
composición es automáticamente grabado en Borradores.<br />
1. Desplace el teléfono hacia arriba, presione la Tecla [MENU] y a seguir<br />
presione 2. Centro <strong>de</strong> Mensajes, 4. Borradores.<br />
2. Seleccione un mensaje y presione la Tecla [EDITAR] para editar el mensaje.<br />
Para borrar el mensaje, presione la Tecla <strong>de</strong> Función Izquierda [Borrar],<br />
Borrar Sí y enseguida presione la Tecla .<br />
3. Cuando navegue por el menú Borradores, presione la Tecla <strong>de</strong> Función<br />
Derecha [Opciones] para exhibir as opciones disponibles que se indican<br />
a continuación.<br />
• Enviar: Envía el mensaje.<br />
• Bloquear/Desbloquear: Bloquea o <strong>de</strong>sbloquea el mensaje.<br />
• Agregar a Contactos: Graba el número <strong>de</strong> teléfono en la Lista <strong>de</strong> Contactos.<br />
• Borrar Borradores: Permite que usted borre mensajes <strong>de</strong>sbloqueadas almacenadas en<br />
Borradores.<br />
144 145<br />
01<br />
02<br />
03<br />
04<br />
05<br />
06<br />
07
BORRAR TODOS<br />
Para borrar todos los mensajes almacenados en su teléfono:<br />
1. En la pantalla inicial, presione la Tecla [MENU] y enseguida seleccione<br />
2. Centro <strong>de</strong> Mensajes.<br />
2. Presione la Tecla <strong>de</strong> Función Derecha [Opciones] para exhibir as opciones<br />
disponibles que se indican a continuación:<br />
• Borrar Ban<strong>de</strong>ja <strong>de</strong> Entrada: Seleccione Todas los Mensajes o Solamente Mensajes Leídos y<br />
enseguida presione la Tecla .<br />
• Borrar Enviados: Seleccione Sí o No y enseguida presione la Tecla .<br />
• Borrar Borradores: Seleccione Si o No y enseguida presione la Tecla .<br />
• Borrar Todos: Seleccione Todos los Mensajes Incluyendo No Leídos o Todos excepto<br />
Mensajes No Leídos y enseguida presione la Tecla .<br />
3. Se exhibirá un mensaje <strong>de</strong> confirmación.<br />
Los mensajes bloqueados no pue<strong>de</strong>n borrarse.<br />
BUZON<br />
El menú Buzón muestra el número <strong>de</strong> nuevos mensaje <strong>de</strong> voz grabados en su ban<strong>de</strong>ja<br />
<strong>de</strong> correo <strong>de</strong> voz.<br />
1. Desplace el teléfono hacia arriba, presione la Tecla [MENU] y a seguir<br />
presione 2. Centro <strong>de</strong> Mensajes, 5. Buzón.<br />
2. Para borrar informaciones sobre un nuevo correo <strong>de</strong> voz, presione la Tecla <strong>de</strong><br />
Función Izquierda [Borrar], seleccione Si y enseguida presione la Tecla<br />
.<br />
PARA EL ACCESO A SU BANDEJA DE DE CORREO DE VOZ<br />
1. Desplace el teléfono hacia arriba, presione la Tecla [MENU] y enseguida<br />
presione 2. Centro <strong>de</strong> Mensajes, 5. Buzón y enseguida presione la Tecla<br />
[LLAMAR]. O marque el número <strong>de</strong>l teléfono y presione la Tecla ENVIAR .<br />
2. Siga lo prompts para inserir su contraseña y recupere sus mensajes.<br />
Acceso Rápido: Desplace el teléfono hacia arriba, presione y mantenga presionada la<br />
tecla 1 o *86 y presione la Tecla ENVIAR para acce<strong>de</strong>r su ban<strong>de</strong>ja <strong>de</strong> Buzón.<br />
CENTRO DE MENSAJES<br />
E-MAIL MOVIL<br />
El E-mail Móvil da acceso a sus cuentas <strong>de</strong> correo electrónico personales tales como<br />
Yahoo!, MSN, AOL y Gmail. El E-mail móvil funciona con cualquier solución <strong>de</strong> correo<br />
electrónico, incluso si su proveedor <strong>de</strong> servicios <strong>de</strong> e-mail no está en la lista, usted<br />
pue<strong>de</strong> introducir manualmente la dirección <strong>de</strong>l servidor <strong>de</strong> correo electrónico para<br />
agregar su cuenta. El E-mail móvil incluso avisa cuando llega un nuevo mensaje en su<br />
ban<strong>de</strong>ja <strong>de</strong> entrada.<br />
DOWNLOAD DE INSTRUCCIONES PARA EL E-MAIL MOVIL A PARTIR DEL<br />
CATALOGO easyedge SM<br />
1. En la página principal <strong>de</strong>l dispositivo, seleccione Menú.<br />
2. Des<strong>de</strong> el menú opciones, seleccione el ícono easyedge.<br />
3. Utilice las setas hacia arriba/hacia abajo para navegar por el ícono <strong>de</strong>l carro<br />
<strong>de</strong> compras e haga su selección (pue<strong>de</strong> haber varias maneras <strong>de</strong> navegación).<br />
Seleccione el Catálogo.<br />
4. Desplace hacia la carpeta apropiada (El E-Mail Móvil pue<strong>de</strong> ser localizado en el<br />
Mobile Internet) e elija.<br />
5. Desplace hacia y seleccione E-Mail Móvil Gratuito.<br />
6. Seleccione la opción <strong>de</strong> compra gratuita. Seleccione Teléfono o Tarjeta.<br />
7. Progreso <strong>de</strong> la <strong>de</strong>scarga será mostrado.<br />
CONFIGURACION AUTOMATICA DE UNA CUENTA DE E-MAIL<br />
1. Inicie la aplicación y siga las indicaciones hasta la pantalla <strong>de</strong>l proveedor <strong>de</strong> la<br />
cuenta <strong>de</strong> correo. Seleccione un proveedor <strong>de</strong> cuenta <strong>de</strong> correo electrónico.<br />
2. Introduzca la i<strong>de</strong>ntificación <strong>de</strong> usuario y la contraseña – la cuenta es<br />
sincronizada y usted pue<strong>de</strong> visualizar la ban<strong>de</strong>ja <strong>de</strong> entrada <strong>de</strong>l correo<br />
electrónico.<br />
146 147<br />
01<br />
02<br />
03<br />
04<br />
05<br />
06<br />
07
CONFIGURACION MANUAL DE UNA CUENTA DE E-MAIL POP E IMAP<br />
1. Inicie la aplicación y siga las indicaciones hasta la pantalla el proveedor <strong>de</strong> la<br />
cuenta <strong>de</strong> correo electrónico. Desplácese hacia y seleccione más. Desplácese<br />
hacia y seleccione otro.<br />
2. En los campos <strong>de</strong> texto, escriba la dirección <strong>de</strong> correo electrónico, la contraseña<br />
y el nombre <strong>de</strong> usuario. A continuación se le pida para <strong>de</strong>finir <strong>de</strong>talles <strong>de</strong> la<br />
cuenta <strong>de</strong> su proveedor <strong>de</strong> correo electrónico. Seleccione siguiente.<br />
3. Seleccione el protocolo (IMAP o POP).<br />
4. Introduzca los ajustes <strong>de</strong>l servidor <strong>de</strong> entrada. Seleccione siguiente.<br />
5. Introduzca los ajustes <strong>de</strong>l servidor <strong>de</strong> salida. Seleccione siguiente.<br />
6. La cuenta es sincronizada y usted pue<strong>de</strong> visualizar la ban<strong>de</strong>ja <strong>de</strong> entrada <strong>de</strong>l<br />
correo electrónico.<br />
AJUSTES<br />
El menú Ajustes permite que usted configure los ajustes para mensajes enviados o<br />
recibidos en su teléfono. Para acce<strong>de</strong>r los ajustes <strong>de</strong> mensajes:<br />
1. Desplace el teléfono hacia arriba, presione la Tecla [MENU] y a seguir<br />
presione 2. Centro <strong>de</strong> Mensajes, 6. Ajustes.<br />
2. Seleccione uno <strong>de</strong> los menús que se indican a continuación y enseguida<br />
presione la Tecla .<br />
Menús siguientes: 1. Ver mensajes / 2. Modo <strong>de</strong> Entrada / 3. Auto Guardar Enviados /<br />
4. Borrado Automático <strong>de</strong> la Ban<strong>de</strong>ja <strong>de</strong> entrada / 5. Tamaño <strong>de</strong> la Fuente <strong>de</strong>l Centro<br />
<strong>de</strong> Mensajes / 6. Visualización Auto <strong>de</strong> TEXTO / 7. Recuperación Auto <strong>de</strong> Multimedia /<br />
8. Texto Rápido / 9. No <strong>de</strong>l Buzón / 0. Llamada <strong>de</strong> Retorno al No / *. Firma / #. Recibo<br />
<strong>de</strong> Entrega<br />
VISUALIZAR MENSAJES<br />
Seleccione Por Hora o Por Contacto y enseguida presione la Tecla .<br />
• Por Hora: Clasifica los mensajes recibidos y enviados en la Ban<strong>de</strong>ja <strong>de</strong> Entrada y en la<br />
carpeta <strong>de</strong> Enviados por hora.<br />
• Por Contacto: Agrupa todos los mensajes recibidos y enviados por contacto.<br />
CENTRO DE MENSAJES<br />
MODO INSERTAR<br />
Permite que usted ajuste el Modo Insertar estándar para el Centro <strong>de</strong> Mensajes. Por<br />
ejemplo, si el modo Abc está ajustado para el Modo Insertar, este ícono es exhibido en el<br />
campo <strong>de</strong> ingreso <strong>de</strong> texto como estándar.<br />
Seleccione Abc, ABC o 123 y enseguida presione la Tecla .<br />
GRABAR MENSAJES ENVIADOS AUTOMATICAMENTE<br />
Seleccione Activar, Desactivar o Prompt y enseguida presione la Tecla .<br />
• Activar: Todos los mensajes enviados serán grabados en Enviados.<br />
• Desactivar: Todos los mensajes enviados no serán grabados en Enviados<br />
• Prompt: La ban<strong>de</strong>ja <strong>de</strong> diálogo Si o No se exhibe <strong>de</strong>spués <strong>de</strong> enviar un mensaje.<br />
BORRADO AUTOMATICO DE LOS MENSAJES EN LA BANDEJA DE<br />
ENTRADA<br />
Permite que el sistema borre automáticamente los mensajes recibidos cuando la<br />
Ban<strong>de</strong>ja <strong>de</strong> Entrada está llena.<br />
Seleccione Activar o Desactivar y enseguida presione la Tecla .<br />
• Activar: El mensaje más antiguo será borrado <strong>de</strong> la Ban<strong>de</strong>ja <strong>de</strong> Entrada automáticamente<br />
cuando esté llena.<br />
• Desactivar: El mensaje más antiguo no será borrado automáticamente <strong>de</strong> la Ban<strong>de</strong>ja <strong>de</strong><br />
Entrada cuando esté llena.<br />
TAMAÑO DE LA FUENTE DE MENSAJES ENVIADOS<br />
Permite que usted ajuste el tamaño <strong>de</strong> la fuente <strong>de</strong> los mensajes.<br />
Seleccione Pequeña, Normal o Gran<strong>de</strong> y enseguida presione la Tecla .<br />
VISUALIZACION AUTOMATICA DEL TEXTO<br />
Seleccione Activar o Desactivar y enseguida presione la Tecla .<br />
• Activar: Mensajes <strong>de</strong> TEXTO serán automáticamente exhibidas cuando recibidas.<br />
• Desactivada: Los mensajes <strong>de</strong> texto serán exhibidos en la ban<strong>de</strong>ja <strong>de</strong> entrada o al<br />
contestar el prompt <strong>de</strong> mensajes.<br />
148 149<br />
01<br />
02<br />
03<br />
04<br />
05<br />
06<br />
07
RECIBIMIENTO AUTOMATICO DE MULTIMEDIA<br />
Seleccione Activar o Desactivar y enseguida presione la Tecla .<br />
• Activar: Mensajes <strong>de</strong> Imagen, Vi<strong>de</strong>o y Voz serán <strong>de</strong>scargadas automáticamente.<br />
• Desactivar: Los mensajes <strong>de</strong> Imagen, Vi<strong>de</strong>o y Voz <strong>de</strong>ben recuperarse en la Ban<strong>de</strong>ja <strong>de</strong><br />
Entrada o al respon<strong>de</strong>r al prompt <strong>de</strong> mensaje.<br />
TEXTO RAPIDO<br />
Permite que usted crie un nuevo Texto Rápido o edite el Texto Rápido pre-<strong>de</strong>finido.<br />
1. Para crear un nuevo Texto Rápido, presione la Tecla <strong>de</strong> Función Derecha<br />
[Opciones] y enseguida presione 1. Nuevo. Ingrese el nuevo texto y presione<br />
la Tecla [GRABAR].<br />
2. Para editar el Texto Rápido pre-<strong>de</strong>finido, seleccione el Texto Rápido <strong>de</strong> la lista y<br />
presione la Tecla [EDITAR].<br />
3. Para cambiar la posición <strong>de</strong>l Texto Rápido, presione la Tecla <strong>de</strong> Función Derecha<br />
[Opciones] y enseguida presione 2. Mover. Presione la Tecla <strong>de</strong> Dirección<br />
hacia arriba o hacia abajo para acce<strong>de</strong>r la posición <strong>de</strong>seada y enseguida<br />
presione la Tecla [GRABAR].<br />
4. Para borrar un Texto Rápido grabado, presione la Tecla <strong>de</strong> Función Izquierda<br />
[Borrar]. Seleccione Sí y presione la Tecla .<br />
No BUZON<br />
1. Ingrese un nuevo número <strong>de</strong> Buzón o digite el número <strong>de</strong> buzón y enseguida<br />
presione la Tecla .<br />
2. Presione la Tecla <strong>de</strong> Función Izquierda [Agregar] y enseguida presione<br />
1. Esperar o 2.– Pausa <strong>de</strong> 2 Segundos. Por favor, véase la página 31 para<br />
obtener más <strong>de</strong>talle sobre FUNCION DE ESPERA/PAUSA.<br />
CENTRO DE MENSAJES<br />
No DE LLAMADA DE RETORNO<br />
Permite que usted utilice o edite el número <strong>de</strong> llamada <strong>de</strong> retorno estándar para que el<br />
<strong>de</strong>stinatario pueda retornar a llamada.<br />
1. Seleccione Activar o Desactivar y enseguida presione la Tecla .<br />
2. Al seleccionar Activar, ingrese un nuevo número <strong>de</strong> llamada <strong>de</strong> retorno y<br />
enseguida presione a tecla .<br />
FIRMA<br />
Permite que usted pueda crear una firma que pue<strong>de</strong> ser automáticamente inserida al<br />
final <strong>de</strong> cada mensaje.<br />
1. Para <strong>de</strong>sactivar la función Firma, seleccione Ninguna y presione la Tecla .<br />
2. Para ingresar una Firma, seleccione Personalizar, ingrese su firma en el campo<br />
<strong>de</strong> ingreso <strong>de</strong> texto y enseguida presione la Tecla .<br />
ACUSE DE ENTREGA<br />
Permite que usted ajuste un acuse <strong>de</strong> entrega para los mensajes enviados.<br />
Seleccione Activar o Desactivar y enseguida presione la Tecla .<br />
• Activar: Solicita la confirmación <strong>de</strong> entrega.<br />
• Desactivar: No solicita la confirmación <strong>de</strong> entrega.<br />
01<br />
02<br />
03<br />
04<br />
05<br />
06<br />
07<br />
150 151
7<br />
SEGURIDAD Y GARANTIA<br />
Este capítulo trata sobre las directrices y precauciones <strong>de</strong> seguridad que<br />
se <strong>de</strong>ben seguir cuando <strong>de</strong> la operación <strong>de</strong> su teléfono. Antes <strong>de</strong> operar su<br />
teléfono, por favor, tenga conocimiento <strong>de</strong> todos los <strong>de</strong>talles <strong>de</strong> seguridad.<br />
Este capítulo contiene los términos y condiciones <strong>de</strong> servicios y garantías<br />
SEGURIDAD<br />
Informaciones <strong>de</strong> Seguridad para Teléfonos<br />
Portátiles Inalámbricos<br />
Informaciones <strong>de</strong> Seguridad sobre la<br />
Exposición a la Radiofrecuencia según la FCC<br />
Informaciones acerca <strong>de</strong> SAR<br />
Compatibilidad con Aparatos <strong>de</strong> Audición<br />
(HAC) para Dispositivos <strong>de</strong> Telecomunicaciones<br />
Inalámbricos<br />
para su teléfono. Por favor, estúdielos con atención.<br />
Actualización <strong>de</strong>l Consumidor Según la FDA<br />
Para Evitar Potencial Pérdida <strong>de</strong> la Audición<br />
Informaciones <strong>de</strong> Conformidad con el FCC<br />
GARANTIA<br />
Garantía Limitada <strong>de</strong> 12 meses
154<br />
INFORMACIONES DE SEGURIDAD PARA TELEFONOS<br />
PORTATILES INALAMBRICOS<br />
LEA ESTAS INFORMACIONES ANTES DE UTILIZAR SU MOVIL<br />
EXPOSICION A LAS SEÑALES DE RADIOFRECUENCIA<br />
Su móvil es un transmisor y receptor <strong>de</strong> radio <strong>de</strong> baja potencia. Cuando está<br />
encendido (ON), recibe y también envía señales <strong>de</strong> radiofrecuencia (RF). En agosto<br />
<strong>de</strong> 1996, la Comisión Fe<strong>de</strong>ral <strong>de</strong> Comunicaciones (FCC) adoptó las directrices<br />
<strong>de</strong> exposición a la energía <strong>de</strong> radio frecuencia (RF) con niveles <strong>de</strong> seguridad<br />
para móviles. Esas directrices están <strong>de</strong> acuerdo con las normas <strong>de</strong> seguridad<br />
establecidas por organismos estandarizadores internacionales y <strong>de</strong> Estados Unidos:<br />
ANSI C95.1 (1992) *<br />
Informe 86 NCRP (1986) *<br />
ICNIRP (1996) *<br />
Esas normas fueron basadas en evaluaciones abarcadoras y periódicas <strong>de</strong> la<br />
literatura científica relevante. Por ejemplo, más <strong>de</strong> 120 científicos, ingenieros<br />
y médicos <strong>de</strong> universida<strong>de</strong>s, sectores gubernamentales <strong>de</strong> salud y industria<br />
consultaron la entidad <strong>de</strong> investigación disponible para <strong>de</strong>sarrollar la norma ANSI<br />
(C951).<br />
El diseño <strong>de</strong> su móvil está en conformidad con las directrices <strong>de</strong> FCC (y esas<br />
normas).<br />
1* : American National Standards Institute (Instituto Americano <strong>de</strong> Normas<br />
Nacionales).<br />
2* : National Council on Radiation Protection and Measurements (Consejo Nacional<br />
<strong>de</strong> Medidas y Protección contra la Radiación).<br />
3* : International Commission on Nonionizing Radiation Protection (Comisión<br />
internacional <strong>de</strong> Protección contra Radiación No-ionizante).<br />
SEGURIDAD<br />
SEGURIDAD DE LA ANTENA<br />
Utilice solamente la antena provista o una antena <strong>de</strong> sustitución aprobada.<br />
Antenas, modificaciones, o accesorios no autorizados podrán perjudicar la calidad<br />
<strong>de</strong> la llamada, dañar el móvil o resultar en la violación <strong>de</strong> las reglas FCC. Por favor,<br />
contáctese con su reven<strong>de</strong>dor local para reemplazo <strong>de</strong> la antena.<br />
SEGURIDAD AL CONDUCIR<br />
Hablar por móvil mientras conduce el automóvil es extremamente peligroso y<br />
es ilegal en algunos estados. Acuér<strong>de</strong>se que, la seguridad viene en primer lugar.<br />
Verifique las leyes y reglamentos sobre la utilización <strong>de</strong> teléfonos en áreas don<strong>de</strong><br />
usted conduce automóviles. Siempre las obe<strong>de</strong>zca. También, si usted utiliza su<br />
móvil al conducir, por favor:<br />
• De completa atención al manubrio. La dirección segura es su primera<br />
responsabilidad.<br />
• Utilice la operación altavoz si fuere disponible.<br />
• Salga <strong>de</strong> la carretera y estacione antes <strong>de</strong> hacer o contestar una llamada, si las<br />
condiciones <strong>de</strong> dirección lo exijan.<br />
Si usted necesita utilizar el móvil al conducir, se ruega, utilizar los modos <strong>de</strong> una<br />
tecla, marcado rápido y atención automática.<br />
Dispositivos airbag son accionados con gran fuerza. NO coloque objetos<br />
incluyendo equipos inalámbricos instalados o portátiles, en el área sobre el airbag<br />
o en el área <strong>de</strong> activación <strong>de</strong>l airbag. Si un equipo inalámbrico <strong>de</strong>ntro <strong>de</strong>l vehículo<br />
fuere instalado ina<strong>de</strong>cuadamente y el airbag inflar, podrán ocurrir heridas graves.<br />
ADVERTENCIA: La no obediencia a estas instrucciones podrá conducir a graves heridas<br />
personales y posibles daños a la propiedad.<br />
01<br />
02<br />
03<br />
04<br />
05<br />
06<br />
07<br />
155
DISPOSITIVOS ELECTRONICOS<br />
Su teléfono móvil es un radio transmisor y receptor baja potencia. Cuando está<br />
encendido (ON), recibe y también envía señales <strong>de</strong> radio frecuencia (RF). La<br />
mayoría <strong>de</strong> los equipos electrónicos mo<strong>de</strong>rnos están protegidos contra a la energía<br />
<strong>de</strong> radio frecuencia (RF). Sin embargo, pue<strong>de</strong> que algunos equipos electrónicos<br />
no están protegidos contra las señales <strong>de</strong> radio frecuencia (RF) <strong>de</strong> su móvil. Por lo<br />
tanto su teléfono <strong>de</strong>be restringirse a ciertas situaciones.<br />
MARCA PASOS<br />
La Asociación <strong>de</strong> la Industria <strong>de</strong> la Salud Manufacturera recomienda que se<br />
<strong>de</strong>be mantener una separación mínima entre un móvil y un marcapasos<br />
<strong>de</strong> por lo menos 15 centímetros para evitar una potencial interferencia<br />
con el marcapasos. Estas recomendaciones son consistentes con el estudio<br />
in<strong>de</strong>pendiente y por las recomendaciones <strong>de</strong> la Investigación <strong>de</strong> Tecnología<br />
Inalámbrica. A las personas con marcapasos:<br />
• SIEMPRE mantenga el móvil a más <strong>de</strong> 15 centímetros <strong>de</strong> su marcapasos<br />
cuando el teléfono esté encendido.<br />
• No porten el teléfono en una bolsa frontal <strong>de</strong>l pecho.<br />
• Utilice el oído opuesto al marcapasos para minimizar el potencial <strong>de</strong><br />
interferencia.<br />
• Si usted tiene sospechas sobre una posible interferencia, APAGUE (OFF)<br />
inmediatamente su teléfono.<br />
APARATOS DE AUDICION<br />
Algunos móviles pue<strong>de</strong>n interferir con algunos aparatos <strong>de</strong> audición. En caso <strong>de</strong> tal<br />
interferencia, tal vez usted <strong>de</strong>be consultar su proveedor <strong>de</strong> servicio (o comunicarse<br />
con la línea <strong>de</strong> servicio al cliente para discutir otras alternativas). La presión <strong>de</strong>l<br />
sonido excesivo <strong>de</strong> los auriculares pue<strong>de</strong> provocar pérdidas auditivas.<br />
SEGURIDAD<br />
OTROS DISPOSITIVOS MEDICOS<br />
Si usted utiliza otro dispositivo médico personal, consulte al fabricante <strong>de</strong> su<br />
dispositivo para <strong>de</strong>terminar si están <strong>de</strong>bidamente protegidos <strong>de</strong> energía <strong>de</strong><br />
radiofrecuencia (RF) externa.<br />
Su médico también pue<strong>de</strong> asistirlo en obtener esta información. Apague su teléfono<br />
(OFF) en instalaciones <strong>de</strong> salud cuando así lo indiquen las normas anunciadas en<br />
éstas áreas. Los hospitales o centros <strong>de</strong> salud pue<strong>de</strong>n estar utilizando equipo que<br />
pue<strong>de</strong> ser sensible a la energía <strong>de</strong> radio frecuencia (RF) externa.<br />
VEHICULOS<br />
Las señales <strong>de</strong> RF pue<strong>de</strong>n afectar sistemas electrónicos in<strong>de</strong>bidamente protegidos<br />
en vehículos <strong>de</strong> motor. Verifique con su fabricante o representante respecto a su<br />
vehículo. También <strong>de</strong>be consultar al fabricante <strong>de</strong> cualquier equipo que ha sido<br />
agregado a su vehículo.<br />
DISPOSICIONES EN INSTALACIONES<br />
APAGUE (OFF) su teléfono en lugares don<strong>de</strong> por medio <strong>de</strong> anuncios así lo dispone.<br />
OTROS LINEAMIENTOS DE SEGURIDAD<br />
AERONAVES<br />
Las regulaciones <strong>de</strong> la FCC prohíben utilizar el teléfono cuando se está en el aire.<br />
APAGUE (OFF) su teléfono antes <strong>de</strong> abordar una aeronave. Siempre solicita y obtenga<br />
consentimiento previo y aprobación <strong>de</strong>l representante autorizado <strong>de</strong> la aerolínea<br />
antes <strong>de</strong> utilizar su teléfono a bordo <strong>de</strong> una aeronave.<br />
Siempre siga las instrucciones <strong>de</strong>l representante <strong>de</strong> la aerolínea cuando utilice su<br />
teléfono a bordo <strong>de</strong> una aeronave pare prevenir cualquier posible interferencia con<br />
equipo electrónico aéreo.<br />
01<br />
02<br />
03<br />
04<br />
05<br />
06<br />
07<br />
156<br />
157
ÁREAS DE FUNDICION<br />
Para evitar la interferencia con operaciones <strong>de</strong> fundición, APAGUE (OFF) su teléfono<br />
cuando se encuentre en una fundidora o en áreas con la disposición “Apagar el<br />
teléfono <strong>de</strong> dos vías.” Obe<strong>de</strong>zca las señales y las instrucciones.<br />
ATMOSFERAS POTENCIALMENTE EXPLOSIVAS<br />
APAGUE (OFF) su teléfono cuando se encuentre en un área <strong>de</strong> atmósfera<br />
potencialmente explosiva y obe<strong>de</strong>zca todas las señales y las instrucciones. Las chispas<br />
en tales áreas pue<strong>de</strong>n causar una explosión o incendio provocando daño corporal o<br />
inclusive la muerte.<br />
En las áreas con una atmósfera potencialmente explosiva, por lo regular,<br />
pero no siempre se indica esto claramente. Estas incluyen áreas <strong>de</strong> carga<br />
<strong>de</strong> combustible, tales como gasolinera, bajo cubierta en los barcos, en<br />
instalaciones <strong>de</strong> transferencia o almacenamiento, vehículos que utilizan gas<br />
petróleo líquido (como el butano o propano) áreas don<strong>de</strong> el aire contiene<br />
químicos o partículas, tales como grano, polvo o talco <strong>de</strong> metal y cualquier<br />
otra área don<strong>de</strong> a usted normalmente se le indique que apague el motor <strong>de</strong><br />
su vehículo.<br />
PRECAUCIONES<br />
Su móvil es una pieza <strong>de</strong> equipo <strong>de</strong> alta calidad. Antes <strong>de</strong> operar, lea todas las<br />
instrucciones y advertencias <strong>de</strong> precaución en el Cargador USB/Pared (1) la<br />
Batería (2) y el Producto utilizando la batería (3).<br />
El incumplimiento <strong>de</strong> las indicaciones siguientes pue<strong>de</strong> resultar en daño corporal<br />
y/o daño al aparato como consecuencia <strong>de</strong>l vaciado, incendio o ruptura <strong>de</strong> las<br />
baterías.<br />
• NO utilice este equipo en exteriores, don<strong>de</strong> la alta temperatura o alta humedad<br />
son predominantes.<br />
SEGURIDAD<br />
• NO maltrate el equipo. Evite golpes, agitaciones o colisiones. Cuando no esté<br />
utilizándolo, <strong>de</strong>je la unidad en posición plana para evitar posibles daños<br />
causados por la instabilidad.<br />
• NO exponga este aparato a lluvia o al <strong>de</strong>rrame <strong>de</strong> bebidas.<br />
• NO utilice accesorios no autorizados.<br />
• NO <strong>de</strong>sarme el móvil ni sus accesorios. En el caso que sean necesarios asistencia<br />
técnica o reparación, encamine la unidad a un centro <strong>de</strong> asistencia técnica <strong>de</strong><br />
móviles autorizado por PCD. Si esta unidad fuere <strong>de</strong>sarmada, podrá generar el<br />
riesgo <strong>de</strong> choque eléctrico o incendio.<br />
• NO provoque cortocircuito en los terminales <strong>de</strong> la batería con objetos metálicos,<br />
etc.<br />
INFORMACIONES DE SEGURIDAD SOBRE LA EXPOSICION A LA<br />
RADIOFRECUENCIA SEGUN LA FCC<br />
¡ADVERTENCIA! LEA ESTAS INFORMACIONES ANTES DE UTILIZAR LA<br />
UNIDAD<br />
CUIDADOS<br />
En Agosto <strong>de</strong> 1996 la Fe<strong>de</strong>ral Communications Commission (FCC) <strong>de</strong> Estados<br />
Unidos, con su acción en el Informe y Or<strong>de</strong>n FCC 96-326 adoptaron y<br />
actualizaron la norma <strong>de</strong> seguridad para exposición humana a la radiofrecuencia<br />
electromagnética emitida por los transmisores reglamentados por FCC. Aquellas<br />
directrices son consistentes con el estándar <strong>de</strong> seguridad anteriormente<br />
establecido tanto por Estados Unidos como por los organismos <strong>de</strong> normas<br />
internacionales. El proyecto <strong>de</strong> este móvil atien<strong>de</strong> las directrices FCC y las normas<br />
internacionales.<br />
01<br />
02<br />
03<br />
04<br />
05<br />
06<br />
07<br />
158<br />
159
OPERACION DE LA UNIDAD CERCA DEL CUERPO<br />
Este dispositivo fue probado en cuanto a operaciones <strong>de</strong> la unidad cerca <strong>de</strong>l<br />
cuerpo con la parte trasera <strong>de</strong>l móvil, mantenga distancia <strong>de</strong> 2 cm <strong>de</strong>l cuerpo.<br />
Para mantener la conformidad con los requisitos <strong>de</strong> FCC sobre la exposición a la<br />
Radiofrecuencia, solamente utilice pren<strong>de</strong>dores <strong>de</strong> cinturón, coldres o accesorios<br />
similares que mantienen una distancia <strong>de</strong> 2 cm entre el cuerpo <strong>de</strong>l usuario y la<br />
parte trasera <strong>de</strong>l móvil, incluyendo la antena.<br />
La utilización <strong>de</strong> pren<strong>de</strong>dores <strong>de</strong> cinturón, coldres y accesorios similares no <strong>de</strong>ben<br />
contener componentes metálicos en su conjunto. La utilización <strong>de</strong> accesorios<br />
que no satisfacen estos requisitos pue<strong>de</strong> que no atienda los requisitos <strong>de</strong> FCC en<br />
cuanto a la exposición a la energía <strong>de</strong> radio frecuencia (RF) y <strong>de</strong>ben evitarse.<br />
Para más informaciones sobre la exposición a la RF, se ruega acce<strong>de</strong>r el sitio <strong>de</strong> FCC<br />
en www.fcc.gov.<br />
INFORMACIONES ACERCA DE SAR<br />
SEGURIDAD<br />
EL MODELO DE ESTE TELEFONO CUMPLE LOS REQUERIMIENTOS<br />
DEL GOBIERNO REFERENTES A LA EXPOSICION DE ONDAS DE<br />
RADIOFRECUENCIA.<br />
Su teléfono inalámbrico es un radio transmisor y receptor. Está diseñado<br />
y fabricado para no exce<strong>de</strong>r los límites <strong>de</strong> exposición a la energía <strong>de</strong> radio<br />
frecuencia (RF) por la Comisión Fe<strong>de</strong>ral <strong>de</strong> Comunicaciones <strong>de</strong>l Gobierno <strong>de</strong><br />
los EEUU. Estos límites son parte <strong>de</strong> extensas normas que establecer los límites<br />
permitidos <strong>de</strong> energía <strong>de</strong> RF para la población en general. Estas normas están<br />
basadas en estándares que fueron <strong>de</strong>sarrollados por organizaciones científicas<br />
in<strong>de</strong>pendientes a través <strong>de</strong> la evaluación periódica y a fondo <strong>de</strong> los estudios<br />
científicos. Los estándares incluye un margen <strong>de</strong> seguridad substancial diseñado<br />
para asegurar la seguridad <strong>de</strong> todas las personas, sin importar la edad y su salud.<br />
La exposición estándar para los teléfonos móviles emplea una unidad <strong>de</strong> medida<br />
conocida como tasa <strong>de</strong> absorción específica o SAR. El límite SAR <strong>de</strong>finido por<br />
la FCC es <strong>de</strong> 1,6W/kg.* Las pruebas <strong>de</strong> SAR se conducen cuando el teléfono<br />
transmite a su mayor nivel <strong>de</strong> energía certificado en todas las bandas <strong>de</strong><br />
frecuencia don<strong>de</strong> se ha probado. Aunque la SAR se <strong>de</strong>termina por el más alto nivel<br />
<strong>de</strong> energía certificado, el nivel actual <strong>de</strong> SAR mientras se opera pue<strong>de</strong> estar muy<br />
por <strong>de</strong>bajo <strong>de</strong>l nivel máximo. Esto es porque el teléfono está diseñado para operar<br />
en múltiples niveles <strong>de</strong> energía como para sólo requerir la energía necesaria para<br />
alcanzar la red. En general, entre más cerca se encuentre <strong>de</strong> una estación <strong>de</strong> base<br />
<strong>de</strong> antena inalámbrica, menor será la salida <strong>de</strong> energía.<br />
Antes <strong>de</strong> que un mo<strong>de</strong>lo <strong>de</strong> teléfono esté disponible para su venta al público,<br />
se le <strong>de</strong>ben efectuar pruebas y <strong>de</strong>be certificarse por la FCC <strong>de</strong> que no exceda el<br />
límite establecido y adoptado por el gobierno referente a la exposición segura.<br />
01<br />
02<br />
03<br />
04<br />
05<br />
06<br />
07<br />
160<br />
161
Las pruebas se llevan a cabo en posiciones y ubicaciones (ej., en el oído y portado<br />
en el cuerpo) tal como lo requiere la FCC para cada mo<strong>de</strong>lo. El valor más alto <strong>de</strong><br />
SAR para este mo<strong>de</strong>lo <strong>de</strong> teléfono cuando se utiliza cerca <strong>de</strong>l oído es <strong>de</strong> 1,25<br />
W/kg y cuando es portado en el cuerpo tal y como se <strong>de</strong>scribe en esta guía <strong>de</strong><br />
usuario es <strong>de</strong> 1,17 W/kg. (Las medidas cuando se porta en el cuerpo pue<strong>de</strong>n<br />
diferir entre mo<strong>de</strong>los <strong>de</strong> teléfono <strong>de</strong>pendiendo <strong>de</strong> los accesorios disponibles y los<br />
requerimientos <strong>de</strong> la FCC). Aunque pue<strong>de</strong>n existir diferencias <strong>de</strong> los niveles <strong>de</strong><br />
SAR entre varios teléfonos y varias posiciones, todos ellos cumplen con las normas<br />
gubernamentales referentes a la exposición segura.<br />
Las pruebas SAR para la operación junto al cuerpo fueron ejecutadas con un<br />
pren<strong>de</strong>dor <strong>de</strong> cinturón que posibilitaba una separación <strong>de</strong> 20 mm. El <strong>Manual</strong><br />
<strong>de</strong>l Usuario indica que cualesquier holsters/pren<strong>de</strong>dores utilizados con este<br />
dispositivo no <strong>de</strong>ben contener cualesquier componentes metálicos.<br />
La FCC ha otorgado una Autorización <strong>de</strong> Equipo para este mo<strong>de</strong>lo <strong>de</strong> teléfono con<br />
todos los niveles <strong>de</strong> SAR reportados como en cumplimiento con los normas <strong>de</strong><br />
exposición <strong>de</strong> RF <strong>de</strong> la FCC.<br />
La información <strong>de</strong> SAR en este mo<strong>de</strong>lo <strong>de</strong> teléfono se encuentra archivada en la<br />
página <strong>de</strong> Búsqueda <strong>de</strong> ID <strong>de</strong> la FCC http://www.fcc.gov/oet/ea al ingresar en<br />
JYCBUDDY.<br />
Es posible encontrar más informaciones sobre tasas <strong>de</strong> absorción específicas (SAR)<br />
en el sitio <strong>de</strong> la Asociación <strong>de</strong> la Industria <strong>de</strong> Telecomunicación Celular (CTIA) en<br />
http://www.ctia.org.<br />
* En Estados Unidos y en Canadá, el límite <strong>de</strong> SAR para móviles utilizados por el<br />
público es <strong>de</strong> 1,6 vatios/kg (W/kg) en media un gramo más <strong>de</strong> tejido. La norma<br />
incorpora una margen sustancial <strong>de</strong> seguridad para dar protección adicional al<br />
público y para aclarar cualquier variación en las mediciones.<br />
SEGURIDAD<br />
COMPATIBILIDAD CON APARATOS DE AUDICION (HAC) PARA<br />
DISPOSITIVOS DE TELECOMUNICACIONES INALAMBRICOS<br />
COMPROMISO DE PCD<br />
PCD cree que todos nuestros clientes estén habilitados a usufructuar <strong>de</strong> los<br />
beneficios <strong>de</strong> las tecnologías digitales inalámbricas.<br />
Estamos comprometidos en proporcionar una selección <strong>de</strong> dispositivos<br />
compatibles a nuestros clientes que utilizan aparatos <strong>de</strong> audición<br />
CLASIFICACION HAC PARA ESTE MOVIL – TXT8045 (BASICO): M3/T3,<br />
TXT8045US(CLASSE II) :M4/T3<br />
¿QUE SIGNIFICA LA COMPATIBILIDAD CON APARATOS DE AUDICION<br />
La Fe<strong>de</strong>ral Communications Commission (Comisión Fe<strong>de</strong>ral <strong>de</strong> Comunicaciones)<br />
implementó reglas y un sistema <strong>de</strong> clasificación proyectado para habilitar las<br />
personas que utilizan aparatos <strong>de</strong> audición para utilizar más eficientemente estos<br />
dispositivos <strong>de</strong> telecomunicación inalámbricos. El estándar para compatibilidad<br />
<strong>de</strong> móviles digitales con los aparatos <strong>de</strong> audición fue establecido por American<br />
National Standard Institute (ANSI) (Instituto Nacional <strong>de</strong> Estandarización<br />
Americana) C63.19. Hay dos conjuntos <strong>de</strong> estándares ANSI con clasificaciones <strong>de</strong><br />
uno a cuatro (siendo 4 (cuatro) la mejor clasificación): una clasificación “M” para<br />
interferencia reducida facilita la escucha <strong>de</strong> diálogos en el teléfono cuando es<br />
utilizado el micrófono <strong>de</strong>l aparato <strong>de</strong> audición y una clasificación “T” que permite<br />
que el teléfono sea utilizado con aparatos <strong>de</strong> audición operando en modo Telecoll,<br />
reduciendo así los ruidos <strong>de</strong> fondo in<strong>de</strong>seados.<br />
01<br />
02<br />
03<br />
04<br />
05<br />
06<br />
07<br />
162<br />
163
¿COMO PUEDO SABER CUALES TELEFONOS INALAMBRICOS SON COMPATIBLES<br />
CON APARATOS DE AUDICION<br />
La clasificación Hearing Aid Compatibility (Compatibilidad con<br />
Aparatos <strong>de</strong> Audición) está exhibida en la caja <strong>de</strong>l teléfono<br />
inalámbrico.<br />
Rango <strong>de</strong> compatibilidad<br />
con aparatos <strong>de</strong> audición<br />
Un teléfono está consi<strong>de</strong>rado Hearing Aid Compatible (Compatible con Aparatos<br />
<strong>de</strong> Audición) para acoplamiento acústico (modo micrófono) si tiene una<br />
clasificación “M3” ó “M4”. Un móvil digital está consi<strong>de</strong>rado Compatible con<br />
Aparatos <strong>de</strong> Audición para acoplamiento inductivo (modo Telecoil) si tiene una<br />
clasificación “T3” ó “T4”.<br />
Este teléfono fue probado y clasificado para uso con aparatos auditivos para<br />
algunas <strong>de</strong> las tecnologías inalámbricas utilizadas por él. Sin embargo, pue<strong>de</strong><br />
haber algunas nuevas tecnologías inalámbricas utilizadas en este teléfono que<br />
no hayan sido probados aun para uso con aparatos auditivos. Es importante<br />
probar las distintas funcionalida<strong>de</strong>s <strong>de</strong>l teléfono completamente y en diferentes<br />
lugares usando su aparato auditivo o implante coclear para <strong>de</strong>terminar si usted<br />
escucha cualquier ruido <strong>de</strong> interferencia. Consulte su proveedor <strong>de</strong> servicios<br />
sobre su retorno y las políticas <strong>de</strong> cambio y para lograr informaciones sobre la<br />
compatibilidad con aparatos auditivos.<br />
¿COMO SABER SI MI APARATO DE AUDICION OPERARA CON UN MOVIL DIGITAL<br />
ESPECIFICO<br />
Usted tal vez <strong>de</strong>see probar varios móviles para que seleccione aquel que mejor<br />
opera con su aparato <strong>de</strong> audición. Usted también podrá <strong>de</strong>sear hablar con<br />
su médico sobre hasta que punto sus aparatos <strong>de</strong> audición están inmunes a<br />
interferencia, si tienen algún blindaje (protección) y si el aparato <strong>de</strong> audición tiene<br />
una clasificación HAC.<br />
SEGURIDAD<br />
PARA INFORMACIONES ADICIONALES SOBRE TELEFONOS MOVILES DIGITALES<br />
Y APARATOS DE AUDICION<br />
• FCC Hearing Aid Compatibility and Volume Control –<br />
http://www.fcc.gov/cgb/dro/hearing.html<br />
• Hearing Loss Association of America – http://www.hearingloss.org/<br />
• CTIA – http://www.accesswireless.org/Disability-Categories/Hearing.aspx<br />
• Gallau<strong>de</strong>t University, RERC – http://tap.gallau<strong>de</strong>t.edu/voice<br />
ACTUALIZACION DEL CONSUMIDOR SEGUN LA FDA<br />
FDA U.S. FOOD AND DRUG ADMINISTRATION<br />
– CENTRO DE DISPOSITIVOS Y REPORTES<br />
ACTUALIZADOS DE SALUD RADIOLOGICA ACERCA DE<br />
TELEFONOS MOVILES<br />
1. ¿Acaso es verdad que los teléfonos presentan un problema <strong>de</strong> salud<br />
La evi<strong>de</strong>ncia científica disponible no muestra que cualquier problema <strong>de</strong> salud<br />
esté asociado con la utilización <strong>de</strong> teléfonos inalámbricos. Sin embargo, no<br />
existen pruebas <strong>de</strong> que los teléfonos inalámbricos son absolutamente seguros.<br />
Los teléfonos inalámbricos emiten bajos niveles <strong>de</strong> energía <strong>de</strong> radiofrecuencia<br />
(RF) en el rango <strong>de</strong> las microondas cuando se utiliza. También emiten niveles muy<br />
bajos <strong>de</strong> RF en modo inactivo. Aunque los niveles altos <strong>de</strong> RF pue<strong>de</strong>n ocasionar<br />
repercusiones en la salud (al calentar el tejido), la exposición <strong>de</strong> bajos niveles <strong>de</strong><br />
RF no produce efectos <strong>de</strong> calentamiento que ocasionen repercusiones adversas<br />
para la salud. Muchos estudios <strong>de</strong> exposición a niveles bajos <strong>de</strong> RF no han<br />
encontrado repercusión biológica alguna. Algunos estudios sugieren que estos<br />
a biológicos pue<strong>de</strong>n ocurrir, pero tales conclusiones no han sido confirmadas<br />
por investigación adicional. En algunos casos, otros investigadores han tenido<br />
01<br />
02<br />
03<br />
04<br />
05<br />
06<br />
07<br />
164<br />
165
dificulta<strong>de</strong>s en reproducir tales estudios o en <strong>de</strong>terminar las razones <strong>de</strong> los<br />
resultados tan inconsistentes.<br />
2. ¿Cuál es el papel <strong>de</strong> la FDA en lo que concierne la seguridad <strong>de</strong> los<br />
teléfonos inalámbricos<br />
Bajo ley, la FDA no revisa la seguridad <strong>de</strong> productos <strong>de</strong>l consumidor <strong>de</strong> emisión <strong>de</strong><br />
radiación antes <strong>de</strong> ponerlos a la venta, tal como lo hace con nuevas medicinas o<br />
dispositivos médicos. Sin embargo, la agencia tiene autoridad <strong>de</strong> tomar medidas<br />
<strong>de</strong> acción si es que los teléfonos inalámbricos muestran la emisión <strong>de</strong> energía (RF)<br />
en un nivel que es peligroso para el usuario. En tal caso, la FDA pue<strong>de</strong> exigir a los<br />
fabricantes <strong>de</strong> teléfonos inalámbricos que notifiquen a los usuarios <strong>de</strong>l peligro<br />
a la salud y <strong>de</strong> reparar o reemplazar o requisar los teléfonos para que el peligro<br />
ya no exista. Aunque la existencia <strong>de</strong> datos científicos no justifiquen las acciones<br />
normativas <strong>de</strong> la FDA, está le ha insistido a la industria <strong>de</strong> telefonía inalámbrica a<br />
tomar un número <strong>de</strong> precauciones que incluyen lo siguiente:<br />
• Apoyar la investigación necesaria <strong>de</strong> las posibles repercusiones biológicas <strong>de</strong> RF<br />
<strong>de</strong>l tipo que emiten los teléfonos inalámbricos.;<br />
• Diseñar teléfonos inalámbricos <strong>de</strong> manera que minimicen cualquier exposición a<br />
RF al usuario que no es necesaria para la función <strong>de</strong>l dispositivo. y<br />
• Cooperar con los usuarios <strong>de</strong> teléfonos inalámbricos con la mejor información<br />
posible acerca <strong>de</strong> los efectos secundarios <strong>de</strong>l uso <strong>de</strong>l teléfono inalámbrico en la<br />
salud humana.<br />
La FDA pertenece a un grupo <strong>de</strong> trabajo entre agencias fe<strong>de</strong>rales que son<br />
responsables <strong>de</strong> diferentes aspectos <strong>de</strong> seguridad <strong>de</strong> RF para asegurarse <strong>de</strong> los<br />
esfuerzos conjuntos a nivel fe<strong>de</strong>ral. Las siguientes agencias pertenecen a este<br />
grupo <strong>de</strong> trabajo:<br />
• El Instituto Nacional <strong>de</strong> Salud y Seguridad Ocupacional<br />
• La Agencia <strong>de</strong> Protección <strong>de</strong>l Medioambiente<br />
SEGURIDAD<br />
• La Comisión Fe<strong>de</strong>ral <strong>de</strong> Comunicaciones<br />
• La Administración <strong>de</strong> Salud y Seguridad Ocupacional<br />
• La Administración Nacional <strong>de</strong> Telecomunicaciones y Información<br />
Los Institutos Nacionales <strong>de</strong> Salud también participan en activida<strong>de</strong>s <strong>de</strong><br />
algunas activida<strong>de</strong>s <strong>de</strong> grupos <strong>de</strong> trabajo a nivel inter agencia. La FDA comparte<br />
responsabilida<strong>de</strong>s normativas sobre teléfonos inalámbricos con la Comisión<br />
Fe<strong>de</strong>ral <strong>de</strong> Comunicaciones (FCC). Todos los teléfonos que se ven<strong>de</strong>n en los<br />
Estados Unidos, primero <strong>de</strong>ben cumplir con las normas <strong>de</strong> seguridad <strong>de</strong> la FCC<br />
que limitan la exposición a RF. La FCC confía en la FDA y otras agencias <strong>de</strong> salud<br />
para las cuestiones <strong>de</strong> seguridad <strong>de</strong> los móviles. La FCC también regula las<br />
estaciones <strong>de</strong> base <strong>de</strong> que <strong>de</strong>pen<strong>de</strong>n los proveedores <strong>de</strong> servicio <strong>de</strong> telefonía<br />
inalámbrica. Aunque tales estaciones operan a un nivel mayor <strong>de</strong> energía que<br />
los teléfonos inalámbricos mismos, las exposiciones <strong>de</strong> RF a que la gente está<br />
expuesta en estas estaciones <strong>de</strong> base son por lo general, miles <strong>de</strong> veces menos<br />
que las que pue<strong>de</strong>n recibir <strong>de</strong> teléfonos inalámbricos. Por lo tanto, las estaciones<br />
<strong>de</strong> base no están sujetas a las dudas <strong>de</strong> seguridad que se discuten en este<br />
documento.<br />
3. ¿Qué tipos <strong>de</strong> teléfono están sujetos a este reporte actualizado<br />
El término “teléfono inalámbrico” se refiere a teléfonos inalámbricos portátiles<br />
con antena incluida, a menudo llamados teléfonos “cel,” “móvil,” o “PCS.” Este tipo<br />
<strong>de</strong> teléfonos inalámbricos pue<strong>de</strong>n exponer al usuario a energía <strong>de</strong> radiofrecuencia<br />
cuantificable (RF) por la corta distancia entre el teléfono y la cabeza <strong>de</strong>l usuario.<br />
Estas exposiciones <strong>de</strong> RF están <strong>de</strong>limitadas por las normas <strong>de</strong> la Comisión Fe<strong>de</strong>ral<br />
<strong>de</strong> Comunicaciones que fueron <strong>de</strong>sarrolladas con el consejo <strong>de</strong> la FDA y otras<br />
normas <strong>de</strong> agencias <strong>de</strong> salud y seguridad. Cuando el teléfono se encuentra a<br />
distancias más alejadas <strong>de</strong>l usuario, la exposición <strong>de</strong> RF es drásticamente menos<br />
ya que la exposición <strong>de</strong> RF <strong>de</strong> una persona se reduce rápidamente al incrementar<br />
la distancia <strong>de</strong> la fuente. Los llamados teléfonos “sin cables,” los cuales tienen una<br />
01<br />
02<br />
03<br />
04<br />
05<br />
06<br />
07<br />
166<br />
167
unidad <strong>de</strong> base conectada al cable <strong>de</strong>l teléfono en una casa, operan por lo general<br />
a niveles <strong>de</strong> energía mucho menores, y por lo tanto producen exposiciones <strong>de</strong> RF<br />
muy por <strong>de</strong>bajo <strong>de</strong> los límites <strong>de</strong> seguridad <strong>de</strong> la FCC.<br />
4. ¿Cuáles son los resultados <strong>de</strong> la investigación ya realizada<br />
La investigación realizada ha producido resultados conflictivos, y muchos estudios<br />
han sufrido por fallas en sus métodos <strong>de</strong> investigación. Los experimentos en<br />
animales que investigan los efectos <strong>de</strong> exposición <strong>de</strong> energía <strong>de</strong> radiofrecuencia<br />
(RF) características <strong>de</strong> los teléfonos inalámbricos han producido resultados<br />
conflictivos que a menudo no pue<strong>de</strong>n repetirse en otros laboratorios. Sin<br />
embargo, algunos estudios realizados en animales sugieren que los niveles bajos<br />
<strong>de</strong> RF pue<strong>de</strong>n acelerar el <strong>de</strong>sarrollo <strong>de</strong> cáncer en animales <strong>de</strong> laboratorio. Sin<br />
embargo, muchos <strong>de</strong> los estudios que muestran un incremento en el crecimiento<br />
<strong>de</strong> tumores, utilizaron animales que habían sido genéticamente modificados o<br />
tratados con químicos causantes <strong>de</strong> cáncer como para predisponer al <strong>de</strong>sarrollo <strong>de</strong><br />
cáncer en ausencia <strong>de</strong> exposición a la RF. Otros estudios expusieron a los animales<br />
a RF por hasta 22 horas al día. Estas condiciones no son similares a las condiciones<br />
en las que la gente utiliza los teléfonos inalámbricos, así que no sabemos con<br />
certeza el significado <strong>de</strong> lo que estos estudios tienen para la salud humana.<br />
Se han publicado tres amplios estudios epi<strong>de</strong>miológicos <strong>de</strong>s<strong>de</strong> diciembre <strong>de</strong>l<br />
2000. Entre ellos, los estudios investigaron cualquier posible asociación entre el<br />
uso <strong>de</strong> teléfonos inalámbricos y cáncer cerebral primario, glioma meningioma,<br />
o neuroma acústico, tumores cerebrales o <strong>de</strong> las glándulas salivales, leucemia,<br />
u otros canceres. Ninguno <strong>de</strong> los estudios <strong>de</strong>mostraron la existencia <strong>de</strong><br />
ningún efecto dañino para la salud por la exposición <strong>de</strong> <strong>de</strong> RF <strong>de</strong> los teléfonos<br />
inalámbricos. Sin embargo, ninguno <strong>de</strong> los estudios pue<strong>de</strong> contestar dudas sobre<br />
los efectos a largo plazo, ya que el período promedio <strong>de</strong> uso <strong>de</strong>l teléfono en estos<br />
estudios fue <strong>de</strong> tres años.<br />
SEGURIDAD<br />
5. ¿Qué investigación se necesita para <strong>de</strong>cidir si la exposición <strong>de</strong> RF <strong>de</strong><br />
teléfonos inalámbricos representa un riesgo <strong>de</strong> salud<br />
Una combinación <strong>de</strong> estudios <strong>de</strong> laboratorio y epi<strong>de</strong>miológicos en personas que<br />
efectivamente utilizan teléfonos inalámbricos <strong>de</strong>be ofrecer algo <strong>de</strong> la información<br />
necesaria. Los estudios <strong>de</strong> la exposición animal <strong>de</strong> por vida pue<strong>de</strong> completarse<br />
en unos pocos años. Sin embargo, se necesitarían gran<strong>de</strong>s números <strong>de</strong> animales<br />
para ofrecer una prueba confiable <strong>de</strong>l efecto <strong>de</strong> promoción <strong>de</strong> cáncer, si es<br />
que lo existe. Los estudios epi<strong>de</strong>miológicos pue<strong>de</strong>n ofrecer datos que aplican<br />
directamente a poblaciones humana, pero en 10 o más años, un seguimiento<br />
se hará necesario para ofrecer respuestas sobre algunos repercusiones <strong>de</strong> salud,<br />
tales como el cáncer. Esto es porque el intervalo entre el tiempo <strong>de</strong> exposición a<br />
un agente causante <strong>de</strong> cáncer y el tiempo en que se <strong>de</strong>sarrolla el tumor –en caso<br />
<strong>de</strong> que sea el caso- pue<strong>de</strong>n pasar muchos, muchos años. La interpretación <strong>de</strong><br />
los estudios epi<strong>de</strong>miológicos está obstaculizada por dificulta<strong>de</strong>s en la medición<br />
real <strong>de</strong> exposición a la energía <strong>de</strong> radiofrecuencia (RF) durante el uso diario <strong>de</strong><br />
teléfonos inalámbricos. Muchos factores afectan esta medición, tales como el<br />
ángulo en el cual el teléfono se sostiene, o que mo<strong>de</strong>lo <strong>de</strong> teléfono se utiliza.<br />
6. ¿Qué está haciendo la FDA para encontrar más información sobre los<br />
posibles efectos salud <strong>de</strong>l la RF <strong>de</strong> teléfonos inalámbricos<br />
La FDA está trabajando conjuntamente con al Programa Nacional <strong>de</strong> Toxicología<br />
<strong>de</strong> los EEUU y con grupos <strong>de</strong> investigadores en todo el mundo para asegurarse<br />
<strong>de</strong> que estudios <strong>de</strong> prioridad animal se llevan a cabo para tratar preguntas<br />
importantes sobre los efectos <strong>de</strong> la exposición a energía <strong>de</strong> radiofrecuencia (RF).<br />
La FDA ha sido un participante lí<strong>de</strong>r <strong>de</strong>l Proyecto <strong>de</strong> Campos Electromagnéticos<br />
<strong>de</strong> la Organización Mundial <strong>de</strong> Salud (EMF) <strong>de</strong>s<strong>de</strong> su inauguración en 1996.<br />
Un resultado influyente <strong>de</strong> este trabajo ha sido el <strong>de</strong>sarrollo <strong>de</strong> una agenda <strong>de</strong><br />
investigación <strong>de</strong>tallada que ha dirigido el establecimiento <strong>de</strong> nuevos programas<br />
<strong>de</strong> investigación alre<strong>de</strong>dor <strong>de</strong>l mundo. El proyecto también ha ayudado a<br />
01<br />
02<br />
03<br />
04<br />
05<br />
06<br />
07<br />
168<br />
169
<strong>de</strong>sarrollar una serie <strong>de</strong> documentos <strong>de</strong> información pública sobre asuntos <strong>de</strong><br />
EMF. La FDA y la Asociación <strong>de</strong> Telecomunicaciones Celulares y Internet (CTIA)<br />
tienen un Acuerdo <strong>de</strong> Investigación y Desarrollo Cooperativo (CRADA) para<br />
investigar la seguridad inalámbrica. La FDA ofrece la supervisión científica,<br />
obteniendo aportaciones <strong>de</strong> los expertos en organizaciones gubernamentales,<br />
industriales y académicas. El estudio patrocinado por la CTIA es conducido a través<br />
<strong>de</strong> contratistas <strong>de</strong> los investigadores in<strong>de</strong>pendientes. La investigación inicial<br />
incluirá tanto estudios <strong>de</strong> laboratorio como estudios <strong>de</strong> usuarios <strong>de</strong> teléfonos<br />
inalámbricos. El CRADA también incluirá una amplia evaluación <strong>de</strong> lo que la<br />
investigación adicional necesita en el contexto <strong>de</strong>l <strong>de</strong>sarrollo <strong>de</strong> investigación<br />
reciente alre<strong>de</strong>dor <strong>de</strong>l mundo.<br />
7. ¿Cómo puedo investigar a qué tanta energía <strong>de</strong> radiofrecuencia estoy<br />
expuesto al utilizar mi teléfono inalámbrico<br />
Todos los teléfonos que se ven<strong>de</strong>n en los Estados Unidos <strong>de</strong>ben cumplir con<br />
las normas <strong>de</strong> la Comisión Fe<strong>de</strong>ral <strong>de</strong> Comunicaciones (FFC) que limitan la<br />
exposición a la energía <strong>de</strong> radiofrecuencia (RF). La FCC establece estas normas al<br />
consultar con la FDA y otras agencias <strong>de</strong> salud y seguridad fe<strong>de</strong>rales. El límite <strong>de</strong><br />
la FCC <strong>de</strong> exposición a RF <strong>de</strong> teléfonos inalámbricos está <strong>de</strong>finido a una Tasa <strong>de</strong><br />
Absorción Específica SAR <strong>de</strong> 1.6 vatios por kilogramo (1.6W/kg). El límite <strong>de</strong> la<br />
FCC es consistente con los estándares <strong>de</strong> seguridad <strong>de</strong>sarrollados por el Instituto<br />
<strong>de</strong> Ingeniería Eléctrica y Electrónica (IEEE) y el Consejo Nacional <strong>de</strong> Protección y<br />
Medición <strong>de</strong> Radiación. La exposición límite toma en consi<strong>de</strong>ración la habilidad<br />
<strong>de</strong>l cuerpo para eliminar calor <strong>de</strong>l tejido que absorbe energía <strong>de</strong>l teléfono<br />
inalámbrico y que está <strong>de</strong>finida muy por <strong>de</strong>bajo <strong>de</strong> los niveles conocidos que<br />
puedan causar repercusiones. Los fabricantes <strong>de</strong> teléfonos inalámbricos <strong>de</strong>ben<br />
reportar el nivel <strong>de</strong> exposición <strong>de</strong> RF para cada mo<strong>de</strong>lo <strong>de</strong> teléfono a la FCC. El<br />
sitio Web <strong>de</strong> la FCC (http://transition.fcc.gov/oet/rfsafety/) da indicaciones<br />
para localizar el número <strong>de</strong> i<strong>de</strong>ntificación en su teléfono para buscar el nivel <strong>de</strong><br />
exposición <strong>de</strong> RF <strong>de</strong> su teléfono <strong>de</strong>l listado en línea.<br />
SEGURIDAD<br />
8. ¿Qué ha hecho la FDA para medir la energía <strong>de</strong> radiofrecuencia<br />
proveniente <strong>de</strong> teléfonos inalámbricos<br />
El Instituto <strong>de</strong> Ingeniería Eléctrica y Electrónica (IEEE) está <strong>de</strong>sarrollando un<br />
estándar técnico para medir la exposición <strong>de</strong> radiofrecuencia (RF) <strong>de</strong> teléfonos<br />
inalámbricos y otros aparatos inalámbricos con la participación y li<strong>de</strong>razgo <strong>de</strong><br />
científicos y ingenieros <strong>de</strong> la FDA. El estándar <strong>de</strong> la “Práctica Recomendada<br />
para Determinar la Punta-Espacio <strong>de</strong> la Tasa <strong>de</strong> Absorción Especifica (SAR) en<br />
el Cuerpo Humano por Dispositivos <strong>de</strong> Comunicaciones Inalámbricos: Técnicas<br />
Experimentales,” pone enfrente la primera prueba consistente <strong>de</strong> metodología<br />
para medir la tasa en la cual la RF se <strong>de</strong>posita en la cabeza <strong>de</strong> los usuarios<br />
<strong>de</strong> teléfono. El método <strong>de</strong> prueba utiliza un mo<strong>de</strong>lo <strong>de</strong> tejido simulado <strong>de</strong> la<br />
cabeza humana. Se espera que la prueba <strong>de</strong> metodología estandarizada <strong>de</strong> SAR<br />
mejore notablemente la consistencia <strong>de</strong> las mediciones realizadas en diferentes<br />
laboratorios sobre el mismo teléfono. La SAR es la medida <strong>de</strong> la cantidad <strong>de</strong><br />
energía que absorbe el tejido, ya sea por todo el cuerpo o sólo una parte <strong>de</strong>l<br />
cuerpo. Se mi<strong>de</strong> en vatios/kg (o millivatios/g) <strong>de</strong> materia. Esta medida se utiliza<br />
para <strong>de</strong>terminar si un teléfono inalámbrico cumple con las normas <strong>de</strong> seguridad.<br />
9. ¿Qué precauciones se pue<strong>de</strong>n tomar para reducir mi exposición a la<br />
energía <strong>de</strong> radiofrecuencia <strong>de</strong> mi teléfono inalámbrico<br />
Si existe un riesgo proveniente <strong>de</strong> estos productos –y en este punto no sabemos<br />
que lo haya - es probablemente muy pequeño. Pero si a usted le preocupa el<br />
evitar aún riesgos potenciales, usted pue<strong>de</strong> tomar unos cuantos pasos sencillos<br />
para minimizar su exposición a la energía <strong>de</strong> radiofrecuencia (RF). Ya que el<br />
tiempo es un factor clave en cuánta exposición recibe una persona, el reducir el<br />
tiempo <strong>de</strong> uso <strong>de</strong>l teléfono inalámbrico reducirá la exposición a RF.<br />
01<br />
02<br />
03<br />
04<br />
05<br />
06<br />
07<br />
170<br />
171
• Si usted <strong>de</strong>be conducir conversaciones extensas por teléfono inalámbrico todos<br />
los días, pue<strong>de</strong> usted poner más distancia entre su cuerpo y la fuente <strong>de</strong> RF, ya<br />
que nivel <strong>de</strong> exposición baja dramáticamente con la distancia.<br />
Por ejemplo, usted pue<strong>de</strong> utilizar un audífono y cargar el teléfono inalámbrico<br />
lejos <strong>de</strong> su cuerpo o utilice un teléfono inalámbrico conectado a una antena<br />
remota. Una vez más, los datos científicos no <strong>de</strong>muestran que los teléfonos<br />
inalámbricos son perjudiciales. Pero si a usted le preocupa la exposición <strong>de</strong> RF <strong>de</strong><br />
estos productos, pue<strong>de</strong> tomar medidas como las <strong>de</strong>scritas anteriormente para<br />
reducir su exposición a RF <strong>de</strong>l uso <strong>de</strong>l teléfono inalámbrico.<br />
10. ¿Y qué <strong>de</strong> los niños que utilizan teléfonos inalámbricos<br />
La evi<strong>de</strong>ncia científica no muestra un peligro a usuarios <strong>de</strong> teléfonos<br />
inalámbricos, incluyendo a niños y adolescentes. Si quiere tomar precauciones<br />
para reducir la exposición a la energía <strong>de</strong> radiofrecuencia (RF), las medidas<br />
<strong>de</strong>scritas arriban también aplican a niños y adolescentes que utilizan<br />
teléfonos inalámbricos. El reducir el tiempo <strong>de</strong> uso <strong>de</strong>l teléfono inalámbrico y<br />
incrementando la distancia entre el use y la fuente <strong>de</strong> RF reducirá la exposición<br />
a RF. Algunos grupos patrocinados por otros gobiernos nacionales, <strong>de</strong>salientan<br />
el uso <strong>de</strong> teléfonos inalámbricos <strong>de</strong>l todo. Por ejemplo, el gobierno <strong>de</strong>l Reino<br />
Unido distribuye panfletos que contienen tal recomendación en Diciembre <strong>de</strong>l<br />
2000. Ellos observaron que no existe evi<strong>de</strong>ncia <strong>de</strong> que el uso <strong>de</strong> un teléfono<br />
inalámbrico sea la causa <strong>de</strong> tumores cerebrales y otras causas <strong>de</strong> enfermedad. Su<br />
recomendación <strong>de</strong> limitar el uso a niños fue estrictamente precautoria, no estaba<br />
basada en evi<strong>de</strong>ncia científica <strong>de</strong> que existe algún peligro a la salud.<br />
11. ¿Qué hay acerca <strong>de</strong> la interferencia <strong>de</strong>l teléfono inalámbrico con equipo<br />
médico<br />
La energía <strong>de</strong> radiofrecuencia (RF) <strong>de</strong> teléfonos inalámbricos pue<strong>de</strong> interactuar<br />
con algunos dispositivos electrónicos. Por tal razón, la FDA ayudó a <strong>de</strong>sarrollar<br />
SEGURIDAD<br />
un método <strong>de</strong> prueba <strong>de</strong>tallado para medir la interferencia electromagnética<br />
(EMI) en implantes <strong>de</strong> marcapasos cardiacos y <strong>de</strong>s-fibriladores <strong>de</strong> teléfonos<br />
inalámbricos. Este método <strong>de</strong> prueba es ahora parte <strong>de</strong> un estándar patrocinado<br />
por la Asociación <strong>de</strong>l Avance <strong>de</strong> Instrumentación Médica (AAMI). El borrador<br />
final, un esfuerzo conjunto con la FDA, fabricantes <strong>de</strong> aparatos médicos y muchos<br />
otros grupos, se completó a finales <strong>de</strong>l 2000. Este estándar le permitirá a los<br />
fabricantes asegurarse que los pacientes cardiacos y los <strong>de</strong>s-fibriladores estén a<br />
salvo <strong>de</strong> EMI <strong>de</strong>l teléfono inalámbrico. La FDA ha probado aparatos para la sor<strong>de</strong>ra<br />
y medir la interferencia <strong>de</strong> teléfonos inalámbricos portátiles y ayudó a <strong>de</strong>sarrollar<br />
un estándar voluntario patrocinado por el Instituto <strong>de</strong> Ingeniería Eléctrica y<br />
Electrónica (IEEE). Este estándar especifica métodos <strong>de</strong> prueba y requerimientos<br />
<strong>de</strong> <strong>de</strong>sempeño <strong>de</strong> aparatos auditivos y <strong>de</strong> teléfonos inalámbricos <strong>de</strong> manera que<br />
no ocasionen interferencia cuando una persona utiliza un teléfono o un aparato<br />
auditivo “compatibles” al mismo tiempo. Este estándar fue aprobado por el (IEEE)<br />
en el 2000. La FDA continúa monitoreando el uso <strong>de</strong> teléfonos inalámbricos<br />
por posibles interacciones con otros dispositivos médicos. Si llegara ocurrir una<br />
interferencia perjudicial, la FDA conducirá una investigación para evaluar la<br />
interferencia y trabajar sobre cómo resolver el problema.<br />
12. ¿Dón<strong>de</strong> puedo encontrar información adicional<br />
Para información adicional, favor <strong>de</strong> referirse a los siguientes recursos:<br />
• Página Web <strong>de</strong> la FDA sobre teléfonos inalámbricos:<br />
(http://www.fda.gov/Radiation-EmittingProducts/<br />
RadiationEmittingProductsandProcedures/<br />
HomeBusinessandEntertainment/CellPhones/<strong>de</strong>fault.htm)<br />
• Programa <strong>de</strong> Seguridad <strong>de</strong> energía <strong>de</strong> radio frecuencia (RF) <strong>de</strong> la Comisión<br />
Fe<strong>de</strong>ral <strong>de</strong> Comunicaciones (FCC):<br />
(http://www.fcc.gov/oet/rfsafety)<br />
01<br />
02<br />
03<br />
04<br />
05<br />
06<br />
07<br />
172<br />
173
• Comisión Internacional <strong>de</strong> Protección contra Radiación No Iónica:<br />
(http://www.icnirp.<strong>de</strong>)<br />
• Proyecto EMF Internacional <strong>de</strong> la Organización Mundial <strong>de</strong> la Salud (WHO):<br />
(http://www.who.int/emf)<br />
• Junta Nacional <strong>de</strong> Protección Radiológica (UK):<br />
(http://www.hpa.org.uk/radiation/)<br />
PARA EVITAR PERDIDA POTENCIAL DE LA AUDICION<br />
La exposición prolongada a sonidos altos (incluyendo música) es la causa más<br />
común <strong>de</strong> la pérdida <strong>de</strong> audición que pue<strong>de</strong> evitarse. Algunos estudios científicos<br />
sugieren que la utilización <strong>de</strong> dispositivos portátiles <strong>de</strong> audio como por ejemplo,<br />
reproductores <strong>de</strong> música, portátiles y móviles, con ajustes en altos volúmenes<br />
durante largos períodos <strong>de</strong> tiempo pue<strong>de</strong> llevar a la pérdida permanente <strong>de</strong><br />
la audición inducida por ruido. Esto incluye el uso <strong>de</strong> audífonos (incluyendo<br />
diferentes mo<strong>de</strong>los y Bluetooth® u otros dispositivos inalámbricos). La exposición<br />
a sonidos muy altos también está asociada en algunos estudios, al zumbido<br />
(un chillido en el oído), hipersensibilidad al sonido y audición distorsionada. La<br />
susceptibilidad individual a la pérdida <strong>de</strong> audición inducida por ruidos y otros<br />
potenciales problemas <strong>de</strong> audición varía.<br />
La cantidad <strong>de</strong>l sonido producido por un dispositivo <strong>de</strong> audio portátil varía<br />
<strong>de</strong>pendiendo <strong>de</strong> la naturaleza <strong>de</strong>l sonido, <strong>de</strong>l dispositivo, <strong>de</strong> los ajustes <strong>de</strong>l<br />
dispositivo y <strong>de</strong> los audífonos. Usted pue<strong>de</strong> seguir algunas recomendaciones <strong>de</strong><br />
sentido común cuando utilice cualquier dispositivo <strong>de</strong> audio:<br />
• Ajuste el volumen en un ambiente silencioso y seleccione el volumen más bajo<br />
que se pue<strong>de</strong> oír a<strong>de</strong>cuadamente.<br />
• Cuando utilice audífonos, reduzca el volumen si no pue<strong>de</strong> oír a las personas<br />
hablando cerca <strong>de</strong> usted o si la persona que se sienta cerca <strong>de</strong> usted pue<strong>de</strong> oír lo<br />
que usted está escuchando.<br />
GARANTIA<br />
• No suba el volumen para bloquear ruidos adyacentes. Si usted selecciona oír<br />
su dispositivo portátil en un ambiente ruidoso, utilice audífonos supresores <strong>de</strong><br />
ruidos para bloquear los ruidos adyacentes.<br />
• Limite el período <strong>de</strong> tiempo <strong>de</strong> escucha. Conforme el volumen sube, menos<br />
tiempo será necesario para que su audición sea afectada.<br />
• Evite utilizar audífonos <strong>de</strong>spués <strong>de</strong> la exposición a ruidos extremamente<br />
altos como por ejemplo, en conciertos <strong>de</strong> rock, que pue<strong>de</strong>n causar la pérdida<br />
temporal <strong>de</strong> la audición. La pérdida temporal <strong>de</strong> la audición pue<strong>de</strong> hacer con<br />
que volúmenes no seguros <strong>de</strong> sonido parezcan normales.<br />
• No oiga a cualquier nivel <strong>de</strong> volumen que causa incomodidad. Si escucha un<br />
zumbido, si nota que la voz parece encubierta o cualquier dificultad temporal<br />
<strong>de</strong> audición <strong>de</strong>spués <strong>de</strong> oír su dispositivo <strong>de</strong> audio portátil, interrumpa el uso y<br />
consulte un médico.<br />
USTED PUEDE LOGRAR INFORMACIONES ADICIONALES SOBRE ESTE<br />
ASUNTO A TRAVES DE LAS SIGUIENTES FUENTES DE INFORMACION:<br />
ACADEMIA AMERICANA DE AUDIOLOGÍA<br />
11730 Plaza American Drive, Suite 300<br />
Reston, VA 20190<br />
Voz: 800-AAA-2336<br />
E-mail: infoaud@audiology.org<br />
Internet: http://www.audiology.org/<br />
174 175<br />
01<br />
02<br />
03<br />
04<br />
05<br />
06<br />
07
INSTITUTO NACIONAL DE SORDEZ Y OTROS INSTITUTOS DE<br />
SALUD NACIONAL DE DESORDENES RELACIONADAS AL AREA DE<br />
COMUNICACIONES<br />
31 Center Drive, MSC 2320<br />
Bethesda, MD USA 20892-2320<br />
Voz: (301) 496-7243<br />
E-mail: wengerj@nidcd.nih.gov<br />
Internet: http://www.nidcd.nih.gov/<br />
INSTITUTO NACIONAL PARA LA SEGURIDAD OCUPACIONAL Y DE<br />
SALUD<br />
1600 Clifton Rd.<br />
Atlanta<br />
GA 30333, USA<br />
Voz: 1-800-CDC-INFO (1-800-232-4636)<br />
E-mail: cdcinfo@cdc.gov<br />
Internet: http://www.cdc.gov/<br />
INFORMACIONES DE CONFORMIDAD CON LA FCC<br />
Este dispositivo cumple con el artículo 15 <strong>de</strong> las normas <strong>de</strong> la FCC.<br />
Su operación está sujeta a las siguientes dos condiciones:<br />
(1) Este dispositivo pue<strong>de</strong> no causar interferencias dañinas, y<br />
(2) Este dispositivo <strong>de</strong>be aceptar cualquier interferencia recibida. Incluyendo<br />
interferencias que puedan causar operación in<strong>de</strong>seada.<br />
GARANTIA<br />
INFORMACION AL USUARIO<br />
Este equipo ha sido probado y cumple con los límites establecidos para un aparato<br />
digital <strong>de</strong> Clase B según el Artículo 15 <strong>de</strong> las normas <strong>de</strong> la Comisión Fe<strong>de</strong>ral <strong>de</strong><br />
Comunicaciones (FCC). Estos límites están diseñados para proveer una protección<br />
razonable contra interferencias dañinas en una instalación resi<strong>de</strong>ncial. Este<br />
equipo genera, usa y pue<strong>de</strong> irradiar energía <strong>de</strong> radiofrecuencia y, si no se instala<br />
y usa <strong>de</strong> acuerdo con las instrucciones, pue<strong>de</strong> causar interferencias dañinas a las<br />
comunicaciones por radio. Sin embargo, no hay garantías <strong>de</strong> que no ocurrirán<br />
interferencias en una instalación particular. Si este equipo causa interferencia<br />
dañina a la recepción <strong>de</strong> radio o televisión, lo que pue<strong>de</strong> <strong>de</strong>terminarse mediante<br />
el apagado y encendido <strong>de</strong>l equipo, se le aconseja al usuario que intente corregir<br />
la interferencia mediante una o más <strong>de</strong> las siguientes medidas:<br />
• Reorientar o relocalizar la antena receptora. Aumentar la separación entre el<br />
equipo y el receptor.<br />
• Conectar el equipo a un enchufe o circuito diferente <strong>de</strong>l aquél al que el receptor<br />
está conectado.<br />
• Consultar a su ven<strong>de</strong>dor o a un técnico <strong>de</strong> radio/televisión con experiencia para<br />
ayuda.<br />
ADVERTENCIA: • El usuario que realice cambios o modificaciones a la unidad sin la<br />
aprobación expresa <strong>de</strong>l fabricante invalidará su autoridad para usar<br />
el equipo. La conexión <strong>de</strong> periféricos requiere el uso <strong>de</strong> cables con<br />
conexión <strong>de</strong> tierra y señales blindadas.<br />
• Una presión sonora excesiva <strong>de</strong> los auriculares pue<strong>de</strong> provocar<br />
pérdidas auditivas.<br />
01<br />
02<br />
03<br />
04<br />
05<br />
06<br />
07<br />
176 177
GARANTIA LIMITADA DE 12 MESES<br />
Personal Communications Devices, LLC. (la Compañía) garantiza al comprador<br />
original <strong>de</strong> este teléfono celular (móvil) o dispositivo inalámbrico (Producto),<br />
que si este producto o cualesquiera <strong>de</strong> sus partes durante el uso y condiciones<br />
normales <strong>de</strong>l consumidor probara ser <strong>de</strong>fectuoso en material, mano <strong>de</strong> obra que<br />
resultara en mala operación <strong>de</strong>l producto durante los primeros doce (12) meses<br />
<strong>de</strong>l periodo <strong>de</strong> fecha <strong>de</strong> compra (prueba <strong>de</strong> compra requerida), tal(es) <strong>de</strong>fecto(s)<br />
serán reparados o reemplazados según la opción <strong>de</strong> la Compañía (con piezas<br />
nuevas o reconstruidas) sin cargo pelas piezas o mano <strong>de</strong> obra directamente<br />
relacionados con los <strong>de</strong>fecto(s).<br />
La antena, teclado, pantalla, batería recargable y el cargador <strong>de</strong> la batería, si lo<br />
incluye con el Producto, están igualmente garantizados por doce (12) meses <strong>de</strong><br />
la fecha <strong>de</strong> compra.<br />
Esta Garantía se extien<strong>de</strong> solamente para consumidores que adquieran el<br />
producto en los Estados Unidos o Canadá y no es transferible o asignable.<br />
Esta Garantía no aplica a:<br />
(a) Si el producto ha sido sujeto a uso y condiciones anormales, acci<strong>de</strong>ntes,<br />
mal manejo, <strong>de</strong>scuido, alteraciones no autorizadas, mal uso, instalación<br />
ina<strong>de</strong>cuada, reparación o almacenamiento inapropiado.<br />
(b) Producto cuyo número <strong>de</strong> serie mecánico o electrónico ha sido removido,<br />
alterado o borrado.<br />
(c) Daño por exposición a la humedad, temperaturas excesivas o condiciones<br />
medioambientales extremas;<br />
(d) Daño resultante <strong>de</strong> la utilización o conexión <strong>de</strong> otros productos y accesorios no<br />
autorizados por la Compañía.<br />
(e) Defectos en elementos cosméticos, <strong>de</strong>corativos, estructurales o <strong>de</strong> apariencia<br />
tales como las cubiertas y partes no operativas.<br />
GARANTIA<br />
(f ) Producto dañado por causas externas como un incendio, inundación,<br />
suciedad, arena, condiciones <strong>de</strong>l clima, fuga <strong>de</strong> baterías, quema <strong>de</strong> fusible, robo o<br />
uso inapropiado <strong>de</strong> cualquier fuente <strong>de</strong> electricidad.<br />
(g) Producto sometido a modificaciones no autorizadas en el software <strong>de</strong>l<br />
producto o en el propio producto;<br />
(h) Producto sometido a apertura no autorizada o la reparación <strong>de</strong>l producto;<br />
( i ) Producto sujeto a piratería, rastreo <strong>de</strong> contraseñas, <strong>de</strong>sbloqueo <strong>de</strong>l cargador<br />
<strong>de</strong> arranque utilizando el programa <strong>de</strong> inicio rápido, o la manipulación o<br />
cortocircuitar <strong>de</strong> la batería; o<br />
( j ) Producto que ha sido modificado para alterar la funcionalidad o capacidad <strong>de</strong>l<br />
producto sin el permiso escrito <strong>de</strong> la Compañía.<br />
La Compañía no <strong>de</strong>clara su responsabilidad para la remoción o reinstalación <strong>de</strong>l<br />
Producto para cobertura geográfica, por recepción <strong>de</strong> señal ina<strong>de</strong>cuada <strong>de</strong> la<br />
antena o por rango <strong>de</strong> comunicaciones u operaciones <strong>de</strong>l sistema celular como<br />
un todo.<br />
Cuando envíe su dispositivo inalámbrico a la Compañía para reparación o servicio,<br />
por favor observe que cualquier información personal o software instalado<br />
en el producto pue<strong>de</strong> ser alterado o borrado inadvertidamente. Por lo tanto,<br />
recomendamos rotundamente que realice un respaldo <strong>de</strong> toda la información,<br />
sus datos y <strong>de</strong>l software contenido en su Producto antes <strong>de</strong> enviarlo a servicio<br />
o reparación. Esto incluye todas listas <strong>de</strong> contactos, <strong>de</strong>scargas (aplicaciones <strong>de</strong><br />
software <strong>de</strong> terceros, campanillas, juegos y gráficas) y cualquier otra información<br />
agregada a su Producto. Adicionalmente, si el producto utiliza una tarjeta SIM o<br />
Multimedia, favor <strong>de</strong> remover la tarjeta antes <strong>de</strong> enviar el Producto y almacenar<br />
para uso posterior cuando se le regrese su Producto. La Compañía no se hace<br />
responsable ni garantiza la reinstauración <strong>de</strong> software <strong>de</strong> terceros, información<br />
personal o datos <strong>de</strong> memoria contenidos, almacenados o integrados con<br />
01<br />
02<br />
03<br />
04<br />
05<br />
06<br />
07<br />
178 179
cualquier otro dispositivo inalámbrico, ya sea que esté <strong>de</strong>ntro <strong>de</strong> garantía o no<br />
cuando se regresa a la Compañía para reparación o servicio.<br />
Para obtener reparaciones o reemplazo <strong>de</strong>ntro <strong>de</strong> los términos <strong>de</strong> esta garantía,<br />
el Producto <strong>de</strong>be ser entregado con prueba <strong>de</strong> la cobertura <strong>de</strong> la Garantía con<br />
(ej., el recibo fechado <strong>de</strong> venta), la dirección <strong>de</strong>l consumidor remitente, número<br />
<strong>de</strong> teléfono y/o fax en horas y días hábiles y una <strong>de</strong>scripción completa <strong>de</strong>l<br />
problema, el envío prepagado, para la Compañía a la dirección exhibida abajo<br />
o al lugar don<strong>de</strong> se adquirió para realizar el proceso <strong>de</strong> reparación o reemplazo.<br />
Adicionalmente, para dirigirse a una estación <strong>de</strong> servicio <strong>de</strong> garantía en su área,<br />
pue<strong>de</strong> llamar en los Estados Unidos al 1-800-229-1235, y en Canadá al 1-800-<br />
465-9672 (en Ontario llame al 416-695-3060).<br />
LA EXTENSION DE LA RESPONSABILIDAD DE LA COMPAÑIA DENTRO DE ESTA<br />
GARANTIA SE LIMITA A LA REPARACION O REPOSICION PROVISTAS Y EN NINGUNO<br />
MOMENTO, DEBE LA RESPONSABILIDAD DE LA COMPAÑIA EXCEDER EL PRECIO DE<br />
COMPRA POR EL PRODUCTO PAGADO POR EL COMPRADOR.<br />
CUALQUIERA DE LAS GARANTIAS IMPLICADAS, INCLUYENDO GARANTIA DE<br />
MERCABILIDAD O ADAPTACION CON UN PROPOSITO PARTICULAR, DEBE LIMITARSE<br />
A LA DURACION DE ESTA GARANTIA ESCRITA. CUALQUIER ACCION REFERENTE AL<br />
INCUMPLIMIENTO DE ESTA GARANTIA DEBE SER MENCIONADA DENTRO DE UN<br />
PERIODO DE 18 MESES DE LA FECHA DE COMPRA ORIGINAL. DE NINGUNA MANERA<br />
ES LA COMPAÑIA RESPONSABLE POR DANOS CONSECUENCIALES O INCIDENTALES<br />
ESPECIALES POR EL INCUMPLIMIENTO DE ESTA U OTRA GARANTÍA, EXPRESA O<br />
IMPLICITA. SIN EMBARGO, LA COMPAÑIA NO ES RESPONSABLE DE LA TARDANZA<br />
DE LA PROVISION DE SERVICIOS BAJO ESTA GARANTIA O LA PERDIDA DE USO<br />
DURANTE EL TIEMPO QUE EL PRODUCTO ESTE EN REPARACION O ESTE SIENDO<br />
REEMPLAZADO.<br />
GARANTIA<br />
Ninguna persona o representante está autorizado para asumir, <strong>de</strong> parte <strong>de</strong> la<br />
Compañía, responsabilidad alguna más que la expresada aquí en conexión con la<br />
venta <strong>de</strong> este producto.<br />
Algunos estados o provincias no permiten limitaciones en relación a cuánto<br />
tiempo dura una garantía implicada, o <strong>de</strong> cómo no aplican a usted las exclusiones<br />
o limitaciones <strong>de</strong> daño consecuencial o inci<strong>de</strong>ntal, las exclusiones o limitaciones<br />
antes indicadas tal vez no se apliquen a usted. Esta garantía le ofrece a usted<br />
<strong>de</strong>rechos legales específicos y usted también pue<strong>de</strong> tener otros <strong>de</strong>rechos, que<br />
varían <strong>de</strong> estado a estado o <strong>de</strong> provincia a provincia.<br />
EN ESTADOS UNIDOS: Personal Communications Devices<br />
555 Wireless Blvd.<br />
Hauppauge, New York 11788<br />
1-800- 229-1235<br />
EN CANADA:<br />
Personal Communications Devices, LLC<br />
5535 Eglinton Avenue West, Suite 210<br />
Toronto, Ontario<br />
M9C 5K5<br />
1-800-465-9672<br />
01<br />
02<br />
03<br />
04<br />
05<br />
06<br />
07<br />
180 181
NOTA<br />
182<br />
183