Email Setup - US Cellular
Email Setup - US Cellular
Email Setup - US Cellular
- No tags were found...

Create successful ePaper yourself
Turn your PDF publications into a flip-book with our unique Google optimized e-Paper software.
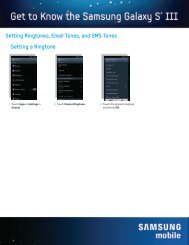
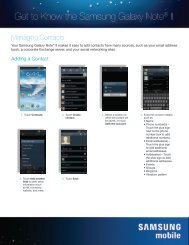
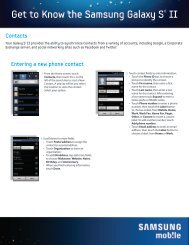
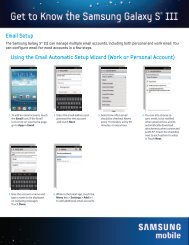
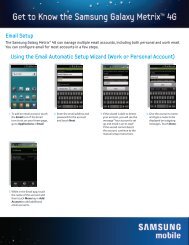
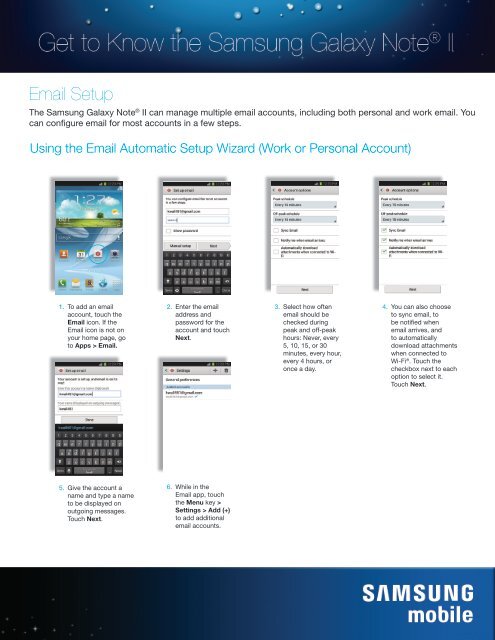
<strong>Email</strong> <strong>Setup</strong><br />
The Samsung Galaxy Note ® II can manage multiple email accounts, including both personal and work email. You<br />
can configure email for most accounts in a few steps.<br />
Using the <strong>Email</strong> Automatic <strong>Setup</strong> Wizard (Work or Personal Account)<br />
1. To add an email<br />
account, touch the<br />
<strong>Email</strong> icon. If the<br />
<strong>Email</strong> icon is not on<br />
your home page, go<br />
to Apps > <strong>Email</strong>.<br />
2. Enter the email<br />
address and<br />
password for the<br />
account and touch<br />
Next.<br />
3. Select how often<br />
email should be<br />
checked during<br />
peak and off-peak<br />
hours: Never, every<br />
5, 10, 15, or 30<br />
minutes, every hour,<br />
every 4 hours, or<br />
once a day.<br />
4. You can also choose<br />
to sync email, to<br />
be notified when<br />
email arrives, and<br />
to automatically<br />
download attachments<br />
when connected to<br />
Wi-Fi ® . Touch the<br />
checkbox next to each<br />
option to select it.<br />
Touch Next.<br />
5. Give the account a<br />
name and type a name<br />
to be displayed on<br />
outgoing messages.<br />
Touch Next.<br />
6. While in the<br />
<strong>Email</strong> app, touch<br />
the Menu key ><br />
Settings > Add (+)<br />
to add additional<br />
email accounts.
Setting Up <strong>Email</strong> Manually (Work or Personal Account)<br />
1. To add an email<br />
account, touch the<br />
<strong>Email</strong> icon. If the<br />
<strong>Email</strong> icon is not on<br />
your home page, go<br />
to Apps > <strong>Email</strong>.<br />
5. Give the account<br />
a name and<br />
type a name to<br />
be displayed on<br />
outgoing messages.<br />
Touch Done.<br />
2. Enter the email<br />
address and<br />
password for the<br />
account and touch<br />
Manual <strong>Setup</strong>. (If<br />
this is not the first<br />
account set up, you<br />
can add an account<br />
while in the <strong>Email</strong><br />
app by touching<br />
the Menu key and<br />
selecting Settings.)<br />
3. Select the account<br />
type: POP3, IMAP, or<br />
Microsoft ® Exchange<br />
ActiveSync ® .<br />
4. Enter the account<br />
details.<br />
• For a POP3 account,<br />
enter the user name,<br />
password, POP3<br />
server, security type,<br />
and port. Select<br />
whether email should<br />
be deleted from the<br />
server. Touch Next.<br />
• For an IMAP account,<br />
enter the user name,<br />
password, IMAP<br />
server, security type,<br />
port, and IMAP path<br />
prefix. Touch Next.<br />
• For a Microsoft<br />
Exchange ActiveSync<br />
account, enter the<br />
domain\user name,<br />
password, and<br />
Exchange server.<br />
Select whether to use<br />
a secure connection<br />
and a client certificate.<br />
(If you choose to use a<br />
client certificate, touch<br />
Client certificate<br />
to add the correct<br />
certificate.) Touch<br />
Next.
Composing an <strong>Email</strong> with a Photo Attachment<br />
1. Touch the <strong>Email</strong><br />
icon. If the <strong>Email</strong><br />
icon is not on your<br />
home page, go to<br />
Apps > <strong>Email</strong>.<br />
2. Touch the<br />
Compose icon in<br />
the upper right of<br />
the screen.<br />
3. Using the<br />
keyboard, enter<br />
the email address<br />
of the recipient.<br />
4. Touch the Subject<br />
field and type a<br />
subject.<br />
5. Touch the text box<br />
and type the text of<br />
the email.<br />
6. Touch Attach to add<br />
an attachment. Select<br />
one of the available<br />
options: Images, My<br />
Files, Take Picture,<br />
Video, Record Video,<br />
Audio, Record Audio,<br />
S Note, Calendar,<br />
Contacts, or Location.<br />
For this example,<br />
select Images.<br />
7. Select Dropbox or<br />
Gallery, and choose<br />
whether to use this<br />
service Always or<br />
Just once.<br />
8. Select a picture<br />
from the Gallery.
Composing an <strong>Email</strong> with a Photo Attachment (Continued)<br />
9. Touch the Send<br />
icon to send the<br />
message.