INSTALLATION MANUAL/USER'S MANUAL - Dural Irrigation
INSTALLATION MANUAL/USER'S MANUAL - Dural Irrigation
INSTALLATION MANUAL/USER'S MANUAL - Dural Irrigation

Create successful ePaper yourself
Turn your PDF publications into a flip-book with our unique Google optimized e-Paper software.
07WTM002887 57004-24 rJ.qxd 2/13/07 11:51 AM Page 10<br />
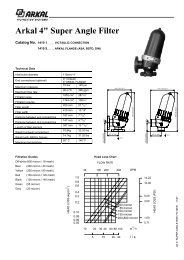
RAIN DELAY<br />
01 JAN 2004<br />
0ff HRS 24<br />
Single Station<br />
This option is most commonly used for testing a specific station or<br />
for additional watering of a specific station. Manual operation is<br />
accomplished by using the Watering Duration Slide Switches.<br />
Important: Only one station will be active at a time. The last station set<br />
to the <strong>MANUAL</strong> ON position will be active (watering).<br />
SINGLE STATION—WITHOUT WATERING DURATION<br />
1. Ensure the rotary selector is on the AUTO position.<br />
2. To activate the station, move the station Watering Duration<br />
Slide Switch to the <strong>MANUAL</strong> ON position (fully up). The<br />
display will indicate “<strong>MANUAL</strong> ON” and the station number<br />
being activated. [See Figure 15]<br />
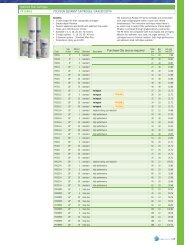
<strong>MANUAL</strong> ON<br />
STATION 2<br />
AM<br />
6:30<br />
TH<br />
SINGLE STATION—WITH WATERING DURATION<br />
1. Follow steps 1 and 2 above.<br />
2. Move the station Watering Duration Slide Switch to the<br />
desired watering duration.<br />
3. When watering is complete, return the Watering Duration<br />
Slide Switch to the Watering Duration previously set for<br />
automatic operation.<br />
Multiple Stations<br />
ENGLISH<br />
Water Budgeting<br />
Figure 13: “Rain Delay” set for 24 hours<br />
Water Budgeting is a simple way to adjust your watering duration to<br />
match seasonal watering needs. Water Budgeting works by increasing<br />
or decreasing watering duration for all stations in all programs.<br />
Adjustment range is from 20% to 200% by increments of 10%. The<br />
default value is 100%.<br />
3. To turn off manual watering, move the Watering Duration<br />
Slide Switch to the <strong>MANUAL</strong> OFF position.<br />
4. Remember to return the Watering Duration Slide Switch to<br />
the Watering Duration previously set for automatic operation.<br />
This option is most commonly used during unseasonably dry or hot<br />
weather. This option allows you to manually water without adjusting<br />
and resetting the Watering Duration Slide Switches.<br />
<strong>MANUAL</strong> TEST<br />
This feature allows the homeowner to run each station 1 minute to<br />
confirm all stations are working properly.<br />
To Run a Test Cycle:<br />
1. Ensure the rotary selector is on the AUTO position.<br />
2. Press the <strong>MANUAL</strong> button once [See Figure 16]<br />
3. Press ENTER to begin, and CLEAR to stop test cycle.<br />
TO SET BUDGETING:<br />
10<br />
1. Turn rotary dial to •BUDGETING position [See Figure 14]<br />
2. To increase or decrease the percentage, press the + or - button.<br />
3. Press ENTER to save setting.<br />
Section 5: Manual Operation<br />
The Orbit ® sprinkler timer allows you 2 options to operate your<br />
sprinklers manually.<br />
Single station<br />
Multiple stations<br />
Note: If a manual operation is started during an automatic program<br />
cycle, the automatic program cycle will be cancelled.<br />
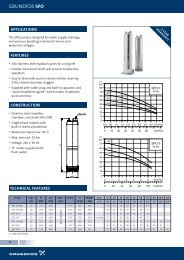
SET<br />
BUDGET VALUE<br />
100 %<br />
Figure 14: Set “Water Budgeting”<br />
Figure 15: Manual Watering One Station<br />
A<br />
B<br />
CTEST ALL<br />
Figure 16: Display – “Test Cycle” selected<br />
Note: This function will activate all stations even those with the slide control<br />
in the manual off position.<br />
MULTIPLE STATIONS—WATER ALL STATIONS ONCE<br />
This can be especially helpful if you happen to experience unusually<br />
warm weather. Each station will water once, in sequence, based on<br />
each station’s Watering Duration setting.<br />
Note: Program settings (A, B, or C) will not affect whether a station<br />
waters or not. If you do not want a station to water, move the Watering<br />
Duration Slide Switch to the <strong>MANUAL</strong> OFF position.<br />
1. Ensure the rotary selector is on the AUTO position.<br />
2. Press the <strong>MANUAL</strong> button once.<br />
3. Continue to press the NEXT button until you see “A B C<br />
Extra All” [See Figure 17].<br />
4. Press the ENTER button, within 30 seconds, to activate<br />
manual watering.<br />
11