INSTALLATION MANUAL/USER'S MANUAL - Dural Irrigation
INSTALLATION MANUAL/USER'S MANUAL - Dural Irrigation
INSTALLATION MANUAL/USER'S MANUAL - Dural Irrigation

Create successful ePaper yourself
Turn your PDF publications into a flip-book with our unique Google optimized e-Paper software.
07WTM002887 57004-24 rJ.qxd 2/13/07 11:51 AM Page 1<br />
<strong>INSTALLATION</strong> <strong>MANUAL</strong>/USER’S <strong>MANUAL</strong><br />
Sprinkler Timers by Orbit ®<br />
<strong>MANUAL</strong> DE INSTALACIÓN / <strong>MANUAL</strong> DEL USUARIO<br />
Controladores para sistemas de aspersión Orbit ®<br />
MODELS:<br />
57004, 57006, 57008, 57012, 57122, 57254, 57256, 57258, 57252,<br />
57292, 57294, 57296, 57606, 57332, 57344, 57346, 57348, 57342,<br />
57334, 57336, 57338, 57298, 57392, 57396, 57384, 57386, 57388,<br />
57382, 91024, 91026, 91028, 91016, 91012, 94004, 94006, 94008,<br />
94002, 94024, 94026, 94028, 94022<br />
PN 57004-24 Rev J
07WTM002887 57004-24 rJ.qxd 2/13/07 11:51 AM Page 2<br />
Table of Contents<br />
ENGLISH<br />
• Introduction . . . . . . . . . . . . . . . . . . . . . . . . . . . . . . . . . . . . . . . .2<br />
• Getting Started . . . . . . . . . . . . . . . . . . . . . . . . . . . . . . . . . . . . . . .3<br />
• Programming . . . . . . . . . . . . . . . . . . . . . . . . . . . . . . . . . . . . . . . .5<br />
• Automatic Operation and Commonly Used Functions . . . . . . . .9<br />
• Manual Operation . . . . . . . . . . . . . . . . . . . . . . . . . . . . . . . . . . .10<br />
• Additional Features . . . . . . . . . . . . . . . . . . . . . . . . . . . . . . . . . .12<br />
• Installation of Indoor Mount Sprinkler Timer . . . . . . . . . . . . . .14<br />
• Wiring Valves, Sprinkler Timer, Pump Start and Master Valve . .15<br />
• Diagnostics Circuit Breaker . . . . . . . . . . . . . . . . . . . . . . . . . . . .17<br />
• Trouble Shooting . . . . . . . . . . . . . . . . . . . . . . . . . . . . . . . . . . . .18<br />
• Glossary of Terms . . . . . . . . . . . . . . . . . . . . . . . . . . . . . . . . . . .19<br />
• Appendix A: Installation of Outdoor Mount Sprinkler Timer . .20<br />
• Appendix B: Rain Sensor and Terminals and Bypass Switch . . .23<br />
ESPAÑOL<br />
• Introducción . . . . . . . . . . . . . . . . . . . . . . . . . . . . . . . . . . . . . . .24<br />
• Inicio . . . . . . . . . . . . . . . . . . . . . . . . . . . . . . . . . . . . . . . . . . . . .25<br />
• Programación . . . . . . . . . . . . . . . . . . . . . . . . . . . . . . . . . . . . . . .27<br />
• Operación automática y funciones de uso común . . . . . . . . . . .31<br />
• Operación manual . . . . . . . . . . . . . . . . . . . . . . . . . . . . . . . . . . .32<br />
• Funciones adicionales . . . . . . . . . . . . . . . . . . . . . . . . . . . . . . . .34<br />
• Instalación del programador de riego en interiores . . . . . . . . . .36<br />
• Conexión de válvulas, programador de riego,<br />
inicio con bomba y válvulas maestras . . . . . . . . . . . . . . . . . . . .37<br />
• Diagnósticos del interruptor de circuito . . . . . . . . . . . . . . . . . . .39<br />
• Solución de problemas . . . . . . . . . . . . . . . . . . . . . . . . . . . . . . .40<br />
• Glosario de términos . . . . . . . . . . . . . . . . . . . . . . . . . . . . . . . . .41<br />
• Apéndice A: Instalación del programador de riego<br />
en interiores y exteriores . . . . . . . . . . . . . . . . . . . . . . . . . . . . . .42<br />
• Apéndice B: Sensor de lluvia y conmutador de<br />
derivación del sensor de lluvia . . . . . . . . . . . . . . . . . . . . . . . . . .45<br />
Section 1: Introduction<br />
Thank you for selecting an Orbit ® sprinkler timer. Orbit ® designers<br />
have combined the simplicity of slide switches with the accuracy of<br />
digital electronics, giving you a sprinkler timer that is both easy to<br />
program and extremely versatile.<br />
Please read the manual completely before you install or use this<br />
sprinkler timer.<br />
To assist you we have included some notable features to<br />
this manual.<br />
1. Glossary of the most common terms (see page 19)<br />
2. Blue Text relates to the buttons used for programming<br />
3. Blue Underlined Text relates to stop positions for both<br />
rotary dial and slide switches.<br />
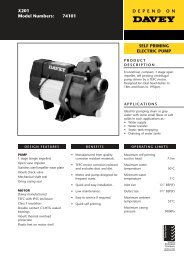
Controls Commonly Used<br />
A Digital Display with Text Messaging<br />
A large LCD (Liquid Crystal Display) shows the time of day and<br />
indicates many of the programming settings. Interactive text messaging<br />
simplifies programming and current sprinkler timer status.<br />
B Programming Buttons<br />
These 7 buttons are used for programming and other operations.<br />
C Rotary Dial<br />
This dial is used for programming, reviewing and operating the<br />
sprinkler timer.<br />
D Slide Switches – Watering Duration<br />
The vertical slide switches permit the following functions:<br />
1. To set the watering duration for each station<br />
2. To manually run an individual station<br />
3. “Dial Set by Minute” – Permits 1 minute increment time settings,<br />
using the + or – buttons.<br />
E Program Slide Switches<br />
The program slide switches allows the user to switch to one of three<br />
programs A, B or C.<br />
a<br />
b f<br />
e<br />
Figure 1: Front view of sprinkler timer<br />
c<br />
d<br />
Section 2: Getting Started<br />
Programming the sprinkler timer can be accomplished in just a few<br />
basic steps. Before you begin programming, it is important to:<br />
• Install the batteries<br />
• Reset the sprinkler timer<br />
• Select the preferred language<br />
• Set the time of day and date<br />
• Determine a watering plan.<br />
Installing the Batteries<br />
This sprinkler timer requires two AA alkaline batteries to store the<br />
program in memory during AC power loss. Fully charged batteries<br />
should provide sufficient power for approximately one year of<br />
protection. Annual battery replacement is recommended.<br />
• Slide the battery cover to the left [See Figure 1]<br />
• Insert two AA alkaline batteries<br />
• Replace the battery cover<br />
Weak or missing batteries can cause the time, date, and program to<br />
be erased after a power failure. If this happens, you will need to<br />
install fully charged batteries and reprogram the sprinkler timer.<br />
Note: Batteries only retain the program in memory. They will not operate<br />
the valves in your sprinkling system.<br />
Resetting the Sprinkler Timer<br />
If this is the first time the sprinkler timer has been programmed, you<br />
should press the small recessed button labeled RESET. Pressing reset<br />
does not affect the factory installed fail-safe program. [See Figure 2]<br />
Do not press the reset button again unless you want to completely<br />
remove all your programming.<br />
ENGLISH<br />
2<br />
F Rain Delay<br />
This button also acts as a shift key for the rotary dial stop positions<br />
in purple.<br />
Figure 2: Programming Keys<br />
3
07WTM002887 57004-24 rJ.qxd 2/13/07 11:51 AM Page 4<br />
Select the Preferred Language<br />
The language of the LCD display can be set for English, Spanish<br />
and French.<br />
1. Turn the rotary dial to Language position.<br />
2. Press the RAIN DELAY button once.<br />
3. Press the NEXT button until you reach the desired language<br />
[See Figure 3]<br />
4. Press ENTER to confirm your selection.<br />
5. Press the RAIN DELAY button or turn the rotary dial to exit<br />
this mode.<br />
Set the Time of Day and Date<br />
Turn the rotary dial to the DATE & TIME position. [See Figure 4]<br />
• Press and hold the + button to advance the clock to the correct<br />
time of day. Use the – button to go in reverse. When the<br />
correct time of day is reached, press the ENTER button to<br />
lock in the time.<br />
• Press the + and – buttons to set the correct year, then<br />
press ENTER.<br />
• Press the + and – buttons to set the correct month, then<br />
press ENTER.<br />
Based on the above information your water program may look like this:<br />
Station<br />
1<br />
2<br />
3<br />
4<br />
Program<br />
A<br />
A<br />
A<br />
B<br />
Watering<br />
Option<br />
Days of Week<br />
Days of Week<br />
Days of Week<br />
Odd/Even<br />
Days<br />
M, W, Sat<br />
M, W, Sat<br />
M, W, Sat<br />
Every other day<br />
Start<br />
Time<br />
5:00 AM<br />
6:45 AM<br />
Duration<br />
Minutes<br />
15 min<br />
15 min<br />
15 min<br />
30 min<br />
Location<br />
Front Strip<br />
Front, North<br />
Front, South<br />
Back, North<br />
Sprinkler<br />
Spray Heads<br />
Spray Heads<br />
Spray Heads<br />
Gear Drive<br />
Plants<br />
Grass<br />
Grass<br />
Grass<br />
Grass<br />
ENGLISH<br />
SET LANGUAGE<br />
ENGLISH<br />
• Press the + and – buttons to set the correct date, then<br />
press ENTER.<br />
The display will show the correct time and date.<br />
5<br />
6<br />
B<br />
C<br />
Odd/Even<br />
Interval<br />
Every other day<br />
Every 5 days<br />
9:00 PM<br />
30 min<br />
30 min<br />
Back, South<br />
Front<br />
Gear Drive<br />
Shrub Head<br />
Grass<br />
Shrubs and Flowers<br />
Figure 3: LCD Display Language Selection<br />
Caution: If a watering schedule is not entered into the sprinkler timer,<br />
the factory installed fail-safe program will turn on each station every day<br />
at 5:00am for 10 minutes. To avoid accidental watering, either turn the<br />
rotary switch to OFF or enter a watering schedule.<br />
Determine a Watering Plan<br />
To help you visualize how best to program the sprinkler timer, it<br />
might be helpful to make a watering plan on paper. This will help<br />
you establish which days and times you want to water.<br />
Take the information above and record your water plan on the<br />
supplied label and place it on the inside of your timer.<br />
Section 3: Programming<br />
This sprinkler timer allows the flexibility of using 3 separate programs A,<br />
B, and C. You may program one or all based on your watering needs.<br />
1. Start Times for Program A, B, or C<br />
4<br />
SET TIME<br />
01 JAN 2004<br />
AM<br />
12:00<br />
TH<br />
Figure 4: LCD Display Setting Time<br />
1. For each station (or valve) write down the watering location,<br />
the type of sprinkler head and the plants to be watered.<br />
2. Using this list, determine the recommended watering duration<br />
(for each type of sprinkler head and the vegetation to be<br />
watered) and frequency for each station.<br />
Important: Identify any imposed watering restrictions through your<br />
local water district.<br />
3. Determine, based on step 2, the ideal watering option for each<br />
station (Days of Week, Watering Interval or Odd/Even Days).<br />
Note: The cycle start time is the time the program begins watering the<br />
first station. Cycle start times do not correspond to specific stations. If you<br />
enter more than one cycle start time, all stations programmed to operate<br />
will water again (in sequence).<br />
The way you set the cycle start time is the same for all programs.<br />
To set the cycle start times for each program you will be using,<br />
do the following:<br />
• Turn the rotary selector to the CYCLE START TIMES position<br />
in the program that you want to set up. The display will show<br />
an A or B or C depending on which program you have selected.<br />
[See Figure 5]<br />
A<br />
SET PROGRAM<br />
START TIME 1<br />
--:--<br />
Figure 5: Setting start time<br />
5
07WTM002887 57004-24 rJ.qxd 2/13/07 11:51 AM Page 6<br />
• Set the time you want to begin watering for cycle start time 1<br />
using the + or – buttons, then press the ENTER button. For<br />
additional cycle start times, simply press NEXT to advance to<br />
the next cycle start time and repeat this procedure by using the<br />
+ and – buttons to enter the time and then press ENTER.<br />
Important: Additional start times will repeat the watering program.<br />
Generally, only one cycle start time is required for each program (A, B, or C).<br />
A<br />
SET WATERING<br />
DAYS-WEEKDAY<br />
MO TU WE TH FR SA SU ODD EVEN INTERVAL<br />
A<br />
SET WATERING<br />
DAYS-INTERVAL<br />
--DAYS<br />
MO TU WE TH FR SA SU ODD EVEN INTERVAL<br />
Figure 8: Selecting “Interval Watering”<br />
A<br />
SET WATERING<br />
DAYS-ODDDAY<br />
EVERY<br />
2DAYS<br />
MO TU WE TH FR SA SU ODD EVEN INTERVAL<br />
Figure 9: Selecting “Odd/Even Watering”<br />
ENGLISH<br />
Note: You cannot set a cycle start time for each station. Stations can<br />
be assigned to either Program A or B or C. Each program can have<br />
up to four cycle start times. Stations assigned to a program will turn<br />
on sequentially according to the cycle start times assigned.<br />
2. Selecting the Watering Frequency in<br />
Programs A, B, or C<br />
This sprinkler timer will allow you to select watering frequency<br />
based on “Day(s) of the Week”, “Intervals” (1 to 32 days), or “Odd<br />
or Even Days”. All of these options are available to use in programs<br />
A, B and C.<br />
By turning the dial to WATERING DAYS (in program A, B or C) the<br />
LCD displays the 3 watering options. [See Figure 6]<br />
• Mo Tu We Th Fr Sa Su applies to Day(s) of Week<br />
watering option<br />
• Odd Even applies to the Odd or Even watering option<br />
• Interval applies to the Interval watering option<br />
“DAY(S) OF WEEK” WATERING OPTION<br />
The Day(s) of Week option allows you to select specific days of the<br />
week to water (e.g. Monday, Wednesday and Saturday).<br />
Figure 6: Selecting Watering Days<br />
A<br />
SET WATERING<br />
DAYS-WEEKDAY<br />
MO TU WE TH FR SA SU ODD EVEN INTERVAL<br />
Figure 7: Selecting “Days of Week”<br />
Important: ODD, EVEN, INTERVAL do not apply to Day(s) of Week<br />
watering option<br />
• To delete a day, previously selected, press the NEXT key until<br />
the day flashes and press the CLEAR button to deselect the day.<br />
“INTERVAL” WATERING OPTION<br />
Interval watering is used to water at an interval from 1 to 32 days.<br />
An interval of 1 will water every day; an interval of 2 will water<br />
every other day, etc.<br />
To set the watering “Interval”:<br />
• Turn the rotary dial to WATERING DAYS in A, B, or C.<br />
• Press NEXT until "interval" flashes on the display. [See Figure 8]<br />
• Select the “INTERVAL” by pressing the + or – buttons to the<br />
desired interval number and press ENTER.<br />
• To remove a previous set interval, continue to press the NEXT<br />
button until “INTERVAL” flashes (in the lower right corner)<br />
and press CLEAR. Enter a new interval or continue to press<br />
the NEXT button to select a different watering option.<br />
“ODD OR EVEN” WATERING OPTION<br />
The sprinkler timer can be selected to only water on Odd days or<br />
Even days. The odd/even schedule is based on the date. You can also<br />
choose to water on odd or even days with spaced intervals.<br />
Example: If you select Odd days with an interval of 2. The program will<br />
water every other odd day (or every 4 days)<br />
To set watering for ODD Days:<br />
• Turn the rotary dial to WATERING DAYS in A, B, or C.<br />
• Press NEXT until "ODD" flashes on the display. If you wish to<br />
water every odd day, press ENTER to confirm the programming.<br />
[See Figure 9]<br />
• If you wish to water on odd days but less frequently than<br />
every other day, press + or – to set the interval from 1 through<br />
5 for watering.<br />
• Press ENTER to save.<br />
To set watering for Even Days proceed with the above steps but<br />
select “EVEN” on the display.<br />
Note: The sprinkler timer will NOT water on the first day the program is<br />
entered or modified if the start time(s) have already passed.<br />
To set Day(s) of Week Option:<br />
• Turn the rotary dial to WATERING DAYS in A, B, or C.<br />
• Press NEXT until the desired day of the week flashes. Press<br />
ENTER to select that day. Day(s) selected will have a water<br />
drop icon over the day of week. Continue until all the<br />
desired days are selected. [See Figure 7]<br />
6<br />
7
07WTM002887 57004-24 rJ.qxd 2/13/07 11:51 AM Page 8<br />
3. Set Watering Durations<br />
This sprinkler timer allows 2 ways to set water duration for each station.<br />
PROGRAM SLIDE SWITCHES<br />
The Program Slide Switches allow you to select a program (A, B or<br />
C) for individual stations. [See Figure 12]<br />
IMPORTANT: This timer contains a Rain Sensor Bypass Switch.<br />
If the rain sensor switch is in the “on” position and no sensor is<br />
connected the sprinkler timer will not operate.<br />
ENGLISH<br />
SLIDE SWITCH<br />
• Slide each Water Duration Slide Switch to its desired time<br />
(from 2 to 120 minutes) for each station. [See Figure 10]<br />
Using information collected in "Establishing a Water Plan" on page<br />
5, select program “A”, “B” or “C” for each station.<br />
Station Advance<br />
When the sprinkler timer is operating, press NEXT to end watering<br />
at the current station and move on to the next station.<br />
DIAL SET BY MINUTE<br />
A watering duration can be set in one minute increments. To do so<br />
you must use the Dial Set by Minute function. The “Dial Set by<br />
Minute” station duration can be set for each individual station.<br />
• Slide the Watering Duration Slide Switch to the DIAL SET<br />
BY MINUTE position (indicated by the solid white bar) for<br />
each station. [See Figure 11]<br />
• Turn dial to the •STATION DURATION.<br />
• Press RAIN DELAY button to access the Station Duration<br />
function.<br />
• The LCD will allow you to set the watering duration for station 1.<br />
• Using the + or – enter the watering duration for station 1 and<br />
press ENTER to save.<br />
• Proceed and enter watering durations for the remaining stations.<br />
• To delete the water duration for a station, press ENTER until<br />
the station appears in the LCD then press CLEAR.<br />
Important: If the slide switch is not in the “Dial Set By Minute” position,<br />
the timer will not use the entered duration.<br />
Note: The watering duration setting will be used by programs A, B and C.<br />
You cannot enter different watering durations for program A, B and C.<br />
TIP:<br />
• To inactivate a station, move the slide switch to the <strong>MANUAL</strong><br />
OFF position.<br />
Figure 10: “Slide Switch durations” set at 10 minutes and 20 minutes<br />
SET WATERING<br />
STN 1 TIME<br />
MINS<br />
TO<br />
---<br />
RUN<br />
Figure 11: “Dial Set by Minute”<br />
Figure 12: “Program Slide Switches” set on program A and B<br />
REVIEWING AND CHANGING YOUR PROGRAM<br />
The Orbit ® sprinkler timer allows an easy to review watering plan.<br />
For example, to review Program “A” watering cycle start times, simply<br />
turn the rotary selector to the CYCLE START TIMES position in<br />
Program “A” and check the times that have been entered. Using the<br />
NEXT button, you can advance through the schedule without fear of<br />
disturbing any programming.<br />
If you want to change the cycle start times, watering days, or watering<br />
intervals, simply follow the directions for that program modification.<br />
After reviewing or changing a watering schedule, remember to turn<br />
the rotary selector back to AUTO if you want the sprinkler timer to<br />
automatically follow your plan.<br />
Section 4: Automatic Operation and<br />
Commonly Used Features<br />
Caution: This appliance is not intended for use by young children or<br />
infirm persons without supervision. Young children should be supervised to<br />
ensure that they do not play with the appliance.<br />
Ready for Automatic Operation<br />
After programming is complete, turn the rotary selector to AUTO.<br />
The sprinkler timer is now fully programmed and ready to use in the<br />
automatic mode. In automatic mode, each station will operate<br />
sequentially, starting with Program A.<br />
Timer Off<br />
Turn the Rotary Dial to the OFF position. This prevents the sprinkler<br />
timer from watering in Automatic and Manual modes.<br />
Rain Delay<br />
Rain delay allows you to delay your sprinkler timer from watering<br />
for a set period of time. Delay settings are 24, 48, and 72 hours and<br />
from 4-99 days.<br />
ACTIVATE THE "RAIN DELAY" FUNCTION:<br />
1. Ensure the rotary selector is on the AUTO position<br />
2. Press the RAIN DELAY button to automatically delay watering<br />
for 24 hours. [See Figure 13]<br />
3. If a longer Rain Delay is desired, use the + or - button to<br />
increase or decrease the setting.<br />
4. Press ENTER or wait 30 seconds and the selected Rain Delay<br />
will begin.<br />
5. The CLEAR button stops the Rain Delay and scheduled watering<br />
will resume.<br />
At the end of the selected Rain Delay amount of time, automatic<br />
watering resumes.<br />
Note: Manual watering will override Rain Delay. When manual watering<br />
is complete, the Rain Delay will resume.<br />
While in rain delay mode, the sprinkler timer will display the<br />
remaining hours. No other buttons, besides CLEAR, will be accepted<br />
while the sprinkler timer is in the rain delay mode.<br />
8<br />
9
07WTM002887 57004-24 rJ.qxd 2/13/07 11:51 AM Page 10<br />
RAIN DELAY<br />
01 JAN 2004<br />
0ff HRS 24<br />
Single Station<br />
This option is most commonly used for testing a specific station or<br />
for additional watering of a specific station. Manual operation is<br />
accomplished by using the Watering Duration Slide Switches.<br />
Important: Only one station will be active at a time. The last station set<br />
to the <strong>MANUAL</strong> ON position will be active (watering).<br />
SINGLE STATION—WITHOUT WATERING DURATION<br />
1. Ensure the rotary selector is on the AUTO position.<br />
2. To activate the station, move the station Watering Duration<br />
Slide Switch to the <strong>MANUAL</strong> ON position (fully up). The<br />
display will indicate “<strong>MANUAL</strong> ON” and the station number<br />
being activated. [See Figure 15]<br />
<strong>MANUAL</strong> ON<br />
STATION 2<br />
AM<br />
6:30<br />
TH<br />
SINGLE STATION—WITH WATERING DURATION<br />
1. Follow steps 1 and 2 above.<br />
2. Move the station Watering Duration Slide Switch to the<br />
desired watering duration.<br />
3. When watering is complete, return the Watering Duration<br />
Slide Switch to the Watering Duration previously set for<br />
automatic operation.<br />
Multiple Stations<br />
ENGLISH<br />
Water Budgeting<br />
Figure 13: “Rain Delay” set for 24 hours<br />
Water Budgeting is a simple way to adjust your watering duration to<br />
match seasonal watering needs. Water Budgeting works by increasing<br />
or decreasing watering duration for all stations in all programs.<br />
Adjustment range is from 20% to 200% by increments of 10%. The<br />
default value is 100%.<br />
3. To turn off manual watering, move the Watering Duration<br />
Slide Switch to the <strong>MANUAL</strong> OFF position.<br />
4. Remember to return the Watering Duration Slide Switch to<br />
the Watering Duration previously set for automatic operation.<br />
This option is most commonly used during unseasonably dry or hot<br />
weather. This option allows you to manually water without adjusting<br />
and resetting the Watering Duration Slide Switches.<br />
<strong>MANUAL</strong> TEST<br />
This feature allows the homeowner to run each station 1 minute to<br />
confirm all stations are working properly.<br />
To Run a Test Cycle:<br />
1. Ensure the rotary selector is on the AUTO position.<br />
2. Press the <strong>MANUAL</strong> button once [See Figure 16]<br />
3. Press ENTER to begin, and CLEAR to stop test cycle.<br />
TO SET BUDGETING:<br />
10<br />
1. Turn rotary dial to •BUDGETING position [See Figure 14]<br />
2. To increase or decrease the percentage, press the + or - button.<br />
3. Press ENTER to save setting.<br />
Section 5: Manual Operation<br />
The Orbit ® sprinkler timer allows you 2 options to operate your<br />
sprinklers manually.<br />
Single station<br />
Multiple stations<br />
Note: If a manual operation is started during an automatic program<br />
cycle, the automatic program cycle will be cancelled.<br />
SET<br />
BUDGET VALUE<br />
100 %<br />
Figure 14: Set “Water Budgeting”<br />
Figure 15: Manual Watering One Station<br />
A<br />
B<br />
CTEST ALL<br />
Figure 16: Display – “Test Cycle” selected<br />
Note: This function will activate all stations even those with the slide control<br />
in the manual off position.<br />
MULTIPLE STATIONS—WATER ALL STATIONS ONCE<br />
This can be especially helpful if you happen to experience unusually<br />
warm weather. Each station will water once, in sequence, based on<br />
each station’s Watering Duration setting.<br />
Note: Program settings (A, B, or C) will not affect whether a station<br />
waters or not. If you do not want a station to water, move the Watering<br />
Duration Slide Switch to the <strong>MANUAL</strong> OFF position.<br />
1. Ensure the rotary selector is on the AUTO position.<br />
2. Press the <strong>MANUAL</strong> button once.<br />
3. Continue to press the NEXT button until you see “A B C<br />
Extra All” [See Figure 17].<br />
4. Press the ENTER button, within 30 seconds, to activate<br />
manual watering.<br />
11
07WTM002887 57004-24 rJ.qxd 2/13/07 11:51 AM Page 12<br />
5. To interrupt or discontinue this cycle, press the CLEAR<br />
button once.<br />
At the completion of this function, the sprinkler timer reverts back<br />
to your normal automatic watering plan.<br />
Note: If the manual operation is started during an automatic program<br />
cycle, the automatic program will be cancelled.<br />
A<br />
B<br />
C<br />
EXTRA ALL<br />
B<br />
EXTRA ALL<br />
Figure 18:<br />
Display showing manual watering,<br />
for stations assigned to program B, selected<br />
SET<br />
NO WATER DAY<br />
MO TU WE TH FR SA SU<br />
Figure 19: Display - “No Water Day”<br />
“NO WATERING PERIOD/TIME”<br />
Set Master Valve or Pump Start<br />
This sprinkler timer allows each station to operate with or without<br />
pump. If a station is set to operate with the pump, it will start two<br />
seconds before the station does.<br />
Note: A Pump Start Relay is required to operate pump. (Sold separately)<br />
TO ACTIVATE “PUMP START” FOR EACH STATION:<br />
1. Turn the rotary dial to the •PUMP position.<br />
2. Press the RAIN DELAY button once. [See Figure 21]<br />
ENGLISH<br />
Figure 17:<br />
Display showing manual watering for all programs and all active stations<br />
MULTIPLE STATIONS—WATER ONLY STATIONS ASSIGNED<br />
TO A SINGLE PROGRAM (A, B OR C)<br />
For this example we will water all stations assigned to Program B.<br />
This procedure will be the same for both Program A and C.<br />
1. Ensure the rotary selector is on the AUTO position.<br />
2. Press the <strong>MANUAL</strong> button once.<br />
3. Continue to press the NEXT button until you see “B EXTRA<br />
ALL” [See Figure 18]<br />
4. Press the ENTER button, within 30 seconds, to activate<br />
manual watering.<br />
5. To interrupt or discontinue this cycle, press the CLEAR<br />
button once.<br />
Note: In this example stations assigned to Program “B” will water one at a<br />
time in sequence.<br />
Section 6: Additional Features<br />
No Watering<br />
“No watering” allows the homeowner to input the restricted water<br />
day(s) and/or period (time), imposed by local water districts. This<br />
feature prevents the homeowner from watering during restricted<br />
days and times.<br />
“NO WATERING” DAY(S) OF WEEK<br />
When restricted day(s) are entered, all watering programs that fall on<br />
a restricted day will not water on that day.<br />
To program “No Water Day(s)”:<br />
1. Turn the rotary dial to NO WATERING<br />
2. Press the NEXT button until the desired day of week flashes<br />
and press CLEAR. [See Figure 19]<br />
Note: Days entered as No Watering days will NOT have a water drop<br />
icon above the day<br />
3. Repeat step 2 until the water drop icon is removed above all<br />
restricted days.<br />
4. To remove a “No Watering” restriction from a day press<br />
the NEXT button until the day flashes and press the ENTER<br />
button.<br />
When a restricted time is entered, all watering programs that fall<br />
on a restricted watering time will be shifted to a non-restricted day<br />
and/or time.<br />
To program “No Watering Period/Time”<br />
1. Turn the rotary dial to NO WATERING<br />
2. Press the RAIN DELAY button once. [See Figure 20]<br />
3. Enter the starting time of the “No Water Period” using the +<br />
and – buttons and press ENTER to accept time.<br />
4. Next set the ending time of the “No Water Period” using the +<br />
and – buttons and press ENTER to accept time.<br />
5. Return rotary dial to the AUTO position.<br />
SET NO WATER<br />
START PERIOD<br />
--:--<br />
Figure 20: Display - No Water Period<br />
3. If you want the pump to be active for the displayed station,<br />
press ENTER.<br />
4. If you do not want the pump to be active for the displayed<br />
station press CLEAR.<br />
5. Press NEXT to advance to the next station.<br />
6. Turn the rotary dial to exit this setting.<br />
SET PUMP<br />
STATION 1<br />
Figure 21: Display - Pump Start active for station 1<br />
12<br />
13
07WTM002887 57004-24 rJ.qxd 2/13/07 11:51 AM Page 14<br />
Station Delay<br />
This feature is commonly used by homeowners with cisterns or well<br />
water. The delay allows cisterns and wells adequate time to re-supply<br />
the reservoir.<br />
Note: Delays between stations can be programmed from 1 minute to 9 hours.<br />
TO PROGRAM STATION DELAY:<br />
1. Turn the rotary dial to •STATION DELAY [See Figure 22]<br />
2. To increase or decrease the time delay time between each station,<br />
press the + or – button.<br />
3. Press the ENTER button to save the time delay setting.<br />
4. Return the rotary dial to AUTO<br />
SET<br />
DELAY TIME<br />
0<br />
Figure 22: Display – Station Delay<br />
Section 7: Installation of Indoor Mount<br />
Sprinkler Timer<br />
3. Installing the Batteries<br />
4. Connecting the Power Supply<br />
5. Connecting Valve Wires to Sprinkler Timer<br />
Note: For installation of OUTDOOR models see Appendix A<br />
1. Selecting a Location<br />
Select a location with the following criteria:<br />
• Near an electrical outlet (Avoid using an outlet controlled by<br />
a switch)<br />
• An indoor, dry location, where operating temperatures are not<br />
below 32° or above 158° Fahrenheit (0 degrees or above 70<br />
degrees Celsius)<br />
• Avoid direct sunlight<br />
• Access to sprinkler wire (from valves)<br />
2. Mounting the Sprinkler Timer<br />
• Using the mounting template (included) mark the screw<br />
locations on the wall.<br />
• Insert a No. 8 screw (included) in the upper mark, leaving the<br />
screw head about 1/8th (3mm) out from the wall. (Use the<br />
expanding anchors in plaster or masonry if necessary.)<br />
• Slip the keyhole slot in the back of the sprinkler timer over the<br />
extended screw. [See Figure 23]<br />
• Replace the battery cover<br />
Note: Batteries alone will not operate the valves in your sprinkling system.<br />
The 24-volt transformer must be plugged in and have power to operate<br />
your system normally.<br />
Keyhole<br />
Screw holes<br />
No. 8 Screw<br />
Wall<br />
Figure 23: Mounting the Sprinkler Timer<br />
4. Connecting the Transformer<br />
• With the cover off, find the two terminal holes labeled<br />
“24VAC IN” [See Figure 25]<br />
• Insuring the transformer is not plugged in; insert one of two<br />
power leads (from the transformer) into each terminal.<br />
Note: It may be necessary to open the terminal to allow for wire insertion<br />
or removal. This is done by pressing upward on the tab located on top of<br />
the terminal.<br />
• Plug in the transformer.<br />
Warning: Do not link two or more sprinkler timers together with<br />
one transformer.<br />
24VAC-OUT SENSOR COMMON PUMP 1 2 3 4 5 6 24VAC-IN<br />
Figure 25: Connecting the Transformer<br />
Transformer<br />
ENGLISH<br />
Before installation please have the following items and tools.<br />
• 2 AA Batteries<br />
• Phillips Screwdriver<br />
• Wire Strippers<br />
Installing the sprinkler timer in 5 easy steps<br />
1. Selecting a Location<br />
2. Mounting the Sprinkler Timer<br />
• Screw a No. 8 screw through the two holes located behind the<br />
batteries in the battery compartment.<br />
3. Install the Batteries<br />
Two AA alkaline batteries are required to retain the program in memory<br />
during power loss. Annual replacement is recommended.<br />
• Remove the battery cover by sliding it to the left. [See Figure 24]<br />
• Insert two AA alkaline batteries<br />
Figure 24: Battery Compartment<br />
Section 8: Wiring Valves, Sprinkler Timer,<br />
Pump Start and Master Valves<br />
1. Wiring the Electric Valves<br />
Note: If the distance between the sprinkler timer and valves is under 700'<br />
(210 m), use Orbit ® sprinkler wire or 20 gauge (AWG) plastic jacketed<br />
thermostat wire to connect the sprinkler timer to the valves. If the distance<br />
is over 700' (210 m), use 16 gauge (AWG) wire.<br />
14<br />
15
07WTM002887 57004-24 rJ.qxd 2/13/07 11:51 AM Page 16<br />
• Taking the sprinkler wire, strip 1/2" (12 mm) of the plastic<br />
insulation off the end of each individual wire.<br />
• Connect one wire from each valve (it doesn’t matter which<br />
wire) to a single “Common” sprinkler wire (usually white)<br />
[See Figure 26]<br />
Important: All wires should be joined together using wire nuts, solder,<br />
and/or vinyl tape. For additional protection to waterproof connections,<br />
an Orbit ® grease cap can be used.<br />
• Next connect the remaining wire from each valve to a separate<br />
colored sprinkler wire.<br />
• To avoid electrical hazards, only one valve should be connected<br />
to each station.<br />
Important: The wire can be buried in the ground; however, for more<br />
protection wires can be pulled through PVC pipe and buried underground.<br />
Be careful to avoid burying the wires in locations where they could be<br />
damaged by digging or trenching in the future.<br />
Zone Wires<br />
Timer<br />
Common Wire<br />
Remote Control<br />
Valves<br />
Sprinklers<br />
Station 1<br />
Station 2<br />
2. Connecting Valve Wires to the Sprinkler Timer<br />
• Remove the terminal compartment cover.<br />
• Strip 1/4" (6 mm) of the plastic insulation off the end of<br />
each wire.<br />
• Determine which valve you want to connect to which station.<br />
Connect each sprinkler wire (excluding the “Common” wire)<br />
to a separate station terminal (numbered above each blue tab)<br />
by inserting the bare wire fully into the hole under each tab.<br />
[See Figure 27]<br />
• It may be necessary to open the terminal to allow for wire<br />
insertion or removal. To do this, simply press upward on the<br />
tab located on top of the terminal.<br />
• Connect the common wire to the terminal (white in color)<br />
labeled “COMMON”.<br />
Note: Only insert one wire into each terminal. If more than two common<br />
wires are required, splice several together so only one wire runs into each of<br />
the two “Common” terminals. Protect the splice connection with a wire nut.<br />
24VAC-OUT SENSOR COMMON PUMP 1 2 3 4 5 6 24VAC-IN<br />
Common Wire<br />
3. Pump Start & Master Valve<br />
This sprinkler timer allows a master valve or pump start relay to<br />
operate whenever a station is on.<br />
Note: If you are activating a pump from this timer, you must purchase a<br />
Pump Start Relay.<br />
From the pump start relay (or master valve); connect one wire to the<br />
“Pump” terminal and the other wire to the “Common” terminal. [See<br />
Figure 28]<br />
Section 9: Diagnostics Circuit Breaker<br />
Smart-Scan ® Diagnostic Fault Sensing<br />
A diagnostic fault sensor will automatically scan for the presence of<br />
a faulty solenoid or wiring short in a valve during each watering<br />
sequence. If a faulty station is detected, the sprinkler timer will move<br />
to the next working station. Smart-Scan ® also detects faulty wiring<br />
for the Pump or Master Control. Upon detection watering cycle is<br />
discontinued.<br />
Fault Notification<br />
• Faulty Station - “FAULT STN” and station number, is displayed.<br />
Note: When multiple faulty stations are detected, only the last<br />
faulty station will be displayed.<br />
• Faulty wiring for pump/master control - “PUMP FAULT”<br />
is displayed.<br />
Correcting the Fault:<br />
1. First repair the short in the wiring or replace the faulty solenoid.<br />
2. Test the station by operating a manual watering sequence.<br />
3. If the short is not detected after a few seconds, the fault<br />
notification message will be terminated.<br />
4. If the message continues, a short in the wiring still exists.<br />
PUMP COM<br />
TIMER<br />
24v<br />
Coil<br />
PUMP START RELAY<br />
To Pump<br />
To Power<br />
Figure 28: Connecting pump start or master valve<br />
Internal Auto-Resetting Electronic Circuit<br />
Breaker<br />
The sprinkler timer is equipped with an internal electronic self-resetting<br />
circuit breaker.<br />
Possible causes of a circuit breaker tripping:<br />
1. If lightning strikes nearby.<br />
2. When the power supply has an electric spike.<br />
3. If a station has a wiring short.<br />
Whenever one of these conditions occurs, the electronic circuit<br />
breaker may trip causing the station output from the sprinkler timer<br />
to be halted momentarily. The batteries will continue to store the<br />
program information and activate the LCD. After a few moments, the<br />
sprinkler timer will automatically retest the circuit to see if the condition<br />
has stopped. If so, the circuit breaker will reset itself.<br />
ENGLISH<br />
Station 3<br />
Figure 26: Connecting Sprinkler Wires to Valves<br />
Station Valves<br />
Figure 27: Connecting Sprinkler Wire<br />
16<br />
17
07WTM002887 57004-24 rJ.qxd 2/13/07 11:51 AM Page 18<br />
Section 10: Trouble Shooting<br />
Symptom Cause Correction<br />
Glossary of Terms<br />
TERM<br />
DEFINITION<br />
ENGLISH<br />
LCD<br />
Displays<br />
Watering<br />
Problems<br />
POWER RESET<br />
FAULT STN<br />
PUMP FAULT<br />
NO AC<br />
Blank or partial LCD<br />
One or more stations do<br />
not turn on<br />
Stations turn on when<br />
they are not supposed to<br />
A Station will turn off<br />
LCD shows watering<br />
program running but<br />
sprinklers do not turn on<br />
Power Surge<br />
Faulty solenoid<br />
Short in sprinkler wire<br />
Short in sprinkler wire going to pump<br />
Transformer not plugged in (indoor models)<br />
Permanent wiring is not connected or connected improperly<br />
(outdoor models)<br />
Main residential power is not on<br />
Missing or low battery and no AC power<br />
Reset button needs to be pushed<br />
Programming incorrect<br />
Flow control stem on valve is turned off<br />
Watering Duration Slide Switch is on "<strong>MANUAL</strong> OFF"<br />
Watering Duration Slide Switch is on "DIAL SET BY MINUTE"<br />
Program Slide Switch is not on the correct Program (A, B, C)<br />
Sprinkler Wire is not connected to timer or valve<br />
The rotary dial is not on "Auto"<br />
Water Supply is not supplying water<br />
Excessive Water Pressure<br />
More that one start time is programmed and/ or with overlapping<br />
"start times" or "programs"<br />
Water Restrictions program is preventing watering<br />
Station Delay is active<br />
Watering Duration Slide Switch is on <strong>MANUAL</strong> ON<br />
Valve may be clogged by debris<br />
Rain Sensor Bypass switch is “ON” but no rain sensor is<br />
connected.<br />
See Page 3<br />
Replace<br />
Check wire connections<br />
Look for cuts in sprinkler wire or replace<br />
Look for cuts in sprinkler wire or replace<br />
Ensure transform is securely plugged in<br />
See Page 21<br />
Check circuit breaker or fuse<br />
Replace batteries and check AC power<br />
Re-enter program(s)<br />
See Page 5<br />
Check valve<br />
Slide the switch to a watering duration<br />
Enter a watering duration (See page 8)<br />
or slide the switch to a watering duration<br />
Slide the Program Switch to the correct<br />
program<br />
Connect wiring<br />
Turn the dial to Auto<br />
Make sure main valve is turned on<br />
Install a pressure reducer<br />
Review programming (See page 9)<br />
See Page 12<br />
See Page 14<br />
Slide Watering Duration Slide Switch to<br />
"<strong>MANUAL</strong> OFF"<br />
Clean Valve<br />
Turn rain sensor switch “OFF”<br />
Controller<br />
Cycle Start Time<br />
<strong>Irrigation</strong> Valve,<br />
Automatic<br />
Master Valve<br />
Multiple Start times<br />
Overlapping Programs<br />
Program (A, B or C)<br />
Rain Delay<br />
Solenoid<br />
Sprinkler Timer<br />
Station<br />
Valve<br />
Watering Option<br />
Watering Program<br />
Watering Restriction<br />
Zones<br />
See sprinkler timer<br />
The time the program begins watering the first station<br />
Used in conjunction with sprinkler timers and are a convenient way of delivering water to lawns,<br />
plants and gardens<br />
A valve that prohibits water from reaching "Station Valves"<br />
A feature that allows a program to be operated multiple times on the same day<br />
When a "Start Time" is set before the previous program has completed<br />
Consists of 1 or more "Start Time(s)," a "Watering Option" (Days of Week, Interval or Odd/Even Days)<br />
and what stations will water<br />
A feature that prevents the sprinkler timer from running it's scheduled watering program for a<br />
specific duration<br />
The electrical part on an irrigation valve that opens and closes the valve<br />
A device that is responsible for turning an automatic irrigation system on and off<br />
An area where the irrigation is all controlled by a single control valve<br />
See irrigation valve<br />
Consists of Days of Week, Interval or Odd/Even Days use in programming<br />
See program<br />
Specific days and/or times that local municipalities prohibit watering<br />
See station<br />
18<br />
19
07WTM002887 57004-24 rJ.qxd 2/13/07 11:51 AM Page 20<br />
Appendix A: Installation of Indoor-Outdoor<br />
Sprinkler Timers<br />
1. Selecting a Location<br />
Select a location with the following criteria:<br />
• Near a power source (if hard wiring) or electrical outlet<br />
(applicable only to U.S. retail timers)<br />
• A location, where operating temperatures are not below 32° or<br />
above 158° Fahrenheit (0 degrees or above 70 degrees Celsius)<br />
• A location, with at least 7" of space is to the left of the sprinkler<br />
timer box for the door to swing open after installation<br />
Note: The sprinkler timers are weather-resistant to UL-50 and ETL ®<br />
Listed, but should not be placed in areas where continuous water could<br />
cause damage.<br />
• A location without direct sunlight<br />
• Access to sprinkler wire (from valves)<br />
Caution: Do not open the Sprinkler Timer when it is raining.<br />
Door Hinge<br />
2. Mounting Sprinkler Timer<br />
• Using the mounting template (included) mark the screw<br />
locations on the wall.<br />
• Insert a No. 8 screw (included) in the upper mark, leaving the<br />
screw head about 1/8th inch (3mm) out from the wall. (Use<br />
expanding anchors in plaster or masonry if necessary)<br />
• Remove the “Terminal Cover” by unscrewing the two screws<br />
and pulling the plastic cover forward, this reveals the “AC Sub<br />
Plate”. [See Figure A1]<br />
• Remove the “Rubber Weather Plug” from “AC Sub-Plate”.<br />
[See Figure A2]<br />
• Slip the slotted keyhole, in the back of the Sprinkler Timer,<br />
over the screw. [See Figure A3]<br />
• Making sure the Timer is level, place a No. 8 screw (included)<br />
in the center depression (located in the hole where the rubber<br />
plug was located) and tighten until the box is held firmly to<br />
the wall, but do not over-tighten.<br />
To make installation easier the Sprinkler Timer has a removable door.<br />
Slotted<br />
Hole<br />
Bottom<br />
Mounting<br />
Hole<br />
Figure A3: Back of Sprinkler Timer<br />
3. Connecting Electrical Power<br />
Caution: For outdoor installation it is recommended that a qualified<br />
electrician completes wiring in accordance with electrical codes and<br />
regulation. This sprinkler timer is intended for use with a Ground Fault<br />
Interrupter (GFI) protected circuit when used outdoors.<br />
Check the model number of your sprinkler timer: various models are<br />
configured differently to meet national requirements. The model<br />
number can be found on the back of the housing, together with<br />
other useful information.<br />
FIND YOUR MODEL BELOW AND GO TO THE<br />
APPROPRIATE SECTION<br />
Models 57396, 57392, 57384, 57386, 57388, 57382<br />
• Go to the Fitted Line Cord section below.<br />
• Outdoor Locations - Insert the line cord into a power Ground<br />
Fault Interrupter (GFI) outlet connected to a GFI circuit.<br />
• Proceed to Section 8 on page 15<br />
PREPARING FOR PERMANENT WIRING<br />
• Remove the “Terminal Cover” by unscrewing the two screws<br />
and pulling the plastic cover forward, this reveals the “AC<br />
Sub-Plate” [See Figure 30]<br />
• Remove the “AC Sub-Plate Cover,” by removing the screw<br />
(located to the right of the rubber plug).<br />
• Loosen the screw on the “Cord Restraint” and the three screws<br />
on the terminal block and remove the “Line Cord” completely.<br />
[See Figure A4]<br />
• Feed the three “Pigtail” wires of the pigtail through the “Exit<br />
Nipple,” under the “Cord Restraint”, and across to the terminal<br />
block. Connect the wires to the “Terminal Block” in the<br />
following manor:<br />
· Black “pigtail” wire – Connect to the “L” terminal (Hot)<br />
· White “pigtail” wire – Connect to the “N” terminal (Neutral)<br />
· Green “pigtail” wire – Connect to the “E” Terminal (Ground)<br />
• Ensure that the terminal screws and the “Cord Restraint”<br />
relief screw are all firmly tightened.<br />
• Replace the AC Sub-Plate and tighten screw (Do not force into<br />
place, if resistance is met check that no wires are trapped)<br />
• Proceed to “Installation using Permanent Wiring”.<br />
ENGLISH<br />
'AA' SIZE TTERY BA<br />
'AA' SIZE TTERY BA<br />
OPEN<br />
24VAC-OUT SENSOR COMMON PUMP 1 2 3 4 5 6 24VAC-IN<br />
Models 57606, 57012, 91016, 91012<br />
• For Indoor mounting go to Fitted Line Cord Installation<br />
section below<br />
• For Outdoor mounting go to Preparing for Permanent Wiring<br />
section below<br />
<strong>INSTALLATION</strong> USING PERMANENT WIRING<br />
Terminal<br />
Compartment<br />
Cover<br />
Terminal Cover Screws<br />
Figure A1: Terminal Cover Figure<br />
Rubber Plug<br />
Figure A2: AC Sub-Plate<br />
AC Sub-Plate<br />
Models 57344, 57346, 57348, 57342, 94022, 94026, 94028<br />
• Go to “Permanent Wiring” section<br />
FITTED LINE CORD <strong>INSTALLATION</strong><br />
Replacement of the supply Cord: If the supply cord is damaged it must<br />
be replaced by a service agent or similarly qualified person in order to<br />
avoid a hazard<br />
• Indoor Locations - Insert the line cord into Ground Fault<br />
Interrupter (GFI) outlet.<br />
Important: The sprinkler timer has a built-in transformer that must be<br />
connected to an AC line voltage source. Check the back of the sprinkler<br />
timer box for power requirements. Local building and electrical codes<br />
usually require that an approved electrical conduit and electrical fittings<br />
be used to connect exterior wall-mounted equipment to AC power. Please<br />
check local codes. Any permanent connection should be made by a licensed<br />
electrical contractor in accordance with the requirements of the National<br />
Electrical Code and other state and local codes.<br />
20<br />
21
07WTM002887 57004-24 rJ.qxd 2/13/07 11:51 AM Page 22<br />
Black<br />
White<br />
Green<br />
Pigtails<br />
24VAC-OUT SENSOR COMMON PUMP 1 2 3 4 5 6 24VAC-IN<br />
Exit Nipple<br />
AC Sub-Plate<br />
Cord Restraint<br />
Line Cord<br />
• Connect the source power conduit to the entrance of the junction<br />
box, following all the appropriate codes.<br />
• Connect the source wires to the wires extending from the<br />
sprinkler timer.<br />
• Take care to follow the correct color code. For USA: connect the<br />
Green for Ground, Black for Live, and White for Neutral. Often the<br />
source ground may be bare copper conductor rather than green<br />
wire. For Europe: Live is Brown and Neutral is Blue, there is no<br />
ground connection required. Be sure that all wires are connected to<br />
the proper source wire.<br />
• Make sure all connections are made with code-approved insulated<br />
connectors.<br />
• Be sure to place a weatherproof gasket and lid on the junction box.<br />
• Proceed to Section 8 on page 15<br />
Appendix B: Rain Sensor and the Rain Sensor<br />
Bypass Switch (Sensor sold separately)<br />
A rain sensor or other type of micro-switch weather sensor may be<br />
connected to the sprinkler timer. The purpose of the sensor is to<br />
stop watering when precipitation is sufficient.<br />
CONNECTING A RAIN SENSOR<br />
• Connect the rain sensor wires to the wiring terminal ports<br />
(yellow in color) labeled “Sensor” [See Figure B1]<br />
Note: Refer to your rain sensor manual for specific wiring instructions.<br />
• Place the sensor on/off switch to the “on” position to<br />
begin operation.<br />
'AA' SIZE TTERY BA<br />
'AA' SIZE TTERY BA<br />
OPEN<br />
24VAC-OUT SENSOR COMMON PUMP 1 2 3 4 5 6 24VAC-IN<br />
ENGLISH<br />
RAIN SENSOR BYPASS<br />
Caution: Do not connect the sprinkler timer to one phase of a three-phase<br />
power system used by a pump or other electrical equipment.<br />
Important: This sprinkler timer has an Exit Nipple-mounted external<br />
power connection. Use this 1/2 inch (13mm) NPT nipple to connect the<br />
sprinkler timer to a standard electrical junction box (UL Listed or equivalent<br />
or comply with IEC or EN standards or equivalent).<br />
• Turn off the AC power at the AC circuit breaker and apply an<br />
appropriate safety lockout. Verify that the power has been turned<br />
off to the installation site using an AC voltmeter set for the correct<br />
measurement range.<br />
• Use power feed wire of 14 gauge (AWG) minimum with a temperature<br />
rating of 155 degrees Fahrenheit (68 degrees Celsius) or higher.<br />
• Install the conduit and associated fittings. Connect the AC electrical<br />
power wiring to the source by following all the right codes and<br />
local standards.<br />
• Connect the junction box (not included) to the NPT nipple.<br />
[See Figure A5]<br />
22<br />
Figure A4: Removing “Line Cord”<br />
'AA' SIZE TTERY BA<br />
'AA' SIZE TTERY BA<br />
1/2" (13 mm)<br />
NPT Nipple<br />
Junction<br />
Box<br />
Wire<br />
Connectors<br />
OPEN<br />
24VAC-OUT SENSOR COMMON PUMP 1 2 3 4 5 6 24VAC-IN<br />
Figure A5: Using a Junction Box<br />
This sprinkler timer is equipped with a sensor override “on/off” switch.<br />
This switch is for use during maintenance and repairs, so the sprinkler<br />
timer can be operated even if the rain sensor is in active mode.<br />
IMPORTANT: If the rain sensor switch is in the “on” position and<br />
no sensor is connected, the sprinkler timer will not operate. To resume<br />
sprinkler timer operation place the switch in the off position.<br />
24 Volt Output Terminals<br />
Orbit ® <strong>Irrigation</strong> has equipped this sprinkler timer with 24 VAC<br />
output terminals. This allows direct 24 volt connection to the Sensor,<br />
avoiding the need to run a separate power source. This is not an input<br />
terminal and should only be used with an Environmental Sensor.<br />
Caution:<br />
1. Before connecting the sensor to the 24 VAC output terminals,<br />
turn off the power supply to the sprinkler timer.<br />
2. Only connect sensors requiring 24 volts. Connecting any device<br />
not 24 volt may cause damage to both sprinkler timer and sensor.<br />
3. Please consult with the manufacture of the sensor you<br />
are attaching.<br />
4. The appliance is not intended for use by young children or<br />
infirm persons without supervision<br />
5. Young children should be supervised to ensure that they do<br />
not play with the appliance<br />
VAC Out<br />
'AA' SIZE TTERY BA<br />
'AA' SIZE TTERY BA<br />
Figure B1:<br />
Attaching the Rain Sensor<br />
OPEN<br />
24VAC-OUT SENSOR COMMON PUMP 1 2 3 4 5 6 24VAC-IN<br />
23
07WTM002887 57004-24 rJ.qxd 2/13/07 11:51 AM Page 24<br />
ESPAÑOL<br />
Help<br />
Before returning this sprinkler timer to the store, contact Orbit ®<br />
Technical Service at: 1-800-488-6156, 1-801-299-5555<br />
Listings<br />
The sprinkler timer is tested to UL-1951 (Models 57004, 57006, 57008,<br />
57122) and UL-50 (Models 57606, 57012) standard and is ETL ® listed.<br />
Appropriate international models are CSA ® and CE ® approved.<br />
Trademark Notice<br />
Control Star ® , and Smart-Scan ® are registered trademarks of Orbit ®<br />
<strong>Irrigation</strong> Products, Inc. The information in this manual is primarily<br />
intended for the user who will establish a watering schedule and<br />
enter that schedule into the sprinkler timer. This product is intended<br />
to be used as an automatic sprinkler timer for activating 24 VAC irrigation<br />
valves, as described in this manual.<br />
Orbit ® <strong>Irrigation</strong> Limited Six Year Warranty<br />
Orbit ® <strong>Irrigation</strong> Products, Inc. warrants to its customers that its<br />
products will be free from defects in materials and workmanship<br />
for a period of six years from the date of purchase.<br />
We will replace, free of charge, the defective part or parts found to<br />
be defective under normal use and service for a period of up to six<br />
years after purchase (proof of purchase required).<br />
We reserve the right to inspect the defective part prior to replacement.<br />
Orbit ® <strong>Irrigation</strong> Products, Inc. will not be responsible for<br />
consequential or incidental cost or damage caused by the product<br />
failure. Orbit ® liability under this warranty is limited solely to the<br />
replacement or repair of defective parts.<br />
To exercise your warranty, return the unit to your dealer with a<br />
copy of the sales receipt.<br />
Safety of children: The controller is not intended for use by young<br />
children or infirm person without supervision. Young children should be<br />
supervised to ensure they do not play with controller.<br />
Sección 1: Introducción<br />
Le agradecemos su elección de un programador de riego Orbit ® . Los<br />
diseñadores de Orbit ® han combinado la simplicidad de los conmutadores<br />
deslizantes con la precisión de la electrónica digital, ofreciéndole<br />
a usted un programador fácil de usar y extremadamente versátil.<br />
Lea este manual completamente antes de instalar o usar este programador<br />
de riego.<br />
Para ayudarle, en este manual hemos incluido varias funciones<br />
importantes.<br />
1. Glosario con los términos más comunes (vea la página 41)<br />
2. Texto azul refiere a los botones usados para la programación<br />
3. Texto azul subrayado refiere a las pociones de parada para<br />
los conmutadores deslizantes y para el dial.<br />
Mandos de uso habitual<br />
A Pantalla digital con mensaje de texto<br />
Una gran pantalla LCD (de cristal líquido) muestra la hora del día<br />
e indica muchos de los ajustes del programa. Los mensajes de texto<br />
interactivos simplifican la programación y el estado del programador<br />
de riego.<br />
B Botones de programación<br />
Estos 7 botones se usan para programar, entre otras operaciones.<br />
C Dial<br />
Esta ruedecilla se usa para programar, revisar y manejar el programador<br />
de riego.<br />
D Conmutadores deslizantes – Duración del riego<br />
Los conmutadores deslizantes verticales permiten las siguientes<br />
funciones:<br />
1. Ajuste de la duración del riego para cada estación<br />
2. Ejecución manual de una estación concreta<br />
3. "Ajuste del dial por minuto" (Dial Set by Minute) – Permite<br />
ajustar la hora en el dial con incrementos de 1 minuto mediante<br />
las teclas + y –<br />
E Conmutadores deslizantes de programación<br />
Los conmutadores deslizadores de programación permite al usuario<br />
conmutar entre los programas A, B y C.<br />
b<br />
<strong>MANUAL</strong> ACT.<br />
2<br />
DURACIÓN 5<br />
ESTACIÓN 10<br />
MINUTOS 15<br />
20<br />
30<br />
45<br />
DIAL PARA<br />
AJUSTOR 60<br />
LOS MIN 120<br />
+ –<br />
<strong>MANUAL</strong> DESACTIVADO<br />
SENSOR DE<br />
LLUVIA<br />
ACT.<br />
<strong>MANUAL</strong> EFFACER APLAZAMIENTO POR LLUVIA<br />
RESTABLECER<br />
e<br />
DESACT<br />
a<br />
+ SIQUIENTE INTRO<br />
–<br />
f<br />
ESTACIONES<br />
Ilustración 1: Vista frontal del programador de riego<br />
C<br />
DÍAS DE<br />
RIEGO<br />
HORAS<br />
DE INCIO<br />
DÍAS DE<br />
RIEGO<br />
AUTO<br />
APAGADO<br />
B<br />
HORAS<br />
DE INCIO<br />
DÍAS DE<br />
RIEGO<br />
<strong>MANUAL</strong> EFFACER APLAZAMIENTO POR LLUVIA<br />
RESTABLECER<br />
+ –<br />
SIQUIENTE INTRO<br />
c<br />
A<br />
· FECHA/HORA<br />
· DUREE STATION<br />
HORAS<br />
DE INCIO<br />
· PRESUPUESTOS<br />
· IDIOMA<br />
· APLAZA.<br />
ESTACIÓN<br />
· BOMBA<br />
SIN RIEGO<br />
· DÍAS<br />
· HORA<br />
d<br />
Sección 2: Inicio<br />
Para programar este temporizador de riego sólo tendrá que seguir<br />
algunos pasos. Antes de comenzar la programación, es importante:<br />
• Instalar las pilas<br />
• Poner a cero el temporizador de riego<br />
• Seleccionar un idioma<br />
• Ajustar la hora y el día<br />
• Determinar un plan de riego.<br />
Instalar las pilas<br />
Este programador de riego requiere pilas alcalinas AA para almacenar<br />
el programa en la memoria en caso de corte de corriente (VCA). Las<br />
pilas completamente cargadas proporcionan suficiente energía para<br />
un año aproximado de protección. Es recomendable cambiar las<br />
pilas anualmente.<br />
• Corra hacia la izquierda la tapa del compartimento de pilas<br />
[Ilustración 1]<br />
• Inserte dos pilas alcalinas AA<br />
• Coloque de nuevo la tapa del portapilas<br />
Si falta alguna pila o las pilas están algo gastadas, los ajustes de hora,<br />
fecha y de programa pueden perderse tras un corte de electricidad.<br />
En tal caso, necesitará colocar pilas completamente cargadas y<br />
reprogramar el programador de riego.<br />
Nota: Las pilas sólo mantienen el programa en la memoria.<br />
No activan las válvulas en el sistema de riego.<br />
Poner a cero el temporizador de riego<br />
Si ésta es la primera vez que programa el programador de riego,<br />
pulse el pequeño botón llamado RESTABLECER. Este botón no<br />
afecta al programa de protección instalado en fábrica. [Ilustración 2]<br />
No pulse de nuevo el botón de reajuste RESTABLECER, a menos<br />
que desee eliminar completamente todos los ajustes de programación.<br />
ESPAÑOL<br />
24<br />
F Aplazamiento por lluvia<br />
Este botón también actúa como tecla de cambio para las posiciones<br />
de parada de color morado en el dial.<br />
Ilustración 2: Teclas de programación<br />
25
07WTM002887 57004-24 rJ.qxd 2/13/07 11:51 AM Page 26<br />
Seleccionar un idioma<br />
El lenguaje de la pantalla LCD puede adecuarse al inglés, español<br />
y francés.<br />
1. Gire el dial hacia la posición • IDIOMA<br />
2. Pulse el botón APLAZAMIENTO POR LLUVIA.<br />
3. Pulse el botón SIGUIENTE hasta que encuentre el idioma<br />
deseado [Ilustración 3]<br />
4. Pulse INTRODUCIR para confirmar la selección.<br />
5. Pulse el botón APLAZAMIENTO POR LLUVIA o gire el<br />
dial para abandonar este modo.<br />
26<br />
IDIOMA<br />
ESPA OL<br />
<strong>MANUAL</strong> EFFACER APLAZAMIENTO POR LLUVIA<br />
RESTABLECER<br />
+ –<br />
SIQUIENTE INTRO<br />
Ilustración 3: Selección del idioma en la pantalla LCD<br />
HORA<br />
01 ENE 2004<br />
AM<br />
12:00<br />
TH<br />
<strong>MANUAL</strong> EFFACER APLAZAMIENTO POR LLUVIA<br />
RESTABLECER<br />
+ –<br />
SIQUIENTE INTRO<br />
C<br />
DÍAS DE<br />
RIEGO<br />
HORAS<br />
DE INCIO<br />
DÍAS DE<br />
RIEGO<br />
AUTO<br />
APAGADO<br />
B<br />
DÍAS DE<br />
RIEGO<br />
HORAS<br />
DE INCIO<br />
DÍAS DE<br />
RIEGO<br />
HORAS<br />
DE INCIO<br />
DÍAS DE<br />
RIEGO<br />
AUTO<br />
APAGADO<br />
HORAS<br />
DE INCIO<br />
DÍAS DE<br />
RIEGO<br />
Ilustración 4: Hora de ajuste en la pantalla LCD<br />
C<br />
B<br />
A<br />
A<br />
· FECHA/HORA<br />
· DUREE STATION<br />
HORAS<br />
DE INCIO<br />
· PRESUPUESTOS<br />
· IDIOMA<br />
SIN RIEGO<br />
· DÍAS<br />
· HORA<br />
· FECHA/HORA<br />
· DUREE STATION<br />
HORAS<br />
DE INCIO<br />
· APLAZA.<br />
ESTACIÓN<br />
· BOMBA<br />
· PRESUPUESTOS<br />
· IDIOMA<br />
· APLAZA.<br />
ESTACIÓN<br />
· BOMBA<br />
SIN RIEGO<br />
· DÍAS<br />
· HORA<br />
Ajustar la hora y el día<br />
Gire el dial hasta la posición FECHA/HEURE . [Ilustración 4]<br />
• Pulse la tecla + para adelantar la hora o la fecha en el reloj. Use<br />
el botón – para ejecutar en sentido inverso. Una vez ha llegado a la<br />
fecha o la hora adecuada, pulse INTRODUCIR para fijar la hora.<br />
• Pulse las teclas + y – para ajustar el año correcto y pulse la<br />
tecla INTRODUCIR.<br />
• Pulse las teclas + y – para ajustar el año correcto y pulse<br />
INTRODUCIR.<br />
• Pulse las teclas + y – para ajustar la fecha correcta y pulse<br />
INTRODUCIR.<br />
La pantalla mostrará la hora y fecha correctas.<br />
Precaución: Si no ha introducido un plan de riego en el programador, el<br />
programa de protección instalado en fábrica se activará en cada estación<br />
todos los días a las 05:00, durante 10 minutos. Para evitar un riego<br />
accidental, gire el dial en posición de apagado (OFF) o introduzca un<br />
programa de riego.<br />
Determinar un plan de riego<br />
Para facilitar la visualización de la mejor manera de programar el<br />
temporizador, puede escribir en un papel un plan de riego. Este<br />
plan le puede ayudar a establecer qué días y a qué hora desea que<br />
se produzca el riego.<br />
1. Escriba, para cada estación (o válvula), la ubicación del riego,<br />
el tipo de aspersor y las plantas que deben ser regadas.<br />
2. Esta lista le ayudará a determinar la duración del riego<br />
recomendada (para cada tipo de aspersor y vegetación que<br />
desea regar) y la frecuencia para cada estación.<br />
Importante: Identifique cualquier restricción en el suministro de agua que<br />
pueda sufrir su zona.<br />
3. Determine, según el paso 2, la opción ideal de riego para cada<br />
estación (día de la semana, intervalo de riego o días pares e<br />
impares).<br />
De acuerdo con la información anterior, su programa de riego puede<br />
presentar el siguiente cuadro:<br />
Estación<br />
1<br />
2<br />
3<br />
4<br />
5<br />
6<br />
Programa<br />
A<br />
A<br />
A<br />
B<br />
B<br />
C<br />
Opción de<br />
riego<br />
Días de la semana<br />
Días de la semana<br />
Días de la semana<br />
Par/Impar<br />
Par/Impar<br />
Intervalo<br />
Días<br />
Lu, Mi, Sá<br />
Lu, Mi, Sá<br />
Lu, Mi, Sá<br />
Cada 2 días<br />
Cada 2 días<br />
Cada 5 días<br />
A partir de la información proporcionada anteriormente, escriba su<br />
plan de riego en la etiqueta suministrada y colóquelo en el interior<br />
del programador.<br />
Sección 3: Programación<br />
Este programador de riego permite la flexibilidad de 3 programas<br />
individuales: A, B y C. Puede programar uno o los tres, según sus<br />
propias necesidades de riego.<br />
1. Ajuste de las horas de inicio en los<br />
programas A, B o C<br />
Hora de<br />
inicio<br />
5:00 AM<br />
6:45 AM<br />
9:00 PM<br />
Nota: La hora de inicio del ciclo es la hora en que el programa comienza<br />
a regar la primera estación. Las horas de inicio del ciclo no corresponden<br />
con las estaciones específicas. si introduce más de una hora de inicio del<br />
ciclo, todas las estaciones programadas para operar iniciarán de nuevo el<br />
riego (en secuencia).<br />
La manera de ajustar la hora de inicio del ciclo es idéntica para todos<br />
los programas. Para ajustar las horas de inicio de ciclo para cada<br />
programa que usted utilice, siga los siguientes pasos:<br />
• Ponga el dial selector en posición HORA DE INICIO en el<br />
programa que desee ajustar. Esta pantalla mostrará una A, B o C,<br />
según el programa que haya seleccionado. [Ilustración 5]<br />
Duración<br />
en minutos<br />
15 min<br />
15 min<br />
15 min<br />
30 min<br />
30 min<br />
30 min<br />
Ubicación<br />
Banda frontal<br />
Frontal, Norte<br />
Frontal, Sur<br />
Posterior, Norte<br />
Posterior, Sur<br />
Frontal<br />
A<br />
AJUSTE PROG.<br />
HR. INICIO 1<br />
--:--<br />
<strong>MANUAL</strong> EFFACER APLAZAMIENTO POR LLUVIA<br />
RESTABLECER<br />
+ –<br />
SIQUIENTE INTRO<br />
Aspersorio<br />
Cabezas de aspersión<br />
Cabezas de aspersión<br />
Cabezas de aspersión<br />
Engranaje<br />
Engranaje<br />
Cabeza para arbusto<br />
C<br />
DÍAS DE<br />
RIEGO<br />
HORAS<br />
DE INCIO<br />
DÍAS DE<br />
RIEGO<br />
AUTO<br />
APAGADO<br />
B<br />
HORAS<br />
DE INCIO<br />
Planta<br />
Hierba<br />
Hierba<br />
Hierba<br />
Hierba<br />
Hierba<br />
Arbustos y flores<br />
DÍAS DE<br />
RIEGO<br />
Ilustración 5: Ajuste de la hora de inicio<br />
A<br />
· FECHA/HORA<br />
· DUREE STATION<br />
HORAS<br />
DE INCIO<br />
· PRESUPUESTOS<br />
· IDIOMA<br />
· APLAZA.<br />
ESTACIÓN<br />
· BOMBA<br />
SIN RIEGO<br />
· DÍAS<br />
· HORA<br />
27<br />
ESPAÑOL
07WTM002887 57004-24 rJ.qxd 2/13/07 11:51 AM Page 28<br />
• Ajuste la hora (1) a la que desee iniciar el riego mediante las<br />
teclas + o –, y pulse INTRODUCIR. Para horas de inicio de<br />
ciclo adicionales, pulse el botón SIGUIENTE para avanzar a la<br />
siguiente hora de inicio y repita este procedimiento usando las<br />
teclas + y –; a continuación, pulse INTRODUCIR.<br />
Importante: Las horas de inicio adicionales repiten el programa de riego.<br />
Generalmente, se requiere una sola hora de inicio del ciclo para cada programa<br />
(A, B o C).<br />
Nota: No es posible ajustar una hora de inicio de ciclo para cada<br />
estación. Las estaciones pueden ser asignadas a los programas A, B o<br />
C. Cada programa puede tener hasta cuatro horas de inicio de ciclos.<br />
Las estaciones asignadas a un programa se activan en secuencia de<br />
acuerdo con las horas de inicio de ciclo indicadas.<br />
2. Selección de la frecuencia de riego en el<br />
Programa A, B o C<br />
Este programador de riego le permite seleccionar la frecuencia de<br />
riego según los días de la semana (Days of the week), intervalos<br />
(Intervals) de 1 a 32 días o según los días pares o impares<br />
(Odd/Even Days). Todas estas opciones están disponibles en los<br />
programas A, B y C.<br />
Gire el dial en la posición DÍAS DE RIEGO (días de riego, en el<br />
programa A, B o C) para visualizar en la pantalla LCD las 3 opciones<br />
de riego. [Ilustración 6]<br />
• Mo Tu We Th Fr Sa Su (lunes, martes, miércoles, jueves,<br />
viernes, sábado y domingo, respectivamente) se aplica a la<br />
opción de riego de los días de la semana<br />
• Odd Even (Impar/Par) se aplica a la opción de riego en días<br />
Pares o Impares<br />
• Interval (Intervalo) se aplica a la opción de riego en intervalos<br />
OPCIÓN DE RIEGO “DÍAS DE LA SEMANA”<br />
La opción "Días de la semana" le permite seleccionar días concretos<br />
de la semana para regar (por ejemplo: lunes, miércoles y sábado).<br />
A<br />
AJUSTE RIEGO<br />
DiAS-LABORAL<br />
MO TU WE TH FR SA SU ODD EVEN INTERVAL<br />
<strong>MANUAL</strong> EFFACER APLAZAMIENTO POR LLUVIA<br />
RESTABLECER<br />
+ –<br />
SIQUIENTE INTRO<br />
DÍAS DE<br />
RIEGO<br />
HORAS<br />
DE INCIO<br />
DÍAS DE<br />
RIEGO<br />
Ajuste de la opción "Días de la semana:"<br />
AUTO<br />
APAGADO<br />
HORAS<br />
DE INCIO<br />
DÍAS DE<br />
RIEGO<br />
Ilustración 6: Selección de los días de riego<br />
A<br />
AJUSTE RIEGO<br />
DiAS-LABORAL<br />
MO TU WE TH FR SA SU ODD EVEN INTERVAL<br />
Ilustración 7: Selección de "Días de la semana"<br />
• Ponga el dial en posición DÍAS DE RIEGO en el programa<br />
A, B, o C<br />
• Pulse SIGUIENTE hasta que el día de la semana deseado<br />
parpadee. Pulse INTRODUCIR para seleccionar el día. El<br />
día o los días seleccionados se acompañan de un un icono<br />
del día de la semana. Siga el mismo procedimiento para<br />
seleccionar los días que desee. [Ilustración 7]<br />
Importante: ODD (impar), EVEN (par) e INTERVAL (intervalo)<br />
no son aplicables en la opción de riego Días de la semana<br />
• Para borrar un día previamente seleccionado, pulse SIGUIENTE<br />
hasta que el día en concreto parpadee y pulse la tecla EFFACER.<br />
C<br />
B<br />
A<br />
· FECHA/HORA<br />
· DUREE STATION<br />
HORAS<br />
DE INCIO<br />
· PRESUPUESTOS<br />
· IDIOMA<br />
· APLAZA.<br />
ESTACIÓN<br />
· BOMBA<br />
SIN RIEGO<br />
· DÍAS<br />
· HORA<br />
A<br />
AJUSTE RIEGO<br />
DiAS-INTERV.<br />
MO TU WE TH FR SA SU ODD EVEN INTERVAL<br />
OPCIÓN DE RIEGO "INTERVAL" (INTERVALO)<br />
El riego en intervalos se utiliza para regar en un intervalo de 1 a 32<br />
días. Un intervalo de 1 día significa que se riega todos los días; un<br />
intervalo de 2 significa que se riega cada dos días, etc.<br />
Ajuste del intervalo de riego "Interval":<br />
--DAYS<br />
Vea la Ilustración 8: Selección del Riego en intervalos<br />
• Ponga el dial en posición DÍAS DE RIEGO en el programa<br />
A, B, C.<br />
• Pulse SIGUIENTE hasta que la palabra "INTERVAL" parpadee<br />
en la pantalla [Ilustración8]<br />
• Busque el número del "intervalo" deseado mediante las teclas<br />
+ o – y pulse INTRODUCIR<br />
• Para eliminar un intervalo previamente ajustado, continúe pulsando<br />
la tecla SIGUIENTE hasta que la palabra "INTERVAL"<br />
parpadee (en la esquina inferior derecha) y pulse EFFACER.<br />
Indique un nuevo intervalo o continúe pulsando la tecla<br />
SIGUIENTE para seleccionar un opción de riego distinta.<br />
OPCIÓN DE RIEGO “ODD O EVEN” (PAR O IMPAR)<br />
Puede ajustar el programador para que riegue solamente los días<br />
impares (Odd) o los días pares (Even). El programa de par/impar se<br />
basa en la fecha. También puede escoger un riego en días pares o<br />
impares con intervalos específicos.<br />
Por ejemplo: si selecciona días impares con un intervalo de 2, su programador<br />
de riego regará cada dos días impares (es decir: cada 4 días)<br />
A<br />
AJUSTE RIEGO<br />
DiAS-IMPARS<br />
Ajuste del riego en días impares:<br />
2DAYS<br />
MO TU WE TH FR SA SU ODD EVEN INTERVAL<br />
• Ponga el dial en posición DÍAS DE RIEGO en el programa<br />
A, B, o C<br />
• Pulse SIGUIENTE hasta que la palabra "ODD" parpadee en la<br />
pantalla. Si desea regar cada dos días impares, pulse INTRO-<br />
DUCIR para confirmar esta programación. [Ilustración 9]<br />
• Si desea regar en días impares pero con menos frecuencia que<br />
cada dos días, ajuste el intervalo de riego de 1 a 5 mediante las<br />
teclas + o –<br />
Por ejemplo: si selecciona días impares con un intervalo de 2, su programador<br />
de riego regará cada dos días impares (es decir: cada 4 días).<br />
• Pulse INTRODUCIR para fijar el ajuste<br />
Para ajustar un riego en días pares, siga los pasos descritos pero<br />
seleccionando "EVEN" en la pantalla.<br />
Nota: Si la(s) hora(s) de inicio han expirado, el programador de riego<br />
NO riega el primer día en que se introdujo o se modificó el programa.<br />
EVERY<br />
Ilustración 9: Selección del riego "Pares e impares"<br />
ESPAÑOL<br />
28<br />
29
07WTM002887 57004-24 rJ.qxd 2/13/07 11:51 AM Page 30<br />
3. Ajuste de la duración del riego<br />
Este programador de riego le permite 2 opciones de ajuste de la<br />
duración del riego (Watering duration) para cada estación.<br />
CONMUTADOR DESLIZANTE<br />
• Ponga cada conmutador en la hora deseada (de 2 a 120<br />
minutos) para cada estación. [Ilustración 10]<br />
AJUSTE DEL DIAL POR MINUTO<br />
Puede fijar la duración del riego con incrementos de un minuto.<br />
Para ello, utilice la función de Ajuste del dial por minuto (Dial Set by<br />
Minute). La duración de la estación "Ajuste del dial por minuto"<br />
puede ser fijada para cada estación individualmente.<br />
• Ponga el conmutador de duración del riego (Watering<br />
Duration) en posición DIAL PARA AJUSTOR LOS MIN para<br />
cada estación. [Ilustración 11]<br />
• Ponga el dial en posición • DUREE STATION.<br />
• Pulse el botón APLAZAMIENTO POR LLUVIA para acceder<br />
a la función DUREE STATION.<br />
• En la pantalla LCD puede ajustar la duración del riego para la<br />
estación 1<br />
• Introduzca la duración del riego con las teclas + y – para la<br />
estación 1 y, a continuación, pulse INTRODUCIR para<br />
guardar el ajuste<br />
• Continúe el proceso e introduzca las duraciones de riego para el<br />
resto de estaciones<br />
• Para suprimir la duración de riego de una estación determinada,<br />
pulse INTRODUCIR hasta que la estación aparezca en la<br />
pantalla y pulse EFFACER.<br />
Importante: Si el conmutador deslizante no está en la posición<br />
“DIAL PARA AJUSTOR LOS MIN”, el programador no empleará<br />
la duración completa.<br />
Nota: El ajuste de duración de duración se utiliza en los programas<br />
A, B y C. No es posible introducir distintas duraciones de riego para<br />
los programas A, B y C.<br />
Consejo<br />
• Para desactivar una estación, mueva el conmutador deslizante<br />
a la posición DESACTIVAR <strong>MANUAL</strong><br />
<strong>MANUAL</strong> ACT.<br />
2<br />
DURACIÓN<br />
ESTACIÓN<br />
MINUTOS<br />
DIAL PARA<br />
AJUSTOR<br />
LOS MIN<br />
+ –<br />
5<br />
10<br />
15<br />
20<br />
30<br />
45<br />
60<br />
120<br />
<strong>MANUAL</strong> DESACTIVADO<br />
ESTACIONES<br />
Ilustración 10: "Duraciones con el conmutador deslizante" fijadas<br />
en 10 minutos y 20 minutos<br />
AJUSTE RIEGO<br />
STN 1 RETR.<br />
---<br />
RUN<br />
MINS<br />
TO<br />
<strong>MANUAL</strong> EFFACER APLAZAMIENTO POR LLUVIA<br />
RESTABLECER<br />
+ –<br />
SIQUIENTE INTRO<br />
<strong>MANUAL</strong> ACT.<br />
2<br />
DURACIÓN<br />
ESTACIÓN<br />
MINUTOS<br />
5<br />
10<br />
15<br />
20<br />
30<br />
45<br />
60<br />
120<br />
DIAL PARA<br />
AJUSTOR<br />
LOS MIN<br />
+ –<br />
<strong>MANUAL</strong> DESACTIVADO<br />
SENSOR DE<br />
LLUVIA<br />
ACT.<br />
DESACT<br />
C<br />
DÍAS DE<br />
RIEGO<br />
HORAS<br />
DE INCIO<br />
ESTACIONES<br />
DÍAS DE<br />
RIEGO<br />
AUTO<br />
APAGADO<br />
HORAS<br />
DE INCIO<br />
DÍAS DE<br />
RIEGO<br />
Ilustración 11: "Ajuste del dial por minuto"<br />
B<br />
A<br />
· FECHA/HORA<br />
· DUREE STATION<br />
HORAS<br />
DE INCIO<br />
· PRESUPUESTOS<br />
· IDIOMA<br />
· APLAZA.<br />
ESTACIÓN<br />
· BOMBA<br />
SIN RIEGO<br />
· DÍAS<br />
· HORA<br />
CONMUTADORES DESLIZANTES DE PROGRAMACIÓN<br />
Los Conmutadores deslizantes de programación le permiten seleccionar<br />
un programa (A, B o C) para las estaciones individualmente.<br />
[Ilustración 12]<br />
Con la información recogida en el apartado “Determinar un plan de<br />
riego”, en la página 27, seleccione un programa “A”, “B” o “C” para<br />
cada estación.<br />
Ilustración 12: Ajuste de los “Conmutadores deslizantes de<br />
programación” en los programas A y B<br />
REVISIÓN Y MODIFICACIÓN DEL PROGRAMA<br />
El programador de riego Orbit® le permite revisar fácilmente su plan<br />
de riego. Por ejemplo: para revisar las horas de inicio del ciclo de<br />
riego para el programa “A”, ponga el dial selector en posición HORA<br />
DE INICIO en el programa “A” y compruebe las horas introducidas.<br />
Con el botón SIGUIENTE puede revisar el programa sin preocuparse<br />
de alterar otro programa.<br />
Si desea modificar las horas de inicio del ciclo, los días de riego o los<br />
intervalos de riego, simplemente siga las instrucciones para la modificación<br />
de dicho programa.<br />
Tras revisar o cambiar un programa de riego, y desea que el programador<br />
de riego ejecute su programa, recuerde poner el dial selector<br />
en posición AUTO.<br />
Sección 4: Operación automática y funciones<br />
de uso común<br />
Precaución: Este aparato no debe ser utilizado por niños o personas<br />
minusválidas sin supervisión. Los niños deben estar bajo vigilancia para<br />
evitar que jueguen con el aparato.<br />
.<br />
Listo para la operación automática<br />
Una vez completada la programación, ponga el dial selector en posición<br />
AUTO. El programador de riego está ya completamente programado<br />
y listo para funcionar en modo automático. En modo<br />
automático, cada estación funciona secuencialmente, comenzando<br />
con el Programa A.<br />
IMPORTANTE: Este temporizador contiene un conmutador de<br />
derivación con sensor de lluvia. Si el conmutador con sensor de<br />
lluvia está activado (“on”) y no se ha conectado ningún sensor,<br />
el programador de riego no funcionará.<br />
Avance de estación<br />
Con el programador de riego en funcionamiento, pulse SIGUIENTE<br />
para terminar el riego en la estación actual y pasar a la siguiente<br />
estación.<br />
Programador apagado (OFF)<br />
Evita que el programador riegue en modos Automático y Manual.<br />
Aplazamiento por lluvia (Rain Delay)<br />
El aplazamiento por lluvia le permite retrasar el riego durante un<br />
cierto período de tiempo. Los ajustes de aplazamiento son de 24, 48<br />
y 72 horas y de 4 a 99 días.<br />
ACTIVACIÓN DE LA FUNCIÓN “APLAZAMIENTO POR<br />
LLUVIA”:<br />
1. Asegúrese de que el dial está en posición AUTO<br />
2. Pulse el botón APLAZAMIENTO POR LLUVIA para<br />
suspender el riego automáticamente durante 24 horas.<br />
[Figura 13]<br />
3. Si desea retrasar el riego por lluvia durante más tiempo,<br />
pulse las teclas + o – para aumentar o reducir el ajuste.<br />
4. Pulse INTRODUCIR o espere 30 segundos: el ajuste<br />
seleccionado de aplazamiento por lluvia comenzará.<br />
5. Pulse EFFACER para detener la función de aplazamiento por<br />
lluvia y activar de nuevo el riego programado<br />
Al término del período de aplazamiento por lluvia, se reanuda el<br />
riego automáticamente.<br />
Nota: El riego manual anula el aplazamiento por lluvia. Una vez<br />
completado el riego manual, se reanuda el aplazamiento por lluvia.<br />
Mientras el dispositivo esté en modo aplazado, el programador de<br />
riego muestra las horas restantes. Excepto el botón EFFACER, no se<br />
acepta ningún otro botón mientras el programador de riego esté en<br />
modo de aplazamiento por lluvia.<br />
ESPAÑOL<br />
30<br />
31
07WTM002887 57004-24 rJ.qxd 2/13/07 11:51 AM Page 32<br />
RETR. LLUVIA<br />
01 ENE 2004<br />
0ff HRS 24<br />
<strong>MANUAL</strong> EFFACER APLAZAMIENTO POR LLUVIA<br />
RESTABLECER<br />
+ –<br />
SIQUIENTE INTRO<br />
Estimación del agua (Water Budgeting)<br />
La estimación del agua es una sencilla manera de ajustar la duración<br />
del riego para satisfacer las necesidades según la estación del año.<br />
Para estimar el agua se aumenta o disminuye la duración del riego<br />
para todas las estaciones en todos los programas. El margen de<br />
ajuste varía entre un 20% y un 200% en incrementos de 10%.<br />
El valor predeterminado es de 100%<br />
PARA ESTABLECER LA ESTIMACIÓN:<br />
1. Gire el dial a la posición • PRESUPUESTO [Ilustración 14]<br />
2. Para aumentar o disminuir el porcentaje, pulse las teclas + o –.<br />
3. Pulse INTRODUCIR para fijar el ajuste.<br />
Sección 5: Operación manual<br />
El programador de riego Orbit® le permite ajustar 2 opciones para<br />
operar el temporizador manualmente.<br />
Una estación<br />
Varias estaciones<br />
DÍAS DE<br />
RIEGO<br />
HORAS<br />
DE INCIO<br />
DÍAS DE<br />
RIEGO<br />
AUTO<br />
APAGADO<br />
HORAS<br />
DE INCIO<br />
DÍAS DE<br />
RIEGO<br />
· FECHA/HORA<br />
· DUREE STATION<br />
HORAS<br />
DE INCIO<br />
Ilustración 13: “Aplazamiento por lluvia” fijado en 24 horas<br />
Nota: Si se arranca un funcionamiento manual durante un ciclo de<br />
programa automático, éste ciclo será cancelado.<br />
C<br />
B<br />
A<br />
· PRESUPUESTOS<br />
· IDIOMA<br />
· APLAZA.<br />
ESTACIÓN<br />
· BOMBA<br />
SIN RIEGO<br />
· DÍAS<br />
· HORA<br />
A. Una estación<br />
Esta opción se utiliza normalmente para probar una estación específica<br />
o para el riego adicional de una estación específica. La operación<br />
manual se consigue mediante los Conmutadores Deslizantes de<br />
Duración Del Riego<br />
Importante: Sólo se activa una estación a la vez. Se activará (riego) la<br />
última estación activada en posición ACTIVAR <strong>MANUAL</strong><br />
UNA ESTACIÓN – SIN DURACIÓN DE RIEGO<br />
1. Asegúrese de que el dial está en posición AUTO.<br />
2. Para activar la estación, ponga el interruptor de estación<br />
Conmutadores Deslizantes de Duración Del Riego en posición<br />
ACTIVAR <strong>MANUAL</strong>. La pantalla muestra ACTIVAR<br />
<strong>MANUAL</strong> y el número de la estación activada. [Figura 15]<br />
3. Para desactivar el riego manual, ponga el Conmutadores<br />
Deslizantes de Duración Del Riego en posición<br />
DESACTIVAR <strong>MANUAL</strong><br />
4. Recuerde devolver el Conmutadores Deslizantes<br />
de Duración Del Riego a la posición previa para el<br />
funcionamiento automático<br />
AJUSTAR<br />
VALOR PRES.<br />
100 %<br />
<strong>MANUAL</strong> EFFACER APLAZAMIENTO POR LLUVIA<br />
RESTABLECER<br />
+ –<br />
SIQUIENTE INTRO<br />
DÍAS DE<br />
RIEGO<br />
HORAS<br />
DE INCIO<br />
DÍAS DE<br />
RIEGO<br />
AUTO<br />
APAGADO<br />
HORAS<br />
DE INCIO<br />
DÍAS DE<br />
RIEGO<br />
Ilustración 14: Ajuste de la “Estimación del agua”<br />
C<br />
B<br />
A<br />
· FECHA/HORA<br />
· DUREE STATION<br />
HORAS<br />
DE INCIO<br />
· PRESUPUESTOS<br />
· IDIOMA<br />
· APLAZA.<br />
ESTACIÓN<br />
· BOMBA<br />
SIN RIEGO<br />
· DÍAS<br />
· HORA<br />
<strong>MANUAL</strong> ACT.<br />
ESTACI N 2<br />
AM<br />
6:30<br />
TH<br />
<strong>MANUAL</strong> EFFACER APLAZAMIENTO POR LLUVIA<br />
RESTABLECER<br />
+ –<br />
SIQUIENTE INTRO<br />
<strong>MANUAL</strong> ACT.<br />
2<br />
DURACIÓN<br />
ESTACIÓN<br />
MINUTOS<br />
5<br />
10<br />
15<br />
20<br />
30<br />
45<br />
60<br />
120<br />
DIAL PARA<br />
AJUSTOR<br />
LOS MIN<br />
+ –<br />
<strong>MANUAL</strong> DESACTIVADO<br />
SENSOR DE<br />
LLUVIA<br />
ACT.<br />
DESACT<br />
DÍAS DE<br />
RIEGO<br />
HORAS<br />
DE INCIO<br />
DÍAS DE<br />
RIEGO<br />
AUTO<br />
APAGADO<br />
HORAS<br />
DE INCIO<br />
DÍAS DE<br />
RIEGO<br />
Ilustración 15: Riego manual en una estación<br />
C<br />
ESTACIONES<br />
A<br />
B<br />
CPROBAR TODO<br />
B<br />
A<br />
· FECHA/HORA<br />
· DUREE STATION<br />
HORAS<br />
DE INCIO<br />
Ilustración 16: Pantalla – “Ciclo de prueba” seleccionado<br />
· PRESUPUESTOS<br />
· IDIOMA<br />
· APLAZA.<br />
ESTACIÓN<br />
· BOMBA<br />
SIN RIEGO<br />
· DÍAS<br />
· HORA<br />
UNA ESTACIÓN – CON DURACIÓN DE RIEGO<br />
1. Siga los pasos 1 y 2 descritos<br />
2. Ponga el Conmutadores Deslizantes de Duración Del Riego<br />
de la estación en la posición de duración de riego deseada<br />
3. Una vez completado el riego, recuerde devolver el<br />
Conmutadores Deslizantes de Duración Del Riego a la<br />
posición previa para el funcionamiento automático.<br />
B. Varias estaciones<br />
Esta opción se utiliza normalmente en condiciones atmosféricas secas<br />
o excepcionalmente secas. Esta opción le permite regar manualmente<br />
sin ajustar ni reajustar los Conmutadores Deslizantes de Duración<br />
Del Riego.<br />
PRUEBA <strong>MANUAL</strong><br />
Esta opción le permite operar cada estación durante 1 minuto para<br />
confirmar que todas las estaciones funcionan correctamente.<br />
Para ejecutar un ciclo de prueba:<br />
1. Asegúrese de que el dial está en posición AUTO<br />
2. Pulse una vez el botón <strong>MANUAL</strong> [Ilustración 6]<br />
3. Pulse INTRODUCIR para comenzar y EFFACER para detener<br />
el ciclo de prueba<br />
Nota: Esta función activará todas las estaciones, incluso aquellas con el<br />
control deslizante en la posición off (apagado) manual.<br />
VARIAS ESTACIONES - RIEGO DE TODAS LAS ESTACIONES<br />
A LA VEZ<br />
Esta opción puede ser especialmente práctica si hace un calor inusual.<br />
En cada estación se riega una vez, en secuencia, según el ajuste de<br />
duración del riego de cada estación.<br />
Nota: Los ajustes del programa (A, B o C) no se ven afectados si una<br />
estación riega o no. Si no desea regar con una estación, mueva el<br />
Conmutadores Deslizantes de Duración Del Riego a la posición<br />
DESACTIVAR <strong>MANUAL</strong>.<br />
1. Asegúrese de que el dial está en posición AUTO<br />
2. Pulse una vez la tecla <strong>MANUAL</strong><br />
3. Pulse el botón SIGUIENTE hasta que aparezca en la pantalla<br />
“A B C Extra TODO” [Ilustración 17]<br />
4. Para activar el riego manual, pulse INTRODUCIR antes de<br />
que transcurran 30 segundos<br />
ESPAÑOL<br />
32<br />
33
07WTM002887 57004-24 rJ.qxd 2/13/07 11:51 AM Page 34<br />
5.Para activar o detener este ciclo, pulse la tecla EFFACER<br />
Tras completar esta función, el programador de riego regresa a su<br />
plan de riego automático habitual.<br />
Nota: Si arranca un funcionamiento manual durante un ciclo de<br />
programa automático, el programa automático será cancelado.<br />
A<br />
B<br />
C<br />
EXTRA TODO<br />
Ilustración 17:<br />
Pantalla con el riego manual para todos los<br />
programas y todas las estaciones activas<br />
VARIAS ESTACIONES – RIEGO SÓLO DE LAS ESTACIONES<br />
PARA UN SOLO PROGRAMA (A, B O C)<br />
Para este ejemplo, regaremos todas las estaciones asignadas al<br />
programa B. Este procedimiento es igual para los programas A y C.<br />
1. Asegúrese de que el dial está en posición AUTO<br />
2. Pulse una vez la tecla <strong>MANUAL</strong>.<br />
3. Pulse el botón SIGUIENTE hasta que aparezca en la pantalla<br />
“B Extra TODO” [Ilustración 18]<br />
4. Para activar el riego manual, pulse INTRODUCIR antes de<br />
que transcurran 60 segundos.<br />
5. Para activar o detener este ciclo, pulse la tecla EFFACER<br />
Nota: En este ejemplo, las estaciones asignadas al programa “B” regarán<br />
una a una consecuentemente.<br />
B<br />
EXTRA TODO<br />
Ilustración 18:<br />
Pantalla con riego manual seleccionado para<br />
las estaciones asignadas al programa B<br />
Sección 6: Funciones adicionales<br />
Sin riego (No watering)<br />
La opción “sin riego” le permite indicar los días de restricción de<br />
riego y la duración (hora) de la restricción impuesta en su zona.<br />
Esta función evita que se produzca el riego durante los días y las<br />
horas en que hay restricción de riego.<br />
DÍAS DE LA SEMANA “SIN RIEGO”<br />
Una vez introducidos los días de restricción de agua, todos los programas<br />
de riego planificados para dicho día quedarán cancelados.<br />
Para programar el “Día sin riego”:<br />
1. Gire el dial hasta la posición SIN RIEGO<br />
2. Pulse SIGUIENTE hasta que el día de la semana parpadee y<br />
pulse EFFACER. [Ilustración 19]<br />
Nota: Los días indicados como días sin riego NO se acompañan de unicono<br />
3. Repita el paso 2 hasta que el icono de la gota de agua<br />
desaparezca de todos los días restringidos.<br />
4. Para eliminar una restricción de “Sin riego” de un determinado<br />
día, pulse la tecla SIGUIENTE hasta que dicho día<br />
parpadee y, a continuación, pulse INTRODUCIR.<br />
AJUSTAR<br />
DiA SIN AGUA<br />
MO TU WE TH FR SA SU<br />
Ilustración 19: Pantalla – “ Día sin agua”<br />
“HORA/PERÍODO SIN RIEGO”<br />
Cuando haya introducido un período de restricción, todos los<br />
programas comprendidos en ese período de restricción de agua<br />
cambiarán al día o la hora sin restricción.<br />
Para programar “Hora/Período sin riego”<br />
1. Gire el dial hasta la posición SIN RIEGO<br />
2. Pulse el botón APLAZAMIENTO POR LLUVIA [Figura 20]<br />
3. Indique la hora de inicio del “Período sin riego” mediante las<br />
teclas + y –, y pulse INTRODUCIR para aceptar el ajuste.<br />
4. A continuación, indique la hora de fin del “Período sin riego”<br />
mediante las teclas + y –, y pulse INTRODUCIR para aceptar<br />
el ajuste.<br />
5. Ponga el dial en posición AUTO.<br />
SIN AGUA<br />
INIC. PERiO.<br />
--:--<br />
Ilustración 20: Pantalla – “SIN AGUA INIC. PERíO”<br />
Ajuste de la válvula maestra o inicio con bomba<br />
Este programador de riego permite a cada estación funcionar con o<br />
sin bomba. Si una estación está programada para operar con bomba,<br />
ésta comenzará a funcionar dos segundos antes de que lo haga la<br />
estación.<br />
Nota: Para que la bomba funcione, se requiere un relé de inicio con<br />
bomba. (de venta aparte)<br />
PARA ACTIVAR EL “INICIO CON BOMBA” PARA CADA<br />
ESTACIÓN:<br />
1. Gire el dial hasta la posición BOMBA.<br />
2. Pulse el botón APLAZAMIENTO POR LLUVIA [Figura 21]<br />
3. Si desea activar la bomba para la estación visualizada en pantalla,<br />
pulse INTRODUCIR<br />
4. Si NO desea activar la bomba para la estación visualizada en<br />
pantalla, pulse EFFACER.<br />
5. Pulse SIGUIENTE para avanzar hasta la siguiente estación.<br />
6. Gire el dial para abandonar este ajuste<br />
AJUSTE BOMBA<br />
ESTACI N 1<br />
Ilustración 21: Pantalla –<br />
Inicio con bomba activo para la estación 1<br />
ESPAÑOL<br />
34<br />
35
07WTM002887 57004-24 rJ.qxd 2/13/07 11:51 AM Page 36<br />
Aplazamiento en estación (Station Delay)<br />
Esta función se utiliza comúnmente junto con cisternas o pozos<br />
acuíferos. El retraso permite a las cisternas y a los pozos adecuar el<br />
tiempo de relleno.<br />
Nota: Los aplazamientos entre las estaciones pueden ser programados desde<br />
1 minuto hasta 9 horas.<br />
PARA PROGRAMAR UN APLAZAMIENTO DE ESTACIÓN::<br />
1. Gire el dial a la posición • APLAZA. ESTACIÓN [Ilustración 22]<br />
2. Para aumentar o reducir el tiempo de retrase entre cada estación,<br />
pulse + o –<br />
3. Pulse INTRODUCIR para guardar el ajuste de retraso de<br />
la hora<br />
4. Ponga de nuevo el dial en posición AUTO<br />
AJUSTAR<br />
TIEMPO RETR.<br />
0<br />
3. Instalar las pilas<br />
4. Conectar el suministro eléctrico<br />
5. Conectar los cables de la válvula en el programador de riego<br />
Nota: Para la instalación de los MODELOS DE EXTERIOR,<br />
consulte el Apéndice A<br />
1. Seleccionar un lugar<br />
Seleccione una ubicación siguiendo los siguientes criterios:<br />
• Cerca de una toma eléctrica (evite una toma de electricidad<br />
con interruptor)<br />
• El espacio interior debe ser seco, donde la temperatura de<br />
operación no sea inferior a 0º C ni superior a 70º C (32º F -<br />
158º F)<br />
• Evite la luz directa del sol<br />
• Accesibilidad al cable del programador (desde las válvulas)<br />
2. Montar el programador de riego<br />
• Con la plantilla de montaje (incluida), marque en la pared los<br />
puntos de fijación.<br />
• Coloque de nuevo la tapa del portapilas<br />
Nota: Las pilas no activan las válvulas en el sistema de riego. Deberá<br />
conectar un transformador de 24 voltios y disponer de corriente eléctrica<br />
para operar su sistema de riego normalmente.<br />
Ranura<br />
Agujeros de los tornillos<br />
Tornillo Núm. 8<br />
Pared<br />
Ilustración 23: Ponga a cero el temporizador de riego<br />
4. Conectar el transformador<br />
• Sin la tapa, busque los dos orificios terminales marcados como<br />
“24VAC IN”. [Ilustración 25]<br />
• Asegúrese de que el transformador no esté conectado a la red;<br />
inserte uno o dos cables eléctricos (desde el transformador) en<br />
cada terminal<br />
Nota: Es posible que tenga que abrir el terminal para poder insertar o<br />
extraer el cable. Para ello, levante la pestaña situada en la parte superior<br />
del terminal.<br />
• Conecte el transformador.<br />
Advertencia: No conecte dos o más programadores de riego en un<br />
solo transformador.<br />
24VAC-OUT SENSOR COMMON PUMP 1 2 3 4 5 6 24VAC-IN<br />
ESPAÑOL<br />
Ilustración 22: Pantalla – Aplazamiento en estación<br />
Sección 7: Instalación del programador de<br />
riego en interiores<br />
Antes de la instalación, tenga los siguientes objetos y herramientas<br />
disponibles:<br />
• 2 pilas AA<br />
• Un destornillador Phillipsr<br />
• Pelador de cables<br />
Instalación del programador de riego en 5 sencillos pasos:<br />
1. Seleccionar un lugar<br />
2. Montar el programador de riego<br />
36<br />
• Inserte un tornillo Nº 8 (incluido) en la marca superior, dejando<br />
la cabeza del tornillo unos 3 mm (1/8”) sobresaliendo de la<br />
pared. (En caso necesario, utilice las anclas de expansión en la<br />
pared de yeso o de mampostería)<br />
• Cuelgue la ranura en forma de cerradura en la parte trasera del<br />
programador de riego del tornillo de expansión. [Figura 23]<br />
• Inserte un tornillo Nº 8 en ambos orificios detrás de las pilas,<br />
en el compartimento de las pilas.<br />
3. Instalar las pilas<br />
Para conservar el programa en la memoria durante un corte eléctrico,<br />
se requieren dos pilas alcalinas AA. Es recomendable cambiar las<br />
pilas anualmente.<br />
• Extraiga la tapa del portapilas deslizándola hacia la izquierda.<br />
[Figura 24]<br />
• Inserte dos pilas alcalinas AA<br />
SENSOR DE<br />
LLUVIA<br />
ACT.<br />
DESACT<br />
Ilustración 24: Compartimento de pilas<br />
Sección 8: Conexión de válvulas, programador<br />
de riego, inicio con bomba y válvulas<br />
maestras<br />
1. Cableado de las válvulas eléctricas<br />
Nota: Si la distancia entre el programador de riego y las válvulas es<br />
menor de 210 m (700’), utilice un cable de riego Orbit® o un cable de<br />
termostato con toma de plástico de 20 gauges (según la escala de diámetros<br />
americana AWG) para conectar el programador de riego con las<br />
válvulas. Si la distancia es mayor de 210 m (700’), use un cable de<br />
16 gauges (según AWG).<br />
Ilustración 25: Conexión del transformador<br />
Transformador<br />
37
07WTM002887 57004-24 rJ.qxd 2/13/07 11:51 AM Page 38<br />
• Sujete el cable del programador, pele 12 mm (1/2”) del plástico<br />
aislante en el extremo de cada uno de los cables.<br />
• Conecte un cable de cada válvula (no importa qué cable) con<br />
un cable del programador marcado como “Común” (normalmente<br />
blanco). [Ilustración 26]<br />
Importante: todos los cables deben estar unidos mediante una tuerca para<br />
empalme, un soldador o cinta aislante. Para más protección de las conexiones<br />
resistentes al agua, puede utilizar un tapón de grasa Orbit®.<br />
• Una el cable restante de cada una de las válvulas con un cable<br />
del programador de distinto color<br />
• Para evitar peligros de electrocución, debe conectar una sola<br />
válvula en cada estación<br />
Importante: Puede enterrar el cable en el suelo, aunque, para mayor<br />
protección, puede pasar los cables por un tubo de PVC y enterrar éste.<br />
Procure evitar enterrar los cables en tierra donde puedan ser perforados<br />
o trinchados en un futuro.<br />
2. Conectar los cables de la válvula en el<br />
programador de riego<br />
• Retire la tapa del compartimento terminal.<br />
• Pele 6 mm (1/4”) del plástico aislante por el extremo de<br />
cada cable.<br />
Controladores<br />
para sistemas<br />
de aspersión<br />
Zona de<br />
Cable específica<br />
Cables comunes<br />
Válvula<br />
Aspersores<br />
Estación 1<br />
Estación 2<br />
• Determine qué válvula desea conectar y en qué estación.<br />
Conecte cada cable del programador (excepto el cable<br />
“Común”) en un terminal de estación individual (numerado<br />
sobre la pestaña azul). Para ello, inserte el trozo de cable<br />
pelado completamente en el orificio debajo de cada pestaña.<br />
[Figura 27].<br />
• Es posible que tenga que abrir el terminal para poder insertar<br />
o extraer el cable. Para ello, simplemente levante la pestaña<br />
situada en la parte superior del terminal.<br />
• Conecte el cable común en el terminal (de color blanco),<br />
marcado como “COMMON”.<br />
Nota: Inserte solamente un cable en cada terminal. Si requiere más de dos<br />
cables comunes, junte varios para formar un solo cable y que éste pase por<br />
cada uno de ambos terminales “Comunes”. Proteja la junta de los cables<br />
con una tuerca de empalme.<br />
3. Bomba de arranque y válvula maestra<br />
Este programador de riego permite el funcionamiento de una válvula<br />
maestra o un relé de inicio con bomba, si la estación está activada.<br />
Nota: Si activa una bomba desde este programador, necesitará utilizar un<br />
relé de bomba de arranque.<br />
24VAC-OUT SENSOR COMMON PUMP 1 2 3 4 5 6 24VAC-IN<br />
Cables comunes<br />
Desde el relé de la bomba de arranque (o válvula maestra), conecte<br />
un cable en el terminal “PUMP” (bomba) y otro cable en el terminal<br />
“COMMON”. [Figura 28]<br />
Sección 9: Diagnósticos del interruptor<br />
de circuito<br />
Sensor de fallos de diagnóstico Smart-Scan ®<br />
Un sensor de fallos de diagnóstico busca automáticamente la presencia<br />
de un solenoide defectuoso o un cable roto en una válvula<br />
durante cada secuencia de riego. Si se detecta una estación defectuosa,<br />
el programador de riego pasará a la siguiente estación. Smart-<br />
Scan ® también detecta un cable deteriorado para la bomba o el control<br />
principal. Para la detección, se detiene el ciclo de riego.<br />
Notificación de averías<br />
• Estación defectuoso – en la pantalla aparece “FALLO STN” y<br />
el número de estación. Nota: Si se detectan varias estaciones<br />
defectuosas, sólo se mostrará la última estación averiada.<br />
• Cable deteriorado para bomba o control principal – Aparece<br />
“FALLO BOMBA”<br />
Corrección del fallo:<br />
1. Primero, repare la rotura en el cable o recambie el solenoide<br />
defectuoso.<br />
2. Pruebe la estación ejecutando una secuencia de riego manual.<br />
3. Si, tras unos segundos, no se detecta un fallo, el mensaje<br />
error desaparecerá<br />
4. Si el mensaje persiste, todavía existe un cable roto.<br />
PUMP COM<br />
CONTROLADORES PARA<br />
SISTEMAS DE ASPERSIÓN<br />
24v<br />
Coil<br />
Bomba<br />
RELÉ DE INICIO DE BOMBEO AUTOMÁTICO<br />
El poder eléctrico<br />
Ilustración 28:<br />
Conexión de la bomba de arranque o de la válvula maestra<br />
Interruptor de circuito electrónico interno<br />
de autorreajuste<br />
El programa del riego dispone de un interruptor de circuito electrónico<br />
interno de reajuste automático..<br />
Las causas posibles de un fallo en el interruptor de circuito son:<br />
1. La luz se corta en su proximidad.<br />
2. Cuando el suministro eléctrico sufre un pico.<br />
3. Si una estación tiene un cable roto.<br />
Si ocurre alguna de estas situaciones, el interruptor de circuito electrónico<br />
puede fallar, causando un fallo en la estación en el programador<br />
de riego que provocaría una parada momentánea. Las pilas<br />
continúan funcionando para almacenar la información del programa<br />
y activar la pantalla LCD. Tras unos momentos, el programador de<br />
riego comprueba automáticamente que la situación de fallo en el<br />
interruptor de circuito ha desaparecido. En tal caso, el interruptor<br />
de circuito se reajustará.<br />
ESPAÑOL<br />
Válvula<br />
Estación 3<br />
Figura 26: Conexión de los cables del programador en las válvulas<br />
Ilustración 27: Conexión del cable del programador<br />
38<br />
39
07WTM002887 57004-24 rJ.qxd 2/13/07 11:51 AM Page 40<br />
Sección 10: Solución de problemas<br />
Ayuda Glosario de términos<br />
Síntoma Causa Corrección<br />
TÉRMINO<br />
DEFINICIÓN<br />
Pantalla<br />
LCD<br />
Problemas<br />
de riego<br />
REAJUS. ENC.<br />
FALLO STN<br />
FALLO BOMBA<br />
SIN VCA<br />
Pantalla LCD<br />
(parcialmente) en blanco<br />
Una o más estaciones no<br />
están encendidas<br />
Las estaciones se activan<br />
cuando no deberían<br />
Una estación se<br />
desactiva<br />
La pantalla LCD muestra el<br />
programa en ejecución, pero<br />
el riego no está activado<br />
Variación eléctrica<br />
Solenoide defectuoso<br />
Cable de riego roto<br />
Cable de riego hacia la bomba deteriorado o roto<br />
El transformador no está conectado (modelos de interior)<br />
El cableado permanente no está (correctamente) conectado (modelos de exterior)<br />
No hay suministro de corriente central<br />
Las pilas están gastadas, no hay pilas en el compartimento o no hay<br />
suministro eléctrico<br />
El botón RESTABLECER debe ser accionado<br />
Programación incorrecta<br />
La retención del control de flujo en la válvula está apagada<br />
El Conmutadores Deslizantes de Duración Del Riego está activado para<br />
apagado manual "DESACTIVAR <strong>MANUAL</strong>"<br />
El Conmutadores Deslizantes de Duración Del Riego está en posición de<br />
ajuste del dial por minuto "DIAL PARA AJUSTOR LOS MIN"<br />
Conmutadores Deslizantes de Duración Del Riego no corresponde al<br />
Programa (A, B, C)<br />
El cable de riego no está conectado en el programador o la válvula<br />
El dial no está en posición "Auto"<br />
El sistema de suministro de agua no entrega agua<br />
Demasiada presión de agua<br />
Ha programado más de una hora de inicio o existen horas de inicio o<br />
programas coincidentes<br />
El programa de restricción de agua bloquea el paso de agua<br />
La función de aplazamiento en estación APLAZA. ESTACIÓN está activada<br />
El Conmutador deslizante de Duración de riego está activado en<br />
modo manual “ACTIVAR <strong>MANUAL</strong>”<br />
La válvula puede estar obturada por suciedad<br />
El interruptor de derivación con sensor de lluvia está encendido<br />
(ON) pero no hay ningún sensor de lluvia conectado<br />
Vea la página 25<br />
Recambie<br />
Compruebe las conexiones del cable<br />
Compruebe que los cables del programador no<br />
estén deteriorados; recambie, en caso necesario<br />
Asegúrese de que el transformador está bien conectado<br />
Vea la página 43<br />
Compruebe el interruptor de circuito o el fusible<br />
Cambie las pilas y compruebe la corriente<br />
Introduzca de nuevo los programas<br />
Vea la página 27<br />
Controle la válvula<br />
Deslice el conmutador a una posición de<br />
duración de riego<br />
Indique una duración de riego (Vea la página 30) o deslice<br />
el conmutador a una posición de duración de riego<br />
Ponga el conmutador de programa en posición<br />
del programa correcto<br />
Conecte el cable<br />
Ponga el dial en Auto<br />
Asegúrese de que la válvula principal está activada<br />
Monte un reductor de presión<br />
Revise la programación (Vea la página 27)<br />
Vea la página 34<br />
Vea la página 36<br />
Deslice el conmutador deslizante de Duración<br />
de riego en la posición "DESACTIVAR <strong>MANUAL</strong>"<br />
Limpie la válvula<br />
Apague el interruptor con sensor de lluvia (OFF)<br />
Controlador<br />
Hora de inicio del ciclo<br />
Válvula de irrigación,<br />
Automática<br />
Válvula maestra<br />
Diversas horas de inicio<br />
Programas superpuestos<br />
Programa (A, B o C)<br />
Aplazamiento por lluvia<br />
Solenoide<br />
Programador de riego<br />
Estación<br />
Válvula<br />
Opción de riego<br />
Programa de riego<br />
Restricción de riego<br />
Zonas<br />
Vea el programador de riego.<br />
La hora en que el programa comienza el riego en la primera estación.<br />
Utilizada junto con los programadores de riego; resulta una práctica manera de suministrar en huertos,<br />
plantas y jardines.<br />
Una válvula que evita que el agua llegue a las "Válvulas de estación".<br />
Función que permite ejecutar un programa varias veces al día.<br />
Ocurren cuando se ajusta una "Hora de inicio" antes de haber completado el programa anterior.<br />
Consiste en una o más "Horas de inicio", una "Opción de riego" (Días de la semana, Intervalo o Días<br />
pares/impares) y el producto que las estaciones van a regar.<br />
Función que evita que el programador de riego ejecute su programa de riego planificado durante u cierto<br />
lapso de tiempo.<br />
Parte eléctrica de un válvula de irrigación que abre y cierra la válvula.<br />
Dispositivo responsable de activar y desactivar un sistema de irrigación automático.<br />
Un área donde la irrigación es controlada completamente por una sola válvula de control.<br />
Vea Válvula de irrigación.<br />
Consiste en la opción Días de la semana, Intervalo o Días pares/impares que se utiliza en la programación.<br />
Vea Programa<br />
Días específicos u horas en que el organismo municipal competente prohíbe el riego en la zona.<br />
Vea Estación<br />
ESPAÑOL<br />
40<br />
41
07WTM002887 57004-24 rJ.qxd 2/13/07 11:51 AM Page 42<br />
<strong>MANUAL</strong> ACT.<br />
2<br />
DURACIÓN 5<br />
ESTACIÓN 10<br />
MINUTOS 15<br />
20<br />
30<br />
45<br />
DIAL PARA<br />
AJUSTOR 60<br />
LOS MIN 120<br />
+ –<br />
<strong>MANUAL</strong> DESACTIVADO<br />
SENSOR DE<br />
LLUVIA<br />
ACT. DESACT<br />
<strong>MANUAL</strong> EFFACER APLAZAMIENTO POR LLUVIA<br />
RESTABLECER<br />
C<br />
ESTACIONES<br />
B<br />
A<br />
· BOMBA<br />
· HORA<br />
Apéndice A: Instalación del programador de<br />
riego en interiores y exteriores<br />
1. Seleccione un lugar<br />
Seleccione una ubicación siguiendo los siguientes criterios:<br />
• Cerca de una fuente eléctrica (con cable) o toma eléctrica<br />
(sólo con programadores de venta en los EE.UU.)<br />
• El sitio debe ser seco, donde la temperatura de operación no<br />
sea inferior a 0º C ni superior a 70º C (32º F - 158º F).<br />
• Un sitio donde queden, al menos, 18 cm (7”) de espacio en el<br />
lateral izquierdo del programador de riego, para que se pueda<br />
abrir la puerta tras la instalación.<br />
Nota: Los programadores de riego son resistentes al agua, de acuerdo<br />
con la normativa UL-50 y la lista ETL®, aunque no debe colocar el<br />
aparato en zonas donde un continuo contacto con el agua pueda<br />
causar daños.<br />
• Evite la luz directa del sol<br />
• Accesibilidad al cable del programador (desde las válvulas)<br />
Precaución: No abra el programador de riego cuando esté lloviendo.<br />
Visagra de la puerta<br />
Cubierta del<br />
compartimento<br />
del terminal<br />
+ –<br />
SIQUIENTE INTRO<br />
Ilustración A1: Tapa del terminal<br />
DÍAS DE<br />
RIEGO<br />
HORAS<br />
DE INCIO<br />
DÍAS DE<br />
RIEGO<br />
AUTO<br />
APAGADO<br />
DÍAS DE<br />
RIEGO<br />
· FECHA/HORA<br />
· DUREE STATION<br />
HORAS<br />
DE INCIO<br />
· PRESUPUESTOS<br />
· IDIOMA<br />
· APLAZA.<br />
ESTACIÓN<br />
Tornillos de la cubierta del terminal<br />
HORAS<br />
DE INCIO<br />
SIN RIEGO<br />
· DÍAS<br />
2. Montaje del programador de riego<br />
• Con la plantilla de montaje (incluida), marque en la pared los<br />
puntos de fijación.<br />
• Inserte un tornillo Nº 8 (incluido) en la marca superior, dejando<br />
la cabeza del tornillo unos 3 mm (1/8”) sobresaliendo de la<br />
pared. (En caso necesario, utilice las anclas de expansión en la<br />
pared de yeso o de mampostería)<br />
• Extraiga la “Tapa del terminal” destornillando los dos tornillos<br />
y empujando la tapa de plástico, descubriendo la “Placa inferior<br />
CA”. [Ilustración A1]<br />
• Extraiga el tapón de goma de la “Placa inferior CA”.<br />
[Ilustración A2]<br />
• Cuelgue la ranura en forma de cerradura en la parte trasera del<br />
programador de riego del tornillo. [Ilustración A3]<br />
• Asegúrese de que el programador está nivelado, inserte un<br />
tornillo Nº 8 (incluido) en la depresión central (situada en el<br />
orificio donde se encontraba el tapón de goma) y apriételo (sin<br />
pasarlo de rosca) hasta que la caja esté bien fija en la pared<br />
Para facilitar la instalación, el programador de riego dispone de una<br />
puerta extraíble.<br />
Tapón de goma<br />
'AA' SIZE TTERY BA<br />
'AA' SIZE TTERY BA<br />
OPEN<br />
24VAC-OUT SENSOR COMMON PUMP 1 2 3 4 5 6 24VAC-IN<br />
Ilustración A2: Placa inferior CA<br />
Placa inferior CA<br />
Agujero de<br />
la ranura<br />
Agujero de<br />
montaje inferior<br />
Ilustración A3: Parte trasera del programador de riego<br />
3. Conexión a la toma eléctrica<br />
Precaución: Para una instalación al aire libre, es recomendable que un<br />
electricista cualificado realice el cableado según los códigos eléctricos y las<br />
normativas. Cuando utilice este programador al aire libre, use un circuito<br />
con interruptor diferencial automático de seguridad (GFI)..<br />
Compruebe el número del modelo de su programador de riego: para<br />
cumplir los requisitos nacionales, algunos modelos se configuran de<br />
distinta manera. Puede leer el número del modelo en la parte trasera<br />
de la caja, además de información práctica.<br />
ANOTE EL MODELO Y CONSULTE LA SECCIÓN<br />
CORRESPONDIENTE<br />
Modelos 57396, 57392, 57384, 57386, 57388, 57382<br />
• Siga en la siguiente sección: Cable de conexiones.<br />
Modelos 57606, 57012, 91016, 91012<br />
• Para un montaje en interior, siga en la sección Instalación del<br />
cable de conexiones<br />
• Para un montaje en exterior, siga en la sección Preparación<br />
para un cableado permanente<br />
Modelos 57344, 57346, 57348, 57342, 94022, 94026, 94028<br />
• Vaya a la sección “Cableado permanente”<br />
INSTALACIÓN DEL CABLE DE CONEXIONES<br />
• Ubicaciones en interior – Enchufe el cable en la toma eléctrica<br />
con interruptor diferencia automático de seguridad (GFI)<br />
• Ubicación en exterior – Enchufe el cable en una toma eléctrica<br />
con interruptor diferencia automático de protección (GFI)<br />
conectada a un circuito GFI.<br />
• Continúe en la página 37 de la Sección 8<br />
PREPARATIVOS PARA EL CABLEADO PERMANENTE<br />
• Extraiga la “Tapa del terminal” destornillando los dos tornillos y<br />
empujando la tapa de plástico, descubriendo la “Placa inferior<br />
CA”. [Ilustración 30]<br />
• Retire la “Tapa de la placa inferior CA” soltando el tornillo<br />
ubicado a la derecha del tapón de goma.<br />
• Afloje el tornillo en el reductor de tensión del cable y los tres<br />
tornillos en el bloque del terminal y extraiga completamente el<br />
cable de conexión. [Ilustración A4]<br />
• Introduzca los tres cables trenzados por la “boquilla de salida”,<br />
por debajo del “reductor de cable” y por el bloque del terminal.<br />
Conecte los cables en el “bloque del terminal” de la<br />
siguiente manera:<br />
- Cable negro “trenzado” – Conectado en el terminal “L” (fase)<br />
- Cable blanco “trenzado” – Conectado en el terminal “N”<br />
(neutro)<br />
- Cable verde “trenzado” – Conectado en el terminal “E”(masa)<br />
• Asegúrese de que los tornillos del terminal y el tornillo reductor<br />
de tensión están firmemente atornillados.<br />
• Cambie la placa inferior CA y apriete el tornillo (no fuerce<br />
demasiado; cuando halle resistencia, compruebe que los cables<br />
no están aprisionados)<br />
• Continúe en “Instalación con cableado permanente”<br />
INSTALACIÓN CON CABLEADO PERMANENTE<br />
Importante: El programador de riego dispone de un transformador que<br />
debe ser conectado a una fuente de corriente alterna (CA). Lea los requisitos<br />
eléctricos del programador de riego en la parte trasera de la caja. La<br />
construcción local y los códigos eléctricos requieren, normalmente, que un<br />
electricista certificado realice el cableado y las conexiones eléctricas necesarias<br />
para conectar el equipo montado en una pared exterior en una<br />
toma eléctrica. Verifique los códigos locales. De acuerdo con los requisitos<br />
del código eléctrico nacional (National Electrical Code) y otros eventuales<br />
códigos locales y estatales, toda conexión permanente debe ser realizada<br />
por un electricista certificado.<br />
ESPAÑOL<br />
42<br />
43
07WTM002887 57004-24 rJ.qxd 2/13/07 11:51 AM Page 44<br />
44<br />
Negro<br />
Blanco<br />
Verde<br />
Trenzado<br />
24VAC-OUT SENSOR COMMON PUMP 1 2 3 4 5 6 24VAC-IN<br />
Placa inferior CA<br />
Boquilla de salida<br />
Reductor de cable<br />
Ilustración A4: Extracción del “Cable de conexión”<br />
Cable de conexiones<br />
Precaución: No conecte el programador de riego en una toma de una fase en<br />
un sistema eléctrico trifásico que utilice una bomba u otro equipo eléctrico.<br />
Importante: Este programador de riego dispone de una conexión eléctrica<br />
externa con “boquilla de salida”. Use esta boquilla NPT de 13 mm (1/2”)<br />
para conectar el programador de riego en una caja de conexiones eléctricas<br />
normal (Lista UL o equivalente o según las normas CEI y EN o equivalentes).<br />
• Corte el paso eléctrico en el interruptor de circuito eléctrico y bloquee<br />
de manera segura y adecuada. Verifique que no hay suministro<br />
eléctrico hacia el lugar de instalación; para ello, mida con un<br />
voltímetro de VCA.<br />
• Use un cable de alimentación de 14 gauges (según AWG), como mínimo,<br />
con un margen de temperatura a partir de 68º C (155º F)<br />
• Instale el cableado y las conexiones correspondientes. Conecte el<br />
cable eléctrico en la fuente CA siguiendo los códigos y las normativas<br />
adecuados.<br />
• Conecte la caja de uniones (no incluida) en la boquilla NPT. [Ilustración A5]<br />
• Conecte el cableado de la fuente eléctrica en la toma de la caja de<br />
uniones, de acuerdo con los códigos adecuados.<br />
• Conecte los cables de la fuente en los cables de alargo en el programador<br />
de riego<br />
• Procure seguir el correcto código de color. Para EE.UU.: conecte el<br />
cable verde en masa (Ground), el negro en fase (Live) y el blanco<br />
en neutro (Neutral). A menudo, la conexión fuente a tierra puede<br />
ser un conductor de cobre pelado, en lugar del cable verde. Para<br />
Europa: Fase (Live) es marrón y neutro (Neutral) es azul; no se<br />
requiere conexión a tierra. Asegúrese de que todos los cables están<br />
conectados en el cable fuente adecuado<br />
• Compruebe de que todas las conexiones se realizan con conectores<br />
aislados y codificados correctamente<br />
• Coloque una junta resistente al agua y tape la caja de uniones.<br />
• Continúe en la página 37 de la Sección 8<br />
'AA' SIZE TTERY BA<br />
'AA' SIZE TTERY BA<br />
Ilustración A5: Uso de una caja de uniones<br />
OPEN<br />
24VAC-OUT SENSOR COMMON PUMP 1 2 3 4 5 6 24VAC-IN<br />
13 mm NPT<br />
Toma de empalme<br />
Caja de<br />
conexiones<br />
Conectores<br />
de cable<br />
Apéndice B: Sensor de lluvia y conmutador<br />
de derivación del sensor de lluvia (Sensor de<br />
venta por separado)<br />
Puede conectar en el controlador un sensor de lluvia u otro tipo de<br />
sensor atmosférico de microconmutación. El objetivo del sensor es<br />
detener el riego cuando la precipitación es suficiente.<br />
CONEXIÓN DE UN SENSOR DE LLUVIA<br />
• Conecte los cables del sensor de lluvia en los puertos<br />
terminales del cableado (de color amarillo) marcado como<br />
“Sensor”. [Ilustración B1]<br />
Nota: Para instrucciones específicas del cableado, consulte el manual<br />
de su sensor de lluvia.<br />
• Para comenzar la operación, encienda el sensor con el<br />
interruptor (“on”).<br />
DERIVACIÓN DEL SENSOR DE LLUVIA<br />
Este programador de lluvia dispone de un conmutador de encendido<br />
(on/off) para anular la función del sensor. Este conmutador se utiliza<br />
durante tareas de mantenimiento y reparación, de manera que el temporizador<br />
puede funcionar incluso si el sensor de lluvia está en modo<br />
activo.<br />
IMPORTANTE: Si el conmutador con sensor de lluvia está activado<br />
(“on”) y no se ha conectado ningún sensor, el programador de riego no<br />
funcionará. Para reanudar la función del controlador, ponga el conmutador<br />
en posición de apagado (off).<br />
Terminales de salida de 24 voltios<br />
Orbit® <strong>Irrigation</strong> ha equipado este programador de riego con terminales<br />
de salida de “24 VCA OUT”. De este modo, se consigue una<br />
conexión de 24 voltios directa en el sensor, evitando así la necesidad<br />
de una fuente eléctrica aparte. No se trata de un terminal de entrada,<br />
por lo que no debe ser usada con un sensor ambiental.<br />
Precaución:<br />
1. Antes de conectar el sensor en los terminales de salida de<br />
24 VAC, apague el suministro eléctrico del controlador.<br />
2. Conecte solamente sensores de 24 voltios. Si conecta un<br />
dispositivo que no sea de 24 voltios, puede dañar el controlador<br />
y el sensor.<br />
3. Consulte con el fabricante del sensor que está utilizando.<br />
VAC Out<br />
'AA' SIZE TTERY BA<br />
'AA' SIZE TTERY BA<br />
OPEN<br />
24VAC-OUT SENSOR COMMON PUMP 1 2 3 4 5 6 24VAC-IN<br />
Ilustración B1: Conexión del sensor de lluvia<br />
'AA' SIZE TTERY BA<br />
'AA' SIZE TTERY BA<br />
OPEN<br />
24VAC-OUT SENSOR COMMON PUMP 1 2 3 4 5 6 24VAC-IN<br />
45<br />
ESPAÑOL
07WTM002887 57004-24 rJ.qxd 2/13/07 11:51 AM Page 46<br />
Consejo<br />
Antes de devolver este controlador a la tienda, contacte con<br />
el Servicio técnico de Orbit ® llamando al: 1-800-488-6156, 1-801-<br />
299-5555<br />
Listados<br />
El controlador ha sido probado según las normativas UL-1951 (Modelos<br />
57004, 57006, 57008, 57122) y UL-50 (Modelos 57606, 57012) y<br />
aparece en la lista ETL ® . Los modelos CSA ® y CE ® son modelos aprobados<br />
para uso internacional..<br />
Nota sobre la marca comercial<br />
Control Star ® y Smart-Scan ® son marcas comerciales registradas de<br />
Orbit ® <strong>Irrigation</strong> Products, Inc. La información contenida en este<br />
manual sirve, en primera instancia, para que el usuario pueda<br />
establecer un plan de riego e introducir dicho plan en el programador.<br />
Este producto debe ser usado como controlador temporizador<br />
automático para activar válvulas de irrigación de 24 VCA,<br />
como se describe en este manual.<br />
Garantía limitada de Orbit ® <strong>Irrigation</strong> durante<br />
seis años<br />
Orbit ® <strong>Irrigation</strong> Products, Inc. garantiza a sus clientes que sus<br />
productos no sufrirá ningún fallo de material ni fabricación durante<br />
seis años a partir de la fecha de compra..<br />
Hasta una período de seis años tras la fecha de compra (se requiere<br />
comprobante de compra), reemplazamos, sin costes, las piezas<br />
defectuosas durante un funcionamiento normal<br />
Antes de recambiar la pieza, nos reservamos el derecho a inspeccionar<br />
la pieza defectuosa en cuestión. Orbit ® <strong>Irrigation</strong> Products,<br />
Inc. no asume ninguna responsabilidad por daños o costes incidentals<br />
o derivados de un fallo del producto. La responsabilidad de<br />
Orbit ® respecto a esta garantía se limita únicamente al recambio o<br />
la reparación de piezas defectuosas.<br />
Para hacer uso de esta garantía, devuelta la unidad a su vendedor,<br />
con una copia del recibo de compra.<br />
46
07WTM002887 57004-24 rJ.qxd 2/13/07 11:51 AM Page 47<br />
p 801 295 9820<br />
f 801 951 5815<br />
www.fluid-studio.net<br />
1065 South 500 West<br />
Bountiful, Utah 84010<br />
1<br />
proof no:<br />
date: 2.07.07<br />
des: RA spck: RA<br />
job no:<br />
07WTM002887<br />
client: orbit<br />
sku: 57004-24<br />
upc: NA<br />
file name:<br />
07WTM002887 57004-24 rJ.qxd<br />
software: quark 6.5<br />
dimensions:<br />
flat: w: 7.25 h: 6.25<br />
finished: w: 7.25 h : 6.25 d: XX<br />
colors<br />
color<br />
color<br />
Registration<br />
non printing<br />
non printing<br />
PMS<br />
PMS<br />
PMS<br />
CMYK<br />
280 C color color<br />
additional instructions:<br />
· -<br />
·<br />
Printers are<br />
responsible for<br />
meeting print<br />
production<br />
requirements.<br />
Any changes<br />
must be approved<br />
by the client and<br />
Fluid Studio.<br />
Printed piece<br />
must meet<br />
designated<br />
specifications<br />
on this form.