User Manual / Manual del Usuario - Easy2.com
User Manual / Manual del Usuario - Easy2.com
User Manual / Manual del Usuario - Easy2.com
- No tags were found...
You also want an ePaper? Increase the reach of your titles
YUMPU automatically turns print PDFs into web optimized ePapers that Google loves.
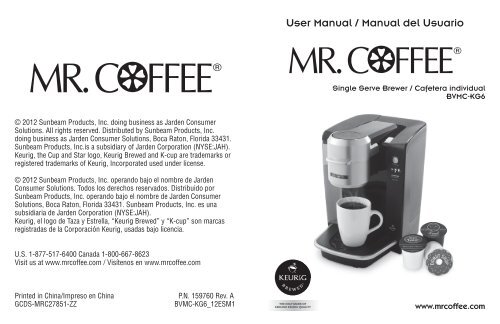
<strong>User</strong> <strong>Manual</strong> / <strong>Manual</strong> <strong>del</strong> <strong>Usuario</strong>Single Serve Brewer / Cafetera individualBVMC-KG6© 2012 Sunbeam Products, Inc. doing business as Jarden ConsumerSolutions. All rights reserved. Distributed by Sunbeam Products, Inc.doing business as Jarden Consumer Solutions, Boca Raton, Florida 33431.Sunbeam Products, Inc.is a subsidiary of Jarden Corporation (NYSE:JAH).Keurig, the Cup and Star logo, Keurig Brewed and K-cup are trademarks orregistered trademarks of Keurig, Incorporated used under license.© 2012 Sunbeam Products, Inc. operando bajo el nombre de JardenConsumer Solutions. Todos los derechos reservados. Distribuido porSunbeam Products, Inc. operando bajo el nombre de Jarden ConsumerSolutions, Boca Raton, Florida 33431. Sunbeam Products, Inc. es unasubsidiaria de Jarden Corporation (NYSE:JAH).Keurig, el logo de Taza y Estrella, “Keurig Brewed” y “K-cup” son marcasregistradas de la Corporación Keurig, usadas bajo licencia.U.S. 1-877-517-6400 Canada 1-800-667-8623Visit us at www.mrcoffee.com / Visítenos en www.mrcoffee.comPrinted in China/Impreso en ChinaP.N. 159760 Rev. AGCDS-MRC27851-ZZ BVMC-KG6_12ESM1 www.mrcoffee.com
IMPORTANT SAFEGUARDSWhen using electrical appliances, basic safety precautionsshould be followed, including the following:1. READ ALL INSTRUCTIONS BEFORE USING.2. Do not touch hot surfaces. Use handles and knobs whenavailable. Scalding may occur if the coffee Brewer ismoved or opened or K-Cup ® pack is disturbed duringbrewing cycles.3. This appliance must be properly installed and located inaccordance with these instructions before it is used.4. The use of accessory attachments not recommended bythe appliance manufacturer may result in fire, electricalshock or injury to persons.5. Do not place on or near a hot gas or electric burner, or ina heated oven.6. Do not use outdoors.7. To protect against fi re, electric shock and injury, do notimmerse cords, plugs or the appliance in water or anyother liquid.8. Use only water in this appliance! Do not put any otherliquids or foods in the Water Reservoir.9. To disconnect, unplug power cord when not in use andbefore cleaning.10. Do not operate any appliance with a damaged cord orplug or after the appliance malfunctions or is damaged inany manner. Contact your Mr. Coffee ® Customer Serviceto arrange for replacement or repair.11. Do not let the cord hang over the edge of the table orcounter, or touch hot surfaces.12. Close supervision is necessary when any appliance is usedby or near children.13. Do not open the Brewer while brewing is in progress.14. Do not use appliance for other than intended use.CAUTION: There are two sharp needles that puncture theK-Cup ® pack, one above the K-Cup ® Assembly Housing andthe other in the bottom of the K-Cup ® Assembly Housing.To avoid risk of injury, do not put your fi ngers in the K-Cup ®Assembly Housing.CAUTION: There is extremely hot water in the K-Cup ®Assembly Housing during the brew process. To avoid risk ofinjury, do not lift the handle or open the K-Cup ® AssemblyHousing during the brewing process.WARNING: To reduce the risk of fi re or electricshock, do not remove any service covers. There areno user serviceable parts inside the coffeemaker.Only authorized personnel should repair thecoffeemaker.Please read ALL of the instructions in this manual carefullybefore you begin to use this appliance. Proper care andmaintenance will ensure a long life and a trouble-freeoperation for this appliance. Please save these instructionsand refer to them for cleaning and care tips.SAVE THESE INSTRUCTIONS2 3
SPECIAL CORD SET INSTRUCTIONS1. A short power supply cord is provided to reducethe hazards resulting from a person or pet becomingentangled in, or tripping over, a longer cord.2. An extension cord may be purchased and used if care isexercised in its use.3. If an extension cord is used, the marked electrical ratingof the extension cord must be at least 10 amps and 120volts. The resulting extended cord must be arrangedso that it will not drape over a countertop or tabletopwhere it can be pulled on by children or tripped overaccidentally.4. This appliance has a polarized plug (one blade is widerthan the other). To reduce the risk of electric shock,this plug will fit in a polarized outlet only one way. If theplug does not fit fully in the outlet, reverse the plug. If itstill does not fit, contact a qualifi ed electrician. Do notmodify the plug in any way.5. You can customize the length of the power cord so thatit is the exact length you desire. To increase the length ofthe power cord: grasp the power cord (not the powerplug) and gently lift it out of the slot, then pull it awayfrom the Single Serve Brewer. To decrease the length ofthe power cord: grasp the power cord (not the powerplug), lift it out of the slot and gently feed it into theSingle Serve Brewer. Lock the cord in the slot whenfi nished.TABLE OF CONTENTSImportant Safeguards . . . . . . . . . . . . . . . . . . . . . . . . . . . . . . 2Special Cord Set Instructions. . . . . . . . . . . . . . . . . . . . . . . . . 4Parts Diagram . . . . . . . . . . . . . . . . . . . . . . . . . . . . . . . . . . . . 6Set-Up & How to Brew . . . . . . . . . . . . . . . . . . . . . . . . . . . . . 7Helpful Hints . . . . . . . . . . . . . . . . . . . . . . . . . . . . . . . . . . . . . 10Adding Water To The Water Reservoir . . . . . . . . . . . . . . . . . . . 12Auto Off Timer Feature . . . . . . . . . . . . . . . . . . . . . . . . . . . . . 12Control Panel Indicator Lights . . . . . . . . . . . . . . . . . . . . . . . . . . 13Cleaning and Maintaining . . . . . . . . . . . . . . . . . . . . . . . . . . 14Troubleshooting . . . . . . . . . . . . . . . . . . . . . . . . . . . . . . . . . 16Service and Maintenance . . . . . . . . . . . . . . . . . . . . . . . . . . 18Warranty Information . . . . . . . . . . . . . . . . . . . . . . . . . . . . . 19Welcome and congratulations on the purchase of yournew Mr. Coffee ® Single Serve Brewer. With a large variety ofKeurig ® K-Cup ® packs, the options are endless. You can enjoytea, cocoa, and coffee, in a fast and simple way.How you enjoy your Mr. Coffee ® Single Serve Brewer is up toyou!THIS PRODUCT IS FORHOUSEHOLD USE ONLY4 5
5. Place chosen K-Cup ® packinto the K-Cup ® AssemblyHousing.NOTE: Brew•Off Button fl ashesindicating the Brew Head isopen.CAUTION: Avoid the sharpneedle inside the Brew Head.6. Close by pushing down on theBrew Head handle.NOTE: Closing the Brew Head willpuncture the K-Cup ® pack.7. Press the Serving SizeButton to choosebetween 6 oz., 8 oz.,or 10 oz. cups.A light will indicateyour selection.6 8 10oz.8. Place a coffee cup in thedispense area on the DripTray. Press the Brew•OffButton to start brewing.NOTE: Initial Brew willbe longer than averagebecause water needs to beheated up before brewing.Subsequent brews will beshorter as long as the watertank is fi lled.NOTE: Drip Tray and DripTray Plate can be removed toaccommodate larger mugs.9. The Brew•Off Button will pulse toindicate that the brewing processhas begun.NOTE: After the brewing process iscomplete, an automatic drying cycleremoves most of the liquid from theK-Cup ® pack. This may take up to 60seconds.10. ENJOY!8 9
HELPFUL HINTS• Keep your Brewer turned “ON” at all times – To brew afresh cup of coffee, tea or hot cocoa anytime you want,we suggest you keep your Brewer turned “ON” all the time.However, you can set the Brewer to automatically turn offtwo hours after your last brew. Follow the instructions onpage 12 to activate or de-activate the auto-off feature.• Initial Cleansing Brew – Before you use your Brewer for thefi rst time, perform an initial cleansing brew by running cleanwater through the brew cycle without using a K-Cup ® pack.• One Cup at a Time – Your new Brewer makes one freshbeverage at a time.• Water Reservoir - Your new Brewer holds up tp 40 oz. ofwater.This will make aproximately 6 cups of coffee (6oz.each) or 5 cups of coffee (8oz. each) or 4 cups of coffee(10oz.). This Brewer also has a internal pre-heated hotwater reservoir for a faster brew.• The Right Water Makes a Difference – For the best tastinggourmet coffee, tea or hot cocoa, we recommend usingbottled or filtered water. We do not recommend usingdistilled or reverse osmosis water. Water quality varies fromplace to place. If you notice an undesirable taste in yourcup of coffee such as chlorine or other mineral taste, werecommend you consider using bottled water or waterfrom a fi ltration system.• Replace K-Cup ® Pack Between Brews - It is necessary toreplace your K-Cup ® pack before starting your next brew.This will reset the Brewer to allow you to brew another cupof coffee.• Customize Your Flavor & Brew – With the choice of over200 varieties of K-Cup ® packs, your Brewer gives youendless options to customize the flavor and strength that’sperfect for you. For a strong, intense cup, select an ExtraBold K-Cup ® pack (with up to 30% more ground coffeethan regular varieties).• Brewing Into a Tall Mug – To brew into a tall mug, simplyremove the Drip Tray Plate and Drip Tray, place the tall mugon the Drip Tray Base.• The Drip Tray – Any liquid overflow (from your cup or mug)will be caught in the Drip Tray. Make sure you empty theDrip Tray regularly.• Clean Your Brewer Regularly – To keep your Brewer lookingand performing its best, be sure to clean the external andinternal components on a regular basis. See page 14 formore information.• De-Scaling – Mineral content in water varies from placeto place. Depending on the mineral content of the waterin your area, calcium deposits or scale may build up inyour Brewer. Scale is non-toxic, but left unattended, it canhinder Brewer performance. De-scaling your Brewer helpsmaintain the heating element and other internal parts of theBrewer that come in contact with water. See page 16 formore information.• Storing – When storing your Brewer, carefully empty the DripTray and Water Reservoir. Store your Brewer upright in a safe,dry, frost-free environment.10 11
ADDING WATER TO THE WATER RESERVOIRThe Add Water Light will fl ash indicating the Water Reservoiris out of water. Fill Water Reservoir with fi ltered or bottledwater to the MAX FILL line. Once Water Reservoir is placedback on the Brewer, press the Brew•Off Button to beginthe brewing process. The first brew after refi lling the WaterReservoir will be longer than average because more waterneeds to be heated up before brewing. Subsequent brewswill be shorter as long as the Water Reservoir remains fi lled.NOTE: Pressing the Brew•Off Button is not needed if you refillthe Water Reservoir before the Add Water Light fl ashes.AUTO OFF TIMER FEATUREThis Brewer is equiped with an auto-off timer feature thatwill turn off the Brewer after 2 hours of non-use. NOTE: TheBrewer’s auto-off timer comes deactivated from the factory.Follow the below steps to activate or deactivate the auto-offtimer.1. To activate the auto-off timer, hold down the Serving SizeButton and Brew•Off Button together for 5 seconds. TheServing Size Indicators and Brew•Off Button will flash 2times indicating the auto-off timer is activated.2. To deactivate the auto-off timer, hold down the ServingSize Button and Brew•Off Button together for 5 seconds.The Serving Size Indicators and Brew•Off Button will flash 5times indicating the auto-off timer is de-activated.CONTROL PANEL INDICATOR LIGHTSIndicator6 8 10oz.6 8 10oz.Brew•OffButtonBrew•OffButton+ServingSizeIndicatorsServingSizeIndicatorsAdd WaterLightPre-HeatingLightFlashingPulsingSteady onFlashes 2timesFlashes 5timesFlashingFlashingFlashingReasonIndicates Brew Head is openor water is neededIndicates Brewer is brewingReady to brewIndicates the auto-offtimer feature is activated.See page 12 for furtherinstructions.Indicates the auto-off timerfeature is de-activated.See page 12 for furtherinstructions.Indicates Brewer needs tobe de-scaled. See de-scaleinstructions on page 16.Indicates the Water Reservoiris out of water. When WaterReservoir is refi lled, press theBrew●Off Button to resumeor start brewing.Indicates water in theinternal reservoir in heatingto prepare for your nextbrew. The light will go offindicating that the waterhas reached the correcttemperature to brew.12 13
CLEANING AND MAINTAINING YOUR SINGLESERVE BREWERCleaning External PartsCAUTION : Make sure the Brewer is unpluggedbefore cleaning and allow to cool. Regularcleaning of the Brewer’s external components isrecommended.1. Never immerse the Brewer in water or other liquids. Thehousing and other external components may be cleanedwith a soapy, damp, non-abrasive cloth.2. The Drip Tray can accumulate liquids. The Drip Tray andDrip Tray Plate should be periodically inspected andcleaned with a damp soapy nonabrasive lint free cloth. TheDrip Tray and Drip Tray Plate should not be put into thedishwasher. To remove the Drip Tray, simply Lift upward,keeping it level at all times to avoid spilling.Cleaning the K-Cup ® Assembly Housing1. Cleaning the Parts – The K-Cup ® Assembly Housing can beplaced on the top rack of a dishwasher.NOTE: Use low temperature cycles in the dishwasher.To remove from the Brewer, lift the Brew Head, then graspthe top of the K-Cup ® Assembly Housing with one handwhile pushing up on the bottom of the K-Cup ® AssemblyHousing from underneath with the other until it releases.After cleaning, align the K-Cup ® Assembly Housing with theopening using the two front ribs as a guide, and snap intoplace from the top.2. Cleaning the Funnel – The funnel can beremoved from the K-Cup ® Assembly Housing bypulling on it until it snaps off (fig. 1). The funnelis dishwasher safe. To replace it, snap it backonto the K-Cup ® Assembly Housing.3. Cleaning the Needles – The exit needle isFIGURE 1located on the inside bottom of the K-Cup ® AssemblyHousing. Should a clog arise due to coffee grinds, it canbe cleaned using a paper clip or similar tool.Remove K-Cup ® Assembly Housing and detachfunnel. Insert the household tool into theneedle to loosen the clog and push it out. TheK-Cup ® Assembly Housing is dishwasher safe. Apaper clip can also be used to clean the BrewHead Needle located inside of the Brew Head.CAUTION:There are sharp needles thatpuncture the K-Cup ® pack above theK-Cup ® Assembly Housing and in thebottom of the K-Cup ® AssemblyHousing. To avoid risk of injury, do notFIGURE 2put your fi ngers in the K-Cup ® Assembly Housing.Cleaning and Emptying the ReservoirDiscard the remaining water by removing the Water ReservoirLid and turning the Water Reservoir upside down over thesink. The Water Reservoir Lid should NOT be put into thedishwasher. It should be cleaned with a damp, soapy, nonabrasivecloth and rinsed thoroughly. The Water Reservoir isdishwasher safe.NOTE: DO NOT dry the inside of the Water Reservoir with acloth as lint may remain.CAUTION: Please rinse the Water Reservoir thoroughlyafter cleaning to ensure that no cleaners or cleaningsolutions remain in this area as they may contaminatethe water supply in the Brewer. Do not immerseappliance in water.StorageEmpty the Water Reservoir before storing and take care toensure that you store your Brewer in a safe and frost freeenvironment. It is suggested to store your Brewer in the uprightposition. If you store the Brewer in a cold environment, yourun the risk of condensation freezing inside the Brewer andcausing damage. When you prepare to use it after storage, werecommend wiping the Water Reservoir with a damp lint-freecloth and running three cleansing brews without a K-Cup ® pack.14 15!
If your Brewer has been in an environment below freezing,please be sure to let it warm to room temperature for 2hours before using.De-Scaling Your BrewerThe Brewer should be de-scaled every 3-6 months to ensureoptimal performance or when there are white deposits in theWater Reservoir. It is possible for calcium deposits to build upfaster, making it necessary to de-scale more often. The threeServing Size Indicators will flash indicating the Brewer needsto be de-scaled.PROBLEMBrewer doesnot have powerBrewer will notbrewSOLUTION1. Make sure you have at least 40 ounces of undiluted whitevinegar on hand. You will also need a 10 oz ceramic mug(do not use a paper cup) and access to a sink.2. Fill the Water Reservoir with 40 ounces of undiluted whitevinegar, place a ceramic mug on the Drip Tray Plate.3. Close the Brew Head and perform a brew into the ceramicmug without adding a K-Cup ® pack.4. Repeat the brew cycle until the Water Reservoir is emptyand then allow it to sit for at least 60 minutes.Brewer not5. Fill the Water Reservoir with 40 ounces of filtered orbrewing a fullpurified water, close the Brew Head, place a cup on theservingDrip Tray Plate and perform a brew.6. Repeat the brew cycle until the Water Reservoir is empty(with no K-Cup ® pack in place) to clean the Brewerplumbing and get rid of any residual taste from the vinegar.The Brewer is now ready for normal use again.Note: If the de-scale process is not followed correctly or ifyou choose not to de-scale your Brewer, the lights can beWon’t workreset as with most other Mr. Coffee ® Brewers, by unpluggingwith Keurig ® Mythe Brewer for 30 seconds.K-Cup ®TROUBLESHOOTING YOUR SINGLE SERVE BREWERYour MR. COFFEE ® Single Serve Brewer has been carefullyAdd Water Lightdesigned to give you many years of trouble-free service.is still flashing afterIn the unlikely event that your new coffeemaker does notWater Reservoir isoperate satisfactorily, please review the following potentialrefilledproblems and try the steps recommended BEFORE you call anAuthorized Sunbeam Service Center.16 17Make sure the Brew•Off Button is pressed andis illuminated.Plug Brewer into an independent outlet.Check to be sure that it is plugged in securely.Plug into a different outlet.If Brewer is cold/frozen, wait for at least twohours for it to reach room temperature beforepowering on.Check to make sure there is water in theWater Reservoir and the Brew Head is closedsecurely. NOTE: the Brew•Off Button will flashif the Brew Head is open.Lift Brew Head and replace K-Cup ® pack toreset the Brewer.The exit needle may be clogged (refer to page 14).Clean K-Cup ® Assembly Housing if necessaryand rinse under faucet (refer to page 14).De-scale the Brewer (refer to page 16).If you have repeated the de-scale procedureon your Brewer two times and the Brewer isstill not brewing, contact Customer Service.K-Cup ® Assembly Housing needs to be removed.Esnure My K-Cup ® lid is secured tightly.Press the Brew●Off Button to begin brewing.The Add Water light will then turn off.
SERVICE AND MAINTENANCEIf your coffeemaker requires service, do not return it to thestore where you purchased it. All repairs and replacementsmust be made by Sunbeam or an authorized SunbeamService Center. If you live in the U.S. or Canada, please callus at the following toll-free telephone numbers to find thelocation of the nearest authorized service center:U.S. 1-877-517-6400Canada 1-800-667-8623You may also visit our web site atwww.mrcoffee.comTo assist us in serving you, please have the coffeemakermo<strong>del</strong> number and date of purchase available when you call.The mo<strong>del</strong> number is stamped on the bottom metal plate ofthe coffeemaker.We welcome your questions, comments or suggestions.In all your communications, please include your completename, address and telephone number and a descriptionof the problem.Mo<strong>del</strong> Number: _______________________________________(The mo<strong>del</strong> number is stamped on the bottom metal plate ofthe coffeemaker)Serial Number_________________________________________Date Code: ___________________________________________(Located on the metal prong of the power cord. Begins witha letter followed by three numbers)Date of Purchase: ______________________________________WARRANTY INFORMATION1-YEAR LIMITED WARRANTYSunbeam Products, Inc. doing business as Jarden ConsumerSolutions or if in Canada, Sunbeam Corporation (Canada)Limited doing business as Jarden Consumer Solutions(collectively “JCS”) warrants that for a period of one yearfrom the date of purchase, this product will be free fromdefects in material and workmanship. JCS, at its option, willrepair or replace this product or any component of theproduct found to be defective during the warranty period.Replacement will be made with a new or remanufacturedproduct or component. If the product is no longer available,replacement may be made with a similar product of equal orgreater value. This is your exclusive warranty. Do NOT attemptto repair or adjust any electrical or mechanical functions onthis product. Doing so will void this warranty.This warranty is valid for the original retail purchaser from thedate of initial retail purchase and is not transferable. Keepthe original sales receipt. Proof of purchase is required toobtain warranty performance. JCS dealers, service centers,or retail stores selling JCS products do not have the right toalter, modify or any way change the terms and conditions ofthis warranty.This warranty does not cover normal wear of parts or damageresulting from any of the following: negligent use or misuseof the product, use on improper voltage or current, usecontrary to the operating instructions, disassembly, repairor alteration by anyone other than JCS or an authorized JCSservice center. Further, the warranty does not cover: Acts ofGod, such as fi re, fl ood, hurricanes and tornadoes.What are the limits on JCS’s Liability?JCS shall not be liable for any incidental or consequentialdamages caused by the breach of any express, implied orstatutory warranty or condition.Except to the extent prohibited by applicable law, any implied18 19
warranty or condition of merchantability or fitness for a particular NOTESpurpose is limited in duration to the duration of the above warranty.JCS disclaims all other warranties, conditions or representations,express, implied, statutory or otherwise.JCS shall not be liable for any damages of any kind resultingfrom the purchase, use or misuse of, or inability to use theproduct including incidental, special, consequential or similardamages or loss of profits, or for any breach of contract,fundamental or otherwise, or for any claim brought againstpurchaser by any other party.Some provinces, states or jurisdictions do not allow theexclusion or limitation of incidental or consequentialdamages or limitations on how long an implied warranty lasts,so the above limitations or exclusion may not apply to you.This warranty gives you specific legal rights, and you may alsohave other rights that vary from province to province, state tostate or jurisdiction to jurisdiction.How to Obtain Warranty ServiceIn the U.S.A.If you have any question regarding this warranty or would liketo obtain warranty service, please call 1-877-517-6400 and aconvenient service center address will be provided to you.In CanadaIf you have any question regarding this warranty or would liketo obtain warranty service, please call 1-800-667-8623 and aconvenient service center address will be provided to you.In the U.S.A., this warranty is offered by Sunbeam Products,Inc. doing business as Jarden Consumer Solutions located inBoca Raton, Florida 33431. In Canada, this warranty is offeredby Sunbeam Corporation (Canada) Limited doing business asJarden Consumer Solutions, located at 20 B Hereford Street,Brampton, Ontario L6Y 0M1. If you have any other problemor claim in connection with this product, please write ourConsumer Service Department.PLEASE DO NOT RETURN THIS PRODUCT TO ANYOF THESE ADDRESSES20 21
PRECAUCIONES IMPORTANTESCuando utilice electrodomésticos, se deben seguirprecauciones básicas de seguridad, incluidas las siguientes:1. LEA TODAS LAS INSTRUCCIONES ANTES DEL USO.2. No toque las superfi cies calientes. Utilice manijas yperillas si las hay. Si el electrodoméstico se mueve o seabre durante los ciclos de preparación, se pueden sufrirquemaduras, al igual que si se altera el K-Cup ® pack.3. Este electrodoméstico se debe instalar y localizar deforma correcta de acuerdo con estas instrucciones antes<strong>del</strong> uso.4. El uso de accesorios no recomendados por el fabricante<strong>del</strong> electrodoméstico puede resultar en incendio,descarga eléctrica o lesiones a personas.5. No coloque sobre quemadores eléctricos o de gas, nicerca de éstos, o en un horno caliente.6. No lo use en exteriores.7. Para protegerse contra un incendio, descarga eléctricao lesión, no sumerja en agua o en cualquier otro líquidolos cables, enchufes o el electrodoméstico.8. ¡Use únicamente agua en este electrodoméstico! Nocoloque ningún otro líquido o alimento en el depósito<strong>del</strong> agua.9. Desconecte la unidad cuando no esté en uso y antes <strong>del</strong>impiarla.10. No opere ningún electrodoméstico con un cable oenchufe dañados o después de un mal funcionamiento ocualquier daño <strong>del</strong> electrodoméstico. Llame a Servicio alcliente de Mr. Coffee ® para el reemplazo o la reparación.11. No deje que el cable quede colgando <strong>del</strong> borde de lamesa o mostrador o que toque superficies calientes.12. Se necesita supervisión cercana cuando cualquierelectrodoméstico se use cerca de niños o por parte deéstos.13. No abra este electrodoméstico cuando el café se estépreparando.14. No utilice el artefacto para otros fi nes que no sean losespecificados.PRECAUCIÓN: Hay dos agujas filosas que perforan el paqueteindividual K-Cup ® pack, una por encima y otra por debajo<strong>del</strong> receptáculo <strong>del</strong> K-Cup ® pack. Para evitar riesgo de lesión,no ponga los dedos en la carcasa de ensamblaje <strong>del</strong> K-Cup ®pack.PRECAUCIÓN: Durante el proceso de preparación el agua <strong>del</strong>receptáculo <strong>del</strong> K-Cup ® pack está extremadamente caliente.Para evitar riesgo de lesión, no levante la manija ni abra lacarcasa <strong>del</strong> ensamblaje <strong>del</strong> K-Cup ® pack durante el procesode preparación.ADVERTENCIA! Para reducir el riesgo de incendioo descarga eléctrica, no retire ninguna cubierta.No existen partes que el usuario pueda reparardentro de este electrodoméstico. Solamentepersonal autorizado debe reparar la cafetera.Lea cuidadosamente TODAS las instrucciones de estemanual antes de empezar a usar este electrodoméstico. Elmantenimiento y cuidado correctos garantizan una vida largay una operación sin problemas de este electrodoméstico.Guarde estas instrucciones y consúltelas para sugerenciasdurante la limpieza y el cuidado.CONSERVE ESTAS INSTRUCCIONES22 23
INSTRUCCIONES ESPECIALES PARA EL CABLE1. Se incluye un cable corto de suministro de energía parareducir los peligros que resulten de que una persona omascota se enreden o tropiecen con un cable más largo.2. Se puede comprar un cable de extensión y usarse concuidado.3. Si se usa un cable de extensión, el calibre eléctricomarcado de la extensión debe ser por lo menos de 10amperios y 120 voltios. El cable de extensión se debecolocar de manera que no cuelgue de una mesa omostrador donde los niños lo puedan jalar o tropezarseaccidentalmente.4. Este electrodoméstico tiene un enchufe polarizado(una pata es más ancha que la otra). Para reducir elriesgo de descarga eléctrica, este enchufe encajará enun tomacorriente polarizado en una sola dirección. Si elenchufe no encaja completamente en el tomacorriente,voltee el enchufe. Si sigue sin encajar, contacte a unelectricista calificado. De ninguna manera modifi que elenchufe.5. Usted puede ajustar el largo <strong>del</strong> cable eléctrico de maneraque sea de la longitud precisa que usted desee. Paraaumentar el largo <strong>del</strong> cable eléctrico: agarre el cableeléctrico (no el enchufe) y hálelo hacia arriba de suhendidura con <strong>del</strong>icadeza, retirándolo de la cafetera. Paradisminuir el largo <strong>del</strong> cable eléctrico: agarre el cable eléctrico(no el enchufe) y hálelo hacia arriba de su hendidura,insertándolo con <strong>del</strong>icadeza en la cafetera. Fije el cable en lahendidura cuando termine.ADVERTENCIARIESGO DE INCENDIO O DEDESCARGA ELÉCTRICA.NO ABRA !ADVERTENCIA: PARA REDUCIR EL RIESGO DEINCENDIO O DE DESCARGA ELÉCTRICA NORETIRE LA TAPA INFERIOR. NO EXISTEN PARTESINTERNAS QUE EL USUARIO PUEDA REPARAR.ÚNICAMENTE PERSONAL DE SERVICIO AUTORIZADOPUEDE REALIZAR REPARACIONES.ES TE PRODUCTO ES PARA USODOMÉSTICO ÚNICAMENTECONTENIDOPrecauciones importantes . . . . . . . . . . . . . . . . . . . . . . . . . . 22Instrucciones especiales para el cable. . . . . . . . . . . . . . . . . 24Diagrama de partes . . . . . . . . . . . . . . . . . . . . . . . . . . . . . . . . . . 26Instalación de la cafetera y preparación <strong>del</strong> café . . . . . . . . 27Consejos Útiles . . . . . . . . . . . . . . . . . . . . . . . . . . . . . . . . . . . . 30Añadiendo Agua al Depósito de Agua . . . . . . . . . . . . . . . . . . 31Función de Apagado Automático . . . . . . . . . . . . . . . . . . . . . . 32Luces <strong>del</strong> Panel de Control . . . . . . . . . . . . . . . . . . . . . . . . . . 33Limpieza y mantenimiento . . . . . . . . . . . . . . . . . . . . . . . . . . . 34Solución de problemas . . . . . . . . . . . . . . . . . . . . . . . . . . . . 37Servicio y mantenimiento . . . . . . . . . . . . . . . . . . . . . . . . . . 39Información de la garantía . . . . . . . . . . . . . . . . . . . . . . . . . 40Bienvenidos y felicitaciones por la compra de su nuevacafetera individual MR. COFFEE ® . Con una gran variedadde K-Cup ® packs Keurig ® , las opciones son infinitas. Ustedpuede disfrutar <strong>del</strong> te, chocolate y café, en una forma rápiday sencilla.¡Disfrutar de su cafetera individual MR. COFFEE ® depende deusted!24 25
DIAGRAMA DE PARTES6714131211INSTALACIÓN DE LACAFETERA Y PREPARACIÓNDEL CAFÉ1. Ponga la cafetera sobre unasuperfi cie plana, retire el material<strong>del</strong> empaque y conecte la unidad.1510982. Retire el depósito de agua y tapa<strong>del</strong> depósito de agua, luegollénelo con agua embotellada oagua fi ltrada hasta la línea Max Fill(Llenado Máximo).NOTA: no sobrepase esta línea.Controles e Indicadores1. Botón Colar•Apagado2. Luz de Pre-Calentado3. Indicador <strong>del</strong> tamaño de la taza4. Botón para seleccionar el tamañode la taza5. Indicador de añadir agua6. Cubierta <strong>del</strong> tanque de agua7. Tanque de agua8. Base de bandeja de goteo9. Bandeja de goteo10. Plato de la bandeja de goteo11. Cabezal de preparación12. Lugar para el K-cup ® pack13. Aguja de preparación14. Manija <strong>del</strong> Cabezal de preparación15. Orifi cios para fi jar el Tanque de agua123453. Vuelva a colocar la tapa <strong>del</strong> depósitoy el depósito de agua en el costadoizquierdo de la cafetera4. Levante la manija de la cafeterapara insertar un paqueteindividual K-Cup ® Pack.NOTA: NO retire o perfore la cubiertade papel de aluminio <strong>del</strong> K-cup ® pack.26 27
5. Ponga el paquete individualK-Cup ® Pack deseado en ellugar para el K-Cup ® Pack.NOTA: El botón Colar•Apagadodestella para indicar que elcabezal de preparación estáabierto.PRECAUCIÓN: Tenga cuidado conla aguja dentro <strong>del</strong> cabezal depreparación.6. Cierre haciendo presión sobre elcabezal de preparación.NOTA: Al cerrar el cabezal depreparación, se perforará el paqueteindividual K-Cup ® Pack.8. Coloque su taza en lazona para dispensar, arribade la bandeja de goteo.Pulse el botón Brew•Off(Colar•Apagado) para iniciarla elaboración de su bebida.NOTA: La preparación inicialtomará más tiempo de lo normalya que el agua debe calentarseantes de iniciar el proceso. Eltiempo de las preparacionesposteriores será más corto,siempre y cuando el tanque deagua esté lleno.NOTA: la bandeja de goteo y elplato de la bandeja de goteose pueden remover para darcabida a tazas grandes.7. Seleccione el tamañode su taza presionandoel botón Serving Size(Seleccionar el tamaño <strong>del</strong>a taza). Una luz indicaráel tamaño seleccionado:6 onzas, 8 onzas o 10onzas.6 8 10oz.9. Cuando el agua llega a latemperatura adecuada el botónBew•Off (Colar•Apagado) titilaráy la elaboración de su bebidacomenzará.NOTA: Después de que el procesode elaboración se haya completado,un ciclo automático de enfriamientopara eliminar casi todo el líquido <strong>del</strong>K-Cup ® pack. Este proceso puedetardar hasta 60 segundos.10. ¡DISFRUTE!28 29
CONSEJOS ÚTILES• Personalice su sabor y preparación – Con una selecciónde más de 200 variedades de K-Cup ® packs, su cafetera• Mantenga su Cafetera encendida en todo momento -le ofrece infi nidad de opciones para personalizar el saborPara preparar una nueva taza de café, té o chocolate eny la concentración perfecta para usted. Para una taza decualquier momento que desee, le sugerimos que mantenga café fuerte, intenso, seleccione el “Extra Bold” K-Cup ® packsu cafetera encendida todo el tiempo. Sin embargo, se(hasta 30% más café molido que las variedades normales).puede configurar la cafetera para que automáticamentese apague dos horas después de que haya preparado su• Preparación de una taza más grande – Para preparar unaúltima bebida. Siga las sencillas instrucciones de la página 32taza más grande (o tazas de viaje), simplemente retirepara hacer el uso de la cafetera conveniente para usted.la bandeja de goteo y coloque la taza en la base de labandeja.• Operación para limpieza inicial – Antes de utilizar su• La bandeja de goteo – Cualquier líquido derramadocafetera por primera vez, se debe realizar una limpieza(desde el vaso o taza) caerá en la bandeja de goteo.inicial utilizando solamente agua y activando un ciclo deCerciórese de vaciar la bandeja de goteo periódicamente.preparación sin utilizar un K-Cup ® pack.• Limpie su cafetera con frecuencia – Para mantener su• Una taza a la vez – Su nueva cafetera prepara una bebidacafetera luciendo y operando de la mejor forma, cercióresefresca cada vez.de limpiar los componentes externos e internos con• Tanque de agua - Su nueva cafetera puede almacenar hasta frecuencia. Para mayor información, consulte la página 34.40 oz de agua. Esta cantidad será suficiente para preparar • Descalcificación – El contenido mineral en el agua varía de6 tazas de pequeñas (6 oz. cada una), 5 tazas medianasun lugar a otro. Dependiendo <strong>del</strong> contenido mineral <strong>del</strong>(8 oz. cada una) o 4 tazas grandes (10 oz. cada una). Esta agua en su área, se pueden acumular depósitos de calciocafetera cuenta con un depósito interno que mantieneen su cafetera. Estos minerales no son tóxicos, pero si seagua precalentada, para una preparación más rápida.ignora, puede entorpecer el desempeño de la cafetera.• El agua correcta hace la diferencia – Para un mejor saborDescalcificar su cafetera ayuda a mantener el elemento<strong>del</strong> café gourmet, té o chocolate caliente, recomendamoscalefactor y otras partes internas de la cafetera que entranque use agua filtrada o embotellada. No recomendamosen contacto con el agua. Para mayor información consulteagua destilada o de ósmosis inversa. La calidad <strong>del</strong> aguala página 36.varía de un lugar a otro. Si nota un sabor no deseado• Almacenamiento – Cuando almacene su cafetera, vacíe conen su taza de café como cloro u otro sabor mineral, lecuidado la bandeja de goteo y el tanque de agua. Guarderecomendamos que considere usar agua embotellada ola cafetera en posición vertical en un ambiente seguro,proveniente de otro sistema de filtración.seco y libre de congelamiento.• Sustituya el K-Cup ® pack entre preparaciones - EsAÑADIENDO AGUA AL DEPÓSITO DE AGUAnecesario sustituir el K-Cup ® pack antes de comenzar supreparación. Esto restablecerá la cafetera para que puedaLa Luz de Add Water (Añadir Agua) titilará indicando queel tanque no tiene agua. Llene el tanque de agua con aguapreparar otra taza de café.fi ltrada o embotellada a la línea Max Fill (Llenado Máximo).30 31
Una vez que haya colocado el tanque de agua de nuevoen la cafetera, pulse el botón Brew•Off (Colar•Apagado)para iniciar el proceso de funciona. La primera preparacióndespués de nuevamente llenar el tanque de agua tomarámás tiempo de lo normal ya que antes de iniciar el procesohay que calentar más agua. El tiempo de las preparacionesposteriores será más corto, siempre y cuando el tanque deagua permanezca lleno.NOTA: No es necesario pulsar el botón Brew•Off(Colar•Apagado) si se llena el tanque de agua antes de quela luz de Add Water (Añadir Agua) se encienda.FUNCIÓN DE APAGADO AUTOMÁTICO - AUTO OFFEsta cafetera está equipada con una función detemporizador de apagado automático que se activarádespués de 2 horas de no uso. NOTA: El apagadoautomático viene desactivado de fábrica. Siga los pasos acontinuación para activar o desactivar la función de apagadoautomático.1. Para activar la función de apagado automático, mantengapresionado el botón Serving Size (Botón para seleccionarel tamaño de la taza) y el Brew•Off (Colar•Apagado)durante 5 segundos. Los indicadores de tamaño de lataza y el botón Colar•Apagado parpadearán 2 veces paraindicar que el de apagado automático está activado.2. Para desactivar la función de apagado automático,mantenga presionado el botón Serving Size (Botón paraseleccionar el tamaño de la taza) y el Botón Brew•Off(Colar•Apagar) durante 5 segundos. Los indicadores detamaño de la taza y el botón Colar•Apagado parpadearán5 veces para indicar que el de apagado automático estáactivado.LUCES DEL PANEL DE CONTROL6 8 10oz.6 8 10oz.IndicadorBotónColar•ApagadoBotónColar•Apagado+Indicador <strong>del</strong>tamaño de latazaIndicador <strong>del</strong>tamaño de latazaAñadir aguaLuz de Pre-CalentadoTitilaPulsaFijaTitila 2vecesTitila 5vecesTitilaTitilaTitilaAcciónIndica que el Cabezal depreparación está abiertoIndica que la unidad estacolandoLista para colarIndica que el apagadoautomático esta activado.Vea la pagina 32 para masinstruccionesIndica que el apagadoautomático esta desactivado.Vea la página 32 para másinstruccionesIndica que la unidad debe serlimpiada.vea las instruccionesen la página 36Indica que el tanque de aguaestá vacío. Cuando el tanquede agua se llena de nuevo,presione el botón Brew●Offpara reanudar o empezar lapreparación.Indica que el agua en eldepósito interior se estácalentando para prepararsu próxima bebida. La luzse apagará indicando queel agua ha alcanzado latemperatura correcta parapreparar su bebida.32 33
LIMPIEZA Y MANTENIMIENTO DE SU CAFETERAINDIVIDUALLimpieza de las partes externasPRECAUCIÓN: Verifique que la cafetera estédesconectada antes de hacer la limpieza normal. Serecomienda la limpieza frecuente de los componentesexternos de la cafetera. Permita que se enfríe.1. Nunca sumerja la cafetera en agua o en otros líquidos.La base <strong>del</strong> K-cup pack y otros componentes externosse pueden limpiar con un paño jabonoso y húmedo, noabrasivo.2. La bandeja de goteo puede acumular líquidos. La bandejade goteo y la base de la bandeja de goteo se debeninspeccionar y limpiar periódicamente con un pañojabonoso y húmedo, no abrasivo que no produzca pelusa.La bandeja de goteo o la base no se deben lavar en lalavadora de platos. Para retirar el ensamble de la bandejade goteo, simplemente deslícelo en dirección suya,manteniéndolo nivelado en todo momento para evitarderrames.Limpieza <strong>del</strong> ensamble de receptáculo <strong>del</strong> K-Cup ® Pack1. Limpieza de las partes – El ensamble <strong>del</strong> receptáculo <strong>del</strong>K-Cup ® pack se puede colocar en la sección superior <strong>del</strong>lavaplatos. NOTA: Use un ciclo de temperatura baja enel lavaplatos. Para retirar la cafetera, levante el frente <strong>del</strong>a cafetera, agarre la parte superior <strong>del</strong> receptáculo <strong>del</strong>K-Cup ® pack con una mano mientras empuja hacia arribacon la otra mano la base <strong>del</strong> receptáculo <strong>del</strong> K-Cup ®pack hasta que se libere. Después de limpiar, alinee elreceptáculo <strong>del</strong> K-Cup ® pack con la aberturautilizando las dos estrías <strong>del</strong>anteras como guíay coloque en su lugar desde la parte superior.2. Limpieza <strong>del</strong> embudo – El embudo se puederetirar <strong>del</strong> receptáculo <strong>del</strong> K-Cup ® packhalando hasta que se libere (figura 1).FIGURA 134 35El embudo se puede lavar en el lavaplatos. Para volver acolocar, simplemente encaje de nuevo en el ensamble <strong>del</strong>receptáculo <strong>del</strong> K-Cup ® pack.3. Limpieza de las agujas - La aguja de salida seencuentra ubicada en la base interna <strong>del</strong> lugarpara el K-Cup ® pack. Si se obstruye la aguja acausa de alguna partícula de café molido, sepuede destapar utilizando un clip para papelo un instrumento similar. Quite el lugar parael K-Cup ® pack y separe el embudo. Inserteel instrumento dentro de la aguja para aflojarla obstrucción y expulsarla. El lugar para elK-Cup ® pack es apto para lavado en lavavajilla. FIGURA 2También puede utilizar un clip para papelpara limpiar la aguja <strong>del</strong> cabezal de preparación que seencuentra en el interior <strong>del</strong> cabezal de preparación.PRECAUCIÓN: Hay dos agujas filosas que perforanel paquete individual K-Cup ® pack, una por encimay otra por debajo <strong>del</strong> receptáculo <strong>del</strong> K-Cup ® pack.Para evitar riesgo de lesión, no ponga los dedos enla carcasa de ensamblaje <strong>del</strong> K-Cup ® pack.Limpieza y vaciado <strong>del</strong> tanqueDeseche el sobrante de agua removiendo la tapa <strong>del</strong>depósito y volcando el depósito en la pileta. La tapa <strong>del</strong>depósito de agua NO debe lavarse en el lavavajillas. Lave conun paño húmedo con jabón no abrasivo y enjuague bien. Eldepósito de agua es apto para lavado en lavavajillas.NOTA: NO seque el interior <strong>del</strong> tanque de agua con un pañoya que las pelusas pueden quedar en el tanque.PRECAUCIÓN: Por favor, enjuague el tanque deagua completamente después de la limpieza paraasegurarse que no quedan residuos de limpiadoreso soluciones de limpieza, ya que pueden contaminarel suministro de agua en la cafetera. No sumerja elelectrodoméstico en agua.!
AlmacenamientoDesocupe tanque de agua antes de almacenar y cercióresede guardar su cafetera en un ambiente seguro y que noquede expuesta a congelamiento. Se sugiere guardar lacafetera en posición vertical. Si guarda la cafetera en unambiente frio, se corre el riesgo de congelamiento porcondensación al interior lo que podría causar daños. Cuandose prepare para usarla después de estar almacenada,recomendamos limpiar el tanque de agua con un pañohúmedo, libre de pelusa y operar tres ciclos sin un K-Cup ® pack.Si la cafetera ha estado en un ambiente por debajo <strong>del</strong>nivel de congelamiento, cerciórese de dejarla calentar atemperatura ambiente por 2 horas antes de usar.Cómo quitar el sarro a su cafeteraSe debe limpiar el sarro de la cafetera cada 3-6 meses paragarantizar un desempeño óptimo o cuando se formendepósitos blancos en el tanque de agua. Es posible que losdepósitos de calcio se desarrollen más rápido, lo que exigelimpiar el sarro más frecuentemente.1. Verifi que que tiene a mano al menos 40 onzas devinagre blanco no diluido. También necesitará una jarrade cerámica de 10 onzas (no use una taza desechable)y acceso a un lavadero de platos.2. Llene tanque de agua con 40 onzas de vinagre blancono diluido hasta la marca <strong>del</strong> NIVEL DE LLENADO.Coloque la jarra de cerámica sobre la base de la bandejade goteo.3. Cierre el cabezal de preparación y realice un ciclo depreparación en una taza de cerámica sin agregar elK-Cup ® pack.4. Repita un ciclo de preparación hasta que el tanque estévacio y luego deje reposar por 60 minutos.5. Llene el tanque con 40 onzas de agua fi ltrada opurifi cada, cierre el cabezal de preparación, coloqueuna jarra en la base de la bandeja de goteo y realice unciclo de preparación.6. Repita el ciclo de preparación hasta que el depósitoesté vacío (sin tener un K-Cup ® pack), para limpiar lastuberías de la cafetera y deshacerse de cualquier saborresidual <strong>del</strong> vinagre.La cafetera está ahora lista para suuso normal.NOTA: las tres luces LED indicadoras <strong>del</strong> tamaño de tazasseguirán titilando si no se siguen los procedimientos <strong>del</strong>impieza correctamente.SOLUCIÓN DE PROBLEMAS PARA SU CAFETERAINDIVIDUALSu Cafetera Individual MR. COFFEE ® ha sido diseñadacon esmero para darle muchos años de servicio sincontratiempos. En el caso improbable de que su nuevacafetera individual no funcione adecuadamente, favorexaminar los siguientes problemas potenciales y efectuarlos pasos recomendados ANTES de llamar a un Centro deServicio Autorizado Sunbeam.PROBLEMALa cafeteraindividual notiene energía36 37SOLUCIÓNVerifi que que el botón de Brew•Off(Colar•Apagado) esté oprimido eiluminado.Conecte la cafetera individual en untomacorriente independiente.Verifi que que esté conectada de formasegura.Conecte en un tomacorriente diferente.
PROBLEMALa cafeteraindividual noprepara el café.La cafeteraindividualprepara el caféparcialmente.La cafetera nofunciona conKeurig ® misK-Cup ® .La luz Add Water(Agregar agua)todavía estaráparpadeandodespués de llenarel tanque de agua.SOLUCIÓNSi la cafetera individual está fría/congelada, espere por lo menos doshoras para que alcance la temperaturaambiente antes de encenderla.Asegúrese de que haya agua enel tanque y de que la cabeza depreparación esté cerrada firmementeNOTA: El botón “Brew•Off(Colar•Apagado)” se iluminaráintermitentemente si la cabeza depreparación está abierta.Levante el cabezal y reemplace el K-Cup ®pack para reiniciar la cafetera.La aguja de salida puede estar obstruida(consulte la página 35).Si es necesario, limpie y enjuague enel grifo el receptáculo <strong>del</strong> K-Cup ® pack(consulte la página 34).Retire el sarro de la cafetera individual(consulte la página 36).Si ha repetido el procedimiento <strong>del</strong>impieza <strong>del</strong> sarro en su cafeteraindividual dos veces y ésta sigue sinfuncionar, contacte a Servicio al cliente.El lugar para el K-Cup ® pack debe serremovido.Asegúrese que la tapa <strong>del</strong> K-Cup ® estébien cerrada.Presione el botón Brew●Off paraempezar la preparación. Entonces la luzde Add Water se apagará.Servicio y mantenimientoSi su cafetera requiere reparación, no la devuelva a la tiendadonde la compró. Todas las reparaciones y reemplazos sedeben hacer a través de Sunbeam o de un centro de servicioautorizado de Sunbeam. Si usted vive en EE.UU. o Canadá,llámenos a los siguientes números telefónicos gratuitos paraencontrar el centro de servicio autorizado más cercano:EE.UU. 1-877-517-6400Canadá 1-800-667-8623También puede visitar nuestro sitio web enwww.mrcoffee.comPara atenderle mejor, tenga consigo el número <strong>del</strong> mo<strong>del</strong>ode la cafetera y la fecha de compra cuando llame. El número<strong>del</strong> mo<strong>del</strong>o está estampado en la placa metálica por debajode la cafetera.Sus preguntas, comentarios o sugerencias son bienvenidos.En todas sus comunicaciones, incluya su nombre completo,dirección y número telefónico, así como una descripción <strong>del</strong>problema.Número <strong>del</strong> Mo<strong>del</strong>o:____________________________________(El número <strong>del</strong> mo<strong>del</strong>o está estampado en la placa de metalinferior de la cafetera)Número de Serie:_______________________________________Código de Fecha: ______________________________________(Ubicado en la punta metálica <strong>del</strong> cable eléctrico. Comienzacon una letra seguida de tres números)Fecha de Compra:______________________________________38 39
INFORMACIÓN DE GARANTÍAGarantía Limitada de 1 AñoSunbeam Products, Inc. operando bajo el nombre de JardenConsumer Solutions, o en Canadá, Sunbeam Corporation(Canada) Limited operando bajo el nombre de JardenConsumer Solutions, (en forma conjunta, “JCS”), garantizaque por un período de un año a partir de la fecha decompra, este producto estará libre de defectos de materialesy mano de obra. JCS, a su elección, reparará o reemplazaráeste producto o cualquier componente <strong>del</strong> mismo quepresente defectos durante el período de garantía. Elreemplazo se realizará por un producto o componentenuevo o reparado. Si el producto ya no estuviera disponible,se lo reemplazará por un producto similar de valor igual osuperior. Ésta es su garantía exclusiva. No intente repararo ajustar ninguna función eléctrica o mecánica de esteproducto. Al hacerlo elimínará ésta garantía.La garantía es válida para el comprador minorista originala partir de la fecha de compra inicial y la misma no estransferible. Conserve el recibo de compra original. Parasolicitar servicio en garantía se requiere presentar un recibode compra. Los agentes y centros de servicio de JCS o lastiendas minoristas que venden productos de JCS no tienenderecho a alterar, modifi car ni cambiar de ningún otro modolos términos y las condiciones de esta garantía.Esta garantía no cubre el desgaste normal de las piezasni los daños que se produzcan como resultado de usonegligente o mal uso <strong>del</strong> producto, uso de voltaje incorrectoo corriente inapropiada, uso contrario a las instruccionesoperativas, y desarme, reparación o alteración por parte deun tercero ajeno a JCS o a un Centro de Servicio autorizadopor JCS. Asimismo, la garantía no cubre actos fortuitos talescomo incendios, inundaciones, huracanes y tornados.¿Cuál es el límite de responsabilidad de JCS?JCS no será responsable de daños incidentales o emergentescausados por el incumplimiento de alguna garantía ocondición expresa, implícita o legal.Excepto en la medida en que lo prohíba la ley aplicable,cualquier garantía o condición implícita de comerciabilidado aptitud para un fin determinado se limita, en cuanto a suduración, al plazo de la garantía antes mencionada.JCS queda exenta de toda otra garantías, condiciones omanifestaciones, expresa, implícita, legal o de cualquier otranaturaleza.JCS no será responsable de ningún tipo de daño queresulte de la compra, uso o mal uso <strong>del</strong> producto, o porla imposibilidad de usar el producto, incluidos los dañosincidentales,especiales, emergentes o similares, o la pérdida deganancias, ni de ningún incumplimiento contractual, sea deuna obligación esencial o de otra naturaleza, ni de ningúnreclamo iniciado contra el comprador por un tercero.Algunas provincias, estados o jurisdicciones no permitenla exclusión o limitación de los daños incidentales oemergentes ni las limitaciones a la duración de las garantíasimplícitas, de modo que es posible que la exclusión o laslimitaciones antes mencionadas no se apliquen en su caso.Esta garantía le otorga derechos legales específicos y esposible que usted tenga otros derechos que varían de unestado, provincia o jurisdicción a otro.Cómo solicitar el servicio en garantíaEn los Estados Unidos.Si tiene alguna pregunta sobre esta garantía o desea recibirservicio de garantía, llame al 1-877-517-6400 y podráobtener la dirección <strong>del</strong> centro de servicio que le resulte másconveniente.En CanadáSi tiene alguna pregunta sobre esta garantía o desea recibirservicio de garantía, llame al 1-800-667-8623 y podráobtener la dirección <strong>del</strong> centro de servicio que le resulte másconveniente.40 41
En los Estados Unidos, esta garantía es ofrecida por SunbeamProducts, Inc. operando bajo el nombre de Jarden ConsumerSolutions, Boca Ratón, Florida 33431. En Canadá, estagarantía es ofrecida por Sunbeam Corporation (Canada)Limited operando bajo el nombre de Jarden ConsumerSolutions, 20 B Hereford Street, Brampton, Ontario L6Y 0M1.Si usted tiene otro problema o reclamo en conexión coneste producto, por favor escriba al Departamento de Servicioal Consumidor.POR FAVOR NO DEVUELVA ESTE PRODUCTO ANINGUNA DE ESTAS DIRECCIONESNOTAS42 43


