Electric Skillet - GE :: Housewares
Electric Skillet - GE :: Housewares
Electric Skillet - GE :: Housewares
- No tags were found...

Create successful ePaper yourself
Turn your PDF publications into a flip-book with our unique Google optimized e-Paper software.
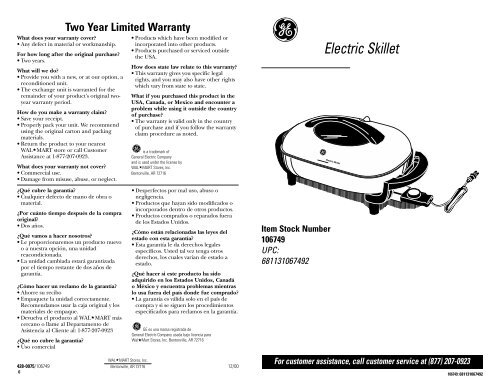
Two Year Limited WarrantyWhat does your warranty cover?• Any defect in material or workmanship.For how long after the original purchase?• Two years.What will we do?• Provide you with a new, or at our option, areconditioned unit.• The exchange unit is warranted for theremainder of your product’s original twoyearwarranty period.How do you make a warranty claim?• Save your receipt.• Properly pack your unit. We recommendusing the original carton and packingmaterials.• Return the product to your nearestWAL★MART store or call CustomerAssistance at 1-877-207-0923.What does your warranty not cover?• Commercial use.• Damage from misuse, abuse, or neglect.• Products which have been modified orincorporated into other products.• Products purchased or serviced outsidethe USA.How does state law relate to this warranty?• This warranty gives you specific legalrights, and you may also have other rightswhich vary from state to state.What if you purchased this product in theUSA, Canada, or Mexico and encounter aproblem while using it outside the countryof purchase?• The warranty is valid only in the countryof purchase and if you follow the warrantyclaim procedure as noted.is a trademark ofGeneral <strong>Electric</strong> Companyand is used under the license byWAL★MART Stores, Inc.Bentonville, AR 72716<strong>Electric</strong> <strong>Skillet</strong>¿Qué cubre la garantía?• Cualquier defecto de mano de obra omaterial.¿Por cuánto tiempo después de la compraoriginal?• Dos años.¿Qué vamos a hacer nosotros?• Le proporcionaremos un producto nuevoo a nuestra opción, una unidadreacondicionada.• La unidad cambiada estará garantizadapor el tiempo restante de dos años degarantía.¿Cómo hacer un reclamo de la garantía?• Ahorre su recibo• Empaquete la unidad correctamente.Recomendamos usar la caja original y losmateriales de empaque.• Devuelva el producto al WAL★MART máscercano o llame al Departamento deAsistencia al Cliente al: 1-877-207-0923¿Qué no cubre la garantía?• Uso comercial• Desperfectos por mal uso, abuso onegligencia.• Productos que hayan sido modificados oincorporados dentro de otros productos.• Productos comprados o reparados fuerade los Estados Unidos.¿Cómo están relacionadas las leyes delestado con esta garantía?• Esta garantía le da derechos legalesespecíficos. Usted tal vez tenga otrosderechos, los cuales varían de estado aestado.¿Qué hacer si este producto ha sidoadquirido en los Estados Unidos, Canadáo México y encuentra problemas mientraslo usa fuera del país donde fue comprado?• La garantía es válida solo en el país decompra y si se siguen los procedimientosespecificados para reclamos en la garantía.<strong>GE</strong> es una marca registrada deGeneral <strong>Electric</strong> Company usada bajo licencia paraWal★Mart Stores, Inc. Bentonville, AR 72716Item Stock Number106749UPC:681131067492WAL★MART Stores, Inc.428-0075/106749 Bentonville, AR 7271612/006For customer assistance, call customer service at (877) 207-0923106749: 681131067492
Cómo usar la Carácterísticadel Apoyatapa1. Sujete la tapaa un ángulode 45 grados.Insertar eltraba para elapoyatapa (enla tapa)dentro de la ranura del lado dla asaSIN SONDA.2. El traba del apoyatapa debeinsertarse entra la orilla de la asa y laasa en sí.3. Si no se inserta el apoyatapaapropiadamente, no se levantará obajará correctamente.4. Una vez que se la ha insertado, latapa se puede bajar sobre la sarténCómo Límpiar su SarténPRECAUCIÓN: La sartén está caliente.Manejéla con cuidado.1. Permita siempre que la sartén seenfríe totalmente antes de limpiarla.2. Desenchufe el cordón deltomacorriente de la pared, despuésquite la sonda del aparato. Limpiela sonda con una toalla seca.3. Sumerja la sartén y la tapa en aguatibia jabonosa y lávelas con un pañosuave. Enjuague bien y seque.10paraprevenirsalpicadurasmientras secocina.5. O se puedelevantar latapa ypermitir quedescanse en la asa para podermezclar o revolver la comida, sintener que poner la tapa con grasa oagua sobre el mostrador. NOTA: Latapa descansará apropiadamente si eltraba del apoyatapa no se ha insertadoapropiadamente en el lado de la asa.Todas las piezas, excepto la sonda detemperatura de control, se puedenmeter al lavavajillas.NOTA: No use almohadillas de acero,agentes de limpieza abrasivos oestropajos en la superficie de cocinarpuesto que dañarán el revestimientoantiadherente.PRECAUCIÓN: No sumerja la sonda decontrol de temperatura, en agua o encualquier otro líquido.This appliance has a polarized plug(one blade is wider than the other). Toreduce the risk of electric shock, thisplug is intended to fit into a polarizedoutlet only one way. If plug does not fitfully into the outlet, reverse the plug. Ifit still does not fit, contact a qualifiedelectrician. Do not attempt to modifythe plug in any way.Keep Warm SettingThe temperature control probe has a“Keep Warm” range setting ofParts and Features1234561 2 3 4Transparent Glass Window7Lid HandleSteam VentLidSide Handles/Legs5 5Temperature Control Probe*7 Lid Rest Latch*NOTE: Use only model MPTC-3 temperature control probeHow to Assemble Your <strong>Skillet</strong>Remove all parts from the packaging.Assembling Lid Handle1. Find lid and lidhandle.2. Align posts onlid handle intoholes locatedon the outsideof the lid.Handle shouldbe centeredover glass in thelid.3. Place the phillips head screwsthrough screw holes on the inside ofthe lid (2 places).4. Tighten screws until snug. Screwsshould be seated flush against lidapproximately 160° to 180°F. Theindicator light will cycle on and offwhen this setting is in use to indicatethat the skillet is maintaining thedesired temperature.ImportantCheck the handles/legs of your skilletperiodically for looseness. If needed,re-tighten with a screwdriver. CAUTION:Overtightening can result in stripping ofscrews or cracking of handles and base.surface. The lid isnow ready for use.Assembling SideHandles/Legs1. Place pan upsidedown on table.2. Find the side handle that is marked“PROBE SIDE”. This handle must bemounted on the pan side where theprobe connectsto the pan.3. Align handlescrew holes overthe screw postson pan (2 placesper handle).4. Insert screws (2 per handle) throughholes in bottom of side handles/legs63
Energía EléctricaSi el circuito eléctrico se sobrecargacon otros artefactos, la sartén nofuncionará apropiadamente. Se debehacer funcionar la sartén en uncircuito separado de los otrosartefactos eléctricos.Enchufe PolarizadoEste artefacto electrodoméstico tieneun enchufe polarizado (una clavija esmás ancha que la otra). Para reducirriesgos contra electrochoques, esteenchufe encajará en un tomacorrientepolarizado solamente de una manera.Si no entra totalmente en eltomacorriente, dé vuelta el enchufe. Sitampoco entra, comuníquese con unelectricista competente. No trate deburlar esta característica de seguridad.Piezas y Características1Ventanilla de vidrio2 3 42 transparenteAsa de la tapa73 Escape para el vapor54 TapaAsas laterales/patas5Sonda de control de6 temperatura*7 Traba para el apoyatapa*NOTA: Usar sólo la sonda de control de temperatura Modelo MPTC-3Cómo Armar su SarténSaque todas las piezas de la caja.Armado de la asa para la tapa1. Localice la tapa y la asa2. Alineé los postes en la asa dentro delos orificios en la parte exterior de latapa. Se debe centrar la asa sobre elvidrio en la tapa.3. Coloque los tornillos Phillips a través8de los orificios en el interior de la1Posición para MantenerTempladoEl control de temperatura tiene unmargen de posiciones para "mantenertemplado" de aproximadamente 160°Fa 180°F. La luz indicadora seencenderá y se apagará cuando estaposición se esté usando para indicarque la sartén está manteniendo latemperatura deseada.ImportanteRevise las asas y la base de su sarténperiódicamente para ver si están flojas.Si es necesario, vuelva a apretar con unatornillador. PRECAUCIÓN: Si se apretademasiado, puede causar que los tornillosse pasen de rosca o que las asas y labase se rajen.superficie de latapa (2 lugares)4. Apriete lostornillos hastaque esténfirmes. Lostornillos debenestar al mismoborde de lasuperficie de la56How to Clean Your <strong>Skillet</strong>CAUTION: <strong>Skillet</strong> is hot. Handle carefully.1. Always allow the skillet to completelycool before cleaning.2. Unplug cord from wall outlet, thenremove temperature control probefrom appliance. Wipe probe cleanwith a dry towel.3. Immerse the skillet and lid in warm,soapy water and wash with a soft cloth.Helpful Hints• Before using the skillet for the firsttime, lightly brush cooking surfacewith vegetable oil. Heat, uncovered, to300°F. Turn “OFF” and coolcompletely. Wipe away excess oil.• Use only nylon or heat-proof plasticcooking utensils. Metal utensils mayRinse well and dry. All parts, exceptthe temperature control probe, arefully immersible and dishwasher-safe.NOTE: DO NOT use steel wool, abrasivecleaners, or metal scouring pads oncooking surfaces as this will damage thenon-stick coating.WARNING: Do not immerse temperaturecontrol probe in water or other liquid.scratch the non-stick surface.• This skillet is not designed to deep fry.To pan-fry, do not use more than 1cup of oil. Select a vegetable oil orpeanut oil for frying, Butter and oliveoil should only be used to saute foodson a lower temperature setting.Temperature and Cooking GuideFOOD AMOUNT TIME/DIRECTIONS TEMP.BUR<strong>GE</strong>RS 1⁄4 lb. 3 to 9 minutes/per side (medium) 300°FSTEAK 1" thick, boneless 9 to 12 minutes/per side 300°FCHICKEN boneless breasts 6 to 7 minutes/per side 300°FFRENCH TOAST 3 to 5 minutes/per side 325°FPANCAKES 1 to 3 minutes/per side 300°FEGGSFried 2 to 3 minutes/first side 300°F1 to 2 minutes/second sideMelt 1 to 2 tsp. butter or margarine in skilletPoached 1 to 6 eggs 2 to 3 minutes 250°F or 300°FPour 2 cups water and 1 tsp. cider vinegarin skillet. Heat to boiling. Break each egginto a bowl; slip into water. Cover and cook2 to 3 minutes.Scrambled 3 to 4 minutes 300°FMelt 1 to 2 tablespoons butter ormargarine in skillet. Add eggs, cook, stirgently, until set and cooked.BACON 5 minutes/first side1 to 3 minutes/second side300°FSAUSA<strong>GE</strong> LINKS 8 to 10 minutes 300°FSAUSA<strong>GE</strong> PATTIES 6 minutes/first side5 to 6 minutes/second side300°F5
and align screws in holes in the pan.5. Tighten screws with a screwdriveruntil snug. Screws should be seatedflush against handle.6. Repeat steps 3 through 5 with thenon-probe side handle.How to Use Your <strong>Skillet</strong>1. Turn temperature control to “OFF”.Plug temperature control probesecurely into receptacle on skillet,plug into standard 120v AC outletand turn temperature control todesired setting.2. The temperature control indicatorlight will come on when you set oradjust the temperature. Once thedesired temperature is reached, theindicator light will go out. (Whenadding food, the indicator light willcome on briefly as the overallcooking temperature is reduced.)3. Preheat the skillet with the lid on for10 – 15 minutes or until theindicator light goes out. NOTE: Thecooking temperatures listed in thisuser manual are estimates. Adjust thecooking temperature slightly up or1. Hold lid at a45-degreeangle orgreater, andinsert lid restlatch (on lid)into the cutouton NON-PROBE SIDE handle.2. Lid rest latch must be inserted betweenrib on handle and handle itself.3. If lid is improperly inserted, it will notraise and lower correctly.4. Once inserted, lid can be lowered into7. Once both handles are tightenedsecurely, place skillet upright onto itslegs. Assembly is complete.CAUTION: Do not operate skillet prior toassembly of side handles/legs and lidhandle.down to achieve the results you prefer.4. To place the lid on the skillet, holdlid at a 45-degree angle and insert lidrest latch (on lid) into cutout onNon-Probe Side handle and lowerthe lid into place.5. To remove lid, lift up at a 45-degreeangle and pull out to the right.6. A steam vent is located on the lid. Toopen steam vent, turn vent so thatthe opening on the vent knob isfacing to the rear. The steam ventallows steam to escape while cookingwith the lid in place. CAUTION:Escaping steam is hot! Be carefulwhen removing or lifting lid.NOTE: If heating oil, always leave the lidoff. If oil smokes, immediately turn skillet“OFF” and allow to cool.How to Use the Lid Rest Featureposition overpan forspatter freecooking.5. Or lid can beraised, andallowed to reston handle forturning or removing food, without thehassle of placing greasy or wet lid oncountertop. NOTE: Lid will not sitproperly unless the lid rest latch isproperly inserted into the side handle.tapa. Ahora puede usar la tapa.Armado De Las AsasLaterales/ Patas1. Volteé la sarténsobre la mesa.2. Localice la asalateral que estámarcada “LADODE LA SONDA”.Se debe armar esta asa en el mismolado donde se conecta la sonda a lasartén.3. Alineé los orificios de los tornillossobre los postes de tornillo de lasartén (2 lugares por asa).4. Inserte los tornillos (2 por asa) através de los orificios en la parteCómo Usar Su Sartén1. Gire el control de temperatura a laposición “OFF” (apagado). Coloquela sonda de control de temperaturafirmemente en su receptáculo en lasartén, enchufe en una toma decorriente estándar de 120 V de CA ygire el control de temperatura a laposición deseada.2. La luz indicadora del control detemperatura se encenderá cuandofije o ajuste la temperatura. Una vezque se alcance la temperaturadeseada, la luz indicadora seapagará. (Al añadir alimentos, la luzindicadora se encenderá brevementeya que la temperatura general decocción se reduce).3. Precaliente la sartén con la tapapuesta durante 10 a 15 minutos ohasta que la luz indicadora seapague. NOTA: Las temperaturas decocción que aparecen en el libro sonaproximadas. Ajuste la temperatura decocción ligeramente hacia arriba ohacia abajo para conseguir losresultados preferidos.lateral inferior de las asas/patas yalinear los tornillos en los orificiosde la sartén.5. Asegure lostornillos con unatornillador hastaque estén firmes.Los tornillosdeben estar lisossobre la asa.6. Repita los pasos 3 a 5 con la asa en ellado sin sonda.7. Una vez que ambas asas se hanapretado seguramente, voltear lasartén sobre sus patas. Se haterminado el armado.PRECAUCIÓN: No hacer funcionar lasartén antes de armarla con susasas/patas y la asa en la tapa.4. Para colocar la tapa sobre la sartén,sujete la tapa a un ángulo de 45grados e inserte el traba apoyatapa(en la tapa) dentro de la ranura dellado sin sonda y baje la tapa hacia sulugar.5. Para remover la tapa, levántela a unángulo de 45 grados y levántelahacia la derecha.6. Existe un escape para vapor en latapa. Para abrirlo gire el escape demanera que la apertura en el escapede vapor esté hacia la parte trasera.El escape para vapor permite que seescape el vapor mientras se cocinacon la tapa puesta. PRECAUCIÓN: ¡Elvapor es caliente! Tenga mucho cuidadcuando levante o saque la tapa.NOTA: Si va a calentar el aceite, nuncause la tapa. Si sale humo del aceite,APAGUE inmediatamente la sartén y dejeque se enfríe.49
IMPORTANT SAFEGUARDSPlease read and save these instructions. When using electrical appliances, basicsafety precautions should always be followed, including the following:1. Read all instructions before using.2. Do not touch hot surfaces. Usehandles or knobs.3. To protect against electrical shock,do not immerse unit, cord or plugsin water or other liquid.4. Close supervision is necessary whenany appliance is used nearchildren. This appliance is not to beused by children.5. Unplug from outlet when not in useand before cleaning. Allow to coolbefore putting on or taking offparts, and before cleaning.6. Do not operate any appliance with adamaged cord or plug or after theappliance malfunctions or has beendamaged in any manner. CallCustomer Service(see warranty) toreturn for examination, repair, oradjustment.7. The use of accessory attachmentsnot recommended by manufacturermay cause injuries.8. Do not use outdoors.9. Do not let cord hang over edge oftable or counter, or touch heatedsurfaces.10. Do not place on or near a hot gasor electric burner, or in a heatedoven.11. Extreme caution must be usedwhen moving appliance containinghot oil or other hot liquids.12. Always attach plug to appliance first,then plug cord in the wall outlet. Todisconnect, turn control to “OFF”,then remove plug from wall.13. Do not use appliance for other thanintended use.14. Be sure handles/legs are assembledand fastened properly. See assemblyinstructions on page 4. “How toAssemble Your <strong>Skillet</strong>” and “How toUse the Lid Rest Feature”.SAVE THESE INSTRUCTIONS!Consumer Safety InformationTHIS APPLIANCE IS INTENDED FOR HOUSEHOLD USE ONLY.THIS APPLIANCE HAS NO USER-SERVICEABLE PARTS INSIDE.Extension CordA short power supply cord is providedto reduce the risk resulting frombecoming entangled in or trippingover a longer cord. An extension cordmay be used if care is exercised in use.If an extension cord is used, themarked electrical rating of theextension cord should be at least asgreat as the electrical rating of theskillet. The extension cord should bearranged so that it will not drape over2the countertop or tabletop where itcan be pulled on by children ortripped over unintentially.<strong>Electric</strong>al PowerIf electric circuit is overloaded withother appliances, skillet may notoperate properly. <strong>Skillet</strong> must beoperated on separate circuit fromother operating appliances.Polarized PlugConsejos Útiles• Antes de usar la sartén por primeravez, unte ligeramente la superficiede cocinar con aceite vegetal.Caliente, sin tapar, a 300°F. Apaguey enfríe completamente. Limpie elexceso de aceite.• Utilice solamente utensilios decocina de nilón o de plásticoresistentes al calor. Los utensilios demetal podrían rayar la superficieantiadherente.Cuadro de Cocinar• Esta sartén no está diseñada parafrituras profundas con mucho aceite.Para freír no use más de 1 ⁄2 taza deaceite. Elija un aceite vegetal o decacahuete para freír. Solamente sedebe usar mantequilla o aceite deoliva para saltear alimentos a unatemperatura más baja.ALIMENTO CANTIDAD TIEMPO/DIREC. TEMP.HAMBURGUESAS 1⁄4 de libra 3 - 9 minutos por cada lado (medio) 300°FBISTEC1" de grosor,sin hueso 9 - 12 minutos por cada lado 300°FPOLLOpechugas de pollodeshuesadas 6 - 7 minutos por cada lado 300°FTOSTADA FRANCESA 3 - 5 minutos por cada lado 325°FPANQUEQUES 1 - 3 minutos por cada lado 300°FHUEVOSFritos 2 - 3 minutos primer lado, 300°F1 to 2 minutos segundo lado.Derrita 1-2 cucharadas de mantequillao margarina en la sartén.Escalfados 1-6 huevos 2 - 3 minutos 250°F or 300°FVierta 2 tazas de agua y cucharadita devinagre de sidra en la sartén. Caliente hastaque hierva. Rompa cada huevo en unrecipiente para salsa; métalo en el agua.Cubra y cocine durante 2 a 3 minutos.Revueltos 3 - 4 minutos. 300°FDerrita 1 a 2 cucharadas de mantequilla omargarina en la sartén. Añada huevos,cocine revolviendo suavemente, hasta queestén cuajados y hechos.TOCINO (BACÓN) 5 minutos/primer lado1 a 3 minutos/segundo lado300°FSALCHICHAS 8-10 minutos 300°FPASTELILLOS(PATTIES) DESALCHICHA 6 minutos primer lado,5-6 minutos segundo lado300°F11