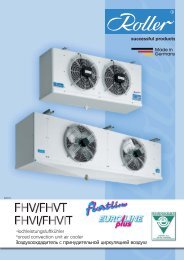
DLK/ DLKT FKN/ FKNT UV/ UVT - Walter Roller GmbH & Co.
DLK/ DLKT FKN/ FKNT UV/ UVT - Walter Roller GmbH & Co.
DLK/ DLKT FKN/ FKNT UV/ UVT - Walter Roller GmbH & Co.

You also want an ePaper? Increase the reach of your titles
YUMPU automatically turns print PDFs into web optimized ePapers that Google loves.
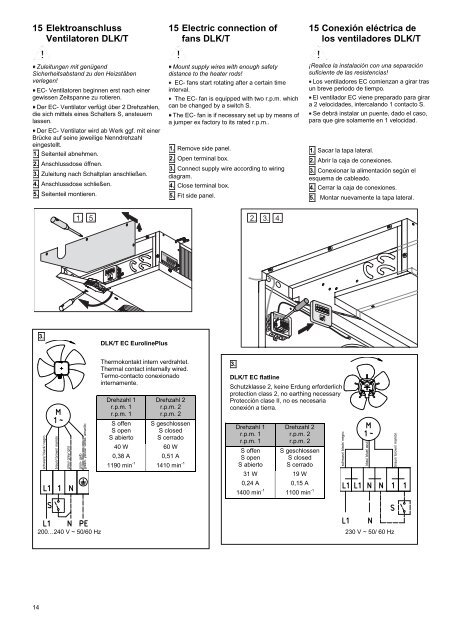
15 Elektroanschluss<br />
Ventilatoren <strong>DLK</strong>/T<br />
Zuleitungen mit genügend<br />
Sicherheitsabstand zu den Heizstäben<br />
verlegen!<br />
EC- Ventilatoren beginnen erst nach einer<br />
gewissen Zeitspanne zu rotieren.<br />
Der EC- Ventilator verfügt über 2 Drehzahlen,<br />
die sich mittels eines Schalters S, ansteuern<br />
lassen.<br />
Der EC- Ventilator wird ab Werk ggf. mit einer<br />
Brücke auf seine jeweilige Nenndrehzahl<br />
eingestellt.<br />
1. Seitenteil abnehmen.<br />
2. Anschlussdose öffnen.<br />
3. Zuleitung nach Schaltplan anschließen.<br />
4. Anschlussdose schließen.<br />
5. Seitenteil montieren.<br />
14<br />
3.<br />
<strong>DLK</strong>/T EC EurolinePlus<br />
Thermokontakt intern verdrahtet.<br />
Thermal contact internally wired.<br />
Termo-contacto conexionado<br />
internamente.<br />
Drehzahl 1<br />
r.p.m. 1<br />
r.p.m. 1<br />
S offen<br />
S open<br />
S abierto<br />
15 Electric connection of<br />
fans <strong>DLK</strong>/T<br />
Mount supply wires with enough safety<br />
distance to the heater rods!<br />
EC- fans start rotating after a certain time<br />
interval.<br />
The EC- fan is equipped with two r.p.m. which<br />
can be changed by a switch S.<br />
The EC- fan is if necessary set up by means of<br />
a jumper ex factory to its rated r.p.m..<br />
1. Remove side panel.<br />
2. Open terminal box.<br />
3. <strong>Co</strong>nnect supply wire according to wiring<br />
diagram.<br />
4. Close terminal box.<br />
5. Fit side panel.<br />
Drehzahl 2<br />
r.p.m. 2<br />
r.p.m. 2<br />
S geschlossen<br />
S closed<br />
S cerrado<br />
40 W 60 W<br />
0,38 A 0,51 A<br />
1190 min -1 1410 min -1<br />
<strong>DLK</strong>/T EC flatline<br />
15 <strong>Co</strong>nexión eléctrica de<br />
los ventiladores <strong>DLK</strong>/T<br />
¡Realice la instalación con una separación<br />
suficiente de las resistencias!<br />
Los ventiladores EC comienzan a girar tras<br />
un breve periodo de tiempo.<br />
El ventilador EC viene preparado para girar<br />
a 2 velocidades, intercalando 1 contacto S.<br />
Se debrá instalar un puente, dado el caso,<br />
para que gire solamente en 1 velocidad.<br />
1. Sacar la tapa lateral.<br />
Schutzklasse 2, keine Erdung erforderlich<br />
protection class 2, no earthing necessary<br />
Protección clase II, no es necesaria<br />
conexión a tierra.<br />
Drehzahl 1<br />
r.p.m. 1<br />
r.p.m. 1<br />
S offen<br />
S open<br />
S abierto<br />
Drehzahl 2<br />
r.p.m. 2<br />
r.p.m. 2<br />
S geschlossen<br />
S closed<br />
S cerrado<br />
31 W 19 W<br />
0,24 A 0,15 A<br />
1400 min -1 1100 min -1<br />
2. Abrir la caja de conexiones.<br />
3. <strong>Co</strong>nexionar la alimentación según el<br />
esquema de cableado.<br />
4. Cerrar la caja de conexiones.<br />
5. Montar nuevamente la tapa lateral.<br />
200…240 V ~ 50/60 Hz 230 V ~ 50/ 60 Hz<br />
3.