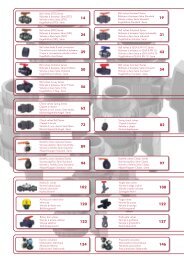
Catálogo - Métrico (PDF: 6,3 MB) - Cepex
Catálogo - Métrico (PDF: 6,3 MB) - Cepex
Catálogo - Métrico (PDF: 6,3 MB) - Cepex

You also want an ePaper? Increase the reach of your titles
YUMPU automatically turns print PDFs into web optimized ePapers that Google loves.
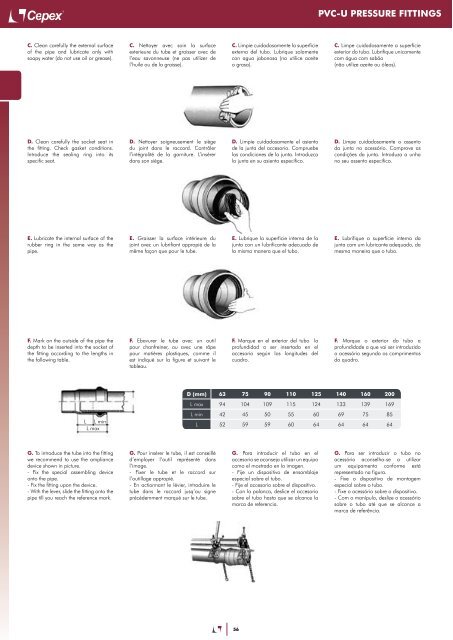
C. Clean carefully the external surface<br />
of the pipe and lubricate only with<br />
soapy water (do not use oil or grease).<br />
D. Clean carefully the socket seat in<br />
the fitting. Check gasket conditions.<br />
Introduce the sealing ring into its<br />
specific seat.<br />
E. Lubricate the internal surface of the<br />
rubber ring in the same way as the<br />
pipe.<br />
F. Mark on the outside of the pipe the<br />
depth to be inserted into the socket of<br />
the fitting according to the lengths in<br />
the following table.<br />
L L min<br />
L max<br />
G. To introduce the tube into the fitting<br />
we recommend to use the ampliance<br />
device shown in picture.<br />
- Fix the special assembling device<br />
onto the pipe.<br />
- Fix the fitting upon the device.<br />
- With the lever, slide the fitting onto the<br />
pipe till you reach the reference mark.<br />
C. Nettoyer avec soin la surface<br />
exterieure du tube et graisser avec de<br />
l’eau savonneuse (ne pas utilizer de<br />
l’huile ou de la graisse).<br />
D. Nettoyer soigneusement le siège<br />
du joint dans le raccord. Contrôler<br />
l’intégralité de la garniture. L’insérer<br />
dans son siège.<br />
E. Graisser la surface intérieure du<br />
joint avec un lubrifiant appropié de la<br />
même façon que pour le tube.<br />
F. Ebavurer le tube avec un outil<br />
pour chanfreiner, ou avec une râpe<br />
pour matières plastiques, comme il<br />
est indiqué sur la figure et suivant le<br />
tableau.<br />
G. Pour insérer le tube, il est conseillé<br />
d’employer l’outil représenté dans<br />
l’image.<br />
- Fixer le tube et le raccord sur<br />
l’outillage appropié.<br />
- En actionnant le lévier, introduire le<br />
tube dans le raccord jusq’au signe<br />
précédemment marqué sur le tube.<br />
C. Limpie cuidadosamente la superficie<br />
externa del tubo. Lubrique solamente<br />
con agua jabonosa (no utilice aceite<br />
o grasa).<br />
D. Limpie cuidadosamente el asiento<br />
de la junta del accesorio. Compruebe<br />
las condiciones de la junta. Introduzca<br />
la junta en su asiento específico.<br />
E. Lubrique la superficie interna de la<br />
junta con un lubrificante adecuado de<br />
la misma manera que el tubo.<br />
F. Marque en el exterior del tubo la<br />
profundidad a ser insertada en el<br />
accesorio según los longitudes del<br />
cuadro.<br />
56<br />
PVC-U PRESSURE FITTINGS<br />
C. Limpe cuidadosamente a superfície<br />
exterior do tubo. Lubrifique unicamente<br />
com água com sabão<br />
(não utilize azeite ou óleos).<br />
D. Limpe cuidadosamente o assento<br />
da junta no acessório. Comprove as<br />
condições da junta. Introduza a unha<br />
no seu assento específico.<br />
E. Lubrifique a superfície interna da<br />
junta com um lubricante adequado, da<br />
mesma maneira que o tubo.<br />
F. Marque o exterior do tubo a<br />
profundidade a que vai ser introduzido<br />
o acessório segundo os comprimentos<br />
do quadro.<br />
D (mm) 63 75 90 110 125 140 160 200<br />
L max 94 104 109 115 124 133 139 169<br />
L min 42 45 50 55 60 69 75 85<br />
L 52 59 59 60 64 64 64 64<br />
G. Para introducir el tubo en el<br />
accesorio se aconseja utilizar un equipo<br />
como el mostrado en la imagen.<br />
- Fije un dispositivo de ensamblaje<br />
especial sobre el tubo.<br />
- Fije el accesorio sobre el dispositivo.<br />
- Con la palanca, deslice el accesorio<br />
sobre el tubo hasta que se alcance la<br />
marca de referencia.<br />
G. Para ser introduzir o tubo no<br />
acessório aconselha-se a utilizar<br />
um equipamento conforme está<br />
representado na figura.<br />
- Fixe o dispositivo de montagem<br />
especial sobre o tubo.<br />
- Fixe o acessório sobre o dispositivo.<br />
- Com o manípulo, deslize o acessório<br />
sobre o tubo até que se alcance a<br />
marca de referência.