Manuales - Nilfisk PARTS - Nilfisk-Advance
Manuales - Nilfisk PARTS - Nilfisk-Advance
Manuales - Nilfisk PARTS - Nilfisk-Advance
Create successful ePaper yourself
Turn your PDF publications into a flip-book with our unique Google optimized e-Paper software.
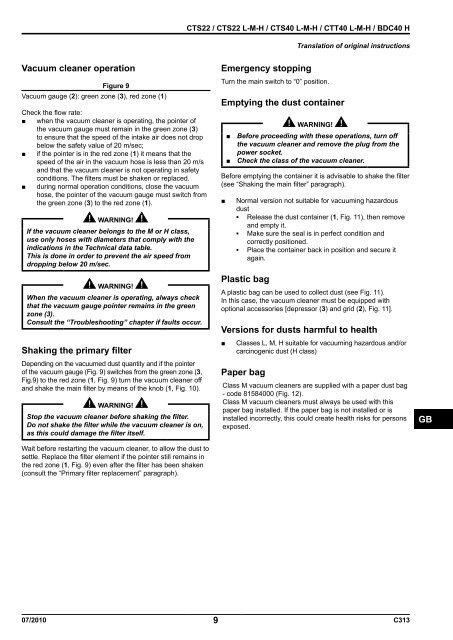
Vacuum cleaner operation<br />
Figure 9<br />
Vacuum gauge (2): green zone (3), red zone (1)<br />
Check the flow rate:<br />
■ when the vacuum cleaner is operating, the pointer of<br />
the vacuum gauge must remain in the green zone (3)<br />
to ensure that the speed of the intake air does not drop<br />
below the safety value of 20 m/sec;<br />
■ if the pointer is in the red zone (1) it means that the<br />
speed of the air in the vacuum hose is less than 20 m/s<br />
and that the vacuum cleaner is not operating in safety<br />
conditions. The filters must be shaken or replaced.<br />
■ during normal operation conditions, close the vacuum<br />
hose, the pointer of the vacuum gauge must switch from<br />
the green zone (3) to the red zone (1).<br />
WARNING!<br />
If the vacuum cleaner belongs to the M or H class,<br />
use only hoses with diameters that comply with the<br />
indications in the Technical data table.<br />
This is done in order to prevent the air speed from<br />
dropping below 20 m/sec.<br />
WARNING!<br />
When the vacuum cleaner is operating, always check<br />
that the vacuum gauge pointer remains in the green<br />
zone (3).<br />
Consult the “Troubleshooting” chapter if faults occur.<br />
Shaking the primary filter<br />
Depending on the vacuumed dust quantity and if the pointer<br />
of the vacuum gauge (Fig. 9) switches from the green zone (3,<br />
Fig.9) to the red zone (1, Fig. 9) turn the vacuum cleaner off<br />
and shake the main filter by means of the knob (1, Fig. 10).<br />
WARNING!<br />
Stop the vacuum cleaner before shaking the filter.<br />
Do not shake the filter while the vacuum cleaner is on,<br />
as this could damage the filter itself.<br />
Wait before restarting the vacuum cleaner, to allow the dust to<br />
settle. Replace the filter element if the pointer still remains in<br />
the red zone (1, Fig. 9) even after the filter has been shaken<br />
(consult the “Primary filter replacement” paragraph).<br />
CTS22 / CTS22 L-M-H / CTS40 L-M-H / CTT40 L-M-H / BDC40 H<br />
Emergency stopping<br />
Turn the main switch to “0” position.<br />
Emptying the dust container<br />
Translation of original instructions<br />
WARNING!<br />
■ Before proceeding with these operations, turn off<br />
the vacuum cleaner and remove the plug from the<br />
power socket.<br />
■ Check the class of the vacuum cleaner.<br />
Before emptying the container it is advisable to shake the filter<br />
(see “Shaking the main filter” paragraph).<br />
■ Normal version not suitable for vacuuming hazardous<br />
dust<br />
▪ Release the dust container (1, Fig. 11), then remove<br />
and empty it.<br />
▪ Make sure the seal is in perfect condition and<br />
correctly positioned.<br />
▪ Place the container back in position and secure it<br />
again.<br />
Plastic bag<br />
A plastic bag can be used to collect dust (see Fig. 11).<br />
In this case, the vacuum cleaner must be equipped with<br />
optional accessories [depressor (3) and grid (2), Fig. 11].<br />
Versions for dusts harmful to health<br />
■ Classes L, M, H suitable for vacuuming hazardous and/or<br />
carcinogenic dust (H class)<br />
Paper bag<br />
Class M vacuum cleaners are supplied with a paper dust bag<br />
- code 81584000 (Fig. 12).<br />
Class M vacuum cleaners must always be used with this<br />
paper bag installed. If the paper bag is not installed or is<br />
installed incorrectly, this could create health risks for persons<br />
exposed.<br />
07/2010 9 C313<br />
GB


