MD 81209 manual DE_GB_FR_IT_ES.book - medion
MD 81209 manual DE_GB_FR_IT_ES.book - medion
MD 81209 manual DE_GB_FR_IT_ES.book - medion

Create successful ePaper yourself
Turn your PDF publications into a flip-book with our unique Google optimized e-Paper software.
<strong>MD</strong> <strong>81209</strong> <strong>manual</strong> <strong>DE</strong>_<strong>GB</strong>_<strong>FR</strong>_<strong>IT</strong>_<strong>ES</strong>.<strong>book</strong> Seite 3 Montag, 27. Februar 2006 10:33 10<br />
INHALTSVERZEICHNIS<br />
Sicherheitshinweise . . . . . . . . . . . . . . . . . .4<br />
Über dieses Gerät . . . . . . . . . . . . . . . . . . .6<br />
Legende . . . . . . . . . . . . . . . . . . . . . . . . . . .9<br />
Lieferumfang . . . . . . . . . . . . . . . . . . . . . .10<br />
Sender anschliessen . . . . . . . . . . . . . . . .12<br />
Über SCART-Anschluss . . . . . . . . . . . . . . . . . . . . . . . . . . 12<br />
Ohne SCART-Anschluss . . . . . . . . . . . . . . . . . . . . . . . . . . 12<br />
Infrarot Extender (für Fernbedienungen) . . . . . . . . . . . . . 14<br />
Netzadapter anschliessen . . . . . . . . . . . . . . . . . . . . . . . . . 17<br />
Kanal wählen . . . . . . . . . . . . . . . . . . . . . . . . . . . . . . . . . . . 17<br />
Aufstellen . . . . . . . . . . . . . . . . . . . . . . . . . . . . . . . . . . . . . . 17<br />
Sender an einen Computer anschliessen 18<br />
Empfänger anschliessen . . . . . . . . . . . . .22<br />
Anschluss über ein DIN-AV-Cinchkabel . . . . . . . . . . . . . . 22<br />
Anschluss über SCART-Adapter . . . . . . . . . . . . . . . . . . . . 22<br />
Gerät zwischenschalten . . . . . . . . . . . . . . . . . . . . . . . . . . 23<br />
Netzadapter anschliessen . . . . . . . . . . . . . . . . . . . . . . . . . 23<br />
Kanal wählen . . . . . . . . . . . . . . . . . . . . . . . . . . . . . . . . . . . 24<br />
Quelle wählen . . . . . . . . . . . . . . . . . . . . . . . . . . . . . . . . . . . 24<br />
Aufstellen . . . . . . . . . . . . . . . . . . . . . . . . . . . . . . . . . . . . . . 24<br />
Kanaleinstellung . . . . . . . . . . . . . . . . . . .25<br />
Reinigung/Entsorgung . . . . . . . . . . . . . . .26<br />
Wenn Störungen auftreten . . . . . . . . . . . .27<br />
Technische Daten . . . . . . . . . . . . . . . . . .28<br />
Konformitätsinformation . . . . . . . . . . . . .29<br />
3<br />
D
<strong>MD</strong> <strong>81209</strong> <strong>manual</strong> <strong>DE</strong>_<strong>GB</strong>_<strong>FR</strong>_<strong>IT</strong>_<strong>ES</strong>.<strong>book</strong> Seite 4 Montag, 27. Februar 2006 10:33 10<br />
SICHERHE<strong>IT</strong>SHINWEISE<br />
Lesen Sie bitte vor Inbetriebnahme die Sicherheitsvorschriften<br />
aufmerksam durch und beachten<br />
Sie die Warnungen in der Bedienungsanleitung<br />
. Bewahren Sie die Bedienungsanleitung<br />
immer in Reichweite auf.<br />
Wenn Sie das Gerät verkaufen oder weitergeben, händigen<br />
Sie unbedingt auch diese Anleitung aus.<br />
Umgebungsbedingungen<br />
• Schützen Sie das Gerät vor Feuchtigkeit und Hitze.<br />
• Vermeiden Sie es, die Geräte in Bereichen mit unzulänglicher<br />
Belüftung (z. B. zwischen Regalen oder dorthin, wo<br />
Vorhänge oder Möbel die Belüftungsöffnungen verdecken)<br />
aufzustellen.<br />
• Vermeiden Sie das Eindringen von Fremdkörpern und Flüssigkeiten<br />
in die Geräte. Setzen Sie die Geräte nicht Tropfoder<br />
Spritzwasser aus.<br />
• Offene Brandquellen, wie z. B. brennende Kerzen, dürfen<br />
nicht auf die Geräte gestellt werden.<br />
• Die Gummifüße der Geräte können in Verbindung mit Möbeloberflächen<br />
Farbveränderungen hervorrufen. Stellen<br />
Sie die Geräte gegebenenfalls auf eine geeignete Unterlage.<br />
Netzanschluss<br />
Lassen Sie Kinder niemals unbeaufsichtigt elektrische<br />
Geräte benutzen.<br />
• Schließen Sie die Netzadapter nur an gut erreichbare<br />
Netzsteckdosen 230 V ~ 50 Hz an.<br />
4
<strong>MD</strong> <strong>81209</strong> <strong>manual</strong> <strong>DE</strong>_<strong>GB</strong>_<strong>FR</strong>_<strong>IT</strong>_<strong>ES</strong>.<strong>book</strong> Seite 5 Montag, 27. Februar 2006 10:33 10<br />
• Verwenden Sie ausschließlich die mitgelieferten Netzadapter.<br />
• Versuchen Sie nie, die Netzadapter an andere Buchsen anzuschließen,<br />
da sonst Schäden verursacht werden können.<br />
• Ein beschädigtes Netzteil darf nicht mehr verwendet werden.<br />
Ersetzen Sie es durch ein gleichwertiges Netzteil.<br />
Störungen<br />
• Ziehen Sie bei Beschädigungen des Netzadapters, der Anschlusskabel<br />
oder der Geräte sofort den Netzadapter aus<br />
der Netzsteckdose.<br />
• Versuchen Sie auf keinen Fall, die Geräte selber zu öffnen<br />
und/oder zu reparieren.<br />
• Wenden Sie sich an unser Service Center oder eine andere<br />
geeignete Fachwerkstatt.<br />
Gesundheit<br />
• Die geringe Sendeleistung der Geräte schließt eine gesundheitliche<br />
Gefährdung nach dem derzeitigen Stand der Forschung<br />
und Technik aus.<br />
5<br />
D
<strong>MD</strong> <strong>81209</strong> <strong>manual</strong> <strong>DE</strong>_<strong>GB</strong>_<strong>FR</strong>_<strong>IT</strong>_<strong>ES</strong>.<strong>book</strong> Seite 6 Montag, 27. Februar 2006 10:33 10<br />
ÜBER DI<strong>ES</strong><strong>ES</strong> GERÄT<br />
Ihr Funkübertragungssystem überträgt Signale kabellos von<br />
einer Audio-/Videoquelle zu einem anderen Audio-/Videogerät.<br />
Typischerweise werden die Funksignale von einer Quelle mit<br />
Antenne (z. B. einem SAT-Receiver) zu einem anderen Gerät<br />
ohne Antenne (z. B. ein anderes TV-Gerät im Haus) geleitet,<br />
um die Antenne des ersten Geräts für das zweite Gerät nutzen<br />
zu können.<br />
Sie können die Fernbedienung der<br />
Quelle einsetzen, um dieses Gerät<br />
über den Empfänger steuern. Ihr<br />
System überwindet Distanzen von<br />
bis zum 100 m im Freien und 30 m<br />
im Haus.<br />
Darüber hinaus ist es grundsätzlich<br />
möglich, das Funkübertragungssystem<br />
an einen PC anzuschließen<br />
und so z. B. digitale Präsentationen<br />
auf einen Fernseher zu übertragen.<br />
Mögliche Signalgeber und Empfänger<br />
Eine typische Anwendung ist z. B., den Fernsehempfang eines<br />
Satelliten-Receivers als Quelle auf einen anderen Fernsehapparat<br />
im Haus weiterzuleiten. Andere Audio-/<br />
Videoquellen können etwa ein DVD-Rekorder, ein Videorekorder,<br />
ein TV-Gerät, die „D-Box“ (Premiere) oder auch eine<br />
PC-Karte sein. Das an den Empfänger angeschlossene Gerät<br />
kann z. B. ein Fernseher oder ein Verstärker sein.<br />
6
<strong>MD</strong> <strong>81209</strong> <strong>manual</strong> <strong>DE</strong>_<strong>GB</strong>_<strong>FR</strong>_<strong>IT</strong>_<strong>ES</strong>.<strong>book</strong> Seite 7 Montag, 27. Februar 2006 10:33 10<br />
Funksender und -empfänger zuordnen<br />
Der Sender des Funkübertragungssystems wird an die Audio-/Videoquelle,<br />
der Empfänger etwa an einen Fernseher<br />
oder Videorecorder angeschlossen. Mithilfe der dreiadrigen<br />
AV-Cinchkabel oder den SCART-Adaptern schließt man an<br />
das System die drei Signalarten Video sowie Audio-rechts<br />
und Audio-links an.<br />
Die Audio-/Videoquelle fernbedienen<br />
Sie können die Fernbedienung der Audio-/Videoquelle nutzen,<br />
um diese Geräte am Ort des Empfängers zu steuern. Die<br />
Fernbedienungssignale (Infrarot) werden dabei in Funksignale<br />
gewandelt und übertragen. Der Sender wiederum wandelt<br />
die Funksignale wieder in ein Infrarotsignale um. Die zwei Infrarotsender<br />
des Infrarotextenders geben diese Signale dann<br />
zu den entsprechenden Geräten weiter.<br />
Scart oder Cinch<br />
Wenn die Audio-/Videoquelle einen SCART-Anschluss besitzt,<br />
nutzen Sie den SCART-Adapter für den Sender. Wenn<br />
das an den Empfänger angeschlossene Gerät einen SCART-<br />
Anschluss besitzt, nutzen Sie den SCART-Adapter für den<br />
Empfänger.<br />
Besitzt das am Empfänger angeschlossene Gerät keinen<br />
SCART-Anschluss, nutzen Sie eins der dreiadrigen Cinchkabel.<br />
Wenn die Audio-/Videoquelle einen 3,5 mm Audioausgang<br />
besitzt, nutzen Sie den mitgelieferten Audioadapter.<br />
7<br />
D
<strong>MD</strong> <strong>81209</strong> <strong>manual</strong> <strong>DE</strong>_<strong>GB</strong>_<strong>FR</strong>_<strong>IT</strong>_<strong>ES</strong>.<strong>book</strong> Seite 8 Montag, 27. Februar 2006 10:33 10<br />
Reichweiten<br />
Audio- und Videosignale werden im 2,4 GHz-Bereich übertragen.<br />
Im freien Feld beträgt die Reichweite ca. 100 m, innerhalb<br />
von Gebäuden ca. 30 m. Je nach Umgebungsbedingung<br />
kann die Reichweite geringer ausfallen.<br />
Anwendungsbeispiel<br />
8
<strong>MD</strong> <strong>81209</strong> <strong>manual</strong> <strong>DE</strong>_<strong>GB</strong>_<strong>FR</strong>_<strong>IT</strong>_<strong>ES</strong>.<strong>book</strong> Seite 9 Montag, 27. Februar 2006 10:33 10<br />
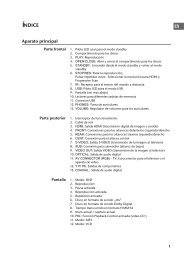
LEGEN<strong>DE</strong><br />
(Abbildungen auf der Ausklappseite)<br />
Sender<br />
1. Mini DIN Eingang 6. Eingang für Infrarotsender<br />
„AV IN 1“ IR EXT.<br />
2. Mini DIN Eingang 7. Audio-/Video-<br />
„AV IN 2“ Sendeantenne<br />
3. DC-Eingang 8. Betriebs-LED<br />
12 V 200 mA<br />
4. Mini DIN Ausgang<br />
AV OUT<br />
9. Schalter ON/OFF<br />
5. Schalter Quelle 1/2 10. Kanalwahlschalter<br />
(ca. 10 Sek.<br />
gedrückt halten)<br />
A/B/C/D<br />
Empfänger<br />
1. Mini DIN Ausgang 5. Schalter Quelle 1/2<br />
AV EXTEND (ca. 10 Sek.<br />
gedrückt halten)<br />
2. DC-Eingang 9 V 6. Schalter ON/OFF<br />
400mA<br />
3. Audio-/Video- 7. Kanalwahlschalter<br />
Empfangsantenne A/B/C/D<br />
4. Betriebs-LED/<br />
Infrarotsender<br />
9<br />
D
<strong>MD</strong> <strong>81209</strong> <strong>manual</strong> <strong>DE</strong>_<strong>GB</strong>_<strong>FR</strong>_<strong>IT</strong>_<strong>ES</strong>.<strong>book</strong> Seite 10 Montag, 27. Februar 2006 10:33 10<br />
LIEFERUMFANG<br />
Vergewissern Sie sich nach dem Auspacken, ob folgende<br />
Teile mitgeliefert worden sind:<br />
Sender:<br />
• Sender<br />
• Netzadapter für den Sender, 12 V 200 mA<br />
Zubehör:<br />
• 1 Infrarotextender mit zwei externen IR-Sendern<br />
• 1x SCART-Adapter für den Sender „Transmitter“<br />
• 1x Mini DIN-SCART-Kabel für den A/V-Eingang<br />
• 1x Mini DIN-SCART-Kabel für den A/V-Ausgang<br />
• 1x Audioadapter 3,5 mm Klinkenstecker auf Cinchbuchse<br />
• 1x Mini DIN-AV-Cinchkabel<br />
10
<strong>MD</strong> <strong>81209</strong> <strong>manual</strong> <strong>DE</strong>_<strong>GB</strong>_<strong>FR</strong>_<strong>IT</strong>_<strong>ES</strong>.<strong>book</strong> Seite 11 Montag, 27. Februar 2006 10:33 10<br />
Empfänger:<br />
• Empfänger<br />
• 1x Netzadapter für den Empfänger, 9 V 400 mA<br />
Zubehör:<br />
1x SCART-Adapter für den Empfänger „Receiver“<br />
1x Mini DIN-AV-Cinchkabel<br />
Verpackung<br />
Das Funkübertragungssystem befindet sich<br />
zum Schutz vor Transportschäden in einer Verpackung.<br />
Verpackungen sind Rohstoffe, somit<br />
wiederverwendungsfähig und können dem<br />
Rohstoffkreislauf zugeführt werden.<br />
11<br />
D
<strong>MD</strong> <strong>81209</strong> <strong>manual</strong> <strong>DE</strong>_<strong>GB</strong>_<strong>FR</strong>_<strong>IT</strong>_<strong>ES</strong>.<strong>book</strong> Seite 12 Montag, 27. Februar 2006 10:33 10<br />
SEN<strong>DE</strong>R ANSCHLI<strong>ES</strong>SEN<br />
Der Sender wird mit einer Audio-/Videoquelle (Quelle 1) verbunden.<br />
Dies kann z. B. ein SAT-Empfänger, ein Videorekorder,<br />
ein DVD-Gerät, ein TV-Gerät oder auch eine Grafik-Karte<br />
(siehe unten) sein.<br />
Über SCART-Anschluss<br />
Wenn die Audio-/Videoquelle einen SCART-Anschluss besitzt,<br />
verbinden Sie das mitgelieferte Mini DIN-SCART-Kabel<br />
für den A/V-Eingang mit dem SCART-Ausgang dieses Geräts<br />
und dem Mini DIN-Eingang (AV IN 1) am Sender.<br />
Ohne SCART-Anschluss<br />
Wenn die Audio-/Videoquelle keinen SCART-Anschluss besitzt,<br />
verbinden Sie das mitgelieferte Mini DIN-AV-Cinchkabel<br />
mit dem A/V-Cinch-Ausgang dieses Geräts und dem Mini<br />
DIN-Eingang (AV IN 1) am Sender.<br />
• Der gelbe Cinch-Stecker ist für einen Video-Anschluss, der<br />
rote für Audio rechts, der weiße für Audio links.<br />
• Um nur Tonsignale zu übertragen, verbinden Sie nur die<br />
Audio-Stecker.<br />
• Wenn Sie den Sender an eine 3,5 mm Audiobuchse einer<br />
Audio-/Videoquelle anschließen möchten, verwenden Sie<br />
den Audioadapter und verbinden diesen mit den Audio-<br />
Steckern des Mini DIN-SCART-Cinchkabels.<br />
• Verbinden Sie anschließend den Mini DIN-Stecker am anderen<br />
Ende des Mini DIN-AV-Cinchkabels mit der entsprechenden<br />
Buchse am Sender.<br />
12
<strong>MD</strong> <strong>81209</strong> <strong>manual</strong> <strong>DE</strong>_<strong>GB</strong>_<strong>FR</strong>_<strong>IT</strong>_<strong>ES</strong>.<strong>book</strong> Seite 13 Montag, 27. Februar 2006 10:33 10<br />
• Um das Videosignal auch an ein Fernsehgerät weiterzuleiten,<br />
das dort platziert ist, wo der Sender aufgestellt wurde,<br />
verbinden Sie das Mini DIN-SCART-Kabel für den A/V Ausgang<br />
(AV OUT) mit dem SCART-Eingang am Fernsehgerät.<br />
Beispielanordung Sender<br />
Die folgende Skizze stellt eine Beispielanordnung mit einem<br />
Satelliten-Receiver und einem TV-Gerät auf der Senderseite<br />
dar:<br />
13<br />
D
<strong>MD</strong> <strong>81209</strong> <strong>manual</strong> <strong>DE</strong>_<strong>GB</strong>_<strong>FR</strong>_<strong>IT</strong>_<strong>ES</strong>.<strong>book</strong> Seite 14 Montag, 27. Februar 2006 10:33 10<br />
Infrarot Extender (für Fernbedienungen)<br />
Um vom Ort des Empfängers aus die Audio-/Videoquelle<br />
fernbedienen zu können, müssen Sie den Infrarot-Extender<br />
anschließen.<br />
• Verbinden Sie den Stecker des Infrarot-Extenders mit der<br />
IR EXT Buchse am Sender (siehe Abbildung auf der vorherigen<br />
Seite).<br />
• Ziehen Sie das Papier von der Klebefläche eines der beiden<br />
IR-Sender ab. Befestigen Sie den IR-Sender so an der Audio-/Video-Quelle,<br />
dass sie auf den Infrarotempfänger dieses<br />
Geräts gerichtet ist. Dabei muss die Oberseite der<br />
Diode ca. 1 cm Abstand vom Infrarotempfänger haben<br />
(siehe Abb. unten).<br />
Mehrere Geräte nutzen<br />
Da der Infrarot-Extender zwei IR-Sender hat, können Sie<br />
mehrere Geräte gleichzeitig vom Ort des Empfängers aus<br />
fernbedienen. So können Sie z. B. sowohl Videorekorder als<br />
auch DVD-Player an einem anderen Ort nutzen.<br />
• Befestigen Sie dazu jeweils einen IR-Sender wie oben beschrieben<br />
an jedem Gerät, das sie an einem anderen Ort<br />
nutzen möchten.<br />
14
<strong>MD</strong> <strong>81209</strong> <strong>manual</strong> <strong>DE</strong>_<strong>GB</strong>_<strong>FR</strong>_<strong>IT</strong>_<strong>ES</strong>.<strong>book</strong> Seite 15 Montag, 27. Februar 2006 10:33 10<br />
Mehrere Geräte anschließen<br />
Sie können auch ein zweites Gerät an den Sender anschließen,<br />
die Signale dieses Geräts an den Empfänger weiterleiten<br />
und von dort aus dieses Gerät mit der Fernbedienung<br />
steuern.<br />
• Wenn Sie das Gerät an den AV IN 1 Eingang des Senders<br />
angeschlossen haben, ist das Gerät als Quelle 1 definiert,<br />
beim Anschluss an den AV IN 2 Eingang des Senders als<br />
Quelle 2.<br />
• Über den Schalter SOURCE 1/2 am Sender können Sie nun<br />
einstellen, welches Signal an den am AV OUT Ausgang angeschlossenen<br />
Fernseher weitergegeben wird.<br />
15<br />
D
<strong>MD</strong> <strong>81209</strong> <strong>manual</strong> <strong>DE</strong>_<strong>GB</strong>_<strong>FR</strong>_<strong>IT</strong>_<strong>ES</strong>.<strong>book</strong> Seite 16 Montag, 27. Februar 2006 10:33 10<br />
Beispielanordung Sender mit zwei Geräten<br />
Die folgende Skizze stellt eine Beispielanordnung mit einem<br />
Satelliten-Receiver, einem TV-Gerät und einem DVD-Player<br />
auf der Senderseite dar:<br />
16
<strong>MD</strong> <strong>81209</strong> <strong>manual</strong> <strong>DE</strong>_<strong>GB</strong>_<strong>FR</strong>_<strong>IT</strong>_<strong>ES</strong>.<strong>book</strong> Seite 17 Montag, 27. Februar 2006 10:33 10<br />
Netzadapter anschliessen<br />
• Schließen Sie den Netzadapter für den Sender an die 12 V-<br />
Anschlussbuchse (DC 12 V) des Senders an.<br />
• Nehmen Sie die Schutzkappe ab und stecken Sie den<br />
Netzadapter in die Steckdose (230 V ~ 50 Hz).<br />
• Stellen Sie den ON/OFF-Schalter auf die Position ON. Die<br />
rote Betriebs LED leuchtet.<br />
• Klappen Sie die Sendeantenne auf und richten Sie sie in<br />
Richtung Empfänger aus.<br />
Kanal wählen<br />
• Wählen Sie mit dem Kanalwahlschalter an der Unterseite<br />
des Geräts einen Kanal (A/B/C/D) aus, auf dem gesendet<br />
werden soll.<br />
Aufstellen<br />
• Stellen Sie den Sender auf eine feste Oberfläche.<br />
• Richten Sie die Sendeantenne mit der flachen Seite in Richtung<br />
des Empfängers aus.<br />
17<br />
D
<strong>MD</strong> <strong>81209</strong> <strong>manual</strong> <strong>DE</strong>_<strong>GB</strong>_<strong>FR</strong>_<strong>IT</strong>_<strong>ES</strong>.<strong>book</strong> Seite 18 Montag, 27. Februar 2006 10:33 10<br />
SEN<strong>DE</strong>R AN EINEN COMPUTER<br />
ANSCHLI<strong>ES</strong>SEN<br />
Sie können den Sender auch an einen Computer anschließen,<br />
um die Computerausgabe z. B. auf ein Fernsehgerät zu<br />
übertragen.<br />
Die Übertragung der Computerausgabe auf ein Fernsehgerät<br />
ist meistens nicht sinnvoll, wenn eine Computeranwendung<br />
darauf ablaufen soll. Die Bildausgabe des TV-Geräts reicht in<br />
der Regel nicht aus, um das höher aufgelöste Computerbild<br />
anzuzeigen.<br />
Werden allerdings Videos oder Präsentationen wiedergegeben,<br />
ist die Ausgabe über einen Fernseher durchaus empfehlenswert.<br />
Folgende Voraussetzungen müssen gewährleistet sein:<br />
• Ihr Computer hat einen Videoausgang, der die Bildausgabe<br />
auf ein TV-Gerät unterstützt.<br />
• Das Betriebssystem und der Treiber Ihrer Grafikkarte unterstützen<br />
den Videoausgang.<br />
Vorgehensweise<br />
Abhängig von der Grafikkarte und dem Betriebssystem wird<br />
die Ausgabe über den Videoausgang unterschiedlich aktiviert.<br />
Da es eine Vielzahl von Kombinationen gibt, können wir<br />
hier nur eine allgemeine Anleitung geben. Lesen Sie bitte in<br />
der Bedienungsanleitung Ihres Computers bzw. der Grafikkarte<br />
nach, wie das Bild auf den Videoausgang umgeleitet<br />
wird.<br />
Das nachfolgende Beispiel setzt einen PC mit dem Betriebssystem<br />
Windows® ab der Version 98 voraus.<br />
18
<strong>MD</strong> <strong>81209</strong> <strong>manual</strong> <strong>DE</strong>_<strong>GB</strong>_<strong>FR</strong>_<strong>IT</strong>_<strong>ES</strong>.<strong>book</strong> Seite 19 Montag, 27. Februar 2006 10:33 10<br />
• Beenden Sie alle Programme und schalten Sie den Computer<br />
aus.<br />
• Nehmen Sie die Bedienungsanleitung Ihres PCs zur Hand<br />
und folgen Sie den Anweisungen zur Nutzung des Videoausgangs.<br />
• Schließen Sie den gelben Stecker des AV-Cinchkabels an<br />
den Videoausgang der Grafikkarte an. Sollte Ihre Grafikkarte<br />
nicht über einen Cinch-Ausgang verfügen, benutzen Sie<br />
einen entsprechenden Adapter (Sonderzubehör).<br />
• Stecken Sie nun den roten und den weißen Stecker des<br />
Mini DIN-AV-Cinchkabels in den passenden Audioausgang<br />
Ihres PCs. Meist verfügen PCs über 3,5-mm-Klinkenbuchsen,<br />
so dass Sie hier den mitgelieferten Adapter verwenden<br />
können.<br />
• Nun schließen Sie den Mini DIN-Stecker des Kabels an den<br />
Eingang AV IN 1 der Sendestation an.<br />
• Schalten Sie nun die Sende- und die Empfangsstation sowie<br />
Ihr TV-Gerät ein und wählen den passenden Videokanal<br />
an Ihrem TV-Gerät.<br />
• Starten Sie den PC und warten Sie, bis das Betriebssystem<br />
vollständig geladen ist.<br />
• Klicken Sie nun mit der rechten Maustaste einmal auf den<br />
Desktop (Arbeitsfläche) und wählen Sie „Eigenschaften“,<br />
um die „Eigenschaften für Anzeige“ anzuzeigen:<br />
19<br />
D
<strong>MD</strong> <strong>81209</strong> <strong>manual</strong> <strong>DE</strong>_<strong>GB</strong>_<strong>FR</strong>_<strong>IT</strong>_<strong>ES</strong>.<strong>book</strong> Seite 20 Montag, 27. Februar 2006 10:33 10<br />
• Klicken Sie nun auf „Einstellungen“, um die Ausgabe Ihres<br />
PCs entsprechend zu konfigurieren. Es gibt hier enorme<br />
Abweichungen zwischen den unterschiedlichen Grafikkarten.<br />
Lesen Sie daher in der entsprechenden Bedienungsanleitung<br />
nach, wie Sie nun weiter vorgehen müssen. Meist kann auch<br />
die Online-Hilfe mit der Taste F1 aufgerufen werden, um detaillierte<br />
Informationen zu erhalten.<br />
Wenn Sie die Einstellungen korrekt vorgenommen haben,<br />
wird das Bild des PCs nun auf dem TV-Gerät wiedergegeben.<br />
20
<strong>MD</strong> <strong>81209</strong> <strong>manual</strong> <strong>DE</strong>_<strong>GB</strong>_<strong>FR</strong>_<strong>IT</strong>_<strong>ES</strong>.<strong>book</strong> Seite 21 Montag, 27. Februar 2006 10:33 10<br />
Warenzeichen<br />
MS-DOS® und Windows® sind eingetragene Warenzeichen<br />
der Fa. Microsoft®.<br />
Pentium® ist ein eingetragenes Warenzeichen der Firma Intel®.<br />
Haftpflichtbeschränkung für Datenverlust/Folgeschäden<br />
Datensicherung:<br />
Bei jeder Veränderung des PC-Systems sollten Sie eine Datensicherung<br />
auf externen Medien (z. B. CD-R) durchführen,<br />
um Datenverlust zu vermeiden. Für verloren gegangene Daten<br />
haftet die MEDION AG nicht.<br />
Funktionalität:<br />
Aufgrund der enormen Unterschiede bei Betriebssystemen<br />
und Grafikkarten können wir die in diesem Kapitel ("Sender an<br />
einen Computer anschließen") beschriebene Funktionalität<br />
nicht pauschal garantieren. Bitte informieren Sie sich bei einem<br />
zuständigen Fachhändler/Fachmann.<br />
Folgeschäden:<br />
Bitte beachten Sie beim Anschluss des Funkübertragungssystems<br />
unbedingt die Gebrauchsanweisungen Ihres Computers,<br />
der verwendeten Software und der Zusatzkomponenten.<br />
Wir haften nicht für Schäden oder Datenverluste, die durch<br />
Fehlanwendung oder nicht bestimmungsgemäßen Gebrauch<br />
entstanden sind.<br />
21<br />
D
<strong>MD</strong> <strong>81209</strong> <strong>manual</strong> <strong>DE</strong>_<strong>GB</strong>_<strong>FR</strong>_<strong>IT</strong>_<strong>ES</strong>.<strong>book</strong> Seite 22 Montag, 27. Februar 2006 10:33 10<br />
EMPFÄNGER ANSCHLI<strong>ES</strong>SEN<br />
Es gibt mehrere Möglichkeiten, Audio-/Video-Signale des<br />
Senders auf einem anderen Gerät zu empfangen.<br />
Anschluss über ein DIN-AV-Cinchkabel<br />
• Verbinden Sie das Mini DIN-AV-Cinchkabel mit dem Ausgang<br />
AV EXTEND des Empfängers und den entsprechenden<br />
Buchsen am empfangenden Gerät (z. B. dem<br />
Fernseher).<br />
Anschluss über SCART-Adapter<br />
• Verbinden Sie das Mini DIN-AV-Cinchkabel mit dem Ausgang<br />
AV EXTEND des Empfängers und dem SCART-Adapter<br />
für den Empfänger.<br />
• Stecken Sie den SCART-Adapter mit dem Aufdruck „Receiver“<br />
in den SCART-Eingang des empfangenden Geräts<br />
(z. B. den Fernseher).<br />
22
<strong>MD</strong> <strong>81209</strong> <strong>manual</strong> <strong>DE</strong>_<strong>GB</strong>_<strong>FR</strong>_<strong>IT</strong>_<strong>ES</strong>.<strong>book</strong> Seite 23 Montag, 27. Februar 2006 10:33 10<br />
Beispielanordung Empfänger<br />
Die folgende Skizze stellt eine Beispielanordung des Empfängers<br />
und eines Fernsehgeräts wahlweise mit dem Mini-<br />
DIN-AV-Cinchkabel oder einem SCART-Adapter dar.<br />
Gerät zwischenschalten<br />
Statt den Empfänger direkt mit einem Fernseher zu verbinden,<br />
können Sie auch ein anderes Audio-/Videogerät zwischenschalten.<br />
Dies könnte z. B. ein Videorekorder sein, den<br />
Sie dann auf die beschriebenen Arten mit dem Empfänger<br />
verbinden können.<br />
Netzadapter anschliessen<br />
• Schließen Sie den Netzadapter für den Empfänger an die 9-<br />
Volt-Anschlussbuchse des Empfängers an.<br />
• Stecken Sie den Netzadapter in eine gut erreichbare Steckdose<br />
(230 V ~ 50 Hz).<br />
23<br />
D
<strong>MD</strong> <strong>81209</strong> <strong>manual</strong> <strong>DE</strong>_<strong>GB</strong>_<strong>FR</strong>_<strong>IT</strong>_<strong>ES</strong>.<strong>book</strong> Seite 24 Montag, 27. Februar 2006 10:33 10<br />
• Schalten Sie das empfangende Gerät (z. B. den Fernseher)<br />
ein und stellen Sie den ON/OFF-Schalter des Empfängers<br />
auf ON. Die rote Betriebs-LED leuchtet.<br />
Kanal wählen<br />
Achten Sie darauf, dass der Empfänger auf den gleichen Kanal<br />
(A/B/C/D) eingestellt ist, wie der Sender.<br />
Quelle wählen<br />
Falls Sie zwei Geräte an den Sender angeschlossen haben<br />
sollten, können Sie nun mit dem Schalter Schalter SOURCE<br />
1/2 zwischen dem Empfang des ersten (Quelle 1) und des<br />
zweiten Geräts (Quelle 2) umschalten.<br />
• Halten Sie hierzu die Taste SOURCE 1/2 an der Rückseite<br />
des Empfängers für etwa 10 Sekunden lang gedrückt, bis<br />
das Gerät umschaltet.<br />
• Sie können auch eine beliebige Taste auf der Fernbedienung<br />
eines an den Sender angeschlossenen Geräts für<br />
etwa 10 Sekunden gedrückt halten, bis das Gerät umschaltet.<br />
Aufstellen<br />
• Stellen Sie den Empfänger auf eine feste Oberfläche.<br />
• Stellen Sie den Empfänger so auf, dass die Front mit der<br />
LED-Betriebsanzeige in Ihre Richtung weist.<br />
• Wenn Sie die Fernbedienung der Audio-/Video-Quelle benutzen,<br />
halten Sie sie in Richtung Empfänger.<br />
• Klappen Sie die Empfangsantenne auf und richten Sie sie<br />
in Richtung Sender aus, bis Sie ein optimales Bild haben.<br />
24
<strong>MD</strong> <strong>81209</strong> <strong>manual</strong> <strong>DE</strong>_<strong>GB</strong>_<strong>FR</strong>_<strong>IT</strong>_<strong>ES</strong>.<strong>book</strong> Seite 25 Montag, 27. Februar 2006 10:33 10<br />
KANALEINSTELLUNG<br />
Ihr Funkübertragungssystem ist mit vier Kanälen ausgestattet,<br />
d. h. es kann auf vier verschiedenen Frequenzen senden.<br />
Der Kanalschalter finden Sie bei beiden Geräten auf der Unterseite.<br />
• Stellen Sie Sender und Empfänger auf denselben Kanal ein.<br />
• Probieren Sie aus, welcher der Kanäle A, B, C oder D den<br />
besten Empfang liefert.<br />
• Sie können die vier Kanäle auch dazu nutzen, bis zu vier<br />
Funkübertragungssysteme einzusetzen.<br />
25<br />
D
<strong>MD</strong> <strong>81209</strong> <strong>manual</strong> <strong>DE</strong>_<strong>GB</strong>_<strong>FR</strong>_<strong>IT</strong>_<strong>ES</strong>.<strong>book</strong> Seite 26 Montag, 27. Februar 2006 10:33 10<br />
REINIGUNG/ENTSORGUNG<br />
Reinigung<br />
• Verwenden Sie zum Reinigen ein trockenes, weiches Tuch.<br />
• Verwenden Sie keine Reinigungslösungen, die die Oberfläche<br />
der Geräte angreifen können. Sprühen Sie den Reiniger<br />
niemals direkt auf die Geräte.<br />
Entsorgung<br />
Werfen Sie das Funkübertragungssystem am Ende<br />
seiner Lebenszeit keinesfalls in den normalen<br />
Hausmüll. Erkundigen Sie sich in Ihrer Stadt- oder<br />
Gemeinde-verwaltung nach Möglichkeiten einer<br />
umwelt- und sachgerechten Entsorgung.<br />
26
<strong>MD</strong> <strong>81209</strong> <strong>manual</strong> <strong>DE</strong>_<strong>GB</strong>_<strong>FR</strong>_<strong>IT</strong>_<strong>ES</strong>.<strong>book</strong> Seite 27 Montag, 27. Februar 2006 10:33 10<br />
WENN STÖRUNGEN AUFTRETEN<br />
Falls Störungen auftreten sollten , prüfen Sie bitte zunächst,<br />
ob die Anlage richtig eingerichtet ist. Folgende Übersicht<br />
kann Ihnen dabei helfen:<br />
Keine Audio/Video Übertragung<br />
• Sind die Netzadapter eingesteckt?<br />
• Sind Sender und Empfänger eingeschaltet?<br />
• Sind die Kanäle für Sender und Empfänger gleich eingestellt?<br />
• Ist die Übertragungsquelle eingeschaltet?<br />
• Mauern und Decken verringern die Reichweite.<br />
• Überprüfen Sie die Verbindungen an den angeschlossenen<br />
Geräten.<br />
Schlechte Empfangsqualität<br />
• Richten Sie die Antennen von Sender und Empfänger noch<br />
einmal aufeinander aus.<br />
• Verändern Sie die Position des Senders und Empfängers<br />
ein wenig.<br />
• Es kann durch verschiedene Einflüsse wie Wellen anderer<br />
Radiogeräte zu Beeinträchtigungen kommen.<br />
• Wählen Sie einen anderen Kanal.<br />
Fernbedienung reagiert nicht<br />
• Halten Sie die Fernbedienung direkt in Richtung Empfänger.<br />
• Die Dioden des Infrarotsenders müssen ca. 1 cm Abstand<br />
von dem Infrarotempfänger der Audio-/Video-Quelle haben.<br />
• Haben Sie die IR-Dioden richtig ausgerichtet?<br />
27<br />
D
<strong>MD</strong> <strong>81209</strong> <strong>manual</strong> <strong>DE</strong>_<strong>GB</strong>_<strong>FR</strong>_<strong>IT</strong>_<strong>ES</strong>.<strong>book</strong> Seite 28 Montag, 27. Februar 2006 10:33 10<br />
TECHNISCHE DATEN<br />
Sender:<br />
Netzadapter<br />
Eingang: 230 V ~ 50 Hz<br />
Ausgang:<br />
4 Kanäle<br />
12 V 200 mA<br />
Frequenzbereich: 2,4000 - 2,4835 GHz<br />
Anschlüsse:<br />
Rückkanal für<br />
1 Mini-DIN-Ausgang<br />
2 Mini-DIN-Eingänge<br />
Fernbedienungssignal: 433 MHz<br />
Empfänger:<br />
Netzadapter<br />
Eingang: 230 V ~ 50 Hz<br />
Ausgang:<br />
4 Kanäle<br />
9V 400mA<br />
Frequenzbereich: 2,4000 - 2,4835 GHz<br />
Anschlüsse: 1 Mini-DIN-Ausgang<br />
Die Netzadapter sind GS-geprüft.<br />
Technische Änderungen vorbehalten!<br />
28
<strong>MD</strong> <strong>81209</strong> <strong>manual</strong> <strong>DE</strong>_<strong>GB</strong>_<strong>FR</strong>_<strong>IT</strong>_<strong>ES</strong>.<strong>book</strong> Seite 29 Montag, 27. Februar 2006 10:33 10<br />
KONFORM<strong>IT</strong>ÄTSINFORMATION<br />
Hiermit erklärt Medion AG, dass sich das Gerät <strong>MD</strong> <strong>81209</strong> in<br />
Übereinstimmung mit den grundlegenden Anforderungen<br />
und den anderen relevanten Vorschriften der Richtlinie 1999/<br />
5/CE befindet.<br />
Auf Wunsch erhalten Sie weitere Informationen zur Konformitätserklärung<br />
von unserem Service-Center.<br />
Geprüft für den Betrieb in allen EU-Ländern.<br />
29<br />
D
<strong>MD</strong> <strong>81209</strong> <strong>manual</strong> <strong>DE</strong>_<strong>GB</strong>_<strong>FR</strong>_<strong>IT</strong>_<strong>ES</strong>.<strong>book</strong> Seite 30 Montag, 27. Februar 2006 10:33 10<br />
30
<strong>MD</strong> <strong>81209</strong> <strong>manual</strong> <strong>DE</strong>_<strong>GB</strong>_<strong>FR</strong>_<strong>IT</strong>_<strong>ES</strong>.<strong>book</strong> Seite 3 Montag, 27. Februar 2006 10:33 10<br />
CONTENTS<br />
Safety instructions . . . . . . . . . . . . . . . . . . 4<br />
About this appliance . . . . . . . . . . . . . . . . . .6<br />
Key . . . . . . . . . . . . . . . . . . . . . . . . . . . . . . .9<br />
Contents of package. . . . . . . . . . . . . . . . .10<br />
Connecting the transmitter . . . . . . . . . . .12<br />
Via SCART connection . . . . . . . . . . . . . . . . . . . . . . . . . . . . 12<br />
No SCART connection . . . . . . . . . . . . . . . . . . . . . . . . . . . . 12<br />
Infrared extender (for remote control) . . . . . . . . . . . . . . . 14<br />
Connecting the mains adapter . . . . . . . . . . . . . . . . . . . . . 17<br />
Selecting a channel . . . . . . . . . . . . . . . . . . . . . . . . . . . . . . 17<br />
Setting up . . . . . . . . . . . . . . . . . . . . . . . . . . . . . . . . . . . . . . 17<br />
Connecting the transmitter<br />
to a computer . . . . . . . . . . . . . . . . . . . . . .18<br />
Connecting the receiver . . . . . . . . . . . . . .22<br />
Connecting via a DIN AV cinch cable . . . . . . . . . . . . . . . . 22<br />
Connecting via the SCART adapter . . . . . . . . . . . . . . . . . 22<br />
Interposing a device . . . . . . . . . . . . . . . . . . . . . . . . . . . . . 23<br />
Connecting the mains adapter . . . . . . . . . . . . . . . . . . . . . 23<br />
Selecting a channel . . . . . . . . . . . . . . . . . . . . . . . . . . . . . . 24<br />
Selecting the source . . . . . . . . . . . . . . . . . . . . . . . . . . . . . 24<br />
Setting up . . . . . . . . . . . . . . . . . . . . . . . . . . . . . . . . . . . . . . 24<br />
Setting channels . . . . . . . . . . . . . . . . . . .25<br />
Cleaning/disposal. . . . . . . . . . . . . . . . . . .26<br />
Troubleshooting . . . . . . . . . . . . . . . . . . . 27<br />
Technical data . . . . . . . . . . . . . . . . . . . . 28<br />
Ration of conformity . . . . . . . . . . . . . . . .29<br />
3<br />
<strong>GB</strong>
<strong>MD</strong> <strong>81209</strong> <strong>manual</strong> <strong>DE</strong>_<strong>GB</strong>_<strong>FR</strong>_<strong>IT</strong>_<strong>ES</strong>.<strong>book</strong> Seite 4 Montag, 27. Februar 2006 10:33 10<br />
SAFETY INSTRUCTIONS<br />
Please read these instructions carefully<br />
before using the system and note the<br />
warnings in the operating instructions. Always<br />
keep the operating instructions close to<br />
hand.<br />
If you sell the appliance or give it away, please ensure that<br />
you also pass on these instructions.<br />
Environmental requirements<br />
• Protect the device from moisture and heat.<br />
• Avoid placing the devices in poorly ventilated areas (such<br />
as between shelves or where curtains or furniture can<br />
block the vents).<br />
• Do not allow foreign bodies or liquids to get into the<br />
device. Do not expose the devices to water.<br />
• Naked flames such as lit candles must not be placed on<br />
the devices.<br />
• The rubber feet on the devices may leave marks on<br />
furniture surfaces. Place the devices on a suitable<br />
underlay if necessary.<br />
Power connection<br />
Never allow children to use electrical appliances<br />
unattended.<br />
• Connect the mains adapters to easily<br />
accessible 230V ~ 50Hz power sockets only.<br />
4
<strong>MD</strong> <strong>81209</strong> <strong>manual</strong> <strong>DE</strong>_<strong>GB</strong>_<strong>FR</strong>_<strong>IT</strong>_<strong>ES</strong>.<strong>book</strong> Seite 5 Montag, 27. Februar 2006 10:33 10<br />
• Use only the mains adapters supplied.<br />
• Never try to connect the mains adapters to other<br />
connectors as this may damage the devices.<br />
• If a mains adapter is damaged, it should not be used.<br />
Replace it with the same type of mains adapter.<br />
Faults<br />
• Remove the mains adapter(s) from the power socket<br />
immediately if the mains adapter, the connection cable or<br />
the devices are damaged.<br />
• Never try to open and/or repair the devices yourself.<br />
• Contact our service centre or qualified personnel.<br />
Health Issues<br />
• The low transmitting power of the devices eliminates any<br />
danger to health according to the current state of<br />
research and technology.<br />
5<br />
<strong>GB</strong>
<strong>MD</strong> <strong>81209</strong> <strong>manual</strong> <strong>DE</strong>_<strong>GB</strong>_<strong>FR</strong>_<strong>IT</strong>_<strong>ES</strong>.<strong>book</strong> Seite 6 Montag, 27. Februar 2006 10:33 10<br />
ABOUT THIS APPLIANCE<br />
Your radio transmission system transmits signals wirelessly<br />
from an audio/video source to another audio/video device.<br />
Typically, the radio signals are sent from a source with an<br />
aerial (e.g. a SAT receiver) to another device without an<br />
aerial (e.g. a different TV in the building) so that the first<br />
device's aerial can be used for the second device.<br />
You can use the source remote<br />
control to control this device via<br />
the receiver. Your system will work<br />
over distances of up to 100m<br />
outdoors and 30m indoors.<br />
It is also possible to connect the<br />
radio transmission system to a PC,<br />
for instance to transmit digital<br />
presentations onto a TV.<br />
Possible signal transmitters and receivers<br />
Typically, the system may be used to transfer the television<br />
reception from a satellite receiver, as the source, to another<br />
television in your house. Other audio/video sources can be<br />
a DVD recorder, a video recorder or a television, the "D-<br />
Box" (Premiere) or even a PC card. The device connected to<br />
the receiver may be, for example, a television or an<br />
amplifier.<br />
6
<strong>MD</strong> <strong>81209</strong> <strong>manual</strong> <strong>DE</strong>_<strong>GB</strong>_<strong>FR</strong>_<strong>IT</strong>_<strong>ES</strong>.<strong>book</strong> Seite 7 Montag, 27. Februar 2006 10:33 10<br />
Assigning the radio transmitter and receiver<br />
The transmitter in the radio transmission system is<br />
connected to the audio/video source and the receiver is<br />
connected to a television or video recorder. The three-core<br />
AV cinch cable or the SCART adapter is used to connect the<br />
three types of signal – video, audio right and audio left – to<br />
the system.<br />
Controlling the audio/video source remotely<br />
You can use the audio/video source remote control to<br />
control these devices from the point where the receiver is<br />
located. The (infrared) remote control signals are converted<br />
and transmitted as radio signals. The transmitter converts<br />
the radio signals back into an infrared signal. The two<br />
infrared transmitters in the infrared extender then send<br />
these signals on to the relevant devices.<br />
Scart or Cinch<br />
If the audio/video source has a SCART connection, use the<br />
SCART adapter for the transmitter. If the device connected<br />
to the receiver has a SCART connection use the SCART<br />
adapter for the receiver.<br />
If the device connected to the receiver does not have a<br />
SCART connection use one of the three-core cinch cables.<br />
If the audio/video source has a 3.5mm audio output use the<br />
audio adapter supplied.<br />
7<br />
<strong>GB</strong>
<strong>MD</strong> <strong>81209</strong> <strong>manual</strong> <strong>DE</strong>_<strong>GB</strong>_<strong>FR</strong>_<strong>IT</strong>_<strong>ES</strong>.<strong>book</strong> Seite 8 Montag, 27. Februar 2006 10:33 10<br />
Range<br />
Audio and video signals are transmitted in the 2.4GHz<br />
range. The range is approx. 100m in the open air and<br />
approx. 30m inside. The range may be less depending on<br />
environmental conditions.<br />
Example use<br />
8
<strong>MD</strong> <strong>81209</strong> <strong>manual</strong> <strong>DE</strong>_<strong>GB</strong>_<strong>FR</strong>_<strong>IT</strong>_<strong>ES</strong>.<strong>book</strong> Seite 9 Montag, 27. Februar 2006 10:33 10<br />
KEY<br />
(Diagrams on fold-out page)<br />
Transmitter<br />
1. Mini DIN input 6. Input for infrared<br />
"AV IN 1" transmitter IR EXT.<br />
2. Mini DIN input 7. Audio/video<br />
"AV IN 2" transmitter aerial<br />
3. DC input 8. Operating LED<br />
12V 200mA<br />
4. Mini DIN output<br />
AV OUT<br />
9. ON/OFF switch<br />
5. Switch source 1/2 10.Channel switch<br />
(hold down for<br />
approx. 10 secs.)<br />
A/B/C/D<br />
Receiver<br />
1. Mini DIN output 5. Switch source 1/2<br />
AV EXTEND (hold down for<br />
approx. 10 secs.)<br />
2. DC input 9V<br />
400mA<br />
6. ON/OFF switch<br />
3. Audio / video 7. Channel switch<br />
Receiver aerial<br />
4. Operating LED/<br />
infrared transmitter<br />
A/B/C/D<br />
9<br />
<strong>GB</strong>
<strong>MD</strong> <strong>81209</strong> <strong>manual</strong> <strong>DE</strong>_<strong>GB</strong>_<strong>FR</strong>_<strong>IT</strong>_<strong>ES</strong>.<strong>book</strong> Seite 10 Montag, 27. Februar 2006 10:33 10<br />
CONTENTS OF PACKAGE<br />
When you have unpacked everything, check that the parts<br />
below have been included:<br />
Transmitter:<br />
• Transmitter<br />
• Mains adapter for the transmitter, 12V 200mA<br />
Accessories:<br />
• 1 infrared extender with two external IR transmitters<br />
• 1x SCART adapter for the "Transmitter"<br />
• 1x Mini DIN SCART cable for the A/V input<br />
• 1x Mini DIN SCART cable for the A/V output<br />
• 1x audio adapter 3.5mm stereo jack to cinch socket<br />
• 1x Mini DIN AV cinch cable<br />
10
<strong>MD</strong> <strong>81209</strong> <strong>manual</strong> <strong>DE</strong>_<strong>GB</strong>_<strong>FR</strong>_<strong>IT</strong>_<strong>ES</strong>.<strong>book</strong> Seite 11 Montag, 27. Februar 2006 10:33 10<br />
Receiver:<br />
• Receiver<br />
• 1x mains adapter for the receiver, 9V 400mA<br />
Accessories:<br />
1x SCART adapter for the "Receiver"<br />
1x Mini DIN AV cinch cable<br />
Packaging<br />
The radio transmission system is packaged to<br />
protect it against transportation damage.<br />
Packaging is raw material and can be re-used<br />
or added to the recycling system.<br />
11<br />
<strong>GB</strong>
<strong>MD</strong> <strong>81209</strong> <strong>manual</strong> <strong>DE</strong>_<strong>GB</strong>_<strong>FR</strong>_<strong>IT</strong>_<strong>ES</strong>.<strong>book</strong> Seite 12 Montag, 27. Februar 2006 10:33 10<br />
CONNECTING THE TRANSM<strong>IT</strong>TER<br />
The transmitter is connected to an audio/video source<br />
(Source 1). This can be a SAT receiver, a video recorder, a<br />
DVD player, a television or even a graphics card (see<br />
below).<br />
Via SCART connection<br />
If the audio / video source has a SCART connection,<br />
connect the Mini DIN SCART cable for the A/V input<br />
(supplied) to this device's SCART output, and the Mini DIN<br />
input (AV IN 1) to the transmitter.<br />
No SCART connection<br />
If the audio/video source has no SCART connection,<br />
connect the Mini DIN AV cinch cable (supplied) to this<br />
device's A/V cinch output, and the Mini DIN input (AV IN 1)<br />
to the transmitter.<br />
• The yellow cinch plug is for a video connection, the red<br />
one is for audio right, and the white one is for audio left.<br />
• If you want to transmit sound signals only, connect the<br />
audio plugs only.<br />
• If you want to connect the transmitter to a 3.5mm audio<br />
jack on an audio/video source, use the audio adapter and<br />
connect it to the audio plugs on the Mini DIN SCART cinch<br />
cable.<br />
• Then connect the Mini DIN plug on the other end of the<br />
Mini DIN AV cinch cable to the appropriate socket on the<br />
transmitter.<br />
12
<strong>MD</strong> <strong>81209</strong> <strong>manual</strong> <strong>DE</strong>_<strong>GB</strong>_<strong>FR</strong>_<strong>IT</strong>_<strong>ES</strong>.<strong>book</strong> Seite 13 Montag, 27. Februar 2006 10:33 10<br />
• To send the video signal on to a TV set positioned where<br />
the transmitter has been set up, connect the Mini DIN<br />
SCART cable for the A/V output (AV OUT) to the SCART<br />
input on the TV.<br />
Example of transmitter setup<br />
The following diagram shows a typical arrangement with a<br />
satellite receiver and a TV on the transmitter side:<br />
13<br />
<strong>GB</strong>
<strong>MD</strong> <strong>81209</strong> <strong>manual</strong> <strong>DE</strong>_<strong>GB</strong>_<strong>FR</strong>_<strong>IT</strong>_<strong>ES</strong>.<strong>book</strong> Seite 14 Montag, 27. Februar 2006 10:33 10<br />
Infrared extender (for remote control)<br />
You have to connect the infrared extender if you want to be<br />
able to use the remote control from where the receiver is<br />
positioned.<br />
• Connect the plug on the infrared extender to the IR-EXT<br />
socket on the transmitter (see diagram on previous page).<br />
• Remove the paper backing from the sticky surface of one<br />
of the two IR transmitters and stick the IR transmitter onto<br />
the audio/video source so that it is aligned with the<br />
infrared receiver on this device. The top of the diode<br />
should be approx. 1 cm away from the infrared receiver<br />
(see diagram below).<br />
Using more than one device<br />
As the infrared extender has two IR transmitters, you can<br />
simultaneously operate more than one device remotely<br />
from the receiver. For example, you can use the video<br />
recorder as well as the DVD player in another room.<br />
• Attach an IR transmitter as described above to each<br />
device that you want to use in another location.<br />
Connecting more than one device<br />
You can also connect a second device to the transmitter that<br />
14
<strong>MD</strong> <strong>81209</strong> <strong>manual</strong> <strong>DE</strong>_<strong>GB</strong>_<strong>FR</strong>_<strong>IT</strong>_<strong>ES</strong>.<strong>book</strong> Seite 15 Montag, 27. Februar 2006 10:33 10<br />
can send signals from this device to the receiver and control<br />
this device remotely from there.<br />
• If you have connected the device to the transmitter's AV IN<br />
1 input, the device is defined as Source 1, whereas it will<br />
be Source 2 if connected to the transmitter's AV IN 2 input.<br />
• You can now use the SOURCE 1/2 switch on the<br />
transmitter to choose which signal is transmitted to the TV<br />
connected to the AV OUT output.<br />
15<br />
<strong>GB</strong>
<strong>MD</strong> <strong>81209</strong> <strong>manual</strong> <strong>DE</strong>_<strong>GB</strong>_<strong>FR</strong>_<strong>IT</strong>_<strong>ES</strong>.<strong>book</strong> Seite 16 Montag, 27. Februar 2006 10:33 10<br />
Example of transmitter setup with two devices<br />
The following diagram shows a typical arrangement with a<br />
satellite receiver, a TV and a DVD player on the transmitter<br />
side:<br />
16
<strong>MD</strong> <strong>81209</strong> <strong>manual</strong> <strong>DE</strong>_<strong>GB</strong>_<strong>FR</strong>_<strong>IT</strong>_<strong>ES</strong>.<strong>book</strong> Seite 17 Montag, 27. Februar 2006 10:33 10<br />
Connecting the mains adapter<br />
• Connect the mains adapter for the transmitter to the 12V<br />
socket (DC 12V) on the transmitter.<br />
• Remove the protective cover and insert the mains adapter<br />
into the socket (230V ~ 50Hz).<br />
• Set the ON/OFF switch to the ON position. The red<br />
operating LED will light up.<br />
• Open up the transmitter aerial and align it with the<br />
receiver.<br />
Selecting a channel<br />
• Use the channel switch at the bottom of the device to<br />
select a channel (A/B/C/D) to which the signal is to be<br />
sent.<br />
Setting up<br />
• Place the transmitter on a sturdy surface.<br />
• Align the flat side of the transmitter aerial with the receiver.<br />
17<br />
<strong>GB</strong>
<strong>MD</strong> <strong>81209</strong> <strong>manual</strong> <strong>DE</strong>_<strong>GB</strong>_<strong>FR</strong>_<strong>IT</strong>_<strong>ES</strong>.<strong>book</strong> Seite 18 Montag, 27. Februar 2006 10:33 10<br />
CONNECTING THE TRANSM<strong>IT</strong>TER TO A<br />
COMPUTER<br />
You can also connect the transmitter to a computer in order<br />
to transmit computer output to a television, for example.<br />
It does not usually make sense to transmit computer output<br />
to a TV for running computer applications, since the TV’s<br />
screen display is not usually good enough to display the<br />
higher resolution computer image.<br />
If you want to show videos or presentations, however,<br />
displaying them via the TV is highly recommended.<br />
The following requirements have to be fulfilled:<br />
• Your computer has a video output that provides video<br />
images suitable for a TV.<br />
• The operating system and the drivers for your graphics<br />
card support video output.<br />
How to proceed<br />
Output via video output is activated differently depending on<br />
your operating system and graphics card. As there are<br />
numerous combinations of these, we can only provide<br />
general instructions here. Please check the operating<br />
instructions for your computer or graphics card to see how<br />
you can divert the image to video output.<br />
The following example requires a PC running the Windows®<br />
98 operating system or above.<br />
18
<strong>MD</strong> <strong>81209</strong> <strong>manual</strong> <strong>DE</strong>_<strong>GB</strong>_<strong>FR</strong>_<strong>IT</strong>_<strong>ES</strong>.<strong>book</strong> Seite 19 Montag, 27. Februar 2006 10:33 10<br />
• Close all programs and switch off your computer.<br />
• Refer to the operating instructions for your PC and follow<br />
the instructions for using video output.<br />
• Connect the yellow plug on the AV cinch cable to the<br />
graphics card’s video output. If your graphics card does<br />
not have a cinch output, use a suitable adapter (optional<br />
accessory).<br />
• Connect the red and white plugs on the Mini DIN AV cinch<br />
cable to the appropriate audio output on your PC. PCs<br />
usually have 3.5mm stereo jacks, so you can use the<br />
adapter supplied.<br />
• Connect the cable's Mini DIN plug to the transmitter's AV<br />
IN 1 input.<br />
• Now switch on the transmitting station, the receiving<br />
station and your TV, and choose the appropriate video<br />
channel on your TV.<br />
• Start your PC and wait until the operating system has fully<br />
loaded.<br />
• Right-click once on the Desktop and choose "Properties"<br />
to show the "Display Properties":<br />
• Now click on "Settings" to configure your PC’s output.<br />
19<br />
<strong>GB</strong>
<strong>MD</strong> <strong>81209</strong> <strong>manual</strong> <strong>DE</strong>_<strong>GB</strong>_<strong>FR</strong>_<strong>IT</strong>_<strong>ES</strong>.<strong>book</strong> Seite 20 Montag, 27. Februar 2006 10:33 10<br />
Various graphics cards can differ enormously here.<br />
You should therefore check the relevant operating<br />
instructions to see how you should proceed. You can usually<br />
use the F1 key to call up online help, which provides you with<br />
detailed information.<br />
If all the settings are correct, the image from the PC will now<br />
be displayed on the TV.<br />
20
<strong>MD</strong> <strong>81209</strong> <strong>manual</strong> <strong>DE</strong>_<strong>GB</strong>_<strong>FR</strong>_<strong>IT</strong>_<strong>ES</strong>.<strong>book</strong> Seite 21 Montag, 27. Februar 2006 10:33 10<br />
Trademarks<br />
MS DOS® and Windows® are registered trademarks of<br />
Microsoft®.<br />
Pentium® is a registered trademark of Intel®.<br />
Limitation of liability for loss of data/consequential<br />
losses<br />
Backup:<br />
To avoid loss of data you should back up all data to external<br />
media (such as CD-R) each time you change your PC<br />
system. MEDION AG accepts no liability for loss of data.<br />
Functionality:<br />
The enormous differences between operating systems and<br />
graphics cards mean that we cannot guarantee the<br />
functionality described in this section ("Connecting the<br />
transmitter to a computer"). Please contact a specialist<br />
supplier or expert.<br />
Consequential losses:<br />
When you connect the radio transmission system to your<br />
computer, you must take note of the operating instructions<br />
for your computer, the software used and additional<br />
components.<br />
We are not liable for damages or loss of data that were<br />
caused by incorrect or improper use.<br />
21<br />
<strong>GB</strong>
<strong>MD</strong> <strong>81209</strong> <strong>manual</strong> <strong>DE</strong>_<strong>GB</strong>_<strong>FR</strong>_<strong>IT</strong>_<strong>ES</strong>.<strong>book</strong> Seite 22 Montag, 27. Februar 2006 10:33 10<br />
CONNECTING THE RECEIVER<br />
There are several ways to receive the transmitter’s audio/<br />
video signals on a different device.<br />
Connecting via a DIN AV cinch cable<br />
• Connect the Mini DIN AV cinch cable to the receiver's AV<br />
EXTEND output and the corresponding sockets on the<br />
receiving device (e.g. the TV).<br />
Connecting via the SCART adapter<br />
• Connect the Mini DIN AV cinch cable to the receiver's AV<br />
EXTEND output and the SCART adapter for the receiver.<br />
• Plug the SCART adapter labelled "Receiver" into the<br />
SCART input on the receiving device (e.g. the TV).<br />
22
<strong>MD</strong> <strong>81209</strong> <strong>manual</strong> <strong>DE</strong>_<strong>GB</strong>_<strong>FR</strong>_<strong>IT</strong>_<strong>ES</strong>.<strong>book</strong> Seite 23 Montag, 27. Februar 2006 10:33 10<br />
Example of receiver setup<br />
The diagram below shows a typical setup for the receiver<br />
and a TV, either with the Mini DIN AV cinch cable or a SCART<br />
adapter.<br />
Interposing a device<br />
Instead of connecting the receiver directly to the television,<br />
you can also interpose a different audio/video device. This<br />
could be a video recorder, for example, which you can then<br />
connect with the receiver as already described.<br />
Connecting the mains adapter<br />
• Connect the mains adapter for the receiver to the 9 volt<br />
connector on the receiver.<br />
• Plug the mains adapter into an easily accessible socket<br />
(230V ~ 50Hz).<br />
• Turn on the receiving device, such as the television, and<br />
set the receiver’s ON/OFF switch to the ON position. The<br />
23<br />
<strong>GB</strong>
<strong>MD</strong> <strong>81209</strong> <strong>manual</strong> <strong>DE</strong>_<strong>GB</strong>_<strong>FR</strong>_<strong>IT</strong>_<strong>ES</strong>.<strong>book</strong> Seite 24 Montag, 27. Februar 2006 10:33 10<br />
red operating LED will light up.<br />
Selecting a channel<br />
Check that the receiver is set to the same channel (A/B/C/<br />
D) as the transmitter.<br />
Selecting the source<br />
If you have connected two devices to the transmitter, you<br />
can now use the SOURCE 1/2 switch to switch between the<br />
receiver of the first (Source 1) and the second (Source 2)<br />
device.<br />
• To do this, keep the SOURCE 1/2 button at the top of the<br />
receiver pressed down for around 10 seconds, until the<br />
device switches over.<br />
• You can also press down any button on the remote control<br />
belonging to a device that is connected to the transmitter<br />
for 10 seconds, and it will switch devices.<br />
Setting up<br />
• Place the receiver on a sturdy surface.<br />
• Position the receiver so that the front with the LED<br />
operating indicator is facing you.<br />
• If you are using the remote control from the audio/video<br />
source, point it towards the receiver.<br />
• Open up the transmitter aerial and align it with the<br />
transmitter until you have the optimal image.<br />
24
<strong>MD</strong> <strong>81209</strong> <strong>manual</strong> <strong>DE</strong>_<strong>GB</strong>_<strong>FR</strong>_<strong>IT</strong>_<strong>ES</strong>.<strong>book</strong> Seite 25 Montag, 27. Februar 2006 10:33 10<br />
SETTING CHANNELS<br />
Your radio transmission system has four channels – i.e., four<br />
different frequencies can be used.<br />
The channel switch is on the bottom of both devices.<br />
• Set the transmitter and receiver to the same channels.<br />
• Test which channel (A, B, C or D) provides the best<br />
reception.<br />
• You can also use the four channels to operate up to four<br />
radio transmission systems.<br />
25<br />
<strong>GB</strong>
<strong>MD</strong> <strong>81209</strong> <strong>manual</strong> <strong>DE</strong>_<strong>GB</strong>_<strong>FR</strong>_<strong>IT</strong>_<strong>ES</strong>.<strong>book</strong> Seite 26 Montag, 27. Februar 2006 10:33 10<br />
CLEANING/DISPOSAL<br />
Cleaning<br />
• Use a soft, dry cloth to clean the devices.<br />
• Never use cleaning solutions that could damage the<br />
surface of the devices. Never spray cleaning fluids directly<br />
onto the devices.<br />
Disposal<br />
At the end of its life, the radio transmission system<br />
should not be disposed of in household rubbish.<br />
Seek the advice of your local authority on correct,<br />
environmentally-friendly disposal.<br />
26
<strong>MD</strong> <strong>81209</strong> <strong>manual</strong> <strong>DE</strong>_<strong>GB</strong>_<strong>FR</strong>_<strong>IT</strong>_<strong>ES</strong>.<strong>book</strong> Seite 27 Montag, 27. Februar 2006 10:33 10<br />
TROUBL<strong>ES</strong>HOOTING<br />
If errors occur, check first that the system was set up<br />
correctly. The following overview may help you:<br />
No audio/video transmission<br />
• Are all mains adapters plugged in?<br />
• Are the transmitter and the receiver switched on?<br />
• Are the channels for the transmitter and the receiver the<br />
same?<br />
• Is the transmission source switched on?<br />
• Walls and ceilings can reduce the signal range.<br />
• Check the connections to the connected devices.<br />
Poor reception quality<br />
• Realign the transmitter and receiver aerials.<br />
• Change the position of the transmitter and the receiver<br />
slightly.<br />
• Interference can be caused by several factors, such as<br />
radio waves from other devices.<br />
• Choose a different channel.<br />
The remote control does not react<br />
• Point the remote control directly towards the receiver.<br />
• The infrared transmitter’s diodes should be approx. 1 cm<br />
away from the infrared receiver of the audio/video source.<br />
• Have you aligned your infrared diodes correctly?<br />
27<br />
<strong>GB</strong>
<strong>MD</strong> <strong>81209</strong> <strong>manual</strong> <strong>DE</strong>_<strong>GB</strong>_<strong>FR</strong>_<strong>IT</strong>_<strong>ES</strong>.<strong>book</strong> Seite 28 Montag, 27. Februar 2006 10:33 10<br />
TECHNICAL DATA<br />
Transmitter:<br />
Mains adapter<br />
Input: 230V ~ 50Hz<br />
Output:<br />
4 channels<br />
12V 200mA<br />
Frequency range: 2.4000 – 2.4835GHz<br />
Connections: 1 Mini-DIN output<br />
2 Mini-DIN inputs<br />
Feedback channel for<br />
remote control signal: 433MHz<br />
Receiver:<br />
Mains adapter<br />
Input: 230V ~ 50Hz<br />
Output:<br />
4 channels<br />
9V 400mA<br />
Frequency range: 2.4000 – 2.4835GHz<br />
Connections: 1 Mini-DIN-output<br />
The mains adapters are GS certified<br />
Subject to technical changes.<br />
28
<strong>MD</strong> <strong>81209</strong> <strong>manual</strong> <strong>DE</strong>_<strong>GB</strong>_<strong>FR</strong>_<strong>IT</strong>_<strong>ES</strong>.<strong>book</strong> Seite 29 Montag, 27. Februar 2006 10:33 10<br />
INFORMATION CONCERNING THE<br />
<strong>DE</strong>CLARATION OF CONFORM<strong>IT</strong>Y<br />
Hereby, Medion AG declares that <strong>MD</strong> <strong>81209</strong> is in<br />
compliance with the essential requirements and other<br />
relevant provisions of Directive 1999/5/EC.<br />
For further information concercing the Declaration of<br />
Conformity, please contact our Service Center.<br />
Tested to be used in all EU-countries.<br />
29<br />
<strong>GB</strong>
<strong>MD</strong> <strong>81209</strong> <strong>manual</strong> <strong>DE</strong>_<strong>GB</strong>_<strong>FR</strong>_<strong>IT</strong>_<strong>ES</strong>.<strong>book</strong> Seite 30 Montag, 27. Februar 2006 10:33 10<br />
30
<strong>MD</strong> <strong>81209</strong> <strong>manual</strong> <strong>DE</strong>_<strong>GB</strong>_<strong>FR</strong>_<strong>IT</strong>_<strong>ES</strong>.<strong>book</strong> Seite 3 Montag, 27. Februar 2006 10:33 10<br />
TABLE <strong>DE</strong>S MATIÈR<strong>ES</strong><br />
Consignes de sécurité . . . . . . . . . . . . . . . .4<br />
À propos de cet appareil. . . . . . . . . . . . . . .6<br />
Légende . . . . . . . . . . . . . . . . . . . . . . . . . . .9<br />
Contenu . . . . . . . . . . . . . . . . . . . . . . . . . .10<br />
Branchement de l’émetteur . . . . . . . . . . .12<br />
Branchement avec prise Péritel . . . . . . . . . . . . . . . . . . . . 12<br />
Branchement sans prise Péritel . . . . . . . . . . . . . . . . . . . . 12<br />
Câble d’extension infrarouge (pour les<br />
télécommandes) . . . . . . . . . . . . . . . . . . . . . . . . . . . . . . . . 14<br />
Branchement de l’adaptateur secteur . . . . . . . . . . . . . . . 17<br />
Sélection du canal . . . . . . . . . . . . . . . . . . . . . . . . . . . . . . . 17<br />
Installation . . . . . . . . . . . . . . . . . . . . . . . . . . . . . . . . . . . . . 17<br />
Branchement de l’émetteur sur un<br />
ordinateur . . . . . . . . . . . . . . . . . . . . . . . .18<br />
Branchement du récepteur . . . . . . . . . . .22<br />
Branchement au moyen d’un câble DIN-AV-Cinch . . . . . 22<br />
Branchement par le biais de l’adaptateur Péritel . . . . . . 22<br />
Branchement intermédiaire d’un appareil . . . . . . . . . . . . 23<br />
Branchement de l’adaptateur secteur . . . . . . . . . . . . . . . 23<br />
Sélection du canal . . . . . . . . . . . . . . . . . . . . . . . . . . . . . . . 24<br />
Sélection de la source . . . . . . . . . . . . . . . . . . . . . . . . . . . . 24<br />
Installation . . . . . . . . . . . . . . . . . . . . . . . . . . . . . . . . . . . . . 24<br />
Réglage des canaux . . . . . . . . . . . . . . . . .25<br />
Nettoyage et recyclage . . . . . . . . . . . . . .26<br />
En cas de problèmes . . . . . . . . . . . . . . . .27<br />
Données techniques . . . . . . . . . . . . . . . .28<br />
Informations relatives à la conformité . .29<br />
3<br />
F
<strong>MD</strong> <strong>81209</strong> <strong>manual</strong> <strong>DE</strong>_<strong>GB</strong>_<strong>FR</strong>_<strong>IT</strong>_<strong>ES</strong>.<strong>book</strong> Seite 4 Montag, 27. Februar 2006 10:33 10<br />
CONSIGN<strong>ES</strong> <strong>DE</strong> SÉCUR<strong>IT</strong>É<br />
Lisez attentivement les consignes de sécurité<br />
avant de mettre les appareils en marche et<br />
tenez compte des mises en garde figurant<br />
dans le mode d’emploi. Ayez toujours le<br />
mode d’emploi à portée de main.<br />
Lorsque vous vendez ou donnez les appareils, pensez à<br />
remettre également ce mode d’emploi.<br />
Conditions d’installation<br />
• Protégez les appareils de l’humidité et de la chaleur.<br />
• Évitez de placer les appareils dans des endroits où<br />
l’aération est insuffisante (par exemple entre des<br />
étagères ou dans des endroits où des rideaux ou des<br />
meubles couvrent les orifices de ventilation).<br />
• Faites en sorte qu’aucun corps étranger ou liquide ne<br />
puisse pénétrer dans les appareils. N’exposez pas les<br />
appareils à des égouttements ou des projections d’eau.<br />
• Ne posez aucune source de flammes nues (bougies<br />
allumées, par exemple) sur les appareils ou à proximité<br />
immédiate.<br />
• Les pieds en caoutchouc des appareils peuvent réagir au<br />
contact des surfaces des meubles et provoquer des<br />
décolorations. Placez les appareils sur une surface<br />
appropriée.<br />
Raccordement au secteur<br />
Ne jamais laisser un enfant utiliser sans<br />
surveillance un appareil électrique.<br />
• Raccordez l’adaptateur secteur uniquement à<br />
une prise secteur 230 V ~ 50 Hz facile d'accès.<br />
4
<strong>MD</strong> <strong>81209</strong> <strong>manual</strong> <strong>DE</strong>_<strong>GB</strong>_<strong>FR</strong>_<strong>IT</strong>_<strong>ES</strong>.<strong>book</strong> Seite 5 Montag, 27. Februar 2006 10:33 10<br />
• Utilisez uniquement les adaptateurs secteur fournis.<br />
• N’essayez jamais de brancher les adaptateurs secteur à<br />
d’autres prises, car cela pourrait causer des dommages.<br />
• Il est fortement déconseillé d’utiliser un bloc<br />
d’alimentation endommagé. Remplacez-le par un bloc<br />
d’alimentation similaire.<br />
Problèmes<br />
• Si l’adaptateur secteur, le câble d’alimentation ou<br />
l’appareil est endommagé, débranchez immédiatement<br />
l’adaptateur secteur de la prise de courant.<br />
• N’essayez en aucun cas d’ouvrir et/ou de réparer vousmême<br />
les appareils.<br />
• Adressez-vous à notre centre de service après-vente ou à<br />
un autre centre de réparation compétent.<br />
Santé<br />
• Dans l’état actuel des recherches et de la technique, tout<br />
danger pour la santé est exclu étant donné la faible<br />
puissance d’émission des appareils.<br />
5<br />
F
<strong>MD</strong> <strong>81209</strong> <strong>manual</strong> <strong>DE</strong>_<strong>GB</strong>_<strong>FR</strong>_<strong>IT</strong>_<strong>ES</strong>.<strong>book</strong> Seite 6 Montag, 27. Februar 2006 10:33 10<br />
À PROPOS <strong>DE</strong> CET APPAREIL<br />
Votre système de transmission sans fil transmet des<br />
signaux sans fil à partir d’une source audio-vidéo jusqu’à un<br />
appareil audio-vidéo.<br />
D’habitude, l’appareil transmet les signaux radioélectriques<br />
d’une source à antenne (par exemple un récepteur satellite)<br />
vers un autre appareil sans antenne (par exemple un autre<br />
téléviseur dans la maison) afin de pouvoir utiliser l’antenne<br />
du premier appareil pour le second.<br />
Vous pouvez utiliser la<br />
télécommande de la source pour<br />
contrôler cette dernière au travers<br />
du récepteur. Votre système peut<br />
émettre sur des distances pouvant<br />
aller jusqu’à 100 m en extérieur et<br />
30 m à l’intérieur.<br />
En outre, il est même possible de<br />
brancher le système de<br />
transmission sans fil sur un<br />
ordinateur et de transmettre ainsi des présentations<br />
numériques sur un téléviseur.<br />
Émetteurs et récepteurs possibles<br />
Une des applications typiques consiste, par exemple, à<br />
retransmettre la source que reçoit un récepteur satellite sur<br />
un autre téléviseur de la maison. Autres sources audiovidéo<br />
: graveur DVD, magnétoscope, téléviseur, décodeur<br />
(par ex. Canal Plus) ou même carte PC. L’appareil branché<br />
sur le récepteur peut être un téléviseur ou un amplificateur,<br />
par exemple.<br />
6
<strong>MD</strong> <strong>81209</strong> <strong>manual</strong> <strong>DE</strong>_<strong>GB</strong>_<strong>FR</strong>_<strong>IT</strong>_<strong>ES</strong>.<strong>book</strong> Seite 7 Montag, 27. Februar 2006 10:33 10<br />
Attribution de l’émetteur et du récepteur<br />
L’émetteur du système de transmission sans fil se branche<br />
sur une source audio-vidéo, le récepteur par exemple sur<br />
un téléviseur ou un magnétoscope. On branche les trois<br />
signaux vidéo, audio gauche et audio droite sur le système<br />
à l’aide d’un câble Cinch AV à trois fils ou d’un adaptateur<br />
Péritel.<br />
Commande à distance de la source audio-vidéo<br />
Vous pouvez utiliser la télécommande de la source audiovidéo<br />
pour contrôler ces appareils là où se trouve le<br />
récepteur. Les signaux de la télécommande (infrarouges)<br />
sont convertis en signaux radioélectriques puis retransmis.<br />
L'émetteur convertit à son tour les signaux radioélectriques<br />
en un signal infrarouge. Les deux émetteurs du câble<br />
d’extension infrarouge retransmettent alors ces signaux<br />
aux appareils correspondants.<br />
Péritel ou Cinch<br />
Si la source audio-vidéo possède une prise Péritel, utilisez<br />
l’adaptateur Péritel pour l’émetteur. Si l’appareil branché<br />
sur le récepteur possède une prise Péritel, utilisez<br />
l’adaptateur Péritel pour le récepteur.<br />
Si l’appareil branché sur le récepteur ne possède pas de<br />
prise Péritel, utilisez un des trois fils du câble Cinch.<br />
Si la source audio-vidéo possède une sortie audio de 3,5<br />
mm, utilisez l’adaptateur audio fourni.<br />
7<br />
F
<strong>MD</strong> <strong>81209</strong> <strong>manual</strong> <strong>DE</strong>_<strong>GB</strong>_<strong>FR</strong>_<strong>IT</strong>_<strong>ES</strong>.<strong>book</strong> Seite 8 Montag, 27. Februar 2006 10:33 10<br />
Portées<br />
Les signaux audio et vidéo sont transmis sur une fréquence<br />
de 2,4 GHz. Sur un champ libre, la portée est d’environ 100<br />
m, dans un bâtiment, elle est de 30 m. La portée peut se<br />
trouver réduite en fonction de l’environnement.<br />
Exemple d’application<br />
8
<strong>MD</strong> <strong>81209</strong> <strong>manual</strong> <strong>DE</strong>_<strong>GB</strong>_<strong>FR</strong>_<strong>IT</strong>_<strong>ES</strong>.<strong>book</strong> Seite 9 Montag, 27. Februar 2006 10:33 10<br />
LÉGEN<strong>DE</strong><br />
(Illustrations sur la page dépliante)<br />
Émetteur<br />
1. Entrée mini DIN 6. Entrée pour l’émetteur<br />
« AV IN 1 » infrarouge IR EXT.<br />
2. Entrée mini DIN 7. Antenne émettrice<br />
« AV IN 2 » audio-vidéo<br />
3. Entrée DC 8. Voyant marche/arrêt<br />
12 V 200 mA<br />
4. Sortie mini DIN 9. Interrupteur marche/arrêt<br />
AV OUT (ON/OFF)<br />
5. Interrupteur source 1/2 10.Interrupteur de sélection<br />
(maintenir enfoncé<br />
10 secondes environ)<br />
de canal A/B/C/D<br />
Récepteur<br />
1. Sortie mini DIN 5. Interrupteur source 1/2<br />
AV EXTEND (maintenir enfoncé<br />
10 secondes environ)<br />
2. Entrée DC 9 V 6. Interrupteur marche/arrêt<br />
400 mA (ON/OFF)<br />
3. Antenne réceptrice 7. Interrupteur de sélection<br />
audio-vidéo<br />
4. Voyant marche/arrêt/<br />
émetteur infrarouge<br />
de canal A/B/C/D<br />
9<br />
F
<strong>MD</strong> <strong>81209</strong> <strong>manual</strong> <strong>DE</strong>_<strong>GB</strong>_<strong>FR</strong>_<strong>IT</strong>_<strong>ES</strong>.<strong>book</strong> Seite 10 Montag, 27. Februar 2006 10:33 10<br />
CONTENU<br />
Le déballage une fois terminé, vérifiez que les éléments<br />
suivants vous ont bien été livrés :<br />
Émetteur :<br />
• Émetteur<br />
• Adaptateur secteur pour l’émetteur, 12 V 200 mA<br />
Accessoires :<br />
• 1 câble d’extension infrarouge avec deux émetteurs<br />
infrarouges externes<br />
• 1x adaptateur Péritel pour l’émetteur « Transmitter »<br />
• 1x câble Péritel-mini DIN pour l’entrée A/V<br />
• 1x câble Péritel-mini DIN pour la sortie A/V<br />
• 1x adaptateur audio 3,5 mm pour connecteur jack sur<br />
prise Cinch<br />
10
<strong>MD</strong> <strong>81209</strong> <strong>manual</strong> <strong>DE</strong>_<strong>GB</strong>_<strong>FR</strong>_<strong>IT</strong>_<strong>ES</strong>.<strong>book</strong> Seite 11 Montag, 27. Februar 2006 10:33 10<br />
• 1x câble mini DIN-AV-Cinch<br />
Récepteur :<br />
• Récepteur<br />
• 1x adaptateur secteur pour le récepteur, 9 V 400 mA<br />
Accessoires :<br />
1x adaptateur Péritel pour le récepteur « Receiver »<br />
1x câble mini DIN-AV-Cinch<br />
Emballage<br />
Votre système de transmission sans fil se<br />
trouve dans un emballage de protection afin<br />
d’éviter qu'il ne s’abîme au cours du transport.<br />
Les emballages sont des matières premières<br />
et peuvent être recyclés ou réintégrés dans le<br />
circuit des matières premières.<br />
11<br />
F
<strong>MD</strong> <strong>81209</strong> <strong>manual</strong> <strong>DE</strong>_<strong>GB</strong>_<strong>FR</strong>_<strong>IT</strong>_<strong>ES</strong>.<strong>book</strong> Seite 12 Montag, 27. Februar 2006 10:33 10<br />
BRANCHEMENT <strong>DE</strong> L’ÉMETTEUR<br />
Il faut brancher une source audio-vidéo (source 1) sur<br />
l’émetteur. Il peut s’agir d’un des appareils suivants :<br />
récepteur satellite, magnétoscope, lecteur DVD, téléviseur<br />
ou carte graphique (voir plus bas).<br />
Branchement avec prise Péritel<br />
Si la source audio-vidéo possède une prise Péritel,<br />
branchez le câble mini DIN-Péritel fourni pour l'entrée A/V<br />
sur la sortie Péritel de cet appareil et sur l’entrée mini DIN<br />
(AV IN 1) de l’émetteur.<br />
Branchement sans prise Péritel<br />
Si la source audio-vidéo ne possède pas de prise Péritel,<br />
branchez le câble mini DIN-AV-Cinch fourni pour l'entrée A/<br />
V-Cinch sur la sortie A/V-Cinch de cet appareil et sur<br />
l’entrée mini DIN (AV IN 1) de l’émetteur.<br />
• La fiche Cinch jaune est pour la vidéo, la rouge pour<br />
l’audio droite et la blanche pour l’audio gauche.<br />
• Pour transmettre uniquement les signaux sonores,<br />
branchez uniquement les fiches audio.<br />
• Pour brancher l’émetteur sur la prise audio 3,5 mm d’une<br />
source audio-vidéo, utilisez d’adaptateur audio et<br />
branchez celui-ci sur la fiche audio du câble mini DIN-<br />
Péritel-Cinch.<br />
• Branchez ensuite la fiche mini DIN sur l’autre extrémité du<br />
câble mini DIN-AV-Cinch sur la prise correspondante de<br />
l’émetteur.<br />
12
<strong>MD</strong> <strong>81209</strong> <strong>manual</strong> <strong>DE</strong>_<strong>GB</strong>_<strong>FR</strong>_<strong>IT</strong>_<strong>ES</strong>.<strong>book</strong> Seite 13 Montag, 27. Februar 2006 10:33 10<br />
• Pour retransmettre aussi le signal vidéo sur un téléviseur<br />
placé là où l’émetteur a été installé, branchez le câble mini<br />
DIN-Péritel pour la sortie A/V (AV OUT) sur l’entrée Péritel<br />
du téléviseur.<br />
Exemple de configuration pour l’émetteur<br />
Le schéma suivant illustre un exemple de configuration avec<br />
un récepteur satellite et un téléviseur du côté de l’émetteur :<br />
13<br />
F
<strong>MD</strong> <strong>81209</strong> <strong>manual</strong> <strong>DE</strong>_<strong>GB</strong>_<strong>FR</strong>_<strong>IT</strong>_<strong>ES</strong>.<strong>book</strong> Seite 14 Montag, 27. Februar 2006 10:33 10<br />
Câble d’extension infrarouge (pour les<br />
télécommandes)<br />
Pour pouvoir utiliser la télécommande sur la source audiovidéo<br />
à l’endroit où se trouve le récepteur, vous devez<br />
raccorder le câble d’extension infrarouge.<br />
• Branchez la fiche du câble d’extension infrarouge sur la<br />
prise IR EXT de l’émetteur (voir illustration à la page<br />
précédente).<br />
• Retirez le papier de la surface collante d’un des deux<br />
émetteurs infrarouges. Collez l’émetteur infrarouge sur le<br />
récepteur infrarouge de la source audio-vidéo de cet<br />
appareil. Veillez à placer la face supérieure de la diode à<br />
environ 1 cm de distance du récepteur infrarouge<br />
(voir illustration plus bas).<br />
Utilisation de plusieurs appareils<br />
Étant donné que le câble d’extension infrarouge possède<br />
deux émetteurs infrarouges, vous pouvez contrôler<br />
simultanément plusieurs appareils à l’endroit où se trouve le<br />
récepteur. Par exemple, vous pouvez ainsi utiliser un<br />
magnétoscope et un lecteur DVD qui se trouvent dans un<br />
autre endroit.<br />
• Pour ce faire, collez un émetteur infrarouge, comme<br />
décrit ci-dessus, sur chaque appareil que vous souhaitez<br />
14
<strong>MD</strong> <strong>81209</strong> <strong>manual</strong> <strong>DE</strong>_<strong>GB</strong>_<strong>FR</strong>_<strong>IT</strong>_<strong>ES</strong>.<strong>book</strong> Seite 15 Montag, 27. Februar 2006 10:33 10<br />
pouvoir utiliser dans un autre endroit.<br />
Branchement de plusieurs appareils<br />
Vous pouvez aussi brancher un deuxième appareil,<br />
retransmettre les signaux de cet appareil vers le récepteur<br />
et de là contrôler cet appareil avec la télécommande.<br />
• Si vous avez branché l’appareil sur l’entrée AV IN 1 de<br />
l’émetteur, l’appareil est alors défini comme source 1, si<br />
vous l’avez branché sur l’entrée AV IN 2 de l’émetteur, il<br />
est alors défini comme source 2.<br />
• L’interrupteur SOURCE 1/2 de l’émetteur vous permet<br />
maintenant de sélectionner le signal à retransmettre sur le<br />
téléviseur branché sur la sortie AV OUT.<br />
15<br />
F
<strong>MD</strong> <strong>81209</strong> <strong>manual</strong> <strong>DE</strong>_<strong>GB</strong>_<strong>FR</strong>_<strong>IT</strong>_<strong>ES</strong>.<strong>book</strong> Seite 16 Montag, 27. Februar 2006 10:33 10<br />
Exemple de configuration : émetteur avec deux<br />
appareils<br />
Le schéma suivant illustre un exemple de configuration avec<br />
un récepteur satellite, un téléviseur et un lecteur DVD du<br />
côté de l’émetteur :<br />
16
<strong>MD</strong> <strong>81209</strong> <strong>manual</strong> <strong>DE</strong>_<strong>GB</strong>_<strong>FR</strong>_<strong>IT</strong>_<strong>ES</strong>.<strong>book</strong> Seite 17 Montag, 27. Februar 2006 10:33 10<br />
Branchement de l’adaptateur secteur<br />
• Branchez l’adaptateur secteur pour l’émetteur sur la prise<br />
de connexion 12 V (DC 12 V) de l’émetteur.<br />
• Retirez le capuchon de protection et branchez<br />
l’adaptateur secteur dans la prise secteur (230V ~ 50 Hz).<br />
• Mettez l’interrupteur marche/arrêt (ON/OFF) sur la<br />
position ON. Le voyant rouge de marche s’allume.<br />
• Relevez l’antenne émettrice et orientez-la en direction du<br />
récepteur.<br />
Sélection du canal<br />
• Sélectionnez à l’aide de l’interrupteur de sélection de<br />
canal situé en-dessous de l’appareil le canal (A/B/C/D)<br />
qui sera utilisé pour la retransmission.<br />
Installation<br />
• Installez l’émetteur sur une surface solide et plane.<br />
• Dirigez le côté plat de l’antenne émettrice en direction du<br />
récepteur.<br />
17<br />
F
<strong>MD</strong> <strong>81209</strong> <strong>manual</strong> <strong>DE</strong>_<strong>GB</strong>_<strong>FR</strong>_<strong>IT</strong>_<strong>ES</strong>.<strong>book</strong> Seite 18 Montag, 27. Februar 2006 10:33 10<br />
BRANCHEMENT <strong>DE</strong> L’ÉMETTEUR SUR UN<br />
ORDINATEUR<br />
Vous pouvez aussi brancher l’émetteur sur un ordinateur<br />
afin de retransmette l’affichage de l’ordinateur sur un<br />
téléviseur, par exemple.<br />
La retransmission de l’affichage de l’ordinateur sur un<br />
téléviseur n’a souvent aucun sens si c’est pour y afficher<br />
une application. La qualité de l’image (résolution) du<br />
téléviseur ne suffit en général pas pour afficher la résolution<br />
supérieure de l’ordinateur.<br />
En revanche, si vous désirez afficher des vidéos ou des<br />
présentations, la restitution sur un téléviseur est tout à fait<br />
recommandable.<br />
Il faut remplir les conditions suivantes :<br />
• Votre ordinateur possède une sortie vidéo qui prend en<br />
charge l’affichage d’une image sur un téléviseur.<br />
• Le système d’exploitation et le pilote de la carte graphique<br />
prennent en charge l’affichage vidéo.<br />
Procédure à suivre<br />
L’affichage par le biais de la sortie vidéo est fonction de la<br />
carte graphique et du système d’exploitation. Étant donné<br />
qu’il existe de nombreuses combinaisons, nous ne pouvons<br />
présenter ici qu’une introduction générale. Veuillez lire<br />
dans le mode d’emploi de votre ordinateur, ou de votre<br />
carte graphique, comment faire passer l’image sur la sortie<br />
vidéo.<br />
L’exemple suivant requiert un ordinateur équipé du<br />
système d’exploitation Windows® 98 ou supérieur.<br />
18
<strong>MD</strong> <strong>81209</strong> <strong>manual</strong> <strong>DE</strong>_<strong>GB</strong>_<strong>FR</strong>_<strong>IT</strong>_<strong>ES</strong>.<strong>book</strong> Seite 19 Montag, 27. Februar 2006 10:33 10<br />
• Fermez tous les logiciels et éteignez l’ordinateur.<br />
• Servez-vous du mode d’emploi de votre ordinateur pour y<br />
trouver les indications relatives à l’utilisation de la sortie<br />
vidéo.<br />
• Branchez la fiche jaune du câble Cinch AV sur la sortie<br />
vidéo de la carte graphique. Si votre carte graphique ne<br />
dispose pas d’une sortie Cinch, utilisez l’adaptateur qui<br />
convient (accessoire supplémentaire).<br />
• Branchez maintenant les fiches rouges et blanches du<br />
câble mini DIN-AV-Cinch sur les sorties audio appropriées<br />
de votre ordinateur. En général, les ordinateurs<br />
possèdent des prises jack de 3,5 mm, il est donc possible<br />
d’utiliser l’adaptateur livré.<br />
• Branchez maintenant la fiche mini DIN du câble sur<br />
l’entrée AV IN 1 de la station émettrice.<br />
• Allumez maintenant les stations émettrice et réceptrice<br />
ainsi que votre téléviseur et réglez la chaine vidéo<br />
appropriée sur ce dernier.<br />
• Allumez l’ordinateur et attendez que le système<br />
d’exploitation soit complètement chargé.<br />
• Cliquez maintenant une fois sur le bouton droit de la souris<br />
sur le Bureau et sélectionnez « Propriétés » pour afficher<br />
les « Propriétés d’affichage » :<br />
• Cliquez maintenant sur « Paramètres » pour configurer<br />
l’affichage de votre ordinateur. Il existe de fortes<br />
19<br />
F
<strong>MD</strong> <strong>81209</strong> <strong>manual</strong> <strong>DE</strong>_<strong>GB</strong>_<strong>FR</strong>_<strong>IT</strong>_<strong>ES</strong>.<strong>book</strong> Seite 20 Montag, 27. Februar 2006 10:33 10<br />
disparités entre les différentes cartes graphiques.<br />
Reportez-vous donc au mode d’emploi approprié pour<br />
savoir comment procéder en partant de là. Il est souvent<br />
aussi possible d’afficher de l’aide en ligne en appuyant sur<br />
la touche F1 afin d’obtenir des informations plus détaillées.<br />
Si vous avez correctement effectué le paramétrage, l’image<br />
de l’ordinateur s’affichera maintenant sur le téléviseur.<br />
20
<strong>MD</strong> <strong>81209</strong> <strong>manual</strong> <strong>DE</strong>_<strong>GB</strong>_<strong>FR</strong>_<strong>IT</strong>_<strong>ES</strong>.<strong>book</strong> Seite 21 Montag, 27. Februar 2006 10:33 10<br />
Marques déposées<br />
MS-DOS® et Windows® sont des marques déposées de la<br />
société Microsoft®.<br />
Pentium® est une marque déposée de la société Intel®.<br />
Responsabilité limitée pour les pertes de données/<br />
dommages consécutifs<br />
Sauvegarde des données<br />
Avant toute modification sur votre système informatique, il<br />
vous est conseillé d’effectuer une sauvegarde sur un<br />
support externe (par ex. CD-R) afin d’éviter toute perte de<br />
données. MEDION AG ne peut être tenue pour responsable<br />
de la perte de données.<br />
Fonctionnalités :<br />
Étant donné les grandes disparités existant entre les<br />
systèmes d’exploitation et les cartes graphiques, nous ne<br />
pouvons pas garantir la fonctionnalité décrite dans la<br />
présente section (« Branchement de l’émetteur sur un<br />
ordinateur »). Veuillez vous informer auprès du revendeur/<br />
spécialiste concerné.<br />
Dommages consécutifs :<br />
Lors du branchement du système de transmission sans fil,<br />
veillez à respecter le mode d’emploi de votre ordinateur, du<br />
logiciel utilisé et des périphériques.<br />
Nous déclinons toute responsabilité pour les dommages ou<br />
les pertes de données découlant d’une mise en œuvre<br />
erronée ou d’une utilisation non-conforme.<br />
21<br />
F
<strong>MD</strong> <strong>81209</strong> <strong>manual</strong> <strong>DE</strong>_<strong>GB</strong>_<strong>FR</strong>_<strong>IT</strong>_<strong>ES</strong>.<strong>book</strong> Seite 22 Montag, 27. Februar 2006 10:33 10<br />
BRANCHEMENT DU RÉCEPTEUR<br />
Il existe plusieurs possibilités de recevoir des signaux<br />
audio-vidéo de l’émetteur sur un autre appareil.<br />
Branchement au moyen d’un câble DIN-AV-Cinch<br />
• Branchez le câble mini DIN-AV-Cinch sur la sortie AV<br />
EXTEND du récepteur et sur la prise correspondante de<br />
l’appareil de réception (par exemple un téléviseur).<br />
Branchement par le biais de l’adaptateur Péritel<br />
• Branchez le câble mini DIN-AV-Cinch sur la sortie AV<br />
EXTEND du récepteur et sur l’adaptateur Péritel de<br />
l’émetteur.<br />
• Branchez l’adaptateur Péritel sur lequel est imprimé «<br />
Receiver » sur l’entrée Péritel de l’appareil de réception<br />
(par exemple un téléviseur).<br />
22
<strong>MD</strong> <strong>81209</strong> <strong>manual</strong> <strong>DE</strong>_<strong>GB</strong>_<strong>FR</strong>_<strong>IT</strong>_<strong>ES</strong>.<strong>book</strong> Seite 23 Montag, 27. Februar 2006 10:33 10<br />
Exemple de configuration du récepteur<br />
Le schéma suivant présente un exemple de configuration<br />
du récepteur et d’un téléviseur soit avec un câble mini DIN-<br />
AV-Cinch ou un adaptateur Péritel.<br />
Branchement intermédiaire d’un appareil<br />
Au lieu de brancher directement le récepteur sur un<br />
téléviseur, vous pouvez aussi intercaler un autre appareil<br />
audio-vidéo. Il peut par exemple s’agir d’un magnétoscope<br />
que vous pouvez alors brancher sur le récepteur comme<br />
décrit plus haut.<br />
Branchement de l’adaptateur secteur<br />
• Branchez l’adaptateur secteur pour l’émetteur sur la prise<br />
de connexion 9 V du récepteur.<br />
• Branchez l’adaptateur secteur sur une prise de courant<br />
230 V ~ 50 Hz facilement accessible.<br />
• Allumez l’appareil récepteur (par exemple le téléviseur) et<br />
23<br />
F
<strong>MD</strong> <strong>81209</strong> <strong>manual</strong> <strong>DE</strong>_<strong>GB</strong>_<strong>FR</strong>_<strong>IT</strong>_<strong>ES</strong>.<strong>book</strong> Seite 24 Montag, 27. Februar 2006 10:33 10<br />
mettez l’interrupteur ON/OFF du récepteur sur ON. Le<br />
voyant rouge de marche s’allume.<br />
Sélection du canal<br />
Veillez à ce que le récepteur soit réglé sur le même canal (A/<br />
B/C/D) que celui de l’émetteur.<br />
Sélection de la source<br />
Si vous avez branché deux appareils sur l’émetteur, vous<br />
pouvez maintenant passer de la réception du premier<br />
appareil (source 1) à la réception du deuxième appareil<br />
(source 2) à l’aide de l’interrupteur SOURCE 1/2.<br />
• Pour ce faire, maintenez la touche SOURCE 1/2 à l’arrière<br />
du récepteur enfoncée pendant environ 10 secondes,<br />
jusqu’à ce que l’appareil fasse la commutation.<br />
• Vous pouvez aussi maintenir enfoncée pendant environ 10<br />
secondes une touche quelconque sur la télécommande<br />
de l’appareil branché sur l’émetteur, jusqu’à ce que<br />
l’appareil fasse la commutation.<br />
Installation<br />
• Installez le récepteur sur une surface solide et plane.<br />
• Placez le récepteur de telle manière que l’avant sur lequel<br />
se trouve le voyant se trouve dans votre direction.<br />
• Si vous utilisez la télécommande de la source audio-vidéo,<br />
visez en direction du récepteur.<br />
• Relevez l’antenne réceptrice et orientez-la en direction de<br />
l’émetteur, jusqu’à obtention d’une image claire.<br />
24
<strong>MD</strong> <strong>81209</strong> <strong>manual</strong> <strong>DE</strong>_<strong>GB</strong>_<strong>FR</strong>_<strong>IT</strong>_<strong>ES</strong>.<strong>book</strong> Seite 25 Montag, 27. Februar 2006 10:33 10<br />
RÉGLAGE <strong>DE</strong>S CANAUX<br />
Votre système de transmission sans fil possède quatre<br />
canaux, c’est-à-dire qu’il peut émettre sur quatre<br />
fréquences distinctes.<br />
Vous trouverez l’interrupteur du canal en dessous de<br />
chacun des deux appareils.<br />
• Réglez l’émetteur et le récepteur sur le même canal.<br />
• Essayez de trouver le canal (A/B/C/D) offrant la meilleure<br />
réception.<br />
• Les quatre canaux vous permettent d’utiliser jusqu’à<br />
quatre systèmes de transmission sans fil.<br />
25<br />
F
<strong>MD</strong> <strong>81209</strong> <strong>manual</strong> <strong>DE</strong>_<strong>GB</strong>_<strong>FR</strong>_<strong>IT</strong>_<strong>ES</strong>.<strong>book</strong> Seite 26 Montag, 27. Februar 2006 10:33 10<br />
NETTOYAGE ET RECYCLAGE<br />
Nettoyage<br />
• Pour nettoyer l’appareil, utilisez un chiffon doux et sec.<br />
• N’utilisez aucun produit d’entretien qui pourrait abîmer la<br />
surface des appareils. Ne vaporisez jamais le produit<br />
d’entretien directement sur les appareils.<br />
Élimination<br />
Lorsque votre système de transmission sans fil<br />
arrive en fin de vie, ne le jetez en aucun cas dans<br />
une poubelle classique. Informez-vous auprès de<br />
votre municipalité des possibilités d'élimination<br />
écologique et adaptée.<br />
26
<strong>MD</strong> <strong>81209</strong> <strong>manual</strong> <strong>DE</strong>_<strong>GB</strong>_<strong>FR</strong>_<strong>IT</strong>_<strong>ES</strong>.<strong>book</strong> Seite 27 Montag, 27. Februar 2006 10:33 10<br />
EN CAS <strong>DE</strong> PROBLÈM<strong>ES</strong><br />
Si des problèmes devaient survenir, vérifiez d’abord si le<br />
système est installé correctement. L'aperçu ci-dessous<br />
peut éventuellement vous aider :<br />
Aucune transmission audio-vidéo<br />
• Les adaptateurs secteur sont-ils branchés ?<br />
• Les émetteurs et récepteurs sont-ils allumés ?<br />
• Les canaux de l’émetteur et du récepteur sont-ils les<br />
mêmes ?<br />
• La source de la transmission est-elle allumée ?<br />
• Les murs et les plafonds réduisent la portée.<br />
• Vérifiez les branchements des appareils connectés.<br />
Mauvaise qualité de réception<br />
• Dirigez encore une fois les antennes de l’émetteur et du<br />
récepteur l’une vers l’autre.<br />
• Modifiez un peu la position de l’émetteur et du récepteur.<br />
• Différents facteurs, comme d’autres appareils<br />
radioélectriques, peuvent provoquer des perturbations.<br />
• Sélectionnez un autre canal.<br />
La télécommande ne réagit pas.<br />
• Tenez la télécommande directement en direction du<br />
récepteur.<br />
• Les diodes de l’émetteur infrarouge doivent se trouver à<br />
une distance de 1 cm du récepteur infrarouge de la<br />
source audio-vidéo.<br />
• Avez-vous dirigé correctement les diodes infrarouges ?<br />
27<br />
F
<strong>MD</strong> <strong>81209</strong> <strong>manual</strong> <strong>DE</strong>_<strong>GB</strong>_<strong>FR</strong>_<strong>IT</strong>_<strong>ES</strong>.<strong>book</strong> Seite 28 Montag, 27. Februar 2006 10:33 10<br />
DONNÉ<strong>ES</strong> TECHNIQU<strong>ES</strong><br />
Émetteur :<br />
Adaptateur secteur<br />
Entrée : 230 V ~ 50 Hz<br />
Sortie :<br />
4 canaux<br />
12 V 200 mA<br />
Gamme de fréquences : 2,4000 - 2,4835 GHz<br />
Prises : 1 sortie Mini-DIN<br />
2 entrée Mini-DIN<br />
Canal de retour pour<br />
Signal de la télécommande : 433 MHz<br />
Récepteur :<br />
Adaptateur secteur<br />
Entrée : 230 V ~ 50 Hz<br />
Sortie :<br />
4 canaux<br />
9 V 400 mA<br />
Gamme de fréquences : 2,4000 - 2,4835 GHz<br />
Prises : 1 sortie Mini-DIN<br />
Les adaptateurs secteur sont homologués GS.<br />
Sous réserve de modifications techniques !<br />
28
<strong>MD</strong> <strong>81209</strong> <strong>manual</strong> <strong>DE</strong>_<strong>GB</strong>_<strong>FR</strong>_<strong>IT</strong>_<strong>ES</strong>.<strong>book</strong> Seite 29 Montag, 27. Februar 2006 10:33 10<br />
INFORMATIONS RELATIV<strong>ES</strong> À LA<br />
CONFORM<strong>IT</strong>É<br />
Par la présente Medion AG déclare que l‘appareil <strong>MD</strong> <strong>81209</strong><br />
est conforme aux exigence essentielles et aux autres<br />
dispositions pertinentes de la directive 1999/5/CE.<br />
Notre centre d'assistance vous fera parvenir sur demande<br />
de plus amples informations concernant la déclaration de<br />
conformité.<br />
Contrôlé pour vente la vente dans tous les pays de<br />
l‘Union Européene.<br />
29<br />
F
<strong>MD</strong> <strong>81209</strong> <strong>manual</strong> <strong>DE</strong>_<strong>GB</strong>_<strong>FR</strong>_<strong>IT</strong>_<strong>ES</strong>.<strong>book</strong> Seite 30 Montag, 27. Februar 2006 10:33 10<br />
30
<strong>MD</strong> <strong>81209</strong> <strong>manual</strong> <strong>DE</strong>_<strong>GB</strong>_<strong>FR</strong>_<strong>IT</strong>_<strong>ES</strong>.<strong>book</strong> Seite 3 Montag, 27. Februar 2006 10:33 10<br />
INDICE<br />
Indicazioni di sicurezza. . . . . . . . . . . . . . . .4<br />
Informazioni sull’apparecchio . . . . . . . . . .6<br />
Didascalia . . . . . . . . . . . . . . . . . . . . . . . . .9<br />
Contenuto della confezione . . . . . . . . . . .10<br />
Collegare il trasmettitore . . . . . . . . . . . . .12<br />
Con collegamento SCART . . . . . . . . . . . . . . . . . . . . . . . . . 12<br />
Senza collegamento SCART . . . . . . . . . . . . . . . . . . . . . . . 12<br />
Estensore a infrarossi (per telecomandi) . . . . . . . . . . . . . 14<br />
Collegare l’adattatore di rete . . . . . . . . . . . . . . . . . . . . . . 17<br />
Selezionare il canale . . . . . . . . . . . . . . . . . . . . . . . . . . . . . 17<br />
Posizionamento . . . . . . . . . . . . . . . . . . . . . . . . . . . . . . . . . 17<br />
Collegare il trasmettitore<br />
ad un computer . . . . . . . . . . . . . . . . . . . .18<br />
Collegare il ricevitore . . . . . . . . . . . . . . . .22<br />
Collegare con un cavo spinotto AV DIN . . . . . . . . . . . . . . 22<br />
Collegare con un adattatore SCART . . . . . . . . . . . . . . . . 22<br />
Inserire un apparecchio . . . . . . . . . . . . . . . . . . . . . . . . . . 23<br />
Collegare l’adattatore di rete . . . . . . . . . . . . . . . . . . . . . . 23<br />
Selezionare il canale . . . . . . . . . . . . . . . . . . . . . . . . . . . . . 24<br />
Selezionare la fonte . . . . . . . . . . . . . . . . . . . . . . . . . . . . . . 24<br />
Posizionamento . . . . . . . . . . . . . . . . . . . . . . . . . . . . . . . . . 24<br />
Impostazione di canale . . . . . . . . . . . . . .25<br />
Pulizia / Smaltimento . . . . . . . . . . . . . . . .26<br />
In caso di guasti . . . . . . . . . . . . . . . . . . . 27<br />
Specifiche tecniche . . . . . . . . . . . . . . . . .28<br />
Informazione di conformità . . . . . . . . . . .29<br />
3<br />
I
<strong>MD</strong> <strong>81209</strong> <strong>manual</strong> <strong>DE</strong>_<strong>GB</strong>_<strong>FR</strong>_<strong>IT</strong>_<strong>ES</strong>.<strong>book</strong> Seite 4 Montag, 27. Februar 2006 10:33 10<br />
INDICAZIONI DI SICUREZZA<br />
Leggere accuratamente le indicazioni di<br />
sicurezza e seguire le avvertenze riportate nel<br />
presente <strong>manual</strong>e d’istruzioni prima di<br />
mettere in funzione l’apparecchio. Tenere<br />
sempre a portata di mano le istruzioni per<br />
l'uso.<br />
In caso di vendita o cessione dell'apparecchio, consegnare<br />
assolutamente le presenti istruzioni per l’uso.<br />
Condizioni ambientali<br />
• Proteggere l'apparecchio dall'umidità e dal caldo.<br />
• Evitare di posizionare gli apparecchi in luoghi con una<br />
scarsa ventilazione (per es. tra mensole o in luoghi in cui<br />
tendaggi o mobili possono ostruire le aperture di<br />
ventilazione).<br />
• Evitare che corpi estranei e liquidi penetrino negli<br />
apparecchi. Non esporre gli apparecchi a schizzi e gocce.<br />
• Evitare di posizionare eventuali fonti di incendio, come per<br />
es. candele accese, sugli apparecchi.<br />
• I piedini in gomma degli apparecchi possono alterare il<br />
colore delle superfici di mobili con cui sono in contatto.<br />
Posizionare se necessario gli apparecchi su un supporto<br />
idoneo.<br />
Collegamento alla rete<br />
Non fare utilizzare gli apparecchi elettrici a<br />
bambini senza la dovuta sorveglianza.<br />
• Collegare gli adattatori di rete a prese<br />
elettriche da 230 V ~ 50 Hz di facile accesso.<br />
4
<strong>MD</strong> <strong>81209</strong> <strong>manual</strong> <strong>DE</strong>_<strong>GB</strong>_<strong>FR</strong>_<strong>IT</strong>_<strong>ES</strong>.<strong>book</strong> Seite 5 Montag, 27. Februar 2006 10:33 10<br />
• Utilizzare esclusivamente gli adattatori di rete forniti in<br />
dotazione.<br />
• Evitare di collegare gli adattatori di rete ad altre prese,<br />
visto che ne potrebbero risultare dei danni.<br />
• Non è consentito l’ulteriore utilizzo di un adattatore di rete<br />
danneggiato. Sostituire l’adattatore con un dispositivo di<br />
tipo equivalente.<br />
Guasti<br />
• In caso di danni all’adattatore di rete, al cavo di<br />
allacciamento o agli apparecchi, staccare<br />
immediatamente l'adattatore dalla presa.<br />
• Non provare in alcun caso ad aprire e/o riparare gli<br />
apparecchi da soli.<br />
• Rivolgersi al nostro centro di assistenza o a un qualsiasi<br />
altro centro specializzato.<br />
Salute<br />
• Considerata la ridotta potenza di trasmissione degli<br />
apparecchi è possibile escludere, sulla base della ricerca<br />
e del progresso tecnologico attuali, un’esposizione a<br />
rischi per la salute delle persone.<br />
5<br />
I
<strong>MD</strong> <strong>81209</strong> <strong>manual</strong> <strong>DE</strong>_<strong>GB</strong>_<strong>FR</strong>_<strong>IT</strong>_<strong>ES</strong>.<strong>book</strong> Seite 6 Montag, 27. Februar 2006 10:33 10<br />
INFORMAZIONI SULL’APPARECCHIO<br />
Il sistema di trasmissione via radio senza fili trasmette i<br />
segnali da una fonte audio/video ad un altro apparecchio<br />
audio/video.<br />
In linea generale i segnali radio sono trasmessi da una fonte<br />
dotata di antenna (per es. un ricevitore satellitare) ad un<br />
altro apparecchio senza antenna (per es. un altro televisore<br />
in casa) allo scopo di utilizzare l’antenna del primo<br />
dispositivo altresì per il secondo apparecchio.<br />
Per comandare l’apparecchio<br />
attraverso il ricevitore è possibile<br />
utilizzare il telecomando della<br />
fonte. Il sistema ricopre distanze di<br />
fino a 100 m in campo aperto e 30<br />
m in casa.<br />
Oltre a ciò è sostanzialmente<br />
possibile collegare il sistema di<br />
trasmissione via radio ad un PC<br />
per la trasmissione per es. di<br />
presentazioni digitali su un<br />
televisore.<br />
Possibili generatori e ricevitori di segnale<br />
Un’applicazione tipica consiste per es. nella trasmissione di<br />
segnali televisivi da un ricevitore satellitare quale fonte ad<br />
un altro televisore presente in casa. Altre fonti audio/video<br />
possono inoltre essere un registratore DVD, un<br />
videoregistratore, un televisore, un decoder pay TV o anche<br />
una scheda PC. L’apparecchio collegato al ricevitore può<br />
essere per es. un televisore o un amplificatore.<br />
6
<strong>MD</strong> <strong>81209</strong> <strong>manual</strong> <strong>DE</strong>_<strong>GB</strong>_<strong>FR</strong>_<strong>IT</strong>_<strong>ES</strong>.<strong>book</strong> Seite 7 Montag, 27. Februar 2006 10:33 10<br />
Assegnazione di radiotrasmettitore e<br />
radioricevitore<br />
Il trasmettitore del sistema di trasmissione via radio è<br />
collegato alla fonte audio/video mentre il ricevitore è a sua<br />
volta collegato ad un televisore o videoregistratore. Grazie<br />
ai cavi spinotto AV tripolari o agli adattatori SCART è inoltre<br />
possibile collegare i tre tipi di segnale video, audio di destra<br />
e audio di sinistra al sistema.<br />
Telecomandare le fonti audio e video<br />
Il sistema consente l’utilizzo del telecomando della fonte<br />
audio/video per comandare gli apparecchi presenti sul<br />
luogo di ubicazione del ricevitore. I segnali di telecomando<br />
(infrarossi) sono infatti trasformati in segnali radio e quindi<br />
trasmessi. Il trasmettitore riconverte a sua volta i segnali<br />
radio in segnali infrarossi. I due trasmettitori a infrarossi del<br />
ripetitore a infrarossi trasmettono poi questi segnali ai<br />
rispettivi apparecchi.<br />
Scart o spinotto<br />
Se la fonte audio/video è dotata di collegamento SCART, si<br />
consiglia di utilizzare l'adattatore SCART per il trasmettitore.<br />
Se l’apparecchio collegato al ricevitore è dotato di<br />
collegamento SCART, si consiglia di utilizzare l'adattatore<br />
SCART per il ricevitore.<br />
Se l’apparecchio collegato al ricevitore non è invece dotato<br />
di collegamento SCART è possibile utilizzare uno dei cavi<br />
spinotto tripolari.<br />
Se la fonte audio/video presenta un’uscita audio da 3,5<br />
mm, si consiglia l’impiego dell’adattatore audio fornito in<br />
dotazione.<br />
7<br />
I
<strong>MD</strong> <strong>81209</strong> <strong>manual</strong> <strong>DE</strong>_<strong>GB</strong>_<strong>FR</strong>_<strong>IT</strong>_<strong>ES</strong>.<strong>book</strong> Seite 8 Montag, 27. Februar 2006 10:33 10<br />
Distanze massime<br />
Segnali audio e video sono trasmessi sulla banda di<br />
frequenza 2,4 GHz. La portata corrisponde in campo aperto<br />
a ca. 100 m, all’interno di edifici a ca. 30 m. A seconda delle<br />
condizioni ambientali la portata può anche risultare<br />
inferiore.<br />
Esempio di applicazione<br />
8
<strong>MD</strong> <strong>81209</strong> <strong>manual</strong> <strong>DE</strong>_<strong>GB</strong>_<strong>FR</strong>_<strong>IT</strong>_<strong>ES</strong>.<strong>book</strong> Seite 9 Montag, 27. Februar 2006 10:33 10<br />
DIDASCALIA<br />
(Figure sulla pagina ripiegata)<br />
Trasmettitore<br />
1. Ingresso Mini DIN 6. Ingresso per trasmettitore<br />
„AV IN 1“ a infrarossi IR EXT.<br />
2. Ingresso Mini DIN 7. Antenna trasmittente<br />
„AV IN 2“ audio/video<br />
3. Ingresso DC 8. LED di esercizio<br />
12 V 200 mA<br />
4. Uscita Mini DIN<br />
AV OUT<br />
9. Interruttore ON/OFF<br />
5. Interruttore fonte 1/2 10.Interruttore di selezione<br />
(tenere premuto ca. 10<br />
sec.)<br />
canali A/B/C/D<br />
Ricevitore<br />
1. Uscita Mini DIN 5. Interruttore fonte 1/2<br />
AV EXTEND (tenere premuto ca. 10<br />
sec.)<br />
2. Ingresso DC 9 V 6. Interruttore ON/OFF<br />
400mA<br />
3. Antenna ricevente 7. Interruttore di selezione<br />
audio/video canali A/B/C/D<br />
4. LED di esercizio/<br />
trasmettitore a infrarossi<br />
9<br />
I
<strong>MD</strong> <strong>81209</strong> <strong>manual</strong> <strong>DE</strong>_<strong>GB</strong>_<strong>FR</strong>_<strong>IT</strong>_<strong>ES</strong>.<strong>book</strong> Seite 10 Montag, 27. Februar 2006 10:33 10<br />
VERIFICA <strong>DE</strong>LLA CONFEZIONE<br />
Dopo aver aperto la confezione, assicurarsi che essa<br />
contenga i seguenti pezzi:<br />
Trasmettitore:<br />
• Trasmettitore<br />
• Adattatore di rete per il trasmettitore, 12 V 200 mA<br />
Accessori:<br />
• 1 estensore a infrarossi con due trasmettitori IR esterni<br />
• 1 adattatore SCART per il trasmettitore „Trasmitter“<br />
• 1 cavo SCART Mini DIN per l’ingresso A/V<br />
• 1 cavo SCART Mini DIN per l’uscita A/V<br />
• 1 adattatore audio jack da 3,5 mm su presa spinotto<br />
• 1 cavo spinotto AV Mini DIN<br />
10
<strong>MD</strong> <strong>81209</strong> <strong>manual</strong> <strong>DE</strong>_<strong>GB</strong>_<strong>FR</strong>_<strong>IT</strong>_<strong>ES</strong>.<strong>book</strong> Seite 11 Montag, 27. Februar 2006 10:33 10<br />
Ricevitore:<br />
• Ricevitore<br />
• 1 adattatore di rete per il ricevitore, 9 V 400 mA<br />
Accessori:<br />
1 adattatore SCART per il ricevitore „Receiver“<br />
1 cavo spinotto AV Mini DIN<br />
Imballaggio<br />
Il sistema di trasmissione via radio è contenuto<br />
in una confezione che lo protegge dai danni di<br />
trasporto. Le confezioni sono materie grezze e<br />
quindi riutilizzabili e possono essere riciclate.<br />
11<br />
I
<strong>MD</strong> <strong>81209</strong> <strong>manual</strong> <strong>DE</strong>_<strong>GB</strong>_<strong>FR</strong>_<strong>IT</strong>_<strong>ES</strong>.<strong>book</strong> Seite 12 Montag, 27. Februar 2006 10:33 10<br />
COLLEGARE IL TRASMETT<strong>IT</strong>ORE<br />
Il trasmettitore è collegato ad una fonte audio/video (fonte<br />
1). Questa può essere costituita da un ricevitore satellitare,<br />
un videoregistratore, un apparecchio DVD, un televisore o<br />
anche una scheda grafica (vedi qui di seguito).<br />
Con collegamento SCART<br />
Se la fonte audio/video è dotata di un collegamento SCART,<br />
collegare il cavo SCART Mini DIN fornito per l’ingresso A/V<br />
con l’uscita SCART di questo apparecchio e con l’ingresso<br />
Mini DIN (AV IN 1) presso il trasmettitore.<br />
Senza collegamento SCART<br />
Se la fonte audio/video non è dotata di un collegamento<br />
SCART, collegare il cavo spinotto AV DIN fornito con l’uscita<br />
spinotto A/V di questo apparecchio e con l’ingresso Mini<br />
DIN (AV IN 1) presso il trasmettitore.<br />
• Lo spinotto giallo è previsto per il collegamento video,<br />
quello rosso per l’audio di destra, quello bianco per<br />
l’audio di sinistra.<br />
• Per la trasmissione di soli segnali audio è sufficiente<br />
collegare la spina audio.<br />
• Volendo collegare il trasmettitore alla presa audio da 3,5<br />
mm di una fonte audio/video, si consiglia di utilizzare un<br />
adattatore audio e di collegare questo con le prese audio<br />
del cavo spinotto SCART Mini DIN.<br />
• Collegare infine la spina Mini DIN dell’altra estremità del<br />
cavo spinotto AV Mini DIN inserendola nella rispettiva<br />
presa presso il trasmettitore.<br />
12
<strong>MD</strong> <strong>81209</strong> <strong>manual</strong> <strong>DE</strong>_<strong>GB</strong>_<strong>FR</strong>_<strong>IT</strong>_<strong>ES</strong>.<strong>book</strong> Seite 13 Montag, 27. Februar 2006 10:33 10<br />
• In modo da inoltrare il segnale video anche ad un<br />
televisore presente sul luogo di ubicazione del<br />
trasmettitore, collegare il cavo SCART Mini DIN per<br />
l’uscita A/V (AV OUT) con l’ingresso SCART<br />
dell’apparecchio televisivo.<br />
Esempio di disposizione del trasmettitore<br />
Il seguente schema raffigura un esempio di disposizione di<br />
ricevitore satellitare e televisore sul lato del trasmettitore:<br />
13<br />
I
<strong>MD</strong> <strong>81209</strong> <strong>manual</strong> <strong>DE</strong>_<strong>GB</strong>_<strong>FR</strong>_<strong>IT</strong>_<strong>ES</strong>.<strong>book</strong> Seite 14 Montag, 27. Februar 2006 10:33 10<br />
Estensore a infrarossi (per telecomandi)<br />
Per poter telecomandare la fonte audio/video dal luogo di<br />
ubicazione del ricevitore è necessario collegare prima<br />
l’estensore a infrarossi.<br />
• Inserire la spina dell’estensore a infrarossi nella presa IR<br />
EXT del trasmettitore (vedi figura sulla pagina<br />
precedente).<br />
• Sfilare la pellicola protettiva dalla superficie adesiva di uno<br />
dei due trasmettitori IR. Fissare il trasmettitore IR alla<br />
fonte audio/video in modo che il ricevitore a infrarossi<br />
rimanga puntato su questo apparecchio. La parte<br />
superiore del diodo deve mantenere in tal caso una<br />
distanza di ca. 1 cm dal ricevitore a infrarossi<br />
(vedi figura in basso).<br />
Impiegare un maggior numero di apparecchi<br />
La presenza di due trasmettitori IR presso l’estensore a<br />
infrarossi consente di telecomandare<br />
contemporaneamente un maggior numero di apparecchi<br />
dal luogo di ubicazione del ricevitore. Ciò consente di<br />
utilizzare per es. videoregistratori o anche lettori DVD<br />
installati in luogo diverso.<br />
• Seguendo quanto riportato sopra basta infatti collegare<br />
un trasmettitore IR ad ognuno degli apparecchi che si<br />
14
<strong>MD</strong> <strong>81209</strong> <strong>manual</strong> <strong>DE</strong>_<strong>GB</strong>_<strong>FR</strong>_<strong>IT</strong>_<strong>ES</strong>.<strong>book</strong> Seite 15 Montag, 27. Februar 2006 10:33 10<br />
desiderano utilizzare in un altro luogo.<br />
Collegare un maggior numero di apparecchi<br />
È altresì possibile collegare un secondo apparecchio al<br />
trasmettitore, inoltrare i segnali da questo apparecchio al<br />
ricevitore e telecomandare da qui l’apparecchio.<br />
• Se l’apparecchio è collegato all’ingresso AV IN 1 del<br />
trasmettitore, l’apparecchio è definito come fonte 1;<br />
collegandolo invece all’ingresso AV IN 2 del trasmettitore<br />
risulterà come fonte 2.<br />
• Attraverso l’interruttore SOURCE 1/2 presente sul<br />
trasmettitore è possibile definire il segnale da trasmettere<br />
al televisore collegato all’uscita AV OUT.<br />
15<br />
I
<strong>MD</strong> <strong>81209</strong> <strong>manual</strong> <strong>DE</strong>_<strong>GB</strong>_<strong>FR</strong>_<strong>IT</strong>_<strong>ES</strong>.<strong>book</strong> Seite 16 Montag, 27. Februar 2006 10:33 10<br />
Esempio di disposizione del trasmettitore con due<br />
apparecchi<br />
Il seguente schema raffigura un esempio di disposizione di<br />
ricevitore satellitare, televisore e lettore DVD sul lato del<br />
trasmettitore:<br />
16
<strong>MD</strong> <strong>81209</strong> <strong>manual</strong> <strong>DE</strong>_<strong>GB</strong>_<strong>FR</strong>_<strong>IT</strong>_<strong>ES</strong>.<strong>book</strong> Seite 17 Montag, 27. Februar 2006 10:33 10<br />
Collegare l'adattatore di rete<br />
• Collegare l’adattatore di rete del trasmettitore alla presa<br />
da 12 V (DC 12 V) del trasmettitore.<br />
• Rimuovere il coperchio di protezione e collegare<br />
l’adattatore di rete alla presa (230 V ~ 50 Hz).<br />
• Impostare l’interruttore ON/OFF in posizione ON. Il LED di<br />
esercizio rosso si accende.<br />
• Estrarre l’antenna trasmittente e puntarla in direzione del<br />
ricevitore.<br />
Selezionare il canale<br />
• Selezionare con l'interruttore di selezione canali presente<br />
sul lato inferiore dell’apparecchio un canale (A/B/C/D)<br />
dal quale si desidera trasmettere.<br />
Posizionamento<br />
• Posizionare il trasmettitore su una superficie stabile.<br />
• Puntare l’antenna trasmittente con parte piatta verso il<br />
trasmettitore.<br />
17<br />
I
<strong>MD</strong> <strong>81209</strong> <strong>manual</strong> <strong>DE</strong>_<strong>GB</strong>_<strong>FR</strong>_<strong>IT</strong>_<strong>ES</strong>.<strong>book</strong> Seite 18 Montag, 27. Februar 2006 10:33 10<br />
COLLEGARE IL TRASMETT<strong>IT</strong>ORE AD UN<br />
COMPUTER<br />
Il trasmettitore è altresì collegabile ad un computer per<br />
estendere l’uscita del computer per es. su un televisore.<br />
La trasmissione dei segnali in uscita dal computer su un<br />
televisore non è in genere consigliabile volendo visualizzare<br />
sull’apparecchio un’applicazione del computer. Infatti,<br />
l’uscita immagine del televisore non è in genere sufficiente<br />
a riprodurre la risoluzione superiore dell’immagine video del<br />
computer.<br />
Se si tratta invece di riprodurre video o presentazioni è<br />
senz'altro appropriato ricorrere all’uscita su un televisore.<br />
Sono necessari i seguenti requisiti:<br />
• Il computer è dotato di uscita video in grado di supportare<br />
le immagini trasmesse su un televisore.<br />
• Il sistema operativo ed il driver della scheda grafica<br />
sostengono l’uscita video.<br />
Procedimento<br />
La trasmissione del segnale attraverso l’uscita video è<br />
attivata in maniera diversa a seconda di scheda grafica e<br />
sistema operativo impiegati. Considerata la molteplicità di<br />
combinazioni si è in grado di fornire in questo contesto solo<br />
delle istruzioni generali. Si consiglia di consultare il<br />
<strong>manual</strong>e d’istruzioni del proprio computer o della scheda<br />
grafica per ottenere indicazioni sulla procedura da seguire<br />
per la trasmissione di immagini dall’uscita video.<br />
Nel seguente esempio si presuppone la presenza di un PC<br />
con sistema operativo Windows® a partire dalla versione<br />
98.<br />
18
<strong>MD</strong> <strong>81209</strong> <strong>manual</strong> <strong>DE</strong>_<strong>GB</strong>_<strong>FR</strong>_<strong>IT</strong>_<strong>ES</strong>.<strong>book</strong> Seite 19 Montag, 27. Februar 2006 10:33 10<br />
• Chiudere tutti i programmi e spegnere il computer.<br />
• Prendere in mano il <strong>manual</strong>e d’istruzioni del proprio PC e<br />
seguire le indicazioni riguardanti l’impiego dell’uscita<br />
video.<br />
• Collegare la spina gialla del cavo spinotto AV all’uscita<br />
video della scheda grafica. Se la scheda grafica non fosse<br />
dotata di uscita spinotto, utilizzare un rispettivo adattatore<br />
(accessori speciali).<br />
• Introdurre quindi la spina rossa e bianca del cavo spinotto<br />
AV Mini DIN nella rispettiva uscita audio del PC. I<br />
computer sono in genere dotati di prese jack da 3,5 mm,<br />
circostanza che consente di utilizzare l’adattatore fornito<br />
in dotazione.<br />
• Collegare quindi la presa Mini DIN del cavo all’ingresso AV<br />
IN 1 della stazione trasmittente.<br />
• Fatto questo, inserire la stazione trasmittente e ricevente<br />
insieme all'apparecchio televisivo e selezionare sul<br />
televisore il rispettivo canale video.<br />
• Avviare il PC e attendere il caricamento completo del<br />
sistema operativo.<br />
• Cliccare una volta con il tasto destro del mouse sul<br />
desktop e selezionare „Proprietà“ per visualizzare il<br />
dialogo „Proprietà per visualizzare“:<br />
• Fare quindi clic su „Impostazioni“ per configurare l’uscita<br />
dei segnali del proprio PC. A causa del grande numero di<br />
19<br />
I
<strong>MD</strong> <strong>81209</strong> <strong>manual</strong> <strong>DE</strong>_<strong>GB</strong>_<strong>FR</strong>_<strong>IT</strong>_<strong>ES</strong>.<strong>book</strong> Seite 20 Montag, 27. Februar 2006 10:33 10<br />
schede grafiche sono possibili enormi differenze.<br />
Consultare il rispettivo <strong>manual</strong>e d’istruzioni per apprendere<br />
il procedimento da seguire. Per informazioni più dettagliate<br />
è in genere possibile aprire la guida on-line premendo il<br />
tasto F1.<br />
Se le impostazioni sono state eseguite in maniera corretta,<br />
l’immagine del PC è riprodotta sul televisore.<br />
20
<strong>MD</strong> <strong>81209</strong> <strong>manual</strong> <strong>DE</strong>_<strong>GB</strong>_<strong>FR</strong>_<strong>IT</strong>_<strong>ES</strong>.<strong>book</strong> Seite 21 Montag, 27. Februar 2006 10:33 10<br />
Marchi registrati<br />
MS-DOS® e Windows® sono marchi registrati di<br />
Microsoft®.<br />
Pentium® è un marchio registrato di Intel®.<br />
Limitazioni della responsabilità per perdite di dati/<br />
danni indiretti<br />
Back-up dati:<br />
Prima di qualsiasi modifica del sistema PC si consiglia di<br />
eseguire un back-up dati su un supporto dati esterno (per<br />
es. CD-R) allo scopo di evitare un’eventuale perdita di dati.<br />
MEDION AG non risponde per perdite di dati.<br />
Funzionalità:<br />
A causa delle considerevoli differenze tra sistemi operativi e<br />
schede grafiche non si è in grado di garantire le funzionalità<br />
descritte nel presente capitolo ("Collegare il trasmettitore<br />
ad un computer"). Si prega di consultare un rivenditore<br />
specializzato/un esperto in materia per ricevere maggiori<br />
informazioni.<br />
Danni indiretti:<br />
In sede di collegamento del sistema di trasmissione via radio<br />
è assolutamente necessario osservare le istruzioni d’uso del<br />
proprio computer, del software impiegato e dei componenti<br />
accessori in uso.<br />
Non si risponde per danni o perdite di dati risultanti da un<br />
impiego errato o non conforme agli usi previsti.<br />
21<br />
I
<strong>MD</strong> <strong>81209</strong> <strong>manual</strong> <strong>DE</strong>_<strong>GB</strong>_<strong>FR</strong>_<strong>IT</strong>_<strong>ES</strong>.<strong>book</strong> Seite 22 Montag, 27. Februar 2006 10:33 10<br />
COLLEGARE IL RICEV<strong>IT</strong>ORE<br />
Vi sono diversi modi per ricevere i segnali audio/video del<br />
trasmettitore su un altro apparecchio.<br />
Collegare con un cavo spinotto AV DIN<br />
• Collegare il cavo spinotto AV Mini DIN con l’uscita AV<br />
EXTEND del ricevitore e le rispettive prese<br />
dell’apparecchio (per es. il televisore).<br />
Collegare con un adattatore SCART<br />
• Collegare il cavo spinotto AV Mini DIN con l’uscita AV<br />
EXTEND del ricevitore e l’adattatore SCART per il<br />
ricevitore.<br />
• Introdurre l'adattatore SCART con la dicitura „Receiver“<br />
nell’ingresso SCART dell’apparecchio ricevente (per es. il<br />
televisore).<br />
22
<strong>MD</strong> <strong>81209</strong> <strong>manual</strong> <strong>DE</strong>_<strong>GB</strong>_<strong>FR</strong>_<strong>IT</strong>_<strong>ES</strong>.<strong>book</strong> Seite 23 Montag, 27. Februar 2006 10:33 10<br />
Esempio di disposizione del ricevitore<br />
Il seguente schema raffigura un esempio di disposizione di<br />
ricevitore e televisore, a scelta con un cavo spinotto AV Mini<br />
DIN o un adattatore SCART.<br />
Inserire un apparecchio<br />
Anziché collegare il ricevitore direttamente ad un televisore,<br />
il sistema consente anche di inserire in mezzo un altro<br />
apparecchio audio/video. Questo potrebbe essere per es.<br />
un videoregistratore, collegabile a sua volta con il ricevitore<br />
seguendo le modalità descritte.<br />
Collegare l'adattatore di rete<br />
• Collegare per il ricevitore un adattatore di rete alla presa<br />
da 9 Volt del ricevitore.<br />
• Inserire l’adattatore di rete ad una presa elettrica (230 V ~<br />
50 Hz) di facile accesso.<br />
• Inserire l’apparecchio ricevente (per es. il televisore) e<br />
23<br />
I
<strong>MD</strong> <strong>81209</strong> <strong>manual</strong> <strong>DE</strong>_<strong>GB</strong>_<strong>FR</strong>_<strong>IT</strong>_<strong>ES</strong>.<strong>book</strong> Seite 24 Montag, 27. Februar 2006 10:33 10<br />
impostare l'interruttore di ON/OFF del ricevitore su ON. Il<br />
LED di esercizio rosso si accende.<br />
Selezionare il canale<br />
Verificare che ricevitore e trasmettitore siano impostati sullo<br />
stesso canale (A/B/C/D).<br />
Selezionare la fonte<br />
Avendo collegato due apparecchi al trasmettitore è<br />
possibile passare con l'interruttore SOURCE 1/2 dalla<br />
ricezione del primo apparecchio (Fonte 1) al secondo<br />
(Fonte 2).<br />
• Tenere quindi premuto il tasto SOURCE 1/2 sul lato<br />
posteriore del ricevitore per circa 10 secondi fino a<br />
quando non si verifica il passaggio da un apparecchio<br />
all'altro.<br />
• È anche possibile premere per circa 10 secondi un tasto<br />
qualsiasi del telecomando di un apparecchio collegato al<br />
trasmettitore fino a quando non si verifica il passaggio da<br />
un apparecchio all’altro.<br />
Posizionamento<br />
• Posizionare il ricevitore su una superficie stabile.<br />
• Disporre il ricevitore in modo che il pannello dotato di LED<br />
di esercizio sia rivolto nella propria direzione.<br />
• Utilizzando il telecomando della fonte audio/video, tenerlo<br />
puntato sul ricevitore.<br />
• Estrarre l’antenna ricevente e puntarla in direzione del<br />
trasmettitore fino ad ottenere un’immagine perfetta.<br />
24
<strong>MD</strong> <strong>81209</strong> <strong>manual</strong> <strong>DE</strong>_<strong>GB</strong>_<strong>FR</strong>_<strong>IT</strong>_<strong>ES</strong>.<strong>book</strong> Seite 25 Montag, 27. Februar 2006 10:33 10<br />
IMPOSTAZIONE CANALE<br />
Il sistema di trasmissione via radio è dotato di quattro canali,<br />
ciò significa che la trasmissione è eseguibile su quattro<br />
frequenze differenti.<br />
L’interruttore di canale si trova per entrambi gli apparecchi<br />
sul lato inferiore.<br />
• Impostare per trasmettitore e ricevitore lo stesso canale.<br />
• Eseguire dei test per individuare tra i canali A, B, C o D<br />
quello che offre la migliore ricezione.<br />
• I quattro canali possono essere altresì utilizzati in<br />
presenza di quattro distinti sistemi di trasmissione via<br />
radio.<br />
25<br />
I
<strong>MD</strong> <strong>81209</strong> <strong>manual</strong> <strong>DE</strong>_<strong>GB</strong>_<strong>FR</strong>_<strong>IT</strong>_<strong>ES</strong>.<strong>book</strong> Seite 26 Montag, 27. Februar 2006 10:33 10<br />
PULIZIA / SMALTIMENTO<br />
Pulizia<br />
• Per la pulizia, utilizzare un panno asciutto, morbido.<br />
• Non ricorrere a detergenti in grado di danneggiare la<br />
superficie degli apparecchi. Non applicare mai il<br />
detergente direttamente sugli apparecchi .<br />
Smaltimento<br />
Al termine della durata utile non smaltire in alcun<br />
caso il sistema di trasmissione via radio assieme ai<br />
rifiuti domestici. Rivolgersi all'amministrazione<br />
comunale per conoscere le possibilità per uno<br />
smaltimento conforme alle normative in materia<br />
ambientale.<br />
26
<strong>MD</strong> <strong>81209</strong> <strong>manual</strong> <strong>DE</strong>_<strong>GB</strong>_<strong>FR</strong>_<strong>IT</strong>_<strong>ES</strong>.<strong>book</strong> Seite 27 Montag, 27. Februar 2006 10:33 10<br />
IN CASO DI GUASTI<br />
Se si riscontrano guasti, verificare prima se l’impianto è<br />
impostato correttamente. La seguente tabella può essere<br />
utile:<br />
Nessuna trasmissione audio/video<br />
• Gli adattatori di rete sono inseriti?<br />
• Trasmettitore e ricevitore sono accesi?<br />
• Per trasmettitore e ricevitore sono stati impostati gli stessi<br />
canali?<br />
• La fonte di trasmissione è accesa?<br />
• Pareti e soffitti riducono la portata.<br />
• Verificare gli allacciamenti degli apparecchi collegati.<br />
Cattiva qualità di ricezione<br />
• Puntare di nuovo le antenne di trasmettitore e ricevitore<br />
l’una sull’altra.<br />
• Cambiare di poco la posizione di trasmettitore e ricevitore.<br />
• Effetti diversi tra cui le onde di altri apparecchi radio<br />
possono causare interferenze.<br />
• Impostare un altro canale .<br />
Il telecomando non reagisce<br />
• Puntare il telecomando direttamente in direzione del<br />
ricevitore.<br />
• I diodi del trasmettitore a infrarossi devono mantenere<br />
una distanza di ca. 1 cm dal ricevitore a infrarossi della<br />
fonte audio/video.<br />
• I diodi IR sono stati posizionati in maniera corretta?<br />
27<br />
I
<strong>MD</strong> <strong>81209</strong> <strong>manual</strong> <strong>DE</strong>_<strong>GB</strong>_<strong>FR</strong>_<strong>IT</strong>_<strong>ES</strong>.<strong>book</strong> Seite 28 Montag, 27. Februar 2006 10:33 10<br />
SPECIFICHE TECNICHE<br />
Trasmettitore:<br />
Adattatore di corrente<br />
Entrata: 230 V ~ 50 Hz<br />
Uscita:<br />
4 canali<br />
12 V 200 mA<br />
Frequenza: 2,4000 - 2,4835 GHz<br />
Collegamenti: 1 uscita Mini-DIN<br />
2 ingresso Mini-DIN<br />
Canale di ritorno per<br />
Segnale di telecomando: 433 MHz<br />
Ricevitore:<br />
Adattatore di corrente<br />
Entrata: 230 V ~ 50 Hz<br />
Uscita:<br />
4 canali<br />
9V 400mA<br />
Frequenza: 2,4000 - 2,4835 GHz<br />
Collegamenti: 1 uscita Mini-DIN<br />
Gli adattatori di rete hanno la verifica GS.<br />
Con riserva di modifiche tecniche!<br />
28
<strong>MD</strong> <strong>81209</strong> <strong>manual</strong> <strong>DE</strong>_<strong>GB</strong>_<strong>FR</strong>_<strong>IT</strong>_<strong>ES</strong>.<strong>book</strong> Seite 29 Montag, 27. Februar 2006 10:33 10<br />
INFORMAZIONE DI CONFORM<strong>IT</strong>À<br />
Con la presente Medion AG dichiare che questo <strong>MD</strong> <strong>81209</strong><br />
è conforme ai requisiti essenziali ed alle altre disposizioni<br />
pertinenti stabilite dalla direttiva 1999/5/CE.<br />
Il nostro centro di assistenza clienti sarà lieto di fornirvi su<br />
richiesta ulteriori informazioni riguardo la Dichiarazione di<br />
conformità.<br />
Approvato per l’uso nei paesi della Ue.<br />
29<br />
I
<strong>MD</strong> <strong>81209</strong> <strong>manual</strong> <strong>DE</strong>_<strong>GB</strong>_<strong>FR</strong>_<strong>IT</strong>_<strong>ES</strong>.<strong>book</strong> Seite 30 Montag, 27. Februar 2006 10:33 10<br />
30
<strong>MD</strong> <strong>81209</strong> <strong>manual</strong> <strong>DE</strong>_<strong>GB</strong>_<strong>FR</strong>_<strong>IT</strong>_<strong>ES</strong>.<strong>book</strong> Seite 3 Montag, 27. Februar 2006 10:33 10<br />
ÍNDICE<br />
Advertencias de seguridad . . . . . . . . . . . 4<br />
Sobre este aparato . . . . . . . . . . . . . . . . . .6<br />
Descripción . . . . . . . . . . . . . . . . . . . . . . . .9<br />
Volumen de suministro . . . . . . . . . . . . . . .10<br />
Conexión del emisor . . . . . . . . . . . . . . . 12<br />
Conexión a través de un euroconector . . . . . . . . . . . . . . 12<br />
Conexión sin euroconector . . . . . . . . . . . . . . . . . . . . . . . . 12<br />
Extensor de infrarrojos (para mandos a distancia) . . . . . 14<br />
Conexión del adaptador de red . . . . . . . . . . . . . . . . . . . 17<br />
Selección del canal . . . . . . . . . . . . . . . . . . . . . . . . . . . . . . 17<br />
Colocación . . . . . . . . . . . . . . . . . . . . . . . . . . . . . . . . . . . . . 17<br />
Conexión del emisor a un ordenador . . . .18<br />
Conexión del receptor . . . . . . . . . . . . . . 22<br />
Conexión mediante un cable cinch de audio DIN . . . . . . 22<br />
Conexión a través del adaptador euroconector . . . . . . . 22<br />
Intercalar un aparato . . . . . . . . . . . . . . . . . . . . . . . . . . . . . 23<br />
Conexión del adaptador de red . . . . . . . . . . . . . . . . . . . 23<br />
Selección del canal . . . . . . . . . . . . . . . . . . . . . . . . . . . . . . 24<br />
Selección de la fuente . . . . . . . . . . . . . . . . . . . . . . . . . . . . 24<br />
Colocación . . . . . . . . . . . . . . . . . . . . . . . . . . . . . . . . . . . . . 24<br />
Config. canal . . . . . . . . . . . . . . . . . . . . . .25<br />
Limpieza / eliminación . . . . . . . . . . . . . . .26<br />
En caso de problemas . . . . . . . . . . . . . . .27<br />
Especificaciones técnicas . . . . . . . . . . . .28<br />
Información de conformidad . . . . . . . . . .29<br />
3<br />
<strong>ES</strong>
<strong>MD</strong> <strong>81209</strong> <strong>manual</strong> <strong>DE</strong>_<strong>GB</strong>_<strong>FR</strong>_<strong>IT</strong>_<strong>ES</strong>.<strong>book</strong> Seite 4 Montag, 27. Februar 2006 10:33 10<br />
ADVERTENCIAS <strong>DE</strong> SEGURIDAD<br />
Antes de la puesta en marcha, lea por favor<br />
atentamente las presentes advertencias de<br />
seguridad y preste atención a las<br />
advertencias detalladas en el <strong>manual</strong> de<br />
instrucciones. Mantenga siempre a su<br />
alcance las instrucciones de funcionamiento.<br />
Si vende o cede el aparato a otra persona, entréguele sin<br />
falta también las presentes indicaciones.<br />
Condiciones del entorno<br />
• Proteja el aparato contra la humedad y las altas temperaturas.<br />
• Evite emplazar el aparato en lugares en los que exista una<br />
ventilación insuficiente (por ejemplo, entre estanterías o<br />
allí donde cortinas o muebles tapen los orificios de<br />
ventilación).<br />
• Asimismo, evite que líquidos u objetos extraños penetren<br />
en el interior de los aparatos. No exponga los aparatos a<br />
gotas o salpicaduras de agua.<br />
• No se deben colocar fuentes de fuego (p. ej. velas<br />
encendidas) encima de los aparatos.<br />
• En contacto con las superficies de los muebles, los pies<br />
de goma de los aparatos pueden ocasionar<br />
modificaciones del color. En este caso, coloque los<br />
aparatos sobre una base adecuada.<br />
Conexión a la red<br />
No deje los aparatos eléctricos al alcance de<br />
niños pequeños sin vigilancia.<br />
• Conecte los adaptadores de red a una toma de<br />
corriente bien accesible de 230 V ~ 50 Hz.<br />
4
<strong>MD</strong> <strong>81209</strong> <strong>manual</strong> <strong>DE</strong>_<strong>GB</strong>_<strong>FR</strong>_<strong>IT</strong>_<strong>ES</strong>.<strong>book</strong> Seite 5 Montag, 27. Februar 2006 10:33 10<br />
• Utilice exclusivamente los adaptadores de red<br />
suministrados.<br />
• En ningún caso trate de conectar los adaptadores de red<br />
a otras tomas, puesto que pueden producirse daños.<br />
• Un adaptador de red dañado no se puede utilizar.<br />
Sustitúyalo por un adaptador de red equivalente.<br />
Averías<br />
• En caso de desperfectos en la clavija, en el cable de<br />
conexión o en el aparato, desenchúfelo inmediatamente.<br />
• No intente en ningún caso abrir y/o arreglar usted mismo<br />
los aparatos.<br />
• Diríjase a nuestro servicio de reparación o a otro taller<br />
especializado adecuado.<br />
Salud<br />
• Según el estado actual de las investigaciones y de la<br />
técnica, la potencia de emisión de los aparatos no supone<br />
ninguna amenaza para la salud.<br />
5<br />
<strong>ES</strong>
<strong>MD</strong> <strong>81209</strong> <strong>manual</strong> <strong>DE</strong>_<strong>GB</strong>_<strong>FR</strong>_<strong>IT</strong>_<strong>ES</strong>.<strong>book</strong> Seite 6 Montag, 27. Februar 2006 10:33 10<br />
SOBRE <strong>ES</strong>TE APARATO<br />
Su sistema de radiotransmisión transmite las señales de<br />
vídeo y audio a otro equipo de vídeo o audio de forma<br />
inalámbrica.<br />
Normalmente se conducen las radioseñales desde una<br />
fuente con antena (por ejemplo un receptor de satélite)<br />
hasta otro aparato sin antena (por ejemplo otro televisor de<br />
la casa), a fin de poder utilizar la antena del primer aparato<br />
con el segundo.<br />
Puede emplear el mando a<br />
distancia de la fuente para<br />
controlar este aparato a través del<br />
receptor. Su sistema supera<br />
distancias de hasta 100 m en el<br />
exterior y 30 m en el interior del<br />
inmueble.<br />
Además en principio es posible<br />
conectar el sistema de<br />
radiotransmisión a un PC y por<br />
ejemplo, transmitir presentaciones digitales a un televisor.<br />
Posibles emisores y receptores de señales<br />
Un empleo típico consiste p. ej. en retransmitir la recepción<br />
de televisión de un receptor satélite a otro televisor de la<br />
casa. Otras fuentes de audio / vídeo pueden ser por<br />
ejemplo una grabadora DVD, una grabadora de vídeo, un<br />
televisor, un descodificador (televisión por pago – "PAY-<br />
TV") o una tarjeta para PC. El aparato receptor puede ser<br />
por ejemplo, un televisor o un amplificador.<br />
6
<strong>MD</strong> <strong>81209</strong> <strong>manual</strong> <strong>DE</strong>_<strong>GB</strong>_<strong>FR</strong>_<strong>IT</strong>_<strong>ES</strong>.<strong>book</strong> Seite 7 Montag, 27. Februar 2006 10:33 10<br />
Asignación del emisor a un receptor<br />
El emisor del sistema de radiotransmisión se conecta a la<br />
fuente de audio / vídeo; el receptor, a un televisor o una<br />
grabadora de vídeo, por ejemplo. Con la ayuda del cable AV<br />
cinch de tres conductores o el adaptador euroconector, el<br />
sistema se conecta a los tres tipos de señales: vídeo, audio<br />
derecha y audio izquierda.<br />
Controlar la fuente de audio / vídeo por mando a<br />
distancia<br />
Puede emplear el mando a distancia de la fuente de audio o<br />
vídeo para controlar estos equipos desde el lugar donde se<br />
encuentra el receptor. Las señales del mando a distancia<br />
(infrarrojo) son transformadas y transmitidas como<br />
radioseñales. El emisor a su vez los vuelve transformar de<br />
nuevo en señales infrarrojas. Los dos emisores de<br />
infrarrojos del extensor de infrarrojos transmiten dichas<br />
señales a los equipos correspondientes.<br />
Conexión cinch o euroconector<br />
Si la fuente de audio / vídeo dispone de una conexión para<br />
euroconector, utilice el adaptador euroconector para el<br />
emisor. Si el aparato conectado al receptor dispone de una<br />
conexión para euroconector, utilice el adaptador<br />
euroconector para el receptor.<br />
Si el aparato conectado al receptor no dispone de una<br />
conexión para euroconector, utilice uno de los cables cinch<br />
de tres conductores.<br />
Si la fuente de audio / vídeo dispone de una salida de audio<br />
de 3,5 mm, utilice el adaptador de audio incluido en el<br />
suministro.<br />
7<br />
<strong>ES</strong>
<strong>MD</strong> <strong>81209</strong> <strong>manual</strong> <strong>DE</strong>_<strong>GB</strong>_<strong>FR</strong>_<strong>IT</strong>_<strong>ES</strong>.<strong>book</strong> Seite 8 Montag, 27. Februar 2006 10:33 10<br />
Alcance<br />
Las señales de audio y vídeo se transmiten en una<br />
frecuencia de 2,4 GHz. Al aire libre el alcance es de aprox.<br />
100 m; en el interior de edificios de aprox. 30 m.<br />
Dependiendo de las condiciones del entorno el alcance<br />
puede ser también menor.<br />
Ejemplo de aplicación<br />
8
<strong>MD</strong> <strong>81209</strong> <strong>manual</strong> <strong>DE</strong>_<strong>GB</strong>_<strong>FR</strong>_<strong>IT</strong>_<strong>ES</strong>.<strong>book</strong> Seite 9 Montag, 27. Februar 2006 10:33 10<br />
<strong>DE</strong>SCRIPCIÓN<br />
(Ilustraciones en la hoja desplegable)<br />
Emisor<br />
1. Entrada mini DIN 6. Entrada para emisor<br />
„AV IN 1“ de infrarrojos IR EXT.<br />
2. Entrada mini DIN 7. Antena emisora<br />
„AV IN 2“ de audio y vídeo<br />
3. Entrada DC 8. LED de funcionamiento<br />
12 V 200 mA<br />
4. Salida mini DIN<br />
AV OUT<br />
9. Interruptor ON/OFF<br />
5. Selector de fuente 1/2 10.Selector de canal<br />
(mantener pulsada<br />
10 seg. aprox.)<br />
A/B/C/D<br />
Receptor<br />
1. Salida mini DIN 5. Selector de fuente 1/2<br />
AV EXTEND (mantener pulsada<br />
10 seg. aprox.)<br />
2. Entrada DC 9 V 6. Interruptor ON/OFF<br />
400mA<br />
3. Antena receptora 7. Selector de canal<br />
de audio/vídeo A/B/C/D<br />
4. LED de funcionamiento<br />
Emisor de infrarrojos<br />
9<br />
<strong>ES</strong>
<strong>MD</strong> <strong>81209</strong> <strong>manual</strong> <strong>DE</strong>_<strong>GB</strong>_<strong>FR</strong>_<strong>IT</strong>_<strong>ES</strong>.<strong>book</strong> Seite 10 Montag, 27. Februar 2006 10:33 10<br />
VOLUMEN <strong>DE</strong> SUMINISTRO<br />
Después de desembalar el aparato, asegúrese de que las<br />
siguientes piezas están contenidas en el suministro:<br />
Emisor:<br />
• Emisor<br />
• Adaptador de red para el emisor, 12 V 200 mA<br />
Accesorios:<br />
• 1 extensor de infrarrojos con dos emisores de infrarrojos<br />
externos<br />
• 1x adaptador euroconector para el emisor „transmisor“<br />
• 1x cable euroconector mini DIN para la entrada A/V<br />
• 1x cable euroconector mini DIN para la salida A/V<br />
• 1x adaptador de audio de 3,5 mm con clavija jack a toma<br />
cinch<br />
10
<strong>MD</strong> <strong>81209</strong> <strong>manual</strong> <strong>DE</strong>_<strong>GB</strong>_<strong>FR</strong>_<strong>IT</strong>_<strong>ES</strong>.<strong>book</strong> Seite 11 Montag, 27. Februar 2006 10:33 10<br />
• 1x cable cinch de audio mini DIN<br />
Receptor:<br />
• Receptor<br />
• 1x adaptador de red para el receptor, 9 V 400 mA<br />
Accesorios:<br />
1x adaptador euroconector para el emisor „receptor“<br />
1x cable cinch de audio mini DIN<br />
Embalaje<br />
El sistema de radiotransmisión está embalado<br />
para protegerlo contra eventuales daños<br />
durante el transporte. Los embalajes son<br />
materias primas y por ello reutilizables y aptos<br />
para ser integrados en el ciclo de reciclaje de<br />
materias primas.<br />
11<br />
<strong>ES</strong>
<strong>MD</strong> <strong>81209</strong> <strong>manual</strong> <strong>DE</strong>_<strong>GB</strong>_<strong>FR</strong>_<strong>IT</strong>_<strong>ES</strong>.<strong>book</strong> Seite 12 Montag, 27. Februar 2006 10:33 10<br />
CONEXIÓN <strong>DE</strong>L EMISOR<br />
El emisor se conecta con una fuente de audio / vídeo<br />
(fuente 1). Dichas fuentes pueden ser por ejemplo, un<br />
receptor digital, una grabadora de vídeo, un aparato DVD,<br />
un televisor o una tarjeta gráfica (ver más abajo).<br />
Conexión a través de un euroconector<br />
Si la fuente de audio / vídeo dispone de una conexión para<br />
euroconector, conecte el cable euroconector mini DIN para<br />
entrada A/V a la salida de euroconector de este equipo y a<br />
la entrada mini DIN (AV IN 1) del emisor.<br />
Conexión sin euroconector<br />
Si la fuente de audio / vídeo no dispone de conexión para<br />
euroconector, conecte el cable cinch AV mini DIN<br />
suministrado a la salida cinch A/V de este equipo y a la<br />
entrada mini DIN (AV IN 1) del emisor.<br />
• La clavija cinch amarilla es para la conexión de vídeo; la<br />
roja, para audio derecha; la blanca, para audio izquierda.<br />
• Para transmitir únicamente el sonido, conecte sólo las<br />
clavijas de audio.<br />
• Si desea conectar el emisor a una toma de audio de 3,5<br />
mm de una fuente de audio o vídeo, use el adaptador de<br />
audio y conéctelo con las clavijas de audio del cable cinch<br />
euroconector mini DIN.<br />
• A continuación, conecte la clavija mini DIN del otro<br />
extremo del cable cinch mini DIN-AV a la toma<br />
correspondiente del emisor.<br />
12
<strong>MD</strong> <strong>81209</strong> <strong>manual</strong> <strong>DE</strong>_<strong>GB</strong>_<strong>FR</strong>_<strong>IT</strong>_<strong>ES</strong>.<strong>book</strong> Seite 13 Montag, 27. Februar 2006 10:33 10<br />
• Para transmitir la señal de vídeo también a un televisor<br />
colocado en el lugar en el que se encuentra el emisor,<br />
conecte el cable euroconector mini DIN de la salida A/V<br />
(AV OUT) con la entrada de euroconector del televisor.<br />
Ejemplo de disposición del emisor<br />
El siguiente esquema muestra un ejemplo de cómo pueden<br />
ir conectados el receptor satélite y el televisor del lado del<br />
emisor:<br />
13<br />
<strong>ES</strong>
<strong>MD</strong> <strong>81209</strong> <strong>manual</strong> <strong>DE</strong>_<strong>GB</strong>_<strong>FR</strong>_<strong>IT</strong>_<strong>ES</strong>.<strong>book</strong> Seite 14 Montag, 27. Februar 2006 10:33 10<br />
Extensor de infrarrojos (para mandos a<br />
distancia)<br />
Para controlar a distancia la fuente de audio o de vídeo<br />
desde el lugar del receptor, deberá conectar el extensor de<br />
infrarrojos.<br />
• Conecte la clavija del extensor de infrarrojos con el enchufe<br />
IR-EXT del emisor (ver ilustración en la página anterior).<br />
• Retire el papel de la superficie adhesiva de uno de los dos<br />
emisores de infrarrojos. Fije el emisor de infrarrojos en la<br />
fuente de audio / vídeo de tal modo que esté orientado<br />
hacia el receptor de infrarrojos de ese aparato. La cara<br />
superior del diodo debe estar a aprox. 1 cm de distancia<br />
del receptor de infrarrojos (ver ilustración más abajo).<br />
Utilización de varios aparatos<br />
Puesto que el extensor de infrarrojos tiene dos emisores,<br />
con el mando a distancia puede controlar varios aparatos<br />
simultáneamente desde el lugar del receptor. De este modo<br />
puede, por ejemplo, utilizar en lugares diferentes tanto la<br />
grabadora de vídeo como el reproductor DVD.<br />
• Fije uno de los emisores infrarrojos, tal y como se ha<br />
descrito más arriba, en cada aparato que quiera utilizar en<br />
un lugar diferente.<br />
14
<strong>MD</strong> <strong>81209</strong> <strong>manual</strong> <strong>DE</strong>_<strong>GB</strong>_<strong>FR</strong>_<strong>IT</strong>_<strong>ES</strong>.<strong>book</strong> Seite 15 Montag, 27. Februar 2006 10:33 10<br />
Conexión de varios aparatos<br />
También puede conectar un segundo equipo al emisor para<br />
que las señales se transmitan de este equipo al receptor y<br />
para controlarlo desde allí con el mando a distancia.<br />
• Al conectar el equipo con la entrada AV IN 1 del emisor,<br />
quedará definido como la fuente 1, y al conectarlo a la<br />
entrada AV IN 2, como la fuente 2.<br />
• Con el interruptor SOURCE 1/2 del emisor puede definir<br />
qué señal se va a transmitir hacia el televisor conectado a<br />
la salida AV OUT.<br />
15<br />
<strong>ES</strong>
<strong>MD</strong> <strong>81209</strong> <strong>manual</strong> <strong>DE</strong>_<strong>GB</strong>_<strong>FR</strong>_<strong>IT</strong>_<strong>ES</strong>.<strong>book</strong> Seite 16 Montag, 27. Februar 2006 10:33 10<br />
Ejemplo de disposición del emisor con dos equipos<br />
El siguiente esquema muestra un ejemplo de cómo pueden<br />
ir conectados un receptor satélite, un televisor y un<br />
reproductor DVD del lado del emisor:<br />
16
<strong>MD</strong> <strong>81209</strong> <strong>manual</strong> <strong>DE</strong>_<strong>GB</strong>_<strong>FR</strong>_<strong>IT</strong>_<strong>ES</strong>.<strong>book</strong> Seite 17 Montag, 27. Februar 2006 10:33 10<br />
Conexión del adaptador de red<br />
• Conecte el adaptador de red para el emisor a la toma de<br />
12 V (DC 12 V) del emisor.<br />
• Retire la tapa protectora y conecte el adaptador de red en<br />
la toma de corriente (230 V ~ 50 Hz).<br />
• Ponga el interruptor ON/OFF en la posición ON. Se<br />
enciende el LED rojo de funcionamiento.<br />
• Despliegue la antena del emisor y oriéntela hacia el<br />
receptor.<br />
Selección del canal<br />
• Seleccione el canal (A, B, C o D) por el que se va a<br />
transmitir mediante el selector situado en la parte inferior<br />
del equipo.<br />
Colocación<br />
• Coloque el emisor sobre una superficie lisa y firme.<br />
• Oriente la antena del emisor con la cara plana en dirección<br />
del receptor.<br />
17<br />
<strong>ES</strong>
<strong>MD</strong> <strong>81209</strong> <strong>manual</strong> <strong>DE</strong>_<strong>GB</strong>_<strong>FR</strong>_<strong>IT</strong>_<strong>ES</strong>.<strong>book</strong> Seite 18 Montag, 27. Februar 2006 10:33 10<br />
CONEXIÓN <strong>DE</strong>L EMISOR A UN OR<strong>DE</strong>NADOR<br />
También puede conectar el emisor a un ordenador para,<br />
por ejemplo, transmitir la señal del ordenador a un televisor.<br />
La transmisión de la señal de salida del ordenador al<br />
televisor no suele tener mucho sentido si debe ejecutarse<br />
algún programa de ordenador. La señal de imagen del<br />
televisor no suele bastar para mostrar la imagen de elevada<br />
definición del ordenador.<br />
Pero si se reproducen vídeos o presentaciones, sí resulta<br />
recomendable la transmisión al televisor desde el<br />
ordenador.<br />
Para ello deben cumplirse los siguientes requisitos:<br />
• Su ordenador tiene una salida de vídeo compatible con<br />
una salida de vídeo para televisor.<br />
• El sistema operativo y los controladores de la tarjeta<br />
gráfica son compatibles con la salida de vídeo.<br />
Procedimiento<br />
La emisión a través de la salida de vídeo se activa de<br />
distintos modos en función de la tarjeta gráfica y del sistema<br />
operativo. Puesto que existe gran cantidad de<br />
combinaciones posibles, en las presentes instrucciones<br />
sólo podemos dar una indicación general. Lea en las<br />
instrucciones de funcionamiento del ordenador o de la<br />
tarjeta gráfica el modo cómo se transmite la imagen a la<br />
salida de vídeo.<br />
El siguiente ejemplo presupone un PC con el sistema<br />
operativo Windows® a partir de la versión 98.<br />
18
<strong>MD</strong> <strong>81209</strong> <strong>manual</strong> <strong>DE</strong>_<strong>GB</strong>_<strong>FR</strong>_<strong>IT</strong>_<strong>ES</strong>.<strong>book</strong> Seite 19 Montag, 27. Februar 2006 10:33 10<br />
• Finalice todos los programas y desconecte el ordenador.<br />
• Tome las instrucciones de funcionamiento de su PC y siga<br />
las indicaciones para la utilización de la salida de vídeo.<br />
• Conecte la clavija amarilla del cable AV cinch a la salida de<br />
vídeo de la tarjeta gráfica. En caso de que su tarjeta<br />
gráfica no disponga de una salida cinch, utilice le<br />
correspondiente adaptador (accesorio especial).<br />
• Conecte ahora las clavijas roja y blanca del cable cinch AV<br />
mini DIN a las correspondientes salidas de audio de su<br />
PC. La mayoría de los PC disponen de enchufes de 3,5<br />
mm, de modo que puede utilizar el adaptador incluido en<br />
el suministro.<br />
• Conecte ahora la clavija mini DIN del cable a la entrada AV<br />
IN 1 de la estación emisora.<br />
• Conecte ahora tanto la estación transmisora como la<br />
receptora y su televisor, y escoja en éste el<br />
correspondiente canal de vídeo.<br />
• Encienda su ordenador y espere hasta que el sistema<br />
operativo se haya cargado totalmente.<br />
• Haga doble clic con la tecla derecha del ratón sobre el<br />
escritorio y seleccione „Propiedades“, para mostrar<br />
Propiedades de pantalla:<br />
• Ahora haga clic en „Configuración“, para configurar la<br />
correspondiente salida de su PC. Aquí existen<br />
muchísimas diferencias entre las distintas tarjetas<br />
19<br />
<strong>ES</strong>
<strong>MD</strong> <strong>81209</strong> <strong>manual</strong> <strong>DE</strong>_<strong>GB</strong>_<strong>FR</strong>_<strong>IT</strong>_<strong>ES</strong>.<strong>book</strong> Seite 20 Montag, 27. Februar 2006 10:33 10<br />
gráficas.<br />
Lea por ello en las correspondientes instrucciones de<br />
funcionamiento el modo cómo debe proceder. En la<br />
mayoría de los casos también puede accederse a la ayuda<br />
en línea pulsando la tecla F1, a fin de obtener información<br />
detallada.<br />
Si ha realizado los ajustes correctamente, se transmitirá la<br />
imagen del PC al televisor.<br />
20
<strong>MD</strong> <strong>81209</strong> <strong>manual</strong> <strong>DE</strong>_<strong>GB</strong>_<strong>FR</strong>_<strong>IT</strong>_<strong>ES</strong>.<strong>book</strong> Seite 21 Montag, 27. Februar 2006 10:33 10<br />
Marcas registradas<br />
MS-DOS® y Windows® son marcas registradas de<br />
Microsoft®.<br />
Pentium® es una marca registrada de Intel®.<br />
Limitación de la responsabilidad civil en caso de<br />
pérdida de datos / daños resultantes<br />
Aseguramiento de datos:<br />
Antes de cada cambio del sistema del ordenador debería<br />
efectuar una copia de seguridad de sus datos en un medio<br />
externo (por ejemplo, en un CD-R), a fin de evitar pérdidas<br />
de datos. MEDION AG no se hace responsable de datos<br />
perdidos.<br />
Funcionalidad:<br />
Debido a las grandes diferencias existentes en los sistemas<br />
operativos y en las tarjetas gráficas, en este capítulo<br />
("Conexión del emisor a un ordenador") no podemos<br />
garantizar la funcionalidad de las indicaciones descritas.<br />
Por favor, consulte al comercio o personal especializados.<br />
Daños resultantes:<br />
Durante la conexión del sistema de transmisión por favor<br />
tenga en cuenta las instrucciones de funcionamiento de su<br />
ordenador, del software empleado y de los componentes<br />
adicionales.<br />
No nos responsabilizamos de los daños o pérdidas de datos<br />
que resulten de una utilización errónea o inadecuada.<br />
21<br />
<strong>ES</strong>
<strong>MD</strong> <strong>81209</strong> <strong>manual</strong> <strong>DE</strong>_<strong>GB</strong>_<strong>FR</strong>_<strong>IT</strong>_<strong>ES</strong>.<strong>book</strong> Seite 22 Montag, 27. Februar 2006 10:33 10<br />
CONEXIÓN <strong>DE</strong>L RECEPTOR<br />
Existen varias posibilidades de recibir señales de audio /<br />
vídeo de un emisor en otro aparato.<br />
Conexión mediante un cable cinch de audio DIN<br />
• Conecte el cable cinch AV mini DIN AV a la salida AV<br />
EXTEND del receptor y a las tomas correspondientes de<br />
los equipos receptores (por ejemplo, del televisor).<br />
Conexión a través del adaptador euroconector<br />
• Conecte el cable cinch AV mini DIN a la salida AV EXTEND<br />
del receptor y al adaptador euroconector del receptor.<br />
• Conecte el adaptador euroconector con la inscripción<br />
"Receiver“ (= receptor) al aparato receptor (p. ej., el<br />
televisor).<br />
22
<strong>MD</strong> <strong>81209</strong> <strong>manual</strong> <strong>DE</strong>_<strong>GB</strong>_<strong>FR</strong>_<strong>IT</strong>_<strong>ES</strong>.<strong>book</strong> Seite 23 Montag, 27. Februar 2006 10:33 10<br />
Ejemplo de disposición del emisor<br />
El siguiente esquema muestra un ejemplo de cómo pueden<br />
ir conectados el receptor y un televisor con el cable cinch de<br />
audio mini DIN o con un adaptador euroconector.<br />
Intercalar un aparato<br />
En lugar de conectar el receptor directamente con un<br />
televisor, también puede intercalar otro aparato de audio /<br />
vídeo. Dicho aparato puede ser, por ejemplo, una<br />
grabadora de vídeo que se puede conectar después con el<br />
receptor tal y como se ha descrito.<br />
Conexión del adaptador de red<br />
• Conecte el adaptador de red para el receptor a la toma de<br />
9 V de este último.<br />
• Conecte el adaptador de red a una toma de fácil acceso<br />
(230 V ~ 50 Hz).<br />
• Encienda el aparato receptor, por ejemplo el televisor y<br />
23<br />
<strong>ES</strong>
<strong>MD</strong> <strong>81209</strong> <strong>manual</strong> <strong>DE</strong>_<strong>GB</strong>_<strong>FR</strong>_<strong>IT</strong>_<strong>ES</strong>.<strong>book</strong> Seite 24 Montag, 27. Februar 2006 10:33 10<br />
ponga el interruptor ON/OFF del receptor en ON. Se<br />
enciende el LED rojo de funcionamiento.<br />
Selección del canal<br />
Tenga en cuenta que el receptor debe estar puesto en el<br />
mismo canal (A, B, C o D) que el emisor.<br />
Selección de la fuente<br />
Si ha conectado dos equipos al emisor, ahora podrá elegir<br />
entre la recepción de la señal del primer equipo (fuente 1) o<br />
del segundo (fuente 2) mediante el interruptor SOURCE 1/<br />
2.<br />
• Para ello, mantenga pulsada durante 10 segundos<br />
aproximadamente la tecla SOURCE 1/2 situada en la<br />
parte posterior del receptor, hasta que el aparato cambie<br />
de fuente.<br />
• También puede mantener pulsada durante unos 10<br />
segundos cualquier tecla del mando a distancia de uno de<br />
los equipos conectados al emisor hasta que el equipo<br />
cambie de fuente.<br />
Colocación<br />
• Coloque el receptor sobre una superficie lisa y firme.<br />
• Coloque el receptor de tal modo que el frontal, con el LED<br />
de funcionamiento, esté orientado hacia usted.<br />
• Cuando utilice el mando a distancia de la fuente de audio<br />
/ vídeo, diríjalo hacia el receptor.<br />
• Despliegue la antena receptora y oriéntela hacia el emisor<br />
hasta obtener una imagen óptima.<br />
24
<strong>MD</strong> <strong>81209</strong> <strong>manual</strong> <strong>DE</strong>_<strong>GB</strong>_<strong>FR</strong>_<strong>IT</strong>_<strong>ES</strong>.<strong>book</strong> Seite 25 Montag, 27. Februar 2006 10:33 10<br />
CONFIG. CANAL<br />
Su sistema de radiotransmisión dispone de con cuatro<br />
canales; es decir, puede emitir en cuatro frecuencias<br />
diferentes.<br />
En ambos aparatos, el selector de equipos se encuentra en<br />
la parte inferior.<br />
• Ajuste el emisor y el receptor al mismo canal.<br />
• Pruebe cuál de los canales A/B/C/D ofrece la mejor<br />
recepción.<br />
• También puede utilizar los cuatro canales para utilizar<br />
hasta un total de cuatro sistemas de radiotransmisión.<br />
25<br />
<strong>ES</strong>
<strong>MD</strong> <strong>81209</strong> <strong>manual</strong> <strong>DE</strong>_<strong>GB</strong>_<strong>FR</strong>_<strong>IT</strong>_<strong>ES</strong>.<strong>book</strong> Seite 26 Montag, 27. Februar 2006 10:33 10<br />
LIMPIEZA / ELIMINACIÓN<br />
Limpieza<br />
• Para limpiar el aparato, emplee siempre un paño seco y<br />
suave.<br />
• No utilice productos de limpieza que puedan dañar la<br />
superficie de los aparatos. Nunca espolvoree los<br />
productos de limpieza directamente sobre los aparatos.<br />
Eliminación<br />
No tire bajo ningún concepto el sistema de<br />
radiotransmisión al final de su vida útil a la basura<br />
doméstica normal. Consulte en su ayuntamiento o<br />
autoridad local la posibilidad de una eliminación<br />
apropiada y respetuosa con el medio ambiente.<br />
26
<strong>MD</strong> <strong>81209</strong> <strong>manual</strong> <strong>DE</strong>_<strong>GB</strong>_<strong>FR</strong>_<strong>IT</strong>_<strong>ES</strong>.<strong>book</strong> Seite 27 Montag, 27. Februar 2006 10:33 10<br />
EN CASO <strong>DE</strong> PROBLEMAS<br />
En caso de que surjan irregularidades, compruebe en<br />
primer lugar que la instalación sea correcta. La siguiente<br />
tabla puede ayudarle a ello:<br />
No hay transmisión de audio ni vídeo<br />
• ¿Ha enchufado los adaptadores de red?<br />
• ¿Ha conectado el emisor y el receptor?<br />
• ¿Ha seleccionado los mismos canales para el emisor y el<br />
receptor?<br />
• ¿Está encendida la fuente de transmisión?<br />
• Los muros y los techos reducen el alcance de la<br />
transmisión.<br />
• Compruebe las conexiones en los aparatos conectados.<br />
Calidad de recepción defectuosa<br />
• Vuelva a ajustar las antenas del emisor y del receptor para<br />
que queden orientadas la una hacia la otra.<br />
• Modifique un poco la posición del emisor y del receptor.<br />
• Existen diversos factores, como las ondas de otros<br />
aparatos de radio, que pueden reducir la calidad de la<br />
transmisión.<br />
• Seleccione otro canal.<br />
El mando a distancia no reacciona<br />
• Mantenga el mando a distancia directamente orientado<br />
hacia el receptor.<br />
• Los diodos del emisor de infrarrojos deben estar a aprox.<br />
1 cm de distancia del receptor de infrarrojos de la fuente<br />
de audio / vídeo.<br />
• ¿Ha orientado correctamente los diodos de infrarrojos?<br />
27<br />
<strong>ES</strong>
<strong>MD</strong> <strong>81209</strong> <strong>manual</strong> <strong>DE</strong>_<strong>GB</strong>_<strong>FR</strong>_<strong>IT</strong>_<strong>ES</strong>.<strong>book</strong> Seite 28 Montag, 27. Februar 2006 10:33 10<br />
<strong>ES</strong>PECIFICACION<strong>ES</strong> TÉCNICAS<br />
Emisor:<br />
Adaptador de red<br />
Entrada: 230 V ~ 50 Hz<br />
Salida:<br />
4 canales<br />
12 V 200 mA<br />
Gama de frecuencias: 2,4000 - 2,4835 GHz<br />
Conexiones: 1 salida Mini-DIN<br />
2 entrada Mini-DIN<br />
Canal de retorno para la señal del mando a distancia:<br />
433 MHz<br />
Receptor:<br />
Adaptador de red<br />
Entrada: 230 V ~ 50 Hz<br />
Salida:<br />
4 canales<br />
9V 400mA<br />
Gama de frecuencias: 2,4000 - 2,4835 GHz<br />
Conexiones: 1 salida Mini-DIN<br />
Los adaptadores de red disponen de la homologación GS.<br />
¡Las especificaciones técnicas están sujetas a cambios sin<br />
previo aviso!<br />
28
<strong>MD</strong> <strong>81209</strong> <strong>manual</strong> <strong>DE</strong>_<strong>GB</strong>_<strong>FR</strong>_<strong>IT</strong>_<strong>ES</strong>.<strong>book</strong> Seite 29 Montag, 27. Februar 2006 10:33 10<br />
INFORMACIÓN <strong>DE</strong> CONFORMIDAD<br />
Por medio de la presente Medion AG declara que el<br />
apparato <strong>MD</strong> <strong>81209</strong> cumple con los requisitos esenciales y<br />
cualesquiera otras disposiciones aplicables o exigibles de<br />
la Directiva 1999/5/CE.<br />
Nuestro Servicio técnico le remitirá a petición más<br />
información acerca de la declaración de conformidad.<br />
Revisado para el servicio en todos los países de la UE.<br />
29<br />
<strong>ES</strong>
<strong>MD</strong> <strong>81209</strong> <strong>manual</strong> <strong>DE</strong>_<strong>GB</strong>_<strong>FR</strong>_<strong>IT</strong>_<strong>ES</strong>.<strong>book</strong> Seite 30 Montag, 27. Februar 2006 10:33 10<br />
30