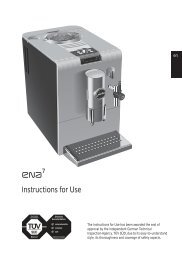
Manual tehnic expresoare Saeco Primea Touch Plus - Cafea
Manual tehnic expresoare Saeco Primea Touch Plus - Cafea
Manual tehnic expresoare Saeco Primea Touch Plus - Cafea

Create successful ePaper yourself
Turn your PDF publications into a flip-book with our unique Google optimized e-Paper software.
TABLE OF CONTENTS<br />
Operation and maintenance manual<br />
Before using the machine, please read the attached operating instructions.<br />
Carefully read the safety rules<br />
Mode d'emploi<br />
Veuillez lire attentivement le mode d'emploi<br />
(notamment les consignes de sécurité) avant d'utiliser l'appareil.<br />
FOR HOUSEHOLD USE ONLY<br />
USAGE DOMESTIQUE SEULEMENT
IMPORTANT SAFEGUARDS<br />
When using electrical appliances, basic safety precautions should always be<br />
followed to reduce the risk of fire, electric shock, and/or injury to persons,<br />
including the following:<br />
1 Read all instructions and information in this instruction book and any<br />
other literature included in this carton referring to this product before<br />
operating or using this appliance.<br />
2 Do not touch hot surfaces. Use handles or knobs.<br />
3 To protect against fire, electric shock and personal injury do not immerse<br />
cord, plugs or appliance in water or other liquid.<br />
4 Close supervision is necessary when any appliance is used by or near<br />
children.<br />
5 Unplug from outlet when not in use and before cleaning. Allow to<br />
cool before putting on or taking off parts, and before cleaning the<br />
appliance.<br />
6 Do not operate any appliance with a damaged cord or plug or after<br />
the appliance malfunctions or has been damaged in any way. Return<br />
appliance to the nearest authorized service centre for examination,<br />
repair or adjustment.<br />
7 The use of accessory attachments not recommended by the appliance<br />
manufacturer may result in fire, electric shock or personal injury.<br />
8 Do not use outdoors.<br />
9 Do not let cord hang over edge of table or counter, or touch hot<br />
surfaces.<br />
10 Do not place on or near a hot gas or electric burner, or in a heated<br />
oven.<br />
11 Always turn appliance “OFF”, then plug cord into the wall outlet. To<br />
disconnect, turn switch to “OFF”, then remove plug from wall outlet.<br />
12 Do not use appliance for other than intended household use.<br />
13 Use extreme caution when using hot steam.<br />
SAVE THESE INSTRUCTIONS
CAUTION<br />
This appliance is for household use only. Any servicing, other than cleaning<br />
and user maintenance, should be performed by an authorized service<br />
centre. Do not immerse machine in water. To reduce the risk of fire or<br />
electric shock, do not disassemble the machine. There are no parts inside<br />
the machine serviceable by the user. Repair should be done by authorized<br />
service personnel only.<br />
1 Check voltage to be sure that the voltage indicated on the nameplate<br />
corresponds with your voltage.<br />
2 Never use warm or hot water to fill the water tank. Use cold water only.<br />
3 Keep your hands and the cord away from hot parts of the appliance<br />
during operation.<br />
4 Never clean with scrubbing powders or harsh cleaners. Simply use a soft<br />
cloth dampened with water.<br />
5 For optimal taste of your coffee, use purified or bottled water. Periodic<br />
descaling is still recommended every 2-3 months.<br />
6 Do not use caramelized coffee<br />
INSTRUCTIONS FOR THE POWER<br />
SUPPLY CORD<br />
A A short power-supply cord is provided to reduce risks of tangling or<br />
tripping over a longer cord.<br />
B Longer extension cords are available and may be used if care is exercised in<br />
their use.<br />
C If a long extension cord is used:<br />
1 the marked electrical rating of the extension cord should be at least as great<br />
as the electrical rating of the appliance.<br />
2 if the appliance is of the grounded type, the extension cord should be a<br />
grounding type<br />
3 the cord should not hang from the table to avoid the risk of tangling or<br />
tripping.
2<br />
TABLE OF CONTENTS<br />
GENERAL INFORMATION.................................................................................................................................3<br />
MACHINE........................................................................................................................................................4<br />
ACCESSORIES ....................................................................................................................................................................4<br />
INSTALLATION................................................................................................................................................5<br />
STARTING THE MACHINE ........................................................................................................................................................5<br />
MANUAL PRIMING OF THE WATER CIRCUIT ....................................................................................................................................6<br />
SETTING THE LANGUAGE AND THE CLOCK ....................................................................................................................................6<br />
"AQUA PRIMA" FILTER ..........................................................................................................................................................7<br />
DISPLAY .........................................................................................................................................................8<br />
CHOOSE COFFEE AROMA ........................................................................................................................................................8<br />
ADJUSTMENTS...............................................................................................................................................9<br />
COFFEE INTENSITIY ..............................................................................................................................................................9<br />
ADJUSTING THE HEIGHT OF THE DRIP TRAY. .................................................................................................................................9<br />
FILLING THE MILK CONTAINER..................................................................................................................................................9<br />
BEVERAGE DISPENSING................................................................................................................................10<br />
ESPRESSO / COFFEE / LONG COFFEE .......................................................................................................................................10<br />
DISPENSING BEVERAGES WITH GROUND COFFEE ........................................................................................................................... 11<br />
HOT WATER DISPENSING ...................................................................................................................................................... 12<br />
LATTE MACCHIATO ............................................................................................................................................................. 12<br />
DISPENSING HOT MILK ........................................................................................................................................................ 13<br />
ESPRESSO MACCHIATO ........................................................................................................................................................14<br />
CAPPUCCINO ...................................................................................................................................................................14<br />
BEVERAGE PROGRAMMING ..........................................................................................................................15<br />
BEVERAGE PROGRAMMING MENU ............................................................................................................................................15<br />
ESPRESSO / COFFEE / LONG COFFEE PROGRAM ...........................................................................................................................15<br />
PROGRAMMING MILK BEVERAGES ............................................................................................................................................16<br />
MACHINE SETTINGS .....................................................................................................................................18<br />
PROGRAMMING THE MACHINE ................................................................................................................................................18<br />
LANGUAGE MENU ............................................................................................................................................................. 19<br />
CUP ILLUMINATION MENU .................................................................................................................................................... 19<br />
AQUA PRIMA FILTER MENU ................................................................................................................................................... 19<br />
WATER HARDNESS MENU .................................................................................................................................................... 20<br />
RINSE MENU ................................................................................................................................................................... 20<br />
CUP WARMING PLATE MENU ................................................................................................................................................. 21<br />
ACCOUSTIC TONES AND ALARMS MENU.................................................................................................................................... 21<br />
DISPLAY MENU ................................................................................................................................................................ 21<br />
BEVERAGE SETTINGS ..........................................................................................................................................................22<br />
ADJUSTMENT OF THE COFFEE BREW TEMPERATURE ..................................................................................................................... 22<br />
AROMA ADJUSTMENT FOR COFFEE BREWING.............................................................................................................................. 23<br />
PREBREWING ADJUSTMENT (ONLY COFFEE BEVERAGES) ................................................................................................................ 23<br />
ADDITIONAL FUNCTIONS ......................................................................................................................................................24<br />
COFFEE OF THE WORLD FUNCTION ......................................................................................................................................... 24<br />
DEMO MODE ................................................................................................................................................................... 26<br />
BEVERAGE COUNTER FUNCTION ............................................................................................................................................. 26<br />
MAINTENANCE..................................................................................................................................................................27<br />
MILK CIRCUIT RINSE CYCLE .................................................................................................................................................. 27<br />
MILK CIRCUIT WASH CYCLE .................................................................................................................................................. 28<br />
COFFEE CIRCUIT CLEANING CYCLE (BREW GROUP WASH CYCLE) ....................................................................................................... 31<br />
BLOCK DISPLAY .............................................................................................................................................................. 31<br />
DESCALING .................................................................................................................................................................... 32<br />
CLOCK SETTINGS ..............................................................................................................................................................34<br />
TIME SETTING ................................................................................................................................................................. 34<br />
AUTOMATIC TIMER SETTINGS................................................................................................................................................ 35<br />
ENERGY SAVING SETTINGS ................................................................................................................................................... 37<br />
SPECIAL .........................................................................................................................................................................38<br />
FACTORY SETTINGS ........................................................................................................................................................... 38<br />
CLEANING AND MAINTENANCE ....................................................................................................................39<br />
GENERAL MACHINE CLEANING ................................................................................................................................................39<br />
MILK CONTAINER MAINTENANCE AND CLEANING...........................................................................................................................40<br />
CLEANING THE BREW GROUP .................................................................................................................................................42<br />
GRINDER MAINTENANCE ......................................................................................................................................................43<br />
ERROR CODES ..............................................................................................................................................44<br />
TECHNICAL DATA..........................................................................................................................................45<br />
SAFETY RULES .............................................................................................................................................46
GENERAL INFORMATION<br />
The coffee machine is intended for preparing espresso by using either coffee beans or ground coffee. It<br />
includes an automatic device for preparing milk beverage and a hot water dispenser.<br />
The machine is elegantly designed for domestic use and is not suitable for continuous heavy duty or<br />
professional use.<br />
Warning: no liability is assumed for any damage caused by:<br />
• Incorrect use not in accordance with the intended uses;<br />
• Repairs not carried out by authorized customer service centers;<br />
• Tampering with the power cord;<br />
• Tampering with any part of the machine;<br />
• The use of non-original spare parts and accessories;<br />
• Failure to descale the machine or use at temperatures below 0°C.<br />
IN THESE CASES, THE WARRANTY IS NOT VALID.<br />
A WARNING TRIANGLE DRAWS ATTENTION TO ALL THE INSTRUCTIONS THAT<br />
ARE IMPORTANT FOR USER SAFETY. PLEASE FOLLOW THESE INSTRUCTIONS<br />
CAREFULLY TO AVOID SERIOUS INJURY!<br />
HOW TO USE THESE OPERATING INSTRUCTIONS<br />
Keep these operating instructions in a safe place and make them available to anyone else who may use the coffee<br />
machine. For further information or if you experience problems not completely or sufficiently addressed in these<br />
instructions, please contact an Authorized Customer Service Center.<br />
KEEP THESE INSTRUCTIONS<br />
3
4<br />
Open coffee bean hopper<br />
button<br />
Compartment for milk<br />
container<br />
Water tank<br />
ACCESSORIES<br />
Grinder<br />
adjustment key<br />
MACHINE<br />
Cup warming plate<br />
TOUCH SCREEN Display<br />
SBS<br />
Dispensing head<br />
Drip tray + grill and fl oat<br />
Additional milk container<br />
(without cappuccinatore)<br />
Cappuccinatore<br />
maintenance kit<br />
Coffee bean hopper<br />
Button for raising/lowering<br />
the drip tray<br />
Hot water spout<br />
Lubricant for the<br />
brew group<br />
Cleaning detergent<br />
(Brew group)<br />
Socket for<br />
power cord<br />
"Aqua Prima" Filter<br />
Coffee bean hopper cover<br />
Compartment for preground<br />
coffee<br />
Main switch<br />
Service door<br />
Detergent for cleaning<br />
milk container<br />
Coffee grounds drawer<br />
Drip tray<br />
Brew group<br />
Water hardness<br />
tester<br />
Ground coffee<br />
measuring scoop
1 2 3<br />
4<br />
7<br />
STARTING THE MACHINE<br />
Make sure that the main power button is not switched to the “ON” position.<br />
Press the button on the coffee<br />
hopper to open the cover. Fill the<br />
hopper with coffee beans.<br />
Fill the tank with fresh drinking<br />
water. Do not exceed the “max”<br />
level indicated on the water tank.<br />
Once fi lled place the tank back<br />
into the machine.<br />
Press the main switch once to turn<br />
on the machine. The appliance<br />
automatically performs a diagnosis<br />
of its functions. This test is<br />
performed each time the machine<br />
is turned on.<br />
Close the cover pushing it down<br />
completely.<br />
5<br />
Attach the female end of the<br />
power cord to the machine. Insert<br />
the male end into the power<br />
outlet.<br />
The machine automatically<br />
primes the water circuit.<br />
The machine is now ready<br />
for use.<br />
INSTALLATION<br />
6<br />
5<br />
Remove the water tank.<br />
We recommend installing the "Aqua<br />
Prima" fi lter (see page 7).<br />
Place a container beneath the hot<br />
water spout.<br />
Water may not be dispensed<br />
into the glass.<br />
This should not be considered<br />
a malfunction.<br />
TO ASSESS WATER HARDNESS, SEE "WATER<br />
HARDNESS MENU" ON PAGE 20.
6<br />
1 2 3<br />
1<br />
deutsch<br />
français<br />
italiano (ch)<br />
language<br />
1/2<br />
Italiano (i)<br />
english<br />
nederlands<br />
Select the desired language.<br />
Press for the other languages.<br />
4<br />
demo<br />
INSTALLATION<br />
MANUAL PRIMING OF THE WATER CIRCUIT<br />
<strong>Manual</strong>ly prime the water circuit only when the following<br />
display appears.<br />
Note: fi rst make sure that the water tank is full.<br />
Position a container under the hot<br />
water spout (it is possible that<br />
water will not come out of the<br />
spout).<br />
self-test<br />
The machine starts and displays<br />
the menu in the selected<br />
language.<br />
ok<br />
2<br />
deutsch<br />
français<br />
italiano (ch)<br />
language<br />
1/2<br />
Press to select the desired<br />
language.<br />
4<br />
demo<br />
priming the machine<br />
self-test<br />
start<br />
Press the display once and the<br />
machine will begin priming the<br />
water circuit.<br />
Italiano (i)<br />
english<br />
nederlands<br />
ok<br />
priming the machine<br />
3<br />
Press “ok”.<br />
5<br />
deutsch<br />
français<br />
italiano (ch)<br />
If desired, the “demo” function (see page 26)<br />
may be activated by pressing the key, each time<br />
the machine carries out a self-diagnosis.<br />
When the prime circuit cycle is<br />
fi nished, remove the container.<br />
The machine is now ready for<br />
use.<br />
SETTING THE LANGUAGE AND THE CLOCK<br />
When the machine is switched-on for the fi rst time, it requires the selection of the desired language.<br />
This allows you to adjust the parameters of the beverages to the typical parameters of the country<br />
where the machine is used. This is why some languages are differentiated also by country.<br />
avvio<br />
language<br />
1/2<br />
Italiano (i)<br />
english<br />
nederlands<br />
See manual on page 34 to<br />
adjust the clock.<br />
ok
«AQUA PRIMA» FILTER<br />
To improve the quality of the water used, install the "Aqua Prima" fi lter. After installation, go to the<br />
fi lter activation program (see programming). In this mode the machine advises the user when the<br />
fi lter must be replaced.<br />
1 2<br />
Remove the "Aqua Prima" fi lter<br />
from its packaging. Enter the date<br />
of the current month.<br />
4 5<br />
Place a container beneath the<br />
hot water spout.<br />
7<br />
language<br />
display<br />
alerts &<br />
acoustic<br />
settings<br />
go back<br />
restore<br />
default<br />
settings<br />
cup<br />
illumination<br />
machine<br />
settings<br />
cup<br />
warmer<br />
water<br />
<br />
water<br />
hardness<br />
rinsing<br />
back to<br />
menu<br />
Insert the fi lter in its place within<br />
the empty tank (see fi gure).<br />
Press down until it clicks into<br />
place.<br />
show icon<br />
explanation<br />
Press "programming menu".<br />
Press "water fi lter". Press "activate fi lter".<br />
8<br />
not<br />
inserted<br />
go back<br />
restore<br />
default<br />
settings<br />
water<br />
<br />
my custom<br />
coffee<br />
save<br />
settings<br />
activate<br />
<br />
inserted<br />
3<br />
Press "machine settings".<br />
The machine then activates the "Aqua Prima" fi lter. Wait for the cycle to fi nish automatically.<br />
When the activation cycle ends, the machine proceeds to the choose beverage menu.<br />
NOTE: occasionally, the machine may not dispense the desired quantity of water for the correct water<br />
fi lter initialization. In this case, repeat the operations described from point 6 and following.<br />
programming<br />
menu<br />
back to<br />
menu<br />
7<br />
Fill the tank with fresh water. Let<br />
the fi lter soak for 30 minutes. After<br />
30 minutes discard the water in the<br />
tank and refi ll with fresh water.<br />
6<br />
machine<br />
settings<br />
specials<br />
maintenance<br />
energy<br />
saving<br />
main<br />
menu<br />
beverage<br />
settings<br />
extras<br />
clock<br />
settings<br />
back to<br />
coffee<br />
menu
8<br />
DISPLAY<br />
It is possible to change the type of display and choose between " icon format" and "text format"<br />
show icon<br />
explanation<br />
Go to the "text<br />
format" menu<br />
ICON FORMAT<br />
my custom<br />
coffee<br />
Beverage<br />
programming<br />
Accessing the<br />
programming menu<br />
• To get the desired beverage, press the corresponding symbol on the display.<br />
The machine automatically performs all the necessary operations.<br />
• To make 2 cups, press the beverage symbol twice.<br />
CHOOSE COFFEE AROMA<br />
programming<br />
menu<br />
press twice<br />
The intensity of the color on the cup icon (only valid for coffee beverages) indicates the aroma, or<br />
quantity of coffee to be ground, for preparing the beverage. The greater the quantity of coffee<br />
ground the stronger the coffee will taste.<br />
weak medium strong<br />
hot<br />
milk<br />
hot<br />
water<br />
Go to the "icon<br />
format" menu<br />
TEXT FORMAT<br />
latte<br />
macchiato<br />
medium<br />
long<br />
coffee<br />
medium<br />
cappuccino<br />
espresso<br />
macchiato<br />
medium strong<br />
coffee espresso<br />
medium strong<br />
When the machine is programmed to use pre-ground coffee or when a beverage is customized, the<br />
icon is displayed in a different way and/or accompanied by an asterisk (see section on<br />
“programming beverages”.)<br />
pre-ground customization<br />
show<br />
icon<br />
my custom<br />
coffee<br />
programming<br />
menu
1<br />
COFFEE INTENSITIY<br />
The SBS system has been carefully designed to give your coffee the intense taste you desire. Simply<br />
turn the dial and you will notice that the coffee goes from mild intensity to strong intensity.<br />
SBS – SAECO BREWING SYSTEM<br />
SBS adjusts the intensity of the brewed coffee,<br />
and can even be adjusted while brewing. Any<br />
adjustment has an immediate effect on the<br />
brewing coffee.<br />
2<br />
MILD<br />
COFFEE<br />
ADJUSTING THE HEIGHT OF THE DRIP TRAY.<br />
Adjust the drip tray before dispensing any beverages.<br />
Height adjustable drip tray.<br />
FILLING THE MILK CONTAINER<br />
Open the milk compartment and<br />
remove the container located<br />
within.<br />
MEDIUM<br />
COFFEE<br />
ADJUSTMENTS<br />
STRONG<br />
COFFEE<br />
To raise the drip tray, press lightly on the lower part of the button. To lower the tray,<br />
press lightly on the upper part of the button; when the desired height is reached,<br />
release the button.<br />
Note: There is a red fl oater in the drip tray. When it rises, the tray must be emptied<br />
and washed.<br />
Only the container with the cappuccinatore must be fi lled before preparing beverages with milk. Do not<br />
use milk after the best-before date. (Important! Refer to the instructions for maintenance and cleaning<br />
of the cappuccinatore on page 40).<br />
Remove the container cover and pour in the milk. DO NOT<br />
EXCEED THE MAXIMUM LEVEL shown in the fi gure. Close<br />
the container and place it back in the milk compartment.<br />
Make sure to carefully close the compartment.<br />
9<br />
We recommend using the other<br />
supplied container to store any<br />
remaining milk in the refrigerator.<br />
Clean the circuits using only the<br />
container with the cappuccinatore.
10<br />
DISPENSING COFFEE, HOT WATER AND MILK CAN BE INTERRUPTED AT ANY TIME BY<br />
SELECTING THE "STOP ... DISPENSING" BUTTON.<br />
THEDISPENSED MILKCANREACHHIGHTEMPERATURES: THEREISADANGEROF<br />
SCALDING. DO NOT TOUCH IT WITH BARE HANDS.<br />
THE MILK USED MUST HAVE BEEN PROPERLY PRESERVED.<br />
DONOTUSEITAFTERTHEEXPIRATIONDATEONTHEPACKAGE.<br />
Check that all the containers are clean. To do this operation, follow the instructions in the "Cleaning and<br />
Maintenance" (see page 39).<br />
WHEN YOU HAVE FINISHED PREPARING BEVERAGES CONTAINING MILK, PROCEED WITH<br />
CLEANING THE CONTAINER AND THE MACHINE'S CIRCUIT.<br />
To brew 2 cups, the machine dispenses half of the entered quantity and briefly interrupts dispensing in<br />
order to grind the second serving of coffee. Coffee dispensing is then restarted and completed.If a milk<br />
beverage has been chosen, the machine automatically dispenses the milk. If the first coffee is interrupted,<br />
the second will not be dispensed.<br />
ESPRESSO / COFFEE / LONG COFFEE<br />
This procedure shows how to dispense an espresso. To dispense another type of coffee, press the<br />
appropriate icon. Use appropriate espresso or coffee cups so that the coffee will not overflow.<br />
1 2 3<br />
show icon<br />
explanation<br />
BEVERAGE DISPENSING<br />
my custom<br />
coffee<br />
programming<br />
menu<br />
Choose the beverage and press<br />
the corresponding icon on the<br />
display: once for 1 cup and twice<br />
for 2 cups.<br />
The machine begins grinding the<br />
quantity of coffee entered.<br />
stop<br />
coffee<br />
dispensing<br />
espresso<br />
Begin dispensing the selected<br />
beverage.<br />
The machine ends dispensing automatically according to the quantity determined by the manufacturer. It is<br />
possible to customize this quantity. See page 15.<br />
If you wish to interrupt the dispensing cycle, press the " stop coffee dispensing" button.
DISPENSING BEVERAGES WITH GROUND COFFEE<br />
Pre-ground coffee must be poured into the appropriate compartment positioned next to the coffee bean<br />
hopper. Pour in only coffee ground for espresso machines and never coffee beans or instant coffee. (see the<br />
"Beverage programming" chapter on page 15).<br />
WARNING: PUT PRE-GROUND COFFEE IN THE COMPARTMENT ONLY WHEN YOU WISH TO<br />
DISPENSE THIS TYPE OF BEVERAGE.<br />
INSERT ONLY ONE SCOOP OF GROUND COFFEE AT A TIME. TWO CUPS OF COFFEE CANNOT BE<br />
DISPENSED AT THE SAME TIME.<br />
1 2<br />
add preground<br />
coffee<br />
start!<br />
3<br />
show icon<br />
explanation<br />
Press the appropriate button and<br />
the display will show:<br />
4<br />
add preground<br />
coffee<br />
start!<br />
5<br />
go<br />
back<br />
In the example given below, we chose to dispense a long coffee using pre-ground coffee.<br />
The customized choice of using pre-ground coffee is shown on the display with an asterisk next to the<br />
chosen beverage.<br />
my custom<br />
coffee<br />
programming<br />
menu<br />
Press the "start! "button to start<br />
dispensing.<br />
go<br />
back<br />
A message appears, reminding<br />
the user ground coffee in the<br />
appropriate compartment.<br />
stop<br />
coffee<br />
dispensing<br />
long<br />
coffee<br />
Begins dispensing the selected<br />
beverage.<br />
11<br />
Pour ground coffee into the preground<br />
coffee compartment using<br />
the measuring scoop provided<br />
with the accessories.<br />
Note:<br />
• After 1 minute from when the message appears (2), if brewing has not started the machine will return to<br />
the main menu and dump any inserted coffee into the coffee grounds drawer.<br />
• If no pre-ground coffee is poured into the compartment, only water will be dispensed.<br />
• If 2 or more scoops of coffee are added, the machine will not dispense the beverage and the coffee in the<br />
compartment will be dumped into the coffee grounds drawer.
12<br />
1<br />
show icon<br />
explanation<br />
Press the hot water icon once.<br />
1<br />
show icon<br />
explanation<br />
BEVERAGE DISPENSING<br />
HOT WATER DISPENSING<br />
WHEN THE HOT WATER BEGINS TO DISPENSE, SHORT SPURTS OF HOT WATER MAY BE<br />
DISPENSED WHICH POSE A RISK OF SCALDING. THE HOT WATER SPOUT CAN REACH<br />
HIGH TEMPERATURES: AVOID TOUCHING IT WITH BARE HANDS.<br />
Select the beverage and press the<br />
corresponding icon on the<br />
display: once for 1 cup and twice<br />
for 2 cups.<br />
4 latte<br />
macchiato<br />
5<br />
stop<br />
coffee<br />
dispensing<br />
my custom<br />
coffee<br />
Once milk has been dispensed, the<br />
machine automatically prepares the<br />
coffee.<br />
2<br />
stop<br />
water<br />
dispensing<br />
hot<br />
water<br />
Begin hot water dispensing.<br />
LATTE MACCHIATO<br />
SEE INSTRUCTIONS ON PAGE 40 FOR OPTIMAL MILK DISPENSING<br />
Fill the milk container<br />
my custom<br />
coffee<br />
programming<br />
menu<br />
programming<br />
menu<br />
stop<br />
milk<br />
dispensing<br />
2 3<br />
The machine begins grinding the<br />
quantity of coffee entered.<br />
latte<br />
macchiato<br />
add<br />
milk<br />
After this, the machine allows you to<br />
dispense more milk if you wish. This<br />
option remains active for<br />
approximately 2 seconds. To activate,<br />
press the “add milk” button.<br />
To dispense another cup of<br />
hot water, repeat this<br />
operation.<br />
stop<br />
coffee<br />
dispensing<br />
6<br />
latte<br />
macchiato<br />
stop<br />
milk<br />
dispensing<br />
When the coffee finishes grinding,<br />
the machine will automatically<br />
dispense the programmed quantity<br />
of hot milk.<br />
show icon<br />
explanation<br />
milk<br />
rinsing<br />
my custom<br />
coffee<br />
programming<br />
menu<br />
The “milk rinsing” icon will flash<br />
once the machine is done<br />
dispensing in order to clean the<br />
milk circuit. Press the “milk<br />
rinsing” icon to clean the internal<br />
milk circuit.
If the user wishes to continue preparing other drinks the machine<br />
will keep the “milk rinsing” signal active.<br />
After 20 minutes of inactivity, the machine requires the user to<br />
perform a rinsing cycle as described in Step 7. If the machine is<br />
turned off immediately after dispensing a milk beverage, the next<br />
time the machine is turned on it will require the user to perform a<br />
rinsing cycle.<br />
Note: Before performing the “milk rinsing” function make sure that:<br />
1. an adequate sized container is placed under the dispensing head<br />
2. the milk container with the cappuccinatore is fi lled with fresh<br />
drinking water and inserted in the machine.<br />
3. the water tank is full of fresh water.<br />
7<br />
1<br />
milk rinsing cycle<br />
rinse the milk container<br />
start<br />
rinsing<br />
Remove the milk container from<br />
the machine. If it still contains<br />
milk, pour the milk in the<br />
additional container, to store in the<br />
refrigerator for future use. Rinse<br />
the container with the<br />
cappuccinatore and fi ll it with<br />
fresh water; place it in the<br />
machine and press the “start<br />
rinsing” key.<br />
show icon<br />
explanation<br />
DISPENSING HOT MILK<br />
Fill the milk container<br />
my custom<br />
coffee<br />
programming<br />
menu<br />
2<br />
hot<br />
milk<br />
Press the hot milk icon once. The hot milk is dispensed.<br />
8<br />
rinsing milk circuitplease<br />
wait<br />
rinsing...<br />
While the machine is rinsing the<br />
user cannot interrupt the cycle,<br />
but must wait until the cycle is<br />
completed. Once completed the<br />
machine returns to the main menu.<br />
THIS PROCEDURE MUST BE PERFORMED FOR ALL<br />
MILK BEVERAGES!<br />
stop<br />
milk<br />
dispensing<br />
show icon<br />
explanation<br />
milk<br />
cleaning<br />
9<br />
my custom<br />
coffee<br />
programming<br />
menu<br />
13<br />
After 14 days from the fi rst dispensing<br />
of a milk-based beverage, the message<br />
“milk cleaning” is displayed; it is<br />
advisable to clean the milk circuits as<br />
shown on page 28.<br />
After another 7 days the machine stops<br />
dispensing milk-based beverages and<br />
the milk circuits must be washed;<br />
during this phase, coffee and hot water<br />
may be brewed.<br />
Remove the container, rinse<br />
and dry.<br />
To dispense another cup of milk,<br />
repeat this operation.<br />
When the "milk rinsing" symbol<br />
fl ashes, clean the milk circuits as<br />
described for latte macchiato (see<br />
page 12, Step 6).
14<br />
1<br />
show icon<br />
explanation<br />
4 espresso<br />
macchiato<br />
5<br />
1<br />
BEVERAGE DISPENSING<br />
ESPRESSO MACCHIATO<br />
Press the icon once for 1 cup and<br />
twice for 2 cups.<br />
stop<br />
coffee<br />
dispensing<br />
Once the coffee has been brewed,<br />
the machine automatically prepares<br />
the hot milk.<br />
show icon<br />
explanation<br />
CAPPUCCINO<br />
Press the icon once for 1 cup and<br />
twice for 2 cups.<br />
4 5<br />
cappuccino<br />
stop<br />
coffee<br />
dispensing<br />
Fill the milk container<br />
my custom<br />
coffee<br />
Fill the milk container<br />
my custom<br />
coffee<br />
programming<br />
menu<br />
stop<br />
milk<br />
dispensing<br />
programming<br />
menu<br />
stop<br />
milk<br />
dispensing<br />
Once milk has been dispensed, the<br />
machine automatically prepares the<br />
coffee.<br />
2 3<br />
The machine begins grinding the<br />
quantity of coffee entered.<br />
espresso<br />
macchiato<br />
2 3<br />
The machine begins grinding the<br />
quantity of coffee entered.<br />
cappuccino<br />
add<br />
milk<br />
To dispense more milk, press the<br />
“add milk” icon.<br />
add<br />
milk<br />
stop<br />
coffee<br />
dispensing<br />
espresso<br />
macchiato<br />
Espresso macchiato begins<br />
brewing.<br />
When the "milk rinsing"<br />
symbol flashes, clean the<br />
milk circuits as described for<br />
latte macchiato (see page 12,<br />
Step 6).<br />
stop<br />
coffee<br />
dispensing<br />
cappuccino<br />
stop<br />
milk<br />
dispensing<br />
stop<br />
milk<br />
dispensing<br />
When the coffee finishes grinding,<br />
the machine will dispense the<br />
programmed quantity of hot milk.<br />
When the "milk rinsing"<br />
symbol flashes, clean the<br />
milk circuits as described for<br />
latte macchiato (see page 12,<br />
Step 6).<br />
After this, the machine allows you to dispense more milk if you wish.<br />
Press the “add milk” button within 2 seconds.
1<br />
show icon<br />
explanation<br />
BEVERAGE PROGRAMMING MENU<br />
Hold down the beverage button for<br />
two seconds<br />
BEVERAGE PROGRAMMING<br />
Each beverage can be programmed according to your individual taste. Customization is shown on the<br />
display with the addition of an asterisk.<br />
Once a beverage has been customized it will only dispense that type of<br />
beverage. To change or modify the beverage a new customization must be<br />
done.<br />
To program the desired beverage:<br />
show icon<br />
explanation<br />
ESPRESSO / COFFEE / LONG COFFEE PROGRAM<br />
my custom<br />
coffee<br />
my custom<br />
coffee<br />
programming<br />
menu<br />
Enter the menu of the beverage to<br />
be customized; press and hold<br />
the button for 2 seconds.<br />
show icon<br />
explanation<br />
programming<br />
menu<br />
or<br />
my custom<br />
coffee<br />
select the quantity<br />
of coffee to be<br />
ground (aroma).<br />
return to the<br />
previous<br />
window.<br />
show icon<br />
explanation<br />
Press the button "my coffee" and<br />
within two seconds, press the<br />
beverage button<br />
In this menu you can:<br />
2<br />
programming<br />
menu<br />
light<br />
medium<br />
strong<br />
go<br />
back<br />
restore<br />
settings<br />
restore factory settings.<br />
my custom<br />
coffee<br />
my<br />
espresso<br />
start!<br />
save<br />
settings<br />
programming<br />
menu<br />
preground<br />
save settings.<br />
Selecting a different quantity of coffee<br />
changes the aroma of the beverage.<br />
15<br />
select the use<br />
of pre-ground<br />
coffee.
16<br />
Pressing start! allows the<br />
machine to brew coffee.<br />
1<br />
BEVERAGE PROGRAMMING<br />
3 light<br />
my<br />
4<br />
medium<br />
espresso<br />
start!<br />
After pressing the start!<br />
button, the brew cycle will<br />
start.<br />
strong<br />
go<br />
back<br />
custom<br />
coffee<br />
amount<br />
stop<br />
coffee<br />
dispensing<br />
my<br />
espresso<br />
5<br />
To brew an amount of coffee greater<br />
than that preset by the<br />
manufacturer, press “custom<br />
coffee amount” before the end of<br />
the brew cycle in progress. When<br />
the quantity is reached,<br />
press “stop coffee dispensing”.<br />
6 7<br />
go<br />
back<br />
my<br />
espresso<br />
Once the brew cycle finishes,<br />
press "save settings" within five<br />
seconds.<br />
show icon<br />
explanation<br />
restore<br />
settings<br />
save<br />
settings<br />
save<br />
settings<br />
PROGRAMMING MILK BEVERAGES<br />
my custom<br />
coffee<br />
preground<br />
programming<br />
menu<br />
Enter the menu of the beverage<br />
to be customized; press and hold<br />
the button for 2 seconds.<br />
If the "save settings" button<br />
is not pressed the machine<br />
returns to the main menu<br />
and the customized settings<br />
will not be saved.<br />
restore factory settings.<br />
custom<br />
coffee<br />
amount<br />
stop<br />
coffee<br />
dispensing<br />
my<br />
espresso<br />
The machine automatically starts and<br />
finishes brewing the coffee, according to<br />
the standard settings.<br />
The brew cycle may be<br />
interrupted only by pressing<br />
“stop coffee dispensing”.<br />
If the button is not pressed,<br />
the coffee can overflow in<br />
the cup.<br />
my<br />
espresso<br />
saved!<br />
The display shows the confirmation of<br />
the memorized settings, and the<br />
machine automatically returns to the<br />
main menu.<br />
In this menu you can:<br />
select the<br />
quantity of<br />
coffee to be<br />
2<br />
light<br />
medium<br />
my latte<br />
macchiato<br />
start!<br />
ground. select the use<br />
strong<br />
preground of pre-ground<br />
return to the<br />
coffee.<br />
previous<br />
window.<br />
go<br />
back<br />
restore<br />
settings<br />
save<br />
settings<br />
save settings.<br />
Fill the milk tank
3<br />
Pressing start! allows the<br />
machine to start the brewing<br />
cycle.<br />
5<br />
light<br />
medium<br />
strong<br />
go<br />
back<br />
custom<br />
coffee<br />
amount<br />
stop<br />
coffee<br />
dispensing<br />
my latte<br />
macchiato<br />
start!<br />
my latte<br />
macchiato<br />
The dispensing cycle may<br />
be interrupted only by<br />
pressing “stop milk<br />
dispensing”.<br />
If the button is not pressed,<br />
the milk may overflow.<br />
To dispense an amount of milk greater than that preset by the<br />
manufacturer, press “custom milk amount” before the end of the<br />
dispensing cycle in progress. When the quantity is reached, press<br />
“stop milk dispensing”.<br />
custom<br />
coffee<br />
amount<br />
stop<br />
coffee<br />
dispensing<br />
restore<br />
settings<br />
save<br />
settings<br />
my latte<br />
macchiato<br />
preground<br />
custom<br />
milk<br />
amount<br />
stop<br />
milk<br />
dispensing<br />
The brew cycle may be<br />
interrupted only by pressing<br />
“stop coffee dispensing”.<br />
If the button is not<br />
pressed, the coffee may<br />
To brew an amount of coffee greater than that preset by the<br />
manufacturer, press “custom coffee amount” before the end of the<br />
brew cycle in progress. When the desired quantity is<br />
reached, press “stop coffee dispensing”.<br />
If the "save settings" button<br />
is not pressed the machine<br />
returns to the main menu<br />
and the customized settings<br />
will not be saved.<br />
7<br />
custom<br />
milk<br />
amount<br />
stop<br />
milk<br />
dispensing<br />
After pressing the start!<br />
button, the brew cycle will<br />
start.<br />
9<br />
8<br />
17<br />
The machine automatically starts and<br />
finishes dispensing the milk,<br />
according to the standard settings.<br />
my latte<br />
macchiato<br />
The machine automatically starts<br />
and finishes brewing the coffee,<br />
according to the standard<br />
settings.<br />
overflow. go<br />
save<br />
my latte<br />
macchiato<br />
saved!<br />
4<br />
The display shows the confirmation of the<br />
saved settings, and the machine<br />
automatically returns to the main menu.<br />
custom<br />
coffee<br />
amount<br />
stop<br />
coffee<br />
dispensing<br />
6<br />
custom<br />
coffee<br />
amount<br />
stop<br />
coffee<br />
dispensing<br />
back<br />
my latte<br />
macchiato<br />
my latte<br />
macchiato<br />
settings<br />
custom<br />
milk<br />
amount<br />
stop<br />
milk<br />
dispensing<br />
custom<br />
milk<br />
amount<br />
stop<br />
milk<br />
dispensing<br />
Once the brew cycle finishes,<br />
press "save settings" within five<br />
seconds.
18 PROGRAMMING THE MACHINE<br />
Some of the machine’s functions can<br />
be programmed to customize<br />
operations according to your own<br />
requirements.<br />
Programming the machine<br />
operations (see page 18)<br />
Special functions<br />
(see page 38)<br />
Maintenance (cleaning the<br />
machine) (see page 27)<br />
MACHINE SETTINGS<br />
When the machine settings are selected the following screen appears. Here you can:<br />
set the language of the menus.<br />
set the brightness of the<br />
display colors.<br />
set/activate the tones.<br />
show icon<br />
explanation<br />
Press the "programming menu" button.<br />
The programming menu will access:<br />
machine<br />
settings<br />
specials<br />
maintenance<br />
energy<br />
saving<br />
Activate standby Exit<br />
After having set each of the following menus, press<br />
- "go back" to return to the previous screen<br />
- "restore default settings" to restore the initial values<br />
- "save settings" to save the settings<br />
- "back to menu" to return to the main menu<br />
set the illuminate cups function.<br />
language<br />
display<br />
alerts &<br />
acoustic<br />
settings<br />
go back<br />
restore<br />
default<br />
settings<br />
main<br />
menu<br />
cup<br />
illumination<br />
machine<br />
settings<br />
cup<br />
warmer<br />
my custom<br />
coffee<br />
programming<br />
menu<br />
beverage<br />
settings<br />
extras<br />
clock<br />
settings<br />
back to<br />
coffee<br />
menu<br />
water<br />
<br />
water<br />
hardness<br />
rinsing<br />
back to<br />
menu<br />
set the operation of the cup warming plate.<br />
In depth beverage programming<br />
(see page 22)<br />
Extra functions (see page 24)<br />
- Current date and time<br />
- Standby timer<br />
- Times to turn on/turn off over<br />
the span of a day (see page 34).<br />
set the machine’s operation<br />
through the “Aqua Prima” filter.<br />
set the water hardness.<br />
set the circuit rinse cycle.
“LANGUAGE” MENU<br />
For changing the language of the display.<br />
language<br />
“CUP ILLUMINATION” MENU<br />
This function allows activating/ deactivating the dispensing area illumination.<br />
cup<br />
illumination<br />
“AQUA PRIMA FILTER” MENU<br />
The "Aqua Prima" filter purifies water and allows you to taste all the aroma of the coffee.<br />
water<br />
<br />
turn off illumination.<br />
set the machine to<br />
operate without the”Aqua<br />
Prima” filter.<br />
deutsch<br />
français<br />
italiano (ch)<br />
go back<br />
language<br />
1/2<br />
In this menu you can:<br />
not<br />
inserted<br />
cup<br />
illumination<br />
Italiano (i)<br />
english<br />
nederlands<br />
off on<br />
go back<br />
In this menu you can:<br />
go back<br />
restore<br />
default<br />
settings<br />
restore<br />
default<br />
settings<br />
water<br />
<br />
save<br />
settings<br />
save<br />
settings<br />
activate<br />
<br />
inserted<br />
19<br />
This function was described at the<br />
beginning of the manual.<br />
This setting is of fundamental<br />
importance for correctly adjusting<br />
the parameters of the machine<br />
according to the country where the<br />
machine is used.<br />
turn on illumination.<br />
proceed with the initialization<br />
(cleaning) of the water filter (see<br />
page 7). After initialization the<br />
«insert» option is activated.<br />
set the machine to operate<br />
with the “Aqua Prima” filter.<br />
Note:<br />
• Press "activate filter" each time a new "Aqua Prima" filter is installed.<br />
• Press "not inserted" when an "Aqua Prima" filter is not used.<br />
• Press “inserted” when an “Aqua Prima” filter is used. This function operates even after pressing the<br />
“activate filter” button.<br />
back to<br />
menu<br />
back to<br />
menu<br />
back to<br />
menu<br />
Press to display the next page.
20<br />
PROGRAMMING THE MACHINE<br />
“WATER HARDNESS” MENU<br />
To adjust the level of water hardness, shown on a scale of 1 to 4. The machine is preset at a hardness value of 3.<br />
1 2<br />
Immerse the water hardness strip included in<br />
the welcome pack for one second in water.<br />
Press the "water hardness" button.<br />
water<br />
hardness<br />
“RINSE” MENU<br />
To clean the internal circuits for coffee brewing in order to guarantee that beverages are brewed with fresh water<br />
only.<br />
rinsing<br />
go back<br />
In this menu you can:<br />
off<br />
water<br />
hardness<br />
rinsing<br />
deactivate the rinse cycle. activate the rinse cycle.<br />
go back<br />
restore<br />
default<br />
settings<br />
Check the value.<br />
restore<br />
default<br />
settings<br />
1 2 3 4<br />
save<br />
settings<br />
save<br />
settings<br />
back to<br />
menu<br />
on<br />
back to<br />
menu<br />
The test can be used only for<br />
one measurement.<br />
Set the water hardness on the<br />
machine by pressing + or -<br />
Note: This rinse cycle is<br />
performed every time the<br />
machine is turned on when it<br />
is cool.
“CUP WARMING PLATE” MENU<br />
To activate the cup warming plate on the upper part of the machine.<br />
cup<br />
warmer<br />
keep the cup warming plate<br />
off when the machine is in<br />
stand-by.<br />
activate/deactivate a machine<br />
ready tone.<br />
activate/deactivate a tone<br />
each time a button is pressed.<br />
In this menu you can:<br />
off in<br />
standby<br />
“ACOUSTIC TONES AND ALARMS” MENU<br />
In this menu you can:<br />
machine ready<br />
tone<br />
off<br />
key tones<br />
on<br />
go back<br />
cup<br />
warmer<br />
alerts &<br />
acoustic<br />
settings<br />
restore<br />
default<br />
settings<br />
save<br />
settings<br />
always<br />
on<br />
milk quality<br />
alert<br />
off<br />
milk rinsing<br />
alert<br />
off<br />
back to<br />
menu<br />
21<br />
activate/deactivate a tone that<br />
reminds the user to proceed with<br />
washing the circuits to prepare<br />
milk.<br />
activate/deactivate a tone that<br />
reminds the user to perform the<br />
rinse cycle of the milk circuits (the<br />
tone is activated after one minute<br />
from the beverage brewing).<br />
Note: The tones are divided in the following way:<br />
• Long continuous tone indicates a machine malfunction;<br />
• Brief tone when a button is pressed and to indicate that the machine is ready for use;<br />
• Intermittent tone to indicate that the machine needs to be cleaned.<br />
off<br />
keep the cup warming plate<br />
always on.<br />
keep the cup warming plate<br />
always off.<br />
To activate/deactivate the machine’s acoustic tones. Pressing the button does not immediately change the status.<br />
alerts &<br />
acoustic<br />
settings<br />
“DISPLAY” MENU<br />
To set the correct brightness of the display colors, press the “display” button.<br />
display<br />
go back<br />
go back<br />
restore<br />
default<br />
settings<br />
restore<br />
default<br />
settings<br />
display<br />
save<br />
settings<br />
save<br />
settings<br />
back to<br />
menu<br />
back to<br />
menu<br />
Adjust the brightness by<br />
pressing + or -
22 PROGRAMMING THE MACHINE<br />
BEVERAGE SETTINGS<br />
To adjust the general brew parameters of the various beverages containing coffee, press the<br />
“beverage settings” button on the main menu.<br />
the coffee’s<br />
pre-brewing.<br />
For every single beverage, you can adjust:<br />
The current programming status is indicated according to each parameter.<br />
ADJUSTMENT OF THE COFFEE BREW TEMPERATURE<br />
the coffee’s brew temperature.<br />
the quantity of coffee to be ground<br />
and the use of pre-ground coffee.<br />
To set the temperature for preparing coffee, press the “temperature” button and select the desired temperature.<br />
temperature<br />
medium<br />
low temperature<br />
medium temperature<br />
high temperature<br />
espresso<br />
coffee<br />
long<br />
coffee<br />
go back<br />
prebrewing<br />
normal<br />
go back<br />
low<br />
medium<br />
high<br />
go back<br />
beverage<br />
settings<br />
coffee<br />
settings<br />
restore<br />
default<br />
settings<br />
coffee<br />
temperature<br />
restore<br />
default<br />
settings<br />
save<br />
settings<br />
espresso<br />
macchiato<br />
latte<br />
macchiato<br />
cappuccino<br />
back to<br />
menu<br />
temperature<br />
medium<br />
strength<br />
medium<br />
back to<br />
menu<br />
back to<br />
menu
“AROMA” ADJUSTMENT FOR COFFEE BREWING<br />
To set the “Aroma” function, that is to say the quantity of coffee to be ground, and to set the use of pre-ground<br />
coffee. You can have your beverage with the quantity of coffee you desire or you can choose to prepare it with<br />
decaffeinated coffee by using the “preground” function.<br />
strenght<br />
medium<br />
light<br />
medium<br />
strong<br />
“PREBREWING” ADJUSTMENT (ONLY COFFEE BEVERAGES)<br />
To set the prebrewing function. The coffee is slightly dampened before brewing, bringing out the full aroma of the<br />
coffee and extracting the best flavor.<br />
prebrewing<br />
normal<br />
normal prebrewing<br />
strong prebrewing (longer)<br />
deactivate prebrewing<br />
light<br />
medium<br />
strong<br />
go back<br />
normal<br />
strong<br />
off<br />
go back<br />
restore<br />
default<br />
settings<br />
coffee<br />
strength<br />
coffee<br />
prebrew<br />
restore<br />
default<br />
settings<br />
save<br />
settings<br />
save<br />
settings<br />
preground<br />
back to<br />
menu<br />
back to<br />
menu<br />
23
24<br />
PROGRAMMING THE MACHINE<br />
ADDITIONAL FUNCTIONS<br />
There are some additional functions of the machine. Pressing the “extras” button allows you to access the menu<br />
and the following message will appear on the display.<br />
access the menu where some of<br />
the most famous recipes in the<br />
world are kept.<br />
view the quantities of every type<br />
of product brewed.<br />
“COFFEE OF THE WORLD” FUNCTION<br />
This function allows the user to prepare coffee according to the most famous recipes in the world.<br />
coffee<br />
of the<br />
world<br />
prepare a true Italian<br />
ristretto.<br />
prepare a typical Italian<br />
espresso.<br />
In this menu you can:<br />
coffee<br />
of the<br />
world<br />
beverages<br />
counters<br />
go back<br />
prepare a typical American coffee.<br />
ristretto<br />
espresso<br />
italiano<br />
extras<br />
In this menu you can:<br />
go back<br />
restore<br />
default<br />
settings<br />
american<br />
coffee<br />
coffee<br />
of the<br />
world<br />
goodmorning<br />
coffee<br />
save<br />
settings<br />
demo<br />
back to<br />
menu<br />
café<br />
café creme<br />
goodnight<br />
milk<br />
back to<br />
menu<br />
prepare a coffee for a day full<br />
of energy.<br />
activate the “demo” function to<br />
show the machine’s main<br />
functions.<br />
prepare a typical North European<br />
coffee.<br />
prepare a typical French/<br />
Swiss coffee.<br />
prepare a flavorful latte macchiato<br />
without the fear of not being able<br />
to sleep.
If, for example, you want to taste a typical American coffee, you must press the “American coffee” button. In this<br />
case, the following message appears in the display.<br />
This message<br />
remains active for<br />
approximately 5<br />
seconds and then<br />
returns to the main<br />
message.<br />
go<br />
back<br />
After brewing the desired beverage, it can be saved on one of the icons of the main menu.<br />
return to the recipe<br />
preparation menu<br />
american coffee<br />
To save the beverage you just made, the display shows the icon that allows this function.<br />
go!<br />
american<br />
coffee<br />
is now saved under the icon<br />
choose an icon to brew it<br />
american<br />
coffee<br />
do you want to save<br />
this beverage?<br />
no yes<br />
the position of the SBS knob is shown with<br />
the best cup size to use<br />
Pressing the go! button starts<br />
the brewing process.<br />
25<br />
The beverages in the “Coffee of the World” function, if<br />
saved, will be associated with the following buttons,<br />
and accompanied by an asterisk:<br />
• ristretto:<br />
• Italian espresso:<br />
• coffee:<br />
• café crème:<br />
• American coffee:<br />
• good morning coffee:<br />
• good night milk:<br />
save the beverage<br />
espresso (small cup)<br />
espresso (small cup)<br />
coffee (medium cup)<br />
coffee (medium cup)<br />
long coffee (glass)<br />
espresso (small cup)<br />
latte macchiato<br />
You can associate only one beverage with a single icon. The original settings can be restored using the “Beverage<br />
Settings” menu.
26<br />
“DEMO” MODE<br />
PROGRAMMING THE MACHINE<br />
This function shows the machine’s potential.<br />
demo<br />
This is the way the “demo” mode<br />
operation begins. The messages that<br />
follow illustrate the machine’s<br />
functionality.<br />
To exit this mode, press anywhere on<br />
the display.<br />
BEVERAGE COUNTER FUNCTION<br />
This function shows how many beverages have been prepared for every single type of beverage.<br />
beverage<br />
counters<br />
Note: When this function is activated, the machine is in stand-by and all the functions<br />
are disabled. The “demo” mode is saved even when the machine is turned off by the<br />
main switch.<br />
The next time the machine is turned on, the machine will still be in the “demo” mode.<br />
Pressing the demo button on the display shows:<br />
go back<br />
beverage counters<br />
hot milk 0<br />
latte macchiato 1<br />
cappuccino 0<br />
espresso macchiato 0<br />
hot water 0<br />
coffee long 15<br />
coffee 0<br />
espresso 0<br />
leave demo mode?<br />
no yes<br />
continue the tour exit and activate the<br />
machine’s normal functions<br />
back to<br />
menu
MAINTENANCE<br />
To clean/maintain all of the machine’s internal circuits, press the “maintenance” button on the main menu.<br />
lock the <strong>Touch</strong> Screen (to<br />
preform cleaning of the display).<br />
begin rinsing the milk<br />
circuits.<br />
MILK CIRCUIT RINSE CYCLE<br />
In this menu you can:<br />
lock<br />
display<br />
maintenance<br />
coffee<br />
cleaning<br />
cycle<br />
descaling<br />
cycle<br />
27<br />
begin the wash cycle of the brew<br />
group.<br />
perform the descaling cycle.<br />
To rinse the machine’s internal circuits used for preparing milk.<br />
This short cycle must be performed after 20 minutes from the last dispensing of a beverage with milk.<br />
If this rinse cycle is not performed, the machine comes to a halt and does not allow the dispensing of milk-based<br />
beverages.<br />
Before performing this function make sure that:<br />
1. a large enough container is positioned under the spout.<br />
2. the milk container has been adequately cleaned of all milk residue and contains fresh drinking water.<br />
3. the water tank contains a suffi cient quantity of water.<br />
Press the "milk rinsing cycle" button and then "start rinsing" to start the milk circuit rinse cycle.<br />
milk circuit<br />
rinsing<br />
cycle<br />
begin washing the milk<br />
circuits.<br />
start<br />
rinsing<br />
milk<br />
cleaning<br />
cycle<br />
milk circuit<br />
rinsing<br />
cycle<br />
go back<br />
rinsing milk circuitplease<br />
wait<br />
rinsing...<br />
back to<br />
menu<br />
Wait for the cycle to fi nish.<br />
The machine will return to the main<br />
menu.<br />
Remove the container, rinse and<br />
dry.
28 PROGRAMMING THE MACHINE<br />
MILK CIRCUIT WASH CYCLE<br />
To rinse the machine’s internal circuits used for preparing milk.<br />
This cycle is proposed after 14 days from the fi rst dispensing of a milk-based beverage. After 14 days, the “milk<br />
cleaning” message starts fl ashing (see page 13). Perform the wash cycle as described in this section.<br />
Push the “milk cleaning” button and refer to the instructions below, at step 2. The machine switches to the status<br />
described at point 7.<br />
If the milk circuit wash cycle is not performed after 14 days, the dispensing of milk-based beverages will be still be<br />
possible for only 7 more days. After 7 days, the wash cycle must be performed because the dispensing of milk-based<br />
beverages is disabled. (The machine still enables dispensing hot water and coffee).<br />
To remind the user of this important operation, the message “milk cleaning -3” is shown on the display 3 days before<br />
the deadline and is updated on subsequent days.<br />
Before performing this function make sure that:<br />
1. a large enough container is at hand.<br />
2. the milk container has been adequately cleaned of all milk residue.<br />
3. the water tank contains a suffi cient quantity of water.<br />
THE WASH CYCLE CANNOT BE INTERRUPTED. A PERSON MUST BE PRESENT DURING THE OPERATION.<br />
USE ONLY AND EXCLUSIVELY THE PROVIDED DETERGENT.<br />
1<br />
lock<br />
display<br />
milk<br />
cleaning<br />
cycle<br />
milk circuit<br />
rinsing<br />
cycle<br />
go back<br />
maintenance<br />
coffee<br />
cleaning<br />
cycle<br />
descaling<br />
cycle<br />
Select the function by<br />
pressing the “milk cleaning<br />
cycle” button.<br />
back to<br />
menu<br />
show icon<br />
explanation<br />
show icon<br />
explanation<br />
2<br />
milk<br />
cleaning<br />
milk<br />
cleaning<br />
-3<br />
my custom<br />
coffee<br />
my custom<br />
coffee<br />
Open the compartment and<br />
remove the milk container.<br />
programming<br />
menu<br />
programming<br />
menu<br />
3<br />
Insert the content of the<br />
detergent packet into the<br />
container.
4<br />
Fill the milk container with<br />
fresh water up to the «max»<br />
level.<br />
7 8<br />
milk cleaning cycle<br />
add cleaner<br />
to milk conteiner<br />
Close the compartment.<br />
Press the button.<br />
10<br />
Remove the milk container.<br />
ok<br />
5 6<br />
Insert the container into the<br />
drawer and close the drawer.<br />
milk cleaning cycle<br />
cleaning...<br />
The wash cycle starts<br />
automatically.<br />
Wait for the wash cycle to<br />
fi n i s h .<br />
11 12<br />
milk cleaning cycle<br />
fill milk container with cold water<br />
Rinse the container and fi ll it<br />
with fresh water.<br />
29<br />
Position an adequately sized<br />
container under the milk spout.<br />
The second milk container may be<br />
used as well.<br />
9<br />
milk cleaning cycle<br />
rinse the milk container<br />
When the wash cycle has<br />
fi nished the following appears…<br />
The machine emits a tone.<br />
milk cleaning cycle<br />
start rinsing cycle<br />
start<br />
Insert the container and press<br />
the button.
30<br />
13 14<br />
16<br />
PROGRAMMING THE MACHINE<br />
milk cleaning cycle<br />
rinsing...<br />
milk cleaning cycle<br />
fill milk container with cold water<br />
milk cleaning cycle<br />
rinse the milk container<br />
Wait… When the rinse cycle has fi nished<br />
the above message will appear.<br />
Rinse the container and fi ll it<br />
with fresh water.<br />
Perform another rinse cycle as<br />
shown previously.<br />
When fi nished, the machine<br />
automatically returns to the<br />
main menu.<br />
15<br />
Remove the milk container.
COFFEE CIRCUIT CLEANING CYCLE (BREW GROUP WASH CYCLE)<br />
To clean the machine’s internal circuit used for brewing coffee.<br />
It is advisable to perform this wash cycle after 500 coffee brewing cycles, or monthly.<br />
Packages of <strong>Saeco</strong> detergent tablets may be purchased at your local dealer or by Authorized Service Centres.<br />
Note: before performing this function make sure that:<br />
1. a large enought container is positioned under the spout.<br />
2. has been inserted into the compartment for pre-ground coffee.<br />
3. the water tank contains a suffi cient quantity of water.<br />
THE WASH CYCLE CANNOT BE INTERRUPTED.<br />
A PERSON MUST BE PRESENT DURING THE OPERATION.<br />
Press the "coffee cleaning cycle" button and then "start cleaning" to start the wash cycle.<br />
coffee<br />
cleaning<br />
cycle<br />
BLOCK DISPLAY<br />
start<br />
cleaning<br />
THE MAINTENANCE AND CLEANING OF THE<br />
BREW GROUP IS DESCRIBED ON PAGE 42.<br />
cleaning coffee circuit –<br />
please wait<br />
cleaning...<br />
Wait for the cycle to fi nish. The machine will<br />
return to the main menu.<br />
To clean the display. The touch screen display can be cleaned with a soft dampened cloth or with the appropriate<br />
detergents for cleaning displays sold on the market.<br />
SOLVENTS, ALCOHOL, HARSH DETERGENTS AND/OR SHARP OBJECTS THAT CAN DAMAGE THE DISPLAY MUST<br />
NOT BE USED.<br />
Press the "lock display" button<br />
lock<br />
display<br />
1<br />
display<br />
locked<br />
unlock<br />
unlock<br />
display<br />
locked<br />
To reactivate the display, press "unlock" on the lower right-hand corner and then<br />
(within two seconds) "unlock" in the upper left-hand corner (this button appears<br />
only after having pressed the previous button).<br />
2<br />
31
32<br />
DESCALING<br />
To perform the automatic descaling cycle.<br />
Descaling is necessary every 3-4 months, according to the water hardness, when water comes out more slowly than<br />
normal or when the machine indicates it.<br />
The machine must be turned on and will automatically manage the distribution of the descaling agent.<br />
A PERSON MUST BE PRESENT DURING THE OPERATION.<br />
WARNING! NEVER USE VINEGAR AS A DESCALER.<br />
<strong>Saeco</strong> descaler is recommended, however you can use a non-toxic and/or non-harmful descaling product for coffee<br />
machines, commonly available online or in coffeeshops. The solution used must be disposed of according to the<br />
manufacturer’s instructions and/or according to the regulations enforced in the country of use.<br />
Note: Before beginning the descaling cycle make sure that:<br />
1. a large enough container is positioned under the water spout and the brew head.<br />
2. THE “AQUA PRIMA” FILTER HAS BEEN REMOVED.<br />
3. the water tank has been filled with the descaling solution up to the level indicated with an .<br />
Pause descaling.<br />
The descaling and/or rinsing can be paused and then restarted. When descaling is interrupted the machine will<br />
warn the user that it must be turned off.<br />
WARNING! DESCALING MUST BE COMPLETED WITHIN 24 HOURS FROM ITS INTERRUPTION.<br />
The next time the machine is turned on, the machine will warn the user that the descaling and/or rinse process<br />
must be completed.<br />
1<br />
show icon<br />
explanation<br />
PROGRAMMING THE MACHINE<br />
descaling<br />
200<br />
my custom<br />
coffee<br />
programming<br />
menu<br />
The machine indicates to the user the need to complete the descaling<br />
through the message on the main menu. This does not block the<br />
machine’s operation.<br />
The number under the message indicates the number of beverages that<br />
can be dispensed before the machine before the machine needs to be<br />
descaled.<br />
30 beverages before descaling, the button will begin to flash. When the<br />
number reaches zero, the machine must be descaled.<br />
Pressing the descaling button accesses the descaling menu.<br />
2<br />
go back<br />
descaling cycle<br />
<br />
with descaling solution<br />
start<br />
descaling<br />
back to<br />
menu<br />
When in the descaling menu, the<br />
message “fill the water tank with<br />
descaling solution” appears on the<br />
display.<br />
Perform the descaling cycle by<br />
pressing “start descaling” as<br />
shown.
In order to run a descaling cycle before the machine indicates the necessity to do so, press the button "descaling<br />
cycle" and then "start descaling" to start the descaling cycle.<br />
2<br />
5<br />
descaling<br />
cycle<br />
When the solution is fi nished the<br />
following message appears on the<br />
display:<br />
pause<br />
rinsing<br />
descaling cycle<br />
please wait<br />
rinsing...<br />
start<br />
descaling<br />
insert the water tank<br />
with fresh water<br />
descaling cycle<br />
please wait<br />
The machine performs the rinse cycle. At the<br />
end of the rinse cycle you are requested to fi ll<br />
the tank with fresh drinking water. Before<br />
refi lling the tank, reinsert the Aqua Prima fi lter<br />
if desired.<br />
1<br />
pause<br />
descaling<br />
3<br />
descaling cycle<br />
please wait<br />
descaling...<br />
6<br />
4<br />
ciclo di rinsing risciacquo<br />
cycle<br />
33<br />
The machine begins to dispense the descaling solution through the hot<br />
water spout. The dispensing occurs at preestablished intervals, in order to<br />
allow the solution to be more effective.<br />
Remove the water tank and rinse<br />
with fresh drinking water to<br />
eliminate traces of descaling<br />
solution.<br />
Then, refi ll with fresh drinking<br />
water and reinsert water tank.<br />
descaling cycle<br />
please wait<br />
start<br />
rinsing<br />
Rinse the machine circuits by<br />
pressing "start rinsing".<br />
Put a container under the water spout. When the water<br />
tank is inserted the machine automatically proceeds to<br />
prime the water circuit. If this operation is not successful,<br />
consult "manually priming the circuit" (see page 6)
34<br />
CLOCK SETTINGS<br />
To adjust the current date and time, the timer for stand-by (energy savings) and the times for automatically turning on<br />
and turning off the machine. Press the "clock settings" button on the main menu.<br />
TIME SETTING<br />
To set all the parameters relating to the clock and calendar. Important: To correctly program the times for turning the<br />
machine on and off, press the “timer settings” button.<br />
time<br />
settings<br />
set the parameters<br />
for stand-by after<br />
the last brew.<br />
modify the settings related to the<br />
current time and the day of the<br />
current week.<br />
modify the settings relating to<br />
viewing the time (in 24 hour or<br />
am/pm format).<br />
In this menu you can:<br />
time<br />
weekday<br />
time<br />
format<br />
time<br />
settings<br />
current<br />
time<br />
09:45 (am)<br />
current<br />
weekday<br />
thursday<br />
set<br />
- the current time<br />
- the current date<br />
- the view format<br />
(24 hour – AM/PM)<br />
set the intervals for turning the<br />
machine on and off (three<br />
intervals that can be activated<br />
separately).<br />
view the current time setting.<br />
view the current time format<br />
setting.<br />
Current time/day of the week<br />
To set the day of the week and the current time on the machine. Press the "time/weekday" button.<br />
time<br />
weekday<br />
PROGRAMMING THE MACHINE<br />
energy<br />
saving<br />
settings<br />
go back<br />
In this menu you can:<br />
go back<br />
In this menu you can:<br />
go back<br />
clock<br />
settings<br />
restore<br />
default<br />
settings<br />
09h (am)<br />
time<br />
43 min<br />
weekday<br />
thursday<br />
save<br />
settings<br />
save<br />
settings<br />
time<br />
settings<br />
clock<br />
settings<br />
back to<br />
menu<br />
current<br />
format<br />
24h<br />
back to<br />
menu<br />
back to<br />
menu<br />
view the current day of the week<br />
setting.<br />
Adjust the hour by<br />
pressing + or -<br />
Adjust the minutes<br />
pressing + or -<br />
Adjust the day<br />
pressing or
Time format<br />
To set the time view mode. This setting adjusts all clock functions to either “am/pm” or “24 hour” formats.<br />
To set the time view mode, press the “time format” button. The modificatino is immediately applied and in small<br />
writing appears ‘am/pm” or “24 hour”.<br />
AUTOMATIC TIMER SETTINGS<br />
With this function you can turn on (activate) and turn off (energy savings) the machine at the desired times.<br />
Remember that the machine manages this function only if it is turned on.<br />
clock<br />
settings<br />
set the first<br />
interval for turning<br />
on<br />
choose on what days<br />
the intervals are<br />
active<br />
time<br />
weekday<br />
time<br />
format<br />
go back<br />
In this menu you can:<br />
setting 1<br />
on 07:00 am<br />
off 09:00 am<br />
setting<br />
weekday<br />
go back<br />
time<br />
settings<br />
restore<br />
default<br />
settings<br />
save<br />
settings<br />
select a<br />
timer setting<br />
To correctly program the automatic timer settings, you must:<br />
current<br />
time<br />
09:45 (am)<br />
current<br />
weekday<br />
thursday<br />
current<br />
format<br />
24h<br />
setting 2<br />
on 12:00 pm<br />
off 14:00 pm<br />
setting 3<br />
on 17:00 pm<br />
off 19:00 pm<br />
- set the individual intervals for turning on and turning off the machine.<br />
- choose on which days to apply these auto on/off intervals.<br />
It is recommended to not overlap intervals for turning on the machine.<br />
back to<br />
menu<br />
back to<br />
menu<br />
set the second interval<br />
for turning on<br />
set the third interval<br />
for turning on<br />
35
36<br />
Setting an interval for turning on the machine<br />
In order to program an interval for turning on the machine, press the button for the interval that you wish to set.<br />
setting 2<br />
on 12:00 pm<br />
off 14:00 pm<br />
setting 2<br />
08h (am)<br />
turn<br />
machine<br />
on<br />
15 min<br />
Adjust the hour to turn on by<br />
pressing + or -<br />
Adjust the minutes by<br />
pressing + or -<br />
To save the adjusted settings and go to the next screen<br />
To save the adjusted setting<br />
Adjust the hour to turn off by<br />
pressing + or -<br />
Adjust the minutes by<br />
pressing + or -<br />
For every day, choose the intervals for turning on<br />
Arrow through the days of the week, and for each day, select the automatic timer intervals you wish to activate.<br />
setting<br />
weekday<br />
PROGRAMMING THE MACHINE<br />
Interval not active<br />
for the selected day<br />
Each day you can select various intervals.<br />
1<br />
2<br />
go back<br />
setting 2<br />
go back<br />
setting 1<br />
on 07:00 am<br />
off 09:00 am<br />
go back<br />
09h (am)<br />
turn machine<br />
off<br />
15 min<br />
setting 2<br />
on 12:00 pm<br />
off 14:00 pm<br />
edit weekday<br />
timer<br />
monday<br />
save<br />
settings<br />
save<br />
settings<br />
save<br />
settings<br />
back to<br />
menu<br />
back to<br />
menu<br />
setting 3<br />
on 17:00 pm<br />
off 19:00 pm<br />
back to<br />
menu<br />
To save the settings<br />
Interval active for the<br />
selected day<br />
Select the day by pressing<br />
or
ENERGY SAVING SETTINGS<br />
To set after what duration of time, from the last dispensed beverage, the machine will go into stand-by mode.<br />
The default setting is "after 3 hours".<br />
energy<br />
saving<br />
setting<br />
after<br />
15 min<br />
after<br />
3 hours<br />
go back<br />
restore<br />
default<br />
settings<br />
standby<br />
setting<br />
after<br />
30 min<br />
after<br />
1 hour<br />
When the selected duration of time has<br />
passed, the display reads “stand-by”.<br />
energy<br />
saving<br />
save<br />
settings<br />
back to<br />
menu<br />
start<br />
To activate the machine, press “start”. After having<br />
performed the function diagnostics and the heating up<br />
phase, the machine is once again ready for use.<br />
Select the desired time to<br />
activate stand-by.<br />
37
38<br />
SPECIAL<br />
This menu allows you to access special functions present on the machine. Press the "specials" button on the main<br />
menu.<br />
FACTORY SETTINGS<br />
The function for restoring all the factory settings is contained in this menu. This function is particularly important for<br />
restoring the original settings. Press the “factory settings” button.<br />
factory<br />
settings<br />
Selecting "yes" restores the<br />
settings.<br />
factory<br />
settings<br />
specials<br />
If "yes" is selected, a subsequent confi rmation by inverted switch buttons is<br />
requested to be sure that you want to perform the reset.<br />
ALL THE CUSTOM SETTINGS WILL BE LOST AND CANNOT BE RECOVERED. AFTER RESTORING FACTORY<br />
SETTINGS, YOU MUST, IF DESIRED, REPROGRAM ALL THE MACHINE'S FUNCTIONS.<br />
yes<br />
go back<br />
PROGRAMMING THE MACHINE<br />
do you really want to<br />
restore all factory settings?<br />
all custom settings will be lost!<br />
are you sure?<br />
no<br />
back to<br />
menu<br />
1<br />
go back<br />
no<br />
go back<br />
do you really want to<br />
restore all factory settings?<br />
all custom settings will be lost!<br />
attention!<br />
all default settings<br />
are restored<br />
back to<br />
menu<br />
yes<br />
back to<br />
menu<br />
2 3<br />
4<br />
On the display, the message “all<br />
default settings are restored”<br />
appears for two seconds.<br />
show icon<br />
explanation<br />
my custom<br />
coffee<br />
programming<br />
menu<br />
After this period, the machine<br />
returns to the main display.
1 2 3<br />
4 5<br />
7<br />
GENERAL MACHINE CLEANING<br />
8<br />
CLEANING AND MAINTENANCE<br />
The cleaning described below must be performed once a week.<br />
Note: Always use fresh water. If water is in the machine for several days, empty tank and refi ll it.<br />
WARNING! Do not immerse the machine in water.<br />
Refer to the instructions for maintenance and cleaning of the cappuccinatore on pages 40-41.<br />
Turn the machine off and unplug<br />
the cord.<br />
Remove the grounds drawer,<br />
empty and wash.<br />
Remove the drip tray, empty and<br />
hand wash.<br />
Clean the pre-ground coffee<br />
compartment with a dry cloth.<br />
6<br />
39<br />
If the coffee grounds drawer is emptied with the machine off or when it is not signalled on the display, the<br />
count of the coffee grounds contained in the drawer is not reset. For this reason the machine might display<br />
the “empty dreg drawer” message even after preparing a few coffees.<br />
Clean the tank and the cover. Remove the drip tray, empty and<br />
hand wash.<br />
Clean the display (see page 31).<br />
Clean the cappuccinatore as<br />
shown in the corresponding on<br />
page 40 and 41.
40 CLEANING AND MAINTENANCE<br />
MILK CONTAINER MAINTENANCE AND CLEANING<br />
The milk container and the cappuccinatore have been designed to optimize the milk.<br />
Their constant cleaning and maintenance will allow savouring excellent milk-based beverages.<br />
The cappuccinatore has to be completely cleaned at least once a week.<br />
QUICK MAINTENANCE OF THE CAPPUCCINATORE<br />
Milk may not be frothed optimally. In these cases simply turn the fl ow<br />
regulator as shown in the fi gure.<br />
Turn the regulator 2-3 times to perform a quick maintenance.<br />
Note: If the assembled regulator is missing, replace it with the other 3<br />
regulators provided.<br />
CLEANING AFTER REGULAR USE<br />
After using milk for preparing beverages, clean the milk container and the cappuccinatore. These few simple<br />
steps guarantee that the machine will operate properly.<br />
1 2<br />
Pour milk into a container.<br />
Rinse with lukewarm water all<br />
the parts in contact with milk.<br />
3<br />
Pour fresh water into the milk<br />
container, and perform the milk<br />
circuit rinsing cycle.
THOROUGH MAINTENANCE OF THE CAPPUCCINATORE<br />
Thoroughly wash the cappuccinatore at least once a week.<br />
The components may be washed with household detergents.<br />
1 2 3<br />
Remove the cappuccinatore.<br />
Remove the cap from the lower<br />
part.<br />
Separate the upper part of the<br />
cappuccinatore from the lower<br />
part.<br />
4 5 6<br />
O-RING REPLACEMENT<br />
Remove the O-ring with a sharp<br />
object<br />
Remove the cover.<br />
41<br />
Wash all components. Reassemble the components and<br />
install the cappuccinatore in the<br />
container.<br />
When both parts of the cappuccinatore move too freely, replace the O-ring with the ones supplied.<br />
Quando le due parti del cappuccinatore si muovono troppo liberamente, si deve sostituire l'O-ring con quelli<br />
forniti in dotazione.<br />
1 2 3<br />
Insert the new O-ring pressing it<br />
delicately.<br />
Assemble the upper and lower<br />
part of the cappuccinatore
42<br />
1 2 3<br />
4<br />
CLEANING THE BREW GROUP<br />
The Brew Group must be cleaned at least once a week.<br />
Lubricate the Brew Group after approximately 500 brewing cycles. The grease for the lubrication of the<br />
Brew Group may be purchased by Authorized Service Centres.<br />
Wash the brew group with warm water.<br />
WARNING! Do not wash the brew group with detergents that can compromise its correct operation. Do<br />
not wash in the dishwasher.<br />
Press to open the service door.<br />
Wash the upper fi lter with<br />
running water.<br />
CLEANING AND MAINTENANCE<br />
Press the PUSH button to remove<br />
the brew group.<br />
5<br />
Make sure the group is ready to<br />
be put back in. The two<br />
references must align.<br />
7 8 9<br />
The lever on the rear part of<br />
the group must be in contact<br />
with the group base.<br />
Lubricate the Brew Group guides<br />
only with the supplied grease.<br />
Wash any coffee residues from<br />
the brew group.<br />
6<br />
Make sure the components are in<br />
the correct position. The hook<br />
shown must be in the correct<br />
position; to check its position,<br />
fi rmly press the “PUSH” button.<br />
Apply the grease evenly.
10 11<br />
12<br />
Apply the grease evenly. Insert the washed and dried Brew Insert the coffee grounds drawer.<br />
Group. DO NOT PRESS THE<br />
“PUSH” BUTTON.<br />
Close the service door.<br />
1<br />
GRINDER MAINTENANCE<br />
After approximately 2000 grinding cycles, the grinder needs a slight adjustment to ensure it is running in<br />
peak condition.<br />
WARNING!<br />
This operation should be carried out carefully and by an experienced user. Empty the coffee bean hopper<br />
The screw could fall into the grinder; if it happens remove it before restarting the machine. Protect the<br />
grinder hole with a cloth to avoid this problem.<br />
The snap is signalled by a message on the coffee bean hopper; refer to these messages when this<br />
adjustment is performed. Be sure to empty the coffee bean hopper before starting. Note: the screw could<br />
fall into the grinder; if that happens, be sure to remove it before continuing the cleaning.<br />
Unscrew the screw that holds the<br />
service door closed.<br />
2<br />
Remove screws and service door.<br />
3<br />
Adjust until it clicks.<br />
Then reposition the door and attach it with the previously removed screw.<br />
43
44 ERROR CODES<br />
GUIDE MESSAGE THAT APPEARS HOW TO REMOVE THE MESSAGE<br />
restart the machine Turn off and after 30 minutes turn the machine on again<br />
to restore normal operation.<br />
call assistance Problem that requires the intervention of the customer<br />
service center.<br />
insert drip tray Insert drip tray under the brew group.<br />
close coffee bean container Close the coffee bean hopper cover to be able to brew<br />
any beverage.<br />
add ground coffee This message guides the user when, in the customized<br />
beverage programming, the use of this type of coffee has<br />
been chosen.<br />
insert brew group Insert the brew group in its place.<br />
insert dreg drawer Insert the grounds drawer.<br />
empty dreg drawer Remove the grounds drawer and empty the grounds in<br />
an appropriate container.<br />
Note: The grounds drawer must be emptied only when<br />
the machine requires it and when the machine is turned<br />
on.<br />
Emptying the drawer with the machine turned off does<br />
not allow the machine to register that it has been<br />
emptied.<br />
close side door To be able to make the machine functional, the side door<br />
must be closed.<br />
refill water tank The tank must be removed and refilled with fresh<br />
drinking water.<br />
empty drip tray Open the side door and empty the drip tray under the<br />
brew group)<br />
insert the milk container Insert the milk container in the appropriate compartment<br />
prime the machine Press on the display in order to proceed with manually<br />
priming the water circuit. The machine performs an<br />
automatic attempt to prime the circuit. If this attempt<br />
does not perform correctly you must proceed with these<br />
instructions.<br />
circuit priming failure Contact the customer service center (toll free number) to<br />
request assistance on how to resolve the problem.<br />
the descaling cycle has not been completed<br />
correctly<br />
milk rinsing see page 13 and 27.<br />
milk cleaning see page 13 and 28.<br />
Repeat the operation as described in the appropriate<br />
section.
TECHNICAL DATA<br />
ERROR CODES / TECHNICAL DATA<br />
GUIDE MESSAGE THAT APPEARS HOW TO REMOVE THE MESSAGE<br />
change acqua prima filter The Aqua Prima filter must be replaced in the following<br />
cases:<br />
1. 60 liters of water has been dispensed;<br />
2. 90 days have passed since its installation;<br />
3. 20 days have passed and the machine has not been<br />
used.<br />
Note: this message appears only when "inserted" has<br />
been selected in the water filter function (See page 19).<br />
the cleaning cycle has not been completed<br />
correctly<br />
Repeat the operation as described in the appropriate<br />
section.<br />
insert milk container with cappuccinatore Insert the cappuccinatore in the milk container. Without<br />
the cappuccinatore no beverage containing milk can be<br />
dispensed.<br />
rinse the milk tank The user must wash the milk tank after it has been used.<br />
descale the machine A descaling cycle must be performed on the machine's<br />
internal circuits.<br />
energy saving Press the "start" button<br />
Nominal voltage See label on the appliance<br />
Power rating See label on the appliance<br />
Power supply See label on the appliance<br />
Shell material Plastic<br />
Size (w x h x d) 355 x 380 x 460 mm - 13.8” x 15.4” x 16.9”<br />
Weight 14 Kg - 30.9 lbs<br />
Cable length 1200 mm - 42.2”<br />
Control panel (Digital) Front<br />
Water tank 2 liters - 68 oz. / Removeable<br />
Milk Tank ca. 0.400 liters - 12.5 oz. / Removeable<br />
Coffee Bean Hopper Capacity 350 grams - 8.9 oz. / of coffee beans<br />
Pump pressure 15 bar<br />
Boiler Two in stainless steel<br />
Coffee grinder With ceramic grinders<br />
Pressure safety device Boiler pressure safety valve<br />
Temperature safety device Boiler thermostats and thermal fuses<br />
Subject to engineering and manufacturing changes due to technological developments.<br />
The machine conforms to the European Directive 89/336/EEC (Italian Legislative Decree 476 dated 04/12/92)<br />
concerning electromagnetic compatibility.<br />
45
46<br />
SOS<br />
SAFETY RULES<br />
IN CASE OF EMERGENCY<br />
Immediately unplug the cord from the outlet.<br />
ONLY USE THE APPLIANCE<br />
•Indoors.<br />
• For preparing coffee, hot water and for foaming milk.<br />
• For domestic use.<br />
• By adults in non altered psycho-physical conditions.<br />
PRECAUTIONS FOR THE USE OF THE MACHINE<br />
• Do not use the machine for purposes other than those indicated above, in order to avoid danger.<br />
• Do not introduce any substances other than those indicated in the instruction manual.<br />
• During the normal filling of any reservoirs, all nearby reservoirs must be closed.<br />
• Fill the water tank only with fresh drinking water: Hot water and/or any other liquid may damage the machine.<br />
• Do not use water with carbon dioxide added.<br />
• Do not put fingers or any material other than coffee beans in the coffee grinder.<br />
• Before manipulating the coffee grinder, turn of the machine's main switch and unplug the cord.<br />
• Do not put instant coffee or whole bean coffee in the ground coffee container.<br />
• To operate the machine with the touch screen, use only your fingers.<br />
CONNECTION TO ELECTRICAL POWER<br />
The connection to the electrical network must be carried out in accordance with the safety regulations in force in<br />
the user's country.<br />
The machine must be connected to a socket which is:<br />
• compatible with the type of plug installed on the machine;<br />
• suitably sized to comply with the ratings shown on the machine identification plate.<br />
• effectively grounded.<br />
The power cord must not:<br />
• come into contact with any type of liquid: danger of electric shocks and/or fire;<br />
• be crushed and/or come in contact with sharp surfaces;<br />
• be used to move the machine;<br />
• be used if damaged;<br />
• be handled with damp or wet hands;<br />
• be wound in a coil when the machine is being operated.<br />
• be tampered with.<br />
INSTALLATION<br />
• Choose a solid, stationary flat surface (no more than 2° of inclination).<br />
• Do not install the machine in areas where water could be sprayed.<br />
• Optimal operational temperature: 10°C - 40°C / 50-104 degrees Fahrenheit<br />
• maximum humidity: 90%.<br />
• The machine should be installed in an adequately lit, ventilated, hygienic location and the electric socket should be<br />
within easy reach.<br />
• Do not place on heated surfaces!<br />
• Install it at least 10 cm / 4" from the walls and cooking surfaces.<br />
• Do not use in places where the temperature may drop to a level equal to and/or lower than 0°C / 32 degrees<br />
Fahrenheit. If the machine has been exposed to such conditions notify the customer service center, who will have to<br />
carry out a safety check.<br />
• Do not use the machine near inflammable and/or explosive substances.<br />
• The machine must not be used in an explosive or volatile atmosphere or where there is a high concentration of dust<br />
or oily substances suspended in the air.<br />
• Do not install the machine on top of other appliances.<br />
DANGERS<br />
• The appliance must not be used by children and persons who have not been informed of its operation.<br />
• The appliance is dangerous to children. When left unattended, unplug from the electrical outlet.<br />
• Keep the coffee machine packaging out of the reach of children.<br />
• Never direct the jet of hot water and/or steam towards yourself or others. Danger of scalding.
• Do not insert objects through the appliance’s openings. (Danger! Electrical Current!).<br />
• Do not pull out the plug by yanking on the power cord or touching it with wet hands.<br />
• Warning. Danger of burning when in contact with hot water, steam and the hot water spout.<br />
47<br />
FAILURES<br />
• Do not use the appliance if a failure has been verifi ed or suspected, for example after being dropped.<br />
• Any repairs must be performed by an authorized customer service center.<br />
• Do not use the appliance with a defective power cord. The manufacturer or its customer service center will have to<br />
replace the power cable if damaged. (Caution! Electrical Current!)<br />
• Turn off the appliance before opening the service door. Danger of burns!<br />
CLEANING / DESCALING<br />
• Clean the milk circuit only with the recommended detergent powder supplied with the machine. Carefully follow the<br />
safety instructions given on the packaging.<br />
• Clean the coffee circuit only with the recommended detergent tablets supplied with the machine. Carefully follow<br />
the safety instructions given on the packaging.<br />
• Before cleaning the machine, the main switch must be turned to OFF (0), unplugged from the socket and cooled<br />
down.<br />
• Keep the appliance from coming into contact with splashes of water or immersing in water.<br />
• Do not dry the machine’s parts in conventional or microwave ovens.<br />
• The machine and its components must be cleaned and washed after the machine has not been used for a certain<br />
period.<br />
REPLACEMENT PARTS<br />
For safety reasons, use only original replacement parts and original accessories.<br />
WASTE DISPOSAL<br />
- The packing materials can be recycled.<br />
- Appliance: unplug the appliance and cut the power cord.<br />
- Deliver the appliance and power cord to a service center or public waste disposal facility<br />
This product complies with EU Directive 2002/96/EC.<br />
The symbol on the product or on its packaging indicates that this product may not be treated as household waste.<br />
Instead it shall be handed over to the applicable collection point for the recycling of electrical and electronic<br />
equipment. By ensuring this product is disposed of correctly, you will help prevent potential negative<br />
consequences for the environment and human health, which could otherwise be caused by inappropriate waste<br />
handling of this product. For more detailed information about recycling of this product, please contact your local<br />
city offi ce, your household waste disposal service or the shop where you purchased the product.<br />
FIRE SAFETY<br />
In case of fi re, use Carbon Dioxide extinguishers (CO 2 ). Do not use water or dry-powder extinguishers.<br />
ADDITIONAL INFORMATION FOR CORRECTLY USING THE “AQUA PRIMA” FILTER.<br />
Please follow these simple instructions to correctly use the “Aqua prima” fi lter:<br />
1. Keep the “Aqua prima” fi lter cool and away from sunlight; the room temperature should be between +5°C and<br />
+40°C;<br />
2. Do not use the fi lter in temperatures over 60°C.<br />
3. If the coffee machine is not used for 3 days, we recommend washing the “Aqua prima” fi lter;<br />
4 If the coffee machine is not used for more than 20 days, it is advisable to replace the fi lter.<br />
5. To store an already opened fi lter, seal it in a nylon bag and keep in the fridge; do not store it in the freezer to avoid<br />
damaging the fi lter properties.<br />
6. Before using the fi lter, leave it to soak in the water tank for 30 minutes.<br />
7. Once it is taken out of its pack, do not keep the fi lter in the open air.<br />
8. The fi lter must be replaced 90 days after opening the packing or after treating 60 litres of drinking water.
IMPORTANT<br />
Lors de l’utilisation d’appareils électriques, il est important de prendre les précautions<br />
suivantes, afin d’éviter les décharges électriques, les courts circuits et les accidents<br />
corporels.<br />
1 Lire toutes les instructions et les indications données dans cette brochure, ainsi<br />
que toute autre information que contient l’emballage, avant de mettre la machine<br />
en marche.<br />
2 Ne pas toucher les surfaces chaudes de la machine. Utiliser les poignées ou<br />
boutons.<br />
3 Ne pas plonger le fil électrique, la prise ou l’appareil lui-même dans l’eau<br />
ou tout autre liquide.<br />
4 Faire très attention lorsque l’appareil est utilisé par ou près des enfants.<br />
5 Débrancher l’appareil lorsqu’il n’est pas en service et laissez-le refroidir avant<br />
de retirer les accessoires pour le nettoyage ou de les mettre en place.<br />
6 Ne pas utiliser l’appareil avec un cordon ou une prise en mauvais état ou<br />
après que l’appareil ait été endommagé de quelque manière que ce soit.<br />
Confiez votre appareil au service après-vente autorisé le plus proche pour<br />
examen ou réparation.<br />
7 L’utilisation d’accessoires non recommandés par le fabricant de l’appareil<br />
pourrait poser des problèmes.<br />
8 Ne pas utiliser à l’extérieur.<br />
9 Ne pas laisser le cordon pendre de la table ou de la surface de travail, ni<br />
toucher des surfaces chaudes.<br />
10 Ne pas poser sur une cuisinière ou dans un four chaud.<br />
11 Mettre toujours l’appareil en position «arrêt» avant de le débrancher. Mettre<br />
aussi tous les interrupteurs à «arrêt» avant de le débrancher.<br />
12 Usage domestique seulement.<br />
13 Faire très attention en utilisant la vapeur.<br />
CONSERVER CES INSTRUCTIONS
PRÉCAUTIONS<br />
Appareil destiné à un usage domestique seulement. Tout entretien, en dehors du<br />
nettoyage et de l’entretien usuel par l’usager, doit être fait par un centre de service<br />
autorisé. Ne pas plonger la base dans l’eau. Pour éviter les courts-circuits et les<br />
décharges électriques, ne pas démonter la base. Elle ne contient aucune pièce qui<br />
demande un entretien de la part de l’usager. Toute réparation doit être effectuée<br />
par le personnel d’un service après-vente autorisé.<br />
1 Vérifier si le voltage correspond bien aux spécifications apparaissant sur la<br />
plaque signalétique.<br />
2 Ne jamais mettre de l’eau tiède ou chaude dans le réservoir; mais toujours de<br />
l’eau froide.<br />
3 Ne pas toucher les surfaces chaudes de l’appareil pendant le fonctionnement<br />
et en écarter le cordon électrique.<br />
4 Ne pas utiliser d’alcool éthylique, de solvants, d’essences, de poudre à<br />
récurer et/ou d’objets abrasifs pour le nettoyage de la machine.<br />
5 Utiliser de l’eau purifiée ou en bouteille pour assurer le bon goût du café. Quand<br />
même il vous sera nécessaire de faire le détrartage de votre machine tous les 2-3<br />
mois.<br />
6 Ne pas utiliser du café au caramel<br />
INSTRUCTIONS SUR LE CORDON<br />
ELECTRIQUE<br />
A Votre appareil est muni d’un cordon électrique court afin d’éviter qu’il ne<br />
s’emmêle ou qu’on ne s’y accroche.<br />
B On peut utiliser une rallonge électrique en prenant certaines précautions.<br />
C Si on utilise une rallonge, vérifier:<br />
1 que sa tension est au moins égale à celle de l’appareil<br />
2 qu’elle est munie d’une prise à trois fiches, avec mise à la terre, si c’est le cas<br />
pour le cordon de l’appareil<br />
3 que le câble ne pende pas du meuble.
2<br />
TABLE DES MATIÈRES<br />
INFORMATIONS GENERALES..........................................................................................................3<br />
DESCRIPTION DE L'APPAREIL .........................................................................................................4<br />
ACCESSOIRES ................................................................................................................................................4<br />
INSTALLATION ...............................................................................................................................5<br />
MISE EN MARCHE DE LA MACHINE .........................................................................................................................5<br />
AMORÇAGE MANUEL DU CIRCUIT HYDRAULIQUE ..........................................................................................................6<br />
RÉGLAGE DE LA LANGUE ET DE L'HORLOGE ..............................................................................................................6<br />
FILTRE « AQUA PRIMA » ....................................................................................................................................7<br />
AFFICHEUR ....................................................................................................................................8<br />
AFFICHAGE DE L'ARÔME DU CAFÉ ..........................................................................................................................8<br />
REGLAGES.....................................................................................................................................9<br />
DENSITÉ DU CAFÉ ...........................................................................................................................................9<br />
RÉGLAGE DE LA HAUTEUR DU BAC D'ÉGOUTTEMENT ....................................................................................................9<br />
REMPLISSAGE DU RÉCIPIENT DU LAIT .....................................................................................................................9<br />
DISTRIBUTION DES BOISSONS.....................................................................................................10<br />
CAFÉ EXPRESSO / CAFÉ / CAFÉ ALLONGÉ ..............................................................................................................10<br />
DISTRIBUTION BOISSON AVEC CAFÉ MOULU ............................................................................................................11<br />
DISTRIBUTION D'EAU CHAUDE ............................................................................................................................12<br />
LAIT NOISETTE .............................................................................................................................................12<br />
DISTRIBUTION DE LAIT CHAUD ...........................................................................................................................13<br />
CAFÉ EXPRESSO CRÈME ..................................................................................................................................14<br />
CAPPUCCINO ...............................................................................................................................................14<br />
PROGRAMMATION DES BOISSONS............................................................................................... 15<br />
MENU DE PROGRAMMATION DES BOISSONS ............................................................................................................15<br />
PROGRAMMATION CAFÉ EXPRESSO / CAFÉ / CAFÉ ALLONGÉ .........................................................................................15<br />
PROGRAMMATION DES BOISSONS À BASE DE LAIT ....................................................................................................16<br />
PROGRAMMATION DE LA MACHINE..............................................................................................18<br />
RÉGLAGES DE LA MACHINE ...............................................................................................................................18<br />
MENU « LANGUE » .................................................................................................................................................................19<br />
MENU « ILLUMINATION TASSE » ................................................................................................................................................19<br />
MENU « FILTRE AQUA PRIMA » ...................................................................................................................................................19<br />
MENU « DURETÉ DE L'EAU »..................................................................................................................................................... 20<br />
MENU « RINÇAGE » ............................................................................................................................................................... 20<br />
MENU « PLAQUE CHAUFFE-TASSES » ...........................................................................................................................................21<br />
MENU « TONS ET ALARMES SONORES » ........................................................................................................................................21<br />
MENU « AFFICHEUR » .............................................................................................................................................................21<br />
RÉGLAGES BOISSONS .....................................................................................................................................22<br />
RÉGLAGE DE LA TEMPÉRATURE POUR LA DISTRIBUTION DU CAFÉ .......................................................................................................... 22<br />
RÉGLAGE « ARÔME » POUR LA DISTRIBUTION DU CAFÉ ...................................................................................................................... 23<br />
RÉGLAGE « PRÉ-INFUSION »(UNIQUEMENT BOISSONS À BASE DE CAFÉ) ................................................................................................. 23<br />
FONCTIONS SUPPLÉMENTAIRES ..........................................................................................................................24<br />
FONCTION « CAFÉ DU MONDE » ..................................................................................................................................................24<br />
FONCTION « DÉMO » ............................................................................................................................................................. 26<br />
FONCTION « COMPTEURS DES PRODUITS » .................................................................................................................................... 26<br />
ENTRETIEN ................................................................................................................................................27<br />
CYCLE DE RINÇAGE CIRCUITS LAIT .............................................................................................................................................. 27<br />
CYCLE DE LAVAGE CIRCUITS LAIT ............................................................................................................................................... 28<br />
CYCLE DE DÉTARTRAGE CIRCUITS CAFÉ (CYCLE DE LAVAGE DU GROUPE DE DISTRIBUTION) .............................................................................31<br />
BLOCAGE AFFICHEUR ...............................................................................................................................................................31<br />
DÉTARTRAGE ....................................................................................................................................................................... 32<br />
RÉGLAGES HORLOGE ......................................................................................................................................34<br />
RÉGLAGE DE L'HEURE ............................................................................................................................................................. 34<br />
RÉGLAGE HORLOGE................................................................................................................................................................ 35<br />
RÉGLAGE ÉCONOMIE D'ÉNERGIE ..................................................................................................................................................37<br />
FONCTIONS SPÉCIALES ....................................................................................................................................38<br />
ANNULER TOUS LES RÉGLAGES .................................................................................................................................................. 38<br />
NETTOYAGE ET ENTRETIEN..........................................................................................................39<br />
NETTOYAGE GÉNÉRAL DE LA MACHINE ..................................................................................................................39<br />
NETTOYAGE ET ENTRETIEN DU RÉSERVOIR À LAIT .....................................................................................................40<br />
NETTOYAGEDUGROUPEDEDISTRIBUTION ..............................................................................................................42<br />
ENTRETIEN DES MEULES ..................................................................................................................................43<br />
MESSAGES D'ERREURS ...............................................................................................................44<br />
DONNÉES TECHNIQUES ...............................................................................................................45<br />
CONSIGNES DE SÉCURITÉ ...........................................................................................................46
INFORMATIONS GENERALES<br />
Cette machine est indiquée pour la préparation de café Expresso à partir de café en grains ou de café<br />
moulu ; elle est dotée d'une valve vapeur et eau chaude. Le corps de la machine a été conçu pour un<br />
usage domestique et n'est donc pas indiqué pour un fonctionnement continu de type professionnel.<br />
Attention. Aucune responsabilité n'est assumée pour les éventuels dommages résultant de :<br />
• emploi erroné et non conforme aux buts prévus ;<br />
• réparations effectuées en dehors d'un service après-vente agréé ;<br />
• manipulation incorrecte de cordon d'alimentation ;<br />
• manipulation incorrecte de tout composant de la machine ;<br />
• emploi de pièces de rechange et d'accessoires non originaux.<br />
• détartrage non effectué ou si la machine est utilisée a une température ambiante au dessous de 0°C.<br />
DANS LES CAS CITÉS, LA GARANTIE EST ANNULÉE.<br />
LE TRIANGLE D'AVERTISSEMENT INDIQUE TOUTES LES INSTRUCTIONS<br />
IMPORTANTES POUR LA SÉCURITÉ DE L'UTILISATEUR. SUIVRE SCRUPULEU-<br />
SEMENT CES INDICATIONS POUR ÉVITER LES RISQUES DE BLESSURES<br />
GRAVES.<br />
UTILISATION DU MODE D'EMPLOI<br />
Conserver ce mode d'emploi dans un endroit sûr et la joindre à la machine si une autre personne devait<br />
l'utiliser. Pour des renseignements ultérieurs ou en cas de problèmes non traités ou partiellement traités<br />
dans le présent mode d'emploi, veuillez vous adresser aux services après-vente agréés.<br />
CONSERVER CES INSTRUCTIONS<br />
3
4<br />
<strong>Touch</strong>e pour l'ouverture du<br />
réservoir à grains de café<br />
Plaque avec fonction de<br />
réchauffement des tasses<br />
Ecran à touches tactiles<br />
ACCESSOIRES<br />
SBS<br />
Sortie du café<br />
Bac + grille d'égouttage<br />
et fl otteur<br />
Dispositif pour le<br />
réservoir à lait<br />
Réservoir d'eau<br />
Clé de<br />
réglage<br />
DESCRIPTION DE L'APPAREIL<br />
Récipient du lait<br />
supplémentaire<br />
(sans cappuccinatore)<br />
Graisse pour le<br />
groupe de distribution<br />
Kit entretien<br />
cappuccinatore<br />
Réservoir pour grains de café<br />
<strong>Touch</strong>e pour le soulèvement et<br />
l'abaissement du bac d'égouttage<br />
Buse d'eau chaude<br />
Détergent pour le<br />
nettoyage (Groupe café)<br />
Prise pour<br />
l'alimentation<br />
électrique<br />
Filtre Aqua prima<br />
Détergent pour nettoyer<br />
le réservoir à lait<br />
Couvercle du récipient<br />
à grains de café<br />
Logement café prémoulu<br />
Interrupteur général<br />
Porte de maintenance<br />
Réservoir pour<br />
marc de café<br />
Groupe café<br />
Bac de<br />
récupération d'eau<br />
Test de dureté<br />
de l'eau<br />
Doseur pour le<br />
café moulu
1 2 3<br />
4<br />
7<br />
MISE EN MARCHE DE LA MACHINE<br />
Assurez-vous que l'interrupteur général n'est pas activé.<br />
Appuyez sur la touche située sur le<br />
réservoir à café pour ouvrir le<br />
couvercle. Remplissez le réservoir<br />
avec du café en grains.<br />
Remplissez le réservoir avec de<br />
l'eau potable fraîche ; ne<br />
dépassez jamais le niveau<br />
maximum indiqué sur le réservoir.<br />
Ensuite, remettez le réservoir en<br />
place.<br />
Appuyez une fois sur<br />
l'interrupteur général pour<br />
allumer la machine.<br />
L'appareil procède lui-même à un<br />
diagnostic des fonctions. Ce test<br />
est effectué chaque fois que<br />
l'appareil est allumé.<br />
Fermez le couvercle en appuyant<br />
jusqu'au bout.<br />
5<br />
Branchez la fi che sur la prise<br />
située au dos de l'appareil.<br />
Branchez l'autre extrémité du<br />
câble sur une prise de courant<br />
appropriée (reportez-vous à la<br />
plaquette des données).<br />
La machine effectue<br />
automatiquement l'amorçage<br />
du circuit hydraulique.<br />
La machine est prête à<br />
fonctionner.<br />
INSTALLATION<br />
6<br />
Placez un récipient sous la buse<br />
d'eau chaude.<br />
5<br />
Retirez le réservoir à eau.<br />
Il est conseillé d'installer le fi ltre<br />
« Aqua Prima » (consultez la<br />
page 7).<br />
Il est possible que l'eau ne<br />
s'écoule pas dans le gobelet.<br />
Cela ne constitue pas une<br />
défaillance.<br />
POUR RÉGLER LE DEGRÉ DE DURETÉ DE L'EAU,<br />
REPORTEZ-VOUS À LA SECTION « MENU DURETÉ DE<br />
L'EAU », PAGE 20.
6<br />
1 2 3<br />
1<br />
deutsch<br />
français<br />
italiano (ch)<br />
language<br />
1/2<br />
Italiano (i)<br />
english<br />
nederlands<br />
Sélectionner la langue souhaitée.<br />
Appuyer sur pour les autres<br />
langues.<br />
4<br />
démo<br />
INSTALLATION<br />
AMORÇAGE MANUEL DU CIRCUIT HYDRAULIQUE<br />
L'amorçage manuel du circuit hydraulique n'est possible que<br />
lorsque l'affi cheur indique la page-écran suivante.<br />
Remarque : avant d'effectuer cette opération,<br />
assurez-vous que le réservoir à eau est rempli.<br />
Placez un récipient sous la buse<br />
d'eau chaude (il se peut que l'eau<br />
ne s'écoule pas de la buse).<br />
test<br />
automatique<br />
La machine se met en marche et<br />
indique le menu dans la langue<br />
sélectionnée.<br />
ok<br />
2<br />
deutsch<br />
français<br />
italiano (ch)<br />
langue<br />
1/2<br />
Italiano (i)<br />
english<br />
nederlands<br />
Appuyer pour sélectionner la langue<br />
souhaitée.<br />
5<br />
démo<br />
remplir le circuit<br />
test<br />
automatique<br />
démarrer<br />
Appuyez une fois sur l'écran tactile ;<br />
la machine démarre le cycle<br />
d'amorçage du circuit hydraulique.<br />
ok<br />
remplir le circuit<br />
Une fois l'amorçage du circuit<br />
terminé, retirez le récipient. La<br />
machine est prête à fonctionner.<br />
RÉGLAGE DE LA LANGUE ET DE L'HORLOGE<br />
Lors de la première mise en marche de la machine, il faut sélectionner la langue souhaitée ; cela<br />
permet d’adapter les paramètres des boissons à ceux du Pays d’utilisation. C’est pourquoi certaines<br />
langues sont différenciées aussi en fonction du pays.<br />
démarrer<br />
3<br />
italiano (ch)<br />
Appuyer sur « ok ».<br />
6<br />
deutsch<br />
français<br />
langue<br />
1/2<br />
Consulter le manuel à la<br />
page 34 pour le réglage<br />
de l’horloge.<br />
Il est possible, éventuellement, d’activer la fonction «<br />
démo » (voir page 26) en appuyant sur la touche chaque<br />
fois que la machine effectue l’autodiagnostic.<br />
Italiano (i)<br />
english<br />
nederlands<br />
ok
FILTRE « AQUA PRIMA »<br />
Afi n d'améliorer la qualité de l'eau utilisée, installez le fi ltre « Aqua Prima ». Après l'installation,<br />
effectuez l'activation du fi ltre (consultez la programmation) ; cela permet à l'appareil d'indiquer à<br />
l'utilisateur lorsqu'il faut remplacer le fi ltre.<br />
1 2<br />
Déballez le fi ltre « Aqua Prima » ;<br />
réglez la date sur le mois en<br />
cours.<br />
4 5<br />
Placez un récipient sous la buse<br />
d'eau chaude.<br />
7<br />
langue<br />
<br />
sons et<br />
alarmes<br />
retourner<br />
en arrière<br />
illumination<br />
tasse<br />
réglages<br />
machine<br />
plaque<br />
chauffe-tasses<br />
rétablir<br />
valeurs<br />
standard<br />
<br />
eau<br />
dureté<br />
eau<br />
rinçage<br />
retourner<br />
au menu<br />
Insérez le fi ltre dans son logement<br />
à l'intérieur du réservoir vide<br />
(regardez la fi gure).<br />
Appuyez jusqu'au point d'arrêt.<br />
<br />
menu avec<br />
textes<br />
Appuyez sur « menu<br />
programmation ».<br />
Appuyez sur « fi ltre à eau ». Appuyez sur « activation fi ltre ».<br />
8<br />
pas<br />
inséré<br />
retourner<br />
en arrière<br />
rétablir<br />
valeurs<br />
standard<br />
<br />
eau<br />
enregistrer<br />
présélections<br />
activation<br />
<br />
inséré<br />
3<br />
Remplissez le réservoir avec de<br />
l'eau potable fraîche. Plongez le<br />
fi ltre dans le réservoir rempli<br />
pendant 30 minutes.<br />
7<br />
Appuyez sur « réglages machine ».<br />
La machine procède à l'activation du fi ltre « Aqua Prima ». Attendez jusqu'à ce que le cycle termine<br />
automatiquement. Une fois le cycle d'activation terminé, la machine revient au menu de sélection des produits.<br />
REMARQUE : il est possible que la machine ne distribue pas la quantité d’eau demandée pour l’activation<br />
correcte du fi ltre. Dans ce cas, répéter les opérations décrites à partir du point 6 en avant.<br />
mon<br />
café<br />
menu programmation<br />
retourner<br />
au menu<br />
6<br />
réglages<br />
machine<br />
spécialités<br />
entretien<br />
économie<br />
dȎnergie<br />
menu<br />
principale<br />
présélections<br />
boissons<br />
fonctions<br />
supplémentaires<br />
réglages<br />
horloge<br />
menu<br />
préparation<br />
café
8<br />
AFFICHEUR<br />
Il est possible de modifi er la page-écran de l'affi cheur et de choisir entre le « format icône » et le<br />
« format texte ».<br />
FORMAT ICÔNE<br />
FORMAT TEXTE<br />
<br />
menu avec<br />
textes<br />
Passez au menu<br />
« format texte »<br />
mon<br />
café<br />
Programmation<br />
des produits<br />
menu programmation<br />
Accédez au menu<br />
de programmation<br />
• Pour obtenir la boisson souhaitée, appuyez sur le symbole correspondant sur l'affi cheur.<br />
La machine effectue automatiquement toutes les opérations nécessaires.<br />
• Pour obtenir 2 tasses, appuyez deux fois sur le symbole de la boisson souhaitée.<br />
AFFICHAGE DE L'ARÔME DU CAFÉ<br />
appuyez 2 fois<br />
L'intensité de la couleur de l'icône (valable uniquement pour les boissons à base de café) indique<br />
l'intensité de l'arôme (soit la quantité de café à moudre) pour la préparation de la boisson. Majeure<br />
est la quantité de café moulu, plus fort est l'arôme du café distribué .<br />
léger moyen fort<br />
lait<br />
chaud<br />
eau<br />
chaude<br />
Passez au menu<br />
« format icône »<br />
lait<br />
noisette<br />
moyen<br />
cafè<br />
long<br />
moyen<br />
cappuccino<br />
expresso<br />
crème<br />
moyen forte<br />
cafè expresso<br />
moyen forte<br />
Lorsque la machine est programmée pour utiliser le café prémoulu ou bien lorsqu'on personnalise un<br />
produit, l'icône est affi chée de façon différente et/ou marquée par un astérisque (reportez-vous aux<br />
sections relatives à la programmation des boissons).<br />
prémoulu personnalisation<br />
<br />
icônes<br />
mon<br />
café<br />
menu programmation
DENSITÉ DU CAFÉ<br />
Le dispositif SBS a été conçu pour vous permettre de choisir la densité et l'intensité du goût de votre<br />
café. Il suffi t tout simplement de tourner le bouton pour obtenir un café qui s'adapte le mieux à vos<br />
goûts.<br />
SBS – SAECO BREWING SYSTEM<br />
Cela permet de régler la densité du café<br />
distribué. Il est possible d'effectuer le réglage<br />
même pendant la distribution du café. Le<br />
réglage a un effet immédiat sur la distribution<br />
de la boisson sélectionnée.<br />
1<br />
CAFÉ<br />
LÉGER<br />
Bac d'égouttement réglable en hauteur.<br />
CAFÉ<br />
MOYEN<br />
RÉGLAGE DE LA HAUTEUR DU BAC D'ÉGOUTTEMENT<br />
Réglez la hauteur du bac d'égouttement avant de distribuer les boissons.<br />
REMPLISSAGE DU RÉCIPIENT DU LAIT<br />
Ouvrez le logement du récipient<br />
du lait et retirer le récipient situé<br />
à l'intérieur.<br />
REGLAGES<br />
CAFÉ<br />
FORT<br />
Appuyez légèrement sur la partie inférieure de la touche pour soulever le bac ou<br />
bien sur la partie supérieure pour le baisser. Une fois la hauteur souhaitée atteinte,<br />
vous pouvez relâcher la touche.<br />
Remarque : le bac d'égouttement est muni d'un fl otteur rouge ; lorsque le fl otteur<br />
se soulève, il faut vider et laver le bac.<br />
Il ne faut remplir que le récipient équipé de cappuccinatore avant de préparer une boisson quelconque<br />
à base de lait. Ne pas utiliser le lait après la date de péremption. (Important ! Se reporter à la section<br />
relative à l’entretien et au nettoyage à la page 40).<br />
2<br />
9<br />
Nous vous conseillons d’utiliser<br />
l’autre récipient fourni en dotation<br />
pour conserver l’éventuel lait pas<br />
utilisé au réfrigérateur. N’utiliser<br />
que le récipient complet de<br />
cappuccinatore pour le nettoyage<br />
du circuit.<br />
Retirer le couvercle du réservoir et y verser du lait. NE JAMAIS<br />
DÉPASSER LE NIVEAU MAXIMAL indiqué sur la fi gure. Refermer le<br />
réservoir et le remettre dans son logement, en vérifi ant de bien<br />
fermer ce dernier.
10<br />
LA DISTRIBUTION DU CAFÉ, DE L'EAU CHAUDE ET DU LAIT PEUT ÊTRE INTERROMPUE<br />
À TOUT MOMENT EN APPUYANT SUR LA TOUCHE « ARRÊTER DISTRIBUTION ... ».<br />
LE LAIT DISTRIBUÉ PEUT ATTEINDRE DES TEMPÉRATURES ÉLEVÉES : RISQUE DE<br />
BRÛLURES. ÉVITER TOUT CONTACT DIRECT AVEC VOS MAINS.<br />
LE LAIT UTILISÉ DOIT AVOIR ÉTÉ CONSERVÉ CORRECTEMENT. N'UTILISEZ JAMAIS DE<br />
LAIT APRÈS LA DATE DE PÉREMPTION INDIQUÉE SUR L'EMBALLAGE.<br />
Assurez-vous que tous les réservoirs sont propres. A cet égard, conformez-vous aux consignes de la section<br />
« Nettoyage et entretien » (consultez la page 39).<br />
APRÈS LA DISTRIBUTION DE BOISSONS À BASE DE LAIT, LE RÉCIPIENT DU LAIT ET LES<br />
CIRCUITS DE L'APPAREIL DOIVENT ÊTRE LAVÉS.<br />
Pour la distribution de 2 tasses, l'appareil prépare la première moitié de la quantité de café programmée et<br />
interrompt pendant un bref moment la distribution de café afin de moudre la seconde moitié. La distribution<br />
du café se poursuit ensuite et se termine sans autre interruption. Si la boisson sélectionnée contient du lait,<br />
la machine distribue automatiquement le lait. Si la distribution de la première tasse de café est interrompue,<br />
la seconde tasse ne sera pas distribuée.<br />
CAFÉ EXPRESSO / CAFÉ / CAFÉ ALLONGÉ<br />
Cette procédure montre comment distribuer un café expresso. Pour la distribution d'un autre type de café,<br />
appuyez sur l'icône correspondante. N'utilisez que de petites tasses ou de tasses appropriées pour éviter<br />
tout déversement de café.<br />
1 2 3<br />
<br />
menu avec<br />
textes<br />
DISTRIBUTION DES BOISSONS<br />
mon<br />
café<br />
menu programmation<br />
Choisissez le produit souhaité et<br />
appuyez sur l'icône<br />
correspondante de l'écran ;<br />
appuyez une fois pour obtenir une<br />
tasse, deux fois pour 2 tasses.<br />
La machine commence à moudre<br />
la quantité de café programmée.<br />
arrêter<br />
distribution<br />
café<br />
expresso<br />
La distribution de la boisson<br />
sélectionnée commence.<br />
La machine arrête automatiquement la distribution du café en fonction des quantités préréglées lors de la<br />
fabrication en usine. Il est possible de programmer la quantité à distribuer, consultez la page 15.<br />
Si vous souhaitez interrompre le cycle de distribution, appuyez sur la touche «arrêter distribution café».
DISTRIBUTION BOISSON AVEC CAFÉ MOULU<br />
Le café prémoulu doit être versé dans le compartiment prévu à cet effet, situé à côté du réservoir à café en<br />
grain. Vous ne devez verser que du café moulu pour machines expresso ; ne versez jamais de café en grains<br />
ni de café soluble (consultez la section « Programmation des boissons », page 15)<br />
ATTENTION : NE VERSEZ DU CAFÉ PRÉMOULU DANS LE COMPARTIMENT QUE SI VOUS DÉSIREZ<br />
PRÉPARER UNE BOISSON AVEC CE TYPE DE CAFÉ.<br />
N'INTRODUISEZ QU'UNE SEULE MESURE DE CAFÉ MOULU À LA FOIS. IL N'EST PAS POSSIBLE<br />
DE DISTRIBUER DEUX CAFÉS À LA FOIS.<br />
Dans l'exemple ci-dessous, on a choisi de distribuer le café allongé en utilisant du café prémoulu.Le choix<br />
personnel d'utiliser du café prémoulu est indiqué sur l'affi cheur par l'astérisque situé sur la boisson<br />
présélectionnée.<br />
1 2<br />
ajouter café<br />
pré-moulu<br />
démarrer!<br />
3<br />
<br />
menu avec<br />
textes<br />
En appuyant sur la touche<br />
correspondante, l'affi cheur<br />
indique :<br />
4<br />
ajouter café<br />
pré-moulu<br />
démarrer!<br />
5<br />
retourner<br />
en arrière<br />
mon<br />
café<br />
menu programmation<br />
Appuyez sur la touche démarrer!<br />
pour commencer la distribution.<br />
retourner<br />
en arrière<br />
La page-écran rappelle à<br />
l'utilisateur de verser le café<br />
moulu dans le compartiment<br />
prévu à cet effet.<br />
arrêter<br />
distribution<br />
café<br />
café<br />
long<br />
La distribution de la boisson<br />
sélectionnée commence.<br />
11<br />
Versez le café moulu dans le<br />
compartiment prévu à cet effet à<br />
l'aide de la mesure fournie.<br />
Remarque :<br />
• Si la distribution n'est pas démarrée dans une minute après l'affi chage de la page-écran (2), la machine<br />
revient au menu principal et décharge l'éventuel café introduit dans le bac d'égouttement ;<br />
• Si le café prémoulu n'est pas versé dans son compartiment, la machine ne distribuera que de l'eau ;<br />
• Si 2 ou plusieurs mesures de café sont versées dans le compartiment, la machine ne distribue pas de<br />
boisson et le café versé sera déchargé dans le bac d'égouttement.
12<br />
1<br />
<br />
menu avec<br />
textes<br />
Appuyez une fois sur l'icône<br />
correspondant à l'eau chaude.<br />
1<br />
DISTRIBUTION DES BOISSONS<br />
DISTRIBUTION D'EAU CHAUDE<br />
AU DÉBUT DE LA DISTRIBUTION, DES ÉCLABOUSSURES D'EAU CHAUDE PEUVENT S'ÉCHAPPER<br />
DE L'APPAREIL : RISQUE DE BRÛLURES. LA BUSE D'EAU CHAUDE PEUT ATTEINDRE DES<br />
TEMPÉRATURES ÉLEVÉES : ÉVITER TOUT CONTACT DIRECT AVEC VOS MAINS.<br />
Choisissez un produit et appuyez<br />
sur l'icône correspondante de<br />
l'écran ; appuyez une fois pour<br />
obtenir une tasse, deux fois pour<br />
2 tasses<br />
4 lait<br />
noisette<br />
5<br />
Une fois la distribution du lait<br />
terminée, la machine prépare<br />
automatiquement le café.<br />
2<br />
La distribution de l'eau chaude<br />
commence.<br />
2 3<br />
La machine commence à moudre<br />
la quantité de café programmée.<br />
lait<br />
noisette<br />
Si souhaité, la machine peut<br />
distribuer une dose supplémentaire<br />
de lait. Cette option reste active<br />
pendant environ 2 secondes. Vous<br />
pouvez l'activer en appuyant sur la<br />
touche « ajouter lait ».<br />
Répétez la procédure pour la<br />
distribution d'une tasse<br />
d'eau chaude<br />
supplémentaire.<br />
LAIT NOISETTE<br />
POUR UNE DISTRIBUTION OPTIMALE DU LAIT, SE REPORTER AUX INSTRUCTIONS INDIQUÉES<br />
À LA PAGE 40<br />
Remplissez le réservoir à lait<br />
<br />
menu avec<br />
textes<br />
arrêter<br />
distribution<br />
café<br />
mon<br />
café<br />
mon<br />
café<br />
menu programmation<br />
menu programmation<br />
arrêter<br />
distribution<br />
lait<br />
arrêter<br />
distribution<br />
eau<br />
eau<br />
chaude<br />
ajouter<br />
lait<br />
arrêter<br />
distribution<br />
café<br />
6<br />
lait<br />
noisette<br />
Dès que le processus de mouture<br />
est terminé, la machine distribue<br />
automatiquement la quantité<br />
programmée de lait chaud.<br />
<br />
menu avec<br />
textes<br />
rinçage<br />
lait<br />
mon<br />
café<br />
arrêter<br />
distribution<br />
lait<br />
menu programmation<br />
L'appareil propose de nettoyer les<br />
circuits lait. La touche clignote.<br />
Appuyez sur « rinçage lait » pour<br />
effectuer le nettoyage des circuits<br />
internes.
Si vous ignorez l'avertissement de nettoyage et que vous désirez<br />
préparer d'autres boissons, le message de rinçage des circuits lait<br />
continue à s'affi cher.<br />
Si vous n'entreprenez rien dans les 20 minutes qui suivent, vous<br />
serez alors obligés d'effectuer un cycle de rinçage comme décrit<br />
au point 7. Si vous éteignez la machine après la distribution d'une<br />
boisson à base de lait, lors d'une nouvelle remise en marche vous<br />
serez obligé d'effectuer le cycle de rinçage des circuits lait.<br />
Remarque : avant d'activer cette fonction, assurez-vous que:<br />
1. un récipient de taille suffi sante se trouve sous la buse du<br />
distributeur ;<br />
2. le récipient du lait équipé de cappuccinatore contient de l’eau<br />
fraîche potable et qu’il est inséré à l’intérieur de la machine ;<br />
3. le réservoir à eau contient une quantité d'eau suffi sante.<br />
7<br />
cycle rinçage circuits lait<br />
<br />
démarrage<br />
rinçage<br />
Enlever le récipient du lait de la<br />
machine. S’il contient encore du lait,<br />
remettre ce dernier au réfrigérateur<br />
en utilisant le récipient<br />
supplémentaire fourni en dotation<br />
pour pouvoir l’utiliser ensuite. Rincer<br />
et remplir le récipient équipé de<br />
cappuccinatore avec de l’eau fraîche.<br />
Le mettre dans la machine et appuyer<br />
sur « démarrage rinçage ».<br />
DISTRIBUTION DE LAIT CHAUD<br />
Remplissez le réservoir à lait<br />
1<br />
<br />
menu avec<br />
textes<br />
mon<br />
café<br />
menu programmation<br />
Appuyez une fois sur l'icône<br />
correspondant au lait chaud.<br />
8<br />
2<br />
rinçage circuits lait<br />
attendre svp<br />
rinçage...<br />
Pendant cette phase, vous ne<br />
pouvez pas intervenir et devez<br />
attendre la fi n du processus. La<br />
machine revient ensuite au menu<br />
principal.<br />
CETTE PROCÉDURE EST NÉCESSAIRE POUR TOUTES<br />
LES BOISSONS À BASE DE LAIT !<br />
lait<br />
chaud<br />
arrêter<br />
distribution<br />
lait<br />
La distribution du lait chaud<br />
commence.<br />
<br />
menu avec<br />
textes<br />
rinçage<br />
lait<br />
9<br />
mon<br />
café<br />
menu programmation<br />
13<br />
Le message « rinçage lait » s’affi che 14<br />
jours après la première distribution d’une<br />
boisson à base de lait. Il est conseillé de<br />
rincer les circuits du lait comme décrit à la<br />
page 28. Lorsque 7 jours supplémentaires<br />
se sont écoulés, la machine bloque la<br />
distribution des boissons à base de lait et il<br />
faut effectuer obligatoirement le lavage des<br />
circuits du lait. Pendant cette phase, il est<br />
toutefois possible de distribuer du café et de<br />
l’eau chaude.<br />
Retirez le récipient, rincez-le<br />
et séchez-le.<br />
Pour une distribution supplémentaire<br />
de lait, répétez la procédure.<br />
Lorsque le symbole « rinçage lait »<br />
clignote, effectuez le nettoyage des<br />
circuits lait comme décrit dans la<br />
section consacrée au lait noisette<br />
(consultez la page 12, icône 6 et<br />
suivantes).
14<br />
1<br />
<br />
menu avec<br />
textes<br />
4 expresso<br />
crème<br />
5<br />
1<br />
DISTRIBUTION DES BOISSONS<br />
CAFÉ EXPRESSO CRÈME<br />
Appuyez une fois sur l'icône pour<br />
obtenir une tasse et deux fois<br />
pour obtenir 2 tasses.<br />
arrêter<br />
distribution<br />
café<br />
Une fois la distribution du café<br />
terminée, la machine prépare<br />
automatiquement le lait chaud.<br />
<br />
menu avec<br />
textes<br />
CAPPUCCINO<br />
Appuyez une fois sur l'icône pour<br />
obtenir une tasse et deux fois<br />
pour obtenir 2 tasses.<br />
4 5<br />
cappuccino<br />
arrêter<br />
distribution<br />
café<br />
mon<br />
café<br />
mon<br />
café<br />
menu programmation<br />
arrêter<br />
distribution<br />
lait<br />
menu programmation<br />
arrêter<br />
distribution<br />
lait<br />
Une fois la distribution du lait<br />
terminée, la machine prépare<br />
automatiquement le café.<br />
2 3<br />
La machine commence à moudre la<br />
quantité de café programmée<br />
expresso<br />
crème<br />
Appuyez sur « ajouter lait » pour la<br />
distribution d'une quantité de lait<br />
supplémentaire, si souhaitée.<br />
2 3<br />
La machine commence à moudre<br />
la quantité de café programmée.<br />
cappuccino<br />
ajouter<br />
lait<br />
ajouter<br />
lait<br />
arrêter<br />
distribution<br />
café<br />
La machine permet ensuite, au besoin, de distribuer une<br />
quantité supplémentaire de lait. Appuyer sur la touche<br />
«ajouter du lait » dans les 2 minutes qui suivent.<br />
Remplissez le réservoir à lait<br />
expresso<br />
crème<br />
La distribution du café expresso<br />
crème commence.<br />
Lorsque le symbole «rinçage<br />
lait » clignote, effectuez le<br />
nettoyage des circuits lait<br />
comme décrit dans la section<br />
consacrée au lait noisette<br />
(consultez la page 12, icône<br />
6 et suivantes).<br />
arrêter<br />
distribution<br />
café<br />
Remplissez le réservoir à lait<br />
cappuccino<br />
arrêter<br />
distribution<br />
lait<br />
arrêter<br />
distribution<br />
lait<br />
Une fois la mouture terminée, la<br />
machine distribue la quantité de<br />
lait chaud programmée.<br />
Lorsque le symbole «rinçage<br />
lait» clignote, effectuez le<br />
nettoyage des circuits lait<br />
comme décrit dans la section<br />
consacrée au lait noisette<br />
(consultez la page 12, icône<br />
6 et suivantes).
1<br />
<br />
menu avec<br />
textes<br />
MENU DE PROGRAMMATION DES BOISSONS<br />
Gardez la touche de la boisson<br />
souhaitée appuyée pendant deux<br />
secondes<br />
PROGRAMMATION DES BOISSONS<br />
Chaque boisson peut être programmée selon vos goûts personnels. La fonction de programmation d'une<br />
boisson est indiquée sur l'afficheur par un astérisque.<br />
Quand une boisson a été programmée, seul ce type de boisson peut être<br />
distribué. Pour modifier la quantité de lait ou de café, vous devez procéder à une<br />
nouvelle programmation ou annuler celle qui est en cours.<br />
Programmation de la boisson souhaitée :<br />
<br />
menu avec<br />
textes<br />
ou<br />
Appuyez sur la touche « mon café » et<br />
ensuite sur la touche correspondant à la<br />
boisson souhaitée dans deux secondes.<br />
PROGRAMMATION CAFÉ EXPRESSO / CAFÉ / CAFÉ ALLONGÉ<br />
mon<br />
café<br />
mon<br />
café<br />
menu programmation<br />
Accéder au menu de la boisson à<br />
programmer ; garder la touche<br />
appuyée pendant deux secondes.<br />
<br />
menu avec<br />
textes<br />
menu programmation<br />
mon<br />
café<br />
sélectionner la<br />
quantité de café à<br />
moudre (arôme)<br />
revenir à la<br />
fenêtre<br />
précédente<br />
Au cours de cette phase, vous pouvez :<br />
2<br />
menu programmation<br />
<br />
menu avec<br />
textes<br />
léger<br />
moyen<br />
forte<br />
retourner<br />
en arrière<br />
rétablir les réglages mis au<br />
point en usine<br />
mon<br />
café<br />
menu programmation<br />
mon<br />
expresso<br />
démarrer!<br />
rétablir<br />
réglages<br />
enregistrer<br />
présélections<br />
pré-moulu<br />
Si vous sélectionnez une quantité de café<br />
différente, l'arôme de la boisson change.<br />
15<br />
choisir si vous<br />
désirez utiliser<br />
le café<br />
prémoulu<br />
sauvegarder vos réglages
16<br />
1<br />
PROGRAMMATION DES BOISSONS<br />
3 léger<br />
mon<br />
Si vous appuyez sur la<br />
4<br />
moyen<br />
expresso<br />
démarrer!<br />
touche démarrer!,<br />
vous devez obligatoirement<br />
terminer le cycle de<br />
forte<br />
pré-moulu distribution.<br />
retourner<br />
en arrière<br />
En appuyant sur la touche<br />
démarrer!, la machine se prépare<br />
à distribuer le café.<br />
réglage<br />
personnel<br />
café<br />
arrêter<br />
distribution<br />
café<br />
mon<br />
expresso<br />
5<br />
Si vous désirez distribuer une<br />
quantité de café supérieure à celle<br />
qui a été prévue par le fabricant,<br />
appuyez sur la touche « réglage<br />
personnel café » avant la fin du<br />
processus de distribution en cours.<br />
Lorsque la quantité souhaitée est<br />
atteinte, appuyez sur la touche<br />
«arrêter distribution café »<br />
6 7<br />
retourner<br />
en arrière<br />
mon<br />
expresso<br />
enregistrer<br />
présélections<br />
Une fois la distribution terminée,<br />
appuyer sur « enregistrer présélections<br />
» dans les cinq secondes<br />
qui suivent.<br />
<br />
menu avec<br />
textes<br />
rétablir<br />
réglages<br />
enregistrer<br />
présélections<br />
Si vous n'appuyez pas sur la<br />
touche « enregistrer présélections<br />
», l'appareil<br />
revient au menu principal et<br />
les réglages individuels ne<br />
seront pas mémorisés.<br />
PROGRAMMATION DES BOISSONS À BASE DE LAIT<br />
mon<br />
café<br />
menu programmation<br />
Accéder au menu de la boisson à<br />
programmer ; garder la touche<br />
appuyée pendant deux secondes.<br />
sélectionner la<br />
quantité de<br />
café à moudre<br />
(arôme)<br />
revenir à la<br />
fenêtre<br />
précédente<br />
L'appareil procède automatiquement à la<br />
distribution du café conformément aux<br />
réglages standard.<br />
La distribution ne peut être<br />
interrompue qu'en appuyant<br />
sur la touche « arrêter<br />
distribution café ». Si cette<br />
touche n'est pas appuyée, le<br />
café peut déborder de la<br />
tasse.<br />
mon<br />
expresso<br />
mémorisé!<br />
L'afficheur vous confirme<br />
l'enregistrement de votre<br />
programmation. L'appareil revient<br />
automatiquement au menu principal.<br />
Au cours de cette phase, vous pouvez :<br />
2<br />
léger mon lait<br />
choisir si vous<br />
noisette<br />
désirez utiliser<br />
moyen démarrer! le café<br />
prémoulu pour<br />
forte<br />
pré-moulu la préparation à<br />
effectuer<br />
retourner<br />
en arrière<br />
rétablir<br />
réglages<br />
rétablir les réglages mis au<br />
point en usine<br />
réglage<br />
personnel<br />
café<br />
arrêter<br />
distribution<br />
café<br />
enregistrer<br />
présélections<br />
mon<br />
expresso<br />
Remplissez le réservoir à lait<br />
sauvegarder vos réglages
3<br />
léger<br />
moyen<br />
forte<br />
retourner<br />
en arrière<br />
En appuyant sur la touche démarrer!, la<br />
machine se prépare à distribuer la<br />
boisson programmée.<br />
5<br />
réglage<br />
personnel<br />
café<br />
arrêter<br />
distribution<br />
café<br />
mon lait<br />
noisette<br />
La distribution ne peut être<br />
interrompue qu'en<br />
appuyant sur la touche<br />
«arrêter distribution lait ».<br />
Si cette touche n'est pas<br />
appuyée, le lait peut<br />
déborder de la tasse<br />
Si vous désirez distribuer une quantité de lait supérieure à celle qui a été<br />
prévue par le fabricant, appuyez sur la touche « réglage personnel lait »<br />
avant la fin du processus de distribution en cours. Lorsque la quantité<br />
souhaitée est atteinte, appuyez sur la touche « arrêter distribution lait »<br />
réglage<br />
personnel<br />
café<br />
arrêter<br />
distribution<br />
café<br />
mon lait<br />
noisette<br />
démarrer!<br />
rétablir<br />
réglages<br />
enregistrer<br />
présélections<br />
mon lait<br />
noisette<br />
pré-moulu<br />
réglage<br />
personnel<br />
lait<br />
arrêter<br />
distribution<br />
lait<br />
La distribution ne peut être<br />
interrompue qu'en appuyant<br />
sur la touche « arrêter<br />
distribution café ». Si cette<br />
touche n'est pas appuyée, le<br />
café peut déborder de la<br />
tasse.<br />
Si vous désirez distribuer une quantité de café supérieure à celle qui<br />
a été prévue par le fabricant, appuyez sur la touche « réglage<br />
personnel café » avant la fin du processus de distribution en cours.<br />
Lorsque la quantité souhaitée est atteinte, appuyez sur la touche<br />
«arrêter distribution café »<br />
Si vous n'appuyez pas sur la<br />
touche « enregistrer présélections<br />
», l'appareil<br />
revient au menu principal et<br />
les réglages individuels ne<br />
seront pas mémorisés.<br />
7<br />
réglage<br />
personnel<br />
lait<br />
arrêter<br />
distribution<br />
lait<br />
Si vous appuyez sur la<br />
touche démarrer!,<br />
vous devez obligatoirement<br />
terminer le cycle de<br />
distribution.<br />
9<br />
mon lait<br />
noisette<br />
mémorisé!<br />
4<br />
réglage<br />
personnel<br />
café<br />
arrêter<br />
distribution<br />
café<br />
L'afficheur vous confirme l'enregistrement de<br />
votre programmation. L'appareil revient<br />
automatiquement au menu principal.<br />
8<br />
mon lait<br />
noisette<br />
17<br />
L'appareil procède automatiquement à<br />
la distribution du lait conformément<br />
aux réglages standard.<br />
6<br />
réglage<br />
personnel<br />
café<br />
arrêter<br />
distribution<br />
café<br />
mon lait<br />
noisette<br />
L'appareil procède<br />
automatiquement à la distribution<br />
du café conformément aux<br />
réglages standard.<br />
retourner<br />
en arrière<br />
mon lait<br />
noisette<br />
enregistrer<br />
présélections<br />
réglage<br />
personnel<br />
lait<br />
arrêter<br />
distribution<br />
lait<br />
réglage<br />
personnel<br />
lait<br />
arrêter<br />
distribution<br />
lait<br />
Une fois la distribution terminée,<br />
appuyer sur « enregistrer présélections<br />
» dans les cinq secondes qui<br />
suivent.
18 PROGRAMMATION DE LA MACHINE<br />
Vous pouvez programmer certaines<br />
fonctions de la machine afin que<br />
celles-ci soient adaptées à vos<br />
besoins.<br />
Programmation des fonctions de<br />
la machine (consultez la page 18)<br />
Fonctions spéciales<br />
(consultez la page 38)<br />
Entretien (nettoyage de la machine)<br />
(consultez la page 27)<br />
RÉGLAGES DE LA MACHINE<br />
Lorsque vous sélectionnez le menu « réglages machine », la page-écran suivante s'affiche, à partir de laquelle vous<br />
pouvez :<br />
régler la langue des menus<br />
régler la luminosité des couleurs<br />
de l'afficheur<br />
régler/activer les indicateurs<br />
sonores<br />
<br />
menu avec<br />
textes<br />
Appuyez sur la touche « menu de programmation ».<br />
L'écran affiche le menu de programmation :<br />
réglages<br />
machine<br />
spécialités<br />
entretien<br />
économie<br />
d'énergie<br />
Mise de l'appareil en mode standby<br />
Après avoir réglé chacun de ces menus, appuyez sur :<br />
- « retourner en arrière » pour revenir à la page-écran précédente<br />
- « rétablir valeurs standard » pour rétablir les valeurs de base<br />
- « enregistrer pré-sélections » pour sauvegarder les réglages<br />
- « retourner au menu » pour revenir au menu principal<br />
régler le fonctionnement de l'éclairage des tasses<br />
langue<br />
<br />
sons et<br />
alarmes<br />
retourner<br />
en arrière<br />
mon<br />
café<br />
menu<br />
principale<br />
réglages<br />
machine<br />
rétablir<br />
valeurs<br />
standard<br />
illumination<br />
tasse<br />
chauffe-tasses<br />
menu programmation<br />
présélections<br />
boissons<br />
fonctions<br />
supplémentaires<br />
réglages<br />
horloge<br />
menu<br />
préparation<br />
café<br />
Quitter<br />
<br />
eau<br />
dureté d'<br />
eau<br />
rinçage<br />
retourner<br />
au menu<br />
régler le fonctionnement de la plaque chauffe- tasses<br />
Programmation approfondie des<br />
produits (consultez la page 22)<br />
Fonctions supplémentaires<br />
(consultez la page 24)<br />
- Date et heure actuelles<br />
- Minuterie (standby)<br />
- Heures de marche et d'arrêt<br />
au sein d'une journée<br />
(consultez la page 34)<br />
régler le fonctionnement de l'appareil<br />
via le filtre « Aqua Prima »<br />
régler le degré de dureté de l'eau<br />
régler le rinçage des circuits de<br />
l'appareil
MENU « LANGUE »<br />
Ce menu permet de modifier la langue de l'afficheur. Cette fonction a été décrite au<br />
début du mode d'emploi. La<br />
langue<br />
MENU « ILLUMINATION TASSE »<br />
Cette fonction permet d’activer/désactiver l’éclairage de la zone de distribution.<br />
illumination<br />
tasse<br />
MENU « FILTRE AQUA PRIMA »<br />
Le filtre « Aqua prima » épure l'eau et permet de goûter tout l'arôme du café.<br />
<br />
eau<br />
éteindre<br />
l'éclairage.<br />
régler la machine de façon<br />
qu'elle fonctionne sans le<br />
filtre « Aqua prima ».<br />
deutsch<br />
français<br />
italiano (ch)<br />
retourner<br />
en arrière<br />
langue<br />
1/2<br />
Dans ce menu, vous pouvez :<br />
illumination<br />
tasse<br />
Italiano (i)<br />
english<br />
nederlands<br />
désactivé activé<br />
retourner<br />
en arrière<br />
Dans ce menu, vous pouvez :<br />
pas<br />
inséré<br />
retourner<br />
en arrière<br />
rétablir<br />
valeurs<br />
standard<br />
rétablir<br />
valeurs<br />
standard<br />
<br />
eau<br />
retourner<br />
au menu<br />
Appuyer pour afficher la page suivante<br />
enregistrer<br />
présélections<br />
enregistrer<br />
présélections<br />
retourner<br />
au menu<br />
activation<br />
<br />
19<br />
sélection de la langue est<br />
fondamentale pour régler<br />
correctement les paramètres de<br />
la machine selon le pays<br />
d'utilisation.<br />
Cette fonction permet<br />
d'activer ou de désactiver<br />
l'éclairage de petites tasses.<br />
allumer<br />
l'éclairage.<br />
activer le filtre (lavage) (voir<br />
page 7). Une fois l’activation<br />
terminée, l’option « inséré » est<br />
activée.<br />
régler la machine de façon<br />
qu'elle fonctionne avec le filtre<br />
« Aqua prima ».<br />
Remarque :<br />
• Appuyez sur « activation filtre » chaque fois qu'un nouveau filtre « Aqua Prima » est installé ;<br />
• Appuyez sur « pas inséré » lorsque le filtre « Aqua Prima » n'est pas utilisé ;<br />
• Appuyez sur « inséré » lorsque le filtre « Aqua Prima » est utilisé. Cette fonction est activée même après<br />
que la touche « activation filtre » a été appuyée.<br />
inséré<br />
retourner<br />
au menu
20<br />
PROGRAMMATION DE LA MACHINE<br />
MENU « DURETÉ DE L'EAU »<br />
Ce menu permet de régler le degré de dureté de l'eau sur une échelle de 1 à 4. L'appareil est préréglé sur le degré de<br />
dureté 3.<br />
1 2<br />
Plongez dans l'eau la bande de test fournie<br />
avec le kit pendant une seconde, afi n de<br />
vérifi er la dureté de votre eau.<br />
Appuyez sur la touche « dureté eau ».<br />
dureté d'<br />
eau<br />
MENU « RINÇAGE »<br />
Ce menu permet le nettoyage des conduites internes pour la distribution du café, afi n de garantir que la distribution<br />
des boissons est effectuée uniquement avec de l’eau fraîche.<br />
rinçage<br />
retourner<br />
en arrière<br />
Déterminez la valeur.<br />
dureté d'<br />
eau<br />
Dans ce menu, vous pouvez :<br />
rinçage<br />
La bande ne peut être utilisée que<br />
pour une seule mesure.<br />
Réglez le degré de dureté de<br />
l'eau sur la machine à l'aide des<br />
touches + ou –<br />
désactiver le rinçage désactivé<br />
activé activer le rinçage<br />
retourner<br />
en arrière<br />
rétablir<br />
valeurs<br />
standard<br />
rétablir<br />
valeurs<br />
standard<br />
1 2 3 4<br />
enregistrer<br />
présélections<br />
enregistrer<br />
présélections<br />
retourner<br />
au menu<br />
retourner<br />
au menu<br />
Remarque : le rinçage est<br />
effectué à chaque mise en<br />
marche de la machine<br />
lorsque celle-ci s'est<br />
refroidie.
MENU « PLAQUE CHAUFFE-TASSES »<br />
Ce menu permet d'activer la plaque chauffe-tasses située au-dessus de l'appareil.<br />
chauffe-tasses<br />
garder la plaque chauffetasses<br />
éteinte lorsque la<br />
machine est en mode standby<br />
éteint<br />
quand en<br />
stand-by<br />
MENU « TONS ET ALARMES SONORES »<br />
Dans ce menu, vous pouvez :<br />
chauffetasses<br />
toujours<br />
allumé<br />
désactivé<br />
21<br />
garder la plaque chauffe-tasses<br />
toujours allumée.<br />
garder la plaque chauffe-tasses<br />
toujours éteinte.<br />
Ce menu permet d'activer ou de désactiver les indicateurs sonores de l'appareil. Vous pouvez en modifier l'état en<br />
appuyant sur la touche correspondante.<br />
sons et<br />
alarmes<br />
activer ou désactiver un signal<br />
sonore de machine prête<br />
activer ou désactiver un signal<br />
sonore qui se fait entendre à<br />
chaque pression de touche<br />
MENU « AFFICHEUR »<br />
Ce menu permet de régler la luminosité correcte de l'afficheur. Appuyez sur la touche « afficheur ».<br />
<br />
retourner<br />
en arrière<br />
retourner<br />
en arrière<br />
rétablir<br />
valeurs<br />
standard<br />
<br />
enregistrer<br />
présélections<br />
Dans ce menu, vous pouvez :<br />
son machine<br />
prête<br />
désactivé<br />
touches<br />
sonore<br />
activé<br />
retourner<br />
en arrière<br />
rétablir<br />
valeurs<br />
standard<br />
rétablir<br />
valeurs<br />
standard<br />
sons et<br />
alarmes<br />
enregistrer<br />
présélections<br />
enregistrer<br />
présélections<br />
retourner<br />
au menu<br />
avis qualité<br />
lait<br />
désactivé<br />
avis rinçage<br />
lait<br />
désactivé<br />
retourner<br />
au menu<br />
retourner<br />
au menu<br />
activer ou désactiver un signal<br />
sonore vous signalant d'effectuer<br />
le lavage des circuits lait<br />
activer/désactiver un signal sonore<br />
qui rappelle à l’utilisateur de rincer<br />
les circuits pour la préparation du<br />
lait (la préparation de la boisson<br />
terminée, le signal se déclenche<br />
au bout d’une minute).<br />
Remarque : les signaux sonores sont d'habitude divisés de la façon suivante :<br />
• Signal long et continu pour signaler une défaillance de la machine ;<br />
• Signal bref pour signaler qu'une touche a été appuyée et que la machine est prête à être utilisée ;<br />
• Signal intermittent pour signaler qu'il est nécessaire effectuer un nettoyage.<br />
Réglez la luminosité en<br />
appuyant sur + ou –
22 PROGRAMMATION DE LA MACHINE<br />
RÉGLAGES BOISSONS<br />
Ce menu permet de régler les paramètres généraux de distribution des différentes boissons à base<br />
de café. Appuyez sur la touche « présélections boissons » dans le menu principal.<br />
la pré-infusion du<br />
café<br />
En sélectionnant chaque boisson, vous pouvez régler :<br />
la température de<br />
distribution du café<br />
la quantité de café à moudre et<br />
l'utilisation du café prémoulu<br />
L'état actuel de la programmation est indiqué à la hauteur de chaque paramètre.<br />
RÉGLAGE DE LA TEMPÉRATURE POUR LA DISTRIBUTION DU CAFÉ<br />
Ce menu permet de régler la température de distribution du café. Appuyez sur la touche « température » et<br />
sélectionnez la température souhaitée.<br />
témperature<br />
moyenne<br />
Température basse<br />
Température moyenne<br />
Température élevée<br />
expresso<br />
cafè<br />
café<br />
long<br />
retourner<br />
en arrière<br />
préinfusion<br />
normale<br />
retourner<br />
en arrière<br />
basse<br />
moyenne<br />
haute<br />
retourner<br />
en arrière<br />
présélections<br />
boissons<br />
présélections<br />
cafè<br />
rétablir<br />
valeurs<br />
standard<br />
témperature<br />
café<br />
rétablir<br />
valeurs<br />
standard<br />
enregistrer<br />
présélections<br />
expresso<br />
créme<br />
lait<br />
noisette<br />
cappuccino<br />
retourner<br />
au menu<br />
témperature<br />
moyenne<br />
force<br />
moyenne<br />
retourner<br />
au menu<br />
retourner<br />
au menu
RÉGLAGE « ARÔME » POUR LA DISTRIBUTION DU CAFÉ<br />
Ce menu permet de régler l'« Arôme », soit la quantité de café à moudre, ainsi que l'utilisation de café prémoulu.<br />
Vous pouvez goûter votre boisson avec la quantité de café souhaitée ou bien vous pouvez la préparer avec du<br />
café décaféiné en utilisant la fonction « pré-moulu ».<br />
force<br />
moyenne<br />
léger<br />
moyen<br />
fort<br />
RÉGLAGE « PRÉ-INFUSION » (UNIQUEMENT BOISSONS À BASE DE CAFÉ)<br />
Ce menu permet de régler la fonction de pré-infusion : le café est légèrement humidifié avant l'infusion, ce qui<br />
permet au café de développer l'ensemble de son arôme, lui conférant ainsi un goût incomparable.<br />
préinfusion<br />
normale<br />
pré-infusion normale<br />
pré-infusion forte (plus longue)<br />
pré-infusion désactivée<br />
légère<br />
moyenne<br />
forte<br />
retourner<br />
en arrière<br />
normale<br />
longue<br />
désactivé<br />
retourner<br />
en arrière<br />
force<br />
du café<br />
moulu<br />
rétablir<br />
valeurs<br />
standard<br />
préinfusion<br />
café<br />
rétablir<br />
valeurs<br />
standard<br />
enregistrer<br />
présélections<br />
enregistrer<br />
présélections<br />
pré-moulu<br />
retourner<br />
au menu<br />
retourner<br />
au menu<br />
23
24<br />
PROGRAMMATION DE LA MACHINE<br />
FONCTIONS SUPPLÉMENTAIRES<br />
La machine présente des fonctions supplémentaires. Pour accéder à ce menu, appuyez sur la touche « fonctions<br />
supplémentaires ». L'afficheur montre la page-écran suivante :<br />
accéder au menu contenant<br />
certaines des recettes les plus<br />
célèbres au monde.<br />
afficher les quantités distribuées<br />
pour chaque type de boisson.<br />
FONCTION « CAFÉ DU MONDE »<br />
Cette fonction vous permet de préparer le café selon les recettes les plus célèbres au monde.<br />
cafè<br />
du<br />
monde<br />
préparer un véritable café<br />
serré italien<br />
préparer un typique café<br />
expresso italien<br />
Dans ce menu, vous pouvez :<br />
cafè<br />
du<br />
monde<br />
compteurs<br />
produit<br />
retourner<br />
en arrière<br />
préparer un typique café américain<br />
ristretto<br />
espresso<br />
italiano<br />
fonctions<br />
supplémentaires<br />
Dans ce menu, vous pouvez :<br />
retourner<br />
en arrière<br />
rétablir<br />
valeurs<br />
standard<br />
american<br />
coffee<br />
enregistrer<br />
présélections<br />
cafè<br />
du<br />
monde<br />
goodmorning<br />
coffee<br />
préparer un café pour une<br />
journée pleine d'énergie<br />
démo<br />
retourner<br />
au menu<br />
café<br />
café<br />
creme<br />
goodnight<br />
milk<br />
retourner<br />
au menu<br />
activer la fonction « démo » pour<br />
afficher les fonctions principales<br />
de la machine<br />
préparer un typique café de<br />
l'Europe du Nord<br />
préparer un typique café<br />
français ou suisse<br />
préparer un lait noisette<br />
savoureux sans craindre de ne pas<br />
réussir à vous endormir
Si par exemple vous voulez savourer un typique café américain, appuyez sur la touche « american coffee ». En ce cas,<br />
l'afficheur montrera la page-écran suivante :<br />
Cette page-écran<br />
reste active pendant<br />
environ 5 secondes ;<br />
ensuite, on revient à<br />
la page-écran<br />
principale.<br />
retourner<br />
en arrière<br />
Une fois la boisson souhaitée distribuée, vous pouvez la mémoriser dans les touches du menu principal pour la<br />
distribuer lorsque vous désirez.<br />
revenez au menu de<br />
préparation des recettes<br />
american coffee<br />
démarrer!<br />
Si vous choisissez de sauvegarder la boisson qui vient d'être distribuée, l'afficheur montre la touche qui en permet<br />
l'accès rapide.<br />
american<br />
coffee<br />
ici sauvé sous l'icône<br />
sélect. icône pour la distribution<br />
american<br />
coffee<br />
voulez-vous sauvergarder<br />
cette boisson?<br />
non oui<br />
l'afficheur montre la position du bouton SBS<br />
ainsi que le type de tasse à utiliser de<br />
préférence.<br />
25<br />
Si les boissons faisant partie de la fonction « Café du<br />
monde » sont mémorisées, elles seront associées aux<br />
touches suivantes avec l'ajout d'un astérisque :<br />
• café serré :<br />
• café expresso italien :<br />
• café :<br />
• café crème :<br />
• café américain :<br />
• café bonjour :<br />
• lait bonne nuit :<br />
Chaque touche ne peut être associée qu'à une seule boisson.<br />
Pour rétablir les valeurs de base, utilisez le menu « Réglages boissons ».<br />
En appuyant sur la touche<br />
démarrer! la machine<br />
commence la distribution de la<br />
boisson présélectionnée.<br />
mémorisez la boisson<br />
café expresso (tasse petite)<br />
café expresso (tasse petite)<br />
café (tasse moyenne)<br />
café (tasse moyenne)<br />
café allongé (gobelet)<br />
café expresso (tasse petite)<br />
lait noisette
26<br />
FONCTION « DÉMO »<br />
PROGRAMMATION DE LA MACHINE<br />
Cette fonction permet d'afficher les potentialités de la machine.<br />
démo<br />
Le fonctionnement de la machine en<br />
mode « démo » est ainsi démarré. Les<br />
pages-écran qui seront ensuite<br />
affichées montreront les<br />
fonctionnalités de la machine.<br />
Pour quitter la fonction, appuyez sur<br />
un point quelconque de l'afficheur.<br />
FONCTION « COMPTEURS DES PRODUITS »<br />
Cette fonction permet d'afficher le nombre des produits qui ont été préparés pour chaque type de boisson.<br />
compteurs<br />
produit<br />
Remarque : lorsque cette fonction est activée, la machine est en mode standby et<br />
toutes ses fonctions sont désactivées. La fonction « démo » reste mémorisée même<br />
lorsqu'on éteint la machine à l'aide de l'interrupteur général. Quand la machine sera<br />
remise en marche, elle redémarrera à partir de la fonction « démo ».<br />
En appuyant sur la touche « démo », l'afficheur montre :<br />
retourner<br />
en arrière<br />
continuez à<br />
afficher<br />
compteurs produit<br />
lait chaud 0<br />
lait noisette 1<br />
cappuccino 0<br />
expresso crème 0<br />
eau chaude 0<br />
cafè long 15<br />
cafè 0<br />
expresso 0<br />
quitter mode démo?<br />
non oui<br />
retourner<br />
au menu<br />
quittez et activez les<br />
fonctions standard de la<br />
machine.
ENTRETIEN<br />
Ce menu permet d'effectuer le nettoyage et l'entretien de tous les circuits internes de l'appareil. Appuyez sur la<br />
touche « entretien » dans le menu principal.<br />
effectuer le nettoyage de<br />
l'affi cheur (cette fonction<br />
bloque l'écran tactile)<br />
démarrer le lavage des<br />
circuits lait<br />
démarrer le rinçage des<br />
circuits lait<br />
CYCLE DE RINÇAGE CIRCUITS LAIT<br />
Dans ce menu, vous pouvez :<br />
blocage<br />
<br />
cycle<br />
nettoyage<br />
circuits lait<br />
cycle<br />
rinçage<br />
circuits lait<br />
entretien<br />
cycle<br />
nettoyage<br />
circuits café<br />
détartrage<br />
27<br />
démarrer le cycle de lavage du<br />
groupe de distribution<br />
lancer le cycle de<br />
détartrage<br />
Ce menu vous permet d'effectuer le rinçage des circuits internes de l'appareil qui servent à la préparation des<br />
boissons à base de lait.<br />
Ce cycle bref doit être effectué obligatoirement après que 20 minutes se sont écoulées à partir de la distribution de la<br />
dernière boisson à base de lait.<br />
Si le rinçage n’est pas effectué, la machine se bloque et ne permet pas la distribution de boissons contenant du lait.<br />
Remarque : avant d'activer cette fonction, assurez-vous que :<br />
1. un récipient de taille suffi sante se trouve sous la buse du distributeur ;<br />
2. le récipient du lait ne contient plus de résidus de lait et qu'il a été correctement lavé et rempli d'eau potable fraîche ;<br />
3. le réservoir à eau contient une quantité d'eau suffi sante.<br />
Appuyez sur la touche « cycle rinçage circuits lait » et puis sur la touche « démarrage rinçage » pour démarrer le<br />
cycle de rinçage des circuits lait.<br />
cycle<br />
rinçage<br />
circuits lait<br />
démarrage<br />
rinçage<br />
retourner<br />
en arrière<br />
rinçage circuits lait<br />
attendez svp<br />
rinçage...<br />
Attendez que le cycle de rinçage soit<br />
terminé ; l'appareil revient au menu<br />
principal.<br />
retourner<br />
au menu<br />
Retirez le récipient, rincez-le<br />
et séchez-le.
28 PROGRAMMATION DE LA MACHINE<br />
CYCLE DE LAVAGE CIRCUITS LAIT<br />
Cette fonction permet de rincer les circuits internes de la machine qui servent à la préparation du lait.<br />
La machine propose d’effectuer ce cycle 14 jours après la distribution de la première boisson à base de lait.<br />
L’inscription clignotante « rinçage lait » s’affi che au bout de 14 jours (voir page 13) ; procéder au rinçage comme<br />
décrit dans le présent paragraphe.<br />
Appuyer sur la touche « rinçage lait » et se reporter aux instructions indiquées au point 2 ( aux pages 28-29) ; la<br />
machine se met au point 7.<br />
Il sera toutefois possible de distribuer toutes les boissons à base de lait pendant encore 7 jours. Maintenant, le cycle<br />
de lavage doit être nécessairement effectué puisque la distribution des produits à base de lait est invalidée. (La<br />
machine permet toutefois la distribution d’eau chaude et de café).<br />
Pour aider l’utilisateur à ne pas oublier cette opération importante, le message « rinçage lait -3 » est affi ché 3 jours<br />
avant l’échéance et ainsi de suite les jours suivants.<br />
Appuyer sur la touche « rinçage lait » et se reporter aux instructions indiquées au point 2 ( aux pages 28-29) ; la<br />
machine se met au point 7.<br />
Remarque : avant d'activer cette fonction, assurez-vous que :<br />
1. un récipient de taille suffi sante est à portée de la main ;<br />
2. le récipient du lait a été correctement lavé et qu'il ne contient plus de résidus de lait ;<br />
3. le réservoir à eau contient une quantité d'eau suffi sante.<br />
LE CYCLE DE LAVAGE NE PEUT PAS ÊTRE INTERROMPU. PENDANT CETTE OPÉRATION, LA PRÉSENCE<br />
D'UNE PERSONNE EST NÉCESSAIRE. N'UTILISEZ QUE LE DÉTERGENT FOURNI AVEC L’APPAREIL<br />
1<br />
blocage<br />
<br />
cycle<br />
nettoyage<br />
circuits lait<br />
cycle<br />
rinçage<br />
circuits lait<br />
retourner<br />
en arrière<br />
Sélectionnez la fonction en<br />
appuyant sur la touche.<br />
cycle<br />
nettoyage<br />
circuits café<br />
détartrage<br />
retourner<br />
au menu<br />
<br />
menu avec<br />
textes<br />
<br />
menu avec<br />
textes<br />
2<br />
rinçage<br />
lait<br />
rinçage<br />
lait<br />
-3<br />
mon<br />
café<br />
mon<br />
café<br />
menu programmation<br />
menu programmation<br />
Ouvrir le logement et enlever le<br />
réservoir à lait.<br />
3<br />
Verser le contenu du sachet<br />
de détergent dans le<br />
réservoir.
4<br />
Remplir le réservoir à lait<br />
d’eau fraîche jusqu’au niveau<br />
« max ».<br />
7 8<br />
cycle nettoyage circuits lait<br />
verser le détergents dans<br />
le récipient du lait<br />
retourner<br />
en arrière<br />
Fermer le logement.<br />
Appuyer sur la touche.<br />
10<br />
ok<br />
5 6<br />
Ouvrir le logement et y insérer<br />
le réservoir avec le détergent.<br />
cycle nettoyage circuits lait<br />
lavage...<br />
Le cycle de rinçage commence<br />
automatiquement.<br />
Attendre que le rinçage soit<br />
terminé.<br />
11 12<br />
cycle nettoyage circuits lait<br />
<br />
d'eau froide<br />
Retirer le réservoir à lait. Rincer le réservoir et le<br />
remplir avec de l’eau fraîche.<br />
Placer un récipient suffi samment<br />
grand sous la buse de<br />
distribution du lait Il est<br />
également possible d’utiliser le<br />
second réservoir à lait<br />
9<br />
cycle nettoyage circuits lait<br />
<br />
Lorsque le rinçage est terminé,<br />
l’écran affi che....<br />
La machine émet un bip.<br />
cycle nettoyage circuits lait<br />
démarrer rinçage<br />
démarrage<br />
Insérer le réservoir et appuyer<br />
sur la touche.<br />
29
30<br />
13 14<br />
16<br />
PROGRAMMATION DE LA MACHINE<br />
cycle nettoyage circuits lait cycle nettoyage circuits lait<br />
rinçage... <br />
Attendez.... Lorsque le rinçage est<br />
terminé, l'écran affi che....<br />
cycle nettoyage circuits lait<br />
<br />
d'eau froide<br />
Rincez le récipient et<br />
remplissez-le avec de l'eau<br />
fraîche.<br />
Effectuez un autre cycle de<br />
rinçage en suivant la procédure<br />
décrite auparavant.<br />
Une fois terminé, la machine<br />
revient automatiquement au<br />
menu principal<br />
15<br />
Retirez le récipient du lait
CYCLE DE NETTOYAGE CIRCUITS CAFÉ (CYCLE DE LAVAGE DU GROUPE DE DISTRIBUTION)<br />
Cette fonction permet d'effectuer le nettoyage des circuits internes de l'appareil qui servent à la distribution du<br />
café. Il est conseillé d’effectuer ce cycle de lavage après 500 distributions de boissons contenant du café ou bien<br />
une fois par mois. Il est possible d’acheter les emballages de détergent en pastilles <strong>Saeco</strong> chez votre revendeur<br />
habituel ou bien auprès des centres d’assistance agréés.<br />
Remarque : avant d'activer cette fonction, assurez-vous que :<br />
1. un récipient de taille suffi sante se trouve sous la buse du distributeur ;<br />
2. vous avez introduit la pastille spéciale de nettoyage dans le groupe de distribution ;<br />
3. le réservoir à eau contient une quantité d'eau suffi sante.<br />
LE CYCLE DE LAVAGE NE PEUT PAS ÊTRE INTERROMPU. PENDANT CETTE<br />
OPÉRATION, LA PRÉSENCE D'UNE PERSONNE EST NÉCESSAIRE.<br />
Appuyez sur la touche « cycle nettoyage circuits café » et ensuite sur « démarrage cycle nettoyage », afi n de<br />
démarrer le cycle de lavage.<br />
cycle<br />
nettoyage<br />
circuits café<br />
BLOCAGE AFFICHEUR<br />
démarrage<br />
cycle nettoyage<br />
POUR L’ENTRETIEN ET LE NETTOYAGE DU<br />
GROUPE DE DISTRIBUTION, SE REPORTER À<br />
LA PAGE 42.<br />
lavage circuits caféattendre<br />
svp<br />
lavage...<br />
Attendez que le cycle de lavage soit terminé ;<br />
l'appareil revient au menu principal.<br />
Cette fonction permet de nettoyer l'affi cheur. Pour le nettoyage de l'écran tactile, veuillez toujours utiliser un chiffon<br />
doux et humide ou bien un détergent spécial pour écrans vendu dans le commerce.<br />
TOUTE UTILISATION DE SOLVANTS, D'ALCOOL, DE DÉTERGENTS AGRESSIFS ET/OU D'OBJETS<br />
POINTUS QUI POURRAIENT ENDOMMAGER LA SURFACE DE L'AFFICHEUR EST INTERDITE.<br />
Appuyez sur la touche « blocage affi cheur »<br />
blocage<br />
<br />
1<br />
<br />
bloqué<br />
déblocage<br />
déblocage<br />
<br />
bloqué<br />
Pour réactiver l'affi cheur, appuyez sur « déblocage » en bas à droite, ensuite (dans<br />
les deux secondes qui suivent) sur « déblocage » en haut à gauche (cette touche<br />
n'apparaît que lorsque vous avez appuyé sur la première touche de déverrouillage).<br />
2<br />
31
32<br />
DÉTARTRAGE<br />
Cette fonction permet de démarrer le cycle automatique de détartrage.<br />
Le détartrage est nécessaire tous les 3-4 mois en fonction de la dureté de l’eau, quand l’eau s’écoule plus lentement<br />
que d’habitude ou quand la machine le signale. La machine doit être allumée et elle gère automatiquement la<br />
distribution du détartrant.<br />
PENDANT CETTE OPÉRATION, LA PRÉSENCE D'UNE PERSONNE EST NÉCESSAIRE.<br />
ATTENTION ! N'UTILISEZ JAMAIS DE VINAIGRE POUR DÉTARTRER LA MACHINE.<br />
Nous vous recommandons d’utiliser de préférence le produit détartrant <strong>Saeco</strong>. En tout cas, vous devez utiliser un<br />
produit détartrant pour machines à café de type non toxique ni nocif vendu dans le commerce. Le produit détartrant<br />
utilisé doit être éliminé conformément aux dispositions du fabricant et/ou aux dispositions en vigueur dans le pays<br />
d'utilisation.<br />
Remarque : avant de démarrer le cycle de détartrage, assurez-vous que :<br />
1. un récipient de taille suffisante se trouve sous la buse d'eau et du distributeur ;<br />
2. LE FILTRE « AQUA PRIMA » N'EST PLUS DANS LE RÉSERVOIR À EAU ;<br />
3. le produit détartrant a été versé dans le réservoir à eau jusqu'au niveau marqué par le symbole .<br />
Arrêt du cycle de détartrage.<br />
Le détartrage et/ou le rinçage peut être arrêté momentanément. Lorsque le cycle de détartrage est arrêté, la<br />
machine vous signale qu’elle doit être éteinte.<br />
ATTENTION ! LE DÉTARTRAGE DOIT ÊTRE TERMINÉ DANS LE 24 HEURES QUI SUIVENT SON ARRÊT.<br />
Lorsque la machine est remise en marche, elle vous signale que le processus de détartrage et/ou de rinçage<br />
doit être terminé.<br />
1<br />
<br />
menu avec<br />
textes<br />
PROGRAMMATION DE LA MACHINE<br />
détartrage<br />
200<br />
mon<br />
café<br />
menu programmation<br />
L'appareil signale que le détartrage est nécessaire via un message<br />
apparaissant dans le menu principal. Ce message d'avertissement ne<br />
bloque pas le fonctionnement de l'appareil. Le chiffre indiqué sous le<br />
message d'avertissement indique le nombre de distributions que vous<br />
pouvez effectuer avant l'arrêt de l'appareil (ce chiffre se réduit chaque<br />
fois que vous préparez une boisson). Lorsqu'il ne reste que 30<br />
distributions avant l'arrêt de l'appareil, la touche d'avertissement<br />
commence à clignoter. Lorsque le chiffre atteint zéro, l'appareil s'arrête<br />
et il faut procéder au détartrage de la machine.<br />
Pour accéder au menu de détartrage, appuyez sur la touche.<br />
2<br />
cycle de détartrage<br />
remplir le réservoir d'eau<br />
avec la solution détartrante<br />
retourner<br />
en arrière<br />
démarrage<br />
détartrage<br />
retourner<br />
au menu<br />
Lorsque la machine s'arrête, l'écran<br />
affiche le message suivant :<br />
« remplir le réservoir d'eau<br />
avec la solution détartrante ».<br />
Procédez au détartrage de<br />
l'appareil en appuyant sur «<br />
démarrage détartrage » comme<br />
décrit précédemment.
Afi n d'effectuer le détartrage de l'appareil avant que la machine ne s'arrête ou que le message de détartrage<br />
obligatoire n'apparaisse, appuyez sur la touche « détartrage », puis sur « démarrage détartrage » pour démarrer le<br />
cycle de détartrage.<br />
2<br />
5<br />
détartrage<br />
Dès que la solution détartrante a<br />
été complètement diffusée,<br />
l'écran affi che le message<br />
suivant :<br />
pause<br />
rinçage<br />
cycle de détartrage<br />
attendre svp<br />
cycle de détartrage<br />
attendre svp<br />
rinçage…<br />
démarrage<br />
détartrage<br />
placer le réservoir avec<br />
de l'eau fraîche<br />
1<br />
pause<br />
détartrage<br />
L'appareil procède au rinçage. Après le rinçage,<br />
l'appareil vous demande de remplir le réservoir<br />
avec de l'eau fraîche potable. Avant de remplir le<br />
réservoir à nouveau, vous pouvez éventuellement<br />
introduire le fi ltre « Aqua Prima ».<br />
L'appareil commence à distribuer le produit détartrant à travers la buse<br />
d'eau chaude. La distribution du produit détartrant s'effectue à des<br />
intervalles prédéfi nis ; de cette manière, le produit détartrant peut agir<br />
effi cacement.<br />
3<br />
cycle de détartrage<br />
attendre svp<br />
détartrer…<br />
Retirez le réservoir à eau et rincez-le<br />
avec de l'eau potable fraîche afi n<br />
d'éliminer les traces éventuelles<br />
laissées par le produit détartrant.<br />
Ensuite, remplissez le réservoir avec<br />
de l'eau potable fraîche et remettezle<br />
en place.<br />
6<br />
4<br />
cycle de détartrage<br />
attendre svp<br />
ciclo di cycle risciacquo de<br />
rinçage<br />
33<br />
démarrage<br />
rinçage<br />
Effectuez le rinçage des circuits de<br />
la machine en appuyant sur «<br />
démarrage rinçage ».<br />
Placez un récipient sous la buse d'eau. Après que le<br />
réservoir à eau a été remis en place, l'appareil procède<br />
automatiquement à l'amorçage du circuit hydraulique. Si<br />
cette opération ne réussit pas, veuillez vous reporter à la<br />
section « amorçage manuel du circuit hydraulique » (page 6).
34<br />
RÉGLAGES HORLOGE<br />
Cette fonction permet de régler la date et l'heure actuelles, la minuterie pour le passage en mode standby (économie<br />
d'énergie) ainsi que les heures de marche et d'arrêt automatiques de la machine. Appuyez sur la touche « réglages<br />
horloge » dans le menu principal.<br />
Dans ce menu, vous pouvez :<br />
RÉGLAGE DE L'HEURE<br />
Cette fonction vous permet de régler les paramètres de l'heure et de la date. Cette fonction est importante pour<br />
pouvoir ensuite programmer correctement les horaires de marche et d'arrêt de la machine !<br />
réglage de<br />
l'heure<br />
régler les paramètres<br />
pour le passage en mode<br />
standby après la dernière<br />
distribution<br />
modifier les réglages concernant<br />
l'heure actuelle et le jour de la<br />
semaine en cours ;<br />
modifier les réglages concernant<br />
le format d'affichage de l'heure<br />
(en format 24 heures ou AM/PM)<br />
format<br />
heure<br />
réglage de<br />
l'heure<br />
heure<br />
actuelle<br />
09:45 (am)<br />
jour de la<br />
semaine<br />
vendredi<br />
HEURE ACTUELLE/JOUR DE LA SEMAINE<br />
Ce menu permet de régler le jour de la semaine ainsi que l'heure actuelle sur la machine.<br />
Appuyez sur la touche « temps jour de la semaine ».<br />
temps<br />
jour de la<br />
semaine<br />
PROGRAMMATION DE LA MACHINE<br />
réglage<br />
stand-by<br />
retourner<br />
en arrière<br />
Dans ce menu, vous pouvez :<br />
temps<br />
jour de la<br />
semaine<br />
retourner<br />
en arrière<br />
Dans ce menu, vous pouvez :<br />
retourner<br />
en arrière<br />
rétablir<br />
valeurs<br />
standard<br />
réglages<br />
horloge<br />
09h (am)<br />
temps<br />
43 min<br />
jour semaine<br />
vendredi<br />
enregistrer<br />
présélections<br />
enregistrer<br />
présélections<br />
réglage de<br />
l'heure<br />
réglage<br />
de l'horloge<br />
retourner<br />
au menu<br />
format<br />
courant<br />
24h<br />
retourner<br />
au menu<br />
retourner<br />
au menu<br />
régler :<br />
- l'heure actuelle ;<br />
- la date actuelle ;<br />
- le format d'affichage de l'heure ;<br />
- (24 heures – AM/PM).<br />
régler les intervalles de temps<br />
entre la mise en marche et l'arrêt<br />
de l'appareil (trois intervalles<br />
peuvent être activés séparément).<br />
afficher l'heure actuellement<br />
réglée ;<br />
afficher le jour de la semaine<br />
actuellement réglé ;<br />
afficher le format d'affichage de<br />
l'heure actuellement réglé.<br />
régler l'heure en<br />
appuyant sur + ou –<br />
régler les minutes en<br />
appuyant sur + ou –<br />
régler le jour en<br />
appuyant sur ou
FORMAT HEURE<br />
Cette fonction permet de régler le mode d'affichage de l'heure. Tout changement du mode d'affichage modifie tous<br />
les paramètres qui nécessitent d'un affichage/réglage de l'heure !<br />
Appuyez sur la touche « format heure ». Le changement est immédiatement enregistré et l'écran affiche « am/pm »<br />
ou « 24h » selon le cas.<br />
RÉGLAGE HORLOGE<br />
Cette fonction vous permet de mettre en marche (allumer) et d'arrêter (économie d'énergie) la machine aux<br />
horaires que vous souhaitez.<br />
Rappelez-vous que la machine active cette fonction à condition que l'interrupteur général soit activé.<br />
réglage<br />
de l'horloge<br />
régler le premier<br />
intervalle de mise<br />
en marche<br />
choisir les jours<br />
pendant lesquels<br />
activer les intervalles<br />
Pour un réglage correct vous devez :<br />
temps<br />
jour de la<br />
semaine<br />
format<br />
heure<br />
retourner<br />
en arrière<br />
Dans ce menu, vous pouvez :<br />
réglage 1<br />
allumé 07:00 am<br />
éteint 09:00 am<br />
réglage<br />
jour semaine<br />
retourner<br />
en arrière<br />
réglage de<br />
l'heure<br />
rétablir<br />
valeurs<br />
standard<br />
enregistrer<br />
présélections<br />
sélectionner<br />
le réglage<br />
- régler les intervalles de mise en marche et d'arrêt de la machine.<br />
- choisir les jours pendant lesquels ces intervalles seront activés.<br />
heure<br />
actuelle<br />
09:45 (am)<br />
jour de la<br />
semaine<br />
vendredi<br />
format<br />
courant<br />
24h<br />
retourner<br />
au menu<br />
réglage 2<br />
allumé 12:00 pm<br />
éteint 14:00 pm<br />
réglage 3<br />
allumé 17:00 pm<br />
éteint 19:00 pm<br />
retourner<br />
au menu<br />
régler le deuxième<br />
intervalle de mise en<br />
marche<br />
régler le troisième<br />
intervalle de mise en<br />
marche<br />
Il est conseillé de programmer les intervalles de mise en marche de manière à ce qu'ils ne se chevauchent pas.<br />
35
36<br />
RÉGLAGE D'UN INTERVALLE DE MISE EN MARCHE<br />
Afin de régler un intervalle de mise en marche, appuyez sur la touche de l'intervalle que vous souhaitez régler.<br />
réglage 2<br />
allumé 12:00 pm<br />
éteint 14:00 pm<br />
réglage 2<br />
08h (am)<br />
enclecher<br />
la machine<br />
15 min<br />
Réglez l'heure de mise en marche<br />
en appuyant sur + ou –<br />
Réglez les minutes en<br />
appuyant sur + ou –<br />
pour sauvegarder les valeurs introduites et passer à la page-écran suivante.<br />
pour sauvegarder les valeurs introduites.<br />
Réglez l'heure d'arrêt en<br />
appuyant sur + ou –<br />
Réglez les minutes en<br />
appuyant sur + ou –<br />
CHOISIR LES INTERVALLES DE MISE EN MARCHE POUR CHAQUE JOUR<br />
Faites défiler les jours de la semaine et sélectionnez pour chaque jour le/les réglage/s que vous souhaitez activer.<br />
réglage<br />
jour semaine<br />
PROGRAMMATION DE LA MACHINE<br />
Intervalle pas<br />
activé pour le jour<br />
sélectionné<br />
réglage 2<br />
réglage 1<br />
allumé 07:00 am<br />
éteint 09:00 am<br />
09h (am)<br />
éteindre<br />
la machine<br />
15 min<br />
réglage 2<br />
allumé 12:00 pm<br />
éteint 14:00 pm<br />
modif. compt.<br />
jour semaine<br />
mardi<br />
Vous pouvez sélectionner des intervalles différents pour chaque jour.<br />
1<br />
retourner<br />
en arrière<br />
2<br />
retourner<br />
en arrière<br />
retourner<br />
en arrière<br />
enregistrer<br />
présélections<br />
enregistrer<br />
présélections<br />
enregistrer<br />
présélections<br />
retourner<br />
au menu<br />
retourner<br />
au menu<br />
réglage 3<br />
allumé 17:00 pm<br />
éteint 19:00 pm<br />
retourner<br />
au menu<br />
pour mémoriser les réglages<br />
Intervalle activé pour le jour<br />
sélectionné<br />
Sélectionnez le jour en<br />
appuyant sur ou
RÉGLAGE ÉCONOMIE D'ÉNERGIE<br />
Cette fonction permet de régler l'intervalle de temps entre la dernière distribution de boisson et le passage de<br />
l'appareil en mode standby.<br />
L'intervalle par défaut est « après 3 heures ».<br />
réglage<br />
stand-by<br />
au bout de<br />
15 min<br />
au bout de<br />
3 heures<br />
retourner<br />
en arrière<br />
réglage<br />
stand-by<br />
rétablir<br />
valeurs<br />
standard<br />
enregistrer<br />
présélections<br />
au bout de<br />
30 min<br />
au bout de<br />
1 heure<br />
Lorsque le temps programmé pour le retard d'arrêt termine, le<br />
message suivant apparaît :<br />
économie<br />
d'énergie<br />
retourner<br />
au menu<br />
démarrer<br />
Pour démarrer la machine, appuyez sur « démarrer ». La<br />
machine procède au diagnostic des fonctions. Après la<br />
phase de chauffage, elle est prête à fonctionner.<br />
37<br />
Sélectionnez le retard d'arrêt.
38<br />
FONCTIONS SPÉCIALES<br />
Ce menu permet d'accéder aux fonctions spéciales de l'appareil. Appuyez sur la touche « fonctions spéciales » dans<br />
le menu principal.<br />
ANNULER TOUS LES RÉGLAGES<br />
Ce menu permet de rétablir tous les paramètres réalisés en usine. Cette fonction est notamment importante si vous<br />
désirez rétablir les paramètres de base. Appuyez sur la touche « annuler tous les réglages ».<br />
annuler tous<br />
les réglages<br />
Le rétablissement des données<br />
standards s'effectue en<br />
sélectionnant « oui ».<br />
annuler tous<br />
les réglages<br />
spécialités<br />
Si vous sélectionnez « oui », vous devez confi rmer votre choix à nouveau, afi n<br />
d'empêcher tout rétablissement involontaire des paramètres de base.<br />
TOUS LES RÉGLAGES PERSONNELS SERONT DEFINITIVEMENT PERDUS ET NE POURRONT PLUS ÊTRE<br />
RÉCUPÉRÉS. UNE FOIS LES PARAMÈTRES STANDARDS RÉTABLIS, VOUS POURREZ REPROGRAMMER<br />
TOUTES LES FONCTIONS DE LA MACHINE, SI SOUHAITÉ.<br />
oui<br />
retourner<br />
en arrière<br />
PROGRAMMATION DE LA MACHINE<br />
voulez-vous vraiment mèmoriser les<br />
paramètres standard?<br />
tous les réglages personnelles<br />
seront annulés!<br />
êtes-vous sûr?<br />
non<br />
retourner<br />
au menu<br />
retourner<br />
en arrière<br />
1<br />
voulez-vous vraiment mèmoriser les<br />
paramètres standard?<br />
tous les réglages personnelles<br />
seront annulés!<br />
non<br />
retourner<br />
en arrière<br />
attention!<br />
tous les paramètres<br />
ont été rétablis<br />
retourner<br />
au menu<br />
oui<br />
retourner<br />
au menu<br />
2 3<br />
4<br />
L'écran affi che pendant 2 secondes<br />
le message suivant : « Tous les<br />
paramètres ont été rétablis »<br />
<br />
menu avec<br />
textes<br />
mon<br />
café<br />
menu programmation<br />
Une fois cette période de temps<br />
écoulée, l'appareil revient au<br />
menu principal.
1 2 3<br />
4 5<br />
7<br />
NETTOYAGE GÉNÉRAL DE LA MACHINE<br />
8<br />
NETTOYAGE ET ENTRETIEN<br />
Le nettoyage décrit ci-dessous doit s'effectuer au moins une fois par semaine.<br />
Remarque : n'utilisez pas de l'eau qui n'a pas été remplacée depuis plusieurs jours.<br />
ATTENTION ! Ne pas immerger la machine dans l’eau.<br />
Pour le nettoyage et l’entretien du cappuccinatore, se reporter à la section correspondante à la page 40.<br />
Le comptage du marc déposé dans le tiroir n’est pas remis à zéro en vidant le marc quand la machine est<br />
éteinte ou quand cette opération n’est pas signalée sur l’affi cheur. C’est la raison pour laquelle la machine<br />
peut affi cher le message « vider réser. marc à café » même après n’avoir préparé que quelques cafés.<br />
Éteignez l'appareil et débranchez<br />
la prise.<br />
Retirez le tiroir à marc, videz-le et<br />
nettoyez-le.<br />
Retirez le bac d'égouttement,<br />
videz-le et lavez-le.<br />
Lavez le réservoir et le couvercle. Retirez le bac d'égouttement,<br />
videz-le et nettoyez-le.<br />
Nettoyez le compartiment du café<br />
prémoulu à l'aide du pinceau.<br />
Nettoyez l'affi cheur (consultez la<br />
page 31)<br />
6<br />
Retirer le récipient du lait et le<br />
laver (se reporter à la page 40<br />
pour le nettoyage du<br />
cappuccinatore).<br />
39
40 NETTOYAGE ET ENTRETIEN<br />
NETTOYAGE ET ENTRETIEN DU RÉSERVOIR À LAIT<br />
Le réservoir à lait ainsi que le cappuccinatore ont été conçus pour optimiser l’utilisation du lait.<br />
En effectuant leur nettoyage et entretien de façon constante, il sera possible de déguster d’excellentes<br />
boissons à base de lait.<br />
Effectuer le nettoyage complet du cappuccinatore au moins une fois par semaine.<br />
ENTRETIEN RAPIDE CAPPUCCINATORE<br />
Il se pourrait que le lait ne soit pas émulsionné de façon optimale. Dans<br />
ces cas, tourner le régulateur d’écoulement illustré sur la fi gure.<br />
Tourner le régulateur 2-3 fois pour effectuer un entretien rapide.<br />
Remarque : 3 régulateurs supplémentaires sont fournis pour remplacer<br />
celui déjà monté, dans le cas où celui-ci serait perdu.<br />
LAVAGE APRÈS UN EMPLOI NORMAL<br />
Laver le réservoir à lait ainsi que le cappuccinatore après avoir utilisé du lait pour la préparation des<br />
boissons. Il ne suffi t que de quelques simples opérations pour garantir le fonctionnement optimal de la<br />
machine.<br />
1 2<br />
Verser le lait dans un récipient.<br />
Rincer toutes les parties qui sont<br />
entrées en contact avec le lait<br />
avec de l’eau tiède.<br />
3<br />
Verser de l’eau fraîche et<br />
effectuer le cycle de rinçage.
ENTRETIEN APPROFONDI CAPPUCCINATORE<br />
Laver soigneusement le cappuccinatore au moins une fois par semaine.<br />
Les composants peuvent être lavés avec des détergents à usage domestique.<br />
1 2 3<br />
Retirer le cappuccinatore.<br />
Séparer la partie supérieure de<br />
celle inférieure du<br />
cappuccinatore.<br />
4 5 6<br />
Enlever le bouchon de la partie<br />
inférieure.<br />
REMPLACEMENT DU JOINT TORIQUE<br />
Retirer le joint torique à l’aide<br />
d’un objet pointu.<br />
Retirer le bouchon.<br />
41<br />
Laver tous les composants. Remonter tous les composants et<br />
installer le cappuccinatore dans<br />
le réservoir.<br />
Lorsque les deux parties du cappuccinatore bougent trop librement, il faut remplacer le joint torique avec un<br />
des joints fournis en dotation.<br />
1 2 3<br />
Insérer le nouveau joint torique<br />
en appuyant délicatement.<br />
Assembler la partie supérieure et<br />
celle inférieure du<br />
cappuccinatore.
42<br />
1 2 3<br />
4<br />
NETTOYAGE ET ENTRETIEN<br />
NETTOYAGE DU GROUPE DE DISTRIBUTION<br />
Le groupe de distribution doit être nettoyé au moins une fois par semaine.<br />
Lubrifi er le groupe de distribution après 500 distributions environ. Il est possible d’acheter la graisse pour<br />
lubrifi er le groupe de distribution auprès des centres d’assistance agréés.<br />
Lavez le groupe de distribution avec de l'eau tiède.<br />
ATTENTION ! Ne lavez pas le groupe de distribution avec de détergents qui pourraient affecter son<br />
fonctionnement. Ne le lavez pas au lave-vaisselle.<br />
Appuyez sur la porte de service<br />
pour l'ouvrir.<br />
Laver le fi ltre supérieur sous l’eau<br />
courante.<br />
5<br />
7 8 9<br />
Le levier placé sur la partie<br />
arrière du groupe doit être en<br />
contact avec la base.<br />
Pour retirer le groupe de<br />
distribution, appuyez sur la<br />
touche PUSH.<br />
Assurez-vous que le groupe de<br />
distribution est en position de<br />
repos ; les deux références<br />
doivent coîncider.<br />
Lubrifi er les convoyeurs du<br />
groupe uniquement avec la<br />
graisse fournie.<br />
Laver le groupe de distribution en<br />
éliminant tout résidu de café.<br />
6<br />
S’assurer que tous les<br />
composants se trouvent dans la<br />
bonne position.Le crochet indiqué<br />
doit être dans la position correcte<br />
; pour vérifi er, appuyer d’un coup<br />
sec sur la touche « PUSH ».<br />
Distribuer la graisse de façon<br />
uniforme.
10 11<br />
12<br />
Distribuer la graisse de façon<br />
uniforme.<br />
1<br />
ENTRETIEN DES MEULES<br />
Remontez-le sans appuyer sur la<br />
touche PUSH !<br />
2<br />
Fermer la porte de service et<br />
insérer le tiroir à marc.<br />
3<br />
43<br />
Après plusieurs cycles de mouture (2000 environ), il est nécessaire d'effectuer un petit réglage des meules<br />
afi n d'obtenir un café moulu toujours parfait.<br />
ATTENTION !<br />
Il est conseillé d’effectuer cette opération en prêtant beaucoup d’attention ; elle peut être effectuée par un<br />
utilisateur expert. Vider le réservoir à café en grain.<br />
Il se pourrait que la vis tombe à l’intérieur du moulin à café. Si cela se passe, récupérer la vis avant de<br />
remettre la machine en marche. Pour éviter cet inconvénient, protéger le trou du moulin à café au moyen<br />
d’un chiffon.<br />
Le cran est signalé par une indication située sur le réservoir à café. Se reporter à ces indications lors du<br />
réglage.<br />
Dévissez la vis qui fi xe la porte de<br />
service.<br />
Retirez la vis et la porte.<br />
Réglez d'un cran.<br />
Ensuite, remettez la porte en place et fi xez-la à l'aide de la vis que vous avez enlevée auparavant.
44 MESSAGES D'ERREURS<br />
MESSAGES D'ERREUR MESURES À PRENDRE<br />
éteindre et rallumer l’appareil pour remédier au<br />
défaut<br />
Afin de rétablir le fonctionnement normal de<br />
l'appareil, éteignez-le et rallumez-le au bout de<br />
trente secondes.<br />
appeler assistance L'appareil présente un problème qui ne peut être éliminé<br />
que par le centre d'assistance.<br />
remettre en place le bac de récupération Remettez en place le bac de récupération<br />
situé sous le groupe café).<br />
refermer le couvercle du réservoir à grains de<br />
café<br />
Fermez le couvercle du réservoir à grains de café<br />
afin de permettre à la boisson de s'écouler.<br />
ajouter café pré-moulu Introduisez du café en poudre lorsque vous avez<br />
sélectionné un programme individuel qui<br />
nécessite ce type de café.<br />
remettre en place le groupe café Remettez en place le groupe café dans le<br />
compartiment prévu à cet effet.<br />
remettre en place le réservoir de marc à café Remettez en place le réservoir de marc de café.<br />
vider réser. marc à café Retirez le tiroir à marc et videz-le dans un bac approprié.<br />
Remarque : le tiroir à marc ne peut être vidé que lorsque<br />
la machine le demande. Cette opération doit être<br />
effectuée quand la machine est allumée. En effet, en<br />
vidant le tiroir pendant que l'appareil est éteint, vous<br />
empêcherez l’enregistrement de l’action de vidage par<br />
l’appareil.<br />
refermer la porte latérale La porte latérale doit être fermée pour que l'appareil<br />
fonctionne correctement.<br />
remplir le réservoir d’eau Retirez le réservoir d'eau et remplissez-le d'eau<br />
potable fraîche.<br />
vider le bac de récupération sous le groupe café (Ouvrez la porte latérale et videz le bac de récupération<br />
situé sous le groupe café).<br />
mettre en place le récipient à lait (Le récipient à lait doit être placé dans le réservoir<br />
prévu à cet effet).<br />
purger la machine Afin de poursuivre le chargement du circuit d'eau,<br />
appuyez sur la touche correspondante de l'écran.<br />
L'appareil essaye de charger le circuit automatiquement;<br />
en cas d'échec, vous devez procéder au<br />
chargement manuel.<br />
le chargement du circuit n'a pas été<br />
correctement exécuté<br />
le cycle de détartrage n'a pas été<br />
correctement exécuté<br />
Contactez le service après-vente pour remédier à ce<br />
problème.<br />
Répétez l'opération comme indiquée dans la section<br />
spécifique.<br />
rinçage lait se reporter aux pages 13 et 27<br />
rinçage lait se reporter aux pages 13 et 28
MESSAGES D'ERREURS / DONNÉES TECHNIQUES<br />
MESSAGES D'ERREUR MESURES À PRENDRE<br />
changer le filtre à eau Le filtre Aqua Prima doit être remplacé si l'une des<br />
situations suivantes se produit :<br />
1. 60 litres d'eau ont déjà été distribués ;<br />
2. 90 jours se sont écoulés depuis son installation ;<br />
3. 20 jours se sont écoulés, au cours desquels l'appareil<br />
n'a pas été utilisé.<br />
Remarque : ce message n'apparaît que si le message «<br />
inséré » a été sélectionné dans la fonction filtre à eau<br />
(reportez-vous à la page 19).<br />
le cycle de nettoyage n'a pas été correctement<br />
exécuté<br />
mettre en place le récipient à lait avec<br />
la buse à cappuccino<br />
DONNÉES TECHNIQUES<br />
Mêmes instructions qu'au paragraphe concernant le<br />
chargement du circuit.<br />
Mettez la buse à cappuccino dans le récipient à lait.<br />
Sans ce dispositif, l'appareil ne peut fournir de<br />
boissons avec du lait.<br />
rincer le réservoir à lait Nettoyez le récipient à lait après utilisation.<br />
détartrer l'appareil Vous devez procéder au détartrage des circuits<br />
internes de l'appareil.<br />
économie d'énergie Appuyez sur la touche « démarrer ».<br />
Tension nominale voir plaque signalétique de l’appareil<br />
Puissance nominale voir plaque signalétique de l’appareil<br />
Alimentation voir plaque signalétique de l’appareil<br />
Matériel du boîtier Plastique<br />
Dimensions (l x h x p) 355 x 380 x 460 mm<br />
Poids 14 Kg<br />
Longueur du câble 1200 mm<br />
Tableau de commande sur le devant (écran numérique)<br />
Réservoir d»eau 2 l - amovible<br />
Récipient à lait 0,400 l - amovible<br />
Capacité du réservoir à café 350 g de café en grains<br />
Pression de la pompe 15 bar<br />
Chauffe-eau deux en acier inoxydable<br />
Moulin à café en céramique<br />
Dispositif de sécurité de la pression soupape de sécurité, pression des éléments chauffants<br />
Dispositif de sécurité de la température thermostats et fusibles thermiques<br />
des éléments chauffants<br />
Toutes modifications de construction et d'exécution réservées dans le cadre d'une amélioration<br />
technique de l'appareil. Conformité de l'appareil avec la directive européenne 89/336/CEE relative à la<br />
compatibilité électromagnétique (adoption de la loi 476 du 04/12/92).<br />
45
46<br />
SOS<br />
CONSIGNES DE SÉCURITÉ<br />
EN CAS D'URGENCE<br />
Retirer immédiatement la fiche de la prise électrique.<br />
N'UTILISER L'APPAREIL<br />
• que dans des locaux fermés<br />
• que pour la préparation de café, d'eau chaude et de mousse de lait<br />
• qu'à des fins domestiques<br />
• que par des adultes dotés d'une bonne constitution physique et mentale.<br />
MESURES DE PRÉCAUTION CONCERNANT L'UTILISATION DE L'APPAREIL<br />
• Afin d'éviter toute situation de danger, ne pas utiliser l'appareil à d'autres fins que celles prévues.<br />
• Ne pas mettre dans les réservoirs et récipients d'autres substances que celles prévues dans le mode d'emploi.<br />
• Lorsqu'un réservoir / récipient a été correctement rempli, tous les autres réservoirs doivent être fermés.<br />
• Ne mettre que de l'eau potable fraîche dans le réservoir d'eau : l'eau chaude et / ou d'autres liquides peuvent<br />
endommager l'appareil.<br />
• Ne pas utiliser d'eau gazeuse.<br />
• Ne pas mettre les doigts dans le moulin à café et ne pas y mettre d'autres substances que des grains de café. Avant<br />
d'inspecter le moulin à café, vous devez éteindre l'appareil en appuyant sur l'interrupteur général, puis débrancher la<br />
fiche de la prise électrique.<br />
• Ne pas mettre de café soluble ou de café en grains dans le réservoir pour café en poudre<br />
• Afin de commander l'appareil au moyen de l'écran à touches tactiles, vous devez uniquement utiliser les doigts.<br />
RACCORDEMENT ÉLECTRIQUE<br />
Le raccordement électrique doit être conforme aux dispositions de sécurité de votre pays.<br />
La prise électrique à laquelle la machine est branchée doit :<br />
• être compatible avec la fiche du câble de l'appareil ;<br />
• présenter la bonne taille afin de se conformer aux instructions de la plaque du fabricant située sur la partie inférieure<br />
de l'appareil ;<br />
• être correctement reliée à la terre.<br />
Le câble électrique ne doit en aucun cas :<br />
• entrer en contact avec un quelconque liquide : risque de décharge électrique et / ou d'incendie ;<br />
• être coincé et / ou entrer en contact avec des objets pointus ;<br />
• être utilisé pour déplacer l'appareil ;<br />
• être utilisé lorsqu'il est endommagé ;<br />
• être en contact avec des mains humides ou mouillées ;<br />
• être tordu lorsque l'appareil est en service ;<br />
• être endommagé<br />
INSTALLATION<br />
• Choisir comme lieu d'emplacement de l'appareil un endroit bien aménagé, plat et solide (l'angle d'inclinaison ne doit<br />
en aucun cas être supérieur à 2°).<br />
• Ne pas placer l'appareil dans des endroits où l'eau pourrait s'infiltrer dedans.<br />
• Température de service optimale : entre 10°C et 40°C.<br />
• Humidité maximale de l'air : 90 %.<br />
• Le lieu d'emplacement doit être hygiénique, bien éclairé et bien aéré. La prise électrique doit être facilement<br />
accessible.<br />
• Ne pas poser l'appareil sur des surfaces brûlantes ou chaudes !<br />
• Respecter un intervalle de 10 cm à partir des murs et des plaques de cuisson.<br />
• Ne pas utiliser l'appareil dans des pièces affi chant une température égale ou inférieure à 0°C. Si l'appareil est<br />
exposé à de telles conditions, contacter le service après-vente afin qu'un contrôle de sécurité puisse être effectué.<br />
• Ne pas mettre en marche l'appareil à proximité de substances facilement inflammables et / ou explosives.<br />
• Il est strictement interdit d'utiliser l'appareil dans des pièces soumises à un risque élevé d'explosion ou dont l'air<br />
contient une haute concentration de poudres ou de substances à base d'huile.<br />
• Ne pas placer la machine sur d'autres appareils.<br />
DANGERS<br />
• Ne pas laisser les enfants se servir de l'appareil. Cette consigne vaut également pour les personnes qui ne<br />
connaissent pas le fonctionnement de l'appareil.<br />
• L'appareil peut représenter un danger pour les enfants. Si l'appareil est laissé sans surveillance, débrancher la fiche.<br />
• Ne pas conserver les matériaux d'emballage à la portée des enfants.<br />
• Ne jamais orienter le jet de vapeur ou d'eau chaude sur soi-même ou sur d'autres personnes : risque de brûlures.
• Ne pas insérer d'objets dans les ouvertures de l'appareil (danger : courant électrique !).<br />
• Ne pas toucher la fi che électrique avec des mains ou des pieds mouillés, ne pas débrancher la fi che en tirant sur le<br />
câble.<br />
• Attention : risque de brûlures lors du contact avec l'eau chaude, la vapeur et la buse d'eau chaude.<br />
47<br />
PANNES<br />
• Ne pas utiliser l'appareil en cas de problèmes de fonctionnement ou en cas de doute (par ex. : après que l'appareil est<br />
tombé par terre).<br />
• Faire procéder aux réparations éventuelles par le service après-vente agréé.<br />
• Ne jamais utiliser l'appareil lorsque le câble électrique est défectueux. Le câble défectueux doit être remplacé par le<br />
producteur ou le service après-vente agréé (danger : courant électrique !).<br />
• Eteindre l'appareil avant d'ouvrir la porte de maintenance. Risque de brûlures !<br />
NETTOYAGE / DÉTARTRAGE<br />
• Pour laver le circuit du lait, n’utiliser que le détergent en poudre conseillé et fourni avec la machine. Se conformer<br />
scrupuleusement aux consignes de sécurité reportées sur l’emballage.<br />
• Pour laver le circuit du café, n’utiliser que le détergent en pastilles conseillé et fourni avec la machine. Se conformer<br />
scrupuleusement aux consignes de sécurité reportées sur l’emballage.<br />
• Avant de pouvoir commencer le nettoyage, l'interrupteur doit être en position OFF (0).<br />
Débrancher la fi che et laisser refroidir l'appareil.<br />
• Protéger l'appareil contre les éclaboussures d'eau et ne pas le plonger dans l'eau.<br />
• Ne pas faire sécher les pièces de l'appareil dans les fours traditionnels et / ou dans le micro-ondes.<br />
• Nettoyer l'appareil et ses composants après une mise hors service prolongée.<br />
PIÈCES DÉTACHÉES<br />
Pour des raisons de sécurité, toujours utiliser les pièces détachées et les accessoires du fabricant.<br />
ELIMINATION<br />
L'emballage peut être recyclé.<br />
L' appareil est en conçu et fabriqué pour faciliter sa valorisation, son recyclage ou sa réutilisation conformément à<br />
la directive européenne 2002/96/CEE relative aux appareils électriques et électroniques usagés (waste electrical<br />
and electronic equipment - WEEE).<br />
Le logo ci-contre apposé sur l'appareil indique que ce produit ne peut pas être éliminé avec les déchets ménagers<br />
non triés.<br />
Lorsque vous aurez décidé de vous en séparer défi nitivement, il convient de faire procéder à la collecte sélective de<br />
cet appareil en vous conformant au mode de reprise mis en place dans votre commune (collecte ponctuelle des<br />
encombrants, déchèterie), ou en faisant appel au service de reprise proposé par votre distributeur, ou bien, en le<br />
confi ant à des organisations caritatives et des associations à but non lucratif.<br />
En vous assurant que ce produit est éliminé correctement, vous favorisez la prévention des conséquences<br />
négatives pour l'environnement et la santé humaine.<br />
PROTECTION CONTRE LES INCENDIES<br />
En cas d'incendie, utiliser un extincteur à base de gaz carbonique (extincteur CO 2 ). Ne pas utiliser d'eau ni<br />
d'extincteur à base de poudre.<br />
INFORMATIONS COMPLÉMENTAIRES POUR UN USAGE CORRECT DU FILTRE «AQUA PRIMA»<br />
Pour utiliser correctement le fi ltre «Aqua prima», nous vous prions d’observer les consignes suivantes :<br />
1. Conservez le fi ltre «Aqua prima» dans un local frais, à l’abri du soleil ; la température du local doit être comprise entre<br />
+5°C et +40°C;<br />
2. Utilisez le fi ltre dans un environnement où la température ne dépasse pas 60°C.<br />
3. Lavez le fi ltre «Aqua prima» si vous laissez la machine à café inutilisée pendant trois jours ;<br />
4 Il est conseillé de remplacer le fi ltre si vous laissez la machine à café inutilisée plus de 20 jours ;<br />
5. Si vous souhaitez conserver un fi ltre ouvert, fermez-le hermétiquement dans un sac en plastique et rangez-le au<br />
frigo ; il est interdit de le conserver au surgélateur car les propriétés du fi ltre s’altéreraient.<br />
6. Avant d’utiliser le fi ltre, laissez-le dans le réservoir d’eau pendant 30 minutes.<br />
7. Ne conservez pas le fi ltre au contact de l’air après l’avoir déballé.<br />
8. Le fi ltre doit être remplacé 90 jours après l’ouverture de l’emballage ou après avoir traité 60 litres d’eau potable.
SAECO INTERNATIONAL GROUP S.P.A<br />
(SOCIETÀ SOGGETTA A DIREZIONE E COORDINAMENTO DI EL GRINGO INVESTIMENTI S.P.A).<br />
- Via Torretta, 240 - 40041 Gaggio Montano (Bo) - Italy<br />
declare under our responsability that the product:<br />
SUP 030 ADR<br />
to which this declaration relates is in conformity with the following standards or other normative<br />
documents:<br />
• Safety of household and electrical appliances - General requirements EN 60335-1(1994); A11(1995) -<br />
A1(1996) - A12(1996) - A13(1998) - A14(1998) - A15(2000)<br />
• Safety of household and electrical appliances - Part 2^ Particular requirements for appliances for heating<br />
liquids EN 60335-2-15(1996) - A1(1999)<br />
• Safety of household and electrical appliances - Part 2^ Particular requirements for coffee mills and coffee<br />
grinders EN 60335-2-14 (1996) - A11(1998) - A1(1998) - A2(2000)<br />
• Limits and methods of measurements of radio disturbance characteristics of electrical motor-operated and<br />
thermal appliances for households and similar purposes, electric tools and similar electric apparatus - EN<br />
55014-1(1993) A1(1997) + A2(1999)<br />
• Electromagnetic compatibility (EMC) Part 3^ Limits - Section 2: Limits for harmonic current emissions<br />
<br />
<br />
<br />
• Immunity requirements for household appliances, tools and similar apparatus. Product family standard EN<br />
55014-2 (1997)<br />
Following the provision of the directives: EC 73/23, EC 89/336, EC 92/31, EC 93/68<br />
Gaggio Montano - li, 27/09/06<br />
EC DECLARATION OF CONFORMITY<br />
EC 73/23, EC 89/336<br />
EC92/31, EC93/68<br />
R & D Manager<br />
Mr. Andrea Castellani
SAECO INTERNATIONAL GROUP S.P.A<br />
(SOCIETÀ SOGGETTA A DIREZIONE E COORDINAMENTO DI EL GRINGO INVESTIMENTI S.P.A).<br />
- Via Torretta, 240 - 40041 Gaggio Montano (Bo) - Italy<br />
déclarons sous notre responsabilité que le produit:<br />
SUP 030 ADR<br />
auquel la présente déclaration se réfère est conforme aux suivantes normes:<br />
• Sécurité des appareils électroménagers et électriques - Conditions générales requises EN 60335-1(1994);<br />
A11(1995) - A1(1996) - A12(1996) - A13(1998) - A14(1998) - A15(2000).<br />
pareils<br />
pour chauffer des liquides EN 60335-2-15(1996) - A1(1999)<br />
vériseurs<br />
et moulins à café EN 60335-2-14 (1996) - A11(1998) - A1(1998) - A2(2000)<br />
• Limites et méthodes de mesure des perturbations radio caraetéristiques des appareils thermiques et avec<br />
moteur électrique pour usage ménager et autres buts similaires, instruments électriques et autre appareillage<br />
électrique similaire - EN 55014-1(1993) A1(1997) + A2(1999)<br />
• Compatibilité électromagnétique (EMC) Partie 3: Limites - Section 2: Limites pour les émissions de courant<br />
<br />
+ A14(2000)<br />
pillotage<br />
de tension dans des systèmes d’alimentation à basse tension pour des appareils avec courant<br />
<br />
• Conditions d’immunité requises pour des appareils électroménagers, instruments et autres appareils similaires.<br />
Norme pour groupe de produits EN 55014-2 (1997)<br />
selon les dispositions des directives; CE 73/23, CE 89/336, CE 92/31, CE 93/68.<br />
Gaggio Montano - li, 27/09/06<br />
DECLARATION DE CONFORMITÉ CE<br />
EC 73/23, EC 89/336<br />
EC92/31, EC93/68<br />
R & D Manager<br />
Mr. Andrea Castellani
08-12-06<br />
del Rev.01<br />
<strong>Saeco</strong><br />
International Group S.p.A.<br />
Via Torretta, 240<br />
Cod.15000901<br />
I-40041 Gaggio Montano, Bologna<br />
Tel: + 39 0534 771111<br />
Fax: + 39 0534 31025<br />
www.saeco.com<br />
The manufacturer reserves the right to change the features of the product without prior notice.<br />
SUP030ADR<br />
Le producteur se réserve le droit d“apporter toutes modifications sans préavis.<br />
© <strong>Saeco</strong> International Group S.p.A. Type