GE Profil# Tri-Temperamre Water Dispenser - ManageMyLife
GE Profil# Tri-Temperamre Water Dispenser - ManageMyLife
GE Profil# Tri-Temperamre Water Dispenser - ManageMyLife

Create successful ePaper yourself
Turn your PDF publications into a flip-book with our unique Google optimized e-Paper software.
ge.com<br />
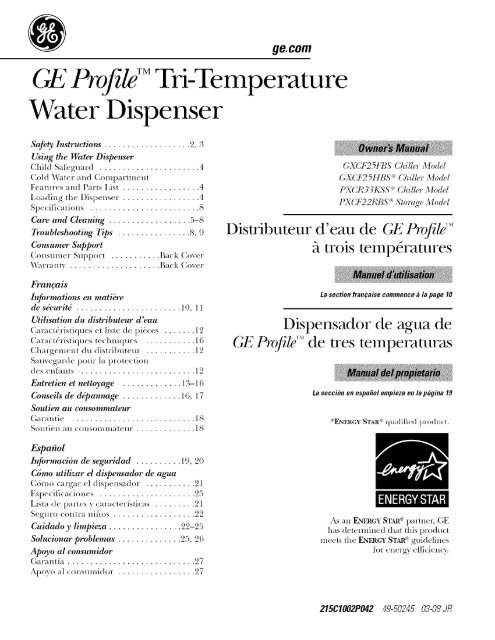
<strong>GE</strong> <strong>Profil#</strong> <strong>Tri</strong>-<strong>Temperamre</strong><br />
<strong>Water</strong> <strong>Dispenser</strong><br />
Safety Instructions ................... 2, 3<br />
Using the <strong>Water</strong> <strong>Dispenser</strong><br />
Child Saii:guard ...................... 4<br />
Cold <strong>Water</strong> and Compartm_ nt<br />
Features and Parts List ................. 4<br />
Loading tile <strong>Dispenser</strong> . ................ 4<br />
Specifications ........................ 8<br />
Care and Cleaning .................. 5-8<br />
Troubleshooting Tips ................ 8, 9<br />
Consumer Support<br />
Consumer Support ........... Back Cov(r<br />
Warramv .................... Back Cov_r<br />
Fran_ais<br />
Info_nations en matibre<br />
de s&urit_ ....................... 1O, 11<br />
Utilisation du distributeur d'eau<br />
( ara_ tdristiques et liste de pil.ces ....... 12<br />
Cara/t&'istiqu( s tel hniques ........... 16<br />
Chatgement du distributeur . .......... 12<br />
Sauvegarde pottr la protection<br />
des ell_l tits ......................... 12<br />
Entretien et nettoyage ............. 13-16<br />
Conseils de d@annage ............. 16, 17<br />
Soutien au eonsommateur<br />
Garantie ........................... 18<br />
SotltieD all consolltillatelli- . ............ 18<br />
E_pa_ol<br />
Informad6n de se_tridad .......... 19, 20<br />
C6mo utilizar el dispensador de agua<br />
(dmo cargar el dis[x nsador . .......... 21<br />
Espedfi(adones ..................... 25<br />
Lism de partes y tarat teristicas ......... 21<br />
S,.!guro contra nil_tos .................. 22<br />
Cuidado y limpi_a ................ 22-25<br />
Solueionarproblemas .............. 25, 26<br />
Apoyo al eonsumidor<br />
(;anmt_a ............................ 27<br />
Apoyo al (onsmnidor . ................ 27<br />
GX(J _)t 'B5 Chiller Modal<br />
GXC2_ _HB5 " Chillier Model<br />
[X(B3_KSS (hzgr_ Mo&l<br />
l XCI 2_BB5 " Slorage Model<br />
Distributeur d'eau de <strong>GE</strong> Profi& TM<br />
it trois tempdramres<br />
Lasectionfran_aise commencea la page 10<br />
Dispensador de agua de<br />
<strong>GE</strong> Profile'Mde tres temperaturas<br />
Lasecci6n en espa_ol empieza en la pagina 19<br />
*ENERGY STAR _'_qualific d produ(I.<br />
_"; all ENERGY STAR c_ partner; (;E<br />
has determined that this product<br />
meets the ENERGYSTAR_ guidelines<br />
for energy eflici_ ncy.<br />
215C1002P042 49-50245 03-08JR
IMPORTANTSAFETYINFORMATION.<br />
READALLINSTRUCTIONSBEFOREUSING.<br />
2<br />
WARNING!<br />
Use this appliance only for its intended purpose as described in this Owner's Manual.<br />
SAFETYPRECAUTIONS<br />
When using electrical appliances, basic safety precautions should be foflowed, including the following.<br />
_!_This water dislx:ns( r lllllSI I)( properly installed<br />
alld located ill a(coFd_lll(?e with these illgtltlCliollS<br />
before it is used.<br />
I)o not allow children 1o clim/), stand or hang<br />
on the outside otthe disl)ensec or on the shelves<br />
inside the storag( cabinet (on some models).<br />
ThQ; could tip the dispenser over and damage<br />
it and seriously injure themselves.<br />
_; I) not store or use gasoline or odmr flammable<br />
xapors and liquids in the vicini b of this or any<br />
olheF appliance.<br />
_,,l _)ltgtl(_s It dis)(ls( I)(fi:_¢ (1( fig<br />
or making, rel)ail_.<br />
NOTE:<strong>GE</strong>does not support any servicing of the<br />
dispense_Westrongly recommendthat you do not<br />
attempt to service flTedispenseryourself.<br />
!_J,I)o not use tills dispenser to disp( nse anything<br />
other than wall 1:<br />
g?iI)(> not plug in the l;,Ow(_rcord or 1111-11oil Ill(! l)OW( r<br />
swin h_s when the water dispenser is emply.<br />
PROPER INSTALLATION ANDLOCATION<br />
_M1 _ , t 1_,st 1 (2.5 cm) ofspa(e bet_vecn the<br />
back ofthe waler disl)et_ser and the wall to allow<br />
fi)rl)roperair circulalion.<br />
I)o not install th( _ater disp( nser where<br />
Ihe tenll)( rature will go 1)elo_ 5(PF (IO°C) or<br />
above 10t)°F (38°C).<br />
i}+)_Vil)(up any waler spills immedialely after loading<br />
or unloading _alcr bottles.<br />
(3_dren should be superwsed by a parent when<br />
using this product.<br />
WARNING:_o.,o,._ ,_thwater that<br />
is microbiologJcally tmsafe or of unRnoxm quali_:<br />
@+ CAUTION: The dispenser beats water<br />
to a temperature of approximately 194°F (90°C).<br />
<strong>Water</strong> temperatures above 125°F (52°C) can cause<br />
severe burrLs or death from ,scalding. Children,<br />
the disabled and the elderly are at highest risk<br />
of being _alded.<br />
NOTICE:_+ product is intended solely<br />
for use in drilling cmmed and boxed beverages,<br />
and packaged nonperishables.<br />
_5_Install the water dispenser on a level t]oor strong<br />
enough u_suppolT it when fillly loaded. Do not<br />
install where it will be sul_iecl 1o dirccl +,unlight,<br />
heat or lllOiSHll-e,<br />
_gStainkss steel panels (on some mo&ls) at( cov(r(d<br />
with protective fihn. R(mo'+( Ill(! fihn bci}._re<br />
Ol>eraling the l)ro(lu(l.
GROUNDING INSTRUCTIONS<br />
WARNING: Improper use of the grounding plug can result in a risk of electric shock.<br />
This appliance nmst be ground_ d. In the event of an<br />
dectrical short (ircuil, grounding redtaes th_ risk of<br />
d_ ctric sho(k.<br />
This appliance is equipped witll a power cord hmdng a<br />
gromlding wire with a grounding plug. The phlg llltlst<br />
be plugged into an outlet that is properly installed and<br />
grounded.<br />
Consuh a qualified electrician it lhe grounding<br />
insu-u< tions are 11ol complemly undev,,lood, or if doubt<br />
exisls as 1o whether the appliance is properly<br />
grounded.<br />
If'the outlet is a slm:(lar(I 2-prong wall outl(l, it is<br />
your pm:-,onal responsibility and obligation to brae<br />
it rq)laced witb a prop( rly groun(h d Y_-prong<br />
wall Ollllet.<br />
[)0 llOt [111(/(1" _IIIV CiI'(I/IIIS[alI((!S ([11 Ol" l'eHIO\(<br />
PROPERDISPOSALOFTHEWATERDISPENSER<br />
Refrigerant Disposal<br />
Your old water dispenser may have used a wgulalcd<br />
reh-igermlt in its cooling ,u,qem. These r(flJgel-,mts<br />
are believed to harm slmtoq_heric ozon(. It 7,'ou<br />
are throwing away your old dispensel; make smx _<br />
tile l*!fligel',nlt is renloved and recovered tk)r proper<br />
disposal b} an EI{\-_ (rtified technician. If)(a/<br />
inmntionally release tiffs rcfl-igel-ant, you can be sul_ject<br />
to lines and impfisonnmnt u rider provisions of<br />
enviromnental legislation.<br />
tb( tllird (ground) prong f'ron_ tim pox_er cord.<br />
I)O 110[ /IS( _/11adapt( r phlg with this appliance.<br />
I)o 11o[ [IS( [tll ( xtension cord witb tllis applianc(.<br />
If t11¢ power (ord is too sllom ha:e a qualitied<br />
¢leclrician inslall an oullet n(ar lbe al?pliance.<br />
For best operation, plug the appliance into its own<br />
ele(trical outlet on a dedicated circuit to prey( nt<br />
f'lickering of lights, blo_ ing ot fllse or nipping<br />
of circuit breakel;<br />
READANDFOLLOWTHISSAFETYINFORMATIONCAREFULLY.<br />
SAVETHESEINSTRUCTIONS<br />
3
Usingthe water dispenser.<br />
4<br />
Features and Parts List<br />
0 BottleSupportCollar--Black (WS28X10048)<br />
Separator (WS28X10013)<br />
Cold <strong>Water</strong> Tank<br />
Hot (Red) and Cold (Blue) Power Switch (back of dispenser on equipped<br />
models). The CaM (Blue) power sxdlch also turns on xhe dfilkr<br />
coral)area,, at, on equipped models.<br />
IndicatorLights. The power indicator light will be lit when th_ dispenser is<br />
phlgged in. The hot and caM indicalor light_ will Q'cle on mad ell while<br />
the dispenser he_ts and cools the wakr. (:ompressor start m_y be delayed<br />
up to 3 n]imlk s Oil certain models.<br />
_Hot _, RoomTemperature_ , Cold _ <strong>Water</strong><strong>Dispenser</strong>Buttons<br />
<strong>Dispenser</strong>DripTrey(WS28X10031) andGrille(WS28X10032)<br />
CompartmentDripTrey(WS29X10029)onmodelsGXCF25FBS, GXCF25HBSand<br />
PXCR33KSSonly<br />
Chi//er Compartment on models GXCF25FBS,GXCF25HBSand PXCR33KSSonly.<br />
The ( onll)altnlent is inlcndcd solely ibr use in drilling (mam'd mad boxed<br />
beverages and packaged nonl)erishables.<br />
Storage Compartment on model PXCF22RBS,Do not us_ to slor_ fi_o(Is<br />
re(lulling refligcratJon. Thc con]l)artment is not refligeraled.<br />
Compartment Shelf (WS28X100281<br />
DrainageCap(WSOIXIO008)<br />
SiliconStopper(WSOIXIO007)<br />
Loading the <strong>Dispenser</strong> and Start Up<br />
Sanitizethedispenserwatertankspriorto<br />
installingafallbottleof waterfor_e firsttime(see<br />
"CleaningandSanitizingthe <strong>Water</strong>Tanks").<br />
IMPORTANT: Makesure thedispenseris unplugged<br />
withboththe hotandcoldpower switches(onthe<br />
backof the dispenseronmodelsso equipped)setto<br />
the0 (off)position. Beforeplacing#Tewaterbottle<br />
onthe dispenser,washhandsandwipethe top of<br />
thebottlewitha cleancloth.Avoidtouchingthepart<br />
of the bottlethatwill bein contactwiththe water<br />
dispense_<br />
Makesure thewaterlevelin thetop of the<br />
dispenseris towenoughto allowfor proper<br />
bottleinstallation.Failuretodo somaycause<br />
thedispensertooverflo_<br />
l. Peel the label from the lop cover at the<br />
bottle (if present). Do not remove the<br />
entire bottle cap.<br />
Child Safeguard<br />
The ItOT dispenser button is equipped with<br />
a child sateguard that reduces tile risk of hot<br />
water being dispensed accidentally or by small<br />
children. Ib dispense water, rotate the knob<br />
cotmmrclockwise and push the butlon in.<br />
The knob will leset automatically when<br />
file button is released.<br />
2, Place th_ bottle on top otthe dispenser as<br />
shown, aligning the dispensing _lve l)robe<br />
to file center el the water bottle cap. Press<br />
down until tile probe penetrates the bottle<br />
cap, allowing the bottle 1o rest on the<br />
suppolt collal:<br />
3, IMPORTANT:Press bothdispense buttonsuntil<br />
water mns from bath taps.<br />
4. Phlg in the dispenseE<br />
5. S(t tile COLD and IIOI'l_ower switches<br />
(localt d on lhe lop left rear otfll( (lislx lzser<br />
on models so equipl)ed) u) Ihe I (on) position.<br />
6, Nlow 30 lninums ti:)r water to l(ach hot<br />
and cold t(mperamres.<br />
Contact a local waterbottle distributor to purchase<br />
water bottles,<br />
Thedispenserheats water to a temperature of<br />
approximately 190°F(88°C).<strong>Water</strong> temperatures<br />
above 125°/:(52°C)can cause severe bums or death<br />
fromscalding. Children,the disabled andthe<br />
elderly are at highestrisk of beingscalded.<br />
CAUTION:Cbildre.sboa,d bosapo ised<br />
by a parent when usingthisproduct.
Care and cleaning of the dispenser.<br />
Drip<br />
Cleaning the Outside Cabinet and Storage/Chiller Compartment<br />
IMPORTANTSetbothpowerswitches(arttheback<br />
of the dispenser, if equipped)in the 0 (off)position<br />
andunplugthewaterdispenserbefbrecleaning.<br />
Fh( cabinet anti compartment of ti_( dispens(:r<br />
can Ix. wash( d witia mild soap<br />
anti _/ter. Rinse thoroughly with ckar waml:<br />
Never use commercial clean_ _s el abrasive<br />
scouling pox_lels.<br />
Stainless Steel Surfaces (on some models)<br />
Donotusea steelwool pad,"# will scratchthe<br />
surface.<br />
Ib clean til_ stainless sl_el surfhc_, use warm<br />
sudsy water or a stainless sled clean(r or polish.<br />
Ahvayswipe tile sulb_ce ill tim direction of'tll(<br />
grain. Follow lhe clean(r inslructions fi)r<br />
cl(aning tile stainless steel surfime.<br />
,_'_V('ep aD,'_lv OF vac//t]lll ally dllst t-1"oi71<br />
th< contiensel coils on tim back of tile unit.<br />
Dyt I×'st _vsults, use a brush speci dlVdesigned<br />
fk)ltiffs purpo'
Care and cleaning of the dispenser.<br />
Draining the <strong>Dispenser</strong><br />
The dispenser should be thained heti)_e clem/ing the ranks and be_iwe lea_ing t'_r hmg vacations ov ahsen(es.<br />
1. Set both power switches (on the back of the dispensm,<br />
if equil)ped) in the 0 (off)position and unplug the dispensec<br />
2. Remove the "_aterbott]e from the dispenser:<br />
3. Put a cont:dner that willwithsrund hot _artq- under the hot _ater<br />
tap, Press the hot dlsl0ertser button until the water is<br />
cod (about 1 quart). Add _amr m the cold _tter rese_woir<br />
(on top where the bottle supplies water) as needed.<br />
4. Dispense water ti-omboth buttons into container(s) until<br />
no more _,_,ttercarl be dispensed (about 1 quart of water<br />
still remains in the dispenseO.<br />
5. Place a large bucket beneath the dv4in otltlet on the rear<br />
(*fthe dispensm:<br />
6<br />
(rear of dispenser)<br />
outlet cap<br />
6. [sing a Phillips screwdriver, loosen the screws on the bracket<br />
cow_ring the drain outlet cap. Rotate the bracket out of<br />
the _J_ to allos_access to the cap.<br />
7. Remove the ca]) and silicon stopper flora the drain outlet<br />
and and allow "_vaterto drain. Atter dr,fining, replacethestopper<br />
andcap.<br />
8. [{oote tile bracket ba(k inro ph
Toremove<br />
Toreplace<br />
_'_ _arator<br />
Cleaning the Separator<br />
IMPORTANT"Set both power switches<br />
(on the back of the dispenser, ff equipped)<br />
f17the 0 (off) position arid unplug the water<br />
dispenser before cteanflTg.<br />
1. Remove the water bottle and drain the<br />
dispens(r (see OrabTingthe <strong>Dispenser</strong>).<br />
2. P.(_mov(_the support collar b) turning<br />
cotmterclocloMse and pulling straight otE<br />
3. Remove the plastic separator by pulling<br />
straight out (you Ilia)" need<br />
1o twist slightly to loosen).<br />
4. Clean the separator with dish soap<br />
and water orin the top rack of<br />
117(dishwashel:<br />
6.<br />
7.<br />
8,<br />
9.<br />
Dry the separator thoroughly on<br />
both sides.<br />
Using a clean cloth or paper towel,<br />
thoroughly dry lbe cold water reservob;<br />
Place the separator back in the<br />
dispensm: Make sm-e file long, tapered<br />
end of the separator is positioned firmly<br />
on the metal plug on the bottom ot the<br />
Fuse r', OiI'.<br />
Replace the support collar and turn<br />
clocloMse until it is fn-mly in place.<br />
Install a full wat(r bottle on the<br />
dislx user (see Loading the <strong>Dispenser</strong>).<br />
Sanitizing and Cleaning the <strong>Water</strong> Tanks<br />
IMPORTANT.Periodically the water dispenser tanks must be sanitized to prevent unpleasant tastes in the water and cleaned to<br />
remove mineral deposits that can impair flow.<br />
1,<br />
To Sanitize:<br />
2_<br />
3.<br />
4.<br />
5.<br />
6,<br />
7.<br />
8.<br />
Bel%re cleaning, sel I)olb l)o'0,er sxdtcbes<br />
(on tb_ back (}f 111(dispens( r, i_equipp(d) []<br />
in 1he O(off) position and unplugthe water OFF<br />
dispenser, position<br />
NOTE:For flr,,t time install_tion, skip<br />
steps 2-4.<br />
Erupt) tile water bottle, then remov( it fi'om<br />
tile dispens( l;<br />
Drain lb( water tanks (se( Draining the <strong>Dispenser</strong>).<br />
Reinstallthe silicon stopperanddrain cap<br />
(see DrainhTgthe <strong>Dispenser</strong>).<br />
DO NOTADD BLEACHFIRSTORDIRECTLYTOTHE<br />
DISPENSER.Concentratedbleachmay damageplastic.<br />
A(Id 1/2 teasl)oon (2.5 ml) of ordinalw 6.0% maximum<br />
household bleach to a 2 quart (2 lit(r) pitcher filled<br />
with tap water.<br />
Pour the sohltion in the opening at lb( top of<br />
the dispensen<br />
Repeat steps 5 and (3 until tile dispenser is full.<br />
Press the but and cold dispenser buttons until<br />
the water just begins to flow from the taps.<br />
9. Allow to sit tor 15-20 minutes.<br />
10. Rinse out the bleach solution:<br />
-- Drain tile water tanks into a larg( bucket<br />
(see Drainingthe <strong>Dispenser</strong>).<br />
-- Make sure that the silicon StOl)per is NOTinstalled.<br />
-- IMPORTANT" Remove the separator and wipe out the<br />
cold water reservoir (see Cleaning the Separator).<br />
-- Clean, lb(n reinstall the separator and collar<br />
(see Cleaning the Separator).<br />
-- Pour approximately 1 gallon (4 quarts or 4 liters)<br />
ot fresll tap water into th_ top and allow to drain<br />
into the bucket.<br />
-- Flush with an additional 1 gallon (4 quarts or<br />
4 liters) ot fit'sh tap wat(r and allow to drain<br />
into the buck(t.<br />
11. Reinstall the silicon stopper and draincap<br />
(see DraflTflTgthe <strong>Dispenser</strong>).<br />
12. ]nsmll _1h-esh water bottle (see Loading the <strong>Dispenser</strong>).<br />
13. DispenseI quart(1 liter) of water from each tap and taste<br />
to mak( sun' tim blemb solution is (ompl(tcl)<br />
removed.<br />
ff you continueto tastethe chlorine fromthe bleach solution,<br />
repeat steps 10-13until the taste is gone,<br />
14. Plug in th( dislx riser. Tllen turn Oil Ih( hol [_]<br />
and cold [)ow_ r switches (on th( back of th(<br />
disp( ns_ r, it ((luipp(d). ON<br />
position<br />
ToRemove Mineral Deposits:<br />
Mix 2 quarts (2fiters) of water with two quarts of vinegar OR mix I gallort of water (4liters) with 16ounces (454g) of citric acid<br />
crystals. Bleach does not remove mflleral deposits. Do this in place of step 5 when removing mineral deposits.
Care and cleaning of the dispenser.<br />
Defrosting (for models GXCF25FBS,GXCF25HBS and PXCR33KSS)<br />
Defrost wbenever frost on the waft of dTechiller mmpartment becomes<br />
excessive Never use a sharp or metallic instrument to remove frost<br />
as it may damage the liner. We recommendusinga plastic scraper<br />
Do net use any electrical devicein defrostingyour chiller comparLmen_<br />
Todefrost:<br />
}'_R(nlove inms from the conlparHnent.<br />
i!i_"Ihrn tilt' Cold (Blue) Pow(r swit_ll (it equippu(I) t_ off<br />
and unplug tile dispenser;<br />
_'_Put sev(ml towels in th_ bottom of the compartment<br />
to collect watel:<br />
Preparing for Vacation<br />
For long vacations or absences, set both power switches<br />
(on the back of the diq)ens_ l if'equipped) to th( 0 (off)<br />
position.<br />
1. / nplug tile waU.,rdispensel:<br />
2. Remove tile water bottle.<br />
3. I)l-,fin lhe water tanks (see DrainhTgthe <strong>Dispenser</strong>).<br />
Specifications<br />
ChillingRate:approx. 0.5 gallons (2 liters) p(r hour<br />
Heating Rate: approx. 0.8 gallons (3 linpQ per bou r<br />
TroubleshootingTips.<br />
Defrosting usually takes a fi_w hours. "Ib defiost fhstel,<br />
keep tile (leer open.<br />
After defrosting:<br />
_i_!_i!_ Possible Causes What ToDo<br />
_'_R( movc the wet towels and _i[)(' up any renmining watt*l;<br />
}!i_Wipe tile comparmmnt with a (IU cloth.<br />
i!i:,Plug ill the unit and turn on tile Cold (Bhle) power switch<br />
(it equipped). R(turn imms to tile unit.<br />
4. [h T tile sepmvJtor fllorougbly on both tile top and bottom<br />
(see Cleaningthe Separator).<br />
5. Lear( the door ot tile chiller comparlment open.<br />
After returningfromvacation,makesureto sani_zethe watertanks<br />
beforeusingthedispenser(seeCleanhTgandSanitizingthe <strong>Water</strong>Tank).<br />
Capacity:3 or 5 gallon bottle<br />
PowerConsumption: Heating: 480 wall_,lllax.<br />
Cooling: 125 walls max.<br />
Separator needs cleaning. * S(c Cleanirtgthe Separator<br />
Unit nee(Is to be sanhized. ,S(tCleanhTgartdSanitizirtgflTe<strong>Water</strong>Tanks.<br />
Disl0en,ser is unplt_jged. * Push the plug (ompl(tely into the oullet.<br />
The fuse i,sblo_a_n/drcuit * Replace house disc or reset the boos( circuit breakel;<br />
breaker kslripped. * Ill()() lnan} it(ms are phlgge(I into a single cir(uil,<br />
mov( some items to a diflbrent circuit.<br />
All the water in the water tank * Wait 30 mimltes tbr water 1o beat or cool.<br />
has been used.<br />
Temperature limiter tripped. * Sot tile [lot m_d (old power swit(hes (on tile l)a(k of tile<br />
dispensm; i_equipped) to the O (off)position. Wait 5 minutes;<br />
then set the switches lo the I(on) position. L nplug unit [or 5<br />
minutes if model does not have sepm-4te power switches. Wait 30<br />
lllill!llt'S f't)Y walt'r to Ileal or cool.<br />
Empty _ter bottle. • Repla(( wilb a new boltle of wat(m<br />
Mineral deposits clogging tanks. • Se( Care.and Cleaning.<br />
Chiller door has been left open. • Ch_e chiller door.<br />
Ice buildup Mocking v_ater flow. • 'Ibm off cold power _witcb (if equipped) or unphlg unit<br />
overnigllt. Once water call be disp(ns(d fiom thu(x t, phlg tlnit<br />
back in or turn cold po_er switch back to th_ ON position.<br />
Crack or pin bole in bottle. • Replace with a new bottle of _:_tel;<br />
Norm al Operatio n_ompre_sor • Wait for up to 3 nfinules fl,r tll_ compressor Io start.<br />
start may be delayed by up to<br />
3 ntinutes (on certain models) to<br />
pro o the compre, sorale.
Possible Causes What ToDo<br />
<strong>Water</strong> system overtired. <strong>Water</strong> • I)ispens_ _old water until air is rt k ast'd into th_ bottle.<br />
is boiling, in the hot tank and<br />
tmbbliIg up into the bottle.<br />
<strong>Water</strong> dispel_ser is uneven. • M_lke surc the water is installed on a kwl floor strong enough<br />
to support it when fully loaded.<br />
Bottle making a gurgling noLse • TI liS is norl_]al.<br />
as water fills the tanks.<br />
Hot water boiling sound. • rI'his is normal.<br />
<strong>Dispenser</strong> or water bottle shakes • This is normal.<br />
when the coolh_ s_tem cycles off.<br />
<strong>Water</strong> lms high mineral content. • I?illd a "_,alel-SOllrt:e ,,ida Iow{r h;aldll( ss.<br />
Hot uater tank N empty or • Press the hot dispenser button until water flows to remove<br />
not completely full. air fl-om the hot tank.<br />
Cl_ler is not on. • Turn th( Cold (Blu() poxwr _wit
• f y<br />
INFORMATIONSIMPORTANTESENMATIEREDESECURITE.<br />
LISEZTOUTESLESINSTRUCTIONSAVANTD'UTILISERCETAPPAREIL.<br />
!0<br />
AVERTISSEMENT!<br />
N'utilisez cet appareil qu'aux fins pr#vues dans le Manuel du propri#taire.<br />
PR[-CAUTIONS DESE-CURITE-<br />
Quand vous utilisez un apparel! #lectrom@ager, vous devez suivre des pr@autions en mafi#re de s#curit#,<br />
en particufier les suivantes .<br />
_'Vous devez I)ien installer el placer _( (]istlil)tlt(t]l<br />
d'ea[], COl]D)l-lll(_lll( lit _ C(!S i]]Stlt]ctiolls, _lV_]ll[ (l(<br />
l'utilis( l_<br />
!_)Ne F,ennettezjamais _ des erdhnts de gfimpel;<br />
de se t(nir ou de s( pendre 5 l'ext&-ieur du<br />
distributeur ou sur los _tag(q-(s qtli se tFOUVt'll[ _'1<br />
l'int&'ieur de l'armoire de mngem(nt (sur certains<br />
mod61es). Ils peuvent renvcrs( r le distributeur (t<br />
l'endolnmag( r ou se bles_er st:ri(usem( nt.<br />
i_2Ne l'nngezjamais ou n'utilisezjamais d'(ss(nce ou<br />
d'autre liquide ou _petn-inflmnmable h proximit_<br />
de ce disn'ibuteur ou (1( tOtlt autre appareil<br />
_1_ctrom_nagm:<br />
_{_1)(? )mnchez xotl* distribul( ur d'
INSTRUCTIONS DEMISE,4LA TERRE<br />
AVERTISSEMENT: Un_._is_.tiHs_tion d_I__ich_ t_i_h_s6o peut occasionner<br />
one secousse #lectrique.<br />
Cet appareil tqectrom&mger doit &ye ntis _ la lerye.<br />
Ell Ca%(le {otlrl drcuit 61e( tyique, la ntis( fi la terre<br />
r(duit 1{ lisque de s(couss( _lectrique.<br />
Cet appareil t:lecnona6nagvr esl muni d'un cordon<br />
d'alimenmtion muni d'un fil 41eraise fi la t(H*: avec<br />
une fiche triphasde. La rich( dolt £,tre bvanch6e<br />
darts une prise naln-,de qui e.,r bien instalh:e et raise<br />
fi la terre.<br />
(_onsultez u n ¢qecll-icien qualifi(} si vous ne comprenez<br />
pas bi(n les ilast*uctions d( lnis( _ la t(lre ou si vous<br />
ne savez pas si votre al)pareil {st bien mis Ala terr¢.<br />
Si la l)l-isemurale esl tin( prise nounale biphas&:, vous<br />
_';t(s r¢sl)Onsal)l¢ {t vous {;t¢soblig& d( la r(mplac( r<br />
par tree pyis( triphas&: I)ien raise _'1la leyr{.<br />
Ne cotlpez Oil ll'el]levez.jalllais la [yoisi{?lll( 1)roche<br />
(mi';e fi la terye) (Ill cordon d'alimenmlion.<br />
N'ulilisez pas une fiche d'adaplation avec c(t<br />
appareil.<br />
BONNEMISEAU REBUTDUDISTRIBUTEUR D'EAU<br />
Disposition do refrigerant<br />
Voty( ancien distribuleuy d'eml peut contenir<br />
un ydtiig_l-,int r6glem( ntaiyc darts son sXst&ne de<br />
refroidissement. Ces y6ffig&ants so*Itjug& nocit_,<br />
pour l'ozone sn-atosph6yique. Si vous d6barrassez<br />
de votl-e ancien distvibuteur, assuyez-vous que<br />
1_ r6fyig6rant soil enlev6 et ydcup6yd par un<br />
lechnicien certifi6 par I'EPA. Si vous lib6r(z<br />
intentionnell( merit ce r(_f'rig6rant, wins pouvez &lye<br />
SOI.IIIIiS at]x (Olltl-aVel][ioIIS {t }_1l'elllpyisollllelllell[<br />
SOilS pFOViSiOHS des lois stir l'ellVil-OHllel_lellt.<br />
N'ufilis_ z pas de rallonge _lectvique avec cet appareil.<br />
Si 1( cordon (l'alinaentalion est tyop court, demandez fi<br />
tm Olectricien qualifi6 d'installer line prise intrude py_'*s<br />
de _onv appareil.<br />
Polly I111 meilleuy ii)llCtiOllllelllel][, /)l'dll( hez cet<br />
appaleil iqectrom&lager fi sa pyopre [)rise _lectfique<br />
pour _viter loute lumi(,lv qui clignote, fusible qtfi saute<br />
ou disjoncleur qui bascule.<br />
LISEZETSUIVEZSOIGNEUSEMENT CESMESURESDESE-CURITE-.<br />
CONSERVEZCESINSTRUCTIONS<br />
//
Utilisationdudistributeurd'eau.<br />
!2<br />
I<br />
' _- protection des enfants<br />
CaracMristiques et liste de pieces<br />
0 Collierdesoutiendebouteille--noir(WS28XIO048)<br />
Separateur (WS28X10013)<br />
R_servoird'eaufroide<br />
Commutateursdemarcheeau chaude(rouge)et eau froide(bleu)(arrieredu distributeur<br />
sur/es modMesequipbs),l,e (ommut_tteur de marche Cold (bleu) met au_i en<br />
marche le compatliment refroidisseut; sur les mod_.les _quip&.<br />
Voyantst_moins.De xoyant t&noin d'alimentation sera a/lum_ lol_-squele disrributeur<br />
esl bmnch_. Les _}mlts t_moin chaud et ti'okl \Ol/t almmafivcment s'Nlumer et<br />
s'_teindre tandis que le di.,,triNiteur reti'oidit et r&hauiI;e l'eau. Sur cel_ains mr_/_:k_,<br />
comptcsseur dmmit &:matTer p'a_: un d_lai de 3 mimltc_.<br />
Boutonsde distributionHot(chaude)_ , Roomtemperature(temp&atureambiante)_ ,<br />
CoM(froide)<br />
Chargement du distributeur<br />
Plateaude condensationdudistributeur(WS28X10031)etgrille (WS28X10032)<br />
Plateaudecondensation ducompartiment (WS29X1002.9) cur/esmodMesGXCF25FBS,<br />
GXCF25HBS etPXCR33KSS uniquement<br />
Compartiment refrnidisseur surlesmodMesGXCF25FBS, GXCF25HBS etPXCR33KSS<br />
uniquementCe ('Olllpk,rlilrlent tle dolt &re utilis_ que pouI refioidir des boissons en<br />
bo_wou ell puquet et des aliments n(m-D&issablesembull&.<br />
Compartimemdo stockage, sur IomodMePXCF22RB$. Ne I'ufilisezIJaSpour stacker de<br />
la nourfiturc devant _ne t_:fiig,Srde,l,e compmtiment n'est gas r_flig_:rt:.<br />
Etagereducompartiment (WS28X10028)<br />
Capuchondedrainage(WSOIXIO008)<br />
Bouchonen silicone(WSOIXIO007)<br />
Desinfectezle reservoir d'eaoavantdeI'emp/irpoor/a<br />
premiereDis (coosoltez"Nettoyagent desinfectiondes<br />
reservoirsd'eao'),<br />
IMPORTANT:Assurez-vousquele distributeursalt<br />
d4branch4nt quo los deuxcommutateursde marcho(eau<br />
chaudent eaufroide)(_,farri_re du distributeur`pourles<br />
modOlesquien sootdot4s)soienton position0 (armt)avant<br />
de le chargerAvantde le charger,essuyezlehaut de la<br />
bouteilleavec un lingepropreet lavez-vousles mains.Evitez<br />
de toucherla partiede la bouteillequi seraen contactovec<br />
le distributeurd'eau.<br />
Assurez-vousquaIo niveaude feau on haut du distributeur<br />
salt suffisammentbas pourpermettreuoe bonneinstallation<br />
de la bouteille.Si vousno le faitesgas,vousrisquezde<br />
provoquerun debordementdu distributour<br />
l. P(kz l'dtiqu(tt< du couvercle silt/d (1/ ha/ll (k<br />
capuchon de la bouteille.<br />
Sauvegarde pour la protection des enfants<br />
Le bouton du distfibmeur CHAUD est muni qu'une<br />
samegal*le pour la s('( rail(" des Infants (lui r&hlit le<br />
risque de distribution accidenlcl/e d'eau chaude par<br />
de jem/es en£mt_,. D)ur fair_ cou/er I'eml, murnez le<br />
COll_lmtlmtetlr darts le sens inversl des aiguil/es d'tlne<br />
ITIODtl'_"{'t al;pt/v('z sur I1 botltOlL Ie COI//lll/l[2nl:IIF<br />
Se 1(h/let atmm/atiqtlel/lel/t el/ pla(e qtl iiid _.t)[is<br />
i*:lfichez le bouton.<br />
2. Placcz la boutl ille (n haut du distr:tbumur<br />
(amine l'indklue la ligure, era alignam la son&<br />
du robinet disl]Jbuleur au (enlro du bouchon de<br />
la boumille d'eml. P_essez vt.t_, le b %j_lsqu'fi (e<br />
q_le la sonde pdng'txe dans le lx_uchon de la<br />
lxmt* ille, en p< rmeltant {ila boul
Entretienet nettoyagedu distributeur.<br />
Grille<br />
condensation<br />
Nettoyage de I'exterieur de I'armoire et de rangement<br />
du compartiment refroidisseur<br />
IMPORTANT:Mettezlosdeuxcommotateursde marche<br />
(_I'arribre du distributeur,si bquip_)on position0 (art_t)<br />
et d_branchezledistributeurd'eauavantde le nottoyer<br />
VOtlS po/ivez i/etto}ei I'annohc clle (OlllpaFtimeDt<br />
du disuibuteur mcc de/'eml sa_onneuse. Rincez bkn<br />
avec de l'eau pure. N'uli]isez jamais de nem:,_ant<br />
(llmlnel_(ial OIl {le po/Idl'(' i_I'(_C/]I'(_Yable,sire.<br />
Surfaces en acier inoxydable (sur certains modules)<br />
N'ntilisezpasdetamponsdelained'acier;<br />
ilsponrraientrayerla surface.<br />
])(mr nelt*>x*+rla smta_:e en acier inoxydable, utJllsez<br />
de l'eau chatlc]e savoDJ/et/x c,tl till produit netloval3t<br />
ou ciw i+ader inoxydable. E',',m cz tvmjoul', la surface<br />
darts le sees d_l giain. Suivez los instmctkms du<br />
ploduit netR)vant pot]l IlettOver la S/]Ff_ICe el/aciel<br />
inoxTdable.<br />
Enle¥cz la p(*ussi{-rc du sol penl]n d/i ((}ndensal('ui _1<br />
I'alli{-rc de l'apparcil _ I'aide d'une bross_ ou d'un<br />
aspil;_tcm: Poul" obtenil les l_sullals los m{ illeurs,<br />
ulilisez tree brosse sp_:cialemenl tongue ai cello fin.<br />
Vous la trouvcrcz darts la plupalt des magasins<br />
d'apparcils (qectrom(.nagvrs.<br />
POU] sav(¢lr (Ol/lt/lell[ a(]]{ I('Y le prodt]it [lellO_/l/t<br />
Entretienet nettoyagedu distributeur.<br />
Vidange du distributeur<br />
V(msdevez fide) le distfibuteur av,mt de netm)er les )&e/_oirs et re'ant de vousabsente) pour de longucs vacan(es ou une kmgue dmt:e.<br />
1. Mettez les intemlpteur', de mard/e (fil'aMbre du dlstribmeur, si<br />
0quipS) en position 0 {arr_t)et d_branchez le distributeur d'eau.<br />
2. Enlevezla bouteilled'eau du disuibutem:<br />
3. Mettez le contenant qul recexa'4l'eau chaude sous le robinet d'eau<br />
chmlde. Appuyez sur le bomon du distribumur d'eau chaude jusqu"a<br />
ce que l'eau soit fralche (elwiron 1 litre)..a:}outezde l'eau all<br />
r,_se>'oird'eau floide (en haut de liioff la bouteille fburnit l'eau)<br />
si nOcessalre.<br />
4. Appu'_ezsur les deux boutons du distributeur et laissezcouler l'eau<br />
,jusqt£fice qt£il n'y ait phls d'eau qui coule (emir{m 1 liu_ d'eau<br />
demeure dans le distributeur).<br />
5. Placez un grand seau sous la sortie de vidange situde _ I'arri{,re<br />
du distl'ibutetu:<br />
!4<br />
(arri_re du distributeur)<br />
de sortie<br />
- . , . ) ....<br />
6. A1 ded nt) te_sthlhps, desselezles_sdt st)p)tqtlcotxle<br />
le capuchon de sortie de vidm%e.Faitest{_urnerle supkuwt.s<br />
compl{.tementpour avoiraccbsau capuchon.<br />
7. Enlevezle capuchon et le bouchon de siliconede la solxlede vidangv<br />
et permetmzfil'eau de s'&ou/m: ApN's]a vidange, remettez onplace<br />
lebouchonetlecapucho#.<br />
8, ]b_aJtes RR]rlI(T le st]ppo/t _lJ']n de le rell/ettre tq-i place et i_sserr_z<br />
les_is.<br />
,&ssurez-vous d'installer une bouteille pleine et de faire couler I'eau<br />
dr] Iobil/et d'eau chaude avant de b£ancher et de Itq//e[tre en marche<br />
le disnTibuteur @oil7 Chargementdu distributeur).
Enl@ement Remiseenplace<br />
soutien de bouteille<br />
_ S@arateur<br />
Nettoyage du separateur<br />
IMPORTANT:Mettezles deuxcommutatoursdo<br />
marche(_farribre du distributeur,si #quipfi)en<br />
position0 (arr#t)ot dfibranchezledistributeurd'oau<br />
avanttoutnettoyogo.<br />
1. Enlevez la bouteille d'eau et _idez le dlsuibuteur<br />
2.<br />
3.<br />
4.<br />
(consultez Vidagedo distdbutour).<br />
Enlevez le collier de soufien en lournant dans<br />
le sens oppo_ a cehfi des aiguilles d'tme montre<br />
et en lh'ant droit.<br />
En/exez le s@amteur el/mati{_re pbtstklue<br />
en th'al-ltdroit (vousavez peut-btre beSOil/<br />
de tordre l_gOrement pour dOgagvr).<br />
Neuoyez le s¢ipal'dt_/ll" avec de I'eau sax_)l/netlse<br />
savol/netlse o0 dans le lave-xaisselle, stir le pal/ier<br />
sup&ieul:<br />
Desinfection et nettoyage des reservoirs d'eau<br />
5. Faites bien sdcher le hautet le bas du _parateu/:<br />
6. A l'akle d'un linge propre ou d'un es,_uie-iout,<br />
s&:hez le r&er*_)il d'eau ifaide _1ibnd.<br />
7. Remettezle sOparatelll- el/place dans le<br />
disuibuteul: ,&SSUleT-xous que I'extrOmit6allong6e<br />
et amincie du s@aramur salt insdrt:eteiT_/ell/ent<br />
dam la pfiw m_:m/liquesittl_Sen bat,du r&e*woil:<br />
8. Remetmzen placele collier de soutien et tournez<br />
dons le sens des aigttillesd'tme montre jusqu'ii ce<br />
qu'il soilbien tix_:en place.<br />
9. Remettezen placela bouteille d'eau (consulmz<br />
Chargement dudistributoon.<br />
IMPORTANT: Vous dovozdOshffecter p#riodiquemont los r#sorvoirs du distributeur d'eau pour empgcher toute accumulation<br />
de d#pOtsmin#raux quipeuvent changer le gol)t et le dObit de l'eau.<br />
Pour d_sinfecter :<br />
1. _'kvalit de (/(_silllt_( [eI, lliett(!z les detlX<br />
C¢)II]lllll[a[etll_S (l( Inal-(h(! (_'1 I'_IFFi_I'(_<br />
du distribuwur, si dquipd) en posidon 0 (arr_t)<br />
_t debranchez le distributeur d'eau. NOTE: Pour Position<br />
ARR[:T<br />
la premi{qu installation, sautez lus dtapes 2-4.<br />
2. _idez la b(mteille deau, puis retirez-la du distlibuteul:<br />
3. Videz les i6servoirs d'eau (w)ir Vidage du distributour).<br />
4. Remettez en place le bouchon de silicone et le capuchon<br />
de drain (volt Vidago du distributeur).<br />
5. N'AJOUTF_ZPAS L'EAUDE JAVEL EN PREMIER OU<br />
DIRECTEMENT DANS LEDISTRIBUTEUR. L'eau de Javel<br />
concentree risque d'endommager le plastique.<br />
_{ I'S('Z 1/2 {'l.]iller _'1thd (2,5 ml) d'eau (It' Javtq<br />
donmstique (concentration 6,0 % maximum) dmls<br />
une cruche de 2 litres remplie cleat] du robinet.<br />
6. Vers{ z la sohltioll dallS l'otlvel-ltlre sittlee Sill" le d(_sstls<br />
du distributeur.<br />
7. R_pdtez les dtapes 5 el 6 jUS(lU'fi ce que le (listributeur<br />
soil plein.<br />
8. Appuvez SUl les botltOllS (/e distribtltioli d'eau chmlde<br />
et fi-oide jusqu'_i ce que l'eau coule des deux robinets.<br />
9. Laissez la solution agir pendant 15 a 20 minules.<br />
10. Rincage de la solution d'eau de Javel :<br />
-- "_idez le (onk'nu des rdsetvoirs (/'('au (lolls 1111grand<br />
seau (xoir Vidago du distributour).<br />
-- :\SSIII'L'Z-_,OUS que<br />
PA$ en place.<br />
le hoe(hart en silicone nu soil<br />
-- IMPORTANT:Enlevezles#parateuretnettoyezle<br />
r#servoh"d'eaufroide (volt Nettoyago dus#paratour).<br />
-- Netloyez, puis remetlez eli place le sdparateur et<br />
le collier de soutien (voir Nettoyago du s@arotour).<br />
-- Versez approximativcment 1 gallon (4 liues) d'(au<br />
du robinet clans l'ouverture (/11 dessus, puis laisser<br />
l'eau s'{1(ollleF dons le ',eat].<br />
-- "kkq-sez un autre gallon (4 lilres) d'
Entretienet nettoyagedu distributeur.<br />
Degivrage (pour les mod#les GXCF25FBS,GXCF25HBS et PXCR33KSS)<br />
ObdivrezchaquefoisClUelegivresurlapard ducempartiment refroidi_salr<br />
devientexcessiveN_tilisezjamaisd'instrDme_aigDiseDD<br />
metalliqDepourenlever le givre,car VDDSrisqDezd'endDmmager<br />
les DDndDites. Noesvousrecemmandens d'utifiserungrattoirenmatibre<br />
plastiquaNtltilisezjamaisenappareilblectriquepeerdbgivrerle<br />
compartiment refroidisseur<br />
Pour d#givrer :<br />
_'_Enlevcz los aliln_ nts du _ompartimcnt.<br />
i!i:"Mettez le _ommutateur de marche Cold (bleu) (si _quil%)<br />
en position OFF (arr&) _t d6bmnchez le distlibutcul:<br />
Preparation au depart en vacances<br />
ill,Ill(1 VOIlS [)_ll_tt Z €'11 _l(_/llces Otl VOllS _ll)S('lltez [)('ll(l_lllt<br />
longtCml)S, nwttez les deux ( ommutatcurs de marche<br />
(h l'arri&e du distlibuwul; si dqui[%) en position 0 (arr_O.<br />
1. Ddbranchez le distfibuteur d'< au.<br />
2. Enlevez la bouteille d'eml.<br />
3. Videz les rdservoirs d'eau (volt Vidagedudistributeur).<br />
Caracteristiques techniques<br />
TaDxde refrDidissement: environ 2 litres (0,5 gallons) par hemx'<br />
TaDXde reDhaDffDmDUt :( IIViFOII3 liu-es (0,8 gallons) pal- h_u re<br />
Conseilsde depannage.<br />
_ _Dmpress_ur_de_arre<br />
pa_ torsouer_pp_rei/ e_t<br />
/6<br />
Cause possible Oue faire<br />
}'2Mett( z plusiems s(lwi_ ttcs _n 1)as du compartiment, pour<br />
recueillir l'eau.<br />
Le (/6givrage prend gdn&vdelnent queklues heul*:s. Pour<br />
ddgivrer phls r,lpidement, laissez la porte ouverte.<br />
Apres ave# degivre :<br />
}'_Enlcvcz los se_vicm,s mouilldcs
idistributettrd_i<br />
itdubr_it;<br />
Un_vais_de_dans;<br />
Cause possible Que faire<br />
I1 y a till |rou d'epingle ou tlne fente<br />
dzaas la bouteille.<br />
Le s)stbtne d'eau est trop plein. L'eau<br />
bout dzaas le reservoir d'eau chaude et<br />
bouillonne dans la bouteille,<br />
.Le dlswibuteur d'eau n'est pas bien<br />
a nlveall,<br />
La bouteille fait Ilia glou-glotl quand<br />
l'eau relnplit les r6servoirs.<br />
Son d'eau chaude qui bot,t.<br />
Le distributeur ou la borne'lie d'eau vibre<br />
lorsque le s_.'st_n,e de refroid[ssement<br />
termine son cycle.<br />
L'eau confient beallcou l) de nlint;rat LX.<br />
Le reservoir d'em, dlaude est vide<br />
ou pas completement plein.<br />
L'appareil n'est pas en mard,e.<br />
Le distfibmeur d'eau n'est pas branch,.<br />
Le fi,sible a saut_./le disionctetu" a bascul_.<br />
Le distributeur d'eau se ta-ouve stw<br />
tree stwface in,gale.<br />
• Rcmpla(ez par unc nomdle boul(ille d'ean.<br />
• I)ispcns_z (k I'eau fi'oklcjusqu'5 c_ que I'ail est relfidad_ dans<br />
hi bouteillc.<br />
• Assm'ez-x_)us que le distribnlenr d'ean soit bien inslalld sur un planchcl<br />
horizoltl3] s/l[_is31111nent t_)l?l l'ff)/ir le sofia,!nil qtland il est plein.<br />
• Ce lmlitestnonnal.<br />
• Ce lmlitestnonnal.<br />
• C'est i/,)rl13_ll.<br />
• "[_Fou\ez fine SO[llce d_ca[i inoills dtlrt'.<br />
\ppl+tzs rkl_ t)ndi:dslnb Ioad_ (11 /de _l t+qn_<br />
1'_ / c /I ) 51_ It' ch _s_ s " d'ea (la ok.<br />
• Mettez k c
Soutienau consommateur.<br />
• @ze cm¢n_, la gmanfiz,?<br />
SiteIntemet<strong>GE</strong>Appliances vvwvv.electromenagersge.ca<br />
Avez vous une question ou besoin d'aide concernant votre al)pareil dleclromdnager? Essay_ z le site internel de (;I,_<br />
Applimlc( s, 24 h(ures pay join, 365jotns par an. Pore- plus de conlk)rt et de ral:fiditd vous pouvez maimenani y<br />
(xtmire les manuds d'utilisation, _t ln,_.ln_ commander des pi6( es.<br />
StudiodeDesignpourta VraieVie vvww.electromenagersge.ca<br />
<strong>GE</strong> aRit actixemem en thveur (111concept de Design [ 7nivel-,el-_tes produils, selwices et environnemenis qui<br />
peuvent ,3tre utilis_s pro- des l)er_omms de to!it age, taille et capacitd. Nous reconnaissons 1( besoin de (oncevoir<br />
des produils adal)lds aun grand nolnl)re de handicaps l)h?_,iques et mentailx. Pore- ol)mnir des details sur les<br />
applications du Design [ Jniversel de GI(, qui comprend des i(16es d'agencement de (ui_ine pour des personnes<br />
handicap(_es, consultez d_.s _'1pr_:sent notre site internet. Pollr les pel_onnes nml-entendantes, merci d'al)peler le<br />
numero : 800.TI)I).G1L\C (800.833.4322).<br />
Pibceset accessoires wvvvv.electromenagersge.ca<br />
Les [)er_onnes peuvent rt.cevoir directement _ la maison des pi6ces ties cart(s VISA, MasterCard ou I)iscoxer sont<br />
accel)ldes ). Commandez ell ligne fi lollt monlent, 24 heurcs parjour ou pal- ldldphone au nlnnero 800.626.2002,<br />
mix Emts-Unis, pendant les holaircs de bm-cau habituels. Au Canada, appelez ml mlm(rt_ 800.663.6060.<br />
Losdirectives stipulees dans le present manuel comportent des procedures que n'importe quel utilisateur pout effectuer.<br />
<strong>GE</strong> n'est en favour d'aucune reparation ou entretien pour le distributeur, Nous vous recommandons fortement de ne pas<br />
essayer d'assurer vous-m_me los r_parations ou I'entretien de votre distributeur.<br />
Contacteznous wvvvv.electromenagersge.ca<br />
Si VOtlS ll'()t(s paS satisl _it du S( lvi(e AI)res Vent( doni xous axez/)(n_fici_ de (;E, (:otll_t(i(z llOllS s/It llolre silt<br />
en fburnissant tousles details, y (oml)ris xotr_ lllllll( FOd(: i(!l(!phon_, ou _crixez au : Manag( t; CtlStOln( r R(lations,<br />
<strong>GE</strong> Al)plianc_ s, Applimac( Park, Louisvilk, k_" 40225.<br />
--'lbnt ddtant tie mal_:/iel ou dl main d*oeuvre du pl_dniL<br />
-- l,es bouteilles d'eau.<br />
-- Les d('p]acen_eu ls fi vol i_! (l_tT]lJ_ile pour VOtl_ el/Sei_l] el ¸ COl_l/n el/l<br />
tniliser le prodtlil.<br />
-- IL]l/e insl_t//_ttloll, i_l_llse Oil el/lrelien ]lli-OITeCle,<br />
-- Wl_e p_ll_/le dtl ploduit ca/ISee par till abllS d'tltJ]isal]Ol_, ulle/_/allVaise<br />
tlli]isalion, l(ttlle/nodific_tlon, exploilallOl_ coHl/l/elcJa]e Otl tll/e<br />
tllJlJsalion dtl i)l_dtllt (l_tl/S iin btlt nol/p_Vtl.<br />
-- ']()111 pltldllil (jill t!sl llli]is( _ el_ dellol'_, d'll!_e r(_sJd_!l_ce ou d'llll bllleall<br />
-- i_ _J_[_la(e_ei_ des filsibles ou des disjoncle_n s de la rdsidence.<br />
-- Ufilisation de ce p_duit Io_que I'ean esl microbiok)giqt_ement<br />
i/nptlre ou de qualil( _ iUCOlM/tle,<br />
-- l)on/l_/age atl pl odllJt _ _,_tus ]'tltilJsez pour d ist/ibtlel ¸ _t111i_! _hose<br />
qtle de ]'e_ttl.<br />
-- [_ut dommage _lns6 ml prodnit pal" acddent, incendie, il_ol_(laliol_<br />
ou acre de Dieu.<br />
-- ]_1111service a11 prodlliL<br />
-- Tout doffanage forluit ou indire_ cause pal" des defau_ _ventuels de<br />
cet appareiL son il_stalialion ou ies reparations effeou_es.<br />
GARANTIE LIMITEE D'UNE ANNI_E<br />
• Conlnl_n_ aois:fl/ain_ ma Id_kzmcfiol* ?<br />
-- R_t/l/el/eZ le ploduIl _ttl/l/ag_aSil/o1"1 VOtlS I'_vez _chet(' aYec tlne<br />
exemplaim de la "Preuve d'achat'; Une unh_ neuve ou i_nlise _ neuf<br />
_,la _ln hie, Celte _rantie exclnt les fi_is d'exp&lilion du In od_lil 5<br />
_)tm d_)micile,<br />
EXCLUSIONDE GARANTIESIMPUCITES--Votre soul et unique<br />
recourseat I_ehange duproduitsolonlea dispositionsde eette<br />
Garantielimitee. Tonteslos garantiesimplieites,ineluantlea<br />
garantiesde eommereialiteet d'adequationa un usage<br />
speeifique, sent limitees a une anneeou a la periode la plus<br />
eourteautoriseepar la legislation.<br />
Cette garanfie cowcre Facizeteur ofig_zml et tout proprietaire subsbquent des<br />
produi_s ad_et6s h ties Fins r6sidenfieUes ou de bureau _ l'int6rieur ties Etats-<br />
U_fis, En ALaska, cette garmatie exdut le eofit d'ex_)6dition ou les appels tie<br />
set.dice a vo_0P lllilL$Oll oll bllrealL<br />
Cermi_s ]_mts ne permettent p,'ts l'exdusion ou ia restriction des dommages<br />
accessoires ou co_s6cufifs. Cette gm_afie vous domae des droits juridiques<br />
parficuliers, n_fis votts pouvez 6galement avoir d'm_tres droits qui varient<br />
d'Etat/_ E_at, Pour com_titre vos droits j_u'idiques, co_su!tez le burem_ de<br />
protection du consonunateur de votre localit6_ de votre Etat ou le procure_tr<br />
g_h_brai de votre Etat.<br />
(_ontactez no_s sur ge,com, ou appeiez le num6ro s,'ms frais 800.952.5039 aux<br />
Emts-Uzfis. Au Cm_atL% conmctez nm_s s_lr w_w.eiect romenagersge.ca, ou<br />
appeiez le numero sm_s frais 866.777.7627.<br />
Garant: GeneralElectricCompany,Louisville,KY4022_
INFORMACIONESDESEGURIDADIMPORTANTES.<br />
LEATODASLASINSTRUCCIONESANTESDEUSAR.<br />
iADVERTENCIA!<br />
Use este aparato solamente con e! prop6sito para el cua! fue fabricado de acuerdo a come se describe en<br />
este Manual del Propietario.<br />
PRECAUCIONES DESEGURIDAD<br />
Cuando use aparatos, usted debe tomar ciertas precauciones de seguridad, incluyendo las siguientes.<br />
Esle dislx nsador de agua del)e set instalado<br />
aprol)iadanaente 7"lo(alizado de a(uerdo (on<br />
estas illSIIRlCCiOIIeS _llleS d( Sel" (IS_I(IO.<br />
f_ No pelmita que los nifios se trepen, pm-('n o<br />
cuelguen de In parte ext(ma del dispensadol,<br />
o en los estames en el intelior del gabinele<br />
de ahnacenanfiento (en algunos modelos). Eslo<br />
podrfa hacer que el dispensador se voltee y s( d_lfie<br />
o cmls( lesiones sefias a los t'dflos.<br />
_i/No alllla('ell{ o tlSe ,_asOlilla lli OIFOS _,a[Jor(:s<br />
o lfquidos inflmnabl(s pr6ximo a (ste u otro apamlo.<br />
_!_D(sconect¢ el dispensador (k agua alll(!s (1(<br />
limpiaflo o hac¢ rle cual(luier rq)araci6n.<br />
NOTA:<strong>GE</strong>noproporciona servicio para el dispensadoi:<br />
Recomendamosque nointenteproporcionar servicio<br />
al dispensadorustedmismo.<br />
_2No use esle disp( nsador de agua para dispet'_sar<br />
llillgllll_ O[I'H (OS_I qlle llO se_ _g(l_/.<br />
_!_No con(cte el cable (l&:lri(o ni accion( los<br />
it'm:n-uF, t,..w(s el_(tricos (uando (1 disp(nsador<br />
(h agua (st5 xa(io.<br />
;i!Limpie cual(luier dermme de agua inmediatamente<br />
despu& de hal)er llenado o xaciado I)otellas d( a#,,ua.<br />
_ Los nifios deben _r supervisados por tmo de los<br />
padres cuando se disponga a utsar este producto.<br />
ADVERTENCIA:No_ co.._.,.o<br />
sea mJcrobio16gJcamente ilt_a o de calidad<br />
desconocida.<br />
F<br />
PRECAUCION:<br />
INSTALACIONAPROPIADAYLOCALIZACION<br />
Permila pot lo lllellOS 2,5 CIII (1 pulg.) de espacio<br />
entre la part( post( rior del disp_ nsador (]e agua y<br />
la pared, pal-_ pennilir que (l air( cir(ul(.<br />
}_No instal¢ el disp(nsa(lor de agua (lov_de la<br />
temperature est6 l)or del)@_ de 10 "C (50 "F)<br />
o ( (_('_ (k 38"C(100"F).<br />
Eldispensador calienta<br />
ag-ua a tma temperaatra de aproximadamenle 90 "C<br />
(194 °F). El ag_a a temperattu, as mayores de 52 °C<br />
(125 °F) puede causar quemadm-as severas y hasta<br />
la mtterte debido a las quemadttr_s. Los nifios, las<br />
personas con incapacidades I_L_iCZLS y los ancianos<br />
tienen tm riesgo mayor de sufrir quemadtwas.<br />
_/I"IllYlOU,AlllI_tl"Este producto fiene la hltendbn<br />
de ser usado solamente en bebid_s erdatad,xs<br />
refrigerad_s y en bebidas en cajas, adem&s de<br />
productos sin exph_aci6n empacados.<br />
_ilnstale el dispensador (le agua en un [)is() lfivelado<br />
1osuficientemente resist(me pm'a resistir su pe_,o<br />
cuando ec,t_ lotahnente lleno. N,.)instale donde est_<br />
st@u:) a la hlz dirccta del sx)l,call()*-o humedad.<br />
i_iiL s paneles d( ac(ro inoxidable (en algunos<br />
m(×lelos) estfin cul)iertos (on pelkula de l)role( dGn.<br />
Relir_ la pelfcula antes de la ,_l:,(!l_x(:i6t'_del produ(to.<br />
/9
INFORMACIONESDESEGURIDADIMPORTANTES.<br />
LEATODASLASINSTRUCCIONESANTESDEUSAR.<br />
2O<br />
INSTRUCCIONES PARACONEXIONA TIERRA<br />
ADVERTENCIA:El.soin_propi_do do.. onch,f_ q,o,oost_conoct_do _tierra<br />
apropiaflamente poflr[a resultar en riesgos fie flescargas el#ctricas.<br />
ES[( al)al_][o debe (gt_lr colie( [_/do _/[i(rl'zL Ell el<br />
caso de (ltle OClll_l_ llll COl_LO cil-ctlilO, la COllexion<br />
a ti(n'4 reduce el riesgo de descarga eh:cuica.<br />
Este apa_-ato estfi equipado con un cable ( IEctlico qu(<br />
tiene un enchufi • que cuenta con un cable pa_-a selcon(ctado<br />
a tierl-a. El enchufk, deb( estar conectado a<br />
tm enchufe qu_ est_ instalado apropiadamente ) que<br />
est_ conectado a tierl-a.<br />
Consulte a un electricista calificado si usted no<br />
entiende las instrucciones de conexidn a tierra, o si<br />
existe alguna duda de si el al)amto _st_i conectado<br />
apropiadamente a tierm.<br />
Si el enchufi' es uno estfindar de dos clav!jas, es su<br />
responsabilktad personal y obligacidn hater que sea<br />
reemplazado con un enchuli_ de 3 clavijas con<br />
conexidn a lierra.<br />
COMOELIMINARSUDISPENSADOR DEAGUA<br />
DEFORM APROPIADA<br />
Deshacerse del refrigerante<br />
Su antiguo dispensador d( agua puede haber<br />
usado un r(h-ig(rante regulado en su sislema<br />
de enh'iamiento. Estos rel'l-igeranles son nocivos<br />
para (1 ozono estratosl'drico. Si se deshace d(1<br />
antiguo dispensadol; asegOrese de que se deshaga<br />
del re[rigerante correctamente pot un t&:nico<br />
c( rtificado EPA. Si se lib_ ra a propdsito el<br />
refrigerante puede estar suieto alas multas v<br />
al (ncarcelamiento l)_[jolas estil)ulaciones de<br />
la 1_gislacidn ambiental.<br />
R_jo Ilillglllla Cil-(!/llSl_/llCi_l (7oUt( o l-(llltl(va 1_] [elc( lclavija<br />
(la de conexidn a lierra) &l cable d6< trico.<br />
No utilizar till adal)t21dOF (Oll isle _lpHl_/lo.<br />
No ulilizar un cable de extensidn con este apamto.<br />
Si el cable el_ctrico del apm-,tlo es muy corto, haga<br />
que un electrk:ista calificado insmle un tomacorrienle<br />
cerca del apm-41o.<br />
Pro-4obmner una m_jor opemcidn, enchut;.* esle<br />
apamto en su lomacorri(nte pvol)io pardi evitar que<br />
las luc{s paq)adeen, que se queme un filsible o que<br />
se dispare un interruptor (le circuilo.<br />
LEAYSIGACUIDADOSAMENTE LAINFORMACION DESEGURIDAD.<br />
CONSERVESTASINSTRUCCIONES
Comeutilizarel dispensadorde agua.<br />
I<br />
Lista de partes y caracteristicas<br />
0 Collardeapoyodela botella--negro(WS28XIO048)<br />
Separador(WS28X10013)<br />
Tanquedeaguafria<br />
IntermptoresdepotenoiaCaliente(rojo)y Frio(azul)(en /a parteposteriordel<br />
dispensadoren modelosequipados),El intermpt_w de potencia fi'io (azu]) tmnbi&l<br />
endende el compartimietlro _f(), en modelos equipados.<br />
Lucesindicadoras. La luz indicadora de encendk]o se encenderfi cua_ldo se enOmfb<br />
el dispensudol: I_l.';tuces indicadot_s de caliente fifo se encender, ln ) apagatfin<br />
mienm,s el dispensador calientu ) enfi-fa el agua. E1 ammque de[ comprc_or puede<br />
retardarse hasta 3 mirmtos en ciem,s modelos.<br />
Botonespara suministrar agua Hot(ealiente) _ , RoomTemperature(temperatura<br />
ambiente) i, Cold(fria) U<br />
Bandejadegoteodispensadora(WS28X10031)ypardlla (WS28X10032)<br />
0 Bandejadegoteode compartimiento(WS29X10029)enmodelosGXCF25FBS,GXCF25HBS<br />
y PXCR33KSSsolamente<br />
Compartimientofrio enmode/os GXCF25FBS, GXCF25HBSyPXCR33KSSsolamente.<br />
E1 colnpmtimienro tiem' la intendfm exclusi_ a de se_ usa&) en bebidas enl_Jmd_<br />
refiig_wd_ _ en bebidas en c_Jjas,adem(ts de productos sin (xpit_,tciem empacados.<br />
Compartimentode almacenamiento,en modeloPXCF22RBS. No lo utilice para<br />
alma('enar alimentos<br />
refi'ige_ddo.<br />
que requieren _'_£rigeraci6n el ('oml)artimento no _ en(uentm<br />
0 Estantede compartimiento(WS28XIO0281<br />
Come cargar el dispensador<br />
Tapadedrenaje(WSOIXIO008)<br />
Tap6ndesilicona(WSOIXIO007)<br />
Desinfectelos tanquesdeaguade/dispensadorantes<br />
de cargarel dispensadorla primeravez(vet "Come<br />
limpiary desinfectarlostanquesdeagua"),<br />
IMPORTANT£"Cerci6resede queel dispensadorest#<br />
desconectadocon ambosinterruptoresde aguafriay<br />
de agua caliente(en laparteposteriordel dispensador,<br />
en modetosquedispongande estacaracteristica)en la<br />
posiciSn0 (apagado).Antesde colocar labotellade agua<br />
en el flispensador,l#veselasmanosy limpielaparte<br />
superiorde la botellacon un patiolimpio.Evitetocar<br />
lapare de la botetlaque estar#en contactocon et<br />
dispensadorde agua.<br />
Cerci6resede queelnivel delagua en lapartesuperior<br />
detdispensadores Iosuficientementebajaparapermitir<br />
quela botellapuedaset instaladaapropiaflamente.No<br />
hacerlopodriacausarquehayaun derrameen el<br />
dispensado_<br />
l. Pele la etiqueta de la (ubierta superior de la<br />
botella (si dispone de ella). No remueva toda<br />
la tapa de la lx_tella.<br />
2. Co/oq/le la botellaencima de/dispensadol; ml<br />
y como se muestr,i. ,AJinee]asonda de/a v;ilvula<br />
de dispensaddn con el cenu'o de la tapa de la<br />
botella de agua. Pre',ione haciaabajo hasm<br />
que la sonda penetre en la tapa de la bomlla,<br />
pennitiendo que la bomlla_ecoloque sobm<br />
la abt_/zademde apo)o.<br />
3. IMPORTANr£'Presioneambosbotonesde<br />
dispensaci6n hastaqoesa/g agesperambosgrifos.<br />
4. Enchuf;eel dispensado*:<br />
5. Coloque los il_temlpmres de agua FRJAy<br />
C_,I,[ENTE(ubicadosen la pm_.esuperior<br />
izquiel*lademls del dispensadol:en modelos que<br />
dispongan de esmcaracmlgtica) en la posici6n I<br />
(enoendido).<br />
6. [)(_jt.que tr,mscurl'an 30 mimltos pard que el agua<br />
alcaricelas temperatures caliente y ilia.<br />
P6ngaseoncontactoconundistribuiflor de<br />
bate#asdeaguaIocalparacomprar lasbotellas.<br />
21
Comeutilizarel dispensadorde agua.<br />
Seguro contra ni_os<br />
El botdn CAI.IENTE del dispensador estfi<br />
equipado (o1111n seguro contm nifios que<br />
reduce el riesgo de que un nifio suminisn-e<br />
agua caliente accidentalmente. Pm-,_ disl)ensar<br />
agua, rot( el bon;n en direccidn conn-,tria<br />
alas agt/jas del reloj y (mpl{je el botdn<br />
hacia adenn-o. E1 botdn se reselear,5<br />
atllOlllatica/ll(:llte Cllall(]o el bolt*ill sea<br />
liberado.<br />
Cuidadoy limpiezadel dispensador.<br />
22<br />
El dispensador calienta agua a una temperatura<br />
de aproximadamente 88 °C (190 °F).El agua a<br />
temperaturas mayores de 52 °C (125 °F)paede<br />
causar qaemaduras severas y hasta /a maerte<br />
debido a las quemaduras. Losni_os, las personas<br />
con incapacidades fisicas y los ancianos tienen<br />
an riesgo mayor de sufrir quemaduras.<br />
PRECAUCION: tosei os debee ser<br />
supervisados per uno de los padres cuando<br />
se disponga a asar este prodacto.<br />
Come limpiar e/gabinete exterior y el compartimiento frio de a/macenamiento<br />
IMPORTANTE:Cotoqueambosinterruptores<br />
el#ctricos (ontaparte posterior del dispensador,<br />
si corresponde)enlaposiciSn 0 (apagado)y<br />
desconecteel dispensadordeagua antesde<br />
limpia_<br />
El gabinete y el comp;utimiento d(l<br />
dispensador pueden ser la_:_rcon jabdn "_uave<br />
y agua. I.ave bien con agua limpia. Nunca use<br />
lilnpiadol>s com(rciales o polvos pulidores<br />
abrasivos.<br />
Superficies de acero inoxidable (on algunos modelosj<br />
Nouseunaalmohadillade lanade acero;rayara<br />
la supefficie.<br />
Para limpiar la superficie de acero inoxidable,<br />
use agua jabonosa con Doca (spuma o bien<br />
un liml)iador o abrillantador [)ar, i acero<br />
inoxidable. Siemprc limpie la superlicie en la<br />
dircccidn d(l gc,mo. Siga las instmcciones del<br />
limpiador para limpiar la superficie (le acero<br />
inoxidable.<br />
Descooecte el dispeesador antes de limpiar.<br />
Pase un patio o limpie con una aspimdon_<br />
cualquier polxo de las bovinas del<br />
condensador en la parte posterior de la<br />
unidad. Para m(jores resultados, use un<br />
cepillo especialm(nte disefiado para este<br />
propdsito. Estos estfin disponibles en la<br />
mavor_ de las tielMas de aparatos.<br />
])am recibir inl}._rmacidn acerca de ddnde<br />
compl_lr limpiador o abrillantador paca acero<br />
inoxidable con su disnibuidor local mils<br />
CeI'('HIIO, llmne a lllleSn-o ill/lllel-O ,_l-an/i[o:<br />
Centre de piezas nacional 800.626.2002<br />
ge.com<br />
Come fimpiar el interior del compartimiento frio<br />
(GXCF25FBS,GXCF25HBS y PXCR33KSS)<br />
Para ayudar a evitar olores, d@, una c_!j_ IJml)ie on'as parms (lel coml)arfimielltO fifo,<br />
abicrta (Ic bi(arl)onato dc soda en (1<br />
inchlyendo los empaques d( la puerta y todas<br />
compartimiento fi-io.<br />
las partes plfisticas de la misma fi')tma.<br />
Lse una sohlcidn (le agua tibia } bicarbonalo<br />
de soda: ah-ededor de una cucharada (15 ml)<br />
de bicarbonan_ de soda y un cuarto (1 litro)<br />
d( agua. Esto limpia y neumlliza los olor(s.<br />
E*ljuague y limpi( hasm secal:
Parriila<br />
/<br />
de goteo<br />
Como drenar el dispensador<br />
Como fimpiar la bandeja de goteo y parrilla<br />
I._Jbandeja de golco dcl dispensador no<br />
drone alltom_ticamente. Pare reducir el goteo<br />
de ague, la bandcja y su parrilla deben ser<br />
",_lciadas,limpiadas y s(cadas de manera<br />
regulan<br />
Limpie con un jab6n suave o en el estante<br />
superior tie un lavaplatos.<br />
El dispcnsador deber_a scr drenado mm,s dc limpiar los tunqucs } antes de salir a una va( adoncs lul_t{as o mlsencias.<br />
1. Coloque ambos interruptorcs el_cuicos (en la pm-te<br />
postelior del dispensadol; si corresponde) ell la posicidn<br />
0 (apagado)y& sconecle el disl)ensador d( ague.<br />
2. Retire In botella de ague del disl)ensadol:<br />
3. Coloque un comenedor que resista ague caliente deb@><br />
del gfifb de agua caliente. Presione el bot6n dispensador<br />
de _tgtta caliente hasta que el agua se enfrie (cerca de un<br />
cuarto). A_rcgm' ague al dcpdsito dc ague ti/a (_n la partc<br />
de arriba dond( la botella suministra
Cuidadoy limpiezadel dispensador.<br />
Come desinfectar y limpiar los tanques de agua<br />
IMPORTANTE:Peri6dicamente se deben desinfectar los tanques dispensadores de agua para evitar sabores desagradables<br />
en el agua y limpiar pars retirar los depSsitos de mflmrales quepuedan obstaculizar el flujo.<br />
Para desinfectar:<br />
1. Anl(s de limpial, coloque ambos imerruptores<br />
ehnctri(os (tn la parte posterior del U<br />
dispensador, si _orresponde) en la posici6n P0sMOn<br />
O(apagado)y desconecteel dispensadorde apagado<br />
agua. Nota: Pm-a[a instaLid6n per primers<br />
vcz, ignore los pasos 2_t.<br />
2. Desocupe la botella d( agua, lu(go retflela del<br />
dispensador.<br />
3. Dr(no los tanques de agua (ver COrnsdrenar el<br />
dispertsador).<br />
4. Voelvea instalarel tapon de silicona y la tapa de drenaje<br />
(_er C6modrenar el dispensador).<br />
5. NO AGREGUEBLANQUEADORPRIMEROODIRECTAMENTE<br />
EN ELDISPENSADOR.<br />
El blanqueadorconcentrado puede da#ar el plastics.<br />
Agregue l/2 cucharada (2,5 ml) de blanqueador<br />
comfin ( asero al 6% (omo mfiximo, auna j_rra<br />
tie dos cuartos (2 litros) lleml con agua de la ll_lve.<br />
6. Vierta la soluci6n en la ab(rmra (n la parte superior<br />
del dispensador.<br />
7. Repita los pasos 5 y 6 hasta que el dispensador est_<br />
liens.<br />
8. Presione los botones (lel dispensador pars agua f'rfav<br />
caliente basts qu( el agua empiece a fluir d( las llaves.<br />
9. Permita que s( asiente pot 15-20 n]inutos.<br />
10. EnjuagueIn soluci6n de blanqueador:<br />
-- Drone los tanqucs (h' agua en una (ubcta gr;mdc<br />
(_er C6modrenar el dispensador).<br />
Pars retirar los depositnsde minerales:<br />
-- Cerci6rese de que el tap6n de silicons NO est_<br />
instalado.<br />
IMPORTANTE:Retire el separador y limpie el tanque<br />
de agua fria (w:r COrnslimpiar et separador).<br />
Limpie, luego xuelva a insmlar el separatist<br />
v el collar (ver C6mo timpiaret separador).<br />
Vierta aproximadamente 1 gal6n (4 cuartos<br />
o 4 litros) de agua fiesca de la llave en la parte<br />
superior y permita qu( s( drone hacia la cubers.<br />
Ell juague con 1 gal6n (4 cuartos o 4 litros)<br />
adicional de agua tresca de la llave y permits<br />
(luese drene hacia la cubeta.<br />
11. Vuelvea instalar el tapon de silicona y la taps de drenaje<br />
(vet C6modrenar el dispensador).<br />
12. ]nstale una botella tie agua fl-esca (vet COrnscargar<br />
el dispensador).<br />
13. Dispense I cuarto (1 litro) de agua de cada Ilave y prut:bela<br />
pars (x,rciorarse de quc la soluti(_n blanqucadora (st;i<br />
{ on]pletamente eliminada.<br />
Si continuael saber a clorode la soloci6n blanqoeadora,repita<br />
lospasosdel 10a113hasta queel saber desaparezca.<br />
14. Conectt el dislx nsadoxz I,u(go, encit nda los [_]<br />
interruptores de agua trfa y agua calit rite<br />
(on la parle posterior d(1 dispensador, si P0sici6n<br />
corresp,,md(), encendido<br />
Mezcte 2 cuartos (2fitros) de agua con dos cuartos de virtagre 0 BIEN urt gal6rt de agua (4fitros) con 16onzas(454g) de cristates de<br />
acids citrics. El btanqueador no retira los dep6sitos mhmrates. Hags esto en vez del paso 5 at retirar los dep6sitos minerales.<br />
Como descongelar (pars modelos GXCF25FB& GXCF25HBS y PXCR33KSS)<br />
Descoogelecadavezqueel hieloeolapareddelcompartimieotonfdador<br />
se vuelvaexcesivaNoncantiliceoninstruments confile o metalico<br />
pararetirarel hieloya quepuededa_arel revestimiento.<br />
Recomoodamos elosodeuoraspadorplasticoNouseoing_oaparato<br />
elbctdcoparadescoogelar el compartimieotoeofriador<br />
La descongelacidn pot 1ogenel-al ionia unas pocas hol-as. Pac4<br />
descongdar mils r_ipidamente, n]antenga la puerta al)ierta.<br />
Despuesdedescongelan<br />
}!i_" Retire las loallas mojadas )limpie cualquier agua reslanle.<br />
Para descongela_ f_ Limpie (1 comparfimiento con un patio seco.<br />
f_Retire los arffculos del compaltinfiento.<br />
}!i_.Gir el imerruptor d&:tlico Cold (azul) (si con-esponde)<br />
a la posiciGn d( apagado y desconecte el dispensadol:<br />
}!i:" Cok_:lue _uias mallas al %rids del compaltimiento pars<br />
24<br />
l-eCOgel- agua.<br />
}'_Conecte la unidad y encienda el interruptor el_ctrico en<br />
Cold (azul) (si corresponde). Regrese los artRulos a la<br />
uuidad.
Preparandose para las vacaciones<br />
Para va(aciolleS CXIL_IISHSO atlSellcias, ( oloqtle los dos<br />
Jim rruptorcs eldctricos (en la parte posterior del (lispt nsadol;<br />
si corrcsponde) en la posicidn 0 (apagado).<br />
1. Desconecte el ';unlinisn-ador de agua.<br />
2. Rcnnmv_l la botella de agua.<br />
3. Drone los tanques de agua (ver Cdmo drenaroldispensador).<br />
Especificaciones<br />
Ritmo de enfriamiento: Aprox. 0,5 ,_aloncs (2 litros) por hoed<br />
Ritmo de calentamiento: Aprox. 0,8 galoncs (3 litros) pot html<br />
Solucionarproblemas.<br />
Posibles causas Que hacer<br />
El separador necesita ser limpiado.<br />
El dispensador<br />
.................................................................... dedm fectado.<br />
de _m debe ser<br />
El dispei_sador de ag.'tm estfi<br />
desconectado.<br />
El ftt_ible o d interruptor de<br />
circuito se quem6 o _ dispar6,<br />
Toda el agua en el tanque<br />
Itlusada,<br />
El limitador de temperatura<br />
se dispar6.<br />
Eldispeh_Mo+deagO_ BoteUadeaguavacia.<br />
_°.hth, c{*°_--N°_ Dep6sitosminerales _ puedenestar<br />
(si corresp_hde)<br />
#fi#_en_ _nc_hdido<br />
obstruyendo los tmzques.<br />
Hay tm agrietamiento o tm<br />
agujerito en la botella.<br />
4. Seque el ';cpm'ddor complelamente tanlo (11la palte sul)eficnco111oell<br />
la palte infZ,rior (w:r COmotimpiar etsoparador).<br />
5. Dcjt la puerto del enfliador abierm.<br />
Oespu_sde regresar de vacaciones,cerci6reso de desinfoctarlos<br />
tanquesde agua antesde usar el dispensador(ver Cdmolimpiar y<br />
desflffectar el tanque deagua).<br />
Capacida& Bot(lla de 3 d 5 galones<br />
Consumo electrico: En calentanliento: 480 vafios mfiximo<br />
En ( nfi'iamk nto: 125 ulfios mfiximo<br />
• V{r COmolimpiarelseparado_<br />
• Vtr COmolimpiary desinfectarlos tanquesdeagua.<br />
• Empt{je tl ( nchutk' complemmenw tn el tomacon-ient(.<br />
• Rcemplace el fusible o re@/ste el ilm rruptor de circuilo.<br />
• Si delnasiados arth ulos estfin cncllufi,dos en 1/11cilvuito<br />
dnic
Solucionarproblemas.<br />
Posibles causas Que hacer<br />
El dispensador de ag,tm no estfi " C(rcidr_ _
Servicioal consumidor.<br />
P ginaWebde<strong>GE</strong>Appliances ge.com<br />
dTiene al%una pregunta sol)re su electrodom&lico? iPmebe la l)_igina W(b de <strong>GE</strong> Apl:diances 24 betas al dfa,<br />
cual(luier dfa del afio! Para mayor conveniencia v seq,dcio tn_is rfif)i&; va, l)uede descargar,, l(_s,Manuales de los<br />
Pr(;pi(larios, o hasla ordenar partes en ll+nea.<br />
RealLifeDesignStudio(Estudbdedisefioparalavidareal) ge.com<br />
<strong>GE</strong> apoya el concepto de Diseflo L vliversal--F, rc,ductos, s,._vicios y ambi(ntes q_de pueden usar gente de t,odas las<br />
edades, tamafio_ y capacidades. Rcconocemos la nec(sidad de disefiar par, i una gl-,m gama (It habilidades y<br />
dificuhades fNicas y mental_ s. Pard mils detalles colin las aplicaciones de <strong>GE</strong> Disefio [ niversal, inchlyendo ideas de<br />
dis(rio par,_ In cocina par, i personas con discapacidades, mir_ ll!lestl'd pfi_:ina X%b hoy mismo. Pare per_,onas COil<br />
dificuhades mlditiuls, thvor d_ llamar al 800.TDD.GF:\C (800.833.4322).<br />
Piezas[ accesofios ge.com<br />
]ndividuos pueden solicitar que s< les emfen partes a sus casas (aceptmnos Ins larj( las VISA, Masl( rCaB-/y<br />
I)iscov(r). I Iaga su pedklo en ]lllea boy, 24 horns cada (Ira o llamar por lel(2[()ll(L (:ll lOS EEl U, al 800.626.21X)2<br />
dul-ante horas normales de oficina. En Canada, llame al 800.663.60(;0.<br />
Lasinstruccionesdescritasen estemanualcubrenlosprocedimientosaseguirpercualquierusuario,<strong>GE</strong>noproporciona<br />
servicioparael dispensador.Recmnendamosquenointenteproporcionarservicioal dispensadorustedmismo,<br />
Pdngasencontactoconnosotros ge.com<br />
Si no (slfi salisf_(ho (on el s( rvi(io que re(ibe de <strong>GE</strong>, )dngase (n (ontarto (Oll IIOSO[FOS ( I 1 ( St _] ) g l 1 _'_(I)<br />
indicml(lo l(;d(;s los d_ lnlles asf como su ndmero d( lel(_f(nlO o (s(rfl>anos a:<br />
• +1Qu+:cub*+, e+t+z ,g+na+dia ?<br />
-- Cua/quie+ detecto de t iblScaen los matellales o la marmtScttn:t<br />
del producto,<br />
-- i_s botellas de agua.<br />
-- g]ajes a stl CaSa para l_nse6ar]l! c61_1(i ilsar (!1 pfodtl(Tto.<br />
-- h/staladol/o elltre_ i/laproplada, o l]lantl'nin/_ento ]///proplo<br />
-- _l]as de] pl_)dtlctO si 6aY abllSO, l_lal tlSO. o tlSO para otros pfo])_s]t(_<br />
que I(ks ploptlestos, o tlSO para lirlcs con)er(iales.<br />
-- 1 _ plodtlct£ts qlle sl)l_ ilsad(_ _ll!ra de tin a//ib]l!nt_! residential o<br />
de ofcina.<br />
-- Reemplazo de los filsiblesde la casa o el i_juste de los interl upto+_s<br />
de circuito.<br />
-- I_S(t de l?_I_! pl_dtlctO donde el ,tgt/a eSla i_/iCl obio] _ +__ co_?<br />
-- Un aft(>.<br />
(;en{ ral Manag( 1; Custom(r R(lalions<br />
• .<br />
(,E Appllanc(s,<br />
.<br />
Apl)han((<br />
)<br />
l ark<br />
Louisville, Ix'Y40225<br />
GARANTIA LIMITADA POR UN AIqO<br />
• gCdmo ]uzk+)]a *_dzzma(M_* & b_ _Ymn+_ia ?<br />
Garante:GeneralElecgicCompany,Louisville,KY 4022_<br />
-- D(_aldh_da al minolism a quien le comped el ploducto con<br />
tma copia de "Proot of Purchase" (prueba de comps), _ le<br />
p_l])orciol_al_ un_ tlnidad i_tl_ i_aco/idicionada. Est_t _l'ant(a<br />
exC]tl}_ el cosIo (le l_nvl'O del prodtlcI_) a dol_/ici]io.<br />
EXCLUSIONDEGARANTIASIMPLICITAS--Su OnicoFexclusive<br />
derechoes el cambiodel producto,tal Fcomese indicaen esta<br />
GarantialimitadaJCualquiergara_iliaimplicita,incluyendo/as garantias<br />
implicitasdecomerciabilidadoadecuaci(_npara un findeterminado,<br />
estan/imitadasa una_o oel periodode tiempomas brevepermilido<br />
per la le_<br />
Es_ia garmlfia se extiende al coinprador original y cualquier compl,'ador<br />
posterior de produoos comprados para use r esldenclM o en la oficina<br />
denlro de Estados Ulfidos. Ell Alaska, la garalitia exduye el costo de envio<br />
o has visit,as de se_iclo a su c,xsa u oficina.<br />
Algunos e_ados no lleriniten la exdusi6n o las limimciones de dafios<br />
incidentales o COl_S_-uenclales. Esta gm'antia da derechos legales<br />
especificos, y usted podria teller otros derechos que val_l tie estado<br />
a estado. Para saber o_hles son sus deredms legale& consulte a la ofichaa<br />
de asuntos del consmnidor local o la ofichm del AVlorn_, General ell sit<br />
locMidad.<br />
P6n g,',','as_ ell t ;o 11t_'l t'_lio con nosotl'O s ell ge.coln,<br />
o llame sha ca_go al 800.952.5039, o 866.777.7627 en Ca_mda.<br />
27
ConsumerSupport.<br />
• llTlat d(,v:s[his _,a*rm_{l'.,ve_ ?<br />
<strong>GE</strong>AppliancesWebsite ge.com<br />
] Iave a qu¢ slion or need assislance with your applimace? Try the <strong>GE</strong> A ) _l" c(I, please (:all 8tXLTDD.G1L\C (800.833.4322).<br />
PartsandAccessories ge.com<br />
IndMduals can ha\( parts sent direclly Io thdr llom{ s (VISA, Mastc rCard mid Disco',er cm-ds at(accq)ted). ()l-(]er<br />
T "9" 9 "<br />
oMine today 24 hours (x(Q' day or by l)hon(, ill Illc [.S. at 8(R).()-0.-002 (hnqng nornlal busin¢ss hours. In<br />
Canada, call 800.663.6060.<br />
Instructionscontainedinthismanualcoverprocedurestobeperformedbyanyuser.<strong>GE</strong>doesnotsupportanyservicing of<br />
thedispenser.We stronglyrecommendthatyoudonotattempttoservicethedispenseryourself.<br />
ContactUs ge.com<br />
If you arc not satiffied with the service you roe(ire flom <strong>GE</strong>, contact us on our _Wcbsitewith all the details inchlding<br />
your phon( nulnbcl; or wriR to: General Managt l; Cusl,)m{r R(lations<br />
(;E Applianc_ s, Appliance Park<br />
Louisville, KY40225<br />
-- AIly de_!cl ill lllalelia]s oi" woFklllallshi]) ill ille lll_illlfaCllll ed pl odllcI,<br />
-- _ltel ¸ bottles¸<br />
-- SelvJce Ilip S [o yoii1 ¸ hollle R/teach _)11 how 1(3Ilse I]le piodllcL<br />
-- hnp/opeJ ¸ instalJafion, deli_ elw or maintenance,<br />
-- Failure ot ¸rile prodllcl if il is al_ltsed, misused, aheied, used<br />
( oilllllei( ia]]y or llsed t()l ¸ olJl(!l ¸ Ihal1111(¸!6 l[ellded Dill DOSe<br />
-- p! odll(?l_ [hal¸ al_! llsed Ol iI side! a l (tsi(telllia] Ol ¸ ol_(?_ _l]_il ()_111 l_!ll [.<br />
-- I_placemen_ of house tilses or Ieserllng of cilcuil bl_a_l s,<br />
-- Use of this [)lxxhl(:t wheie _lter is =nirlxibkik_giralh' unsa_ or of<br />
-- Damage to the i_lx/_l_lct il¸ used _) dispense anyibing otllel ¸ iban waml;<br />
-- Danlage to the pR/duct caused I_ accident, fire. floods or ai:_s (if God<br />
--Ally s_!l_,i(Te to the plodll(Tt.<br />
-- Incidental or coose_lenda[ damage causeil _ possible defects widi dfis<br />
appliance, its mstallalion or repair.<br />
LIMITED 1-YEAR WARRANTY<br />
• fb* h_w l*nl(4aflg_Ik o*_lal pmvha*g'?<br />
-- Return Io die relailer from whirh i_ was pulchased, along willl a copy of<br />
ille "Proof of Pulchase." A new ol¸1econdilioned unil will be plx)vided<br />
lllis warlanw excludes the (:ostof shipping Ille p/oduct I_)your home<br />
EXCLUSIONOFIMPLIED WARRANTIES--Yoursoleand<br />
exclusiveremedyis productexchangeas providedin this<br />
Limited Warranty.Anyimplied warranties,includingthe<br />
implied warrantiesofmerchantability orfitness fora particular<br />
purpose, are limited to oneyear or the shortestperiod allowed<br />
by law<br />
Tiffs warl_nty is extended to die ofigilml purchaser and may succeeding<br />
o_aier for products lxlrdiased for home or office ttse _iliiti ilie USA.<br />
In Alaska, die w_arran_' exc_des ilie cost of slfipping or ser_ce m your<br />
itoine or o ffi('_,<br />
Warraotor:GeneralElectricCompany,Louisville,KY4022_<br />
Some states do iiot allow die exduMon or lhifitafion of incidental or<br />
COllSPqll ellflal daaimges. Tfrts _v,nrranq, gives you specific legal rigitts, mad you<br />
lnay MSO have oilier rlgit ts_ 'which vary from state to state. To know _itat your<br />
legal l_giltS are, con_lllt your local or state coitsumer affairs office or _ur<br />
state's Art orney Genel,'al.<br />
Contact t,_sat ge.coni, or car toll-free at 800.952.5039 in die U.S., or<br />
866.777,7627 Il_ Cmmda.<br />
Printed in China