HDR-UX5 - ManageMyLife
HDR-UX5 - ManageMyLife
HDR-UX5 - ManageMyLife

You also want an ePaper? Increase the reach of your titles
YUMPU automatically turns print PDFs into web optimized ePapers that Google loves.
Addiliomd h_formation on lhis product and answers<br />
Io freguenfly asked guestions c_m be found _lt our<br />
Custol_/er Support Websile.<br />
http://www.sony.net/<br />
Printed on 70% or more recycled paper<br />
using VOC (Volatile Organic Compound)free<br />
vegetable oil based ink.<br />
Printed in Japan IIIIIIIIII<br />
2319777110<br />
g)<br />
0<br />
I<br />
C<br />
U_<br />
SONY<br />
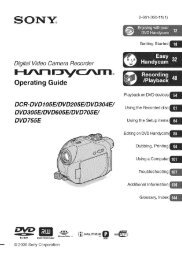
Digital HD Video Camera Recorder<br />
Operating Guide<br />
<strong>HDR</strong>-<strong>UX5</strong>/UX7<br />
AVCHD<br />
_ _,nfoLITHIUM_ Hnmll<br />
© 2007 Sony Corporation<br />
5ERIE5<br />
2-319-777-11(1)<br />
Getting Started<br />
Editing<br />
Utilizing Recording Media<br />
Customizing Your<br />
Camcorder<br />
Using a Computer<br />
Troubleshooting<br />
Additional Information<br />
Quick Reference<br />
Spanish Quick Guide/<br />
Guia r_tpida en espahol
To reduce fire or shock hazard, do<br />
not expose the unit to rain or<br />
moisture.<br />
CAUTIONTO_UC_ THERISKOF_ _CT_ICS_OCK<br />
CO _OT_MOVE COWR(OR_AC_}.<br />
_O USER-SErVICEAbLEPA_TSI_SlOE.<br />
REFERSER_CINGTOaUALIFIE_SERVICEPERSO_E_<br />
the user to the presence of<br />
uninsuhlted "dangerous<br />
/_ This w_ltagesymbol _' withinis intended the produces to alert<br />
ellclosure [hal lllay be of<br />
sufficient magnitude to<br />
constitute a risk of electric<br />
shock to persons.<br />
This symbol is inlended to alert<br />
the user 1_)tile presence: of<br />
important operating and<br />
maintenance (servicing)<br />
insn uctions in the lileramre<br />
accompanying the appliance,
IMPORTANTSAFEGUARDS<br />
For your protection, please read these safety<br />
instructions completely before operating<br />
the appliance, attd keep this manual for<br />
future reference.<br />
Carefully observe all warnings, precautions<br />
and instructions oil the appliance, or the one<br />
described in the operating inslructions attd<br />
adhere to them.<br />
PowerSources<br />
This set should be operaled only hom tile lype of<br />
power source indicated on the marking label. If<br />
you are nol sure of the lype of electrical power<br />
supplied to your home. consuh your dealer or<br />
local power company. For lhose sets designed lo<br />
operale ll'()nl baltely power, or other sources, relcr<br />
to the operaling instruclions.<br />
Polarization<br />
This sel may be equipped with a polarized ac<br />
power coM plug (a plug having one blade wider<br />
than the olher).<br />
Tills plug will fil inlo the i)o\ver outlel only one<br />
way. This is a sal_:ty li:ature. If you are unable to<br />
insert the plug lhlly into lhe oullet, lly reversing<br />
the plug. [f tile plug should still lail to fit, conlacl<br />
your electrician to have a suitable outlet installed.<br />
Do not delcat the sal_:ty purl?ose of tile polarized<br />
plug by Iorcing il in.<br />
Overloading<br />
Do not o_, erload wall outlets, extension cords or<br />
corn enience receptacles beyond their c_pacity_<br />
since Ibis cml result in firc or electric shock.<br />
ObjectandLiquidEntry<br />
Never push objects ot rely kind into the set<br />
through openings as they may touch dangerous<br />
vollage points or sllort out parts lhal couM rcsull<br />
m a fire or electric sllock. Norm- spill liquid of any<br />
kind on lhe set.<br />
Attachments<br />
Do not use _ittilclllnents llOl rccolnnlcllded by tile<br />
iilanul_lc[urt2r, as they may cause hazards.<br />
Cleaning<br />
Unl)lug tile scl h'om tile wall outlet belbre<br />
cle_ming or polishing it. Do not use liquid clemmrs<br />
or aerosol cleaners. Use a cloth lightly dampened<br />
with water lot cleaning the exterior of tile set.<br />
Water andMoisture<br />
Do not use power-line operated _ls near water<br />
lbr examl?le, near a balhmb, washbowl, kilchen<br />
sink, or laundry tub, in a wel basemenl, or near a<br />
swimming pool, elc.<br />
Power-CordProtection<br />
Roule tim power cord so thai it is not likely to be<br />
walked on or pinched by ilems placed upon or<br />
againsl them, paying parlicular auemion to tile<br />
plugs, receptacles, and lhe point wllere llle cord<br />
exils liom tile appliance.<br />
Accessories<br />
Do not place tile set
INPORTANT SAFEGUARDS(go_i_sdl<br />
Lightning<br />
For added protectfim lor this _el during a fighlning<br />
storm, or when it is lelt un_tlended and unused lor<br />
long periods of time. unplug it l_x)m tile wall<br />
outlcl and disconnect lhe antenna or cable system.<br />
This will prevenl damage to the set due to<br />
lighming and power-line surges.<br />
DamageRequiringService<br />
Unplug tim sel hx)m lhe wall oullel and rclcr<br />
selvicing to qualified _rvice personnel under tile<br />
lbllowing condilions:<br />
When the power cord or plug is damaged or<br />
frayed.<br />
If liquid has be_n spilled or objects have hdlen<br />
into the sel.<br />
If the _t has been exposed to rain or water.<br />
If the set has been subjecl to excessive shock by<br />
being dropped, or lhe cabinet has b_n<br />
damaged.<br />
If lhe set does not opert_te normally when<br />
Iollowing lhe operaling instructions. Adjust<br />
only lhose controls thai are specified in the<br />
operating instructions, hnproper adjuslmenl of<br />
other controls may resuh in damage and will<br />
often require extensive work by a qualified<br />
technician 1_>rt2storc tile set to normal operalion.<br />
Wllen file set exhibits a distincl change in<br />
performance this indicales a need lor service.<br />
Servicing<br />
Do not altelnpl to ser_,ice lhe sel yourself as<br />
opening or rclnoving covers may expose you to<br />
dangerous voltage or other hazards.<br />
Relcr all servicing to qualified service personnel.<br />
Replacementparts<br />
Whcn replacement paris m'e required, be sure lhe<br />
ser_ ice leclmician has used replacement paris<br />
specilied by tile u/anul_cturer tllat llave tile same<br />
charactcristics as tile original palls.<br />
Unauthorized substitmions may rcsu]l ill fire.<br />
electric sllock, or olher hazards.<br />
SafetyCheck<br />
Upon completion ol any scP4ce or repairs to tile<br />
sel. ask tile service lechnician 1o perfimn routine<br />
salcty checks (as specified by tile manul_,cturcr)<br />
to determine tllal the set is in safi: operating<br />
condilion.
Readthis beforeoperatingyourcamcorder<br />
Before operating the unit, please read this<br />
manual thoroughly, and retain it for futttre<br />
reference.<br />
CAUTION<br />
Tile use of optical instrumen(s with this produc(<br />
will increase eye ha/urd. Use of controls or<br />
adjustlncnls or perfimnance of proccdures olher<br />
than those specified herein may 1_3suh in<br />
hazardous radiation exposure.<br />
Replace tile battery with tile specified type only.<br />
Otherwi_, firc or injul T may rcsuh.<br />
Owner's Record<br />
Tile model and serial numbers _,l _ localed on tile<br />
bottom. Record the serial nmnbcr in the space<br />
provided below. Relt_r to lhese numbers whenex er<br />
you call upon your Sony dealer rcgarding this<br />
product.<br />
Model No. <strong>HDR</strong>-<br />
Serial No.<br />
Model No. AC-<br />
No.<br />
RECYCLINGLITHIUM-IONBATTERIES<br />
o<br />
Lift/lure-Ion batteries are<br />
recyclable. You can help preserve<br />
our ellvirolll/lelll by relurllillg<br />
your used rechargeable batleries<br />
to the collec(ion and recycling<br />
location nearest you.<br />
For more inlormation regarding recycling of<br />
rechargeable batteries, call toll h-ee 1-800-822-<br />
8837_ or visil hltp://www.rbrc.org/<br />
Caution: Do nol handle damaged or leaking<br />
Lithium-Ion batteries.<br />
If you have any questions abou( (his produc(, you<br />
may call:<br />
Sony ('ustonler Inl(lrlnation Center<br />
1-800-222-SONY (7669).<br />
The number below is lor the FCC rclated matters<br />
only.<br />
RegulatoryInformation<br />
Declaration of Conformity<br />
Trade Name: SONY<br />
Model NO.: <strong>HDR</strong>-<strong>UX5</strong><br />
Responsible Party:Sony Electronics Inc.<br />
Address: 16530 VizJ Esprillo, San Diego, CA<br />
92127 U.S.A.<br />
Telephone NO.: 858-942-2230<br />
This device complies with Part 15 of the FCC<br />
Rules. Operation is subject to tile 6_llowing lwo<br />
conditions: (1) This device may not cau_<br />
harmfifl intcrfi:rence, and (2) this device mus(<br />
accept ally intefli:rencc received, including<br />
inlerfi:rence ll/_]tinay cause undesircd operalion.<br />
Declaration of Conformity<br />
Trade Name: SONY<br />
Model NO.: <strong>HDR</strong>-UX7<br />
Responsible Party:Sony Electronics Inc.<br />
Address: 16530 Via Esprillo, San Diego, CA<br />
92127 U.S.A.<br />
Telephone NO.: 858-942-2230<br />
This device complies with Part 15 of the FCC<br />
Rules. Operation is subject to tile 6_llowing lwo<br />
conditions: (1) This device may not cau_<br />
harmfifl intcrfi:rence, and (2) this device musl<br />
accept ally intefli:rencc received, including<br />
inlerli:rence lh_]tinay cause undesircd operalkm.<br />
CAUTION<br />
You are cautioned that any changes or<br />
modifications not expressly approved in this<br />
manual could void your authority to operate this<br />
equipment.<br />
Continued._ 5
RsaS this b÷fs_÷ sD÷_ati_N ya[_ samssN÷_ {gssti[_ssS/<br />
Note<br />
This equiplnent has been tested and lound to<br />
comply with the lhnits k_r a Class B digital<br />
device, pursuant to Part 15 of the FCC Rules.<br />
These lhnits arc designed to provide reasonable<br />
protcctkln against harmflll intcrlcrcncc ill a<br />
residential installation. This equipment generaes,<br />
uses, and call radiate radio frequency energy and,<br />
if nol installed and used in accordance with tile<br />
instr/ictions, may callse llarll/l/i] illterl_Jr_211c_ to<br />
radio colntnunications.<br />
However. there is no guarantee thai interl_lcnce<br />
will not occur ill a particular installation. If this<br />
equipmem does cause harmflll interlcrcncc to<br />
radio or television reception, which can be<br />
deternlined by turning the equipment off and on,<br />
tile user is encouraged to tl T IOcorrect tile<br />
intmlcrence by one or nlorc of tile li)llowing<br />
measures:<br />
Reorient or relocate the receiving antenna.<br />
Increz_se the separation bcl\v_n the equipment<br />
and receiver.<br />
Connect tile equipment inlo an outlet on a<br />
circuit dillcrent flom that to which tile receiver<br />
is connected.<br />
Consult the dealcr or an experienced mdio/TV<br />
technician lbr help.<br />
Tile supplied intefl,*cv cable must be used with tile<br />
equipment ill order to comply with tile limits lot a<br />
digital device pursuanl to Subparl B of Parl 15 of<br />
FCC Rules.<br />
For the State of California, USA only<br />
Pcrclllorate Material - special handling may<br />
apply. See<br />
www,dtsc.ca.gov/llazardouswastc/perchlorate<br />
Pcrclllorate Material: Litllium battery contams<br />
perchlorate.<br />
Your camcorder is supplied with two<br />
kinds of operations guides.<br />
"Operating Guide"/This manu:d)<br />
"First Step Guide" for using your<br />
camcorder with the computer connected<br />
(stored on the supplied CD-ROM)<br />
Types of the disc you can use in your<br />
camcorder<br />
You can use the following discs only.<br />
8cm DVD-RW<br />
8cm DVD+RW<br />
8cm DVD-R<br />
8cm DVD+R DL<br />
Use the discs with marks listed below. See<br />
page 15 for details.<br />
DVD_DL<br />
For reliability and durability of recording/<br />
playback, we recommend that you use Sony<br />
discs or discs with an _N_{g_ *(for<br />
VIDEO CAMERA) mark for your<br />
camcorder.<br />
• Using a disc oilier than above may cause the<br />
unsatishLctory recording/playback or you may<br />
not be able to remove tile disc lioln your<br />
calncorder.<br />
* Depending on file place you bougllt, file disc has
Types of "Memory Stick" you can use<br />
in your camcorder<br />
You can use "Memory Stick Duo' marked<br />
with MfiMOR¥ SIIEK DUO or<br />
MEUORYSTIEKPRO Duo (p. 107).<br />
"Memory Stick Duo"<br />
(This size can be used with your<br />
camcorder.)<br />
"Memory Stick"<br />
(You cannot use it in your camcorder.)<br />
• You cannot use any type of memory card<br />
except "Memory Stick Duo."<br />
• "Memory Stick PRO" and "Memory Stick<br />
PRO Duo" can be used only with<br />
"Memory Stick PRO" compatible<br />
equipment.<br />
• Do not attach a label or the like oil a<br />
"Memory Stick Duel' or a Memo U Stick<br />
Due Adapter.<br />
When using a "Memory Stick Duo"<br />
with "Memory Stick" compatible<br />
equipment<br />
Be sure to insert tile "Memory Stick Due"<br />
into tile Memory Stick Duo Adaptor.<br />
Memory Stick Duo Adaptor<br />
Using the camcorder<br />
• Do not hohl tile can/corder by the<br />
following parts.<br />
Viewfinder LCD screen<br />
Battery<br />
• The camcorder is not dustproofed.<br />
dripproofcd or waterproofed. See<br />
"Handling your camcorder"/p. 109).<br />
• To prevent discs lhom being broken or<br />
recorded images from being lost. do net<br />
do the following when either of the<br />
respective lamps of the POWER switch<br />
(p. 24) or the ACCESS lamp/p. 27) is on:<br />
to remove the battery pack or AC<br />
Adaptor from the camcorder.<br />
to apply mechanical shock or vibration to<br />
the camcorder.<br />
• When connecting your camcorder to<br />
another device with an HDMI cable, a<br />
component video cable, or a USB cane.<br />
be sure to insert the connector plug in the<br />
correct way. Pushing the plug forcibly<br />
into the terminal will damage the terminal<br />
and may result in a malfunction of your<br />
camcorder.<br />
About menu items, LCD panel,<br />
viewfinder,and lens<br />
• A menu item that is grayed cut is uot<br />
available under the current recording or<br />
playback conditions.<br />
• The LCD screen and the viewfinder are<br />
manufactured using extremely highprecision<br />
technology, so over 99.999; of<br />
the pixels are operational for effective<br />
use. However. there may be some tiny<br />
Continued._ 7
Rsad this bsfo_s oDs_ati_Sym[_ camcor_s_ (Sostisse_}<br />
black points and/or bright points (white.<br />
red. blue. or green in color) that appear<br />
constantly on tile LCD screen and the<br />
viewfinder. These points are normal<br />
results of the manufacturing process and<br />
do not affect the recording in :my way.<br />
White, red, blue or<br />
green point<br />
• Exposing the LCD screen, the viewfinder,<br />
or the lens to direct sunlight for long<br />
periods of time may cause malfimctious.<br />
• Do not aim at the sun. Doing so might<br />
cause your camcorder to malfunction.<br />
Take images of the sun only in low light<br />
conditions, such as at dusk.<br />
Onrecording<br />
• Before starting to record, test the<br />
recording fimction to make sure the nnage<br />
and sound are recorded without any<br />
problems. You cannot delete images once<br />
you record them on a DVD-R/DVD+R<br />
DL. Use a DVD-RW/DVD+RW for trial<br />
recording/p. 15).<br />
• (!ompensation for the contents of<br />
recordings catmot be provided, even if<br />
recording or playback is not possible due<br />
to a malfimction of the camcorder, storage<br />
media, etc.<br />
• TV color systems differ depending on the<br />
countries/regions. To view your<br />
recordings on a TV, you need an NTSC<br />
system-based TV.<br />
• Television programs, fihns, video tapes,<br />
and other materials may be copyrighted.<br />
Unauthorized recording of such materials<br />
may be contrary to the copyright laws.<br />
About language setting<br />
The on-screen disph,ys in each local<br />
language are used lkw illustrating the<br />
operating procedures. Change the screen<br />
language before using your camcorder if<br />
necessary (p. 25).<br />
Onplayingthe discon otherdevices<br />
You c:m play back. or format discs recorded<br />
with HD (high definition) nnage quality<br />
only on AVCHD lk_rmat compatible<br />
devices.<br />
About this manual<br />
• The images of the LCD screen :rod the<br />
viewfinder used in this manual for<br />
illustration purposes are captured using a<br />
digital still camera, and therefore may<br />
appear different from the actual images of<br />
the LCD screen and the viewfinder.<br />
• Design and specifications of recording<br />
media and other accessories are subject to<br />
change without notice.<br />
• Disc in this Operating Guide refers to 8cm<br />
DVD discs.<br />
• The illustrations used on this manual are<br />
based on the model <strong>HDR</strong>-UX7.<br />
AboutheCarlZeisslens<br />
Your camcorder is equipped with a Carl<br />
Zeiss lens. which was developed jointly by<br />
Carl Zeiss. in Germany, and Sony<br />
Corporation. and produces superior images.<br />
It adopts the MTF measurement system for<br />
video cameras and offers a quality typical<br />
of a Carl Zeiss lens. Also. the lens for your<br />
camcorder is T*-coated to suppress<br />
unwanted reflections and faithfully<br />
reproduce colors.<br />
MTF= Modulation Transfer Function. The<br />
number value indicates the amount of light<br />
from a subject coming into the lens.
Aboutthe marks used inthis manual<br />
• The operations avail:_ble depend on tile<br />
disc used. Tile following marks are used<br />
to indicate the type of disc you can use<br />
for a particular operation.<br />
• These marks indicale tile discs thai can<br />
be used whell recoMing with HD (high<br />
definilion) image quality.
10<br />
Table of Contents<br />
IMPORTANT SAFEGUARDS ........ 3<br />
Read this before operating your<br />
camcorder ...................................... 5<br />
Subject examples and solutions ... 12<br />
Operation flow .............................. 13<br />
Selecting the right disc ................. 15<br />
"1_ HOME" and "o,,5OPTION"<br />
- Taking advantage of two types of<br />
menus .......................................... 17<br />
Step 1: Checking supplied items .. 20<br />
Step 2: Charging the battery pack 21<br />
Step 3: Turning the power on and<br />
setting the date and time .............. 24<br />
Changing the language setting ..... 25<br />
Step 4: Adjusting your camcorder to<br />
suit you ......................................... 26<br />
Step 5: Inserting a disc or a "Memory<br />
Stick Duo". .................................... 27<br />
Easy Recording/Playback (Easy<br />
Handycam) ................................... 30<br />
Recording the images .................. 33<br />
Zooming ........................................ 35<br />
Recording sound with more presence<br />
(5.1ch surround recording) ........... 35<br />
Using the flash .............................. 36<br />
Recording high quality stHIimages<br />
during movie recording (Dual Rec)<br />
....................................................... 36<br />
Recording in dark places<br />
(NightShot) .................................... 37<br />
Adjusting the exposure for backlit<br />
subjects ......................................... 37<br />
Recording in mirror mode ............. 37<br />
Recording the fast action in slowmotion<br />
(SMTH SLW REC) .............. 38<br />
Controlling the image settings<br />
manually with the camera control dial<br />
(<strong>HDR</strong>-UX7) .................................... 38<br />
Viewing the images ...................... 40<br />
Using PB zoom .............................. 42<br />
Playing back a series of still images<br />
(Slide show) ................................... 42<br />
Playing the image on a TV ........... 43<br />
I_ (OTHERS) category ............... 48<br />
Deleting images ............................ 48<br />
Dividing the image ........................ 50<br />
Creating the Playlist ..................... 51<br />
Dubbing to VCR or DVD/HDD<br />
recorders ...................................... 53<br />
Printing recorded images (PictBridge<br />
compliant printer) .......................... 54<br />
(MANAGE DISC/MEMORY)<br />
category ........................................ 56<br />
Making the disc compatible with<br />
playback on other devices or DVD<br />
drives (Finalizing) ......................... 56<br />
Playing a disc on other devices ....60<br />
Finding the right disc - DISC SELECT<br />
GUIDE .......................................... 61<br />
Deleting all scenes on the disc<br />
(Formatting) .................................. 62<br />
Recording additional scenes after<br />
finalizing ....................................... 64<br />
What you can do with the<br />
(SETTINGS) category of the<br />
HOME MENU ............................... 65<br />
Using the HOME MENU ................ 65
Listofthe_ (SETTINGS) category<br />
items............................................. 65<br />
MOVIESETTINGS ....................... 67<br />
(Items forecording movies)<br />
PHOTOSETTINGS ...................... 70<br />
(Items forecording still images)<br />
VIEWIMAGESSET..................... 73<br />
(Items tocustomize thedisplay)<br />
SOUND/DISP SET....................... 75<br />
(Items toadjust thesound andthe<br />
screen)<br />
OUTPUTSETTINGS .................... 76<br />
(Items forwhenconnecting other<br />
devices)<br />
CLOCK/_ LANG........................... 77<br />
(Items tosetclockandlanguage)<br />
GENERAL SET............................ 78<br />
(Other setup items)<br />
Activating functions usingthe<br />
°_=OPTION MENU....................... 79<br />
Using theOPTION MENU............. 79<br />
Recording items ontheOPTION<br />
MENU............................................ 80<br />
Viewing itemsontheOPTION<br />
MENU............................................ 80<br />
DetailsontheOPTIONMENU<br />
items............................................. 81<br />
WhatyoucandowithWindows<br />
computer ....................................... 86<br />
Installing the"FirstStepGuide" and<br />
software ........................................ 88<br />
Viewing "FirstStepGuide". ........... 90<br />
UsingaMacintosh computer ........ 90<br />
Troubleshooting ............................ 91<br />
Warning indicators and<br />
messages ................................... 100<br />
Using your camcorder abroad .... 103<br />
Precautions and maintenance .... 105<br />
About the Disc ............................ 105<br />
About the AVCHD format ............ 106<br />
About the "Memory Stick" .......... 107<br />
About the "InfoLITHIUM" battery<br />
pack ............................................ 108<br />
About the x.v.Color ..................... 109<br />
Handling your camcorder ........... 109<br />
Specifications .............................. 112<br />
Identifying parts and controls ...... 118<br />
Indicators displayed during<br />
recording/playback ...................... 122<br />
Glossary ...................................... 125<br />
Index ........................................... 126<br />
11
12<br />
Subjectexamplesand solutions<br />
Checking year<br />
_'SMTH SLW REC....................... 38<br />
Capturing still<br />
images luring<br />
movie recerlini<br />
_. Dual Rec ................................... 36<br />
Flowers in close-<br />
up<br />
_"PORTRAIT................................. 83<br />
P"FOCUS...................................... 81<br />
_'TELE MACRO............................ 81<br />
Focusing an the<br />
dog on the left<br />
side of the screen<br />
_'FOCUS ...................................... 81<br />
_"SPOT FOCUS............................ 81<br />
Qetting a good<br />
or beach<br />
_. Backlight................................... 37<br />
_. BEACH...................................... 83<br />
_. SNOW....................................... 83<br />
A chill on the<br />
stage under a<br />
_'SPOTLIGHT .............................. 83<br />
Fireworks with all<br />
its splendor<br />
_'FIREWORKS ............................. 83<br />
_" FOCUS...................................... 81<br />
under dim light<br />
_. NightShot ................................. 37<br />
_.COLOR SLOW SHTR................. 84
0perati0n flew<br />
You can consull the [DIS(7 SELECT GUIDE] (p. 61)<br />
displayed on the screen lo selecl ale right disc.<br />
h_HiaHze_hedis_(p 27).<br />
When you format the disc, you can select the recording image quality, HD/high<br />
definition) or SD/standard definition/.<br />
HD(highdefh_ition)i_llagequalHg SD sta_darddefi_Hio_)imageqHalitg<br />
DVD format<br />
The recorded disc c:m be ph_yed on<br />
DVD devices.<br />
Notes<br />
• Your cumcorder is compma)le with the "1440 x 1080/60i"standard ot AVCHD format (p. ]25).<br />
"AVCHD 1080ilbrmat" is abbreviated as "AVCHD"in this manual, except when it must be<br />
d_.-_cribcdin rnoYedmail.<br />
< _ Sh#at _lSi_)gyour _am¢order (p, aS),<br />
Movies are recorded on a disc, and still images are<br />
recorded on a "Memory Slick Duo."<br />
................................................... J<br />
_/<br />
£<br />
.<<br />
=_<br />
2<br />
3<br />
g<br />
Continued"') 13
14<br />
:_'_i_fli_g movbsm_ aHD(high defi_itim_}TV<br />
You can m!ioy moxies with HD (high defiuiti(m)<br />
image qualily, wilh Ihe same image qualily as they<br />
were recorded.<br />
Viewing movies e_, a _o_,,-HD {high<br />
defi_fitb_,}TV(p. 45}<br />
You can r!!joy movies recorded with HD (high<br />
definition) image quality, but they will be converted to SD (standard definition image<br />
quality.<br />
"_" Tips<br />
• You can consuh the [TV CONNECT Guide] (p. 43) displayed on lhe scr_n on connecting your TV<br />
and camcorder.<br />
If your device is compatible with AVCHD format, you can play a disc with HD (high<br />
defiuitioul image quality on the device.<br />
Important notice regarding discs recorded in the AVCHD format<br />
• This camcorder captures high definition footage in the AVCHD format. DVD media<br />
containing AVCHD footage should not be used with DVD based players or recorders, as<br />
the DVD player/recorder may fail to e.iect the media and may erase its contents without<br />
warning. DVD media containing AVCHD footage may be played on a compatible Blu-ray<br />
Disc TM player/recorder or other compatible device.<br />
_amce_de_ to a DVD devbe (p. 53}<br />
The dubbed images will be recorded with SD (slaudard<br />
definition) image quality.<br />
Editi_lg the diss o_ a _empHte_ (p,85)<br />
Using a computer, you can edit or copy imagesrecorded<br />
with HD (high definition) image qu:dity. Inst:dl the<br />
supplied application software on the computer in advance.
$eJ÷ctin# the right disc<br />
You can use DVD-RW. DVD+RW. DVD-R. and DVD+R DL discs of 8 cm in diameter with<br />
your camcorder. What you can do with the recorded images depends on the image recording<br />
quality, HD (high definition) or SD/standard definition), and the type of disc you selected.<br />
( ) indicates the ret_:rcncepage.<br />
Disc type DVD- DVD+ DVD-R DVD+R<br />
RW RW DL<br />
Disc symbols _ _ _<br />
Delcling or ediling images on your camcorder O O<br />
148, 5O)<br />
Finalizing required Io phly on olher devices (56) O O O O<br />
Making addilional recordings on a finalized disc 0 0<br />
(64)<br />
Formatling Ihe used disc Iouse il again (62) 0 0<br />
Making longer recordings on a side of a disc O<br />
Disc type DVD_RW,_,1 DVD+ DVD-R DVD+R<br />
VIDEO [ VR<br />
RW DL<br />
Disc symbols om<br />
Deleting the last movie recorded (49) o o O<br />
Deleting or editing images on your<br />
camcorder 148,50)<br />
Finalizing required to play on other o o _.2 0 0<br />
devices (56)<br />
Making additional recordings on a o o O<br />
finalized disc (64)<br />
Formatting the used disc to use it again o o 0<br />
(62)<br />
Making longer recordings on a side of a O<br />
disc<br />
"1 There are 2 recording lormats. VIDEO mode and VR mode. ff_r DVD-RW.<br />
*2 Finalizing is required to play tile disc in a DVD drive on a computer. A DVD+RW that is not linalized<br />
l/lay callse tile COl/lputer lO l/la]lilnction.<br />
Rw<br />
o<br />
=_<br />
3<br />
g<br />
Continued._ 15
16<br />
Approximate recordable time in minutes on one side of a disc. Recordable time difl'ers<br />
depending on the recording mode (p. 65).<br />
( ): tile minimum recording time<br />
HD (high definition) image quality<br />
AVC HD 12M (HQ+)<br />
(highest quality)<br />
AVC HD 9M (HQ)<br />
(high qua]ity)<br />
AVC HD 7M (SP)<br />
(standard quality)<br />
AVC HD 5M (LP)<br />
(long play)<br />
SD (standard definition) image quality<br />
SD 9M (HQ) (high<br />
quality)<br />
SD 6M (SP) (standard<br />
quality)<br />
SD 3M (LP) (long<br />
play)<br />
0 Notes<br />
• Tileaspect ratio of inl_lgesrecorded with HD (high definition) image quality is 1(,:9(wide).<br />
"_° Tips<br />
• Figures such as 12M anti9M in the table show the average bit rate. M stands lor Mbps.<br />
• If you use a double-sidcd disc. you can record on both sides of the disc (p. 105).<br />
• [DISC SELECT GUIDEI will help you _lect a right disc (p. 61).<br />
Your camcorder uses tile VBR (Variable Bit Ratc) li.>rlnat to automatically adjust image quality to suit the<br />
rccording scene. Tills technology cauls fluctuations in the recording time of z_disc.<br />
Movics containing quickly moving and complex images are recorded at a higher bit rate. and this reduces<br />
the overall recording time.
°° HOME'° and °° OPTION"<br />
oTakingadvantage of two typesofmenus<br />
Category (p. 17)<br />
Categoriesand items of the HOMEMENU<br />
I_(CAMERA) category<br />
MOVIE* 34<br />
PHOTO* 34<br />
SMTHSLWREC 38<br />
r"_7(VIEW IMAGES)category<br />
VISUALINDEX* 41<br />
PLAYLIST 51<br />
_(OTHERS) category<br />
DELETE* 48<br />
EDIT 5(t<br />
PLAYLIST EDIT 51<br />
PRINT 54<br />
COMPUTER 48<br />
TV CONNECTGuide* 43<br />
I_(MANAGE DISC/MEMORY)<br />
category<br />
FINALIZE* 56<br />
DISCSELECTGUIDE 6]<br />
0 FORMAT* 62<br />
FORMAT* 63<br />
UNFINALIZE 64<br />
DISCINFO 56<br />
_(SETTINGS) category<br />
To custenlize your camcorder (p. 6. 5" ) .<br />
* You can set these ilems during Easy Handycam<br />
operation (p. 30). On the items in lhe<br />
m_ (SETTINGS) category you can use during<br />
Easy Handycam operation, s_ page 80.<br />
==<br />
-<<br />
=_<br />
3<br />
g<br />
Continued._ 17
18<br />
1 Slide the POWER switch to turn<br />
on your camcorder.<br />
2 Press _(HOME) [] or [_.<br />
ft (HOME) []<br />
(HOME) []<br />
3 Touch the desired category.<br />
Example: _ (OTHERS) category<br />
4 Touch the desired item.<br />
Example: IEDIT]<br />
5 Perform the operation, following<br />
the instructions on the screen.<br />
To turn offthe HOMEMENU<br />
TouchF_q.<br />
Whenyouwantto knowsomething<br />
abouthefunctionofeachitemon<br />
theHOMEMENU- HELP<br />
1 Press _(HOME).<br />
Tile HOME MENU appears.<br />
2 TouchE_(HELP).<br />
Tile bottom ol' tile [T](HELP) button<br />
ttll'nS orange
Touch the item you want to know<br />
the content.<br />
When you touch an item. its explanation<br />
appears 1711 the screen.<br />
To apply the option, touch [YES],<br />
otherwise, touch [NO].<br />
To deactivatethe HELP<br />
Tuuch [T](HELP) again in step 2.<br />
i<br />
Just a tuuch on the screen during shooting<br />
or playback displays the functions available<br />
at that moment. You will find it easy tu<br />
make various settings. See page 79 for<br />
further details.<br />
?,_--(OPTIO N)<br />
........<br />
==<br />
-<<br />
=_<br />
3<br />
g<br />
19
20<br />
Ge_th_gSt_Hed<br />
Step1: Checkingsupplieditems<br />
Make sure that you have the fl_llowing<br />
items supplied with your camcorder.<br />
The number in tile parentheses indicates the<br />
number of that item supplied.<br />
AC Adaptor (1) (p. 21)<br />
Power cord (1) (p. 21)<br />
Component video cable (1) (p. 44)<br />
AN connecting cable (1) (p. 44, 53)<br />
USB cable (1) (p. 54)<br />
Wireless Remote Commander (1)<br />
(p. 121)<br />
A butt£m-type lithium batleJy is already installed.<br />
Rechargeable battery pack NP-FH60<br />
(<strong>HDR</strong>-<strong>UX5</strong>), NP-FH70 (<strong>HDR</strong>-UX7)(1)<br />
(p. 21)<br />
CD-ROM "Handycam Application<br />
Software" (1) (p. 86)<br />
Operating Guide (This manual) (1)
Step2: Chargingthe batterypack<br />
You can charge the "InfoLITHIUM"<br />
battery pack (H series) (p. 108) after<br />
attaching it to your camcorder.<br />
fO Notes<br />
• You cmluse only lhe H series of<br />
' InloLITHIUM" batlery pack wilh your<br />
canlcorder.<br />
4<br />
/ Slide the POWER switch in the<br />
direction of the arrow to OFF<br />
e_<br />
(CHG) (The default setting).<br />
Raise the viewfinder, then attach<br />
the battery pack by sliding it in<br />
the direction of the arrow until it<br />
clicks.<br />
3 Connect the AC Adaptor to the<br />
DC IN jack of your camcorder.<br />
Open tile jack cover, and connect the<br />
DC plug of tile AC Adaptor.<br />
Match tile • mark on tile DC plug with<br />
the • mark on your camcorder.<br />
4 Connect the power cord to the AC<br />
Adaptor and the wall outlet.<br />
Tile CHG (clmrge) l:mlp lights up mM<br />
charging starts. The CHG (charge) lamp<br />
turns off when tile battery is fully<br />
charged.<br />
5 Disconnect the AC Adaptor from<br />
the DC IN jack on your<br />
camcorder.<br />
fO Notes<br />
• Disconnecl lhe AC Adaptor h'om lhe DC IN<br />
jack holding bolh the camcorder and lhe DC<br />
plug,<br />
m<br />
=<br />
21
22<br />
Step 2: gha(g)_) the batte(y pack (go_ti_e_}<br />
To remove the battery pack<br />
(!) Slide tile POWER switch to OFF<br />
(CHG).<br />
(_) Raise tile viewfinder.<br />
@ Press tile BATT (battery release) button<br />
and remove the battery pack.<br />
O Notes<br />
• When you renlove the baoely pack or lhe A("<br />
Adaptor, make sure that the _ (Movie) lamp/<br />
(Still) lamp (p. 24) is turned off,<br />
When storing the battery pack<br />
Fully discharge the battery belkn'e storing it<br />
for an extended period (see page 109 for the<br />
details of storage).<br />
Touseanoutsidepowersource<br />
Make the same connections as you do when<br />
charging the battery pack. The battery pack<br />
will not lose its charge in this case.<br />
To checkthe remaining battery<br />
(Battery Info)<br />
Set the POWERswitch to OFF (CHG), then<br />
press DISP/BATT INFO.<br />
DISP/<br />
BATT INFO<br />
After a while, the approximate recordable<br />
time and batte U information appear lkw<br />
about 7 seconds. You can view the battery<br />
in%rmation for up to 20 seconds by<br />
pressing DISP/BATT INFO again while the<br />
inlkwmation is displayed.<br />
Remaining battery (approx.)<br />
Recording capacity (approx.)<br />
Chargingtime<br />
Approximale tittle (nlin.) required when<br />
you fully charge a fully discharged battery<br />
pack.<br />
NP-FH50 135<br />
NP-FH60 (supplied with 135<br />
<strong>HDR</strong>-<strong>UX5</strong>)<br />
NP-FHTO (supplied with 170<br />
<strong>HDR</strong>-UX7)<br />
NP-FH 100 390<br />
Recording time<br />
Approximate tittle (nlitt.) :_v:fihlble when<br />
you use a fully charged battery pack.<br />
<strong>HDR</strong>-<strong>UX5</strong><br />
lmlge HD SD HD SD<br />
quality *_<br />
NP-FH50 60 70 30 35<br />
60 75 3(1 35<br />
60 75 3(} 35<br />
NP-FH60 75 95 35 45<br />
(supplied) 75 100 35 50<br />
90 100 45 50
NP-FH70 13(7 155 65 75<br />
13(7 165 65 80<br />
135 165 65 80<br />
NP-FHIO0 3(75 360 150 180<br />
<strong>HDR</strong>-UX7<br />
310 375 155 185<br />
320 375 160 185<br />
lmlge HD SD HD SD<br />
qualily **<br />
NP-FH50 55 65 25 30<br />
55 65 25 3O<br />
55 65 25 3O<br />
NP-FH70 115 140 55 7(1<br />
(supplied) 120 145 60 7(}<br />
120 145 6(} 70<br />
NP-FHI00 275 325 135 160<br />
285 335 140 165<br />
300 335 150 165<br />
* Typical recording time shows tile lime when<br />
you repeat recording starl/slop, lurning lhe<br />
power on/oil and zooming.<br />
.... HD" stands lor high definition image quality,<br />
and 'SD" stands lot slandard inlage qualily.<br />
O Notes<br />
• All times measured with recording mode [SP]<br />
under the lolh)wing conditions:<br />
Top: When the LCD backlighl turns on.<br />
Middle: When lhe LCD backlight turns olli<br />
Bottonl: When recording with the viewfinder<br />
while lhe LCD panel is cloud.<br />
Playing time<br />
Approximate time (rain.) available when<br />
you use a fully char_ed ballery pack.<br />
<strong>HDR</strong>-U×5<br />
Image HD SD HD SD<br />
qualily**<br />
NP-FH50 90 105 100 120<br />
NP-FH60 125 140 135 160<br />
(supplied)<br />
NP-FH70 200 23(7 220 255<br />
NP-FH 100 455 515 500 580<br />
<strong>HDR</strong>-UX7<br />
hnage HD SD HD SD<br />
quality**<br />
NP-FH50 90 100 95 1I 0<br />
NP-FH70 195 220 205 235<br />
(supplied)<br />
NP-FH 100 440 5(7(7 470 535<br />
* When tile LCD backlight is on.<br />
.... HD" slands lbr high definition inlage quality,<br />
and "SD" stands lot standard inlage quality.<br />
On the battery pack<br />
• Belbre changing tile hallery pack, slide tile<br />
POWER switch to OFF (CHG) and 111131 off the<br />
(Movie) lamp/ll'_ll (Still) lamp (p. 24).<br />
• Tile CHG (charge) hunp flashes during<br />
chargim,_, or Balterv. hllb (p. 22) will nol be<br />
correctly disph/yed under the following<br />
conditions:<br />
The baltery pack is nol attached correclly.<br />
The batlery pack is danlaged.<br />
Tile batlel T pack is worn-out (Fill" Battery<br />
lnfo only).<br />
• The power will not be supplied from the batlel3'<br />
as long as lhe AC Adaptor is connected to the<br />
DC IN jack of your camcorder, even when tile<br />
power cord is disconnected hom the wall outlet.<br />
Continued.* 23<br />
/
24<br />
Step 2: ghar_ic_ the batt+ry pack<br />
• When altaching an optional video ligla, it is<br />
recommended lbal you use all NP-FH 100<br />
battm T pack.<br />
• We do nol recommend using an NP-FH30.<br />
which only allows short recording and playback<br />
limes, witll your camcorder.<br />
On the charging/recording/playback time<br />
• Times measured whcn using tile camcorder +tl<br />
25 °C 177 °F) (10 %" to 30 %" (50 OFto 86 °F) is<br />
recommended).<br />
• Tile recording and playback time will be shorler<br />
when you use your camcorder ill low<br />
telnperal UlCS.<br />
• Tile recording and playback time will be shormr<br />
depending on the conditions under which you<br />
use your Calllcorder,<br />
On the AC Adaptor<br />
• Use tim nearby wall outlet when using tile A( +"<br />
Adaptor. Disconnect tile AC Adaptor hom tile<br />
wall oudet immediatcly if any malfimction<br />
occurs while usillg your camcorder.<br />
• Do not u_ the AC Adaptor placed in a narrow<br />
space, such as between a wall and lhmiture.<br />
• Do not short-circuit the DC plug of the AC<br />
Adaptor or bauery terminal with any metallic<br />
objects. This may cause a malflmction.<br />
• Even if your camcorder is turned oil AC power<br />
/house current) is still supplied to it while<br />
connected to tile wall outlet via tile AC Adaptor.<br />
Step3: Turningthe<br />
poweron andsetting<br />
the date and time<br />
Set the date and time when using lifts<br />
camcorder for the first time. If you do not<br />
set the date attd time, the [CLOCK SET]<br />
screen appears every time you turn on your<br />
camcorder or change the POWER switch<br />
position.<br />
Touch Ihe bultons on the<br />
screen.<br />
POWER switch-<br />
1 While pressing the green button<br />
in the center, slide the POWER<br />
switch repeatedly in the direction<br />
of the arrow to turn on the power.<br />
(Movie): To recoM movies<br />
(Still): To record still images<br />
The [CLOCK SET] screen appears.<br />
2 Select the desired geographical<br />
area with A/V, then touch [NEXT].
3 Set [DST SET] or [SUMMERTIME],<br />
then touch [NEXT].<br />
4 Set [Y] (year) with _hJV.<br />
5 Select [M] with
26<br />
Step4: Adjustingyourcamcorderto suit you<br />
Open the LCD panel 9(1 degrees to the<br />
camcorder/@), then rotate it to the best<br />
angle to record or play/@/.<br />
@90 degrees<br />
(max.)<br />
@90 degrees to<br />
the camcorder<br />
@180 degrees DISP/BATT INFO<br />
(max.)<br />
To turn off the LCD backlight to make<br />
the battery last longer<br />
Press :rod hold DISP/BATT INFO for :1few<br />
seconds until "k--d_Fappears.<br />
This setting is practical when you use your<br />
camcorder in bright conditions or you want<br />
to save battery power. The recorded image<br />
will not be affected by tile setting. To turn<br />
on the LCD backlight, press and hold DISP/<br />
BATT INFO for a few seconds until _E'_F<br />
disappears.<br />
0 Notes<br />
• Do not press tile buttons below the LCD scrcen<br />
accidentally when you open or adjusl ltle LCD<br />
panel.<br />
"_° Tips<br />
• 11you open the LCD panel 90 degr_s to tile<br />
camcorder, dlen rotate it 180 degrees to tile lens<br />
side, you cml close tile LCD panel with the LCD<br />
scrcen t_cing ouL This is convenient during<br />
playback operations.<br />
• On the HOME MENU. louch _ (SETTINGS)<br />
[SOUND/DISP SETI _ [LCD BRIGHT]<br />
(p. 75) to adjust the brighmess of the LCD<br />
screen.<br />
• Pressing DISP/BATT INFO toggles the screcn<br />
indicalors (such as time code) on or ofl_<br />
You can view images using tile viewfinder<br />
to avoid wearing down the battery, or when<br />
the image seen on the LCD screen is poor.<br />
Viewfinder<br />
Viewfinder lens<br />
adjustment lever<br />
Move it until the<br />
image is clear.<br />
"_° Tips<br />
• You can _uljust the brightness oi lhe _iewtinder<br />
backlight by selecting _/SETTINGS) ----+<br />
[SOUND/DISP SETI _ [VF B.LIGHTI on the<br />
HOME MENU (p. 75).
Step5: Insertinga disc or a "Memory Stick<br />
DUO"<br />
A new 8 cm DVD-RW. DVD+RW. DVD-<br />
R. or DVD+R DL is required for recording<br />
(p. 15).<br />
O Notes<br />
• Remove dust or fingerplinls irom tile disc<br />
belorehand, using a soft cloth (p.106).<br />
4<br />
/ Check that the power of your<br />
camcorder is on.<br />
," Slide the disc cover OPEN switch<br />
in the direction of the arrow<br />
(OPEN b).<br />
[PREPARING TO OPEN] appears on<br />
the LCD screen, then the disc cover<br />
opens slightly, automatically.<br />
Pickup lens<br />
open il fulther.<br />
ACCESS lamp (Disc)<br />
Disc cover OPEN switch<br />
O Set the disc with the recording<br />
side facing your camcorder, then<br />
press the center of the disc until it<br />
clicks.<br />
Set tile disc with the label side l_tcing<br />
out when using a single-sided disc.<br />
4 Close the disc cover.<br />
[DISC ACCESS] appears on the LCD<br />
screen.<br />
It may take some time for the camcorder<br />
to recognize the disc, depending on the<br />
disc type and condition.<br />
Skip to step 7 when you use a DVD-R/<br />
DVD+R DL.<br />
5 When you use a DVD-RW/<br />
DVD+RW, touch [Use DISC<br />
SELECT GUIDE].<br />
0 Notes<br />
• You cannol use [Use DIS(-" SELECT GUIDE]<br />
during Easy Handycam opera6on (p. 30).<br />
Format tile disc, lollowing tile insll uctions on<br />
the screen.<br />
6 Touch [Record HD (high<br />
definition) images.].<br />
m<br />
g<br />
Continued._ 27
28<br />
Step 5: I_s÷_ti_ a disc o_a °°N÷mo_yStick g_m°' {go_ti_e_}<br />
Touch [Record SD (standard definition)<br />
images.] to record with SD (standard<br />
definition) image quality.<br />
Items displayed vary depending oil tile<br />
status of your camcorder, or the type of<br />
disc inserted.<br />
7 Touch the option that is right for<br />
you on the screen.<br />
The disc will be fornmtted with the<br />
image recording quality and mode you<br />
selected. When the formatting is<br />
completed, you can start recording on<br />
the disc.<br />
If youselectSD(standarddefinition)<br />
image quality<br />
• When you use a DVD-RW. select a<br />
recording format, [VIDEO] or [VR],<br />
(p. 15). If you format a disc during Easy<br />
Handycam operation (p. 30), the<br />
recording format is fixed to [VIDEO].<br />
• When you use a DVD+RW. select the<br />
aspect ratio, [16:9 WIDE] or [4:31.<br />
To remove the disc<br />
(!) Perform steps 1 and 2 to open the disc<br />
cover.<br />
(g) While holding the disc fastener at the<br />
center, tip up the edge of the disc.<br />
\\,<br />
0 Notes<br />
• You cannot change tile image quality (HI) (high<br />
definition/ or SD (slandard definilion), p. 13) of<br />
a disc nlidway.<br />
• Be carefifl nol to obstruct the operation wilh<br />
your hand or other ot!iects, etc.. when opening<br />
or closing tile disc cover. Move the belt to the<br />
bottonl of the canlcorder, then open or close the<br />
disc cover.<br />
• If you catch lhe belt when closing lhe disc<br />
cover, it nlay cause your canlcorder to<br />
mallunction.<br />
• Do nol touch the disc wilh the rccording skle or<br />
pickup lens (p. 111).<br />
Wllml using a double-sided disc, take care nol to<br />
smudge lhe surlacc with fingerprints.<br />
• If you close the disc cover with the disc set<br />
incorrectly, it may cause your canlcorder to<br />
mallunoion.<br />
• Do nol disconnecl lhe power sources during<br />
Iormatting.<br />
• Do not apply shock or vibration to your<br />
camcorder:<br />
while lhe ACCESS lamp is on<br />
while the ACCESS lamp is flashing<br />
while [DISC ACCESSI or [PREPARING TO<br />
OPEN] is displayed on the LCD screen<br />
• It may take sonle lime to remove the disc<br />
depending on the disc condition or recorded<br />
nlalerials.<br />
• It nlay take lip to l0 minutes to renlove a disc if<br />
it is damaged or is dirty witll fingerprinls, etc. In<br />
thai case. the disc might be danlaged.<br />
"_° Tips<br />
• You C_lll rClllO_e tile disc when _1 power source<br />
is connecle(I to your C[llllcorder e_, ell Whell your<br />
camcorder is turned ore However, lhe disc<br />
recognilion process (step 4) does not start.<br />
• To delele all of tile prcviously recorded images<br />
hom a DVD-RW/DVD+RW. then to use il<br />
again to record new images, see "Deleting all<br />
scenes on llle disc (Pormaoing)" on page 62.<br />
• You can check the right disc using [DISC<br />
SELECT GUIDEI on the HOME MENU<br />
(p. 61).
You can use only a "Memory Stick Duo"<br />
marked with MEM0_YfiTl[S DUn or<br />
MEtaORYSTIIZKPRODuo (p. 107).<br />
"_° Tips<br />
• The mnnber of recordable images _ary,<br />
depending on die image qualily or lhe image<br />
size. For details, see page 70.<br />
1 Open the LCD panel.<br />
2 Insert the "Memory Stick Duo"<br />
into the "Memory Stick Duo" slot<br />
in the right direction until it clicks.<br />
Access lamp<br />
("Memory Stick Duo")<br />
To eject a "Memory Stick Duo"<br />
Open the LCD panel, lightly push the<br />
"Memory Slick Duo" in once.<br />
0 Notes<br />
• When the access lamp is lit or flashing, your<br />
ctuncorder is mading/wriling datm Do not shake<br />
or knock your catllcorder, [/1111the power oil,<br />
qiect lhe "Memol T Stick Duo," or remove ll_e<br />
baltery pack. Od/erwise, image data may be<br />
damaged.<br />
• If you lorce the "Memory Slick Duo" into the<br />
s]ol in the wrong dircction, the 'Memo W Slick<br />
Duo," the 'Memory Slick Duo" slot. or image<br />
data may be damaged.<br />
• When inselting or eiecting tile "Memory Slick<br />
Duo," be careful so lhal the "Memory Stick<br />
Dtlo _ does not pop out and drop,<br />
m<br />
g<br />
29
30<br />
f_e_:anl_g/Playback<br />
EasyRecording/Playback(EasyHandycam)<br />
With this E_sy Handyeam operation, most of the cmnera settings are mttomatic_dly optim_dly<br />
atliusted, which frees you from detailed a@lstments. The screen font size increases for easy<br />
viewing.<br />
[] <strong>HDR</strong>-<strong>UX5</strong><br />
1 Slide the POWER switch [] to<br />
light up the N (Movie) lamp.<br />
2 Press EASY [_.<br />
EASY 1_ appears on [he serL'el]+<br />
3 Press START/STOP [] or [] to<br />
start recording.*<br />
STOP<br />
ISTBYI :_ IRECI<br />
To stop recording, press it again.<br />
* Movies are recorded in [SP] mode.<br />
1 Slide the POWER switch [] to<br />
light up the O (Still) lamp.<br />
2 Press EASY [_.<br />
EASY _ appears on the screen.<br />
3 Press PHOTO [] to record.**<br />
Press and hold lightly Press IMly to<br />
Io adjust the tk)cus, record.<br />
Flashing _ Lil<br />
**Still inlages are recorded in [FINE] quality.
1 Slide the POWER switch [] to turn on your camcorder.<br />
2 Press f'_l(VlEW IMAGES) [] or _.<br />
Tile VISUAL INDEX screen appears on tile LCD screen. (It may take some lime to<br />
display the VISUAL INDEX screen.)<br />
Returns to Ihe recording<br />
Next 6<br />
Relurns Io the recordin{<br />
3 Start playback.<br />
Viewingmovies:<br />
Disphtys the movies<br />
Touch the _ll tab and the moxie to be played back.<br />
type<br />
Appcurs with the inmge on<br />
each of the tab that was<br />
lastly played back/recorded<br />
(_" lbr lhe slill image).<br />
_lays Ihe slill images<br />
Return (Io the VISUAL I_,_.,_ ,<br />
INDEX SCI'eCn)__ _01/mln _ 0:00:14.... I Toggles Phty or Pause as<br />
,_ • _ _ you Iouch<br />
previous scene_ _<br />
Bc_inning°fthcscene/I I_ 00t _l- _ _? Nex( Date/time sceneof<br />
recol(lin_ '_<br />
Slop (go Io Ihe VISUAL @r-_<br />
INDEX screen) It_ 125[_<br />
n x<br />
ixe 'erse/F( rward<br />
Viewing still images:<br />
Touch the _ tab and the slill image to be played back.<br />
Return (to Ihe VISUAL-- @60min _ 14/14<br />
INDEX screen)<br />
* [DATA CODE] is lixed to [DATE/TIME] (p, 73).<br />
Slide show (p. 42)<br />
Dale/lime of recording 'r<br />
Previous/Next<br />
g<br />
"13<br />
m<br />
Continued--_ 31
32<br />
EasyRs¢o_@N/Naybask (EasyHad@cam} (8sstiaus#}<br />
"_° Tips<br />
• When all mo_ies fi'om (116 selectcd one to file<br />
last one are played back, tile screen rcmms to<br />
the VISUAL INDEX screen,<br />
• Touch _/[_ during pause to play back<br />
movies slowly,<br />
• To adjust the sound volume, touch I_(HOME)<br />
_ (SETTINGS) _ [SOUND<br />
SETTINGS] _ [VOLUME], then adjust the<br />
volume with _/[_.<br />
To cancel Easy Haudycam<br />
operation<br />
Press EASY [] again. _ disappears<br />
from the screen.<br />
Adjustable menu settings during<br />
Easy Handycam operation<br />
Touch _/HOME) [] or [] to display<br />
a@tstable menu settings/p. 17, 65).<br />
0 Notes<br />
• You can neilfier delele nor edit nlovies on tile<br />
disc during Easy Handycam operalion.<br />
• Most of the s_tlings remm to tile defimlt soiling<br />
automatically. However. some lllCnu ilems arc<br />
fixed m cerlain setlings. For delails, see page 91.<br />
• When Ii)rmalting DVD-RW discs with SD<br />
(standard definition) image quality, the<br />
recording Ii)rmal is fixed m VIDEO (p. 62).<br />
• _ (OPTION) does not appearonfllescrcen.<br />
• Canccl Easy Handycam_ operatfim if you want to<br />
add efli:cts to the images, or if you wahl to make<br />
various sctlings.<br />
Unavailable buttonsduring Easy<br />
Handycam operation<br />
Dm'ing Easy H:mdycam operation, you<br />
camlot use some buttons/f]lnctions, since<br />
most of the items are set automatically<br />
/p. 91). If you press a button that does not<br />
work, [Invalid during Easy Handycam<br />
operation.] may appear on the screen.<br />
To make the disc compatible<br />
with playback on other devices<br />
(Finalizing)<br />
You need to finalize a recorded disc to<br />
make it compatible with playback on other<br />
devices or computers. See page 56 on<br />
finalizing operation.<br />
0 Notes<br />
• You cannol make additional recordings on<br />
DVD-R/DVD+R DL discs once you finalize lfie<br />
disc. even if there is h-ee space on lhe disc.<br />
• The disc menu is fixed to [STYLEII.<br />
• You cannol record addilional materials on a<br />
finalb'cd disc during Easy Handycam operalion<br />
(p. 64).
Recordingthe images<br />
START/STOP[]<br />
POWER switch []<br />
If the POWER<br />
switch is set to OFF<br />
ICHG), slide it<br />
while pressing the<br />
green button.<br />
t_ (HOME) []<br />
_lt (Movie) lamp<br />
r<br />
II_ (Slill) lamp<br />
t_ (HOME) []<br />
O Notes<br />
PHOTO []<br />
Lens cover<br />
Opens in accordance wilh<br />
the setting of the POWER<br />
...................................................................................................................................................................<br />
If tile ACCESS hunp (p. 27, 29) is on alter<br />
Fasten Ihe grip belt ill Ihe order shown recording is finished, it llleans that data is still<br />
being written onto tile disc or "Memoly Stick<br />
below, then hold your camcorder securely. Dtlo." Do not apply shock Ill"vibralioll 1o your<br />
SWilch.<br />
camcorder, and do not disconnect the ballery or<br />
AC Adaplor.<br />
Continued._ 33
34<br />
Rsss_disS ths imaSss/Csstisssd)<br />
Movies are recorded on tile disc• See page<br />
16 for lhe recording lime.<br />
Slide the POWER switch<br />
[] in the direction of the<br />
arrow to light up the H:H<br />
(Movie) lamp.<br />
Press START/STOP [] or<br />
To stop recording, press START/STOP<br />
again.<br />
To record high resolutionstill images<br />
on the "Memory Stick Duo" during<br />
shootinga movie(Dual Rec)<br />
See page 36.<br />
, _-" @<br />
Slill images are recorded Ol] Ihe "Melnory<br />
Slick Duo." See page 71 for the number of<br />
recordable images<br />
Slide the POWER switch<br />
[] in the direction of the<br />
arrow to light up the i_<br />
(Still) lamp.<br />
Press PHOTO [] lightly to<br />
adjust the focus O (a<br />
beep sounds), then press<br />
it fully O (a shutter click<br />
sounds).<br />
0 0<br />
Flashing---+Lit<br />
The red MIIiappears beside _ . When the<br />
red glgl disappears, the image is recorded.<br />
To switch the recordingmode using<br />
the I_(HOIVIE) button[] or []<br />
On the HOME MENU. touch<br />
(CAMERA) --.,-[MOVIE] or<br />
[PHOTO].
You can magnil3, images to 10 times the<br />
original size with tile power zoom lever or<br />
the zoon/buttons below tile LCD screen.<br />
Wider range of view:<br />
(Wide angle)<br />
Close view: (Telephoto)<br />
Move tile power zoom lever slightly for a<br />
slower zoom. Move it further for a faster<br />
zooIn.<br />
Notes<br />
• Be sure to ke_ 1) your iing_q" on the power ZOOln<br />
lever. It you niobe your finger ()it the power<br />
zoom lever, tim operalion sound ()_ tim power<br />
zoonl lever may also be reCol'de(l.<br />
• You cunnol change the/oom speed with lhe<br />
zoom butlons below the LCD scrccn.<br />
• The minimum possible distance between<br />
camcorder and subject while mainlaining sharp<br />
tPcus is about 1 cm (aboul 13/32 in.) lor wide<br />
angle and abou180 tin (aboul 2 5/8 loci) h)r<br />
telephoto.<br />
"_° Tips<br />
• You can sel [DIGITAL ZOOM[ (p. 68) ityou<br />
want IO zoonl 10 a levd greater than l0 x.<br />
Sound picked up by tile builtqn microphone<br />
is converted to 5. Ich surround s;ound and<br />
recorded.<br />
Built-in microphone<br />
Your camcorder has Dolby Digital 5.1<br />
Creator installed for recording 5. Ich<br />
surround sound. Ei_ioy realistic sound when<br />
playing the disc on devices that support 5. Ich<br />
stlrrotlnd Sotln(l.<br />
Dolby Digilal 5.1 Creator. 5.lob sunound sound<br />
(_P Glossary (page 125)<br />
O Notes<br />
• To play tile disc recorded with HD (high<br />
definitkm) image quality and enjoy tile sound in<br />
5.1ch surround, you need an AVCHD Iommt<br />
device compatible with 5.1ch surround (p. 60).<br />
• 5.Ich sound isconverledlo 2ch whenplayed back<br />
on your canlcordel\<br />
• ,I_5.ICh is displayed on the screen during 5.1ch<br />
recording/phJyback.<br />
g<br />
g.<br />
"10<br />
i<br />
Continued._ 35
36<br />
Resordi_# th8 i_a_es {go_ti_usd)<br />
Flash charge<br />
lamp<br />
I_ Flash<br />
Press :_ /flash) repeatedly to select an<br />
appropriate setting.<br />
No indication (Auto flash): Aulomalically<br />
flashes when thcre is insullicient ambient<br />
light.<br />
0 Notes<br />
,_ (Forced flash): Always u_s the flash<br />
regardless of lhe surrounding brighmess.<br />
(_) (No flash): Records wifl_om flash.<br />
• The recolnnlended dislance to tile subject when<br />
using t116 buih-in flash is approximalely 0.31o<br />
2.5 m 11 to 8 I_:el).<br />
• Remove any dusl Iiom lhe suriace of lhe flash<br />
lamp beiore using il. Flash eiicct may be<br />
ilnpaircd if hct_t discoloration or dust obscures<br />
the lamp.<br />
• The flash charge lalnp flickers while charging<br />
lhe flash, and remains lit when the batlery<br />
charge is complete.<br />
• If you use the flash in bright places such as<br />
when shooling a backlil sub.iecL the flash may<br />
not be et]cctive.<br />
• When attaching a conversion lens/optkmal) or a<br />
liher (optional) to your camcorder, the flash<br />
light does not emit light.<br />
"_° Tips<br />
• You cnn change the brighmess ol the flash by<br />
_tling [FLASH LEVEL] (p. 73), or you can<br />
prevent the redcye by setting [REDEYE<br />
REDUCI lP- 731.<br />
You can record high quality still images on<br />
the "Memory Stick Duo" while recording a<br />
movie on the disc.<br />
(_) Set the POWER switch to I1_ (movie),<br />
then press START/STOP to start movie<br />
recording.<br />
@ Press PHOTO fully.<br />
Alter you start recording, and fieR)m you<br />
finish, you can capture up to 3 frames of<br />
still images from your movie.<br />
Orange color<br />
BB_EII boxes indicale the<br />
[_ number of<br />
recorded im iges.<br />
When recording is<br />
finished, Ihe color<br />
changes to orange.<br />
@ Press START/STOP to stop movie<br />
recording.<br />
Stored still images appear one by one, and<br />
the images arc stored onto the "Memory<br />
Stick DuoY When Mill disappears, the<br />
images are recorded.<br />
0 Notes<br />
• Do not cjecl lhe ' iVlenlory Stick Duo" belinc<br />
recording is finished and the slill images arc<br />
stored on file "Memol T Stick Duo."<br />
• You cannol use lhe flash (luring Dual Rec.<br />
"_° Tips<br />
• Whcn the POWER swilch is set to<br />
(Movie), lhe size of slill images becomes:<br />
1_ 2.3M ( 16:9 wide) or 1.7M 14:3)/<strong>HDR</strong>-<br />
<strong>UX5</strong>)
[_] 4.6M (16:9 wide) or 3AM (4:3) (<strong>HDR</strong>-<br />
UX7)<br />
• You can record still images during recording<br />
standby in the same way as when the POWER<br />
switch is _t to I[_ (Still). You can also record<br />
with the fla,,h.<br />
f<br />
OFFI _ ON<br />
NIGHTSHOT<br />
glglglgl_=_<br />
-- Infrared port<br />
Set the NIGHTSHOT switch to ON. ([_<br />
appears.[<br />
(J Notes<br />
• The NightShot and Super NightShot lunctions<br />
use inl_ared lighL Thercl_nc, do not co_er tl_e<br />
mhared port with your lingm_ or odmr objects.<br />
and remove fl_e con,. erskm lens (optional).<br />
• Adjust the li_cus manually ([FOCUS], p. 81 )<br />
when it is hard to lbcus automatically.<br />
• Do not use tl_e NightShot and Super N1ghtShot<br />
lhnctions in bright places. This may cause a<br />
mallhnction.<br />
"_° Tips<br />
• To rccord an image brighter, use Super<br />
NightShot flmclion (p. 84). To record an image<br />
more lailhlhlly to the original colors, use Color<br />
Slow Shutler lhnction (p. 84).<br />
To adjust the exposure for backlit subjects,<br />
press BACK LIGHT to display I_. To<br />
cancel the back light fimction, press BACK<br />
LIGHT again.<br />
Open the LCD panel 90 degrees to the<br />
camcerder (@), then rotate it 180 degrees<br />
to the lens side (@).<br />
"_° Tips<br />
• A mirror-image of lhe sub.iect appears on the<br />
LCD screen, but the mmge will be normal whml<br />
recorded.<br />
g<br />
g.<br />
-ca<br />
Continued._ 37
38<br />
Reco_di__h÷images(Continued}<br />
Fast moving subjects and actions, which<br />
canuot be captured under the ordinary<br />
shooting conditions, can be shot in smooth<br />
moving slow-mutiou for about 3 secunds.<br />
This is usefifl to shoot fast actions such as a<br />
golf or tennis swing.<br />
t1_ (HOME) []<br />
(_) Slide the POWER switch to turn on the<br />
camcorder.<br />
@ Pressi_ (HOME) [] or[_ to display file<br />
HOME MENU.<br />
@ Touch I_ (CAMERA).<br />
(_) Touch [SMTH SLW REC].<br />
g_ ...... ....<br />
(g) Press START/STOP.<br />
An about 3 secoM-movie is recorded as a<br />
12 second-slow-motion-movie.<br />
When [RecoMing...] disappears, recording<br />
is finished.<br />
Tuuch [_ tu cancel the smuoth slow<br />
recording.<br />
To change the setting<br />
Tuuch @._=/OPTION)--+ _-_-_-,then select<br />
the setting you want to change.<br />
• [TIMING]<br />
Select the recording start point alter<br />
START/STOP is pressed. The default<br />
setting is [3sec AFTER].<br />
13sec AFTER I _:_<br />
[3sec BEFORE]<br />
• [RECORD SOUND<br />
Select IONI 1_2, ) tu superimpuse sounds<br />
such as cuuversatiou on the slow motion<br />
pictures. (The default setting is [OFF].)<br />
Vuur caulcorder recurds souuds for abuut<br />
12 seconds while [Recording...] is<br />
displayed in step @.<br />
0 Notes<br />
• Sounds are not recoMed during tile aboul 3<br />
SeColld-mo_, ie shoothlg.<br />
• Image quality ot [SMTH SLW REC] is not as<br />
good as that of normal recording.<br />
You can assign one menu item you use<br />
often to the camera control dial.<br />
Since the focus mljustment is assigned to<br />
the camera cuntrol dial in the default<br />
setting, the operation below is described as<br />
adjusting the focus using the dial.<br />
MANUAL<br />
(2) Press MANUAL to activate the manual<br />
adjustment mode.<br />
Pressing MAN UAL switches the setting<br />
mode between atltonlatic and manuah
(_) Rotate the camera control dial to a_{iustthe<br />
lbcus.<br />
Item you can assign to the camera<br />
control dial<br />
One of lollowing items:<br />
[FOCUS] (p. 81)<br />
[EXPOSURE] (p. 82)<br />
[AE SHIFT] (p. 67)<br />
[WB SHIFT[ (p. 68)<br />
Toassigna menuitemtothecamera<br />
controldial<br />
(!) Press and hold MANUAL lbr a li:w<br />
seconds.<br />
The [DIAL SETTING] screen appears.<br />
(g) Rotate the camera control dial and select<br />
Ihe item to be assigned.<br />
@ Press MANUAL.<br />
O Notes<br />
• Manual settings will be retained even if you<br />
change tile assigned item of the camera control<br />
dial. However, if you set [EXPOSURE] at}er<br />
setting [AE SHIFT] manually, [EXPOSUREI<br />
will oven:ide [AE SHIFT].<br />
• If you _lect [RESET] in step @, all the items<br />
a_{iusted manually are rc',m to tile del_mh<br />
settings.<br />
"_° Tips<br />
• The lunctions of tile items that can be assigned<br />
to tile camera control dial _u'e tile same as those<br />
ol IIIClIU operaliOll.<br />
• You Call _ssigll tile menu it_[/l to tile camera<br />
control dial in the HOME MENU by selecting<br />
(SETTINGS) _ [MOVIE SETTINGSJ/<br />
[PHOTO SETTINGS] _ [DIAL SETTING]<br />
(p. 70),<br />
g<br />
g.<br />
"O<br />
3g
Viewingthe images<br />
4O<br />
"_° Tips<br />
Lens cover<br />
I-_-](VIEW IMAGES) []<br />
__ Zoom lever []<br />
_ POWER<br />
I_(VlEW IMAGES) []<br />
Slide the POWER switch [] to turn on your camcorder.<br />
Press F¢](VIEW IMAGES) [] or _.<br />
switch []<br />
The VISUAL INDEX screen appears on the LCD screen. (It may take some time to<br />
display the VISUAL INDEX screen.)<br />
Returns to the<br />
rccordin_<br />
Previous 6 ima_<br />
Next 6 imm<br />
Relurns Io the<br />
recording screen<br />
Displays the movies<br />
Displays lhe still images<br />
Appears with the image<br />
on each of the tab that<br />
was lastly played back/<br />
recorded (_ Ibr the still<br />
image).<br />
• Mo_ing the zoom lc'ccr F changes tile number of thumbnails on tile VISUAL INDEX screen between b<br />
and 12. You can lix the lmmber of thumbnails by touching _ (SETTINGS) ----+[VIEW IMAGES SET]<br />
----+[_ DISPLAYI on lhe HOME MENU (p. 74).
Start playback.<br />
Touch the _ tab and the movie to be played back.<br />
When all movies from tile selected one to the last one are played back. tile screen returns to the<br />
VISUAL INDEX screen.<br />
Return (lothe VISUAL c ,_<br />
INDEX screen) T_ 60min<br />
Beginning of Ihe scene/£_<br />
pleViotls scene [<br />
Stop (_o to the VISUAL _ _<br />
INDEX screen) I_=_ _-_,_<br />
Toggles Play or Pause as you touch.<br />
_._- Next scene<br />
i 0:00:14 _]<br />
_@-" OPT ON)<br />
Touch the _ tab and the still image to be played back.<br />
Rclurn (Io Ihe VISUAL -- _c_.,= 14/14_<br />
INDEX screen)<br />
Go Io Ihe VISUAL INDEX -- OPTION)<br />
screen<br />
Slide show (p. 42)<br />
Toswitchtotheplaybackmodeusing<br />
the I_(HOIVIE)button[] or[]<br />
On the HOME MENU, touch f'€'] (VIEW<br />
IMAGES) --a,-[VISUAL INDEX].<br />
Toadjusthesoundvolumeof movies<br />
Touch @_._--(OPTION) --+ I"€"1tab --+<br />
IVOLUMEI,<br />
EE]/KE].<br />
then adjust the volume with<br />
"_° Tips<br />
• Touch [_/[_] during pau_ to play back<br />
movies slowly.<br />
• A touch ol _/[_] makes the rever_/fas(<br />
l_)rward approximately 5 times lasler, 2 louches<br />
makes it approximately 10 times l_stm"<br />
(approximately 8 times laster using DVD+RW<br />
with SD (slandard definition) image qualily).<br />
Continued=") 41
42<br />
iiiiiii!liiiiiii!i<br />
You can magnify still images from abottt<br />
I. 1 to 5 times tile original size.<br />
Magnification can be adjttsted with the<br />
power zootn lever or tile zoom blttOllS<br />
below the LCD screen.<br />
w T<br />
(_) Play back tile still images yott want to<br />
magnify.<br />
(_) Magnil3 the still image with T<br />
/Telephoto).<br />
The screen is flamed.<br />
@ Touch the screen at the point you want<br />
to display in the center of the displayed<br />
frame.<br />
(_) Ac0ust the magnification with W (Wide<br />
angle)IT/Telephoto).<br />
To cancel, touch [_.<br />
Touch _ on tile still image playback<br />
screen.<br />
The slide show begins from the selected<br />
image.<br />
Touch NER] to stop the slide show. To<br />
restart, touch [N_N]again.<br />
0 Notes<br />
• You cannot opel"aleplayback zoom during slide<br />
show.<br />
"_° Tips<br />
• You can _t continuous slide show playback by<br />
touching @a /OPTION) _ I_ tab<br />
[SLIDE SI!I"(_)WSETI. The del_mhsetting is<br />
[ONI/confinuous playback).
Playingthe imageon a TV<br />
Connection methods and quality of the<br />
image viewed oil the TV screen differ<br />
depending on what type of TV is connected.<br />
and tile conilectors used.<br />
Use the supplied AC Adaptor as the power<br />
source (p. 21).<br />
Refer also to tile instruction manuals<br />
supplied with Ihe device to be connected.<br />
You can lnake SUl'e[hat you are conneclin_<br />
the TV CoITecIlv_U_.lgl( ** e [TV CONNECT<br />
Guide] displayed on the LCD screen.<br />
Switch the input on the TV to the<br />
connected jack.<br />
Refer to the instruction m:g/uals Ill"the<br />
TV.<br />
_Connect your camcorder and TV<br />
referring to [TV CONNECT Guide].<br />
_Make the required output settings<br />
on your camcorder (p. 44).<br />
Jacksonyourcamc0rder<br />
Open tile jack cover and connecl the cable.<br />
Your camcorder will advise you of tile most<br />
advantageous way of connecting your TV.<br />
Turn on your camcorder, and<br />
press 1_ (HOME).<br />
2 Touch{_(OTHERS).<br />
3 Touch [TV CONNECT Guide].<br />
4 Touch the option that is right for<br />
you on the screen.<br />
S_ect t_ TV ty_,<br />
Meanwhile. you can make tile telex ant<br />
connectioi] belween yOlll" can]corder and<br />
the TV.<br />
g<br />
-O<br />
i<br />
Continued._ 43
44<br />
P+a+++_+th+ +ram++++ a TV I+++t+++÷d}<br />
++_+ct+_+ +_++i+_+ ++++i+_i++++++ +++++++<br />
Images recerded v, ilb HD (bigh definition) in;age quality are played back with HD (l;igb<br />
definition) image quality, lm,tt%es recorded with SD (str+ndard definition) inauge quality are<br />
played back witb SD (stand_u'd dcfinilien) im,ttgc quality.<br />
COMPONENT IN<br />
AUDIO<br />
[]<br />
I HDMI<br />
[]<br />
I<br />
_:, : Signal flow<br />
_ (SETTINGS) _<br />
COMPONENT ]OUTPUT SETTINGS]<br />
Component video cable VIDEOIN --_ [COMPONENT] --_<br />
(supplied)<br />
COmPONENTOUT (Green) Y _] 11080i/48t)i1 (p. 77)<br />
[_ (Blue) PB/CB<br />
• _ (Red) PR/CR<br />
AN connecting cable<br />
(supplied)<br />
(White) (Red) _ AUDIO<br />
• An A/V connecting cable is also needed to output audio signals. Connect tile white and red plugs ol the A/<br />
V connecting cable to the audio input jack of your TV+
HDMIOUT<br />
HDMI cable (optional) HDMI<br />
IN<br />
• U_ an HDMI cable with the HDMI logo (_e the cover).<br />
: Signal flow<br />
• Images arc not output honl the HDMI OUT jack, if copyright protection signals arc rccorded in the<br />
images.<br />
• Sonle TVs lnay not function conectly (e.g., no sound or image) with this connection.<br />
• Do not connect the HDMI OUT jack of your camcorder and HDMI OUT jack of tile external device with<br />
the HDMI cable. This may cause a mallunction,<br />
hnages recorded with HD (high definition) quality is converled It) SD ]standard definition)<br />
and played back. hnages recorded will) SD (standard definition) image qttality are played back<br />
with SD (standard definition) image quality.<br />
COMPONENT IN<br />
AUDIO<br />
[]<br />
,I.<br />
S VIDEO<br />
VIDEO/AUDIO<br />
41"<br />
[]<br />
To setthe aspect ratio accordingto the connectedIV (16:9/4:3)<br />
Set ITV TYPEI to 116:_)lor 14:31according to your TV ]p. 76).<br />
O Notes<br />
'4,"<br />
VIDEO/AUDIO<br />
• When you play back a movie recorded with SD (standard definitkm) image quality on a 4:3 TV that is not<br />
compalible wilh lhe 16:9 signed, display the HOME MENU, then select _ (SETTINGS) _ [MOVIE<br />
SETTINGS] -_- [WIDE SELECT] -_- [4:31 on your camcorder when recording an image (p. 68).<br />
41-<br />
g<br />
"1o<br />
m<br />
[<br />
Continued._ 45
46<br />
P+a+++_the +ma#÷ ++ a TV Ig++t+++÷+}<br />
_ '-+ : Signal flow<br />
_ (SETTINGS) _<br />
COMPONENT IOUTPUT SETTINGSI<br />
Component video cable VIDEOIN _ ICOMPONENT] _<br />
(supplied)<br />
comPo_EmTour (Green) Y 2] 1480i1 (p. 77)<br />
AN connecting cable<br />
(supplied)<br />
(Blue) PB/CB ;J<br />
(Red) PR/CR<br />
(White) 9<br />
(Red) AUDIO<br />
ISETTINGS) --+<br />
]OUTPUT SETTINGS]<br />
---+[TV TYPE] ---+[16:911<br />
[4:31 (p. 76)<br />
• An A/V connecting cable is also needed to output audio signals. Connect the wllite and red phlgs el the A/<br />
V connecting cable to the audk_ input jack of your TV.<br />
_ (SETTINGS) ---+<br />
AN connecting cable with [OUTPUT SETTINGS]<br />
S VIDEO (optional) S VIDEO ---_[TV TYPE] ---_ [ 16:9]1<br />
14:31(p. 76)<br />
AUDIO<br />
• When the S VIDEO plug (S VIDEO channel) is connected, audio signals armnot output. To output audio<br />
signals, connect the white and red plugs of an A/V connecting cable with the S Vff)EO cable to the audio<br />
input jack of your TV.<br />
• Tiffs connection produces higher resolution images compared with the A/V connecting cable (Type _1_']).<br />
AN connecting cable<br />
.............. (supplied) _ (Yellow)@ VIDEO<br />
A/V * :!_"<br />
_OUT (White) 9<br />
_' _ (Red) AUDIO<br />
(SETTINGS) --+<br />
]OUTPUT SETTINGS]<br />
---+[TV TYPE] ---+[16:911<br />
]4:31 (p. 7(+)
When connectingto yourTV via a VCR<br />
Comtect your cameorder tu tile LINE IN<br />
input ott tile VCR using the A/V connecting<br />
cable. Set the ittput selector ott the VCR to<br />
LINE (VIDEO I. VIDEO 2. etc.).<br />
WhenyourTVismonaural(Whenyour<br />
TVhasonlyoneaudioinputjack)<br />
Conttect tile yelh)w plug of tile A/V<br />
cotntecting cable to the video ittput jack and<br />
cotmect the white (left channel) or red<br />
(right channel) plug to the audio input .jack<br />
uf your TV or VCR.<br />
0 Notes<br />
• When you outpul image using the A/V<br />
connecting cable, images are output with SD<br />
(standard delinilion) image qualily.<br />
• When recording, set [X.V.COLORI to [ON] 1o<br />
play back on an x.v.Color-complianl TV (p. 69).<br />
Some settings may need to be adjusted on lhe<br />
TV when playing back. Reicr 1o lhe instruction<br />
manual of your TV lbr delails.<br />
"_° Tips<br />
• If you connect your calncordcr to your TV using<br />
more than one type of cable to output images,<br />
the oMer of priorily ol the output signal is as<br />
follows:<br />
HDMI _ component vkleo _ S Vff)EO<br />
audio/x ideo.<br />
• HDMI (High Definition Muhimedia lntefi_ce)<br />
is an interlace to send both video/audio signals.<br />
The HDMI OUT jack outputs higll quality<br />
images and digital audio.<br />
g<br />
_a.<br />
"O<br />
47
48<br />
(OTHERS)category<br />
This category enables you to edit the<br />
images oil a disc or a "Memory Stick Duo."<br />
ht addition, this category enables you to<br />
utilize your camcorder by connecting it to<br />
other devices.<br />
DELETE<br />
I<br />
_1 (OTHERS) category<br />
You can delete the images on a disc or a<br />
"Memory Stick Duo" (p. 48).<br />
EDIT<br />
You can edit tile tnoxies on a disc or a<br />
"Memory Stick Duo" (p. 50).<br />
PLAYLIST EDIT<br />
You can create and edit a Piaylist (1!. 51 ).<br />
PRINT<br />
You can print still images on a connected<br />
PictBridge printer (p. 54).<br />
COMPUTER<br />
You can connect your camcorder to your<br />
computer (p. 86).<br />
IV CONNECT Guide<br />
Your camcorder adx ises you of tile tnost<br />
advantageous way of connecting your TV<br />
to view images on the TV (p. 43).<br />
Deleting images<br />
You can delete the images recorded on a<br />
disc or a "Memory Stick Duo" using your<br />
canlcorder.<br />
Insert a recorded disc or "Memory Stick<br />
Duo" into your camcorder.<br />
Notes<br />
• hnages cannot be restored once they are delcted.<br />
• During Easy Handycam operation, you cannot<br />
delete movies. Cancel Easy Handycam<br />
operatkm.<br />
"_° Tips<br />
• You can _lecl up to 100 images at one lime.<br />
• You can delete an image when viewing it by<br />
touching O__-(OPT1ON)--+ _ tab<br />
[DELETE].<br />
1 o° the lt_(HOME MENU), touch<br />
_](OTHERS) -_ [DELETE].<br />
2 Touch [@DELETE].<br />
3 Touch [_DELETE].<br />
4 Touch the image to be deleted.<br />
Tile selected scene is marked with 4.<br />
Press and hold tile image oi1 the LCD<br />
screen to confirm the image.<br />
Touch [_ to return to the previous<br />
screen.
5 Touch _ --+ [YES] --+ Ib_]. 2 Touch [_ DELETE].<br />
To delete all movieson the discat one<br />
time<br />
ht step 3, touch [NDELETE ALL] -+<br />
[YES]--+ [YES] --+ tug].<br />
To deletethe last recordedmovie<br />
ht step 3, touch [NLAST SCENE DELl<br />
--+ IBg]--+ [YESI-+ IBg].<br />
TodeleteSD(standar definition)<br />
image quality movies<br />
• You c:mdelete movies on DVD-RW (VR<br />
mode) discs without atty restrictions.<br />
• You can perform only [_ LAST SCENE<br />
DELl (m DVD-RW and DVD+RW discs.<br />
(J Notes<br />
• Do not remove the battery p_Lckor tile At-"<br />
Ad@tor ti'om your c_mlcorder while ediling<br />
images. I1 may damage the disc.<br />
• If the deleted movie is included in the Playlist<br />
(p. 51 ), the movie is deleled also from lhe<br />
P]aylisl.<br />
• Even if you delme unnecessary images from lhe<br />
disc, lhe remaining disc capacity nlay not<br />
increase as much as you can make additional<br />
recording.<br />
• To delete all images recorded in the disc and<br />
restore tile original capacity of the disc, t_ll'nlal<br />
the disc lP. 62).<br />
"_" Tips<br />
• A illovie lecorded by yollr CalllCol'deF ()lit() _l<br />
disc is called an "original."<br />
1 o, the t_(HOME MENU), touch<br />
{_ (OTHERS) --* [DELETE].<br />
3 Touch [_qDELETE].<br />
4 Touch the still image to be<br />
deleted.<br />
The selected still image is marked with<br />
4.<br />
Press attd hold the still image on the LCD<br />
screen to confirm the still image.<br />
Touch 1_7 to retttrn to the previous<br />
screen.<br />
5 Touch rog] -+ [YES] -+ I_K].<br />
To delete all still images on the<br />
"Memory Stick Duo"<br />
In step 3, touch [ [] DELETE ALL] --+<br />
[YES]-+ [YES]-+ 15_].<br />
0 Notes<br />
• You cmmot delete still images when:<br />
a "Memory Stick Duo" wilh the write-prolect<br />
lab is set to the wrile-protcct posilion (p. 107)<br />
lhe selected image is protected.<br />
"_" Tips<br />
• To delete all images recorded on the 'Menloly<br />
Stick Duo," torlnat lhe "Memoly Stick Duo"<br />
(p. 63).<br />
m g<br />
4g
5O<br />
Dividingthe image<br />
O Notes<br />
• During Easy HmMycam operation, you cannot<br />
di_ ide lno_ ies. Cancel Easy Handycam<br />
ol?eration.<br />
1 On the I_(HOME MENU), touch<br />
I;_ (OTHERS) -_ [EDIT].<br />
2 Touch [DIVIDE].<br />
3 Touch the movie to be divided.<br />
Tile movie is played back.<br />
A<br />
RI. Touch _ at the point where<br />
you want to divide the movie into<br />
the scenes.<br />
The movie pauses.<br />
Adjusts the dividing point more<br />
precisely after the dividing point has<br />
been selected wilh [_.<br />
I<br />
Returns to the beginning ol<br />
the selected nlovie.<br />
Play and pause toggles as you press;<br />
IKN.<br />
5 Touch r_ -_ [YES] -_ Ira.<br />
O Notes<br />
• IVlovies callnot be restored OllCe they iJrc<br />
di_ ided.<br />
• Do not rcmove lhe batlery pack or the AC<br />
Adaplor honl your camcorder while editing<br />
images. I1 may damage the disc.<br />
• You can do lhis operalkm only with DVD-RW<br />
/VR nlode/lor file SD/standard definilion)<br />
image quality.<br />
• Even if the divided movie is included in the<br />
Playlist, the movie is nol divkled in the Playlist.<br />
• A slight dillcrcnce may occur flom lhe point<br />
where you touch [_ and file acltlal dividing<br />
point, as your camcorder selects the dividing<br />
I?oinl based on about hall;+_cond incremenls.
Creatingthe Playlist<br />
A Playlist is a list showing tlmmbnails of<br />
tile movies that you have selected. The<br />
original scenes are not changed, even if you<br />
edit or delete the scenes in the Playlist.<br />
Make sure to insert the recorded disc into<br />
your camcorder.<br />
fO Notes<br />
• You can do ltlis operation only with DVD-RW<br />
(VR nlode) lot the SD (standard definition)<br />
image quality.<br />
• During Easy Handycam operation, you can<br />
neidmr add movies to file Playlisl, nor edit<br />
movies in the Playlist. Cancel Easy Handycam<br />
operation.<br />
1 on the _(HOME MENU), touch<br />
(OTHERS) --_ [PLAYLIST<br />
EDIT].<br />
2 Touch [I_ADD].<br />
3 Touch the scene to be added to<br />
the Playlist.<br />
Tile selected scene is marked with _.<br />
Press and hold the image on tile LCD<br />
screen to confirm the image.<br />
Touch [7] to return to tile previous<br />
screen.<br />
4 Touch _ --* [YES] --* rug].<br />
To add all the movies on the disc in<br />
the Playlist<br />
In step 2, touch [_ADD ALL] -+ IYESI<br />
--_ [YES] --_ IWff].<br />
fO Notes<br />
• Do not relno_e the battcry pack or the AC<br />
Adaptor h'onl your camcorder while editing the<br />
Playlisl. It may danlage file disc.<br />
"_° Tips<br />
• You can add a maxinmm ol 999 movies to tile<br />
Playlist.<br />
• You can add a movie whenviewing it using<br />
[_ ADD] on _ (OPTION).<br />
Make sure to inserl the disc on which tile<br />
Playlist is added into your camcorder.<br />
1 On the I_(HOME MENU), touch<br />
I';"1(VIEW IMAGES) --*<br />
[PLAYLIST].<br />
i Touch the scene from which you<br />
want to play back.<br />
Tile Playlist is played back from tile<br />
selected scene to the end, then the<br />
screen returns to the Playlist screen.<br />
To erase unnecessary scenes from the<br />
Playlist<br />
@ On the _" (HOME MENU), touch<br />
(OTHERS) ---+[PLAYLIST EDIT].<br />
==<br />
Continued._ 51
52<br />
g_sati_ the ?_ayHst(go_tim_sd)<br />
@ Touch IERASEI.<br />
To erase all the scenes from the PlaylisL<br />
t()uch [ERASE ALL] _ [YES] _ [YES]<br />
---* [_.<br />
@ Select the scene to be deleted from the list.<br />
The selected scene is marked with _/.<br />
Press and hold the image on the LCD<br />
screen to confirm the image.<br />
Touch [_ to return to the previous<br />
screen.<br />
(_) Touch FeK]---+ [YES] ---+ FOg].<br />
"_° Tips<br />
• The original scenes arc not changed even it you<br />
erase the scenes flx)mlhe Playlist.<br />
To changethe orderwithin the Playlist<br />
(_ On the _ (HOME MENU), touch<br />
[_ (OTHERS) --+ [PLAYLIST EDITI.<br />
@ Touch IMOVEI.<br />
@ Select the scene to be moved.<br />
The selected scene is marked with _/.<br />
Press and hold the image on the LCD<br />
screen to confirm the image.<br />
Touch F_ to mtum to the previous<br />
screen.<br />
(_) Touch Fe_].<br />
0 Select the destination with D--I/I---q.<br />
Destination bar<br />
Press and hold the image on the LCD<br />
screen to confirm the image.<br />
(g) Touch FoR] --_ IYESI --+ Feg].<br />
"_" Tips<br />
• Whcn you select nlultiple scenes, the scenes are<br />
moved lollowing the order appeared in the<br />
Playlist.<br />
To divide a moviewithin the Playlist<br />
(_) On the "_ (HOME MENU), touch<br />
[_ (OTHERS) ---+ [PLAYLIST EDIT[.<br />
@ Touch IDIVIDEI.<br />
@ Select the scene to be divided.<br />
The playback of the selected scene starts.<br />
(_) Touch _ at the point where you want<br />
to divide the movie into scenes.<br />
The movie pauses.<br />
Play and pause toggles as you press<br />
[E:_<br />
Touch F6_]--_ IYESI --_ F6K].<br />
1_ Notes<br />
• A slight dillcrcnce may occur lrom the point<br />
where you touch {_ and lhe aclual dividing<br />
point, as your camcorder selects the dividing<br />
poinl based on aboul hall:-_cond incremenls.<br />
-i_i- Tips<br />
• The original movies are not changed even it you<br />
divide the movie in the Playlist.
Dubbingto VCRor DVD/HDDrecorders<br />
You can dub images played back oil your camcorder to other recordittg devices, such as VCRs<br />
or DVD/HDD recorders. Connect the device in either of the following ways.<br />
Conttect your camcorder to tile wall outlet using the supplied AC Adaptor for this operation<br />
(p. 21). Refer also to tile iustruction manuals supplied with the devices to be connected.<br />
O Notes<br />
• Movies recorded with HD (high definition) image quality will be dubbed with SD (standard<br />
definition) image quality.<br />
• Since dubbing is periormed via analog data translEr, the image quality may deteriorate.<br />
• To copy _,disc recoMed with HI) (higll definition) image quality, install tile application software<br />
(supplied/ on your compuler (p. 88), and copy the ftnages 1o a disc in lhe compuler.<br />
AN OUT jack<br />
>,: Video/Signal flow<br />
I<br />
Devices with an S VIDEO<br />
jack<br />
[] A/V connecting cable (supplied)<br />
Connect to the input jack of tile other<br />
device.<br />
[] A/V connecting cable with S<br />
VIDEO (optional)<br />
When connecting to another device via<br />
the S VIDEO jack, by using an A/V<br />
connecting cable with an S VIDEO<br />
cable/optional), higher quality images<br />
carl be produced than with an A/V<br />
connecting cable. Connect the white and<br />
red plug/lefl/right audio) and the S<br />
VIDEO plug (S VIDEO chaunel) of the<br />
A/V connecting cable with an S VIDEO<br />
cable (optional). The yellow plug<br />
connection is not necessary. S VIDEO<br />
connection only will not output audio.<br />
/Yellow)<br />
® @ @ ® ®<br />
AUDIO VIDEO AUDIO<br />
Devices without an<br />
VCRs or DVD/HDD S VIDEO jack<br />
recorders<br />
O Notes<br />
• You cannot dub 1o recorders connected with all<br />
HDMI cable.<br />
• To hide the scr_n indicators (such as a counter.<br />
etc.) on the sclven of the monitor device<br />
connected, set _(SETTINGS) _ [OUTPUT<br />
SETTINGS]-+ [DISP OUTPUT] _ [LCD<br />
PANEL] !the del_mft setting) on the HOME<br />
MENU (p. 77).<br />
• To record filedale/time and camera settings<br />
data, displzJythem on the screen (p. 73).<br />
• When you arc connecting your calncorder to a<br />
monauraldevice, connect the yellow plug of the<br />
A/V connecting cable to lhe videinputjack.<br />
and lftered/right channel/or the white (left<br />
channel) plug 1o lhe audio input jack on lhe<br />
device.<br />
m g<br />
Continued._ 53
54<br />
gsbbi_S ts VCR sr gVgiHSg<br />
rsss_srs/Ssstisssd}<br />
3<br />
4<br />
Insert the recorded disc into your<br />
camcorder.<br />
Turn on your camcorder, and<br />
press r_(VIEW IMAGES).<br />
Set [TV TYPE] accoMing to the display<br />
device/p. 76).<br />
Insert the recording media in the<br />
recording device.<br />
If your recoMing device has an iuput<br />
selector, set it to tile input mode.<br />
Connect your camcorder to the<br />
recording device (VCR or DVD/<br />
HDD recorder) with the A/V<br />
connecting cable (supplied) [] or<br />
an A/V connecting cable with S<br />
VIDEO (optional) [_.<br />
Co]mect your camcurder to tile input<br />
jacks of the recording device.<br />
Start the playback on your<br />
camcorder, and record it on the<br />
recording device.<br />
Refer to tile instrl,lctiou manuals<br />
supplied with your recording device for<br />
details.<br />
6 When dubbing is finished, stop<br />
the recording device, and then<br />
your camcorder.<br />
Printingrecorded<br />
images(PictBridge<br />
compliant printer)<br />
You can print out still images using a<br />
PictBridge compliant printer, without<br />
connecting the camcorder to a computer.<br />
_PictBridge<br />
Connect your camcorder to tile AC Adaptor<br />
to obtain power from the wall outlet (p. 21/.<br />
Insert the "Memory Stick Duo" containing<br />
still images into your camcorder, and turn<br />
on the printer.<br />
Turn on your camcorder.<br />
2 Connect the q_(USB) jack of your<br />
camcorder to the printer using<br />
the USB cable (p. 118).<br />
[USB SELECT] appears on the screen<br />
automatically.<br />
3 Touch [_ PRINT].<br />
When connection is complete, []<br />
(PictBridge connecting) appears on<br />
lhe screc31L<br />
One of tile still images stored on the<br />
"Memory Stick Duo" will be displayed.<br />
(J Notes<br />
• _V_ C_tll _Ll_ll'_tlltC3e [h¢3 op_l-_aiOll Ot o]]ly I/Iod_Is<br />
that are PictBrklge compatible.
1 Touch the still image to be<br />
printed.<br />
Tile selected image is marked with 4.<br />
Press attd hold the image on tile LCD<br />
screen to confirm tile image.<br />
Touch [_ to return to the previous<br />
screen.<br />
2 Touch O.._--(OPTION), set the<br />
following options, then touch<br />
r_.<br />
ICOPIES]: Set munber of copies of a<br />
still image to be printed. You can set up<br />
to 20 copies.<br />
[DATE/TIME]: Select [DATE],<br />
[DAY&TIME], or [OFF] (no date/time<br />
printed).<br />
[SIZE]: Select the paper size.<br />
If you do not change the setting, go to<br />
step :3.<br />
3 Touch [EXEC] -+ [YES] -+ IOK].<br />
Tile image selection screen appears<br />
again.<br />
I0 finishprinting<br />
Touch [_] on tile image selection screen.<br />
O Notes<br />
• Rel_:r also to tile instruction manual of tile<br />
printer to be used.<br />
• Do not attempt the lollowing operations when<br />
[] is on the screen. Tile operatkms may not be<br />
perlbrmed properly.<br />
To operate the POWER switcll.<br />
To press E1 (VIEW IMAGES)<br />
To disconnecl the USB cable fl'om the printer.<br />
To remove the "Memoly Stick Duo" fl'om<br />
your camcorder<br />
• If the primer slops working, disconnect the USB<br />
cable, turn the printer off and on again, and<br />
restart the operatkm hom the beginning.<br />
• You can select only the paper sizes that the<br />
primer can prim.<br />
• On some primer models, the lop, bottonl, right,<br />
and lel} edges of images may be trimmed. If you<br />
print a still image recorded in a 16:9/wide)<br />
ratio, the lell and right ends of the image may be<br />
trimmed widely.<br />
• Some printcr models may not suppolt the date<br />
printing flmction. Relk_rto your prinleffs<br />
instruclion manual lor details.<br />
• The lollowing types of images may not be<br />
printed:<br />
images edited on a computer<br />
images recorded on other devices<br />
images larger than 3 MB<br />
inmges larger than 2848 x 2136 pixels<br />
"_° Tips<br />
• PictBrklge is an industry standaM established<br />
by tile Camera & Imaging Products Association<br />
(CIPA). You c_,11prim still images without using<br />
a computer by connecting a printer directly to a<br />
digital video camera or digital still camera.<br />
regardless of model or manul_tctulvr.<br />
• You can print a slill image when viewing il by<br />
touching _.(OPTION)--4 [_ tab--4<br />
[PRINTI.<br />
m g<br />
55
56<br />
U#fiziW Recogdf#gMedia<br />
(MANAGEDISC/<br />
MEMORY)category<br />
This cale._ery enables you Io use a disc or a<br />
"Menaery Slick Duo" for various purposes.<br />
(MANAGE DISC/MEMORY)<br />
category<br />
FINALIZE<br />
You c:m enable discs to be played on ether<br />
devices by finalizing them (p. 56).<br />
DISC SELECT GUIDE<br />
Your camcorder adx ises you of the right<br />
disc for your purpose (p. 61).<br />
_FORMAT<br />
You can format and use the disc again<br />
(p. 62).<br />
FORMAT<br />
You can format :rod use the "Memer_ Stick<br />
Duo" again (p. 63).<br />
UNFINALIZE<br />
You can unfinalize a disc and recoM mere<br />
images on it (p. 64).<br />
DISCINFO<br />
You can display the disc information.<br />
Making the disc<br />
compatiblewith<br />
playbackon other<br />
devicesor DVDdrives<br />
(Finalizing)<br />
Finalizing makes the recorded disc<br />
compatible for playback with other devices<br />
and DVD drives of computers.<br />
Beflwe finalizing, you can select a type of<br />
DVD menu that enables you te select a<br />
particular scene (p. 58).<br />
Discsrecordedwith HD (high<br />
definition) image quality<br />
Discs of all kinds should be finalized.<br />
Discs recorded with SD (standard<br />
definition) image quality<br />
• Fin:dize DVD-RW/DVD-R/DVD+R DL.<br />
• Finalize DVD+RW in the following<br />
cases:<br />
To create the DVD menu<br />
To playback in the DVD drives of<br />
conlputers<br />
Recorded time is shorl (5 minutes or less<br />
in HQ mode, 8 minutes or less in SP<br />
mode aM 15 minutes or less in LP mode)<br />
0 Notes<br />
• Playback compatibilily with all device is not<br />
guaranteed.<br />
• Only the devices compatible with the AVCHD<br />
Iormat can play lhe discs recorded wilh HD<br />
(high definitkm) image qualily (p. 60).<br />
Currently avaihJbleDVDdevices cannot play<br />
the_ discs.<br />
• In the case of SD (standard definition) image<br />
quality, a DVD menu is created instead of a disc<br />
[IICIIII.<br />
• No DVD menu is created lor DVD-RW/VR<br />
mode).
The following operations are for the discs recorded with HD (high definition) image quality.<br />
_To play hackadisconanotherdeviceforthefirsttime(p. 58)<br />
_'1o addrecordingsto afinalizeddisc(p.64)<br />
O Notes<br />
• During Easy Handycam operation, you canno_ _dd recordings to a finalized disc even i_ you use DVD-<br />
RW or DVD+RW. To do so, cancel Easy Handycam operalion,<br />
= ::o<br />
=<br />
m.<br />
Continued._ 57
58<br />
Makia# the disc caapatiNe with p_ayback ae ether devices ar #V# d[ives<br />
_To play hacka disconanotherdeviceafteraddinga recording(p. 58)<br />
O Notes<br />
• It takes fl'om a mhmte lo a nlaximmn oI _veral<br />
hours lo finalize a disc. Tile shorter lhe amount<br />
of malerial recorded on the disc, tile longer it<br />
takes Ibr finalizing.<br />
• Use tile AC Adaptor as tile power source 1o<br />
prcxenl your camcorder [i()ll] running out of<br />
power during finalizing.<br />
• When you finalize a double-sided disc, you<br />
must Iinalizc each side of tile disc individually.<br />
4<br />
/ Place your camcorder in a stable<br />
position, and connect the AC<br />
Adaptor to the DC IN jack on your<br />
camcorder.<br />
2 Turn on the power by sliding the<br />
POWER switch.<br />
3 Insert the disc to be finalized.<br />
Make a desired disc<br />
!_yback On<br />
4 o, the I_(HOME MENU), touch<br />
(MANAGE DISC/MEMORY) --*<br />
[FINALIZE].<br />
To select a disc menu style, touch<br />
?_./OPTION) --+ [DIS(? MENU]<br />
(p. 59).<br />
Go to step 5 if you want to finalize the<br />
disc using [STYLE I ] (default setting).<br />
5 Touch [YES] -_ [YES].<br />
Finalizin_ starts.<br />
6 When [Completed.] appears,<br />
touch I_K].
0 Notes<br />
• Do not apply shock or _ ibl'ation to your<br />
CalnCOl'der, and do not disconnect the AC<br />
Adaptor during fina]izfilg.<br />
When you need to disconnect file AC Adaptol,<br />
milke sure tllitl the power ol your Cnll/corder is<br />
set to oll mid disconnect the AC Adaptor alier<br />
tile _ (Movie) or _ (Still) lamp goes oH.<br />
Finalizing restarts when you connect the AC<br />
Adaptor and rain on your camcorder again.<br />
You cannot remove the disc until the finalizing<br />
operation is completed.<br />
• When using tile lbllowing discs, @ A flashes<br />
al?er finalizing is completcd on the recording<br />
standby screen of your C_llllCOrder, Renlove the<br />
disc l]onl your citnlcorder.<br />
Discs rccoMed with HD (high definition)<br />
image quality<br />
Discs recorded with SD (standard definition)<br />
image quality, except DVD-RW (VR mode)<br />
"_° Tips<br />
• When you set to create a disc menu (or DVD<br />
menu) and finalize tile disc, tile disc menu<br />
appears lot a lcw _conds while finalizing the<br />
disc.<br />
• Alter file disc is finalized, -L-.-.a- is attached<br />
at the bottom of lhe disc typc/rccording lormat<br />
indicator, such as ".@." in the ct_se of DVD-<br />
RW.<br />
I0 selecta discmenustyle<br />
(i) ht step 4, touch @__.(OPTION) -...+<br />
[DIS(? MENU].<br />
(_) Select the desired style from 4 types of<br />
pattern with 1_'1/1-+1.<br />
Select [NO MENU] if you do not create<br />
a disc menu.<br />
@ Touch [Ug].<br />
0 Notes<br />
• During Easy Handycanl operalion, tile disc<br />
menu is lixcal to [STYLE 11.<br />
• You cannot do this operation with DVD-RW<br />
(VR mode) lbr the SD (standard definition)<br />
image qualily.<br />
,_=<br />
:o<br />
2<br />
5g
6O<br />
Playinga disc on other devices<br />
The kind of device you can play a disc on<br />
depends on the image quality (HD (high<br />
delinition) or SD (standard definition))<br />
selected when the disc was recorded. For<br />
details, refer to the instruction manual<br />
supplied with your device or consult your<br />
dealer.<br />
Discs recorded with HD (high<br />
definition) image quality<br />
This camcorder captures high definition<br />
footage in the AVCHD format.<br />
DVD media containing AVCHD footage<br />
should not be used with DVD based players<br />
or recorders, as the DVD player/recorder<br />
may fail to eject the media and may erase<br />
its contents without warning. DVD media<br />
containing AVCHD footage may be played<br />
on a compatible Blu-ray Disc TM player/<br />
recorder or other compatible device.<br />
Discsrecordedwith SD(standard<br />
definition) image quality<br />
You can play these discs back on DVD<br />
devices. However. we do not guarantee<br />
playback on all DVD devices.<br />
0 Notes<br />
• Make sure that you finalize a recorded disc.<br />
However. when you record movies with SD<br />
/standard definition) image quality on a<br />
DVD+RW disc, you can play the disc wid_out<br />
finalizing it (p. 56).<br />
• Do not u_ an 8 cm CD adaptor with an 8 cm<br />
DVD as it may cause a malfimction.<br />
• Make sure that a vel_ically installed device is<br />
placed in a position such as thai the disc can be<br />
placed horizontally.<br />
• If you have inserted a disc recorded in the<br />
AVCHD lfirmat in a DVD device, there is a risk<br />
that you can neither rccord nor play back the<br />
disc correctly Oil yollr canlcorder.<br />
• Some discs cannot be played back, may lreeze<br />
Ior an Jnslant belvceen scenes. Sonle lllnclJons<br />
may be disabled on some devices.<br />
"_° Tips<br />
• De_ices thai support subtitles can display the<br />
recording dale and lime where the subtitles<br />
normally appeal: (p. 69). Refi:r to the instruction<br />
manual of your device.<br />
• If you have created a disc mcnu (p. 58). you can<br />
select the desired scene in the menu.<br />
• You can also play the playlist back on other<br />
devices if the discs were recorded with HD<br />
(lligh definition) image quality (p. 51 ).<br />
Create the playlist on your camcorder in<br />
advance, then select _ on the disc menu.<br />
Toplay a discrecordedwith HD(high<br />
definition)imagequality<br />
Install "Picture Motion Browser" on the<br />
supplied CD-ROM on the computer to play<br />
movies/p. 881.<br />
To play a discrecordedwith SD<br />
(standar definition)imagequality<br />
You c:m play a disc on a computer it' a<br />
DVD playback application is installed on<br />
the computer.<br />
Insert the finalized disc into the DVD drive<br />
of your computer. Play back the disc using<br />
a DVD playback application.<br />
0 Notes<br />
• You must finalize ll_e disc (p. 5b). Otherwi_, a<br />
nlalhlnctioll may occur.<br />
• Make sure thai the DVD drive of the computer<br />
can play an 8 cm DVD+<br />
• Do not use an 8 cm CD adaptor with an 8 cm<br />
DVD as it may cause a mallhnction.<br />
• The disc may not be played back, or the movies<br />
may not be played smoothly on some<br />
conlpulers+<br />
• You cannot copy movies dircctly to the hard<br />
disk of your computer to play back or edit them<br />
on your COlllpllter.<br />
"_° Tips<br />
• For details Oll operations aim proced/lres, see tile<br />
'First Step Guide" on the supplied CD-ROM<br />
(p, 90).
The volume label of the disc recorded<br />
with SD (standar definition)image<br />
quality<br />
The date when tile disc was First used is<br />
recorded.<br />
<br />
When tile disc was first used at 6:00 pm on<br />
January lsl 2007:<br />
2007_01 01 06H00M PM<br />
"_" Tips<br />
Volume<br />
label<br />
• hnages in discs recorded with SD (standard<br />
definition) image quality are stored in the<br />
tbllowing tblders:<br />
DVD-RW (VR mode)<br />
DVD RTAV Iolder<br />
Other discs and modes<br />
VIDEO TS folder<br />
Findingthe right disc<br />
- DISCSELECTGUIDE<br />
Select the option that is right for you on the<br />
screen, then you will be informed of the<br />
appropriate disc for yollr purposes.<br />
1 On the t_'(HOME MENU), touch<br />
(MANAGE DISC/MEMORY).<br />
2 Touch [DISC SELECT GUIDE].<br />
3 Touch the option that is right for<br />
you on the screen. -_:<br />
When you answer all the quesliens, you :a<br />
will be informed of the right disc for<br />
you. _.<br />
When you insert Ihe same lype of disc<br />
as thai indicated in the results of Ihe<br />
guide, the disc is fermatted with the<br />
options you selected.<br />
61
62<br />
Deleting all sceneson the disc<br />
(Formatting)<br />
Formatting makes tile recorded disc new<br />
and reusable by deleting all tile data<br />
recorded on the disc. The recording<br />
capacity of the disc is recovered by<br />
formatting it.<br />
A DVD-R/DVD+R DL cannot be<br />
formatted. Replace it with a new<br />
disc.<br />
If youformatafinalizeddisc<br />
Formatting deletes all images on a finalized<br />
disc. One of tile followittg icons, _ or<br />
_, appears on the screen, but there is no<br />
need to finalize the disc again before<br />
playing the disc on an AVCHD format<br />
compatible player.*<br />
When formatting a disc of the SD<br />
(standar definition)imagequality<br />
• In the case of a DVD-RW (VIDEO<br />
mode), the disc is unfinalized and it has to<br />
be finalized again to enable the disc to be<br />
played on another device.<br />
• In the case of a DVD-RW (VR mode)/<br />
DVD+RW, formatting deletes all images<br />
on a finalized disc. One of the following<br />
icons, C-R-_w_ or _._.__,, appears on Ihe<br />
screen, but there is no need to finalize the<br />
disc again before playing the disc on other<br />
devices.*<br />
* To creale a disc menu (DVD mmm) on a<br />
DVD+RW or DVD-RW wilh HD (high<br />
definition) image quality, finali/v lhe disc again<br />
(p. 561.<br />
4<br />
/ Connect the AC Adaptor to the<br />
DC IN jack on your camcorder,<br />
then connect the power cord to<br />
the wall outlet.<br />
Turn on your camcorder.<br />
3 Insert the disc to be formatted<br />
into your camcorder.<br />
4 On the _(HOME MENU), touch<br />
(MANAGE DISC/MEMORY) -_<br />
[_) FORMAT].<br />
fO Notes<br />
• The scrt,enmessage will be dittcrclU it the disc<br />
was lormaued with SD (standard definition)<br />
image qualily al the previous lormalting. Follow<br />
lhe pl'ocedul'CS OH lhe screen,<br />
5 Touch [YES].<br />
To record with SD (st:uldard defiuitiou)<br />
image qualily, Iouch [SD].<br />
fO Notes<br />
• You cannol change the recording lormat ot a<br />
disc midway.<br />
• For dclails on AVCHD lorn/al/DVD lormat, see<br />
page 13.<br />
6 Touch the option that is right for<br />
you on the screen.
Tile disc will be formatted in file<br />
recording image quality and formal you<br />
selected.<br />
When tile disc is forn/alled, you can<br />
start recording on tile disc.<br />
ToformatadiscwithSD(standard<br />
definition)imagequality<br />
• Select tile recording form:a. VIDEO mode<br />
or VR mode. lbr DVD-RW (p. 15). If you<br />
format DVD-RW during Easy Handycam<br />
oper:dion (p. 30), the recording lbrmat is<br />
fixed to VIDEO.<br />
• Select the aspect ratio, [16:9 WIDE] or<br />
14:31,for DVD+RW.<br />
O Notes<br />
• U_ the AC Adaptor as the power source to<br />
prevenl yotlr CalllCOl'del" l/'onl rtlnlling oul of<br />
power during lornl+ttfing.<br />
• Do not apply shock or vibration to your<br />
camcoMer, and do not disconnect the AC<br />
A&tptor &lring h)rmatfing.<br />
• When you use a doublc-sided disc. lotto+ruing is<br />
required on each side. You can lormat each side<br />
in the dil]crent recording lormat,<br />
• In the case of DVD+RW with SD (standard<br />
definition), you cannot change the movie aspect<br />
ratio midway. Formal the disc again to change<br />
the aspect ratio,<br />
• You cannot lormat a disc that has been<br />
protected on other devices. Cancel the<br />
protection with the original device, and then<br />
lbrmat it.<br />
Formatlingdeletes all images on a<br />
"Memory Slick Duo."<br />
Turn on your camcorder.<br />
Insert the "Memory Stick Duo" to<br />
be formatted into your<br />
camcorder.<br />
3 On the I_-(HOME MENU), touch<br />
(MANAGE DISC/MEMORY) -+<br />
[ _ FORMAT].<br />
4 Touch [YES] -+ [YES].<br />
5 When [Completed.] appears,<br />
touch I_.<br />
O Notes<br />
• E_en the still images protected with another<br />
device aDdnsl accidental deletion are also<br />
deleted.<br />
• Do not attempt the h)llowing operations when<br />
[Executing...] is on the scrcen:<br />
To operate the POWER switch or buttons<br />
To remove the "Memory Stick Duo"<br />
63
64<br />
Recordingadditional scenesafter finalizing<br />
You can record additional material on the<br />
finalized DVD-RW/DVD+RW after the<br />
following steps, if there is space to record<br />
on the disc.<br />
4<br />
| Connect the AC Adaptor to the<br />
DC IN jack on your camcorder,<br />
then connect the power cord to<br />
the wall outlet.<br />
2 Slide the POWER switch to turn<br />
on the _ (Movie) lamp.<br />
3 Insert the finalized disc into your<br />
camcorder.<br />
A COltfirmaliolt screen appears to<br />
prompt you to confirm thal you wish to<br />
record additional scenes.<br />
4 Touch [YES] --* [YES].<br />
5 When [Completed.] appears,<br />
touch rug].<br />
For the discsrecordedwith SD<br />
(standarddefinition) image quality<br />
• When using finalized DVD-RW (VR<br />
mode) discs, you can record additional<br />
material on the disc without any<br />
additional steps.<br />
• To unfinalize DVD_RW (VIDEO mode),<br />
perform _ (MANAGE DISC/<br />
MEMORY) -+ [UNFINALIZE] on the<br />
HOME MENU.<br />
• If you have created a DVD menu (p. 58)<br />
when finalizing the DVD+RW, a dialog<br />
appears to confirm that you wish to record<br />
additional scenes when you slide the<br />
POWER switch and turn ()it the<br />
(Movie) lamp.<br />
O Notes<br />
• Use tile AC A&_ptoras power sourceto prevent<br />
your catllcorder from rullning out (d power<br />
d/lring tile operation.<br />
• Do nol apply shock or vibration lo your<br />
camcorder, and do not disconnect the AC<br />
Adaplor during lhe operalion.<br />
• A disc menu crealcd during finalizing are<br />
deleted.<br />
• Whcn you use a double-sided disc, perlbrm lhis<br />
operalion on each side.<br />
• You CallllOlrecord addilional sceneson a<br />
finalized DVD-R/DVD+R DL disc.<br />
• You CallllOl record additional scenes on a<br />
finalized disc during Easy Handycam operation.<br />
To do so, cancel Easy Handycam operalion.
C#stomiziW Yo_#C_mcor#er<br />
What you can do with the _(SETTINGS)<br />
categoryof the HOMEMENU<br />
You can change the recording funcliens and<br />
the operating sctlings for your convenience. 0 Touch the desired setup item.<br />
11the ilcm is not on the screen, louch A/<br />
1 Turn on your camcorder, then<br />
press t_ (HOME).<br />
11_ (HOME)<br />
(SETTINGS) category<br />
2 Touch _._--.(SETTINGS).<br />
• to change the page.<br />
Jl<br />
_1, Touch the desired item.<br />
If the item is net on the screen, touch A/<br />
• Io change the page.<br />
5 Change the setting, then touch<br />
I_¢1.<br />
MOVIESETTINGS(p. fi7)<br />
_T_ RECMODE 67<br />
_REC MODE 67<br />
AE SHIFT.1 67<br />
WB SHIFT.1 68<br />
NIGHTSHOTLIGHT 68<br />
WIDE SELECT 68<br />
DIGITALZOOM 68<br />
Continued._ 65<br />
3<br />
==<br />
=<<br />
==<br />
3<br />
g
66<br />
What you can _e with the _ {SETTINGS)category of the HONEMENU<br />
STEADYSHOT 68<br />
AUTOSLW SHUTTR 68<br />
X.V.COLOR 69<br />
GUIDEFRAME 6_)<br />
ZEBRA 6_)<br />
REMAINING 6_)<br />
SUB-TDATE 69<br />
FLASHLEVEL 73<br />
REDEYEREDUC 73<br />
DIAL SETTING.1 70<br />
PHOTOSETTINGS(p. 70)<br />
[] IMAGE SIZE.2 7o<br />
[] QUALITY 72<br />
FILENO. 72<br />
AESHIFT.1 67<br />
WB SHIFT.1 68<br />
NIGHTSHOTLIGHT 68<br />
STEADYSHOT.1 6_;<br />
GUIDEFRAME 6_)<br />
ZEBRA 6_)<br />
FLASHLEVEL 73<br />
REDEYEREDUC 73<br />
DIAL SETTING.1 70<br />
VIEW IMAGES SET (p. 73)<br />
LCDBLLEVEL 75<br />
LCDCOLOR 75<br />
VFB.LIGHT 75<br />
OUTPUT SETTINGS (p. 76)<br />
TV TYPE 76<br />
DISP OUTPUT 77<br />
COMPONENT 77<br />
CLOCK/I_LANG (p. 77)<br />
CLOCKSET.2 24<br />
AREASET 77<br />
DST SET/SUMMERTIME 77<br />
1_LANGUAGESET.2 77<br />
GENERAL SET (p. 78)<br />
DEMO MODE 78<br />
REC LAMP 78<br />
CALIBRATION 1] 1<br />
A.SHUT OFF 78<br />
REMOTECTRL 78<br />
'_<strong>HDR</strong>-UX7<br />
,2 You can set lllese i(ems also during Easy<br />
Handycam operation (p, 30),<br />
,s [SOUND SETTINGS] during Easy Handycam<br />
operation,
MOVIESETTINGS<br />
(itemsforrecordingmovies)<br />
Touch @, then @.<br />
If the item is not on the screen, touch A/V<br />
to change the page.<br />
How to set<br />
_" (HOME MENIJ) -+ page 65<br />
@_.(OPTION MENU) -...+page 79<br />
The default settings are marked with P,'.<br />
You can select a recording mode to record a<br />
movie with HD (high definition) image<br />
quality from 4 levels.<br />
RDRQ+<br />
Records in the highest quality mode.<br />
(AVC HD 12M (HQ+))<br />
HD HQ<br />
Records in high quality mode.<br />
/AVC HD9M (HQ))<br />
HD SP<br />
Records in standard quality mode.<br />
(AVC HD 7M (SP))<br />
HDLP<br />
Increases the recording time (Long Play).<br />
/AVC HD 5M (LP))<br />
O Notes<br />
• If you rccord in the LP mode, details in scenes<br />
with quick movements may appear rough when<br />
you play lhe disc back.<br />
"_° Tips<br />
• See page 16 on tile expected rccoMing time ol<br />
ouch recording mode.<br />
You can select a recording mode to record a<br />
movie with SD (standard definition/ image<br />
quality from 3 levels.<br />
SD HQ<br />
Records in high quality mode.<br />
(SD 9M (HQ)).<br />
SDSP<br />
Records in standard quality mode.<br />
ISD 6M (SP)).<br />
SDLP<br />
Increases the recording time (Long Play).<br />
ISD 3M ILP))<br />
O Notes<br />
• If you record in the LP mode, tim quality of<br />
scenes may be degraded, or scenes with quick<br />
movemcnts may appeal" wilh a block noise when<br />
you play back tile disc.<br />
"_" Tips<br />
• S_ page 16 on the expected recording time ol<br />
each recording mode.<br />
Select [ON] to atliust the exposure using<br />
(dark)/[_7 (bright). [] and the<br />
setting value appear when [AE SHIFT] is<br />
anything other than the default setting.<br />
"_° Tips<br />
• Touch [_7 ilthe subject is white or tile<br />
backlight is bright, or touch E_ if tile subject<br />
is black or the light is dim.<br />
• You can adjust lhe automatic exposure level to<br />
brighter or darker when [EXPOSUREI is set to<br />
IAUTOI.<br />
• You can also adjust the setting manually using<br />
the camera control dial (p. 38).<br />
3<br />
=_<br />
3<br />
g<br />
Continued._ 67
68<br />
NOWE SE?TING${Co_i_med}<br />
Select ION] to adjust the white balance to<br />
Ihe desired selling using _/[_7.<br />
[] and the selling value appear when [WB<br />
SHIFT] is anything other than the default<br />
setting.<br />
"_° Tips<br />
• When the white balance is sel to a lower _alue,<br />
imuges appeur bhfish, mid when set to a higher<br />
value, images appear reddish.<br />
• You can also adjust the stating manually using<br />
lhe camera control dM (p. 38).<br />
When using either the NightShot (p. 37) ur<br />
]SUPER NIGHTSHOT] (p. 84) functiun to<br />
recurd, you can record clearer images by<br />
setting [NIGHTSHOT LIGHT], which<br />
emits infrared light (invisible), tu [ON] (the<br />
default setting).<br />
0 Notes<br />
• Do not cover tile inh'arcd port with your fingers<br />
or other objects (p. 37).<br />
• Remove the conversion lens (optional).<br />
• The maximum shooling distance using<br />
[NIGHTSHOT LIGHTI is aboul 3 m / 10 l_:el).<br />
When recording with SD (standard<br />
definition) image quality, you can select the<br />
aspect ratio according to the TV connected.<br />
Refer also to the instruction manuals<br />
supplied with your TV.<br />
16:9 WIDE<br />
Records images to the fidl screen on a 16:9<br />
(wide) TV screen.<br />
4:3 (4_)<br />
Records images to the full screen on a4:3<br />
TV screen.<br />
0 Notes<br />
• Set [TV TYPE] correcdy according to the TV<br />
connecled lin playback (p. 76).<br />
You can select the maximum zoom level in<br />
case you want to zoom to a level greater<br />
than 10 x (the default setting) during<br />
recording. Nute that the image quality<br />
decreases when you use the digital zuom.<br />
W_T<br />
The right side of the bar shows the digital<br />
zooming factor. The zooming zone<br />
appears when you select the zooming<br />
level.<br />
OFF<br />
Up to l0 x zoom is pclibrmed optically.<br />
211 x<br />
Up to 10 x zoom is perlbrmed optically,<br />
and after that, up to 20 x zoom is<br />
perfunned digitally.<br />
811x (<strong>HDR</strong>-<strong>UX5</strong>)<br />
Lip to 10 x zoom is pcrli)rmcd optically,<br />
and after that, up to 80 x zoom is<br />
performed digitally.<br />
You can compensate fur camera shake (the<br />
delault setting is [ON]). Set<br />
[STEADYSHOT] to [OFF] ( '_ ) when<br />
using a tripod (optional), then the image<br />
beconles naturah<br />
The shutter speed becomes 1/30 seconds<br />
automatically when shooting in dark places<br />
(the default setting is [ON]).
When recording, set to[ON] tocapture<br />
wider range ofcolors. Variuus colors such<br />
asthebrilliant color offlowers and<br />
turquoise blueoftheseacanbemore<br />
faithfillly reproduced.<br />
0 Notes<br />
• Set [X.V.COLOR] to [ON] only when lhe<br />
recorded content will be played back on an<br />
x.v.Color-complianl TV. Otherwise. set to<br />
[OFF] (tile defimh seuing).<br />
• If tile movies recorded with tiffs lunction [ONI<br />
is played back on an non-x.v.Color-complianl<br />
TV. the coh)r nlay not be reproduced correctly.<br />
• [X.V.COLORI cannot be set to [ONI:<br />
when the disc is not Iormalted with HD (high<br />
definition/ image quality.<br />
while recording a nlovie.<br />
You can display the lhame attd check that<br />
the subject is horizontal ur vertical by<br />
setting [GUIDEFRAME] to [ON].<br />
The frame is not recorded. Press DISP/<br />
BATT INFO to make the frame disappear.<br />
"_° Tips<br />
• Positioning tile subject at tile cross point of tile<br />
guide hanle nlakes a balanced composition.<br />
Diagonal stripes appear in portions of the<br />
screen where brightness is at a preset level.<br />
This is useful as a guide when atliustiug the<br />
brightness. When you change the def:mlt<br />
setting, [] is displayed. The zebra pattent<br />
is not recorded.<br />
I,,.OFF<br />
The zebra _:_atternis not displayed.<br />
7O<br />
The zebra pattern appears at a screen<br />
brightness level of about 70 IRE.<br />
IO0<br />
The zebra pallern appears at a screen<br />
brighlness level of about 100 IRE or<br />
higher.<br />
O Notes<br />
• Portkms olthe screen where brigllmess is about<br />
100 IRE or above Inay appear overexposed.<br />
"_° Tips<br />
• IRE represenls lhe screen brightness leveh<br />
P,"AUTO<br />
Displays the remaining disc indicator for<br />
about 8 seconds in situations such as Ihose<br />
described below.<br />
When your camcorder recognizes the<br />
remaining disc capacity with the POWER<br />
swilch sel to _ lMovie).<br />
When you press DISP/BATT INFO to<br />
switch the indicator from off to on with<br />
the POWER switch set to _ (Movie).<br />
When you select the movie recording<br />
mode on the HOME MENU.<br />
ON<br />
Always displays the remaining disc<br />
indicator.<br />
0 Notes<br />
• When tile remaining recordable tinle lor mo_ ies<br />
is less than 5 nlinutes, the indicator slays on the<br />
scrcen.<br />
Select [ON] (the default setting/to display<br />
the recording date and time when you play<br />
back a disc on a device with a subtitle<br />
display function. Alsu refer tu the<br />
instruction manual of the playback device.<br />
0 Notes<br />
• Discs recorded wilh HD (high definition) image<br />
quality can be played on AVCHD lPrmal<br />
compatible devices only (p. 60).<br />
Continued._ 69<br />
3<br />
==<br />
-<<br />
==<br />
3<br />
g
70<br />
MOWE smm s/co. i. e / PHOTOSETTINGS<br />
You can set this function when you shoot<br />
still images using the built-in flash, or an<br />
external flash (optional) that is conrpatible<br />
with your camcorder.<br />
HIGR(_+)<br />
Makes the flash level higher.<br />
l,, NORMAL(_ )<br />
LOW(S-)<br />
Makes the flash level lower.<br />
You carl set this function when you shoot<br />
still images using the built-in flash, or an<br />
external flash (optional) that is compatible<br />
with your camcorder.<br />
You call prevent redeye by activating the<br />
flash before recording.<br />
Set [REDEYE REDUC] to [ON], then press<br />
/flash) (p. 37) repeatedly to select a<br />
setting.<br />
(_) (Auto redeye reduction): Pro-flashes 1o<br />
reduce redeye before ll_e flash automalically<br />
fashes when therc is insut]icienl ambient<br />
lighl.<br />
(_) _ /Forced rcdeye reduclion): Always<br />
uses the flash and the rcdeye reducing prcflash.<br />
(_) (No flash): Records withoul flash.<br />
O Notes<br />
• Tile redeye reduction may not produce the<br />
desired etlcct due to individual ditlcrcnces and<br />
other condilions.<br />
You call select ,'.Illilem you wallt to set to<br />
the cr.unera control diah For details, see<br />
page 38.<br />
(itemsforrecordingstillimages)<br />
Touch (_), then @.<br />
If tile ilem is not oo tile screen, touch A/V<br />
to change tile page.<br />
How to set<br />
1_ (HOME MENU) --+ page 65<br />
O_./OPTION MENU) --+ page 79<br />
The default settings are marked with P,'.<br />
<strong>HDR</strong>-<strong>UX5</strong><br />
4.ON ( 4LT.oPa )<br />
Records still images clearly.<br />
3.0M (_'a.oM)<br />
Records still images clearly ill the 16:9<br />
(wide) ratio.<br />
1.9M ( 1[_._.9M )<br />
Allows you to record more still images ill<br />
relatively clear quality.<br />
VGA(0.aM) (vL_aGA)<br />
Allows the maximum mmrber of still<br />
images to be recorded.<br />
<strong>HDR</strong>-UX7<br />
_"6.1M ( 6L-_.IM )<br />
Records still inmges clearly.<br />
4.6M (L"_4.+p_, )<br />
Records still images clearly ill the 16:9<br />
(wide) ratio.<br />
3.1M ( 3L_].la )<br />
Allows you to record more still images ill<br />
relatively clear quality.<br />
VGA(0.3Mr (VL_GA )
Allows the maximum number of still<br />
images to be recorded.<br />
0 Notes<br />
• [[]IMAGE SIZE] can be set only during<br />
recording standby.<br />
Capacityofthe"Memory StickDuo"<br />
(MB)andthenumberof recordable<br />
images<br />
WhenthePOWERswitchis I_ (Still)<br />
<strong>HDR</strong>-<strong>UX5</strong><br />
64MB 32 42 65 390<br />
81 I (15 160 980<br />
128MB 64 85 13// 780<br />
16() 215 325 197(}<br />
256MB 115 150 235 14(}0<br />
295 395 590 3550<br />
512MB 235 310 480 285(t<br />
600 800 1200 72(}(}<br />
IGB 48(1 640 980 5900<br />
1200 1600 2450 14500<br />
2GB 990 13(}0 2000 12000<br />
2500 3350 5000 30000<br />
4GB 1950 2600 3950 23500<br />
NDR-UX7<br />
4900 66011 9500 59000<br />
64MB 21 28 40 390<br />
53 70 101) 980<br />
128MB 42 56 80 780<br />
105 135 205 1970<br />
256MB 76 100 140 14(t0<br />
19(1 250 370 3550<br />
512MB 155 205 295 2850<br />
39(1 510 76(1 7200<br />
IGB 315 420 600 5900<br />
800 1050 1550 14500<br />
2GB 650 860 1200 12000<br />
1600 2150 3150 311000<br />
4GB 1250 1700 240(t 23500<br />
3200 4250 6300 59000<br />
When the POWER switch is N<br />
(Movie)*<br />
<strong>HDR</strong>-<strong>UX5</strong><br />
64MB 56 72<br />
135 175<br />
128MB 110 145<br />
28(} 355<br />
256MB 20(t 260<br />
500 640<br />
512MB 410 530<br />
1000 1300<br />
IGB 840 1050<br />
2100 2650<br />
2GB 1700 22110<br />
4300 5500<br />
4GB 34(}0 4400<br />
8500 10501)<br />
* The image size is fixed depending on the aspect<br />
ratio of the image recorded:<br />
[_ 2.3MI with HD (high definition) image<br />
qualily<br />
[_ 2.3MI in the aspect ratio 16:9 with SD<br />
/standard definition) image quality<br />
[I .7MI in the aspect ratio 4:3 with SD<br />
/standard definition) image quality<br />
Continued._ 71<br />
3<br />
==<br />
-<<br />
==<br />
3<br />
g<br />
a_
72<br />
PHOTO SETTINGS(go_tim_÷d)<br />
<strong>HDR</strong>-UX7<br />
64MB 28 37<br />
70 93<br />
128MB 56 74<br />
135 185<br />
256MB 100 130<br />
25O 335<br />
512MB 2(15 270<br />
510 690<br />
IGB 420 550<br />
1050 1401)<br />
2GB 860 I l Oil<br />
2150 2850<br />
4GB 1700 2250<br />
4250 5700<br />
* The image size is fixed depending on the aspect<br />
ratio of the image recorded:<br />
[1_ 4.6MI witl_ HD (high definition) image<br />
quality<br />
[1_ 4.6MI in tl_e aspect ratio 16:9 with SD<br />
(standard definition) image quality<br />
[3.4MI in the aspect ratio 4:3 widl SD<br />
(standard definition) inmge quality<br />
0 Notes<br />
• All numbers measured at tile lbllowing setting:<br />
Top: [FINE] is selected Ibr image quality.<br />
Bollv)lIl: [STANDARDI is selected lor image<br />
quality.<br />
• All numbers me*,sured when using a "Memory<br />
Stick Duo" made by Sony Colt_orafion. The<br />
number of recordable images varies depending<br />
on the recording environment.<br />
• The unique pixel array of Sony's ClearVid<br />
CMOS Sensor and image processing system<br />
/new Enhanced Imaging Proccssor) allows the<br />
still image resolution equivalent to the sizes<br />
described.<br />
_FINE (FINE)<br />
Records still images at Ihc fine image<br />
quality level.<br />
STANDARD (STD)<br />
Records slill images al the slandald image<br />
qualily level.<br />
SERIES<br />
Assigns file numbers in sequence ew.'n if<br />
the "Memory Stick Duo" is replaced with<br />
another one.<br />
RESET<br />
Assigns file numbers individually for each<br />
"Memory Stick Duo."<br />
See page 67.<br />
See page 68.<br />
See page 68.<br />
See page 68.<br />
See page 69.
See pa_e 69.<br />
See page 70.<br />
See page 70.<br />
See page 70.<br />
VIEWIMAGESSET<br />
(Itemsto customizethedisplay)<br />
Touch @, fl'len @.<br />
If the item is not on 1he screen, touch A/V<br />
Io chan_e file page.<br />
How to set<br />
"_" (HOME MENU) --+ page 65<br />
@_.(OPTION MENU) -...+page 79<br />
The default setlings are marked with P,'.<br />
During playback, displays the information<br />
(data code) recorded automatically at file<br />
lime of recording.<br />
_'OFF<br />
Data code is not displayed.<br />
DATE/TIME<br />
Displays the date and lime.<br />
CAMERADATA(below)<br />
Displays camera scqting dala.<br />
DATE/TIME<br />
[] Dale<br />
[_Time<br />
aAN _ aorar_<br />
3<br />
-<<br />
=_<br />
3<br />
g<br />
Continued._ 73
74<br />
VIEWINaGESSET(go_ti_us_/<br />
CAMERA DATA<br />
Movie<br />
Still image<br />
[] SteadyShot off<br />
[] Brightness<br />
[] White balance<br />
[_ Gain<br />
[] Shutter speed<br />
[] Aperture value<br />
[] Exposure<br />
"_° Tips<br />
• { appears lbr an inmge recorded using a flash.<br />
• The data code is displayed on the TV screen if<br />
you connect your camcorder lo a TV.<br />
• The indicalor toggles lhrough the lbllowing<br />
_quences as you press DATA CODE on lhe<br />
Relnom Comm_,nder: [DATE/TIMEI<br />
[CAMERA DATA] _ [OFFI /no indicafion).<br />
• Depending on the disc condilion, bars [--:--:--I<br />
appear.<br />
You can select the number of thumbnails<br />
that appear on the VISUAL INDEX screen.<br />
Thumbnail (_= Glossary/p. 125)<br />
_" ZOOM LINK<br />
Change the number of tlmmblmils (6 or 12)<br />
with the ZOOII/ lever on your camcorder.*<br />
6IMAGES<br />
Displays tlmmbnails of 6 images.<br />
12IMAGES<br />
Displays thumbnails of 12 images.<br />
* You call operate with tile ZOOln buttons Oll tile<br />
LCD l/an/e or on lhe Remote (_'on/mallder.
SOUND/DISPSET<br />
(itemstoadjustthesoundandthescreen)<br />
Touch @, lhen @.<br />
If lhe item is nol on lhe screen, touch A/V<br />
It) change the page.<br />
Howto set<br />
_1_ (HOME MENU) -_- page 65<br />
O_.(OPTION MENU) -_- page 79<br />
The default settings are marked with P.'.<br />
Touch [_7/[_7 to a@tsl the x olume<br />
(p. 41[.<br />
_ON<br />
A melody sounds ;,,'hen you start/slop<br />
recording, or operate Ihe touch panel.<br />
OFF<br />
Cancels Ihe melody or shulter sound.<br />
You ear) adjust the brightness of the LCD<br />
screen.<br />
(_) Adjusl Ihe brightness wilh E_/[_.<br />
@ Touch [_.<br />
"_° Tips<br />
• This adjtlsllllen[ does llO[ _ll]_c[ lhe recorded<br />
images in any way.<br />
You can at[just the brightness of the LCD<br />
screen's backlight.<br />
_" NORMAL<br />
St_mdardbrightness.<br />
BRIGHT<br />
Brightens the LCD screen.<br />
0 Notes<br />
• _¢Vhell you COllnec[ your CalllCOr_ler to outsMe<br />
power sources, [BRlGHT] is am_mlatically<br />
selected lot file _lfing.<br />
• When you select [BRIGHT], baltely lilt is<br />
slightly reduced during recording.<br />
• If you ()pen tile LCD panel 18{I degrees to lace<br />
the screen outside and close the LCD panel to<br />
tile canlcorder body, the setting becomes<br />
[NORMALI am_matically,<br />
"_° Tips<br />
• This a_c[iustnlenl does not allEct the recoMed<br />
images ill ally way,<br />
You can adjust the color of lhe LCD screen =o<br />
with _/1_7.<br />
[] DDDDDDDD'IIIIIIII [] 3<br />
g<br />
Low inlcnsilv High intcnsit,.<br />
"_" Tips<br />
• This ac[iustmenl does not all_ct tile recorded<br />
images ill rely way.<br />
You car) atljust the brightness of the<br />
viewfinder.<br />
_" NORMAL<br />
St_mdardbrightness.<br />
BRIGHT<br />
Brightens the vicwlindcr screen.<br />
Continued._ 75<br />
3
76<br />
SOUND!D SET/Co. SP i e / OUTPUTSETTINGS<br />
O Notes<br />
• xvVhell you connect your cawlcorder to o/llside<br />
power sources, [BR[GHT] is automatically<br />
_lecled h)r lhe setling.<br />
• When you select [BRIGHT], baltcry lilt is<br />
sliglaly reduced during recording.<br />
"_° Tips<br />
• This adjustment does not aBbcl the recorded<br />
images in any way.<br />
(itemsforwhenconnectingotherdevices)<br />
Touch @, then @.<br />
If the item is not on the screen, touch A/V<br />
to change the page.<br />
How to set<br />
1_ (HOME MENU) -+ page 65<br />
@_.(OPTION MENU) -...+page 79<br />
The default settings are marked with P,'.<br />
You need to convert the signal depending<br />
on the TV connected when playing back the<br />
image. The recorded images are played<br />
back as lk_llewing ilhtstratiens.<br />
_'16:9<br />
Select to view your images on a 16:9<br />
(wide) TV.<br />
Wide (16:9) 4:3 images<br />
images<br />
4:3<br />
Select to view your images on a 4:3<br />
standard TV.<br />
Wide (16:9) 4:3 images<br />
images<br />
0 Notes<br />
• "_Vllcll you COllnect your Cillncordcr Io a TV<br />
compatible with the ID-1 system and play back<br />
a disc. set [TV TYPEI to [I 6:91. The TV
automatically switches theaspect ratio<br />
according 1olheplayback picture. Rel_r also1o<br />
themanual supplied withyour TV.<br />
P,"LCDPANEL<br />
Shows displays such as the time code on<br />
the LCD screen and in the viewfinder.<br />
V-OUT/PANEL<br />
ShL)_l, rs displays such as the time code on<br />
the TV screen, LCD screen, and in the<br />
viewfiMer.<br />
Select [COMPONENT] when connecting<br />
your camcorder to a TV with the<br />
component input jack.<br />
480i<br />
Select when connecting your camcordcr to<br />
a TV with the component input jack.<br />
I_.1080i/480i<br />
Sck,ct when connecting your camcoMcr to<br />
a TV that has the component input jack<br />
and is capable of displaying the 1080i<br />
signah<br />
CLOCK/ LANG<br />
(itemsto setclockandlanguage)<br />
Touch @, then @.<br />
If the ilem is not on 1he screen. Iouch &./W<br />
I() chan_e the page.<br />
How to set<br />
_" (HOME MENU) -+ page 65<br />
@_.(OPTION MENU) -...+page 79<br />
See page 24.<br />
You can atljust a time difference without<br />
stopping the clock.<br />
Set your local area using A/V when using<br />
your camcorder overseas.<br />
Refer to the world time difference on page<br />
I04.<br />
You can change this setting without<br />
stopping the clock.<br />
Set to [ON] to move the time forward<br />
I hour.<br />
You can select the language to be used on<br />
the LCD screen.<br />
"_" Tips<br />
• Your camcorder offers [ENG[SIMPI]<br />
(simplified English) for when you cannot<br />
find your native tongue among the<br />
options.<br />
3<br />
..<<br />
=_<br />
3<br />
g<br />
77
78<br />
GENERALSET<br />
(Othersetupitems)<br />
Touch (_), then @.<br />
If the ilem is not on the screen, touch ,Ik/V<br />
It) change the page.<br />
How to set<br />
(HOME MENU) --+ page 65<br />
@_÷.(OPTION MENU) --+ page 79<br />
The default settings are marked with _.<br />
The default setting is ION], allowing you to<br />
view the demonstration in about 10<br />
minutes, after you slide the POWER switch<br />
to #_ (Movie).<br />
"_° Tips<br />
• The demonstration will be suspended when:<br />
you press START/STOP or PHOTO<br />
you touch the scmcn during tile<br />
demonstr;dion. (The demonstration starts<br />
again after about 10 nlinutes.)<br />
you slide the disc cover open switch.<br />
you remove or insert a "Memo W Stick Duo."<br />
you _t the POWER switch to I1_ (Still).<br />
you press _ (HOME)l[_] (VIEW<br />
IMAGES).<br />
The camera recording lamp will not light up<br />
during recording when you set this to<br />
[OFF]. (The default selting is [ON].)<br />
See page 11 I.<br />
_'5 min<br />
The camcordcr is automaticall,v turned off<br />
whet) you do not operate yotlr camcorder<br />
ff)r more than approximately 5 minutes.<br />
NEVER<br />
The camcorder is not automatically turned<br />
off.<br />
Notes<br />
• "_Vhcll you COllnect your calncorder 1o il wall<br />
outlet. [A.SHUT OFF] is automatically _t to<br />
[NEVER].<br />
The default selling is ION], allowing you to<br />
use the supplied Remole Commander<br />
(p. 121).<br />
"_° Tips<br />
• Set to [OFF] to prevent your camcorder hom<br />
responding to a command sent by another VCR<br />
rell/()te COlllrol Ullit.
Activatingfunctionsusingthe .OPTION MENU<br />
The OPTION MENU appears just like tile<br />
pop-up window that appears when you<br />
right-click tile mouse oil a cumputer.<br />
Various ftmctions are displayed in the<br />
context elfthe operation.<br />
1 While using your camcorder,<br />
touch O_.__-(OPTION)on the screen.<br />
@._. (OPTIO N)<br />
I<br />
Tab<br />
2 Touch the desired item.<br />
If you caunul find the desired item.<br />
touch anolher lab Iu change the page.<br />
3 Change the setting, then touch<br />
r_.<br />
When the item youwant is not onthe<br />
screen<br />
Touch another lab. If yuu cannut find the<br />
item anywhere, the fimctiun dues nut wurk<br />
under Ihe silualiun.<br />
(J Notes<br />
• Tile tabs and ilems that appear on the screen<br />
depend on the rccording/playback status oI your<br />
camcordel: al the time.<br />
• Some items appear wilhoul a tab.<br />
• You cannot use the OPTION MENU during<br />
Easy Handycam operalion.<br />
3<br />
-<<br />
=_<br />
3<br />
g<br />
Continued._ 79
8O<br />
Activati_f_tio_s usi_ th8_OPT_ON MENU {Continued)<br />
See page 79 for setting operation. See page 79 for setting operation.<br />
tab<br />
FOCUS 81<br />
SPOTFOCUS 81<br />
TELEMACRO 81<br />
EXPOSURE 82 _ tab<br />
SPOTMETER 82 DIVIDE 0 5o<br />
AESHIFT(<strong>HDR</strong>-UX7) o (_7 ERASE o 51<br />
SCENESELECTION 82 ERASEALL 0 52<br />
WHITEBAL. 83 MOVE 0 52<br />
WBSHIFT(<strong>HDR</strong>-UX7) O (,8<br />
COLORSLOWSHTR 84 -- (Atabdependsonthesituation)<br />
SUPERNIGHTSHOT 84 [_ ADD 0 51<br />
ADDALL 0 5I<br />
tab PRINT O 54<br />
FADER 84 SLIDESHOW 42<br />
D.EFFECT 85 VOLUME © 41<br />
PICT.EFFECT 85 DATACODE © 73<br />
SLIDESHOWSET 42<br />
_-_ tab N ADO © 5I<br />
_REC NODE o (,7 NADD ALL o 51<br />
IrgNRECNODE o (,7<br />
MICREFLEVEL 85 -- (Notab)<br />
[] IMAGESIZE 0 70 COPIES 0 55<br />
[] QUALITY © 72 DATERINE © 55<br />
SELF-TIMER 85 SIZE 0 55<br />
TIMING 38 DISCMENU** 0 59<br />
RECORDSOUND 38<br />
ii!i!!N_!!!ii_!_!_!_!_!_!_!_!_!_!_!_!_!_!_!<br />
_¸i_i_i _i_i_i_i_i _¸i_i_i _i_i_i_i_!i_ii ¸iiiilili!<br />
tab<br />
DELETE O 48<br />
DELETEALL O 49<br />
* Items that are included in the HOME MENU<br />
also.<br />
**[DVD MENUI lbr SD (standard definition)<br />
image qualily
Detailson the OPTIONMENUitems<br />
Ilems you can set only on the OPTION<br />
MENU will be described below.<br />
The default settings are marked with P.'.<br />
You can atljust tile focus manually. You call<br />
select this function also when you want lo<br />
foc/ls on a certain subject intentionally.<br />
(_) Touch [MANUAL].<br />
t_ appears.<br />
(_) Touch _ (focusing on close subjects)/<br />
(focusing on distant subjects) to<br />
sharpen Ihe focus. _ appears when Ihe<br />
lk)cus cannot be adjusted any closer, and t_<br />
appears when the R)cus cannot be a({justed<br />
farther away.<br />
(_) Touch [_.<br />
To adjusl file focus aulomaticaily, 1ouch<br />
[AUTOI --+ _ in slep (_).<br />
0 Notes<br />
• The minimum possible distance between<br />
cg,mcorder and subject while maintaining sharp<br />
locus is about 1 cm (aboul 13/32 in.) lor wide<br />
angle and about 80 cm (aboul 2 5/8 toot) for<br />
telephoto.<br />
"_° Tips<br />
• It is easier lo locus on lhe subject by moving tile<br />
power zoom lever towards T (lelepholo) to<br />
ad.iusl the locus, then towards W (wide angle) to<br />
ac/iust the zoom for recording. When you wahl<br />
to record a sutzject at close range, nlove the<br />
power zoom lever to W (wide angle), then<br />
adjust the locus.<br />
• The local distance information (the distance al<br />
which the sut_ject is locused on: to be retcrred<br />
when it is dark _uldhard lo adjtlsl loctls) appears<br />
for a few seconds in the tk)llowing cases. (II will<br />
not be displayed correctly if you are using a<br />
conversion lens (optional).)<br />
When the focus mode is switched from<br />
alllOlllalic 1o lllallu_lh<br />
When the locus is adjusted manually.<br />
• You can also adjust file locus manually using<br />
the camera connol dial (p. 38) (<strong>HDR</strong>-UX7).<br />
You can select and atljusl tile focal point to<br />
aim it at a subjecl not located at the cenler<br />
of tile screen.<br />
(_) Touch Ihe subject on Ihe screen.<br />
t:_ appears.<br />
(_) Touch [ENDI.<br />
To adjust the focus automatically, touch<br />
[AUTO] -+ [END] in slep (_).<br />
0 Notes<br />
• It you set [SPOT FOCUSI, [FOCUS[ is<br />
atltonlalically _11o [MANUAL].<br />
This is useful to shoot small subjects, such<br />
as flowers or insects. You call blur out<br />
backgrounds and the subject stands out<br />
clearer.<br />
When you set [TELE MACRO] to [ON]<br />
(T_), the zoom (p. 35) moves to the top of<br />
the T (telephoto) hide automatically and<br />
allows recording suI)iects at a close<br />
distance, down to about 37 cm ( 14 518 ill.)<br />
(<strong>HDR</strong>-<strong>UX5</strong>), or 45 cm (I 7 3/4 ill.) (<strong>HDR</strong>-<br />
UX7).<br />
To cancel. 1ouch [OFF], or zoom Io wideangle<br />
(W side).<br />
3<br />
..<<br />
=_<br />
3<br />
g<br />
Continued._ 81
82<br />
B÷tai+s+_ the OPTIONMENUitems (g+_ti_÷d/<br />
0 Notes<br />
• When recoMing a dislant subject, tbcusing may<br />
be dit]]cuh and can lake some lime.<br />
• A@lst the locus manually (IFOCUSI. p. 81)<br />
when il is hard to tbcus automatically.<br />
You can fix the brighmess of a picture<br />
manually. A_ljust tile brightness when the<br />
subject is tou bright or too clark.<br />
@ Touch IMANUAL].<br />
appears.<br />
(_) A(!iust the exposure by touching [_/<br />
@ Touch [_].<br />
T/ ) re urn he se till_ o O , au urea lC expusure,<br />
luuch [AUTO] --+ _ ill step 0.<br />
"_" Tips<br />
• You can also adjust file seUing manually using<br />
lhe camera conlrol dial (p. :;8) (<strong>HDR</strong>-UX7).<br />
You call a@lst and fix the exposure tu the<br />
subject, so that it is recorded in suitable<br />
brightness even when there is strung<br />
contrast between tile sut!ject and the<br />
background, such as subjects in the<br />
spotlight on stage.<br />
@<br />
/<br />
L Iv+:q<br />
@ Touch the point _hcre you want to fix and<br />
a(!just the exposure on the screen.<br />
appears.<br />
@ Touch IENDI.<br />
To returu Ihe settiug to aulumatic exposure.<br />
tuuch [AUTO] _ lEND] ill step @.<br />
0 Notes<br />
• [tyou set [SPOT METER]. [EXPOSURE] is<br />
automatically set to [MANUAL].<br />
You call record images eflk'ctively ill<br />
various situations.<br />
AUTO<br />
Select this to automatically record images<br />
effectively without the [SCENE<br />
SELECTION] function.<br />
TWILIGHT* (,,11)<br />
Shoots night scenes at a distance without<br />
h)sing the dark atmosphere of the<br />
surroundings.<br />
TWILIGHTPORT.(-'_ )<br />
Shoots lX)rlraits with 1)ackground using a<br />
flash ill slill image recording mode.<br />
CANOLE (-_)<br />
Shoots candlelil scenes+ without Slx)iling<br />
Ihe almosphere.<br />
SUNRISE&SUNSET* (_-)<br />
Shoots sunrises or sunsets full of<br />
atmosl)herc.
FIREWORKS*(_i!))<br />
Fireworks are recoMed in all Iheir<br />
splendor.<br />
LANDSCAPE*(_-I )<br />
Shoots distant subjects clearly. This sclting<br />
also prevents your camcorder from<br />
fi)cusing on glass or metal mesh in<br />
windows that comes in between the<br />
camcorder and the subject.<br />
PORTRAIT (o_)<br />
Brings oul Ihe subject such as people or<br />
flowers while cleating a soft background.<br />
SPOTLIGHT**(@)<br />
Prevents people's faces from appearing<br />
excessively white when subjects arc lit by<br />
strong light.<br />
BEACH**( }*'= )<br />
Shoots seaside or lake side: the blue of the<br />
water will be recoMed clearly.<br />
SNOW**(@)<br />
Prevents people's faces flom appearing<br />
dark in strong light or reflected lighL such<br />
as on a ski slope.<br />
* Adjusted to focus only on objects fallher away.<br />
**Adjusted llot to foctls oll objects a short distance<br />
away,<br />
O Notes<br />
• It you set [SCENE SELECTION], [WHITE<br />
BAL.] setting is canceled,<br />
You can a(ljusl the color balance to the<br />
brighmess of the recording enviromnenl.<br />
AUTO<br />
The white buhmcc is adjusted<br />
automatically.<br />
OUTDOOR ('_)<br />
The white balance is adjusted to be<br />
appropriate for the following recording<br />
conditions:<br />
Ouldoors<br />
Night views, neon signs and fireworks<br />
Sunrise or sunset<br />
Under daylight fluorcscenl lamps<br />
INDOOR(_)<br />
The white bahmcc is adjusted to bc<br />
appropri ae for the following recording<br />
conditions:<br />
Indoors<br />
At party scenes or studios where the lighling<br />
conditions change quickly<br />
Undm video lamps in a studio, or under<br />
sodium lamps or incandescent-like color<br />
hunps<br />
ONEPUSH(_=_)<br />
The white bahmce _ill be a_[justcd<br />
according to the ambient light.<br />
@ Touch [ONE PUSH].<br />
@ Frame a white object such as a piece of<br />
paper, to fill the screen under the same<br />
lighting conditions as you will shoot<br />
the subject.<br />
(_) Touch I_I_l.<br />
_i_ flashes quickly. When the white<br />
balance has been a_!iusted and stored in<br />
the memory, the indicator stops<br />
flashing.<br />
3<br />
-<<br />
=_<br />
3<br />
g<br />
Continued-_ 83
84<br />
Betai+son the OPTIONMENUitems (goetim_ed}<br />
1_ Notes<br />
• Sel [WHITE BAL.] to [AUTO], or a@tst tile<br />
cok)r in [ONE PUSHI under while or cool white<br />
fluorcscent lamps.<br />
• When you select [ONE PUSHI, keep shooting a<br />
while ohject while txmzl is flashing quickly.<br />
• I:_mzlflashes slowly if [ONE PUSHI could not<br />
be sel.<br />
• When [ONE PUSHI was selected, if txmzlkeeps<br />
flashing aBer touching [_. sm [WHITE BAg.I<br />
to [AUTOI.<br />
• If you set [WHITE BAg. l, [SCENE<br />
SELECTION] is set to [AUTO].<br />
"_i° Tips<br />
• For heuer color balm_ce a@lstment, select<br />
[AUTOI and aftn your camcorder at a nearby<br />
white ohject lor about 10 seconds, ill<br />
you changed the battery pack when [AUTO]<br />
was selected,<br />
you nloved your canlcorder 1o or lrom<br />
outdoors after using it.<br />
• You need to rcdo lONE PUSH]+ if:<br />
you changed the [SCENE SEgECTION]<br />
settings.<br />
you nloved your camcorder 1o or II'olI/<br />
outdoors after using it.<br />
When you set [COLOR SLOW SHTR] to<br />
[ON], you can record an image brighter in<br />
color even in clark places.<br />
['_ appears on the screen.<br />
To cancel [COLOR SLOW SHTR], touch<br />
IOFFI.<br />
Notes<br />
• Adjust the locus manually ([FOCUS], p. 81)<br />
when it is hard to l_)ctls automatically.<br />
• The shutter speed of your camcorder changes<br />
depending on the brightness, which may rcsu]l<br />
in a slowdown of tile motion of tile inmge.<br />
The image will be recorded at a maximutn<br />
of 16 times the sensitivity of NightShot<br />
recording if you set [SUPER<br />
NIGHTSHOT] to [ON] while the<br />
NIGHTSHOT switch/p. 37) is also set to<br />
ON. S{_} appears on the screen.<br />
To return tothe normal setting, set [SUPER<br />
NIGHTSHOT] to [OFF].<br />
0 Notes<br />
• Do not use [SUPER NIGHTSHOT] ill hright<br />
placcs. This may cause a malftmction.<br />
• Do not cover the inliared port with your fingers<br />
or other objects lP- 37).<br />
• Rmnove the conversion lens (optional).<br />
• Adjust the lbcus manually/[FOCUSI, p. 81 )<br />
when it is hard to locus automatically.<br />
• The shutter speed of your camcorder changes<br />
depending on the brightness, which may resuh<br />
ill a slowdown of tile nlotion of the image,<br />
You can record a transition with the<br />
following effects adding to the interval<br />
between scenes.<br />
(2) Select the desired effect in [STBY] (during<br />
fiJding in) or [REC] (during fading out)<br />
mode, then touch [_.<br />
@ Press START/STOP.<br />
The fader indicator stops flashing and<br />
disappears when the fade is complete.<br />
To cancel the fader befl_re starting the<br />
operation, touch [OFF] ill step @.<br />
If you press START/STOP. the setting is<br />
canceled.<br />
Fading out<br />
WHITE FADER<br />
Fading in
BLACKFADER<br />
If you select [OLD MOVIE], [g+, appears.<br />
You can add an old moxie effect lo images<br />
To cancel [D.EFFECTI, touch [OFFI.<br />
You can add special effects to an image<br />
during recording or playback. _ appears.<br />
I,,.OFF<br />
Does not use IPICT.EFFECT] setting.<br />
SEPIA<br />
hnagcs appear in sept;,.<br />
B&W<br />
hnages appear in black and white.<br />
PASTEL<br />
hnages appear :is a pale paslel drawing.<br />
You can select the microphone level ff_r<br />
recording sound.<br />
Select [LOWI when you w:mt to record<br />
exciting :rod powerful sound in a concert<br />
hall etc.<br />
P,"NORMAL<br />
Records various surround sounds,<br />
converting them into the certain level•<br />
LOW (|*)<br />
Records surround sound faithflflly. This<br />
setting is not suitable lbr recording<br />
conversations.<br />
The sell'timer records a still image after<br />
about 10 seconds.<br />
Press PHOTO to record still images when<br />
[SELF-TIMER] is set to [ON] and _tS,)<br />
appears.<br />
To cancel the count down. touch [RESET]•<br />
To cancel the self4imer, select [OFF].<br />
"_° Tips<br />
• You can also operate by pressing PHOTO on<br />
the Remote Commander (p. 121).<br />
3<br />
_Z<br />
85<br />
-<<br />
=_<br />
3<br />
g<br />
P:,_
86<br />
What youcan dowith Windowscomputer<br />
When you install tile "Picture Motion<br />
Browser" on a Windows computer from tile<br />
supplied CD-ROM. you can enjoy the<br />
following operatiuns.<br />
"_"Tips<br />
• See paD"90 when you use a Macintosh<br />
COil/purer.<br />
• Playing a discin AVCHDformat<br />
-. Player for AVCHD<br />
You canview movieswith HD(high<br />
definition)imagequalityrecordedona<br />
disc usingyour camcorderbyinsertingthe<br />
disc intothe DVDdriveof yourcomputer.<br />
0 Notes<br />
• EVe311 ill it C()II11r)UlCI" ¢3nvil'OlllllelU vchelv the<br />
operations arc guaranl_d, some tiames may be<br />
dropped ti'om movies.<br />
• Importing movies taken with your<br />
camcorder<br />
You can import the movies recoMed with<br />
HD lhigh definition) image quality as they<br />
arc.<br />
• Viewingmoviesimportedto a<br />
computer<br />
You c;m man ,ge movies and still images<br />
by date and time of shooting, and select<br />
movies or still images you waut to view as<br />
thumbnails. These thumbnails can be<br />
enlarged and played in a slide show.<br />
Creating a disc in AVCHD format<br />
Selected from the movies imported, you<br />
can create a disc consisting of movies with<br />
HD (high definition) image quality.<br />
Copyinga disc<br />
-+ Video Disc Copier<br />
You can copy all the images on a disc<br />
taken with your camcorder.<br />
The "First Step Guide" is an instruction<br />
manual you can refer tu on your computer.<br />
This describes basic operations, from initial<br />
hookup of yuur camcorder and computer<br />
and making settings, tu general operation<br />
the first time you use the software "Picture<br />
Mution Browser" stured on the CD-ROM<br />
(supplied).<br />
Referring to "Installing the "First Step<br />
Guide'"' (p. 88), start the "First Step<br />
Guide", then lidlow the instructions.<br />
The Help guide explains all the flmctions of<br />
all the software applications. Refer to the<br />
Help gukle lk_rlhrther detailed operations<br />
after reading the "First Step Guide"<br />
thoroughly.<br />
To display the Help guide, click the [?]<br />
mark un the screen.<br />
For the support information of Picture<br />
Motiun Browser. visit the following URL:<br />
http://www.sony.nel/support-disofl/<br />
When using "Picture Motion Browser"<br />
OS: Microsoft Windows 2000 Professionah<br />
Windows XP Home Editiom Windows XP<br />
Prufcssional or Windows XP Media Center
Edition<br />
StandaM installation is required.<br />
Operation is not assured if the above OS<br />
has been upgraded or in a multi-boot<br />
enviromnent.<br />
CPU: lntel Pentium 4 2.8 GHz CPU or faster<br />
ilntel Pentium 4 3.6 GHz or faster, Intel<br />
Pentium D 2.8 GHz or laster, or [ntel Core<br />
Duo 1.66 GHz or faster is recommended.)<br />
For processing SD (standard definition)<br />
image quality content only, an lntel<br />
Pentium I11 1 GHz or faster is necessary.<br />
Application: DirectX 9./)c or later (This<br />
product is based on DirectX technology. It<br />
is necessary to have DirectX installed.)<br />
.Net Framework 1.1 /installed with Picture<br />
Motion Browser, depending on your<br />
computer environnlent)<br />
Sound system: [)imct Sound compatible<br />
sound card<br />
blemery: 512 M B or more (1 GB or more is<br />
recommended./<br />
For processing SD (standard definition)<br />
image quality content only, 256 MB of<br />
memory or more is necessary.<br />
Hard disk:<br />
Disc volume required for installation:<br />
Approximately 800 MB ( Ill GB or more<br />
may be necessary when creating AVCHD<br />
h)rmat discs.)<br />
Display: DirectX 7 or later-compatible video<br />
card, Minimum 1024 x 768 dots, High<br />
Color / 16 bit color/<br />
Others: v_ USB port (this must be provided<br />
as standard, Hi-Speed USB (USB 2.0<br />
compatible) is recommended L DVD burner<br />
(CD-ROM drive is necessa U for<br />
instalbaion/<br />
Whenplayingstillimagesrecorded<br />
ona "MemoryStickDuo"ona<br />
computer<br />
OS: Microsoft Windo_ s 2000 Prol_'ssiomd,<br />
Windows XP Home Edition, Windows XP<br />
Professional or Windows XP Media Center<br />
Edition<br />
Standard installation is required.<br />
Operation is not assured if the above OS<br />
has been upgraded.<br />
CPU: MMX Pentium 200 MHz or faster<br />
Others: _ USB port/Ihis must be provided<br />
as standard)<br />
(J Notes<br />
• Operations are not guaranteed on all the<br />
reconllllcnded environlllents.<br />
For example, other open or background<br />
applications running on currendy may limil<br />
producl perlonnancc.<br />
• Even in a COlllplllerenvironnlcnl where the<br />
operations are guaranl_d, flames may be<br />
dropped frommovies with HD (high definition)<br />
image quality, resuhing in unevenplayback.<br />
However,importedimages and imageson discs<br />
crealed subsequendy will not be afl_:cted.<br />
"_° Tips<br />
• If your computcr has a Memory Slick slot, insert<br />
the 'Memory Stick Duo' on which still images<br />
arc recorded imo the Memol T Slick Duo<br />
Adaplor (optionalh then in_rl it into the<br />
MemoJy Slick slol on your conlputer 1o copy<br />
still images 1o the computcr.<br />
• When using a "MemolT Slick PRO Duo" and<br />
your conlputer is not conlpafible v¢ilhit. connect<br />
your camcorder wilh tile USB cable instead of<br />
using the Men/ory Slick s]ol on the conlpuler.<br />
3<br />
87
88<br />
Installingthe "First StepGuide"andsoftware<br />
Before connecting your camcorder<br />
to the computer, you need to install the<br />
"First Step Guide" and software to your<br />
Windows computer. The installation is<br />
required only for the first time.<br />
Contents to be installed and procedures<br />
may differ depending on your OS.<br />
"_" Tips<br />
• See page 90 when you use a Macintosh<br />
COlllputer.<br />
1 Confirm that your camcorder is<br />
not connected to the computer.<br />
," Turn on the computer.<br />
(J Notes<br />
• Log on asAdministrators torinstallation.<br />
• Close allapplications lunning on the conlputer<br />
be/bre installing the sot_ware.<br />
3 Place the supplied CD-ROM in the<br />
disc drive of your computer.<br />
The installation screen appears.<br />
If the screen does not appear<br />
(_) Click [Starl], then click [My<br />
Computer]. (For Windows 2000_<br />
double-click [My Computer].)<br />
Q Double-click [SONYPICTUTIL IE:)]<br />
ICD-ROM) (disc drive).*<br />
* Drive names (such as (E:)) may vary<br />
depending on tile colnpuler.<br />
4 Click [FirstStepGuide].<br />
5 Select the desired language and<br />
the model name of your<br />
camcorder from the pull-down<br />
menu.<br />
6 Click [FirstStepGuide(HTML)].<br />
Installation starts.<br />
When [Save is complele] appears, click<br />
[OK] to finish the installation.<br />
To installthe First Step Guide in PDF<br />
In step 6, click [FirstStepCuide(PDF)].<br />
To installthe software "Adobe<br />
Reader" to displaythe PDFfile<br />
In step 6, click [Adobe(R) Reader(R)].<br />
1 Perform steps 1 to 3 in "Installing<br />
the "First Step Guide'"' (p. 88).<br />
2 Click [Install].<br />
3 Confirm the language for the<br />
application to be installed, then<br />
click [Next].
I<br />
€"1"Confirm the area and country/<br />
region you live in, then click<br />
[Next].<br />
The software to be installed >,rill be<br />
configured accordiug to your couutry/<br />
region.<br />
5 Read [License Agreement], check<br />
[I accept the terms of the license<br />
agreement] if you agree, then<br />
click [Next].<br />
IO Connect your camcorder to your<br />
computer via a USB cable, then<br />
click [Next] on the connection<br />
confirmation screen.<br />
Even if a screett prompting you to<br />
restart your computer appears, you do<br />
uot need tu restart it at this tithe. Restart<br />
your computer alter completing tile<br />
installation.<br />
"7<br />
/ Follow the instructions on the<br />
screen to install the software.<br />
Restart tile computer if required tu<br />
complete the iustallatiun.<br />
The followittg iustallatiun screens may<br />
be displayed, depeudittg on your<br />
operatittg ettvirunment, ht this case,<br />
folluw the instructiotts on the screen to<br />
install the suftware.<br />
Sonic UDF Reader- Software<br />
required to recognize an AVCHD<br />
format mode discs<br />
Windows Media Format 9 Series<br />
Runtime (Wiudows 21R)Oonly) -<br />
Suftware required to create DVD videu<br />
discs<br />
Microsoft .NET Framework 1.1 -<br />
Suftware required to create AVCHD<br />
format discs<br />
Microsoft DirectX 9.0c - Software<br />
required for handling movies<br />
8 After the computer restarts,<br />
remove the CD-ROM from the<br />
disc drive of your computer.<br />
Tile short-cut icons, such as I_ I<br />
(Picture Motiun Browser), appear un the<br />
desktop.<br />
"_" Tips<br />
• S_ 'Firsl Step (-Juide" Oll disconllectillg tile<br />
USB cable.<br />
After you it>tall the<br />
software, a shortcut icon for<br />
the customers registration<br />
website is created un the<br />
desktop.<br />
• Once yuu register on the website, yuu<br />
can get secure and useful customer<br />
suppurt.<br />
http://www.sony.net/registration/di/<br />
3<br />
8g
9O<br />
Viewing"First Step<br />
Guide"<br />
"_° Tips<br />
• See page 90 when you use a Macintosh<br />
COil/put ell<br />
To view "First Step Guide" ott your<br />
computer. Microsoft lnternet Explorer<br />
Vet.6.0 or later is recommettded.<br />
Double-click the shortcut icon of [ First Step<br />
Guide] on the desktop.<br />
"_° Tips<br />
• You can also start by selecting [Start],<br />
[Programs] ([All Programs] lor Windows XP),<br />
[Sony Picture Utilityl, [First Step Guide], your<br />
camcorder model name, titan "First Step Guide"<br />
in HTML.<br />
• To view 'First Step Guide" in HTML without<br />
installing, copy the desired language lblder fl+om<br />
file [ FirstgtepGuidel Iolder on the CD-ROM,<br />
and then double-click [lndex.htmll.<br />
• Reli:r to "First Step Guide" in PDF (p. 88) ill tile<br />
Mllowing ca_s:<br />
When printing the desired topics of "First<br />
Step Guide"<br />
When "First Stt:p Guide" is not displayed<br />
correctly due to the browser setting c'ccn ill<br />
reconunended environment.<br />
When tim HTML version of'First Step<br />
Guide" cannot be installed.<br />
Usinga Macintosh<br />
computer<br />
You catt copy the still images from the<br />
"Memory Stick Duo" to the Macitttosh.<br />
htstall "First Step Gukle" in the supplied<br />
CD-ROM.<br />
0 Notes<br />
• Tile supplied soltwarc 'Picture Motion<br />
Browser" does not operate on Mac ON.<br />
• Reicr to "First Step Guide" lot the details on<br />
connecting your camcordcr to tile computer and<br />
copying tile still images.<br />
To copy still images from a "Memory<br />
Stick Duo"<br />
OS: Mac OS 9.1/9.2 or Mac OS X Ivl0. l/<br />
v 10.2/v 10.3/v 10.4).<br />
Others: _ USB port (this must be provided<br />
as standard)<br />
The "First Step Guide" is an instruction<br />
manual you can refer to utt your computer.<br />
This describes basic operations, from ittitial<br />
hookup of your camcorder and computer<br />
attd makittg setting.<br />
Referring to "htstallittg the "First Step<br />
Guide'"'. start the "First Step Guide", then<br />
follow the instructions.<br />
Copy "FirstStepGuide/PDF)," stored in the<br />
desired language in the [FirstStepGuide]<br />
folder, to your computer.<br />
Double-click "FirstStepGuide(PDF)".<br />
If a software to view PDF is not installed ott<br />
your computer, you can dowttload Adobe<br />
Reader from the following web page:<br />
http://www.adobe.com/
TfoubLeshoo_h_g<br />
Troubleshooting<br />
If you run into any problems using your<br />
camcorder, use the following table to<br />
troubleshoot the problem. If the problem<br />
persists, disconnect the power source and<br />
contact your Sony dealer.<br />
• Overall operations/Easy Handycam/<br />
Remote Commander .......................... p. 91<br />
• Batteries/Power sources .................... p. 92<br />
• LCD screen/viewfinder ..................... p. 93<br />
• Discs/"Memory Stick Duo". ............. p. 93<br />
• Recording .......................................... p. 94<br />
• Playing back a disc on your camcorder<br />
........................................................... p. 96<br />
• Playing back a disc on other devices<br />
........................................................... p. 97<br />
• Editing movies on the disc ................ p. 97<br />
• Viewing images on a TV ................... p. 98<br />
• Dubbing/Connecting to other devices<br />
........................................................... p. 9_<br />
• Connecting to a computer ................. p. 99<br />
• Functions that cannot be used<br />
simultaneously ................................... p. 99<br />
The power does not turn on.<br />
• Attach a charged buttery pack to the<br />
camcorder (p. 21).<br />
• Connect the plug of the AC Adaptor to the<br />
wall outlet (p. 21 ).<br />
The camcorder does not operate<br />
even when the power is set to on.<br />
• It takes a fe_x seconds l()r your camcolder<br />
to be ready to shoot after the power is<br />
turned on. This is not a malfunction.<br />
• Disconnect the AC Adaptor from the wall<br />
outlet or remove the batte W pack, then<br />
reconnect it after about 1 minute. If the<br />
functions still do not work, press the<br />
RESET button (p. 119) using a sharp-<br />
pointed ol2ject. (If you press the RESET<br />
button, all settings, including the chick<br />
setting, are reset.)<br />
• The temperature of your camcorder is<br />
extremely high. Turn off your camcorder<br />
and leave it for a while in a cool place.<br />
Buttons do not work.<br />
• During Easy HaMycam operation (p. 3(tL<br />
you cannot use following buttons/<br />
functions.<br />
BACK LIGHT (p. 37)<br />
Camera control dial (p. 38) (<strong>HDR</strong>-UX7)<br />
Playback zoom (p. 42)<br />
Switching on/off the LCD backlight<br />
(p. 26)<br />
°_=(OPTION) does not appear on the<br />
screen.<br />
• During Easy Handycam operation, you<br />
cannot use the OPTION MENU.<br />
Menu settings have changed<br />
automatically.<br />
• During Easy Handycam operation, most of<br />
the menu settings return to their defaults.<br />
• During Easy HaMycam operatiom some<br />
menu items are fixed as follows.<br />
Movie recording mode: [SP]<br />
Still image quality: [FINE]<br />
[DATA CODE]: [DATE_IME]<br />
Recording l\)rmat of DVD-RW:<br />
[VIDEO] (for SD (standard definition)<br />
imlge quality)<br />
• Following menu items return to the defauh<br />
settings when you set the POWER switch<br />
to OFF (CHG) for more than 12 hours.<br />
[FOCUS]<br />
[SPOT FOCUSI<br />
[EXPOSUREI<br />
[SPOT METER]<br />
[SCENE SELECTION]<br />
[WHITE BALI<br />
[MICREF LEVEL]<br />
Continued._ 91
g2<br />
Trssb_sshsstisS (Ssstisssd}<br />
Even if you press EASY, menu<br />
settings do not switch to their<br />
defaults automatically.<br />
• Following menu settings remain ;is they<br />
were set even during Easy Handvcam<br />
operation.<br />
IFILE NO.I<br />
[VOLUME]<br />
ITV TYPE]<br />
[[] DISPLAY]<br />
[DEEP]<br />
ISUB-T DATE]<br />
[CLOCK SET]<br />
[AREA SETI<br />
[DST SETI/ISUMMERTIME<br />
I_LANGUAGE SETI<br />
I!IMAGE SIZEI<br />
[WIDE SELECT]<br />
[COMPONENT]<br />
[DEMO MODE]<br />
[DIAL SETTING] (<strong>HDR</strong>-UX7)<br />
]TIMING] and ]RECORD SOUND] in<br />
[SMTH SLW REC]<br />
[X.V.COLOR]<br />
Your camcorder vibrates.<br />
• Vibration occurs depending on tile<br />
condition of the disc. This is not a<br />
malfimction.<br />
A vibration is felt in your hand or a<br />
faint sound is heard during<br />
operation.<br />
• This is not a malfimction.<br />
A motor sound is heard in the<br />
camcorder when the disc cover is<br />
closed without a disc.<br />
• Your cumcordcr is trying to recognize Ibe<br />
disc. This is not a malfunction.<br />
Your camcorder gets warm.<br />
• This is because the power has been turned<br />
on for a long time. This is not a<br />
malfimction. Turn off your camcorder and<br />
leave it for a while ill a cool place.<br />
The supplied Remote Commander<br />
does not function.<br />
• Set IREMOTE CTRLI to IONI (p. 78).<br />
• Insert a battery into the battery holder with<br />
the +_ polarities correctly matching the +/<br />
marks (p. 121).<br />
• Remove any obstructions between the<br />
Remote Conm/ander and the remote<br />
sensor.<br />
• Point the remote sensor away from strong<br />
light sources such as direct sunlight or<br />
overhead lighting. Otherwise, the Remote<br />
Commander may not fimction properly.<br />
Another DVD device malfunctions<br />
when you use the supplied Remote<br />
Commander.<br />
• Select a commander mode ()tilerthan DVD<br />
2 for your DVD device, or cover tile sensor<br />
of your DVD device with black paper.<br />
The power abruptly turns off.<br />
• When appmxim:,tcly 5 minutes have<br />
elapsed while you do not operate your<br />
camcorder, the camcorder is automatically<br />
turned off/A.SHUT OFF). Change the<br />
setting of [A.SHUT OFF] (p. 78), or turn<br />
on the power agaim or use the AC Adaptor.<br />
• Charge the battery pack (p. 21).<br />
The CHG (charge) lamp does not<br />
light while the battery pack is being<br />
charged.<br />
• Slklc tile POWER switch to OFF (CHG)<br />
(p. 21).<br />
• Attach the battery pack to the camcorder<br />
correctly (p. 21).<br />
• Connect the power cord to the wall outlet<br />
properly.<br />
• Tile battery charge is completed (p. 21).<br />
The CHG (charge) lamp flashes while<br />
the battery pack is being charged.
• Attach the battery pack to the camcorder<br />
correctly lp. 211. If the problem persists,<br />
disconnect the AC Adaptor from the wall<br />
outlet and contact your Sony dealer. The<br />
battery pack may be damaged.<br />
The remaining battery time indicator<br />
does not indicate the correct time.<br />
• The temperature of the environment is too<br />
high or too low. This ix not a malfimction.<br />
• Fully charge the battery again. If the<br />
problem persists, replace the battery pack<br />
with a new one (p. 21).<br />
• The indicated time may not be correct<br />
depending on the environment of use.<br />
The battery pack is quickly<br />
discharged.<br />
• Tbc temperature of the environment ixtoo<br />
high or low. This ix not a malfunctkm.<br />
• Fully charge the batte U again. If the<br />
problem persists, replace the battery pack<br />
with a new one (p. 21).<br />
The buttons do not appear on the<br />
touch panel.<br />
• Touch the LCD screen lightly.<br />
• Press DISP/BATT INFO on your<br />
camcorder (or DISPLAY on the Remote<br />
Commander) (p. 26).<br />
The buttons on the touch panel do<br />
not work correctly or do not work at<br />
all.<br />
• Adjust the touch panel ([CALIBRATION])<br />
(p. 111).<br />
Menu items are grayed out.<br />
• You cannot select grayed items in the<br />
current recording/playback situation.<br />
• There are some functions you cannot<br />
activate simultaneously (p. 99).<br />
The image in the viewfinder is not<br />
clear.<br />
• Move the vim_finder lens a_ljustment lever<br />
until the image appears clearly (p. 26).<br />
The image in the viewfinder has<br />
disappeared.<br />
• No image ix displayed in the viewfinder<br />
when the LCD panel is open (p. 26).<br />
The disc cannot be removed.<br />
• Make sure the power source (battery pack<br />
or AC Adaptor) ix connected correctly<br />
(p. 21).<br />
• The disc ix damaged or is dirty with<br />
fingerprints, etc. In this case, it rely take up<br />
to 10 minutes to remove the disc.<br />
• The temperature of your camcorder is<br />
extremely high. Turn oft" your camcorder<br />
and leave it for a while in a cool place.<br />
• Finalizing is interrupted by turning off your<br />
camcorder. Turn on your camcorder and<br />
remove the disc after finalizing is<br />
completed (p. 58).<br />
Images cannot be deleted.<br />
• The maximum numher of images that you<br />
can delete on the index screen at one time<br />
is 100.<br />
• hnages cannot be deleted depending on the<br />
type and mode of a disc (p. 15).<br />
Remaining disc space indicator is<br />
not displayed.<br />
• Set 11_ REMAINING] Io ION] Io dways<br />
display the remaining disc space indicator<br />
(p. 69).<br />
The indicators of the disc type and<br />
the recording format on the LCD<br />
screen are grayed out.<br />
=-<br />
• The disc rely have been cre m:dx_itha<br />
device other than your canlcorder. You can<br />
Continued._ g3
g4<br />
Trssb_sshsstisS/Ss_tisssd}<br />
play back the disc with your camcorder.<br />
but you cannot record additional scenes.<br />
You cannot operate functions using<br />
the "Memory Stick Duo."<br />
• If you use a "Memory Stick Duo"<br />
formatted on a computer, format it again on<br />
your camcorder (p. 63).<br />
You cannot delete images, or format<br />
the "Memory Stick Duo."<br />
• The maximum numher of images that you<br />
can (Mete on the index screen at one time<br />
is 100.<br />
• You cannot delete the images protected on<br />
another device.<br />
The data file name is incorrect or<br />
flashing.<br />
• The file is broken.<br />
• Use the file format that is compatihlc with<br />
your c Hncorder (p. 1117).<br />
Refer also to "Discs/"Memory Stick Duo ....<br />
(p. 93).<br />
Pressing START/STOP does not<br />
record movies on the disc.<br />
• The playback screen is displayed. Set your<br />
camcorder to recording standby (p. 34).<br />
• Your camcorder is recording the scene you<br />
have just shot on the disc.<br />
• The disc has run out of space. Use a new<br />
disc or format the disc (DVD-RW/<br />
DVD+RW only, p. 62). Or delete the<br />
unnecessary images (p. 48).<br />
• When you are using one of the following<br />
discs after finalizing it, make the disc to be<br />
able to record idditional scenes (p. 64). Or<br />
use a new disc.<br />
DVD+RW<br />
DVD-RW recorded with HD (high<br />
definition/ image quality<br />
DVD-RW (VIDEO mode) recorded with<br />
SD (standard definition) image quality<br />
• The temperature of your camcorder is<br />
extremely high. Turn off your camcorder<br />
and leave it lk)ra while in a cool place.<br />
• Moisture condensation has occurred with<br />
the disc. Turn off your camcorder and<br />
leave it lk)r about I hour in a cool place<br />
(p. I I0).<br />
You cannot record a still image.<br />
• The pla54_ack screen is disph,yed. Set your<br />
camcorder to recording standby (p. 34).<br />
• The "Memory Stick Duo" has run out of<br />
sp ice. Use a new "Memory Stick Duo" or<br />
format the "Memory Stick Duo" (p. 63). Or<br />
delete the unnecessary images (p. 49).<br />
• You cannot record a still image together<br />
with:<br />
[SMTH SLW REC]<br />
[FADER]<br />
[D.EFFECT]<br />
[PICT.EFFECT]<br />
• You cannot record a still image on a disc<br />
OIX your camcorder.<br />
The ACCESS lamp lights up even<br />
when you stop recording.<br />
• Your camcordcr is recording the scene you<br />
have just shot on the disc.<br />
The recording angle looks different.<br />
• The recording angle may look different<br />
depending on the mode of your camcordcr.<br />
This is not a mall?ruction.<br />
The flash does not work.<br />
• You cannot record with the flash _ith:<br />
Capturing still images while shooting a<br />
movie<br />
The conversion lens (optional) attached<br />
• Even if auto flash or (_) (Auto redeye<br />
reduction) is selected, you cannot use the<br />
flasll with:<br />
NightShot<br />
[SUPER NIGHTSHOT]
[TWILIGHT], [CANDLE],<br />
[SUNRISE&SUNSET], [FIREWORKS]<br />
[LANDSCAPE], [SPOTLIGHT],<br />
[BEACH] or[SNOW] in [SCENE<br />
SELECTION]<br />
[MANUAL] ill [EXPOSURE]<br />
[SPOT METER]<br />
The actual recording time for movie<br />
is less than the expected<br />
approximate recording time of a<br />
disc.<br />
• Depending on an object, such ;is a fast<br />
moving object, the time available for<br />
recording may shorten (p. 16).<br />
The recording stops.<br />
• The temperature of your Caglcordcr is<br />
extremely high. Turn off your camcorder<br />
and leave it lbr a while in a cool place.<br />
• Moisture condensation has occurred with<br />
the disc. Turn off your camcorder and<br />
leave it about 1 hour in a cool place<br />
(p. 110).<br />
There is a time difference between<br />
the point where you press START/<br />
STOP and the point that the<br />
recorded movie starts/stops.<br />
• On yo/ir camcordcr, there may bca slight<br />
time difference bclwccn the point where<br />
you press START/STOP and the actual<br />
point that recording movie starts/stops.<br />
This is not a malfunction.<br />
The movie aspect ratio (16:9/4:3)<br />
cannot be changed.<br />
• You cannot change the aspect ratio when:<br />
recording movies with HD (high<br />
definition) image quality.<br />
recording movies on DVD+RW with SD<br />
(standard definitkm) image quality.<br />
there is no disc in your camcorder.<br />
The auto focus does not function.<br />
• Set IFOUUSI to IAUTOI (p. 81).<br />
• The recording conditions are not suitable<br />
for auto lbcus. A([just the focus manually<br />
/p. 81).<br />
[STEADYSHOT] does not function.<br />
• Set [STEADYSHOT] to ION] (p. 68).<br />
• [STEADYSHOT] may not be able to<br />
compensate for excessive vibrations.<br />
The BACK LIGHT function does not<br />
function.<br />
• The BACK LIGHT function does not work<br />
during Easy Handycam operation.<br />
The subjects passing by the frame<br />
very fast appear crooked.<br />
• This is called tile focal phmc phenomenon.<br />
This is not a malfunction. Because (71the<br />
way the image device (CMOS sensor)<br />
reads ()titimage signals, the subjects<br />
passing by the frame rapidly might appear<br />
crooked depending on the recording<br />
conditions.<br />
Tiny spots in white, red, blue, or<br />
--4<br />
green appear on the screen. __<br />
• The spols appear when you are recording _"<br />
wilh [SUPER NIGHTSHOT] or [COLOR<br />
SLOW SHTR]. This is not a malfunction.<br />
The color of the image is not<br />
correctly displayed.<br />
• Set tile NIGHTSHOT switch to OFF<br />
/p. 37).<br />
The screen image is bright, and the<br />
subject does not appear on the<br />
screen.<br />
• Set tile NIGHTSHOT switch to OFF<br />
(p. 37).<br />
The screen image is dark, and the<br />
subject does not appear on the<br />
screen.<br />
Continued._ g5
g6<br />
TrssNsshsstisS/Sostisssd}<br />
• Press and hold DISP/BATT INEO for a<br />
few seconds to turn on the backlight<br />
(p. 26).<br />
Horizontal stripes appear on the<br />
image.<br />
• This occurs when recording images under a<br />
fluorescent lamp, sodium lamp, or mercury<br />
lamp. This is not a malflmction.<br />
Black bands appear when you<br />
record a TV screen or computer<br />
screen.<br />
• Set [STEADYSHOT] to [OFEI (p. 68)<br />
(<strong>HDR</strong>-<strong>UX5</strong>).<br />
[SUPER NIGHTSHOT] cannot be<br />
operated.<br />
• Set the NIGHTSHOT switch to ON.<br />
[COLOR SLOW SHTR] does not<br />
operate correctly.<br />
• [COLOR SLOW SHTR] may not operate<br />
correctly in total darkness. Use NightShot<br />
or [SUPER NIGHTSHOT].<br />
You cannot adjust [LCD BL LEVEL].<br />
• You cannot CJdjust [LCD BL LEVEL]<br />
whenl<br />
The LCD panel is closed on your<br />
camcorder with the LCD screen fiJcing<br />
out.<br />
The po_ er is supplied from the AC<br />
Adaptor.<br />
You cannot play back a disc.<br />
• Slide the POWER s_itch to turn on your<br />
camcorder and press _ (VIEW<br />
IMAGES).<br />
• On the HOME MENU, touch _ (VIEW<br />
IMAGESL then [VISUAL INDEX].<br />
• Check out the disc compatibility (p. 15).<br />
• Insert a disc with the recording side facing<br />
your camcorder (p. 27).<br />
• The disc that was recorded, formatted, of<br />
finalized on other devices may not be<br />
played back on your camcorder.<br />
The playback image is distorted.<br />
• Cle_mthe disc .sing a soft cloth (p. 106).<br />
Still images stored on a "Memory<br />
Stick Duo" cannot be played back.<br />
• Still images cannot bc phucd back it"you<br />
have modified files or folders, or have<br />
edited the data on a computer. (The file<br />
name flashes in that case.) This is not a<br />
malfilnction (p. 108).<br />
• Still images recorded on other devices may<br />
not be played back, or may be displayed in<br />
wrong size. This is not a malfllnction<br />
(p. 108).<br />
"[Z]" is indicated on an image in the<br />
VISUAL INDEX screen.<br />
• Loading of the data may have failed. It may<br />
be indicated correctly when you turn off<br />
the power and then turn it on agaim or<br />
repeat removing and inserting the<br />
"Memory Stick Duo" a couple of times.<br />
• This may appear on still images recorded<br />
on other devices, edited on a computer, etc.<br />
No sound or only a quiet sound is<br />
heard when playing back a disc.<br />
• Turn up the vohnne (p. 41).<br />
• Sound is not output when the LCD screen<br />
is closed. Open Ihe LCD screen.<br />
• When you record sound with [MICREF<br />
LEVEL] (p. 85) set to [LOW]_ the recorded<br />
sound may be difficult to hear.<br />
• In case of [SMTH SLW REC]_ you cannot<br />
record sounds during shooting (about 3<br />
seconds).
You cannot play back the disc, or the<br />
disc is not recognized.<br />
• To play back a disc recorded with HD<br />
(high definition) image quality_ you need a<br />
device compatible with AVCHD lbrmat<br />
(p. 60).<br />
• Clean the disc using a soft cloth (p. 106).<br />
• Finalize Ibe disc (p. 56).<br />
• A disc recorded in VR mode cannot be<br />
played back on a device that does not<br />
support VR mode. Check the compatibility<br />
in the instruction manual of the playback<br />
device.<br />
The playback image is distorted.<br />
• Ck'an the disc using a soft cloth (p. 106).<br />
"IT]" is indicated on an image in the<br />
disc menu/DVD menu.<br />
• Loading of the data may have failed _qlen<br />
the disc was finalized. For the following<br />
discs, make the disc capable of additional<br />
recording (p. 64), then remake the disc<br />
menu by finalizing the disc again (p. 58).<br />
The disc menu/DVD menu may be<br />
displayed correctly.<br />
DVD+RW<br />
DVD-RW recorded with HD (high<br />
definition) image qualily<br />
DVD-RW (VIDEO mode) recorded with<br />
SD (standard definition) image quality<br />
Playback freezes for an instant<br />
between the scenes.<br />
• The image may freeze for an instant<br />
between scenes depending on the device<br />
being used. This ix not a malfimctkm.<br />
• In case of DVD+R DL, the image may<br />
freeze for an instant when the recording<br />
layer changes. This is not a malfunction.<br />
Playback does not move to the<br />
previous scene when you press<br />
I
g8<br />
TrssNsshsstisS/Ssstisssd}<br />
Unable to copy the images from a<br />
disc to a "Memory Stick Duo."<br />
• You cannot copy a movie from a disc to a<br />
"Memory Stick Duo" as a still image<br />
during playback on your camcorder.<br />
Unable to finalize.<br />
• Battery is running out during finalizing.<br />
Use the AC Adaptor.<br />
• The disc has already been finalized. In the<br />
case of following discs, follow the required<br />
procedure to record additional material<br />
(p. 64):<br />
DVD+RW<br />
DVD-RW recorded with HD (high<br />
definition) image quality<br />
DVD-RW (VIDEO mode) recorded with<br />
SD lstandard definition/ image quality<br />
Unable to perform [UNFINALIZE].<br />
• You cannot perform [UNFINALIZE] on<br />
the following discs:<br />
DVD-R<br />
DVD+R DL<br />
DVD+RW recorded with SD Istandard<br />
definition) image quality<br />
DVD-RW (VR mode) recorded with SD<br />
(standard definition/ image quality<br />
You cannot edit or record additional<br />
material on a disc using other<br />
devices.<br />
• You may not be able to edit a disc recorded<br />
on your camcorder using other devices.<br />
You cannot view the image or hear<br />
the sound on the TV.<br />
• When you are using the component video<br />
cable, sol [COMPONENT] according to<br />
the requirements of the connected device<br />
(p. 77).<br />
• when you are using Ibe component vide()<br />
cable, make sure the red and white plugs of<br />
the A/V connecting cable arc connected<br />
(p. 44).<br />
• hnages arc not output from the HDMI<br />
OUT jack, it"copyright protection signals<br />
are recorded in Ihe images.<br />
You cannot hear the sound.<br />
• When you arc using the component video<br />
cable, make sure the red and white plugs of<br />
the A/V connecting cable are connected<br />
(p. 44, 46).<br />
• When you are using the S VIDEO plug,<br />
make sure the red and white plugs of the A/<br />
V connecting cable are connected (p. 46).<br />
The image appears distorted on the<br />
4:3 TV.<br />
• This happens when viewing a image<br />
recorded in the 16:9 (wide) mode on a 4:3<br />
TV. Set [TV TYPE] correctly (p. 76) and<br />
play back the image.<br />
Black bands appear at the top and<br />
bottom of the screen of the 4:3 TV.<br />
• Tbis happens _hcn viewing a image<br />
recorded in the 16:9 (wide) mode on a 4:3<br />
TV. This is not a malfimction.<br />
You cannot dub correctly.<br />
• You cannot dub images using the HDMI<br />
cable.<br />
• The A/V connecting cable is not connected<br />
properly. Make sure that the A/V<br />
connecting cable is connected to the proper<br />
jack, i.e. to the input jack of another device<br />
for dubbing a image from your camcorder<br />
(p. 53).
When using the movies on a disc, a<br />
computer does not recognize your<br />
camcorder.<br />
• Install Picture Motion Browser (p. 88).<br />
• Disconnect the USB device other than the<br />
kesq_oard, the mouse, and the camcorder<br />
from the computer.<br />
• Disconnect the cable from the computer<br />
and camcorder_ restart the cotilpllter_ then<br />
connect them again correctly.<br />
Cannot use the supplied software,<br />
Picture Motion Browser, on the<br />
Macintosh computer.<br />
• YOLI cannot use Picture Motion Browser on<br />
a Macintosh.<br />
The following list shows examples of<br />
unworkable combinations of l)mctions and<br />
menu items.<br />
BACK LIGHT ISPOT METER],<br />
IFIREWORKS],<br />
[MANUAL] in<br />
[EXPOSUREI<br />
[SCENE NightShoL ISUPER<br />
SELECTION] NIGHTSHOT[,<br />
[COLOR SLOW<br />
SHTR], [OLD<br />
MOVIE[, [TELE<br />
MACRO], [FADER]<br />
[SPOT METER] NightShoL [SUPER<br />
NIGHTSHOT]<br />
[EXPOSURE] NightShoL [SUPER<br />
NIGHTSHOT]<br />
[WHITE BALl NightShot, [SUPER<br />
NIGHTSHOT]<br />
[ONE PUSH] in [SMTH SLW REC]<br />
[WHITE BAL.]<br />
ISPOT FOCUS] ISCENE SELECTION]<br />
ISUPER IFADER], ID.EFFECT]<br />
NIGHTSHOT]<br />
[COLOR SLOW [FADERI,<br />
SHTR] [D.EFFECT], [SCENE<br />
SELECTION]<br />
[FADER] [SUPER<br />
NIGHTSHOT],<br />
[COLOR SLOW<br />
SHTR]_ [D.EFFECT],<br />
ICANDLE],<br />
[FIREWORRSI<br />
[D.EFFECTI [SUPER<br />
NIGHTSHOT],<br />
[COLOR SLOW<br />
SHTR], [FADER]<br />
[OLD MOVIE] [SCENE SELECTION],<br />
[PICT.EFFECT]<br />
[PICT.EFFECT] [OLD MOVIE]<br />
[STEADYSHOT] [SMTH SLW REC]<br />
(<strong>HDR</strong>-<strong>UX5</strong>)<br />
[TELE MACRO] [SCENE SELECTION]<br />
[AUTO SLW [SMTH SLW REC],<br />
SHUTTR] [D.EFFECT]_ [SCENE<br />
SELECTION],<br />
[COLOR SLOW<br />
SHTRI, [SUPER<br />
NIGHTSHOT]<br />
[AE SHIFT] [FIREWORKS],<br />
[MANUAL] in<br />
[EXPOSURE]<br />
[WIDE SELECT] [OLD MOVIE]<br />
gg
100<br />
Warningindicatorsand messages<br />
If indicaturs appear on tile LCD screen or in<br />
the viewfiuder, check tile fullowiug.<br />
Some symptoms you can fix by yuurself. If<br />
the problem persists even alter you have<br />
tried a couple of times, contact yuur Sony<br />
dealer or local authorized Sony service<br />
facility.<br />
:0a:00<br />
C: (or E:) D[3:D[3 (Self-diagnosis<br />
display)<br />
C:04:r3r3<br />
• The battery pack is not an "InfuLITHIUM"<br />
battery pack. Use an "InfoLITHIUM"<br />
battery pack (p. 108).<br />
• Connect the DC plug of the AC Adaptor to<br />
the DC IN.jack of your camcorder securely<br />
(p. 21).<br />
C:13:F3r3<br />
• The disc is faulty. Use a compatible disc<br />
with your camcorder lp. 15).<br />
• The disc is dirty or has scratches on it.<br />
Clean the disc wilh a soft cloth (p. 106).<br />
C:32:r3r3<br />
• Symptoms that are not described above<br />
have occurred. Remove and insert the disc,<br />
then operate your camcorder igain.<br />
• Remove Ihe power source. Reconnect it<br />
and operate yotlr camcorder again.<br />
• Turn on your camcorder again.<br />
E:20:r313 / E:31 :r3r3 / E:61 :r313 /<br />
E:62:F313 / E:91 :r3r3 / E:94:F313<br />
• A nmlfunction that you cannot serxice has<br />
occurred. Contact your Sony dealer or local<br />
authorized Sony service facility. Inform<br />
them of the 5-digit code, which starts from<br />
-E. ,_<br />
101-0001 (Warning indicator<br />
pertaining to files)<br />
Slow flashing<br />
• The fih: is damaged.<br />
• The file is unreadable.<br />
(_ (Warning indicator pertaining to<br />
discs)<br />
Slow flashing<br />
• No disc is inserted.*<br />
• Less than 5 mimltes remains fur recording<br />
movies.<br />
• The disc cannot be reador written, because<br />
the single-sided disc is inserted inside out.<br />
Fast flashing<br />
• An unrecognizable disc is inserted.*<br />
• A finalized disc is inserted into your<br />
camcorder during recording standby.<br />
• The disc is lhlly recorded.*<br />
• The disc recorded in the different TV color<br />
system from your camcorder is inserted<br />
when _ (Movie) is selected.*<br />
_--(You need to remove the disc)*<br />
Fast flashing<br />
• An unrecognizable disc is insellcd.<br />
• The disc is fldly recorded.<br />
• An error might have occurred with the disc<br />
drive in your camcorder.<br />
• A finalized disc is inserted into your<br />
camcorder (p. 56).<br />
_\_ (Battery level warning)<br />
Slow flashing<br />
• The buttery pack is nearly used up.<br />
• Depending on the operating, environment,<br />
or battery conditions, c\_ may flash, even if<br />
there are approximately 20 minutes<br />
remaining.
[J_ (High temperature warning)<br />
Slow flashing<br />
• The temperature, of your camcorder is<br />
getting higher. Tuna off your camcorder<br />
and leave it fi)r a while in a cool place.<br />
Fast flashing*<br />
• The temperature of your camcorder is<br />
extremely high. Turn off your camcorder<br />
and leave it fi)r a while in a cool place.<br />
_ (Warning indicator pertaining to<br />
"Memory Stick Duo")<br />
• No "Memory Stick Duo" is inserted<br />
(p. 29).<br />
_1 (Warning indicators pertaining to<br />
"Memory Stick Duo" formatting)*<br />
• The "Memory Stick Duo" is &m/.gcd.<br />
• The "Memory Stick Duo" is not lbrmatted<br />
correctly (p. 63, 107).<br />
(Warning indicator pertaining to<br />
incompatible "Memory Stick Duo")*<br />
•An incompaiblc "MemoryStick [)uo '_is<br />
inserted (p. 63, 107).<br />
o--. (Warning indicator pertaining<br />
to the write-protect of the "Memory<br />
Stick Duo")*<br />
• The write-protect tab on the "Memory<br />
Stick Duo" is set to lock (p. 1(}7).<br />
• Access to the "Memory Stick Duo" was<br />
restricted on another device.<br />
(Warning indicator pertaining to<br />
the flash)<br />
Fast flashing<br />
• There is something wrong with the flash.<br />
"_& (Warning indicator pertaining to<br />
camera-shake warning)<br />
• The amount of lights is not sufficient, so<br />
camera-shake easily occur',. Use the flash.<br />
• The camcorder is unsteady, so camera-<br />
shake easily occurs. Hold the camcorder<br />
steady with both hands and shoot the<br />
image. However, note that the camera-<br />
shake w irning indicator does not<br />
disappear.<br />
* You hear a melody when the warning indicators<br />
appear on the screen (p, 75).<br />
If tnessages appear on the screen, follow the<br />
instructions.<br />
• Disc<br />
_-- Recording on disc disabled.<br />
• A malfunction has occurred with the disc<br />
and the disc cannot be used.<br />
Playback prohibited.<br />
• You ;ire trying to phJy b;ick an<br />
incompatible disc with your camcorder.<br />
• You are trying to play back an image<br />
recorded with a copyright protection<br />
signah<br />
,_ _-- Need to unfinalize disc.<br />
• To record on the lin_dized DVD+RW/<br />
DVD-RW (VIDEO mode in the case of SD<br />
/standard definition) image quality),<br />
unfinalize it (p. 64).<br />
@ _-- Disc error. Remove disc.<br />
• Your eamcorder cannot recognize the disc,<br />
because the disc is incompatible, has<br />
scratches.<br />
_-- Disc error. Unsupported<br />
format.<br />
• The disc recorded in the diflL,rcnt l_nnmt<br />
code from your camcorder. Formatting the<br />
-'4<br />
=-<br />
Continued._ 101
102<br />
Waraia# iadicatars a_d messa#es {ga[Ria_ed}<br />
disc rely enable you to use the disc on your<br />
camcorder (DVD-RW/DVD+RW only)<br />
(p. 62).<br />
• "Memory StickDuo"<br />
_ Reinsert the Memory Stick.<br />
• Reinsert Ihc "Memory Stick Duo" a f_.,_<br />
times. If even then the indicator fl ishes, the<br />
"Memory Stick Duo" could be damaged.<br />
Try with another "Memory Stick Duo."<br />
_] This Memory Stick is not<br />
formatted correctly.<br />
• Check tile lk)rmat, then format tile<br />
"Memory Stick Duo" with your camcorder<br />
if necessa U (p. 63, 107).<br />
Memory Stick folders are full.<br />
• You cannot create folders exceeding<br />
999MSDCF. You cannot create or delete<br />
created folders using your camcorder.<br />
• Format the "Memo U Stick Duo" (p. 63), or<br />
delete them using your computer.<br />
Cannot save still picture.<br />
• When using the Dual Rec function, donot<br />
remove the still image recording media<br />
from the camcorder until disc recording is<br />
finished and still image recording is<br />
complete (p. 36).<br />
• PictBridge compliantprinter<br />
Not connected to PictBridge<br />
compatible printer.<br />
• Switch off the printer and switch it on<br />
agaim then disconnect the USB cable and<br />
reconnect it.<br />
Cannot print. Check the printer.<br />
• Switch off the printer and switch it on<br />
agaim then disconnect the USB cable and<br />
reconnect it.<br />
• Others<br />
No further selection is possible.<br />
• You can sck'ct up to 100 images at one<br />
time to:<br />
delete images<br />
edit the playlist<br />
print still images<br />
Data protected.<br />
• The disc has been protected _ith another<br />
device.<br />
Cannot divide.<br />
• You cannot divided a movie Ihat is<br />
extremely short.<br />
Recovering data _ Avoid any<br />
vibration.<br />
• Your camcorder tries to recover data<br />
automatically if the data writing was not<br />
perR)rmed properly.<br />
Cannot recover data on disc.<br />
• Writing data to the disc has failed.<br />
Attempts were made to recover the data,<br />
but they were unsuccesslhh<br />
Please wait.<br />
• This is displayed if the disc removal<br />
process takes time. Turn on the canlcorder<br />
and leave it lk)r about 10 minutes.<br />
preventing vibration.
Add#irmaf _tofmMion<br />
Usingyourcamcorderabroad<br />
Powersupply<br />
You can useyour camcorder in any<br />
countries/regions using tile AC Adaptor<br />
supplied with your camcorder within the<br />
AC 100 V to 240 V, 50/60 Hz range.<br />
lIse a commercially available AC plug<br />
adaptor [a], if necessary, depending on the<br />
design of the wall outlet [b].<br />
[<br />
AC-L200/L200B [a] [b]<br />
Viewing images recorded with HD<br />
(high definition)imagequality<br />
In countries/regions where 1080i/60i is<br />
supported, you can view the images with<br />
the same HD (high definition) image<br />
quality as that of the recorded images. You<br />
need an NTSC-system-based and 1080i160i<br />
compatible TV/or monitor) with<br />
component and AI JDIO/VIDEO input<br />
jacks. Both a component video cable and an<br />
A/V connecting cable must be connected.<br />
Viewing images recorded with SD<br />
(standarddefinition)imagequality<br />
To view images recorded with SD/standard<br />
defiuitionl image quality, you need an<br />
NTSC-system-based TV with AUDIO/<br />
VIDEO input jacks. An A/V connecting<br />
cable must be connected.<br />
OnTVcolorsystems<br />
Your camcorder is an NTSC-system-based<br />
camcorder. If you want to view the<br />
playback image on a TV. it must be an<br />
NTSC-system-based TV with an AUDIO/<br />
VIDEO input jack.<br />
B ,hama Islands, Bolivi ,,<br />
Canada, Central America,<br />
Chile, Colombia, Ecuador,<br />
NTSC Guyana, Jamaica, Japan, Korea,<br />
Mexico, Peru, Surinam, Taiwan,<br />
the Philippines, the U.S.A.<br />
Venezuela, etc.<br />
Australia, Austria, Belgium,<br />
China, Czech Republic,<br />
Denmark, Finland, Germany,<br />
Holland, Hong Kong, Hungary,<br />
PAL Italy, Kuwail, Malaysia, New<br />
Zealand, Norway, Poland,<br />
Portugal, Singapore, SIovak<br />
Republic, Spain, Sweden,<br />
Switzeflan& Thailand, United<br />
Kingdom, etc.<br />
PAL- M Brazil<br />
PAL- N Argentina, Paraguay, Uruguay.<br />
Bulgaria, France, Guiana, Dan,<br />
SECAM lraq, Monaco, Russia, Ukraine,<br />
etc.<br />
m.<br />
=Z<br />
3<br />
g<br />
Continued._ 103
104<br />
Usi_ you_ cam¢o_d÷_ab_oa_{go_i_÷d}<br />
Settingto the local time<br />
You c:m easily set the clock to the local time by settin_ a time difference when usin_ your<br />
camcorder abroad. Sel _ (SETTINGS) _ [CLOCK/_ILANG] _ [AREA SET] _md [DST<br />
SETI/[SUMMERTIME] on the HOME MENU (p. 24).<br />
Worldtimedifference<br />
+1+2::+3+4+5 - 0-9i- i-7 -6i-5 -2 i -1 4i-3<br />
GMT I,isbon. I,ondon<br />
+01:00 Berlin. Paris<br />
+02:00 Helsinki, Cairo. Islanbu[<br />
+03:00 Moscow, Nairobi<br />
+03:30 Tclnan<br />
+(N:00 Abu I)habi, Baku<br />
+04:30 Kabul<br />
+(/_:00 Karachi, Islamabad<br />
+05:30 Calcutta, New I)elhi<br />
+0_:00 Alma U, I) haka<br />
+0_:30 Rangoon<br />
+07:00 Bangkok, Jakalla<br />
+08:00 HongKong, Singapore, Beiiing<br />
+(N;00 Seouk Tokyo<br />
+(N:30 Adelaide I)m win<br />
+10:00 Melbourne, Sydney<br />
",, %..<br />
+ I 1:00 Solomon Is<br />
+ 12:00 FiJL Welli nglon<br />
12:00 Ini we_ok, K walalei n<br />
1 I:00 Midway Is. Samoa<br />
10:00 H iwaii<br />
09:00 Alaska<br />
08:00 I,osAngeles, Tiiuana<br />
4)7:00 I)envel, Arizona<br />
4)6:(X) Chicago, Mexico City<br />
4)5:00 NewYolk, I3ogola<br />
4)4:(X) Santiago<br />
4)3:30 S[ John's<br />
4)3:00 Brasilia. Montevideo<br />
02:00 t'cnlando de Nomnha<br />
_,)1:00 Azoles, Cape Velde Is
Precautionsand maintenance<br />
See page 15 for the details of discs<br />
which you can use with your<br />
camcorder.<br />
Notes on use<br />
• Huld the disc by its edge while supporting<br />
the center hole lightly. Do not touch the<br />
recording side (the oppusite of the printed<br />
side when using a single-sided disc).<br />
• Before shooting, be sure to remove dust<br />
and fingerpriuts from the disc with a suft<br />
cloth. Otherwise you may not be able to<br />
record or play normally in some situations<br />
using that disc.<br />
• When you set the disc in your camcorder,<br />
press firmly until it clicks. When the<br />
message [C:13:r-lUl] appears on the LCD<br />
screen, open the disc cover and set the<br />
disc again.<br />
• Do not attach any adhesive material such<br />
as a sticker on the surface of a disc. If you<br />
do so. the disc may become unbalanced.<br />
and this may cause a malfunction of the<br />
disc or your camcorder.<br />
Useof double-sidediscs<br />
Duuhle-sided discs allow you to record<br />
both sides of a disc.<br />
N Recordingon the A side<br />
Place the disc in yuu rcamcurder with the side<br />
with the [] symbul at the center facing<br />
outwards until it clicks.<br />
[] symbol<br />
Place the [] symbol lacing<br />
Oil[wards.<br />
RecoMing is made on lhe rear side.<br />
• W hen uiu_, s (r a duuble-slded disc. ake care<br />
not to smudge the surface with<br />
fiu_erprinls.<br />
• When a double-skied disc is used in your<br />
camcurder, recording/playback are<br />
perlkwmed on that side only. You cannot N"<br />
swilch lU recurd un or play back the other<br />
side with the disc set tu the camcurder.<br />
When recordiug/playback of one side is<br />
complete, remove the disc and turn it over<br />
tu access the other side.<br />
• Perfurm the following operations on each<br />
side of a double-sided disc:<br />
Finalizing lP. 561<br />
Unfinalizing (p. 64)<br />
Formauing (p. 62)<br />
Continued._ 105
106<br />
Pr++a+_+++++a++ ma++te+a+++ {g+++t++m++}<br />
Care and storage of the discs<br />
• Keep tile disc clean, or tile inmge quality<br />
of the audio and video output may<br />
deteriorate.<br />
• (!lea+) the disc with a soft cloth.<br />
Wipe the disc from the center out. For<br />
dirt. clean the disc with a soft cloth<br />
slightly moistened in water, then remove<br />
the moisture with a soft. dry cloth. Do not<br />
use solvents such as benzine, cleaners<br />
intended for vinyl LPs or antistatic spray,<br />
as they may cause a malfimction to the<br />
disc.<br />
• Do not expose the disc to direct sunlight<br />
or leave it in a humid place.<br />
• When you carry or store the disc. put it in<br />
its case.<br />
• When you want to write letters or marks.<br />
etc. on a single-sided disc. write only on<br />
the printed side using an oil-based marker<br />
with a felt-tip, and do not touch the ink<br />
until it dries. Do not heat the disc or use a<br />
sharp-pointed tool. such as ball point pen.<br />
Do not dry the surface by heating. You<br />
cannot write, or mark. on double-sided<br />
discs.<br />
Your digital vide() camera recorder<br />
incorporates both the AVCHD format and<br />
the DVD format for the recording function.<br />
What is the AVCHDformat?<br />
The AVCHD format is a high definition<br />
digital video camera format used to record<br />
an HD (high defiuitionl signal of either the<br />
1080i specification *_ or the 720p<br />
specification'::h using efficient data<br />
compression coding technology. The<br />
MPEG-4 AVC/H.264 format is adopted to<br />
compress video data. and the Dolby Digital<br />
or Linear PCM system is used to compress<br />
audio data.<br />
The MPEG-4 AVC/H.264 format is capable<br />
of compressing images at higher efficiency<br />
than that of the conventional image<br />
compressing format. The MPEG-4 AVC/<br />
H.264 format enables a high definition<br />
(HD) video signal shot on a digital video<br />
camera recorder to be recorded OIt _ ClU<br />
DVD discs.<br />
Recordingandplaybackonyour<br />
camcorder<br />
Based on the AVCHD format, your<br />
camcorder records with the HD (high<br />
definition) image quality mentioned below.<br />
Video signal:<br />
AVCHD format 1440 x 1080/60i<br />
Audio signal:<br />
Dolby Digital 5.1 ch<br />
Recording media:<br />
8 cm DVD-RW. DVD+RW. DVD-R.<br />
DVD+R DL discs<br />
• DVDs recorded in AVCHD iormat other than<br />
the above mentioned cannot be played on your<br />
camcorder. 8 cm DVD-RAM discs cannot be<br />
recorded or played Oll yOlll +canlcorder,<br />
In additiou to HD (high definition) image<br />
quality, your camcorder is capable of<br />
recording an SD (standard definition) signal<br />
in the conventional DVD format.<br />
'q: 1080i specification<br />
A high definition specification which utilizes<br />
1080 etli:ctive scanning lines and the interlace<br />
system.<br />
_2: 720p specificution<br />
A high definition specification which utilizes 720<br />
ellcctive scanning lines and the progressive<br />
syslem+
A "Memory Stick" is a compact, portable<br />
IC recording medium with a large data<br />
capacity.<br />
You can use only a "Memory Stick Duo."<br />
which is about the half size of a standard<br />
"Metnory Stick." with your camcorder.<br />
However. we do not guarantee the<br />
operation of all types of "Memory Stick<br />
Duo" oil your camcorder.<br />
"Memory Stick"<br />
lwithout MagicGate)<br />
"Memory Stick Duo "*_ O<br />
(without MagicGate)<br />
"MagicOate Memory Stick"<br />
"Memory Stick Duo "*_ O *2*a<br />
/with MagicGate)<br />
"M igicOate Memory Stick ©*3<br />
D/io _ "1<br />
"Memory Stick PRO"<br />
"Memory Stick PRO Duo" *_ O *2*a<br />
.1 A "Memory Stick Duo" is about half lhe size of<br />
a standard "Memory Stick."<br />
*a The lypes of '*Memol T Stick" lhat supporl higll<br />
speed dala lransfi:r. The speed of data translPr<br />
varies depending on tile device 1o be used.<br />
*a "MagicGate" is a copyrigla protection<br />
teclmology thal records and transfi:rs lhe<br />
contents ill an Cllcrypled l_)rlnat. N0tc that d_,la<br />
tllal uses "MagicGate" lechnology cannol be<br />
recorded or played on yollr camcorder.<br />
• Still image lormat: Your canlcorder compresses<br />
and records image dala in tile JPEG (Joinl<br />
Pholographic Experls Group) fi)rmal. Tile file<br />
extension is ' .JPG."<br />
• File nanles of still images:<br />
101- {RRII: This file name appears on the<br />
screen of your camcorder.<br />
DSC00001 .JPG: This file nanle appears on<br />
lhe display of a conlpuler.<br />
• A "Memory Stick Duo" lk)rnlaucxl by a<br />
conlputer/Windows OS/Mac OS) does not have<br />
guaranleed compatibilily wilh your calncorder.<br />
• Data read/write speed may vary depending on<br />
the combination of the "Menlol 3, Slick" and<br />
"Menlory Slick '' colnp]ianl product you use.<br />
On a "Memory Stick Duo" with a<br />
write-protect tah<br />
You can prevent accident_ erasure of<br />
images whett you slide the write-protect tab<br />
on the "Memory Stick Duo" with a small<br />
tapered object, to the write-protect position.<br />
Notes on use<br />
Damaged or lost image data will not be<br />
compens:ded for. and may occur in the<br />
following cases:<br />
• If you cjecl the 'Menlol 3, Stick Duo," lurn tile<br />
power oil on your catllc()rder, or renlove the<br />
battery pack fi)r replacenlent while your<br />
camcorder is reading or wriling image files on<br />
the "Memory Stick Duo"/while lhe access lanlp<br />
is Ill or flashing).<br />
• If you use tile "Memory Stick Duo" near<br />
inagnels or magnetic fields.<br />
It is recommended you make a back-up of<br />
important data on the hard disk of a<br />
conlputer.<br />
N On handling a "Memory Stick"<br />
Keep the lk)lh)wiug in mind when handling<br />
a "Memory Stick Duo."<br />
• Be carefid not to apply excessive lorce when<br />
wriling on a nlcmo area on a "Memory Stick<br />
DIÂo. _'<br />
Do not auacll a label or lhe like on a "Memory<br />
Stick Du(f' or a Memory Stick Duo adaptor.<br />
When you can'y or slorc a ' Menlory Slick Duo."<br />
put it in ils case.<br />
Do not touch, or allow metallic objects to colne<br />
Jilt()conlact with tile ternlinals,<br />
Do not bend, drop or apply strong b_rce lo tile<br />
'Memory Stick Duo."<br />
Do not disassemble or nlodily tile 'Memory<br />
Stick Duo."<br />
Do not let file "Memory Stick Duo" gel wet.<br />
• Be carotid 1o ke_p "Menlol T Stick Duo" media<br />
oul of lfie reach of small childrcn. Their is<br />
danger thai a child nlighl swallow il.<br />
m.<br />
=Z<br />
3<br />
g<br />
Continued"* 107
108<br />
Pr++a+_+++++a++ ma++t++a+++ {g+++t++m++}<br />
• Do not insert anything other than a "Memory<br />
Stick Duo" into the +'Memo W Stick Duo" slot.<br />
Doing so may cause a nlulfimction.<br />
@ On a location for use<br />
Do nut use or keep tile "Memory Stick<br />
Duu" in the fulluwing lucatiutts:<br />
• Places subject to cxtrcmely high temperature,<br />
such as a car parked outside in the summer.<br />
• Places under direct sunlight.<br />
• Places with extremely high humidity or subject<br />
1o corl+oSive gases.<br />
M On the Memory Stick Duo adaptor<br />
After ittsertittg a "Memory Stick Duo" into<br />
the Memory Stick Duo udaptor, yuu can use<br />
it with a standard "Memury Stick"<br />
compliant device.<br />
• When using a "Memory Stick Duo" with a<br />
+'Memoly Stick" compliant device, be sure to<br />
insert the "Memory Stick Duo" into a Memory<br />
Stick Duo adaptor.<br />
• When inserting a "Memory Stick Duo" into a<br />
Memo W Stick Duo adaptor, make sure file<br />
'Memo W Stick Duo" is inserted luting in the<br />
correct direction, thm] insert it all the way in.<br />
Note that improper u+ may cause a<br />
malfunction. Also, if you lorce the "Memory<br />
Stick Duo" into the Memory Stick Duo adaptor<br />
in the wrong direction, it nlay be damaged.<br />
• Do not insert a Memory Stick Duo adaptor<br />
without a "Memory Stick Duo" attached. Doing<br />
so nlay result in malflmctions of the uniL<br />
M On a "Memory Stick PRODuo"<br />
The maximum memury capacity of a<br />
"Memory Stick PRO Duu" that can be used<br />
uu your camcurder is4 GB.<br />
Onimagedatacompatibility<br />
• Image data files recorded on a 'lMemol 3, Stick<br />
Duo" by your camcorder COll_)lnl [(Jthe<br />
"Design rule for Camera File system" univm:sal<br />
standard established by the JEITA (Japan<br />
Electronics and Inb_rnlation Technok_gy<br />
Industries Association).<br />
• On your camcorder, you cannot play back still<br />
images recorded on other devices (DCR-<br />
TRV900 or DSC-D700/D770) thai do not<br />
conkmn to the universal standard. (The_<br />
models are not sold in some regions.)<br />
• If you cannot use a "Memol 3' Stick Duo" that<br />
has been used with another device, b_wmat it<br />
with your camcorder (p. 63). Note that<br />
lonnatting erases all inlbrmation on the<br />
+'Menlory Stick Duo."<br />
• You may not be able to play back images with<br />
your cglnlcorder:<br />
When playing back image data modified on<br />
your computer+<br />
When playing back image data recorded with<br />
other devices.<br />
Your camcorder operates unly with att<br />
"InfuLITHIUM" battery pack (H series).<br />
"InfoLITHIUM" H series battery packs<br />
haxe file ('j)+._our_,u_ ,_ tnark.<br />
What is an "InIoLITHIUIVI" battery<br />
pack?<br />
An "htfuLITHIUM" battery pack is a<br />
lithiumqott battery pack that has functions<br />
for communicatittg informatiott related tu<br />
operating conditions between your<br />
camcorder and an optional AC Adaptor/<br />
charger.<br />
The "hffuLITHIUM" battery pack<br />
calculates the puwer consumptiott<br />
according to the operating conditions of<br />
your camcorder, and displays the remaining<br />
battery time in mittutes.<br />
With an AC Adaptor/charger. the remaitting<br />
battery time and charging time appear.<br />
The battery pack NP-FH70 supplied with<br />
<strong>HDR</strong>-UX7 is compatible with<br />
"ActiFORCE." "ActiFORCE" is a ttew<br />
getteratiott power system. Battery capacity,<br />
boost charge, and the speed and accuracy uf<br />
battery time remaitting calculations have<br />
been improved when compared with<br />
current "htfuLITHIUM" P-series batteries.
To chargethe battery pack<br />
• Be sure to charge the battm T pack belore you<br />
sttlrt rising yotlr calncorder+<br />
• We rccolnnlend cllarging tile battcry pack in ml<br />
mnbienl temperature ol between 10 °C to 30 °C<br />
(50 °F to 86 OF) until tim CHG (clmrge) lmnp<br />
turns oil. If you charge the battery pack outside<br />
of this tenlperamre range, you nlay not be able<br />
to charge it elliciently.<br />
• After charging is conlplete, disconnect the cable<br />
fiom the DC IN jack on your camcorder or<br />
remove the battery pack.<br />
To usethe batterypack effectively<br />
• Battery pack perlkwnlance decrcases wllen tile<br />
surrounding tenlperature is 10 °C (50 OF) or<br />
below, and tile lengtll of tftne you can use file<br />
battcry pack becolnes shorter. In that case. do<br />
one olthe b.)llowing to use the battely pack lbr a<br />
longer time.<br />
Put tile battery pack ill a pocket to warm it up.<br />
and insert it in your camcol'der right bel_)rc<br />
yo/I start Inking shots.<br />
U_ a large capacity battcry pack: NP-FH 100<br />
(optional).<br />
• Frequent use of the LCD scrccn or a ftequent<br />
playback, li_st ft)rward or rewind operation<br />
wears out the battery pack lastcr.<br />
We rccomnlcnd using a large capacity battery<br />
pack: NP-FH 1{1{}.<br />
• Be sure to set file POWER switch to OFF<br />
(CHG) when not recording or playing back on<br />
your camcorder. The batte W pack is also<br />
COllSUll/ed when your canlcorder is ill recording<br />
standby or playback pause.<br />
• Have spare battt:ry packs ready Ibr two or thre_<br />
times the expectcd recording filne, and make<br />
trial recordings using a DVD-RW/DVD+RW<br />
beft)rc making the actual recording.<br />
• Do not expose tile battery pack to water. The<br />
battery pack is not water resistanL<br />
Aboutthe remaining batterytime<br />
indicator<br />
• When tile power goes off even fllougll the<br />
renlaining battery time indicator indicates tllat<br />
the battel T pack has enough power to operate.<br />
churge the battery pack ftllly aguin. Remaining<br />
battery tftne will be indicated correctly. Note,<br />
however, that the batte W indication will not be<br />
restored if it is used in high telnperaturcs l_}ra<br />
long time, or if left in a tully charged state, or<br />
when tile battcl'y pack is lrcqtlently tlsed. Use<br />
the remaining battery tftne indication as a rougll<br />
guide only.<br />
• The ,:_X,3 lnark that indicates low battcl 3, flashes<br />
even if thcrc arc still 5 to 10 nlinutes of battery<br />
tinlc renlaining, depending on the operating<br />
condidons or ambient tenlperamre.<br />
Aboutstorageofthebatterypack<br />
• If tile battery pack is not used for a long lime,<br />
l_flly charge tile battcJy pack and use it up on<br />
your canlcorder once a yeilr to lnltintain proper<br />
l_mction. To store tile battery pack, rcm(B e it<br />
li+onl your cmncorder and put it ill a dry, cool<br />
place.<br />
• To discharge file battery pack on your<br />
camcorder completely, touch m_ (SETTINGS)<br />
++4 [GENERAL SET] ++4 [A.SHUT OFF] ++4<br />
[NEVERI on the HOME MENU and leave your<br />
camcorder in recording standby until the power<br />
goes off (p. 78).<br />
Aboutbatterylife<br />
• Battcly capacity decrcases ovcr tftne mM<br />
ttmmgll repeated use. If decrcased usage tinle<br />
between charges becomes significant, it is<br />
probnbly time tO replace it with a new one.<br />
• Each battcry's lift: is governed by storage,<br />
opcrating and environmental conditions.<br />
• x.v.Color is a more lumiliar term lbr tile xvYCC<br />
standard proposed by Sony. and is a tradenlark<br />
of Sony. _"<br />
• xvYCC is an international standard lor color<br />
space in vide(}. Tiffs standm+d can express a 3<br />
wider color range [ball tile currently used<br />
broadcast standard.<br />
Onuseandcare<br />
• Do not use or store tile camcorder and<br />
accessories in tile k)llowing locations:<br />
Anywhere extremely hot or cokl. Never leave<br />
tllenl exposed to temperatures above 60 °C<br />
/ 140 °F). such as under direct sunlight, near<br />
heaters or ill a car parked ill the sun. They<br />
nlay nlallhnction or become &lornled.<br />
Continued._ lOg
110<br />
Pr++a+_+++++a++ ma++te+a+++ (g+g+t++m++}<br />
Near strong magnetic fields or mechanical<br />
vibration. The camcorder may mallunction.<br />
Near strong radii) waves or radiation. The<br />
camcoMer may not be able to record properly,<br />
Near AM receivers and video equipnlcnt.<br />
Noise [nay occur.<br />
On a sandy beach or anywhere dusty, If sand<br />
or dust gets in your camcorder, it may<br />
nmlfimction. Somclimes this mallhnction<br />
cannot be repaired.<br />
Near windows or outdoors, whcre file LCD<br />
screen, tile viewfinder, or the lens may be<br />
exposed to direct sunlight. This damages the<br />
inside of the viewfinder or the LCD screen.<br />
Anywhere very humid.<br />
• Operate your camcorder on DC 6.8 V/7.2 V<br />
/battely pack) or DC 8.4 V /AC Adaptor).<br />
• For DC or AC operation, use the accessories<br />
rccommcnded in these operating instructkms.<br />
• Do not let your camcorder get wet, lbr example.<br />
h'onl rain or sea water. If your canlcorder gets<br />
wet, it may malflmction. Sometimes this<br />
malfunction cannot be repaired.<br />
• If any solid ot_iect or lk]ukl gets inside the<br />
casing, unplug your camcorder and have it<br />
checked by a Sony dealer belore operating it<br />
any fllrther.<br />
• Avoid rough handling, disas+mbling,<br />
modilying, physical shock, or impao such as<br />
hammering, dropping or stepping on the<br />
product, Be particuhu+ly carelhl of the lens.<br />
• Keep the POWER switch setting to OFF/CHG)<br />
when you are not using your calncorder.<br />
• Do not wrap your canlcorder with a towel, lor<br />
example, and operate it. Doing so might cause<br />
heat to build up inside.<br />
• When disconnecting the mains lead. pull it by<br />
the plug and not the cord.<br />
• Do not damage file power cord such as by<br />
placing anyflfing heavy on it.<br />
• Keel? metal contacts clean.<br />
• Keep tile Remote Commander and button-type<br />
battel 3, out of children's reach. If the battery is<br />
accidentally swallowed, consuh a doctor<br />
immediately.<br />
• If the battel 3, electrolytic liquid has leaked:<br />
consuh your local authori/vd Sony scpdcc<br />
li_cility.<br />
wash oflany liquid that may have contacted<br />
your skin.<br />
if any liquid gets in your eyes, wash with<br />
plenty of water and consuh a doctor.<br />
N Whennotusingyourcamcorder fora<br />
longtime<br />
• Periodically turn it on and let it fun such as by<br />
playing back discs or recording lor about 3<br />
minutes.<br />
• Renlove a disc lrolll your calncorder.<br />
• Use up tile battery pack complctely belore<br />
storing it.<br />
Moisturecondensation<br />
If your camcorder is brought directly from a<br />
cold place to a warm place, moisture may<br />
condense inside your camcorder, on the<br />
surface of the disc. or on the pickup lens.<br />
This may cause a malfunction to your<br />
canlcorder.<br />
@ It moisture condensationhas occurred<br />
Leave your camcorder for about I hour<br />
withottt tm'ning it on.<br />
N Noteonmoisturecondensation<br />
Moisture may condense when you bring<br />
your camcorder from a cold place into a<br />
warm place (or vice versa) or when you use<br />
your camcorder in a humid place as<br />
follows:<br />
• You bring your camcorder hom a ski sh)pe into<br />
a place warmed up by a beating device.<br />
• You bring your camcorder lrom an air<br />
condilioned car or roonl illlO a hol place oulside+<br />
• YOU use your canlcorder al}er a squall or a<br />
shower+<br />
• You use your canlcorder ill a ho[ and hulnid<br />
pluce.<br />
N How to preventmoisture condensation<br />
When you bring your camcorder from a<br />
cold place into a warlIl place, put your<br />
camcorder in a plastic bag and seal it<br />
tightly. Remove the bag when the air<br />
temperature inside the plastic bag has<br />
reached the surrounding temperatttre (after<br />
about 1 hour).
LCDscreen<br />
• Do not exert excessive pressure on the LCD<br />
scwen, as il may cause damage.<br />
• If your camcorder is used in a cold place, a<br />
residual image may appear on the LCD screen.<br />
This is not a malflmction.<br />
• While using your camcorder, the back of the<br />
LCD scJ_cn may Ileal up. This is not a<br />
mallunction.<br />
N To clean the LCDscreen<br />
If fingerprints or dust make the LCD screen<br />
dirty, it is recommended you use a soft<br />
cloth to clean it. When you use the LCD<br />
Cleaning Kit (optional). do not apply the<br />
cleaning liquid directly tu the LCD screen.<br />
Use cleaning paper moistened with the<br />
liquid.<br />
N Onadjustment of the LCD screen<br />
(CALIBRATION)<br />
The huttous on the touch panel may uot<br />
wurk currectly. If this happens, fullow the<br />
procedure below. It is recommended that<br />
you cunnect your camcorder to the wall<br />
outlet using the supplied AC Adaptor<br />
during the operation.<br />
@ Turn on your camcorder, then press<br />
1_ (HOMEb<br />
(g) Touch _ ISETTINGS) _ [GENERAL<br />
SET] _ [CALIBRATION].<br />
(_) Touch "x" displayed onthe screen with the<br />
corner of the "Memory Stick Duo" or the<br />
like. The position of "x" changes.<br />
Touch [CANCEL] to canceh<br />
If you did not press the right spot, try the<br />
calibratiun again.<br />
0 Notes<br />
• Do nol use a shal'p-poinledob.jecllor<br />
calibralion. Doing so may danmge lhe LCD<br />
screen,<br />
• You cannot calibrate tile LCD screen if it is<br />
rolated, or closed wilh lhe sclven l_cing out.<br />
Onmaintenanceofthecasing<br />
• If llle casing is soiled, clean dm calncorder body<br />
witha soft cloth lightlymoislened with waler,<br />
and then wipe the casing with a dry soft clolh.<br />
• Avoid tilelollowing to avoid damage to the<br />
finish:<br />
Using chmnicals such as thinner, benzine.<br />
alcotlohchemical clolhs, rcpellenL insecticide<br />
and sunscreen.<br />
Handling tile camcorder wdb above<br />
substances on your bands.<br />
Leaving the casing in contact with lubber or<br />
vinyl ob.ieclslor a hmg period of time.<br />
Onthepickuplens<br />
• Do not touch the lens inside the disc<br />
cover. Keep the disc cover closed except<br />
when inserting and removing the disc. to<br />
keep dust out.<br />
• When yuur camcorder does nut work<br />
because the pickup lens is dirty, clean it<br />
with a blower (nut supplied). Do not touch<br />
the pickup lens directly during cleaning<br />
because this mW cause the camcorder to<br />
malflmction.<br />
Pickc _ lens<br />
Aboutcareandstorageofthelens<br />
• Wipe tim surt_ce of tile lens clean with a soil<br />
cloth in the lolh)wing instances:<br />
When therc are fingerprinls on the lens<br />
surlace,<br />
In hot or humid locations<br />
When the lens is exposed 1osally air such as<br />
al lbe _aside.<br />
=Z<br />
3<br />
g<br />
Continued._ 111
112<br />
s eca tio s ai ts a se Specifications<br />
• Slorc in a well-venlilated location suhject to<br />
little dirt or dust.<br />
• To prcvenl mold. periodically clean lhe lens as<br />
described above. I1 is recommellded that you<br />
operate your catllcordcr about once a lnonth 1o<br />
keep it in optimum state lot a long time.<br />
Onchargingthepre-installed<br />
rechargeahlebattery<br />
Your Calncorder has a preqnstalled<br />
rechargeable battery to retain the dale. time.<br />
aud other settings even when the POWER<br />
switch is set to OFF (CHG). The preinstalled<br />
rechargeable battery is always<br />
charged while your camcorder is connected<br />
to the wall outlet via the AC Adaptor or<br />
while the battery pack is attached. The<br />
rechargeable battery will be fully<br />
discharged in about 3 months if you do<br />
not use your camcorder at all. Use your<br />
camcorder after charging the prednstalled<br />
rechargeable battery.<br />
However. even if the pre-installed<br />
rechargeable batte U is not charged, the<br />
camcorder operation will not be affected as<br />
long as you are not recording the date.<br />
Procedures<br />
(_OI]llL_Ct _our cail]corder to a D, 3ll outlet<br />
using the supplied AC Adaptor. :rod leave it<br />
with the POWER switch set to OFF (CHG)<br />
for more than 24 hours.<br />
System<br />
Video compression fiwmat<br />
AVCHD (HD)/MPEG2 (SD)/JPEG<br />
(Still images)<br />
Audio compression fiwmat<br />
Dolby Digital 2/5. Ich<br />
Dolby Digital 5.1 Creator<br />
Vide() signal<br />
NTSC color. EIA standards<br />
10g0i/60i specification<br />
Usable discs<br />
8 cm DVD_RW/DVD+RW/DVD-R/<br />
DVD+R DL<br />
Recording fiwmat<br />
Movie<br />
HD:<br />
AVCHD 10g0i/6(li<br />
SD:<br />
DVD-RW: DVD_VIDEO (VIDEO<br />
mode), DVD-Video Recording (VR<br />
model<br />
DVD+RW: DVD+RW Video<br />
DVD-R/DVD+R DL: DVD_VIDEO<br />
Still image<br />
Exif Ver.2.2 1<br />
Recording time<br />
DVD-RW/DVD+RW/DVD-R:<br />
AVC HD 12M/HQ+): Approx. 15 min<br />
AVC HD 9M/HQ): Approx. 20 thin<br />
AVC HD 7M/SP): Approx. 25 thin<br />
AVC HD 5M/LP): Approx. 32 rain<br />
SD 9M (HQ): Approx. 20 thin<br />
SD 6M (SP): Approx. 30 thin<br />
SD 3M/LP): Approx. 60 thin<br />
DVD+R DL:<br />
AVC HD 12M/HQ+): Approx. 27 thin<br />
AVC HD 9M/HQ): Approx. 35 thin<br />
AVC HD 7M/SP): Approx. 45 thin<br />
AVC HD 5M/LP): Approx. 60 rain<br />
SD 9M (HQ): Approx. 35 min<br />
SD 6M (SP): Approx. 55 min<br />
SD 3M (LP): Approx. 110 min
Viewfinder<br />
Electric viewfinder (color)<br />
Image device (CMOS Sensor)<br />
<strong>HDR</strong>-<strong>UX5</strong>:<br />
CMOS: 5.9 mm (1/3 type)<br />
Recording pixels (still, 4:3):<br />
Max. 4.0 mesa (2 304 x 1 728) pixels .2<br />
Gross: Approx. 2 100 000 pixels<br />
Effective/movie. 16:9):<br />
I 430 000 pixels<br />
Effective/movie, 4:3):<br />
I 080 000 pixels<br />
Effective (still, 16:9):<br />
I 491) 000 pixels<br />
Effective (still, 4:3):<br />
I 990 000 pixels<br />
<strong>HDR</strong>-UX7:<br />
CMOS: 6.3 mm (1/2.9 type)<br />
Recording pixels (still, 4:3):<br />
Max. 6.1 mesa (2 848 x 2 1361 pixels .2<br />
Gross: Approx. 3 200 000 pixels<br />
Effective/movie. 16:9):<br />
2 280 000 pixels<br />
Effective/movie, 4:3):<br />
I 710 000 pixels<br />
Effective (still, 16:9):<br />
2 280 000 pixels<br />
Effective (still, 4:3):<br />
3 (M0 000 pixels<br />
Lens<br />
Carl Zeiss Vario-Som/ar T_<br />
<strong>HDR</strong>-<strong>UX5</strong>:<br />
10 x (Optical)<br />
20 x, 80 x (Digital)<br />
Filter diameter: 37 mm (I 1/2 in.)<br />
<strong>HDR</strong>-UX7:<br />
10 x (Optical)<br />
20 x (Digital)<br />
Filter diameter: 37 mm (I 1/2 in.)<br />
Focal length<br />
FI.8 ~ 2.9<br />
<strong>HDR</strong>-<strong>UX5</strong>:<br />
1-5.1 - 51 mm (7/32 - 2 1/8 in.)<br />
When converted to a 35 mm still<br />
camera<br />
For movies *a:41.3 ~ 485 mm (l l 1/16<br />
~ 19 1/8 in.) (16:9), 5(1.5~ 594 mm (2 ~<br />
23 1/2 in.) 14:3)<br />
For still images: 40.4 _ 41Mmm / 1 5/8<br />
~ 16 in.) (16:9), 37 ~ 370 mm (I 1/2<br />
14 5/8 in.) 14:3)<br />
<strong>HDR</strong>-UX7:<br />
1"-5.4 ~ 54 mm (7/32 ~ 2 1/4 in.)<br />
When converted to a 35 mm still<br />
C_liller_l<br />
For movies: 40 - 4(X)mm (1 5/8 - 15 3/<br />
4 in.) (16:9), 49 - 490 mm (I 15/16 -<br />
19 3/8 in.) 14:3)<br />
For still images: 40 - 400 mm (1 5/8 -<br />
15 3/4 in.) (16:9), 37 - 370 mm (1 1/2<br />
14 5/8 in.) (4:3)<br />
Color telnperature<br />
[AUTO], lONE PUSH I,<br />
[INDOOR] (3 200 K),<br />
[OUTDOOR] (5 800 K)<br />
Minimum illumination<br />
2 Ix (lux) (AUTO SLW SHUTTR ON,<br />
Shutter speed 1/30 sec.)<br />
(I lx (lux)/during NightShot lhnction)<br />
*_"Exil_ is a file lbrmat lbr still images,<br />
established by the JEITA (Japan<br />
Electronics and lnlbrmation Technology<br />
Industries Association). Files in this<br />
format can have additional infl)rmation<br />
such as your camcorder's setting<br />
inlbrmation at the time of recording.<br />
*2Theunique pixel arrly of Sony's<br />
ClearVid CMOS Sensor and image<br />
processing system (new Enhanced<br />
hnaging Processor) allows _.tillimage<br />
resolution equivalent to the sizes<br />
described.<br />
m,<br />
=Z<br />
3<br />
Continued.._ 113
114<br />
*SThe fuca] length figures are actual<br />
figures resulting frum 9,Jde angle pixel<br />
readout.<br />
• Manuti_cturcd under license from Dolby<br />
Laboratoric',.<br />
Input/Output connectors<br />
Audio/Video output<br />
I0-pin cunnector<br />
Vide() signal: 1 Vp-p, 75 f-) (ohms)<br />
Luminance signal: 1Vp-p, 75 f) (ohms)<br />
Chrominance signal: 0.286 Vp-p, 75 _-)<br />
(ohms)<br />
Audio signal: 327 mV (at luad<br />
impedance 47 k_-)(kilohms)), Output<br />
impedance with less than 2.2 k£-)<br />
(kilohms)<br />
COMPONENT OUT jack<br />
Y: I Vp-p, 75f-) (ohms)<br />
PB/Pr. CI_/CI< +/- 350 mV. 75 _-)<br />
(ohms)<br />
HDMI OUT jack<br />
Type A (19-pin)<br />
Headphone jack (<strong>HDR</strong>-UX7)<br />
Stereo minijack (0 3.5 ram)<br />
USB jack<br />
mini-B<br />
MIC input jack (<strong>HDR</strong>-UXT)<br />
Stereo minijack (0 3.5 ram)<br />
REMOTE jack<br />
Stereo mini-minijack (0 2.5 ram)<br />
LCD screen<br />
hnage<br />
<strong>HDR</strong>-<strong>UX5</strong>:<br />
6.9 cm (2.7 type, aspect ratio 16:9<br />
<strong>HDR</strong>-UX7:<br />
8.8 cm (3.5 type, aspect ratio 16:9<br />
Total dot nmnber<br />
21 I 2(I(I (960 x 220)<br />
General<br />
Power reqtfirelnents<br />
DC 6.8 V/7.2 V (battery pack)<br />
DC 8.4 V (AC Adaptor)<br />
Average power consmnption<br />
During camera recording using the<br />
view finder with nornml brightness:<br />
<strong>HDR</strong>-<strong>UX5</strong>:<br />
HD: 4.9 W. SD: 4.1 W<br />
<strong>HDR</strong>-UX7:<br />
HD: 5.4 W. SD: 4.6 W<br />
During camera recording using the<br />
LCD with normal brighmess:<br />
<strong>HDR</strong>-<strong>UX5</strong>:<br />
HD: 5.1 W. SD:4.3 W<br />
<strong>HDR</strong>-UX7:<br />
HD: 5.6 W. SD: 4.7 W<br />
Operating temperature<br />
0 'C tu +4(I 'C (32 'Ftu 104 'F)<br />
Storage temperature<br />
-20 'C to + 60 'C (-4 'Ftu + 140 'F)<br />
Dimenskms (approx.)<br />
<strong>HDR</strong>-<strong>UX5</strong>:<br />
72x87x 142mm<br />
(2 7/8 x 3 1/2 x 5 5/8 in.) (w/h/d)<br />
including the projecting parts<br />
72x87x 145mm<br />
(2 7/8 x 3 1/2 x 5 5/8 in.) (w/h/d)<br />
including the pr(_iecting parts, the NP-<br />
FH60 rechargeable battery pack<br />
attached<br />
<strong>HDR</strong>-UX7:<br />
72x87x 142ram<br />
(2 718 x 3 112x 5 5/8 in.) (w/h/d)<br />
iucluding the prqjecting parts<br />
72 x 87 x 145 mm<br />
(2 718 x 3 112x 5 5/8 in.) (w/h/d)<br />
including the prqiecting parts, the NP-<br />
FH70 rechargeable battery pack<br />
attached
Mass (approx.)<br />
<strong>HDR</strong>-UXS:<br />
530 g (1 lb 2 oz) main unit only<br />
610 g (1 lb 5 oz) including the NP-<br />
FH60 rechargeable battery pack and a<br />
disc<br />
<strong>HDR</strong>-UX7:<br />
590 g (1 lb 4 oz) main unit only<br />
690 g (l lb 8 oz) including the NP-<br />
FH70 rechargeable battery pack and a<br />
disc<br />
Supplied accessories<br />
See page 20.<br />
AC Adaptor AC-L200/L200B<br />
Power requireuleuts<br />
AC 100 - 240 V. 50/60 Hz<br />
Current consumption<br />
0.35 - O.18 A<br />
Power consumption<br />
18W<br />
Output wdtage<br />
DC 8.4 V*<br />
Operating temperature<br />
0 'C to + 40 'C (32 'Fto 104 'F)<br />
Storage temperature<br />
-20 'C to+ 60 'C (-4 °F to+ 140 'F)<br />
Dimensions (approx.)<br />
48 x 29 x 81 mm (1 15/16 x 1 3116 x<br />
3 I/4 in./(w/hid) excluding the<br />
proiecting parts<br />
Mass (approx.)<br />
170 g (6 oz) excluding the mains lead<br />
* See lhe label on the AC Adaptor lbr other<br />
specificalions.<br />
Rechargeablebatterypack<br />
NP-FH60<br />
Maxinluul output voltage<br />
DC 8.4 V<br />
Output voltage<br />
DC 7.2 V<br />
Capacity<br />
7.2 Wh ( 1 (XI(ImAh)<br />
Dimensions (approx.)<br />
31.8 x 33.3 x 45.0 mm<br />
(1 5/16x I 5/16x I 13/16 in.) (w/hM)<br />
Mass (approx.)<br />
80 g (2.9 oz)<br />
Operating temperature<br />
0 'C to+40 'C 132 'Fto 104 'F)<br />
Type<br />
Lithium ion<br />
NP-FH70<br />
Maximum output voltage<br />
DC 8.4 V<br />
Output voltage<br />
DC 6.8 V<br />
Capacity<br />
12.2 Wh (l 800 mAh)<br />
Dimensions (approx.)<br />
31.8 x 33.3 x 45.0 mm<br />
(l 5/16x I 5/16x I 13/16 in.) (w/hM)<br />
Mass (approx.)<br />
95 g (3.4 oz)<br />
Operating temperature<br />
0 'C to+40 'C (32)Fto 11)4'F)<br />
Type<br />
Lithium ion<br />
Design and specificalions arc subject to change<br />
without notice,<br />
m.<br />
=Z<br />
3<br />
g<br />
Continued._ 115
116<br />
Ontrademarks<br />
• "Handycam" and<br />
r'J__/cJ_n arc<br />
re_islelcd tradcqnm'ks ol Sony Corporalion.<br />
• "AVCHD" and "AVCHD" logotype are<br />
tradenlarks of Malsushita Electric Industrial<br />
Co., Ltd. and Sony Corporation.<br />
JY_<br />
• Memoly S lck," _.' Mclnory S lck<br />
Duo." "MEMDRYSTI[R 1]UI]," "Memory Slick<br />
PRO Duo," 'MEMDRY5TI[K PRO BU0,"<br />
'MagicGate," 'M_GICG_TE ,"<br />
'MagicGate Memo U Stick" and 'MagicGate<br />
Memo W Slick Duo" arc trademarks of Sony<br />
Corporation,<br />
• "Inlk_LITHIUM" is a trademark of Sony<br />
Corporation,<br />
• DVD-RW. DVD+RW, DVD-R, and DVD+R<br />
DL logo air trademarks.<br />
• "x,v.Color" is a trademark of Sony Corl?oration,<br />
• Dolby and the double-D symbol am trademarks<br />
of Dolby Laboratories.<br />
• Dolby Digital 5.1 Creator is a trademark of<br />
Dolby Laboratories.<br />
• Microsoft. Windows, and Windows Media arc<br />
trademarks or registered trademarks of U.S,<br />
Microsol_ Corporalion in the U.S, and other<br />
countries.<br />
• Macintosh and Mac OS arc registered<br />
trademarks of Apple Computer. lnc in the U,S.<br />
and olher COllnlries.<br />
• HDML the HDMI logo and High-Definition<br />
Muhimedia lntm'lacc arc trademarks or<br />
rcgistercd trademarks of HDMI Licensing LLC.<br />
• Pcnlium is a trademark or regislmed trademark<br />
of Inlel Corporalion,<br />
• Adobe. lhe Adobe logo, and Adobe Acrobat arc<br />
eilher rcgislered trademarks or lrademarks of<br />
Adobe Systems lncorporalcd in lhe Uniled<br />
Stales and/or olher countries.<br />
All other product names mentioned tlercin may be<br />
the trademarks or registered trademarks of their<br />
respective companies. Furthernlorc. rxl and "_3"<br />
arc not illentioned ill each case in Ibis nlanual.<br />
NotesontheLicense<br />
ANY USE OF THIS PRODUCT OTHER THAN<br />
CONSUMER PERSONAL USE lN ANY<br />
MANNER THAT COMPLIES WITH THE<br />
MPEG-2 STANDARD FOR ENCODING<br />
VIDEO INFORMATION FOR PACKAGED<br />
MEDIA lS EXPRESSLY PROHIBITED<br />
WITHOUT A LICENSE UNDER APPLICABLE<br />
PATENTS lN THE MPEG-2 PATENT<br />
PORTFOLIO_ WHICH LICENSE IS<br />
AVAILABLE FROM MPEG LA. L.LC,. 250<br />
STEELE STREET, SUITE 3(Xt,DENVER,<br />
COLORADO 80206.<br />
THIS PRODUCT IS LICENSE[) UNDER THE<br />
AVC PATENT PORTFOLIO LICENSE FOR<br />
THE PERSONAL AND NON-COMMERCIAL<br />
USE OF A CONSUMER TO<br />
(i) ENCODE VIDEO IN COMPLIANCE WITH<br />
THE AVC STANDARD/'AVC VIDEO") AND /<br />
OR<br />
(ii) DECODE AVC VIDEO THAT WAS<br />
ENCODED BY A CONSUMER ENGAGE[) IN<br />
A PERSONAL AN[)<br />
NON-COMMERCIAL ACTIVITY AND/OR<br />
WAS OBTAINED FROM A VIDEO<br />
PROVff)ER LICENSE[) TO PROVIDE AVC<br />
VIDEO. NO LICENSE IS GRANTED OR<br />
SHALL BE IMPLIED FOR ANY OTHER USE.<br />
ADDITIONAL INFORMATION MAY BE<br />
OBTAINED FROM MPEG LA, LL,C,<br />
SEE <br />
"C Library," "Expat," "zlib." and "libjpcg"<br />
software are provided in your cmncorder, We<br />
provide this software ba_d on license agrcmnents<br />
wilh their owners of copyright. Based on rcquesls<br />
by the owners of copyrighl of lhesc soflwarc<br />
applicalions, we llave an obligation to inlorm you<br />
of the lPllowing. Please rcad file lbllowing<br />
sections.<br />
Read "licen_ 1.pdf" in the "License" R)ldcr on tile<br />
CD-ROM. You will find licenses (in English) of<br />
"C Library," "Expal." "zlibi' and "libjpcg"<br />
sollwarc.
On GNUGPL/LGPLapplied software<br />
Tile '_oltwm'e tbt is eligible lor tile lbllowing<br />
GNU General Public License (hereinaller roll:fred<br />
to as "GPL") or GNU Lesser General Public<br />
Licen_ (hercinalter rcl_:rrcd to w, ' LGPL") are<br />
included in ltle camcorder.<br />
This inli_wms you that you have a right to have<br />
access 1o, modily, and redistribute source code lor<br />
these sollwau'e programs under file condilions of<br />
the supplied GPL/LGPL.<br />
Source code is provided on tile web. U_ lhe<br />
lollowing URL to download il. When<br />
downloading llle source code, selecl <strong>HDR</strong>-UX 1/<br />
<strong>HDR</strong>-SR 1 as lhe model lor your camcorder.<br />
http://www.sony.neffProducts/Linux/<br />
We would prcli:r you do llOl COlllacl us about tile<br />
contems of source code.<br />
Read "license2.pdF' in the 'License" lolder on the<br />
CD-ROM. You will find licenses/in English) of<br />
' GPL," and "LGPL" sollwarc.<br />
To view file PDF, Adobe Reader is n_ded. If il is<br />
nol installed on your computer, you call download<br />
il h'om the Adobe Syslems web page:<br />
hlq_://ww w.adobe.com/<br />
=Z<br />
3<br />
=o<br />
117
118<br />
Q_mk Re_mnce<br />
Identifyingparts and controls<br />
The utnnbers ill ( ) are reference pages.<br />
[]<br />
[]<br />
[]<br />
[]<br />
[]<br />
[] POWER switch (24)<br />
[] _ (flash) button (36)<br />
[] _/CHG (charge) lamp (21, 36)<br />
[] REMOTE jack<br />
Connect other optional accessories.<br />
[] _' (USB)jack (54)<br />
[] A/V OUT.jack (46)<br />
[] DC IN jack (21)<br />
[] Active Interface Shoe _#;_s_ (35)<br />
The Active hlterface Shoe supplies<br />
power to optional accessories such as a<br />
video light, a flash, or a microphone.<br />
The accessory Call be tume(l oil or off as<br />
you operate the POWER switch on your<br />
camcorder. Refer to the operating<br />
instructions supplied with your<br />
accessory for details.<br />
The Active hlterface Shoe has a safety<br />
device for fixing the installed accessory<br />
securely. To conuect all accessory, press<br />
down and push it to the end. and then<br />
tighten the screw. To remove an<br />
accessory, loosen tile screw, and then<br />
press down and pull out the accessory.<br />
• Whcll you arc recording movies wifll an<br />
external flash (optional) connected to the<br />
accessory shoe. tUrllOil tile power of tile<br />
exlernal flash to prcvenl charging noi_<br />
being recorded.<br />
• You cannol use an exlernal flash (oplional/<br />
and the built-in fliJsh at the same lime.<br />
• When an external microphone (optional) is<br />
connected, it takes precedence over file<br />
inlernal microphone (p. 35).<br />
[] Disc cover (27)<br />
[] _ (Movie)/_ (Still) mode lan/ps<br />
(24)<br />
[] START/STOP button (34)<br />
[] Grip belt (33)<br />
[] Hooks for a shoulder belt<br />
Attach a shoulder belt (optional).
<strong>HDR</strong>-<strong>UX5</strong><br />
[]<br />
[]<br />
[]<br />
[]<br />
[] V<br />
[]<br />
[]<br />
[]<br />
[]<br />
[]<br />
[]<br />
[] I-€'1 (VIEW IMAGES) button (40)<br />
[] DISP/BATT INFO button (22)<br />
[] EASY button (30)<br />
[] RESET button<br />
Initializes all tile settings, including the<br />
setting of tile date and time.<br />
[] LCD screen/touch panel (17, 26)<br />
[] START/STOP button (34)<br />
[] Zoom buttons (35, 42)<br />
[] l_" (HOME) button (18, 65)<br />
[]<br />
[]<br />
[]<br />
[]<br />
[]<br />
[] MIC (PLUG IN POWER).jack (<strong>HDR</strong>-<br />
UX7)<br />
When an external microphone<br />
(optional) is connected, it takes<br />
precedence over the internal<br />
microphone (p. 35).<br />
[] Q (headphones) jack (<strong>HDR</strong>-UX7)<br />
[] Speaker<br />
Playback sounds come out from the<br />
speaker. For how to atljust the volume,<br />
see page 41.<br />
[] Viewfinder (26)<br />
[] Viewfinder lens adjustment lever (26)<br />
[] BATT (battery release) button (22)<br />
[] Battery pack (21)<br />
[] "Memory Stick Duo" slol/access lamp<br />
(29)<br />
[] HDMI OUT jack (45)<br />
[] COMPONENT OUT jack (44)<br />
Continued._ 11g
120<br />
Ne_tifyiaS parts a_ co_trNs {#o[_tia_ed)<br />
[]<br />
[]<br />
[]<br />
[]<br />
[]<br />
[] Disc cover OPEN switch/ACCESS<br />
lamp (27)<br />
[] Interoal microphone (35)<br />
An Active Interface Shoe compatible<br />
microphone (optional) will take<br />
precedence when colmected.<br />
[] Flash (36)<br />
[] Lens (Carl Zeiss Lens) (8)<br />
[] MANUAL button (38) (<strong>HDR</strong>-UX7)<br />
[] Camera control dial (38) (<strong>HDR</strong>-UX7)<br />
[] Power zoom lever (35, 42)<br />
[] PHOTO button (34)<br />
[] BACK LIGHT button (37)<br />
[] NIGHTSHOT switch (37)<br />
[] Camera recording lamp (33)<br />
Lights up in red during recording.<br />
Flashes when remaining disc space or<br />
battery power is low.<br />
[] Tripod receptacle<br />
Attach the tripod (optional: the length of<br />
the screw must be less than 5.5 mm<br />
(7132 in.)) to the tripod receptacle using<br />
a tripod screw.<br />
[]<br />
[]<br />
[]<br />
[]<br />
[] Rmnote sensor<br />
Point the Remote Commander (p. 121 )<br />
towards the renlote sensor to operate<br />
your camcorder.
RemoteCommander<br />
[] DATA (7ODE button (73)<br />
Displays the date and tinle or camera _uing<br />
dataof therecorded images whenyoupressthis<br />
duringplayback.<br />
[] PHOTO button (34)<br />
The on-scr_n inlage when you press this<br />
buuvlnwill be recorded as a still image.<br />
[] SCAN/SLOW buttons (41)<br />
[] _ _ (Previous/Next) buttons (41)<br />
[] PLAY button (41)<br />
[] STOP button (41)<br />
[] DISPLAY button (22)<br />
[] Transmitter<br />
[] START/STOP button (34)<br />
[] Power zoom buttons (35, 42)<br />
[] PAUSE buttons (41)<br />
[] VISUAL INDEX button (40)<br />
Displaysa VISUAL INDEX screen whenyou<br />
press this during playback.<br />
[] "4/ I_ / • / • / ENTER buttons<br />
When you press any buuon ontile VISUAL<br />
INDEX screen or Playlist+the orange h+ame<br />
appears on the LCD screen. Select a desired<br />
[]<br />
buuon or an itein with • / • / • / • then press<br />
ENTER to cnter.<br />
0 Notes<br />
• Renlove the insulation sheel hel_)rc using the<br />
Renlote {_'Olnlllunder.<br />
• Pointthe Remote Conmlander towards therenlote<br />
sensor to operate your canlcorder (p. 120).<br />
• When 11o conlnlallds have be_n senl Jrolll tile<br />
Remote Commander in a certain period, the<br />
orange/iame disappears. When you press any of<br />
• / • / • / • or ENTER again, the/)+ame appears<br />
at file position where it was displayed lasL<br />
• _IrOU cannot select solne buuons Oll tile LCD<br />
screen using • / • / • / I!'<br />
To changethe battery of the Remote<br />
Commander<br />
(_) While pressing on the tab, inset your<br />
fingernail into the slit to pull out the battery<br />
case.<br />
(_) Place a new batte U with the + side facing<br />
up+<br />
@ Insert the battery case back into the Remote<br />
Commander until it clicks.<br />
Tab<br />
WARNING<br />
Q<br />
Battery m:, 5 explode it' mistreated. Do not<br />
recharge, disassemble or dispose of in<br />
fire.<br />
• When the lithiunl battel T beconles weak, tile<br />
operating distance of tile Renlote Conmlander<br />
may shorten, or tile tenlote COnllnander may<br />
not flmction propcrly. In this case, replace the<br />
battery with a Sony CR2025 lithiuln battcry+<br />
Use of another battely [nay present a risk of firm<br />
or explosion.<br />
121
122<br />
Indicatorsdisplayedduringrecording/playback<br />
[] Recording %rmat (HD/SD) (13) and<br />
recording mode (HQ+/HQ/SP/LP) (67)<br />
[] HOME button (18)<br />
[] Remaining battery (approx.) (22)<br />
[] Recording status ([STBY] (standby) or<br />
[RE(7] (recording))<br />
[] Counter (hour/mioute/second)<br />
[] Disc type (15)<br />
Recording mode (VIDEO/VR) appears<br />
for DVD-RW discs recorded in the SD<br />
(standard definition/image quality only.<br />
[] OPTION button (I 9)<br />
[] Dual Rec (36)<br />
[] VIEW IMAGES button (401<br />
[] 5. Ich surround recording (35)<br />
[] Quality ([FINE]/ [STD]) (72)<br />
hn loc si T`` ,'_r_<br />
q<br />
[] Appears while a still image is being<br />
saved.<br />
[] Recording folder<br />
"_° Tips<br />
• When using the Dual Rec timction, the movie<br />
and still image shooting scrcens arc both shown<br />
together. Tile display position ditlcrs slightly<br />
hom that during normal operation.<br />
• As the number of still images rccorded in<br />
"Memory Stick Duo" increases, new tblders are<br />
automatically created tv_slDrc lheln.<br />
[] Recording format (HD/SD) (13) and<br />
recording mode (HQ+/HQ/SP/LP) (67)<br />
[] Return button<br />
[] Remaining battery (approx.) (22)<br />
[] Playback mode<br />
[] Counter (houffminute/second)<br />
[] Disc type (15)<br />
[] Previous/Next button (41)<br />
[] OPTION button (19)<br />
[] Video operation buttons (41)<br />
[] Scene number
[_ hnage size (70)<br />
CurreJ)t slJll Jm_ge ngm?ber/Tolal<br />
number of recorded still images<br />
[_ Data file name<br />
[_ Slide show button (42)<br />
Previous/Next button (41)<br />
[_ Playback folder<br />
[_1 VISUAL INDEX button (4(I)<br />
Following indicators appear during<br />
recording/playback to indicate the settings<br />
ol ) otlr oaR?c¢lrdcr'.<br />
Upper lel_ Upper right<br />
Boltom<br />
Upper left<br />
Cenlel-<br />
_5.1Qh 5.1ch surround recording/<br />
playback (35)<br />
*Q) SeltLtimc'r r_:cording(85)<br />
i _) ._+ ._- Flash light (36)<br />
_4 MICREF LEVEL low<br />
(85)<br />
U/0pet #_tht<br />
Vt_D_RFt,D_ Fader (84)<br />
WIDE SELECT (68)<br />
:U'do_F LCD backlight off (26)<br />
Center<br />
C*_ Slide show set (42)<br />
[] NightShot (37)<br />
S{_ Super NightSbot (841<br />
_._ Color Slow Shutter (84)<br />
[] PictBridge connecting<br />
(54)<br />
c\_._ @ "_ii, Warning (100)<br />
I<br />
,2-<br />
::o<br />
#b<br />
g<br />
Continued._ 123
124<br />
Is_icats_s disp_ays_ _t_i_S rsss_di_S/pta_bask {gs_fim_sd}<br />
Bottom<br />
Picture eflk?ct(85)<br />
Digital ellk.ct (85)<br />
t_ _ Manual focus/81 )<br />
,_ _ _ _A SCENE SELECTION<br />
"i})[] m_'° /82)<br />
[] Backlight (37)<br />
-_.'- @,vlxmzl White balance (83)<br />
"q_,_;' SteadyShot off (68)<br />
SPOT METER 182)1<br />
EXPOSURE (82)<br />
[] AE SHIFT (67) (<strong>HDR</strong>-<br />
UX7)<br />
WB SHIFT (68) (<strong>HDR</strong>-<br />
UX7)<br />
T_ Tele macro (81)<br />
[] Zebra (69)<br />
({:oral} X.V.COLOR (69)<br />
The date, time, and camera setting data of<br />
the recorded images are recorded<br />
automatically on the disc and "Memory<br />
Stick Duo." They are not displayed while<br />
recording. However, you can check them as<br />
]DATA CODE] during playback (p. 73).<br />
You can view the recording date and time<br />
on another device, etc. ([SUB-T DATE],<br />
p. 69).
Glossary<br />
• 5.1chsurroundsound<br />
A system 01at plays back sound on 6 speakers. 3 at<br />
tile lronl (lell, right and center) and 2 at tile rcar<br />
(righl and left) with an additional low-pass<br />
subwoolcr counled as a 0,1 channel Ior<br />
flequencies of 120 Hz or lower.<br />
• AVCHDformat<br />
A high definition digital vide*) camera formal<br />
used to record an HD (lfigh definition) signal<br />
using lhe MPEG-4 AVC/H,264 lbrmat.<br />
• DolbyDigital<br />
An m/dio encoding (compression) syslem<br />
developed by Dolby Laboratories Inc,<br />
• DolbyDigital5.1 Creator<br />
Sound compression leclmology developed by<br />
Dolby Laboratories Inc. wlfich compresses audio<br />
efficiently while prc_rving higll sound quality. It<br />
cnables recording of 5.1 ch surround sound while<br />
using disc space more efficiently. Discs created<br />
by Dolby Digital 5.1 Creator can be played back<br />
on a device compatible with tile disc created on<br />
your canlcorder.<br />
• DVDformat<br />
A lormat u_d to record an SD (standm'd<br />
definilion) signal on 8cnl DVD discs.<br />
• IVIPEG<br />
MPEG stands ft)r Moving Picture Experts Group,<br />
the group of standards lor tile coding (image<br />
compression) of video (movie) and audio. There<br />
arc MPEG 1 and MPEG2 ft)rmals. Your<br />
camcorder records movies wilh SD (slandard<br />
definilion) image qualily in MPEG2 ft)rmal,<br />
• MPEG-4AVC/H.264<br />
Tile latest in]age coding lormal stmldardized<br />
jointly by two intm'lmtional standm'dizafion<br />
ol'gani/ntions, tile ISO-IEC and tile ITU-T. in<br />
2003. Compared with the conventional MPEG2<br />
lormat, MPEG-4 AVC/H264 ]msznoret]lml twice<br />
the elliciency. Your camcorder employs MPEG-4<br />
AVC/H.264 to encode high definition movies.<br />
• Thumbnail<br />
Reduccd-si/c images which enable you to view<br />
many images at tile same time. "VISUAL<br />
INDEX" and "disc mcnu" use a thumbnail display<br />
systenl.<br />
• VIDEOmode<br />
One of tile recording formals you can select when<br />
using a DVD-RW witll SD (standard deftnilion)<br />
image quality. VIDEO mode provides excellenl<br />
compafibilily wilh other DVD devices.<br />
• VISUALINDEX<br />
This ftmction displays images of movies and still<br />
images you have recorded so thai you can _lecl<br />
those scenes you want to play back.<br />
• VRmode<br />
One of tim recording lormats you can select when<br />
using a DVD-RW with SD (standard deftnilion)<br />
image qualily. VR mode enables editing (deleting<br />
or _quence rcarrangen/ent) wilh your camcorder<br />
Finalizing lhe disc lets you play il back on a VR<br />
mode compatible DVD device.<br />
125
126<br />
Index<br />
Numeric<br />
12IMAGES ........................... 74<br />
16:9 ....................................... 76<br />
16:9 WIDE ........................... 68<br />
4:3 ................................... 68.76<br />
4:3 TV ................................... 45<br />
5.1 ch surround recording...... 35<br />
5.1-channel surround sound<br />
.............................................. 35<br />
6IMAGES ............................. 74<br />
8 cm disc ............................... 15<br />
A<br />
AC Adaplor .......................... 21<br />
AE SHIFT ....................... 67_ 99<br />
AREA SET ........................... 77<br />
AUTO SLW SHUTTR (Auto<br />
Slow Shmtcr) .................. 68.99<br />
AVCHD lormal ............ 13. 106<br />
A.SHUT OFF/Auto shut off)<br />
A/V connecting cable.....44_ 53<br />
B<br />
BACK LIGHT .......... 37.95.99<br />
BatteJy .................................. 21<br />
BEACH ................................ 83<br />
BEEP .................................... 75<br />
BLACK FADER .................. 85<br />
Button-type lilhium baltery 121<br />
B&W .................................... 85<br />
c<br />
CALIBRATION ................. 111<br />
CAMERA DATA ................. 73<br />
CANDLE ........................ 82. 99<br />
CD-ROM .............................. 86<br />
Charging lime ....................... 22<br />
CLOCK SET ........................ 24<br />
CLOCK/LANG .................... 77<br />
COLOR SLOW SHTR/Color<br />
Slow Shutler) ........... 84, 96, 99<br />
COMPONENT ..................... 77<br />
Component video cable ....... 44<br />
Computer. ............................ 86<br />
Conllection<br />
D<br />
4:3 TV ........................... 45<br />
High definition TV ....... 44<br />
Printer. .......................... 54<br />
VCR/DVD/HDD deviccs<br />
...................................... 53<br />
Wide TV ....................... 45<br />
DATA CODE ...................... 73<br />
DATE/TIME ................ 73, 124<br />
DC plug ................................ 21<br />
DELETE<br />
Movie ............................ 48<br />
Slill image ..................... 49<br />
DEMO MODE ..................... 78<br />
DIAL SETTING ............ 39, 70<br />
DIGITAL ZOOM ................ 68<br />
Disc menu ............................ 59<br />
Disc remaining ..................... 69<br />
DlSC SELECT GUlDE ....... 61<br />
DISP OUTPUT .................... 77<br />
DISPLAY ............................. 74<br />
Display indicalors .............. 122<br />
DIVIDE<br />
Original ......................... 50<br />
Playlist .......................... 52<br />
Dolby Digital 5.1 Creator ,... 35<br />
Double-sided disc .............. 105<br />
[)ST SET .............................. 77<br />
Dual Rec .............................. 36<br />
DVD drive ............................ 60<br />
DVD 6_wmat ......................... 13<br />
DUD Inmlu ........................... 59<br />
DVD-R ................................. 15<br />
DVD-RW ............................. 15<br />
DVD+R DL .......................... 15<br />
DVD+RW ............................. 15<br />
D.EFFECT(Digital el]oct)<br />
........................................ 85_99<br />
E<br />
Easy Handycam .................... 30<br />
Editing .................................. 48<br />
EXPOSURE ................... 82. 99<br />
F<br />
FADER ........................... 84.99<br />
FILE NO. (File number)....... 72<br />
Finalize ..................... 32. 56. 98<br />
FINE ..................................... 72<br />
FIREWORKS ................. 83.99<br />
Firsl Slep Guide .............. 86. 90<br />
Flash ..................................... 36<br />
FLASH LEVEL .................... 70<br />
FOCUS ........................... 81.95<br />
Formatting<br />
G<br />
Disc ............................... 62<br />
'Memory Slick Duo'...... 63<br />
GENERAL SET ................... 78<br />
Grip belt ................................ 33<br />
GUIDEFRAME .................... 69<br />
R<br />
HD REC MODE ................... 67<br />
HD/high definition) image<br />
quality ................................... 13<br />
HDMI cable .......................... 45<br />
HDMI OUT jack .................. 44<br />
High Definition TV .............. 44<br />
HOME MENU ............... 17.65<br />
CLOCK/LANG ............. 77<br />
GENERAL SET ............ 78<br />
MOVIE SETTINGS...... 67<br />
OUTPUT SETTINGS,,. 76
PHOTO SETTINGS ......70<br />
SOUND/DISP SET .,.,.,,75<br />
VIEWIMAGES SET,.,,73<br />
HQ ........................................ 67<br />
HQ+ ...................................... 67<br />
I<br />
Image quality ........................ 72<br />
lMAGE SlZE ........................ 70<br />
Indicators ............................ 123<br />
INDOOR ............................... 83<br />
"InloLITHIUM" batteJ 3'<br />
pack ..................................... 108<br />
Install .................................... 88<br />
Insulation sheel ................... 121<br />
J<br />
J PEG ................................... 107<br />
k<br />
LANDSCAPE ....................... 83<br />
LANGUAGE SET ................ 77<br />
LAST SCENE [)EL (Last<br />
Scene Delete) ........................ 49<br />
LCD backlighl ...................... 26<br />
LCD BL LEVEL (LCD back<br />
light level) ....................... 75, 96<br />
LCD BRIGHT ...................... 75<br />
LCD COLOR ........................ 75<br />
LCD PANEL ........................ 77<br />
LCD panel ............................. 26<br />
LCD BL LEVEL ........... 75<br />
LCD BRIGHT ............... 75<br />
LCD COLOR ................ 75<br />
LCD screen ........................... 26<br />
Lens cover ....................... 25, 33<br />
LP .......................................... 67<br />
N<br />
MANAGE DISC/MEMORY<br />
calegoJy ................................. 56<br />
"Memory Slick _',................. 107<br />
"MemoJy Slick Duo" ... 29. 107<br />
Number of recordable<br />
piclurcs .......................... 7 l<br />
MICREF LEVEL ................. 85<br />
Mirror mode ......................... 37<br />
Moisture condensalion ....... 110<br />
Movie<br />
Recording mode ............ 67<br />
Shooting ........................ 34<br />
MOVIE SETTINGS ............. 67<br />
MPEG ................................. 125<br />
MPEG-4 AVC/H.264 ......... 125<br />
N<br />
NIGHTSHOT LIGHT .......... 68<br />
Number of recordable<br />
pictures ................................. 71<br />
0<br />
OLD MOVIE ................. 85.99<br />
ONE PUSH .................... 83.99<br />
Operation confirmation becp<br />
.................................. S_ BEEP<br />
O_ION MENU ............ 19_ 79<br />
Original<br />
DELETE ....................... 48<br />
DIVIDE ......................... 50<br />
OTHERS calegol T ............... 48<br />
OUTDOOR .......................... 83<br />
OUTPUT SETTINGS .......... 76<br />
P<br />
PAL .................................... 103<br />
PASTEL ............................... 85<br />
PB zoom ............................... 42<br />
PHOTO SETTINGS ............ 70<br />
PiclBridge ............................. 54<br />
PictBridge PRINT ................ 54<br />
PICT.EFFECT (Picture<br />
elli_ct ) ............................. 85.99<br />
Playback ............................... 40<br />
Playing time ......................... 23<br />
Playlist<br />
Crcaling ......................... 51<br />
DIVIDE ......................... 52<br />
ERASE .......................... 51<br />
MOVE ........................... 52<br />
Playback ........................ 51<br />
PORTRAIT ........................... 83<br />
Preparation ............................ 20<br />
Print ...................................... 54<br />
Prolect ................................. 102<br />
Q<br />
QUALITY ............................ 72<br />
R<br />
REC LAMP .......................... 78<br />
Recording ............................. 33<br />
Recording time ..................... 22<br />
REDEYE REDUC ................ 70<br />
REMAINING ....................... 69<br />
Remaining batlery ................ 22<br />
Remote Commander.....92, 121<br />
REMOTE CTRL (Remote<br />
conlrol) ................................. 78<br />
s<br />
S VIDEO cable ..................... 46<br />
SCENE SELECTION.....82, 99<br />
SD REC MODE ................... 67<br />
Sell-diagnosis display ......... 100<br />
SELF-TIMER ....................... 85<br />
SEPIA ................................... 85<br />
SETTINGS category ............ 65<br />
Slide show ............................ 42<br />
SMTH SLW REC (Smooth<br />
Slow Recording) ................... 38<br />
SNOW .................................. 83<br />
Sollwarc ................................ 88<br />
SOUND SETTINGS ............ 75<br />
SOUND/DISP SET .............. 75<br />
SP .......................................... 67<br />
Continued ._ 127
128<br />
Specificalions ..................... 112<br />
SPOT FOCUS ................ 81, 99<br />
SPOT METER (Flexible spot<br />
reeler) .............................. 82. 99<br />
SPOTLIGHT ........................ 83<br />
STANDARD ........................ 72<br />
STEADYSHOT ........ 68.95.99<br />
Slill image ....................... 34, 40<br />
SUB-T DATE ....................... 69<br />
SUMMERTIME ................... 77<br />
SUNRISE&SUNSET ........... 82<br />
SUPER NIGHTSHOT<br />
.................................. 84.96. 99<br />
System rcquircments ......86. 90<br />
T<br />
TELE MACRO ............... 81.99<br />
Tripod ................................. 120<br />
TV color system ................. 103<br />
TV CONNECT Guide .......... 43<br />
TV TYPE .............................. 76<br />
TWILIGHT .......................... 82<br />
TWILIGHT PORT ............... 82<br />
U<br />
Unfinalizing .................... 64.99<br />
USB 2.0 ................................ 87<br />
USB cable ............................. 20<br />
Using abroad ....................... 103<br />
v<br />
VBR ...................................... 16<br />
VP B.LIGHT (Viewfinder<br />
briglllness) ............................ 75<br />
VIDEO mode ........................ 28<br />
VIEW IMAGES SET ........... 73<br />
Viewfinder. ........................... 26<br />
Viewing picturcs on a TV ..,.43<br />
VISUAL INDEX ............ 31.40<br />
VOLUME ............................. 75<br />
V-OUT/PANEL .................... 77<br />
VR mode .............................. 28<br />
W<br />
Warning indicators ............. 100<br />
Warning messages ............. 101<br />
WB SHIFT (While Balance<br />
Shill) .................................... 68<br />
WHITE BAL. (White<br />
balance) .......................... 83, 99<br />
WHITE FADER .................. 84<br />
WIDE SELECT ............. 68, 99<br />
Wide TV .............................. 45<br />
Windows .............................. 86<br />
World time dillcrcnce ........ 104<br />
Write-protecl tab ................ 107<br />
x<br />
X.V.COLOR ................ 69, 109<br />
Z<br />
ZEBRA ................................ 69<br />
Zoom .................................... 35<br />
ZOOM LlNK ....................... 74
130<br />
&_ai_isfl&tick &dJe/&da r_ida en espaMI<br />
Paso1: ComprobaciGnde los componentes<br />
suministrados<br />
Asegfirese de que dispone de los siguientes<br />
componentes _,llnlinistrados con ]a<br />
videocfimara.<br />
E1 nfimero entre pardntesis indica el nthnero<br />
de componentes suministrados de cada<br />
artfculo.<br />
Adaptador de alimentaci6n de ca (1)<br />
Cable de alimentaci6n (1)<br />
Cable de video por componentes (1)<br />
Cable de conexi6n de AN (1)<br />
Cable USB (1)<br />
Control remoto inalambrico (1)<br />
La pila de litio tipo bot6n ya viene inslalada.<br />
Bateria recargable NP-FH60 (<strong>HDR</strong>-<strong>UX5</strong>),<br />
NP-FH70 (<strong>HDR</strong>-UX7) (1)<br />
CD-ROM "Handycam Application<br />
Software" (1)<br />
Guia de operaciones (este manual) (1)
Paso2: Cargade la bateria<br />
Puede cargar la bateria<br />
"InfoLITHIUM" (serie H) tras<br />
instalarla en la videocfimara.<br />
O Notas<br />
• Sdlo es posible utilizlu" una baterfa<br />
'lnloLITHlUM" de la scrie H con la<br />
videocfimara.<br />
4<br />
/ Deslice el interruptor POWER en<br />
el sentido de la flecha hasta la<br />
rt<br />
posici6n OFF (CHG) (ajuste<br />
predeterminado).<br />
Levante el visor e instale la<br />
bateria deslizfindola en el sentido<br />
de la flecha hasta que haga clic.<br />
Conecte el adaptador de<br />
alimentaci6n de ca a la toma de<br />
entrada de cc de la videocfimara.<br />
Abra la cubierta de la toma y conecte la<br />
clavija de cc del adaptador de<br />
alimentacidn de ca<br />
Haga coincidir la marca • de la clavija<br />
de cc con la marca • de la videocfimara.<br />
4 Conecte el cable de alimentaci6n<br />
al adaptador de alimentaci6n de<br />
ca y al tomacorriente de pared.<br />
E1 indicador CH(; (carga) se enciende y<br />
se inicia el proceso de carga. E1<br />
indicador CHG (carga) se apaga cuando<br />
la baterfa estfi completamente cargada.<br />
5 Desconecte el adaptador de<br />
alimentaci6n de ca de la toma de<br />
entrada de cc de la videocfimara.<br />
g<br />
m.<br />
G'3<br />
==<br />
==<br />
g,<br />
m<br />
Contin_a ._ 131
132<br />
Pas+ £: gar+a +8 +abate++a (g+r_t+m+ac++++}<br />
fO Notas<br />
• Desconecte e] +td+tptadorde alimcntacidn de ca<br />
de ]a tonm de ¢ntrada de cc mientras s/_ieta]a<br />
videoc&n+u++Ly ]+Lc]+M.iu de cc<br />
Paraextraerla bateria<br />
(_) Deslice el interruptor POWER hasta la<br />
posicidn OFF (CHG).<br />
@ Levante el visor.<br />
@ Presione el bot6n BATT (liberacidn de<br />
la bateria) y extraiga la bateria.<br />
fO Notas<br />
• Antes de extraer la baterfa o el adapt+tdor de<br />
a]imentacidn de ca<br />
compruebe que el indicndor _ (pelicula) o<br />
It_ (imfigenes fiias ) est6 apagado.<br />
Almacenamientode la hateria<br />
Descargue la bateria completamente antes<br />
de guardarla durante un largo periodo de<br />
tiempo.<br />
Conexi6na unaluentede<br />
alimentaci6nexterna<br />
Realice las mis;mas conexiones que cuan(lo<br />
cargue la baterfa. La baterfa no se<br />
descargarfi el/ese CaS(}+<br />
Comprobaci6n de la energia restante<br />
de la hateria (BatteryInfo)<br />
Ajuste el interruptor POWERen la posicidn<br />
OFF (CHG) y, a continuacidn, pres;ione<br />
DISP/BATT INFO.<br />
DISP/<br />
BAn" INFO<br />
Pasados unos instantes, se nlostrarMl el<br />
tiempo de grabaci6n restante aproximado y<br />
la informacidn de la baterfa durante<br />
aproximadamente 7 segundo. Puede vet la<br />
informacidn sobre la bateria durante un<br />
mtiximo de 20 s (segundo) si presiona de<br />
nuevo DISP/BATT INFO mientras aparece<br />
dicha informacidn.<br />
Energfa rcstante de la baterfa (aprox.)<br />
U<br />
Capacidadde grabacidn(aprox.)<br />
Tiempo de ¢arga<br />
Tiempo aproxim:,do (rain) necesario para<br />
carg:,r completamente una baterfa<br />
totahnente descargada.<br />
NP-FH50 135<br />
NP-FH60 (suministrado con 135<br />
<strong>HDR</strong>-UXS)<br />
NP-FH70 (suministrado con 170<br />
<strong>HDR</strong>-UX7)<br />
NP-FH 100 39(}<br />
Tiempodegrabaci6n<br />
Tiempo aproxim:,do (rain) disponible<br />
cuando utiliza una bateria completamente<br />
cargada.
<strong>HDR</strong>-<strong>UX5</strong><br />
Calklad de HD SD HD SD<br />
]magen* *<br />
NP-FH50 60 70 30 35<br />
60 75 30 35<br />
60 75 30 35<br />
NP=FH6(t 75 95 35 45<br />
(suministrada) 75 100 35 50<br />
90 100 45 50<br />
NP-FH70 130 155 65 75<br />
130 165 65 80<br />
135 165 65 80<br />
NP-FHIO0 305 360 15(1 180<br />
<strong>HDR</strong>-UX7<br />
310 375 155 185<br />
320 375 16(1 185<br />
Calidad de HD SD HD SD<br />
ilnagell * *<br />
NP-FH50 55 65 25 30<br />
55 65 25 3O<br />
55 65 25 3O<br />
NP-FH70 I 15 140 55 70<br />
(suminislrada) 120 145 60 70<br />
120 145 60 7(1<br />
NP-FHIO0 275 325 135 160<br />
285 335 140 165<br />
31)0 335 15(1 165<br />
* El tiempo de grabaci6n normal indica el tiempo<br />
de grabaci6n al ivpetir las operaciones de inicio/<br />
parada, conexi6n/desconexi6n de la<br />
alimentaci6n y utilizacidn del zoom.<br />
HD" significa calklad de imagen de aha<br />
definici6n y "SD" significa calidad de inlagen<br />
de definici6n est&ldar.<br />
O Notas<br />
• Todos los tiempos sc han calculado con el modo<br />
de grabacidn [SP] cn las siguientes condiciones:<br />
lndicaci6n superior: con la luz de londo de la<br />
pantalla de cristal lfquido encendida.<br />
lndicaci6n central: con la luz de londo de la<br />
pantalla de cristal lfquido apagada.<br />
lndicaci6n inlcrior: al grabar con el visor y con<br />
el panel de cristal lktuido cerrado.<br />
liempo dereproducci6n<br />
Tiempo :,proximado (rain) disponible<br />
cuando utiliza una baterfa completamente<br />
cargada.<br />
<strong>HDR</strong>-<strong>UX5</strong><br />
Calidad de HD SD HD SD _.<br />
ilIlagell* _ _"<br />
ID<br />
NP-FH50 90 105 100 120 -=.<br />
¢-a<br />
NP-FH60 125 140 135 160<br />
(suministrada) _.<br />
NP-FH70 200 230 220 255<br />
NP-FHI00 455 515 500 580<br />
<strong>HDR</strong>-UX7<br />
==<br />
Calidad de HD SD HD SD _=_<br />
i<br />
ilIlagell* #<br />
NP-FH50 90 100 95 1I0<br />
NP-FH70 195 220 205 235<br />
(suministrada)<br />
NP-FH 100 440 500 470 535<br />
* Con la luz de londo de la pamalla de cristal<br />
lfquido encendida<br />
.... HD" significa calidad de imagen de alia<br />
definici6n, mientras que 'SD" se rcfiere a la<br />
calidad de imagen de definicidn estfindar.<br />
Acerca de la bateria<br />
• Antes de reemplazm" la balerfa, deslice el<br />
intcrluptor POWER hasta la posici6n OFF<br />
(CHG) y apague el indicador ]_ (Pelfcula) o<br />
[1_ (hnfigenes fijas).<br />
co.ti.,_..* 133<br />
_,,
134<br />
Paso 2: gar_a d÷ _abate_a<br />
• E1 indica,dor CHG (carga) parpadearfi durante la<br />
carga o la Battery Inlo no se mostrarfi<br />
conectamente en las siguientcs situaciones.<br />
La baterfa no estfi conectada correctamenle.<br />
La balerfa eslfi dafiada.<br />
La balerfa eslfi completamentc gastada (s61o<br />
para la in/ormaci6n sobre la batcrfa).<br />
• Cuando el adaptador de alinmnlacidn de ca eslE<br />
conectado a la toma de entrada de de enlrada de<br />
cc de la videx_cfimara, la baterfa no suministrarfi<br />
alimenlaci6n, aunque el cable de alimcntaci6n<br />
est_ desconecmdo del lomacorricnle de pared.<br />
• Cuando conecte una luz de video opcional, se<br />
rccomienda que utilice una balerfa NP-FH 100.<br />
• No es rccomcndable milizar una baterfa<br />
NP-FH30, clue s61o permite realizar grabaciones<br />
y rcproducciones de corta duracidn con la<br />
videocfimara.<br />
Acerca del tiempo de carga/grabacion/<br />
reproducci6n<br />
• Tiempos calculados milizando la x ideoc_hnar_t _t<br />
una temperatura de 25°C (se recomienda una<br />
lemperalura de I O°C a 30°C)<br />
• E1 tiempo de grabaci6n y de rcproducci6n serfin<br />
mils cortos cuando utilice la videocfimara a<br />
b_ias temperamras.<br />
• En/hnci6n de las condiciones en las que milice<br />
la videocfimara, es posible que el ticmpo de<br />
grabaci6n y reproduccidn se vean reducidos.<br />
Acerca del adaptador de alimentacidn de<br />
ca<br />
• _-'uando utilice el adaptador de alimentacidn de<br />
ca<br />
use el lomacorriente de pared mils cercano. Si<br />
produce alguna/Mla de flmcionamiento<br />
micnlras utiliza la videocfimara, desconectc el<br />
adaptador de alimentaci6n de ca<br />
• No coloque el adaplador de alimentacidn de ca<br />
en lugarcs eslrccllos, conlo por qicl/lplo, clltrc<br />
una pared y un mueble.<br />
• No provoque un cortocircuito en la clavija de cc<br />
del adaplador de alimentaci6n de ca ni en el<br />
lerminal de la baterfa con algfin objeto mel_ilico.<br />
ya clue podrfa causar lallas ml el<br />
tuncionamienlo.<br />
• Incluso con la videocfimara desconectada,<br />
_guirfi rccibiendo corriente eldctrica<br />
(dom,Sslica) mientras estd conectada al<br />
lomacorrienle de pared medianle el adaplador de<br />
alimenlacidn de ca<br />
Paso3: Encendidode<br />
la videoc;imaray<br />
ajuste de la fecha y<br />
hora<br />
Ajuste la fecha y hora cuando utilice la<br />
videocfimara por primera vez. Si no :tittsta<br />
la fecha y hora, aparecergi la pantalla<br />
[AJUS.RELOJ] cada vez que encienda la<br />
videocfimara o cambie la posicidn del<br />
interruptor POWER.<br />
Toque los botones que<br />
aparecen ell ]a panhllla.<br />
Interruptor<br />
POWER [_i /<br />
1 Mientras mantiene presionado el<br />
bot6n verde en el centro, deslice<br />
el interruptor POWER varias<br />
veces en la direcci6n de la flecha<br />
para encender la alimentaci6n.<br />
(Pelicula): p:,ra grabar pelk'ulas<br />
It_ (Im;igenes fijas): para tomar<br />
im_igenes fijas<br />
Aparecergi la pantalla [AJUS.RELOJ].
2 Seleccione la zona geografica<br />
que desee mediante _ y, a<br />
continuaci6n, toque [SIGUIENTE].<br />
3 Ajuste [HORA VERANO] y, a<br />
continuaci6n, toque [SIGUIENTE].<br />
4 Ajuste [A] (afio) mediante A/V.<br />
5 Seleccione [M] con
136<br />
Paso4: Ajustede la videoc mara seg n sus<br />
necesidades<br />
Abra el panel de cristal lfquido 90 grados<br />
respecto a la videoc:imara (@) y, a<br />
continuacidn, gfrelo en el :ingulo que le<br />
resulte mils adecuado para grabar o<br />
reproducir (@).<br />
@90 grados<br />
(mAx,)<br />
@90 grados respecto<br />
a la videocamara<br />
@180 grados DISP/BATT INFO<br />
(mAx.)<br />
Para desactivar la luz de fondo de la<br />
pantalla de cristal liquido y conseguir<br />
que la bateria dure m_istiempo<br />
M:mtenga presionado DISP/BATT INFO<br />
durante unos s (segundo) hasta que<br />
aparezca ."E'do_F •<br />
Este ajuste resulta pr:ictico cuando utiliza la<br />
videocfimara en condiciones de mucho<br />
brillo o si desea ahorrar energfa de la<br />
baterfa. Este :_iuste no afcctarfi a la imagen<br />
grabada. Para encender llt luz de fondo de la<br />
pantalla de cristal lfquido, mantenga<br />
presionado DISP/BATT INFO durante<br />
unos s (segundo)<br />
desaparezca.<br />
hasta que ,"E'_o_<br />
0 Notas<br />
• No prcsione accidenlahnenle los botonc', de<br />
deNtio de la panmlla tie cristal lk]uido cuando<br />
abra o a.iusle el panel.<br />
"_° Sugerencias<br />
• Si abre el panel de cristal lfquido 90 grados<br />
respeclo de la videoc_hnara y 1o gira 180 grados<br />
hacia el o_zielivo, podrfi cerrarlo con la pantalla<br />
de cristal lfquido mirando hacia fi/era. Este<br />
procedimienlo resuha convenienk, para las<br />
operaciones de rcproducci6n.<br />
• En el HOME MENU, loqtle m_ (AJUSTES)<br />
[AJUS.SON./PANT.I _ [BRILLO LCDI<br />
(prig. 73) para ajustar el brillo de la pamalla de<br />
cristal lkIuido.<br />
• Prcsione DISP/BATT INFO para activar o<br />
desacfivar los indicadores que aparecen en<br />
pantalla (por cjemplo, el c6digo de tiempo).<br />
Podrfi contemplar las im:1genes a travds del<br />
visor para evitar que la baterfa se desgaste.<br />
o siempre que la calidad de la imagen de llt<br />
pantalla de cristal lfquido sea muy baja.<br />
Visor<br />
Palanca de ajuste<br />
del objetivo del visor<br />
Mudvala hasta que yea<br />
claramente la imagen.<br />
"_° Sugerencias<br />
• Para _iustar el brillo de la luz tie londo del visor.<br />
seleccione _ (AJUSTES)----+ [AJUS.SONJ<br />
PANT.I _ [LUZ F.VISORI cnd HOME<br />
MENU.
Paso5: InserciGnde un discoo un "Memory<br />
Stick Duo"<br />
Se necesila un disco DVD-RW. DVD+RW.<br />
DVD-R o DVD+R DL de 8 cm nuevo para<br />
realizar la _rabaci6n.<br />
O Notas<br />
• Elimine de antelnano el polvo o las huellas<br />
dacti]ares del disco COIl till patio sllave.<br />
1 Compruebe que la videocamara<br />
est_ encendida.<br />
Deslice el interruptor OPEN de la<br />
cubierta del disco en la direcci6n<br />
de la flecha (OPEN),).<br />
[ABRIENDO...] ap:,recer:i en la<br />
pantalla de cristal lfquklo y, a<br />
continuacidn, la cubierta del disco se<br />
abrirfi ligeramente de fl_rma automfitica.<br />
Indicador ACCESS (disco)<br />
Interruptor OPEN de la cubierta I<br />
del disco<br />
Len}e de Or'E.)_ _!ACe_ESS<br />
captaclon ...... _: ........... J<br />
Cuando la cublerta del disco se haya abierlo<br />
un poco, podrfi abrirla completamenle.<br />
O Coloque el disco con la cara de<br />
grabaci6n hacia la videocamara y,<br />
a continuacibn, presione el centro<br />
del disco hasta que encaje en su<br />
sitio.<br />
Coloque la cara impresa del disco hacia<br />
alllera cuando Illi]ice discos de Ulla SOla cara.<br />
4 Cierre la cubierta del disco.<br />
F,<br />
=3"<br />
[ACCESO A DISCO] aparece en la<br />
_,,<br />
pantalla de crislal lfquido. _.<br />
Es posible que la videoc:imara laMe un<br />
tiempo en reconocer el disco, segfin el --"<br />
tipo de disco y las condiciones en las que<br />
seencuentre.<br />
Vaya clirectamcntc al paso 7 si uliliza tin _-.2_<br />
disco DVD-WDVD+R DL.<br />
5 Cuando utilice discos DVD-RW/<br />
DVD+RW, toque [Utilizar la GUiA<br />
SELECT.DISCO.].<br />
_i_ __ _ ___!;i!i¸i{i{i{i{i{i{i{i{i{i{i{i{i{i{i{i{i{i{i{i{i{i{i{i{i{i{i{i{i{i{i{i<br />
m.<br />
Continaa._ 137
138<br />
Pas+ 5: ++s+r+++++8 ++r++++8+ ++ ++M+m+r+St++k ++++"(g++++t++++a+++++}<br />
O Notas<br />
• No puede utilizar [Utilizar la (-;U(A<br />
SELECT.DISCO.I duranteel fimcionanfiento en<br />
modo Easy Handycaln. Siga las instrucciones en<br />
pantalla para lbrmatear el disc(>.<br />
Toque [Graba imageries HD (alta<br />
definici6n).].<br />
Toque [(;rab:, im:igenes SD (definici6n<br />
estfindar).] para grabar coil calidad de<br />
imagen SD (definici6n est:indar).<br />
Los elementos que se visualizan varfan<br />
ell funcidn del estado de la videocSmara<br />
odel tipo de disco que se ha insertado.<br />
7 Elija la opci6n que desee de las<br />
que aparecen en pantalla.<br />
E1 disco se form:lte,r:i con la calidad de<br />
grabaci6n de im:igenes y el modo que<br />
seleccione. Cuando se haya completado<br />
el formateo del disco, podrfi empezar a<br />
grabar ell dl.<br />
Si selecci0na la calidad de imagenSD<br />
(definici6n est_indar)<br />
• Si utilizadiscos DVD-RW. seleccione un<br />
l'_rmatode grabaci6m [VIDEO] o [VR].<br />
Si formatea un disco durante el<br />
l)mcionamiento en modo Easy<br />
Handycam. el formato de grabacidn se<br />
fijar5 en [VIDEOI.<br />
• Si utilizadiscos DVD+RW. seleccione el<br />
formato [PANORAM.16:g] o [4:3].<br />
Extracci6n del disco<br />
(!) Realice los p:,sos 1 y 2 para abrir ]a<br />
cubierta del disco.<br />
(_) Mientras sujeta el punto de fijaci6n central<br />
del disco+ levante el borde del disco.<br />
O Notas<br />
• No es posible modilicar la calidad de la imagen<br />
(HD (alia definici6n) ni SD (definici6n<br />
estfindar) de un disco una vez iniciado el<br />
proceso+<br />
• A1 abrir o cerrar la cubierta dd disco, tenga<br />
cuidado de no obstaculizar la operaci6n con la<br />
mano ii o[fos ot3il2Jos+ Coloque la correa en la<br />
parm inlcrior de la videocfimara y, a<br />
continuaci6n, abra o cierre la cubierta del disco.<br />
• Es posible que _ produzcan lallas en el<br />
funcionamiento de la videocfimara si la correa<br />
queda enganchada al cerrar la cubierta del disco.<br />
• No toque la cara de grabaci6n del disco ni la<br />
lente de captaci6n.<br />
Cuando utilicc un disco de doble cara, tenga<br />
cuidado de no mlsuciar la superficie con huellas<br />
dactilarcs.<br />
• Es posible que + produzcan lallas en el<br />
funcionamiento de la videocfimara si cierra la<br />
cubierta del disco con ,Sste insertado<br />
incorrectamcnte.<br />
• No desconecte la alimcntaci6n durante el<br />
proceso de lorll/aleo+<br />
• No someta la videocfimara a golpes ni<br />
vibraciones en las siguicntes simackmes:<br />
mientras el indicador ACCESS est£<br />
encendido<br />
mientras el indicador ACCESS est£<br />
parpadeando<br />
mientras _ muestrc [ACCESO A DISCO] o<br />
[ABRIENDO... I en la pantalla de cristal<br />
lkluido
• Es posible que se tarde algfin tielnpo en expulsar<br />
el disco segrin l_s condiciones de riste y los<br />
materiales grabados.<br />
• Es posible que la operaci6n de expulsi6n de un<br />
disco tarde hasta 10 minuto si riste estfi dariado o<br />
sucio de huellas dactilares, etc. En e_ caso. es<br />
posible que el disco suh'a dafios.<br />
"_° Sugerencias<br />
• Es posible expulsar un disco sienlpre que la<br />
videocfimara c_,tri conectada a ulla fuentc de<br />
alimcntaci6n, aunque se encuentre apagada. No<br />
obstante, el proccso de reconocimiento del disc()<br />
(paso 4) no se iniciarfi.<br />
• Compruebe curil es el disco mils adecuado para<br />
la grabaci6n que desea realizar mediante la<br />
opci6n [GU1A SELEC.DISCO] del HOME<br />
MEN U.<br />
$61o se puede utilizar un "Memory Stick<br />
Duo" con la marca MEMORY511[K DUOo<br />
ME_IORY5TIEKPRO Otlo.<br />
"_° Sugerencias<br />
• El nrimero de imrigenes gmbables _arh, en<br />
flmcirin de la calidad o d tamario de la imagen.<br />
1 Abra el panel de cristal liquido.<br />
rt<br />
Inserte el "Memory Stick Duo" en<br />
la ranura para "Memory Stick<br />
Duo" en la direccidn correcta<br />
hasta que encaje en su sitio.<br />
Indicador de acceso<br />
("Memory Stick Duo")<br />
Paraexpulsarun"MemoryStick Duo"<br />
Abra el panel de cristal lfquido y emptlje<br />
ligeramenle el "Melnory Slick Duo" hacia<br />
el interior de la l':lllllr_l Hna vez.<br />
O Notas<br />
• Cuando el indicador de acc_so seenciende o<br />
parpadea, significa que 1_videocriln_u-aestfi<br />
leyendo o grabando datos. No sacuda ni golpe_<br />
la videocfimara, desconecte la alimentacidn,<br />
expulse el 'Memory Stick Duo" ni retire la<br />
baterfa. Si 1o hace. podrfan dariarse los datos de<br />
imrigenes.<br />
• Si fllerza el 'Memol 3, Slick Duo" en la ranura<br />
en la dilvcci6n incorrecla, es posible que el<br />
"Memory Stick Duo", la ranura para "Memory<br />
Stick Duo" o los datos de imfigenes se darien.<br />
• AI insellar o expulsar el "Memo W Slick Duo",<br />
tenga cuidado de que el 'Memol3' Stick Duo"<br />
no sahe y se caiga.<br />
ID<br />
_=.<br />
=_<br />
g,<br />
m<br />
139
140<br />
Grabaci6nde las im_genes<br />
START/STOP[_<br />
t!_ (HOME) []<br />
Interruptor r<br />
POWER [] [ _%<br />
_/juslado en OFF<br />
POwERSi (CHG), el inlermplOrestd deslfcelo -J_<br />
miellt IaS m inliene<br />
verde.presi°nad° elbol()n _ I<br />
lndicador (pelfcula)<br />
Indic idor (fijas)<br />
(HOME) []<br />
PHOTO []<br />
Tapa del objetivo<br />
Sc ibrc cn flmci6n del<br />
ajustedel interruptor<br />
POWER.<br />
Si el indicador ACCESS perlnanece encendido<br />
Ajuste la correa de stljecidn sigtliendo los una vez linalizada la grabaci6n, significa que<br />
pasos indicados a conlinlJaci()n v suiele la todavfa se eSl_ll graballdo datos ell el disco o ell<br />
- el ' Melnory Stick Duo". No somem la<br />
videocfimara correclamente, videocfilllara a golpes ill vibraciolleS, ni<br />
\ \<br />
desconecte la baterfa o el adaptador de<br />
alimenlacidn de ca
m . , " EmE<br />
Las pelfculas se graban en el disco.<br />
Deslice el interruptor<br />
POWER [] en la direccion<br />
de la flecha hasta que se<br />
encienda el indicador N<br />
(pelicula).<br />
Presione START/STOP []<br />
o[].<br />
o .....<br />
[ESPERA]_ [GRAB.]<br />
Para detener la grabaci6n, presione<br />
START/STOP mlevamente.<br />
Las im:igenes fi.jas se graban en el<br />
"Memory Slick Duo".<br />
Deslice en interruptor<br />
POWER [] en la direccion<br />
de la flecha hasta que se<br />
encienda el indicador O<br />
(imfigenes fijas).<br />
Presione ligeramente el<br />
boton PHOTO [] para<br />
ajustar el enfoque O (se<br />
oira un pitido) y, a<br />
continuacion, presionelo<br />
completamente Q (se oira<br />
el chasquido del<br />
obturador).<br />
O O<br />
Parpadea---+SeencieMe<br />
E1 indicador rojo Mill aparecerfi al lado de<br />
. Cuando el indicador rojo Mill<br />
desaparece, la imagen se ha grabado.<br />
Para cambiar al m0d0 de grabaci6n<br />
medianteel b0t6n I_(HOME) [] 0<br />
[]<br />
En el HOME MENU, toque _J'(TOMA<br />
DE IMAGENES) -+ [PELfCULA] o<br />
[FOTO].<br />
141
142<br />
Visualizaci6nde las imfigenes<br />
Tapa del objetivo<br />
Se cicrra dc acucrdo c(mel aju _T_'_' "%4t<br />
I-'€'1(VIS UALIZAR IMAGENES).<br />
_- (HOME) []<br />
1_ (HOME) []<br />
F_q(VlSUALIZAR IM/_GENES) []<br />
__ Palanca del zoom []<br />
terruptor POWER []<br />
I_(VISUALIZAR IM,_,GENES) []<br />
Deslice el interruptor POWER [] para encender la videocamara.<br />
Presione r_-](VISUALIZAR IM.&GENES) [] o [_.<br />
La panlalla VISUAL INDEX aparece en la panlall:, de cristal liquido. (Es posible que<br />
el sislema larde un tiempo en mostrar la panlalla VISUAL INDEX.)<br />
Permile volver a la<br />
6 illlfigenes Aparcce con la imagen<br />
cn la fihima ficha<br />
6 ' li.ia).<br />
Perlllile volver a 11<br />
panlalla de grabaci6n.<br />
"_° Sugerencias<br />
muestra las pelf Muestra las imfigenes fijas.<br />
rcproducida o grabada<br />
(1_ para una imagen<br />
• Si se mueve la palmlcu de zoom F. se puede seleccionar el nfimero de miniamras flue apm'ccen en la<br />
pantalla VISUAL INDEX entrc 6 y 12. Es posible lijar el nfimero de miniaturas que desea que aparczcan<br />
si toca _ (AJUSTES) _ [VIS.AJUSTES IMAGI _ [PANTALLA_ I en el HOME MENU.
Inicie la reproduccion.<br />
Toque la ficha N Y la pelicula que desea reproducir.<br />
Cuando se hayan reproducido todas las pelfculas desde la seleccionada hasta la filtima, volverfi<br />
a aparecer la pantalla VISUAL INDEX.<br />
Alterna el modo de reproduccidn y de pausa cada vez que se toca.<br />
I 1<br />
Toque la fieha _ y la imagen fija que desea reprodueir.<br />
Volver (a la<br />
VISUAL INDEX)<br />
r_ipido<br />
Maya il la OPTION)<br />
INDEX<br />
Presenlaci6n de diapositivas (Dig. 38)<br />
Paracambiaral modode<br />
reproducci6nmediant el bot6n<br />
11_(HOME) [] o []<br />
En el HOME MENU. toque f'#'l<br />
(VISUALIZAR IMi_GENES) --+<br />
[VISUAL INDEX].<br />
Paraajustarel volumendelsonidode<br />
laspeliculas<br />
Toque ?._(OPTION) -"+ _ ficha --i-<br />
[VOL.] y, a continuaci6n. _ljuste el volumen<br />
mediante _/_.<br />
"_° Sugerencias<br />
guiente<br />
• Toque [_/_ durante el modo de pausa<br />
para reproducir pelfculas a cfimara lenta.<br />
• Si ioca [_/_ una vez, el rebobinado o<br />
el avancc rfipido irfin unas 5 veces in& rfipido y.<br />
si 1o toca 2 veces, aumcntarfi la velocidad<br />
aproximadamcnte 10 veces (o unas 8 veces si<br />
utiliza un DVD+RW con calidad de imagen SD<br />
(definici6n estfindar)).<br />
143